Like in many MMOs, the Lost Ark settings and number of UI-related options are plentiful. This guide breaks down those options and helps you have an edge when it comes to gameplay.
This guide will break down your UI and other game settings that can help you play both easier and be able to make more sense of things. While some of these are pretty straightforward, there are a few obscure options that can help you out in-game.
This guide has been updated to include the new options added in the “Destined for Destruction” Update.
Additional UI options that were previously released only on the Korean game client have made their way over to the Western Release of Lost Ark. This guide has been updated to include these new options and highlight their uses.
Video Settings
Video settings affect things from your graphics quality to general in-game performance. While there is not a whole not to customize here, beyond your own preferences, there are a few things worth highlighting.
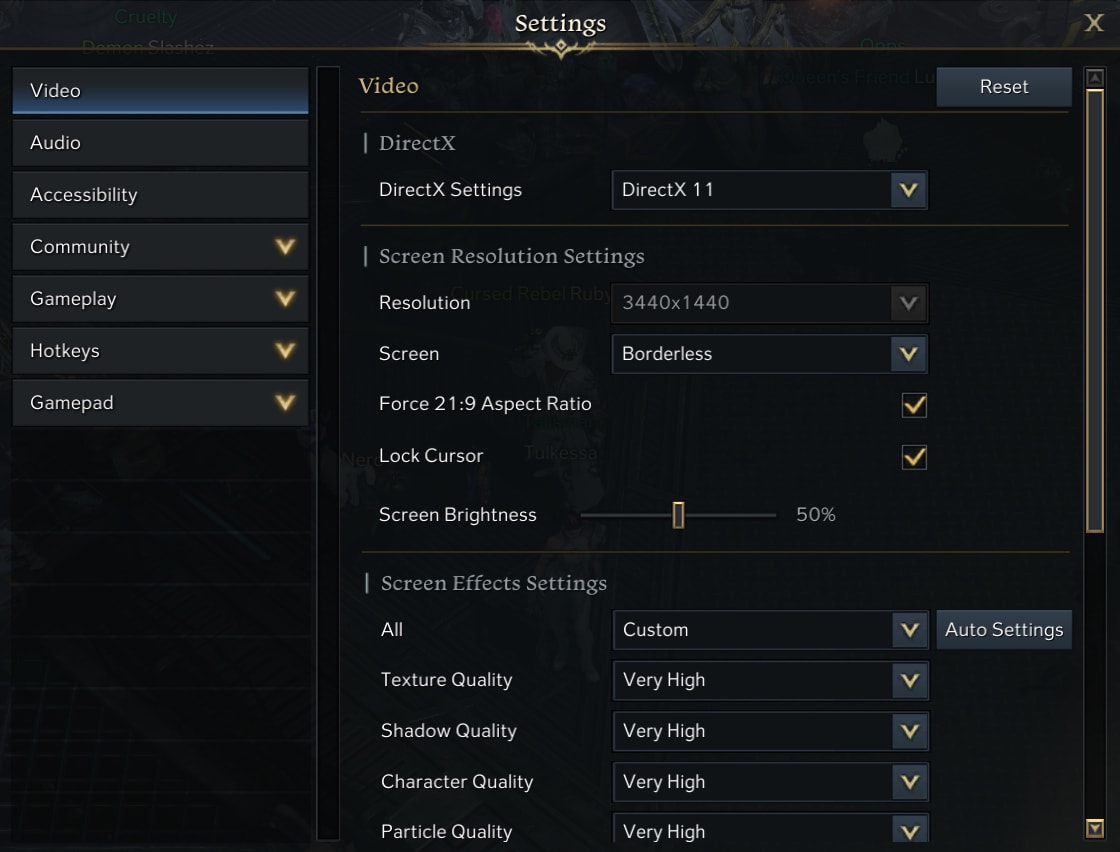
In this first set of options, there’s one key thing to mention, and that Force 21:9 Aspect Ratio. If you plan to play PvP and are not using a native 21:9 monitor, you will want this ON. In my case, my monitor is already 21:9, so it doesn’t matter if this is on or off.
Lock Cursor is another good option to bring up as well. If you frequently tab out of the game, this is a good thing to have enabled. This will make tabbing out or check-in things on another monitor much easier during Auto-Sailing and things like that.
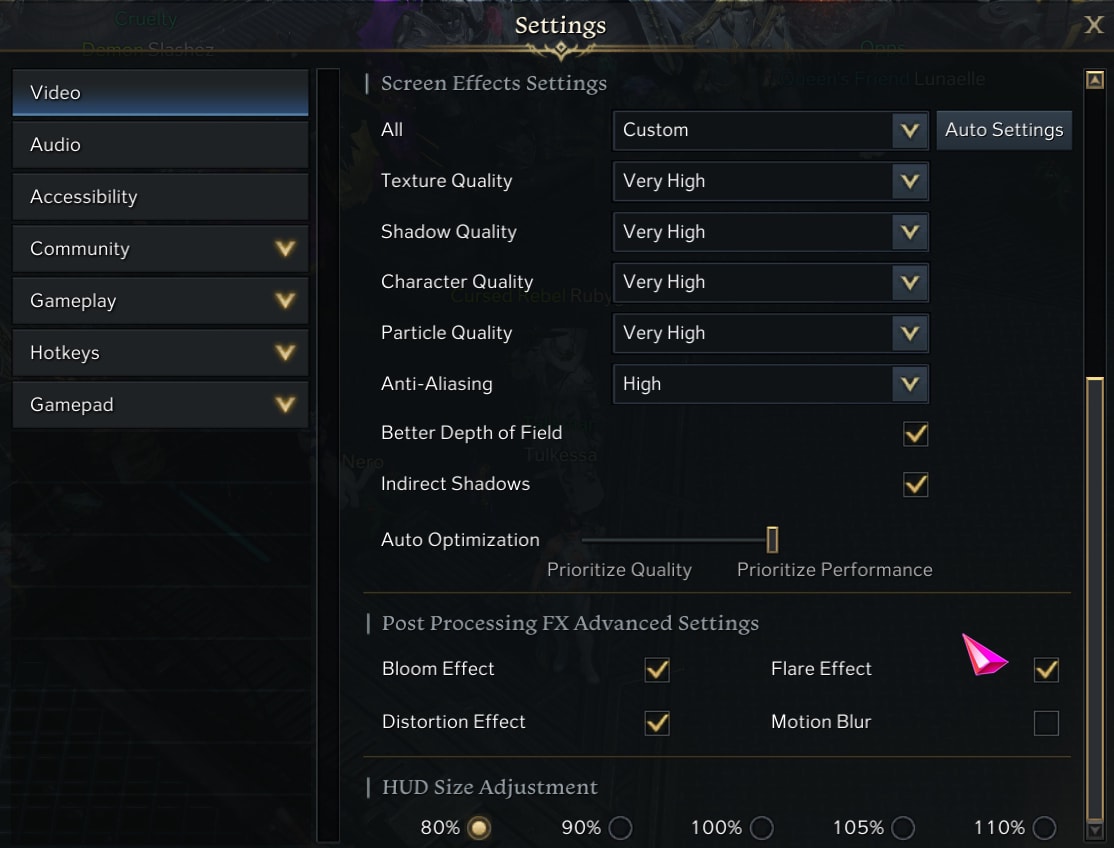
As for Video Settings, unless you have an extremely old video card you should be able to run this game at high settings with little issue. I’ve had little to no lag issues so far with the above settings. Having Auto Optimization set to Prioritze Performance helps a ton with keeping a consistent and high frame rate.
All of the Post Processing Effects are personal choices, if you like them, keep them. I personally don’t like the look of Motion Blur in most games, so I have it off. I’ve barely noticed the other effects outside of a few cutscenes.
HUD Size is also a personal preference. I have it at 80% so it takes up less of the screen. It’s also a good accessibility option if you do need it larger. Use the option that best fits your needs, as it won’t make too much of a difference in the long run.
Audio Settings
Your Audio settings will affect things like Game Volume AND Voice Chat Volume. While these are mostly preferences, there are some useful things to point out.
Select Voice Language determines the language you hear from characters and cutscenes. If you downloaded the Korean Voiceover Pack, this is where you’d enable it.
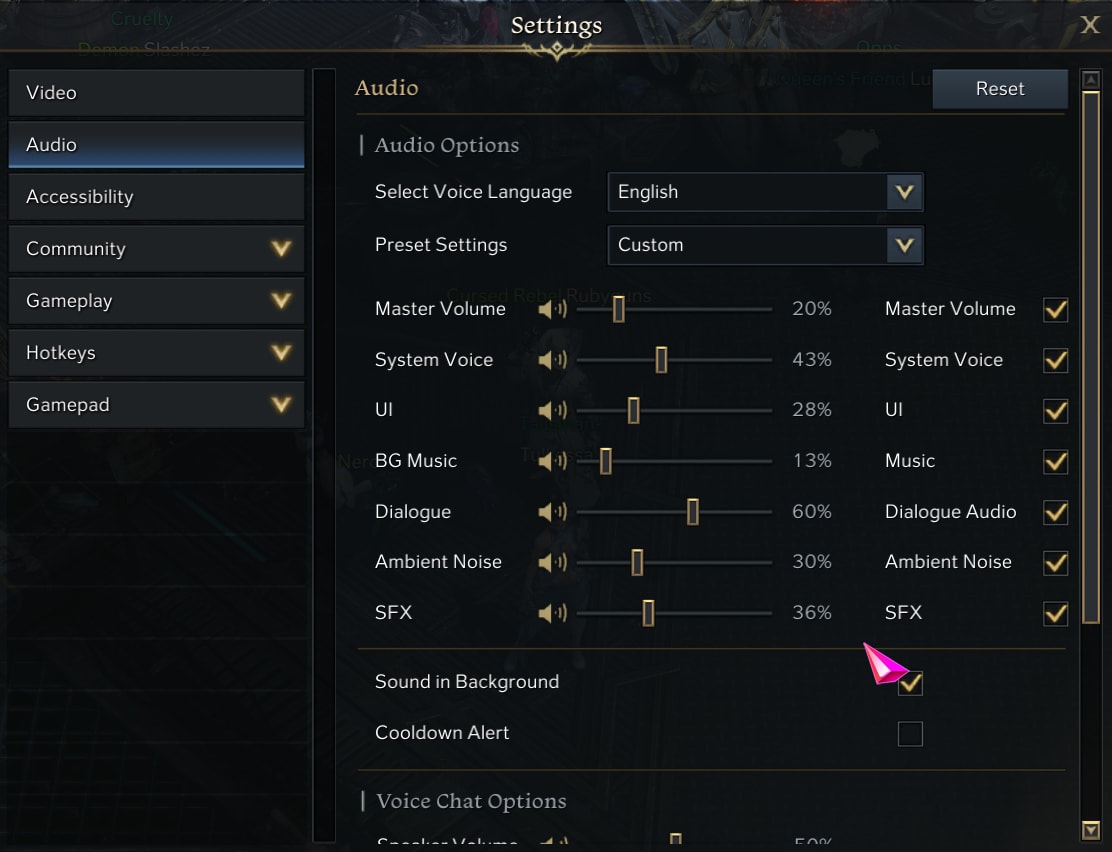
The Presets can be really useful too, if you’re newer to MMOs and not quite sure what good audio setting might be. My custom settings above put priority on dialogue, which is fairly infrequent with the next focus being SFX. SFX Preset can be helpful for making sure you can hear effects tied to attack wind-ups.
The last thing to point out here is the Cooldown Alert setting. While I don’t use it personally, Cooldown Alert can be very helpful for those newer to MMOs. It plays a sound to indicate when a cooldown has finished, so it can help a ton for new RPG players and learning new classes alike. It can be annoying for classes that have low cooldowns.
Beyond this are your options for Voice Chat volume. What options you use for these are entirely preference. You’ll have to balance these with your other audio settings to make them useful, but it can be worth using.
Accessibility Settings
Accessibility Settings affect how your Cursor is displayed, Conolorblind Filters, and Photosensitivity mode. Regardless of whether you need these settings or not, some of them can help the majority of players.
Control Accessibility lets you change your cursor color and size. For the best Visibility, the Larger or Largest Cursor in Pink is recommended. Of course, you can use whichever colors you wish, it’s just that Pink stands out the most amongst all the common background colors in the game.
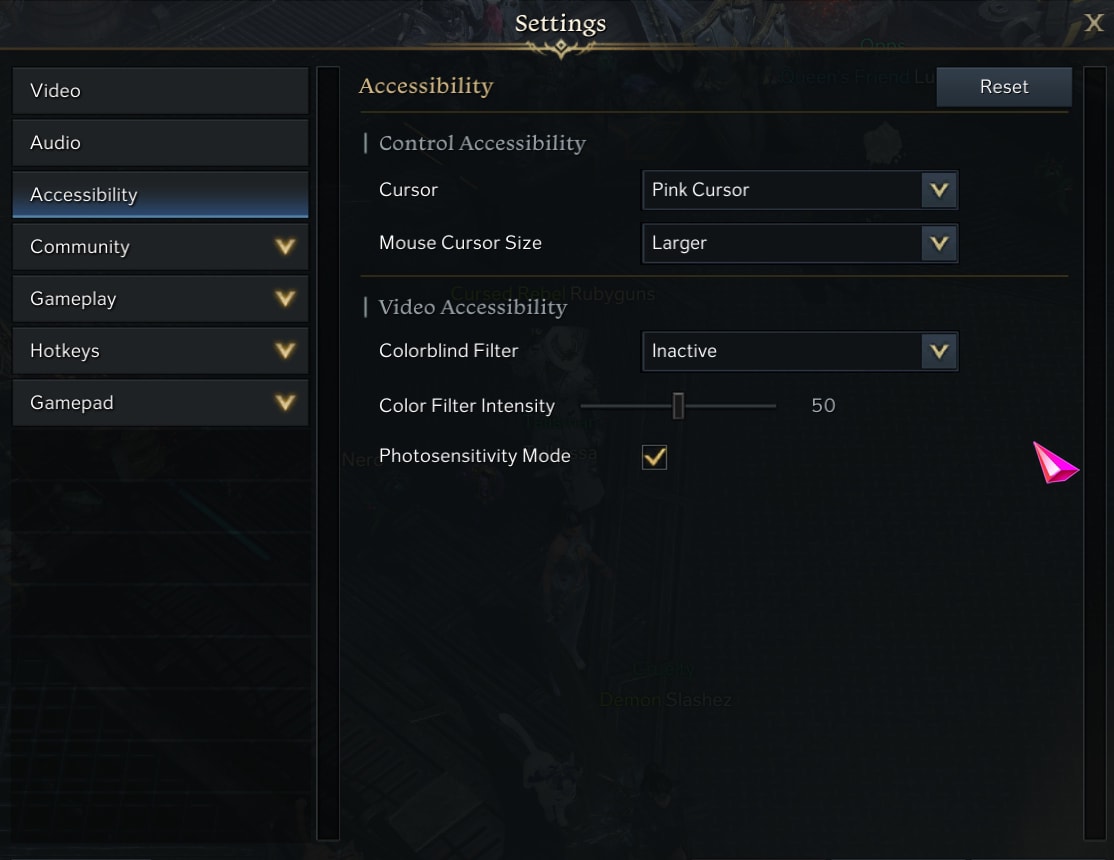
Colorblind options don’t provide any advantages to those that are not colorblind. If you need them, use them. If you don’t need them, they’re not beneficial.
Photosensitivity mode makes the game a bit darker but also removes the flashes of light when you hit a target. In general, Photosensitivity Mode is good to have on, especially if you stream or record your gameplay. I personally don’t have any photosensitivity but opt to keep it on as the flashing can still be an irritant while doing content like Chaos Dungeons where there is high mob density.
Community Settings
Community Settings are focused on Chat, Macros, and in-game requests. What settings you use are mostly personal choices, but again, there are a few things to talk about.
For starters, Font Size is a general accessibility option. This lets you make the text in chat bigger or smaller to fit your needs. This section also allows you to adjust the text color of each type of chat message.
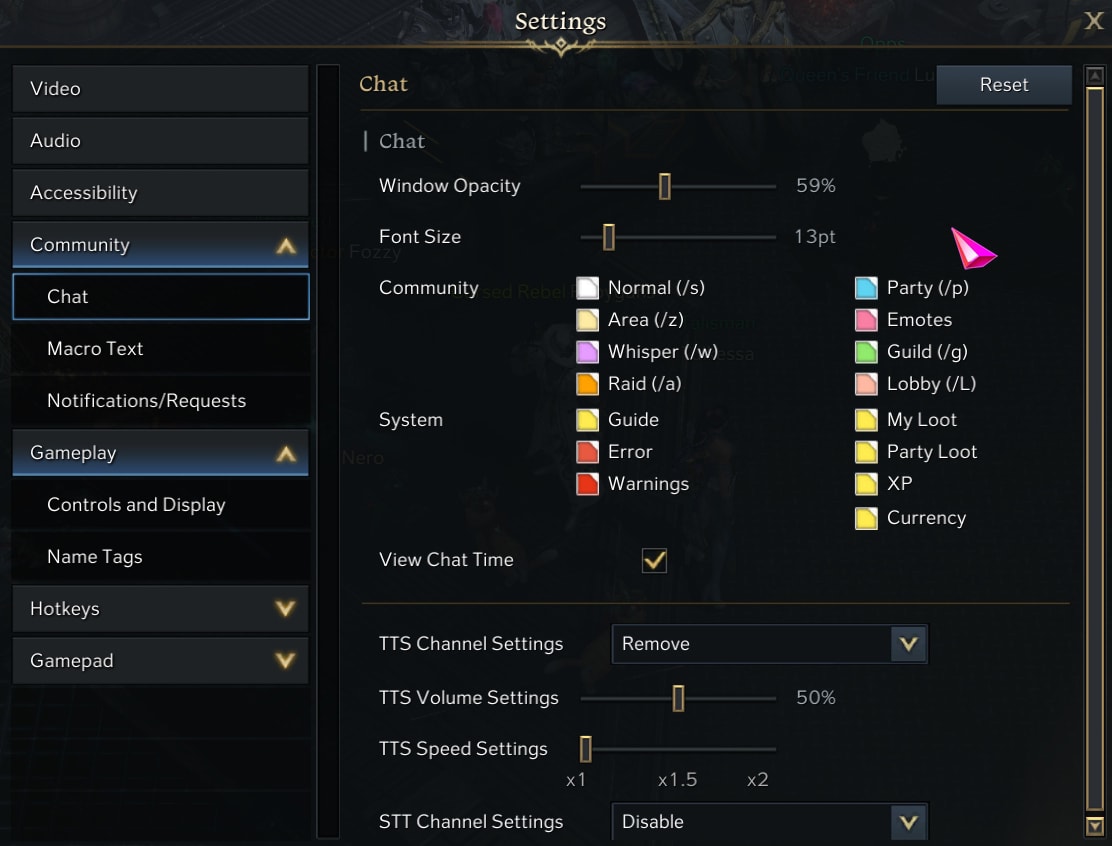
There are also options for Text-to-Speech (TTS) and Speech-to-Text (STT). These are generally good accessibility options that can help if you need them.
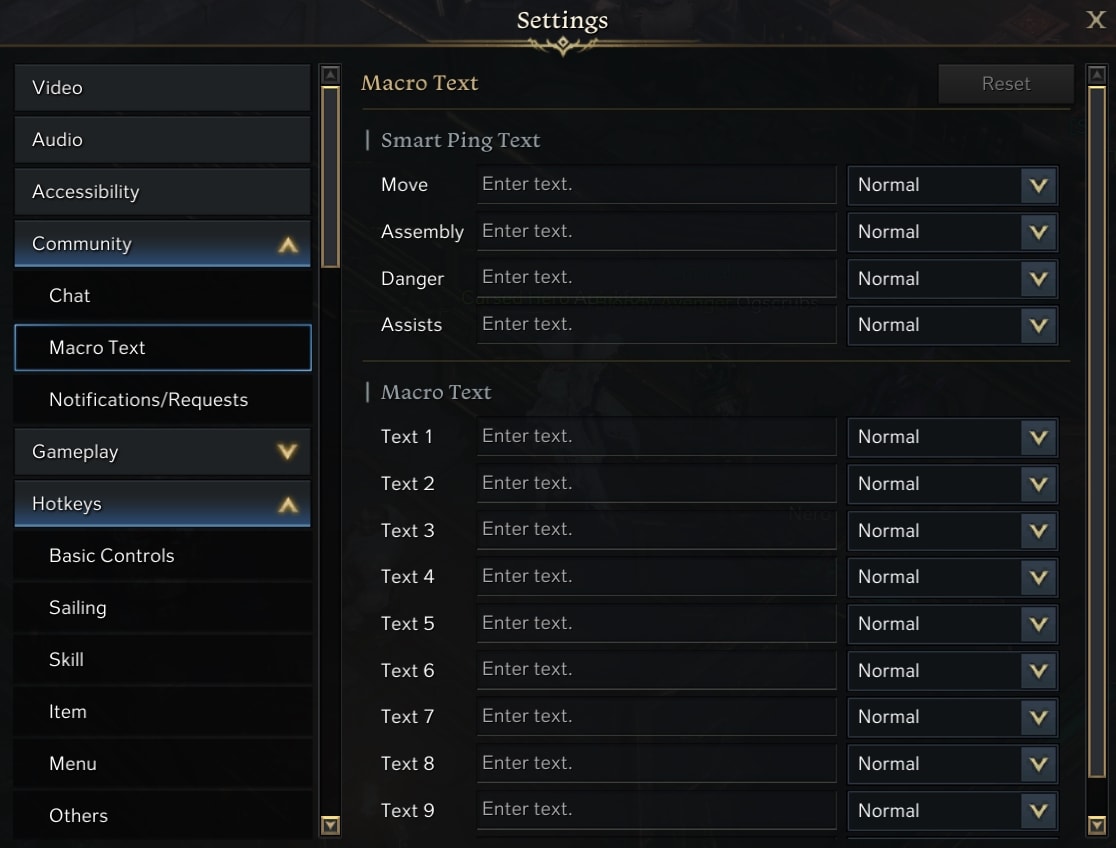
The section for macros can be useful for quick communication or activating things like the Sight Focus Engraving. These combined with comfortable hotkeys can make a world of difference.
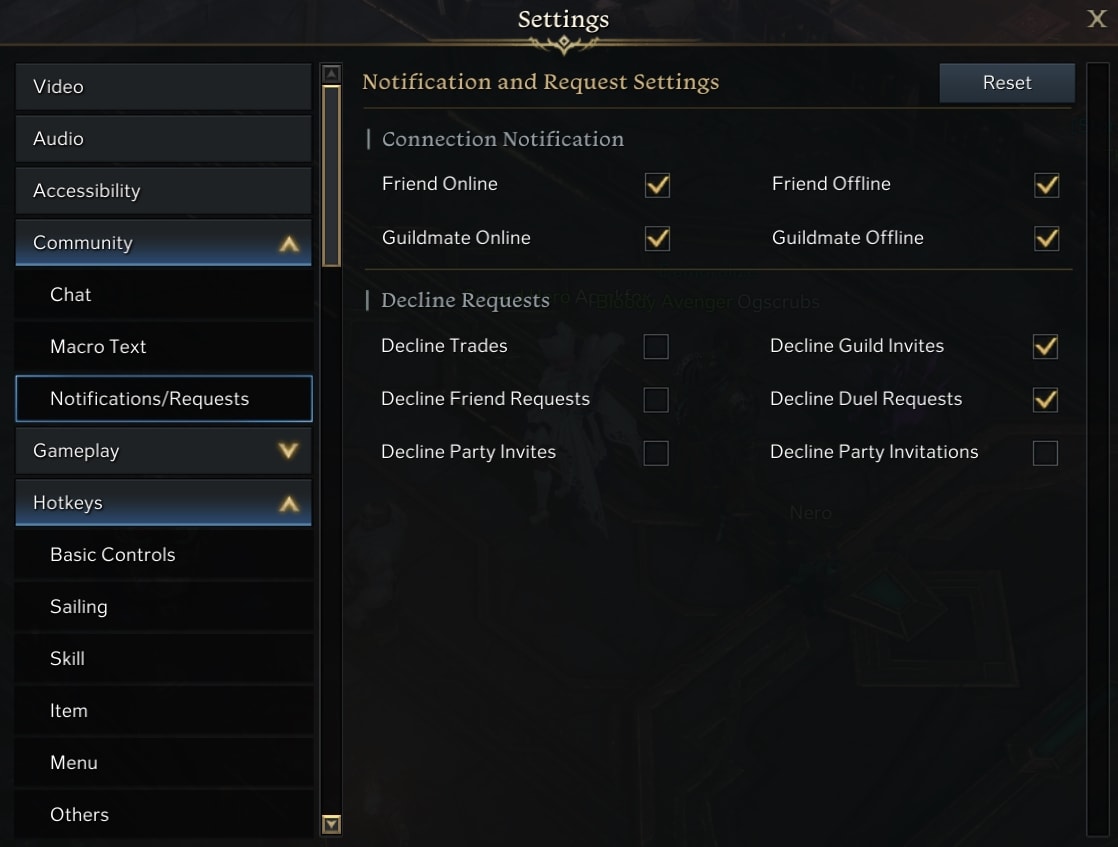
The last part of the Community Settings deals with Notifications. Like many things, these are personal preferences.
I recommend turning Decline Guild Invites on. Like any MMO, there are a lot of people that will randomly invite you if they see you’re guileless. Save yourself the headache and disable them, or find a guild quickly.
Gameplay Settings
Gameplay Settings have a lot more to talk about, as there are a lot of settings here that are incredibly useful.
This first section covers things that you’ll see in combat. In general, you’ll want most of these on for the information they provide. The Player Health Bar can be useful to have on if you’re not used to looking down at the full-size health bar. Outside of that one, the rest should always be on.
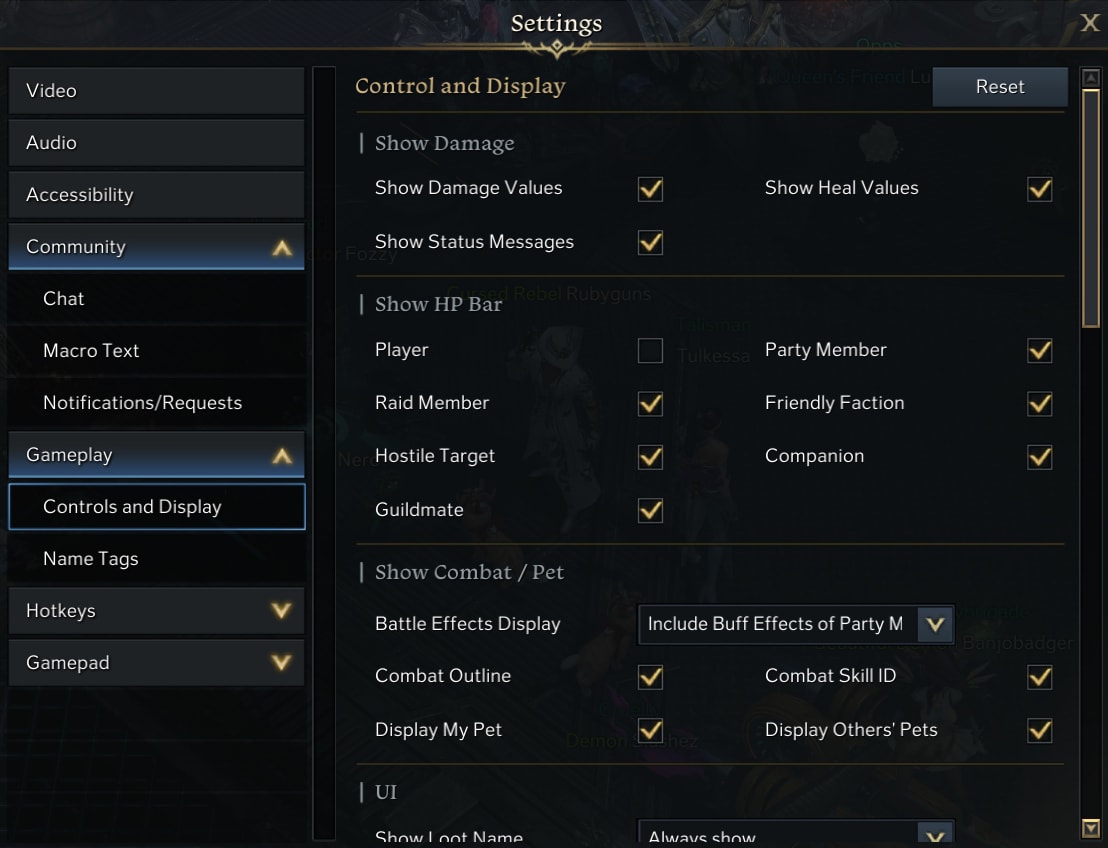
The Show Combat and Pet options are really useful to change. I highly recommend setting Battle effects to Buff Effects only. This helps with both performance and clarity by removing most combat effects, except support Buffs, Healing, and Shields.
Combat Outline is helpful for keeping track of your character and your targets, I usually leave this one on. Combat Skill ID will display the name of Buffs and other effects applied to you, as well as if an AoE is a friendly AoE or not.
The options that Display Pets are a preferred choice, they’re typically not harmful to have on, but if you want fewer things on screen, you can hide them.
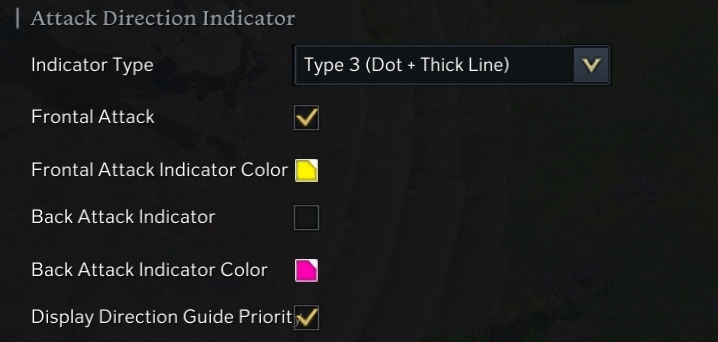
Added in the “Destined for Destruction” update, Attack Direction Indicators help you position for Frontal and Rear Attacks.
I’ve personally left the Indicator Type as the Type 3 Default. This makes it very prominent and hard to miss amidst combat.
As for the Front and Back Indicators, I highly recommend making both indicators high-visibility colors. This helps them stand out more and be easier to see. I personally like using Pink and Yellow shades as they contrast most backgrounds. For most cases, White an okay option as well, but there are some areas where it doesn’t work, like certain Guardian Raids.
I recommend having both the Front and Back indicators ON, and enabling the setting that gives them priority. Even if you don’t use frontal attacks, the frontal indicator can help you figure out the attack direction/angle of certain attacks. The Rear Attack indicator will do similar thing for larger enemies that have tails, like some Guardians. The Priority setting makes sure they go over most visual effects from attacks.
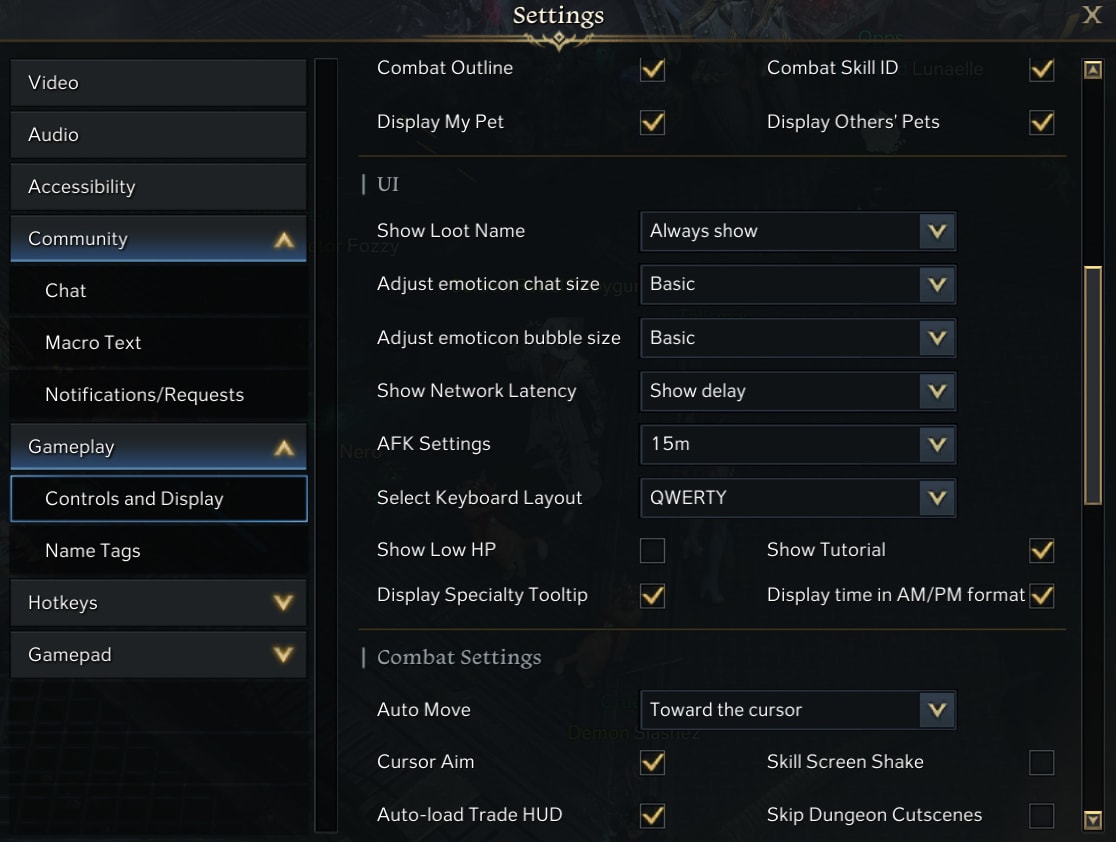
For the UI section here, most of these are fine at their defaults. The only option you made needs to change is the Keyboard Layout, as they affect your keybindings.
I recommend turning Show Low HP off. This turns off the blood effect on the edge of the screen when you reach Low HP. This also turns off the heartbeat sound effect that plays at this threshold as well.
If you’re working on a second character, I also recommend turning off Tutorials. The game will not care if it’s just a new character and will make these pop up regardless as needed. they can often get in the way in combat as well, covering part of your screen until dismissed.
In Combat Settings, I recommend setting Auto Move to the ‘Towards Cursor’ option. This makes auto move more useful for actual gameplay, as instead of just walking a straight line, you will follow the cursor instead.
Cursor Aim helps a lot with making it easier to hit certain skills that are more directional. It will slightly adjust your aim to keep your skill on target, rather than a miss by a bit.
I personally also disable Skill Screen Shake, as it can be pretty disruptive. It can make more skills feel impactful, but it’s not always a great visual effect.
I Highly recommend disabling Auto Trade UI. This makes it so when you gather something, it doesn’t immediately switch to the Trade Skill UI, which means you need to press B to move back to your combat skills. You’d manually need to switch for the skills that need it, like Hunting or Archeology; but this allows you to Forage and Mine without much hassle.
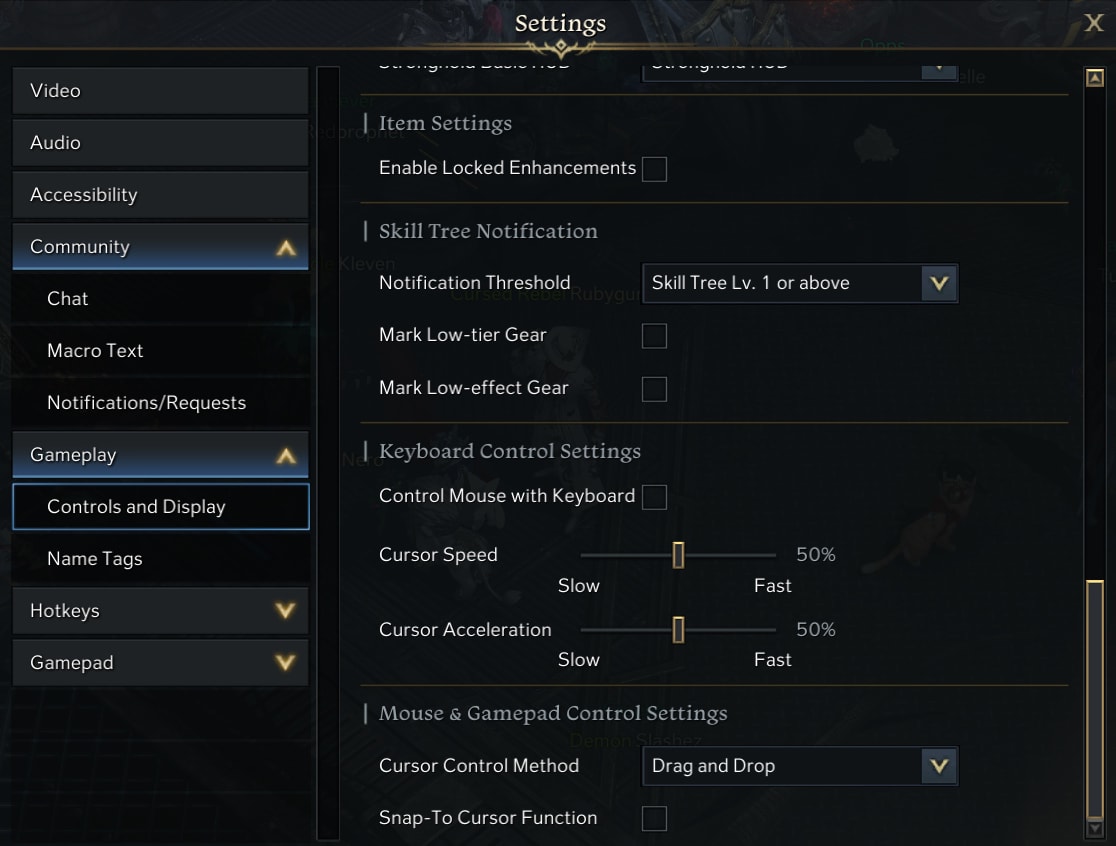
Under Item Settings, Enabled Locked Enhancements is useful if you have multiple gears sets you want to work on or have ability stones drop that you choose to lock right away. This enables to you enhance and use similar features on locked gear if enabled.
The Skill Tree Notification section isn’t relevant until Tier 3 gearing. What this section does is set the minimum Tripod Level that will be marked when tracking a skill tripod.
Checking “Mark Low-tier Gear” will mark gear that is below your current tripod level on your gear. “Mark Low-effect Gear” works similar to the previous option, but will also hide same level tripod levels. These can be useful if you need to swap around your tripod levels.
The last thing that can be useful to point out here is Cursor Contol Method. This has two options, the default Drag and Drop, or Pick Up. Switching to pick up allows you to click an item then click elsewhere to move it.
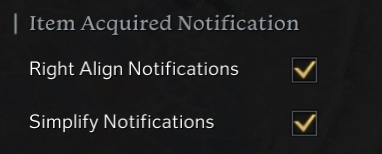
Newly added in the “Destined for Destruction” Update are options to move and simplify drop notifications. I personally prefer both of these options to be on as I’m familiar with drops by icon, but this is my own personal preference. Feel free to play with them and see what works best for you.
Selecting the “Right Align Notifications” will move drop notifications away from the center of the screen, and move them to the right. This is helpful to get them out of the way in combat, as they can take up a decent amount of space in the center of your screen.
Selecting “Simplify Notifications” will remove item names from Drops. This will reduce the notifications down to Icons and count only, which makes them take up less space.
Hotkey Settings
Honestly, Hotkeys will always be a personal preference. However, Lost Ark’s control scheme is pretty good by default. There is one option however that I want to highlight here.
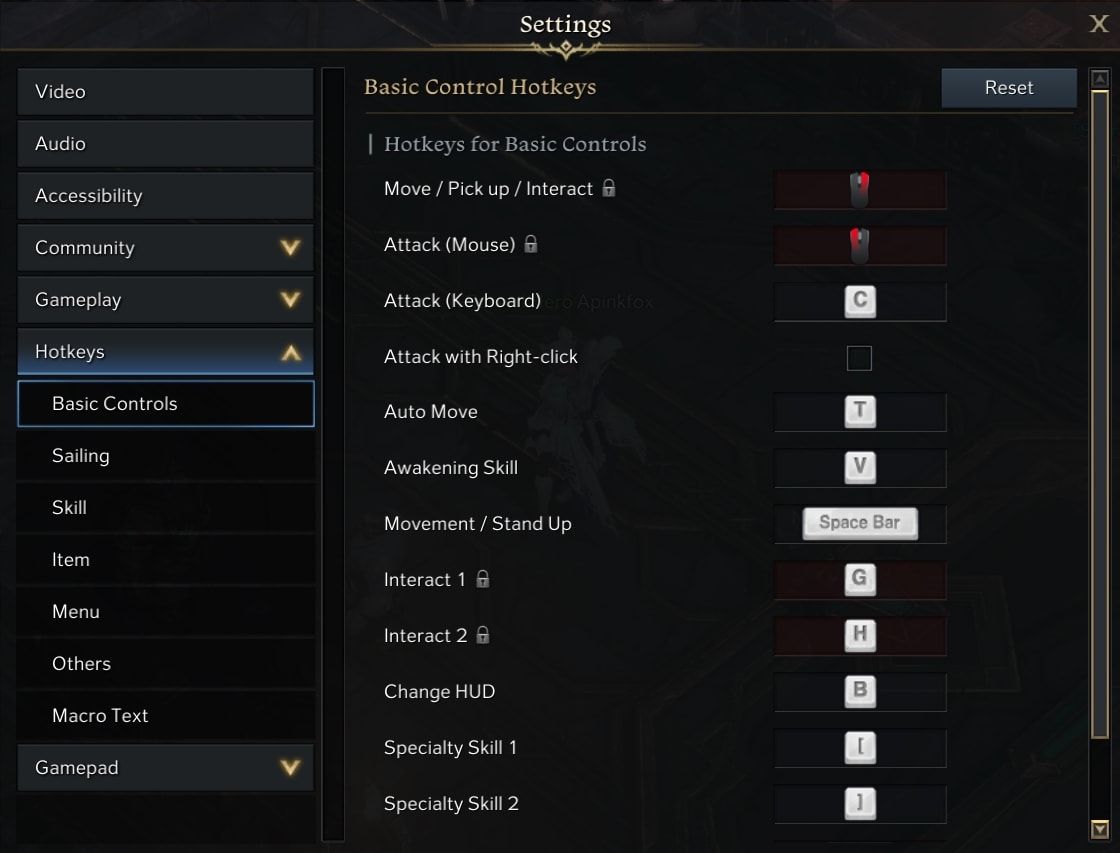
The option I want to highlight here is ‘Attack with Right-Click’. This option will swap the functions of your Left and Right Mouse Buttons. It’s a very unnoticed option, but can be helpful if you find your initial button choice to not be comfortable.
Gamepad Settings
Gamepad Settings are focused on Controller use. While there’s not a ton of setting here, they can be useful for controller players to adjust or remove vibration feedback and targeting options.
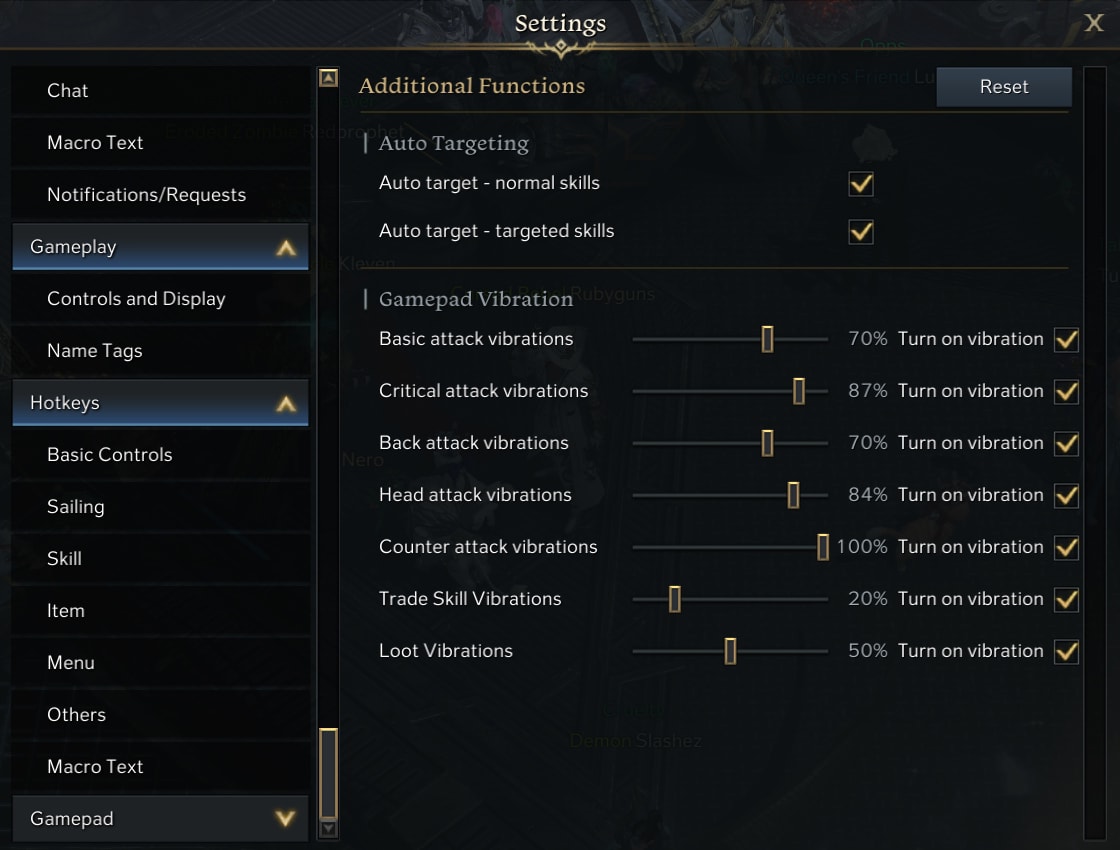
The Auto Targeting options are useful as they make many skills more consistent to use overall. It can still be a comfort thing, as some skills used primarily for movement you may not want to have locked, or they may head towards your target instead of being freely aimed.
Personally, I’d never really want vibrations on with a controller. Everything listed can happen so frequently that it’d get uncomfortable after a while. However, if you prefer controllers, set things how you prefer.
Steam Launch Options
I cannot stress enough how important these additional settings have been for me. They’ve improved the loading and prevented a lot of the slow loading of important objects to start in-game activities.
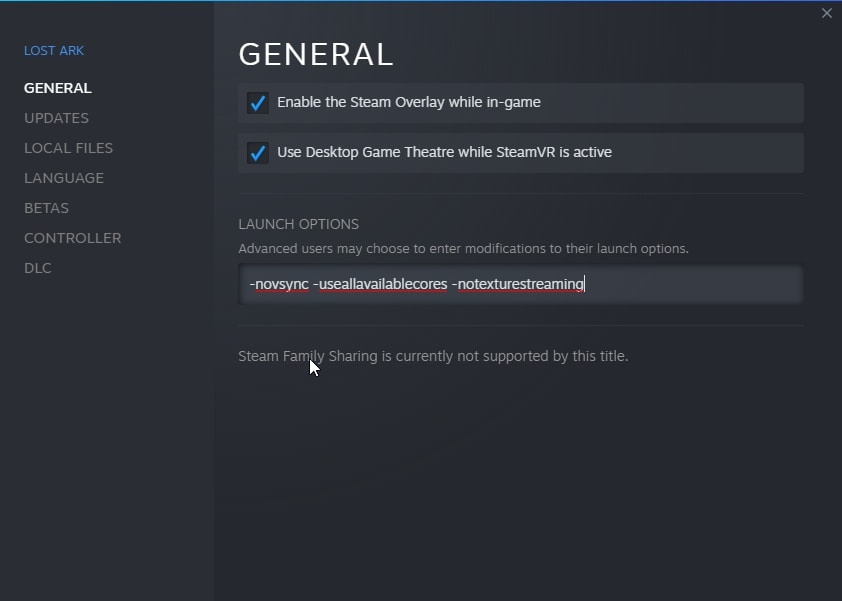
These are applied in Steam by right-clicking the game and your Library and navigating to Properties, then setting these in the default General Tab. There are three I use, and I’ll explain exactly what they do and how they impact things in-game. Remember to put a space between these options if you use more than one
No Texture Streaming
This option is enabled by adding “-notexturestreaming” without the quotes into the Launch Options. This fantastic addition will remove Texture Streaming from the game.
This in essence fixes the slow loading of objects and textures in Lost Ark.
To put it as simply as possible your load times between areas will be a bit longer not by much if you’re using an SSD for storage, But those couple extra seconds will make sure all textures load fully. This means no waiting between exiting an activity and re-entering it or entering another activity.
Use All Available Cores
This option is enabled by adding “-useallavailablecores” without the quotes to the launch options. This allows the game to make use of more of your CPU to help the game run smoother.
This in essence helps to fix the stuttering and hitching while playing Lost Ark.
This is more of a personal option for me. While not everyone will benefit from this, I’ve seen much less stuttering since enabling it. This may only help if you’re running a high-core count CPU, but nonetheless, it can be worth a try if you feel the game’s performance is lacking.
No V-Sync
This option is enabled by adding “-novsync” without the quotes into the launch options. This option simply disables V-Sync.
This in essence uncaps the framerate of Lost Ark.
This is another personal choice of options for me. Since my system is fairly high spec, uncapping the frame rate doesn’t hurt at all. I mostly chose to use this option as the game didn’t have a frame rate limit that was near my display’s native cap.
We have a collection of Lost Ark Beginner Guides for you to check out. They will help you get a nice and smooth start with the game, save precious time and learn the basics easily and progress more efficiently. And be sure to bookmark the Lost Ark Progression Guide as it will take you from level 10 all the way up to the Tier 3 of EndGame.
Lost Ark Beginner Guides Collection
A collection of must-read Beginner Friendly guides for the MMOARPG Lost Ark. Learn the basics of the game, how to level up quicker and easier, how combat works, which perks to get first, what to do and not do as a new player in Arkesia!
Lost Ark Progression Guide: From Level 10 to Tier 3 EndGame
This guide focuses on getting you to the Tier 3 Content in Lost Ark quickly from a fresh start, to give you the best start possible!
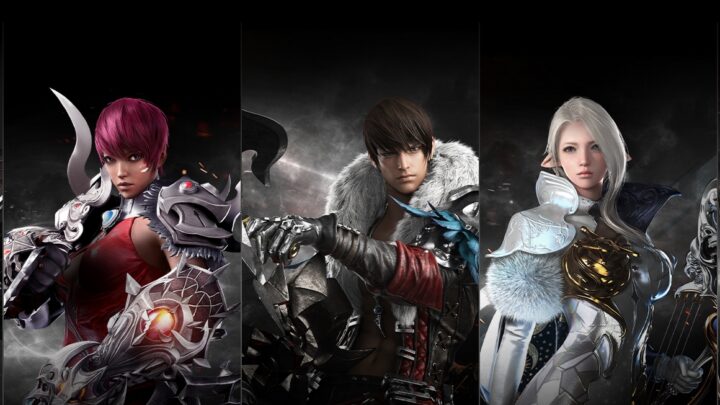
Lost Ark Classes and Roles: a Beginner's Guide
Breaking down the Lost Ark Classes and each individual advanced class available with their Awakening Skills, Class Engravings, and Playstyles!
How to use Advanced Combat Mechanics in Lost Ark
In addition to varied functionality, many skills in Lost Ark also carry additional effects with them. This guide breaks down those effects!
Lost Ark Tripods System Explained
Tripods are an important part of Lost Ark's combat, letting you finely tune your abilities. This guide explains the basics, allowing for more effective skill tuning!
Lost Ark Tips and Tricks: The DOs and DONTs for Beginners
New to Lost Ark? Looking for helpful information to help you with progression and learn game features fast? This is the guide for you!
Lost Ark Gear Honing and Gear Transfer Guide: how it works
Most of Lost Ark’s endgame progression comes from upgrading your gear. This guide teaches you the basics and why it’s important!