Arkesia Grand Prix is a limited-time event in Lost Ark that happens bi-hourly. Learn how to access it, participate and what rewards you get!
The Arkesia Grand Prix is the first Event released for Lost Ark’s Western Release. This event runs from March’s “Hunt for the Guardian Slayer” Update, until the next major patch in April.
This Guide has been updated for the March 24th Changes.
Through participation in the event, and the completion of some dailies, you can earn a currency to spend in an exchange shop. This Exchange Shop is host to a lot of goodies that help with progression as well as some cash shop-only items.
How to access the Arkesia Grand Prix
As of March 24th, the entry quest requires Level 50 to accept. The NPC which you can accept the entry quest from can be found in every major city. Only one character can hold this quest at a time. Be sure to only accept it prior to taking part in the event to avoid any issues related to this limitation.
First, you start by talking to the NPC to receive the daily quest, which can be done once per roster, per day. The first time you talk to her, she will explain a lot of the event’s content including how rewards work.
Once you’ve talked to her, you’ve unlocked access to the event and it will now be tracked by the game’s event schedule in the top left (which may not appear until Level 50). The event happens every 2 hours or every even hour on the UTC clock. If your region adheres to Daylight Savings Time, this may fall on every odd hour instead.
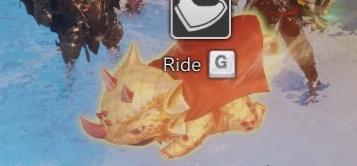
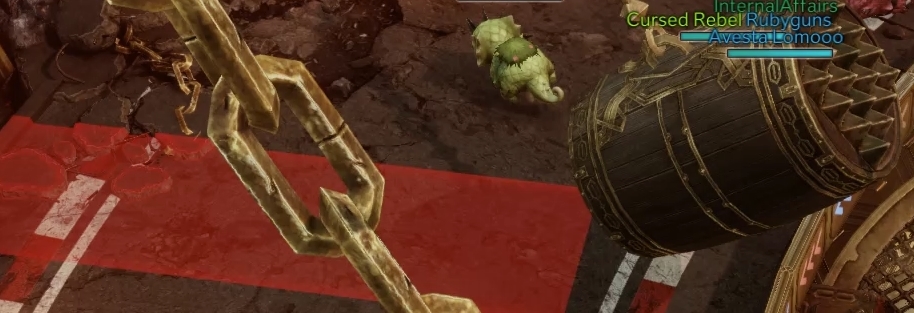
When it’s time to enter for the Arkesia Grand Prix, make your way over to the NPC, and there will be a Super Naruni, a golden lizard with a cape, nearby that serves at the portal to enter the event area.
How to Participate in the Arkesia Grand Prix
So it’s time to enter the Arekesia Grand Prix and you’ve reached the event starting area. The first thing you’ll want to do is read the guide information available from the Play Guide panel at the back of the lobby.
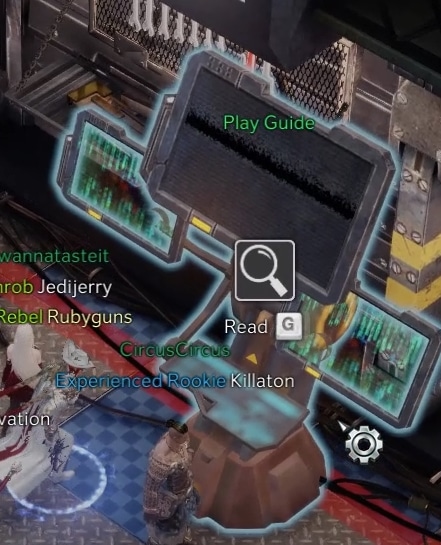
From this panel, you’ll learn that the Naruni you’ll be playing as has a set of 4 moves they can use to disrupt their opponents or avoid hazards and other disruptions. These Consist of Headbutt, Super Naruni!, Plop Bomb, and Tough Naruni.
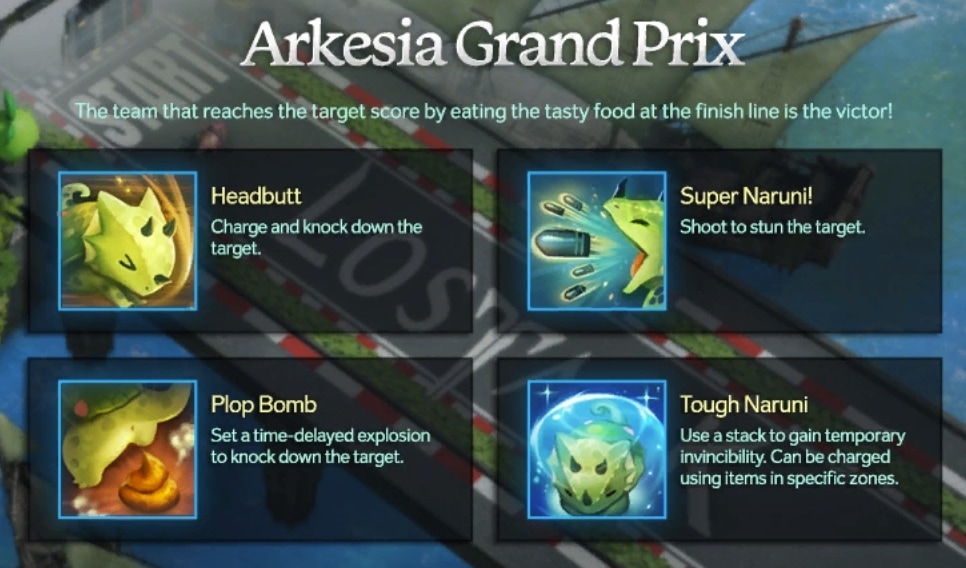
Headbutt is a short dash that can knock down opposing players. This is very good to use at the very start while people are grouped up, as you can disrupt several people at once. If you end up ahead of everyone you can use it to avoid hazards and reach the end faster.
Super Naruni! launches a Super Naruni forward, which stuns opposing players if it connects. If you’re familiar with Mario Kart, it’s similar to a Green Shell there. It’s very useful for catching up to and overtaking players ahead of you.
Plop Bomb is exactly what it looks like, exploding poop. It places a timed delayed mine that explodes after a few seconds. if it hits, it knocks players forward into the air, and they have a long recovery time after landing. If timed and placed correctly, these can be used to follow up a Super Naruni and stun players for longer.
Tough Naruni is an ability that can be used rarely to block the other players’ abilities without interruption. It’s given to the players that fall behind as means of helping them catch up.
After a short time in the lobby that allows time for other players to load in, a portal will open that moves you to the starting line. A brief moment here, and you’ll transform into a Naruni and the race will begin.
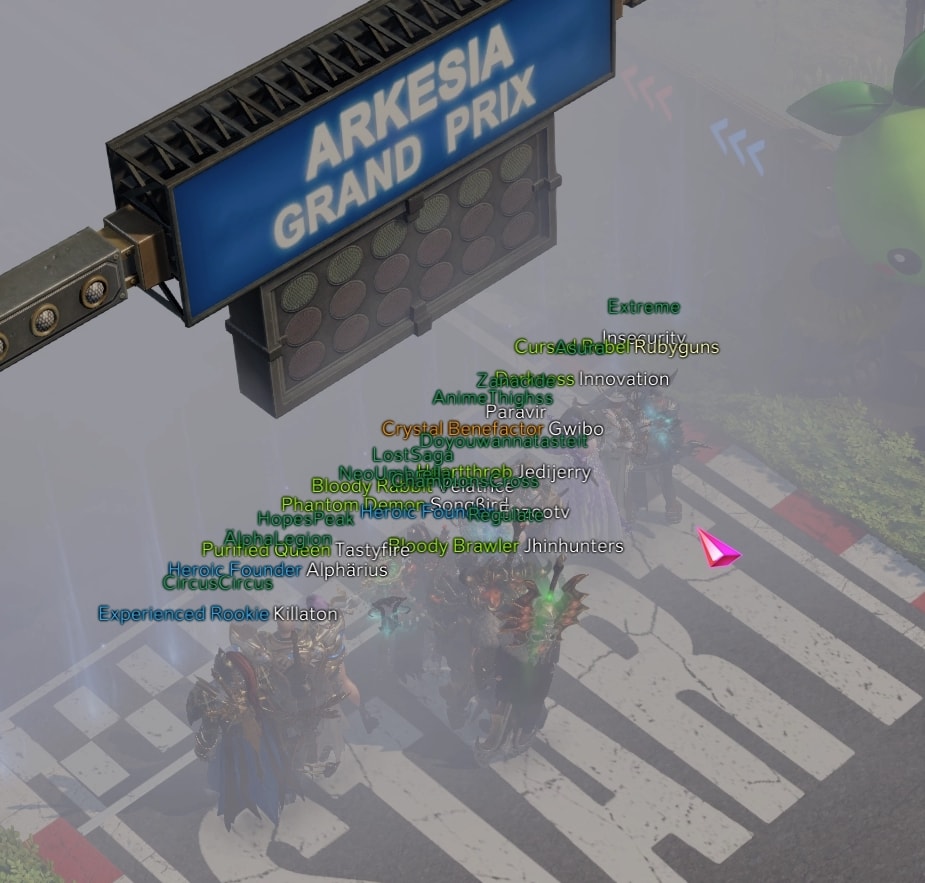
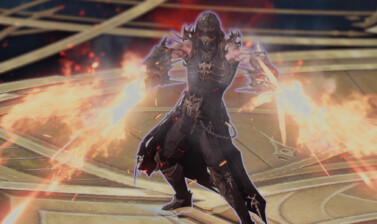
Once the Race begins, the overall goal is to be the first team to have 6 of your 7 players reach the finish line and each the delicious cake that resides after the finish line. The track you’ll be racing through will feature content obstacles based on enemies and bosses that already exist, and some that haven’t been added in the Western Release.

There are multiple strategies to help get a consistent victory, as a team victory is better for everyone. We’ll talk about a few of those shortly. There are however additional bonuses if you’re in the top 3 finishers, which are very small increases in event currency that are typically not worth it.
Track Hazards and how to avoid them
As you progress through the race track, there are also many hazards to be aware of as you go through and can slow you down and keep your team from victory. Thankfully, most of these hazards also have Speed Boosts nearby, which help you get through them quicker and with a bit less risk.
The first of the hazards are the Hammers in the Yorn-themed section of the map. These swing across the map but leave a small safe area at the edge of the side they start from. Since they swing back and forth like a pendulum, the direction and location of the safe area will alternate with each swing.
Hammer Hazards
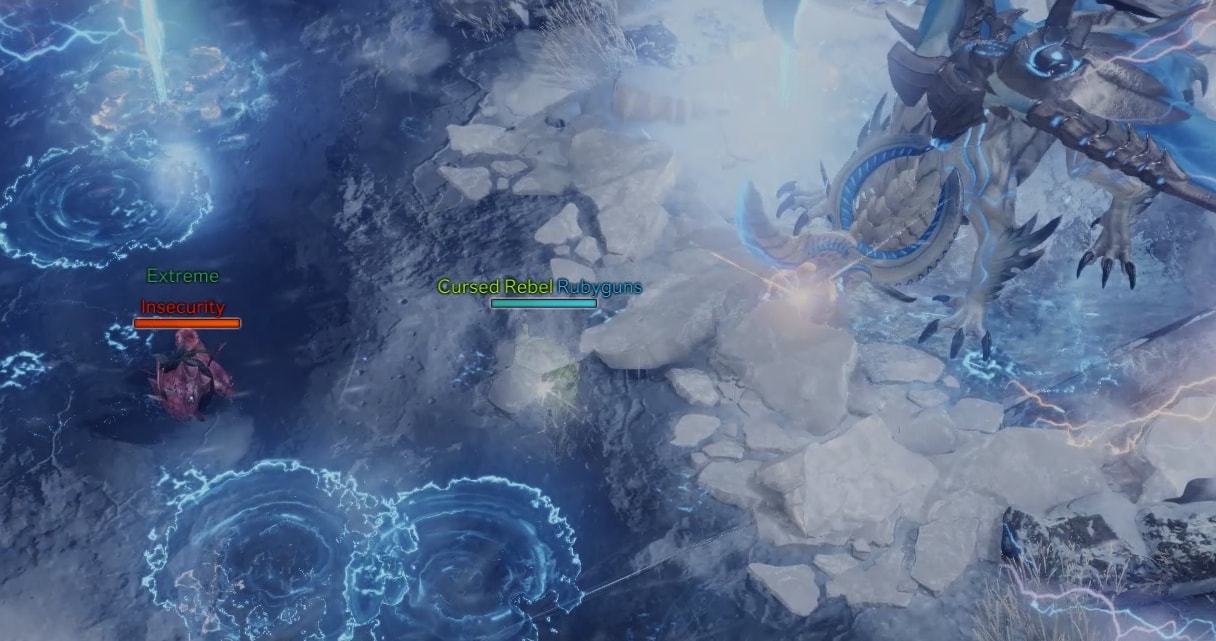
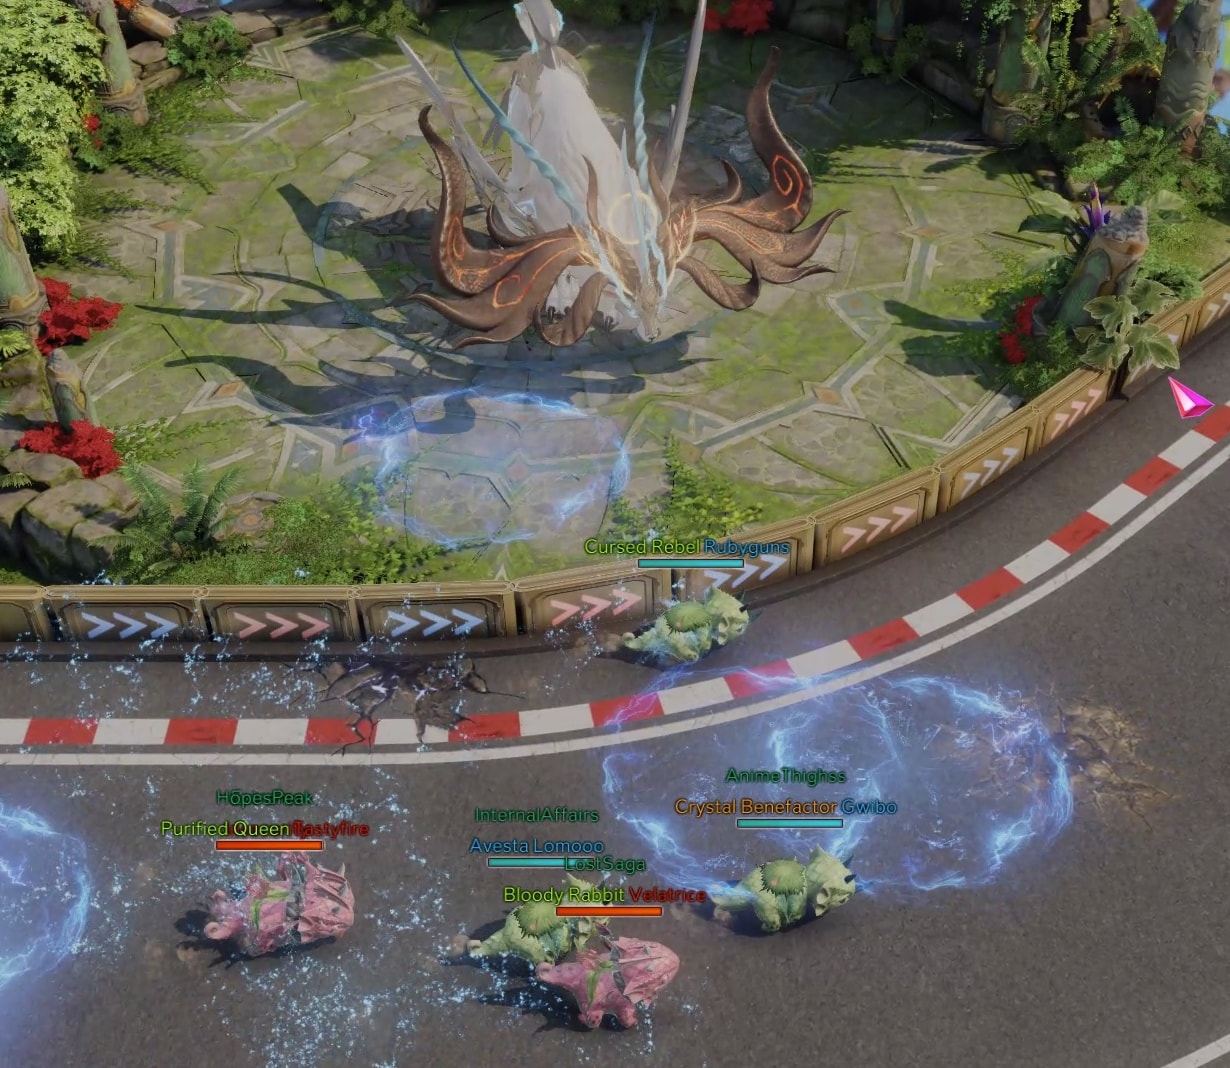
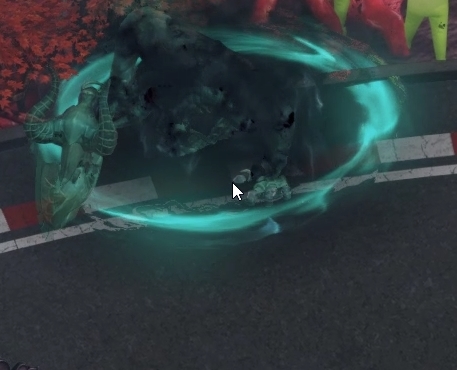
Next up, are the Electrical hazards of the Guardian Section. This section has a Lightning-themed Guardian watching over it which brings electrical storms to the area. These lightning strikes will afflict you with Electrocution, which will not only stun you, but also makes lighting arc from you to nearby allies, slowing them down as well. Staying near the walls and using your Headbutt will help with avoiding these as most hit the middle of the track.
The Guardian here also periodically launches a blast of electrical energy directly in front of them which covers a large area. The moment before this attack is launched, there will be a big flash of energy. This hit the middle of the track so the sides are much safer. Though you generally don’t want to be anywhere in front of them when it goes off.
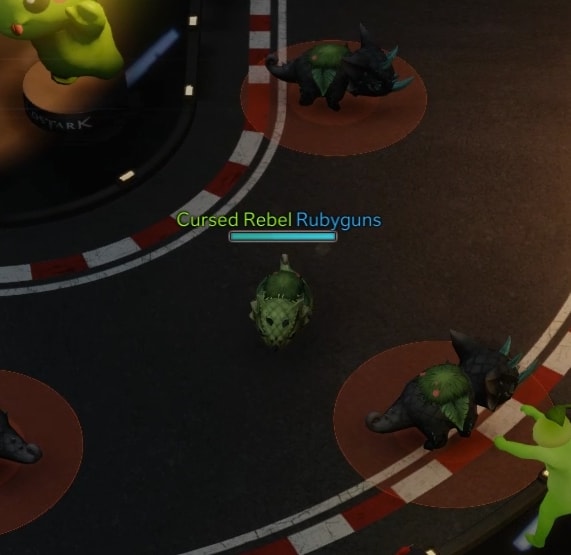
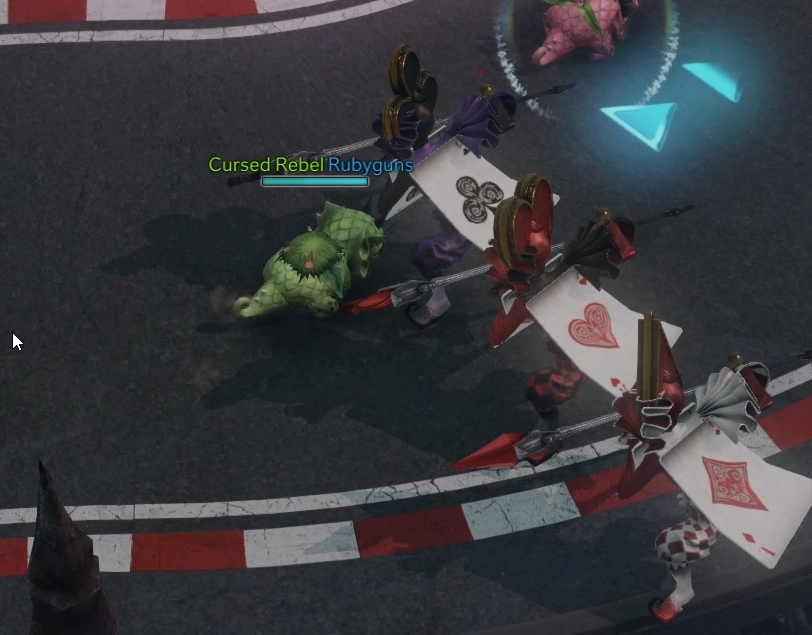
The next Hazard you’ll come across is the Evil Naruni. These unfriendly Naruni will briefly stun you if you get near them. To avoid them you have to weave in between their marked areas. They also pace about, so try not to cut too close to them or you can get caught off guard in a stun.
Up next are the Eel hazards in the Sea of Indolence-themed section of the map. Similar to the Hammers, they cover the span f a section of the track. This time the area is narrower and leaves no gaps, while also being a much longer hazard. If you’re ahead, it’s often good to dash through the final eel, as it’s often not synced with the others and will give you a lot of breathing room.
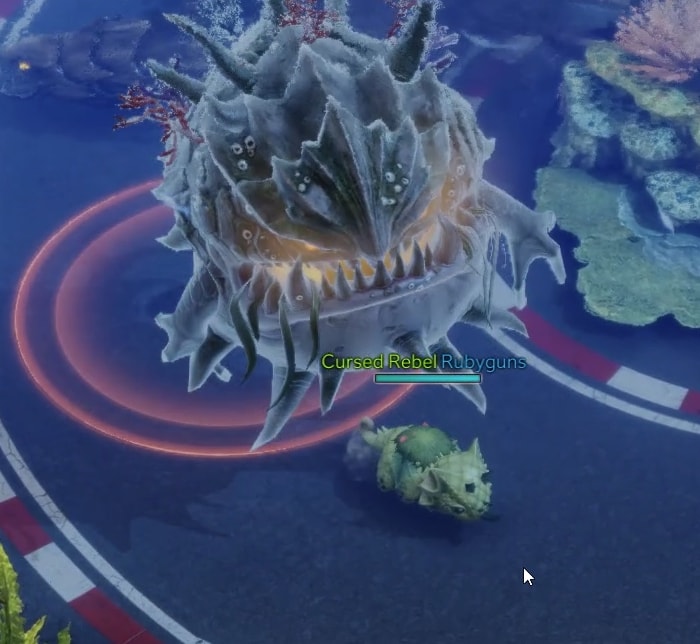
Then there’s the Water Elemental Hazard. This giant Water Elemental will sweep the whole corner of the track after the nearby boost. It creates random hazard zones in the sweeping motion it does. So you’re not guaranteed to get hit, but there are a lot of them, and isn’t worth relying on simply avoiding the middle of the hazard. To avoid this, you either want to get ahead of the sweep with the boost if you get there on time or follow behind it after it goes off.
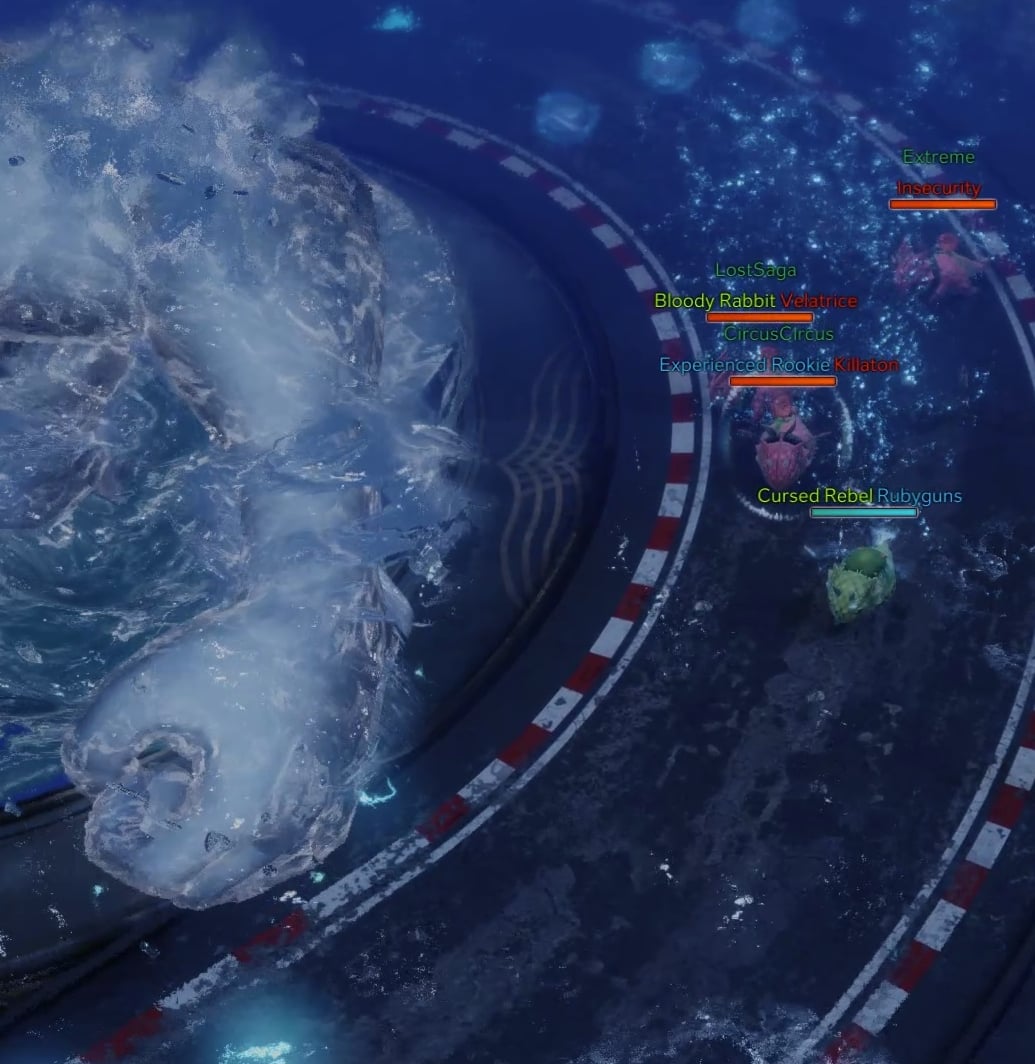
The last hazard for this section of the track comes in the form of Pufferfish. These Pufferfish will plop down on center of the track on a cycle, stunning anything they hit. These are easier to avoid by being near the edges of the track.
The Next Hazard start right after the final Pufferfish. This next area has electrical hazards similar to the previous Guardian section. This time, however, the Lightning comes from the Abyss Raid boss Argos. As before staying to the side will help you avoid most of these blasts.
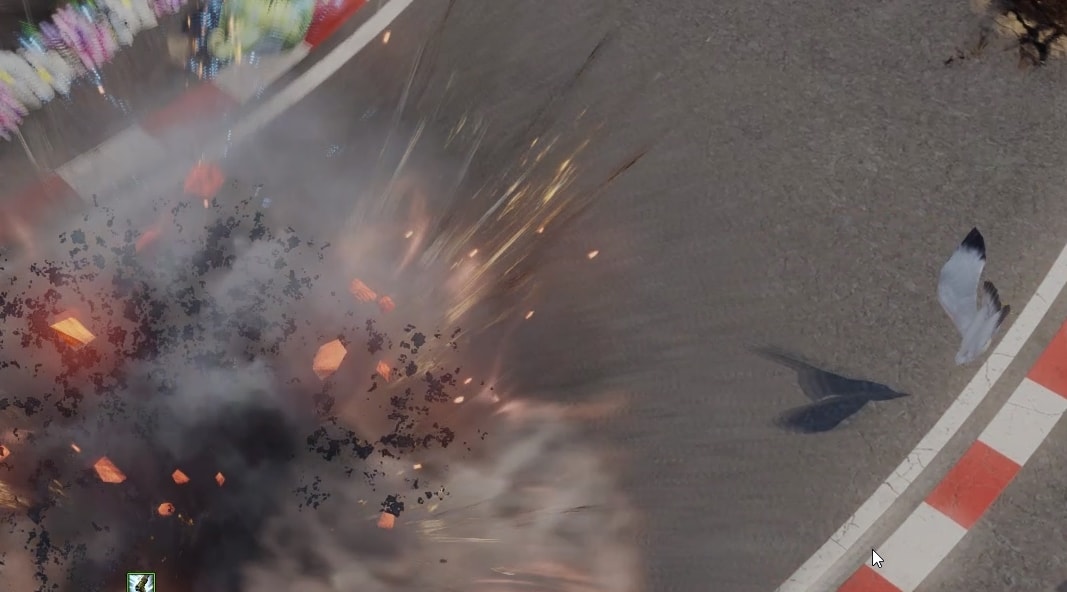
The next area has Seagulls divebombing the track, and creating explosions to avoid. These are easy to avoid if you watch for the shadow of the Seagulls, which indicates where they are about to divebomb. They will however shoot up first and hide this shadow, so be careful to not fully rely on just the shadow
The final section of hazards has just two minor hazards which are together. The first of which are Card Soldiers, which stab in the direction they face periodically. These are typically very easy to avoid and are more threatening if there are other players nearby as they can stun you can prevent you from avoiding the stab. Otherwise, it’s as simple as running through the gaps between them and avoiding not being directly in front of them.
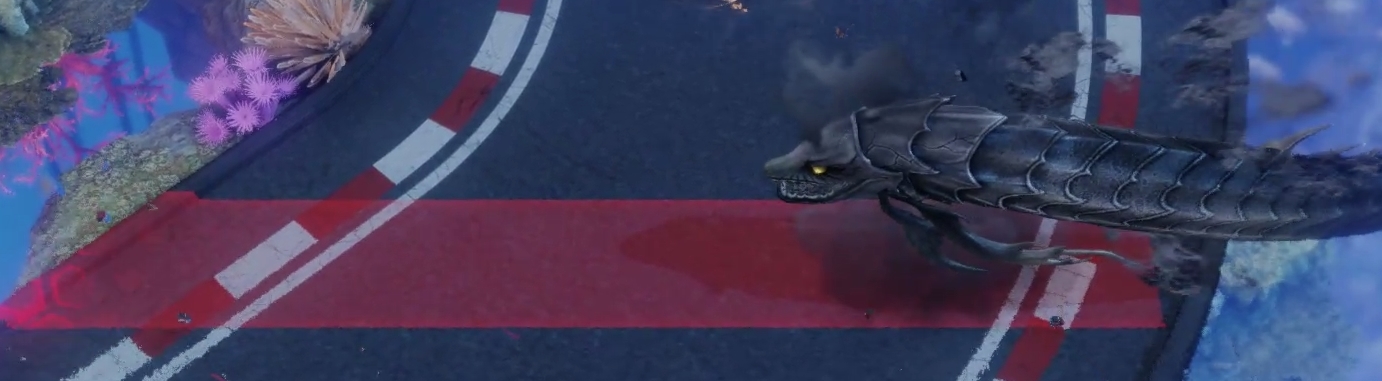
In between each wave of Card Soldiers will be a Shadow of Valtan. This shadowy demon will charge across the map similarly to the Eels. It’s a very quick charge but there’s a long delay between it showing up and charging. Much like the eels, just Headbutt forward to avoid them if needed, otherwise wait it out if it’s about to charge and you don’t have the Headbutt ready.
Once you get past all these hazards, you’re almost done with the race and only have to deal with nearby players.
Strategies to win Arkesia Grant Prix
If you want to go all-out on trying to help your team win, here are a few things you can do:
Headbutt straight out of the gate when the race starts. We mentioned this before, but people are generally clumped and this can lead to them hitting a bad timing for the cycles of the Hammers immediately around the first corner.
If you notice several opposing players falling behind, do what you can to stall them further. Yes, sacrificing a personal victory to guarantee a team victory is a valid strategy for winning. Make use of your Super Naruni! and Plop Bombs to prevent people from catching up faster. If you stall just two players by your own efforts, you’re guaranteeing that your team will win.
If you are ahead of everyone or there are no other players near you to interrupt you from doing so, make use of racing lines. If you are not familiar with the concept of racing lines, you’re trying to follow as straight of lines as possible through turns instead of following the turns.
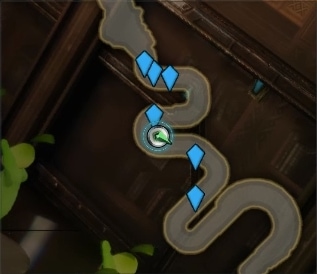
So in the case of a section where there’s a left turn followed by a right turn you want to go into in such that your Naruni will basically touch the inside of each corner, without turning at all; as shown loosely by the image above. Notice how I’m hugging that first corner and headed in such a way that I’m going to end up at the same position of the next turn, that’s a racing line.
What are Arkesia Event Coins and how to earn them
 Arkesia Event Coins are awarded to you based on your placement in the race as well as on whether or not your team wins. You can also receive them from Chaos Dungeon Clears (while you have Aura of Resonance) and Guardian Raid Soul Harvests. Below is a table of the ways to earn them along with the earnings they provide.
| Objective | Payout |
|---|---|
| Grand Prix Win | x888 |
| Grand Prix Loss | x600 |
| Grand Prix First Place Bonus | +200 |
| Grand Prix Second Place Bonus | +150 |
| Grand Prix Third Place Bonus | +100 |
| Chaos Dungeons (with Aura of Resonance) | x125 |
| Guardian Soul Harvest | x125 |
Based on the table above, with just a Win and your dailies on one character, you can get a maximum of 1288 Arkesia Event Coins. That’s 888 for a Win, and 400 from your dailies. Each additional Character in your roster can also add an extra 400 Coins per day with their own dailies, which doesn’t have a limit. So if you have 6 characters in your roster, that’s an extra 2400 Coins per day in addition to your Grand Prix Rewards.
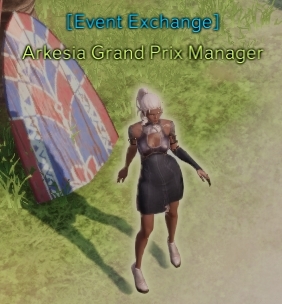
Arkesia Event Coin Exchange
When speaking to the Event NPC after the initial intro quest, you’ll get access to the Event Exchange. This exchange allows you to trade in your Arkesia Event Coins for a variety of items, ranging from additional honing materials to some items that are normally Cash Shop only. You can learn more about Honing Gear in Lost Ark from this guide.
Special Sales
This tab of the Event exchange is where you can purchase weekly Combat and Class Engraving Books, as well as Tier 1-3 Honing Books.
Page 1
You’re limited to 8 Rare Class and Combat Engravings, and 4 Heroic Class and Combat Engravings each week. This is a roster-wide limit.
This page also has the event-exclusive Naruni Hat Cosmetic Chest. This lets you pick one of a few colors of Naruni Hat to own as a cosmetic permanently. This has a Roster limit of 1 for the duration of the event, so make sure you’re grabbing a color you want the first time! The Chest is Roster Bound until opened.
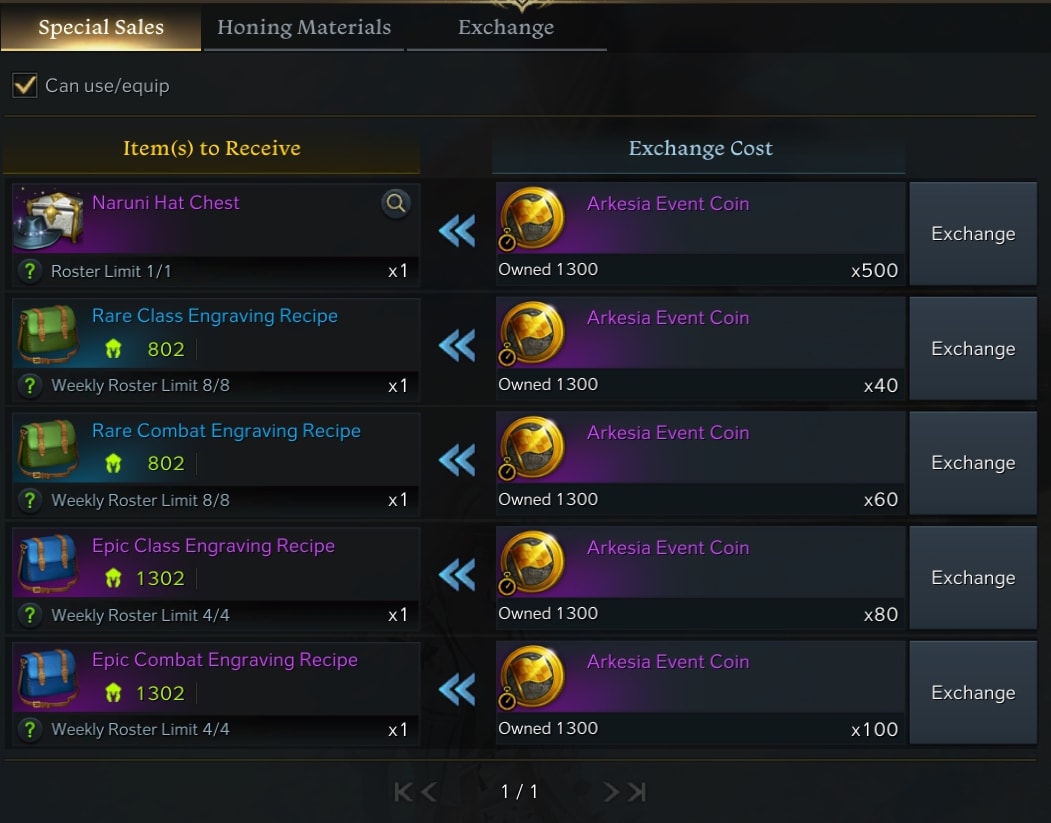
Out of this tab, make absolutely sure you’re getting these Engraving books every week of the event. Over the duration of the event, you’ll be able to get ~32 Rare Engraving books of each Type, and 16 Heroic Engraving books of each type.
That’s 3 additional Learned Engravings of each type you can get to Level 2 (or +6 Noid Points) from the event, and most of the way to get 1 of each type to Level 3 (or +12 Node Points). This can be a huge account-wide power bonus. If you’re unsure of what exactly Learned Engravings are, we have a guide that covers Lost Ark’s Engraving System.
The weekly cost of buying all of these Engraving Books is 1,520 Coins. This is a fairly easy cost to cover, and very worth it overall.
The Naruni Hat Chest is optional, but a free event cosmetic you can pick up with extra coins. Just makes sure you get the higher priority items first before picking it up.
Pages 2 and 3
Added with the March 24th Update, The shop now features Honing Books. These handy books will grant you +10% Honing Success for the respective gear type and tier. As a note, these particular books will only last until April 14th (3 weeks from the March 24th Update), the presumed end of this event. So unfortunately you can’t hold on to these until you need them. You can stack them up if you’ll be near the +13 – +15 Range on your gear before they expire, but otherwise, you can hold off on buying them.
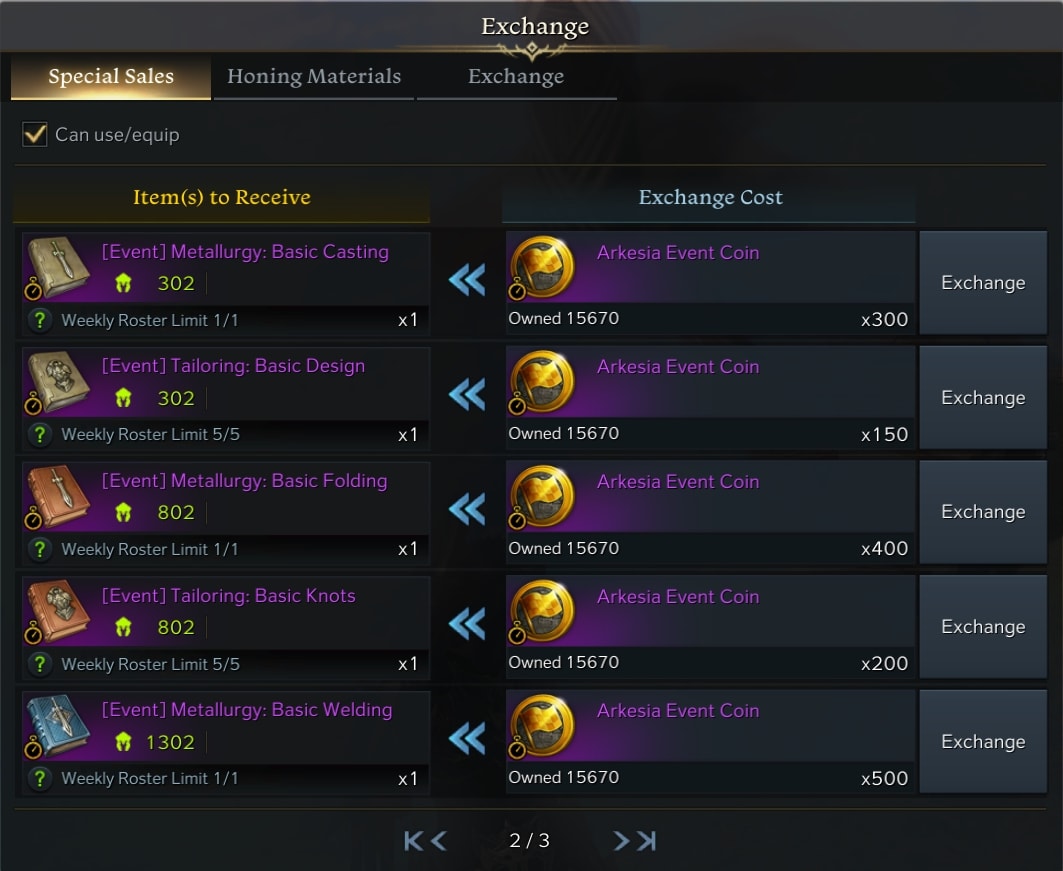
Page 2 has most of these books, while the final Tier 3 book is on the final page. These are listed in order from Tier 1 at the top, with Tier 3 at the end.
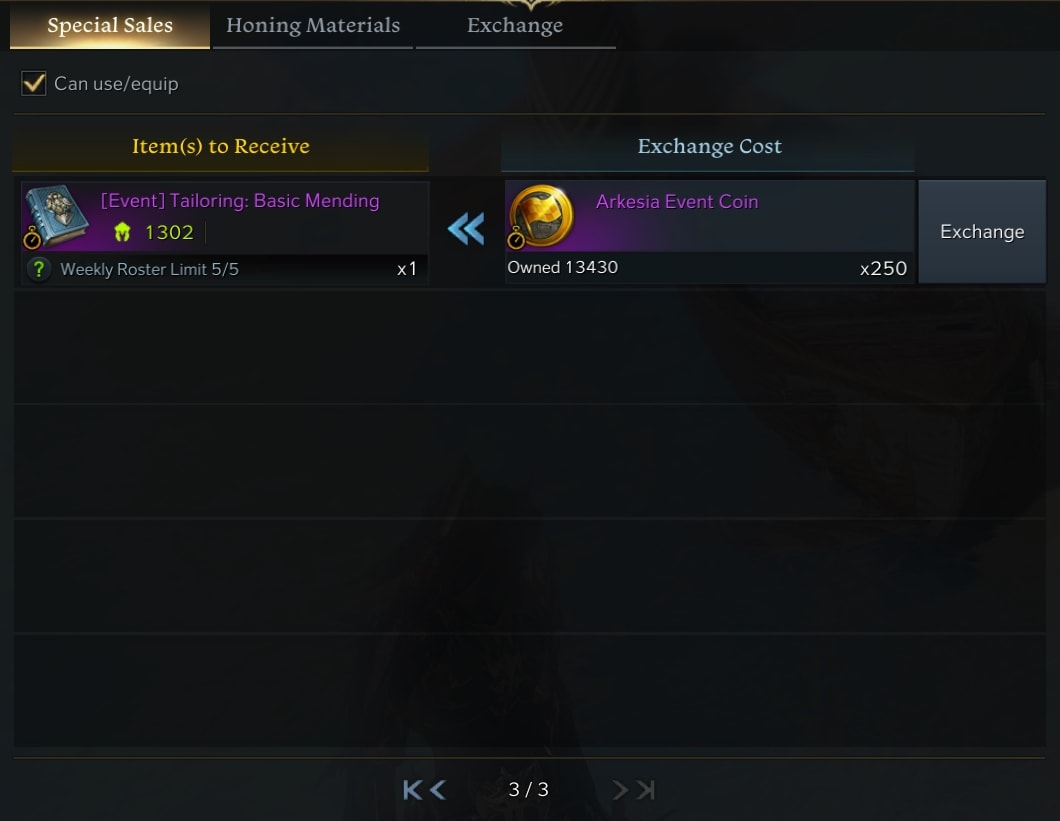
Buying out these books costs a whopping 4,200 Coins per week. The Tier 3 books alone make up 1,750 of that cost. Prioritize the ones you need, as there’s not much of a reason to buy the T1 books if you’re already in T2 or T3.
Honing Materials
This tab has all of the Honing Materials in the game, including the rarer Success Chance Materials. These items are not organized by Tier, but by Type. They are found in the following order: XP Shards, Leapstones, Success Chance Materials, Destruction Stones, Guardian Stones.
If you’re not totally familiar with using the Gear Honing and Transfer Systems, we have a helpful guide that can explain the process.
These should be bought as you need, prioritizing the higher-tier materials first since they’re more expensive. You can bank them until you need them and they’ll be a helpful boost to your progression. However they are level locked, so try to only buy what you can use on your character.
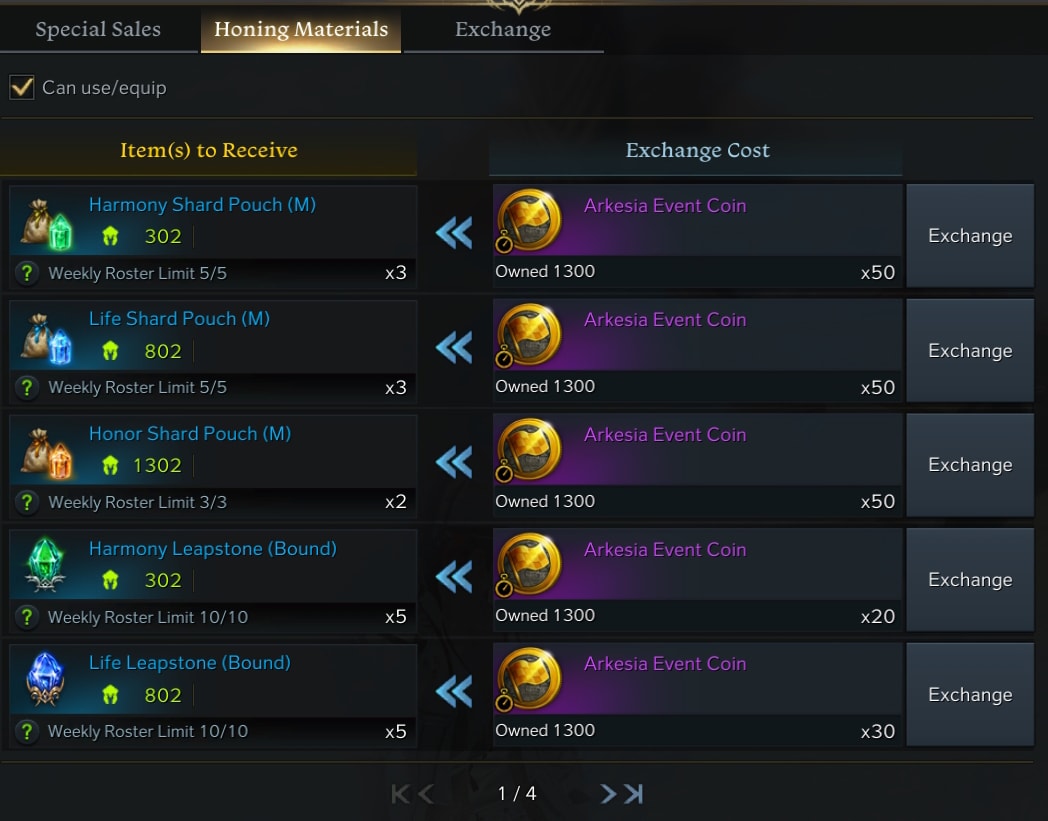
The first page has all of your XP Shards, as well as Harmony and Life Leapstones. These are all Medium Pouches and you get 3 per purchase, for a total of 15 Harmony and Life Shard Pouches, and 9 Honor Shard Pouches. This totals up to 15,000 Harmony/Life Shards and 9,000 Honor Shards per week.
The Leapstones are also 5 per purchase with a limit of 10. This means you can buy 50 Harmony and Life Leapstones this way each week as well. The Honor Leapstones which are found on the next page can only be purchased 5 times weekly and reward only 4 Leapstones. This means you can get 20 of these a week.
In total to buy all of the materials on Page 1 per week, it will cost 1,250 Coins.
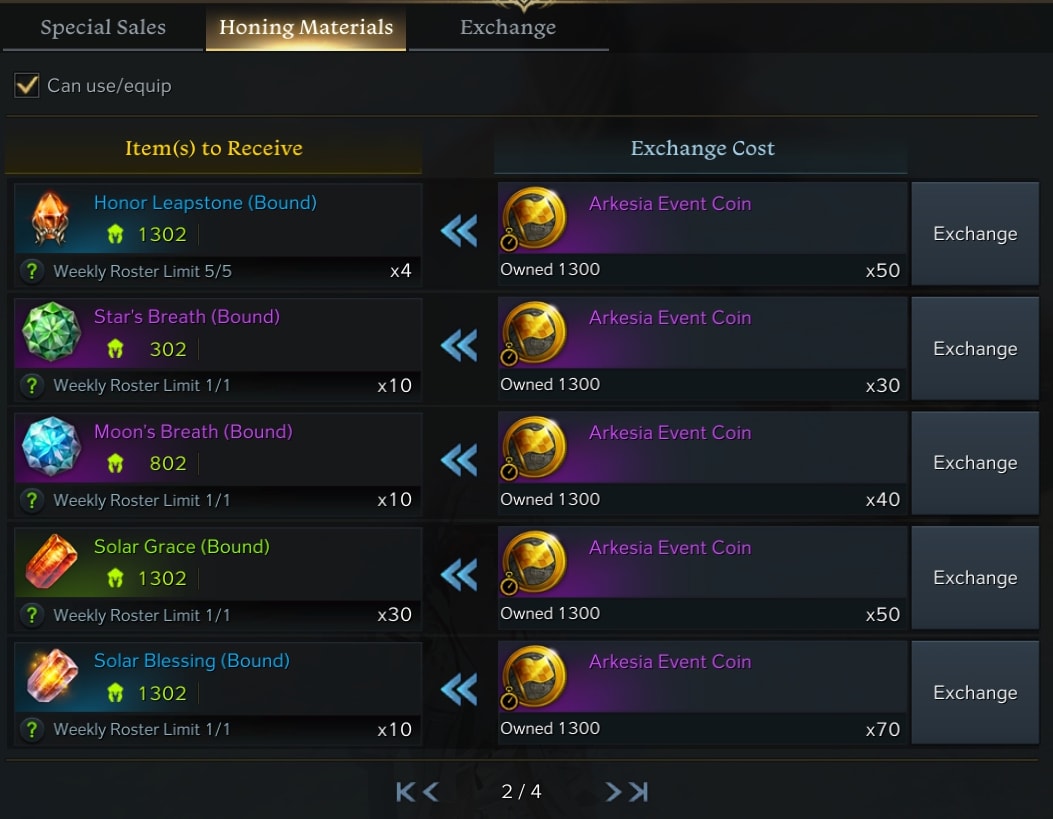
The second page also starts the Success Chance Materials, which are a once-per-week purchase. You can get 10 Tier 1 and Tier 2 materials per week. For Tier 3, you get 30 of the Uncommon rarity material, 10 of the Rare Material, and 5 of the Heroic Rarity items, which are found on the next page.
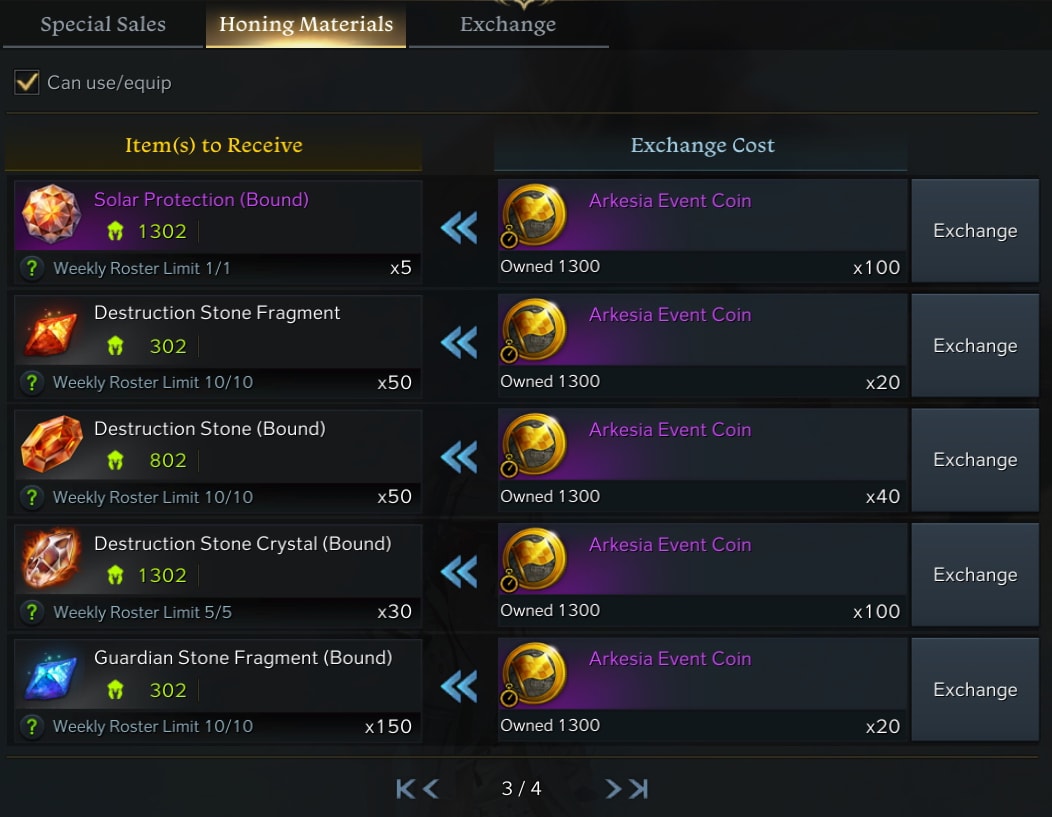
The Third Page here has your Destruction Stones, alongside the previously mentioned Heroic Tier 3 Success Chance Material. As for weekly Limits, you can get 10 bundle of 50 Destructions Stones for Tier 1 and Tiers 2 per week, for 500 of each per week. The Tier 3 materials are limited to 5 bundles of 50, or 150 weekly.
Buying everything from this page of the exchange will cost 1,100 Coins. Or subtracting the cost of Tier 1 materials, which not everyone needs at the moment, 800 Coins per week.
Guardian Stones also start here and carry over into the final page as well.
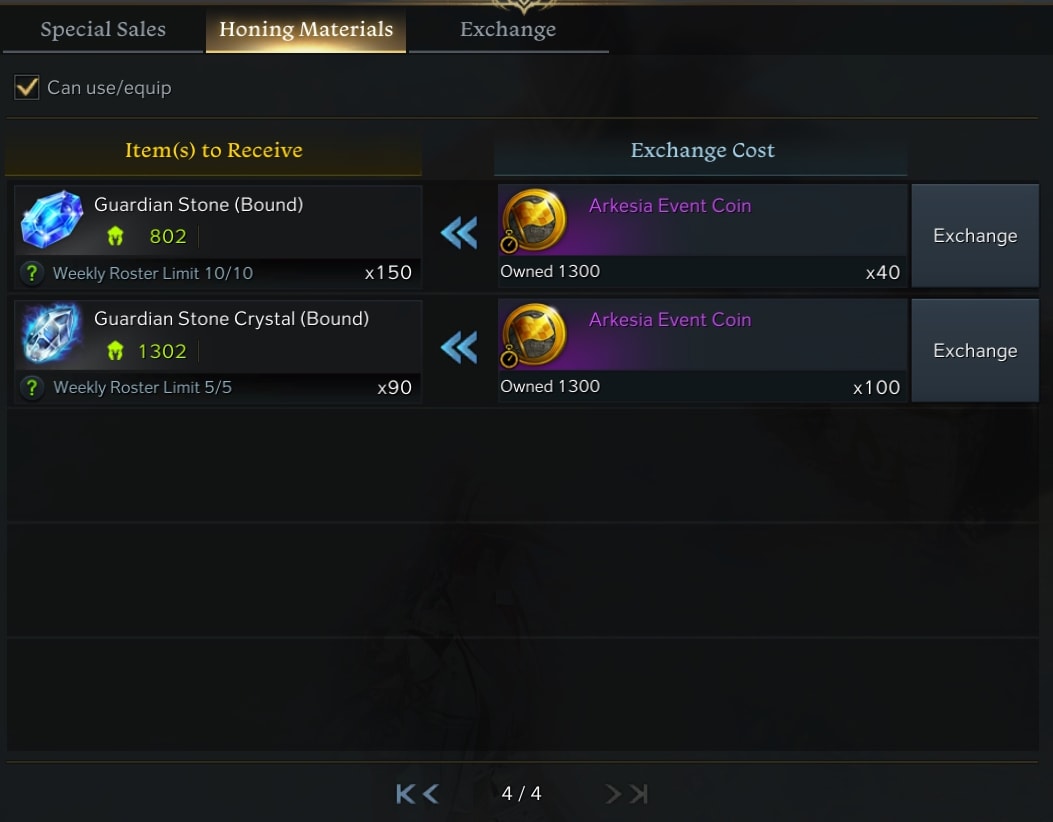
This final page just has Tier 2 and 3 Guardian Stones. As far as Guardian Stones go, you can get 1,500 of both Tier 1 and Tier 2 Guardian Stones per week. Tier 3 is limited to 450 per week.
To buy out all the items on this page of the shop will cost 900 Coins per week.
Exchange
The final set of pages has decent amounts of additional currencies like Pirate Coins and Sailing Coins, as well as some nice Cash Shop-only items that are useful to pick up.
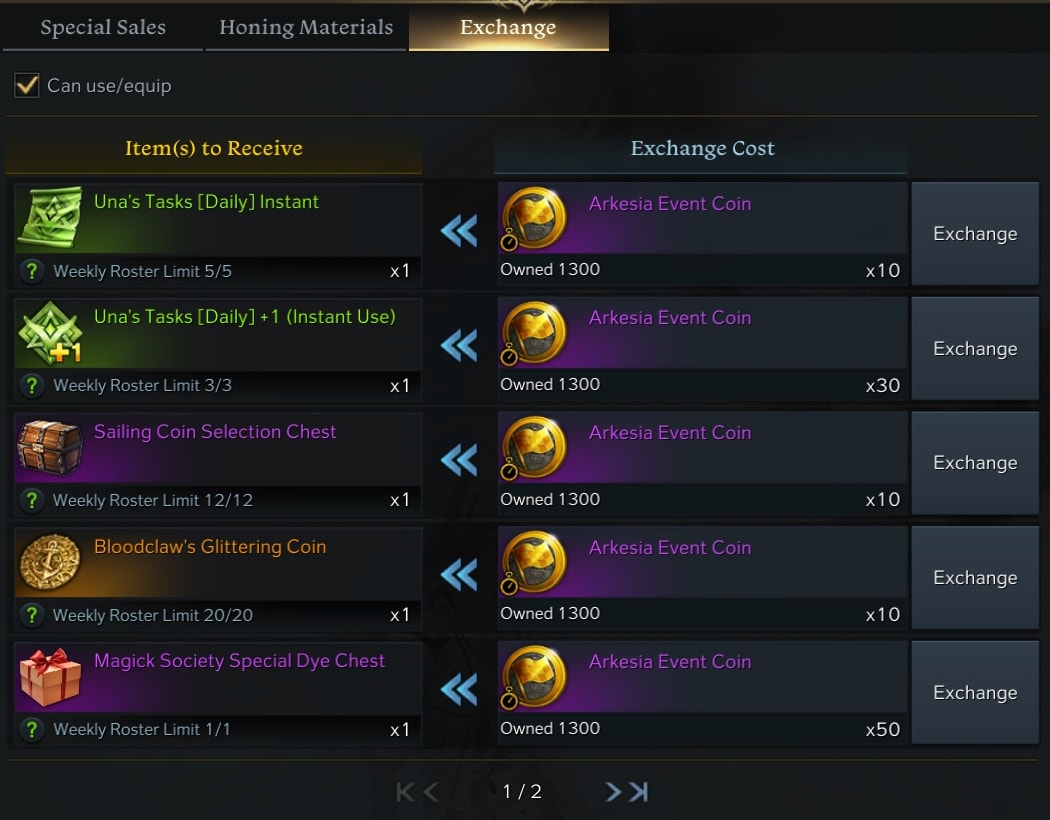
This first page has most of the important items you’ll want to get every week.
Instant Una Tasks will complete a Daily Una’s Task for you and can be a useful time-saver or if you really just dislike a certain Una you typically do. This will only work for Una’s you have unlocked and have previously completed. It’s a toss-up whether or not to get them. If you have extra coins, they’re not bad to have around.
+1 Una Task will allow you to add up to three additional Una’s Tasks to your daily limit, letting you do more Una’s Tasks in a day. These are less worthwhile unless you really need the materials from Una’s Tasks to push to the next tier or something like that.
These two Una’s Tasks items are both Cash Shop items, so if you want something that normally costs money for free, this is the first of them. Getting them is a preference really, so take into consideration if you can make good use of them before purchasing.
Sailing Coin Selection Chest provides you 500 of a chosen Sailing Coin. These coins have a lot of uses, ranging from getting collectibles to getting additional sailors to speed up your boat, or even new boats. You want to make sure you get these each week.
My personal recommendation is Sun Coins, to convert to more Pirate Coins or some collectibles, or any coins you need for collectibles otherwise depending on your needs.
Bloodclaw’s Glittering Coin grants you 500 Pirate Coins per each one used. This means an additional 1`0,000 Pirate Coins per week from purchasing these out. This is another must-buy overall, as Pirate Coins have a lot of uses.
Magick Society Dye Chest gives you the necessary dyes to be able to dye your skins. These are typically Cash Shop-only, so if Fashion is a priority fo you, you may want to pick these up.
Buying out this section of the shop will cost you 510 Coins per week.
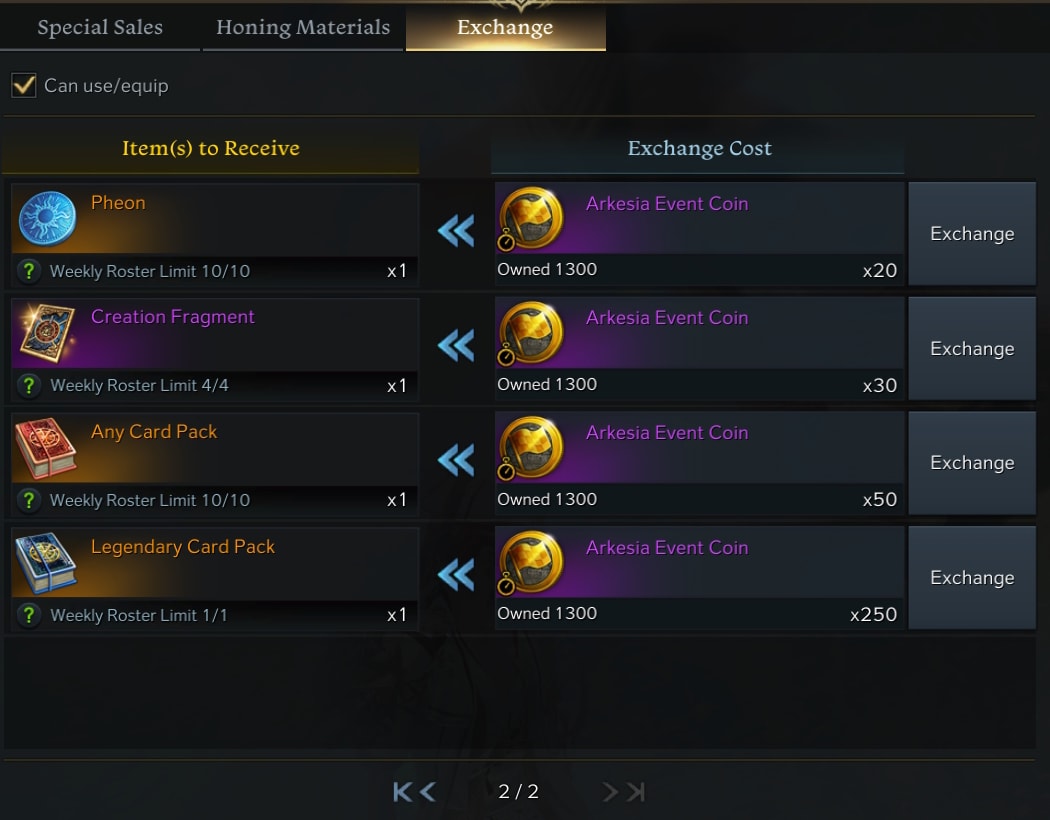
This Last Page has only a couple of necessary purchases. But it can still be good to buy the page out regardless for more roster progression.
Pheons are a paid currency that allows you to trade for items in Tier 3. Getting these every week is an absolute must. Even if you don’t need them right away, these are something that can help you a lot with fine-tuning your gear with market purchases.
While you get a number of them from Log-In Rewards as well, they’re still really good value to grab here. This is because Pheons are not a simple 1 per Market exchange, and some trades will use many of them. More will always be better in the long run.
Creation Fragments are Cards that break down into Card XP when consumed. This will help you make your card decks stronger and allow you to progress your roster that way.
Any Card Packs will grant you a random rarity Card pack from Common to Legendary. While these are a gamble, Cards sets and Card Decks have plenty of useful effects to help with roster growth.
Legendary Card Pack is a guaranteed Legendary Card, as if you has drawn a Legendary Card Pack from an Any Card Pack. With most of the highly useful cards being Legendary, this is a must-buy. While it won’t get you every useful card, it does have plenty of useful ones that can be used.
Buying out this last section of this shop will cost you 1,070 Coins.
Purchase Priorities
Since how many coins you can earn in a day or week is directly tied to how many characters you have, not everyone may have all the coins they need to buy out everything
Below is our list of highly recommended purchases of all the items available, and in what order you should prioritize them for your weekly purchases.
- Tier 3 Honing Materials (characters pushing for 1340+ for raids)
- Engraving Books
- Honing Books
- Tier 2 Honing Materials (characters pushing to 1100)
- Pheons
- Sailing Coin Chests
- Bloodclaw’s Glittering Coin
- Legendary Card Pack
- Any Card Pack
- Creation Fragment
- Una’s Task Items (optional for Growth)
- Magick Society Dye Chest (optional for Fashion)
Tier 3 Honing Materials, Honing Books, and all Engraving Books should take the highest priority in the weekly purchases. This is because each of these purchases is saving you quite a bit of gold in the long run. This is the Same reason why Engraving Books are a second priority as well because, in addition to gold, this also saves you a lot of the RNG hassles involved with getting stronger engravings.
Again as a note, All of the Honing Books from this event will expire April 14th. Keep this in mind when purchasing them, especially in the final week.
Tier 2 Materials are next, as they’re still quite valuable to get and you need plenty of them to reach Item Level 1100. This is followed by the additional currencies, which also can contribute to quick growth and progression through the early tiers. Pheons are the highest priority of these, as they are also helpful for getting gear in Tier 3 as needed.
Finally, we list the Card System items. While these are less direct progression for your character, they’re roster-wide growth which will be a slow burn anyways. Legendary Card Pack is the most important one to get first, as these are painfully hard to get otherwise. Any Card packs are a chance of getting more Legendary Cards but are still a gamble in doing so. Creation Fragments are a bit easier to get, but extra Card XP is always useful to stock up on where you can.
We also added the Dyes to the priority list as it’s a cash shop item that tends to be worth having. Una’s Tasks items are also here, as they provide limited bonuses to growth, but are also cash shop items. Neither of these should have too high of a priority among the items to get weekly, but they both can be useful.
Check out the Lost Ark Guides available on VULKK.com and stay up-to-date with the latest news about the game.