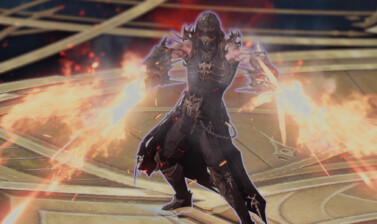
A Beginner’s Guide for Lost Ark’s Deadeye, covering the basics from stats to Skills and info vital to pick up the class.
Lost Ark’s Deadeye is a Ranged Damage dealer that uses a Shotgun, Pistol, and Rifle to deal damage at Close, Medium, and Long ranges respectively. This guide will cover their skills and Tripods for them.
Table of Contents:
- Introduction to the Deadeye Class and Overview
- Deadeye Party Synergy Effect
- Deadeye Stat Priority
- Deadeye Engravings
- Deadeye Skills
- Deadeye Awakening Skills
Introduction to the Deadeye Class and Overview
The Deadeye is a Ranged Damage dealing class with a lot of utility and mobility. between their skills they have a multitude of options, having 21 skills total and using up to 16 of them.
There are 11 Pistol Stance Skills, of which you can always use 8 of, which makes up half of your kit. The other half is split between the 5 Rifle Stance and 5 Shotgun Stance Skills, which you can use 4 each.
A lot of their mobility is found within their pistol skills. Between Dexterous Shot, Somersault Shot, and the first part of Enforce Execution it leaves them with a lot of mobility options. The Pistol is also home two their two skills with the Weakness Exposure Tripod, which is a key part of the class and general party play. This debuff is known as a Party Synergy Skill and will be covered later.
A lot of Deadeye’s Stagger options are found in the Shotgun Stance skills and Tripods, but there are still good options in the Pistol skills as well. Shotgun Stance is also the stance that deals the majority of the damage of the Enhanced Weapon Build. The Pistoleer’s Engraving also grants bonuses to their damage and Stagger to balance the two out in this regard.
The Rifle Stance Skills, unfortunately, fall to filler status while leveling and even in the Enhanced Weapon Build. It does have decent options for extra Stagger and Weakpoint options that can be accessed in Tripods, but other skills will still typically do these better.
Since the Rifle Stance Skills has long, slow animations and are primarily long-range skills, they go widely unused due to Deadeye’s close-range playstyle in PvE. However, they are more useful in PvP, since everything is equalized and you’ll have longer cooldowns and more use for ranged options.
A lot of Deadeye’s damage while leveling and while using the Enhanced Weapon Build will come primarily from their Shotgun Stance Skills. While Pistoleer works with just their Pistol Stance and uses the great damage options there instead. Regardless you’ll want to position for Back Attacks to increase your damage output and Crit Rate.
Deadeye Party Synergy Effect
The Deadeye’s Party Synergy is called Expose Weakness, and can be found on the First Row Tripods for the AT02 Grenade and Spiral Tracker Pistol Skills.
Expose Weakness inflicts a debuff when the mentioned skills deal damage to an enemy, reducing their Critical Resistance by 10% for all party members for 6 seconds.. This can be translated as a Critical Chance Increase for simplicity.
Keeping this Debuff active is crucial to getting the most out of the Deadeye while also increasing your utility for the party.
Deadeye Stat Priority
Below are the Priority Stats for the Deadeye class, listed in order of importance for PvE. Why each stat is taken and used is explained alongside them to help understand their importance.
 Specialization
 Specialization
Despite having no meter to build, the Deadeye actually has a very potent effect from Specialization, which heavily influences their damage from all of their weapon Stances and their Awakening Skill. This makes it a very high priority stat you want to grab as much as possible, typically alongside a mix of Critical and/or Swiftness depending on what content you’re doing.
Below are the respective effects for each of Deadeye’s Weapon Stances.
Please also note the numbers listed for the effects below are affected by Diminishing Returns, which means the value per point will decrease as you stack it further.
Pistol Stance: Increases the Critical Damage of Pistol Skills.
With the majority of the Pistol skills having Crit Rate Tripods as well as Crit as a priority stat, this becomes one of the most reasonable avenues of increasing damage from your Pistol skills. This increases their damage output regardless of your preferred build and is great for both.
Shotgun Stance: Increases Shotgun Damage.
This doesn’t seem like a huge bonus due to the ratio; in Tier 3, this will end up being around 30% extra damage. As your hardest-hitting skills, this bonus makes a much bigger impact than you’d expect.
Rifle Stance: Increases Physical and Magical Penetration of Rifle Skills by 0.03% per point.
Similar to Shotguns, this doesn’t seem like a huge bonus due to the ratio; in Tier 3, this will end up being around 30% Penetration, which greatly increases their damage, despite just being filler skills. Since its penetration, it’s a slightly stronger increase in damage over just a percentage damage increase.
 Critical
 Critical
Critical is your second highest priority and the only other stat you really care about for the Enhanced Weapon Build. This increases your Critical Rate, but is typically only taken in small amounts, usually at a 25% ratio compared to Specialization.
This combined with Party Synergy Effects, your own Party Synergy Debuff called Weakness Exposure; as well as your Crit Rate Tripods and Engravings bring you really close to being at the 100% Critical Rate Cap when you get to Tier 3.
 Swiftness
 Swiftness
Swiftness is your Lowest priority for PvE, but your highest priority stat for PvP. This is because it increases your Movement Speed and Skill Cooldowns by a fair bit which is important in PvP, but not so much PvE as your skill rotations are already decently smooth. It can be taken in very small amounts for PvE to help with skill rotations, as it doesn’t take much to keep a more steady rotation going with the number of skills the Deadeye has.
The Enhanced Weapon build generally doesn’t need it, as they have 16 skills to work with. The Pistoleer build will generally need a small amount due to only having 8 skills, despite being shorter cooldowns overall.
Deadeye Engravings
Deadeye Class Engravings
Below are the two class engravings available for the Deadeye. Each of these engravings offers a unique playstyle for the Deadeye. Which one you use is completely up to your preference, both are viable options.
 Enhanced Weapon
 Enhanced Weapon
“Changing Stances increases your Crit Rate by 20%/25%/30% for 9 seconds”
This Engraving zeroes in on the stance swapping aspect of the Deadeye, granting a powerful Crit Rate buff for doing so. This Engraving alone helps to make Keen Blunt Weapon a very strong option for damage-increasing Engravings. This leads to a more burst-focused playstyle that focuses primarily on Shotgun skills while using Pistols for mobility and filler damage.
Pistoleer
 Pistoleer
“Can only use handgun Stance. Handgun Skill damage increased by 30%/45%/60%, Stagger Damage increased by 40%, Awakening Damage increased by 15%/22%/30%”
This locks you to only your Handgun Stance, dropping the Stance Swap mechanic entirely. This leads to a much easier playstyle that can still deal decent damage as a consistent source of DPS, compared to Enhanced Weapon’s more burst-focused playstyle.
Recommended Battle Engravings for Deadeye
Due to the Deadeye’s low cooldowns and access to various buffs provided from skills, there are a number of good Engravings that are worth considering for the Deadeye. The options below will not include engravings like the widely recommended and more advanced engravings like Grudge or Cursed Doll.
If you want additional information on the Engravings listed below, check out our Guide on Lost Ark’s Engraving System.
Adrenaline
 Adrenaline
Adrenaline helps both Deadeye builds, as their pistol skills make it fairly easy to maintain full stacks throughout a fight. This gives a good boost to Attack power and Critical Rate. This remains really effective from Tier 1 to Tier 3, as Deadeye doesn’t pick up much Crit from their stats.
Raid Captain
 Raid Captain
This one requires the use of Spiral Tracker’s Quick Pace Tripod at a high level. You can also pick up Swiftness in your stats to make it more reliable early on as well. This helps you to both stay more mobile as well as create a short burst window for damage. This can be harder to maintain for long durations, even when going for the Heavy Duty Tripod to help with uptime.
Precise Dagger
 Precise Dagger
This one is more specific to Pistoleer, since in addition to getting High Specialization they only use the Pistols. This slightly reduces their crit damage, but will more or less function as free critical chance due to the high crit damage bonus they gain from their Specialization stat. A flat 12% removed from their large bonus is negligible.
 Keen Blunt Weapon
 Keen Blunt Weapon
Conversely Precise Dagger, Keen Blunt Weapon trades raw damage for Crit Damage. This one ends up being more specific to Enhanced Weapon, as their shotgun skills will not be as heavy on Crit Damage, but already boast incredibly high damage. While the penalty can still impact them, you overall will gain damage from this engraving if you have a high enough Crit Chance from engravings and gear to cover it.
Ambush Master
 Ambush Master
While both builds for the Deadeye can use the Ambush Master engraving, it works better on the Enhanced Weapon Build that will be looking to position behind the boss constantly. It’s a strong damage option that shouldn’t be overlooked, but you will have to be on top of your positioning to make it work well.
Deadeye Skills Overview and Recommendations
While the skills won’t be fully detailed to the number as damage values change with your stats, we will give a rough approximation of how much damage they can do. This is also affected decently by Skill Tripods, and those cases will be noted.
There will also be a lot of mentions of added Stagger, Weak Point, and Super Armor. If you’re not familiar with these terms, we’ve explained them in our Advanced Combat Mechanics Guide. We recommend referring to that guide, to help with the terminology below.
Aimed Shot (Rifle)
 Aimed Shot (Rifle)
“Fires 4 high-caliber bullets dealing low damage and applies an 80% Slow, with the final shot inflicting medium damage and knocking foes down.”
Aimed Shot is primarily an additional Stagger or Weak Point tool for the Enhanced Weapon build and a ranged option for PvP where it’s a slightly stronger skill due to the slow and option for Stun. It’s relatively low on Stagger power but hits multiple times which makes it a bit more useful if you have no other cooldowns and need to pass a stagger check on a boss.
- Skill Type: Normal
- Stagger: Low (Level 1)
- Weak Point: Level 1
- Super Armor: Paralysis Immunity (Level 1)
- Cooldown: 24 seconds
First Row Tripods
High-Speed Bullet
- Effect: Increases bullet Flight Speed by 20-36%
- Recommendation: This Tripod is an alternative choice for PvP, which helps to make it more consistent at longer ranges. However, it really doesn’t have much use outside of this.
Quick Aim
- Effect: Reduces Aim Time by 20%.
- Recommendation: This is the recommended Tripod for PvP, as it reduces the wind-up time of the skill making it a little harder to avoid. If you wanted to use this skill in PvE, this can also be a decent choice for more mobile bosses, since the skill will go off sooner.
The Final Shot
- Effect: The last shot of Aimed Shot is a guaranteed Critical Hit.
- Recommendation: This makes the skill stronger filler for PvE, but not much else. Typically guaranteed Crits don’t provide much in PvP and get outshined by shortened animations like Quck Aim provides.
Second Row Tripods
Enhanced Shot
- Effect: Increases Aimed Shot’s damage by 25%.
- Recommendation: Since this skill is typically just filler in PvE, this ends up not being worth the 20 Skill Points. However, in PvP it can be more useful as you may end up using it more often. Though other skills will still offer more value.
Large Bullet:
- Effect: Increases bullet size by 20%.
- Recommendation: This makes the AoE of the skill just slightly wider, which is more useful in PvP to increase consistency but still not a priority pickup.
Stun Effect
- Changes the Knockdown effect of the final shot to a 3 second Stun in PvE, or 1.5 Second stun for PvP.
- Th Stun isn’t useful for PvE, as all bosses resist it. In PvP however, this upgrade makes it a much stronger ranged crowd control option that is harder to avoid and cannot be canceled with Get Up, as a knockdown would. Very few skills, which are typically only limited to Awakening Skills, have the Level 3 Super Armor to get through this effect.
Third Row Tripods
High-Speed Shot
- Increases Firing Speed by 40% after aiming.
- This Tripod reduces the delay between shots, making it a little more consistent to land all of them consecutively in PvP, if you wanted to opt for it. But for 48 Skill Points, it’s not very worth the pickup in a lot of cases. You could experiment with it in PvP, but this cost cannot be justified in PvE.
Hexa Shot
- Increases Aimed Shot’s shot count by 2, for a total of 6 hits.
- This increases the overall damage of the skill but increases the delay before the final shot. This tradeoff is generally never worth it for PvE, as it’s a filler skill and you have higher priority skills. It’s definitely not worth it for PvP either, as the skill will take longer making you a sitting duck for longer.
AT02 Grenade (Pistol)
 AT02 Grenade (Pistol)
“Toss a grenade at a target location within 10 meters, inflicting low damage”
- Skill Type: Point
- Cooldown: 6 Seconds
Thanks to its low cooldown, this skill is super reliable at applying both the effect of a Bleed rune and Weakness Exposure. Applying Weakness Exposure is all it will be used for at most in the Enhanced Weapon build. Meanwhile, the Pistoleer gets more use out of it by putting extra levels out of it, making it a decent tool for Stagger, despite having no bonus to stagger.
First Row Tripods
Ranged Throw
- Effect: Increases throwing Distance by 2-4 meters.
- Recommendation: AT02 Grenade generally has enough range for PvE applications. You’ll almost always be taking Weakness Exposure instead. This is a stronger PvP option though, as the limited throw range can hurt you a lot more than you’d expect. This makes it easier to use as a follow-up skill.
Wide Explosion
- Effect: Increases the AoE Radius by 20%.
- Recommendation: While the grenade has a decent AoE to start with, making it bigger also has its uses. This tends to be a decent option for the Pistoleer Build to pick up for Chaos Dungeon, where the extra AoE helps you clear packs a bit easier.
Weakness Exposure
- Effect: Hitting an Enemy with this skill will inflict Weakness Exposure, reducing Critical Resistance by 10% for 8 seconds.
- Recommendation: Regardless of build, when Raiding or taking on bosses of any kind you want this Tripod. AT02 Grenade is the shortest cooldown you have that can apply Weakness Exposure, and it’s fairly easy to maintain 100% uptime in most encounters for bosses, due to the skill’s cooldown being shorter than the debuff duration.
Second Row Tripods
Enhanced Grenade
- Effect: Increases AT02 Grenade’s Damage by 50-80%.
- Recommendation: While not used by the Enhanced Weapon Build, the Pistoleer Build can make good use of this extra damage as they’ll be using this skill frequently in most content to apply Weakness Exposure.
Frag Grenade
- Effect: Adds a knockup effect to the skill. Increases cooldown by 6 seconds and reduces damage by 50%.
- Enhanced Grenade is a better PvE option compared to this, as all bosses are immune to knockups. In PvP the Freeze offered by Freeze Grenade is more practical crowd control, offering a stronger immobilize option that only can only be prevented by skills with Level 3 Super Armor, which is pretty much only Awakenings.
Freeze Grenade
- Effect: Changes the damage element to Water and adds a Freeze effect. Increases cooldown by 9 seconds and reduces damage by 75%.
- Recommendation: The best option to use for PvP, offering a really strong crowd control option that makes it a really potent follow-up to an engagement. The Damage and cooldown penalties are far too high to use in PvE. The damage penalty negates any extra damage from a Third Row Tripod.
Third Row Tripods
Firework
- Effect: Throws 3 grenades in a cone. Damage for each grenade is reduced by 60%, but total damage dealt is increased by 20% if all grenades hit the same target.
- Recommendation: While Firework doesn’t offer the same damage as Internal Ignition, it does offer higher Stagger power, being a cluster of 3 grenades instead of 2 individual hits. This makes it useful to Pistoleers if they find themselves in a group with lower Stagger potential. Combine this with an Overwhelm Rune for even more Stagger.
Internal Ignition
- Effect: Ignites foes for 3 seconds on hit. After 3 seconds, the target combusts dealing 100% base damage.
- Recommendation: When using the third-row tripods, Internal Ignition offers the highest damage output of the two options. This makes it the go-to choice for Pistoleers that don’t need the extra stagger power of Firework.
Catastrophe (Rifle)
 Catastrophe (Rifle)
“Throw a claymore at the target location, dealing high damage and launching enemies hit airborne”
Catastrophe is typically a high damage filler with decent stagger for PvE. It’s one of the quicker to use Rifle Stance Skills, despite its more limited range. This limited range isn’t really a setback either, as the Enhanced Weapon Build will typically be playing at close range.
This is also a great combo finisher in PvP, as the high damage tends to interrupt any combos you have going. With it being backed by high damage, it’s a potent burst of damage when it’s being supported by the stagger and crowd control of other skills.
- Skill Type: Holding
- Weak Point: Level 1
- Stagger: Mid (Level 3)
- Super Armor: Paralysis Immunity (Level 1)
- Cooldown: 24 seconds
First Row Tripods
Tenacity:
- Effect: Grants Push Immunity (Level 2 Super Armor) on cast.
- Recommendation: For just 4 Skill Points, getting Level 2 Super Armor is pretty nice. While it’s more useful in PvP, it can still have some niche uses in PvE so get through certain mechanics.
Ranged Aim
- Effect: Increases the maximum range by 10%.
- Recommendation: This Tripod gives Catastrophe a little extra range. Though for most applications it’s not enough of a range boost to really be too helpful.
Quick Aim
- Effect: Increases the field selection Speed by 20-36%.
- Recommendation: This speeds up how quickly the range extends out to maximum, which makes it quicker to use at a longer range. This typically isn’t worth the points, as you’ll often be using it at shorter ranges.
Second Row Tripods
Kill Confirmation
- Effect: Hits against enemies at 50% health or less have +50% Critical Rate.
- Recommendation: This is typically more of a PvE Tripod, as the Crit Rate gets more effect there. With PvP being equalized, you’re not likely to have as much Crit Rate. In PvE your Critical Rate should already be high enough that this 50% is way overkill and becomes a waste.
Defenseless Target
- Effect: Increases damage by 40% against targets that are not Push-Immune.
- Recommendation: This is the go-to option for PvP since your PvP opponents aren’t push-immune unless they use a Super Armor Skill. With this being a combo ender, that often means they’ll be unable to cast anything with Level 2 Super Armor to be able to negate this bonus. Meanwhile, most PvE enemies are going to be Push Immune.
Concussion
- Effect: Increases the Stagger level to Mid-High (Level 4)
- Recommendation: If you were to take anything for PvE in this row, it’d likely be this Tripod. While you already have plenty of Stagger, have a bit of extra makes this a ice option to take if you team is lacking Stagger in general.
Third Row Tripods
Carpet Bombing
- Effect: Detonates 2 additional Claymores, covering a wider area.
- Recommendation: This is a strong PvP option, despite the cost. The increased AoE makes it harder to avoid should an opponent recover too quickly from a combo. It can also allow the skill to deal extra damage.
Eternal Calamity
- Effect: Claymore Fragments explode every 1 second, inflicting up to 120% Base Damage.
- Recommendation: If for some reason you had the points to spend on this skill, this would be the option you’d want to use for PvE. This is a pretty strong damage increase but relies on targets staying still. Most bosses won’t be still enough to get maximum value out of this unless they get staggered, and it’s better to use this skill to Stagger rather than to capitalize on it.
Cruel Tracker (Pistol)
“Fire your handgun 6 times, dealing medium damage, followed by a final shot that deals medium damage”
Cruel Tracker is often one of the main abilities you will use for damage, and this is especially so with a Pistoleer build. While not it’s not one of the strongest pistol skills initially, its Tripods make it a very potent skill. Its tripods also make it a decent source of Weak Point, giving it that extra bit of utility when you can upgrade it.
- Skill Type: Normal
- Attack Type: Back Attack
- Weak Point: Level 1
- Stagger: Low
- Super Armor: Paralysiss Immunity (Level 1)
- Cooldown: 18 Seconds
First Row Tripods
Swift Fingers
- Effect: Increases Attack Speed of Cruel Tracker by 15-27%.
- Recommendation: With this being a multi-hit skill, having the skill go off sooner and finish quicker is almost always going to be beneficial for most circumstances. You’ll almost always take this Tripod over the others in this row.
Magick Control
- Effect: Reduces Cruel Tracker’s MP cost by 50-67%.
- Recommendation: If you find yourself frequently running into mana issues you can use this. Though it’s really not going to do a whole lot, as the base cost of the skill is already quite low compared to your Shotgun Stance Skills.
Repulse
- Effect: Cruel Tracker’s final shot increases push distance and Paralysis Duration.
- Recommendation: This could have some niche use in PvP, but this skill isn’t one you’d typically use for PvP. If you wanted to try and make it work you definitely could, but there are better alternatives.
Second Row Tripods
Vital Point Shot
- Effect: Increases the crit rate of Cruel Tracker’s initial rapid-fire shots by 60%.
- Recommendation: This is a good Tripod to use when you first start using this skill and don’t have access to Crit Rate Engravings just yet. It’ll make it a potent damage source with less investment.
Rapid Fire Enhancement
- Effect: Increases rapid-fire shot count by 3, to 9. Increases the damage of rapid-fire attacks by 50%.
- Recommendation: This Tripod is the opposite of Vital Point Shot, being better when you do have access to the Crit Rate Engravings and are better geared in general. Since you no longer need the extra Crit Rate, this makes the skill do way more damage overall.
Wide Shot
- Effect: Increases the angle width of the rapid-fire shots by 40%.
- Recommendation: Compared to the other two Tripods, this one is pretty weak for its cost. It may have some use in PvP if you did want to use Cruel Tracker, offering a bit of extra consistency.
Third Row Tripods
Quick Draw
- Effect: Changes the skill to Combo Mode. Last Attack is faster and can be used twice. Damage Increased by 40%.
- Recommendation: This is the better option for single-target DPS. It’s a much stronger skill with this Tripod. With this being a damage skill for both common builds, having more damage is almost always going to be good. It also allows the skill to apply it’s Level 1 Weak Point twice.
Explosive Bullet
- Effect: Final shot becomes an explosive round, Increasing Weak Point to Level 2 and a bit of AoE to the final attack while increasing its damage by 40%.
- Recommendation: This Tripod is similarly strong to Quick Draw, but is more commonly used in the Enhanced Weapon build for the added Weak Point effect without the extra delay. It’s also a good AoE option to use in Chaos Dungeons.
Death Fire (Pistol)
 Death Fire (Pistol)
” Fire a volley of bullets over 3 seconds and deal High damage to those caught in the full duration. Hitting the Perfect Zone releases a ring of Grenades dealing Medium Damage”
Death Fire is a great skill for clearing large groups of weaker enemies, making it a great skill for Chaos Dungeons. However outside of this, due to it being a holding skill it falls a bit short on actual DPS.
In PvP however, this can be quite a potent skill when upgraded. Once it gets the proper third-row Tripod, it can be a solid way to engage in a fight.
- Skill Type: Holding
- Attack Type: Back Attack
- Stagger: Mid (Level 3)
- Super Armor: Paralysis Immunity (Level 1)
- Cooldown: 24 Seconds
First Row Tripods
Swift Fingers
- Effect: Attack Speed is increased by 20-36% during the hold duration.
- Recommendation: This Attack Speed actually helps to reduce the Hold duration and can make the skill useful in more situations. It’s not a huge difference by itself, but with other Attack Speed boosts, it can heavily reduce the hold duration and get damage out faster.
Tenacity
- Effect: Grants Push Immunity during the holding duration.
- Recommendation: This is great for PvP, as the additional Push Immunity can stop a lot of Interrupts and allow Death Fire to potentially lock your opponent down for longer.
Keen Strike
- Effect: Increases Crit Rate by 40% during the holding duration.
- Recommendation: If you wanted to try to use Death Fire for Raiding, your choice is between this and Swift Fingers. Swift Fingers is better if you have the Gear and Engravings to Crit often, this helps more if you don’t. This Tripod is also great for leveling when you need the extra crit rate and a strong AoE skill.
Second Row Tripods
Flame Bomb
- Effect: Death Fire now deals Fire Damage and damage is increased by 30%. Burns foes, dealing low damage every second for 5 seconds.
- Recommendation: The Change of Element and the added Burn make this a pretty decent option for general use in Chaos Dungeons or even raids. While it’s not a huge damage jump, the Burn does add a fair bit of extra damage.
Frost Bomb
- Effect: Deathfire now deals Water Damage. Knockdown of the grenades is replaced by a 3 second Freeze instead.
- Recommendation: You’d think this would be good for PvP, but you already have better access to better crowd control options. The delay on the grenades also makes it pretty inconsistent overall.
Chain Throw
- Effect: Throws two sets of grenades consecutively.
- Recommendation: This option ends up being a stronger choice for PvP and Chaos Dungeon. If your opponent gets caught in the first set of grenades, the second is guaranteed to land and deal extra damage.
Third Row Tripods
Infiltrate Decimation
- Effect: Teleport 6 meters and use the skill before moving back 8 Meters.
- Recommendation: This is the go-to for PvP, which changes it from a follow-up skill to more of an engaging skill. While it’s a short distance teleport, it gives the skill some much-needed range for PvP.
Infinite Decimation
- Effect: Increases the number of attacks during the hold duration by 3 while increasing Death Fire’s Crit Damage by 50%.
- Recommendation: This is the go-to for PvE, as the added damage and crit damage make it a pretty decent skill against immobile bosses. Though if the boss you fight is more mobile, you will want to consider another skill. If you can make it work and have decent attack speed, it can be a strong skill.
Dexterous Shot (Pistol)
 Dexterous Shot (Pistol)
“Mave 6 meters as you glide and fire your handgun 4 times, inflicting Low damage to nearby foes. This skill can be used up to twice in a row.”
In all situations, this is a core skill to your mobility in fights. With the right Tripods, it’s a huge boost to your mobility but can still help with repositioning without losing damage in a fight without them.
- Skill Type: Combo
- Attack Type: Back Attack
- Super Armor: Paralysis Immunity (Level 1)
- Cooldown: 6 seconds
First Row Tripods
Magick Control
- Effect: Dexterous Shot has a 50-67% chance of not consuming MP.
- RecommendationThis tends to be a lackluster option, as it’s already an insanely cheap mobility skill. Since it’s not an MP reduction and a chance to not use MP, it just becomes even less worth taking, especially with better first row options.
Agile Movement
- Effect: Increases Attack Speed of Dexterous Shot by 10-18%.
- RecommendationThis is typically the go-to option for Dexterous Shot, regardless of build. The Attack Speed improves the skill’s animation speed, making it faster and increasing your mobility.
Vital Point Attack
- Effect: Increases Dexterous Shot’s Crit Rate by 15-30%.
- Recommendation: This skill doesn’t do meaningful enough damage to ever want to make it a DPS skill. Between Engravings, Stats, and Set Bonuses you should already crit with it often enough.
Second Row Tripods
Close Shot
- Effect: Reduces Dexterous Shot’s AoE radius by 20% while increasing damage by 40%.
- Recommendation: There’s still no reason to use this as a DPS skill. It’s much better for mobility and there’s a Tripod that better supports that focus in this row.
Master of Evasion
- Effect: Dodge Rate is increased by 20% During Dexterous Shot.
- Recommendation: This is a decent option for PvP. Since Excellent Mobility cannot be leveled it’s not quite as strong for PvP. You’re still losing some mobility in taking this, but not as much.
Excellent Mobility
- Effect: Increases move distance by 1-3 Meters.
- Recommendation: This really helps to improve the skill’s mobility, making each cast of the skill go slightly farther. This is the go-to for almost all situations.
Third Row Tripods
Agile Shot
- Effect: Increases Combo Count to 3.
- Recommendation: When you can invest more points into this skill freely, this is a decent Tripod to take. This makes the skill usable 3 times and moves you up to 18 meters. Again, this is the go-to for this skill, but only when you have all of your DPS Tripods set up first.
Swift Shot
- Effect: Adds 2 additional Attacks to each use of Dexterous Shot.
- Recommendation: The extra damage this contributes is pretty pitiful. Even if you stack this with the other DPS Tripods, it’s still not going to contribute a whole lot of damage.
Enforce Execution (Pistol)
 Enforce Execution (Pistol)
“Dash forward 5 meters a deliver an upper kick that deals low damage. Follow-up by rapid rapid-firing your pistol 8 times, dealing medium damage.”
As a Deadeye, this is one of your Counter skills, but also a fantastic mobility skill as well. When playing the Pistoleer Build, this will be your sole option for performing a Counterattack. If there’s no need for either the mobility or counter property, it’s a half-decent filler skill.
- Skill Type: Combo
- Attack Type: Back Attack; Front Attack, Upper Kick only
- Counter: Upper Kick only
- Super Armor: Paralysis Immunity (Level 1)
- Cooldown: 6 Seconds
First Row Tripods
Light Footwork
- Effect: Upper kick no longer knocks foes airborne and Paralyzes instead. Upper Kick Attack Speed is increased by 20%.
- Recommendation: This is always the go-to option for the first row. It speeds up the kick portion skill considerably. This means the initial kick will be a quicker dash, as well as more consistent for Counterattacks.
Big Foot
- Effect: Replaces the upper kick with a Roundhouse Kick which hits a 30% larger area and knocks foes up for longer.
- Recommendation: This is pretty lackluster Tripod, unless you really need the extra AoE option for Chaos Dungeons or something like that.
Vital Point Hit
- Effect: Increases Upper Kick’s Crit Rate by 100%. Further Levels also increase Critical Damage by 37-150%.
- Recommendation: This makes the upper kick a stronger hit of damage, being a guaranteed crit. However, since it’s already a weak hit, it’s not a huge increase in damage. Between Engravings and Gearing, you’ll also Crit fairly often in addition to Specialization boosting the Critical Damage passively.
Second Row Tripods
Aerial Shot
- Effect: Increases the AoE radius of the rapid-fire portion of the skill by 30%.
- Recommendation: This doesn’t add any damage, just extra AoE to the follow-up shots after the kick. This skill has better Tripods in this row.
Tenacity
- Effect: Adds Level 2 Super Armor to the Skill.
- Recommendation: This is a go-to pickup, for both PvE and PvP. The Extra Super armor option makes a safe and consistent mobility option against most damage and crowd control.
Initiate Shot
- Effect: Increases damage of rapid-fire by 40% against foes above 50% health.
- Recommendation: If you really want a bit of extra damage, this can be okay. But since it’s an upper threshold, it’s not super great. While it does decent damage it’s not really worth taking.
Third Row Tripods
Anti-Air Shot
- Effect: Increases rapid-fire crit rate against airborne foes by 50-86%.
- Recommendation: Since this requires the enemy to be airborne, it will only work on weaker enemies that can be knocked airborne. This can make it a decent optional clear tool for Chaos Dungeons, but there are skills more worth that investment.
Barrage Shot
- Effect: Increases rapid-fire shot count by 4 while increasing damage by 15 – 43%.
- Recommendation: Again, helps make the skill decent at clearing packs of weak enemies, but it’s not enough of a damage boost to warrant picking up unless you absolutely have the points to spare, which is unlikely.
Equilibrium (Pistol)
 Equilibrium (Pistol)
“Fires your Handguns across a broad area, dealing high damage.”
This is one of your biggest contributions to DPS, both as a main Pistoleer skill and a damage filler as an Enhanced Weapon Build. With Tripod it also becomes one of your best AoE tools, making it both potent and versatile.
- Skill Type: Normal
- Attack Type: Back Attack
First Row Tripods
High-Speed Shot
- Effect: Increases Attack Speed of Equilibrium by 15-27%.
- Recommendation: With this being one of your highest damage contributed and having a lengthy animation that’s typically made longer by Tripods, Attack Speed is an Absolute must.
Weakness Exposure
- Effect: Applies the Weakness Exposure Debuff to enemies, decreasing their Crit resistance by 10%.
- Recommendation: This is a decent alternative to High Speed shot early on as you won’t always need the Attack Speed and the Critical Rate helps more. Though in general, AT02 Grenade and Spiral Tracker tend to apply this debuff easier and more readily with their shorter cooldowns. It will however prevent you haveing havint to use those skills again in a single roation for anything other than damage.
Master of Evasion
- Effect: Increases Dodge Rate by 10% during Equilibrium.
- Recommendation: Not often used as the other Tripods grant more damage. Since the skill locks you down, it can have its uses in PvP. Damage is still going to be the way to go though for PvE.
Second Row Tripods
Decimation Shot
- Effect: Reduces the AoE of Equilibrium and increases the attacking time of Eqilibrium. Increases the damage by 60%.
- recommendation: This is your go-to option for Raids, as your focusing on a single target. It increases the duration of the skill, but adds a significant amount of damage to it. This is typically offset by High-Speed Shot in the First Row.
Enemy Raid
- Effect: Changes Equilibrium to a 360 degree attack. Damage to Challenge or Lower tier monster is increased by 100%.
- Recommendation: This is both good while leveling, and excellent for Chaos Dungeons in the endgame. This makes it a circular AoE, rather than just a conical AoE, which allows it to clear enemies quickly. The bonus damage applies to everything that isn’t classed as Boss, which is the majority of enemies you’ll fight outside of dungeon bosses and raids.
Ranged Shot
- Effect: Increases AoE size by 20% and Crit Damage by 100%.
- Recommendation:This can be strong in Tiers 1 and 2 before you get decent gear. The big caveat for this is that Specialization is your main stat, which already boosts Critical Damage of Pistol Skills. So there’s a bit of fall offer at the higher end where you have a ton of Specialization stacked, which makes Decimation Shot a better option.
Third Row Tripods
Burn Effect
- Effect: Hits apply a burn effect that deals low damage, but can stack seven times. Damage occurs every second and lasts for 5 seconds.
- Recommendation: This Tripod paired with Decimation Shot results in a fairly consistent 7 stack burn which will end up dealing a ton of damage on top of Eqilibrium’s already high damage. Though this only becomes more effective once you get into later stages of gearing, where you’re already critting with it often.
Vital Point Shot
- Effect: Increases Equlibrium’s Crit Rate by 60%.
- Recommendation: This Tripod is amazing during Tier 1 and Tier 2, where you’ll be hurting on crit. This skill is often a huge source of damage regardless of the build you play. This will make it crit consistently and deal a ton of damage, even early on.
Hour of Judgement (Shotgun)
 Hour of Judgement (Shotgun)
“Fires 3 bullets in a cone shape, each dealing medium damage. Deals high damage if all 3 bullets connect. Bullets fragment after hitting a target, dealing lower damage to targets behind the initial target.”
As far as Shotgun Skills go, this is one of the weakest. It lacks the double damage bonus most other shotguns skills do, and deals significantly less damage because of it. It is, however, still a fairly decent mobbing tool
- Stagger: Low (Level 1)
- Cooldown: 30 seconds
First Row Tripods
Quick Prep
Reduces Hour of Judgement’s cooldown by 6 seconds
Any time you find yourself using this skill, it’ll often use this as a first row Tripod. The other options aren’t too great, and this at least lets the skill contribute more damage in the span of an encounter.
Magick Control
- Effect:Reduces Hour of Judgement MP Cost by 50-67%.
- Recommendation: This sounds like a lot of mana to save, but it’s also not that costly to begin with. It can be a decent alternative to Quick Prep if you are having mana issues, but those are fairly rare.
Master of Evasion
- Effect: Grants 10% Dodge chance during skill use.
- Recommendation: Same as other skills with this buff, there are very rare situations you could use this. But far too rare to choose over a more consistent option like Quick Prep.
Second Row Tripods
Prison Sentence
- Effect: Fires one shot instead of 3, the damage is increased by 360%.
- Recommendation: If you’re going to use this skill, this is the best Tripod to use with it for damage. It makes it more consistent to use. Despite the high damage increase listed, it is closer to just being a 60% increase, since it’s combining the damage of each shot.
Final Verdict
- Effect: Increases Explosion Damage by 30-65%.
- Recommendation: This makes it a slightly stronger AoE, but not really enough to warrant taking over Evidence Destruction’s larger AoE which makes it more useful for mobbing.
Evidence Destruction
- Effect: Increases the number of bullets to 5. AoE Radius + 40%.
- Recommendation: Between the number of projectiles and the increased AoE, this is typically the better option for mobbing. You’d pretty much only be using this for Chaos Dungeons if anything, so it doesn’t matter too much.
Third Row Tripods
Enhanced Fragment
- Effect: Increases outgoing damage by 50%.
- Recommendation: If you really wanted extra damage for this skill, you’d take this alongside Prison Sentence. Though typically this skill isn’t often used because it lacks the additional damage multiplier.
Fragment of Spread
- Effect: Bullets Fragment on Hit. Increases Damage to Challenge or lower foes by 100% and increases fragment range by 20%.
- Recommendation: This can make the skill really potent for Chaos Dungeon or possibly leveling, but not much else.
Last Request (Shotgun)
 Last Request (Shotgun)
“Fire a powerful bullet, dealing very high damage and knocking enemies airborne.”
Despite this skill lacking the melee bonus modifier of most other shotgun skills, it also has really high damage to make up for not having it. It’s a potent damage option for both PvE and PvP alike. Its High damage makes it a potent combo finisher in PvP.
- Stagger: Mid-High (Level 4)
- Weak Point: Level 1
- Attack Type: Frontal Attack, Back Attack
- Cooldown: 36 seconds
First Row Tripods
Quick Prep
- Effect: Reduces Last Request’s cooldown by 7-13 seconds.
- Recommendation: With this being a potent skill, and the other First row options not being too great, this is the go-to option here. Having a lower cooldown on one of your biggest hits is a great thing to have.
Incendiary Bomb
- Effect: Element is now Fire. Inflicts a burn that deals medium damage each second for 5 seconds.
- Recommendation: While the burn contributes decent damage, it’s still less overall damage compared to using the skill more often. With it already being a hard-hitting skill, this burn will contribute much less than you’d expect.
Ice Shot
- Effect: Element is now Water. Adds a Slow that lasts 5 seconds.
- Recommendation: The Slow adds some utility, but Slows are also the weakest form of utility as very few enemies are affected by it. Since the skill is typically used as a finisher in PvP, the slow will also not do much there either.
Second Row Tripods
Fierce Heat
- Effect: Creates a flame zone on the ground that deals low damage every second for 5 seconds. Ice Shot will make it deal Water Damage instead.
- Recommendation: This is a weaker DoT than the Incendiary Bomb tripod, and it’s tied to the ground which is two way that makes it less impactful. There’s still a better option on this row for DPS.
Massive Explosion
- Effect: Increases damage by 20%. Increases knockdown time.
- Recommendation: You would think this may be a good PvP option, but as a combo finisher, your target will already have a shorter knockdown period. This makes it generally useless outside of the small damage increase.
Execution
- Effect: Increases Attack Speed by 20% while adding a 4-meter dash. Damage against Staggered foes is increased by 50%.
- Recommendation: This is the go-to tripod for this row. The Damage against staggered foes is more useful in PvP, but can be useful in PvE as well with certain bosses. The Dash component helps you get in range prior to using this skill or any other shotgun skills you choose to follow up with. The Attack Speed makes both the dash and firing of the skill go off faster as well, increasing DPS.
Third Row Tripods
Double Shot
- Effect: Uses the skill with two Shotguns, dealing 80% Damage each for 160% total. Allows Incendiary Bomb and Fierce Heat to stack twice.
- Recommendation: Despite doubling the damage from both Incendiary Bomb and Fierce Heat while also being a decent damage increase it just doesn’t make the cut. It relies too much on using those other two tripods to get good use out of it.
Volley
- Effect: Fires 3 volleys. Outgoing Damage is increased by 80%.
- Recommendation: This is a huge increase of damage to this skill. Combined with Execution it’s a quick burst of damage that is comparable to other shotgun skills that have the 2x damage modifier.
Meteor Stream (Pistol)
 Meteor Stream (Pistol)
“Fires a volley of bullets into the air then control them to crash into a targeted area, dealing high damage and launching foes into the air.”
Meteor Stream is typically only used by the Pistoleer build, who can afford to invest in it. While it has high damage output it’s slow to cast skill without being able to invest into it. Along with high damage, it also carries decent stagger potential as well for Pistoleers.
- Stagger: Mid (Level 3)
- Cooldown: 20 Seconds
First Row Tripods
Magick Control
- Effect: Reduces Meteor Stream MP Cost by 50-67%.
- Recommendation: While this is one of the higher cost skills for the Pistol Skills, it’s not a short enough cooldown to really warrant using this Tripod.
Muscle Spasm
- Effect: Increases Knockdown duration by 0.5 seconds.
- Recommendation: If this skill were viable for PvP, this could have some niche use, but very little. However it doesn’t which makes it useless.
Weak Point Detection
- Effect: Increases damage to Push-Immune foes by 20%.
- Recommendation: This essentially means 20% more damage to Bosses and some elites, where you’d need it the most. Easily a go-to tripod for this skill.
Second Row Tripods
Wide Explosion
- Effect: Increases explosion radius by 30%.
- Recommendation: This adds a bit of extra AoE, which can make it really useful for things like Chaos Dungeon. However, without any Crit Rate, Opportunist tends to be slightly better for this purpose.
Opportunist
- Effect: Increases Crit Rate aginst pushed foes by 60%.
- Recommendation: This adds a solid 60% Crit Rate to the skill, making it crit fairly often. Once you get to a point in gear and engraving where you quite frequently, it will contribute less. It’ll still only be useful for Chaos Dungeons either way.
Piercing Explosion
- Effect: Meteor Stream will ignore 40-70% of enemy defense.
- Recommendation: This is a huge damage boost for this skill. While not a direct increase which is easier to figure out, it does often provide a damage increase amounting to roughly 60% to start, and more as it is leveled.
Third Row Tripods
Bombardment Support
- Effect: Fires 3 waves of bullets, increasing damage by up to 80%, if all waves hit.
- Recommendation: This Tripod is a trade-off of speed for additional Stagger Power and damage. While Slower, it is incredibly powerful against less mobile bosses. The additional Stagger power and Damage make it worth using if you can handle the slower attack.
Meteor Fall
- Effect: Fires a single Starlight Bullet which quickly falls back down. Attack Speed is increased by 20%, Outgoing damage is increased by 60%.
- Recommendation: While less overall damage compared to Bombardment Support, It offers more consistency. With it being a shorter animation, which is also sped up, it can work well, even against more mobile bosses. Typically, this consistency makes it provide more overall damage in an encounter compared to Bombardment Support.
Perfect Shot (Rifle)
 Perfect Shot (Rifle)
“Fires a high-speed large-caliber bullet that deals medium damage. Hit the perfect zone to deal very high damage and knock the targets back.”
Much like other Rifle Skills, Perfect Shot is mainly a PvP skill. It’s often used as a ranged follow-up to Aimed Shot in that case. In PvE it’s another filler skill, if you choose to use it.
- Stagger: Low (Level 1)
- Cooldown: 30 seconds
First Row Tripods
Bleed Effect
- Effect: When landing in the Perfect Zone, inflict a bleed that deals low damage every second for 5 seconds.
- Recommendation: For the wind-up required by this skill, this extra bit of damage isn’t worth it. In PvP you’re better off using Stable Stance.
Stable Stance
- Effect: Grants Push Immunity (level 2 Super Armor) while Casting Perfect Shot.
- Recommendation: This is the go-to PvP choice, as it makes the skill much harder to interrupt. Push immunity will only allow Freezes, Stun, or similar effects to interrupt you.
Muscle Spasm
- Effect: With a successful Perfect Zone, Knockdown duration is increased by 1 second. Increases Stagger level to Mid (Level 3).
- Recommendation: The Increase in stagger can be useful if you needed the extra stagger tool, but being a holding skill makes it a bit slow to use outside of absolute emergencies. The Shotgun Skills have higher stagger power.
Second Row Tripods
Precision Shot
- Effect: Decreases the size of the Perfect Zone. Perfect Zone grants 50% Crit Rate.
- Recommendation: Generally, for what this skill is used for, this tends to be useless. While crit rate is often nice to have, this skill is either filler or a finisher. There are Tripods that work better for both cases in this row.
Perfect Aim
- Effect: Changes Skill to Casting Mode. Cast for 1 second to receive the same effects as hitting a perfect zone. Canceling during the cast time will apply a 3 second cooldown.
- RecommendationThis is a strong option that works for PvP, as combined with Stable Stance, allows this to also be a fairly spam-able Level 2 Super Armor. It’s still more useful for ease of use while removing the penalty of canceling the skill early. In PvE it removes the timing element of the Perfect Zone, while also making it a faster attack. Though this is typically not a priority skill to upgrade by any means.
Kill Confirmation
- Effect: When landing in the Perfect Zone, Damage to foes under 50% takes 60% more damage.
- Recommendation: This can be a useful option for PvE or PvP, though it may be harder to work with because of the inconsistency. If you wanted It as a stronger finisher, this is a decent option too, but you’ll have to deal with the perfect zone.
Third Row Tripods
Prepared Shooter
- Effect: Reduces time to Perfect Zone by 0.2 seconds. On Successful Perfect Zone, Cast time is reduced by 0.2 seconds.
- For being a third-row Tripod, this is actually really lackluster. There’s no reason to even consider this as an option for its cost.
Enhanced Shot
- Effect: On Successful perfect Zone damage is increased by 50%.
- Recommendation: Again, for a third-row Tripod, this is really lackluster. IT cna still be used if you have the spare points and want a stronger finisher in PvP. The cost makes it not worth the investment for PvE, if you wanted to play around with Rifle Skills.
Plasma Bullet (Pistol)
 Plasma Bullet (Pistol)
“Fire a plasma round that travels at a slow speed, continuously dealing very low damage.”
Despite its low base damage, this skill can be a useful tool for the Pistoleer Build as an alternative filler skill to replace Spiral Tracker. With the right Tripods and runes, it can be a more effective Stagger tool as well. Enhanced Weapon will still use Spiral Tracker as filler because it can apply the Expose Weakness debuff.
- Cooldown: 8 seconds
First Row Tripods
Ranged Shot
- Effect: Increases plasma travel range by 3-5 meters.
- Recommendation: While this does extend the lifetime of the normal Plasma round, there are better options to make this a stronger filler skill. Generally, the default range works just as well for most encounters.
Quick Shot
- Effect: Increases Plasma Bullet’s Attack Speed by 20%.
- Recommendation: Since this skill has a decently long animation after casting, this tends to help with that. The Overall attack speed does overall help the skill feel smoother to run.
Backstep
- Effect: Increases the recoil distance from the shot by 1.5 meters.
- Recommendation: This tripod tends to be the least useful in this row, as it extends the recoil animation time slightly. It’s better to use Quick Shot to reduce the recoil time.
Second Row Tripods
Heavy Duty
- Effect: Allows the skill to stack a second charge.
- Recommendation: As a filler skill, this is the go-to option you want to take. Even with the cooldown being short, it will allow you to use it more frequently to trigger runes like Rage or Quick Recharge if desired.
Freeze Effect
- Effect: Element is now Water. On hit reduces foe’s movement speed by 40% for 2 seconds.
- Recommendation: This doesn’t do anything practical for this skill, as the slow will only apply to weak enemies, or in PvP. This skill is too inconsistent for use in PvP, and would typically only be used when fighting bosses or doing raids in general in PvE.
Vital Point Hit
- Effect: Increase Plasma Shot’s Crit Rate by 30%.
- Recommendation: Since you generally stack up Crit Rate through Engravings and Gear, this is often useless because of that. However, Crit Rate really doesn’t even matter for this skill due to the low damage per hit. Heavy Duty is just the better option overall for PvE.
Third Row Tripods
Hypercharge Area
- Effect: Instead of casting a slow moving bullet, cast a bullet that immediately creates a stationary AoE within 20 meters. Damage is increased by 35%.
- Recommendation: This is the go-to option for DPS and smaller Boss targets. Despite being a stationary AoE, it makes it a more reliable source of filler damage in general. It’s great for smaller bosses, as Plasma Split will pass through such a target too quickly to deal much damage.
Plasma Split
- Effect: The Plasma Bullet is accompanied by two smaller Plasma rounds. Increases Damage by 140%.
- Recommendation: This is the stronger option for raw damage and staggering power. It loses the consistency of Hyperchare Area, but gets a ton of damage and a faster hit rate. The faster hit rate in particular makes it a great Stagger option with an Overwhelm rune. Unfortunately, it’s not great for smaller, or more humanoid bosses
Quick Shot (Pistol)
 Quick Shot (Pistol)
“Quickly fire your handguns 2 times, dealing low damage. This skill can be used twice in a row.”
Despite dealing low damage initially, this skill is a strong damage option when upgraded. While it will generally lose its low cooldown in the process, it is a fantastic damage option regardless of the build that is decently flexible.
- Attack Type: Back Attack
- Cooldown: 8 seconds
First Row Tripods
Swift Fingers
- Effect: Increases Quick Shot’s Attack Speed by 20%.
- Recommendation: In general, this is the go-to option for PvE. The Attack Speed is really hard to pass up, as it will also speed up the animation of one of its third-row Tripods, which has a longer animation.
Repulse
- Effect: Increases the Paralysis Duration.
- Recommendation: This is the go-to PvP option for this skill. The extra duration of Paralysis will make it easier to land follow up skills afterwards.
Enhanced Concentration
- Effect: Increases the re-cast window between uses by 1-3 seconds.
- Recommendation: This Tripod is generally useless. It may have some weird niche use depending on how the Initiate Shot Tripod in the second row works, but it’s not exactly clear and is hard to properly test.
Second Row Tripods
Quick Pace
- Effect: On hit, increases Movement speed by 40% for 1-2 seconds.
- Recommendation: This can help the skill synergize with and maintain the Raid Captain Engraving alongside Triple Shot. Though there are much better engravings for this skill that will provide more overall damage.
Initiate Shot
- Effect: Increases damage to a consecutive hit in the next 3 seconds by 100-160%.
- Recommendation: This is the go-to option for PvE, and the one mentioned by Enhanced Concentration. Not only will this boost the following parts of the skill, but it may also be possible that with Enhanced Concentration you can swap to other weapons to boost other skills Damage. The extra time would allow you to swap back to use the combo and reapply it to another skill of choice.
Gradual Devastation
- Effect: Each hit of the Chain attack increases outgoing damage by 40-70%
- Recommendation: This can be a decent damage increase when paired with Triple Shot, but typically Initiate Shot performs much more consistently and is a stronger effect.
Third Row Tripods
Final Light
- Effect: Increases cooldown by 12 seconds, to 20 seconds. Grants Prarlysis Immunity (Level 1 Super Armor) during the second shot. Adds Level 1 Weak Point to the skill and increases its damage by 600-780%.
- Recommendation: By itself, this Tripod is already good. However, adding Initiate Shot to it makes it absolutely insane. This combination often makes it one of your strongest Pistol Skills, despite removing the low cooldown. The Added Weak Point is a nice bit of utility for either build, as most of your Pistol and Shotgun skills don’t naturally carry it.
Triple Shot
- Effect: Increases the number of Chain Attacks to 3.
- Recommendation: This sacrifices the raw damage and speed for keeping the low cooldown but adds a bit more damage from multiple uses, as you’ll be able to use it 3 times in the same span of time that you’d be able to use Final Shot. It’s not immediate damage, but it will add up over a long fight to deal more damage, especially with a cooldown gem.
Shotgun Dominator (Shotgun)
 Shotgun Dominator (Shotgun)
“Fires two shotguns at foes, dealing medium damage, followed by a finishing shot that deals medium damage. Nearby foes take double damage from this skill.”
As one of the Shotgun skills that has the double damage effect, it becomes of the Enhanced Weapon Build’s core skills. Despite the low-ish values it has on tooltips, the double damage effects really amps up its damage very easily if you can get the bonus consistently. As a Holding Skill, it will deal several instances of damage, which really adds up.
- Stagger: Mid (Level 3)
- Attack Type: Back Attack
- Super Armor: Paralysis Immunity (Level 1)
- Cooldown: 24 seconds
First Row Tripods
Full Range
- Effect: All attacks are considered melee damage. Damage is increased by 10-35%.
- Recommendation: This is great for newer players, as it makes the skill easier to use and get full damage out of it. They should try to get used to the positioning so as to benefit from the better Tripods in this row.
Swift Fingers
- Effect: Increases Attack Speed of Shotgun Dominator by 20-36%.
- Recommendation: This increases the speed at which the skill will deliver its damage. This can be useful in certain situations, however the raw damage of Close Shot will perform better.
Close Shot
- Effect: Increases damage to nearby enemies by 25-50%.
- Recommendation: If you’re used to the positioning, this will be a really nice damage increase. Considering it also gets multiplied by the skill’s inherent double damage bonus, it’s more potent than you’d assume.
Second Row Tripods
Weak Point Detection
- Effect: Increases damage against Push-Immune foes by 40-70%.
- Recommendation: This Tripod is great against bosses, but less so for clearing weak enemies. Since most Elites and Bosses are push immune, they will take this extra damage. This is the preferred option for raids, due to the higher cap compared to Enhanced Fire. However, Enhanced Fire can be an okay alternative if you get Tripods for it easier.
Enhanced Fire
- Effect: Increases damage by 30-60%.
- Recommendation: This is a slightly weaker option for damage but will affect all enemies. The main thing is that it affects the weaker enemies, which is often not needed as much as the damage towards Elites and Bosses.
Swift Preparation
- Effect: After defeating foes, Shotgun Dominator has a 15-35% chance to reset its cooldown.
- Recommendation: In a raid setting, this is pretty much useless, as not every raid will have extra mobs to take down, nor would you want to waste the DPS this provides on them unless it’s critical they go down. In Chaos Dungeon it can be an okay option, but the damage is still the better choice.
Third Row Tripods
Master of CQC
- Effect: Removes the finishing shot, but doubles the holding duration. Individual shot damage is increased by 70%.
- Recommendation: This is a decent damage increase, but also does something you wouldn’t want for a raid setting, which is to lock you down for a longer period of time to get maximum damage. This ultimately makes the other Tripod much better for every situation.
The Ruler
- Effect: Attack Range is reduced by 20% and adds a Perfect Zone to the holding duration. Successful Perfect Zone increases the finisher damage by 200-300%. Failed Perfect Zone performs the standard finishing blow.
- Recommendation: Despite reduced attack range sounding like a drawback, you’ll always want to be up close for this skill anyways to benefit from the double damage bonus. While the Perfect Zone adds an element of timing to the skill. It does greatly reward you for landing it but doesn’t heavily punish a fail either.
Shotgun Rapid Fire (Shotgun)
 Shotgun Rapid Fire (Shotgun)
“Fire your shotgun 3 times, inflicting medium damage with each shot and pushing foes back with the third shot. Nearby foes receive double damage.”
Being another Shotgun skill that has the Double damage bonus to benefit from, it makes it another skill core to the Enhanced Weapon Build. This skill is great for its damage but also serves as your main Weak Point skill.
- Weak Point: Level 1
- Stagger: Mid-High (Level 4)
- Attack Type: Back Attack
- Super Armor: Paralysis Immunity (Level 1)
- Cooldown: 36 seconds
First Row Tripods
Close Shot
- Effect: Increases damage to nearby foes by 25-50%.
- Recommendation: This is the go-to option, as you should always be looking to benefit from the double damage bonus already. This will also be affected by that bonus, which makes it quite powerful.
Full Range
- Effect: All attacks are considered Melee Damage. Increases damage by 10-35%.
- Recommendation: This is an okay option while learning an encounter, but you should look to use Close Shot instead when you’re comfortable with the encounter.
Combo Rapid Fire
- Effect: Changes the Skill to Combo Mode, allowing for each shot to be fired individually. Attack Speed is increased by 10%. Can be canceled by moving or casting another skill between attacks.
- Recommendation: Since this doesn’t add any damage and just makes the skill easier to accidentally interrupt, it’s often not worth using. There are times when the ability to cancel the skill can be useful for saving your dash, but that’s not worth throwing away damage for.
Second Row Tripods
Enhanced Shot
- Effect: Increases Skill damage by 25-50%.
- Recommendation: With this being the only damage increase on this row, it’s almost always the go-to option. However, there are times when Quick Prep can be useful as well, once it’s leveled.
Master of Evasion
- Effect: Increases Dodge Rate by 20%.
- Recommendation: This can be useful in PvP when you get an opportunity to use this skill as follow-up. Outside of PvP though, the dodge will not be helpful in most cases.
Quick Prep
- Effect: Reduces Shotgun Rapid Fire’s Cooldown by 11-15 seconds.
- Recommendation: With this reducing the cooldown by 30-40%, this can be useful for extra DPS. However, it’s typically not used as you’d want to swap to your Shotgun when all of your shotgun skills are ready. Switching for a single skill isn’t typically worth it.
Third Row Tripods
Extended Shot
- Effect: Increases Atack Speed by 30%. Adds a Combo Attack after the initial 3 shots. This finisher shot will knock down the foe and deal 60-95% more damage. Adds a 4-meter recoil to the skill.
- Recommendation: The Recoil is what kills this the most, as the recoil will push you out of range for your other Shotgun skills to get their double damage bonus. It’s also just weaker overall compared to the other option in terms of damage, since it only affects the added shot.
Special Bullet
- Effect: Increases damage to Push-Immune Foes by 80-120%.
- Recommendation: With this starting and capping above Extended Shot, as well as applying to the full skill, it’s the better damage option here. This is a huge damage increase overall, especially so when leveled.
Sign of Apocalypse (Shotgun)
 Sign of Apocalypse (Shotgun)
“Fire your Shotgun 2 times, dealing medium damage. Nearby foes take double damage.”
The final shotgun skill with the double damage effect which makes it core to the Enhanced Weapon Build. This is a combo skill that only deals damage twice but it on par in damage with most other shotgun skills.
- Stagger: Low
- Attack Type: Back Attack
- Super Armor: Paralysis Immunity (level 1)
- Cooldown: 24 Seconds
First Row Tripods
Close Shot
- Effect: Increases damage to nearby enemies by 25-50%.
- Recommendation: Much like other Instances of Close Shot, this is the go-to option for this row, since you’ll be looking to get up close to use the skill anyways.
Full Range
- Effect: All attacks are considered melee Damage. Damage is increased by 10-35%.
- Recommendation: Like the other Instances of Full Range, it can be great while learning an encounter, but worse when your experience with the class and encounter.
Stun Effect
- Effect: Increases Attack Angle by 20%. If the skill hits twice, the enemy is stunned for 2-4 seconds (halved for PvP).
- Recommendation: The highest monster this would apply to are Elites, but it’s easier to just use damage to defeat them faster. Since the effect is halved for PvP, it also has limited use there. You also have longer-ranged and better options in general.
Second Row Tripods
Enhanced Shot
- Effect: Increases damage by 25-50%.
- Recommendation: This is the only damage increase in this row, which makes worth taking in most cases.
Weak Point Enhancement
- Effect: Adds Level 1 to Sign of Apocalyse’s final hit.
- Recommendation: This can be a nice bit of utility if it’s needed for a specific boss. Since the damage tripod in this row isn’t really strong boost, there’s very little harm in swapping it for this when the extra Weak Point is needed.
Quick Prep
- Effect: Reduces Sign of Apocalypse’s cooldown by 5-8 seconds.
- Recommendation: This is a good alternative to Enhanced Shot, however, it’s already one of the shorter shotgun skills, with this reduction it will allow this skill to cycle twice for each time the other do, which can mess up your roations.
Third Row Tripods
Aftermath of Calamity
- Effect: Combo number increased to 3. The last attack’s Damage is 100-161% of the 2nd attack’s value.
- Recommendation: This is overall a smaller damage increase compared to the other Tripod for this row. While it adds a third shot that is stronger, it’s only adding roughly 35-45% damage. Add in the fact that is makes it a slower skill overall and it’s much less.
Approached Apocalypse
- Effect: Increase damage dealt to push-immune foes by 80-120%.
- Recommendation: This is a stronger and much more consistent damage increase, giving twice the boost of Aftermath of Calamity without lengthening the attack. While it’s limited to larger and stronger enemies, those are the ones you actually need the damage for.
Somersault Shot (Pistol)
 Somersault Shot (Pistol)
“Somersault to move 10 meters forward while firing your handgun to deal Medium Damage.”
This skill is used purely for mobility, as it doesn’t inflict enough damage on its own, even with tripods.
- Skill Type: Normal
- Super Armor: Paralysis Immunity (Level 1)
- Cooldown: 9 seconds
First Row Tripods
Magick Control
- Effect: Reduces Somersault Shot’s MP Cost by 50-67%.
- Recommendation: This can be useful as it’s a low cooldown mobility skill. However compared to your other skills it won’t need to be used as often, nor does it have as high of a cost.
Agile Movement
- Effect: Increases Attack Speed by 10-18%.
- Recommendation: As a mobility skill, this in the best option here. Attack Speed will directly increase the speed of teh animation making this a stronger mobility option.
Ignore Collision
- Effect: Somersault can now pierce normal bosses.
- Recommendation: While this has some use cases for Abyssal Dungeons, it is much better to just take the attack speed. There are a number of bosses this won’t work with, which makes it unreliable.
Second Row Tripods
Burn Effect
- Effect: On hit inflicts a Burn that deals very low damage every second for 5 seconds.
- Recommendation: This has some minor use in Chaos Dungeons, while using this skill for mobility, however it’s not even that great there.
Vital Point Shot
- Effect: Incerases Somersault Shot’s Crit Rate by 50-80%.
- Recommendation: This is a better option for Chaos Dungeons or just general use, though you often won’t be maxing this skill.
Master of Evasion
- Effect: Increases dodge rate by 20% while using Somersault Shot.
- Recommendation: This is a great option for PvP. especially when paired with Super Armor from the third row.
Third Row Tripods
Double Jump
- Effect: Increases move distance by 2 meters and increases hit count by 2.
- Recommendation: This add to the mobility of the skill while adding additional attacks, which can make it good for Chaos Dungeons if you have spare points.
Super Armor
- Effect: Grants Level 2 Super Armor and decreases cooldown by 3-4 seconds.
- Recommendation: This is a great PvP Tripod, as it makes in incredibly hard to interrupt the mobility this offers, while allowing you to use it more often.
Spiral Flame
 Spiral Flame
 “Fire a powerful flame bullet, launching foes into the air for Very High Fire Damage. Sets the ground ablaze, inflicting very low Fire Damage every 0.8s for 2.4s.”
This is a great PvP option, however, it does require some setup to land reliably. It’s a decent filler skill in PvE since while its high base damage but doesn’t really gain much from Tripods, allowing it to be useful at lower levels for the extra stagger it can offer.
- Skill Type: Normal
- Stagger: Mid (Level 3)
- Super Armor: Paralysis Immunity (Level 1)
- Cooldown: 27 seconds
First Row Tripods
Ice Shot
- Effect: Changes Element to Water. Creates a frost trail instead of flames, slowing foes that cross this trail by 50-69% for 4 second.
- Recommendation: Despite the slow, this isn’t that great of a PvP Tripod as the trail is quite narrow. Since the skill is often used as a follow-up or finisher after other ranged skills, the fire trail will be more benficial, despite its low damage.
Ferocious Flame
- Effect: No longer knocks up target that are hit, inflicting Ignite instead. After 3 seconds, ignited foes take 20-45% of Spiral Flame’s base damage.
- Recommendation: This can be a decent option for extra damage, but it doesn’t provide much more than the trail does while removing the knock up.
Quick Aim
- Effect: Aiming speed is increased by 50-62%
- Recommendation: This is the best PvP option, as it significantly reduces the wind-up time of the skill.
Second Row Tripods
Growth Bullet
- Effect: Increases damage by a max of 50-80%, based on distance.
- Recommendation: While this has some use cases in PvP, it’s not the most reliable option as the range you use this skill can vary a fair bit.
High-Speed Bullet
- Effect: Increases missile speed by 30-41%. Allow for slow turning while aiming.
- Recommendation: This Tripod is a much more consistent PvP option, as it makes the shot harder to avoid.
Kill Confirmation
- Effect: Increases Crit Rate against foes under 50% health by 60-100%.
- Recommendation: This is about the only Tripod that could make sense with PvE, but it’s in the middle of the tripods for a skill you typically will only use in PvP.
Third Row Tripods
Reinforced Gunbarrel
- Effect: Creates a tornado around the warhead that pulls foes to it. Flame width 20%. Flame trail damage is increased by 200-350.0%. With Ice Shot, increases Move Speed Decrease effect to 80.0%.
- Recommendation: This can make this a half decent mobbing skill for PvE, but the Deadeye has far better options that require less investment and deal greater damage.
Rear Blast
- Effect: The missile no longer pierces. Increases damage by 30-64%. On hit, creates a Rear Blast instead of flames, inflicting all of the flame’s Damage at once dealing medium damage. With Ice Shot, instead of Damage, it now inflicts Freeze on foes for 6.0s. Freeze duration halved in PvP.
- Recommendation: Another decent AoE option, but removes everything that makes it a decent PvP Skill. While it can inflicit a long freeze in PvP, this is ultimately reduced due to PvP mechanics unless it’s theopening hit.
Spiral Tracker (Pistol)
“Throw a spinning handgun at the target location within 10 meters, inflicting medium Damage over 15 hits.”
This will often be one of your main filler skills which is also really good at applying Weakness Exposure. It gets to be a bit more damage heavy as a Pistoleer, however, Enhanced Weapon will also use it as means of maintaining high uptime on Weakness Exposure.
- Skill Type: Point
- Cooldown: 8 seconds
First Row Tripods
Insight
- Effect: Increases use distance by 2-4 meters.
- Recommendation: This can be a decent PvP option, allowing you to throw the skill further and catch your opponets with it.
Weakness Exposure
- Effect: On hit, foe Crit Resistance to attacks by all Party Members is reduced by 10% for 6 seconds.
- Recommendation: This is the go-to option for most situations in PvE, as it enables the skill to apply your Party Synergy Debuff.
Swift Fingers
- Effect: Increases Attack Speed by 20-36%
- Recommendation: This can be a good option for Pistoleers using this a a filler damage skill. Since AT02 Grenade typically takes care of your Weakness Exposure needs, deploying this faster can help more than a second source of a debuff.
Second Row Tripods
Quick Pace
- Effect: Increases Movement speed by 20-30% for 4 seconds after using Spiral Tracker.
- Recommendation: This is a great Tripod to use alongside Raid Captain, allowing you to get roughly 13.5% increased damage during this short buff if Raid Captain is maxed. However, without Raid Captain its not worth using.
Growth Bullet
- Effect: Increases the damage of every third attack by 15-25%.
- Recommendation: This doesn’t offer nearly as much single target damage as Focus Shot. It is the better option for AoE Damage since this damage applies over the full area of the skill.
Focus Shot
- Effect: Damage is increased by 40-70% to foes in the middle of the circle.
- Recommendation: This makes the skill a stronger filler skill for Pistoleer, making it do half-decent damage.
Third Row Tripods
Whirlpool
- Effect: Creates a magnetic force in the center of the circle. AoE Radius is increased by 15%. Slowly pulls foes to the center as it hits.
- Recommendation: This can be a decent Tripod for Chaos Dungeon as it increases the AoE of the skill, and paired with Growth Bullet will clear weak enemies quite well.
Heavy Duty
- Effect: The skill can now stack up to 2.
- Recommendation: This allows for two uses of the skill, where you gain a charge every 8 seconds instead. This will provide more damage as a filler skill, as you can have a high uptime on it’s damage as well as Quick Pace’s effect if its also being used.
Triple Explosion (Rifle)
 Triple Explosion (Rifle)
“Fire an explosive bullet at the target location, inflicting High Damage. You can use this skill up to 3 times in a row.”
While this skill can deal decent damage overall, it’s not exactly the best skill overall. It can be decent filler thanks to its high base damage, but lacks any form of Stagger or Weak Point to really make it useful.
- Skill Type: Chain
- Cooldown: 27 seconds
First Row Tripods
Insight
- Effect: Increases skill use distance by 3 meters.
- Recommendation: While this gives the skill extra range, it’s base range isn’t too bad in general. Can be useful for PvP though.
Kill Confirmation
- Effect: Increases damage by 25-50% against foes with 40% or less health.
- Recommendation: This is a decent damage increase overall, which helps teh skill do more damage.
Enhanced Concentration
- Effect: Time window to cast the next Chain Skill is increased by 3 seconds.
- Recommendation: This allows you more time to use this skill without breaking the chain. For some chain skills this can allow you to fit other attacks in between each cast of this skill, but this may be harder to do for Rifle Skills.
Second Row Tripods
Swift Fingers
- Effect: Increases Attack Speed by 20-36%.
- Recommendation: this speeds up the animation speed of the skill by a good amount, making it quicker and a bit more reliable.
Wide Explosion
- Effect: AoE Radius is increased by 30%
- Recommendation: This can be a good option if you need the AoE, but Swift Fingers is a much more pratical choice for this row.
Flame Bullet
- Effect: Changes element to Fire. Burns foes on hit, dealing low dmaage every second for 6 seconds.
- Recommendation: This can be good bit of added damage if the shots are spaced out properly to extend and reapply the burn.
Third Row Tripods
Quad Explosion
- Effect: Increases Chain Count to 4. Increases Crit Rate by 100% and Crit Damage by 0-44% against foes under 40% Health
- Recommendation: This makes the skill a guarateed Crit while also adding Crit Damage against low health foes. Due to gearing and Engravings, this shouldn’t be needed for anything outside of PvP. In PvP however, it can be a potent option.
Super Explosion
- Effect: Increases Aiming time, damage is increase by 50-80%. Final hit inflicts Stun for 3 seconds. Stun Duration halved in PvP.
- Recommendation: This is a good option for just the pure damage. The increased aiming time is often offset by Swift Fingers.
Deadeye Awakening Skills
Bursting Flare (Awakening)
 Bursting Flare (Awakening)
“Summon a large-caliber rifle and shoot 3 times. The first 2 bullets inflict Incredibly High damage Damage to directly hit foes ending in a burst along the trajectory that pulls foes in for Very High damage. The last shot inflicts Massive damage on direct hits and incredibly high damage to targets behind the initial target.”
Of the Deadeye’s two Awakening Skills, this one does the least amount of damage but deals it much quicker which makes it much more reliable. It’s not always the go-to option, but it is the safer of the two options thanks to its range. It’s also a much stronger stagger option due to being multi-hit as well as having the highest level of stagger available.
- Skill Type: Normal
- Stagger: High+ (Level 6)
- Super Armor: All Immunity (Level 3)
- Cooldown: 5 Minutes
Clay Bombardment (Awakenining)
 Clay Bombardment (Awakenining)
“Throw multiple explosives around, then burst-fire your handgun at them to inflict Very High Damage in addition to Massive explosion Damage, launching foes into the air.”
While this Awaken does high damage, it’s backloaded behind a long wind-up. This wind-up can be mitigated a bit by facing away from your target while using it, but it will still lock you in place until it finishes. It’s a lot riskier to use, as it has quite a short range compared to your other Awakening Skill. In return, you get a single burst of high damage that will deal much high damage than Bursting Flare.
- Skill Type: Normal
- Stagger: Mid-High
- Cooldown: 5 minutes
Skill icons used in this guide have been sourced from lostarkcodex.com.
Deadeye Best Builds
This is intended to be a Beginner-friendly guide to the Deadeye Class. You have now reached the end of the beginner’s portion. If you want to continue further and learn how to master this class, check out the detailed Build Guides we have available. More variations will be added as time and new updates happen.
- Lost Ark Deadeye Pistoleer Build Guide
- More Builds will appear here soon. Please check back later.
Check out the other Lost Ark Guides available on VULKK.com and stay up-to-date with the latest news about the game.