A Beginner’s Guide for Lost Ark’s Destroyer, covering the basics from stats to Skills and Engravings and giving you information vital to pick up and learn the class!
Table of Contents:
- Introduction to the Destroyer Class
- Destroyer Party Synergy Effects
- Destroyer Stat Priority
- Destroyer Engravings
- Destroyer Skills
- Destroyer Awakening Skills
Introduction to the Destroyer Class and Overview
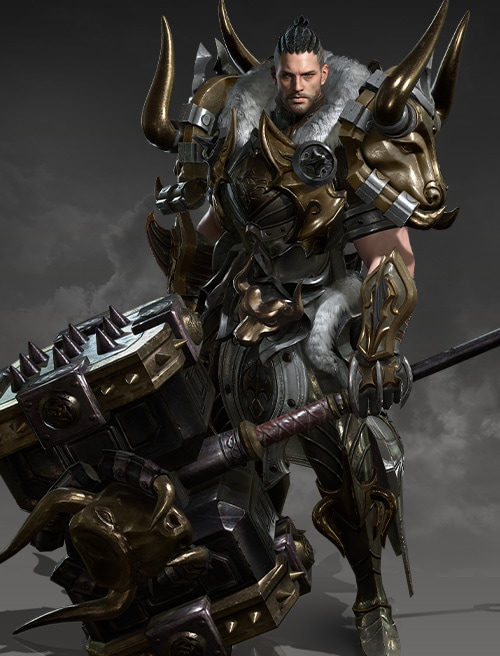
Released with the “Destined for Destruction” Update, the Destroyer is a Warrior class that wields a massive Hammer as their weapon. This slow but powerful warrior is capable of inflicting high stagger with heavy blows.
“The Destroyer is a formidable character, with their ability to control gravity they are a great asset to any group. Part of a team or solo – their solid foundation makes them able to withstand a barrage of attacks, handle crowd control, and wield their deadly hammer inflicting damage.”
The Destroyer is the king of Stagger Damage in Lost Ark. There are no other classes that will be able to stagger a foe quite as easily or effectively. While a Berserker may deal a good amount of Stagger, they still can’t compete with Destroyer. This is due to having both high levels of Stagger and also being a Frontal Attacker boosts their stagger potential.
The Destroyer has 17 skills split between 10 Concentration Skills and 7 Gravity Release Skills. Like most other classes the Destroyer is limited to 8 skills at max in their hotkeys.
Concentration Skills typically focus on building up Gravity Cores, which are expended by using Gravity Release skills. This typically means you’ll be using several Concentration skills and just a few Gravity Release skills.
Destroyer Party Synergy Effects
The Destroyer has two Party Synergy effects called Trace of Pain and Target Focus.
Trace of Pain is found on the Dreadnaught, Jumping Smash, and Power Strike skills and reduces the defense of enemies hit by 12% for 10 seconds. This is Destoyer’s primary Synergy Skill, as it increases the party’s damage. With Dreadnaught and Powerstrike both having really short cooldowns, it is possible to have 100% uptime on this debuff even without the aid of cooldown gems or Swiftness.
Target Focus is an optional Synergy Effect that can be found on the Running Crash skill. This increases Stagger Damage from all sources by 20% for 6 seconds. This is often unnecessary for most content but still exists as an option should it be needed. With Running Crash being a longer cooldown, it’s not going to have high uptime, but can be helpful for very tight stagger checks.
Destroyer Stat Priority
 Crit
Crit
 Crit
CritThe Destroyer is a class with a lot of raw damage packed into its skills and tripods. This makes Crit a good compliment to that, to offset their lack of built-in Crit. While how much you use will vary based on which Build you run, it’s still a very important stat for the destroyer.
 Specialization
 Specialization
Specialization is good for the Destroyer as well, as their Concentration Skills will gain bonus damage from this stat, as well as help them more quickly build fill their Gravity Cores. Both of these effects make Specialization a great stat for Destroyer.
Destroyer Engravings
Destroyer Class Engravings
 Gravity Training
 Gravity Training
“During combat, the Gravity Meter recovers 1%/1.5%/2% every 1s. Basic Attack and Vortex Gravity Crit Rate is increased by 10%/20%/30% and increases Attack Damage by 4%/10%/20% during Hypergravity Mode.”
This Engraving makes the Destroyer a more burst-oriented class, focusing on quickly building to their Hypergravity mode and dealing high damage during its activation. This build will be more focused on Specialization as a stat so they get to Hypergravity Mode more often.
Hammer of Rage
 Hammer of Rage
“When using a Gravity Release Skill, Crit Rate is increased by 3%/4%/5% and Crit Damage is increased by 5%/10%/15% for each Gravity Core used.”
This Engraving makes the Destroyer a consistent source of damage, allowing them to crit fairly consistently. This Engraving also reduces their need for Engraving like Precise Dagger, offering them a pretty high amount of Crit Rate. It also makes Keen Blunt Weapon a worse option due to providing similar amounts of Critical Damage
Recommended Battle Engravings for Destroyer
Below is a list of recommended Engravings you can slot into a Destroyer Build. These will help set you on the right path to properly building out your Glaivier effectively. As such, if an engraving functions better for a specific build, it will be noted.
Since the Destroyer has good access to shields and is a Front Attack based class, this gives them two very good options to use in most cases. Their skills are also slow, so using options to cover up that weakness is also a great idea.
If you want additional information on the Engravings listed below, check out our Guide on Lost Ark’s Engraving System.
Barricade
 Barricade
“Barricade increases your Outgoing Damage by 3% / 8% / 16% while you have an active shield.“
Similar to Gunlancers, Destoyers have a good amount of access to shields which makes this engraving very effective overall of extra damage. This allows you to make good use of the shorter duration shields that you get from spending Gravity Cores.
Master Brawler
 Master Brawler
“Master Brawler increases the damage bonus of Front Attacks by an additional 5% / 12% / 25%.“
As a Class that deals a ton of Frontal Attacks, this is an easy pick up for a huge damage increase. Thanks to Destoyer’s newly added Taunt, it helps them to more easily keep any enemy facing them to take advantage of this.
 Super Charge
 Super Charge
“Super Charge increases the Speed you can charge your Charge Skills by 8% / 20% / 40%. This also increases the damage of these skill by 4% / 10% / 20%.”
A few of the Destroyer’s harder-hitting skills like Perfect Swing are really slow Charge-based skills, allowing them to make good use of this engraving. While they don’t have too many charge skills overall, those that are have a high impact on their damage output.
Spirit Absorption
 Spirit Absorption
“Spirit Absorption increases your Attack and Move Speed by 3% / 8% / 15%.”
Since Destroyer lacks both Attack and Movement Speed due to the lack of Swiftness, this helps to cover that downside. In addition, the added Attack Speed speeds up their slower animations. This helps to keep the class reliable and makes it feel less sluggish overall.
Destroyer Skills
Dreadnaught
 Dreadnaught
“Take a ready stance with your hammer on your shoulder, concentrating your energy on your Cores, and then hit the ground to send forth a shockwave, inflicting Medium Damage, and use the momentum to jump high. While jumping, slam your hammer down onto foes, inflicting Medium Damage.”
Dreadnaught is one of the counter options for the Destroyer. Dreadnaught also has access to Level 2 Super Armor and damage reduction making it a good multi-purpose skill, as well as a strong counter option
- Skill Type: Normal
- Attack Type: Frontal Attack
- Counter: YES
- Stagger: Mid-High (Level 4)
- Weak Point: Level 2
- Cooldown: 10 seconds
First Row Tripods
Tenacity
- Effect: Adds Level 2 Super Armor to Dreadnaught.
- Recommendation: This is a strong option overall. While Dreadnaught does have access to an added dash in this row, it’s a very short dash which makes this the better overall option for easier counters.
Irresistible Force
- Effect: On hit to foes with Push Immunity, ignore Defense by 30-63%.
- Recommendation: This can be nice for the added damage against bosses between counter patterns. However, the tradeoff is often the loss of a low cooldown Super Armor option.
Armor Destruction
- Effect: Reduces target’s defense by 12% for 10 seconds.
- Recommendation: This is a great option with Dreadnaught being your primary counter skill. Not only will the counter stagger the enemy briefly when you counter, but it will also apply this debuff allowing you to go right into your heavy-hitting attacks.
Second Row Tripods
Toughened Body
- Effect: Reduces incoming damage by 30-38.7% during Dreadnaught.
- Recommendation: This can be a solid option overall, allowing you to reduce incoming damage in a pinch if you don’t need your counter right at that moment. It’d also reduce any incoming damage if you end up countering late and taking some damage in the process.
Enhanced Strike
- Effect: Increases damage on Primary target by 30-60%.
- Recommendation: This is a decent damage boost if you wanted to get more damage out of the skill by using its low cooldown between counter patterns.
Raging Hammer
- Effect: Increases damage by 10-18% per enemy hit when hitting 2 or more enemies. Max of 80-144% (8 enemies)
- Recommendation: This can be a decent mobbing option, but typically in cases where you’d be mobbing you wouldn’t be using your counter skill ina lot of cases, opting for a skill with higher AoE.
Third Row Tripods
Splendid Attack
- Effect: Hit the ground for the finishing attack to shoot gravity force upward, launching foes into the air dealing 30-60% increased damage.
- Recommendation: This isn’t a great tripod for the number of points spent for it. It’s very small damage increase compared to the alternative option.
Violent Hammer
- Effect: Attack one additional time while in the air. Damage is increased by 60-94.8%
- Recommendation: If you were to invest in a third-row tripod for this skill, you’d want this one. It just provides much more damage, as well as another hit that can inflict additional stagger.
Earth Eater
 Earth Eater
“Smash the ground behind you, causing High Damage, then deliver a horizontal swing, chunks of rocks following your hammer. Spin a total of 3 times, each spin inflicting Low Damage. Your hammer goes higher with each spin until you swing it down to the ground to inflict High Damage.”
Though a bit on the slower side, Earth Eater is a Gravity release skill that is capable of dealing very high damage while also providing Super Armor to make sure it’s much harder to interrupt or displace you. Its common Tripods further boost both its damage and Super Armor making it a reliable option for damage, stagger, and Weak Point.
- Skill Type: Normal
- Attack Type: Front Attack
- Stagger: High (Level 5)
- Super Armor: Paralysis Immunity (Level 1)
- Weak Point: Level 2
- Cooldown: 24 seconds
First Row Tripods
Enhanced Strike
- Effect: Hammer Direct Hit Damage is increased by 30-73%
- Recommendation: This boosts the damage of the two harder-hitting potions of the skill, making it a great option to pick up for the additional damage being focused on those hits.
Red Shards
- Effect: Rock Fragment Damage is increased by 50-113%.
- Recommendation: This is similar to Enhanced Strike, but only enhances the weaker spinning hits. This can be used for mobbing, when combined with Perspiration and Rock Storm.
Absolute Strength
- Effect: Ignore 10-21% of enemy armor per Gravity Core.
- Recommendation: Due to the Destroyer already having a defense reduction as a party synergy, this often falls short in many circumstances compared to the direct damage increases offered by the other tripods in this row.
Second Row Tripods
Tenacity
- Effect: Increases Super Armor rating to Push Immunity (Level 2)
- Recommendation: With this being a longer attack animation, having more of a guarantee that the attack will finish is always going to be nice.
Perspiration
- Effect: Increases AoE Radius by 30%.
- Recommendation: this can be a good tripod to pair with Red Shards and Rock Storm; making the skill great for mobbing. Beyond this, there’s very little reason to use this tripod
Earth Shock
- Effect: Strike the ground with your hammer, damaging foes 7 meters in front of you, increasing damage by 15%. Causes Earthquake for 3-5 seconds.
- Recommendation: This is also a decent tripod for mobbing, but slightly worse than Perspiration. This is because it makes the skill a forward line AoE, which can be good when used well but lacks the overall coverage of the spinning AoE.
Third Row Tripods
Earthen Rage
- Effect: Create a massive rock hammer and slam it to the ground, increasing damage by 100-166%. When overcharged, this damage is increased to 190-277%. Rock fragments fly and scatter, inflicting 50% of the hammer strike Damage.
- Recommendation: This is the go-to option for damage, as it removes the spinning animation and massively boosts the power for the two remaining hits. The damage from the spinning attack isn’t lost either, as the fragments will still deal significant damage. It also makes it a charge skill which allows it to synergize with Super Charge as an engraving.
Rock Storm
- Effect: Changes to Holding mode. Removes final strike. Increases hammer spinning time and allows movement. Damage is increased by 30-58.6%. Removes Weak Point Attribute from strikes.
- Recommendation: This is great for the mobbing potential when combined with Red Shards and Perspiration. Outside of this though, it’s ultimately a loss of damage as the added spins deal less damage than the removed heavy hit. If you want to use it for single target damage, it’s recommended to take Tenacity instead of Perspiration.
Earth Smasher
 Earth Smasher
“Swing the hammer above your head in a circle and strike the ground, inflicting Medium Damage and creating a huge boulder. Take a swing at it to break it and propel the fragments in a cone-shaped blast, inflicting High Damage. Foes hit by the boulder fragments are stunned for 3s.”
Earth Smasher is a great option for generating Gravity Cores. It does great damage, and has access to both Attack Speed and Tenacity should you need either.
- Skill Type: Normal
- Attack Type: Frontal Attack
- Stagger: Highest (Level 6)
- Cooldown: 24 seconds
First Row Tripods
Fatal Strength
- Effect: Reduces Attack speed by 10%, but increases damage by 20-45%.
- Recommendation: If you want maximum damage for this skill, this is a good option. However the Attack Speed penalty can make it a much slower skill if you don’t have the attack speed coming from somewhere else like the Spirit Absorption engraving.
Toughened Body
- Effect: Reduces incoming damage by 30-40.8% during Earth Smasher
- Recommendation: This can make the skill safer to use, and combined with Tenacity from the second row makes it a really reliable and safe skill.
Agile Movement
- Effect: Increases Attack Speed by 10-18%
- Recommendation: With Destroyer having slower animations, Attack Speed helps them out immensely and has the potential to increase their overall DPS by more than some damage increase options.
Second Row Tripods
Wide Hit
- Effect: Increases AoE Radius by 15%
- Recommendation: With the skill already having high damage, and no damage options in this row, this can be a good pick-up for mobbing purposes. Not as necessary or useful for bossing.
Tenacity
- Effect: Adds Level 2 Super Armor (Push Immunity) to Earth Smasher
- Recommendation: This is the go-to option for bossing, as it can be a slower attack and this will make it much harder for a boss to interrupt it.
Basic Training
- Effect: Rock Fragment Stun duration is increased by 2-3.8 seconds.
- Recommendation: This Tripod just isn’t very useful. It may have some niche use in PvP, but even then Tenacity will often be a better option.
Third Row Tripods
Explosive Hit
- Effect: Spin twice and broadly swing your hammer at the rising rock, shattering it and shooting fragments at 360 degrees. Rock fragment Damage is increased by 50-91%.
- Recommendation: This is a great mobbing and damage option as it increases the reliability of the damage while making it an AoE.
Strange Movement
- Effect: Changes to Point mode. Preparation time before the downward hammer attack is increased by 1 second, but enables you to change your direction for the time being and jump 6 meters before attacking.
- Recommendation: This can make the skill a bit more reliable if you don’t mind the extra delay. it will also allow it to be a short gap closer, which can be useful if your target steps away in the middle of the attack.
Endure Pain
 Endure Pain
“Let out a roar, inflicting High Damage to foes within a 6 meter range. Upon using the skill, gain Level 2 Super Armor (Push Immunity) and 15% damage reduction for 5 seconds.”
This skill is one of the core Destroyer Skills. It deals high damage, taunts, and provides a strong buff that makes it worth using. Its tripods make it a very strong utility skill that Destroyers can rely on.
- Skill Type: Normal
- Attack Type: Frontal Attack, Back Attack
- Stagger: Low (Level 1)
- Super Armor: Push Immunity (Level 2)
- Cooldown: 40 seconds
First Row Tripods
Wide Hit
- Effect: Increases AoE Radius by 25%
- Recommendation: With this skill having a range of 6 meters, this can be slightly useful to make sure its high damage connects. It also offers a bit of room for error when spacing yourself against a boss.
Gravity Enhancement
- Effect: Reduces Endure Pain’s MP Cost by 50-67%.
- Recommendation: Generally this tends to be the best option for this row. Despite Endure Pain having a long cooldown and a fairly low cost, this makes it more likely that you can use it more freely and that you’ll have the MP to use it when needed.
Guaranteed Core
- Effect: Gain a Gravity Core even if the skill doesn’t connect.
- Recommendation: This is a decent option for this row. While you’re not typically going to be worried about it generating cores too much, this can be nice to have. Reduced MP cost is still typically more important due to high cost of the skill.
Second Row Tripods
Anti-Gravity
- Effect: Creates a gravity force shield with 30-41 of Max HP for 5-6 seconds.
- Recommendation: This tripod seems appealing, but offers very little uptime, making it a bit lackluster. Its a great option for solo PvE content where a Taunt is less useful, but outside of that not too great for anything other than providing a shield for Barricade’s damage boost. It may have some niche use in PvP as well.
Fear of War
- Effect: Reduces foe Attack Speed by 20-28.8% and Movement Speed by 40-57.6% for 6-7 seconds on hit.
- Recommendation: This is a good option for PvP, as on top of the Super Armor and damage reduction the skill already grants, this will debuff a nearby person. This allows you to easily and safely retaliate
Taunt
- Effect: Endure Pain applies Taunt to foes on hit, taunting non-player foes for 3 seconds. Challenge and high foes cannot be taunted again for a set time.
- Recommendation: This is the go-to option for PvE. This taunt allows you to interrupt rough boss patterns as well as make it so they face you for your Frontal Attacks for a short time.
Third Row Tripods
Healthy Mentality
- Effect: Increases the duration of Endure Pain’s buff effects by 3-5 seconds.
- Recommendation: This is a good option, allowing you to double the duration of the Super Armor and Damage Reduction when the Tripod is maxed. This is better when you’re facing an enemy that’s more likely to hit you with frequent attacks, such as Chaos Dungeon or the like.
Hidden Pain
- Effect: Increases the Damage Reduction effect to 90%.
- Recommendation: This is a really powerful effect, allowing you to shrug off heavy hits much like a Gunlancer can in PvE. It’s also useful in PvP when paired with Anti-Gravity, which can allow it to shut down nearly any burst or heavy damage on you.
Full Swing
 Full Swing
“Strike behind you with your hammer and spin 360 degrees, attacking surrounding foes 3 times in total, inflicting Medium Damage 3 times. Overcharge to inflict High Damage.”
Full Swing is one of the Destroyer’s iconic skills, being a long charge time, but dealing incredibly high damage when charged. When paired with their taunt, it’s hard to miss and really packs a punch while inflicting a ton of Stagger.
- Skill Type: Charge
- Attack Type: Frontal Attack
- Stagger: High (Level 5)
- Super Armor: Paralysis Immunity (Level 1)
- Weak Point: Level 1
- Cooldown: 30 seconds
First Row Tripods
Tough Heart
- Effect: While Dashing, damage taken is reduced by 30-40.8%. During the swing, this increases to 50-62.5%.
- Recommendation: This adds a nice bit of extra safety to this skill. Though Agile Movement is still a better option for this row.,
Agile Movement
- Effect: Increases Attack Speed by 10-18%.
- Recommendation: Being a slower and lengthy attack when fully upgraded, this si the best tripod for this row. This helps to speed up the animation a fair bit and get your damage out quicker.
Quick Prep
- Effect: Reduces skill cooldown by 4-8 seconds.
- Recommendation: This can be an okay alternative to Agile Movement, which allows you to use the skill more often. Though the Attack Speed still feels much nicer to have.
Second Row Tripods
Tenacity
- Effect: Increases Super Armor to Push Immunity (Level 2).
- Recommendation: Being a charge skill this is a very nice option to take when learning an encounter, or if you really want to ensure you get the damage out of this skill. It is competing for a slot over two damage options, so it can be a tough choice.
Absolute Strength
- Effect: Damage is increased by 10-20% per core you have. Max of 30-60%.
- Recommendation: Since your whole goal will be to get three Gravity Cores and immediately spend them, this tends to be a strong damage option. There is a condition for it, but the condition will be met often enough that it will not feel that way.
Scary Hammer
- Effect: Increases damage by 10-17% per swing, up to a max of 60-102%.
- Recommendation: This is an okay damage increase, but requires the use of the Beast’s Eye tripod to fully utilize. Typically you will take that tripod as well, but it will offer less overall damage compared to Absolute Strength.
Third Row Tripods
Beast’s Eye
- Effect: Charge duration is reduced by 50% and Charge level is increased by 1. Overcharge to spin 7 times and increase total damage by 125-174.5%.
- Recommendation: While this makes the skill longer to execute, it does far more damage and is typically the option you’ll want to use with Rage Hammer.
Outraged Attack
- Effect: Changes to Normal Mode. Spin in place, gradually increasing attack range. Damage is increased by 25-52.5%.
- Recommendation: This removes the Charge and forward movement portions of the skill, instead making the skill an AoE around you with
Gravity Compression
 Gravity Compression
“Thrust the handle of your hammer into the ground and release a gravitational wave while inflicting Very Low Damage.
Hold for 2 seconds to release a black hole, inflicting Medium Damage over 9 hits. If you stop holding before the Holding Meter is maxed out, the black hole explodes and inflicts Medium Damage within a 5 meter radius. Max out the Holding Meter to cause a bigger explosion, inflicting High Damage to foes within a 6 meter radius.”
Gravity Compression is a great Mobbing option, as it offers plenty of AoE, but lacks the raw damage that makes other Gravity Release Skills more appealing. It skill has its uses, but it’s far from the strongest option.
- Skill Type: Holding
- Stagger: Highest (Level 6)
- Super Armor: Paralysis Immunity (Level 1)
- Weak Point: Level 2
- Cooldown: 24 seconds
First Row Tripods
Tough Heart
- Effect: During Holding Duration, incoming damage is reduced by 30-37.5%. This is increased to 50-62.5% during the attack.
- Recommendation: This is a tripod that offers a fair bit of safety, as the holding duration is quite long so it has the potential to shrug off plenty of damage. this is a decent utility option, but not the greatest option if you only care about damage.
Rational Selection
- Effect: Attack Speed is increased by 25%. Cooldown is increased by 6-1 seconds.
- Recommendation: This makes the skill faster but in exchange for added cooldown. With the cooldown being added reducing per tripod level, this can be a pretty rough trade-off until you get tripod levels.
Irresistible Force
- Effect: If the skill is used with 3 Gravity Cores, ignore 30-63% enemy defense.
- Recommendation: This is generally unnecessary since the Destroyer’s primary synergy already reduces enemy defense by 12%. While it can result in more damage, it is generally not worth taking since the skill is used for mobbing in most cases where enemies have low defense already.
Second Row Tripods
Wide Hit
- Effect: Increases AoE Radius by 20%.
- Recommendation: As a mobbing skill, this helps it do its job fairly well. However, it’s competing against two different damage increases in the same row.
Powerful Finish
- Effect: Black Hole Explosion damage is increased by 50-100%
- Recommendation: This increases the damage of the final hit when you hold the skill for the full duration. This will make the final explosion deal pretty significant damage, and more easily clear out the mobs around you.
Absolute Strength
- Effect: Increases damage by 10-20% per Gravity Core.
- Recommendation: This can be a great overall damage boost, as it will increase the damage of the full skill. Generally for its intended purpose Powerful Finish does better for much less investment.
Third Row Tripods
Move Position
- Effect: Black Hole is created at the cursor’s location, within 10 meters.
- Recommendation: This makes Gravity Compression a ranged attack, but there’s little reason to do this as works better as a self-centered AoE in terms of doing Chaos Dungeons or similar content.
Magnetic Field Enhancement
- Effect: Increases Black Hole’s Magnetic Field damage by 150-230%.
- Recommendation: This increases the damage dealt by the Holding portion of the skill by a significant amount. This really helps to allow the skill to clear out weak enemies. It’s not really a priority pick up though, leaving the points better spent elsewhere.
Gravity Force
 Gravity Force
“Hold your hammer close to the hammerhead and swing it at foes in front of you, inflicting Very Low Damage. Afterward, your hammer releases gravitational energy, attacking foes in a straight line 7 times for a total of Medium Damage, pulling them close. Foes affected by the energy receive Low Damage and become forcefully pulled to a nearby position.”
While Gravity Force has a fair bit of AoE to it, it’s not a very strong skill nor does it have the tripods to really support it as a damage skill the best it can offer is being a Gravity Core generator, but not a great one as it only generates 2 cores without a high amount of skill points being spent on it.
- Skill Type: Normal
- Stagger: Low (level 1)
- Super Armor: Paralysis Immunity (Level 1)
- Cooldown: 14 seconds
First Row Tripods
Charge Enhancement
- Effect: Reduces Skill Cooldown by 0.5-0.9 seconds per each enemy hit, up to a limit of 4-7.2 seconds (8 targets)
- Recommendation: When hitting the target cap with this tripod as well as Wavering Gravity, it can allow the skill to reset itself, but at the cost of half of its damage.
Toughened Body
- Effect: Incoming damage during skill use is reduced by 30-40.8%.
- Recommendation: When compared to a Damage increase or cooldown reductio, this falls short for PvE content. It may have some niche use in PvP, but it’s not a reliable option for that content.
Fatal Strength
- Effect: Increases damage by 15-40%
- Recommendation: This is an okay damage increase, considering it’s in the first row and doesn’t come with a penalty or require a condition to be met. It’s Free Damage, making it the go-to option when using this skill.
Second Row Tripods
Agile Movement
- Effect: Increases Attack Speed by 20-36%
- Recommendation: This speeds up the skill animation if you feel it’s necessary. though in most cases you would want one of the other tripods.
Single Attack
- Effect: Increases damage by 30-60% when hitting a single target.
- Recommendation: This is a good option for bossing when using this skill. There are some cases that can make it tricky to use, in most cases it will perform well for PvE Content.
Impaired Mobility
- Effect: On hit, reduce enemy Attack Speed by 20-28.8% and Movement Speed by 40-57.6% for 4 seconds
- Recommendation: This can be a decent PvP tripod, allowing the skill to be a good setup option.
Third Row Tripods
Released Instinct
- Effect: Increases Prep time by 0.4 seconds. Increases damage by 40-70%.
- Recommendation: If you can deal with the extra wind-up time, this is a solid damage increase. Though the wind-up can be a bit long as-is.
Wavering Gravity
- Effect: Changes the Skill to Chain Mode, allowing the skill to be cast a second time within 3 seconds. Damage is reduced by 50% and AoE Radius is reduced by 20%. Casting duration is reduced by 50%.
- Recommendation: This makes the skill overall faster, but makes it much weaker. The only advantage this really offers is giving you a second charge to benefit from Charge Enhancement, giving the potential to reset its cooldown when used as a mobbing skill.
Gravity Impact
 Gravity Impact
“Strike your hammer downward, inflicting Very Low Damage, and start injecting gravitational energy where you stand. Gradually pull and attack foes 8 times for a total of Medium Damage, then cause a gravitational explosion that pulls foes close inflicting Very Low Damage.”
While this skill does okay AoE, unlike skills like Gravity Compression, there’s not enough base damage nor damage tripods to make it a worthwhile skill.
- Skill Type: Normal
- Stagger: Low (Level 1)
- Super Armor: Paralysis Immunity (Level 1)
- Cooldown: 12 seconds
First Row Tripods
Charge Enhancement
- Effect: Reduces skill cooldown by 0.5-0.9 seconds per enemy hit by the first attack, up to a max of 4-6 seconds.
- Recommendation: This is probably the most useful tripod this skill has, though it’s not going to help too much to be frequently using this skill. At best it allows for more frequent Gravity Core generation, but this often isn’t necessary.
Gravity Enhancement
- Effect: Reduces MP cost by 50-67%.
- Recommendation: This is already one of the destroyer’s lowest mana costs, so it’s not worth taking this as it doesn’t provide much benefit.
Agile Movement
- Effect: Increases Attack Speed by 10-18%.
- Recommendation: This increases the animation speed of the skill, which honestly isn’t too long as it is, but can make the skill feel better overall if not using Will Enhancement.
Second Row Tripods
Tough Mind
- Effect: Reduces incoming damage by 10-13.2% ffor each enemy hit by the first attack, up to a max of 60-79.2%. The effect lasts 5 seconds.
- Recommendation: This can have some use if not using Will Enhancement as the skill does lock you in place for a decent bit of time. Though it’s only useful when mobbing as it requires multiple targets for decent effect.
Cruel Vengeance
- Effect: Increases damage by 5-9% for each time you’re hit during skill use, up to a max of 50-90%.
- Recommendation: Unless you’re surrounded by weak enemies, you won’t benefit much from this. Even in that situation, it still doesn’t provide enough damage.
Gravity Echo
- Effect: The gravity explosion immediately stuns for 2 seconds. The effect is halved in PvP.
- Recommendation: There’s no real reason to ever use this as the stun is only going to affect weaker enemies that aren’t that much of a threat anyways.
Third Row Tripods
Wise Strength
- Effect: Increase the power of gravity, gradually increasing the attack range by up to 40%.
- Recommendation: While this sounds decent, it’s not really adding any benefit other than range, which makes it fall short as a third-row tripod option.
Will Enhancement
- Effect: Forcefully hammer the ground and creates a mass of gravity, pulling foes.
- Recommendation: This can be worth using as after the initial hit to the ground, you’re no longer locked in place. This will allow you to use another skill while this one groups up targets for you.
Heavy Crush
 Heavy Crush
“Raise your hammer above your head, then smash the ground with enormous gravitational force, inflicting Medium Damage.”
This skill ends up being a nice, quick skill to generate Gravity Cores while dealing decent damage and stagger thanks to its short cooldown.
- Skill Type: Normal
- Attack Type: Frontal Attack
- Stagger: Mid (Level 4)
- Cooldown: 5 seconds
First Row Tripods
Quick Hit
- Effect: Reduces skill wind-up by 0.3 seconds
- Recommendation: This makes the skill smoother and easier to use, making it more consistent.
Dark Matter
- Effect: Changes Element to Dark. Increases Crit Rate by 15-40%.
- Recommendation: Since the Destroyer often stacks Crit as the main stat, this Tripod often tends to not be as useful in later sections of gearing. Before then, however, it can make it a decent DPS skill.
Earthen Strength
- Effect: Element is now Earth. Increases damage by 10-35%
- Recommendation: While this can be a decent increase in damage with a maxed tripod, this skill isn’t one you’ll typically invest many skill points or Tripods levels into.
Second Row Tripods
Smash
- Effect: On hit, reduces target’s Movement Speed by 20-35% for 5-6 seconds
- Recommendation: This can be useful in some PvP situations, allowing the skill to follow up and extend the slow of another skill or to make it harder for an opponent to run away.
Law of the Jungle
- Effect: Damage to Challenge or Lower monsters is increased by 100-145%.
- Recommendation: This is a great mobbing Tripod, since the skill has a low cooldown and a decent AoE.
Defenseless Target
- Effect: Increases damage against Stunned or Staggered targets by 30-60%.
- Recommendation: This tripod isn’t that great, since stuns will only affect weak enemies and Successful Counters does not count as Staggered. However, this is the only slightly useful tripod for the second row in bossing situations.
Third Row Tripods
Wide Hit
- Effect: Increases AoE Radius by 30%.
- Recommendation: The AoE of this skill is already pretty decent, and Aftershock is an even better mobbing option for the added damage.
Aftershock
- Effect: The Downward Strike causes an Earthquake, dealing 10-16% every second for 5 seconds.
- Recommendation: For mobbing, this tripod combined with Law of the Jungle makes for an incredibly good set of Tripods. The massively increases damage helps these normally weak shockwaves to deal good damage.
Jumping Smash
 Jumping Smash
“Leap to the target location within 10 meters and swing your hammer down to the ground, inflicting High Damage.”
This is a pretty good mobility skill that deals decent damage, as well as has good Stagger and Weak Point in addition to the mobility it provides. Since it’s also a great way of apply of reapplying Trace of Pain, it’s a really well-rounded skill in Destroyer’s kit.
- Skill Type: Point
- Attack Type: Frontal Attack
- Stagger: Mid-High (Level 5)
- Super Armor: Paralysis Immunity (Level 1)
- Weak Point: Level 2
- Cooldown: 16 seconds
First Row Tripods
Dark Flame
- Effect: The element is now Dark. Increases Crit Rate by 15-40%.
- Recommendation: This can be a good option in the early stages of gearing where your Crit stat isn’t very high or you have gear set to supplement your crit rate.
Hammer of the Earth
- Effect: The element is now Earth. Damage is increased by 10-35%.
- Recommendation: This is an okay increase in damage, but it’s not really worth using without a maxed Tripod, and even then it’s questionable.
Superior Change
- Effect: Increases max skill use distance by 2-4 meters.
- Recommendation: This extends the mobility the skill can provide, making it usable from a farther range.
Second Row Tripods
Time Distortion
- Effect: Increases damage by 25-50%.
- Recommendation: This a nice damage boost that doesn’t require any specific to work and can be useful in cases where you don’t need multiple skills to apply Trace of Pain.
Bizarre Hammer
- Effect: Creates two gravity hammers, increasing AoE Radius by 20%. With Smash, the left side is increased by 20% and the right side is increased by 40%.
- Recommendation: This can be an okay option for mobbing, where you wouldn’t need Trace of Pain and want to cover more area.
Armor Destruction
- Effect: Reduces the target’s defense by 12% for 14 seconds.
- Recommendation: As your Synergy Effect, you’re almost always going to take this as it’s a strong synergy skill and this skill applies it the debuff for the longest duration.
Third Row Tripods
Gravity Inversion
- Effect: Soar into the air and slam the hammer down into the ground. Damage is increased by 30%. Upon impact, reverses the gravity of the area within 5 meters of the hammer’s strike point, dealing 30-65% Base Damage and flinging foes into the air.
- Recommendation: This allows the skill to provide strong crowd Control, but the damage it offers is minimal compared to Smash. However you retain the mobility of the base skill.
Smash
- Effect: Changes the Skill to Normal Mode. Leap 5 meters towards the target area. Damage is increased by 100-144%.
- Recommendation: This is a really strong damage boost, but sacrifices the mobility of the base skill for this increase. It’s still affected by Superior Change though, allowing it to still be great mobility overall.
Neutralizer
 Neutralizer
“Imbue your hammer with gravitational energy and swing it downward with might, inflicting Low Damage. This ground smash causes a shockwave within an 8 meter radius, inflicting medium Damage. Use the skill again to hit the ground 2 more times, inflicting Medium Damage each time. Shockwaves inflict the same amount of Damage.”
Due to the shockwaves this skill creates being randomly placed, it really makes this skill a bit unreliable without its third-row tripod, Gravity Control. However, if you do get multiple shockwaves to hit a target with or without the mentioned tripod, it can deal heavy damage.
- Skill Type: Combo
- Attack Type: Frontal Attack
- Stagger: High (Level 5)
- Super Armor: Paralysis Immunity (Level 1)
- Cooldown: 36 seconds
First Row Tripods
Dark Energy
- Effect: Element is changed to Dark. Shockwave Damage ignores enemy Defense by 30-78.9%.
- Recommendation: Since the shockwaves are randomly placed without Gravity Control, this can easily result in a wasted tripod choice. With Gravity Control however, it can be a decent option for additional damage.
Earthen Aura
- Effect: Element is changed to Earth. On hit reduces enemy Movement Speed by 30-46.2%.
- Recommendation: With this being a bit more lengthy of an animation, the slow can help you to finish the skill without much risk as it will continually slow nearby enemies as they get hit. It’s not a great option, but can have its uses.
Powerful Shock
- Effect: Shockwaves launch enemies into the air on hit. Push-Immune enemies take 20-64.4% increased damage.
- Recommendation: This is a decent Tripod, providing crowd control for weaker enemies and more damage for bigger targets. This is a more reliable damage increase compared to Dark Energy, as increased damage also affects the hammer swings.
Second Row Tripods
Wide Hit
- Effect: Increases AoE Radius by 20%.
- Recommendation: The AoE of this skill and the shock waves are both pretty small, so this ends up being a really insignificant increase in AoE.
Unstable Earth
- Effect: Concentrates gravity energy and delivers a single downward blow, inflicting the same amount of Damage as the original 3rd attack. Also, generates 3 shockwaves.
- Recommendation: On top of speeding up the animation, this also generally increases the damage by a bit. This is because all three shockwaves will carry the same damage as the 3rd hit, which is the strongest hit of the skill. While you lose the two weaker hammer swings, you get two stronger shockwaves.
Growing Gravity
- Effect: Shockwave Damage is increased by 20-44% every time you swing your hammer downward.
- Recommendation: This is a really solid damage increase if you don’t mind the longer animation. This will increase the shockwave damage three times, ending with 60-132% increased damage for the third shockwave.
Third Row Tripods
Split
- Effect: Hammering the ground shoots 3 shockwaves at a time.
- Recommendation: This acts more like an AoE Increase, a much better one that Wide hit for how the shockwaves work. While you don’t have any influence over the shockwave locations, it does increase the odds of at least one hitting.
Gravity Control
- Effect: Generates shockwaves around your hammer. Each shockwave attacks 3 times. Total Damage is increased by 100%.
- Recommendation: This reduces the randomness of the skill by quite a bit, making the shockwaves being created placed closer to where the hammer strikes. This help it more consistently deal higher damage and maximizes its strength.
One-Man Army
 One-Man Army
“Swing your hammer sideways to inflict up to 6 blows. Damage increases with each blow, the first blow inflicting Very Low Damage and the last, Medium Damage.”
This skill is capable of dishing out a lot of Stagger but is a bit lacking in overall damage for the length of the skill. Since the skill forces you forward, only stopping when swinging towards a boss-tier enemy it can be a pain to use as it will lock you into the long animation if you miss. You can at least change directions for each swing which can prevent it from missing entirely.
- Skill Type: Holding
- Attack Type: Frontal Attack
- Stagger: Highest (Level 6)
- Super Armor: Paralysis Immunity (Level 1)
- Cooldown: 24 seconds
First Row Tripods
Quick Prep
- Effect: Reduces skill cooldown by 4-8 seconds.
- Recommendation: This will allow you to use the skill more often, letting you gets more uses and more damage out of it over the course of an encounter.
Agile Movement
- Effect: Increases Attack Speed by 10-18%
- Recommendation: With this being a really lengthy Holding Skill, this tripod does wonders for making it at least usable.
Gravity Enhancement
- Effect: Reduces MP Cost by 50-67%.
- Recommendation: Despite being a higher mana cost skill, this tripod just isn’t worth using over the other options in this row.
Second Row Tripods
Rust-Proof Hammer
- Effect: Increases the damage of the first and second swings by 100-200%.
- Recommendation: While this seems like a huge boost, it’s really not. The first two swings are the weakest and this damage increase doesn’t carry over to the swings that follow after. If it did, it may be worth considering.
Weak Point Detection
- Effect: Increases damage to Push-Immune targets by 40-70%.
- Recommendation: This is a really solid damage increase on the targets that actually need to take heavier hits. since this applies across each swing, it’s pretty effective overall.
Red Hammer
- Effect: Per attack, outgoing damage increases by 10-18%. Stacks up to a maximum of 50-90%.
- Recommendation: This can also be a strong damage option. While it doesn’t boost the first few hits too much, it gives a higher boost to the stronger hits which can make it quite effective.
Third Row Tripods
Fatal Hammer
- Effect: The direction can no longer be changed. Enables you to quickly swing 5 times at frontal foes. Then forcefully strike downward. Last attack Damage is increased by 250-407.5%.
- Recommendation: This is a massive damage boost for the final hit, while simultaneously speeding up the first hits. This is the go-to option for increasing the damage of the skill in this row. This does come with the downsides that if you miss, you can miss the entire skill; as well as all of the damage being in that final hit.
Superior Hit
- Effect: Broadly swing your hammer at 360 degrees, attacking 5 times. AoE Radius +20%. Damage is increased by 40-70%.
- Recommendation: This can be a semi-decent mobbing option if desired but doesn’t really do nearly as much for overall damage.
Perfect Swing
 Perfect Swing
“This skill can be charged for 2s. When used midway, you will advance 3 meters forward and charge at foes to inflict Low Damage, followed by a powerful smash inflicting High Damage. Overcharge the skill to move 4 meters forward and deliver an even fiercer blow to inflict Very High Damage.”
Despite being one of the Destroyer’s slowest skills, this skill is easily the biggest source of damage that they have. This makes it worth using in every build, just for the insane amount of damage it offers.
- Skill Type: Charge
- Attack Type: Frontal Attack, Back Attack
- Stagger: High (Level 5)
- Super Armor: Paralysis Immunity (level 1)
- Weak Point: Level 2
- Cooldown: 30 seconds
First Row Tripods
Weak Point Detection
- Effect: Damage to Push-Immune foes is increased by 20-45%.
- Recommendation: This is a solid option for boosting the already high damage when bossing. It leaves you more open to being interrupted, but can be a strong option in spite of that.
Finishing Strike
- Effect: Damage is increased by 20-45% against foes with 50% or less health.
- Recommendation: This is essentially Weak Point Detection with a more strict condition, which makes it much worse. If you want damage, use Weak Point Detection instead.
Tenacity
- Effect: Super Armor is increased to Push-Immunity (Level 2).
- Recommendation: This makes the skill much safer to use, making it much harder to be interrupted. It comes down to the encounter whether you should use this or Weak Point Detection.
Second Row Tripods
Concussion
- Effect: Increases Stagger to Highest (Level 6). Increases damage by 25-50%.
- Recommendation: This is a really solid condition-less damage boost that comes with extra stagger power. While this skill isn;t a great option for dealing stagger this can be a decent boost overall.
Absolute Strength
- Effect: When the skill is used with 3 Gravity Cores, the damage is increased by 30-60%.
- Recommendation: While this is a conditional damage boost, this is a condition you’ll want to be meeting for nearly every Gravity Release skill use already. This makes it a very reliable and easy damage boost, which offer a bit more power over Concussion.
Unnecessary Time
- Effect: Charge Time is reduced by 1 second. Attack Speed after charging is increased by 20%.
- Recommendation: While this doesn’t offer any damage, it does cut down the charge time of your longest charge skill. This can make the skill much quicker and easier to use, but at the cost of the damage you’d get from other tripods. Though, there’s skill a much better option for reducing charge time that does come with damage.
Third Row Tripods
Hour of Slaughter
- Effect: Changes to Normal mode. Immediately swings the hammer, inflicting the same Damage as Overcharge. Generates a gravitational wave that inflicts 60.0% Base Damage.
- Recommendation: This adds Adds additional AoE while removing the charge aspect completely. This can be a decent option if you don’t run the Super Charge engraving, but will not offer quite as much damage. It’s more common for Gravity Training Destroyers to run this to remove the charge aspect.
Intemperance
- Effect: Charge duration is reduced by 50%. Charge Level is increased by 1. Overcharge Damage is increased by 100-145%.
- Recommendation: This is easily the best Tripod to use for single target damage. It’s favored by the Hammer of Rage Destroyer who will almost always run Super Charge.
Power Shoulder
 Power Shoulder
“Crouch and charge 5 meters forward with your hammer held in front of you, attacking 4 times to inflict Low total Damage. Use as a combo to raise the hammer high and inflict Medium Damage, launching foes into the air.”
This skill is primarily used as an additional movement option. It doesn’t offer much beyond the mobility and Gravity Core charging. While it has access to some damage, it doesn’t really perform well in that area.
- Skill Type: Combo
- Attack Type: Frontal Attack
- Stagger: Mid-High (Level 4)
- Super Armor: Paralysis Immunity (Level 1)
- Cooldown: 12 seconds
First Row Tripods
Toughened Body
- Effect: Reduces incoming damage during skill use by 30-40.8%.
- Recommendation: This can be a decent option, mitigating any incoming damage while charging forward.
Victory Contract
- Effect: Upward Attack has its damage increased by 20-52%
- Recommendation: While this only affects the second part of the attack, it’s still a good damage option as the beginning of the skill doesn’t deal much damage and doesn’t reduces your attack speed like Fatal Strength does.
Fatal Strength
- Effect: Reduces Attack Speed by 15%. Damage is increased by 30-60%.
- Recommendation: Since the main use of this skill is for mobility, reducing your attack speed is going to be a very lackluster option. It will make the skill slowly, and only provide a minimal damage increase over Victory Contract.
Second Row Tripods
Objective Complete
- Effect: Increases Charge Distance by 3-5 Meters.
- Recommendation: Since this skill is used for mobility first and foremost, this is the go-to option for this row of tripods when using this skill.
Anti-Gravity
- Effect: During skill use, create a shield equal to 15-25% max health.
- Recommendation: This can be a nice way to boost the damage of this skill when running the Barricade Engraving. Outside of that, it’s nice protection during your mobility skill, if you don’t mind it being a shorter charge.
Wide Hit
- Effect: Dash Attack Radius is increased by 25%.
- Recommendation: This is not worth the skill point investment. There’s no reason to add AoE to the weak charge portion over increasing mobility or adding protection.
Third Row Tripods
Hammer Down
- Effect: Changes the upward attack to a downward slam. Skill Damage is increased by 50-88%.
- Recommendation: This can be a decent damage increase if you had spare points and wanted to get additional damage out of the skill. Though you’ll typically never max this skill.
Express Fury
- Effect: Changes the upward attack to a spinning 360-degree swing. No longer knocks foe into the air. Stuns the foe for 4.0s. Stun Duration is halved in PvP.
- Recommendation: This doesn’t add damage and is at best a niche PvP Tripod. The Stun isn’t going to affect any bosses, and at best will provide crowd control to weaker enemies you could defeat much easier with other skills.
Power Strike
 Power Strike
“Raise your hammer above your head and smash the ground 3 times, inflicting Low Damage one time, then Medium damage twice.”
Power Strike is one of the Destroyer’s Counter options. Much like their other Counter option (Dreadnaught) it can apply Trace of Pain as well as has a similar cooldown, but boasts much high damage output as well as applying more Stagger over multiple hits. The only downside to the skill is that it lacks Super Armor.
- Skill Type: Normal
- Attack Type: Frontal Attack
- Counter: YES
- Stagger: Mid-High
- Cooldown:
First Row Tripods
Reckless Attack
- Effect: During skill use, Damage taken is increased 20.0%. Damage dealt is increased by 30-60%.
- Recommendation: This is a high-risk, high-reward tripod. While it provides a sizable damage increase for a first-row tripod, if you get hit you’ll take additional damage on top of being knocked out of the skill.
Irresistible Force
- Effect: Against Push-Immune enemies, ignore 30-63% of enemy Defense.
- Recommendation: This can also be a sizeable damage increase, and comes with much less risk
Agile Movement
- Effect: Increases Attack Speed by 10-18%.
- Recommendation: This is really helpful, as even though it’s already a faster Counter, this helps you get the damage out of it much quicker. This can allow you to immediately follow with a stronger or slow attack while the enemy is still in their Countered state.
Second Row Tripods
Armor Destruction
- Effect: Reduces enemy armor by 12% for 10 seconds on hit.
- Recommendation: There’s no reason to not take this Tripod in this row, unless you really wanted to make this more of a damage-heavy skill. Though, since you’ll only ever want one of your counter skills, this wouldn’t be a great idea.
Growing Hammer
- Effect: Increases damage by 15-24% for each successful hit, up to a max of 90-144%.
- Recommendation: This Tripod requires the use of Endless Assault to fully maximize the damage potential. Without it, it still provides decent damage increase, but not enough to really consider taking over Trace of Pain’s debuff.
Wide Hit
- Effect: AoE Radius is increased by 20%.
- Recommendation: This increases the AoE of the skill, but since the AoE of the skill is quite small to start with, the effect of this tripod will be minimal.
Third Row Tripods
Endless Assault
- Effect: Increases hit count by 3. increases damage by 25-52.5%.
- Recommendation: This extends the skill, allowing it to do more damage, but also adding to the high-risk, high-reward element of the skill. The hits following the initial hit are faster, so it doesn’t extend the animation time by too much either.
Elaborate Hit
- Effect: Final Attack Damage is increased by 80-153% and knocks down foes.
- Recommendation: While this only affects the third hit of the skill, it is a pretty sizable damage increase. The knockdown doesn’t affect any priority enemies but can be nice when using the skill to clear weaker mobs as well, if the skill doesn’t clear them immediately.
Running Crash
 Running Crash
“Hold to sprint forward and charge at foes, inflicting High Damage over 7 hits. The gravitational energy explodes when you release the skill key or max out the Holding Meter, launching foes into the air for Low Damage.”
Running Crash is generally only used in situations where you want to utilize Target Focus. While it deals okay damage and provides okay mobility when upgraded, there are far better options for both.
- Skill Type: Holding
- Attack Type:
- Cooldown: 18 seconds
First Row Tripods
Agile Movement
- Effect: Increases Attack Speed by 10-18%.
- Recommendation: As a mobility option, this can be a very useful Tripod as Attack Speed will increase the speed at which the attack completes, increasing mobility slightly.
Gravity Enhancement
- Effect: Reduces mana cost by 50-67%.
- Recommendation: This isn’t a skill you will be using often enough to really justify taking this tripod. While it does makes it a cheaper option for mobility, it’s not much less than other skills.
Toughened Body
- Effect: During skill use, damage taken is reduced by 30-40.8%.
- Recommendation: This makes the skill a little safer, but not really worth considering over Agile Movement.
Second Row Tripods
Anti-Gravity
- Effect: During skill use, gain a shield equal to 15-25% Max Health.
- Recommendation: Given this is competing with the tripod slot shared by the tripod that you’re using this skill for, its going to fall short. A shield is nice, but in the cases where you take this skill, it’d exclusively be for Target Focus.
Elaborate Plan
- Effect: Energy explosion no longer knocks enemies up on hit and stuns for 3-4 seconds instead. Stun duration halved in PvP.
- Recommendation: The stun can be a niche option for PvP but has no practical use in PvE.
Target Focus
- Effect: Energy explosion applies Target Focus Debuff, making enemies hit take 20% increased Stagger from all sources for 6 seconds.
- Recommendation: If you’re using Running Crash and not utilizing this synergy skill, you should be using a different skill. There’s no reason to ever not take this tripod in PvE when using this skill.
Third Row Tripods
Rash Movement
- Effect: Changes to Point mode. Charges forward up to 8 meters to the target location. Can no longer attack while charging. Instead, delivers a powerful crash at the arrival point, knocking down the foe. While charging, all collisions with foes other than Guardians are ignored.
- Recommendation: This makes the skill a much faster movement option, but require heavy skill point investment. This is the main reason this skill isn’t used for mobility and really only as means of applying Target Focus.
Enhanced Advance
- Effect: Increases the AoE Radius of the gravity explosion by 50%, and increases its damage by 100-200%.
- Recommendation: This is a nice bit of extra mobbing for weak enemies, but the explosion damage is still quite low overall making this a less than ideal choice.
Seismic Hammer
 Seismic Hammer
“Hold your hammer upside down, then jump and smash the ground, inflicting Low Damage. The crash forms a cone-shaped wall that stretches 11 meters, inflicting Very High Damage.”
Similar to Perfect Swing this is another of Destroyer’s high damage Gravity Release Skills that is used often for its heavy damage. This one can be a little more tricky to use on smaller targets as the main damage from the skill comes from the wall. With a bit of practice though, it becomes a very reliable damage option.
- Skill Type: Normal
- Stagger: High (Level 5)
- Super Armor: Paralysis Immunity (Level 1)
- Weak Point: Level 2
- Cooldown: 30 seconds
First Row Tripods
Quick Prep
- Effect: Cooldown is reduced by 6-11 seconds.
- Recommendation: While this doesn’t provide any direct damage, being able to use more often will allow you to deal more damage with it over the course of an encounter. Since the only tripod this would be competing with is Tenacity, this can often be more valuable for most Destroyers.
Tenacity
- Effect: Increases Super Armor to Push Immunity (Level 2).
- Recommendation: This can allow you to get the skill off more reliably, but in most cases, you’re not going to use this skill unless you’re certain it will land. This typically means that while it can be useful, encounter knowledge will make this much less necessary.
Toughened Body
- Effect: Reduces damage taken during skill use by 30-40.8%.
- Recommendation: While this can have some niche uses, in PvE it’s not going to be able to compete with either Quick Prep or Tenacity for the tripod slot.
Second Row Tripods
Law of the Jungle
- Effect: Increases damage to Challenge and lower monsters by 100-145%.
- Recommendation: This is a great tripod for Chaos Dungeons, as most monsters there will be affected by this tripod and allow the skill to easily clear large groups.
Concussion
- Effect: Increases Stagger to Highest (Level 6). Increases damage by 30-60%.
- Recommendation: This skill doesn’t really need the extra Stagger and also has a much better damage option in High Gravity. Overall this makes this a less effective choice of tripod.
Absolute Strength
- Effect: When you have 3 Gravity Cores, skill damage is increased by 40-70%
- Recommendation: Since you’ll be aiming to always have 3 Gravity Cores when using a Gravity Release Skill, this becomes a free damage tripod.
Third Row Tripods
Starving Strength
- Effect: Creates a circular wall 7 meters around you. Wall damage is increased by 60-95.2%.
- Recommendation: This is the go-to tripod for this skill’s third row. Not only does it bring the wall closer to you, but it also makes it so it hits everything around you along it making it easier to position it. It also adds a significant amount of damage, nearly double the damage of the wall.
Enhanced Weak Point Detection
- Effect: Increases Wall distance by 2 meters. Wall is thicker and wider, dealing 40-70.8% increased damage.
- Recommendation: This tripod doesn’t offer nearly as much damage as Starving Strength, and makes it so you have to position farther way to makes the wall properly connect for the high damage. It does however make the wall easier to hit by making it a wider cone of attack, but not much more consistent.
Destroyer Awakening Skills
Like all other classes, the Destroyer has two Awakening Skills that both deal heavy damage but differ in speed or utility.
Big Bang
 Big Bang
“Gather gravitational energy then explode it, inflicting Extremely High Damage to foes in a 3.2-meter radius and knocking them away. All incoming Damage is reduced by 50% and gain immunity against debuffs, Pushes, and Move Speed reductions. Ignore collisions with Normal foes while gathering energy. You can move while gathering gravitational energy. Damage can be increased up to triple, and the explosion radius will increase by up to 8 meters, depending on how long you gathered energy.”
This awakening deals a ton of damage in a single hit, but as a Holding Skill can be very slow to execute. It is however very reliable due to being an AoE centered on you, that you can reposition by moving. Due to its high damage, it’s the preferred Awakening Skill for Hammer of Rage Destroyers as it can make use of their high Crit Rate.
- Skill Type: Holding
- Stagger: High (Level 5)
- Super Armor: All Immunity (Level 3)
- Weak Point: Level 2
- Cooldown: 5 minutes
Terra Break
 Terra Break
“Hammer the ground in front of you, inflicting Incredibly High Damage as gravitational energy drops from the sky, inflicting Very High Damage. The ground cracks, casting a gravitational field. All foes within the field are knocked down. Swing your hammer upward to create anti-gravity and inflict Incredibly High Damage twice. All foes within range are shot into the air. Concentrate your energy and jump, hammering foes flat to the ground with Extremely High Damage. This skill restores your Gravity Meter 100%.”
This Awakening doesn’t deal nearly as much damage and locks you in place for its long animation, but comes with two distinct advantages. The first is that can be easier to use, as it doesn’t have to charge up for maximum damage. The second is that it refills your Gravity Meter, allowing you to go into Hypergravity immediately after for even more damage. This second benefit makes it the go-to Awakening for Destroyers using the Gravity Training Engraving.
- Skill Type: Normal
- Stagger: High (Level 5)
- Super Armor: All Immunity (Level 3)
- Cooldown: 5 minutes
Destroyer Builds
This is intended to be a Beginner-friendly guide to the Glaivier Class. You have now reached the end of the beginner’s portion. If you want to continue further and learn how to master this class, check out the detailed Build Guides we have available. More variations will be added as time and new updates happen.
- Lost Ark Destroyer Hammer of Rage Build Guide
- More Builds will appear here soon. Please check back later.
Check out the Lost Ark Guides available on VULKK.com and stay up-to-date with the latest news about the game.