
This build for the Necromancer in Diablo 4 focuses on the early game progression of the class, all the way through the campaign’s completion. We’ll guide you through the leveling process, including Skill Order and notable Aspect from dungeons.
This guide is updated for Diablo IV Season 6 and Patch 2.0.
Check our Diablo IV Builds List of uniquely crafted builds for each class.
Table of contents
Diablo 4’s Necromancer is without a doubt a fan favorite. We’re going to cover a Blood-focused build that will be able to easily carry you through to the endgame, starting from Level 1.
This Necromancer leveling build will assume you’re starting out fresh from Level 1. We will however include the extra Skill Points earned through Renown in both the base game and Vessel of Hatred Expansion
To learn more about the available Classes in Diablo 4, read our beginner guide. It will give you more than enough information and show you the advantages and disadvantages of each one.
Build Overview
This Necromancer leveling build focuses on the Blood Surge Skill, and is working around utilizing the early game strength of the Overpower mechanic. With plenty of access to various forms of healing, Fortify, and guaranteed Overpower triggers, we’ll be able to get plenty of high AoE damage.
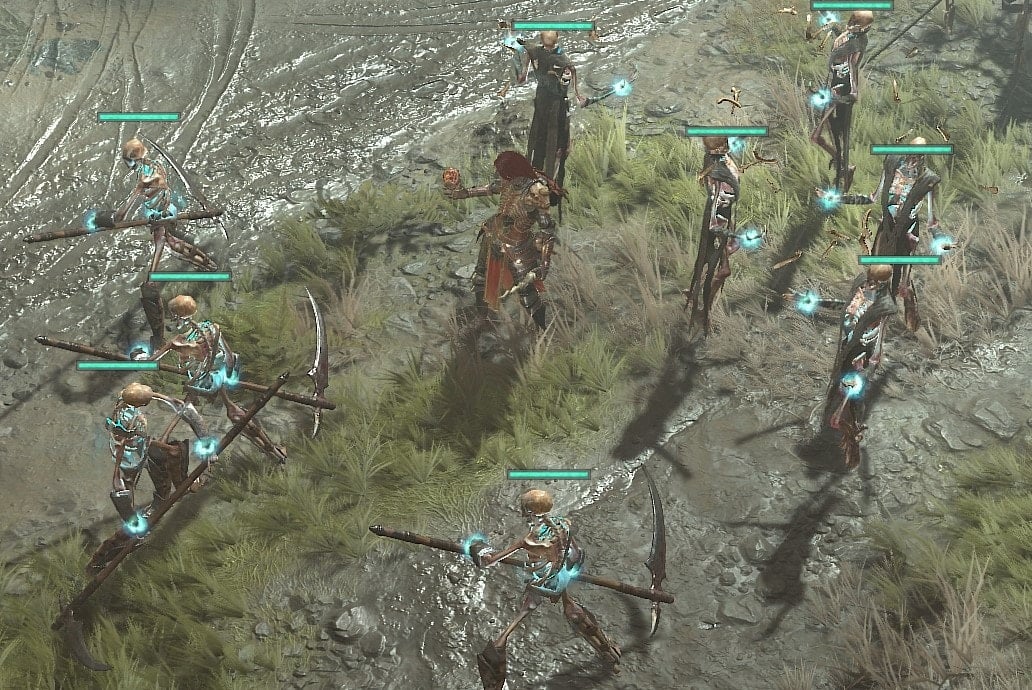
Though they’ll be on the more supportive side of things, we’re also going to leverage our minions as well.
There are plenty of items and Aspects that we can use to improve our build through them well, helping the build to scale into the end game smoothly.
In addition to our Minions, we’ll also be making use of strong defensive skills like Blood Mist as well as Barriers and Fortify for our defensive layers.
Most blood Skills also have some form of healing components as well, which will help with sustaining and generally staying alive
Skills and Passives Breakdown
In this section, we’ll be talking about each skill we use. This is the whys and hows of how the build works, and then we’ll cover the general leveling order.
Important Skills
 Raise Skeletons
 Raise Skeletons
We’ll be making use of our Skeleton friends to help us in various ways beyond just damage. The most notable of these is restoring Essence and generating Corpses (as well as Fortify thanks to Necrotic Carapace).
Reap
 Reap
ReapReap might feel like weird choice, but we’re using it for the utility of easier corpse generation as well as being an AoE skill. Since it generates Essence per enemy hit, it can allow us to very quickly generate essence while fighting groups of enemies. To that end, we’ll be upgrading it to Acolyte’s Reap, for the guaranteed Corpse every 5 seconds.
We do highly recommend swapping this out for Decompose or Hemmorage for difficult boss situations, as they will perform better and give us the Essence generation we need.

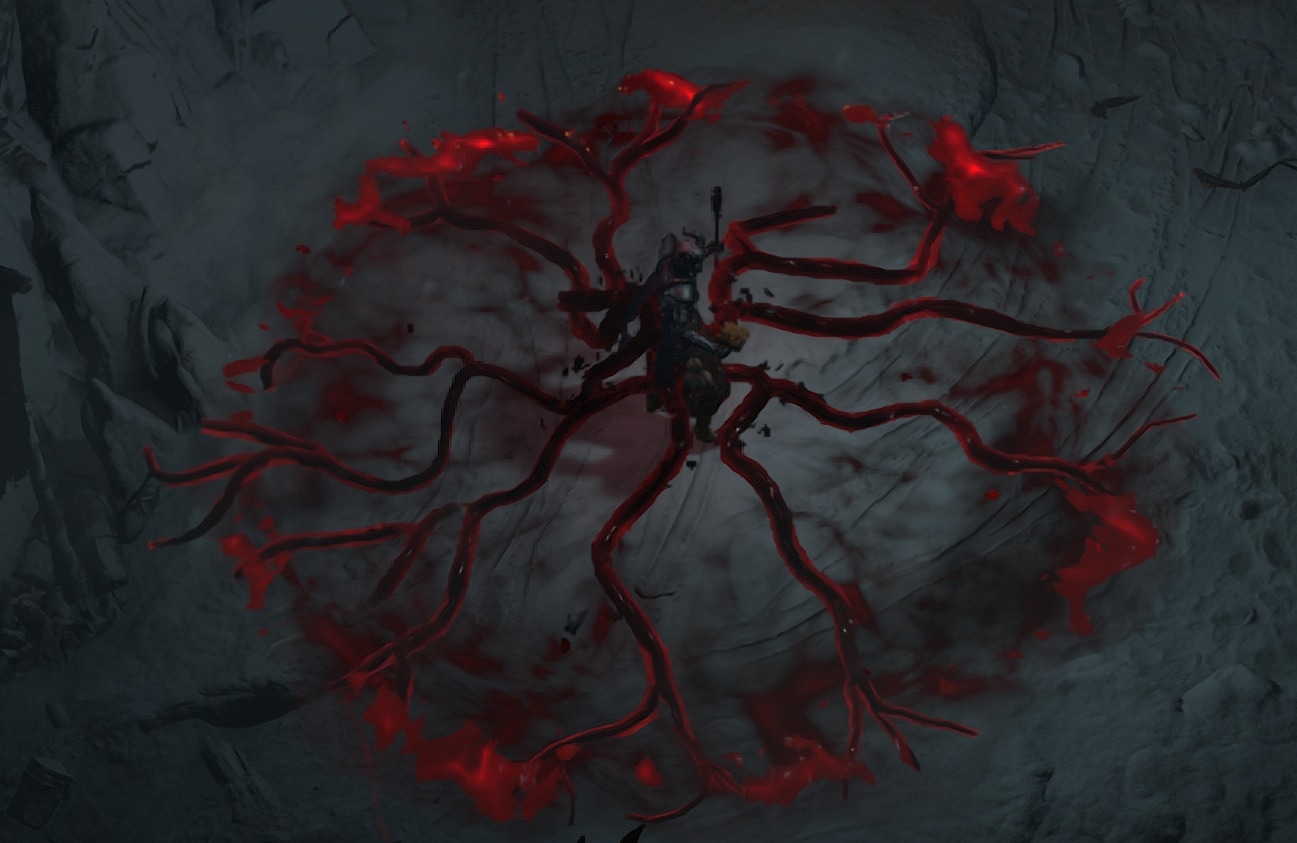
Blood Surge
This is our primary source of damage. It’s a bit shorter in range but deals fantastic damage without the need for Aspects to truly do well. Once upgrade to Paranormal Blood Surge, it’ll be one of our guaranteed sources of Overpower.
With Overpower being applied to all hits of a single cast, we’ll be dealing huge damage. The more enemies we hit, the more often we’ll be able to trigger Overpower, so long as we stay Healthy. This will make it less frequent in bossing situations, but we do have ways to fix that later.
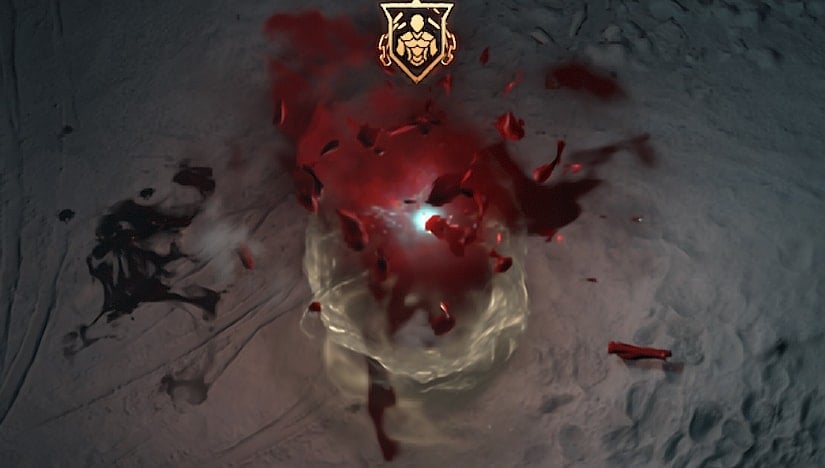
Blood Mist
Blood Mist is the premiere defensive skill for Necromancer. Not only are we immune to damage for up to 3 seonds at a time while it’s active, it can also rapidly deal damage and very minorly heal us.
With Blood Surge frequently Overpowering enemies, we’ll be reducing its cooldown quite a bit, which allows us to use it often. When we use it, it’ll also help us to quickly build up Fortify, further increasing the value of our Overpower.
Decrepify
Decrepify is another great tool that the Necromancer has at their disposal. While we won’t need to cast it for very long manually, it provides a good amount of protection by slowing enemies and reducing their damage. It even helps us lower our Cooldown when we upgrade it to Abhorrent Decrepify.
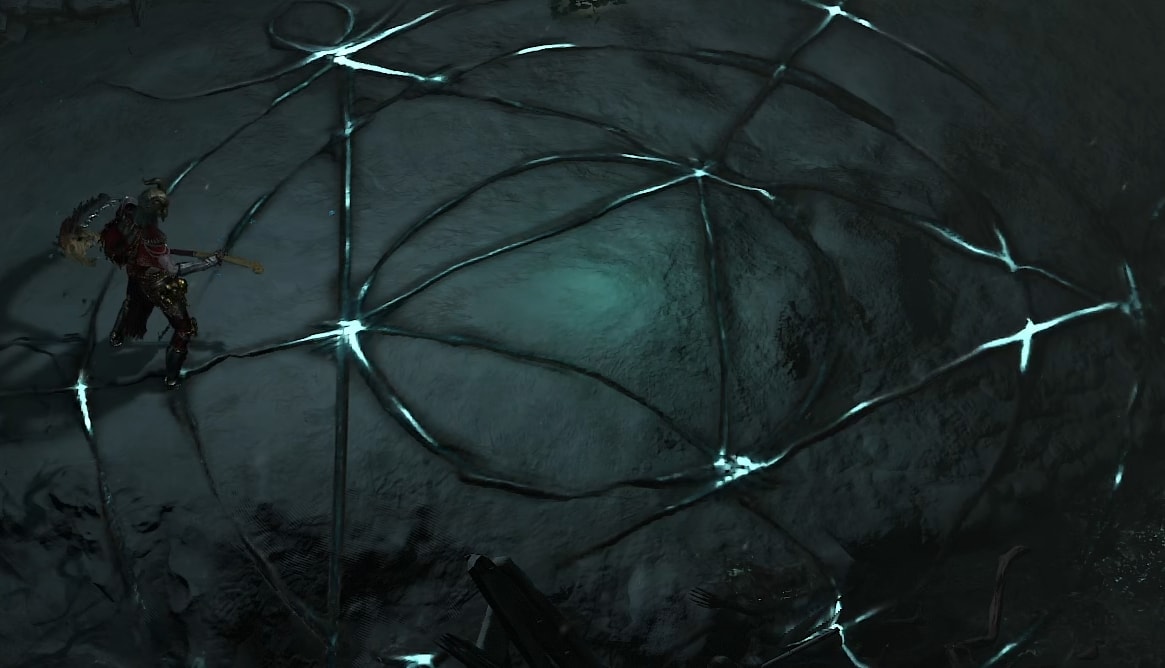
Corpse Tendrils
Corpse Tendrils offers us huge utility, Any time we have a corpse, we’ll be able to group enemies up to get maximum value out of Blood Surge. Not only this the Upgrades also apply Slow, followed by Stun and Vulnerable for a brief time, which can further increase our damage.
This is a great catch-all skill and gives us access to multiple avenues to scale our damage through stats alone. Its short cooldown also enables us to use it often enough with a lower investment that doesn’t take away from other skills.

 Soulrift
Soulrift gives us a lot more offensive power and defensive power compared to Bone Storm right out of the gate. It offers us consistent Barrier, multiple damage boosts, and Essence Generation all without any Aspect slots.
It’ll be tough to fit onto the Hotbar until we get the Aspect of Cursed Aura, allowing us to drop our Curse from our Hotbar.
Important Passives
Here we’re only going to talk about the main passives we want as well as our Key passive. There are unfortunately a couple we will need to take to get access to these though.
 Key Passive – Rathma’s Vigor
Why we take this should be straightforward. Having a guaranteed Overpower every 12 seconds, so long as we stay healthy, is pretty great for the build. This also can reduce it’s cooldown with Blood Orbs, which can spawn from Transfusion.
Imperfectly Balanced
We’ll need to take a point in Unliving Energy to reach Imperfectly Balanced, but this is a decent damage increase overall. Since it provides a Multiplicative bonus, it’s exceptionally strong so long as we can mitigate the increase.
It does increase the cost of Blood Surge, but since Blood Surge costs 30 at base cost, the cost only goes up to around 33. This still keeps us within the initial breakpoint of being able to cast it three times from full Essence without other modifiers.
Death’s Embrace
Death’s Embrace pulls double duty in this build, giving us both damage and defenses, at least from melee enemies. Increasing our outgoing damage, and decreasing our incoming damage from Close enemies. Since This is within the range you’ll be playing Blood Surge, this works out well for us.
 Titan’s Fall
Titan’s Fall is a strong damage bonus where we need it most, against bosses. With Fortify being easy to maintain, we’ll have this up most times.
Amplify Damage
Amplify Damage is a nice Multiplicative Bonus toward Cursed enemies we can get fairly early on. Once we get the Aspect of Cursed Aura, this becomes an entirely passive damage increase.
Coalesced Blood
Coalesced Blood is another Multiplicative Damage bonus we can get, which synergies extremely well with our key passive, Rathma’s Vigor. Staying Healthy will be by far one of the easiest conditions for us to fill, especially for how much damage this can provide.
Transfusion
Transfusion grants us a chance to spawn Blood Orbs when hit Blood Skills. While this has a short internal cooldown, this allows us to use Rathma’s Vigor more often.
Tides of Blood
Tides of Blood gives us even more damage while Healthy, this time more specifically for Overpower. Since we want to scale through Overpower Damage, this is a great choice. Its effect is also doubled while Healthy, making it even stronger for the build.
Drain Vitality
Drain Vitality gives us another avenue of generating Fortify. Though it’s a very low chance, AoE skills like Blood Surge can trigger it more consistently.
Leveling Order: Where to Assign Your Skill Points
We’ll start our leveling by taking Hemorrhage and Enhanced Hemorrhage. This gets us access to our Core Skill where we’ll pick up Blood Surge and upgrade it to Paranormal Blood Surge. We’ll grab our first point in Hewed Flesh, as this connected to Imperfectly Balanced which we’ll get later.
This gets us access to our Corpse and Macabre Skills, where we’ll pick up Blood Mist before upgrading it to Enhanced Blood Mist. Then we’ll max Titan’s Fall, which gets us some early damage against Elites and access to our Curses.
We’ll pick up Abhorrent Decrepify in our Curses, which allows us to shorten our cooldowns. Then we’ll get max Death’s Embrace and Amplify Damage for their damage bonuses. Then we’ll max Death’s Approach for the added mobility.
Now we’ll grab our Blood-related passives. We’ll want to max Coalesed Blood, Tides of Blood, and Drain Vitality. We’ll also pick up a single point in Corpse Tendrils This gives us just enough points spent to get Rathma’s Vigor.
With Rathma’s Vigor, we’re going to start pushing damage, starting by maxing Blood Surge. After that, we’ll max Imperfectly Balanced and Inspiring Leader. By this point we should also have Cursed Aura, and can pick up Supreme Soul Rift for a huge boost in power.
Now we’ll get some more utility and defenses. We’ll start by maxing Hewed Flesh, Necrotic Carapace, Necrotic Fortitude, Transfusion, and Gruesome Mending. This allows us to generate more corpses ourselves, and give us additional means of restoring health, Barrier, and Fortify.
The rest of our passives will max Soulrift to lower its cooldown. We’ll still have some points left over afterward that we can allocate to Hellbent Commander or Spiked Armor.
Necromancer Leveling Progress Summary
This section sums up the Leveling Process in an easier-to-reference format.
| Levels | Icon | Skill | Purpose |
|---|---|---|---|
| 2-3 |  | Hemorrhage | Provides a quick ranged attack that can generate Blood Orbs |
| 4-6 |  | Paranormal Blood Surge | Upgrade to Paranormal for Guanteed Overpower Chance. |
| 7 |  | Hewed Flesh | Early corpse generation. |
| 8-9 |  | Blood Mist | Upgrade to Enhanced Blood Mist |
| 10-12 | TItan’s Fall | More damage against Elites and Bosses. | |
| 13-15 |  | Abhorrent Decrepify | Curse that provides a lot of safety and utility to the build. |
| 16-18 |  | Death’s Embrace | Increases Damage to and Damage Reduction from Close Enemies. |
| 19-21 |  | Amplify Damage | More damage to Cursed enemies. |
| 22-24 |  | Death’s Approach | Movement Speed to help us position easier. |
| 25-27 |  | Coalesced Blood | Synergies extremely well with our key passive, Rathma’s Vigor |
| 28-30 |  | Tides of Blood | More Overpower Damage |
| 31-33 |  | Drain Vitality | Fortify Chance |
| 34 |  | Corpse Tendrils | Utility for pulling mobs into range, and buffs from its Aspect |
| 35 |  | Rathma’s Vigor | A guaranteed Overpower every 12 seconds, so long as we stay healthy. |
| 36-40 | | Blood Surge | Fully Leveling main skill for more damage. |
| 41-43 |  | Imperfectly Balanced | Good Damage boost, now that we can more easily sustain our Essence. |
| 44-46 |  | Inspiring Leader | Critical Strike Chance for us, and even more for our minions. |
| 47-49 | Supreme Soulrift | Damage Boost, Barrier, and Essence Generation | |
| 50-52 |  | Transfusion | Allows us a chance to create Blood Orbs. |
| 53-54 |  | Necrotic Carapace | Fortifies us when we or our minions create corpses. |
| 54-55 | | Hewed Flesh | More Corpse Generation to benefit from Necrotic Carapace |
| 56-58 | Necrotic Fortitude | Chance to generate barrier without Soulrift. | |
| 59-R2 |  | Gruesome Mending | Boosts all of our healing, including the healing from Blood Surge. |
| R3-R6 | Soulrift | Lowers cooldown | |
| R7-R9 |  | Hellbent Commander | Stronger minions as long as we have Aspect of Occult Dominion. |
| R10-R11 |  | Spiked Armor | More Armor. |
Gearing and Stats
In this section, we’ll cover all the things you’d want to keep an eye out for to enhance the final build. This includes our Recommended Weapons, Aspects, Book of the Dead, and of course Unique Items.
Recommended Weapons
Being focused on Overpower, this build runs a 2H Mace. Maces come with inherent Overpower Damage and are quite strong. This also allows us to give a huge boost to any Aspect of our choosing.
While a 1H Mace would have its advantages, like having an extra Defensive or Offensive aspect. For a starting build though, 2H Mace gives more power and is easier to work with.
Ideal Stats
The table below details the ideal stats for our gear, be on the lookout for gear that matches at least two of the three rolls below. We’ve also included Aspects here for easier viewing, refer to the Aspects section for additional details on why these are selected.
Affixes that are CAPITALIZED are the Ideal Affixes to get as a Greater Affix. These are not required but are a good way to push the build further. Affixes in Bold are the ideal Affixes to boost with Masterworking.
In cases where multiple Affixes are listed, the secondary option is for when another stat reaches its cap. This is most common with Armor, where you’d take Maximum Life after reaching the Armor cap.
Scroll the top row horizontally
to see more gear tabs.
Affix 1
Intelligence
Affix 2
OVERPOWER DAMAGE
Affix 3
Maximum Life
Tempered Affix 1
Blood Attack Speed
Necromancer – Blood Finesse (Offensive
Tempered Affix 2
Chance for Blood Surge to Deal Double Damge
Necromancer – Blood Augments (Weapons)
Legendary Aspect
Aspect of Great Feast
Affix 1
MAXIMUM LIFE
Affix 2
Intelligence
Affix 3
Armor OR Cooldown Reduction
Tempered Affix 1
Total Armor OR Maximum Life
Shared – Worldly Endurance (Defensive)
Tempered Affix 2
Blood Surge Size
Necromancer – Blood Innovation (Utility)
OR
Chance to Freeze
Shared – Worldly Fortune (Utility)
Legendary Aspect
Aspect of Disobedience
Affix 1
Intelligence
Affix 2
MAXIMUM LIFE
Affix 3
Essence per Second
Tempered Affix 1
Total Armor OR Maximum Life
Shared – Worldly Endurance (Defensive)
Tempered Affix 2
Blood Surge Size
Necromancer – Blood Innovation (Utility)
OR
Chance to Freeze
Shared – Worldly Fortune (Utility)
Legendary Aspect
Aspect of Hardened Bones
Unique Item Option
Blood Moon Breeches
Affix 1
MAXIMUM LIFE
Affix 2
Armor or Resistance
Affix 3
Intelligence
Tempered Affix 1
Total Armor or Maximum Life
Shared – Worldly Endurance (Defensive)
Tempered Affix 2
Corpse Tendril Size
Necromancer – Profane Innovation (Utility)
OR
Chance to Freeze
Shared – Worldly Fortune (Utility)
Legendary Aspect
Details
Recommended Unique
Cruor’s Embrace
Affix 1
RANKS TO BLOOD SURGE
Affix 2
Overpower Damage
Affix 3
Critical Strike Chance
Tempered Affix 1
Blood Overpower Damage
Necromancer – Blood Finesse (Offensive)
Tempered Affix 2
Soulrift Duration
Necromancer – Decay Innovation (Utility)
OR
Chance to Freeze
Shared – Worldly Fortune (Utility)
Legendary Aspect
Blood-bathed Aspect
Affix 1
MOVEMENT SPEED
Affix 2
Maximum Life
Affix 3
Armor OR Essence per Second
Tempered Affix 1
Movement Speed
Necromancer – Necromancer Motion (Mobility)
Tempered Affix 2
Soulrift Duration
Necromancer – Decay Innovation (Utility)
OR
Chance to Freeze
Shared – Worldly Fortune (Utility)
Legendary Aspect
Aspect of the Cursed Aura
Affix 1
Maximum Life
Affix 2
CRITICAL STRIKE CHANCE
Affix 3
Overpower Damage
Tempered Affix 1
Blood Attack Speed
Necromancer – Blood Finesse (Offensive)
Tempered Affix 2
Resource Cost Reduction or Resource Generation
Shared – Worldly Stability (Resource)
Legendary Aspect
Aspect of Rathma’s Chosen
Affix 1
Maximum Life
Affix 2
CRITICAL STRIKE CHANCE
Affix 3
Overpower Damage
Tempered Affix 1
Blood Attack Speed
Necromancer – Blood Finesse (Offensive)
Tempered Affix 2
Resource Cost Reduction or Resource Generation
Shared – Worldly Stability (Resource)
Legendary Aspect
Starlight Aspect
Unique Item Option
Deathspeaker’s Pendant
Affix 1
Ranks to Coalesced Blood
Affix 2
RANKS TO TIDES OF BLOOD
Affix 3
Critical Strike Chance
Tempered Affix 1
Blood Attack Speed
Necromancer – Blood Finesse (Offensive)
Tempered Affix 2
Total Armor OR Maximum Life
Shared – Worldly Endurance (Defensive)
Legendary Aspect
Blood Getter’s Aspect
Gems and Runewords
This build uses Rubies in our Weapons, Topaz in our Armor, and Skulls in Jewelry.
We opt for Rubies in our Weapons as the added Overpower Damage is the most effective damage bonus we can get.
We use Topaz in our Armor, as Intelligence doubles as both an offensive and defensive stat for us.
We go with Skulls in our Jewelry, as Armor can be hard to get Necromancer. Resistance Gems can also be used if we’re having trouble capping resistances. Ultimately, we’ll want to be capped on both Armor and Resistances.
With Vessel of Hatred, we can also consider Runewords to supplement the build. For this build, we recommend Tam-Ohm and Cir-Zec.
Tam-Ohm will cast Barbarian’s Warcry, giving us a nice damage boost every so often. Due to this Build’s high Attack Speed, we’ll have it up frequently for harder encounters.
Cir-Zec will reduce our Ultimate Cooldown every 3rd cast of Blood Surge. This is a great way to maintain the benefits of Soulrift being active.
Book of the Dead
The Book of the Dead is the Necromancer’s Class Mechanic, which lets you adjust minions to fit your build. You don’t get everything right away, which is why we’re covering it briefly here.
At Level 5 we unlock the Book of the Dead, allowing us to get various bonuses from our minions. We’ll still only have our Skeleton Skirmishers at this point, but we’ll still be able to upgrade them slightly, by increasing their count by 2.
At Level 8 however, we get the Skeletal Defenders. These guys are much more durable overall so we’ll be swapping to them immediately. The Defenders, they’re here to soak up damage, so the first upgrade letting them ignore an attack every 8 seconds is ideal.
At level 15 we’ll have access to our Skeletal mages . For now, we’re stuck with Shadow Mages, use the upgrade that gives us additional damage. Level 15 also gives us our final melee option, Skeletal Reapers. We’ll use Reapers and their chance to create corpses going forward.
Finally, at Level 18 we’ll get the final summon we actually will use, Cold Mages. We’ll want to give them the upgrade that allows them to generate Essence when they land an attack. This is a huge boost to our Essence management overall and worth taking.
After we complete the quest at level 25 to unlock Golems, those will be good sacrifice bonuses for the build. Initially, we’ll only have the Bone Golem, which gives a bit of attack speed. We’ll want to Sacrifice the Iron Golem once it’s unlocked for the Critical Strike Damage bonus.
Aspects and Uniques
In this section, we’ll cover the Aspects you’ll want to grab from dungeons as you can, as well as ones to keep an out for to help the build along. We’ll also talk about the uniques that can help the build out in a few ways, though these will be fairly rare compared to the aspects.
Blood-bathed Aspect
Being one of the earliest available Aspects, the Blood-bathed Aspect allows Blood Surges Nova to echo a second time, dealing less damage. Not only will this deal extra damage, but will also speed up how often we can take advantage of Paranormal Blood Surge.
Aspect of Grasping Veins
If Corpse Tendrils weren’t already enough of a catch-all ability, the Aspect of Grasping Veins has us covered. This grants us an increased Critical Strike Chance for a short duration after using Corpse Tendrils. Additionally, it increases Critical Strike Damage to enemies damaged by Corpse Tendrils.
Aspect of Rathma’s Chosen
Aspect of Rathma’s Chosen synergies with much of our build, granting us attack speed when our Blood Skills Overpower. This alone gives us all the Attack Speed we need, though we could get some from other sources if desired.
Aspect of Hardened Bones
The Aspect of Hardened Bones is a great defensive aspect, granting a ton of Damage Reduction for us and out minions. Strong enough that we’ll even want to boost it by using it in our Amulet slot.
Aspect of Disobedience
Before getting any Uniques, the Undying Aspect works in combination with Blood Surge’s Drain to more regularly activate the Starlight Aspect. This makes it so we’ll trigger Starlight more often, especially against bosses.
Starlight Aspect
Starlight Aspect restores a good amount of our Essence for every 20% of Life we heal, or every 120% we Overheal. With Blood Surge and Blood Mist as well as Hemmorage all contributing to our healing, we’ll trigger this often enough to make it useful. Alongside some Essence per second Affixes, this will sustain our Essence incredibly well even into endgame.
Blood Getter’s Aspect
The Blood Getter’s Aspect will make it so when we cast Raise Skeleton and summon a Skeletal Priest, they’ll buff our damage as well. It’s not a massive buff, but our options for buffs are limited.
Aspect of Occult Dominion
Occult Dominion increases our Minion count, giving us more Corpse and Essence generation from our minions.
Aspect of the Cursed Aura
The Aspect of Cursed Aura is an aspect added in Season 5 that creates a small aura around you that applies Decrepify and Iron Maiden at the same time and will spread it between nearby enemies until it expires. While it has a small range and shorter duration outside the aura compared to manually cursing, it does free up a skill slot to run Bone Storm.
Unique Items
We’re only going to talk about the few that offer the strongest effects on the build. While others help, these are the ones you want to slot into your build if you get the chance. Uniques can drop at any World Tier, but some are restricted to World Tiers 3 and 4.
Cruor’s Embrace
Added in Season 4 and them massively buffed in Season 5, Cruor’s Embrace is THE unique to run with Blood Surge. On top of extra Ranks for Blood Surge, it also gives it the ability to destroy corpses for extra damage. If that wasn’t enough, it comes with Ranks of Tides of Blood as well as draining multiple times from Elites and Bosses for more consistent damage and more lucky hits procs.
Deathspeaker’s Pendant
Deathspeaker’s Pendant is a unique Amulet that fits our build well. Not only will it help with Blood Surge’s general Essence Sustain issue in a lot of cases, but also creates mini-novas from our minions when we Blood Surge. With its Season 5 buffs, it also gives additional Ranks to Blood Surge making it a very appealing option.
Blood Moon Breeches
Added in Season 2 and also buffed in Season 5 are the Blood Moon Breeches. These fit really well into the build, giving us a huge chunk of Overpower Damage against Cursed enemies. It will also allow our Minions to curse for us as well, but Cursed Aura will do that job better.
When you are done with the leveling and campaign, you can use the Endgame Blood Necromancer Build guide to learn how to play the class with a similar spec but tweaked to perfection for Diablo 4’s Endgame. We’ve also got a great Bone Necromancer Build if you want to try something different.
Check out more Diablo 4 Builds for the Necromancer from VULKK.com:


