
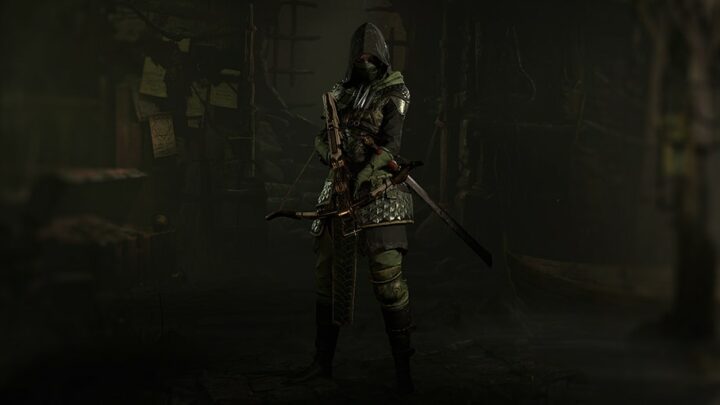
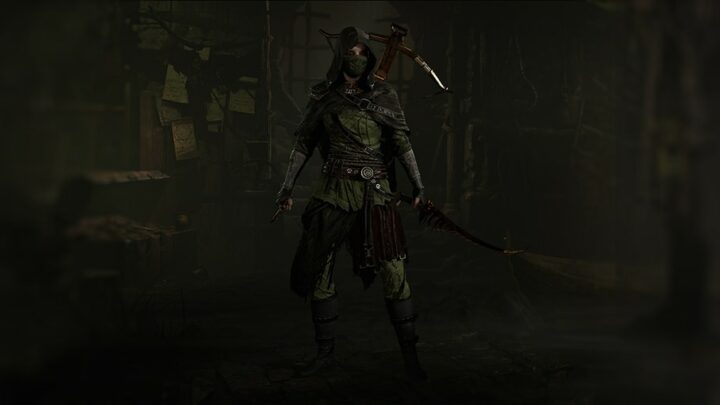
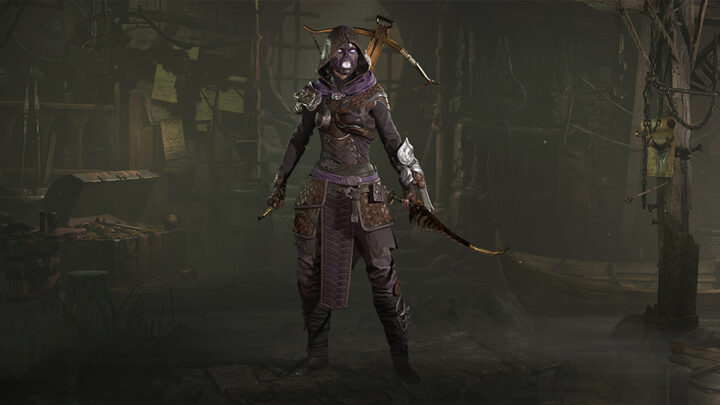
This leveling build for the Rogue in Diablo 4 focuses on the early game progression of the class, all the way through the campaign’s completion. We’ll guide you through the leveling process, including Skill Order and notable Aspect from dungeons.
The Rogue in Diablo 4 is one of those classes that like to be quick and flashy with their skills. We’re going to cover a melee-focused build that comes online early and remains effective from level 1 well into the end game.
This Rogue leveling build will assume you’re starting out fresh from Level 1. We will include the skill points from Renown in both the base game and Vessel of Hatred Expansion.
To learn more about the available Classes in Diablo 4, read our beginner guide. It will give you more than enough information on each one and show you the advantages and disadvantages of each one.
Build Overview
This Rogue leveling build focuses on the Flurry Skill, using a skill that is better for leveling as it’s not as reliant on quick reactions or your positioning. We’ll still be popping packs of enemies with ease and dealing substantial damage thanks to Shadow Imbuement.
This build will still be incredibly mobile thanks to Shadow Step, which helps us get around quickly as well. It’ll also help us break free from Crowd Control, should we get ever get caught by any.
With Dark Shroud there to cover defenses, we won’t be as fragile, but we’ll still have to rely a fair bit on our mobility and positioning to stay safe. Eventually, we’ll be able to improve this skill to make it even more reliable and consistent, for when our enemies don’t just pop from our damage.
We’ll be looking to use the Combo Points Rogue Specialization for this build, as it’ll greatly boost our damage. We also don’t benefit from Inner Sight quite as much as the Twisting Blades build would, which solidifies this choice. Preparation is still an okay choice but offers much less damage for the build.
Skills and Passives Breakdown
In this section, we’ll discuss each skill we use. We’ll explain the whys and hows of how the build works and then cover the general leveling order.
Important Skills

Invigorating Strike
Invigorating Strike is a great starter skill, thanks to it passively increasing your Energy Generation by 20%. This makes it ideal for many melee builds which often want to generate energy very quickly to use their skills over and over.
When it’s upgraded to Fundamental Invigorating Step, it will also become an easy source of applying Vulnerable. Even though it’s a single target skill, Flurry can spread the vulnerable effect, which makes this a strong pairing.

Flurry
Flurry might be a little off-putting to use at first since it’s very directional. However after we get an early aspect for it, it becomes a much better skill overall. With Advanced Flurry it will get stronger and cheaper with each use, stacking three times.

Shadow Step
Shadow Step is a very low cooldown and reliable way to not only move from enemy to enemy, but also break free from crowd control. It does fairly good damage in addition to also boosting our movement speed for a short duration.
Once we upgrade it to Disciplined Shadow Step, it’ll be even better as doing what it already does. Having it on a lower cooldown in general makes it just that much better. Combined with Ravager’s Aspect we’ll be able to use it up to three times in quick succession very early.

Dark Shroud
Dark Shroud is the Rogue’s premiere defensive skill, offering a fairly consistent way of mitigating damage. While you will lose these defensive shadows each time you get hit, we’re able to fix this later with an aspect to make it incredibly reliable.
You could upgrade Dark Shroud down either path, but we recommend Subverting Dark Shroud. This provides a bit of extra sustain on top of the Damage Reduction, making the Rogue more durable.

Shadow Imbuement
Shadow Imbuement allows us to deal Shadow Damage for a couple of skills. Enemies marked by this Imbuement will explode and deal damage to other nearby enemies if defeated quickly. Once we get Flurry’s Aspect, this will cascade and just make entire packs of enemies disappear.
We’ll take this to Mixed Shadow Imbuement for extra damage, allowing the explosion of Shadow Imbue to cascade into each other and improve clear speed.

Shadow Clone
Shadow Clone is a great ultimate Skill all around. Not only does it give us extra damage, it can also be used as a panic button to get out of Crowd Control if we can’t use Shadow Step. Since it echoes all of our skills, it’ll be our main way of improving our Single Target damage.
Important Passives
Here we’re only going to talk about the Passives that grant the build the most benefit, what they do, and why they’re critical to the build.
 Key Passive – Momentum
As a pure melee build, we have a choice between Momentum and Victimize for Key Passives. Since Flurry has a very low Lucky Hit Chance, Momentum wins out here for the consistency. Victimize can still be good once we get deeper into Paragon and can boost it far more, but for leveling, it’s not great.
This grants us a stacking buff that grants Damage Reduction, Energy Regeneration, Movement Speed, and Damage per stack we have with stacks only being lost when Marksman Skills are used. Combined with its Aspect it’s an incredibly powerful and reliable bonus.
Sturdy
As a melee build, the damage reduction from Sturdy will help us out quite a bit, as we’ll be close to enemies at all times.
 Target Practice
Target Practice grants us passive Critical Strike Chance. Alongside Trick Attacks, this heavily reduces our overall need to stack Critical Strike Chance on gear, making it easier to gear up.
Exploit
Exploit is a huge damage increase, granting multiplicative damage bonuses against Healthy and Injured enemies. With a lot of our goal being that we make enemies simply pop and disappear, this is a great pickup.
Malice
Thanks to being able to readily apply Vulnerable, Malice will do plenty to help boost our damage. While this boost will only apply to Vulnerable enemies without a consistent way to knock enemies down, we’ll be able to make frequent use of it.
Precision Imbuement
Precision Imbuement is a little bit of a tricky one to consistently benefit from, but we’ll have no trouble making use of it thanks to Shadow Imbuement. It’ll be far from a permanent bonus, the early critical strike chance is very valuable for the build. Once we get higher rarity Tempering Manuals, we’ll have more consistent access to this.
 Innervation
Innervation restores our Energy with a Lucky Hit. Combined with Flurry’s multiple hits, allows us to consistently trigger it. Without factoring in any bonuses to Lucky Hit, at rank 3, Innervation will have roughly a 15% chance of triggering at least once each time Flurry is cast, per enemy.
Second Wind
Second Wind grants us a temporary Barrier each time we spend 100 Energy, and is a great defensive option later into progression, when we can pick up a Crown of Lucion. Before this, Advanced Flurry will make it trigger very infrequently without high Attack Speed.
Leveling Order: Where to Assign Your Skill Points
We’ll start our leveling by taking Invigorating Strike and Enhanced Invigorating Strike. This will allow us to get our Core Skills, where we’ll take Flurry and upgrade it to Advanced Flurry, as well as a point in Sturdy for some damage reduction and to unlock more skills.
Now we have access to our Agility Skills, where we’ll pick up Disciplined Shadow Step for extra mobility. Next. we’ll max Weapon Mastery for the damage it offers and to get access to our Subterfuge Skills.
In Subterfuge Skills, we’ll pick up Subverting Dark Shroud. This gives us a ton of damage reduction as well as a bit of sustain should we get hit and lose a shadow. Then we can take a point in Siphioning Strikes for Life recovery and get access to Imbuement Skills.
For Imbuement Skills, we’ll take Mixed Shadow Imbuement. This gives us more AoE as well as Critical Strike Chance. Then, we’ll max Flurry to boost its base damage and get it hitting harder, and get access to our Ultimate Skill.
We’ll take Supreme Shadow Clone as our Ultimate Skill of choice. This will copy our skill casts, and with a couple of levels later on effectively double our damage. We’ll fill the point we need to Reach our Key Passive by maxing Target Practice and Trick Attacks to ramp our Critical Strike Chance.
Next, we’ll take a point in innervation for Energy recovery. Now we pick up Momentum as it’s the strongest Key passive we can get. Then we’ll max Innervation, Alchemist Fortune, and Precision Imbuement for more Critical Strike Chance, Lucky Hit Chance, and Energy sustain when Shadow Imbuement is active.
We’ll max Exploit and Malice to continue stacking our damage bonuses. Then, we’ll max Dark Shroud to increase its Damage reduction. After that, we can max Shadow Clone to bring its damage up and add additional burst damage.
To finalize the build, we’ll pick and max Countering Smoke Grenade. This gives us a boost of damage against harder enemies, and we can replace Dark Shroud with this skill as the Umbrous Aspect will maintain our Dark Shrouds. Then we’ll put the remaining points into Second Wind for the added defenses going into the later stages of the game.
Rogue Leveling Progress Summary
This section sums up the Leveling Process in an easier-to-reference format.
| Levels | Icon | Skill | Purpose |
|---|---|---|---|
| 2-3 | | Enhanced Invigorating Strike | A quick attack that provides an Energy Regeneration boost. |
| 4-6 | | Advanced Flurry | Main DPS with ramping damage |
| 7 |  | Sturdy | Early Damage Reduction |
| 8-10 | | Disciplined Shadow Step | Mobility and Unstoppable. |
| 11-13 | | Weapon Mastery | Great DPS boost regardless of current weapons. |
| 14-16 |  | Subverting Dark Shroud | Damage Reduction and sustain. |
| 17 |  | Siphoning Strikes | Consistent Life Recovery for just a single point. |
| 18-20 | | Mixed Shadow Imbuement | Adds decent damage and AoE burst. Unlock and use Combo Points Specialization |
| 21-24 | | Flurry | Fully level our Main Damage Skill. |
| 25-27 | | Supreme Shadow Clone | Taking our Ultimate for extra damage. |
| 28-30 | Target Practice | Free Critical Strike Chance. | |
| 31-33 |  | Trick Attacks | More Critical Strike Chance for free. |
| 34 |  | Innervation | Energy Sustain |
| 35 |  | Momentum | The Key passive for the build, which improves our damage and mobility. |
| 36-37 | | Innervation | Finish maxing. |
| 38-40 |  | Alchemist’s Fortune | Lucky Hit Chance when Shadow Imbument is active |
| 41-43 |  | Precision Imbument | Another Critical Strike Chance bonus when we use Shadow Imbuement. |
| 44-46 |  | Exploit | More damage at the start and end of an encounter |
| 47-49 |  | Malice | More damage to Vulnerable enemies |
| 50-53 | | Dark Shroud | Increases Damage reduction by leveling the skill. |
| 54-57 | | Shadow Clone | Reduced Cooldown and adds initial burst. |
| 58-R4 |  | Countering Smoke Grenade | Max and upgrade for extra damage, replaces Dark Shroud on hotbar. |
| R5-R7 |  | Rugged | Damage Reduction against DoTs |
| R8-R9 | | Sturdy | Finish maxing for more Damage Reduction |
| R10-R12 |  | Second Wind | Temporary Barrier for expending Energy |
| Alternate R10-R12 |  | Figid Finesse | Increases the usefulness of Icy Alchemist’s Aspect, allowing it to grant this damage bonus. |
Gearing and Stats
In this section, we’ll cover all the things you’d want to keep an eye out for to enhance the final build. This includes our Recommended Weapons, Specialization, Aspects, Runewords, and, of course, Uniques.
Recommended Weapons
This build wants Swords for the Dual-wield Slots and a Crossbow For the Ranged Slot. This is due to the Weapon Mastery passive giving better bonuses for us with these weapons. This combination of weapons gives us a general Damage increase from the Swords and Critical Strike Damage from the Crossbow.
This build can also make use of various One-Handed Uniques and Mythics, which will affect the bonuses granted by Weapon Mastery. Keep this Passiv in Mind when optin got use any of them.
Ideal Stats
The table below details the ideal stats for our gear, be on the lookout for gear that matches at least two of the three rolls below. We’ve also included Aspects here for easier viewing, refer to the Aspects section for additional details on why these are selected.
Affixes that are CAPITALIZED are the Ideal Affixes to get as a Greater Affix. These are not required but are a good way to push the build further. Affixes in Bold are the ideal Affixes to boost with Masterworking.
In cases where multiple Affixes are listed, the secondary option is for when another stat reaches its cap. This is most common with Armor, where you’d take Maximum Life after reaching the Armor cap.
Affix 1
Dexterity
Affix 2
MAXIMUM LIFE
Affix 3
Critical Strike Damage
Tempered Affix 1
Chance for Flurry to Deal Double Damage
Agile Augments – Weapon
Tempered Affix 2
Critical Strike Damage
Worldly Finesse – Offensive
Legendary Aspect
Aspect of Encircling Blades
Unique Item Options
Condemnation, Asheara’s Khanjar, Doombringer
Affix 1
MAXIMUM LIFE
Affix 2
Dexterity
Affix 3
Critical Strike Damage
Tempered Affix 1
Chance for Flurry to Deal Double Damage
Agile Augments – Weapon
Tempered Affix 2
Critical Strike Damage
Worldly Finesse – Offensive
Legendary Aspect
Toxic Alchemist’s Aspect
AND
Icy Alchemist’s Aspect
Recommended Unique Item
Crown of Lucion / Heir of Perdition
Stats below are for Helmets before obtaining
Affix 1
Maximum Life
Affix 2
Armor
Affix 3
COOLDOWN REDUCTION
Tempered Affix 1
Additional Casts with Shadow Imbuement
Inbuement Abundance – Utility
Tempered Affix 2
Total Armor
Worldly Endurance – Defensive
Legendary Aspect
Mangler’s Aspect
Affix 1
Maximum Life
Affix 2
Armor
Affix 3
RANKS TO DARK SHROUD
Tempered Affix 1
Flurry Size
Rogue – Alchemist Control (Utility)
Tempered Affix 2
Additional Casts with Shadow Imbuement
Imbuement Abundance – Utility
Legendary Aspect
Enshrouding Aspect
Affix 1
Maximum Life
Affix 2
Armor
Affix 3
RESISTANCE TO ALL ELEMENTS
Tempered Affix 1
Total Armor
Shared – Worldly Endurance (Defensive)
Tempered Affix 2
Flurry Size
Rogue – Alchemist Control (Utility)
Legendary Aspect
Umbrous Aspect
Unique Item Option
Grasp of Shadow
Affix 1
RANKS TO FLURRY
Affix 2
Attack Speed
Affix 3
Critical Strike Chance
Tempered Affix 1
Cutthroat Critical Strike Chance
Cutthroat Finesse – Offensive
Tempered Affix 2
Chance to Daze
Daze Control – Utility
Legendary Aspect
Breakneck Bandit’s Aspect
Affix 1
MOVEMENT SPEED
Affix 2
Maximum Life
Affix 3
Resistance to All Elements
Tempered Affix 1
Movement Speed
Natural Motion – Mobility
Tempered Affix 2
Additional Casts with Shadow Imbuement
Imbuement Abundance – Utility
Legendary Aspect
Ravager’s Aspect
Mythic Item Option
Ring of Starless Skies
Affix 1
Attack Speed
Affix 2
CRITICAL STRIKE CHANCE
Affix 3
Vulnerable Damage
OR
Critical Strike Damage
Tempered Affix 1
Shadow Imbuement Additional Casts
Imbuement Abundance – Resource
Tempered Affix 2
Cutthroat Critical Strike Chance
Cutthroat Finesse – Offensive
Legendary Aspect
Galvanized Slasher’s Aspect
Affix 1
Attack Speed
Affix 2
CRITICAL STRIKE CHANCE
Affix 3
Vulnerable Damage
OR
Critical Strike Damage
Tempered Affix 1
Shadow Imbuement Additional Casts
Imbuement Abundance – Resource
Tempered Affix 2
Critical Strike Damage
OR
Vulnerable Damage
Worldly Finesse – Offensive
Legendary Aspect
Aspect of Imitated Imbuement
Affix 1
RANKS TO WEAPON MASTERY
Affix 2
Ranks to Precision Imbuement
Affix 3
Critical Strike Chance
Tempered Affix 1
Shadow Imbuement Additional Casts
Imbuement Abundance – Resource
Tempered Affix 2
Movement Speed per Dark Shroud
Rogue Motion – Mobility
Legendary Aspect
Aspect of Stolen Vigor
Gems and Runewords
This build uses Emeralds in our Weapons, Emeralds in our Armor, and Skulls in Jewelry.
We opt for Emeralds in our Weapons as we’re heavy on Critical Strikes, and this increases our damage.
We use Emeralds in our Armor, as they provide additional Dexterity, which boosts our damage. For a more defensive option, we can use Amethysts to boost the Barrier granted by Second Wind or the Que Rune.
We go with Skulls for Our Jewelry as Armor is harder to come by. We can use Resistance Gems if needed, as it is important to cap both.
For Runewords there are multiple great combinations we can use, below are our recommended Runewords for Different stages of the builds.
| Stage | Ritual | Invocation | Result |
|---|---|---|
| Leveling | Cir | Lum | Casting 5 Skill restores 210 Energy. |
| Leveling | Cem | Gar | Casting Evade Grants 15% Critical Strike Chance. Stacks to 25%. |
| Midgame | Moni | Gar | Casting 2 Mobility Skills grants 20% Critical Strike Chance. Stacks to 25% |
| Midgame | Cir | Que | Casting 5 Skills grants Druid’s Earthen Bulwark for Barrier. |
| Endgame | Tam | Que | Casting 6 Core Skills casts Druid’s Earthen Bulwark, granting Barrier |
| Endgame | Cir | Xal | Casting 5 Skills increases Maximum Life by 20% for 6 seconds |
Specialization
This build uses Combo Points as its Specialization. Combo Points allow us to forgo Attack Speed on most of our Armor, so long as we build and spend the Combo Points.
Alternatively, if Combo Points aren’t an interesting playstyle, Preparation is a viable option as well. This allows us to have Shadow Clone up far more often, but due to Advanced Flurry reducing our Energy Costs, it will take more casts to trigger.
Boss Powers
Boss Powers are exclusive to Season 8, and offer us a wide variety of options. But we’ve narrowed down the best choices for all stages of the game.
For more information on Boss Powers, check out our Boss Powers Explained guide, which details how to get and upgrade each power, and potential uses for them.
| Stage | Power | Reason |
|---|---|---|
| Leveling | Skerg’s Toxins (Main) | Deals heavy Poisoning Damage to anything that hits us. |
| Midgame | Grigoire’s Lightning Square (Main) | Consistent AoE Damage. |
| Endgame | Flesh Reaper’s Disruption (Main) | Combine with Varshan’s Lifesteal as a Modifier and Aspect of Accursed Touch for consistent AoE damage |
| All | Beast Master’s Training (Modifier) | Huge increase to Summon Damage for stacking Critical Strike Damage, which we already do. |
| All | Hatred’s Embrace’s Haste (Modifier) | Free Critical Strike Chance for keeping our Shadow Resistance capped. Caps out Critical Strike Chance alongside passive bonuses without further investment. |
| All | Sinerat’s Flames (Modifier) | Boost Elemental Damage, scaling with our Resistances. |
| Endgame | Varshan’s Lifesteal (Modifier) | Combine with Flesh Reaper’s Disruption as a Modifier and Aspect of Accursed Touch for consistent AoE damage |
Aspects and Uniques
In this section, we’ll cover the Aspects you’ll want to grab from dungeons as you can, as well as ones to keep an out for to help the build along. We’ll also talk about the uniques that can help the build out in a few ways, though these will be fairly rare compared to the aspects.
Aspect of Encircling Blades
Aspect of Encircling Blades not only makes Flurry a fully circular AoE around us, but gives it an additional multiplicative damage bonus, talk about a huge win. This makes Flurry way less tricky to use and massive increases the number of enemies you can pop with a Shadow-imbued Flurry.
As our largest and most consistent bonus, make sure this makes it onto the Ranged Weapon Slot for more damage.
Breakneck Bandit’s Aspect
Breakneck Bandit’s Aspect provides Flurry with another damage boost and the ability to Stun, enabling Trick Attacks.
Aspect of Stolen Vigor
The aspect of Stolen Vigor is a great way to add extra value to the Momentum Key passive, granting us a good bit of damage for maintaining our stacks.
As our second strongest Damage Aspect, make sure this makes it on to an Amulet.
Aspect of Imitated Imbuement
The Aspect of Imitated Imbuement allows our Clone to also use Imbued Skills. This one is more of an optional choice to help boost the damage from our Shadow Clone, but is a fantastic pick-up if we take Poison Imbuement as a swap for bossing.
Icy Alchemist’s Aspect
With the Season 3 changes, this Aspect now contributes AoE Cold damage and Chill to builds using Shadow Imbuement. This also provides a source of Chill, which not only adds a small layer of defense, but can also result in more damage with Frigid Finesse. Frigid Finesse allows it to be consistently useful without significantly altering our tree, and very easy to fit in if we get Barrier from the Que Rune or Ranks of Second Wind from Tempering.
Toxic Alchemist’s Aspect*
This works similarly to Icy Alchemist, but releases a Poison AoE instead. It’s great damage early on and we could use it to activate passives like Debilitating Toxins or Alchemical Advantage, but this requires significant adjustment to the passive tree to fit. It’ll be the first Offensive Aspect we want to drop in favor of a Unique Weapon.
Ravager’s Aspect
Ravager’s Aspect is great just for the extra charge of Shadow Step, which helps to quickly stack Momentum and trigger Lucky Hit Chance effects. Ultimately, it’s more mobility and utility, which is exactly what we want from the skill.
Umbrous Aspect
Umbrous Aspect allows us to restore Dark Shroud shadows by simply critically striking our enemies, which we’ll do often enough to maintain our stacks passively. This allows us to swap it from our Hotbar in favor of Smoke Grenade in the later stages of progression.
Enshrouding Aspect
The Enshrouding Aspect is a great defensive boost we can take after the Daze Aspects were nerfed quite heavily. This allows us to generate Dark Shroud by using our Healing Potion and increases their damage reduction a bit.
Mangler’s Aspect*
The Mangler’s Aspect allows us to consistently Daze enemies, allowing us to use it as a defensive layer as well as enabling Trick Attacks for more damage. We’ll eventually drop it in favor of Tempering Chance to Daze to make room for Uniques.
Galvanized Slasher’s Aspect*
Galvanized Slasher adds utility to our Shadow Step, giving it a chance to restore all of our Energy. Shadow Step is great at activating this as it has a high Lucky Hit Chance. Eventually, we can drop this to open space for Unique Itemsafter shuffling Aspects around.
Unique Items
We’re only going to talk about the few that offer the strongest effects on the build. While there are others that help, these are the ones you really want to slot into your build if you get the chance. Keep in mind these won’t drop until you enter World Tier 3, which is possible by the end of the leveling process
Crown of Lucion
Crown of Lucion is a Unique Helmet that provides a ramping damage increase, with the downside of also increasing Energy Costs. This works well with Advanced Flurry as it helps offset the downsides of the Unique Effect. The ramping Energy Costs will require some Resource Generation or Energy per Second on gear to maintain.
Heir of Perdition
Every Stat on this Mythic Helmet is just exceptionally good for the build as we can make use of every single one, but a very late game option that can even free up Temper Slots from taking Critical Strike Chance. Crown of Lucion offers a slightly stronger damage multiplier, x75% at full stacks vs Heir of Perdition’s x60%, but the extra ranks on Flurry more than make up for this and allow for far more consistency.
Grasp of Shadow
These Unique Gloves offer a good mix of Stats, but often aren’t worth using without the Skill Ranks Affix being a Greater Affix. This makes it somewhat competitive with a standard pair of gloves with Ranks to Flurry. Using them will, however, come at the cost of having to drop an Offensive Aspect and its Tempers, but largely has the same bonuses we’d get anyways.
Condemnation
Condemnation is a Unique Dagger that works well with the Combo Points Specialization, which is the preferred option for this build. It offers a great multiplicative bonus while granting a chance for any of our attacks to instantly create 3 Combo Points to use. This can allow Flurry to rack up a ton of damage very quickly.
Ashera’s Khanjar
Ashera’s Khanjar is another Dagger that can find use in this build. It gives us a stacking Attack Speed boost, which stacks on top of any Attack Speed from Gear, making Flurry a faster skill. It’s a decent replacement for Accelerating Aspect, especially since it comes with ranks of Weapon Mastery. This Attack Speed can even exceed the normal Attack Speed cap of 100%, making it incredibly valuable.
Doombringer
Doombringer is a Mythic Sword that offers a ton of defensive power, including a huge boost to Maximum Life and multiple Damage Reduction effects. It also has a massive bonus to All Stats, all but ensuring all Paragon bonuses end up activated, providing a huge bonus to offense and defence.
Ring of Starless Skies
The Ring of Starless Skies is a Mythic Ring, which makes it one of the last upgrades we can get, but pairs exceptionally well with both Advanced Flurry. This makes Flurry super cheap to cast and removes any need to invest any Tempered Affixes into Energy Generation while adding more ramping damage to it.
Paragon Boards and Glyphs
Paragon Boards and Glyphs are a feature that becomes available at level 60. Below are our recommended Paragon Boards and Glyph Choices. These are listed in the order we recommend them as well as their pathing.
With the abundance of Paragon Points we can earn, we’ve split the pathing into Initial Pathing and Additional Pathing. Initial Pathing is the clusters we pick up while pathing through the board, while Additional Pathing are the ones we come back for later for additional stats once we’ve gotten all of our Glyphs socketed.
Starter Board
Starter Boards offer a lot of generic offensive and defensive stats. In this case, Damage, Elite Damage, Armor, and Maximum Life are worth picking up.
Initial Pathing
- Prime (Max Life Only)
- Glyph Socket
- Outlaw
- Upper Gate
Additional Pathing
- Dexterity for Glyph
- Resilience
- Skillful
This board offers a lot of accessible Dexterity, so we’ll socket Closer here to take advantage of this.
This Glyph grants Increased Cutthroat Kill Damage Per 5 Dexterity allocated in range. With 40 Dexterity allocated, it grants an increase in Damage Reduction against Close Enemies. At Glyph Level 45, it also grants a multiplicative bonus to Damage against Close Enemies.
Cunning Stratagem
Cunning Stratgem will boost the Non-Damage Combo Point Effects, which is Attack Speed in Flurry’s Case. This Paragon Board also offers us a lot of defenses as well as some Core Skill Damage.
This Paragon Board is rotated so that the Glyph Socket is in the Lower Right of the Paragon Board
Initial Pathing
- Finisher
- Glyph Socket
- Fundamentals
- Right Gate
Additional Pathing
- Dominant
- Denial
- Cunning Stratagem
- Haven
- Slayer
- Strength for Glyph
This board offers a lot of accessible Strength, so we’ll socket Exploit here to take advantage of this.
This Glyph grants Increased Vulnerable Damage Per 5 Strength allocated in range. With 25 Strength allocated, it applies to Vulnerable when we first strike an enemy. At Glyph Level 45, it also grants a multiplicative bonus to Vulnerable Damage.
Exploit Weakness
Exploit Weakness gives us a stacking Damage bonus when hitting Vulnerable enemies. Additionally, this Paragon Board a ton of extra Vulnerable Damage.
We rotate this board so that the Glyph Socket is in the Lower Left of the Paragon Board.
Initial Pathing
- Glyph Socket
- Misery
- Lower Gate
- Exploit
- Exploit Weakness
Additional Pathing
- Toughened
- Artifice
- Unassailable
- Cold Resilience
- Intelligence for Glyph
This board offers a lot of accessible Intelligence, so we’ll socket Combat here to take advantage of this.
This Glyph grants Increaed Critical Strike Damage Per 5 intelligence allocated in range. With 25 Intelligence allocated, it refunds small amount of Energy when Critically Striking. At Glyph Level 45, it also grants a multiplicative bonus to Critical Strike Damage.
Cheap Shot
Cheap Shot gives us a stacking damage buff for each nearby Crowd-Controlled enemy nearby. Additionally, this Paragon Board offers us some more Damage.
This Paragon Board is rotated so that Calculated is near the Upper Side of the Paragon Board.
Initial Pathing
- Devious
- Glyph Socket
- Artifice
- Deviant
- Cheap Shot
- Right Gate
Additional Pathing
- Calculated (Armor Only)
- Dexterity for Glyph
- Spearhead (Max Life only)
This board offers a lot of accessible Dexterity, so we’ll socket Chip here to take advantage of this.
This Glyph grants Increased Physical Damage Per 5 Dexterity allocated in range. With 40 Dexterity allocated, it grants a stacking damage bonus when dealing Physical Damage. At Glyph Level 45, it also grants a multiplicative bonus to Vulnerable Damage.
Eldritch Bounty
Eldritch Bounty increases our Damage and Resistance of the same Element as our most recent Imbued Skill we cast. Additionally, this Paragon Board offers us a lot of Non-Physical Damage and Reduced Imbuement Cooldowns.
We rotate this Paragon Board so that the Glyph Socket is in the Upper Left of the Paragon Board.
Initial Pathing
- Potent
- Glyph Socket
- Ready Supply
- Eldritch Bounty
Additional Pathing
- Concoction
- Restorative
This board offers a lot of accessible Strength, so we’ll socket Turf here to take advantage of this.
This Glyph grants Increased Damage to Close Enemies Per 5 Strength allocated in range. With 25 Strength allocated, it grants increased Damage reduction against Close Enemies. At Glyph Level 45, it also grants a multiplicative bonus to Close Enemies.
When you are done with the leveling process and have finished the campaign of Diablo 4, you can check out our Endgame-focused Imbuement Rogue Build guide. We also have a leveling variation of it if you are interested in playing it since level 1.
Check out more Diablo 4 Builds here on VULKK.com
Diablo 4 Imbuement Rogue Rapid Fire Build Guide
This Imbuement build for the Rogue in Diablo 4 focuses on a post-campaign Endgame Rapid Fire build that functions without too many Aspects, but becomes much more potent with the completed build!
Diablo 4 Combo Point Rogue Build Guide: Poisonous Flurry
This guide for the Combo Point Rogue in Diablo 4 focuses on a post-campaign Endgame Flurry build that functions without too many Aspects, but becomes much more potent with the completed build!

Diablo 4 Dash Rogue Build Guide: Shadowslicer
The Shadowslicer Rogue turns the mobility of the Dash Rogue playstyle into a highly offensive speed-clearing tool. Learn how to play this Diablo 4 build to perfection!
Diablo 4 Trap Rogue Build Guide: Scoundrel's Traps
This Rogue build for Diablo 4 uses the Scoundrel’s Leathers to deal devastating DoT and Burst Damage!
Diablo 4 Penetrating Shot Rogue Build Guide: Luck of the Ranger
This Rogue build utilizes the Combo Point Bonus of Penetrating Shot to make good use of the effect of the Windforce Unique Bow!
Diablo 4 Flurry Rogue Build Guide: Alchemical Blades
This Rogue build for the Rogue class focuses on high uptime on Concealment to be able to fire Shadow-Imbued Flurries for a ton of AoE damage.


