

This guide for the Necromancer in Diablo 4 focuses on a post-campaign Endgame Blood Surge build that functions without too many Aspects, but becomes much more potent with the completed build!
This guide is up-to-date for Season 4 and Patch 1.4.0.
Check our Diablo 4 Builds Catalog of uniquely crafted builds for each class.
The Necromancer is a hybrid summoner and forbidden magic user. In this guide, we’ll be taking a look at a Blood-focused Necromancer built around the Blood Surge skill.
This build guide assumes you’re at least level 50 and have completed enough of your Renown to have gained the 10 additional Skill Points available.
This is an endgame version of our Necromancer Leveling Build. We highly recommend starting with that build and respecing to this version later on.
Build Overview
This is a highly potent Blood-focused Necromancer Build that still utilizes many of the tools from the original build to both alleviate many stat constraints, but also drastically increase Blood Surge’s power. We’ll also have Hemmorhage and Blood Wave doing some work, but their focus isn’t damage.
We’ll be sacrificing minions entirely to gain a few powerful bonuses, which means we won’t have them for the added utility. However, since we also take Momento Mori, the advantages we gain are huge.
On the Defensive side of things, we’ll still have Blood Mist as a great panic button that can break us out of Crowd Control. Blood Wave will also be a decent way to create some breathing room as needed. We’ll also be making use of Decrepify for its Slow and to help with our cooldowns.
We’ll also have Fortify greatly helping us to reduce incoming damage, which helps us actually survive hits while also increasing our Overpower Damage. Almost all of our skills will have the means to help generate this effect.
Skill and Passive Breakdown
In this section, we’ll be talking about each skill we use. This is the whys and hows of how the build works, and then we’ll cover the skill point distribution.
Skills
These are the main skills for the build. We’ll explain what purpose each serves and how they fit the build
 Hemorrhage
Hemorrhage is our Basic Skill, It’ll be used to actively generate Essence, Blood Orbs, and Fortify. Just be careful that the use of this skill does not consume the charge of Rathma’s Vigor.
We’ll be upgrading this to Initiate’s Hemmorhage for the Fortify generation, as well as the additional Essence from Enhanced Hemmorhage.
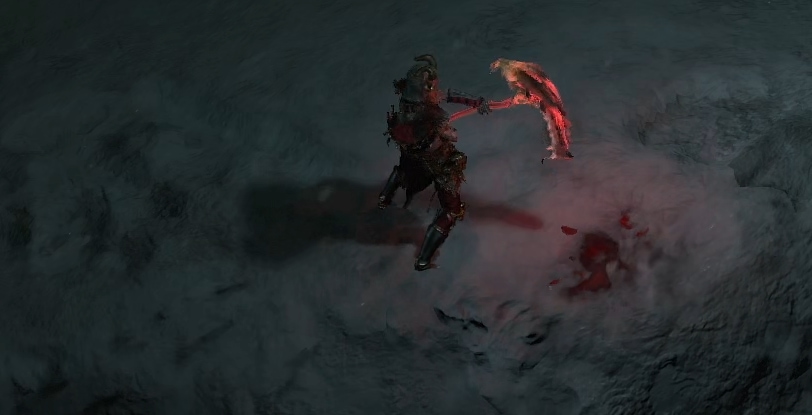
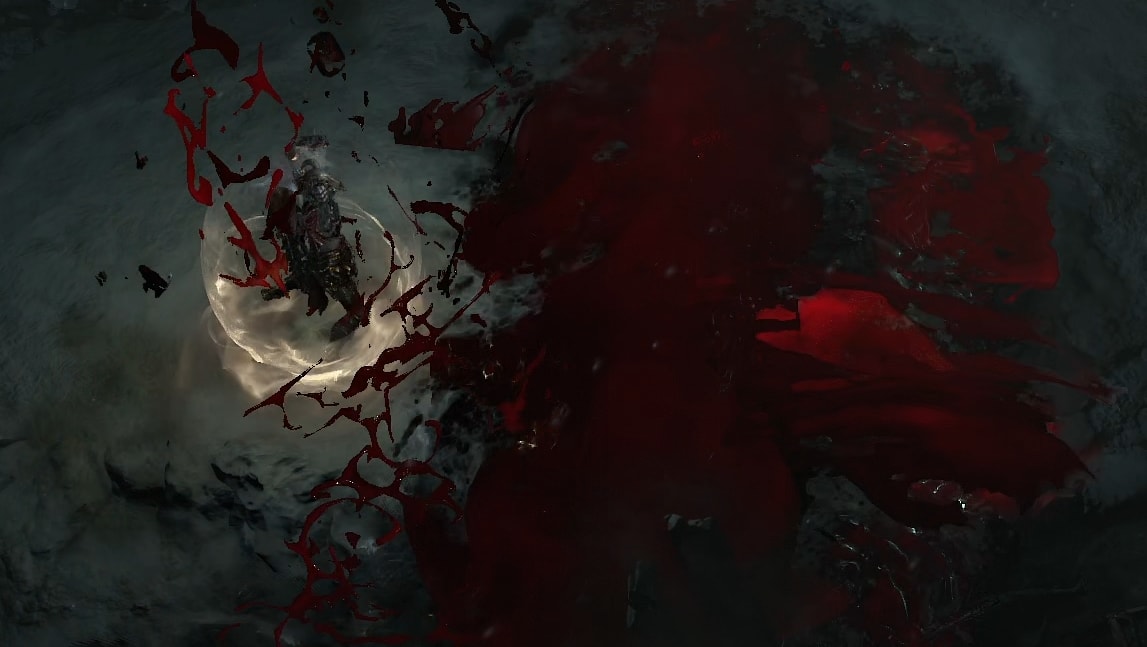
Blood Surge
Blood Surge is our Core Skill and the focus of this build. With the Blood-bathed Aspect, this skill will not only trigger a guaranteed Overpower, but it will also end up dealing triple our Overpower damage.
We’ll be taking Paranormal Blood Surge for the guaranteed Overpower effect. Enhanced Blood Surge will also help with extra sustain in addition to Blood Orbs from out other skills.
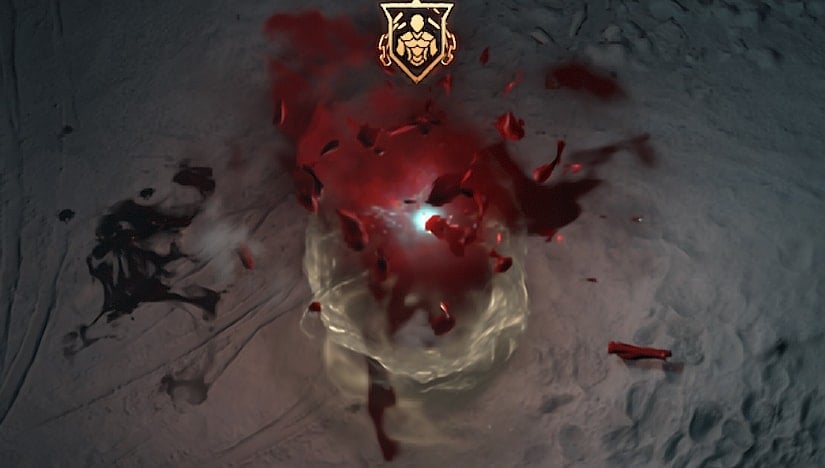
Blood Mist
Blood Mist is our panic Defensive skill, but also one of our most consistent and best ways to generate Fortify off packs of enemies. We’ll have to be wary of the cooldown though, as if we don’t have it up, we won’t be able to break out of Crowd Control.
We’ll be upgrading this to Dreadful Blood Mist for that Fortify effect, as this scales exceptionally well against larger groups. Enhanced Blood Mist will also help keep the cooldown lower as we’ll be able with our Overpowers.
For Bossing scenarios, we’ll swap this to Ghastly Blood Mist for the Corpse generation for reliable corpse creation.
Decrepify
Decrepify is a great curse spell, as we’ll really need the extra damage reduction with no minions to help soak up damage. It’ll also enable us to pick up Amplify Damage as well.
We’ll upgrade this to Abhorrent Decrepify to help with a bit of extra cooldown reduction. While it’s a relatively small chance, all of our skills are AoE with many having decent Lucky Hit Chance to offset this.
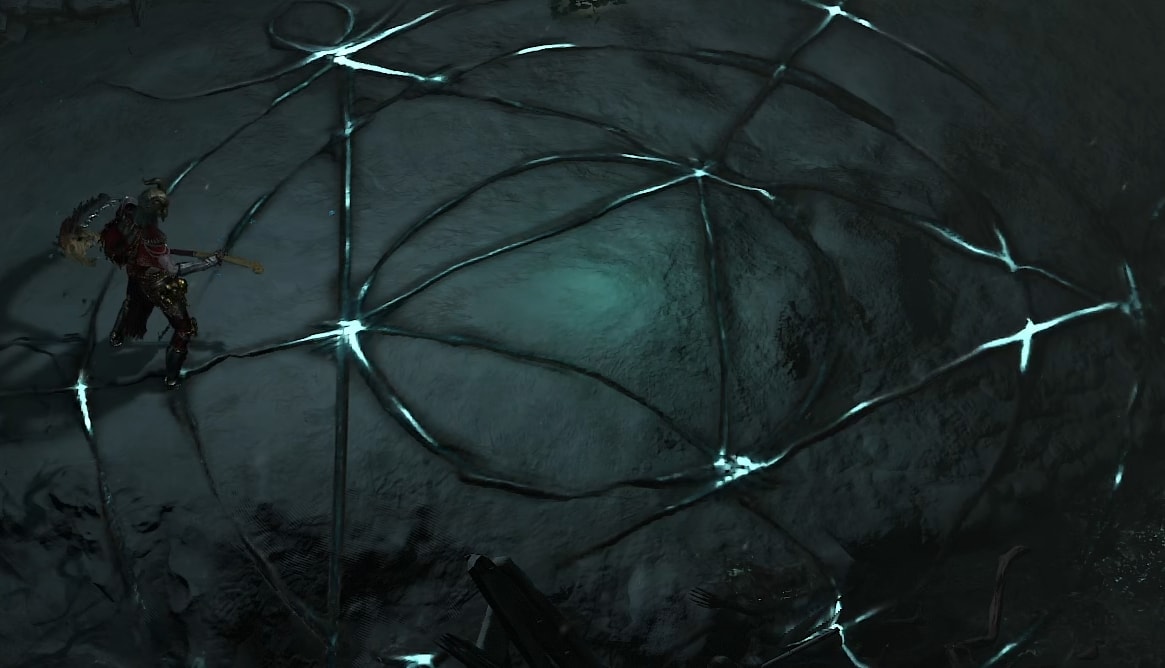
Corpse Tendrils
Corpse Tendrils is an absolutely insane utility skill. At base, it groups enemies and Stuns them, after we upgrade it it gets vulnerable, and with its Aspect, it greatly boosts our Critical Strikes.
We’ll upgrade Corpse Tendrils to Plagues Corpse Tendrils for the added Vulnerable application.

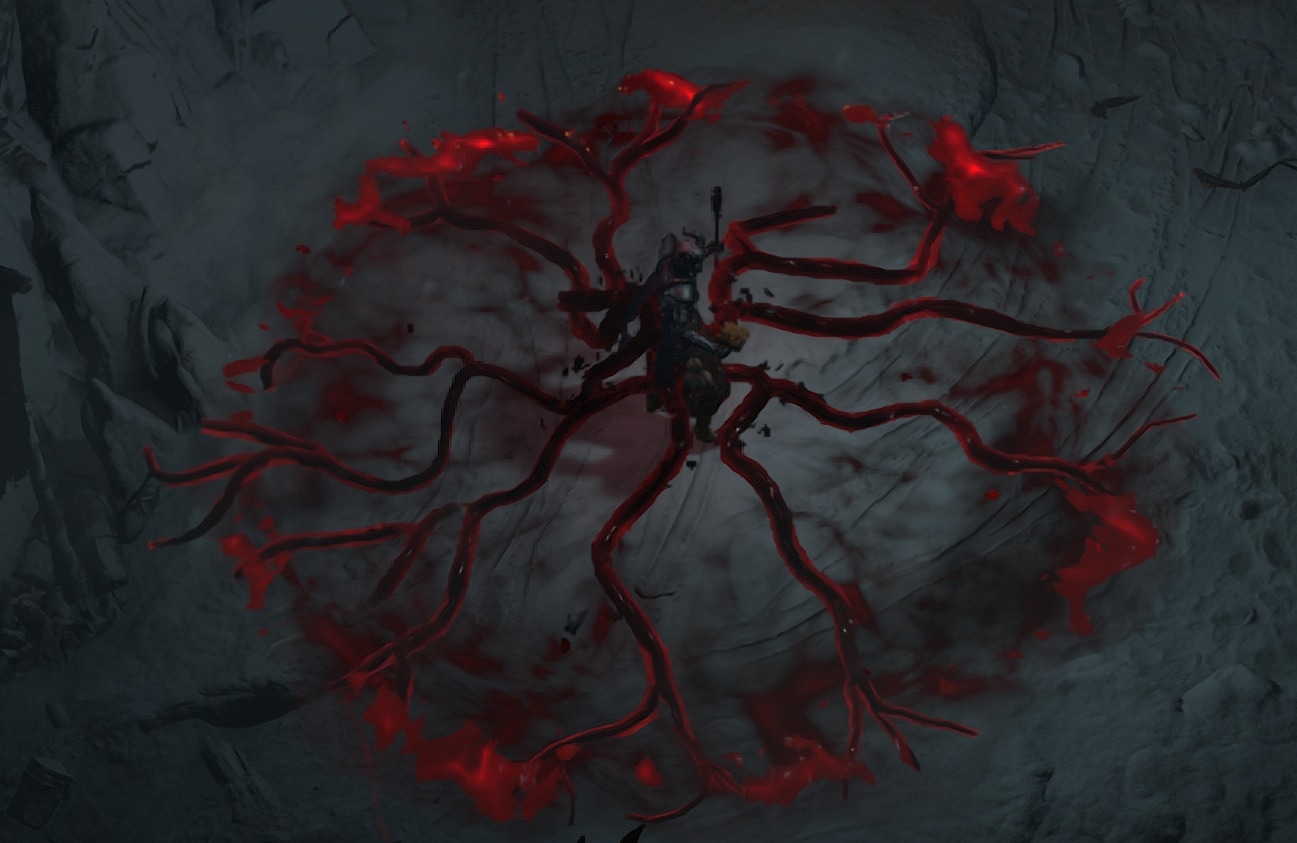
Blood Wave
Blood Wave not only provides huge area damage but will be a huge source of Blood Orbs as well. Just like Blood Surge, it’ll also be able to trigger our Overpower damage multiple times with the Tidal Aspect.
Passives
Here we’re only going to talk about the passives that are core to the build as well as our Key passive.
 Key Passive – Rathma’s Vigor
Much like Paranormal Blood Surge, Rathma’s Vigor also grants us a guaranteed Overpower. Instead of being limited to just Blood Surge, we can use this with any Blood Skill, though we’ll still mostly be busing it for Blood Surge.
Imperfectly Balanced
While Imperfectly Balanced increases our Essence Cost, it also significantly help to increase our damage. We’ll be getting Essence Cost Reduction on gear to help offset this and more easily reach a point where we can cast an extra Blood Surge.
Hewed Flesh
Hewed Flesh allows us to generate corpses in combat without defeating enemies. This is helpful for bosses that don’t summon adds, to be able to still use Corpse Tendrils.
Death’s Embrace
With Blood Surge being a fairly close-range skill, Death’s Embrace not only provides consistent damage but also improved defenses. Without minions, we’ll need these defenses a lot more.
Amplify Damage
With Decrepify being one of our defensive skills, we’re able to take Amplify Damage. This just just free damage, so long as we’re consistently keeping our Curse up.
Gruesome Mending
With its condition removed, Gruesome Mending makes Blood Orbs much more effective at stacking Overpower through the Aspect of Untimely Death.
Transfusion
Transfusion gives us a chance to generate additional Blood orbs with our Blood Skills. It’ll trigger often enough to make the Blood Artisan Cuirass more effective.
Coalesced Blood
Since a lot of our kit it built around us being Healthy and staying Healthy, it should be no surprise we’re taking Coalesced Blood for the free damage. While it’s only active when we are healthy, it’ll be up in most situations, save for immediately after a powerful hit from a boss.
Tides of Blood
Tides of Blood grants us more Overpower Damage and doubles in effectiveness while we’re Healthy. This will be further boosted by Momento Mori and our Book of the Dead choices, providing us with a ton of Overpower Damage right away.
Drain Vitality
Drain Vitality is a solid Lucky Hit effect that can allow all of our Blood Skills to fortify us. We’ll need to get decent Lucky Hit Chance to make it consistent, but our AoE also makes this exceptionally powerful.
Inspiring Leader
We’ll take this to boost our Attack Speed, since we’ll rely on that more than the base damage of Blood Surge to increase our DPS
Stand Alone
Since we’ll be Sacrificing our minions, Stand Alone helps to fill the gap for the damage they’d normally soak up. It’s entirely passive Damage reduction that works super well thanks to that, with the only condition being that we have no summons.
Memento Mori
Memento Mori is an exceptionally strong passive for us, giving us access to many powerful bonuses from our Book of the Dead. It’ll play a huge part is shoring up stats are that often harder to find.
Skill Point Distribution: Where to Assign Your Skill Points
This is an easy-to-reference table for where we’ll be placing all of our Skill points. These are listed in the order they appear on the skill tree.
| Icon | Skill Name | Skill Tree | Points |
|---|---|---|---|
 | Hemorrhage | Basic | 1 |
| Enhanced Hemorrhage | Basic | 1 |
 | Blood Surge | Core | 1 |
| Enhanced Blood Surge | Core | 1 |
| Paranormal Blood Surge | Core | 1 |
 | Unliving Energy | Core | 1 |
 | Imperfectly Balanced | Core | 3 |
 | Hewed Flesh | Core | 3 |
 | Blood Mist | Corpse & Macabre 1 | 4 |
| Enhanced Blood Mist | Corpse & Macabre 1 | 1 |
| Dreadful Blood Mist | Corpse & Macabre 1 | 1 |
 | Decrepify | Curse | 1 |
| Enhanced Decrepify | Curse | 1 |
| Abhorrent Decrepify | Curse | 1 |
 | Amplify Damage | Curse | 3 |
 | Death’s Embrace | Curse | 3 |
 | Corpse Tendrils | Corpse & Macabre 2 | 1 |
| Enhanced Corpse Tendrils | Corpse & Macabre 2 | 1 |
| Plagued Corpse Tendrils | Corpse & Macabre 2 | 1 |
 | Bone Spirit* | Corpse & Macabre 2 | 1 |
| Enhanced Bone Spirit* | Corpse & Macabre 2 | 1 |
| Dreadful Bone Spirit* | Corpse & Macabre 2 | 1 |
 | Gruesome Mending | Corpse & Macabre 2 | 3 |
 | Coalesced Blood | Corpse & Macabre 2 | 3 |
 | Transfusion | Corpse & Macabre 2 | 3 |
 | Drain Vitality | Corpse & Macabre 2 | 3 |
 | Tides of Blood | Corpse & Macabre 2 | 3 |
 | Blood Wave | Ultimate | 1 |
| Prime Blood Wave | Ultimate | 1 |
| Supreme Blood Wave | Ultimate | 1 |
 | Inspiring Leader | Ultimate | 3 |
 | Stand Alone | Ultimate | 3 |
 | Memento Mori | Ultimate | 3 |
 | Rathma’s Vigor | Key Passive | 1 |
Gearing and Stats
In this section, we’ll cover all the things you’d want to keep an eye out for to enhance the final build. This includes our Recommended Weapons, Book of the Dead, Aspects, and of course, Uniques.
Recommended Weapons
For this build, we recommend a 1H Wand and Focus. We’re pretty strapped for Aspect slots, plus the easier access to Lucky Hit Chance, Cooldown Reduction, and Essence Generation is a plus.
A lot of our Damage relies a lot on using Corpse Tendrils often enough to maintain higher uptime on Vulnerable as well as its other effects. This is going to take a lot of Cooldown Reduction to work well.
Should we opt for a 2H Scythe instead, we’d lose an Offensive Aspect slot, which would ultimately mean dropping Tidal Aspect, which means Blood Wave provides much less benefit. The trade-off however, is that the Aspect of Grasping Veins will be extremely potent in a 2H weapon, though a minor upgrade over an Amulet.
Ideal Stats
The table below details the ideal stats for our gear, be on the lookout for gear that matches at least three of the four rolls below.
Due to the width of the table, we highly recommend mobile users rotate their devices to view it properly.
| Slot | Stat 1 | Stat 2 | Stat 3 | Stat 4 |
|---|---|---|---|---|
| Main-Hand | Core Skill Damage | Vulnerable Damage | Overpower Damage | Intelligence |
| Off-Hand | Cooldown Reduction | Essence Cost Reduction | Critical Strike Chance | Lucky Hit Chance |
| Helm | Cooldown Reduction | Maximum Life | Resistance | Total Armor |
| Chest | Maximum Life | Damage Reduction | Total Armor | Resistance |
| Gloves | Critical Strike Chance | Lucky Hit Chance | Attack Speed | Overpower Damage |
| Pants | Maximum Life | Damage Reduction | Total Armor (Or Resitance) | Resistance |
| Boots | Movement Speed | Essence Cost Reduction | Ranks to Corpse Tendrils | Resistance |
| Amulet | Cooldown Reduction | Ranks to Tides of Blood | Ranks to all Macabre Skills | Movement Speed |
| Rings | Critical Strike Chance | Resource Generation (or Maximum Life) | Overpower Damage | Lucky Hit Chance |
Recommended Gems
This Build uses Rubies in the Weapon, Topaz in the Armor, and Diamonds in Jewelry.
We use a Rubies in our Weapons as it increases our Overpower Damage, which is then scaled up by our Sacrifice Bonus for a pretty sizable jump.
We use Topaz in our Armor since Blood Mist has a fairly long cooldown. Even though we can lower it fairly easily, this is a stronger and safer bonus for those times when Blood Mist isn’t available.
Finally, as with any build currently, we use Diamonds in our Jewelry. You can swap these out with more specific resistances as needed, but the general point is resistances.
Vampiric Powers
During the Season of Blood, we’ll have access to Vampiric Powers, which allow us to slot up to five unique powers into our Sanguine Circle to increase the power of the build. We’ll include more than the maximum in the selection below to offer alternatives, but they will be listed in order of their relative strength.
| Name | Effect | Reason |
|---|---|---|
| Blood Boil | Overpowering an enemy creates Volatile Blood Drops that deal Physical damage around you when collected. Additional Guarantees an Overpower periodically. | The extra source of guaranteed Overpower is fantastic, as well as the additional AoE. |
| Sanguine Brace | Grants Fortify when defeating enemies. While Fortify is equal to or greater then 50% Max Life, gain Critical Strike Chance. | Really consistent Fortify generation when mobbing. Extra Crit Chance is a nice bonus. |
| Ravenous | Chance to increase Attack Speed based on your Total Movement Speed. | Overpower Builds want plenty of Attack Speed. |
| Undying | Heal when casting Skills. Effect is doubled under 50% Life. | Sinmce we stack Attack Speed where we can, we’ll be able to get a ton of value out of this. |
| Anticipation | Reduced Ultimate Cooldown. Additionally, Ultimate deals more damage to enemies based on nearby enemies affected by DoT. | We only get the Cooldown, but can put in some work with Blood Artisan Cuirass. |
| Hemomancy | Deals AoE Physical damage that scale with Maximum Life. Heal for each enemy hit by this attack. | We stack Life where we can, so we’ll get a ton of value out of this. |
| Hectic | Every 5 Basic Attacks reduces a random cooldown slightly. | We’ll still end up using Hemmorhage often, and this gives us more benefits for doing so. |
Book of the Dead
For our Book of the Dead, we’ll be taking Sacrifices all around, but we have options to consider.
For our Skeletal Warriors, we can sacrifice Skirmishers for Critical Chance or Defenders for Non-Physical Resistance. Even being boosted by Momento Mori, the Critical Stike Chance results in a flat 8% Critical Strike Chance. This isn’t bad by any means and is by far the best offensive option here.
With Resitances scaling linearly, Sacrificing Defenders is a solid 20% Resistance to all elements, which can be good until you get more of it on your gear to shore up any vulnerabilities to elemental damage. Combined with Momento Mori, it;s 32% Resistances which is a very nice defensive boost.
For our Skeletal Mages, Sacrificing Bone Mages for Overpower Damage is the way to go. This isn’t the additive bonus you find on gear, this is a multiplicative bonus, which after Momento Mori multiplies all sources of Overpower Damage by a ton. This can make it easy to stack up high amounts of Overpower damage, reaching well over 1,000% in the late game.
For our Golems, we’ll want to Sacrifice either Bone Golems or Blood Golems. Bone Golems will give us a decent boost of Attack Speed, which is great for Overpower Builds. Life from Blood Golems is equally good for us, increasing our Life and Fortify for more Overpower Damage.
Aspects
We’ll cover the Aspects that are recommended for maximizing the potential of the build. We’ll also suggest which gear slot you should look to place them in.
 Blood-bathed Aspect
This aspect is what allows us to deal triple the Overpower damage with Blood Surge, as the initial damage and both pulses will be granted the guaranteed Overpower effect.
We don’t need it to be stronger or anything for its intended purpose, so we can place the Blood-bathed Aspect in one of our Weapon slots. Since we can freely replace this at any time, it makes to most since to have on a piece we may change out more often.
Aspect of Grasping Veins
This Aspect is incredibly powerful when it rolls well. It’ll be giving us a solid chunk of both Critical Strike Chance and Damage to anything hit by Corpse Tendrils. Combined with our Sacrifices, we can easily reach ~40% Critical Strike Rate and at least 117% Critical Strike Damage against affected targets with no investment.
For its strength, Aspect of Grasping Veins has to be placed in the Amulet, which will allow it to reach the values above. In the 2H Version, it goes in our weapon instead, where it’ll grant a total of ~50% Critical Chance and at least 156% Critical Damage with our sacrifices.
Aspect of Untimely Death
The Aspect of Untimely Death will make it so the healing we get from Blood Orbs doesn’t go to total waste if we’re already at or near full Life. Instead we get more Overpower damage that gets scaled up by our Sacrifice Bonuses and other Overpower bonuses.
We’ll place the Aspect of Untimely Death in our Gloves, as we don’t need to boost its effect. It’ll be pretty rare that we cap it out between Overpowers anyways.
Tidal Aspect
The Tidal Aspect makes Blood Wave send out three waves, and much like Blood Surge, each of these can Overpower. This additionally makes the Supreme Blood Wave drop a total of 9 Blood Orbs. This is a ton of healing and thanks to another Aspect additional Essence Generation.
We’ll be slotting the Tidal Aspect in our Gloves. While we may need to replace it, it’s not an absolutely vital Aspect and if slotted into well-rolled gloves, it’ll be there a while.
Aspect of Rathma’s Chosen
The Aspect of Rathma’s Chosen will grant us a bunch of Attack Speed when we Overpower with a Blood Skill. This makes it so we can quickly recover Essence or any of the other effects we get from quickly spamming Hemorrhage.
The Aspect of Rathma’s Chosen will be placed on one of our Rings as this is a rare Aspect that can be very hard to replace.
Aspect of Potent Blood
We’re choosing the Starlight Aspect here over the Aspect for the consistency it has. While it’ll trigger every other Blood orb we pick up instead of every single one, it doesn’t have the condition of us being on Full Life. Where Healthy is manageable, any stray hits will take us out of Full Life. Starlight only asks that we heal 25% Life, and we get 15% per blood orb, not accounting for additional sources like Blood Surge.
The Aspect of Potent Blood will be placed on one of our Rings, as that is the only comfortable place to fit a Resource Aspect.
Ghostwalker Aspect
Not only will the Ghostwalker Aspect mitigate the slow from Blood Mist, it’ll also make it so that even if we leave Blood Mist in a bad spot, we’ll still be able to pass through enemies easily. While it doesn’t come with extra damage like Blood-soaked Aspect, it also doesn’t take up an Offensive Slot.
The Ghostwalker Aspect will be placed in our Boots, the only slot that allows Mobility Aspects.
Aspect of Might
The Aspect of Might will give us additional Damage Reduction when we use Hemorrhage. We’ll be using Hemorrhage often due to Blood Surge’s high Essence Cost, so this is a nice extra benefit.
The Aspect of the Might will be slotted in either our Helm or Pants slot, as our Chest will be occupied by a Unique.
Aspect of Disobedience
The Aspect of Disobedience is another great defensive aspect that will increase our Armor by quite a bit just by doing damage. While it stacks up pretty slow, we can maintain it fairly well after using Blood Mist to quickly stack it off a larger pack of enemies.
The Aspect of the Disobedience will be slotted in either our Helm or Pants slot, as our Chest will be occupied by a Unique.
Unique Items
We’re only going to talk about the few that offer the strongest effects on the build. While there are others that help, these are the ones you really want to slot into your build if you get the chance. These will drop starting in Tier 3 content, but decent upgrades for the build once you get them.
Blood Artisan’s Cuirass
Blood Artisan’s Cuirass is a big part of the Essence Generation for the build as well as a bit of extra damage. Not only will it fire off a Bone Spirit that will trigger Essence generation from our Dreadful Bone Spirit when we grab some Blood Orbs, but it also boost the healing of our Blood Orbs.
Blood Moon Breeches
The Blood Moon Breeches are a pair of Unique Pants that do a lot for this build. While we don’t have minions to trigger curses for us, we can still manually Curse for the multiplicative bonus to Overpowe damage which is a significant boost.
Flickerstep
Flickerstep is a pair of Unique Boots that reduce the cooldown of our Ultimate Skill by Evading through enemies. This would allow more frequent use of Blood Wave, performing similarly to the Fastblood Aspect.
Banished Lord’s Talisman
The Banished Lord’s Talisman is a Unique Amulet that gives us another source of guaranteed Overpower, but also makes it so when we Critical Strike and Overpower in a single hit, that hit gets a massive damage boost. Additionally, all of it’s Affixes do not naturally appear on Amulets, which can potentially open up other affixe elsewhere.
Paragon Boards and Glyphs
These two endgame options are part of the Paragon System which is available starting at level 50.
Paragon Boards
Paragon Boards are a feature that becomes available at level 50. These boards allow us to spend the Paragon points we earn for leveling and Renown to strengthen our character. Each of these has a single Glyph Slot to place a glyph of our Choice.
Starter Board
Our Starter Board is fairly basic, granting generic Damage, Life, and Resistance.
Early on we’ll want to path through here quickly to get to our Legendary Boards. So Path along the right side, and use the Glyph as an excuse to path up the upper left. We’ll eventually want to get all the rare and magic nodes here for stats later though.
Bloodbath
Bloodbath is our first Legendary Board and it offers us a lot of useful things for the build. We’ll get Damage, Overpower Damage, Healing Recieved, and Fortify Generation. The Legendary Node will boost our Overpowers, specifically when we trigger Paranormal Blood Surge or Rathma’s Vigor.
We’ll path through the Powerhouse node to grab Bloodbath, then the path to the right to our Glyph slot, taking both Hardended and Remedy that are nearby before exiting to the right. We’ll also want to come back and grab Guarded Advance and Thick Hide for both their stats as well as the Magic nodes around them.
Blood Begets Blood
Blood Begets Blood will grant us a lot of Increased Blood Orb Healing, in addition to Life, Overpower Damage, and Damage. The Legendary Node will also grant us Damage for picking up Blood Orbs, in addition to a similar effect on rare nodes.
We’ll rotate this so our Legendary Node is closer. We’ll path up through Aggression, then to Blood Begets Blood, before heading to the Invigorated cluster to our Glyph Node. We’ll grab Blooddrinker and Blood-Empower before heading down to Vampiric and then finally our lower gate.
Scent of Death
Even though we don’t Consume Corpses, we can still gain the Damage reduction of this effect in most situations.
We’re mostly after the Rare clusters here that provide Critical Damage and Damage to Injured or Healthy Enemies, we just happen to pass by the Legendary on the way.
Rotate the Board so Corrective is the closest to the gate. Here we’ll be pathing down, grabbing Corrective and only the Rare Critical Strike Damage nodes here, then continue down to Scent of Death and make our way to Ruin where we’ll take the whole cluster of damage nodes. Next, it’s over to the Glyph near the middle, then down to Deathmarked.
Glyphs
Each of our Paragon Boards has a Glyph Slot, where we can socket one of our Glyphs. These Glyphs provide powerful bonuses that can be leveled up by completing Nightmare Dungeons to increase their power. Below are the Glyphs we recommend and what board to place them on.
Essence
Essence will grant us Critical Strike Damage with Core Skills for every 5 Dexterity in range. When we have at least 25 in range, it’ll also add a multiplicative bonus to Critical Damage against enemies that are not Healthy (<80%).
We’re placing Essence in the Starter Board, as it can easily fill this requirement with the Magic Dexterity nodes in range immediately.
Territorial
Territorial will increase our Damage to Close Enemies for every 5 Dexterity we have in range. Additionally, it’ll grant 10% Damage Reduction against Close Enemies when we have 25 allocated in range.
We’ll be placing Territorial in the Bloodbath board. It’s the only board outside of the Starter Board that can fill this requirement.
Dominate
Dominate will increase our Overpower Damage for every 5 Willpower in range. When we allocate 25 Willpower, it’ll also increase all damage an enemy take for 5 seconds after we Overpower them.
We’ll be placing Dominate in Blood Begets Blood as it’ll be able to fill this Willpower requirement the easiest.
Undaunted
Undaunted will increase our damage while Fortified for every 5 Willpower in range. When we get 25 Willpower, it’ll grant up to 10% Damage Reduction based on our Fortify.
Undaunted will be placed in Scent of Death, as it can easily fill the Willpower requirement.
This concludes our Diablo 4 Blood Necromancer Build focusing on the Blood Surge skill. You can find more leveling and endgame Diablo 4 builds here on VULKK.com to try new things with your characters and spice up your gameplay.
Looking to try something new and different? Check out our some of our other Necromancer Builds:


