

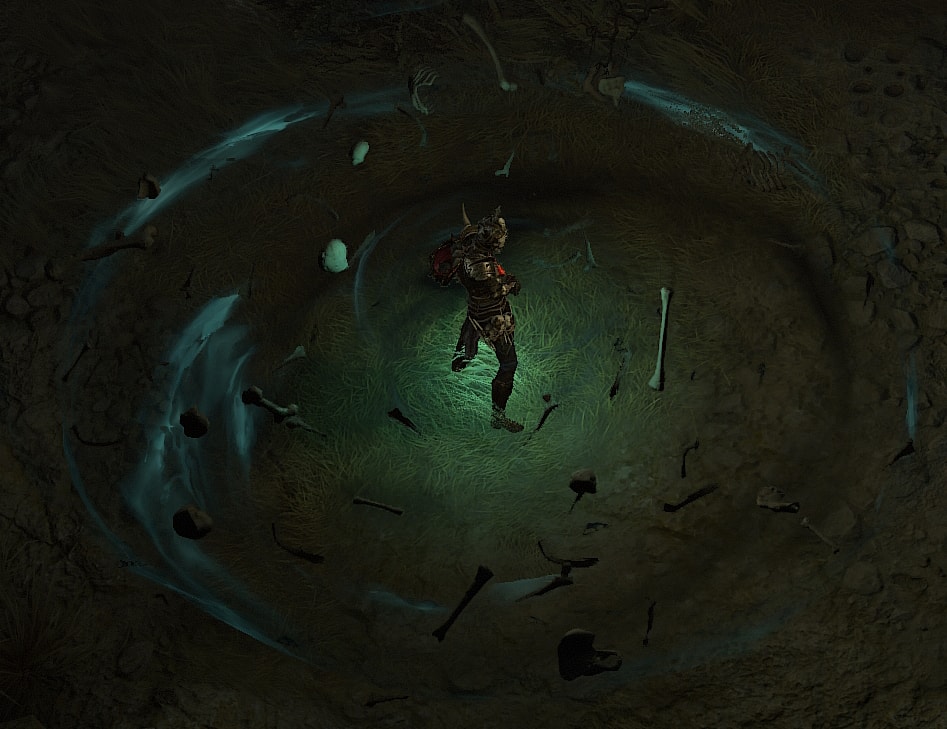
This Bone guide for the Necromancer in Diablo 4 focuses on a post-campaign Endgame Bone Spear build that functions without too many Aspects, but becomes much more potent with the completed build!
This guide is up-to-date for Season 4 and Patch 1.4.0.
Check our Diablo 4 Builds Catalog of uniquely crafted builds for each class.
The Necromancer has a lot of build options, with or without minions, and this build is arguably one of the best for them. This is a Necromancer build that forgoes having Minions in exchange for high damage from Bone Spear.
This Necromancer Bone build guide assumes you’re at least level 50 and have completed enough of your Renown to have gained the 10 additional Skill Points available.
If you want a great leveling build to reach this point with the class, try our Necromancer Leveling Build.
Build Overview
For the build’s offenses, we’re going fully into Bone Spear, looking to minimize our Essence costs by drastically increasing our damage through passives and other effects. With Aspects like the Aspect of Grasping Veins as well as the Aspect of Serration, we’ll be dealing huge damage and taking out most foes in a cast or two.
Defensively, we’re bolstered by the stronger Defensive Aspects available to us in addition to Bone Storm and its own Aspect. This keeps us exceptionally well protected in most situations. We still of course have Blood Mist for the Unstoppable effect, which will also generate some additional corpses for us in situations where we may have none.
Skill and Passive Breakdown
In this section, we’ll be talking about each skill we use. This is the whys and hows of how the build works, and then we’ll cover the skill point distribution.
Skills
These are the main skills for the build. We’ll explain what purpose each serves and how they fit the build
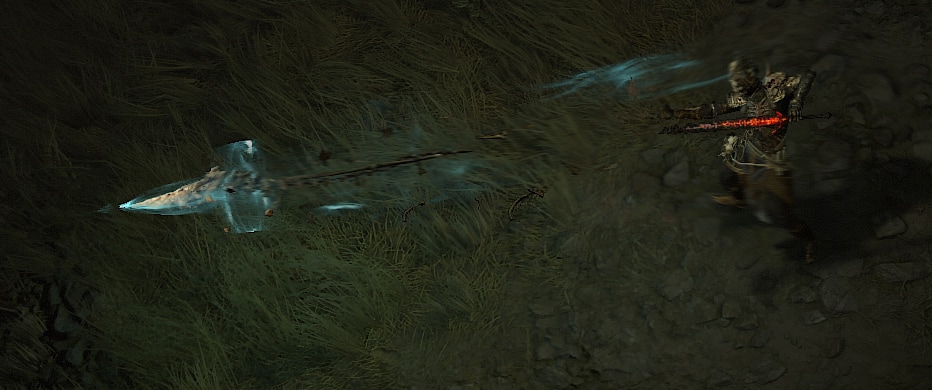
 Bone Spear
This is our Main Damage, which we’ll be setting up to Critical Strike hard and often with most of our skills. With the Aspect of Exposed Flesh, it will fully refund its cost on occasion.
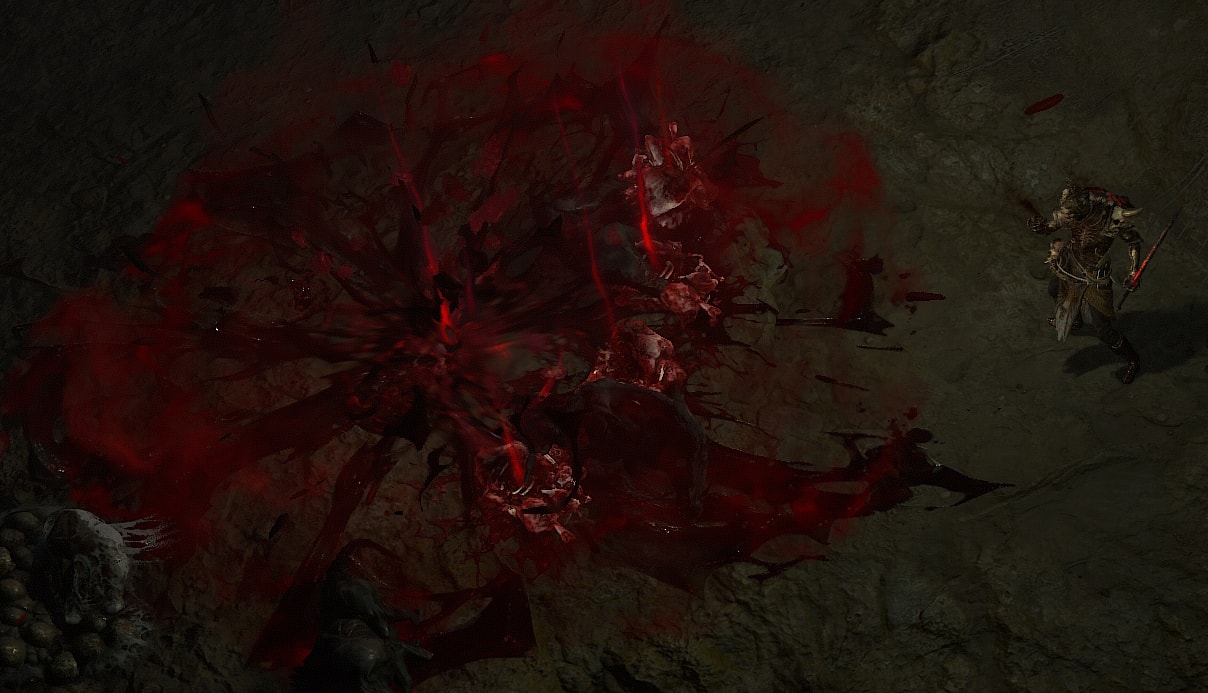
Corpse Explosion
Corpse Explosion is mainly used to trigger Grim Harvest for Essence Generation and Fueled by Death. Being upgraded to Blighted also means it can stack Disobedience quickly in addition to repeatedly activating Abhorrent Decrepify’s effect.
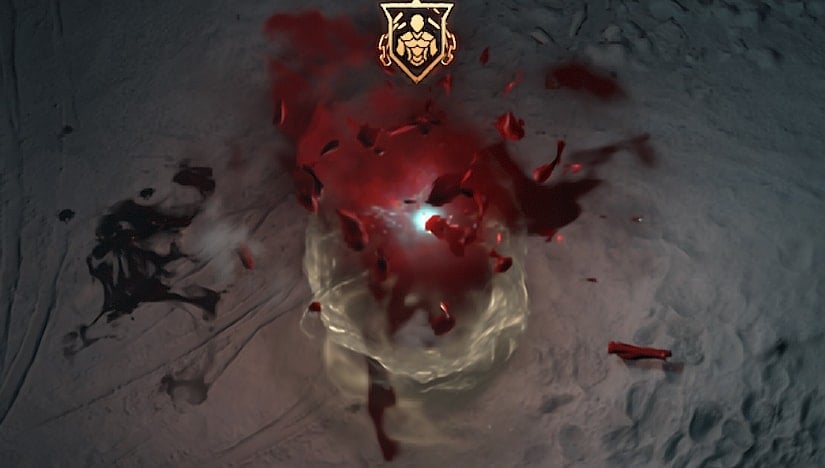
Blood Mist
Blood Mist is our way to break out of Crowd Control first and foremost. While it does generate corpses, its cooldown will be too long to reliably do so in most situations outside of bossing, but that’s the only time this utility is needed.
Decrepify
Decrepify helps with providing Damage Reduction and setting up the Amplify Damage Passive. It’ll also result in a lower cooldown for our Bone Storm with its upgrades.
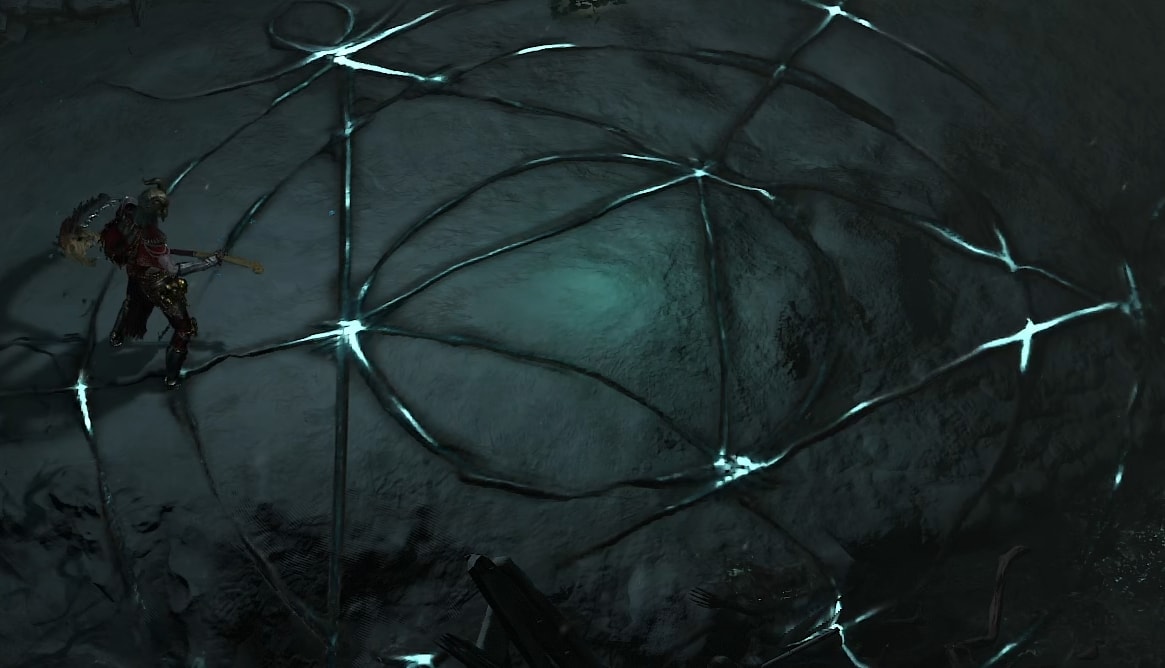
Corpse Tendrils
Corpse Tendrils is mainly used to help group enemies to be taken out by Bone Spear. We’ll often use this after our initial Bone Spear takes out something. It provides a huge boost to Critical Strike Chance and Damage with its Aspect.

Bone Storm
We’re using Bone Storm primarily for its utility, rather than damage. It’ll be a good way to help stack Aspect of Disobedience as well as grant Barrier from the Aspect of Shielding Storm. Additionally the Damage Reduction and Critical Strike Chance buffs it provides help a ton.
Passives
Here we’re only going to talk about the main passives we absolutely want as well as our Key passive. There are unfortunately a couple we will need to take to get access to these though.
 Key Passive – Ossified Essence
Ossified Essence increases our damage dealt with Bone Skills for every point of Essence we have over 50 when casting a skill. With the inclusion of the Aspect of Serration, this extends to Critical Strike Damage as well, though is capped.
Unliving Energy
We’ll need some extra mana beyond 100 to take full advantage of the Ossified Essence Key passive, this helps to meet the minimum required by Aspect of Serration’s bonus.
Imperfectly Balanced
Since our main skill is a Core Skill, there’s no reason not to take this for the free damage. While it makes Bone Spear cost a little more, it only costs ~28 Essence, and this effect can be offset by stats on gear.
Hewed Flesh
Hewed Flesh allows us to generate corpses without needing to defeat enemies. This allows us to make more consistent use of other bonuses in Boss encounters if they go on longer than expected.
Grim Harvest
Grim Harvest allows both Corpse Explosion and Bone Storm (With Osseous Gale Aspect) to restore some Essence. This allows Corpse Explosion to work as a generator skill, albeit a bit of a weaker one.
Fueled by Death
Fueled by Death allows both Corpse Explosion and Bone Storm (With Osseous Gale Aspect) to increase our damage for a short time after consuming a corpse. We’ll be able to maintain this fairly well in most situations
Amplify Damage
Amplify allows us to deal more damage to enemies affected by Decrepify. While this mostly applies to mobbing and elite especially, it’s still worth having for the extra damage.
Alternatively, this can be swapped with Death’s Embrace for a more consistent bonus when paired with Death’s Reach
Death’s Reach
For the most part, we’ll be aiming to hit enemies at the max range of Bone Spear. This makes Death’s Reach a fairly consistent bonus to our damage.
Compound Fracture
Compound Fracture grants our Bone Skills more damage when we Critically Strike a set number of times. Bone Spear both pierces and creates Shards that can also pierce with the Splintering Aspect, which allows us to trigger this very often when mobbing.
Evulsion
Since Bone Spear applies Vulnerable to everything consistently, Evulsion grants us free Critical Strike Damage.
Stand Alone
This provides us a huge boost of Damage Reduction, simply for not having minions. It’s a great defensive passive when you’re not using Skeletons.
Memento Mori
Since we’re sacrificing both set of Skeletons, Memento Mori grants us stronger bonuses. In the case of this build, it’s Critical Strike Chance and multiplicative Damage vs Vulnerable.
Skill Point Distribution: Where to Assign Your Skill Points
This is an easy-to-reference table for where we’ll be placing all of our Skill points. These are listed in the order they appear on the skill tree.
| Icon | Skill Name | Skill Tree | Points |
|---|---|---|---|
 | Decompose | Basic | 1 |
| Enhanced Decompose | Basic | 1 |
 | Bone Spear | Core | 5 |
| Enhanced Bone Spear | Core | 1 |
| Supernatural Bone Spear | Core | 1 |
 | Unliving Energy | Core | 3 |
 | Imperfectly Balanced | Core | 3 |
 | Hewed Flesh | Core | 3 |
 | Blood Mist | Corpse & Macabre 1 | 1 |
| Enhanced Blood Mist | Corpse & Macabre 1 | 1 |
| Ghastly Blood Mist | Corpse & Macabre 1 | 1 |
 | Corpse Explosion | Corpse & Macabre 1 | 1 |
| Enhanced Corpse Explosion | Corpse & Macabre 1 | 1 |
| Blighted Corpse Explosion | Corpse & Macabre 1 | 1 |
 | Grim Harvest | Corpse & Macabre 1 | 3 |
 | Fueled by Death | Corpse & Macabre 1 | 3 |
 | Decrepify | Curse | 1 |
| Enhanced Decrepify | Curse | 1 |
| Abhorrent Decrepify | Curse | 1 |
 | Death’s Reach | Curse | 3 |
 | Amplify Damage | Curse | 3 |
 | Corpse Tendrils | Corpse & Macabre | 1 |
 | Serration | Corpse & Macabre | 2 |
 | Compound Fracture | Corpse & Macabre | 3 |
 | Evulsion | Corpse & Macabre | 3 |
 | Bone Storm | Ultimate | 1 |
| Prime Bone Storm | Ultimate | 1 |
| Supreme Bone Storm | Ultimate | 1 |
 | Stand Alone | Ultimate | 3 |
 | Memento Mori | Ultimate | 3 |
 | Ossified Essence | Key Passive | 1 |
Gearing and Stats
In this section, we’ll cover all the things you’d want to keep an eye out for to enhance the final build. This includes our Recommended Weapons, Book of the Dead, Aspects, and of course, Uniques.
Recommended Weapons
For this build, we highly recommend a 2H Sword. We have a couple of powerful Aspects we’ll be using, and both work exceptionally well in a 2H to make them absurdly strong. Being able to double the effect of just one of them will greatly benefit the build.
It’s possible to use a 1H Weapon and Focus, which helps with some additional cooldown reduction and Essence Cost Reduction but isn’t entirely necessary.
Ideal Stats
The table below details the ideal stats for our gear, be on the lookout for gear that matches at least three of the four rolls below.
Due to the width of the table, we highly recommend mobile users rotate their devices to view it properly.
| Slot | Stat 1 | Stat 2 | Stat 3 | Stat 4 |
|---|---|---|---|---|
| Main-Hand | Critical Strike Damage | Vulnerable Damage | Critical Strike Damage with Bone Skills | Core Skill Damage |
| Off-Hand | Cooldown Reduction | Essence Cost Reduction | Critical Strike Chance | Lucky Hit Chance |
| Helm | Cooldown Reduction | Maximum Life | Resistance | Maximum Essence |
| Chest | Maximum Life | Damage Reduction | Total Armor | Resistance |
| Gloves | Critical Strike Chance | Ranks to Bone Spear | Critical Strike Damage with Bone Skills | Attack Speed |
| Pants | Maximum Life | Damage Reduction | Total Armor | Resistance |
| Boots | Movement Speed | Essence Cost Reduction | Resistance | Resistance |
| Amulet | Cooldown Reduction | Ranks to Evulsion | Movement Speed | Essence Cost Reduction |
| Rings | Critical Strike Chance | Critical Strike Damage | Maximum Life (or Resource Generation) | Critical Strike Damage with Bone Skills |
Recommended Gems
This build uses Emeralds in our Weapons, Topaz in our Armor, and Skulls in our Jewelry.
We use Emeralds in our Weapon as we’ll be applying Vulnerable consistently. This allows Vulnerable to also boost our Critical Strike Damage.
We use Topaz in our Armor as our only source of Unstoppable has a rather long cooldown. Even though we can lower its cooldown, we can’t always guarantee it’ll be ready by the next time we need it.
We use Diamonds in our Jewelry as Resistances are a great defensive boost worth stacking up. We can also swap these out for more specific Resistance gems, to fill out any bonuses not provided by armor.
Vampiric Powers
During the Season of Blood, we’ll have access to Vampiric Powers, which allow us to slot up to five unique powers into our Sanguine Circle to increase the power of the build. We’ll include more than the maximum in the selection below to offer alternatives, but they will be listed in order of their relative strength.
| Name | Effect | Reason |
|---|---|---|
| Ravenous | Chance to increase Attack Speed by a percentage of Total Movement Speed. | Bone Spear does plenty of damage on it’s own, this lets us cast it faster. |
| Anticipation | Increase Ultimate Skill Cooldown. Ultimate Skill deals increased damage for each nearby enemy afflicted by a DoT. | More Uptime on Bone Storm helps us offensively and defensively. |
| Undying | Heal for a small percentage of Max Life when casting any skill. Effect is doubled under 50% Life. | Great additional sustain for the build. |
| Sanguine Brace | Defeating enemies grants Fortify. When Fortify is equal or greater to 50% Maximum Life, gain Critical Strike Chance. | Great source of Fortify, which the build currently lacks. |
| Domination | Increased damage to Stunned, immobilized, Frozen, or Feared Enemies. Non-Elite enemies hit under these status effects will be executed of injured. | Great boost of damage, Execute is helpful for high Nightmare Dungeons. |
| Prey on the Weak | Increased Vulnerable damage. Enemies are Vulnerable while affected by Vampiric Curse. | A small boost of damage. |
| Hemomancy | Deals AoE Physical Damage based on your Maximum Life. Heal for each enemy hit by this attack. | Grant additional AoE damage, which can help deal with weak enemies. |
Book of the Dead
Since this is a minion-less build, we’ll be sacrificing all of them.
Skeletal Skirmishers are sacrificed for their flat Critical Strike Chance, this gives a decent bump for free. Skeletal Defenders can be a consideration if you prefer a more defensive setup.
Cold Skeletal Mages are sacrificed for the bonus damage against Vulnerable enemies. A strong multiplicative bonus that helps with damage. Alternatively, We can sacrifice Shadow Mages for the free Essence, which alongside Unliving Energy provides more than enough Essence to function without the need for it on gear.
Finally, Iron Golem is sacrificed for the Critical Strike Damage bonus. While this isn’t boosted by Memento Mori like the other two are, it will multiply the effects of Critical Damage on our gear, including Aspects.
Aspects
We’ll cover the Aspects that are recommended for maximizing the potential of the build. We’ll also suggest which gear slot you should look to place them in.
 Aspect of Serration
The Aspect of Serration grants Critical Strike Damage in addition to the base effects of the Ossified Essence Key Passive. This effect is capped, but however, unless you’re shoving it on a 2H weapon, you’ll very quickly hit it’s cap.
The Aspect of Serration is placed in our Amulet slot, as we want to boost it, but we don’t need the full boost of 2H weapon.
Aspect of Grasping Veins
The Aspect of Grasping Veins increases our Critical Strike Chance and Critical Strike Damage against enemies affected by Corpse Tendrils.
The Aspect of Grasping Veins gets placed in our 2H Weapon to maximize its bonuses, as this gives a huge amount of Critical Chance and Critical Damage even without a high roll.
Splintering Aspect
The Splintering Aspect not only ensure all targets are made vulnerable by a cast of Bone Spear, but the resulting shard also pierce for huge AoE damage.
The Splintering Aspect will be placed in our Gloves, as we don’t need it to be stronger.
Osseous Gale Aspect
The Osseous Gale Aspect allows Bone Storm to Consume Corpses to boost its duration. This also allows the skill to trigger multiple passives used by the build.
We’ll place the Aspect of Osseous Gale in one of our Rings. It’s a rare Aspect, so we’ll be able to use Aspect of the Umbral in its place until we get it.
Aspect of Exposed Flesh
The Aspect of Exposed Flesh grants our Bone Spear a chance to restore a huge portion of Essence on hit. This trigger fairly often when mobbing, but more importantly improves DPS against bosses as well, giving use free casts.
The Aspect of Exposed Flesh will slot into one of our Rings, as it is a Resource Aspect.
We can also opt to substitute this for the Aspect of the Long Shadow to allow Corpse Explosion to consistently generate Essence for us. The only downside is being fully reliant on Corpse explosion for our Essence, which can be rough if we’re unable to generate corpses.
Aspect of the Protector
The Aspect of the Protector is a great defensive Aspect, granting a free shield every 30 seconds while fighting Elites.
We’ll place Aspect of the Protector in our Helm Slot, any Defensive Slot would work as well. We’ll drop this for Deathless Visage when we acquire one.
Aspect of Shielding Storm
The Aspect of Shield Storms allows Bone Storm to generate a Barrier for each enemy it hits, which helps if we end up getting swarmed by enemies.
We’ll place the Aspect of Shielding Storm in our Chest slot, but any Defensive slot that isn’t our Helm works.
Aspect of Disobedience
The Aspect of Disobedience gives us a stacking Armor buff that helps to mitigate a lot of damage. Without Plagued Corse Explosion though, we won’t have any reliable options for stacking the effect quickly.
We’ll place the Aspect of Disobedience on our Pants, as our last reaming Defensive Slot.
Wind Striker Aspect
The Wind Striker Aspect grants us a Movement Speed boost when we Critically Strike. This just helps out Mobility a bit but isn’t super necessary. Alternatively, replace with Ghostwalker Aspect.
As a Mobility Aspect, the Wind Striker Aspect will be placed in our Boots.
Unique Items
We’re only going to talk about the few that offer the strongest effects on the build. While there are others that help, these are the ones you really want to slot into your build if you get the chance. These will drop starting in Tier 3 content, but decent upgrades for the build once you get them.
Deathless Visage
This is about the only Unique that contributes to the build in any way, but really only offers Additional Essence and Critical Strike Damage. The echoes scale our damage quite a bit against bosses, and provide meaningful damage for when we don’t just one-shot a mob.
Ring of Sacriligious Soul
The Ring of Sacriligious Soul is a Unique Ring that will automatically consume Corpses for us to cast Corpse Explosion and Corpse Tendrils. This effect will also trigger various effects like the Fueled by Death passive and Corpse-eater Paragon effect making them even more reliable bonuses.
Tibault’s Will
Tibault’s Will is a pair of Unique Pants that can restore Essence and increase our damage any time we gain unstoppable. This works great in Season 2 thanks to the Metamorphosis power, but will only be useful for this season unless we gain additional means of Unstoppable.
Paragon Boards and Glyphs
These two endgame options are part of the Paragon System which is available starting at level 50.
Paragon Boards
Paragon Boards are a feature that becomes available at level 50. These boards allow us to spend the Paragon points we earn for leveling and Renown to strengthen our character. Each of these has a single Glyph Slot to place a glyph of our Choice.
Starter Board
As with all starter boards, the Necromancer is no different and only offers generic offensive and defensive boosts.
We’ll path up the right side through Prime, then to the Glyph Node, then through Knowledge to the upper gate. We can come back later and grab the Preservation and Resilience clusters for their defensive bonuses.
Bone Graft
Bone Graft gives us damage and a pretty sizeable boost of Essence which synergizes with Ossifed Essence, its Aspect, and the Serration passive.
We’ll rotate the board so that Bone Graft is near our entrance point at the bottom. We’ll path to the right and pick up Bone Graft, before heading toward the upper left corner, taking Entomb and Calcified on our way to the Glyph Node. Then we’ll grab Shaper of Bone and Erudite before pathing out the right gate near Bone Graft. We can additionally pick up the Tenacity cluster for the extra defenses and the Reinvigorate cluster for the extra Resources later.
Flesh-eater
Flesh Eater gives us an additional damage bonus for consuming corpses. Since we already do this anyway for various reasons, this supplements the build nicely.
Rotate the board so that Flesh-eater is closest to our entry. We’ll path to the right and up, though Stifle then head down and grab Flesh-eater. Then return back to the path above and continue along to Targeted as well as our Glyph Node and the resistances from the Erudite cluster. From here, we’ll head out the right gate.
Scent of Death
Scent of Death is another Corpse-based node, that grants Damage Reduction or damage based on the number of corpses active. This is the last Legendary we can get any use out of, and with careful corpse management, we can have either bonus available.
Rotate the board so Deathbringer is the closest Node. Path down to Deathbringer before heading back up near the start to grab Deathmarked, our Glyph Node, and Preservation before heading straight down to Scent of Death. After this, we can path to Ruin and Corrective before grabbing other desirable nodes on our boards.
Glyphs
Each of our Paragon Boards has a Glyph Slot, where we can socket one of our Glyphs. These Glyphs provide powerful bonuses that can be leveled up by completing Nightmare Dungeons to increase their power. Below are the Glyphs we recommend and what board to place them on.
Control
Control grants increased damage to Crowd Controlled enemies for every 5 Intelligence in range. With 40 Intelligence in range, it grants a multiplicative bonus vs Slowed and Stunned enemies.
This gets placed in our Starter Board, as it can easily fill the requirement without heavy point investment. There is also plenty of extra Intelligence we can use to scale this glyph later.
Essence
Essence grants increased Critical Strike Damage for every 5 Dexterity in range. Once we allocate 25 Dexterity, we get an additional Critical Damage bonus against enemies that are not healthy.
This gets placed in Bone Graft, as with the nearby magic nodes, we can easily fulfill the requirement for the bonus. This board also has a good amount of Dexterity to further scale this glyph.
Exploit
Exploit Increases our damage to Vulnerable targets for every 5 Dexterity in range. With 25 Dexterity in range, we’ll deal damage for each Vulnerable enemy we hit.
We’ll place this on Fleash-eater, as it has enough easily accessible Dexterity in range and well as more to scale with later.
Corporeal
Corporeal increases the effect of Magic nodes in range, in this case more Damage to Injured and Armor. With 40 Intelligence allocated in range, we also gain bonus physical damage.
We’ll place this on Scent of Death, as it has the most accessible intelligence and also because it’s our last board.
This concludes our Diablo 4 Bone Necromancer Build focusing on the Blood Surge skill. You can find more leveling and endgame Diablo 4 builds here on VULKK.com to try new things with your characters and spice up your gameplay.
If you want to try something different, check out some of our other Necromancer Builds:


