This guide for the Fire Sorcerer in Diablo 4 focuses on a post-campaign Endgame Meteor build that functions without too many Aspects, but becomes much more potent with the completed build!
This guide is up-to-date for Season 4 and Patch 1.4.0.
Check our Diablo 4 Builds Catalog of uniquely crafted builds for each class.
The Sorcerer is a class with many options available to them as far as main skills and builds go. This guide focuses on just one of those playstyles, a Meteor Build that is very powerful, but also very demanding on resources.
This Fire Sorcerer build guide assumes you’re at least level 50 and have completed enough of your Renown to have gained the 10 additional Skill Points available.
If you want a great leveling build to reach this point with, try our Sorcerer Leveling Build. Or you can use the Fire Sorcerer Build here to level up with. At the bottom of the guide, we have a leveling segment that will show you how to develop this build from level 1 on a new character.
Build Overview
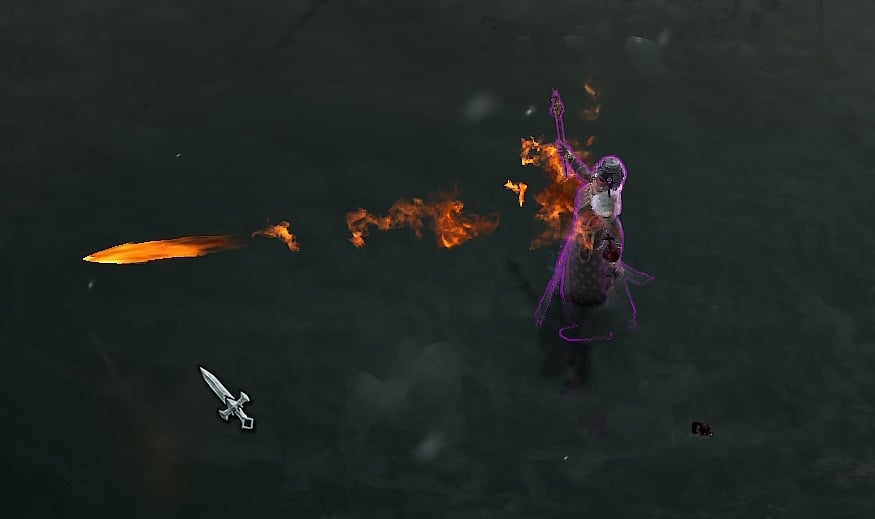
The Fire Sorcerer Build uses Meteor as its main offensive spell. This is a spell that can hit incredibly hard but often lacks AoE, this is why we’ll be supporting it with both Inferno and the Firewall Enchantment. These skills, coupled with Uniques like the Raiment of the Infinite, help keep enemies grouped together for easy clearing.
On the defensive side of things, we’ll have Teleport, Ice Armor, and Frost Nova all providing support to the build. Teleport will not only provide grouping power once we have Raiment of the Infinite but also a fairly reliable source of Unstoppable. Ice Armor helps us to soak up some extra damage, and can also be a source of Unstoppable. Frost Nova helps to make initial casts of our Meteor be more reliable.
Skill and Passive Breakdown
In this section, we’ll be talking about each skill we use. This is the whys and hows of how the build works, and then we’ll cover the skill point distribution.
Skills
These are the main skills for the build. We’ll explain what purpose each serves and how they fit the build
 Fire Bolt
Fire Bolt is our generator skill, which we need since Fire Sorcerers tend to have mana issues. This is especially true since this build also wants to be at or above a certain threshold for Mana and Meteor costs a ton.
Meteor
Meteor is our main source of damage, calling down Meteors from the sky to Critically Strike enemies for huge damage. It’ll also call down additional meteorites which will also hit for just as much damage and improve our AoE slightly.

Teleport
Teleport is mostly here as our way to break out of Crowd Control. Once you get the Raiement of the infinite, you’ll be able to more reliably use it aggressively, as long as you don’t overdo it.

Flame Shield
Flame Shield is one of the best panic button skills the Sorcerer has access to, granting full immunity to damage and statuses for a couple seconds. When we upgrade it, it’ll also heal us for a good bit of our Missing Life.

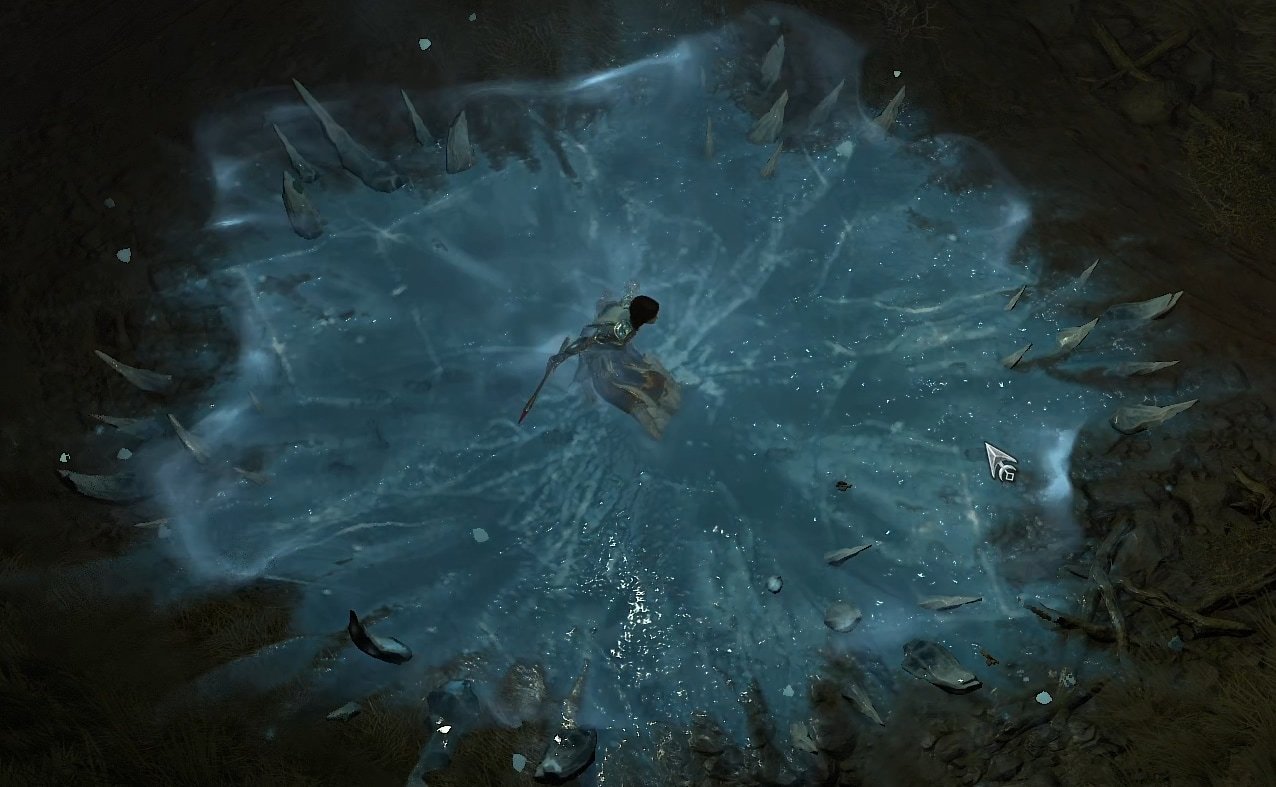
Frost Nova
Frost Nova is both a panic button and a setup tool while fighting packs. It’ll also be our main source of Vulnerable, which we, unfortunately, won’t get to use all too often.
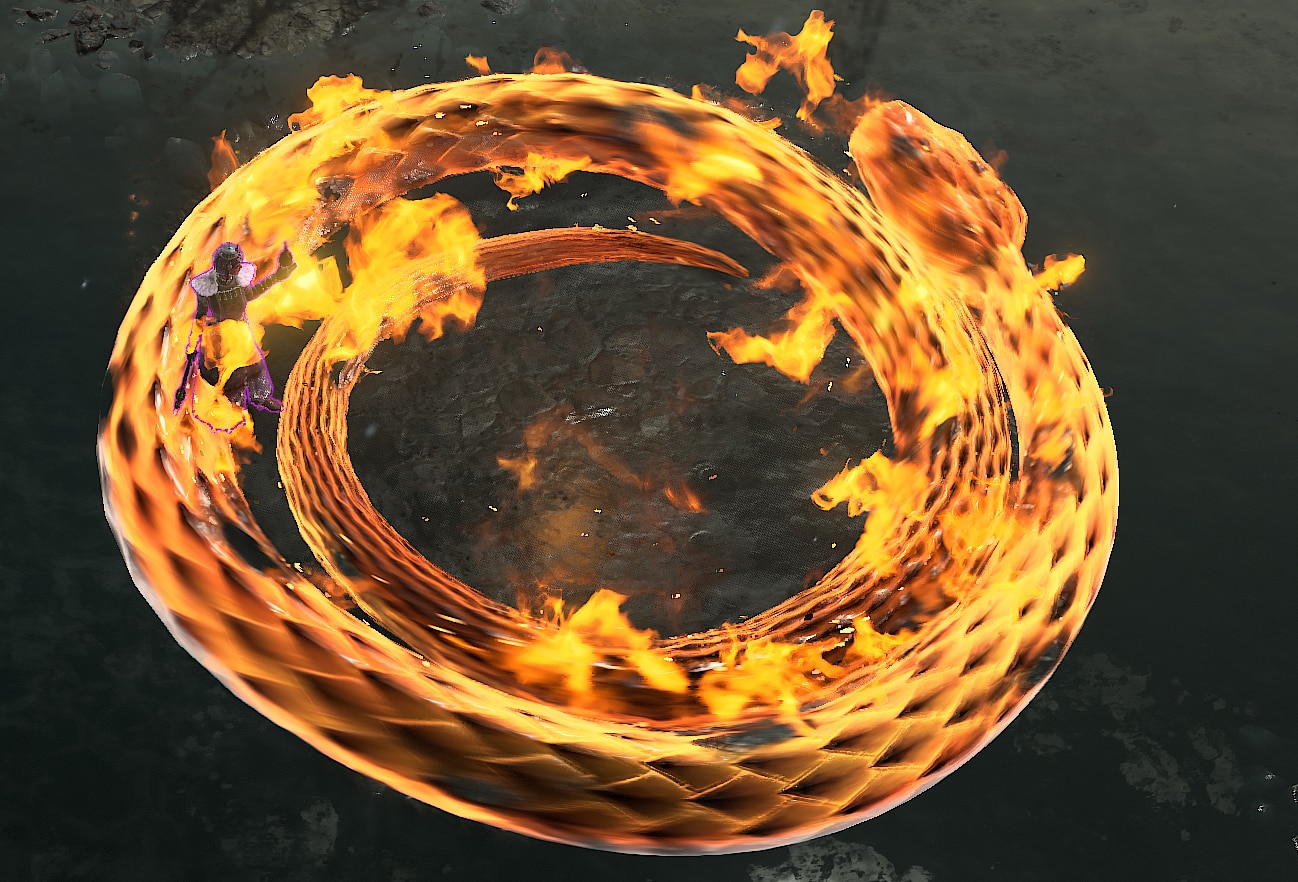
Inferno
Inferno is mainly used for the huge utility and burst potential this provides the build. When active, we’ll be able to freely cast Meteor into the enemies it groups up for us. Having no Mana Cost during this makes this a crucial Cooldown to use well.
Passives
Here we’re only going to talk about the main passives we absolutely want as well as our Key passive. There are unfortunately a couple we will need to take to get access to these though.
 Key Passive – Esu’s Ferocity
Esu’s Ferocity uses a 50% health Threshold for its bonuses. Above this threshold, it grants a Multiplicative bonus to Critical Strike Damage, whereas below it grants Critical Strike Chance. Defeating an enemy with a Critical Strike trigger both bonuses and we’ll be looking to do this often.
Devastation
Devastation increases our Mana which helps with some of our issues, but we mainly take it to progress further into the skill tree.
Elemental Dominance
With this passive now affecting Mastery skills after 1.1.0, it’s worth taking in the build. It’s a nice damage boost that pairs well with Elementalist’s spect.
Glass Cannon
Glass Cannon is a fairly potent damage boost for us, but comes with the slight drawback of taking more damage.
Elemental Attunement
Elemental Attunement helps us to be able to use Frost Nova and Flame Shield more often, both are fairly long cooldowns that can keep us alive, so almost guarantees that one of them is up every 10 seconds or so, as opposed to their normal cooldown of 20+ seconds.
Precision Magic
Precision Magic grants us Lucky Hit Chance, which helps a ton with our overall consistency and damage output. We have multiple strong effects and enchantments that trigger off of lucky hits.
Protection
Protection is a really strong defensive passive, giving us a short-duration shield anytime we use a cooldown. Since every skill that isn’t Fire Bolt or Meteor has a cooldown, we are able to make use of this often.
Inner Flames
inner Flames is a free damage increase for us when we’re Healthy. This won’t be too hard to maintain with all of our protections in place.
Devouring Blaze
Devouring Blaze is an exceptionally strong passive that grants a multiplicative bonus to Critical Strike Damage. This only applies to burning enemies, but all of our skills that deal damage can also Burn, so there’s no worries there.
Fiery Surge
Fiery Surge increases our Mana Regeration by a fair bit when we defeat burning enemies. Meteor is very mana hungry, so anything we get to help reduce or offset its costs are a huge benefit.
Soulfire
Soulfire allows us to reduce our mana Costs for Meteor by standing Still. This will mostly come into play during our burst window with Inferno, where this will have time to stack up safely.
Skill Point Distribution: Where to Assign Your Skill Points
This is an easy-to-reference table for where we’ll be placing all of our Skill points. These are listed in the order they appear on the skill tree.
| Icon | Skill Name | Skill Tree | Points |
|---|---|---|---|
 | Fire Bolt | Basic | 1 |
| Enhanced Fire Bolt | Basic | 1 |
| Flickering Fire Bolt | Basic | 1 |
 | Devastation | Core | 3 |
 | Elemental Dominance | Core | 3 |
 | Flame Shield | Defensive | 1 |
| Enhanced Flame Shield | Defensive | 1 |
| Shimmering Flame Shield | Defensive | 1 |
 | Frost Nova | Defensive | 1 |
| Enhanced Frost Nova | Defensive | 1 |
| Mystical Frost Nova | Defensive | 1 |
 | Teleport | Defensive | 1 |
| Enhanced Teleport | Defensive | 1 |
| Shimmering Teleport | Defensive | 1 |
 | Glass Cannon | Defensive | 3 |
 | Elemental Attunement | Defensive | 3 |
 | Precision Magic | Conjuration | 3 |
 | Align the Elements | Conjuration | 2 |
 | Protection | Conjuration | 3 |
 | Meteor | Mastery | 5 |
| Enhanced Meteor | Mastery | 1 |
| Wizard’s Meteor | Mastery | 1 |
 | Firewall | Mastery | 1 |
| Enhanced Firewall | Mastery | 1 |
| Wizard’s Firewall | Mastery | 1 |
 | Inner Flames | Mastery | 3 |
 | Devouring Blaze | Mastery | 3 |
 | Inferno | Ultimate | 1 |
| Prime Inferno | Ultimate | 1 |
| Supreme Inferno | Ultimate | 1 |
 | Fiery Surge | Ultimate | 3 |
 | Soulfire | Ultimate | 3 |
 | Esu’s Ferocity | Key Passive | 1 |
Gearing and Stats
In this section, we’ll cover all the things you’d want to keep an eye out for to enhance the final build. This includes our Recommended Weapons, Enchantments, Aspects, and of course, Uniques.
Recommended Weapons
For this build, we Highly Recommend a Wand and Focus. While using a 2H weapon is often powerful in its own right, we lose access to very important stats for the build, being Cooldown Reduction and Mana Cost Reduction.
You can still opt for a Staff if you wish, dropping the Aspect of Armageddon and making sure the Elementalist’s Aspect is on the Staff rather than the Amulet and moving Aspect of Three Curses to the Amulet instead. This provides higher damage and crit consistency, at the cost of longer cooldowns and higher mana costs.
Ideal Stats
The table below details the ideal stats for our gear, be on the lookout for gear that matches at least three of the four rolls below.
Due to the width of the table, we highly recommend mobile users rotate their devices to view it properly.
| Slot | Stat 1 | Stat 2 | Stat 3 | Stat 4 |
|---|---|---|---|---|
| Main-Hand | Critical Strike Damage | Vulnerable Damage | Mastery Skill Damage | Damage vs Burning |
| Off-hand | Cooldown Reduction | Critical Strike Chance | Resource Cost Reduction | Lucky Hit Chance |
| Helm | Cooldown Reduction | Maximum Life | Total Armor | Resistance |
| Chest | Maximum Life | Damage Reduction | Damage Reduction from Burning | Resistance |
| Gloves | Critical Strike Chance | Lucky Hit Chance | Attack Speed | Chance to Restore Mana |
| Pants | Maximum Life | Damage Reduction | Damage Reduction from Burning | Ranks of Meteor |
| Boots | Movement Speed | Resource Cost Reduction | Resistance | Resistance |
| Amulet | Cooldown Reduction | Ranks to Devouring Blaze | Ranks to All Mastery Skills | Mana Cost Reduction |
| Rings | Critical Strike Chance | Critical Strike Damage | Maximum Life | Lucky Hit Chance |
Recommended Gems
For this builds we’ll want to use Sapphires in our Weapon, Topaz in our Armor, and Diamonds in our Jewelry.
Placing Sapphires in our Weapons grants us Critical Strike Damage to Crowd Controlled targets. With our access to Stuns, Freeze, and Immbolize, we’ll be able to make good use of this bonus compared to others.
We’ll use Topaz in our Armor as we’re the most vulnerable when we’re Crowd Controlled. While both Teleport and Flame Shield can break us out easily, it’s not always guaranteed to have one or the up available, especially in encounters with lots of stuns.
Finally as with any build currently, we’ll place Diamonds in our Jewelry. Resistances are a big part of survival now, heavily mitigating incoming elemental damage. We can swap these for gems that offer specific resistances to round out out gear later on.
Vampiric Powers
During the Season of Blood, we’ll have access to Vampiric Powers, which allow us to slot up to five unique powers into our Sanguine Circle to increase the power of the build. We’ll include more than the maximum in the selection below to offer alternatives, but they will be listed in order of their relative strength.
| Name | Effect | Reason |
|---|---|---|
| Domination | Increases damage against enemies afflicted with Stun, Frozen, Immobilize, or Fear. If the Enemy is not an Elite, they are executed instead. | Meteor will always Immobilize, making any successive hits more likely to defeat enemies. |
| Anticipation | Reduces Ultimate Skill Cooldown. Increases Ultimate Skill Damage for each nearby enemy afflicted with a DoT effect. | This allows us to more regularly use Inferno for grouping and bursting down enemies. |
| Resilience | Increases Damage Reduction based on Missing Maximum Life. | This is great for taking on all content, but especially harder content. |
| Ravenous | Chance for Attacks to Increase Attack Speed based on Total Movement Speed. | This is a great way to improve our Burst damage, letting us get several Meteors off during Inferno. |
| Flowing Viens | Increases DoT Damage to enemies that are moving or afflicted with Vampiric Curse. | This increases the residual Burning damage of Meteor, Firewall, and even Inferno. |
| Rampart | After not moving for a short time, gain a barrier equal to a percentage of Maximum Life for a short Duration. | This allows us to more readily take advantage of our burst window during Inferno, keeping us safer while we cast. |
| Accursed Touch | Grants all attacks a chance to apply Vampiric Curse. Vampiric Curse can spread to other nearby enemies. | Allows Flowing Veins to be more reliable against more stationary enemies. |
Enchantments
This build uses both the Meteor Enchantment and the Firewall Enchantment.
The Meteor Enchantment can lead to a chain of Meteors being summoned from a single cast, with enough Lucky Hit Chance. This can result in a ton of extra damage in some situations but will be more likely to happen during the use of Inferno where we can cast this rapidly for no cost.
The Firewall Enchantment is used for two reasons, AoE and Mana Recovery. These Firewalls spawned by this Enchantment will significantly improve our overall damage and AoE. With the selected upgrades, they’ll also boost our Mana Regeneration Rate.
Teleport Enchantment can a great late game option to combine with Tibault’s Will and Boots with increased Evade charges. This allows you to easily drop Incendiary Aspect in favor of Tal Rasha’s Iridescent Loop.
Aspects
We’ll cover the Aspects that are recommended for maximizing the potential of the build. We’ll also suggest which gear slot you should look to place them in.
 Aspect of Three Curses
This aspect is what easily enables us to lean into hefty crits that can drop most enemies in a single hit. It provides a significant boost to Critical Strike Damage which is doubled when our target is Healthy.
We’ll place this in one of our Weapons, as we don’t really need to have it boosted, though it is powerful.
Elementalist’s Aspect
Elementalist’s Aspect is out next important Aspect, and this covers a good majority of our Critical Strike Rate. However, this has a condition that requires us to be at or over 100 Mana. We’ll Need additional Mana and Mana Cost Reduction to be able to get more than one cast with this effect.
This aspect will be placed on our Amulet Slot, to boost the Critical Strike Chance it provides.
Aspect of Shattered Stars
The Aspect of Shattered Star is a great aspect for this build as it adds additional, but smaller Meteors to each cast. More importantly, it enables Meteor to Burn without Fire Bolt Enchantment.
This aspect will be placed in our remaining Weapon, as we’ll have two Resource Aspects occupying our Rings.
Aspect of Armageddon
The Aspect of Armageddon is a bit of an odd choice, but it does provide some extra damage during Inferno. It’ll also allow our Meteorites to Immobilize, providing additional setup for Meteor casts.
We’ll place this on our Gloves, as its the only remaining offensive slot, as we’ll have two Resource Aspects occupying our Rings.
Incendiary Aspect
The Incendiary Aspect allows all of our Pyromancy Skills to have a chance of restoring a portion of Mana via Lucky Hit. This affects most of our damage-dealing skills and effects, which makes it fairly reliable.
As a Resource Aspect, this will be placed in one of our Rings. We can replace for Tal Rasha’s Iridescent Loop later on if we opt into using Tibault’s Will.
Prodigy’s Aspect
Since we’ll be able to use cooldowns fairly often, Prodigy’s Aspect works really well to provide large bursts of mana.
As a Resource Aspect, this will be placed in one of our Rings.
Aspect of Disobedience
We have a lot of DoTs in the build, which lends well to using the Aspect of Disobedience as a defensive Aspect, as we can quickly stack it and easily maintain it.
We’ll place this in our Helm Slot, though any defensive slot will work.
Aspect of the Protector
The Aspect of the Protector grants us a much needed barrier when facing Elites and bosses. This gives us a bit of temporary health when we really need it.
We’ll place this in our Pants Slot, though any defensive slot will work.
Aspect of Binding Embers
The Aspect of Binding Embers is a little niche, but works well with the Aspect of the Umbral due to the Immobilize. Being able to walk through enemies is also great utility as well.
We’ll place this on our Chest, to eventually be replaced by Raiment of the Infinite.
Ghostwalker’s Aspect
The Ghostwalker’s Aspect will give us an extra boost of movement speed when we Teleport. The is the most consistent Movement Speed option we get.
As a Mobility Aspect, this will go in our Boots.
Unique Items
We’re only going to talk about the few that offer the strongest effects on the build. While there are others that help, these are the ones you really want to slot into your build if you get the chance. These will drop starting in Tier 3 content, but decent upgrades for the build once you get them.
Raiment of the Infinite
Raiment of the Infinite adds a bit of extra utility to Teleport, allowing us to use it offensively to group enemies up and stun them for easy Meteors. Additionally, it offers ranks to the Glass Cannon passive, providing more damage.
Tibault’s Will
Tibault Will is a pair of Unique Pants that grant us a damage bonus and restore some Mana when we gain Unstoppable. Since we’ll be able to frequently use Teleport for mobility as well as its Unstoppable effect, this adds a ton of extra utility to the build, giving us a secondary way to recover Mana without needing to use our Basic Skill.
Tal Rasha’s Iridescent Loop
Tal Rasha’s Iridescent Loop is a Unique Ring that increases our damage for each element of damage dealt and refreshes all stacks when dealing elemental damage. This is a great ring to pair with Tibault’s Will in the late game, as the effect of Tibault’s Will can easily replace Incendiary Aspect for Resource recovery.
Paragon Boards and Glyphs
These two endgame options are part of the Paragon System which is available starting at level 50.
Paragon Boards
Paragon Boards are a feature that becomes available at level 50. These boards allow us to spend the Paragon points we earn for leveling and Renown to strengthen our character. Each of these has a single Glyph Slot to place a glyph of our Choice.
Starter Board
As with all starter boards, this only offers generic damage and defense.
We’ll path up the right side through Elementalist to our Glyph Node, then continue to the gate through Elemental Balance. We cna come back later and grab the Resilience cluster for extra elemental resistances later.
Searing Heat
Searing Heat increases our Critical Chance with Meteor each time we cast it, granting a fair bit of free Critical Chance. Additionally this board offers plenty of Fire Damage and Fire DoT bonuses.
Rotate the board so Pyromancy is the closest node. We’ll path directly to Searing Heat, stopping to grab Pyromancy along the way. Then we’ll continue up and to the right to our Glyph Node, picking up Combustion along the way. From our Glyph Node, we’ll eventually want to connect to both nearby gate nodes but start with the upper one, taking Flame-touched along the way.
Burning Instinct
Bruning Instinct increases our Burning Damage dealt by our Critical Strike Damage, using a ratio that scales with Intelligence. The board also offers plenty of Damage to Burning targets, which will be nearly everything we hit.
Rotate the Board so Burning Instinct is nearest to the gate. For this board, we’ll path straight up to Kindling, before pathing down through Keeper of Flames to grab Burning Instinct. Then from Kindling, we’ll head up to our Glyph Node. From here we’ll be able to grab Cinders and Smoldering Embers later as needed. We can also grab Culler much later on if desired.
Enchantment Master
Enchantment Master increases the power of our Enchantments. In this build’s case, that means higher Lucky Hit ratios. While they’re not a huge increase it does still increase the base chance which means less Lucky Hit Chance is needed overall. Additionally, this board offers plenty of Non-physical Damage and defenses.
Rotate this board so Enchantment Master is closest to the gate. We’ll head straight to Enchantment Master, grabbing Suffused Resilience along the way. Then we’ll continue further to the right, grabbing Ruinous before heading down to grab Elemental Balance and our Glyph Node. then we can head up and grab Elementalist before grabbing additional nodes to affect glyphs or other bonuses.
Glyphs
Each of our Paragon Boards has a Glyph Slot, where we can socket one of our Glyphs. These Glyphs provide powerful bonuses that can be leveled up by completing Nightmare Dungeons to increase their power. Below are the Glyphs we recommend and what board to place them on.
Adept
Adept increases the damage of Mastery skills, which boosts both Meteor and Firewall. With 40 Intelligence in range, it’ll also increase the AoE of both skills.
This will be placed on our Starter Board. We have a ton of easily accessible Intelligence there that makes the bonus easy to activate and boost up later on with excess points.
Pyromaniac
Pyromaniac is a Glyph that boosts surrounding Paragon Nodes with bonuses to Fire Damage and Fire Resistance. With 25 Willpower in range, each Pyromancy Skill we cast will boost our damage for a short time.
We’ll place this glyph in our Searing Heat board, as it’s the only one with Fire Bonuses in range that it can boost. We’re also very easily able to meet the requirement to activate the bonus with minimal cost.
Destruction
Destruction increases our Critical Strike Damage for every 5 Dexterity allocated in range. With 25 Dexterity allocated in range, we also get an additional multiplicative damage bonus towards Burning Enemies as well.
We’ll place this glyph into our Burning Instinct board, as it can very easily meet the dexterity requirements and we can boost it much higher.
Elementalist
Elementalist grants a boost to Non-Physical nodes in range, which is the main reason we use this glyph. Additionally, with 40 Intelligence in range, we’ll also get a stacking damage bonus granted by each type of damage, which we’ll be able to reliably stack twice.
We’ll place this glyph in the Enchantment Master board, as it has two great cluster of Non-Elemental effects and a heap of Intelligence to trigger to bonus with.
Leveling Order
If you want to play this build from level 1, the next segment of this build guide is for you. Below is the exact leveling order in which you should acquire your skills and passives to maximize damage and overall performance.
This build is not intended to be leveled with, as a result, it may not play comfortably until you’re closer to full build or get the core Offensive Aspects.
| Levels | Icon | Skill | Purpose |
|---|---|---|---|
| 2-4 | | Fire Bolt | Basic Skill, upgraded to Flickering for extra Mana generation. |
| 5-7 |  | Chain Lightning | Comfortable leveling skill dropped for Flame Shield after getting Meteor. |
| 8-10 | | Teleport | Provides Mobility and Unstoppable. |
| 11-13 | | Frost Nova | Provides Crowd Control and Vulnerable. |
| 14-16 | | Glass Cannon | Increased damage, at the cost of defense. |
| 17-19 | | Devastation | Increased Mana, sets up for full swap to Meteor. |
| 20-22 | | Meteor | Upgraded to Wizard’s Meteor for Immobilize. Use Fire Bolt Enchantment until we get Aspect of Shattered Stars. |
| Respec | | Flame Shield | Move Points from Chain Lightning into Flame Shield, taking Shimmering Flame Shield. |
| 23-25 | | Inner Flames | Increase Pyromancy Damage while healthy. |
| 26-28 | | Inferno | Huge damage and grouping power, as well as removing Meteor’s Mana cost for a short time. |
| 29-31 | | Devouring Blaze | Increased Critical Strike Damage, higher bonus vs Immobilized |
| 32-34 | | Firewall | Upgraded to Wizard’s Firewall, used as second enchantment. |
| 35 | | Esu’s Ferocity | Our Key Passive which allows for more consistent Critical Strikes. |
| 36-38 | | Precision Magic | Increased Lucky Hit Chance to trigger Enchantments more often. |
| 39-42 | | Meteor | Fully Leveling our Damage Skill |
| 43-45 | | Elemental Attunement | More Regular access to Flame Shield and Frost Nova. |
| 46 | | Align the Elements | Taken to reach Protection. |
| 47-49 | | Protection | A decent shield that scales with our Max Health, triggered anytime we use a cooldown. |
| Renown | | Fiery Surge | Improved mana regeneration |
| Renown | | Soulfire | Free Mana cost Reduction during and after our burst |
| Renown | | Elemental Dominance | Small improvement to damage, should be able to offset cost increases by this point. |
| Renown | | Align the Elements | Spending the leftover point here to allow it to provide a consistently higher bonus. |
This concludes our Diablo 4 Fire Sorcerer Build focusing on the Meteor skill. You can find more leveling and endgame Diablo 4 builds here on VULKK.com to try new things with your characters and spice up your gameplay.
To learn how to maximize your damage in Diablo 4, consult with our guide on that topic. Learning how to deal the highest possible damage with your build is crucial to succeeding in the Endgame and highest tiers.
If you want to try something different for the Sorcerer, check out some of our other Build Guides.