
This guide for the Barbarian in Diablo 4 focuses on a post-campaign Endgame Whirlwind build that functions without too many Aspects, but becomes much more potent with the completed build.
This guide is up-to-date for Season 4 and Patch 1.4.0.
Check our Diablo 4 Builds Catalog of uniquely crafted builds for each class.
Barbarian is quite the powerful class when it comes to the endgame of Diablo 4, and this build is far from an exception. This Whirlwind-focused build pack plenty of speed and power at full build, letting you breeze through even the hardest of content.
This Berserking Barbarian build guide assumes you’re at least level 50 and have completed enough of your Renown to have gained the 10 additional Skill Points available.
If you want a great leveling build to reach this point with, try our Barbarian Leveling Build – A bleed-focused build that scales well. If you want to level up with the Berserking Whirlwind Build, at the end of this guide, we have a leveling section showing you how to develop a new character from level 1 with this build.
Build Overview
This build is set up around Whirlwind, which has a Fury Cost that’s normally difficult to maintain. Thankfully, we have a very strong answer for this in our Shouts, which can be made to provide a ton of Fury Generation.
Defensively, we have our Shouts provide a ton of bonus Damage Reduction and Unstoppable in addition to their other utility. As we get better gear and certain Uniques, we’ll have fairly high uptime on these, making them very close to 100% uptime.
Skill and Passive Breakdown
In this section, we’ll be talking about each skill we use. This is the whys and hows of how the build works, and then we’ll cover the skill point distribution.
Skills
These are the main skills for the build. We’ll explain what purpose each serves and how they fit the build
 Lunging Strike
This won’t be used often, but it’s a great tool for triggering Lucky Hits, which helps out build a lot. It can also apply some initial Bleeding on an enemy by using Battle Lunging Strike to help setup passives and other bonuses.
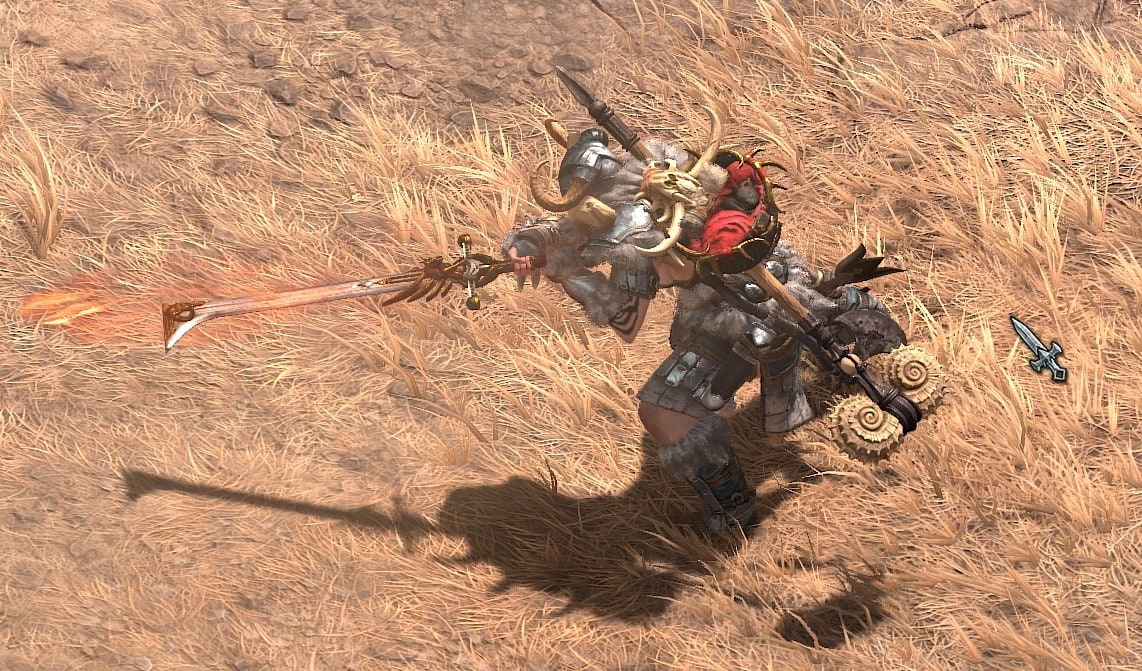
Whirlwind
This is our Main DPS Skill, and we’ll be able to very easily maintain the Fury Cost for this, despite having it cost more due to multiple passives.

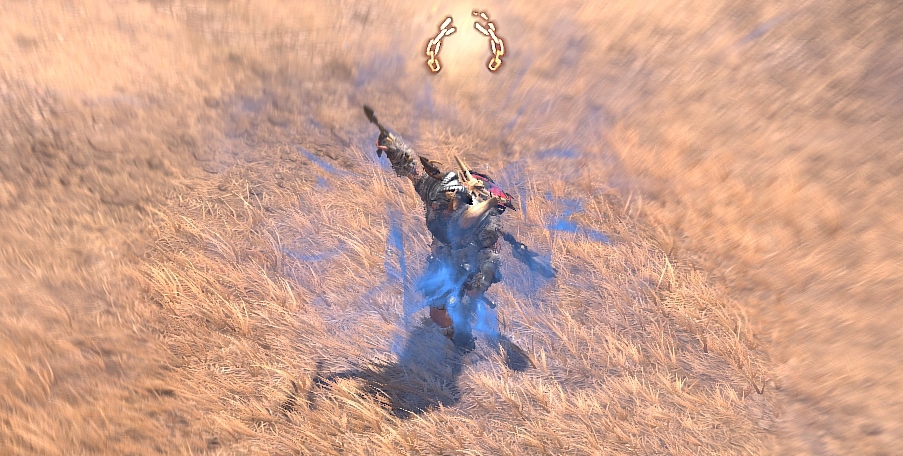
 Rallying Cry
Rallying Cry not only gives us Movement Speed, but also massively boosts our Fury Generation and grants us Unstoppable for its duration after being fully upgraded to Tactical Rallying Cry.
Challenging Shout
Challenging Shout grants us a huge chunk of Damage REduction, making us incredibly durable. When upgraded to Tactical Challenging Shout it’ll even boost our Life and further aid our Fury Generation.
War Cry
War Cry Grants a pretty solid Damage boost but also provides the majority of our Berserk uptime. This gets upgraded to Power War Cry to further increase the damage bonus.
Wrath of the Berserker
Wrath of the Berserker does everything we’d want for the build: Damage, Fury Generation, Movement Speed, Unstoppable. It’s super powerful in this build as well, as the damage ramps up with Fury Spent, and we can spend it as fast as we can generate it.
Passives
Here we’re only going to talk about the main passives we absolutely want as well as our Key passive. Unfortunately, there are a couple we will need to take to get access to these.
 Key Passive – Unbridled Rage
Since our Main DPS Skill is a Core Skill, there’s no reason to not take this massive damage buff. Once everything is setup, the doubled cost of our skill will mean nothing to us.
Pressure Point
Pressure Point allows Whirlwind to apply Vulnerable for itself, while it’s a small chance, we’ll really only need it for bosses after a certain point.
Booming Voice
This extends the duration of our Shout Skills, which allows this build to work as well as it does.
Raid Leader
This grants Healing Over Time to all of our Shouts, allowing for consistent healing in combat.
Prolific Fury
Prolific Fury grants us increased Fury Generation while Berserk, this helps to further offset the increased cost of using Unbridled Rage.
Swiftness
Swiftness help to boost our base Movement Speed up a little, making it easier to get around quickly, despite the lack of a pure Movement Skill.
Pit Fighter
Pit Fighter grants us more damage in addition to reducing damage from ranged enemies. It’s a great addition to a pure melee build like this one.
Counteroffensive
Counteroffensive increases our damage while at least half of our Life is Fortified. We’ll be able to get Fortify very easily through our Paragon Board later on, which makes this a great option later on.
Heavy Handed
Since our Main Weapon for the build is a Two-Handed weapon, this grants us some free Critical Strike Damage.
Wallop
Concussion
Skill Point Distribution: Where to Assign Your Skill Points
This is an easy-to-reference table for where we’ll be placing all of our Skill points. These are listed in the order they appear on the skill tree.
| Icon | Skill Name | Skill Tree | Points |
|---|---|---|---|
 | Lunging Strike | Basic | 1 |
| Enhanced Lunging Strike | Basic | 1 |
| Combat Lunging Strike | Basic | 1 |
 | Whirlwind | Core | 5 |
| Enhanced Whirlwind | Core | 1 |
| Furious Whirlwind | Core | 1 |
 | Pressure Point | Core | 3 |
 | Rallying Cry | Defensive | 1 |
| Enhanced Rallying Cry | Defensive | 1 |
| Tactical Rallying Cry | Defensive | 1 |
 | Challenging Shout | Defensive | 5 |
| Enhanced Challenging Shout | Defensive | 1 |
| Tactical Challenging Shout | Defensive | 1 |
 | War Cry | Brawling | 1 |
| Enhanced War Cry | Brawling | 1 |
| Power War Cry | Brawling | 1 |
 | Booming Voice | Brawling | 3 |
 | Raid Leader | Brawling | 2 |
 | Aggressive Resistance | Brawling | 1 |
 | Prolific Fury | Brawling | 3 |
 | Swiftness | Brawling | 3 |
 | Pit Fighter | Weapon Mastery | 3 |
 | Thick Skin | Weapon Mastery | 1 |
 | Counteroffensive | Weapon Mastery | 3 |
 | Wrath of the Berserker | Ultimate | 1 |
| Prime Wrath of the Berserker | Ultimate | 1 |
| Supreme Wrath of the Berserker | Ultimate | 1 |
 | Heavy Handed | Ultimate | 3 |
 | Wallop | Ultimate | 3 |
 | Concussion | Ultimate | 3 |
 | Unbridled Rage | Key passive | 1 |
Gearing and Stats
In this section, we’ll cover all the things you’d want to keep an eye out for to enhance the final build. This includes our Recommended Weapons, (Class Mechanic), Aspects, and of course, Uniques.
Recommended Weapons
The only weapon we’ll have to care about upgrading is our 2H Bludgeoning. The rest of our weapons will mostly serve to carry Aspects and boost our stats.
Ideal Stats
The table below details the ideal stats for our gear, be on the lookout for gear that matches at least three of the four rolls below.
Due to the width of the table, we highly recommend mobile users rotate their devices to view it properly.
| Slot | Stat 1 | Stat 2 | Stat 3 | Stat 4 |
|---|---|---|---|---|
| 2H Weapons | Critical Strike Damage | Damage while Berserking | Damage to Close | Strength |
| 1H Weapons | Critical Strike Damage | Damage while Berserking | Damage to Close | All Stats |
| Helm | Cooldown Reduction | Maximum Life | Total Armor | Dexterity |
| Chest | Maximum Life | Damage Reduction while Fortified | Damage Reduction from Close | Ranks to Challenging Shout |
| Gloves | Critical Strike Chance | Ranks to Whirlwind | Lucky Hit Chance | Strength |
| Pants | Maximum Life | Damage Reduction while Fortified | Damage Reduction from Close | Resistance |
| Boots | Movement Speed | Fury Cost Reduction | Berserking Duration | Resistance |
| Amulet | Cooldown Reduction | Ranks to Counteroffensive | Fury Cost Reduction | Movement Speed |
| Rings | Critical Strike Chance | Critical Strike Damage | Damage while Berserking | Fury Generation |
Recommended Gems
For this build, we’ll use Emeralds in our Weapons, Rubies in our Armor, and Diamonds in our Jewelry.
We use Emeralds in our Weapons as they’re the only gems we can really make use of here. While we do have some Crowd Control Effects, Vulnerable is overall more consistent for all types of content.
We use Rubies in our Armor as we get plenty of damage reduction from skills and passives that we really don’t need to stack anymore, so we take the increased Life instead.
We use Diamonds in Jewelry as Resistances are a powerful Defensive layer. This mitigates a lot of incoming elemental damage We’ll be able to swap these later for more specific resistance gems.
Vampiric Powers
During the Season of Blood, we’ll have access to Vampiric Powers, which allow us to slot up to five unique powers into our Sanguine Circle to increase the power of the build. We’ll include more than the maximum in the selection below to offer alternatives, but they will be listed in order of their relative strength.
| Name | Effect | Reason |
|---|---|---|
| Bathe in Blood | While using a Channeling Skill, form a pool of blood that increases your damage and damage reduction while channeling inside it. this can only occur once every 8 seconds. | This is a huge boost to single target damage for the build. |
| Sanguine Brace | Defeating enemies grants Fortify. While Fortify is greater than 50% Maximum Life, gain Critical Strike Chance. | This helps to generate Fortify faster as well as brings us even closer to 100% Critical Strike Chance. |
| Undying | Casting a skill heals you. Healing is doubled under 50% Maximum Life. | As a Channeling Skill, Whirlwind will trigger this effect at the same rate it ticks for damage. |
| Metamorphosis | When you evade, turn into a cloud of bats becoming Unstoppable for a short duration. Evading through enemies deals Physical Damage and inflicts Vampiric Curse. | This grants us a near permanent Unstoppable as well as damage from Tibault’s Will when we get them. |
| Prey on the Weak | Increases Vulnerable Damage. Enemies afflicted with Vampiric Curse are also Vulnerable. | Pairs with Metamorphosis to inflict Vulnerable regularly. |
| Anticipation | Reduces Ultimate Skill Cooldown. Increases Ultimate Skill Dmaage for each enemy afflicted with a DoT. | More Uptime on Wrath of the Berserker is a nice quality of life. |
Arsenal System
The Babarian’s Arsenal System allows them to control which attacks will use which weapons they have equipped. In this Build, we’re only able to set this for Lunging Strike and Whirlwind.
Lunging Strike and Whirlwind will be set to use our 2H Bludgeoning as this will give them the highest damage possible.
We’ll also supplement the build with 2H Axe Expertise, as we’ll be able to easily take advantage of the bonus damage to Vulnerable enemies
Aspects
We’ll cover the Aspects that are recommended for maximizing the potential of the build. We’ll also suggest which gear slot you should look to place them in.
 Aspect of Dire Whirlwind
The Aspect of Dire Whirlwind is what makes this build incredibly strong and consistent. It gives Whirlwind a huge chunk of Critical Strike Chance, just for keeping it active a short time.
We’ll place this on one of our 2H Weapons, as it gives an insane amount of Critical Strike Chance.
Aspect of Grasping Whirlwind
The Aspect of Grasping Whirlwind is a great bonus for Whirlwind as it will continually pull enemies in range of Whirlwind.
We’ll place this on our Gloves, as it doesn’t need to be boosted in effect.
Aspect of the Expectant
Aspect of the Expectant is one of those great general-purpose Aspects, which even though we’ll rarely ever need to fully stack it, it’ll affect Whirlwind the entire time we keep it active.
We’ll place this on one of our 1H Weapons, as the maximum effect doesn’t increase.
Aspect of Limitless Rage
Thanks to the Aspect of Echoing Fury, the Aspect of Limitless Rage becomes an easy source of damage, as we’ll frequently be generating more Fury than we spend.
We’ll place this on our other 2H weapon, as it’s one of the largest damage bonuses we get.
Aspect of Retribution
This provides a small boost of damage against stunned targets. Between this and Wallop, it gives us a nice damage boost from Concussive. As a bonus, we have a small chance to stun distant targets when we get hit.
We don’t really need to boost this effect, so it can be placed on one of our 1H Weapons.
Edgemaster’s Aspect
With our Fury being full, or nearly full at all times, this provides another nice damage bonus we can benefit from.
We’ll place this in our Amulet, to boost its effect and grant more damage
Aspect of Echoing Fury
Aspect of Echoing Fury makes each of our Shouts generate a ton of Fury. This combined with the effects of Rallying Cry lead to very quick Fury Generation.
We’ll place this in one of our Rings, a Resource Apsect can only be slotted on Rings.
Bold Chieftain’s Aspect
The Bold Chieftain’s Aspect reduces the cooldown of Shout for each enemy nearby, which results in higher uptime overall. Combined with some Paragon Nodes and other effects, we’ll have very near to 100% uptime on their effects.
This will be placed on our remaining Ring, as it’s also a Resource Aspect.
Relentless Berserker’s Aspect
Relentless Berserker’s Aspect allows Whirlwind to sustain Berserk for much longer. While it’s a Lucky Hit Chance, we’ll often be hitting enough enemies that this will activate often.
We’ll place this in our Helm or Chest, as either of these slots can hold this type of aspect.
Aspect of Disobedience
Between constant bleed applications and Whirlwind hitting enemies multiple times a second, Disobedience becomes a powerful defensive aspect.
We’ll place this on our Pants, making them a purely defensive slot.
Aspect of Numbing Wrath
Since the build will end up generating way more Fury then what it spends, Numbing Wrath takes that additional Fury and turns it into Fortify. This provides another solid and reliable defensive layer.
We’ll place this on our Helm or Chest, depending on which one isn’t holding Relentless Berserker.
Ghostwalker’s Aspect
Ghostwalker is great because more often than not we’ll be Unstoppable. Since it also lets us move through enemies, this also makes it so we can Whirlwind through them.
We’ll place this in our Boots, as it’s the only place we should ever put Mobility Aspects.
Unique Items
We’re only going to talk about the few that offer the strongest effects on the build. While there are others that help, these are the ones you really want to slot into your build if you get the chance. These will drop starting in Tier 3 content, but decent upgrades for the build once you get them.
Gohr’s Devastating Grips
Gohr’s Devastating Grips are Unique Gloves that help Whirlwind a ton. They give you a bit of everything that the build needs and wants, Attack Speed, Lucky Hit, Fury Generation, and even levels to Whirlwind. Additionally, they even add extra bursts of damage as we Whirlwind.
Tuskhelm of Joritz the Mighty
The Tuskhelm of Joritz the Mighty is a Unique Helm that grants us a chance to become Enraged anytime we activate Berserking while already Berserk. This Enraged state increases our damage, Fury Generation, and Cooldown Reduction. It also has great stats for the build.
Tibault’s Will
Tibault’s Will is a pair of Unique Pants that restore our Fury each time we enter Unstoppable, as well as increase our damage during unstoppable and for a duration after. This works extremely well in Season 2 in combination with the Metamorphosis power letting us easily take advantage of both effects consistently.
Paragon Boards and Glyphs
These two endgame options are part of the Paragon System which is available starting at level 50.
Paragon Boards
Paragon Boards are a feature that becomes available at level 50. These boards allow us to spend the Paragon points we earn for leveling and Renown to strengthen our character. Each of these has a single Glyph Slot to place a glyph of our Choice.
Starter Board
As with all classes, our starting board offers generic Damage and Defenses.
As usual, we’ll path up the right side through Brawn. Then we’ll get our Glyph, pathing to pick up extra Dexterity here for use with the glyph that’s going here, then we’ll head out the top through Raw Power.
Warbringer
Warbringer is the only Board that really has a Legendary Node we can use, which will simply grant us Fortify as we spend Fury.
Rorate this board so that our Glyph Node is the closest to our starting board. We’ll path directly to the Glyph Node, taking Raw Power afterwards. Then we path directly to Warbringer, before heading out the left side.
Weapons Master
Weapons Master is mostly just an accessible Glyph Node, but we can also pick up Elite Damage and Physical Damage from this board, which are always welcomed.
We’ll rotate this board so that Raw Power is the closest node to our right gate. We’ll path directly to Raw Power, grab our Glyph Node, then make a detour to Hunter Killer before heading out the upper gate after picking up Iron Strength.
Decimator
Decimator is another board with a fairly accessible Glyph Node, but we’ll also get a fair amount of Vulnerable Damage here as well.
Rotate the board so that our Glyph Node is closest to the gate we enter from. We’ll path straight to that Glyph Node, also picking up Demolish, Arrogance, and all the Willpower in range for our glyph to be placed here. Then we’ll head to the gate while also grabbing Pillage.
Bone Breaker
Bone Breaker is a board we’re taking exclusively for the Glyph Slot. Glyphs are a big part of the power of this build as not many Legendary Node actually help it.
Rotate this board so the Glyph Node is the closest. Path to the Glyph Node, taking as much Dexterity as we can along the way for the Glyph we’ll slot here.
Flawless Technique
Flawless Technique is yet another Glyph Slot for us, but we can’t say no to some extra Critical Strike Damage or Physical Damage either.
Rotate this board so Havoc is closest to where we enter. We’ll path straight to Havoc, then to our Glyph Node, taking most of the Willpower in range for the glyph placed here.
Glyphs
Each of our Paragon Boards has a Glyph Slot, where we can socket one of our Glyphs. These Glyphs provide powerful bonuses that can be leveled up by completing Nightmare Dungeons to increase their power. Below are the Glyphs we recommend and what board to place them on.
Territorial
Territorial increases our damage to Close Enemies for every 5 Dexterity in range. With 25 Dexterity allocated in range, we also gain Damage Reduction against close enemies.
This gets placed on our Starter Board as we’re able to get the most out of it with the least investment.
Wrath
Wrath grants us increased Critical Strike Damage with Core Skills for every 5 Dexterity in range. With 25 Dexterity allocated in range, our Critical Strikes will generate additional Fury.
This gets placed on the Warbringer board, as it can easily exceed the requirement with little investment.
Marshal
Marshal boosts all Magic Nodes in range. With 40 Strength allocated in range, our Shouts will reduce the active cooldown of each other with each cast.
We’ll place this in the Weapons Master board, as it has great clusters of Physical Damage and Armor available to boost while picking up the necessary Strength.
Imbiber
Imbiber increases the damage dealt while Healthy for every 5 Willpower in range. with 25 Willpower allocated in range, it also increases Potion Healing, but we don’t particularly need that, just the damage.
We’ll place this on the Decimator board, as it has plenty of easily accessible Willpower in range to increase the value of the base effect.
Exploit
Exploit increases Vulnerable Damage for every 5 Dexterity in range. Additionally, with 25 Dexterity allocated in range, every enemy you hit will have Vulnerable applied to them.
We’ll place this on the Bone Breaker board, as it can very easily meet the requirement for this bonus, in addition to providing plenty of Dexterity for the main glyph effect.
Undaunted
Disembowel increases our Damage while Fortified for every 5 Willpower in range. With 25 Willpower allocated in range, we’ll gain additional Damage Reduction While Fortified
We’ll place this on our Flawless Technique board, as it can very easily meet the Willpower requirements with plenty of extra Willpower in range.
Leveling Order
If you want to play this build from level 1, the next segment of this build guide is for you. Below you will see the exact leveling order in which you should acquire your skills and passives to maximize damage and overall performance.
| Levels | Icon | Skill | Purpose |
|---|---|---|---|
| 2-4 | | Lunging Strike | Upgrade to Battle Lunging Strike for bleeding. |
| 5-7 | | Whirlwind | Upgrade to Furious Whirlwind. Arsenal – Assign Skills to 2H Slashing. |
| 8-10 | | Rallying Cry | Upgrade to Tactical Rallying Cry for Unstoppable and increased Fury Generation. |
| 11-13 | | Challenging Shout | Upgrade to Tactical Challenging Shout for extra Fury Generation. |
| 14-16 | | War Cry | Upgrade to Power War Cry for increased Damage. |
| 17-19 | | Pressure Point | Allows Whirlwind to inflict Vulnerable. |
| 20-22 | | Booming Voice | Increases Shout Duration. |
| 23-25 | | Raid Leader | Shouts now heal you over their duration. |
| 26-28 | | Wrath of the Berserker | Grants Berserking, Unstoppable, and Movement Speed. |
| 29-32 | | Whirlwind | Max out our DPS Skill to increase damage. |
| 33 | | Aggressive Resistance | bit of damage reduction, used to reach Prolific Fury. |
| 34-36 | | Prolific Fury | Increases our Fury Generation while Berserking. |
| 37-39 | | Pit Fighter | Nice boost of damage and defenses |
| 40-42 | | Heavy Handed | Good boost to Critical Strike Damage |
| 43-45 | | Wallop | Gives a solid damage boost against Stunned and Vulnerable enemies. |
| 46-48 | | Concussive | Allows more consistent Stuns |
| 49 | | Unbridled Rage | Huge power boost, which we should be able to sustain at this point. |
| Renown | | Challenging Shout | Max out for Damage Reduction |
| Respec | | Raid Leader | Remove one Point |
| Renown | | Thick Skin | One point to reach Counteroffensive |
| Renown | | Counteroffensive | Great Damage boost once we’re able to get into Paragon Boards |
| Renown | | Swiftness | Increases Movement Speed. |
This concludes our Diablo 4 Barbarian Build focusing on the Whirlwind skill. You can find more leveling and endgame Diablo 4 builds here on VULKK.com to try new things with your characters and spice up your gameplay.
To learn how to maximize your damage in Diablo 4, consult with our guide on that topic. Learning how to deal the highest possible damage with your build is crucial to succeeding in the Endgame and highest tiers.
Check out other Barbarian Builds we have done:


