While Diablo 4 has fairly simple crafting systems, there are a lot of nuances that aren’t always clear. This guide teaches you everything you need to help get great items very quickly.
Diablo 4 breaks its crafting down between three of the in-game NPCs; The Blacksmith, the Jeweler, and the Occultist.
Each of these plays a different role in the crafting process, but we’re going to cover what they do and how best to use their functions.
We’ll also talk about some lesser-known functions with these crafting options that can take things to a whole new level.
What Item Crafting is in Diablo 4
While there are only three vendors that assist you with all things crafting, there are five main parts to crafting. The bases of each of these are explained below, alongside what makes each very useful.
It’s important to remember that all items up to Unique are tradable as of Season 4. Performing any form of crafting on an item will make it untradeable, no crafting for profit here!
Codex of Power and Aspect Extraction
The Codex of Power holds our Aspects, functioning as both a collection log and a crafting compendium.
Since Season 4, the Codex of Power will retain all our Aspects at the highest power we’ve collected. They will not be available right away from Level 1, nor will they carry over between seasons. We’ll still have to collect, and now upgrade, them in a similar way to before, pulling them from Dungeons or Drops.
There are two ways you can unlock Aspects in Diablo 4. This can be done by Completing a Dungeon to unlock an Aspect or by salvaging a Legendary Item.
Completing a Dungeon will grant us a specific Aspect the first time it’s finished in a Season. This Aspect will always start at its minimum power, but is a guaranteed source for it.
Salvaging Legendary Items will also grant us the Aspect on the item in our Codex of Power. Aspects obtained by Salvaging Legendary items will upgrade our Aspects in the Codex of Power, retaining the highest power we’ve Salvaged. This means one perfect roll of an Affix is all we ever need from a drop, then we can always craft it at maximum strength.
Most Aspects can only have their highest tiers salvaged from an Ancestral Legendary. When looking at the Codex of Power, this is why many will appear as 16/21 ranks until Torment Difficulties, despite displaying as the highest power on the item otherwise.
If an item has an upgraded Aspect, it will have an indicator inside the salvage menu. This lets you see at a glance if you will be upgrading an Aspect any time you salvage a Legendary Item.
Aspect Imprinting
By visiting the Occultist, we have access to Aspect Imprinting, which lets us apply Aspects we’ve collected or unlocked from our Codex of Power. This comes at a small cost of some Gold and some Crafting materials gained by breaking down gear.
For Rares, this is always a combination of a Common Material (Ores/Leather), Veiled Crystals, and their Respective Legendary Material. For Ancestral Legendary Items, this also includes Forgotten Souls, which only drop in Torment Difficulties, most commonly from Helltides or Infernal Hordes.
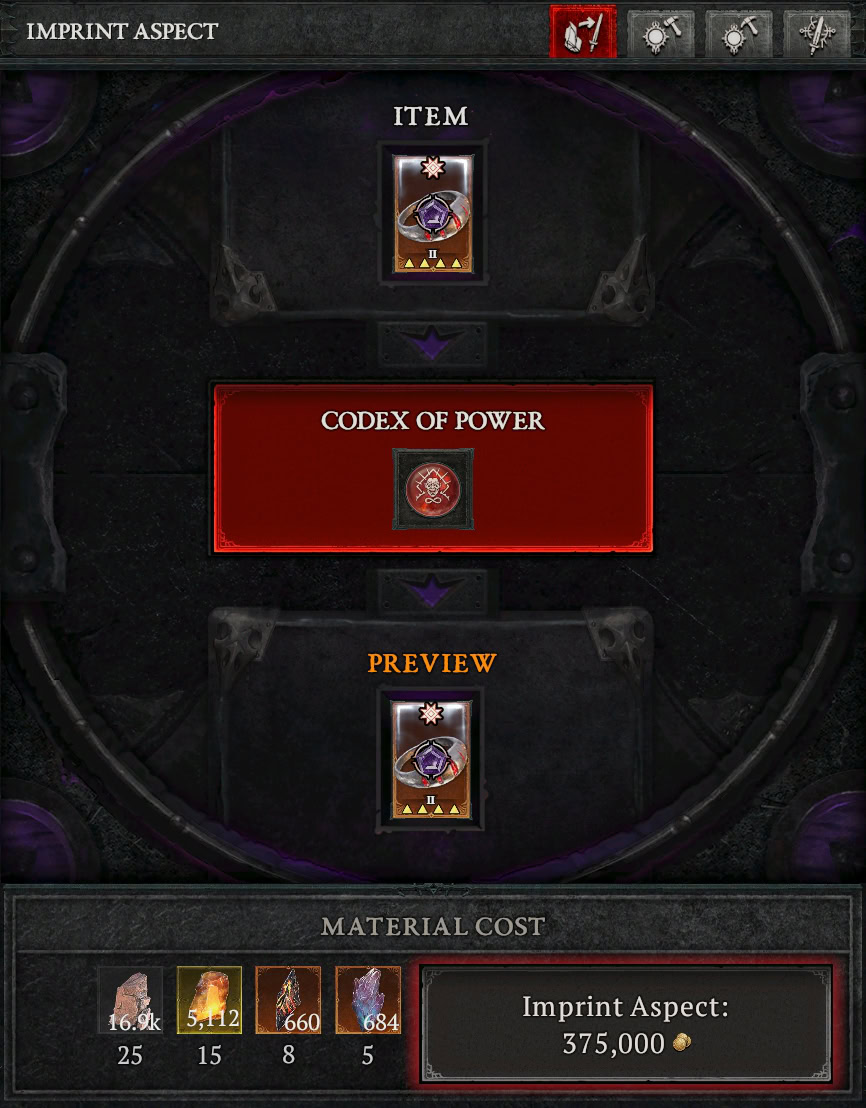
When Imprinting Aspects, you will always Imprint the Aspect at its current power, except for a couple of item types. When Imprinting, an Aspect is 50% Stronger if placed on an Amulet or 100% Stronger on 2-Handed Weapons.
It’s worth noting that, in addition to boosting an Aspect by 50%, Amulets can use any Aspect type. All other gear slots are limited to 1-2 Aspect types, making them much less flexible. Below is a table of those restrictions.
Item Slot
Available Types
Helmet
Defensive or Utility
Body Armor
Defensive or Utility
Leg Armor
Only Defensive
Gloves
Offensive or Utility
Boots
Mobility or Utility
Amulet
Defensive, Mobility, Offensive, Utility
Rings
Offensive or Resource
Weapons
Only Offensive
Focus or Totem
Only Offensive
Shield
Defensive or Utility
Enchanting
By visiting the Occultist, we’ll be able to Enchant Gear. Enchanting allows us to re-roll a single affix line on a piece of gear. Once we choose a line to re-roll, we will be unable to pick another to re-roll even if we chose the option to keep the current roll.
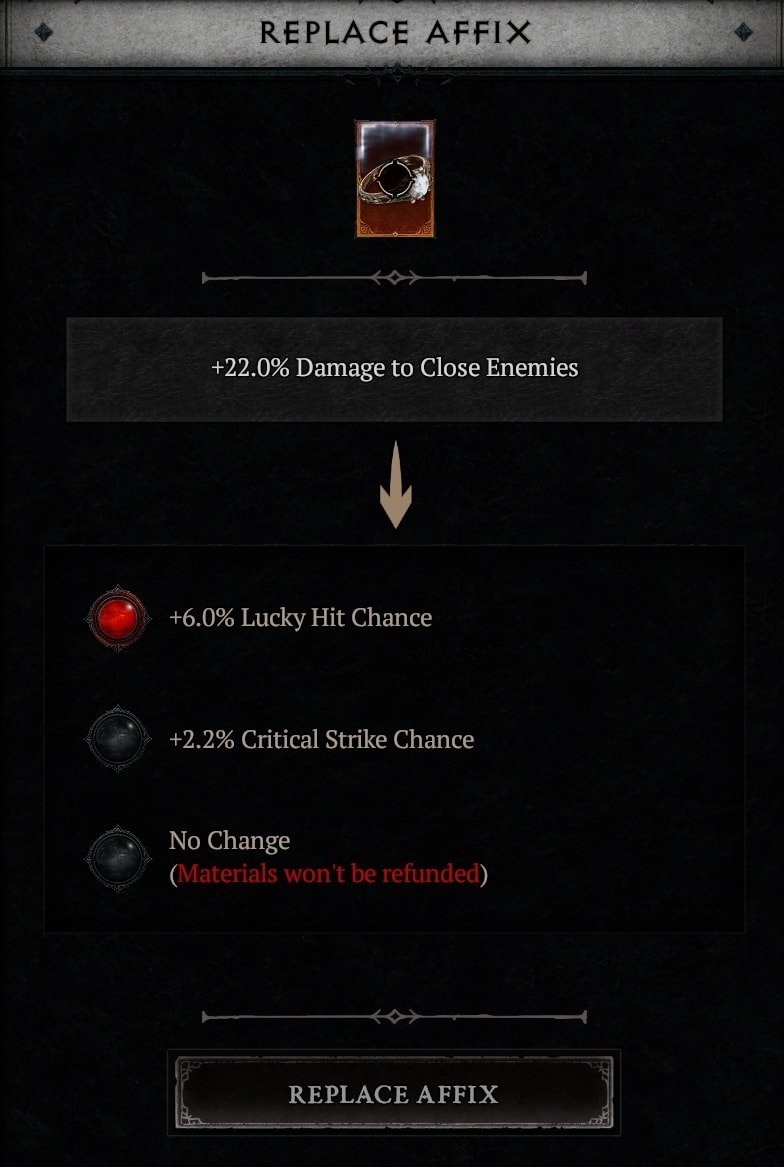
Doing so will cost a fair bit of Gold, increasing slowly for each attempt until it reaches its capped value. This also costs resources, based on the rarity of the item, but this cost does not increase, remaining a fixed value at all times.
Keep in mind, that we should not Enchant a Greater Affix. Enchanting an Affix Slot that is already a Greater Affix will revert it to a regular affix, not replace it with a different Greater Affix. Greater Affixes will not appear during Enchanting in any situation.
The only reason we may consider re-rolling a Greater is to make use of the higher Item Power of an Ancestral Legendary, if it rolled well outside of the Greater Affix. It will still be stronger than basic Legendary, but not by a whole lot.

This can be incredibly expensive for high-tier items, which demand more gold and rarer materials. As long as we have the gold, this is a decent way to get upgrades if an item is missing just one core stat we need.
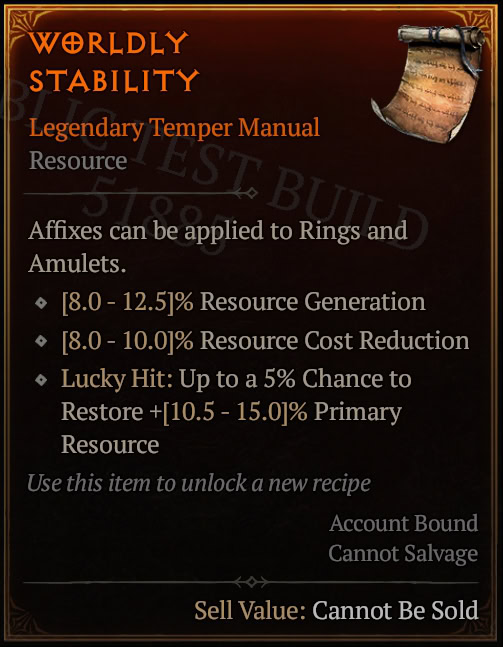
Tempering
Added in Season 4, Tempering is a crafting option that allows us to add special Tempered Affixes to our gear. Tempered Affixes are Affixes that directly modify one or more skills. This can include effects like Additional Projectiles or Increased Area of Effect.
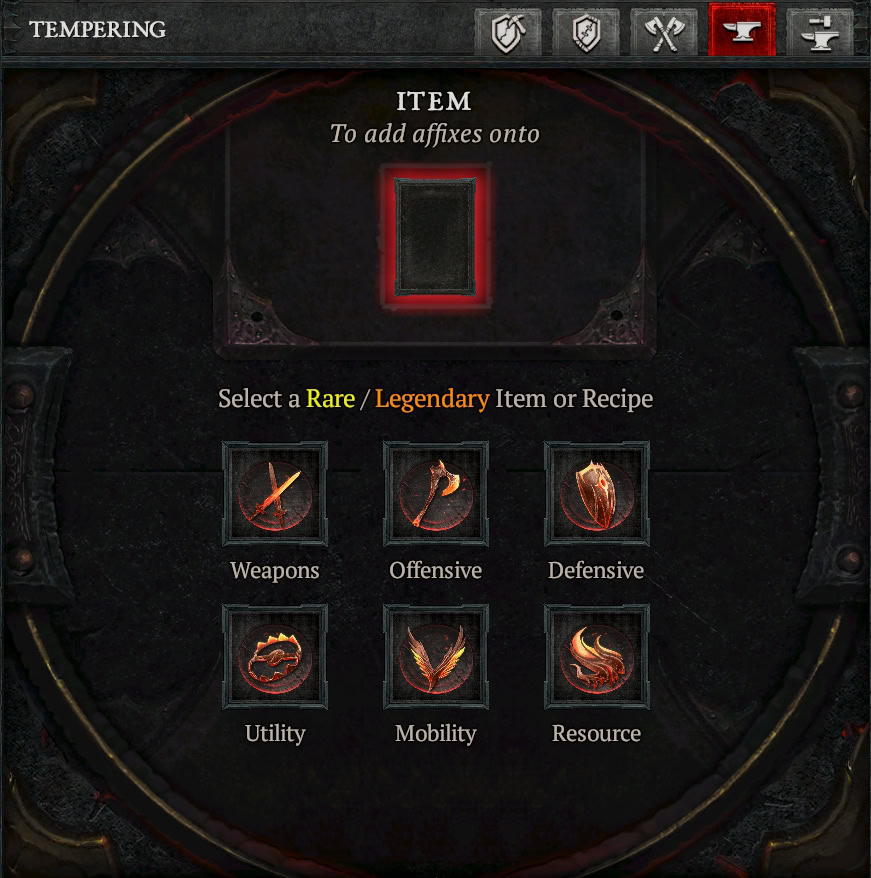
All Rare and Legendary Items can have Tempered Affixes applied to them. Rare Items will only be able to have a single Tempered Affix, while Legendary Items can have two Tempered Affixes. This makes Tempering useful at all stages of the game, but very important once we’re in full Legendary gear.
To begin the process of Tempering an item we’ll need to acquire and use Tempering Manuals, a new crafting item found throughout the game. This unlocks the Tempering Manual’s selection of Affixes for permanent use at the Blacksmith.
All Tempering Manuals and Tempered Affixes fall into six different categories: Weapon, Offensive, Defensive, Utility, Mobility, and Resource. Each of these types has its own generic and class-exclusive options available. Much like Aspects, the categories of Tempered Affixes can only be applied to certain types of gear. Below is a table of which Tempering Types are available for each item type.
Item Slot
Available Categories
Helmet
Defensive or Utility
Body Armor
Defensive or Utility
Leg Armor
Only Defensive
Gloves
Offensive or Utility
Boots
Mobility or Utility
Amulet
Defensive, Mobility, Offensive, Utility
Rings
Offensive or Resource
Weapons
Weapon or Offensive
Focus or Totem
Weapon or Offensive
Shield
Defensive or Utility
Tempering Manuals consist of two to five Affixes that are similar in the Skills or Skill Category they apply to. This means most characters will find one that’s a great option for their current build without being overburdened by dealing with the RNG of dozens of Affixes for a single slot.
All Items also have Tempering Re-rolls, a value that determines how many times a Tempered Affix can be re-rolled. Every item has 5 Tempering re-rolls by default, with one additional re-roll per Greater Affix on Ancestral Legendary Items.
This means that Rare items, which can have one Tempered Affix, will have 6 chances to hit the desired affix. Legendaries can have two Tempered Affixes of different categories, and will have 7 total chances to hit two desired Affixes, with additional chances being granted per Greater Affix on an Ancestral Legendary.
For a more in-depth look at tempering and its general usage, check out our Tempering Guide.
Socketing
By visiting the Jeweler, you can Add Sockets to an item or remove socketed gems to replace them.
While gems aren’t going to make or break a build too often, they do provide fairly strong bonuses that are worth getting. Which gems you use comes down to the needs of your build.
Being able to freely swap these out with no cost is a great benefit for Endgame, allowing you to try different combinations of gems to see what works best. All of our Build Guides include the gems that best suit each build.
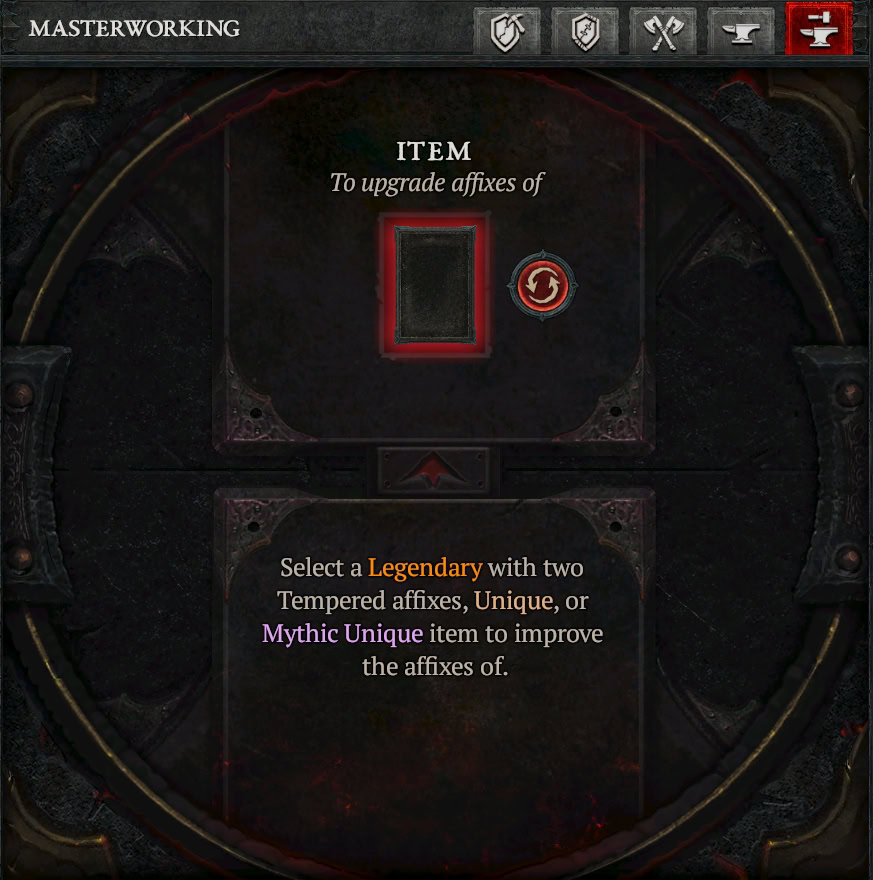
Masterworking
By visiting the Blacksmith, we can Masterwork a Tempered Item to boost the affixes on the item. Masterworking has a total of 12 stages (8 for Non-Ancestral Items), compared to the 4 Upgrading had. This requires special Crafting Materials that can be acquired from Nightmare Dungeons or Infernal Hordes.
As we Clear a Nightmare Dungeon, everything we do have a chance to drop Obducite, our Masterworking Material. The higher the Difficulty we complete a Nightmare Dungeon, the higher the tier and quantity of materials we get. Below is a quick reference of how much you can expect by progressing.
| Diffculty | Average Obducite* |
|---|---|
| Torment 1 | 100 |
| Torment 2 | 200 |
| Torment 3 | 400 |
| Torment 4 | 800 |
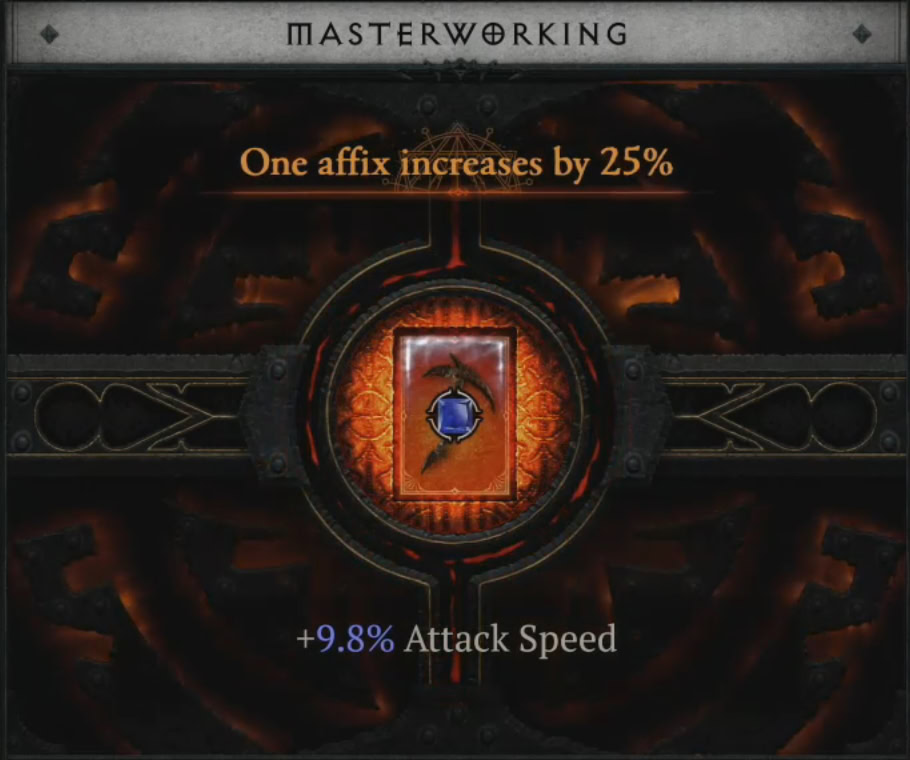
As we masterwork an item, it will use each of the materials above. Every Rank will increase all our Affixes on the item by 5%, this bonus is additive with itself. However, Ranks 4, 8, and 12 will instead boost a single Affix (chosen at random) by 25%. These larger boosts can stack on top of each other as well, leading to a potential increase of 120% in a single Affix.
Below is a table of each Rank, its upgrade costs, and the results of the upgrade itself.
| Rank | Cost | Upgrade |
|---|---|---|
| 1 | 10 | +5% to all Affixes |
| 2 | 20 | +5% to all Affixes |
| 3 | 30 | +5% to all Affixes |
| 4 | 40 | +25% to Random Affix |
| 5 | 60 | +5% to all Affixes |
| 6 | 120 | +5% to all Affixes |
| 7 | 240 | +5% to all Affixes |
| 8 | 360 | +25% to Random Affix |
| 9 | 450 | +5% to all Affixes |
| 10 | 900 | +5% to all Affixes |
| 11 | 1350 | +5% to all Affixes |
| 12 | 2250 | +25% to Random Affix |
At any point, the Blacksmith allows us to reset our Masterwork Rank for 5 Million Gold. This is costly, but thanks to Infernal Hordes, and Whisper Caches, there’s not a shortage of gold.
Salvaging
Salvaging items is fairly set as to what you can expect from any given item or set of items. Below are a few quick tables of what you’ll often see as salvage from any given item type. Of note, Rare items imprinted with Aspects still retain their Rare Salvage class.
| Rarity | Weapons | Armor | Jewelry |
|---|---|---|---|
| Normal (White) | Iron Chunk | Rawhide | Iron Chunk |
| Magic (Blue) | Silver Ore | Superior Leather | Iron Chunk |
| Rare (Yellow) | Veiled Crystal | Veiled Crystal | Veiled Crystal |
| Legendary (Orange) | Baleful Fragment | Coiling Ward | Abstruse Sigil |
| Unique (Gold) | Baleful Fragment | Coiling Ward | Abstruse Sigil |
| Mythic (Purple) | Resplendent Spark | Resplendent Spark | Resplendent Spark |
As of Season 4, salvaging a Legendary Item can also upgrade our Aspects. If the item we Salvage has a stronger version of any Aspect, it will be saved to our Codex of Power in addition to the materials from the table above.
When Salvaging, we’ll often get lower-tier materials in higher quantities from higher rarities. This is also true of the Ancestral Items found in Torment Difficulties. While these may be of the same rarity as lower-grade items, they’ll often salvage for much more.
This brings up the Golden Rule of Salvaging: Sell Lower Quality, Salvage Higher Quality. Since we end up getting much less out of salvaging lower-tier items, it’s best to not even bother picking up things that aren’t of our highest tier available. If you find yourself hurting for resources, then it’s perfectly fine to scrap what you need.
All Items under Legendary Rarity will be auto-salvaged in Torment Difficulties. This is a good Quality of Life change added in Season 6. It means we’ll never have to salvage items to maintain any reasonable amount of resources, it will just be entirely passive.
Crafting Useful Upgrades
This section outlines the general processes of using the various crafting options to craft upgrades for your character. We’ll cover two basic processes, one for leveling and one for crafting Best-in-Slot gear.
Keep in mind, that you should only ever use either of these processes when three or four Affixes on a piece of gear are desirable for your build. Doing so otherwise is a huge waste of time, gold, and resources!
Tempered Treasure
For most of your progression, you’ll be tempering Legendary items to get stronger. This leads to the most basic of Crafting cycles early on, but it’s worth paying attention to what your options are, as they can make your Leveling that much easier. Here’s the basic process we’ll be doing until the point we’re chasing perfected items.
- Find an Item with useful Affixes.
- Refer to the Temper Priorities below
- Enchant it.
- Equip it.
We start by finding an item we want to use, be it a Rare or Legendary. Ideally, it has at least two great stats. Once we reach Torment Difficulties, we’ll want to keep an eye out for Greater Affixes as well, in which case a Greater Affix and a good or tolerable second Affix are ideal to see on a Legendary.
With limited Tempering Slots, here are our recommended Tempering options for leveling.
Gear Slot
Tempered Affixes
Listed Best First
Weapons (includes Off-Hand)
Double Cast, Double Damage, Damage
Shields
Resists, Armor, Life
Helmets
Armor, Defensive Passive, Resists
Body Armor
Armor, Defensive Passive, Resists
Leg Armor
Armor, Defensive Passive, Resists
Gloves
Class Offensive, Damage
Boots
Movement Speed, Class Control
Amulet
Cooldown,
Rings
Efficiency, Damage, Resource Generation
From here, we’ll just want to finish it off by Enchanting it, if necessary. Just be careful you’re not Enchanting away a Greater Affix once you hit Torment 1 and they start appearing.
Going for Best-in-Slot (BiS)
While there’s a slight difference between BiS, and what we can manage with Crafting, we’ll be close enough through this process that the only way it’ll get better is with more Greater Affixes. Below is a quick outline of the process.
- Find a great base item, or maybe two.
- Temper.
- Enchant.
- Imprint.
- Masterwork.
- Socket.
- Equip it
For this example, let’s just say you have an amazing Weapon to drop. We’ll say it has two Greater Affixes, and lucky you, they’re ideal for your build.
We start with Tempering, due to the nature of the system determining if it’s worth continuing the craft at all. Temper our Weapon and Offensive Affixes on. If they roll the stats we want, settle with it being a less-than-perfect roll. If not, use your Re-rolls to try and land the affixes we want, putting priority on Weapon Specific Affixes. If we miss them entirely we’ll need to go find a new item, sadly.
If it survives the Tempering process, we roll that last affix, if it’s undesirable. Just remember to always take the “No Change” option unless we hit one of the stats we’re looking for. Also, unless it’s completely undesired, never roll a Greater Affix, as it will revert to a normal affix. This step is luck-reliant, so it could be the cheapest or the most expensive part of the craft.
Now we can put an Aspect on. Since it’s more likely to find a high Item Power Weapon, we’ll want to make sure we’re putting on the best damage Affix we can. This is especially the case if we’re using a 2-Handed Weapon, as we want that boost to the most impact it can.
Now we begin the Masterworking process. Plan which Affixes you want to hit the big upgrades on and start slamming. Take it one Upgrade at a time. Reset at Rank 4 Until we hit a desired affix, then try for Rank 8. If that lands, go to Rank 12. Decide if you’re fine with the results, or you want to start over until its perfect.
Then finally, we add sockets, if we have to. We want to make sure we’re happy with the item, but realistically, this can be done at any point after a good Tempering or Enchanting result.
Pair the knowledge about Crafting in Diablo 4 with our guide on how to maximize your damage and you will build a very strong character. Speaking of, we also have a lot of Diablo 4 Build Guides for all classes focusing on leveling and endgame.


