

This guide for the Druid in Diablo 4 focuses on a post-campaign Endgame Landslide build that functions without too many Aspects, but becomes much more potent with the completed build!
This guide is up-to-date for Season 4 and Patch 1.4.0.
Check our Diablo 4 Builds Catalog of uniquely crafted builds for each class.
Table of contents
Druid has a good mix of Nature magic, Shapeshifting, and Companion skills at their disposal. This build focuses on both Nature Magic and Companions for its damage.
This Earth Druid build guide assumes you’re at least level 50 and have completed enough of your Renown to have gained the 10 additional Skill Points available.
If you want a great leveling build to reach this point with, try our Druid Leveling Build – A Companion-focused build that breezes through much of the early game. If you want to level up as Druid, at the end of this guide, we have a leveling section showing you how to develop a new character from level 1 with this build.
Build Overview
This build is based around the Subterranean Aspect, released in Update 1.1. It combines the power of Earth Magic for high damage with some assistance from Companions.
Landslide is the build’s primary damage skill, we’ll be casting it manually, as well as through the Subterranean Aspect. Poison Creeper and Wolves will also end up dealing a fair bit of damage, while also enabling a lot of passives and other effects in the process.
On the defensive side of things, we have Earthen Bulwark as our main defensive tool. Our Wolves are also set up to provide us with additional Fortify while still being a good source of extra burst damage.
Skill and Passive Breakdown
In this section, we’ll be talking about each skill we use. This is the whys and hows of how the build works, and then we’ll cover the skill point distribution.
Skills
These are the main skills for the build. We’ll explain what purpose each serves and how they fit the build
 Earth Spike
Earth Spike is our Basic Skill, we’ll always hope that we don’t need it too much for resource generation, but is still one of our better Lucky Hit Chance skills outside of our Companions. We take Wild Earth Spike to double-cast this anytime we Immobilize or stun an enemy for more Lucky Hits.

Landslide
Landslide is our Core Skill and main DPS. On top of its base damage, we use this because Primal Landslide synergizes extremely well with both the Subterranean Aspect as well as Petrify. This gives us plenty of easy Critical hits that help the build out a ton.
Earthen Bulwark
Earthen Bulwark is an on-demand Barrier. We’ll be looking to keep it up and active as much as we can. This is why we use both the Earthguard and Meding Stone Aspects to maintain it. It also provides us with a fairly consistent way to have Unstoppable, so long as the barrier doesn’t just disappear.

Poison Creeper
Poison Creeper does fantastic damage on its own; but throw in its Immobilize and Poison effects and it becomes a great way to activate various passives. With the Subterranean Aspect on top of that, it can destroy packs of monsters fairly quickly.
Wolves
Wolves are a great option for the build, as not only do they provide fairly consistent passive Fortify, their active skill also does a high amount of damage. Combined with a Vicious Heart of Moonrage and it becomes a monster of a skill.

Petrify
Petrify is a great setup skill and gives us a powerful Burst window against all enemies without restricting us to a Shapeshifted form of any kind. In combination with Primal Landslide as well as the Subterranean Aspect, we’re able to quickly tear through most foes.

Passives
Here we’re only going to talk about the main passives we absolutely want as well as our Key passive. There are unfortunately a couple we will need to take to get access to these though.
 Key Passive – Earthen Might
Earthen Might is a no-brainer for us as we don’t Shapeshift at all and only use Earth and Companions skills. This powerful Key Passive grants our Earth Skills a chance to Restore all of our Spirit AND give us 5 seconds of 100% Critical Strike Chance. While it’s a small base chance of 5%, this can go up to 25% if we Critically Strike an Immobilized or Stunned target.
Wild Impulses
Since our main damage skill is a Core Skill, Wild Impuses is a great pick up. It’ll but Landslide’s initial cost up to 33 Spirit, but gives it a nice bump up in damage. We’ll be able to fix this later with Affixes on our gear.
Predatory Instinct
The Extra Critical Strike Chance against close targets is a nice effect to have, should we be unable to gain Terramotes for Primal Landlside. Almost all of our damage is dealt at close Range, so it’s very benfitical.
Call of the Wild
Call of the Wild increases the damage of our Companion Skills. Two of our Skills are Companion Skills, so why not boost their already high active damage and make them more effective.
Crushing Earth
Crushing Earth grants a solid damage bonus to Earth Skills, as we’ll be able to frequently Immobilize and Stun enemies.
Stone Guard
Stone Guard increases the damage of our Earth Skills while at least 50% of our Max Life is Fortified. Since we’ll constantly be stacking Fortify from Safeguard as well as Ferocious Wolves, we’ll have this up more often than not.
Envenom
With Poison Creeper frequently poisoning larger targets as well as the active that will posion huge groups, there’s no reason to be without this. Earth Skill already has a lot of support for Critical Strikes, so having a bit of extra Critical Strike Damage is always nice.
Defiance
Earth Magic is Nature Magic, and this is just free Elite damage for us as a result. With Elites being the tougher foes to take down in most situations every bit of extra damage we can get helps a ton.
Natural Disaster
While we won’t have access to Vulnerable until we get our Paragon Board going, this will still help once we do. Unfortunately, the build does lack the means to benefit from this consistently beyond that. Thankfully much of our burst is front-loaded anyways
Skill Point Distribution
This is an easy-to-reference table for where we’ll be placing all of our Skill points. These are listed in the order they appear on the skill tree.
| Icon | Skill Name | Skill Tree | Points |
|---|---|---|---|
 | Earth Spike | Basic | 1 |
| Enhanced Earth Spike | Basic | 1 |
| Wild Earth Spike | Basic | 1 |
 | Landslide | Core | 5 |
| Enhanced Landslide | Core | 1 |
| Primal Landslide | Core | 1 |
 | Heart of the Wild | Core | 1 |
 | Wild Impulses | Core | 3 |
 | Predatory Instinct | Core | 3 |
 | Earthen Bulwark | Defensive | 1 |
| Enhanced Earthen Bulwark | Defensive | 1 |
| Innate Earthen Bulwark | Defensive | 1 |
 | Poison Creeper | Companion | 5 |
| Enhanced Poison Creeper | Companion | 1 |
| Brutal Poison Creeper | Companion | 1 |
 | Wolves | Companion | 5 |
| Enhanced Wolves | Companion | 1 |
| Ferocious Wolves | Companion | 1 |
 | Call of the Wild | Companion | 3 |
 | Crushing Earth | Wrath | 3 |
 | Safeguard | Wrath | 1 |
 | Stone Guard | Wrath | 3 |
 | Neurotoxin | Wrath | 1 |
 | Envenom | Wrath | 3 |
 | Petrify | Ultimate | 1 |
| Prime Petrify | Ultimate | 1 |
| Supreme Petrify | Ultimate | 1 |
 | Defiance | Ultimate | 3 |
 | Natural Disaster | Ultimate | 3 |
 | Earthen Might | Key Passive | 1 |
Gearing and Stats
In this section, we’ll cover all the things you’d want to keep an eye out for to enhance the final build. This includes our Recommended Weapons, Spirit Boons, Aspects, and of course, Uniques.
Recommended Weapons
This build prefers a 1H Axe and Totem as its main weapons. The Off-hand is the more important part as you can use any 1H weapon, the Axe just happens to be the most beneficial option.
You could opt for a Staff as well, but that often means dropping an aspect to make it work, and
Ideal Stats
The table below details the ideal stats for our gear, be on the lookout for gear that matches at least three of the four rolls below.
Due to the width of the table, we highly recommend mobile users rotate their devices to view it properly.
| Gear | Stat 1 | Stat 2 | Stat 3 | Stat 4 |
|---|---|---|---|---|
| Main-hand | Critical Strike Damage | Critical Strike Damage with Earth Skills | Vulnerable Damage | Core Skill Damage |
| Off-hand | Cooldown Reduction | Critical Strike Chance | Lucky Hit Chance | Spirit Cost Reduction |
| Helm | Cooldown Reduction | Maximum Life | Ranks to Poison Creeper | Ranks to Wolves |
| Chest | Damage Reduction | Damage Reduction while Fortified | Maximum Life | Resistance |
| Gloves | Critical Strike Chance | Critical Strike Damage with Earth Skills | Ranks to Landslide | Lucky Hit Chance |
| Pants | Damage Reduction | Damage Reduction while Fortified | Resistance | Maximum Life |
| Boots | Movement Speed | Spirit Cost Reduction | Resistance | Resistance |
| Amulet | Cooldown Reduction | Ranks to Crushing Earth | Ranks to Companion Skills | Earth Skill Damage |
| Rings | Critical Strike Chance | Critical Strike Damage | Critical Strike Damage with Earth Skills | Lucky Hit Chance |
Recommended Gems
This build uses Sapphires in Weapons and Armor and Diamonds in Jewelry.
We opt for Sapphires in our Weapons as we’ll be able to crowd control enemies more often than we’ll be able to apply Vulnerable.
We use Sapphires in our Armor, as once we have Earthen Bulwark set up properly, we shouldn’t be in any risk of being Crowd Controlled. Early on you may still want Topaz though until you get Earthen Bulwark to a manageable cooldown length.
We go with Diamonds for Our Jewelry for the Resistance it provides. With Resistance being a great defensive layer, Diamonds ar a great option until you need specific Resistances to round out your gear.
Vampiric Powers
During the Season of Blood, we’ll have access to Vampiric Powers, which allow us to slot up to five unique powers into our Sanguine Circle to increase the power of the build. We’ll include more than the maximum in the selection below to offer alternatives, but they will be listed in order of their relative strength.
| Name | Effect | Reason |
|---|---|---|
| Anticipation | Reduces Ultimate Skill Cooldown. Ultimate Skill Damage increased for each nearby Enemy afflicted with a DoT. | Having more uptime on Petrify helps the build a ton with both Damage and Sustain. |
| Metamorphosis | Evading turns us into a cloud of bats, making us Unstoppable during the effect and 4 seconds after. Evading through enemies deals Physical Damage and applies Vampiric Curse. | This give us a very reliable source of Unstoppable to just ignore crowd control. it also allows us to use Tibault’s Will to decent effect. |
| Domination | Deal increased damage to Stunned, Frozen, Immobilized, or Feared enemies. Injured Non-Elites are executed instead. | This is an okay damage boost, but really help with pushing harder content by providing an easy and guaranteed execute with our main skill. |
| Resilience | Increases Damage Reduction based on Missing Maximum Life. | This helps the build survive easier in harder content. |
| Prey on the Weak | Increases Vulnerable Damage. Enemies afflicted with Vampiric Curse | This pairs well with our short range and Metamorphosis for a very consistent damage increase in longer encounters. |
| Blood Boil | Grants a Guaranteed Overpower after a short time. Core Skills that Overpower spawn Volitile Blood Drops that deal physical Damage in an AoE when collected. | This works well to improve how much Banished Lord’s Talisman improves the build. |
| Feed the Coven | Companion Attacks have a chance to restore Spirit and increased damage for a short time. | Since we’ll have 2 Vine Creepers and 3 Wolves supporting us, this can net us a bit of passive Spirit generation, which can help a fair bit. |
Spirit Boons
For our Spirit Boons, we’ll want to use the Boons listed below to boost the effectiveness of the build. We’ll explain each choice we’re taking and how it helps.
For Deer, We’re taking Wariness. Wariness is a pretty generic damage reduction against Elites, but it’s really the only useful effect we can get from the Deer.
For Eagle, we’re taking just Avaian Wrath. This gives us a multiplicative bonus to our Critical Strike Damage, which we’ll be getting plenty of on an Earth Build.
For Wolf, we’ll be taking Packleader and Calamity. Packleader gives us a chance to reset our Companion Skills and both do huge damage, in large groups Subterranean aspect will often trigger this. Calamity is a strong option here as extending the Crowd Control and Critical Damage Boost of Petrify is going to be great in any situation.
For Snake, we’ll take Calm Before the Storm. This allows our Earth Skills to occasionally reduce the Cooldown of Petrify, allowing us to use it more often. Similar to Calamity, the Subterranean Aspect works exceptionally well with this.
As an alternative to better support using a Banished Lord’s Talisman, we can also drop Wolf’s Calamity in exchange for Snake’s Obsidian Slam, granting a second guaranteed Overpower. We’re sacrificing some duration on Petrify, but that doesn’t set us back as much as swapping away from Calm Before the Storm would.
Aspects
We’ll cover the Aspects that are recommended for maximizing the potential of the build. We’ll also suggest which gear slot you should look to place them in.
 Subterranean Aspect
This Aspect is a huge part of the build, boosting the damage of Landslide and also casting it when we active Poison Creeper for huge damage. It’s a great AoE effect that can very easily trigger Lucky Hits for us.
We’ll place this in our Gloves, as it drops fairly uncommonly.
Crashstone Aspect
It’s just not an Earth Build without Crashstone’s huge boost of Critical Strike Damage against Crowd Controlled targets. This synergizes exceptionally well with the build, making the Subterranean Aspect much stronger.
This will be placed in our Amulet to boost its strength, being one of our strongest Offensive Aspects.
Sheperd’s Aspect
Since we’ll have at least 3 companions at any given time, this provides a pretty meaningful improvement to damage. With the Vicious Heart of Moonrage as well as the Aspect of the Stampede, we’ll be able to increase the count of our companions for more damage.
We’ll place this in one of our Weapons.
Aspect of the Aftershock
Aspect of the Aftershock is a great bonus for Landslide, which effectively doubles its damage by having the pillar strike a second time. This results in a massive increase in overall damage.
We’ll place this in one of our Weapons.
Aspect of the Stampede
We use Aspect of the Stampede to not only further boost the effect of the Shepard’s Aspect but also to boost our already powerful companions. Between these two boosts, it’s worth having a slot in the build.
We’ll place this on one of our Rings, since our other offensive slots are filled.
Ballistic Aspect
We’re an Earth Build, and to nobody’s surprise also use Fortify. This improves the damage of Landslide while also boosting the base effect of Earthen Bulwark.
We’ll Slot this into our Helm, letting the other armor pieces be purely defensive.
Aspect of the Umbral
We’re loaded up on Crowd Control, and AoE Crowd Control at that. This helps to alleviate most of our issues with Spirit in combination with Earthen Might, so long as we get a good roll.
This will be placed in our remaining Ring, as Resource Aspects can only be on Rings.
Aspect of Mending Stone
This boosts Earthen Bulwark to not only be more consistent, but also provide us a way to replenish it, helping to keep it active for the full duration.
We’ll place this on our Pants as our Pants tend to be primarily defensive in nature.
Earthguard Aspect
With our heps of Crowd Control, this will allow this aspect to make each activation of Earthen Bulwark to be stronger. With up to 9 seconds of it being active in combination with any gaps in cooldown time, we’ll be able to reliably double the strength of our initial barrier.
We’ll place this in our Chest, as our chest armor tends to be primarily defensive in nature.
Ghostwalker Aspect
Since Earthen Bulwark provides us a very long duration barrier and Unstoppable Effect, Ghostwalker is perfect for getting more speed and utility into the build.
We’ll place this in our Boots, as that’s the best place for Mobility Aspects.
Aspect of Retaliation
The Aspect of Retaliation is a really solid damage boost for the build, given how quickly we can build Fortify and how easily we can maintain it for most situations.
This is an alternative option for one of our Rings. This would replace Aspect of the Umbral, but the build doesn’t suffer many issues with Spirit in the late game, so it cna be a great pick up.
Unique Items
We’re only going to talk about the few that offer the strongest effects on the build. While others help, these are the ones you really want to slot into your build if you get the chance. These will drop starting in Tier 3 content, but decent upgrades for the build once you get them.
Storm’s Companion
Storm’s Companion is strictly optional. Wolves are a big part of our damage and having levels on them can do a lot for us. However, they’re not our main damage, and using these Pants sacrifices one of the main defensive slots we have. Generally, it’s not worth it, but if you want to lean more towards Companions, it can be a fun way to get some extra power.
Airidah’s Inexorable Will
Airidah’s Inexorable Will is a great Unique Ring that pulls enemies in when we use our Ultimate Skill. With most of our damage being a very close-range build, this is a great way to get enemies in range for our burst damage.
Tibault’s Will
Tibault Will is a pair of Unique Pants that grant us increased damage while we’re Unstoppable and for a duration after. Additionally, each time we become (not refresh) Unstoppable, we recover 50 Spirit. These are great to combine with the Metamorphosis Vampiric Power during Season of Blood, but will not be great without it.
Banished Lord’s Talisman
Banished Lord’s Talisman is a Unique Amulet that grants us a Guaranteed Overpower every so often. Combined with Primal Landslide granting Guaranteed Critical Strikes, this can offer an exceptionally powerful damage increase. We can even use the Blood Boil Vampiric Power to make more frequent use of this as well.
Paragon Boards and Glyphs
These two endgame options are part of the Paragon System which is available starting at level 50.
Paragon Boards
Paragon Boards are a feature that becomes available at level 50. These boards allow us to spend the Paragon points we earn for leveling and Renown to strengthen our character. Each of these has a single Glyph Slot to place a glyph of our Choice.
Starter Board
Like all starter board, the Druids offers generic damage and defenses.
As usual, we’ll path up the right side through Prime to our Glyph Node, then continue up the left side through Impel and head to the next board. We’ll come back later to grab Resolve cluster, taking some Dexterity to active the Glyph we’ll place here.
Earthen Devastation
Earthen Devastation offers a lot of Damage Critical Strike Damage bonuses for both Earth Skills and against Crowd Controlled enemies. The Legendary node here increases out Earth Skill damage vs Crowd Controlled enemies, making it a great early pickup.
Rotate this board so Crushing Earth is the closest to the bottom. We’ll path straight up to Earthen Power and our Glyph Node. From here, we’ll head to Resolve and connect to the gate on the right side. Then we’ll head up and around for Earthen Devastation. After this we can grab Oppress and connect to the upper gate as well. From the right gate, we can head straight down to Crushing Earth at any point.
Heightened Malice
Heightened Malice grants a lot of damage to Poisoned Targets, Poison Resist, and Damage Reduction from Poisoned enemies. The Legendary Node grants us a Multiplicative damage bonus when 3 or more nearby enemies are poisoned, improving our mobbing.
We’ll rotate this board so Nature-born is the nearest node to the bottom, and connect it to the top gate of Earthen Devastation. We’ll path directly over to the Glyph Node and pick up Sinking Fangs as well as most of the Dexterity around this Glyph Node. After this we’ll head straight to the right side gate, picking up Overturn in the process. From the Gate, we can also head up to Heightened Malice to pick up that nice bonus, while taking Poison Resilience for the one additional point for the extra life, but not its cluster.
Constricting Tendrils
Constricting Tendrils offers a lot of extra Nature Magic Damage, which is our main damage output. The Legendary node grants all of our Nature Magic a chance to Immobilize and Poison foes, making us less reliant on just the Poison Creeper for Poison and Immobilize.
We’ll rotate this board so the Courage is the closest node to the left side and attach this board to the right gate of Earthen Devastation. We’ll path straight to Devastation before heading up to grab Constricting Tendrils. After this, we’ll head back to near the gate, branch up to our Glyph Node, and pick up Courage and Nature’s Will, pathing through Dexterity nodes for our glyph then head to the top gate.
Ancestral Guidance
Ancestral Guidance offers Basic and Core Skill damage as well as Spirit bonuses. The Legendary node grants us a temporary boost of damage after spending 75 Spirit.
We’ll Rotate this board so that Harmony is closest to the bottom gate and attach this board next to both Heightened Malic and Constricting Tendrils. From the bottom gate, we’ll head up and collect our Glyph Node as well as Harmony. We’ll grab a bit of extra intelligence here to help active the Glyph we’ll place here. From the left side gate, we’ll path up to Ancestral Guidance to complete our Paragon Board, picking up Reclamation for the extra point.
Glyphs
Each of our Paragon Boards has a Glyph Slot, where we can socket one of our Glyphs. These Glyphs provide powerful bonuses that can be leveled up by completing Nightmare Dungeons to increase their power. Below are the Glyphs we recommend and what board to place them on.
Exploit
Exploit boosts our Vulnerable damage for every 5 Dexterity in range. With 25 Dexterity in range, we’ll apply Vulnerable to any foe we hit for three seconds. This ends up being the build’s only source of Vulnerable.
We’ll place this on the Starter Board, as we can activate it fairly easily there after upgrading it.
Human
Human increases all damage we deal while in Human Form for every 5 Willpower in Range. With 40 Willpower in range, we also gain 10% Damage reduction in Human Form. We never leave Human Form, so these will always be active.
We’ll place this in Earthen Devastation as we can easily activate the bonus without much heavy Paragon Point Investment, even before leveling it.
Tectonic
Tectonic Increases your Critical Strike Damage with Earth Skills for every 5 Dexterity allocated in range. With 25 Dexterity allocated in range, we also gain increased Lucky Hit Chance.
We’ll place this in Heightened Malice as we can pick up a ton of Dexterity on this board, making an exceptionally strong option.
Spirit
Spirit increases our Critical Strike Damage for every 5 Dexterity in range. With 25 Dexterity in range, get gain a stacking damage bonus every time we critically strike an enemy.
We’ll place this on Constricting Tendrils as we can easily path through a bunch of dextirty for both effects.
Undaunted
Undaunted boosts our Damage while Fortifed for every 5 Intelligence in range. With 25 Intelligence in range, we gain additional damage reduction based on our Fortify.
We’ll place this on Ancestral Guidance, as the Harmony cluster will help activate this easier.
Leveling Order
If you want to play this build from level 1, the next segment of this build guide is for you. Below you will see the exact leveling order in which you should acquire your skills and passives to maximize damage and overall performance.
| Levels | Icon | Skill | Purpose |
|---|---|---|---|
| 2-4 | | Earth Spike | Upgrade to Wild Earth Spike to improve overall Lucky Hit Chance |
| 5-7 | | Landslide | Upgrade to Primal for synergy with later skills and Aspects |
| 8-10 | | Earthen Bulwark | Upgrade to Innate Bulwark for Unstoppable and additional damage. |
| 11-13 | | Predatory Instincts | Critical Strike Chance vs Close. |
| 14-16 | | Poison Creeper | Upgrade to Brutal for Critical Strike Chance Boost |
| 17-19 | | Wolves | Upgrade to Ferocious for Fortify. |
| 20-23 | | Landslide | Max out our Main DPS Skill for more damage |
| 24 | | Neurotoxin | One point, to reach Envenom later. |
| 25-27 | | Petrify | Fully upgrade for Critical Strike Damage and Spirit Generation |
| 28-31 | | Poison Creeper | Max out our AoE Skill for more damage |
| 32-35 | | Wolves | Max out for a strong Single Target damage option. |
| 36 | | Earthen Might | Insanely powerful Key passive |
| 37-39 | | Crushing Earth | Increased damage to Immobilized or Stunned enemies. |
| 40 | | Safeguard | Earth Skills Fortify on Crit |
| 41-43 | | Stone Guard | Increased Earth Skill Damage while at least 50% Fortified |
| 44-46 | | Envenvom | Increased damage to Poisoned enemies. |
| 47-49 | | Call of the Wild | Increased Companion Skill Damage |
| Renown | | Heart of the Wild | Single Point to reach Wild impulses |
| Renown | | Wild Impulses | Increased Landslide Damage. |
| Renown | | Defiance | Increased Landslide Damage vs Elites. |
| Renown | | Natural Disaster | Increased Landslide Damage vs Vulnerable. |
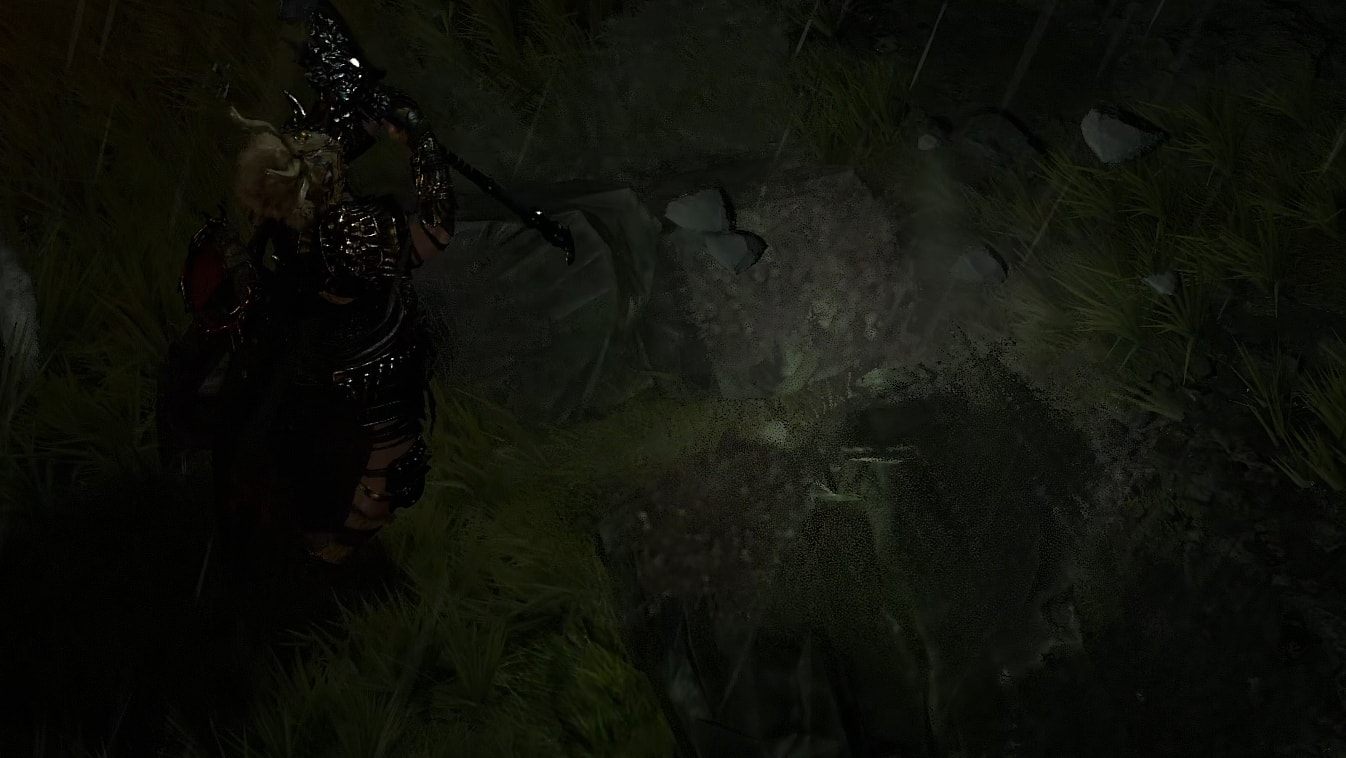
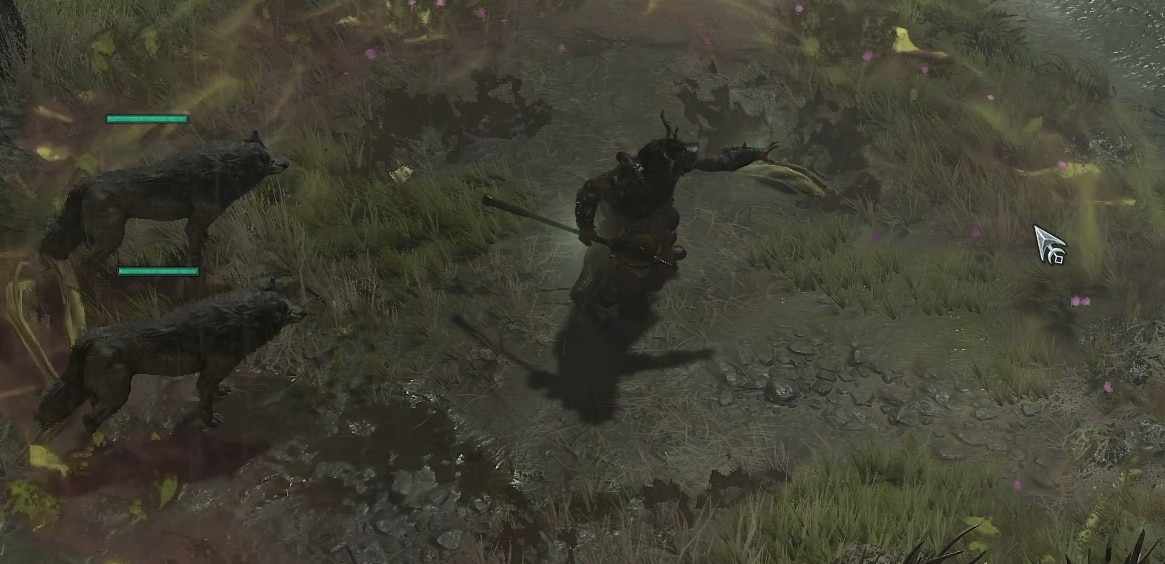
Gameplay Video
Gameplay clip featuring a Nightmare Dungeon Run solo with the “Defiled Earth” Druid Earth Build in Diablo 4.
This concludes our Diablo 4 Druid Build focusing on the Landslide skill. You can find more leveling and endgame Diablo 4 builds here on VULKK.com to try new things with your characters and spice up your gameplay.
To learn how to maximize your damage in Diablo 4, consult with our guide on that topic. Learning how to deal the highest possible damage with your build is crucial to succeeding in the Endgame and highest tiers.


