This Necromancer build for Diablo 4 combines the utility of Blood Skills to support Bone Spirit in a way that provides both consistent DPS and high burst all in one build.
This guide is up-to-date for Season 4 and Patch 1.4.0.
Check our Diablo 4 Builds Catalog of uniquely crafted builds for each class.
This Necromancer build guide assumes you’re at least level 50 and have completed enough of your Renown to have gained the 10 additional Skill Points available.
If you want a great leveling build to reach this point with, try our Necromancer Leveling Build – A build that supports Blood Skills with minions. If you want to level up as a Blood Artisan Necromancer, at the end of this guide, we have a leveling section showing you how to develop a new character from level 1 with this build.
Build Overview
This build uses Blood skills to support Bone Spirit in combination with the Blood Artisan Cuirass. We’re not looking to make Blood Lance anything other than a utility as well as a low-cost skill, as Bone Spirit is still the focus here.
We still use the usual “Necromancer Core” of Blood Mist, Corpse Tendrils, and Decrepify to support the build both offensively and defensively. Though, unlike many builds, we’re taking Blood Wave as the ultimate skill for the additional Blood Orb generation it can provide.
However, this build does currently rely on the Sacreligious effect from Malignant Hearts, as it provides a key part of making this build work properly. This allows us to consistently consume corpses without being forced into taking Corpse Explosion, which allows us to use the Aspect of the Embalmer and benefit from effects like Grim Harvest and Fueled by Death.
Skill and Passive Breakdown
In this section, we’ll be talking about each skill we use. This is the whys and hows of how the build works, and then we’ll cover the skill point distribution.
Skills
These are the main skills for the build. We’ll explain what purpose each serves and how they fit the build
 Blood Lance
Blood Lance in combination with the Aspect of Potent Blood and the Gore Quills Aspect allows it to be fairly sustainable for frequent casts. Gore Quills also gives us the much-needed quality-of-life effect of not having to manually run to Blood Orbs to pick them up, as the skill will consume them at range instead.
 Bone Spirit
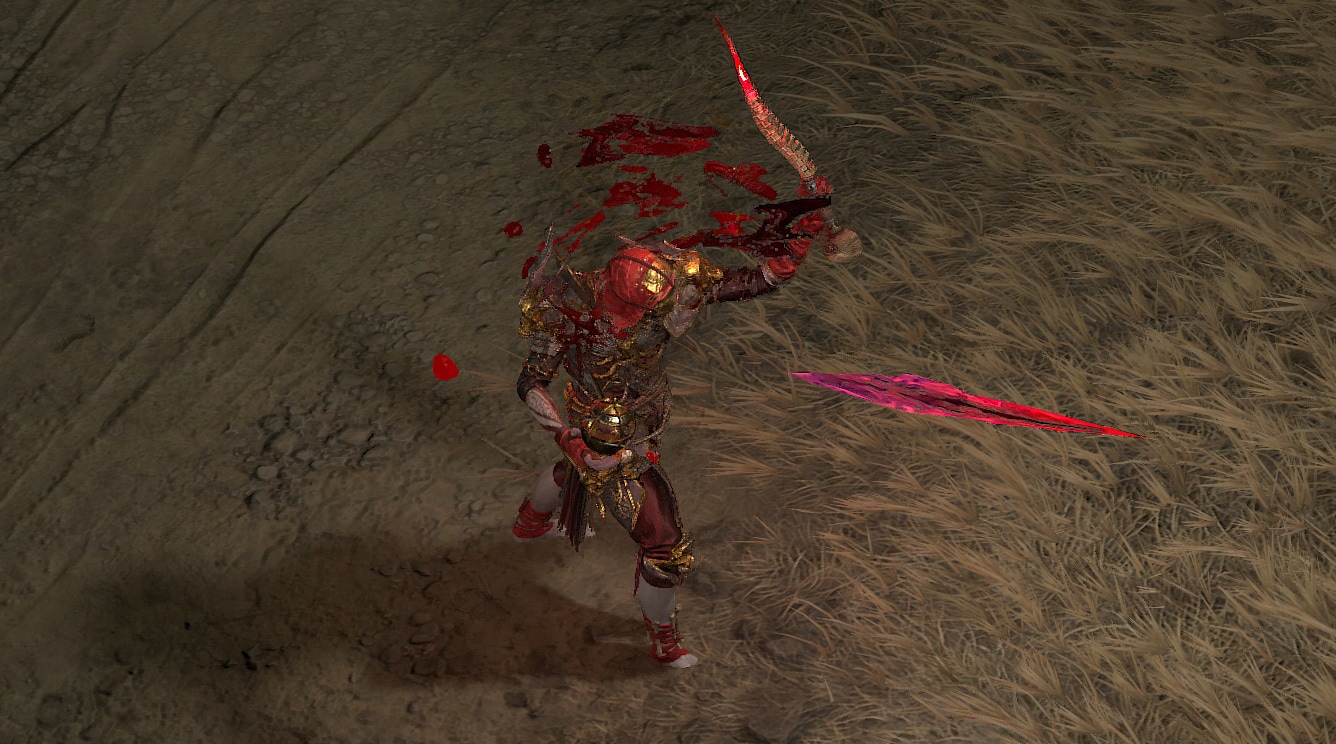
Bone Spirit is huge damage for us, and while the majority of our Bone Spirits will be cast through the Blood Artisan Cuirass, we’re still able to use it as a powerful nuking skill when cast manually. When cast manually, it’ll gain increased damage based on our total Essence, rather than our current Life.
 Blood Mist
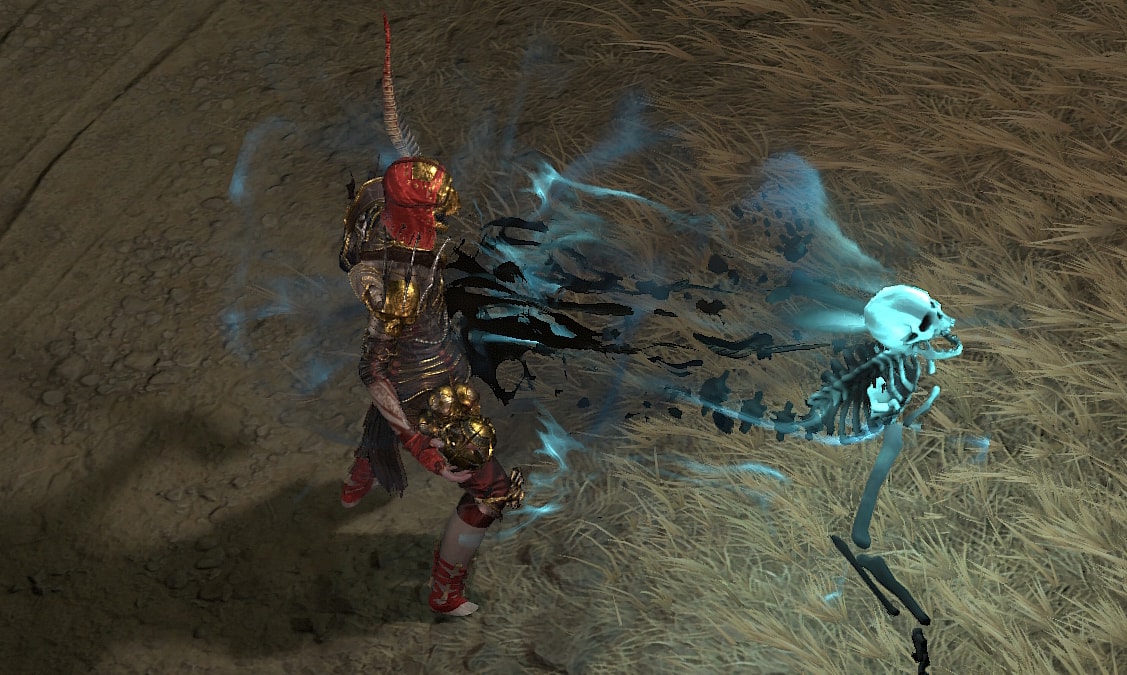
Blood Mist is our only option for Unstoppable to both break crowd control and avoid damage, so we’re forced to take this. Additionally, it can provide additional corpses in a pinch, should we run low in a longer encounter.

 Corpse Tendrils
Corpse Tendrils does a few great things for us. First, it groups enemies up, making it easier to quickly eliminate packs with just a single Bone Spirit. With the Aspect of Grasping Veins, it also provides a solid boost to our Critical Strike Chance and Damage. Finally, it’ll generate a ton of additional Blood Orbs via its Blighted upgrade.

 Decrepify
Decrepify gives us solid utility, slowing and weakening enemies for us. Since we’re playing at range, we have to manually cast it rather than use the Decrepit Aura effect. It’ll also allow Blood Lance and Bone Spirit to Lucky hit and reduce the cooldowns of Corpse Tendrils, Blood Mist, and Blood Wave.

 Blood Wave
Blood Wave is great for keeping enemies off us with its knockback and slow. However, alongside the Tidal Aspect, it’ll generate a ton of Blood Orbs for us to use. Which results in more Essence, and a shorter cooldown for Blood Wave thanks to the Fastblood Aspect.

Passives
Here we’re only going to talk about the main passives we absolutely want as well as our Key passive. There are unfortunately a couple we will need to take to get access to these though.
 Key Passive – Ossified Essence
This Key Passive makes Bone Spirit super strong, in combination with the Aspect of Serration, we’re going to gain at the very minimum gain 50% Damage and 30%+ Critical Strike Damage for Bone Spirit. The damage bonus also increases with our maximum Essence.
 Unliving Energy
This provides us with extra Essence, which increases the bonus from Ossified Essence, as well as Bone Spirit’s own multiplier when we cast it manually.
 Hewed Flesh
This allows our skills to generate additional corpses for us, though Blood Lance is the one that typically ends up doing this the most.
 Grim Harvest
Grim Harvest is a great bonus for increasing our Essence sustain. Unfortunately, we’ll require the help of the Sacrilegious Heart effect to trigger it consistently. We can also use Osseous Gale, at least prior to getting the Blood Artisan’s Cuirass.
Should we be unable to get either effect, we can instead allocate the point that’d be spent here on Compound Fracture instead.
 Fueled by Death
Fueled by Death is a nice damage boost we can also pick up if we have a Sacrilegious Heart effect or are using Bone Storm with Osseous Gale. Similarly, without either effect we can’t make use of this.
Should we be unable to get either effect, we can Instead allocate the points spent here to Imperfectly Balanced instead.
 Death’s Embrace
We’re mainly using this for the Damage reduction, however having our damage not being significantly lower in the closer ranges also helps, though ideally we don’t allow enemies close at all.
 Death’s Reach
Since we’re trying to keep our distance for safety, this is a great damage boost that we can take advantage of with our exceptional range.
 Amplify Damage
We’ll be using Decrepify very often, and this allows us to deal extra damage to enemies we curse.
 Serration
Since we’ll be stacking Maximum Essence, this passive is great at increasing our Critical Strike Chance, reducing the need for Bone Spirit’s upgrade that does the same.
 Inspiring Leader
Even though we don’t use minions, we still benefit from the attack speed. It’s a great boost that speed up our casts of any skills.
 Stand Alone
Since we’re sacrificing all of our summons, this becomes free and massive damage reduction to help us survive.
 Momento Mori
This empowers our Sacrifice bonuses, which in the case of this build means more Critical Strike Chance and more Maximum Essence.
Skill Point Distribution: Where to Assign Your Skill Points
This is an easy-to-reference table for where we’ll be placing all of our Skill points. These are listed in the order they appear on the skill tree.
| Icon | Skill Name | Skill Tree | Points |
|---|---|---|---|
 | Bone Splinters | Basic | 2 |
 | Blood Lance | Core | 1 |
 | Enhanced Blood Lance | Core | 1 |
 | Supernatural Blood Lance | Core | 1 |
 | Unliving Energy | Core | 3 |
 | Hewed Flesh | Core | 3 |
 | Blood Mist | Corpse and Macabre | 1 |
 | Enhanced Blood Mist | Corpse and Macabre | 1 |
 | Ghastly Blood Mist | Corpse and Macabre | 1 |
 | Grim Harvest | Corpse and Macabre | 3 |
 | Fueled by Death | Corpse and Macabre | 3 |
 | Decrepify | Curse | 1 |
 | Enhanced Decrepify | Curse | 1 |
 | Abhorrent Decrepify | Curse | 1 |
 | Death’s Embrace | Curse | 3 |
 | Death’s Reach | Curse | 3 |
 | Amplify Damage | Curse | 3 |
 | Corpse Tendrils | Corpse and Macabre | 1 |
 | Enhanced Corpse Tendrils | Corpse and Macabre | 1 |
 | Blighted Corpse Tendrils | Corpse and Macabre | 1 |
 | Bone Spirit | Corpse and Macabre | 5 |
 | Enhanced Bone Spirit | Corpse and Macabre | 1 |
 | Dreadful Bone Spirit | Corpse and Macabre | 1 |
 | Serration | Corpse and Macabre | 3 |
 | Blood Wave | Ultimate | 1 |
 | Prime Blood Wave | Ultimate | 1 |
 | Supreme Blood Wave | Ultimate | 1 |
 | Inspiring Leader | Ultimate | 3 |
 | Stand Alone | Ultimate | 3 |
 | Momento Mori | Ultimate | 3 |
 | Ossified Essence | Key Passive | 1 |
Gearing and Stats
In this section, we’ll cover all the things you’d want to keep an eye out for to enhance the final build. This includes our Recommended Weapons, Book of the Dead, Aspects, and of course, Uniques.
Recommended Weapons
This build uses a Wand and Focus. We need the Lucky Hit Chance from the Wand and the Cooldown Reduction offered by the Focus to help the build feel smoother to play. Additionally, we’d have to drop an Offensive Aspect to use a 2H Weapon, which we cannot afford to do.
Ideal Stats
The table below details the ideal stats for our gear, be on the lookout for gear that matches at least three of the four rolls below.
This build uses the Blood Artisan’s Cuirass Unique Chest, so the stats listed below are the recommended stats to use until it is acquired.
Due to the width of the table, we highly recommend mobile users rotate their devices to view it properly.
| Slot | Stat 1 | Stat 2 | Stat 3 | Stat 4 |
|---|---|---|---|---|
| Weapons | Critical Strike Damage | Vulnerable Damage | Critical Strike Damage with Bone Skills | Resistance |
| Helm | Cooldown Reduction | Maximum Life | Maximum Essence | Dexterity |
| Chest | Maximum Life | Damage Reduction | Damage Reduction while Fortified | Resistance |
| Gloves | Critical Strike Chance | Lucky Hit Chance | Critical Strike Damage With Bone Skills | Attack Speed |
| Pants | Maximum Life | Damage Reduction | Damage Reduction while Fortified | Resistance |
| Boots | Movement Speed | Essence Cost Reduction | Ranks to Bone Spirit | Ranks to Corpse Tendrils |
| Amulet | Cooldown Reduction | Ranks to Death’s Reach | Ranks to All Macabre Skills | Essence Cost Reduction |
| Rings | Critical Strike Chance | Critical Strike Damage | Resource Generation | Maximum Essence |
Recommended Gems
This build uses Sapphires in our Weapons, Rubies in our Armor, and Diamonds in our Jewelry.
We opt for Sapphire in our Weapons as we don’t have a way of consistently applying Vulnerable to make use of Emeralds. You could opt for Rubies here to increase Blood Lance’s Overpower Damage as well.
We use Rubies in our Armor, as not only does it increase our Maximum Life pool, but it’ll make it more consistent to have a higher damage bonus for the Blood Artisan’s Cuirass if we take a stray hit. It’ll also contribute to Blood Lance’s Overpower Damage.
We go with Diamonds for Our Jewelry as Resistances are much more important now, making a lot of incoming damage do very little. We’ll swap these for gems that offer specific resistances later on to cover what we don’t fill out with our affixes.
Vampiric Powers
During the Season of Blood, we’ll have access to Vampiric Powers, which allow us to slot up to five unique powers into our Sanguine Circle to increase the power of the build. We’ll include more than the maximum in the selection below to offer alternatives, but they will be listed in order of their relative strength.
| Name | Effect | Reason |
|---|---|---|
| Sanguine Brace | Defeating enemies grants Fortify. When Fortify is greater than 50% Maximum health, gain Critical Strike Chance. | The extra Fortify and Critical Strike Chance help the build a ton. |
| Resilience | Grants Damage Reduction based on Missing Life. | This adds a good amount of survivability to make up for the use of unique Chest Armor. |
| Accursed Touch | Grants all attacks a chance to apply Vampiric Curse. Vampiric Curse has a chance to spread between enemies. Increases damage of Accursed Souls. | Combined with Prey on the Weak, allow Blood Lance to apply Vulnerable giving it extra utility for the build. |
| Prey on the Weak | Increases Vulnerable Damage. Enemies afflicted with Vampiric Curse are also afflicted with Vulnerable. | Allows both Accursed Touch and Metamorphosis to apply Vulnerable. |
| Metamorphosis | Evading turns you into a cloud of bats, making you Unstoppable during the animation and 4 seconds after. Enemies you pass through take Physical Damage and are afflicted with Vampiric Curse. | Gives a high uptime Unstoppable to reduce the reliance on Blood Mist. |
| Ravenous | Grants a chance to increase Attack Speed by a percentage of Total Movement Speed. | Allows Blood Lance to generate Blood orbs quicker. |
| Undying | Casting a skill heals you for a portion of Maximum Life. This effect is doubled under 50% Maximum Life. | This can add a decent amount of sustain as Blood Lance is cast fairly quickly. |
Book of the Dead
We’ll be sacrificing all of our minions. We’ll be choosing to Sacrifice Skeletal Skirmishers, Shadow Mages, and the Iron Golem.
By sacrificing Skeletal Skirmishers, we’ll gain increased Critical Strike Chance for all of our skills. With Momento Mori, this grants us 8% Critical Strike Chance
By sacrificing Shadow Mages, we gain Maximum Essence which boost our damage in multiple ways. With Momento Mori, this will grant us 24 additional Maximum Essence, giving Bone Spirit increased Critical Strike Chance from the Serration passive, Damage from Ossified Essence, and Critical Strike Damage from the Aspect of Serration.
By Sacrificing the Iron Golem, we increase our Critical Strike Damage. This doesn’t benefit from the effects of Momento Mori, but still grants us x30% Critical Strike Damage.
Aspects
We’ll cover the Aspects that are recommended for maximizing the potential of the build. We’ll also suggest which gear slot you should look to place them in.
 Aspect of Serration
The Aspect of Serration increases our Critical Strike Damage by 1% for each essence we have over 50 when casting a Bone Skill. We’ll always benefit from the maximum value of this Aspect, save for a very small window after manually casting Bone Spirit.
We’ll place this on our Amulet, as we can take full advantage of the increased Critical Damage thanks to the Essence stacking from Gear, Paragon, and passives
 Aspect of Grasping Veins
We’ll be able to cast Corpse Tendrils often enough to have 100% uptime on Graspng Vein’s effects. The Sacrilegious Heart will also contribute to this uptime as it’ll be the only Corpse Skill on our skill bar for it to cast.
We’ll place this in one of our weapons, thanks to the Serration passive and Essence stacking on Gear, Paragon, and Passives we’ll still be at or near 100% Critical Strike Chance.
 Gore Quills Aspect
We’re mainly using Gore Quills for the utility of allowing Blood Lance to consume Blood Orbs at range. It will still improve Blood Lance’s overall damage, making it great choice overall.
We’ll place this in one of our weapons, as even though it does increase Blood Lance’s damage, it’s a small bonus and we’re only after the utility.
 Tidal Aspect
Tidal makes our Blood Waves fire off three times, doubling its damage potential and tripling its Blood Orb spawning. In total we’ll get 9 Blood Orbs to make use of with Gore Quills and the Blood Artisan’s Cuirass.
We’ll place this in our Gloves, as we’re only after the extra Blood orbs and not the damage.
 Aspect of Potent Blood
Between Blood Lance, Blood Wave, and the Enbalmer Aspect; we’ll be creating a ton of Blood Orbs, allowing us to constantly generate Essence even while actively casting Blood Lance.
As a Resource Aspect, we’ll place this in one of our Rings, which are the only slots that can hold resource Aspects.
 Fastblood Aspect
Similarly to Potent Blood, Fast Blood will also benefit from our Blood Orb generation. Instead of Essence, it reduces the Cooldown of Blood Wave and by extension increases our Blood Orb generation and Essence Generation.
As a Resource Aspect, we’ll place this in one of our Rings, which are the only slots that can hold resource Aspects.
 Exploiter’s Aspect
We’ll be applying Crowd Control often enough that enemies will just become Unstoppable. Exploiter makes it so that even though we cannot apply Crowd Control to them, they’ll at least take increased damage.
We’ll place this in our Boots, as it’s more useful to us than a bit of added mobility.
 Aspect of the Embalmer
Embalmer combined with the Sacrilegious Malignant Heart means that Corpse Tendrils becomes a massive Blood Orb and Essence generator.
We’ll place this in our Helm, as our Chest piece is unique and we’ll place another defensive aspect on our Pants.
 Aspect of Disobedience
Since we’re able to throw out Blood Lances very easily and with minimal cost, Disobedience becomes a great defensive Aspect for us. If we get in trouble and need to use Blood Mist, we’ll also exit Mist with this bonus maxed out.
We’ll place this on our Pants, making it a purely defensive slot for the build.
 Aspect of the Protector
Aspect of the Protector is a filler Aspect until we get the Blood Artisan’s Cuirass. It provides us with a decent barrier to protect our health and and extend our Fortify.
This will be placed in our Chest, until we acquire the Blood Artisan’s Cuirass.
Unique Items
We’re only going to talk about the few that offer the strongest effects on the build. While there are others that help, these are the ones you really want to slot into your build if you get the chance. These will drop starting in Tier 3 content, but decent upgrades for the build once you get them.
Blood Artisan’s Cuirass
This Unique Chest armor allows us to create Bone Spirits by consuming Blood Orbs, and additionally scales their damage by our Current Life, rather than our Current Essence. With all the healing we have we’ll pretty consistently be dealing double damage due to this modifier.
Flickerstep
Flickerstep is a pair of Unique Boots that reduces the cooldown of our Ultimate Skill when we evade through enemies. This allows us to use Blood Wave even more frequently when combined with our our means of reducing its cooldown.
Paragon Boards and Glyphs
These two endgame options are part of the Paragon System which is available starting at level 50.
Paragon Boards
Paragon Boards are a feature that becomes available at level 50. These boards allow us to spend the Paragon points we earn for leveling and Renown to strengthen our character. Each of these has a single Glyph Slot to place a glyph of our Choice.
Starter Board
Like all starter boards, this one offers generic damage and defenses.
As usual, we’ll path up the right side through Prime to our Glyph Node, then continue up, grabbing both Knowledge and Preservation for the Intelligence for the glyph here and head to the next board.
Bone Graft
Bone Graft is the only really useful Legendary Node we can get, which allows our Blood Artisan-created Bone Spirits to increase our damage while stacking up additional Essence for the manual cast. Though this board has many good bonuses we can use.
For this board, we’ll rotate it so our Glyph slot is in the lower right. We’ll path over to our Glyph Node, taking Erudite for the Intelligence and the whole Shaper of Bones cluster for the stats. We’ll also open access to the left gate later, but we have other stuff to grab here first.
Head up to Reinvigorate next, taking only the Maximum Essence nodes. Grab the whole Calcified cluster, then head up to Bone Graft, grabbing Entomb and its Critical Damage nodes before heading out the right gate first. Optionally, we can come back way later and also grab the Tenacity cluster for some extra bulk.
Flesh-eater
Flesh-eater doesn’t grant us much of a bonus unless we have the Sacrilegious effect on it. We can however use the board for a quick glyph, as has plenty of nearby Dexterity which makes it great for our glyph.
Rotate this board so that Poison Conditioned is in the upper left. Head straight to Glyph Node, taking the whole Targeted cluster along the way as well as the Intelligence nodes adjacent to the Glyph Node before cutting down to Erudite and we’re done with this board.
Cult Leader
Cult Leader and all of its nodes offer nothing of value to us, however, we can path through the Glyph Node taking as much Intelligence as we can to activate another glyph.
We’ll connect this to Bone Graft’s left gate and rotate it so our Glyph Node is in the Upper Right. Then we’ll path up to the Glyph Node from directly below it, so we can grab the 20 Intelligence here to start, then grab the remaining 20 for our glyph as we make our way through to the upper gate.
Blood Begets Blood
While we can technically use Blood Begets Blood, it’s not worth the points to path up to it. Some of the other bonuses are great to use though.
We’ll rotate the board so that Recuperate is in the upper left corner. We’ll path directly to our Glyph Node, grabbing both the Blooddrinker and Blood-Empowered clusters and a bit of extra Willpower to use our glyph here. Then we can head out the right side gate, taking a 3-point detour to grab Vampric on our way out for extra Life.
Bloodbath
Bloodbath is our final board, and we opt to take the Legendary node here for the extra boost of damage for our Blood Lances, but it’s optional.
We’ll rotate this board so that Hardened is in the upper right corner. We’ll path to our Glyph Node first, pathing so we extra Dexterity along the way for our glyph. Then we’ll grab the Hardened cluster to activate the glyph and get the other bonuses.
With the Glyph done, we can path down and grab the Powerhouse and Guarded Advance clusters on the way to Bloodbath. These clusters grant us a bit of extra damage for all of our skills, while also netting some extra Overpower for Blood Lance.
Glyphs
Each of our Paragon Boards has a Glyph Slot, where we can socket one of our Glyphs. These Glyphs provide powerful bonuses that can be leveled up by completing Nightmare Dungeons to increase their power. Below are the Glyphs we recommend and what board to place them on.
Amplify
Amplify boost all the Magic Nodes in range by up to 150% of their original value, in our case this means extra Damage and Armor. With 40 Intelligence allocated in range, Cursed Enemies will take extra damage.
We’ll place this in our Starter Board, as there are not many boards we can fully take advantage of the initial bonus. Placing it here provides us with boosted offensive and defensive power while not being too hard to activate the bonus.
Blood-drinker
Blood-drinker also boost all nearby Magic nodes by up to 150% of their original value. When we have at least 40 Intelligence allocated in range, our Blood orbs will Fortify us for a portion of Maximum Life.
We’ll place this in Bone Graft, as we’ll get a solid general damage increase here from that base effect. It’s also not super hard to activate this glyph here as long as it’s level 15.
Sacrificial
Sacrificial increases the effect of Magic Nodes in range by up to 150%, in this case, Elite Damage. With 40 Intelligence allocated in range, we’ll also gain bonus damage for having no active minions.
We’ll place this in Flesh-eater, as we can quickly activate the bonus with the rare nodes and some nearby Intelligence nodes. Additionally, the base effect gives us a nice bump in Elite Damage.
Control
Control increases our damage again Crowd Controlled target for every 5 Intelligence in range. With 40 Intelligence allocated in range, we deal increased damage against Slowed, Stunned, Chilled, or Frozen enemies.
We’ll place this in Cult Leader, as we can easily path through a lot of Intelligence here without taking any useless Magic or Rare Nodes for it. This glyph will need to be level 15 to activate the bonus without taking the rare nodes.
Undaunted
Undaunted increases our Damage while Fortified for every 5 Willpower allocated in range. With at least 25 Willpower allocated in range, we gain additional Damage Reduction while Fortified.
Essence
Essence increases our Critical Strike Damage for every 5 Dexterity allocated in range. With at least 25 Dexterity allocated in range, our Critical Strikes will deal extra damage to enemies below 80% health.
We’ll place this in Bloodbath, as we can activate it by taking the Hardened Cluster and a couple of extra Dexterity nodes that are very close to the glyph node. We stack a ton of Critical Strike Damage on our gear, so it’s not important to feed a ton of Dexterity into this.
Leveling Order
If you want to play this build from level 1, the next segment of this build guide is for you. Below you will see the exact leveling order in which you should acquire your skills and passives to maximize damage and overall performance.
| Levels | Icon | Skill | Purpose |
|---|---|---|---|
| 2-3 |  | Hemorrhage | Basic Skill that can generate extra Blood Orbs early on. |
| 4-6 |  | Blood Lance | Upgrade to Supernatural Blood lance for Guaranteed Overpower and Blood Orb generation |
| 7-9 |  | Hewed Flesh | Chance to generate corpses with any hit. |
| 10-12 |  | Blood Mist | Upgrade tp Ghastly Blood Mist for more Corpses./ |
| 13-15 |  | Decrepify | Upgrade to Abhorrent Decrepify for Cooldown Reduction. |
| 16-18 |  | Death’s Embrace | Solid damage and Damage Reduction increase. |
| 19-21 |  | Corpse Tendrils | Upgrade to Plagued Corpse Tendrils for early damage. Swap to Blighted after getting Blood Artisan Cuirass. |
| 22-24 |  | Bone Spirit | Upgrade to Dreaful Bone Spirit for Essence sustain. |
| 25-27 |  | Bone Storm | Temporary Leveling Ultimate. Swap to Blood Wave with Blood Artisan Cuirass. |
| 28-30 |  | Stand Alone | Huge Damage Reduction. |
| 31-33 |  | Momento Mori | Boosts the effects of our Skeleton Sacrifices substantially. |
| 34-36 |  | Death’s Reach | Great damage boost for our longer range. |
| 37 |  | Ossified Essence | Our Key passive which grants a huge damage boost. |
| 38-41 |  | Bone Spirit | Maxing our main damage skill |
| 42-44 |  | Inspiring Leader | Decent Attack Sped boost. |
| 45-47 |  | Amplify Damage | Increase damage vs Cursed Enemies. |
| 48-49+ |  | Unliving Energy | Maximum essence to boost damage of Bone Spirit |
| Renown |  | Serration | Bonus Critical Strike Chance based on our Maximum Essence |
| Renown |  | Grim Harvest | Great Essence sustain, but requires the Sacrilegious Heart or Osseous Gale Aspect effect to work. Take Compound Fracture if you don’t have either. |
| Renown |  | Fueled By Death | Nice Damage boost that is maintained by Sacrilegious Heart or Osseous Gale. Take Imperfectly Balanced without Sacrilegious. |
This concludes our Diablo 4 Necromancer Build focusing on the Bone Sprit skill. You can find more leveling and endgame Diablo 4 builds here on VULKK.com to try new things with your characters and spice up your gameplay.
To learn how to maximize your damage in Diablo 4, consult with our guide on that topic. Learning how to deal the highest possible damage with your build is crucial to succeeding in the Endgame and highest tiers.
Check out some of our other unique Necromancer Builds we have created:


