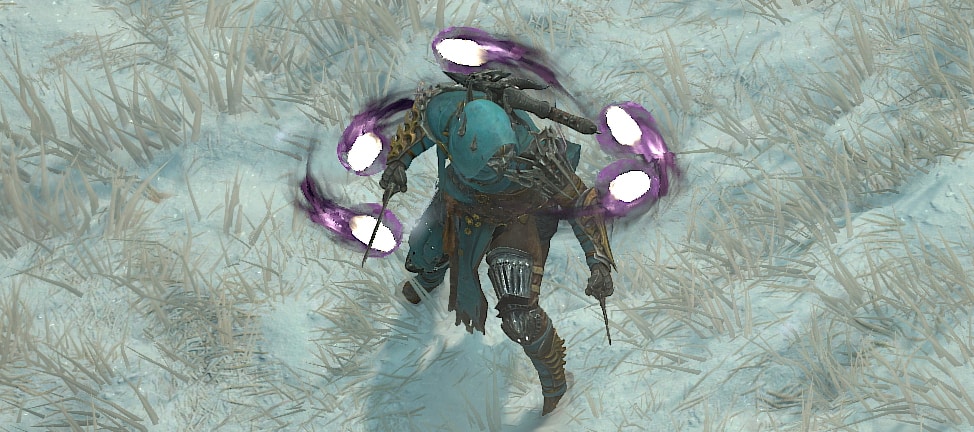
The Shadowslicer Rogue turns the mobility of the Dash Rogue playstyle into a highly offensive speed-clearing tool. Learn how to play this Diablo 4 build to perfection!
This guide is updated for Diablo IV Season 6 and Patch 2.0.
Check our Diablo IV Builds List of uniquely crafted builds for each class.
Table of contents
This Rogue build guide assumes you’re at least level 50 and have completed enough of your Renown to have gained the 10 additional Skill Points available.
If you want a great leveling build to reach this point with, try our Rogue Leveling Build – A build that combines Flurry and Shadow Imbuement for quick clearing.
If you want to level up as a Shadow Slicer Rogue, at the end of this guide, we have a leveling section showing you how to develop a new character from level 1 with this build.
Build Overview
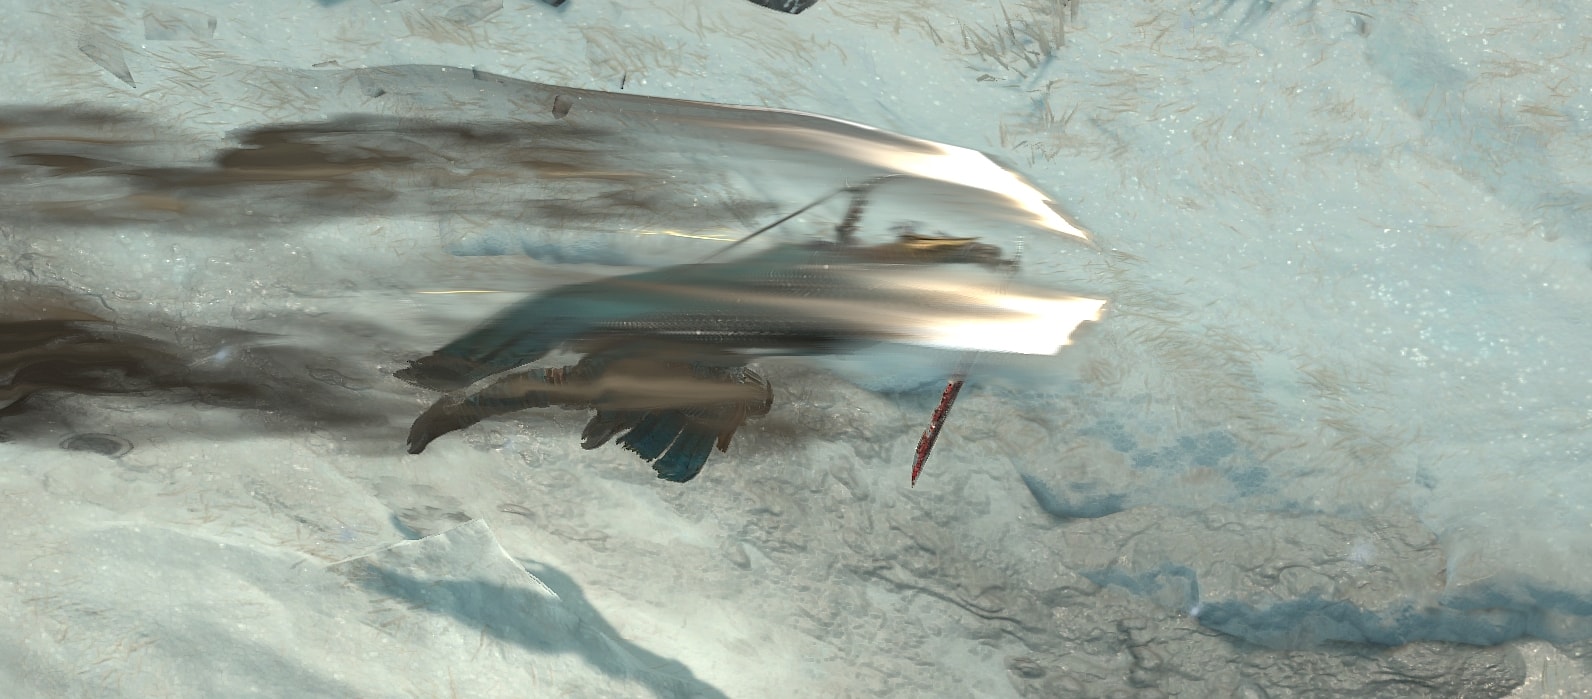
This build leverages a super low cooldown on Dash and the Shadowslicer Aspect along with Shadow Clone to very quickly deal with most enemies while simply passing through them. This ensures 3 quick hits that end up dealing high damage.
At the absolute high end of gearing, Dash will have a 5-second cooldown per charge, and this can almost be fully refunded by Aspect of Quickening Fog, with any use of Smoke Grenade.
Between the Aspect of Quickening Fog itself, manually casting it, and Escape Artist’s Aspect, we’ll be able to Dash far more frequently than expected.
Defensively, we’re utilizing a combination of Daze, Dark Shroud, and Dodge for survival. Since we’re not manually casting Dark Shroud, this allows us to have a very high uptime on our stacks.
If they’re unable to hit us as often as we’re able to generate Shrouds, we’ll often be at a higher stack of them before taking a hit thanks to dodging often.
With how often we’ll be dropping Smoke Grenades we’ll apply Daze often. This alone can keep us incredibly safe by preventing enemy attacks. We’ll also end up with ~26% Dodge with average rolls and ~36% Dodge with high rolls, with another 12% on top of this when we have Agile active. Escape Artist’s Aspect also gives us a number of 100% dodges every 45 seconds. Every time we do Dodge, we gain Attack Speed, Damage, and Energy thanks to stat rolls and the Assimilation Aspect.
Skill and Passive Breakdown
In this section, we’ll be talking about each skill we use. This is the whys and hows of how the build works, and then we’ll cover the skill point distribution.
Skills
These are the main skills for the build. We’ll explain what purpose each serves and how they fit the build
 Flurry
With the changes to the Momentum Key passive in Season 5, we’re using Flurry now. Its low energy cost and reworked passives make it incredibly useful. We’ll primarily use it as a means to apply Vulnerable, move around and reposition in combat, and even get some healing from it.

Dash
Dash is the focus of the build, and thanks to help from the Shadowslicer and Shadow Clone the skill can hit multiple times. This is taken even further with Tempered Affixes, letting this unassuming skill deal unexpectedly high damage.
Shadow Step
Shadow Step is a single point of investment for a very low cooldown option for Unstoppable. It also grants a lot of extra mobility as well for having no investment.
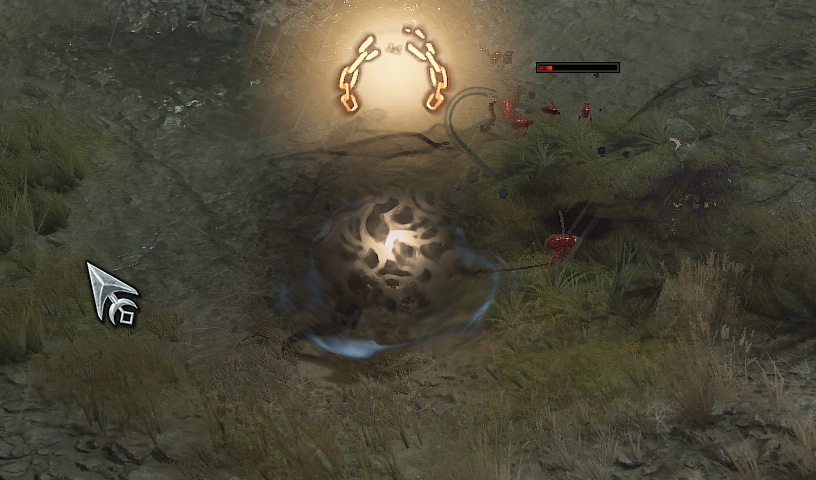
Smoke Grenade
Smoke Grenade is something very prevalent in our build, being dropped by two Aspects, in addition to any manual casts. Each use, regardless of the source, will not only Daze enemies and deal some damage but also lower the cooldown of Dash. This means it provides a great deal of offense and defense.
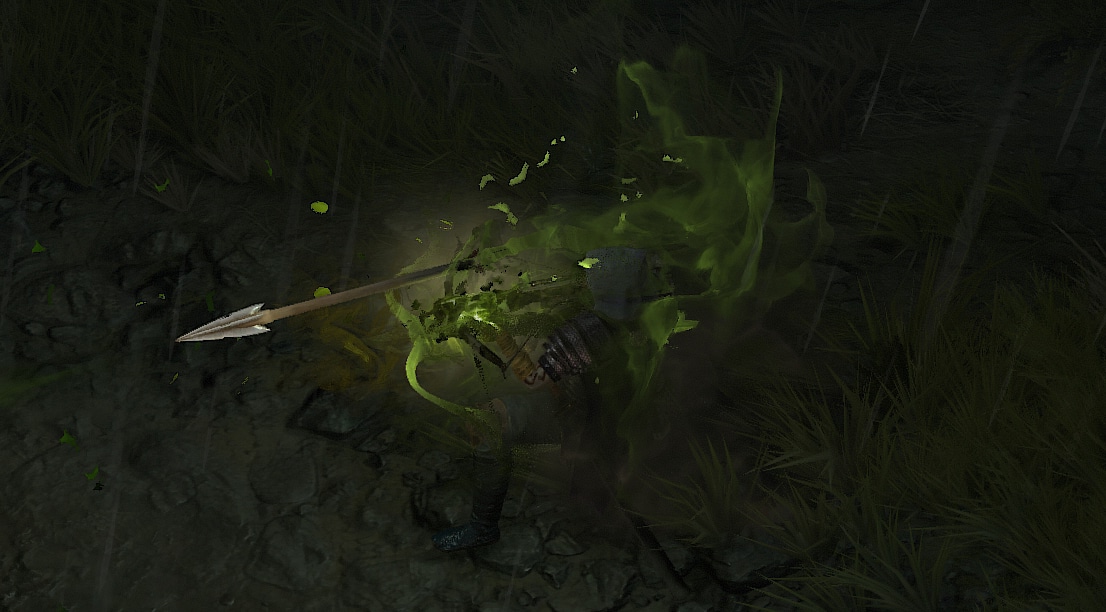
Poison Imbuement
Poison Imbuement adds a solid amount of damage to our skills with low investment. Additionally, it enables us to use the Debiltating Toxins passive for extra defense.
Shadow Clone
Shadow Clone increases our damage potential by repeating casts of Dash and Flurry, upping both bossing and clearing speeds for the build. It also gives us a pretty sizable window of Unstoppable in a pinch.
Dark Shroud
Dark Shoud is something we use almost entirely passively through the Umbrous Aspect. We’ll
With the high Dodge this build aims for, it’s much easier to keep it up for the benefits it provides; namely the Damage Reduction.
Passives
Here we’re only going to talk about the main passives we want as well as our Key Passive. There are unfortunately a couple we will need to take to get access to these though.
 Key Passive – Momentum
We’re using Momentum for the extra Damage Reduction and Energy sustain it provides. This however pretty much locks us to a melee build, as Marksman skills will decrease our stacks and make them harder to maintain.
Sturdy
Sturdy grants us a good amount of damage reduction against close enemies, which protects us from the often faster-hitting melee attackers.
Trick Attacks
When combined with our Smoke Grenades and Tempered Affixes, Trick Attacks provides a pretty sizable boost of Critical Strike Chance very reliably.
Weapon Mastery
Weapon Mastery grants us some nice damage bonuses based on our weapon choices. We’ll talk a bit more about this in the gearing section.
Agile
Agile grants us 12% Dodge for a short period after we use a cooldown. With Dash being able to use frequently, we’ll have high uptime on this effect.
Exploit
Exploit increases our damage against Healthy (>80% Life) and Injured (<35% Life) enemies. This helps our initial burst to quickly take out enemies as well as finish off high-health enemies faster when they get low.
Malice
While we’re not heavily investing in Vulnerable outside of stat rolls on our weapons and Paragon Board, we’ll still end up with a decent amount to make this more than worth the points.
Debilitating Toxins
Debilitating Toxins is another defensive layer for the build, making poisoned enemies deal less damage to us. This is more useful for Elites and bosses rather than weak packs of mobs, but still helps if trying to pusher higher Nightmare tiers.
Second Wind
Second Wind will grant us a pretty sizable barrier for a short duration when we expend a certain amount of Energy. This pairs very well with the Beastfall boots we’ll be using in the final build.
Aftermath
Aftermath got a nice buff and now provides us Healing over time just for having an Ultimate Skill on our bar. Additionally, it still retains its effect of restoring our Energy when we use our Ultimate. This is helpful early on, but also leans into the final build more than anything else.
Innervation
Innervation is one of our ways of sustaining Energy, outside of the Assimilation Aspect. With Dash hitting multiple targets and Flurry hitting multiple times, we’ll trigger this often enough to sustain energy.
Impetus
We’re building around a skill that provides a lot of mobility, so Impetus is very worth taking. Due to how well it synergizes with the build, we’ll even be looking to boost this effect (or Weapon Mastery) with our amulet.
We’ll just have to make a note of when we’re about to use our Ultimate as it will consume the buff this provides and we’ll need to use Shadow Step to re-apply it before Dashing again.
Skill Point Distribution
This is an easy-to-reference table for where we’ll be placing all of our Skill points. These are listed in the order they appear on the skill tree.
| Icon | Skill Name | Skill Tree | Points |
|---|---|---|---|
 | Blade Shift | Basic | 1 |
| Enhanced Blade Shift | Basic | 1 | |
 | Flurry | Core | 1 |
| Enhanced Flurry | Core | 1 |
| Improved Flurry | Core | 1 |
 | Sturdy | Core | 3 |
 | Shadow Step | Agility | 1 |
 | Dash | Agility | 5 |
| Enhanced Dash | Agility | 1 |
| Methodical Dash | Agility | 1 |
 | Rapid Gambits | Agility | 1 |
 | Trick Attacks | Agility | 3 |
 | Weapon Mastery | Agility | 3 |
 | Smoke Grenade | Subterfuge | 1 |
| Enhanced Smoke Grenade | Subterfuge | 1 |
| Countering Smoke Grenade | Subterfuge | 1 |
 | Agile | Subterfuge | 3 |
 | Exploit | Subterfuge | 3 |
 | Malice | Subterfuge | 3 |
 | Poison Imbuement | Imbuement | 1 |
| Enhanced Poison Imbuement | Imbuement | 1 |
| Mixed Poison Imbuement | Imbuement | 1 |
 | Deadly Venom | Imbuement | 1 |
 | Debilitating Toxins | Imbuement | 3 |
 | Shadow Clone | Ultimate | 1 |
| Prime Shadow Clone | Ultimate | 1 |
| Supreme Shadow Clone | Ultimate | 1 |
 | Innervation | Ultimate | 1 |
 | Second Wind | Ultimate | 3 |
 | Aftermath | Ultimate | 1 |
 | Adrenaline Rush | Ultimate | 1 |
 | Impetus | Ultimate | 3 |
 | Momentum | Key Passive | 1 |
Gearing and Stats
In this section, we’ll cover all the things you’d want to keep an eye out for to enhance the final build. This includes our Recommended Weapons, Specialization, Aspects, and of course, Uniques.
Recommended Weapons
For this Build, we’ll want to run a Pair of Swords and a Crossbow. The main reason we’re specific here is the Weapon Mastery passive, but the implicit stats also help too.
The swords grant us x9% Damage each from Weapon Mastery, for a total of x18% Damage alongside their implicit Critical Strike Damage. Meanwhile, the Crossbow grants us x15% Critical Strike Damage from Weapon Mastery and additional Vulnerable damage from its implicit.
Ideal Stats
The table below details the ideal stats for our gear, be on the lookout for gear that matches at least two of the three rolls below. We’ve also included Aspects here for easier viewing, refer to the Aspects section for additional details on why these are selected.
Affixes that are CAPITALIZED are the Ideal Affixes to get as a Greater Affix. These are not required but are a good way to push the build further. Affixes in Bold are the ideal Affixes to boost with Masterworking.
In cases where multiple Affixes are listed, the secondary option is for when another stat reaches its cap. This is most common with Armor, where you’d take another defensive stat after reaching the Armor cap.
Affix 1
Dexterity
Affix 2
CRITICAL STRIKE DAMAGE
Affix 3
Maximum Life
Tempered Affix 1
Dash Damage
Rogue – Trickster Finesse (Offensive)
Tempered Affix 2
Chance to Deal Physical Damage
Shared – Elemental Surge (Weapon)
Legendary Aspect
Shadowslicer Aspect
Affix 1
Maximum Life
Affix 2
Dexterity
Affix 3
CRITICAL STIKE DAMAGE
Tempered Affix 1
Shadow Clone Damage
Rogue – Trickster Finesse (Offensive)
Tempered Affix 2
Chance to deal Physical Damage
Shared – Elemental Surge (Weapon)
Legendary Aspects
Aspect of Iron Rain
AND
Aspect of Synergy
Affix 1
Maximum Life
Affix 2
Armor OR Resistance
Affix 3
COOLDOWN REDUCTION
Tempered Affix 1
Smoke Grenade Cooldown
Rogue – Daze Control (Utility)
Tempered Affix 2
Total Armor OR Dodge Chance
Shared – Worldly Endurance (Defensive)
Legendary Aspect
Details
Affix 1
MAXIMUM LIFE
Affix 2
Dexterity
Affix 3
Armor OR Resistance
Tempered Affix 1
Smoke Grenade Cooldown
Rogue – Daze Control (Utility)
Tempered Affix 2
Total Armor OR Dodge Chance
Shared – Worldly Endurance (Defensive)
Legendary Aspect
Escape Artist’s Aspect
Affix 1
MAXIMUM LIFE
Affix 2
Armor OR Resistance
Affix 3
Dodge Chance
Tempered Affix 1
Smoke Grenade Cooldown
Rogue – Daze Control (Utility)
Tempered Affix 2
Total Armor OR Dodge Chance
Shared – Worldly Endurance (Defensive)
Legendary Aspect
Assimilation Aspect
Affix 1
Maximum Life
Affix 2
Dexterity
Affix 3
CRITICAL STRIKE CHANCE
Tempered Affix 1
Dash Damage
Rogue – Trickster Finesse (Offensive)
Tempered Affix 2
Chance to Daze
Rogue – Daze Control (Utility)
Legendary Aspect
Clandestine Aspect
Unique Item Option
Beastfall Boots
Affixes below are used until Unique is acquired
Affix 1
Maximum Life
Affix 2
MOVEMENT SPEED
Affix 3
Armor or Resistance
Tempered Affix 1
Mobility Cooldown Reduction
Shared – Natural Motion
Tempered Affix 2
Smoke Grenade Cooldown
Rogue – Daze Control (Utility)
Legendary Aspect
Aspect of Concussive Strikes
Affix 1
Maximum Life
Affix 2
CRITICAL STRIKE CHANCE
Affix 3
Critical Strike Damage
Tempered Affix 1
Shadow Clone Damage
Rogue – Trickster Finesse (Offensive)
Tempered Affix 2
Dash Cooldown Reduction
Rogue – Agility Efficiency (Utility)
OR
Ultimate Skill Cooldown Reduction
Necromancer – Necromancer Efficiency (Resource)
Legendary Aspect
Aspect of Encircling Blades
Affix 1
Maximum Life
Affix 2
CRITICAL STRIKE CHANCE
Affix 3
Critical Strike Damage
Tempered Affix 1
Shadow Clone Damage
Rogue – Trickster Finesse (Offensive)
Tempered Affix 2
Dash Cooldown Reduction
Rogue – Agility Efficiency (Utility)
OR
Ultimate Skill Cooldown Reduction
Necromancer – Necromancer Efficiency (Resource)
Legendary Aspect
Aspect of Imitated Imbuement
Affix 1
COOLDOWN REDUCTION
Affix 2
Maximum Life
Affix 3
Ranks of Impetus
Tempered Affix 1
Shadow Clone Damage
Rogue – Trickster Finesse
Tempered Affix 2
Dodge Chance
Shared – Worldly Endurance
Legendary Aspect
Aspect of Quickening Fog
Recommended Gems
This build uses Emeralds in our Weapons, Rubies in our Armor, and Diamonds in our Jewelry.
We opt for Emeralds in our Weapons as we’ll have fairly high Critical Strike Chance.
We use Rubies in our Armor, as they’re the only defensive bonus we get consistent value out of.
We go with Diamonds for Our Jewelry for the Resistance they provide. Later on, you’ll want to swap these to gems that offer more specific resistance to round out what we don’t get from other sources.
Specialization
This build uses the Preparation Specialization. With Dash being our main damage and not requiring Energy, we opt to make use of Flurry alongside the Beastfall Boots to dump our Energy for extra damage and trigger Preparation.
We could also opt for Inner Sight, but we’re not going to benefit from it often enough to make it worth using. Leyrana’s Instinct can make this tempting, but it doesn’t last long enough to provide value.
Likewise, Combo Points could work but would require the use of the Condemnation Dagger to even generate Combo Points. This makes it unreliable in addition to losing all of the favorable stats that come with a Legendary Sword over this Unique Dagger.
Aspects
We’ll cover the Aspects that are recommended for maximizing the potential of the build. We’ll also suggest which gear slot you should look to place them in.
 Shadowslicer Aspect
Shadowslicer is a huge part of this build’s ability to deal damage. The Shadow Clone will be doing a minimum of 150% of our base Dash damage, up to 300% with a perfect roll.
We’ll slot this on our Ranged Weapon, to empower its effect and allow it to reach a 600% bonus instead.
Aspect of Synergy
The Aspect of Synergy works great for this build, allowing Dash to reduce the cooldown of Smoke Grenade and for it to boost Dash’s damage in return. With enough Smoke Grenade Cooldown, we’ll be able to trigger the damage bonus before every attack against Elites or Boss.
We’ll slot this on one of our Melee Weapons, as we don’t need to boost its effect that much beyond getting a good roll of it.
Aspect of Encircling Blades
The Aspect of Encircling Blades gives Flurry a 360-degree AoE and boosts its damage. This allows it to hit more targets and trigger more lucky hits to help Innervation sustain its cost.
We’ll slot this on one of our Rings, as we don’t need to boost its effect for its intended purpose and our Gloves will be taken by a Unique.
Aspect of Iron Rain
We get an incredibly low cooldown for Smoke Grenade, this allows it to be a consistent source of damage and constantly apply Vulnerable. Since Arrow Storms deal Physical Damage, it will also help stack of the effect of the Chip Paragon Glyph.
We’ll place this in one of our Melee Weapons, as it’s mostly a filler and doesn;t need to be boosted.
Clandestine Aspect
Clandestine Aspect grants additional ranks to Agility and Subterfuge Skills. This helps us get extra ranks for Dash, Shadow Step, and Smoke Grenade. For Dash this not only increases damage but lowers its cooldown.
We’ll place this in our Gloves, as the base effect is good enough. If desired it can be swapped to the amulet once you pick up Beastfall Boots,
Aspect of Quickening Fog
The Aspect of Quickening Fog pairs well with Quickening Fog to allow both of our cooldown skills to lower each other’s cooldown. What’s nice about this in particular is that this effect isn’t limited to just Smoke Grenades dropped by this Aspect, which we take advantage of.
We’ll place this on our Amulet, as with a good roll we’re able to knock off almost a full second per enemy hit by any Smoke Grenade, and fully reset the cooldown with gear gear.
Aspect of Concussive Strikes*
Since we have a low cooldown on Smoke Grenade, this allows us to leverage that for more damage. It’ll also work with our Tempered Affix to apply Daze, giving us plenty of crowd control and damage as a result.
We’ll place this on our Boots, as our Helmet and Chest both need to carry Defensive Aspects and Quickening Fog is already taking the Amulet slot. We’ll drop this aspect entirely once acquiring Beastfall Boots, or use it in place of the Clandestine Aspect.
Assimilation Aspect
Increases our Dodge Chance. Each time we dodge it will Fortify us for a good portion of our Maximum Life. This gives us access to another defensive layer we’ve not really had on Rogue outside of Uniques. Paired with Dodge it’s a much stronger defensive layer as well.
As a Defensive Aspect, we’ll place this on our Chest, Pants, or Helm, depending on what’s open.
Aspect of the Crowded Sage
The Aspect of the Crowded Sage heals us for a significant portion of our Maximum Life when we Dodge. Combined with all of our Dodge Chance and other effects, we’ll stay pretty healthy.
We’ll place this in our Helmet, Chest, or Pants; since all of our defensive slots are filled with defensive aspects it doesn’t matter where this is placed.
Escape Artist’s Aspect
Escape Artist grants us 100% dodge for a set number of incoming attacks in the next 10 seconds when we take a hit. These Dodges will also trigger Crowded Sage and Assimilation’s effects, healing and Fortifying us. Additionally, it’ll drop a Smoke Grenade Dazing anything near us and activating Quickening Fog.
We’ll place this in our Helmet, Chest, or Pants; since all of our defensive slots are filled with defensive aspects it doesn’t matter where this is placed.
Umbrous Aspect*
Umbrous allows to get another defensive layer in Dark Shroud. With our high dodge, we’ll have a much easier time maintaining any stacks generated by this effect.
Umbrous Aspect can be used in place of Escape Artist’s Aspect. This trades the low uptime effect for the more consistent Damage Reduction offered by Dark Shroud. However, to make full use of this you’ll need to also trade Second Wind for Dark Shroud and its upgrades to get more benefits.
Unique Items
We’re only going to talk about the few that offer the strongest effects on the build. While there are others that help, these are the ones you really want to slot into your build if you get the chance. These will drop starting in Tier 3 content, but decent upgrades for the build once you get them.
Beastfall Boots
Beastfall Boots are a pair of Unique Boots that cause our next Core Skill after using an Ultimate Skill to consume all of our Energy to deal increased damage. Additionally, our cooldowns will Restore Energy. This solves any Energy issue we may run into, as well as gives us a way to quickly dump Energy to trigger Preparation
Locran’s Talisman
Locran’s Talisman is a Unique Amulet that grants a ton of extra Energy, while providing up to 50% Critical Strike Chance and turning any excess Energy above 100 into Critical Strike Damage.
It’s not a perfect fit for the build, but provides enough raw stats to be worth considering.
The Umbracrux
The Umbracrux is a Unique Dagger that creates Shade Totems, echoing a portion of the damage they take to nearby enemies. With our insanely low Smoke Greande cooldown, we’d be able to have one of these up at all times and just deal extra damage. This would be more helpful for bosses, but worth keeping in mind as a potential option.
Paragon Boards and Glyphs
These two endgame options are part of the Paragon System which is available starting at level 50.
Paragon Boards
Paragon Boards are a feature that becomes available at level 50. These boards allow us to spend the Paragon points we earn for leveling and Renown to strengthen our character. Each of these has a single Glyph Slot to place a glyph of our Choice.
Starter Board
Like all starter boards, this one offers generic damage and defenses.
As usual, we’ll path up the right side through Prime to our Glyph Node, then continue up the left side through Skillful and head to the next board. We’ll want to come back later for Lawless and some Strength Nodes for the Glyph we’ll be placing here. we can also pick up Resilience for a bit of extra Resistance as well.
Exploit Weakness
Exploit Weakness grants us additional damage when hitting Vulnerable enemies. Without a consistent source of Vulnerable for longer encounters, we skip out on this Legendary node. However, we do get a nice bit of Elite Damage as well as just a touch of Vulnerable Damage in the process of activating our Glyph here.
We’ll rotate this board so that our Glyph Node is in the lower right. We’ll start by pathing straight to Hunter Killer and taking the readily available Elite Damage nodes, avoiding the Elite Movement Speed bonus. Then we head to our Glyph Node, taking a few nearby Strength Nodes and the Artifice cluster for our Glyph. Then we’ll exit out the right side gate.
Cheap Shot
Cheap Shot is our first Legendary node we can make great use of, which grants increased damage for each nearby Crowd Controlled enemies, which includes Daze. In addition to the Legendary Node, we’ll also get a nice boost of Critical Strike Damage and Damage vs Crowd Controlled.
We’ll rotate this board so that Cheap Shot is closest to the left side. We’ll path through Oppress, taking the full cluster on the way to Cheap Shot. After grabbing Cheap Shot, we’ll loop up and around to our Glyph Node. We’ll grab Devious while avoid the attribute nodes in its cluster as well as Wiles, taking the two Dexterity Nodes and the Strength Node for it. Then we’ll head out the top gate, taking the Calculated cluster on the way out.
Leyrana’s Instinct
We don’t use Inner Sight, so we don’t benefit from this Legendary and just ignore it entirely. We do however benefit from the Elite Damage and Damage after Dodoign nodes in addition to our glyph.
We’ll rotate this board so the glyph is in the lower left. We’ll path straight up first, so we have easier access to Discerning later after our Glyph Node. But head straight to the Glyph Node first. We’ll spend the minimum points needed to grab Feint and Tolerance, taking Damage after Dodge for Feint and All Resistance for Tolerance. After this, we’ll head out the left gate.
Tricks of the Trade
Tricks of the Trade is a pretty low investment for some bonus damage on our paragon board, allowing Dash and Rapid Fire to have some Synergy. Additionally, we’ll get some Critical Strike Damage, Elite Damage, and Damage vs Close.
We’ll rotate the board so that Havoc is in the upper right. We’ll path straight to Focused, before hopping up to our Glyph Node. We’ll head through Lawless and head out the left gate, grabbing the Brawler cluster on the way out. We’ll come back later and grab the Havoc cluster, pathing up from the middle of the initial entry path.
Eldritch Bounty
This board really only offers us a Glyph slot for the most part. However, we can pick up Imbued Skill Damage and Imbuement Skill Cooldown.
We’ll rotate this board so the Glyph Node is in the upper right. We’ll path directly to the Glyph Node, picking up Dosage and the Intelligence nodes in its cluster for our glyph. Then we’ll pick up Potent and the Imbued Skill Damage nodes before pathing through more Intelligence to grab Ready Supply. Then we can continue to the left and pick up Suffused Resilience for the DoT Damage Reduction and Elemental Resists.
Glyphs
Each of our Paragon Boards has a Glyph Slot, where we can socket one of our Glyphs. These Glyphs provide powerful bonuses that can be leveled up by completing Nightmare Dungeons to increase their power. Below are the Glyphs we recommend and what board to place them on.
Exploit
Exploit grants additional Damage vs Vulnerable for every 5 Strength allocated within range. With 25 Strength allocated in range, we’ll apply Vulnerable for 3 seconds when damaging an enemy, which happens once every 20 seconds per target.
We’ll place this in our Starter Board, as we’ll be able to get extra armor in the process of reaching the Strength threshold.
Turf
Turf Increases Damage vs Close for every 5 Strength allocated in range. With 25 Strength allocated in range, we gain additional Damage Reduction vs Close.
We’ll place this in Exploit Weakness, as the Artifice cluster there helps a lot with reaching the needed threshold.
Closer
Closer increases the damage of Cutthroat Skills for every 5 Dexterity allocated in range. With 40 Dexterity allocated in range, we’ll gain increased Damage Reduction while wielding a melee weapon.
We’ll place this in Cheap Shot, as we can easily meet the Dexterity requirement with the nearby nodes as well as the rare nodes in range once this glyph reaches level 15 or higher.
Chip
Chip increases Physical Damage for every 5 Dexterity allocated in range. With 40 Dexterity allocated in range, Physical Damage applies a stacking damage bonus on enemies.
We’ll place this in Leyrana’s Instincts, as we can get the Dexterity by pathing through and by grabbing the rare nodes in range.
Versatility
Versatility boosts all Magic Nodes in range. With 40 Dexterity allocated in range, our Non-Basic and Non-Core Skills deal increased damage.
We’ll place this in Tricks of the Trade, as there’s a lot of easily accessible Dexterity near the Glyph Node, allowing this to be active sooner.
Combat
Combat increases our Critical Strike Damage for every 5 Intelligence in range. with 25 Intelligence in range, skill that Critically Strike will restore 12% of their energy cost.
We’ll place this in Eldritch Bounty, as the Dosage cluster offers us easy access to Intelligence once the Glyph is level 15 or higher.
Leveling Order
If you want to play this build from level 1, the next segment of this build guide is for you. Below you will see the exact leveling order in which you should acquire your skills and passives to maximize damage and overall performance.
| Levels | Icon | Skill | Purpose |
|---|---|---|---|
| 2-3 | | Blade Shift | Required points in Basic Skill, can be further upgraded to Primary Blade Shift for Resistances, but will require respec later. |
| 4-6 |  | Twisting Blades | Upgraded to Advanced Twisting Blades for consistent early damage to help Dash. |
| 7-9 | | Dash | Upgrade to Methodical Dash for Cooldown Reduction. |
| 10-11 | | Shadow Step | Upgrade to Enhanced Shadow Step for early Critical Strike Chance boost. |
| 12-14 | | Smoke Grenade | Upgrade to Countering Smoke Grenade for Cooldown Reduction. |
| 15-17 | | Sturdy | Great early Damage Reduction from melee enemies. |
| 18-20 | | Poison Imbuement | Upgrade to Mixed for more frequent use. |
| 21-23 | | Weapon Mastery | Consistent damage bonus. |
| 24 |  | Siphoning Strikes | Additional sustain for the build, single point only. |
| 25-27 | | Shadow Clone | Our Ultimate, increases damage output from all skills. |
| 28-31 | | Dash | Fully level our main skill |
| 32 | | Adrenaline Rush | Single point, needed to reach Impetus. |
| 33-35 | | Impetus | Consistent damage bonus while Dashing about. |
| 36 | | Momentum | Increase Movement Speed and Damage Reduction, as well as healing with Aspect of Stolen Vigor. |
| 37-39 | | Innervation | Allows all attacks to have a chance to generate Energy on Lucky Hit. |
| Respec | | Flurry | Blade Shift down to 2 point minimum, Shadow Step down to one point, swap Twisting Blades for Improved Flurry |
| 40 | | Rapid Gambits | Taken to reach Trick Attacks. |
| 41-43 | | Trick Attacks | Daze grants increased Critical Strike Chance |
| 44-46 | | Exploit | Consistent damage bonus for starting and ending encounters quicker. |
| 47-49 | | Agile | Increased Dodge Chance when we use a cooldown. |
| Renown | | Deadly Venom | Single point, to reach Debilitating Toxins. |
| Renown | | Debilitating Toxins | Reduces damage taken from Poisoned targets. |
| Renown |  | Dark Shroud | Upgrade to Countering Dark Shroud for use with Umbrous Aspect. Take Second Wind instead if not using Umbrous. |
| Renown | | Malice | Increased Damage against Vulnerable targets. |
| Renown |  | Precision Imbuement | Leftover point, bonus Critical Strike Chance with Imbued Skills. |
This concludes our Diablo 4 Rogue Build focusing on the Dash skill. You can find more leveling and endgame Diablo 4 builds here on VULKK.com to try new things with your characters and spice up your gameplay.
To learn how to maximize your damage in Diablo 4, consult with our guide on that topic. Learning how to deal the highest possible damage with your build is crucial to succeeding in the Endgame and highest tiers.