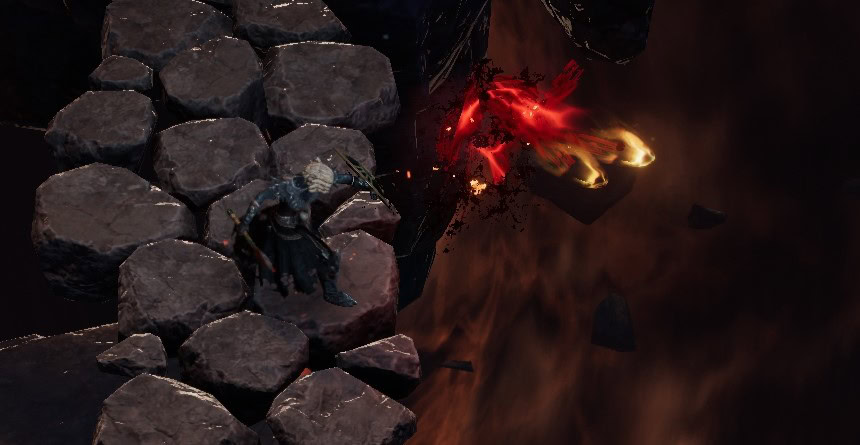
This Warlock Build focuses on the Chaos Bolts and Chthonic Fissure Skills, giving it a good mix of Damage over Time and direct hit damage.
This Warlock build is made to take you from Level 1 to the endgame smoothly. It’s designed without Uniques in mind. Uniques, especially those with Legendary Potential can be used to push the build further and into endgame.
To show you how to play this build starting from Level 1, we have a leveling section at the end of this guide that details our recommended leveling path for Class and Mastery Passives.
Build Overview
This build is focused around the Chaos Bolts Skill, with it being both manually cast as well as indirectly cast by Chthonic Fissure quickly stacking ailments like Bleed, Damned, and Ignite for ramping damage potential.
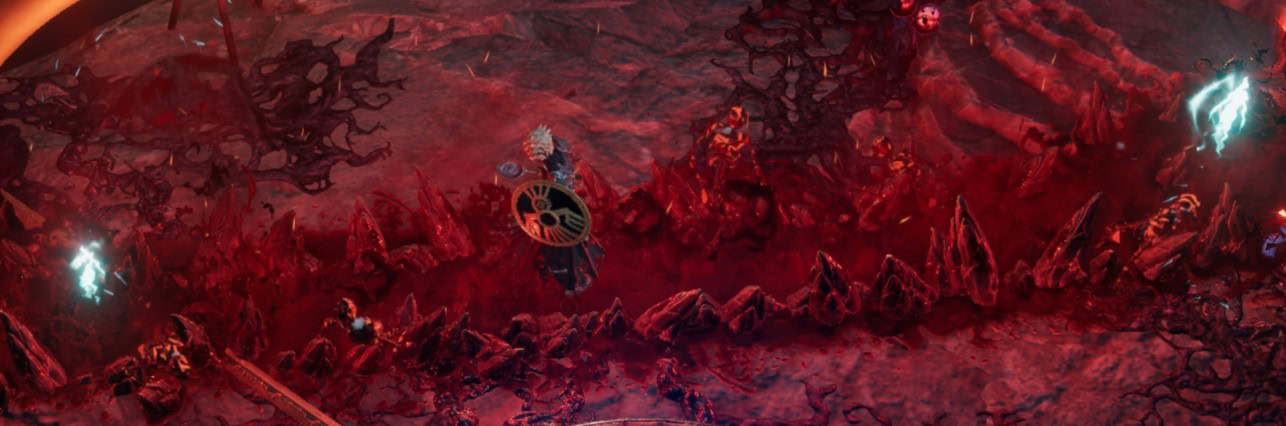
Chthonic Fissure will deal plenty of damage and be a great supporting skill for Chaos Bolts. Between the two of them, we’ll be able to easily and consistently trigger Witchfire as well as spread it for extra damage.
Then we have our Curses, starting with Bone Curse. This curse will Apply Marked for Death, Shred enemy Armor, as well as instantly defeat anything we’re targeting at low health. Pairing the execute with a chance for Bone Armor also gives this a nice layer of defensive power as well. It’ll also double the rate at which Spirit Plague can apply Bleed, as it instances of damage are considered hits as well.
Our other Curse is Spirit Plague, and this skill is really what helps the build function and survive. Its main job will be to build and sustain our Ward in combat through Putrid Recovery. Thanks to Laceration and Pestilence, and its base DoT effect, it will also contribute meaningful damage.
Last but not least, we have Transplant. This will provide us with mobility primarily, but the extra utility in addition to that mobility makes it a great option as a final specialized skill. It’ll be a secondary source of Bone Armor and provide some meaningful mana recovery.
Skills and Specializations Breakdown
In this section, we’ll cover the Skills as well as the Specializations used in the build. Occasionally, more skills than the specialization limit are shown. If a Skill doesn’t have a Specialization Tree shown, then it is used as an Active Skill without one. This typically happens most with Utility skills.
 Chaos Bolts
Chaos Bolts is our main damaging skill, which will do plenty of damage on its own but also rapidly hit enemies to apply other effects at a high rate. This makes it exceptionally strong as a starting skill.
Our Specialization Tree for Chaos Bolts has us boosting Chaos Bolts’ damage by applying Ailments and Curses itself and scaling off those same Ailments and Curses. In this case, it’ll apply Ignite and Damned for Ailments.
It will also periodically cast Bone Curse for us and give it 100% uptime when it comes to single-target situations. Hitting Cursed enemies will also improve our overall sustain of Health and Mana, easily sustaining both with a little extra help.
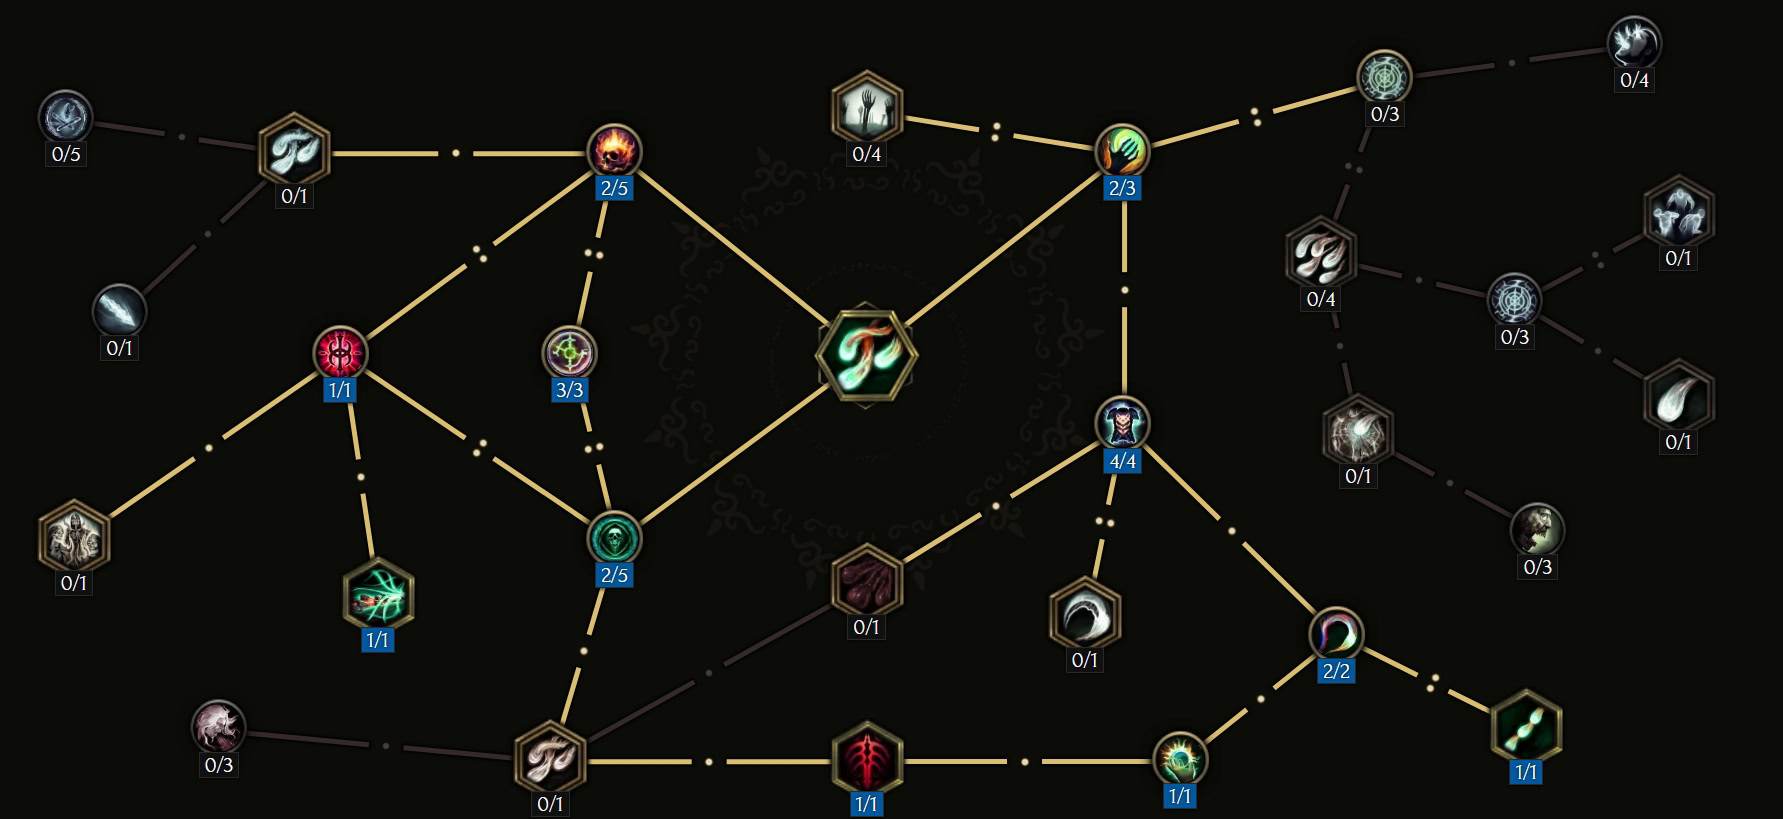
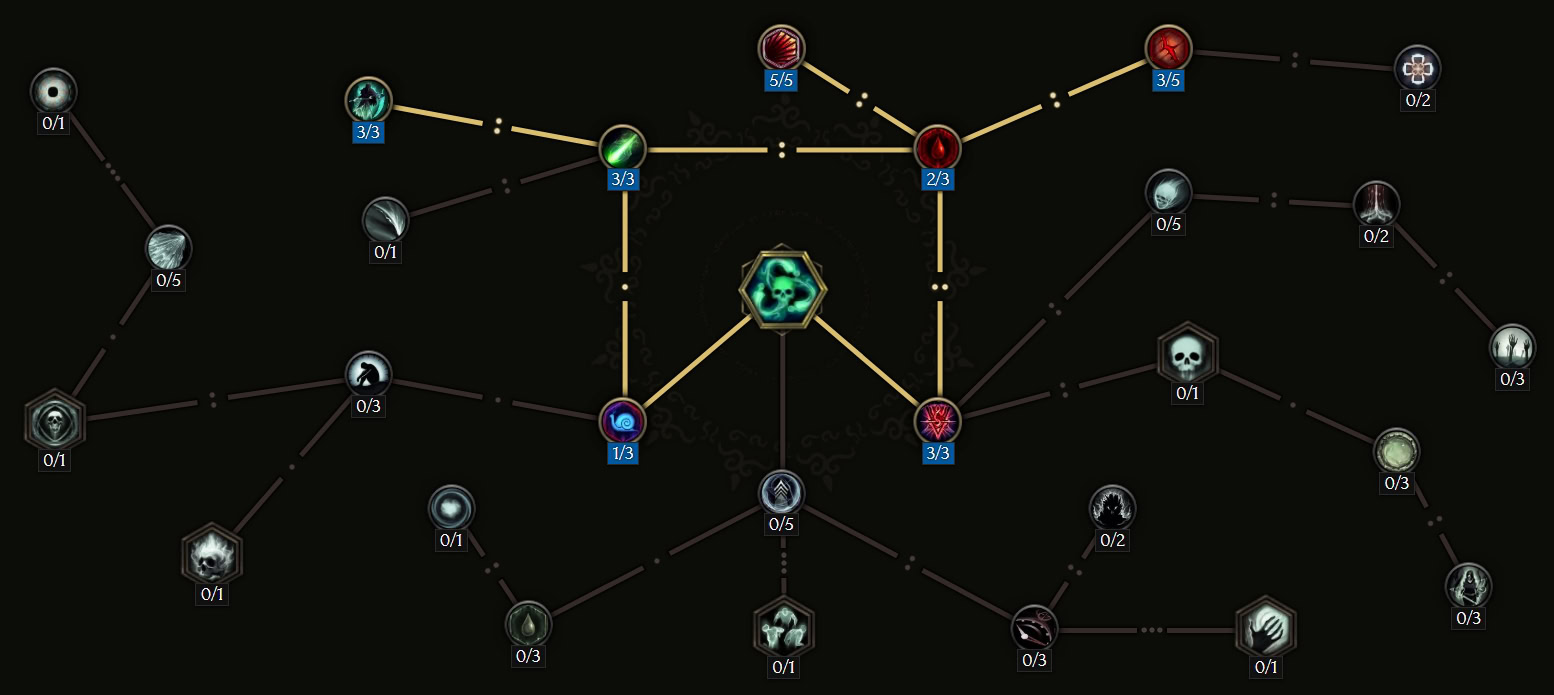
Specialization Tree
We’ll want to start by pathing down the right side to grab Devour the Damned as soon as possible and taking both points to help alleviate mana issues. Then we’ll take Cursed Blood and move over to our ailment area.
We’ll want to take two points in Condemned in Chaos, then max out Exult in Misery, and then two points in Mania in Flames. We’ll pick up A Grave for Two and The Burn next, to further boost damage and keep Chthonic Fissure active longer. Finally, we can go back and max out Doom’s Vindication as well as pick up Seed of Chaos and Another Affliction.
Any Skill Points past 20 are best spent in Abrupt Chaos and Pandemonium to increase our manual Cast Speed as well as get more coverage area.
Level
Passive
Points
(Current/Max)
1
Abrupt Chaos
1/3
2
Doom’s Vindication
1/4
3-4
Devour the Damned
2/2
5
Cursed Blood
1/1
6-7
Condemned to Chaos
2/5
8-10
Exult in Misery
3/3
11-12
Mania in Flames
2/5
13
A Grave for Two
1/1
14
The Burn
1/1
15-17
Doom’s Vindication
4/4
18
Seed of Chaos
1/1
19
Another Affliction
1/1
20
Reaper of Mayhem*
1/1
20-21
Abrupt Chaos
3/3
22-24
Pandemonium
3/3
* Reaper of Mayhem is an alternative 20th Point for late game, but requires a minimum of 15 Dexterity on gear to be effective.
Cthonic Fissure
Chthonic Fissure will serve as a debuffing tool, while also being a secondary way of casting Chaos Bolts. It’ll deal the bulk of our AoE damage as a result.
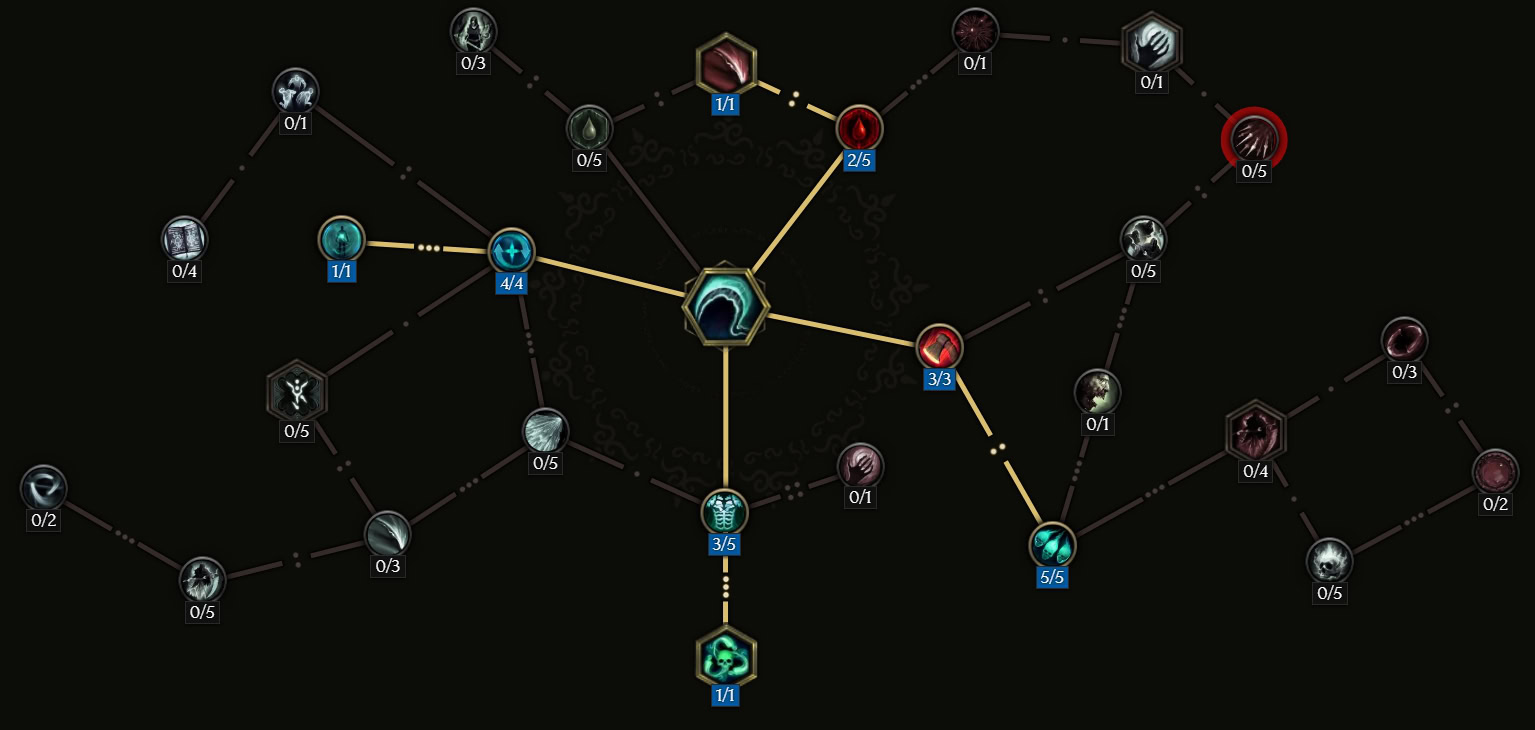
Specialization Tree
The Specialization Tree for Chthonic Fissure is set up to Shred Necrotic and Fire Resistances of enemies, further enabling Chaos Bolts to deal more damage. To do such, we boost the rate at which the Chthonic Fissure releases spirits and by extension Chaos Bolts.
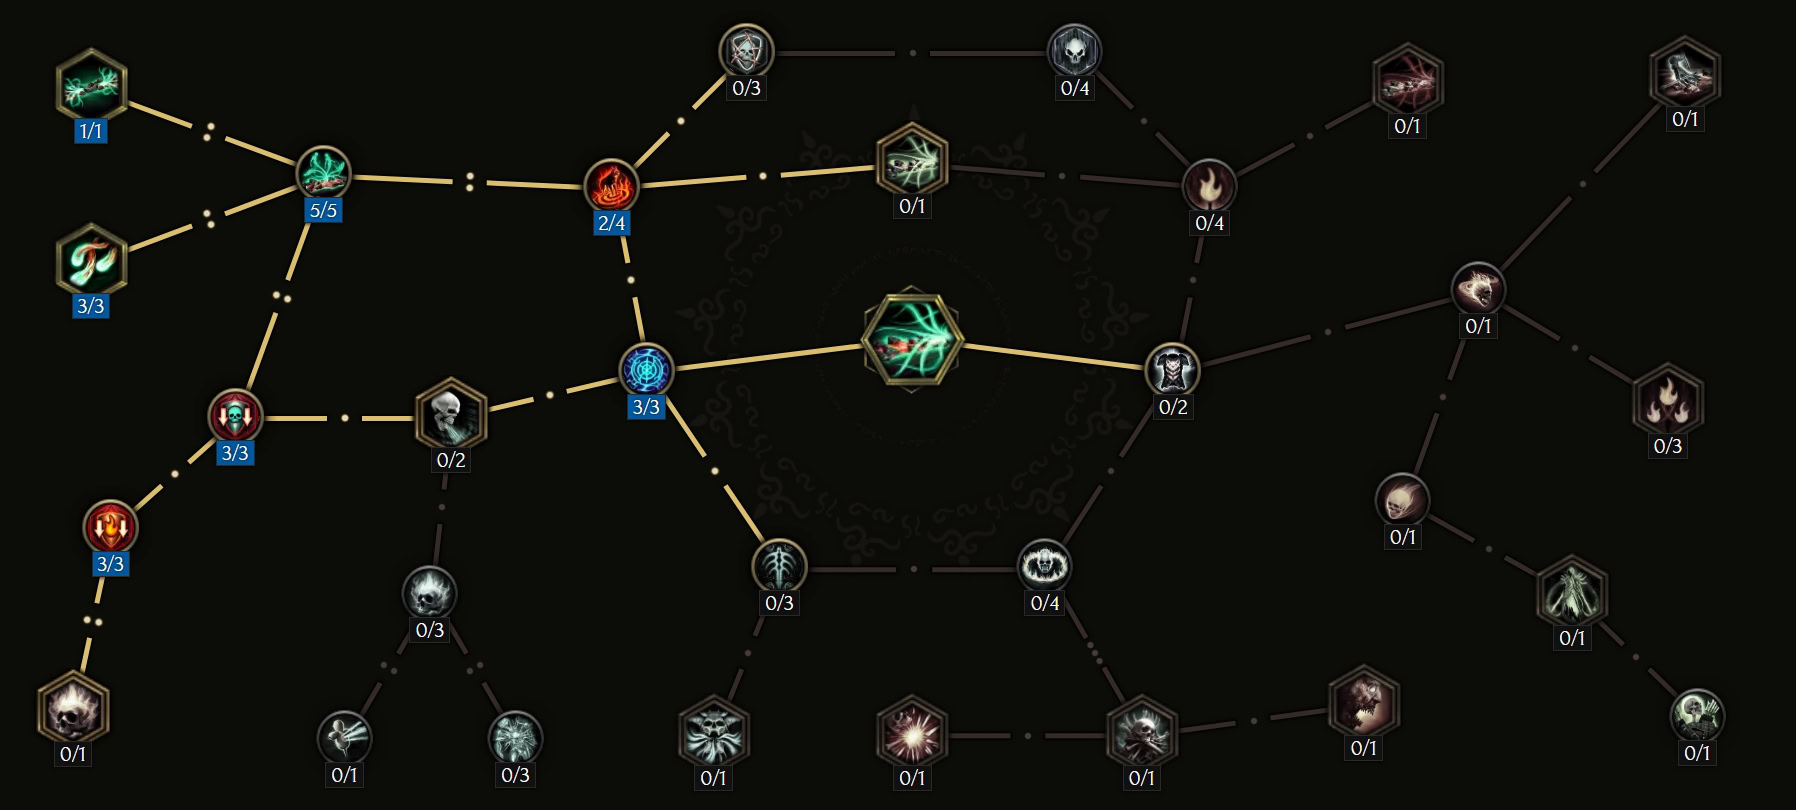
We’ll start by pathing to and maxing Chaotic Rupture first, going through Fragile Crust, Fell Fire, and Stygian Current. Then we’ll max out Stygian Current, so it deals more damage and casts Choas Bolt more often as well. Then we’ll path down to and max Severed Wards and Singed by Terror. Then we’ll finish up by maxing out Fragile Crust before picking up Of Gloom and Flames to keep its mana cost as low as possible.
Any Skill Points past 20 should be put towards reaching and maxing out Damned Waters, to allow for quicker Ailment stacking.
Level
Passive
Points
(Current/Max)
1
Fragile Crust
1/3
2-3
Fell Fire
2/4
4-5
Stygian Current
2/5
6-8
Chaotic Rupture
3/3
9-11
Stygian Current
5/5
12-14
Severed Wards
3/3
15-17
Singed by Terror
3/3
18-19
Fragile Crust
3/3
20
Of Gloom and Flames
1/1
21
Spirit Gale
1/1
22-24
Damned Waters
3/3
Spirit Plague
Spirt Plague will serve two main functions for the build, building Ward and stacking Bleed. We’ll end up with relatively high amounts of Ward, easily reaching 500-1000 at a low level with no investment into Ward.
Specialization Tree
The Specialization Tree for Spirit Plague makes it a core part of our build for both damage and defenses. We prioritize the Ward early to make it very easy to survive, before going into the Bleed section and pumping damage out of it.
We’ll start by pathing through Hindering Affliction and Plague Burst to reach Putrid Recovery, which we max first. We’ll move over to the Bleed section taking two points in Hemorrhage then max Laceration, which enables the Bleed stacking by making every hit we deal apply Bleed. Then we’ll max out Pestilence to greatly increase our overall damage. Finally, we’ll put 3 points into Exsanguination for the Physical Penetration with Bleed to push our damage even more.
Any Skill Points past 20 should be put towards maxing Exsanguination and then grabbing Enfeeblement for the Frailty effect. Alternatively, the point in Hindering Affliction can be dropped for Plague Bearer and excess points can be put into Queen of Plagues and Endless Decay for more DoT effects instead.
Level
Passive
Points
(Current/Max)
1
Hindering Affliction
1/3
2-3
Plague Burst
2/3
4-5
Putrid Recovery
3/3
7
Plague Burst
3/3
8-9
Hemorrhage
2/3
10-14
Laceration
5/5
15-17
Pestilence
3/3
18-22
Exsanguination
5/5
24-24
Enfeeblement
2/3
 Bone Curse
Bone Curse is a huge damage booster, as the damage it deals will trigger from each hit of Chaos Bolts. With it being extended indefinitely by Chaos Bolts, this becomes the second-best supporting skill just behind Spirit Plague.

Specialization Tree
The Specialization Tree for Bone Curse makes it exceptionally powerful, granting us powerful effects like Bone Armor and an execute threshold with all our other damage. It’ll also debuff enemies with Marked for Death and Shred their Armor, increasing our hit and DoT damage.
We’ll want to make our way up to max Brittle Bones as soon as possible for the bonus execute threshold. Then we’ll put 4 points into Conflation to reach Sigil of Mortality to apply Marked for Death. We’ll max Reaper’s Mark so that the Bone Curse applied by Chaos Bolts will have 100% uptime without any manual casts. Then we’ll put two points in Defile Defenses to reach and max Marrow Thief. Then we’ll round off the skill by taking Ruptured Corpse for a bit of extra AoE on top of what we already have.
All Skill points after 20 should be placed into Cloven Flesh. This allows Bone Curse to also stack Bleed alongside Spirit Plague.
Level
Passive
Points
(Current/Max)
1-2
Iron Maiden
2/5
3-5
Brittle Bones
3/3
6-9
Conflation
4/5
10
Sigil of Mortaility
1/1
11-14
Reaper’s Mark
4/4
15-16
Defile Defenses
2/5
17-19
Marrow Thief
3/3
20
Ruptured Corpse
1/1
21-24
Cloven Flesh
4/5
Transplant
Transplant is our general-purpose mobility and utility skill. It’ll end up giving us Bone Armor as well as Blood Pools to help us survive easier. In addition to that it will also grant us Haste and Frenzy letting us move and cast faster.
Specialization Tree
The Specialization Tree for Transplant allows it to provide a ton of great utility beyond just mobility. In particular, we’ll be going for Bone Armor, Haste, Frenzy, and some Mana recovery.
We’ll start by maxing out Fleeting Form, so Transplant is faster and can be used more often. We’ll then put two points into Anemia to reach and max Bone Armor. Next, we’ll max Apostasy to increase the uptime of Bone Armor followed by maxing Plated Bone to improve its effects. Then we’ll max Acolyte’s Fervor for the Haste and Frenzy effects to have the longest possible duration. Finally, we’ll round off by taking a point Azure Veins to max Pale Blood, which helps to offset the high cost of our fully leveled Chthonic Fissure.
We do not need further skill points, as it’s not worth getting the Affix for this skill and they provide very little use.
Level
Passive
Points
(Current/Max)
1-3
Fleeting Form
3/3
4-5
Anemia
2/3
6-8
Bone Armor
3/3
9-11
Apostasy
3/3
12-13
Plated Bone
2/2
14-16
Acolyte’s Fervor
3/3
17
Azure Veins
1/1
18-20
Pale Blood
3/3
Harvest
Harvest is an alternative Specialization option that we can use over Transplant in the later stages of the game. This will be triggered by Chaos Bolts’ Reaper of Mayhem passive, so we’ll need about 15 Dexterity for consistent activation. Once it’s setup, the build becomes almost a one-button build and if you pick up Life’s Journey, it will be.
Specialization Tree
We’ll set up Harvest’s Specialization Tree to provide us with additional Ward generation, Mana Sustain, another source of Withering, and another Instant Kill Threshold that isn’t reliant on Bone Curse being active.
We’ll start by maxing Mind Harvest for the flat Ward on hit, then pick up Mirror Soul for additional Ward based on our Maximum Health. Then we’ll max out Finality for the Instant Kill Threshold. Next, we’ll max out Spirit Shard for Mana recovery and a bit of bonus damage. Then we’ll take two points in Blood Bringer so we can pick up Crimson Death to allow for more Bleed applications. Finally, we’ll take three points in Harrowing Blade so we can pick up Mark of the Locust for Withering and to spread Spirit Plague.
Any additional levels beyond 20 should be placed into Great Scythe for increased AoE. This additional AoE allows for more Ward generation and Spirit Shard per individual cast when mobbing by hitting more enemies.
Level
Passive
Points
(Current/Max)
1-4
Mind Harvest
4/4
5
Mirror Soul
1/1
6-8
Finality
3/3
9-13
Spirit Shards
5/5
14-15
Blood Bringer
2/5
16
Crimson Death
1/1
17-19
Harrowing Blade
3/5
20
Mark of the Locust
1/1
21-24
Great Scythe
4/5
Passive Trees
This section will cover each of the Passive Trees used by the build and the passives that benefit the build the most. We’ll include a rough leveling order at the end of the guide if you’re starting from level one. The Passives shown below are the final results of leveling and where all points would be allocated if you reach level 100.
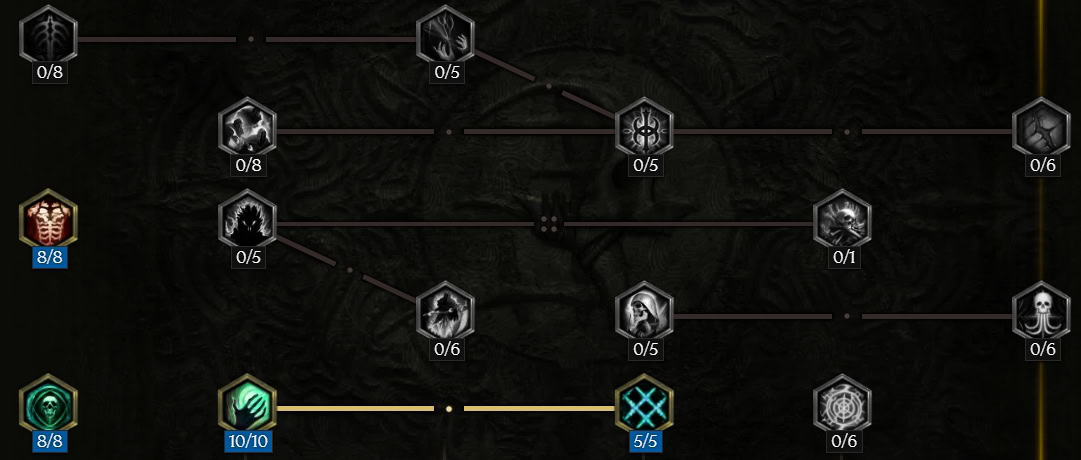
Acolyte Passives
The Base Acolyte Passives offer us a lot of defensive power, particularly Necrotic Resistance which we’ll make great use of with a Warlock Passive later.
Bone Aura
Bone Aura Gives us a nice chunk of base Armor outside of our gear. While we don’t have any minions to benefit from the minion armor, this is still a valuable passive.
Forbidden Knowledge
All of our damage Scales with Intelligence, so it’s no surprise that we’d want as much of it as we can manage. This also comes with a healthy amount of Necrotic Resistance, which takes the pressure off our gear.
Mania of Mortality
Mania of Mortality will help with building up and sustaining our Ward. While it triggers with a low chance, when we finally max the node out later into the build it will provide a ton of Ward when clearing Monoliths.
Unnatural Preservation
Unnatural Preservation mainly provides us with some Ward Retention, letting us build up even more Ward. This also comes with Poison and more Necrotic Resistance, further reducing the pressure on our gear for resistances.
Point Order
We’ll want to start by maxing out Forbidden Knowledge, so we get some early damage scaling. Next, we’ll put 6 points into Bone Aura, for some extra defenses. Then we’ll finish up the early tree by taking one point in Mania of Mortality and then maxing Unnatural Preservation.
When we come back later on, we’ll finish maxing both Bone Aura and Mania of Mortality, but delaying our Warlock passives that long is a no-go.
Passives
Points
Current/Max
Forbidden Knowledge
8/8
Bone Armor
6/8
Mania of Mortality
1/10
Unnatural Preservation
5/5
Bone Armor
8/8
Mania of Mortality
10/10
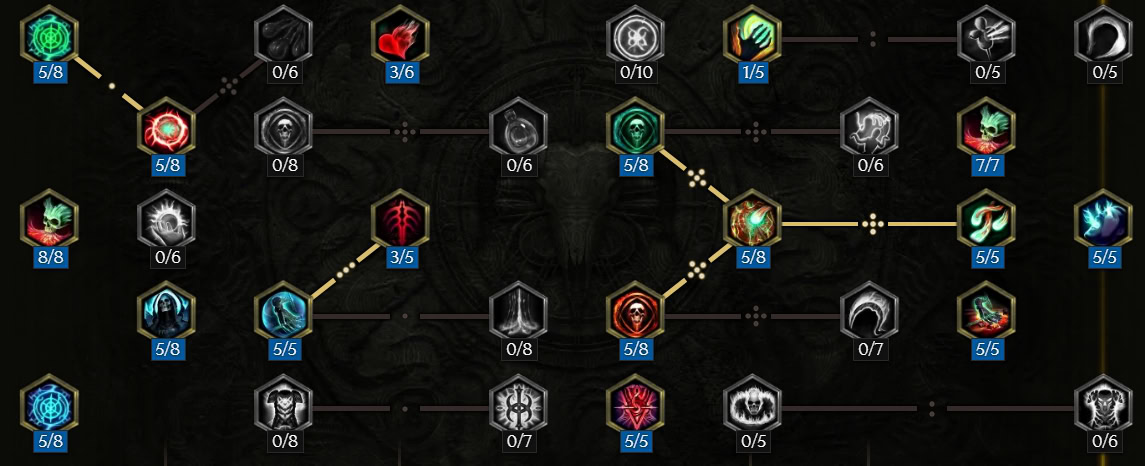
Warlock Passives
The Warlock tree is where we’ll spend the rest of our points. The Warlock Tree provides much of what we’ll need for the build. while Lich has some early options that can be good, we just get more value from the Warlock Tree for this particular setup.
Soul Stealer
Soul Stealer isn’t the greatest passive on its own, but the bonus helps with early mana sustain which makes it worth taking as early as possible. Without it, we’ll likely have a ton of early mana issues.
Spiteful Decay
Spiteful Decay gives us a decent bit of flat Health in addition to increasing our Damage over Time. Its bonus is a nice More Damage Multiplier that will always be active thanks to Chthonic Fissure.
Chaos Flames
Chaos Flames provides a good amount of everything we need for the build in terms of damage. It grants us Fire Damage, Ignite Chance, Necrotic Damage, and Damned Chance.
Occultist’s Mind
Occultist’s Mind is something we’ll pick up later in leveling, but the Intelligence helps with overall damage. Its bonus will also give us a sizable chunk of flat mana come the later stages of the game.
Cauldron of Blood
Cauldron of Blood is also something we’ll pick up later, as the Bleed chance is great, but won’t have too much of an early impact until we can trigger Bleed Overload, which Bone Curse and Transplant will do when we use them in combat.
Ward of Malevolence
Ward of Malevolence will help provide us with a ton of Ward, thanks to its Ward on Kill effect. The additional Ward Decay Threshold also makes it much easier to keep higher amounts of Ward and not let it fully decay.
Harrowing Armor
Harrowing Armor grants us a good bit of flat Armor and Health. It’s not super amazing as it doesn’t give a ton of either, but can be good to pick if you’re struggling to take hits early on.
Spirit Leech
Spirit Leech is a node we’ll only use for leveling, as the Leech helps to give us decent sustain before we can stack up on Ward-increasing effects. We’ll drop it later on for Fleeting Crone.
Imperishable
Imperishable grant sus some flat Vitality. More important is the bonus it offers, letting us scale Ward Decay Threshold through Necrotic Resistance. We’ll take advantage of this with our gear and even our unique items.
Chains of Ruin
This grants us more Damned Chance, and combined with Chaos Flame, we’ll have 95% for both Ailments, not accounting for any other effects from skills. We take 5 points of this for access to the Damned Overload it offers.
Infernal Lash
Infernal Lash is Chains of Ruin for Ignite. We take the same amount of points we get the same 95% Ignite chance for every skill. We’ll also get Ignite Overload as bonus.
Wither
Wither is an incredibly powerful Ailment we can stack on enemies, making them take more damage for all of our DoT effects. Maxing this node means we’ll stack it to its limit almost immediately.
Chaotic Strikes
Chaotic Strikes is a one-point-wonder so to speak. There’s no benefit to maxing it for the build as the majority of the damage we deal is Damage over Time. It will however cause both Spirit from Chthonic Fissure and Chaos Bolt to “crit” without actually critically striking.
The Ashen One
The Ashen One increases our Necrotic and Elemental Damage, which scales the damage of our Damned, Ignites, and Witchfire once we invest 5 points into this. While the node is great for damage, Grimhilde’s Domain will ultimately provide more damage long term.
Vessel of Chaos
Vessel of Chaos is a nice generic boost to Damage over Time, which helps the build a lot. More important, however, is the More Damage Multiplier it grants per overload, which we can stack up to 3 times.
Grimhilde’s Domain
Grimhilde’s Domain is currently a little buggy and only seems to scale with Chaos Flames. However, It does end up scaling our Witchfire a considerable amount to be worth taking.
Fleeting Crone
Fleeting Crone is a great passive that grants Haste and allows for quicker clearing speed in Monoliths. It gives us some extra mobility where we generally have none without Transplant.
Accursed Seer
Accursed Seer is nice for the added Cast Speed, which helps to improve our single-target damage. It also makes it far easier to cast Spirit Plague, since we’ll need to self-cast that for a while.
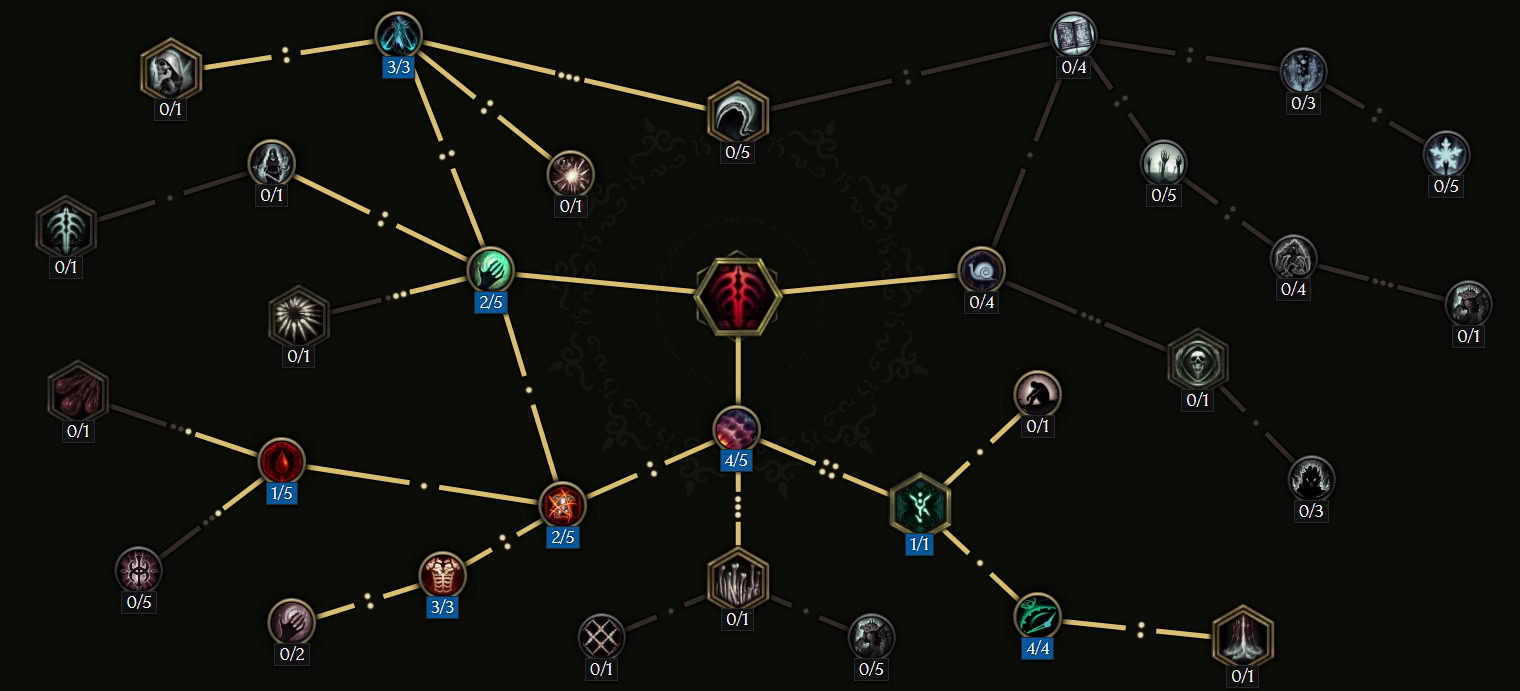
Point Order
We’ll want to start by putting 5 points into Soul Stealer, as it helps with early Mana Sustain. Then we’ll max Chaos Flames for some early damage. Then we’ll put three points into Ward of Malevolence to reach Imperishable and put 3 points into that as well to scale Ward Decay Threshold through Necrotic Resistance. Then we’ll put 4 points into Spirit Leech, which gives us a good bit of Health sustain. Then we’ll max Ward of Malevolence.
Now we’re starting to work towards getting Witch Fire and making it as strong as possible. We’ll start with 5 points into Chains of Ruin to enable Damned Overload, followed by 5 points into The Ashen One to get Witch Fire. Then we’ll put 5 points into Infernal Lash for Ignite Overload. We’ll max Grimhilde’s Domain, followed by 5 points into Vessel of Chaos for the damage it provides. We’ll also grab 5 points into Wither for the powerful debuff it provides. Finally, we’ll put 5 points into Spiteful Decay and another 5 Into Cauldron of Blood for access to Bleed Overload. This gives us all the Overloads and by extension More Damage Multipliers we get passively.
Now to round out the final tree, we’ll get some nice quality-of-life things. We’ll start by maxing Accursed Seer for the increased Cast Speed. One point in Chaotic Strikes to get an occasional burst of damage as we stack our Ailments and apply Witchfire. At this point, we’ll also go back to the Acolyte Tree to max out Mania of Mortality and Bone Aura. We can max Fleeting Crone for additional mobility. Then the final points will go into Occultist’s Mind for more direct damage as well as more mana thanks to the bonus.
Once we have enough Ward generation, we’ll be able to move the points in Spirit Leech. We recommend moving them to Harrowing Armor for the Armor
Passive
Points
Current/Max
Soul Stealer
5/8
Chaos Flames
8/8
Ward of Malevolence
3/5
Imperishable
3/5
Spirit Leech
4/6
Ward of Malevolence
5/5
Chains of Ruin
5/8
The Ashen One
5/8
Infernal Lash
5/8
Grimhilde’s Domain
5/5
Vessel of Chaos
5/7
Wither
5/5
Spiteful Decay
5/8
Cauldron of Blood
5/8
Accursed Seer
5/5
Chaotic Strikes
1/5
Fleeting Crone
5/5
Occultist’s Mind
5/8
Gearing and Affixes
In this section, we’ll cover the gear you’ll want to look out for, as well as the ideal affixes you want on them. The Affixes listed below are for non-unique and non-legendary Items, however, the ideal affixes are just as valuable when crafted onto a Legendary item of the same type.
Ideal Gear and Affixes
This section provides the ideal Item Bases and respective Affixes for the build. Be on the lookout for gear that have two or more of the stats shown below. Ideal Exalted Affixes will be listed in CAPS. We’ll provide a loot filter below that will make this easier.
Item Base
Argent Sceptre or Celestial Sceptre
Prefix 1
DAMAGE OVER TIME
Prefix 2
Cast Speed
Suffix 1
Shared Necrotic Penetration
Suffix 2
Shared Fire Penetration
Item Base
Carapace Shield
Prefix 1
Block Chance
Prefix 2
Block Effectiveness or Health on Block
Suffix 1
ALL RESISTANCES
Suffix 2
Any Resistance or Reduced Damage on Block
Item Base
Caged Souls, Damned Souls, or Decaying Homunculus
Prefix 1
LEVELS TO BONE CURSE
Prefix 2
Damage over Time or
LEVELS TO HARVEST
Suffix 1
Chance to Apply Fraility
Suffix 2
Any Resistance
Item Base
Necropolis Helm
Prefix 1
LEVELS TO CHAOS BOLTS
Prefix 2
Dexterity or Levels to Spirit Plague
Suffix 1
% HEALTH
Suffix 2
Any Resistance
Item Base
Necropolis Plate
Prefix 1
LEVELS OF CHTHONIC FISSURE
Prefix 2
Spirit Frequency with Chthonic Fissure
Suffix 1
% HEALTH
Suffix 2
Flat Health or Any Resistance
Item Base
Crusader Gauntlets or Eternal Gauntlets
Prefix 1
CAST SPEED
Prefix 2
Intelligence or Dexterity
Suffix 1
HYBRID HEALTH
Suffix 2
Any Resistance or Chance to Shred Armor
Item Base
Arcane/Celestial Boots or Vanguard/Mercantile Boots
Prefix 1
MOVEMENT SPEED
Prefix 2
Intelligence or Dexterity
Suffix 1
HYBRID HEALTH
Suffix 2
Crit Avoidance or Any Resistances
Item Base
Spidersilk Sash
Prefix 1
Fire or Necrotic Damage
Prefix 2
Ailment Cleanse on Potion Use
Suffix 1
HYBRID HEALTH
Suffix 2
Crit Avoidance or Any Resist
Item Base
Ivory Ring
Prefix 1
Intelligence or Dexterity
Prefix 2
Damage over Time
Suffix 1
Crit Avoidance
Suffix 2
Health or Any Resistance
Item Base
Bone Amulet
Prefix 1
FIRE PENETRATION
Prefix 2
NECROTIC PENETRATION
Suffix 1
Chance to Apply Fraility
Suffix 2
Any Resistance
Idol Affixes
This section will list the highest value Idol affixes for the build, as well as the Idol type(s) they can be found on.
Affix
Found On
Increased Damage over Time
During Ailment Overload
Adorned
Ward Retention
Any but Small, Humble,
or Stout, Suffix
Damage
Humble or Stout, Suffix
Any Resist
Any, Prefix
Armor
Any, Prefix
% Health
Any, Prefix
Unique and Legendary Items
Many endgame builds for Last Epoch will use one or several Unique or Legendary Items. The ones this build can get the most use out of are listed below alongside when they are the most useful.
Boneclamor Barbute
The Boneclamor Barbute is a unique Helm that gives us a ton of Intelligence, Dexterity and Necrotic Resistance. The big reason this items does a lot for us is it’s unique effect of granting 1 Ward per second for every 3% Uncapped Necrotic Resistance. It’s why we opt for the Bone Amulet and Ivory Rings despite being almost Necrotic Resistance capped by passives alone. Decent rolls on the helmet and accessories can easily net us 120+ Ward per second by themselves.
Mad Alchemist’s Ladle
Mad Alchemist’s Ladle is a crazy powerful Unique Sceptre, especially when it rolls well. It allows us to apply up to 5 Ailments, in addition to the 3 others we apply with our skills already. For each of these Ailments active on an enemy, we deal increased Spell Damage, Allowing us to shred enemies with direct damage and not be fully reliant on our DoTs.
Blood of the Exile
With Bleed being one of our primary DoT effects, the Unique Blood of the Exile Boots are a great fit for us. They naturally come with high Movement Speed, a ton of Attributes, and increases Bleed Duration. They also Make Bleed deal more damage to moving enemies which makes for a stronger clear.
Life’s Journey
Life’s Journey is a Unique Shield that grants some interesting effects. The main effect we’re after with this shield is the Chance to Apply Spirit Plague on Melee Hit. With this shield and a decent amount of Dexterity to enable the Reaper of Mayhem effect, we’re able to turn this build into a simpler “One Button Build”. We’ll have a full guide on this variation of the build at a later time.
Loot Filter
Below is a custom Loot Filter, designed to help you gear up this build from Level 1. This Loot Filter will make it much easier to identify great items without much thought.
You can click this Link to download our Filter for this build. Below is quick rundown of what gets filtered and when.
- Items Always Shown
- Unique/Set/Exalted Items
- All Idols
- All Items with Acolyte-Specfic Affixes (+Level Affixes are EMPHASIZED)
- Gear with 3+ of the Affixes Listed in the Gearing Section
- Ideal Exalted Affixes are EMPHASIZED
- Items Hidden
- Low Level Gear, to ensure items that do show up are good for your level
- Toggle Options
- Hide all Normal, Magic, and Rare items that don’t meet the criteria above.
- Recolor options to show Class-Specifc items for other classes, for Alts.
Leveling Order
If you want to play this build from Level 1, this section is for you. Below is our recommended leveling order for Passive Trees and Skills.
Passive Points
| Passive | Tree | Points |
|---|---|---|
| Forbidden Knowledge | Acolyte | 8/8 |
| Bone Aura | Acolyte | 6/8 |
| Mania of Mortality | Acolyte | 1/10 |
| Unnatural Preservation | Acolyte | 5/5 |
| Soul Stealer | Warlock | 5/8 |
| Chaos Flames | Warlock | 8/8 |
| Ward of Malevolence | Warlock | 3/5 |
| Imperishable | Warlock | 3/5 |
| Spirit Leech* | Warlock | 4/6 |
| Ward of Malevolence | Warlock | 5/5 |
| Chains of Ruin | Warlock | 5/8 |
| The Ashen One | Warlock | 5/8 |
| Infernal Lash | Warlock | 5/8 |
| Grimhilde’s Domain | Warlock | 5/5 |
| Vessel of Chaos | Warlock | 5/7 |
| Wither | Warlock | 5/5 |
| Spiteful Decay | Warlock | 5/8 |
| Cauldron of Blood | Warlock | 5/8 |
| Fleeting Crone | Warlock | 5/5 |
| Accursed Seer | Warlock | 5/5 |
| Mania of Mortality | Acolyte | 10/10 |
| Bone Aura | Acolyte | 8/8 |
| Occultist’s Mind | Warlock | 5/8 |
| Chaotic Strikes | Warlock | 1/1 |
| Harrowing Armor* | Warlock | 4/8 |
All Skill Icons in this guide are sourced from Last Epoch Tools, a Last Epoch Database.
Last Epoch Starter Builds
This is a collection of builds for Last Epoch suitable for new characters and new players. These builds will show you how to start a new character from level 1 and develop it all the way to the endgame and beyond.

Last Epoch Fireball Mage Starter Build
This Last Epoch Mage Build focuses on the Fireball Skill, utilizing a high cast speed and multiple projectiles for high damage output!

Last Epoch Acid Flask Falconer Starter Build
This Last Epoch Falconer Build focuses on the Acid Flask Skill, which relies on dealing damage over time with Poison.
Last Epoch Javelin Paladin Starter Build
This Paladin Build for Last Epoch focuses on the Javelin Skill, utilizing its Holy Trail effect to create areas that deal high Damage Over Time.