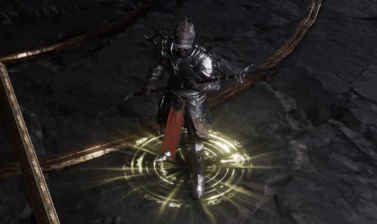
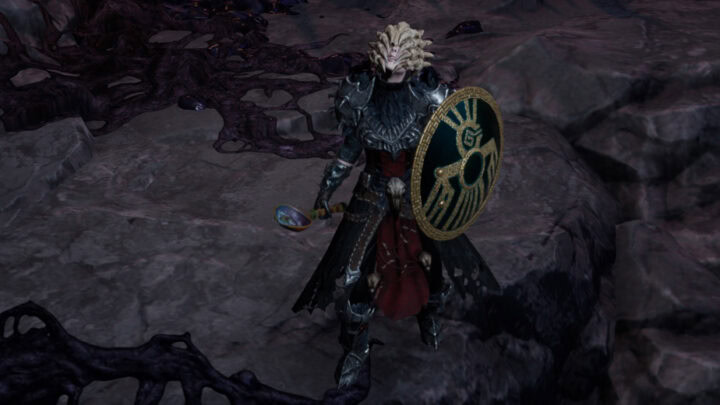
This Falconer Build focuses on the Acid Flask Skill, which relies on dealing damage over time with Poison.
This Falconer build is made to take you from Level 1 to the endgame smoothly. It’s designed without Uniques in mind. Uniques, especially those with Legendary Potential can be used to push the build further and into endgame.
To show you how to play this build starting from Level 1, we have a leveling section at the end of this guide that details our recommended leveling path for Class and Mastery Passives.
Build Overview
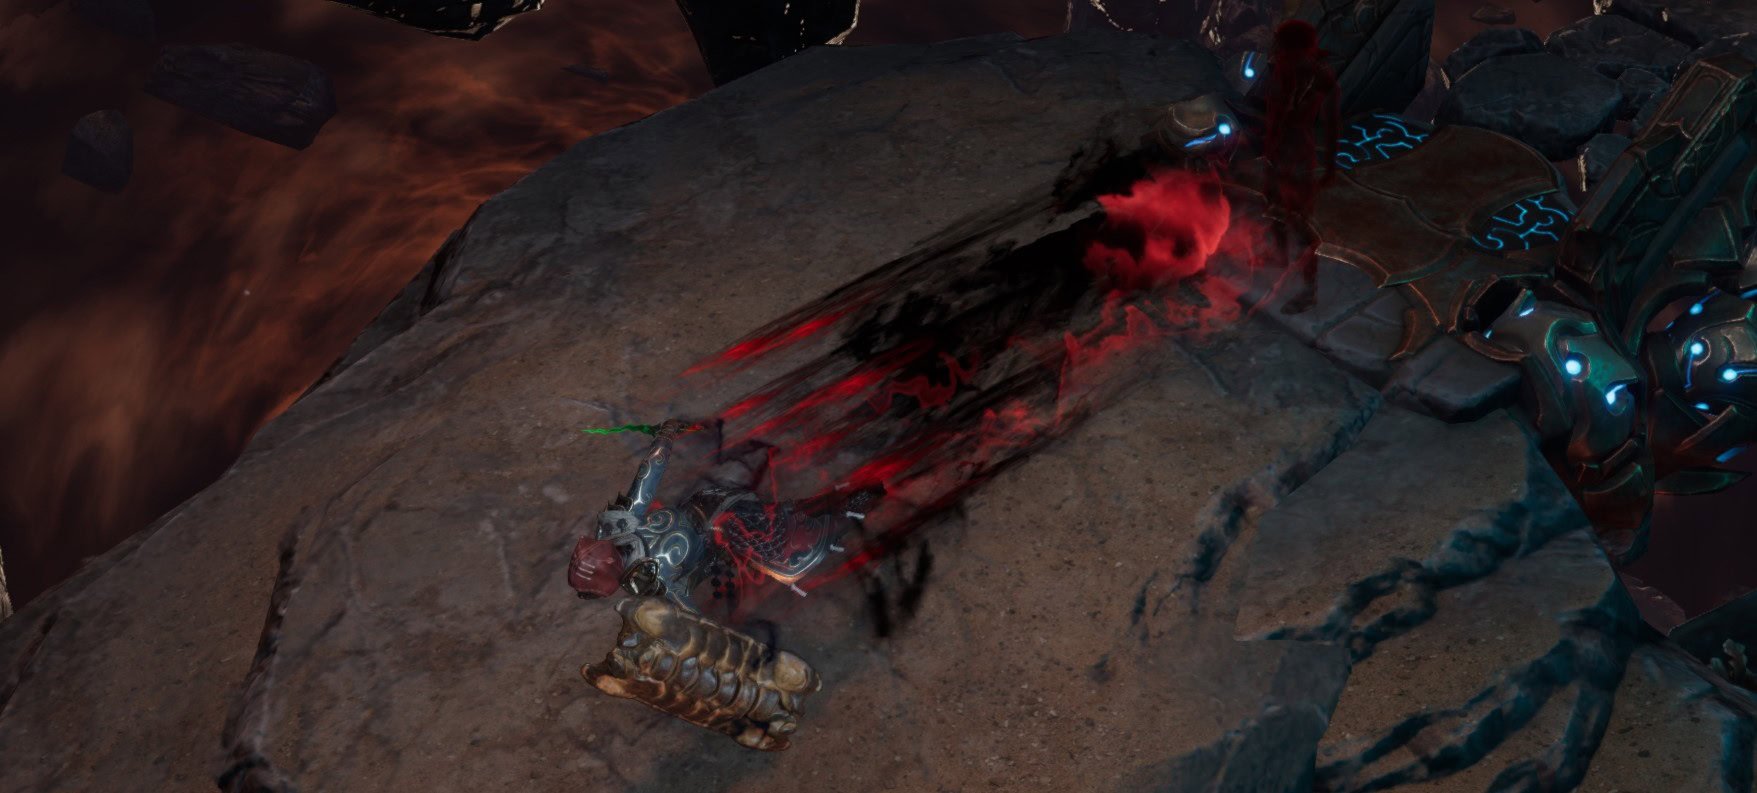
Acid Flask is a strong early-game skill that scales really well, working exceptionally as an introductory build, for the playstyle of Throwing Skills. We’ll be setting it up to deal high damage over time while shredding Poison Resistance and also Penetrating Poison Resists.
We’ll also have Explosive Traps as our main way to deploy Acid Flasks. Explosive Traps will ignore the cooldown added by effects like Poison Pools, and allow us to get several Poison Pools out quickly, covering a large area or focusing them all on one target for faster stacking of Poison. These will also deal great damage on their own to take down weaker enemies quickly.
We’ll also have Falconry, Shurikens, and Shift for their utility. Falconry will allow our falcons to also drop Flasks for us as well provide a reliable Instant Kill Threshold to finish off enemies or bosses. Shuriken will be our Mana Sustain early on, then provide a meaningful amount of Armor later. Shift is a mobility tool primarily, but it carries a ton of defensive utility.
Skills and Specializations Breakdown
In this section, we’ll cover the Skills as well as the Specializations used in the build. Occasionally, more skills than the specialization limit are shown. If a Skill doesn’t have a Specialization Tree shown, then it is used as an Active Skill without one. This typically happens most with Utility skills.
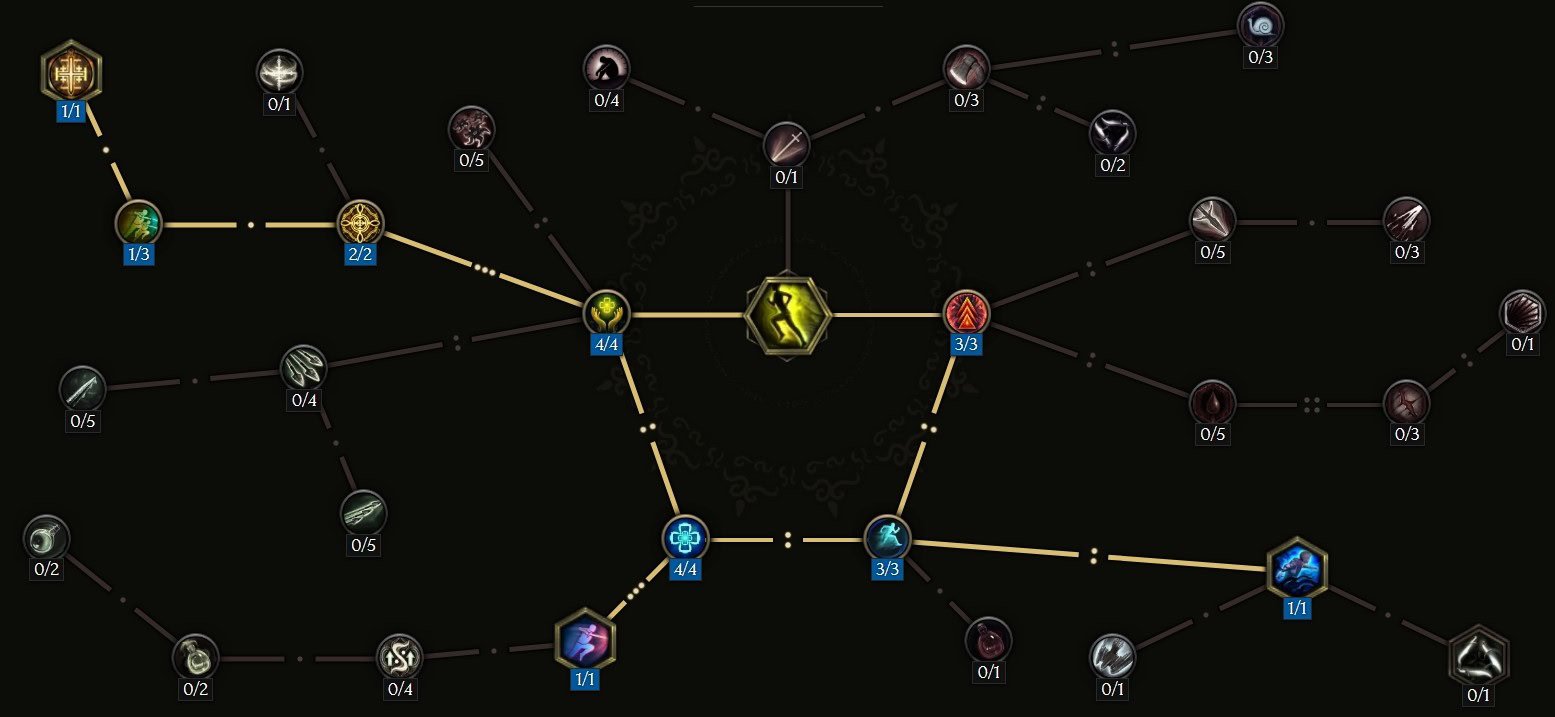
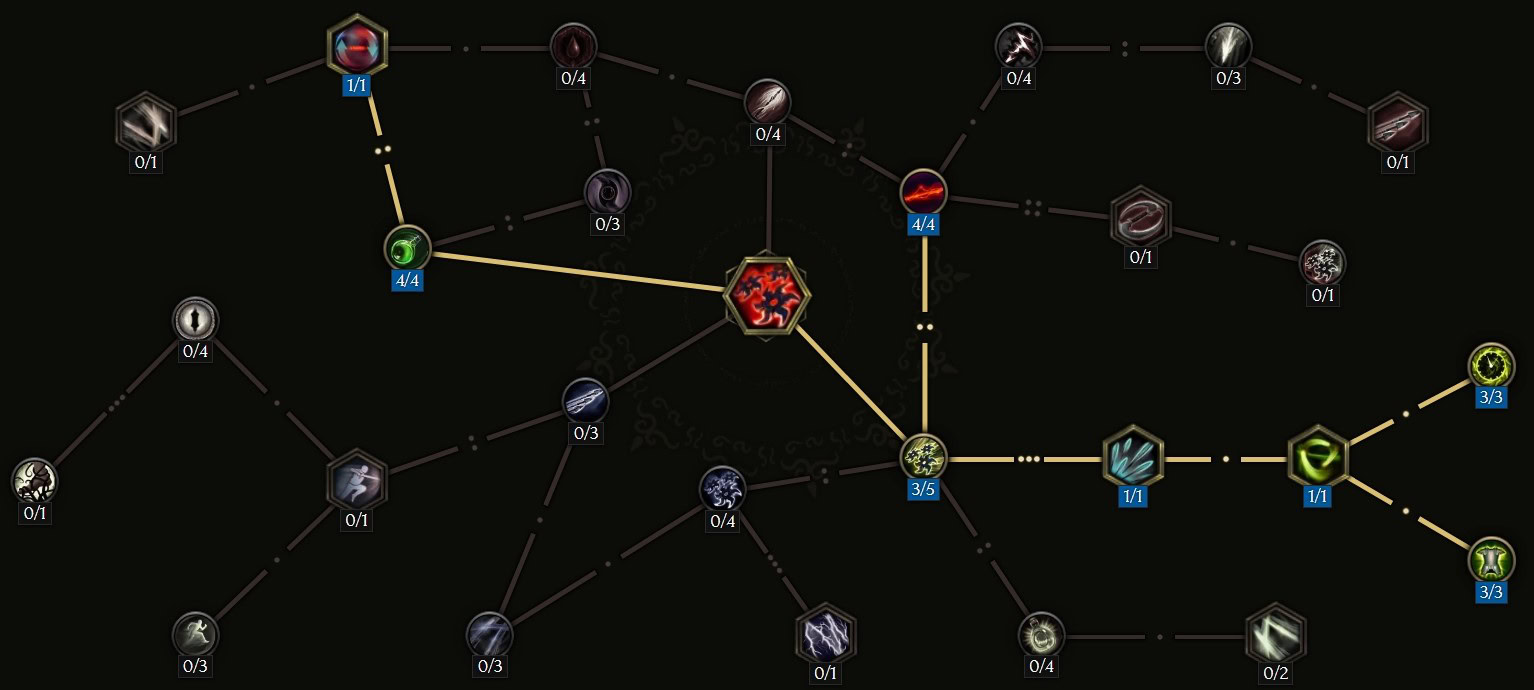
 Acid Flask
Acid Flask is our main damage source, directly dealing damage and stacking poison with each use. As a DoT build, we won’t get much out of the Armor Shred it provides, but it will help Explosive Trap early on.
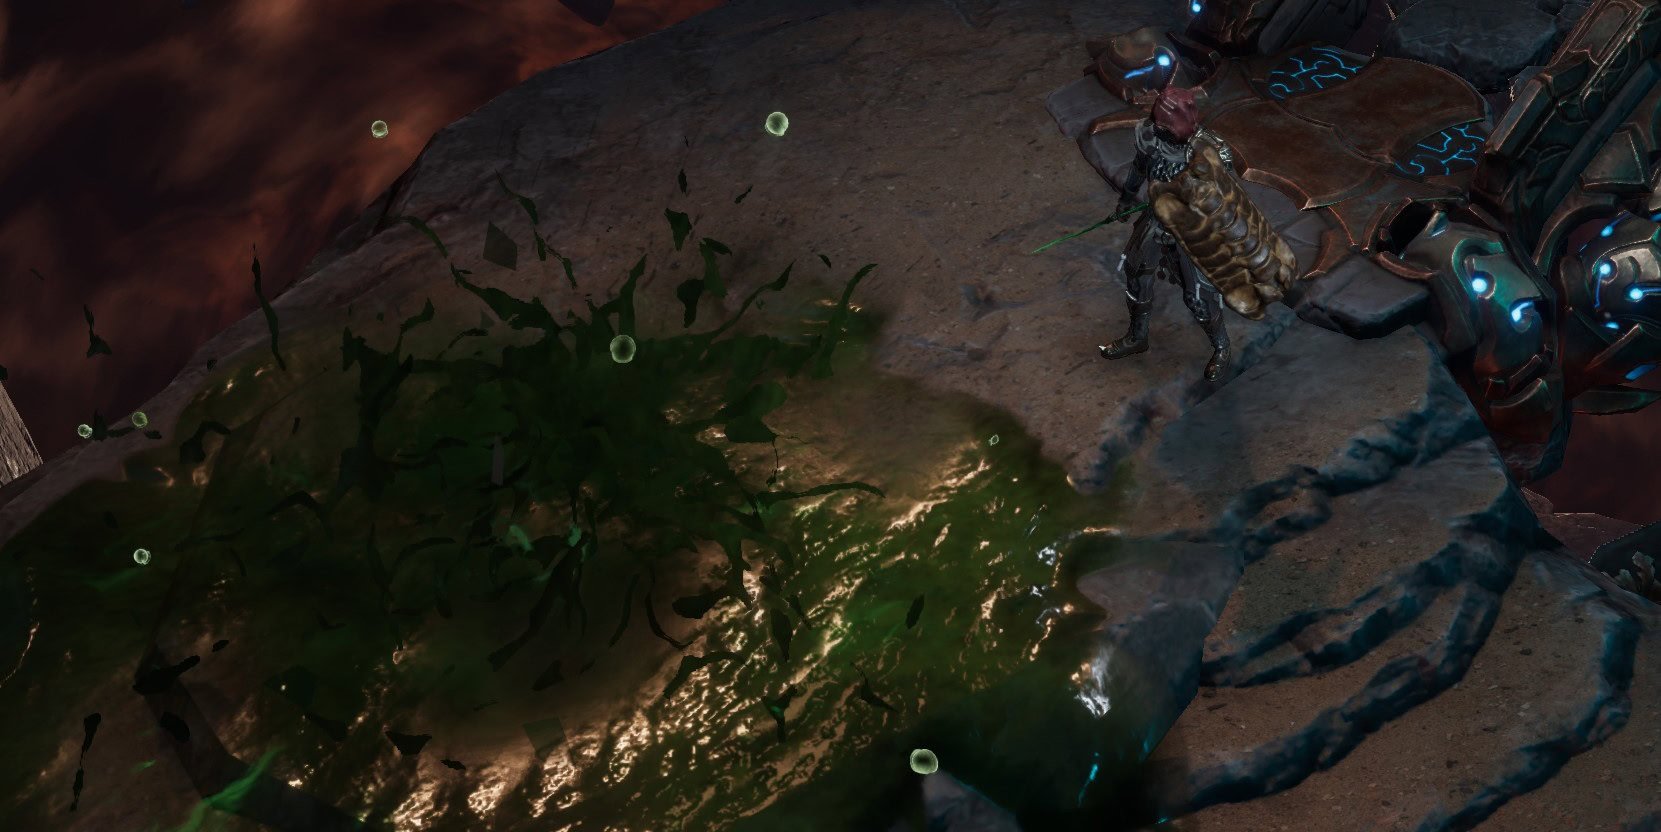
Acid Flask’s Specialization Tree has us lean into the Poison Ailment heavily. Each Flask that hits an enemy will Shred Poison Resistance and leave a Poison pool that quickly applies additional Poison stacks to enemies. We’ll even be able to stack Poison Resistance on our gear to push our damage even higher
We’ll want to start by maxing Corrosive, which will increase the direct damage of Acid Flask, helping with campaign progression. We’ll take 3 points into Splash Zone to increase it’s AoE, allowing it to clear groups of enemies out fairly easily.
Then we’ll move down and pick up 2 points in Caustic Concoction to have a chance of applying additional Poison stacks with each use.
Next, we’ll take a point in Contamination for the Poison Resistance Shred per use. Next, we’ll take 3 points in Lasting Sickness, so we can reach and max Knowledge of Immunity. Then we’ll finish off by taking Poison pools, followed by a point in Lingering Toxicity and two points in Amatoxic Pools.
Any Skill Points past 20 should be placed into Hydrochloric Acid. Once you have enough damage across your gear, drop Corrosive and Splash Zone to max Hindering Mixture and Debilitate instead.
Level
Passive
Points
Current/Max
1-4
Corrosive
4/4
5-7
Splash Zone
3/4
8-9
Caustic Concoction
2/4
10
Contamination
1/4
11-13
Lasting Sickness
3/4
14-16
Knowledge of Immunity
3/3
17
Poison Pools
1/1
18
Lingering Toxicity
1/3
19-20
Amatoxic Pools
2/4
21-25
Hydrochloric Acid
5/5
Respec
Hindering Mixture
4/4
Respec
Lightweight
1/2
Respec
Debilitate
2/2
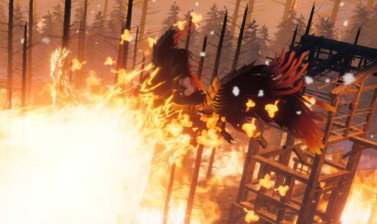
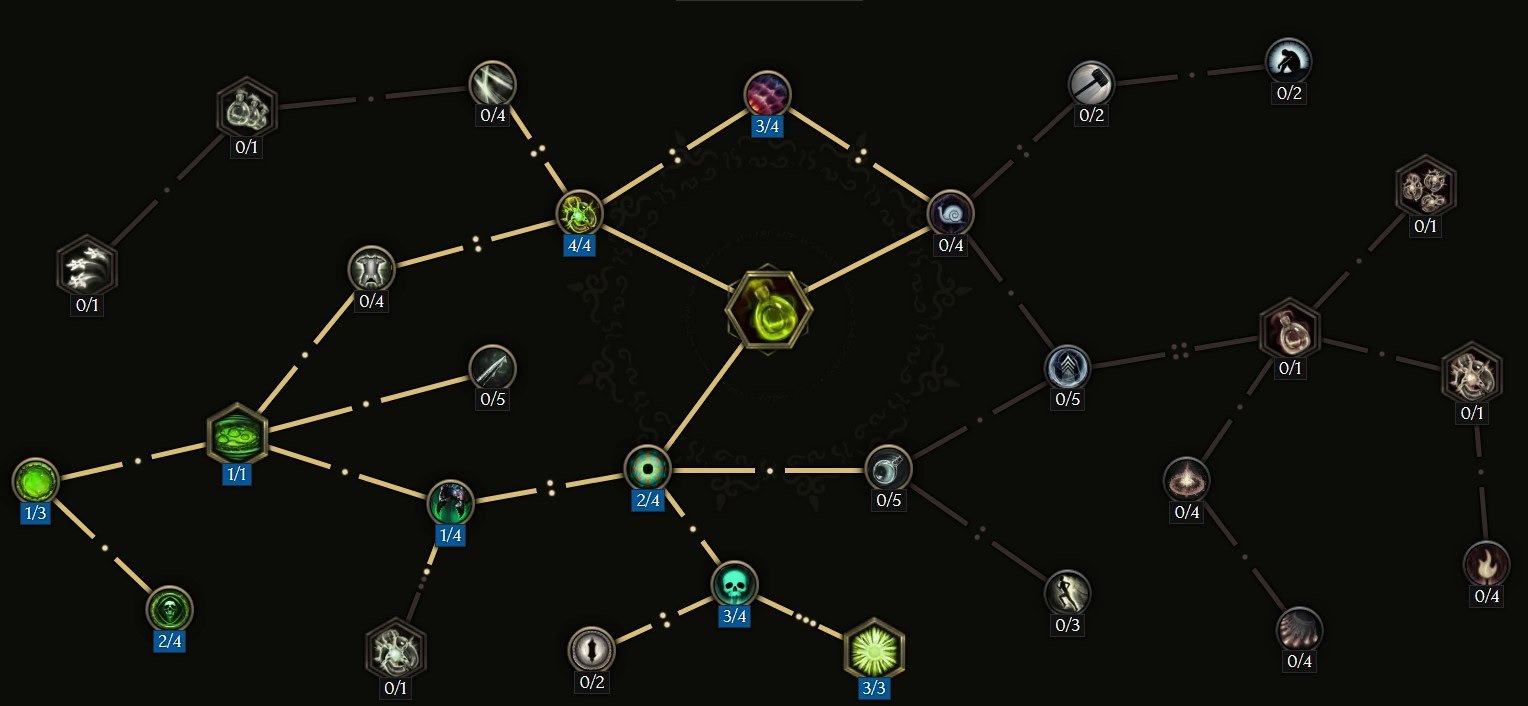
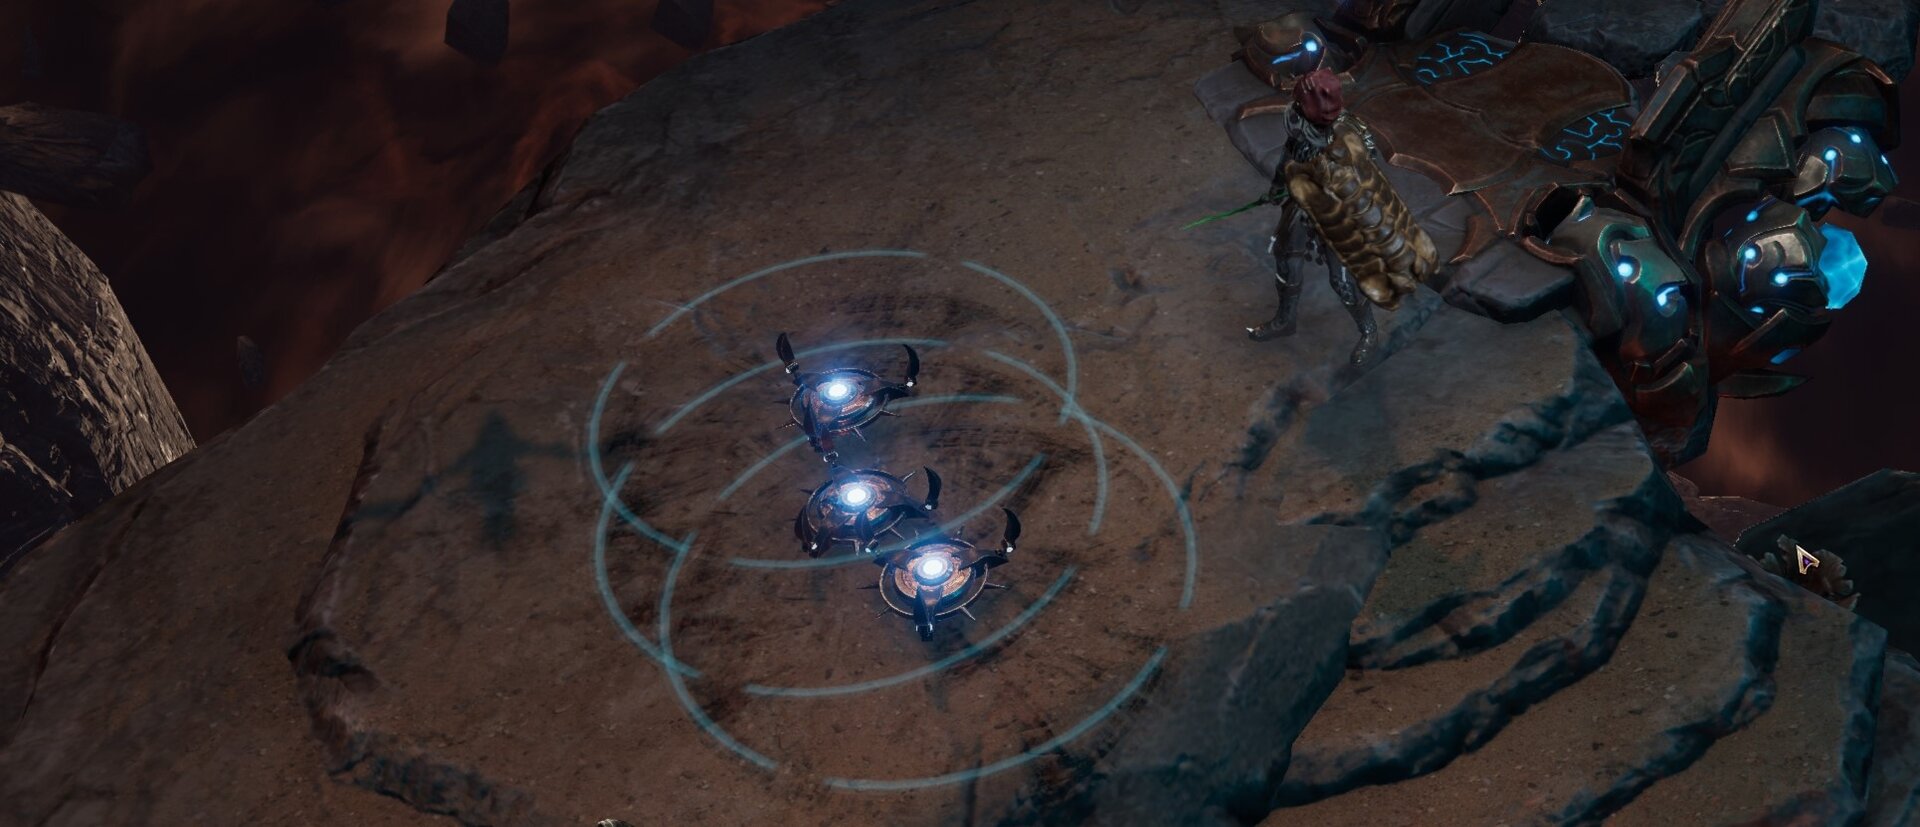
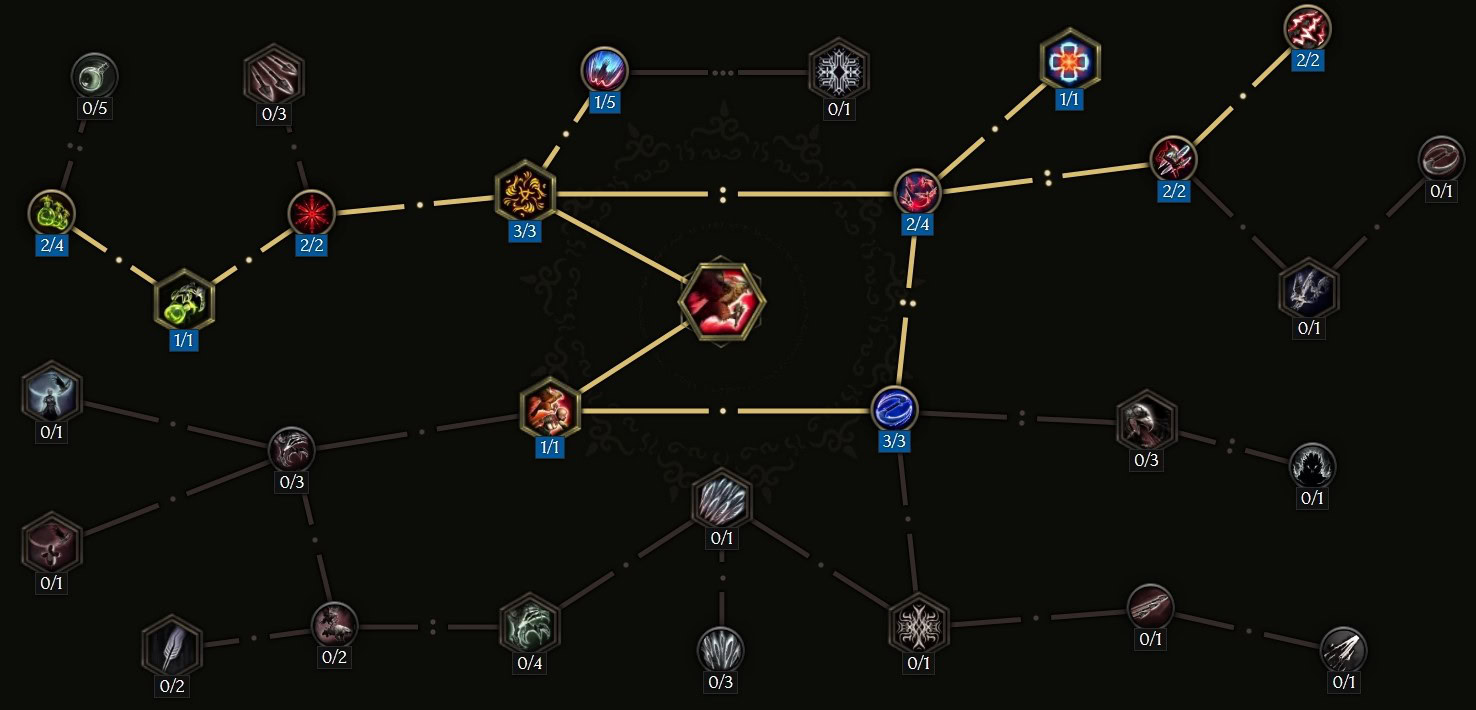
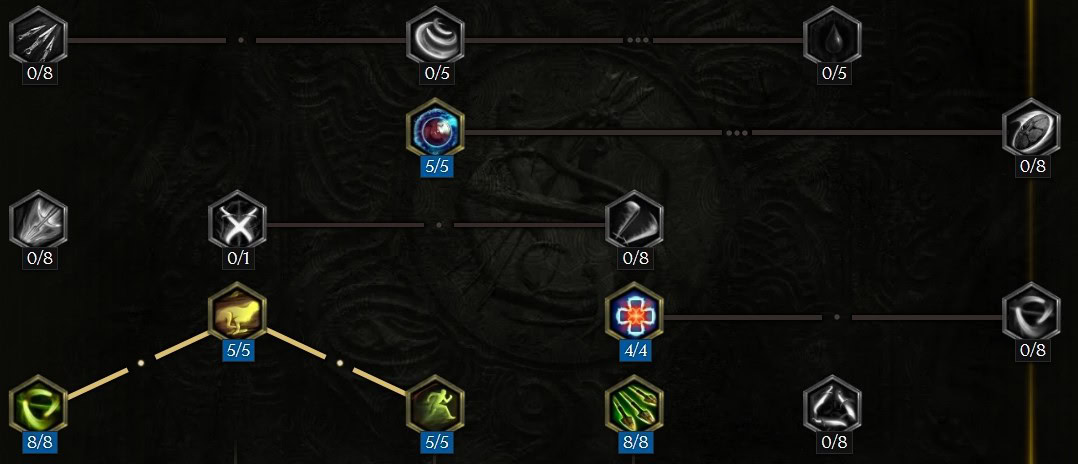
 Explosive Traps
Explosive Traps will be the main way we get our Acid Flasks out and ignore the cooldown applied by the Poison Pools node. We’ll be throwing traps that throw the Acid Flasks, so it can get mana-intensive very quickly.
Explosive Traps’ Specialization Tree will enable us to throw three traps at a time, which can drop additional traps as well as throw Acid Flasks for us. Thye will also be able to provide us with stacks of Dusk Shroud, increasing our Dodge Rating and Glancing Blow Chance. We’ll also want to reduce their costs as much as we can, or our Mana will suffer for it.
We’ll start by taking a point in Minefield to reach and max Trap Sprinkler. This is followed by taking Automated Bombardment so that each Trap we drop will always drop a second trap. Then we’ll pick up Trapuchet so these traps will be thrown instead. Then we take Instrument of the Alchemist so they also throw Acid Flasks.
Now we’ll take a second point in Minefield. Then we’ll want to max Clustered Explosives, so we throw three traps at once. Next we’ll max Subtle Sabotage and max Jelkhor’s Blueprint to cut down the high mana cost to a more manageable level. Then we’ll take Smoke Traps for the added defensive power.
Finally, we’ll round the skill off by taking 2 points in Tinkerer’s Design and picking up Adaptive Fuse to make them more reliable as we kite enemies.
Any Skill Points past 20 should be used to pick up Umbral Saboteur, max out Minefield, and then max Tinkerer’s Design.
Level
Passive
Points
Current/Max
1
Minefield
1/4
2-4
Trap Sprinkler
3/3
5
Automated Bombardment
1/1
6
Trapuchet
1/1
7
Instrument of the Alchemist
1/1
8
Minefield
2/4
9-10
Clustered Explosives
2/2
11-12
Subtle Sabotage
2/2
13-16
Jelkhor’s Blueprint
4/4
17
Smoke Traps
1/1
18-19
Tinkerer’s Design
2/4
20
Adaptive Fuse
1/1
21
Umbral Saboteur
1/1
22-23
Minefield
4/4
24-25
Tinkerer’s Design
4/4
Shift
Shift is our main mobility tool, but will provide us with a lot of defensive utility, healing, and a bit of mana sustain. It’ll get much of this utility in the early levels.
Shift’s Specialization Tree is focused on getting its cost low, and then pumping it with utility. Its biggest utility will be the ability to cleanse ailments from us, making things like enemy Poison much less annoying. It will even provide us with a Shadow that will throw additional Acid Flasks when we manually cast it. It will also copy our uses of Explosive Traps, but this seems to be an unintended interaction and will impact the build very little if removed.
We’ll start by maxing out Velocity to reduces its cooldown and mana costs. Then we’ll max Momentum for a good burst of mobility after Shift ends. Next we’ll max out Swift Recovery to make it refund its cost and even restore a little mana on use.
Now we’ll grab Shadowslip so we can use it to evade through DoT areas without taking damage. Then we’ll take Lasting Presence so it can double out Acid Flask uses. Next, we’ll max Shadow Recuperation for some healing.
This lets us take a point in Breathing Technique and a point in Vault so we can get the Cleanse offered by picking up Molting. We’ll place the final point in Breathing Technique for even more healing.
We don’t recommend getting additional Skill Points for Shift, as they have very limited use.
Level
Passive
Points
Current/Max
1-3
Velocity
3/3
4-6
Momentum
3/3
7-10
Swift Recovery
4/4
11
Shadowslip
1/1
12
Lasting Presence
1/1
13-16
Shadow Recuperation
4/4
17
Breathing Technique
1/2
18
Vault
1/3
19
Molting
1/1
20
Breathing Technique
2/2
Falconry
Falconry is another skill that will throw Acid Flasks for us as well as provide some utility in the form of an Instant Kill Threshold. As we build up our Attributes, it will also be able to restore Health and Mana to us.
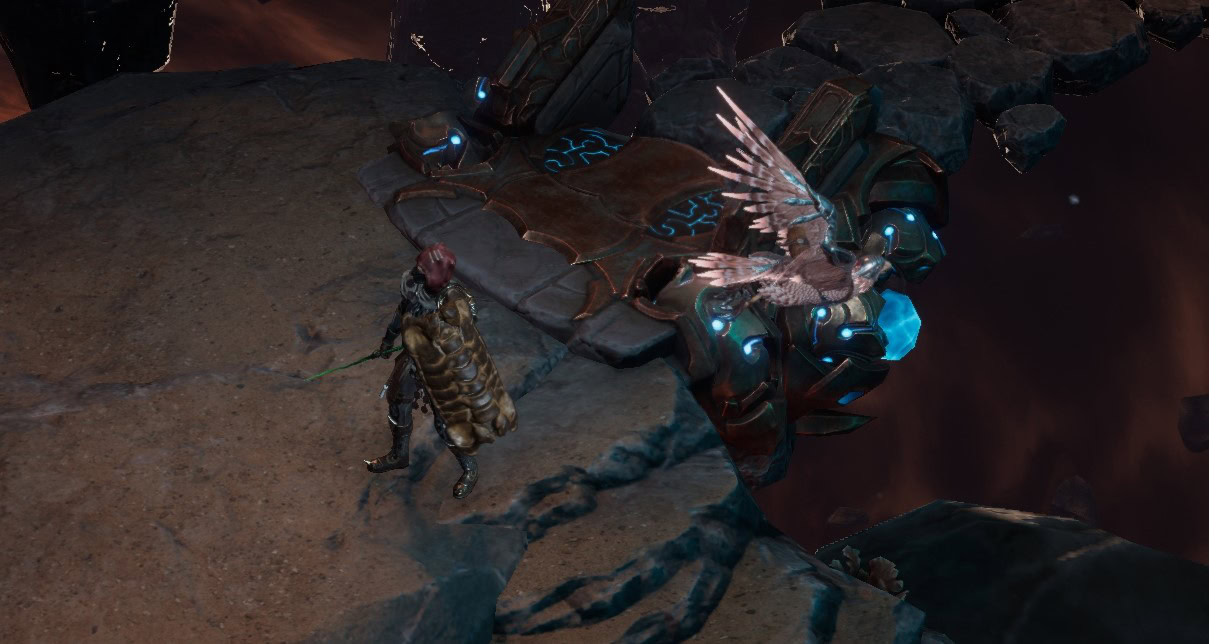
Falconry’s Specialization Tree will enable our trusty Falcon to drop Acid Flasks for us, which will also end up triggering any applications of Falconer’s Mark. This allows our Falcon to deal great damage early on. Then we can focus on adding utility to the skill.
We’ll start by maxing Falconer’s Mark as well as Marking Strikes to allow our Falcon to passively mark enemies. Then we’ll take Toxic Airdrop and two points in Flask Satchel so the Falcon can drop Acid Flask and trigger the marks it places. After that we’ll take a point in Wake of Wings for the buff it provides.
Next we’ll take 2 points in Avaian Stamina to reach Bird of Prey and max it for a higher Instant Kill Threshold. Then we’ll max The Blood Dance as it works well with the Instant Kill Threshold. After that, we’ll take Hunter’s Spoils for the passive recovery.
Then we’ll max Side by Side, so we actively reduce Falcon Strikes’ cooldown as we throw Explosive Traps. Finally we’ll round off the skill by taking Falconer’s Journey for additional scaling.
Any points past 20 should be placed in Wake of Wings to allow for more uptime on the buff.
Level
Passive
Points
Current/Max
1-3
Falconer’s Mark
3/3
4-5
Marking Strikes
2/2
6
Toxic Airdrop
1/1
7-8
Flask Satchel
2/4
9
Wake of Wings
1/5
10-11
Avian Stamina
2/4
12-13
Bird of Prey
2/2
14-15
The Blood Dance
2/2
16
Hunter’s Spoils
1/1
17-19
Side by Side
3/3
20
Falconer’s Journey
1/1
21-24
Wake of Wings
5/5
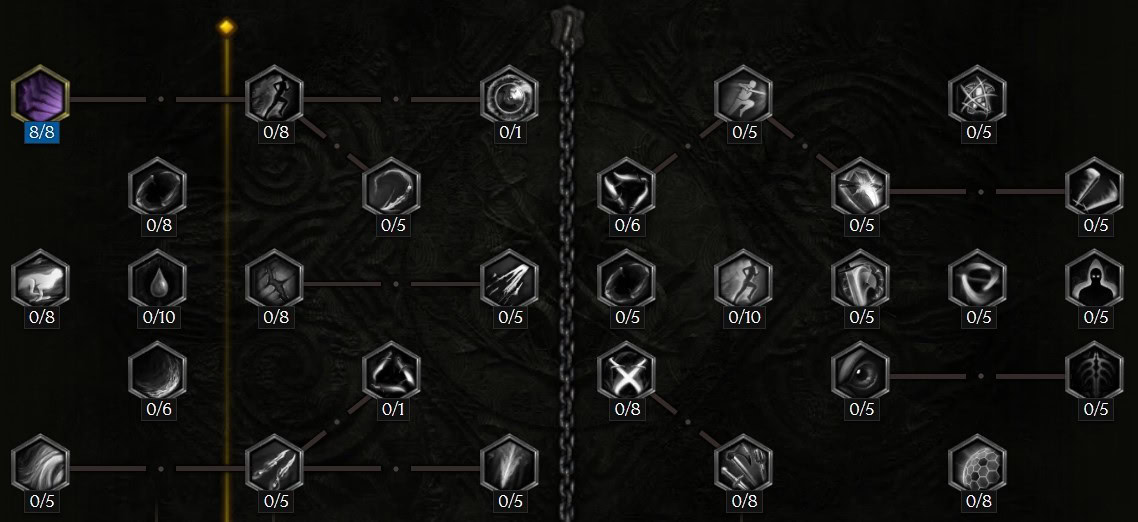
 Shurikens
Shurikens are mainly used for their Bladed Armor passive, which can provide a huge amount of Armor with little investment. They’ll also provide additional Poison stacks as well, still making them effective for damage.
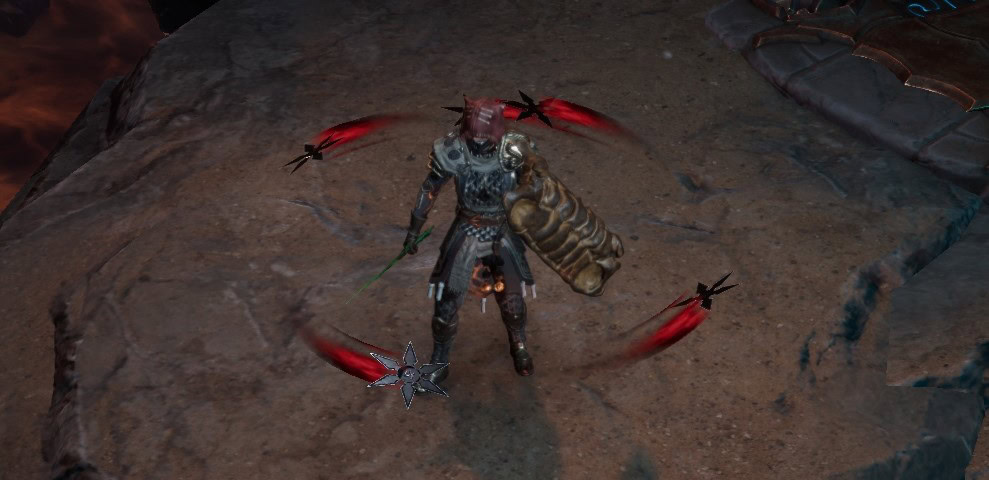
Shurikens’ Specialization Tree enables them as a defensive tool, while still retaining a reasonable amount of offensive power. This is accomplished by making sure they always pierce and last their full duration and increasing the number of Shurikens with each use to be as high as possible.
We’ll start by taking three points in Alacrity to be able to pick up Fan of Blades. Then we’ll pick up Blade Shield and max out Bladed Armor so Shurikens increases our Armor. Then we’ll max Ethereal Blades so they always last their full duration by always piercing our enemies. Then we’ll max Floating Blades to increase their duration further. Then we’ll round the skill off by maxing Toxic Tips and pick up Flip of a Coin for a chance of getting even more Shurikens.
Getting additional points for Shurikens is not recommended. However, if you happen to get them, Abrasive Arsenal isn’t a bad spot to place them.
Level
Passive
Points
Current/Max
1-3
Alacrity
3/5
4
Fan of Blades
1/1
5
Blade Shield
1/1
6-8
Bladed Armor
3/3
9-12
Ethereal Blades
4/4
13-15
Floating Blades
3/3
16-19
Toxic Tips
4/4
20
Flip of a Coin
1/1
21-24
Abrasive Arsenal
4/4
Passive Trees
This section will cover each of the Passive Trees used by the build and the passives that benefit the build the most. We’ll list the rough leveling order here as well, in addition to the full leveling order in the leveling section at the end.
Rogue Passives
Rogue has many great passives in their base passive tree for both offense and defense. In the case of this build, the Poison Resistance and Poison Chance are great options.
Guile
Guild gives us a bit of free Dodge Rating and Poison Resistance. While the Poison Resistance doesn’t help too much in the early levels, it will help our endgame scaling.
Evasion
Evasion is an incredible passive, since we’ll often be kiting enemies which means we’ll almost always just have free damage reduction. It also boosts our Dodge Rating even more to boot.
Agility
Agility gives us a nice damage bonus for getting additional Movement Speed. It also gives us a chance to trigger haste for even more damage at a decent chance.
Dodge and Parry
Dodge and parry isn;t something we’ll necessarily want early on, but Glancing Blows is a great defensive mechanic and the reason we’re take this passive later. The flat Dodge Rating is a minor bonus.
Sapping Strikes
Sapping Strike will provide almost all of our Mana sustain and a bit of healing. The only thing is that we need a skill that costs 0. Early Levels we’ll want to use a skill like Puncture to do this. Shurikens will also work once we get the affix that reduces mana cost or we temporarily use its Scintllant Steel passive to reduce its cost to zero.
Poison Tipped
Poison Tipped is also something we’ll take later, but the more chance to poison we have the higher we can stack Poison on enemies as well as stacking it quicker.
Point Order
Passives marked with an asterisk (*) below are taken later in the leveling process, long after the initial 20 points to unlock Mastery Passive Trees.
Passive
points
Current/Max
Guile
6/8
Evasion
5/5
Agility
5/5
Sapping Strikes
4/4
Dodge and Parry*
5/5
Poison Tipped*
8/8
Guile*
8/8
Falconer Passives
The Falconer Passive Tree is where we’ll get a lot of our damage and more defenses. Thanks to a lot of its damage bonuses being generic, it makes it flexible enough to work well with the build.
Raptor’s Wings
Raptor’s Wing gives us a higher chance to activate Haste and gives us a More Damage Multiplier while it’s active. This makes it a great first passive to have.
Wilderness Scout
This gives us some extra flat Health and more dodge rating. It’s a nice early defensive bonus.
Peltast
This gives us a good bit of Throwing Damage, which really only helps Explosive Trap to deal a good bit of extra damage early on. The Throwing Attack Speed is the more useful part of this passive.
Fencing Grace
This is a nice damage bonus, considering our best set of weapons is a Dagger and a Shield. The Added Block Chance will end up becoming Glancing Blow Chance later, which is a big improvement.
Blast Radius
Blast Radius increases our AoE, Allowing Acid Flask to hit a wider area. This is great for clearing Monoliths.
Deflect and Weave
Deflect and Weave is another great defensive passive, as when maxed it will trade our Block Chance for Glancing Blow Chance. With our other passives and our ideal shield, this will nearly cap our Glancing Blow Chance, which is going to be stronger than what’d get out of Block and be much more reliable.
Evasion Tactics
This is one of the Falconer’s best nodes, giving Dexterity for Damage as well as increasing Armor and Dodge Rating.
Final Souvenir
We’re only taking a single point of this to reach Strike their Flank. It’ll still provide a meager amount of Health and Dodge Rating at least.
Intuitive Connection
This passive allows Falcon Strikes to be an instant Cast, meaning our movement isn’t interrupted when we use it. While it comes with a small hit to its cooldown, it’s a nice quality of life for the skill.
Relentless Talons
This is more generic damage for us and our falcon. As a bonus it’ll even allow the falcon to heal us when it attacks.
Sky Assassin
This gives us generic Damage over Time which by itself is great. The Bonus however also allows our Falcon to easily apply Poison as well, thanks to stacking it for ourselves.
Poise
Poise gives us more Glancing Blow Chance, and alongside the other passive for Glancing Blow, will nearly cap us. The Bonus effect will mean that we are capped as long as we haven’t been hit recently, which makes it amazing for bosses.
Stymphalian Feathers
Stymphalian Feathers gives us a a good bit of flat Armor from stacking Dexterity. The bonus increases this further, increasing our armor for each time our falcon has hit recently.
Strike their Flank
Strike Their Flank gives us more generic damage, but we only want to get the passive and don’t need to max it. Since Our Acid Flasks will stack Slow, we get a ton of damage out of this node.
Tailwind
Tailwind gives us even more damage reduction while moving, in addition to Movement Speed and Dodge Rating. This even gets doubled if our falcon has hit an enemy recently.
Point Order
Passive
points
Current/Max
Raptor’s Wings
5/5
Wilderness Scout
5/8
Peltast
5/7
Fencing Grace
5/7
Blast Radius
5/5
Evasion Tactics
6/6
Relentless Talons
5/5
Intuitive Connection
1/1
Sky Assassin
7/7
Final Souvenir
1/6
Strike their Flank
3/6
Tailwind
6/6
Poise
5/5
Deflect and Weave
5/5
Stymphalian Feathers
6/6
Bladedancer Passives
Bladedancer can offer the build a fair bit of power, but there’s only one passive we need from here.
Cloak of Shadows
Cloak of Shadows is a great node for us, giving us Dexterity for Damage as well as additional Glancing Blow Chance.
Point Order
Passive
points
Current/Max
Cloak of Shadows
8/8
Gearing and Affixes
In this section, we’ll cover the gear you’ll want to look out for, as well as the ideal affixes you want on them. The Affixes listed below are for non-unique and non-legendary Items, however, the ideal affixes are just as valuable when crafted onto a Legendary item of the same type.
Ideal Gear and Affixes
This section provides the ideal Item Bases and respective Affixes for the build. Be on the lookout for gear that have two or more of the stats shown below. Ideal Exalted Affixes will be listed in CAPS. We’ll provide a loot filter below that will make this easier.
As a note for this build, any of the Affixes that say ‘Any Resistance’ should be Poison Resistance if your resistances are capped by other means already.
Item Base
Chitin Dagger or Negotiation Dagger
Prefix 1
Damage Over Time
Prefix 2
POISON DAMAGE
Suffix 1
POISON PENETRATION
Suffix 2
Chance to Poison
Item Base
Carapace Shield
Prefix 1
Block Chance
Prefix 2
Increased Healing Effectiveness
Suffix 1
ALL RESISTANCES
Suffix 2
HEALTH
Item Base
Antidote Vial
Prefix 1
POISON DAMAGE
Prefix 2
Damage over Time
Suffix 1
Frailty Chance
Suffix 2
Any Resistance
Item Base
Scalebane Grimace
Prefix 1
Increased Acid Flask AoE
Prefix 2
CHANCE TO POISON PER DAGGER
Suffix 1
% HEALTH
Suffix 2
Any Resistance
Item Base
Gorgonscale Coat
Prefix 1
Levels to Explosive Trap
Prefix 2
LEVELS TO ACID FLASK
Suffix 1
% HEALTH
Suffix 2
Armor and Reduced Crit Damage Taken
Item Base
Crusader Gauntlets
Prefix 1
Damage over Time
Prefix 2
Increased Area
Suffix 1
HYBRID HEALTH
Suffix 2
Any Resistance
Item Base
Vanguard or Mercantile Boots
Prefix 1
MOVEMENT SPEED
Prefix 2
Dexterity or Experimental Haste
Suffix 1
Health
Suffix 2
ARMOR AND REDUCED CRIT DAMAGE TAKEN
Item Base
Spidersilk Sash
Prefix 1
Poison Damage
Prefix 2
Potion Cleanse
Suffix 1
HYBRID HEALTH
Suffix 2
Armor and Reduced Crit Damage Taken
Item Base
Coral or Gold Ring
Prefix 1
THROWING DAMAGE AND REDUCED MANA COST
Prefix 2
Dexterity or Damage Over Time
Suffix 1
Health
Suffix 2
Any Resistance
Item Base
Bone Amulet or Oracle Amulet
Prefix 1
POISON PENETRATION
Prefix 2
Poison Damage
Suffix 1
Health
Suffix 2
Frailty Chance
Idol Affixes
This section will list the highest value Idol affixes for the build, as well as the Idol type(s) they can be found on.
Affix
Found ON
Chance to Poison per Dagger
Adorned – Prefix
Increased Damage with Dagger
Grand, Ornate, or Adorned – Suffix
Increased Area with Acid Flask
Large – Prefix
Poison Damage
Humble or Stout – Suffix
Any Resist
Any – Prefix
Armor
Any – Prefix
% Health
Any, Prefix
Unique and Legendary Items
Many endgame builds for Last Epoch will use one or several Unique or Legendary Items. The ones this build can get the most use out of are listed below alongside when they are the most useful.
Loot Filter
Below is a custom Loot Filter, designed to help you gear up this build from Level 1. This Loot Filter will make it much easier to identify great items without much thought.
You can Click Here to download our Loot Filter for this Build. Below is quick rundown of what gets filtered and when.
- Items Always Shown
- Unique/Set/Exalted Items
- All Idols
- All Items with Class-Specific Affixes (+Level Affixes are EMPHASIZED)
- Gear with 3+ of the Affixes Listed in the Gearing Section
- Ideal Exalted Affixes are EMPHASIZED
- Items Hidden
- Low-Level Gear, to ensure items that do show up are good for your level
- Toggle Options
- Hide all Normal, Magic, and Rare items that don’t meet the criteria above.
- Recolor options to show Class-Specifc items for other classes, for Alts.
- Hide all Exalted Items not included above, for Endgame Circle of Fortune.
Leveling Order
If you want to play this build from Level 1, this section is for you. Below is our recommended leveling order for Passive Trees and Skills.
Passive Points
Passive
Tree
Points
Current/Max
Guile
Rogue
6/8
Evasion
Rogue
5/5
Agility
Rogue
5/5
Sapping Strikes
Rogue
4/4
Raptor’s Wings
Falconer
5/5
Wilderness Scout
Falconer
5/8
Peltast
Falconer
5/7
Fencing Grace
Falconer
5/7
Blast Radius
Falconer
5/5
Evasion Tactics
Falconer
6/6
Relentless Talons
Falconer
5/5
Intuitive Connection
Falconer
1/1
Sky Assassin
Falconer
7/7
Final Souvenir
Falconer
1/6
Strike Their Flank
Falconer
3/6
Tailwind
Falconer
6/6
Stymphalian Feathers
Falconer
6/6
Poise
Falconer
5/5
Guile
Rogue
8/8
Poison Tipped
Rogue
8/8
Dodge and Parry
Rogue
5/5
Cloak of Shadows
Bladedancer
8/8
Deflect and Weave
Falconer
5/5
All Skill Icons in this guide are sourced from Last Epoch Tools, a Last Epoch Database.
Last Epoch Starter Builds
This is a collection of builds for Last Epoch suitable for new characters and new players. These builds will show you how to start a new character from level 1 and develop it all the way to the endgame and beyond.

Last Epoch Fireball Mage Starter Build
This Last Epoch Mage Build focuses on the Fireball Skill, utilizing a high cast speed and multiple projectiles for high damage output!
Last Epoch Chaos Bolts Warlock Starter Build
This Warlock Build focuses on the Chaos Bolts and Chthonic Fissure Skills, giving it a good mix of Damage over Time and direct hit damage.
Last Epoch Javelin Paladin Starter Build
This Paladin Build for Last Epoch focuses on the Javelin Skill, utilizing its Holy Trail effect to create areas that deal high Damage Over Time.