Infernal Hordes are a wave-based game mode within Diablo 4 introduced in Season 5. This guide will give you the info you need to get the most out of this content.
Table of contents
What are Infernal Hordes
Infernal Hordes are a Wave-based combat activity, with a bit of a rogue-like touch. They’ll task you with taking on successive waves of enemies to spawn Aetheric Events, gaining power through various Boons before taking on the Fell Council and claiming your rewards.
The number of Waves you’ll have to clear increases with each Tier of Infernal Horde, with each tier adding one additional wave. This also means more waves to gather Burning Aether, but the monsters will also be stronger as well.
How to Access Infernal Hordes
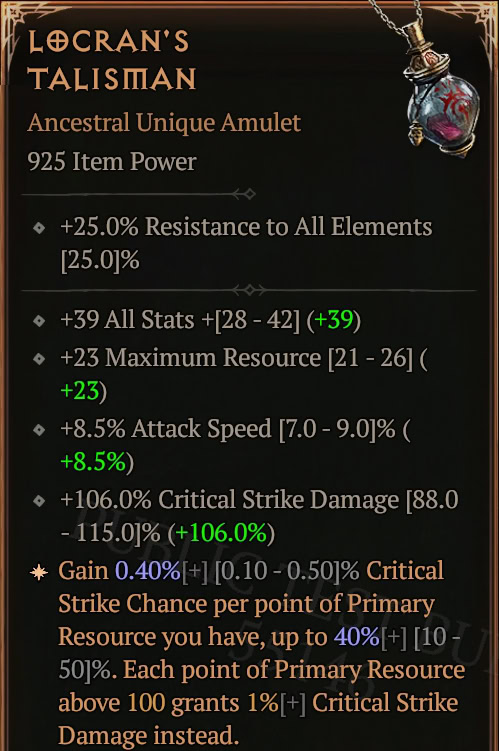
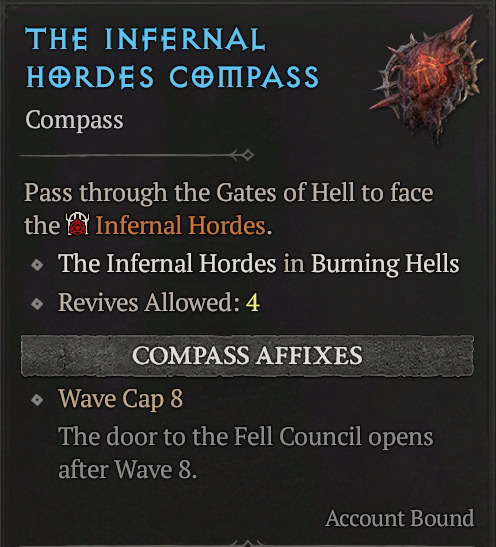
To access Infernal Hordes, you’ll need to complete the “Eyes of the Enemy” quest located near Zarbinzet in Hawezar. Doing so will award you the Locran’s Talisman Unique Amulet and an Infernal Compass.
Infernal Compasses exist in 3 Tiers, which determine the number of waves they’ll have. The wave count is random, but will always be 6, 8, or 10 waves; with 10-wave Compasses being the least common among them. They also scale to our current difficulty, but can only be found in Torment Difficulties.
Compasses have only gotten additional drop locations since being introduced. They’re currently available from Tortured Gifts in Helltides, Whisper Caches from the Tree of Whispers, and rarely as a reward for finishing a Nightmare Dungeon or Kurast Undercity run.
How do Waves Work in Infernal Hordes
Each Wave will consist of groups of enemies spawning and attempting to defeat us. Defeating these enemies will spawn Aetheric Events, small events that award Burning Aether. Burning Aether is this activity’s currency, used to claim Spoils of Hell.
Each Wave will last around two minutes, with a Tier 3 Infernal Horde averaging 10 minutes each. There is currently no way to increase this timer.
Aetheric Events
During each wave, we’ll fill a meter by defeating foes that will spawn a handful of event within the arena.
Each of these varies in reward and difficulty, and is chosen randomly. Some Boons, awarded at the end of each wave, can increase the frequency of a certain event or its value.
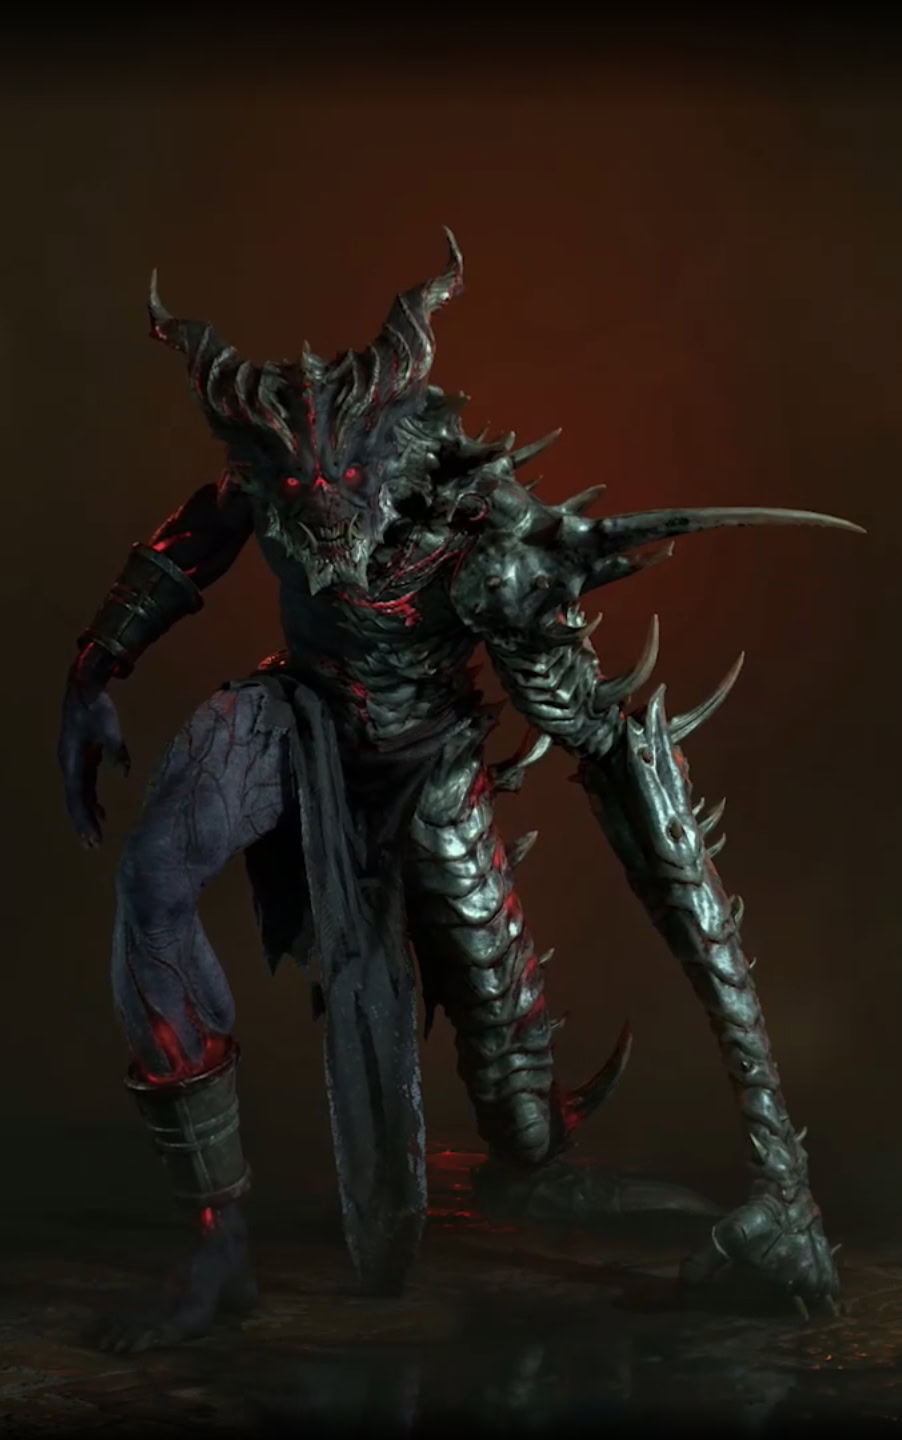
Currently, there are six varieties of events that can occur. These are Aether Fiends, Aether Lords, Aetheric Masses, the Burning Butcher, Hellborne, and Soulspires.
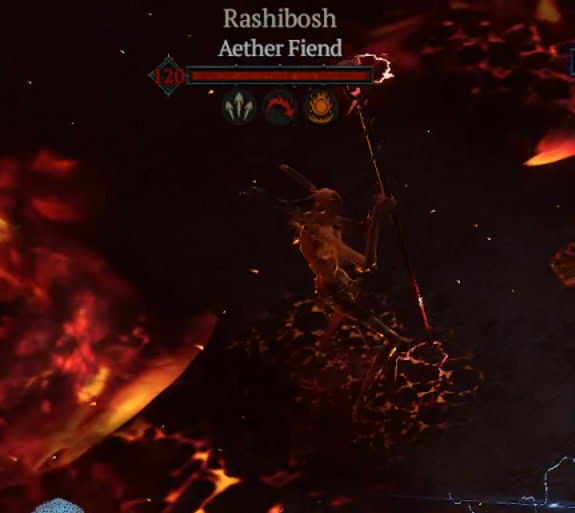
Aether Fiends
Aether Fiends are pretty generic Elite Monsters. The only main difference here is they will drop Burning Aether on death. If your class or build isn’t great with tackling bosses, these are a great thing to upgrade with Boons for more Burning Aether.
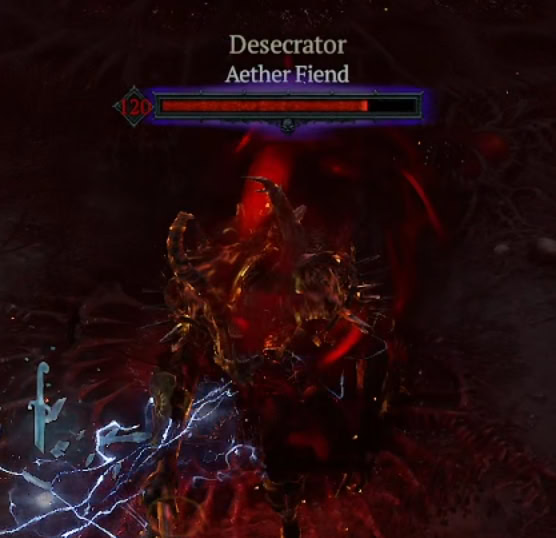
There are some rarer Aether Fiends that can make the Infernal Horde way more hectic. At the current moment, the only one of these I’ve seen was Rashibosh who creates large fire damage areas.
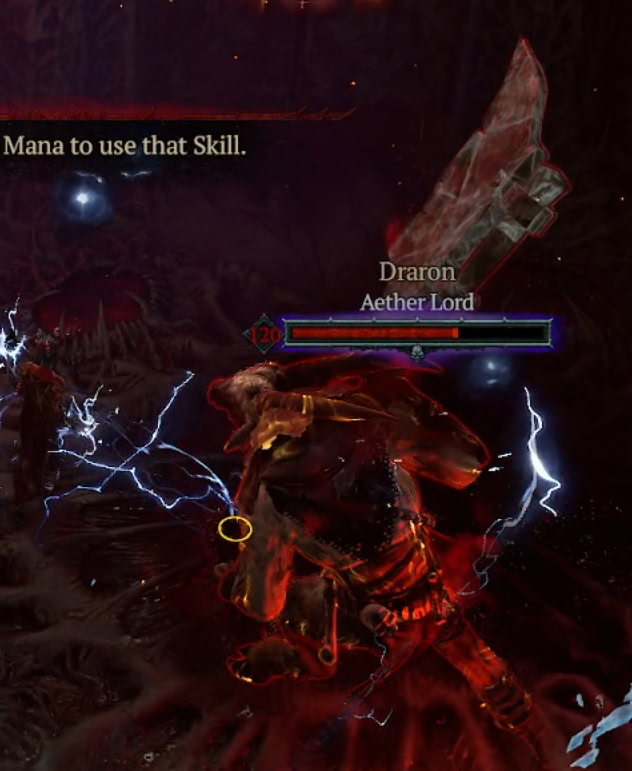
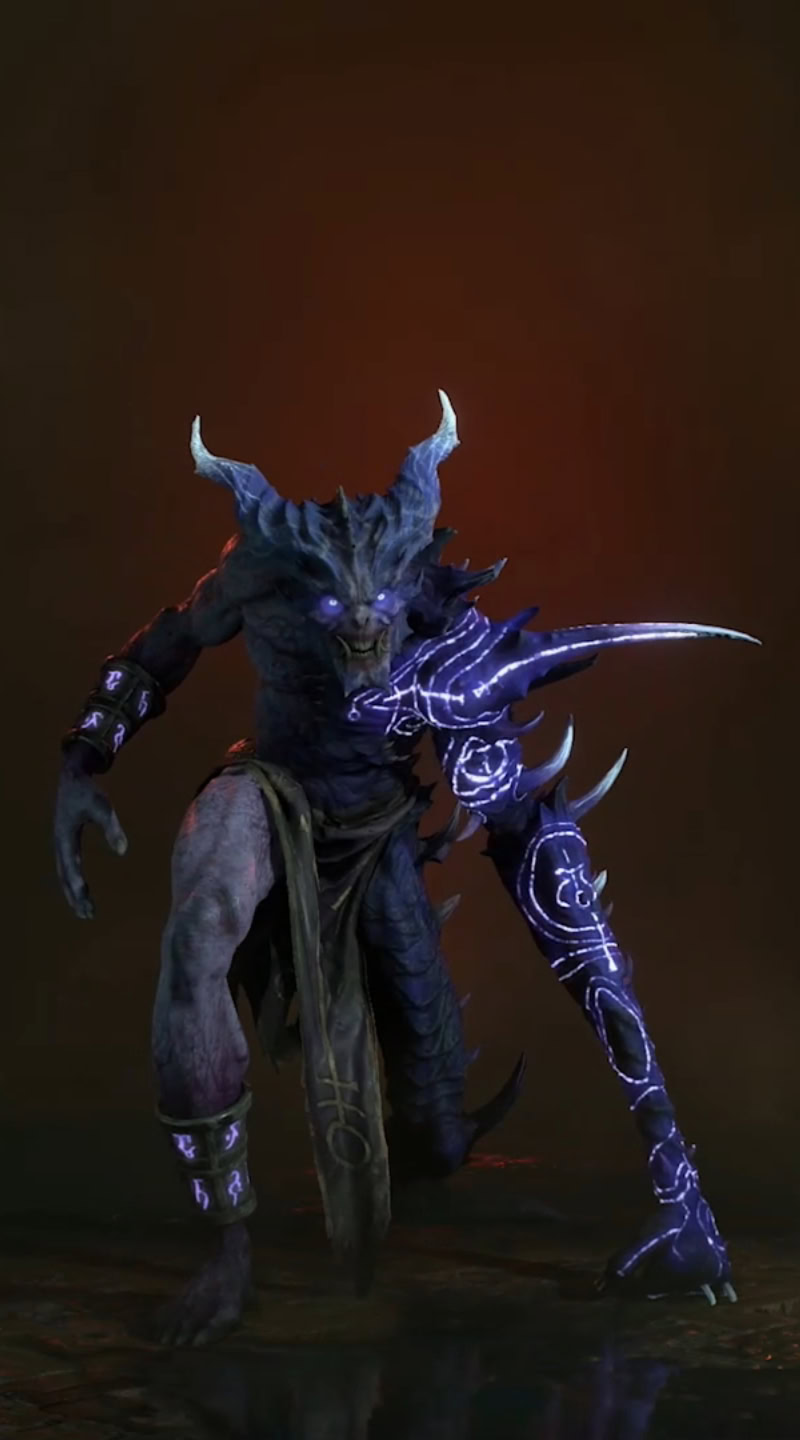
Aether Lords
Aether Lords are upgraded versions of the Dungeon and Stronghold Bosses, which include every boss type, except those that are part of the Endgame Boss Ladder.
While they have a lot of the same attacks, most do have new attacks in their arsenal. Typically the additional attacks are some form of AoE Damage or Crowd Control.
Above Tier 3, you’ll need high damage to get the most out of these. Once Defeated, they’ll drop a handful of Burning Aether.
Unlike most other Aetheric Events, these require a Boon to be taken to have any chance of appearing.
Name
Enemy Type
New Attacks
Name of Aether Lord
Boss used as Base
Unique to Aether Lord
Dellos
Blood Bishop
Shadow Waves – AoE Shadow Damage
Draron
Ice Clan Champion (Malnok)
None
Daxros
Forgotten Bishop (Kor Dragan)
None
Ank’ton
Fallen Shaman (Qara Yisu)
Places 1-3 Lightning AoEs (replaces totems)
Requas
Tomb Lord
Slowing AoE
Seivax
Duz’Agur (Eriman’s Pyre)
None
Nixar
Fly Warrior
Creates Poison Puddles (replaces the roaming swarms)
Ferrox
Cultist Mage (Elias)
None
Jenaille
High Priestess (Omath’s Redoubt)
None
Kreinbargh
Cannibal Brute
None
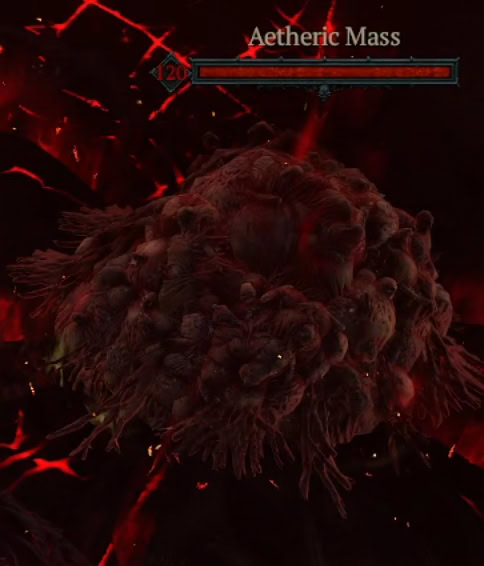
Aetheric Mass
Aetheric Masses work much like the Corrupted Spires found in Helltide, but are just large lumps of flesh instead. Their Attack area around them is divided into 6 sections, of which they’ll hit three each time, with a gap between damage areas. Once Destroyed, they’ll drop Burning Aether.
Burning Butcher
It just wouldn’t be Hell without the Butcher, would it? The Butcher is here in all his glory with some fiery additions to his kit. Seeing him is exceptionally rare, as with most sightings. Similarly to Aether Lords, the Burning Butcher will require a high amount of damage to take down. Once Defeated, he will drop a large amount of Aether, typically 25 or more.
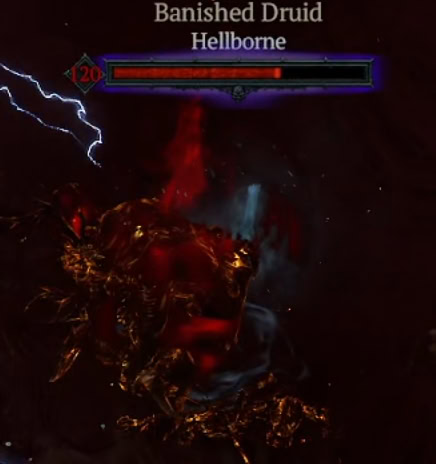
Hellborne
Hellborne can also be found here as well, though unlike the Butcher they remain largely the same. The Hellborne here will typically spawn in groups of two or three, each dropping Burning Aether on death. This makes them just as reliable for Aether as the Aether Fiends.
Much like Aether Lords, the Hellborne require Boons to appear within the Infernal Hordes.
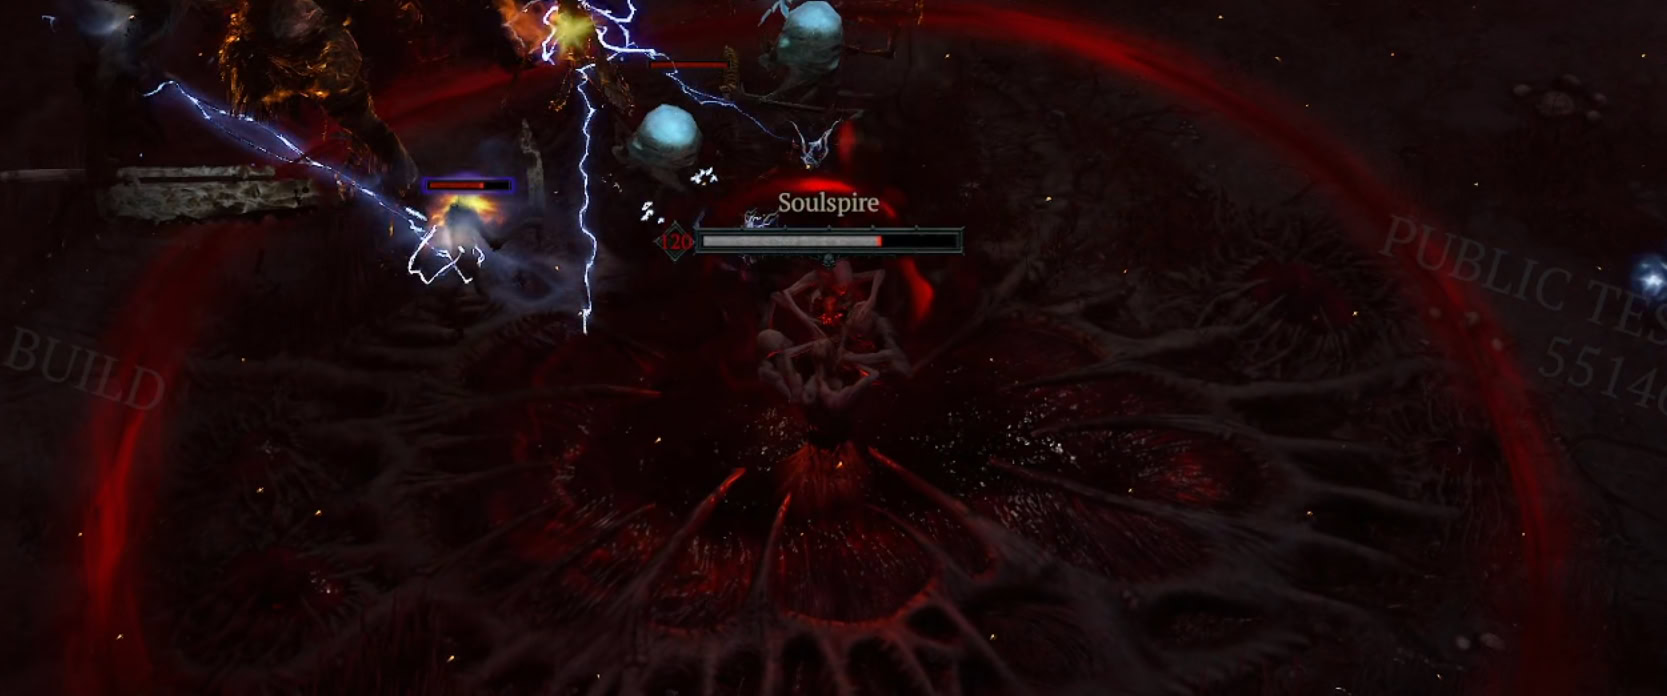
Soulspire
These are like the Ravenous Soulspires found in Helltides, just without the life drain. These will require you to stand near them and defeat a number of enemies. Upon defeating the required number of enemies it will explode and leave behind Burning Aether.
Boons
The Boons in Infernal hordes always come with an upside and a downside to them. Typically the downside will buff enemies, while the upside is typically increasing your Aether Gain from a given event. These can stack, with some even being able to stack with themselves.
These also range in rarity from Common to Unique, which determines how likely you are to see them. Below is a table of these Boons and their effects. Legendary and above Boons will only be available in 8-wave or 10-wave Compasses.
Name
Positive Effect
negative Effect
And Rarity
Aether Rush
(Common)
Gathering Aether increases Movement Speed for 8 seconds
+25% Normal Monster Damage
Burning Hellborne
(Common)
Hellborne drop 1 additional Aether
Hellfire now spawns Hellborne
Burning Rain
(Common)
1-3 Aether will spawn at the end of each wave
Hellfire rain upon you
Bursting Fiends
(Rare)
Aether Fiends explode and damage nearby foes
+25% Elite Damage
Bursting Masses
(Common)
Spawn an Aetheric Mass on Wave Start
Aetheric Masses deal unavoidable damage
Corrupting Spires
(Common)
Soulspires pull foes towards them
Foes near the Soulspire are empowered
Draining Spires
(Common)
Soulspires grant 2 additional Aether
Soulspires drain Life from players in range
Exalted Council (Legendary)
The Fell Council drop 15 additional Aether
+50% Fell Council Damage
Exalted Elites
(Common)
Aether Fiends drop 1 additional Aether
+25% Elite Damage
Exalted Hellborne
(Common)
Hellborne drop 1 additional Aether
+25% Hellborne Damage
Exalted Hordes
(Common)
Defeating Normal Enemies spawns Aetheric Events 50% Faster
+25% Normal Monster Damage
Exalted Masses
(Common)
Aetheric Masses drop 1 additional Aether
+25% Aetheric Mass Damage
Gorging Masses
(Common)
While slowed by the negative effect, you have Unlimited Resource
Defeating an Aetheric Mass slows you for 8 seconds.
Insatiable Spires
(Rare)
Soulspire drop twice as many Aether
Soulspire require double the amount of enemies to be defeated
Invigorating Hellborne
(Rare)
Defeating Hellborne invigorates you
+25% Hellborne Damage
Stalking Devil
(Unique)
Defeating the foe awards 25 additional Aether
Infernal Demon has your scent
Surging Elites
(Rare)
Aether Fiends grant 1 additional Aether
Double chance for Elite Spawns
Summoned Hellborne
(Common)
Hellborne drop 1 additional Aether
Hellborne are hunting you
Summoned Lords
(Rare)
Aether Lords grant 3 additional Aether
Aether Lords can now spawn
Surging Hellborne
(Rare)
Hellborne drop 1 additional Aether
One additional Hellborne per spawn
Teeming Masses
(Rare)
Aether Lords drop 3 additional Aether
Aether Lords Spawn when defeating an Aetheric Mass
Unstoppable Elites
(Rare)
Aether Fiends drop 1 additional Aether
Elites are Unstoppable
Wanderer Enfeebled
(Legendary)
The Fell Council drops 15 additional Aether
Potion Cooldown is increased by 2 seconds
Wanderer Exhausted
(Legendary)
The Fell Council drops 15 additional Aether
Evade Cooldown is increased by 2 seconds
Wanderer Withered
(Legendary)
The Fell Council drops 15 additional Aether
-10% All Resistances
The Fell Council
The Fell Council are the resurrected remains of the Council of Diablo 2, corrupted and twisted by Mephisto’s influence. Each of the five Council members has different attacks. Much like their Diablo 2 Counterparts, all of the Fell Council have the ability to summon Hydras each with unique characteristics.
We’ll always fight three of them at the end of any Infernal Horde but chosen at random. This means we’ll want to be prepared to take on any assortment of them that gets sent our way.
Bremm the Maelstrom
Bremm the Maelstrom is the corrupted version of Bremm Sparkfist. Bremm has several spells, all of which deal Lightning Damage. The Hydra’s summoned by Bremm have two heads that spit a Projectile each with a chain of damage between them.
Bremm will keep his distance, casting Sparkbolts at you. He will occasional throw out two lighting orbs that deal AoE around them, each will create 6 cone aoes around them that rotate with each pulse, rotating clockwise.
When under 66% Life, Bremm will summon Tornados that slowly circle the center of the arena. Wile under 33% Life, Bremm will occasional send 3 projectiles at you, with second set of 3 from another direction, converging on your location when cast.
Geleb the Flame
Geleb the Flame is a corrupted version of Geleb Flamefinger. Geleb has several spells, all of which deal fire damage. The Hydras summoned by Geleb deal Fire damage and will have three heads.
Geleb is the most mobile out of the Fell Council, actively keeping his distance and throwing Firebolts at you. Alongside his Firebolts, Geleb will also cast a Flame Wave, which slowly moves across the arena. Under 50% Life, he’ll cast 3 Flame Waves, instead of one with each cast.
Under 66% Health, he’ll occasionally lob Fireballs that deal damage in a small area upon landing, before splitting and dealing yet another instance of damage around the initial impact. He’ll also begin calling down Meteors, which deal AoE damage on Impact and leave a short duration AoE on the floor.
Ismail the Accursed
Ismail the Accursed is a corrupted version of Ismail Vilehand. Ismail has several spells, most of which are summons. The Hydras summoned by Ismail will be fewer in number and spit projectiles medium-sized projectiles .
Ismail will always stay in the center of the room for the duration of the encounter. He’ll occasionally summon Specters of Ismail, which mimic his ranged attack while alive. While controlling these Specters, Ismail will not be able to attack directly.
His other summon, Claws of Ismail will swipe at you if you get close.
Maffer the Cruel
Maffer the Cruel is a corrupted version of Maffer Dragonhand. Maffer has a variety of attacks, all of which deal physical Damage. The Hydras summoned by Maffer spit larger, slow moving projectiles.
Maffer is the only Council Member who will actively charge at you and attempt to melee you. In addition to this melee attack, he will occasionally launch a spell that will travel forward and will attempt to home towards you. He’ll also occasionally throw out an AoE attack in front of him when you are in melee range.
Under 50% Life, Maffer will quickly close any distance between you and him and attempt to trap you inside a Bone Prison. The walls of this Bone Prison are very fragile.
Wyand the Shadow
Wyand the Shadow is a corrupted version of Wyand Voidbringer. Wyand has several spells, all of which deal Shadow Damage. The Hydras summoned by Wyand are single-headed Hydras that spit small, but fast projectiles.
He’ll primarily stay at range, throwing Shadowbolts at you but will melee you if you get close. Under 66% Life, he’ll begin to occasionally teleport, typically to the furthest point away from you in the arena. Under 50% Life, he’ll occasionally lob Shadowbolts that leave an AoE damage zone that also inflict Darkness
Spoils of Hell
At the end of each run, you’ll be given the choice of four different Spoils of Hell. These are chests you can spend your hard-earned Burning Aether on for various rewards. Currently, there are only 4 variations of spoils.
When selecting a reward, the chosen Spoil of Hell will reset allowing it to be opened again for the same cost. This allows you to distribute your Aether as you see fit and only locks you out of rewards if you have less Aether than is needed to open the chest.
Chest
Contents
Cost
Spoils of Greater Equipment
1-3 Guaranteed Ancestral Items.
Legendary, Unique, or Mythic Rarity.
Additionally drops Scattered Prisms and rarely drops Scrolls of Restoration.
200 Burning Aether
Spoils of Materials
Gem Fragments, Crafting Materials, and Masterworking Materials.
All drops scale with Aether Spent and Difficulty
All Remaining Burning Aether
Spoils of Gold
Heaps of gold.
Scales with Aether and Difficulty
All Remaining Burning Aether
We’ll always want to prioritize grabbing the Spoils of Greater Equipment every run that we can. 200 Aether is a fairly low mark to achieve for most builds, and the guaranteed Ancestral items can significantly boost our character or be worth selling.
Spoils of Materials are the best option to take with our remaining Aether. This chest will always be a more efficient choice just for the Masterworking Materials until we no longer need them. The other resources are useful as well, but generally a bit less so as they’re obtainable anywhere.
The Spoils of Gold is a good choice once we have our gear masterworked or just need Gold for any reason. Compared to the next best source of Gold, Whisper Caches, we’ll get far more per Infernal Hordes compared to the time spent clearing whisper objectives.
How to Get More Burning Aether
We’ve covered the Aetheric Events and Boons above and mentioned a little bit of when they’re ideal. Now let’s go deeper and cover the more ideal scenarios and strategies we’ve found to get more Aether.
Just keep in mind these are ideal scenarios. Due to the random nature of the Boons, the exact strategies are not always possible.
General Tips
Almost all of the ideal scenarios listed below make use of the Exalted Hordes Boon. It’s one of the most powerful Common Boon available, without question. The only time it becomes less effective is if we take Surging Elites along with it. This ends up reducing the number of Normal Mobs overall, which works against this particular Boon.
While not always useful, Aether Rush can be a great Boon if we have no other options worth taking. The movement speed it grants will allow our character to cruise around the arena between events with ease, even if we don’t have high mobility.
Stay closer to the middle of the arena to start. Don’t immediately move to the first event that spawns, instead wait for at least 2 to be active before we start moving. Once all events are cleared or activated, return to the middle. This reduces to amount of movement needed to reach each event and keeps us focused on clearing for more events.
Hellborne Strategy
The Hellborne are probably the most reliable and easiest strategy to set up, while still becoming a top earner for Burning Aether. Unlike Aether Lords, the Hellborne are open to more builds and easier to farm overall. With at least one stack of their Common Boons, they’ll drop around 3 Aether each while also spawning in groups of at least 2. All of this combined makes them the most ideal Strategy to focus on.
While this strategy is significantly better by getting the Summoned Hellborne Boon early, it’s not strictly required as getting them via Hellfire is also just as good, taking just an extra wave to get going if you get lucky. Getting Summoned Hellborne as early as possible should be a goal though, as it also allows them to spawn from Aetheric Events while making the event more common than most others.
Getting at least Summoned Hellborne alongside the Rare Surging Hellborne Boon and the Common Exalted Hordes Boon is the most ideal starting point. Getting Exalted Hordes early on is also worth delaying this potentially. Beyond the initial setup,any additional stacks of Surging Hellborne, Exalted Hellborne, or Exalted Hordes will be beneficial.
This strategy doesn’t have any downsides to it. It’s only slightly worse if we don’t get Summoned Hellborne early on, but it’s common enough that we’ll see it in the first wave or two most times. Compared to the other options, it also doesn’t require a Rare Boon, though the Rare Boon is a significant boost to the Aether we earn.
Aether Lords Strategy
In a very close second place for strategies are Aether Lords. If we’re able to comfortably take on bosses, these are worth a minimum of 5 Burning Aether Each. This makes them ideal targets to farm, so long as our build handles the high-health foes well enough to at least survive them. Thankfully, surviving is the only main requirement, as they will stick around until they are defeated, regardless of how many are present.
This strategy is the most optimal when getting the Summoned Lords Boon early on. This combined with Exalted Hordes ensures you’re able to spawn an effective amount of them. Then on top of this, picking up Teeming Masses and Bursting Masses increases the odds of getting even more Aether Lords.
Bursting Masses can also stack, so you can start a wave with multiple Aetheric Masses and spawn Aether Lords from each of them. This also makes both events relatively common as well, greatly boosting overall Burning Aether earned.
The only problem with this strategy is that both Summoned Lords and Teeming Masses are rare Boons, making them less likely to appear while being the most important ones to get. This makes getting the full setup very inconsistent on lower tiers of Infernal Hordes. However, getting it set up and cleaning out Aether Lords left and right for 8 Burning Aether each feels amazing, even if you get limited time with it.
Aether Fiends Strategy
The last major option to consider is Aether Fiends. These are generally easier to deal with compared to Hellborne and can be just as rewarding. Much like Hellborne, they also spawn in groups of at least 2. The only thing to take note of here is that some Aether Fiends are significantly more powerful than others as noted in the section above regarding them.
The great thing about this strategy is the main bonuses we’re after, Exalted Hordes and Exalted Elites, are extremely common and easy to stack. While Surging Elites and Unstoppable Elites are both Rare and will be beneficial, they are not required either.
For the best amount of Aether, Surging Elites should be taken as early as possible if it shows up. This spawns more Elites (including the weaker Aether Fiends), while also making Aether Fiends a more common Aetheric Event. If you don’t get Surging Elites early, Exalted Hordes can be just as effective for getting more events and more chances at Aether Fiends.
This downside only has the downside of being slightly less effective without Surging Elites. Outside of that, it’s the easiest to set up and get decent results from with any build.
Lucky Lucky
Look, Luck isn’t exactly a real strategy here. However, if you do luck into any of the Legendary or Unique Boons, they can significantly impact your run, for better or for worse. This is because all of the legendary and higher Boons either debuff you, buff the Fell Council, or guarantee a Burning Butcher spawn.
Most of the debuffs are entirely negligible, outside of having your resistances reduced. Of course that’s assuming that it’s reduced Maximum Resistances, if it’s not it is just as minor of a penalty. Assuming you ever see these Boons at all, they are all valuable. Though in a lot of cases, they’re not quite competitive at their
The chances are that if you’re running the highest Tiers of Infernal Hordes or even High Pits, the Butcher is a non-threat to you. He drops a ton of Burning Aether when he goes down, whether you get the Boon or he just appears normally.
Spending your Burning Aether
What rewards we take are ultimately up to our discretion as we’re playing. We do however have a recommendation on how to get the most out of our Burning Aether.
General Spending
Always go for the Spoils of Greater Equipment first, unless you do not need any gear at all. With the adjusted rates of events as well as the reduced Aether costs, we’ll almost always be able to get a single Spoils Greater Equipment. These should always take priority as this option has a higher chance of dropping Unique Items in addition to always dropping an Ancestral Item with a Greater Affix.
However, if you don’t need any gear you can take the Spoils of Materials. This has a bunch of Masterworking Materials, which otherwise can only be gotten from Nightmare Dungeons. Good Infernal Horde Runs can often beat out high Nightmare Dungeons runs in terms of efficiency unless you’re built for speed farming.
The Spoils of Gold will often net you a good amount of Gold as well, making Infernal Hordes the best way to quickly get some good. If we dump all of our Burning Aether at the end of a run, a decent run (~600 Burning Aether) will easily net over 10M Gold even for a Torment 2 run. This value only increases as we’re able to clear the Infernal Hordes at higher and higher difficulties.


