Spiritborn’s Touch of Death skill offers great offensive capabilities with many options for scaling while not lacking in defenses.
This Spiritborn build guide assumes you’re level 60 and have completed enough of your Renown to have gained the 12 additional Skill Points available.
If you want a great leveling build to reach this point with, try our Centipede Spiritborn Leveling Build – A centipede build that plays off Vulnerable to deal high AoE damage. due to this build’s reliance on multiple Unique Items and easy transition from our Leveling Build, we will not be including a leveling path.
Table of contents
Build Overview
This Spiritborn build relies on a handful of Unique Items to get the most out of its damage, but only requires The Rod of Kepleke to start dishing out consistent damage.
The bulk of our damage will be provided by Touch of Death and the Insatiable Aspect that goes with it. This allows us to quickly create swarms that will detonate when we make new ones for consistent bursts of damage.
On top of Touch of Death, we’ll also use The Hunter as our Ultimate which not only deals fantastic damage and grants Ferocity Stacks itself but enables many of our passives for even more damage potential.
On the Defensive side, we’ll mostly be relying on Resolve stacks for a ton of damage reduction. We’ll also be able to convert this to additional damage later on using Aspects, making it a very strong defensive mechanic.
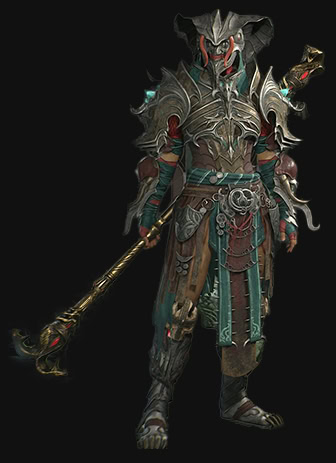
Early on we can make use of the Craze of the Dead God to bolster our defenses heavily if we get them. They do come with the heavy side effect of converting all of our direct damage taken into a Poison DoT. Note that direct damage does not include AoE damage or other Damage over time effects.
Skill and Passive Breakdown
In this section, we’ll be talking about each skill we use. This is the whys and hows of how the build works, and then we’ll cover the skill point distribution.
Skills
These are the main skills for the build. We’ll explain what purpose each serves and how they fit the build
Touch of Death
This is our main DPS skill, dealing consistent damage with its DoT component being popped for instant damage with Noxious Resonance. This enables us to spawn swarms with each attack that we also pop for bursts of damage.
Vortex
Vortex is a utility skill we use to help keep enemies grouped. Since we have no control offer the Touch of Death swarms or their AoE, we want to keep things grouped for maximum damage.
Ravager
Ravager adds a bit of extra damage, but the main reason we use it is for Measured Ravager’s dash and Vigor Generation bonuses. The dash keeps us very mobile so long as we have enemies to hit.

Scourge
Scourge we use for a consistent source of Crowd Control and a boost of damage from that crowd control. It’s built-in Life Steal effect also greatly helps to offset the damage we’ll end up taking from our Uniques as well. It’s also great early for the Vigor Generation it provides.

Armored Hide
We have this in our hotbar skills primarily for the passive Resolve Generation. We’ll be making use of Resolve as well as the active portion of this skill for more damage with Aspects. It’s active will also instantly refill our Resolve Stacks, making it incredibly useful.

The Hunter
The main reason we use The Hunter is for its lower Cooldown and shorter duration compared to the other Ultimates. The Short Duration allows for easier upkeep of Resolution once we’re able to use it more frequently.
Passives
This section covers our Key Passive as well as others that are core to the build. These are what make the build a cohesive package.
 Key Passive – Noxious Resonance
Noxious Resonance often demands stacking of Critical Strike Chance across our gear and allows us to detonate the DoT effect from Touch of Death. However, with the Rod of Kepeleke, we’re able to consistently trigger this. As we get better gear, we’ll eventually reach a point where we’re triggering it with every attack.
 Vigorous
Vigorous boost our Vigor Generation after using a Core Skill. Since Poised Touch of Death is considered a Core Skill, we’ll have this constantly active.
 Balanced Exertion
Balanced Exertion is a considerable damage boost that we get entirely free. The Rod of Kepeleke will make Touch of Death cost 0 Vigor, negating the downside of this passive.
 Unrestrained Power
Unrestrained Power is one of many ways we’ll be making use of Resolve to gain damage. In this case, granting us damage for just maintaining at least 5 stacks of Resolve with the Gorilla Secondary Spirit Hall’s effect.
 Perseverance
Perseverance gives us a massive defensive boost based on our Resolve Stacks. Since we’re aiming for a high amount of Resolves, this becomes an excellent passive to grab.
 Vehemence
Vehemence boosts the damage of our Potency Skills, which is Touch of Death’s initial skill tag. Normally this has a trade-off of Increasing its Cooldown, but this is negated by Poised Touch of Death.
 Potent
Potent gives us a stacking damage boost for dealing damage with Jaguar Skills. Since we’ll be using the Jaguar as our Primary Spirit, we’ll stack this very quickly against bosses where it’s needed.
 Oppressive
This boosts the damage of our Centipede Skills against Crowd Controlled targets, while also increasing our Crowd Control Duration. While this will only boost Touch of Death, this is perfectly fine.
 Resolution
Resolution gives us a considerable damage boost against Elites and Bosses when we use our Ultimate Skill. We’ll take advantage of The Hunter’s low cooldown and reset potential to make excellent use of this.
 Supremacy
Supremacy gives us even more damage for using our Ultimate. In this case, we’ll stack it up as we defeat enemies while The Hunter is active and when it ends. This will fluctuate a lot as the stacks will decay while the Hunter is on cooldown.
Skill Point Distribution
This is an easy-to-reference table for where we’ll be placing all of our Skill points. These are listed in the order they appear on the skill tree.
| Icon | Skill Name | Skill Tree | Points |
|---|---|---|---|
| Withering Fist | Basic | 2 | |
| Vigorous | Core | 3 | |
| Balanced Exertion | Core | 3 | |
| Follow Through | Core | 3 | |
| Vortex | Focus | 1 | |
| Enhanced Vortex | Focus | 1 | |
| Measured Vortex | Focus | 1 | |
| Ravager | Focus | 1 | |
| Enhanced Ravager | Focus | 1 | |
| Measured Ravager | Focus | 1 | |
| Mirage | Focus | 1 | |
| Unrestrained Power | Focus | 3 | |
| Scourge | Defensive | 1 | |
| Enhanced Scourge | Defensive | 1 | |
| Adaptable Scourge | Defensive | 1 | |
| Armored Hide | Defensive | 1 | |
| Enhanced Armored Hide | Defensive | 1 | |
| Antivenom | Defensive | 1 | |
| Nourishment | Defensive | 3 | |
| Endurance | Defensive | 1 | |
| Perseverance | Defensive | 3 | |
| Touch of Death | Potency | 5 | |
| Enhanced Touch of Death | Potency | 1 | |
| Poised Touch of Death | Potency | 1 | |
| Vehemence | Potency | 3 | |
| Potent | Potency | 3 | |
| Ravenous | Potency | 3 | |
| Oppressive | Potency | 3 | |
| The Hunter | Ultimate | 5 | |
| Harmonious The Hunter | Ultimate | 1 | |
| Exalted the Hunter | Ultimate | 1 | |
| Resolution | Ultimate | 3 | |
| Spiritual Attunement | Ultimate | 3 | |
| Supremacy | Ultimate | 3 | |
| Sustenance | Ultimate | 1 | |
| Noxious Resonance | Key Passive | 1 |
Gearing and Stats
In this section, we’ll cover all the things you’d want to keep an eye out for to enhance the final build. This includes our Recommended Weapons, Spirit Hall, Aspects, Runewords, and of course, Uniques.
Recommended Weapons
This build uses a Unique Quarterstaff, the Rod of Kepeleke. Before acquiring this Unique, we’ll still want to use a Quarterstaff to not lose part of our offensive and defensive scaling.
Ideal Stats
The table below details the ideal stats for our gear, be on the lookout for gear that matches at least two of the three rolls below. We’ve also included Aspects here for easier viewing, refer to the Aspects section for additional details on why these are selected.
Affixes that are CAPITALIZED are the Ideal Affixes to get as a Greater Affix. These are not required but are a good way to push the build further. Affixes in Bold are the ideal Affixes to boost with Masterworking.
In cases where multiple Affixes are listed, the secondary option is for when another stat reaches its cap. This is most common with Armor, where you’d take Maximum Life after reaching the Armor cap.
Required Unique Item
Rod of Kepeleke
The stats below are for the weapon used before obtaining.
Affix 1
Dexterity
Affix 2
Resource Cost Reduction
Affix 3
MAXIMUM LIFE
Tempered Affix 1
Ranks to Ravenous
Soil Augments – Weapon
Tempered Affix 2
Potency Damage
Centipede Finesse – Offensive
Legendary Aspect
Insatiable Aspect
Recommended Unique Item
Harmony of Ebewaka
Affix 1
Maximum Life
Affix 2
Armor
Affix 3
RANKS TO TOUCH OF DEATH
Tempered Affix 1
Total Armor
Worldly Endurance – Defensive
Tempered Affix 2
Touch of Death Swarm Duration
Centipede Innovation – Utility
Legendary Aspect
Undying Aspect
Recommended Unique Item
Jacinth Shell
Affix 1
MAXIMUM LIFE
Affix 2
Armor
Affix 3
Resistance to All Elements
Tempered Affix 1
Total Armor
Worldly Endurance – Defensive
Tempered Affix 2
Touch of Death Swarm Duration
Centipede Innovation – Utility
Legendary Aspect
Aspect of Binding Morass
Affix 1
Maximum Life
Affix 2
Armor
Affix 3
RESISTANCE TO ALL ELEMENTS
Tempered Affix 1
Maximum Resolve Stacks
Spiritborn Resolve – Defensive
Tempered Affix 2
Touch of Death Swarm Duration
Centipede Innovation – Utility
Legendary Aspect
Aspect of Interdiction
Unique Item Option
Craze of the Dead God
Affix 1
Attack Speed
Affix 2
RANKS TO CORE SKILLS
Affix 3
Armor
Tempered Affix 1
Basic Skill Damage
Sharpened Finesse – Offensive
Tempered Affix 2
Touch of Death Swarm Duration
Centipede Innovation – Utility
Legendary Aspect
Aspect of Redirected Force
Affix 1
MOVEMENT SPEED
Affix 2
Maximum Life
Affix 3
Armor
OR
Resistance to All Elements
Tempered Affix 1
Movement Speed
Natural Motion – Mobility
Tempered Affix 2
Vortex Size
Eagle Innovation – Utility
Legendary Aspect
Aspect of Haste
Required Unique Item
Ring of the Midnight Sun
Affix 1
Attack Speed
Affix 2
Vulnerable Damage
Affix 3
Critical Strike Chance
Tempered Affix 1
Resource Generation
Worldly Stability – Resource
Tempered Affix 2
Basic Skill Damage
Eagle Finesse – Offensive
Legendary Aspect
Starlight Aspect
Affix 1
ATTACK SPEED
Affix 2
Maximum Life
Affix 3
Chance to Apply Vulnerable
Tempered Affix 1
The Hunter Cooldown
Jaguar Efficiency – Resource
Tempered Affix 2
Basic Skill Damage
Eagle Finesse – Offensive
Legendary Aspect
Aspect of Unyielding Hits
Affix 1
Ranks to Potent
Affix 2
Dexterity
Affix 3
TOTAL ARMOR
Tempered Affix 1
Total Armor
Worldly Endurance – Defensive
Tempered Affix 2
Touch of Death Swarm Duration
Centipede Innovation – Utility
Legendary Aspect
Insatiable Aspect
Scroll the top row horizontally
to see more gear tabs.
Gems and Runewords
This build uses Emeralds in our Weapons, Emeralds in our Armor, and Skulls in Jewelry.
We opt for Emeralds in our Weapons as we’ll be Critically Striking often thanks to Rod of Kepeleke. Late game, we can replace this with one of our Runewords instead.
We use Amethysts in our Armor, as Barrier Generation helps us get more value from Auspicious as well as one of our Runewords. This grants us more overall damage from Viscious Shield
We go with Skulls for Our Jewelry as our Armor, as Paragon should take care of most of our resistance. With the Aspect of Unyielding Hits, we’ll want to overcap on Armor as much as we can, at least up to 4,000 Armor.
For Runewords, there are multiple great combinations we can use, below are our recommended Runewords for Different stages of the builds.
For additional information regarding Runewords, check out our Runewords Guide, which covers all the available runes as well as common and useful combinations.
| Stage | Ritual | Invocation | Result |
|---|---|---|
| Leveling | Yax | Qua | Drinking a Healing Potion grants 40% Movement Speed for 5 seconds. |
| Leveling | Cir | Lum | Casting 5 Skills restores 60 Resource. |
| Midgame | Cir | Gar | Casting 5 Skills grants 25% Critical Strike Chance for 6 seconds. |
| Midgame | Cir | Kry | Casting 5 Skills casts Spiritborn’s Vortex |
| Endgame | Tam | Kry | Casting 6 Non-Channeled Core Skills casts Spiritborn’s Vortex |
| Endgame | Poc | Que | Spending 300% of Maximum Resource casts Druid’s Earthen Bulwark. |
| Endgame | Tam | Xal | Casting 6 Non-Channeled Core Skills grants 20% Maximum Life for 6 seconds. |
Spirit Hall
This build uses Jaguar as its Primary Spirit and Gorilla as its Secondary Spirit of choice.
Jaguar is our Primary Spirit, this gives Touch of Death the Jaguar Skill Tag so it can stack Potent. The extra burst damage this provides can also be crazy when everything lines up just right.
Gorilla is our Secondary Spirit for the free Unstoppable. This lets us ignore all Crowd Control, just not any damage applied along with it. This ensures we almost always have Unrestrained Power active.
Boss Powers
Boss Powers are exclusive to Season 8, and offer us a wide variety of options. But we’ve narrowed down the best choices for all stages of the game.
For more information on Boss Powers, check out our Boss Powers Explained guide, which details how to get and upgrade each power, and potential uses for them.
| Stage | Power | Reason |
|---|---|---|
| Leveling | Allek’s Talons (Main) | Adds a ton of damage to our Basic Skill, applying Damage over Time to a wide area. Can hold up into the endgame with the Rod of Kepeleke. |
| Midgame | Varshan’s Lifesteal (Main) | Decent damage and consistent healing, which can offset the drawback of Jacinth Shell. |
| Endgame | Ashava’s Poison Breath (Main) | Contributes towards Noxious Resonance’s bonus damage. |
| All | Sinerat’s Flames (Modifier) | A huge boost to our overall damage, just from building resistances which we already want to do. |
| Early Game | Hatred’s Embrace’s Haste (Modifier) | Free Critical Strike Chance for keeping our Shadow Resistance capped. Almost caps us alongside Grasping Veins |
| Midgame | Andariel’s Flaming Skull (Modifier) | Increased Damage over Time allows for bigger Noxious Resonance and Insatiable triggers. |
| Endgame | Torusk’s Rage (Modifier) | A huge boost of Attack Speed, but relies on the Control Paragon Glyph to get anywhere near its full value. Takes a lot of pressure of getting Attack Speed on Gear |
Aspects
We’ll cover the Aspects recommended for maximizing the build’s potential. The Ideal Stats section above lists the recommended slots for these, but they can be arranged however necessary except for ones placed in 2H Weapons or Amulets, as those specifically need to be boosted.

Insatiable Aspect
The Insatiable Aspect is the bulk of our damage, allowing us to detonate Touch of Death Swarms for massive damage. We’ll even scale this through Touch of Death Swarm Duration Tempered Affixes. We want this to be as strong as it possibly can.

Aspect of Redirected Force
The Aspect of Redirected Force works with the Aspect of Interdiction and our Resolve stacks to grant us a massive boost of Critical Strike Damage. This bonus is even doubled when we get hit, making it very effective despite not being boosted.
Aspect of Unyielding Hits
The Aspect of Unyielding Hits works together with the Harmony of Ebewaka Unique Helmet to allow us to scale our damage through Armor. This is because the Harmony of Ebewaka will apply the Gorilla Skill Tag to Touch of Death.
Without Harmony of Ebewaka, we’ll be relying entirely on Armored Hide to keep this active, which isn’t going to work without Jacinth Shell to reduce its cooldown.

Aspect of Interdiction
Interdiction grants us Block Chance for every stack of Resolve we have, making it a great defensive boost. We cannot go above 100% Block Chance as a Defensive bonus. However, the Aspect of Redirected Force will count all Block Chance over the cap, allowing for high scaling.

Undying Aspect*
Undying is a great defensive Aspect for open slots when using Jacinth Shell or Craze of the Dead God. While we have Scourge to mitigate any damage dealt by these items, Undying is a nice bit of extra healing, making it easy to stay topped off.

Aspect of Binding Morass*
The Aspect of Binding Morass is mostly filler, but a great Utility Aspect. Any enemy that gets Close or that we deal Damage over Time to will be heavily Slowed. In addition, we’ll deal extra damage to enemies slowed by any means.

Aspect of Apprehension*
Similar to Binding Morass, this is a great filler Aspect. This makes it so that when enemies are slowed beyond a certain point, they also become Feared. In addition, we deal extra damage to Feared enemies.

Aspect of Starlight*
The Aspect of Starlight works exceptionally well alongside Scourge and Touch of Death to help quickly fill our Vigor. This helps to rapidly refill our Vigor before we ultimately replace it with the Ring of the Midnight Sun.

Aspect of Haste
The Aspect of Haste takes care of most of our mobility needs, granting us a ton of Movement Speed just for moving. The only downside is that it may occasionally fall off if we get hung up on an enemy, thankfully Ravager covers that in combat for the most part.
Unique Items
The Unique items listed below are beneficial to the build, but not required for the build to function unless stated otherwise. Unique Items can drop in any difficulty but are more common in Torment Difficulties.
Rod of Kepeleke
This Unique Quarterstaff is not only required for this build but also absurdly powerful for this build. It makes Touch of Death cost nothing to cast, while also granting it the Basic Skill Tag, allowing our main skill to be able to scale with Basic, Core, and Potency bonuses.
Harmony of Ebewaka
The Harmony of Ebewaka is a Unique Helmet that does what the Rod of Kepeleke does for Skill Tags, but this time for the Spirit Tags and boosting its damage for each Spirit tag it has. By adding the Gorilla tag to the skill as well, we’ll be able to trigger effects like the Aspect of Unyielding Hits or similar effects that require Gorilla Skills.
Ring of the Midnight Sun
The Ring of the Midnight Sun restores a significant portion of our Vigor spent when we Critically Strike. THis is absurdly strong paired with the Rod Of Kepeleke, as it will consume all of our Vigor to guarantee a Critical Strike and this will refund a portion of that Vigor. With a high roll and good gear, it can instantly refill our Vigor.
Jacinth Shell
Jacinth Shell is a Unique Body Armor that consumes our Life to lower our Cooldowns. This solves one of the biggest issues this build has naturally, Cooldown Reduction. This makes us highly dependent on Scourge’s Life Steal and Touch of Death’s healing to stay topped up.
It is highly recommended to not use this alongside Craze of the Dead God. Having two effects chipping away at your Life is a good way to die easily.
Craze of the Dead God
The craze of the Dead God is a pair of Unique Gloves that turn all direct damage into Poison Damage Over Time. These will prevent the majority of one-shots from instantly killing you, but the downside is that Damage Over Time is much harder to mitigate. The big upside to using these however is that we’ll rarely lose Resolve Stacks, as direct damage is no longer considered a “hit” and therefore no longer consumes Resolve.
It is highly recommended to not use this alongside Jacinth Shell. Having two effects chipping away at your Life is a good way to die easily.
Paragon Boards and Glyphs
Paragon Boards and Glyphs are a feature that becomes available at level 60. Below are our recommended Paragon Boards and Glyph Choices. These are listed in the order we recommend them as well as their pathing.
With the abundance of Paragon Points we can earn, we’ve split the pathing into Initial Pathing and Additional Pathing. Initial Pathing is the clusters we pick up while pathing through the board, while Additional Pathing are ones we come back for later for additional stats once we’ve gotten all of our Glyphs socketed.
Starter Board
Starter Boards offer a lot of generic offensive and defensive stats. In this case, Damage, Elite Damage, Armor, and Maximum Life are worth picking up.
Initial Pathing
- Prime
- Glyph Socket
- Skillful
- Upper Gate
Additional Pathing
- Spiritual
- Tenacity
- Dexterity for Glyph
This board offers a lot of accessible Dexterity, so we’ll socket Fitness here to take advantage of this.
This Glyph grants Critical Strike Damage Per 5 Dexterity allocated in range. With 40 Dexterity allocated in range, Skill that Critically Strike restore 3 Vigor. At Glyph Level 45, it also grants a multiplicative bonus to Critical Strike Damage.
Sapping
Sapping Restores a portion of our maximum Vigor for casting three skills of the same spirit in a row while granting a bonus to our damage. Additionally, this Paragon Board offers a lot of useful nodes for Attack Speed, Defenses, and Resources.
This Paragon Board is rotated so that the Glyph Socket is in the Lower Right of the paragon Board.
Initial Pathing
- Concentrated
- Glyph Socket
- Eager Prey
- Blessing
- Opportunist
- Sapping
- Upper Gate
Additional Pathing
- Resilience
- Denial
- Intelligence for Glyph
This board offers a lot of accessible Intelligence, so we’ll socket Canny here to take advantage of this.
This Glyph grants Non-Physical Damage Per 5 Intelligence allocated in range. With 25 Intelligence allocated, it grants a stacking damage bonus each time an enemy is hit with Non-Physical Damage. At Glyph Level 45, it also grants a multiplicative bonus to Non-Physical Damage.
In-Fighter
In-Fighter grants us stacking damage and an Attack Speed bonus for each attack we Dodge or Block, and we’ll be blocking every attack that hits us. Additionally, this Paragon Board grants us a good amount of generic offenses and defenses.
This Paragon Board is Rotated so that the Glyph Socket is in the Lower Right of the Paragon Board.
Initial Pathing
- Master
- Glyph Socket
- Rampage
- Right Gate
Additional Pathing
- Primal Rage
- In-Fighter
- Training
- Dexterity for Glyph
This board offers a lot of accessible Dexterity, so we’ll socket Spirit here to take advantage of this.
This Glyph grants Critical Strike Damage Per 5 Dexterity allocated in range. With 40 Dexterity allocated, it grants a stacking Damage bonus to enemies when we Critically Strike them. At Glyph Level 45, it also grants a multiplicative bonus to Critical Strike Damage.
Convergence
Convergence grants us Bonus damage equal to our two highest damage bonuses, up to a cap. Additionally, this Paragon Board offers us a lot of generic Offenses and Defenses.
This Paragon Board is rotated so that the Glyph Socket is in the Lower Left of the Pragaon Board.
Initial Pathing
- Glyph Socket
- Spearhead
- Skillful (Rare only)
- Lower Gate
Additional Pathing
- Training
- Convergence
- Elementalist
- Denial
- Strength for Glyph
This board offers a lot of accessible strength, so we’ll socket Colossal here to take advantage of this.
This Glyph grants Gorilla Skill Damage Per 5 Strength allocated in range. With 25 Strength allocated, it grants increased damage per Resolve we have. At Glyph Level 45, it also grants a multiplicative bonus to Close Damage.
Viscous Shield
Viscous Shield provides grants us Increased damage for every 3% of Maximum Life we have as a Barrier. In addition to this, this Paragon Board offers us a lot of Offensive and Defensive power related to Barrier.
This Paragon Board is rotated so that Vicious Shield is closest to the bottom of the Paragon Board.
Initial Pathing
- Glyph Socket
- Raptor
- Fearless
- Slayer
- Viscous Shield
Additional Pathing
- Bristle
- Primal Ward
- Sentinel
- Dexterity for Glyph
This board offers a lot of accessible Dexterity, so we’ll socket Menagerist here to take advantage of this.
This Glyph boosts all Magic Nodes allocated in range. With 40 Dexterity allocated, it grants a bonus for each Spirit that deals damage to an enemy. At Glyph Level 45, it also grants a multiplicative bonus to Incarnate Skills.
This concludes our Diablo 4 Spiritborn Build focusing on the Touch of Death skill. You can find more leveling and endgame Diablo 4 builds here on VULKK.com to try new things with your characters and spice up your gameplay.
To learn how to maximize your damage in Diablo 4, consult with our guide on that topic. Learning how to deal the highest possible damage with your build is crucial to succeeding in the Endgame and highest tiers.


