This walkthrough will show you how to fully explore Tago’s Tower in Shatterscarp and complete the quest Don’t Look Down while collecting all valuables in and around the tower, including the Thirdborn Brigandine Jack Armor.
Table of contents
Don’t Look Down Quest
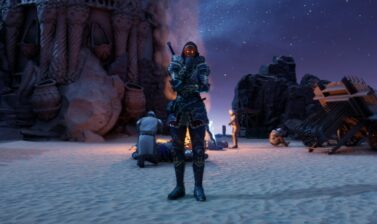
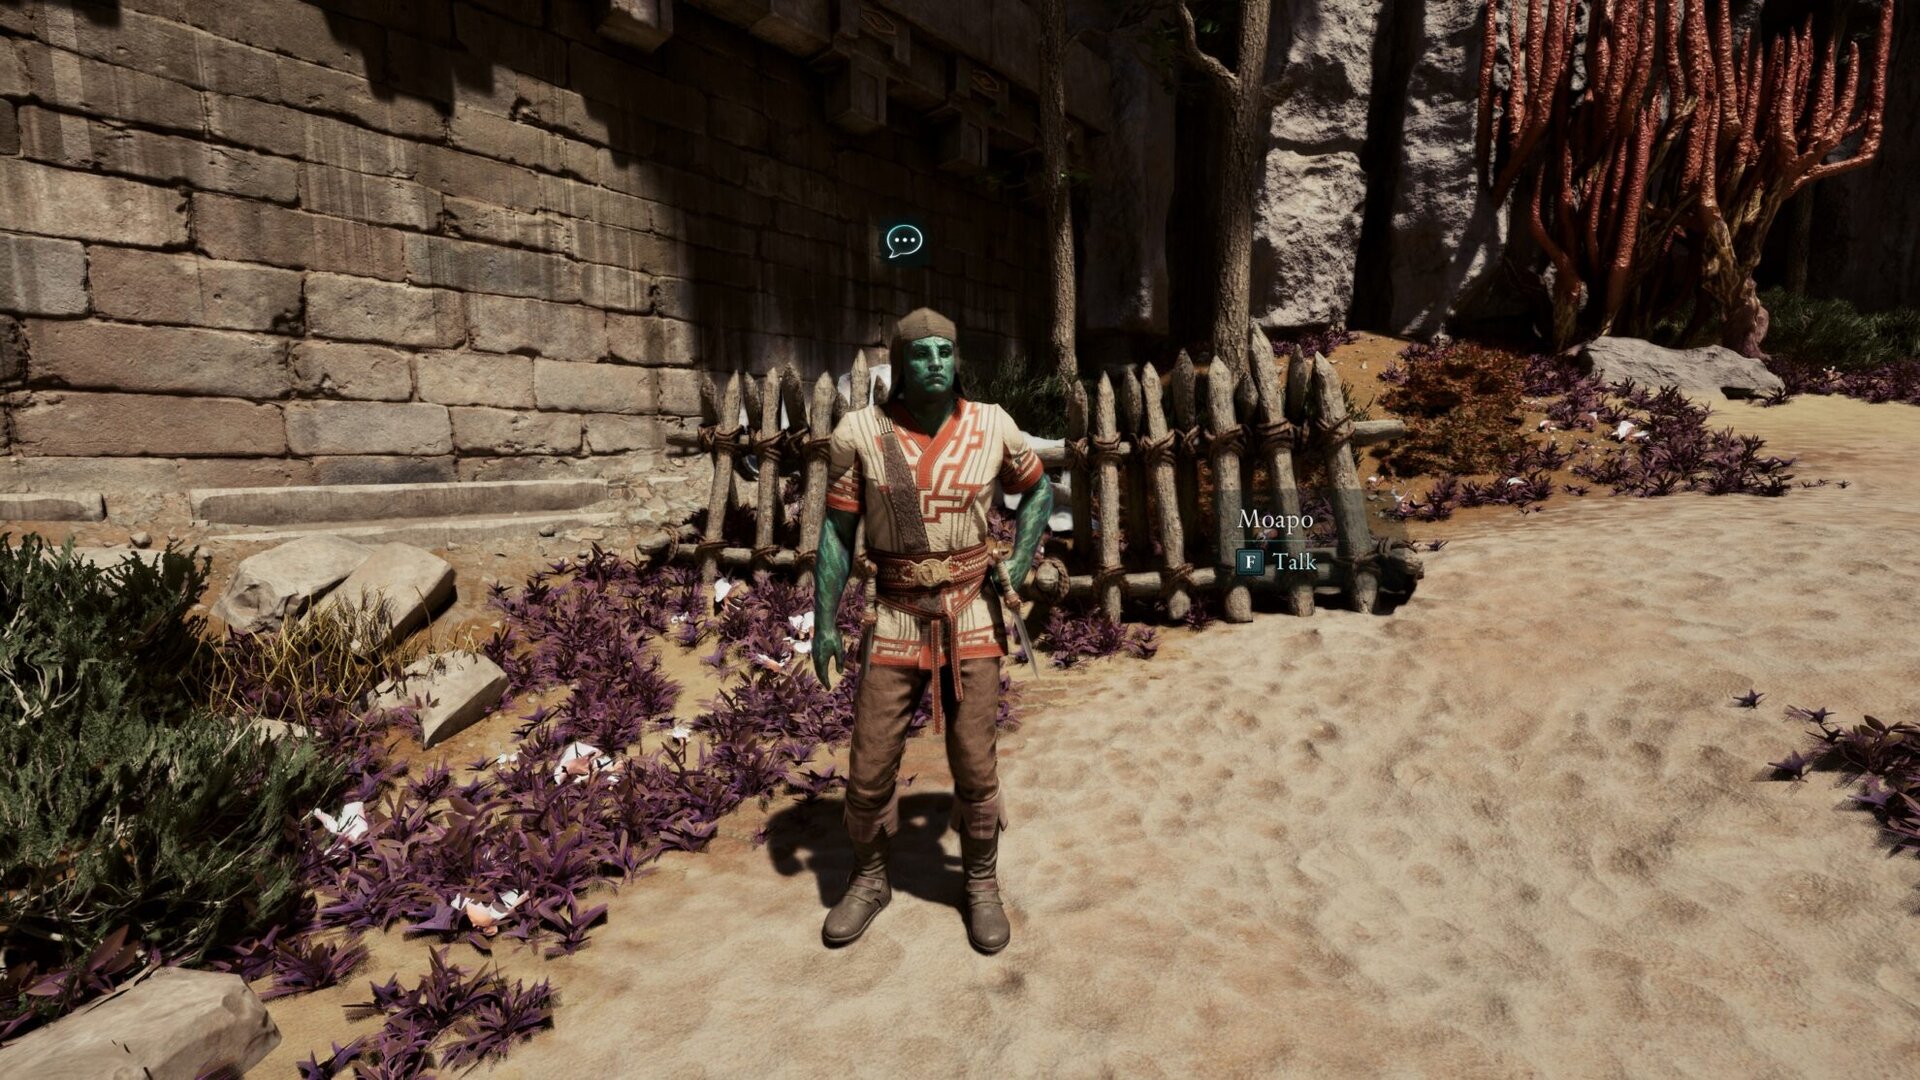
To begin the optional quest, speak to Moapo at the southern entrance to Shark’s Teeth. He’ll tell you to go up the tower without informing you of the many traps inside.
You can return to Moapo after you’re done to lambaste and/or murder him, though be sure to do it before finishing the mission “Shadows of the Past”.
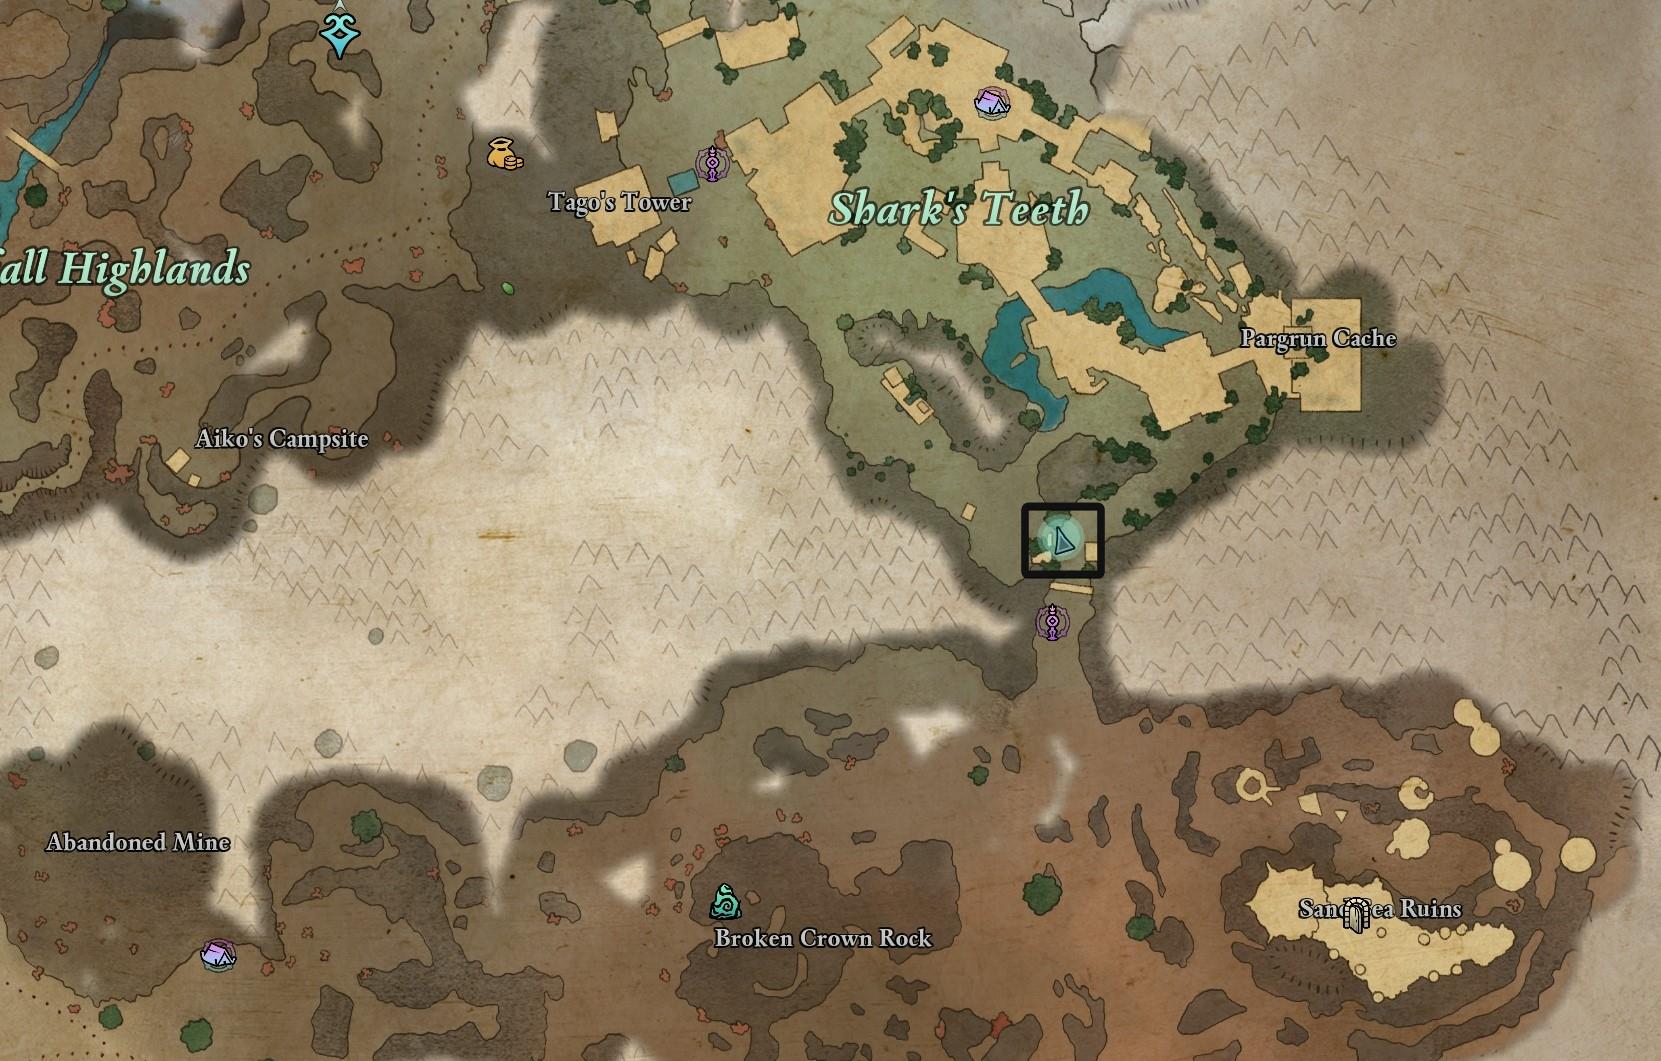
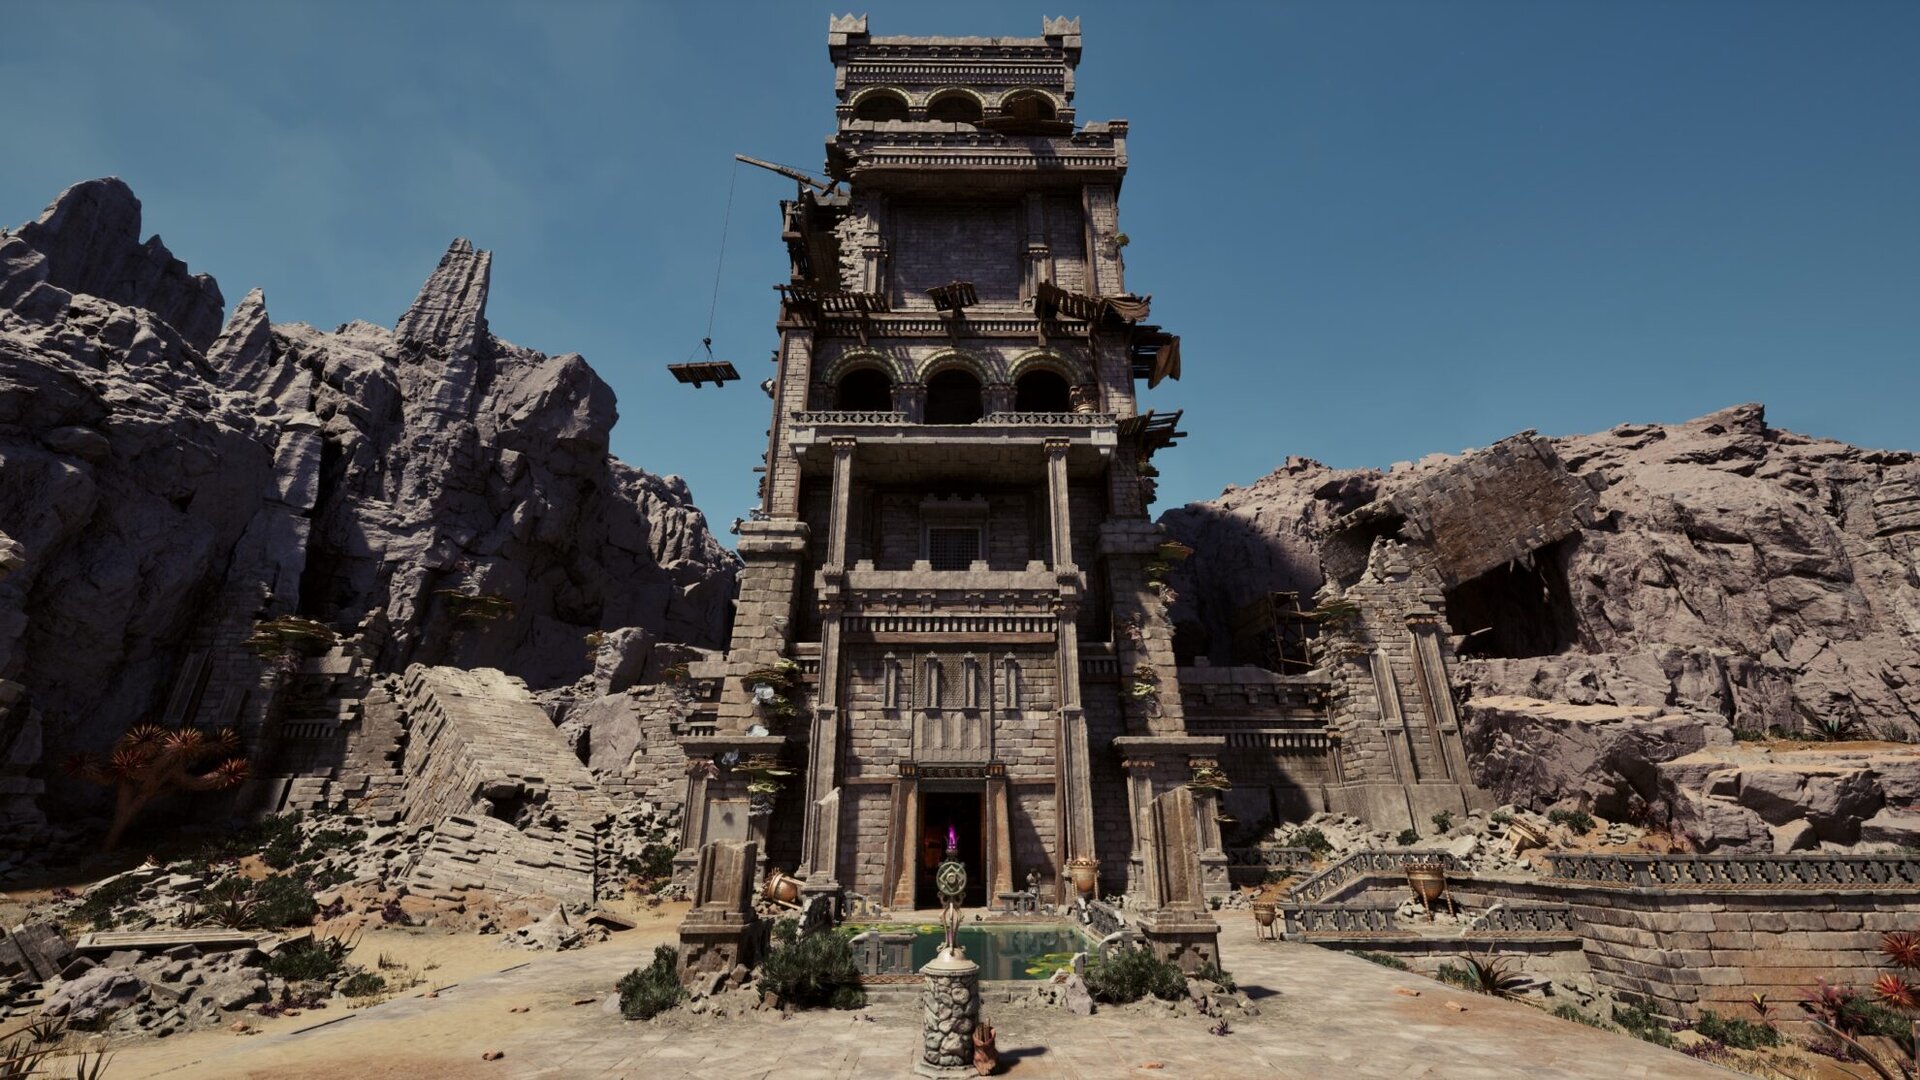
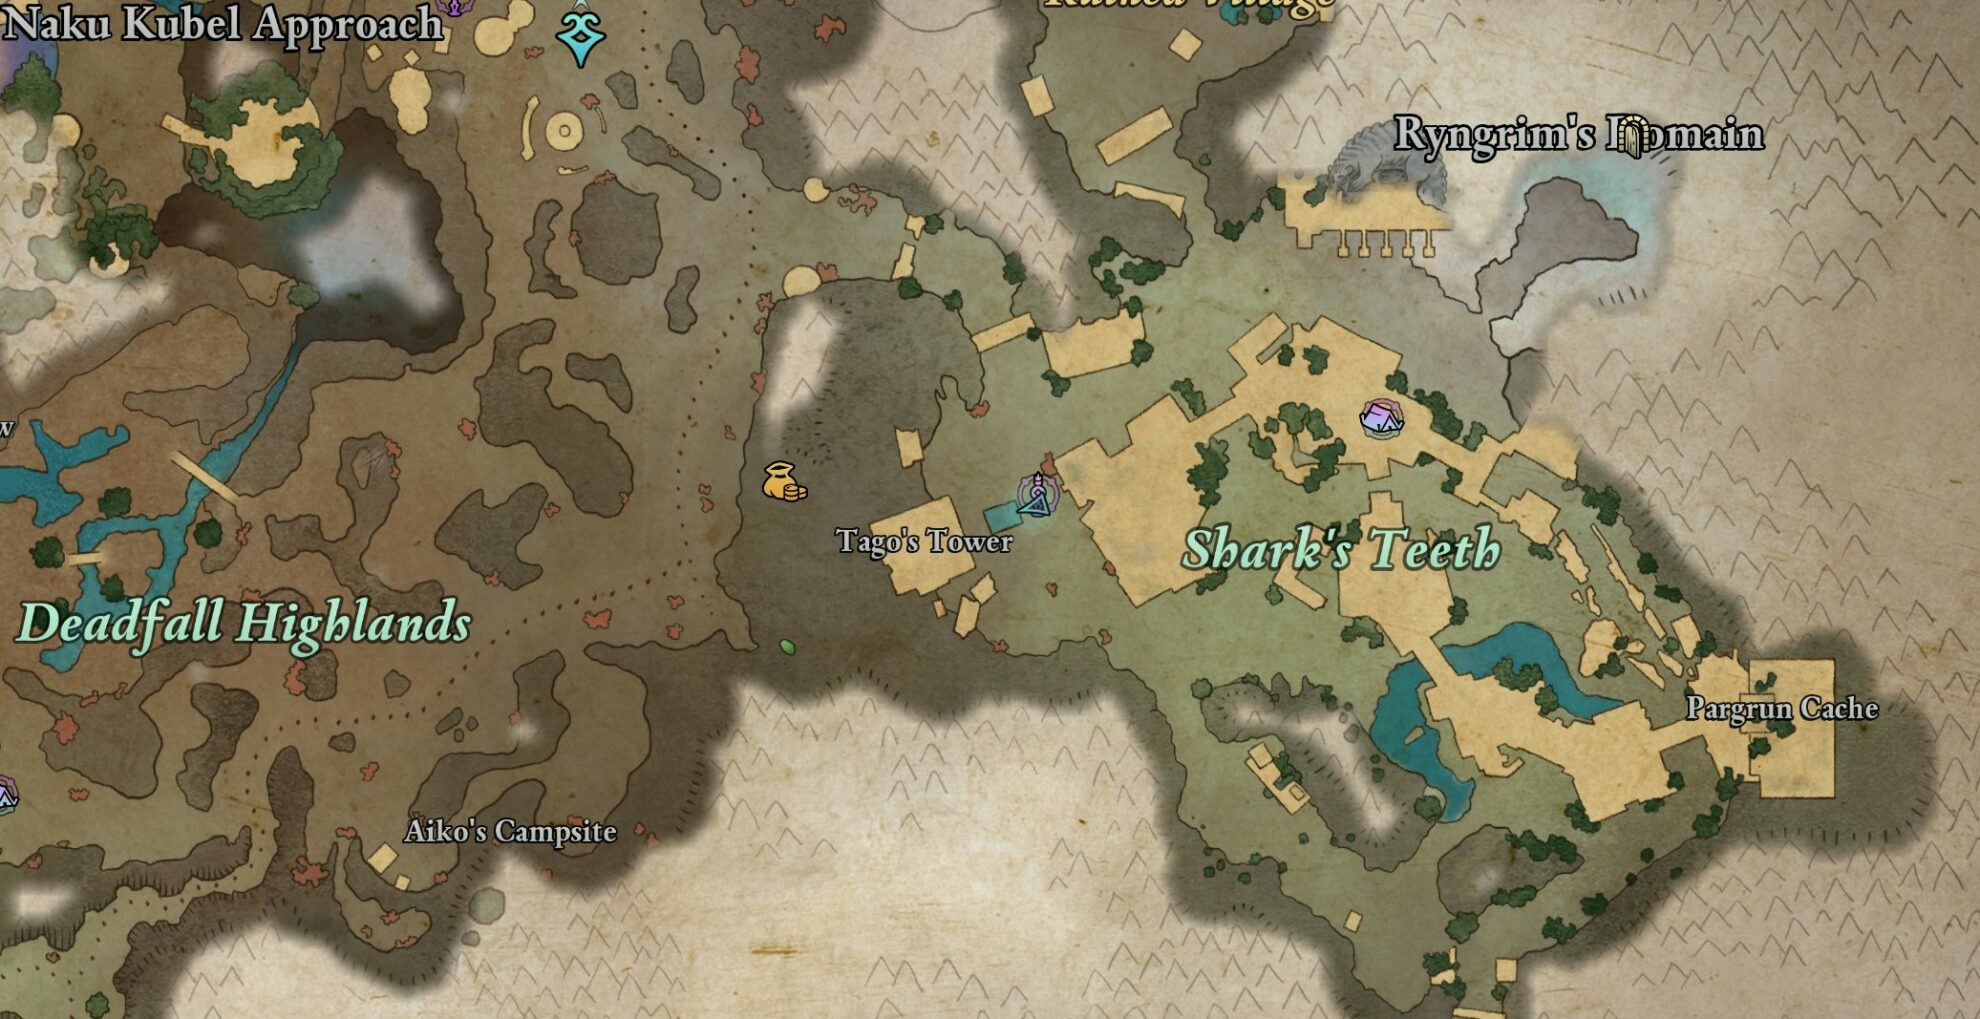
Tower Location
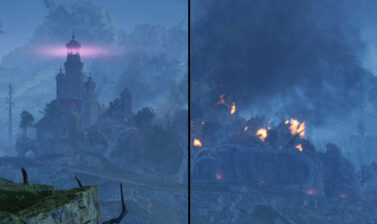
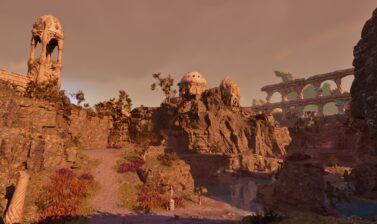
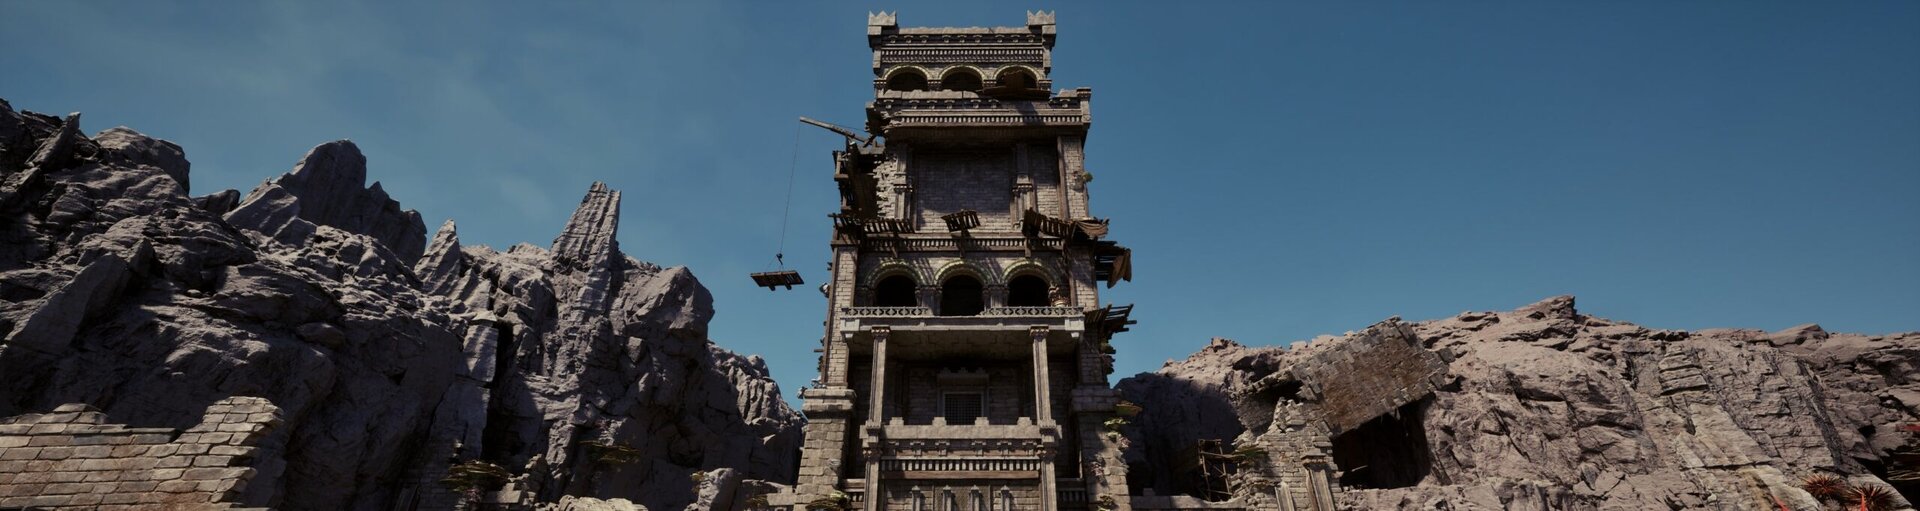
Tago’s Tower is the westernmost Pargrunen building in Shark’s Teeth in Shatterscarp, though it’s tall enough to be seen from across the region.
This entire area is riddled with trip wires. We like to call it “Aloy’s playground” because of that. Disarming each trap yields a tiny amount of XP, though not enough to make a difference.
Besides not looking down, your objective in “Don’t Look Down” is just to get inside the tower and survive the climb the top. There, you will find two NPCs that you can talk with and decide their fate.
There is a lever near the top of the tower that will turn off all traps. It is up to you when and how to explore the tower and open the treasure chests and grab all the valuables.
Video Walkthrough
The video shows you one of the several possible ways to climb up while picking up all treasures, valuable items and lore objects on your way up. The choice at the end of the conversation with Haiako and Katoa is to attack them.
How to get inside Tago’s Tower
The main entrance is barred, so head to the left-hand side and up the ramp formed out of broken piece of the structure and stone wall next to it.
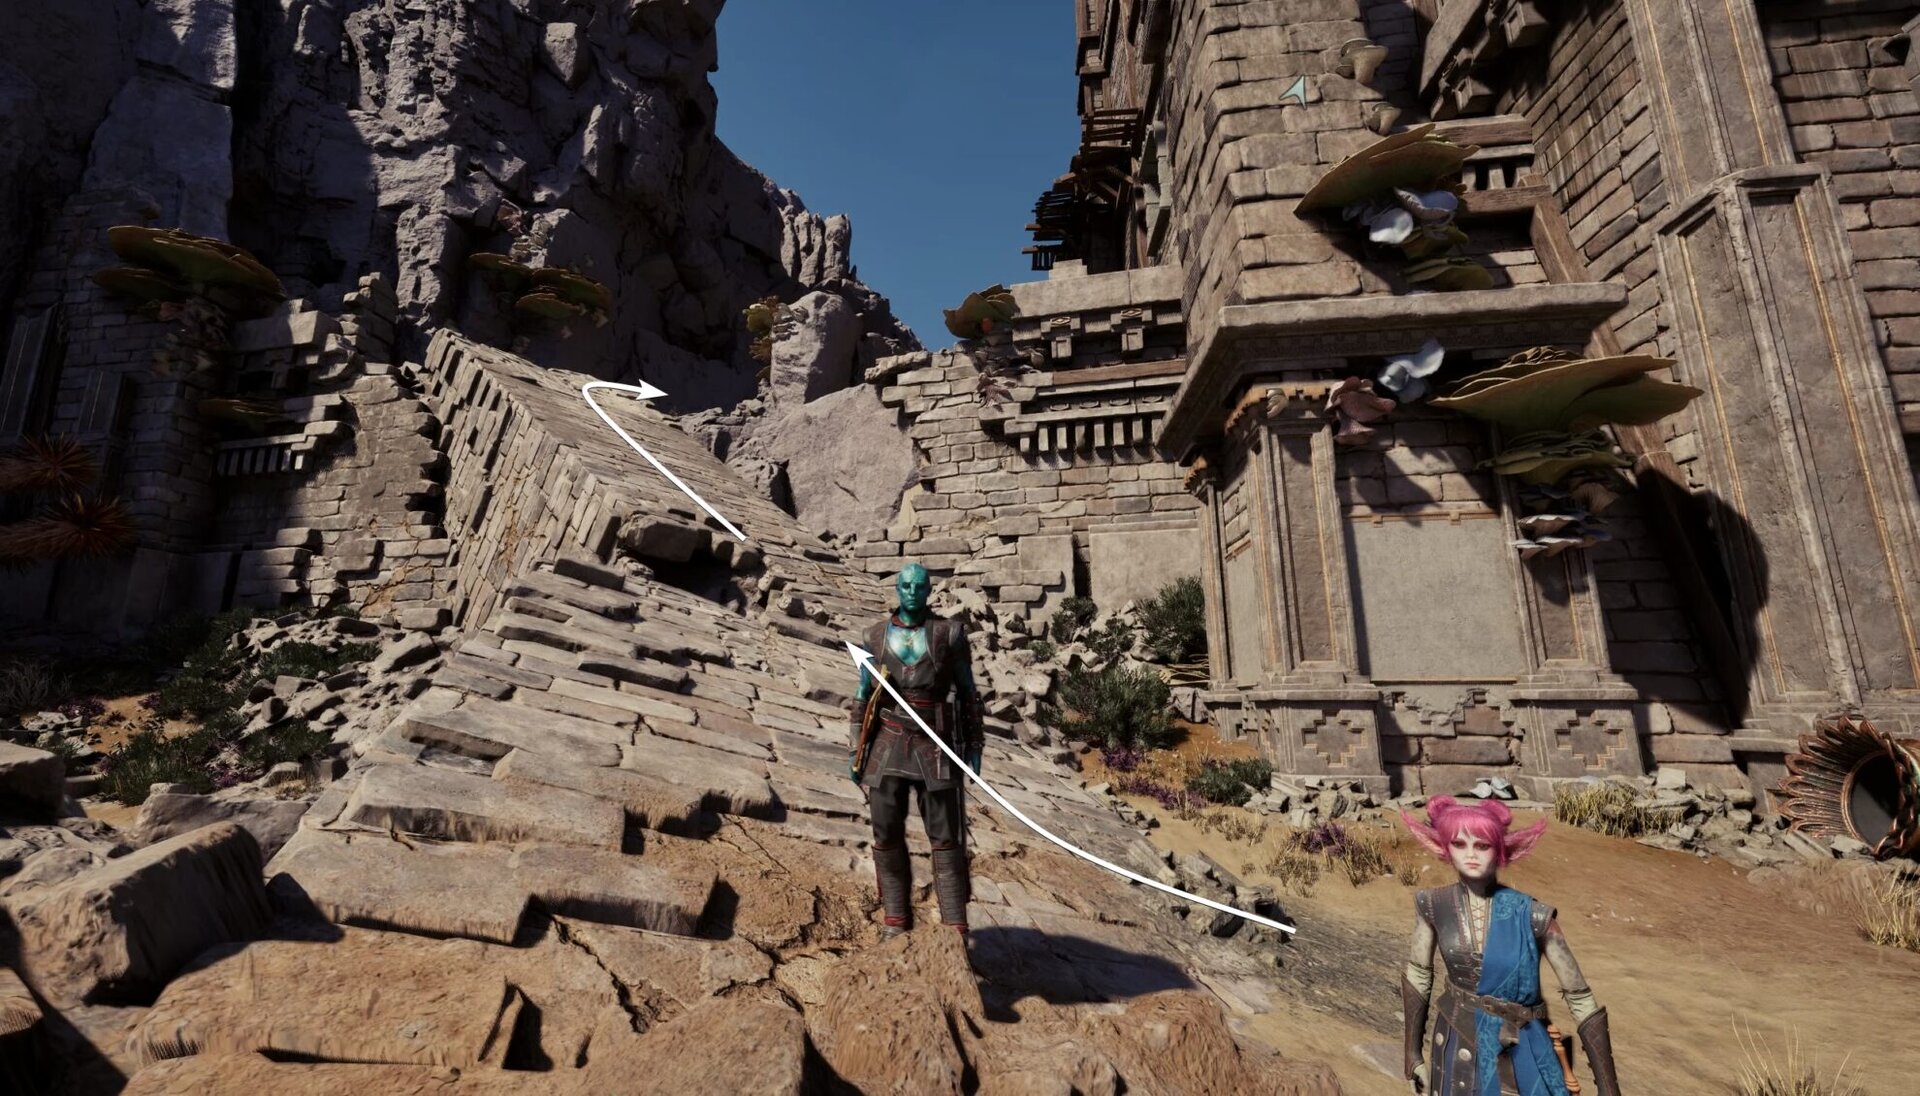
There is a trip wire before the gap and one after it. Disable them to avoid taking damage. Shortly after that, on your right, you will see a corpse. You can pick up the Aedyran Orders document off of this soldier.
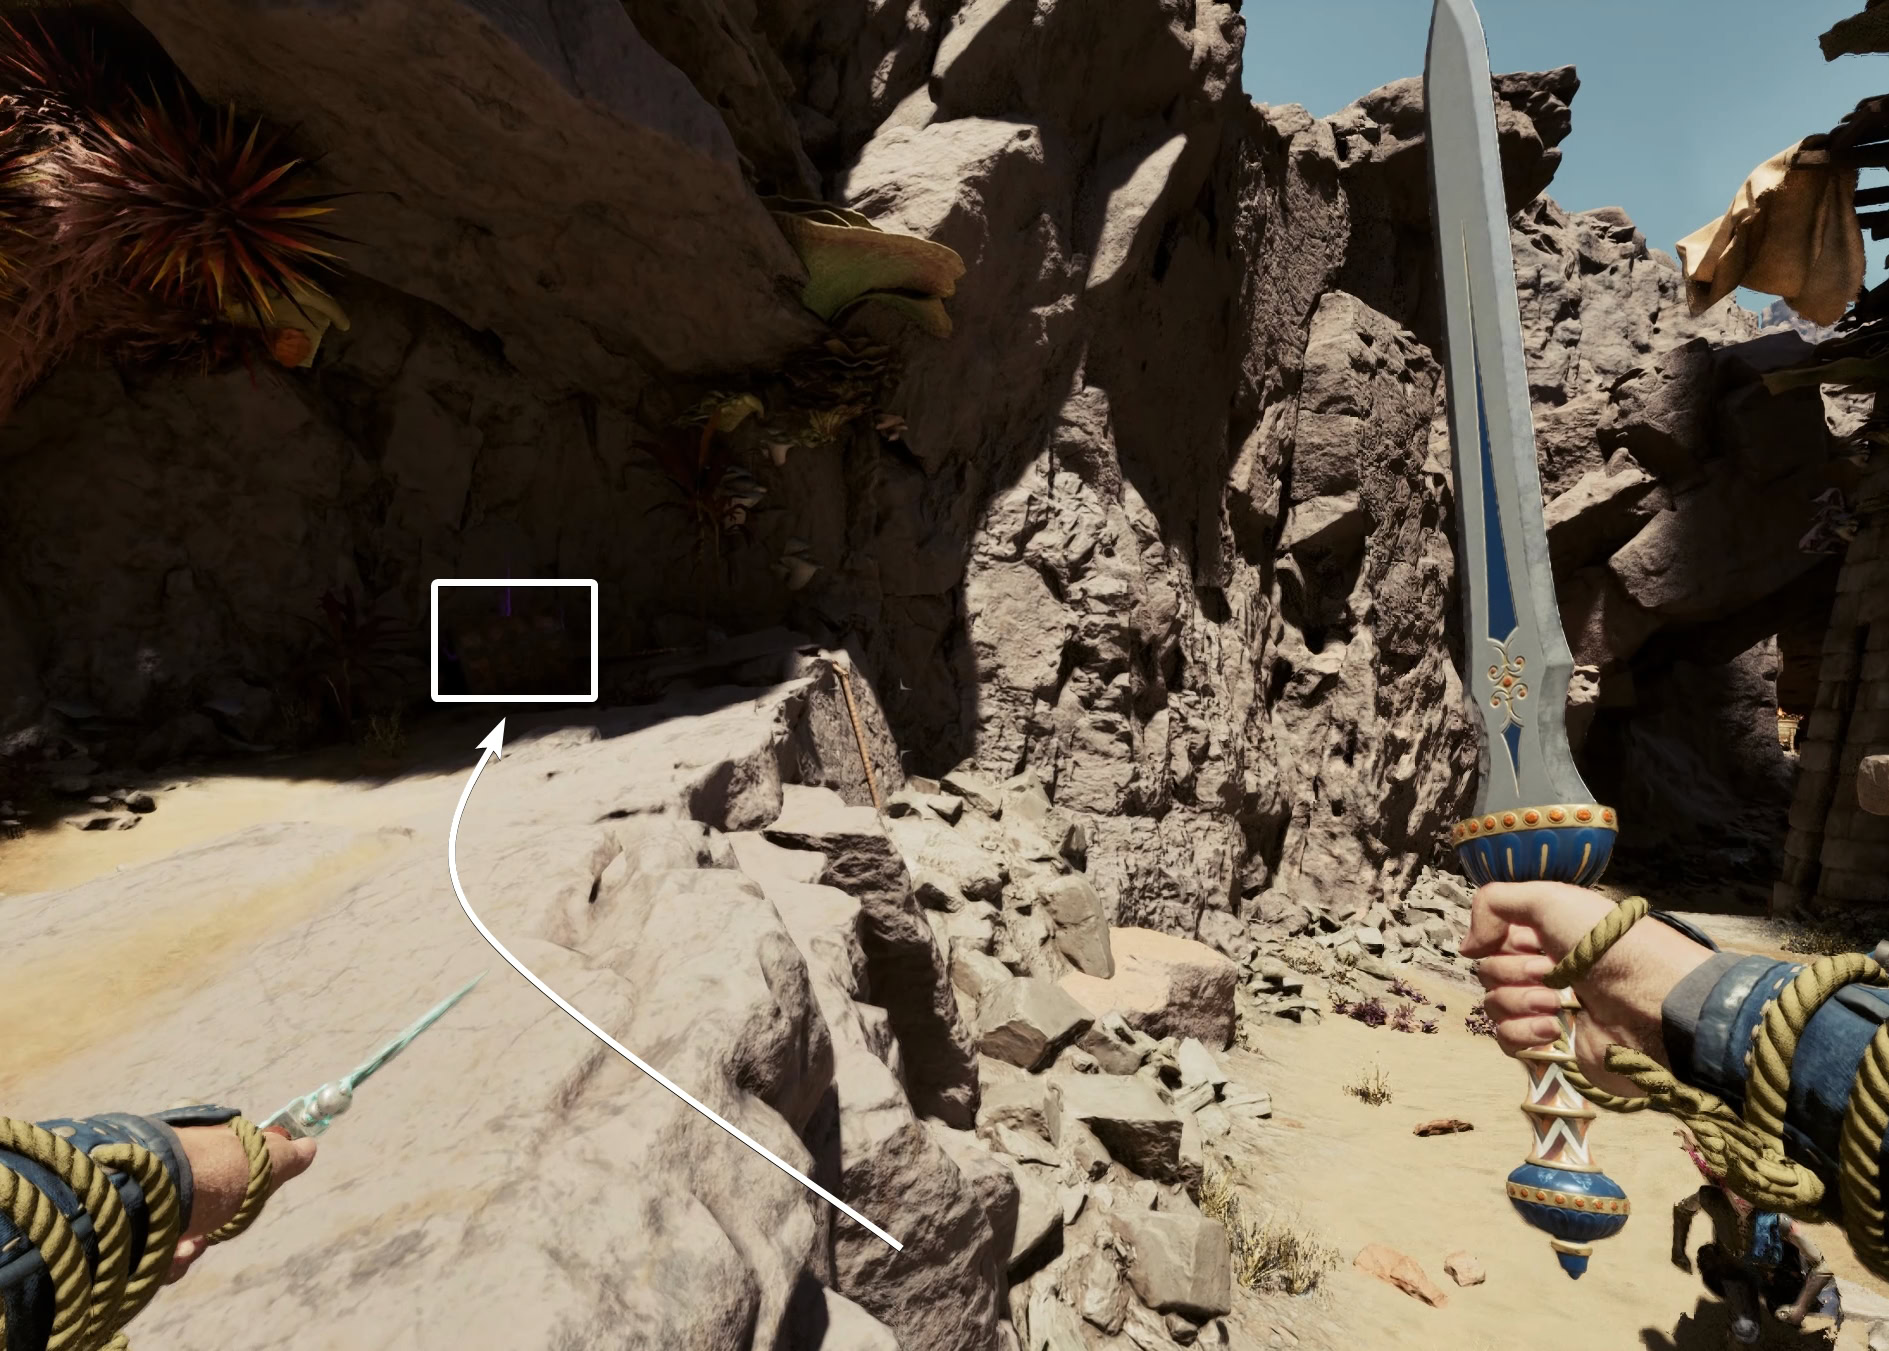
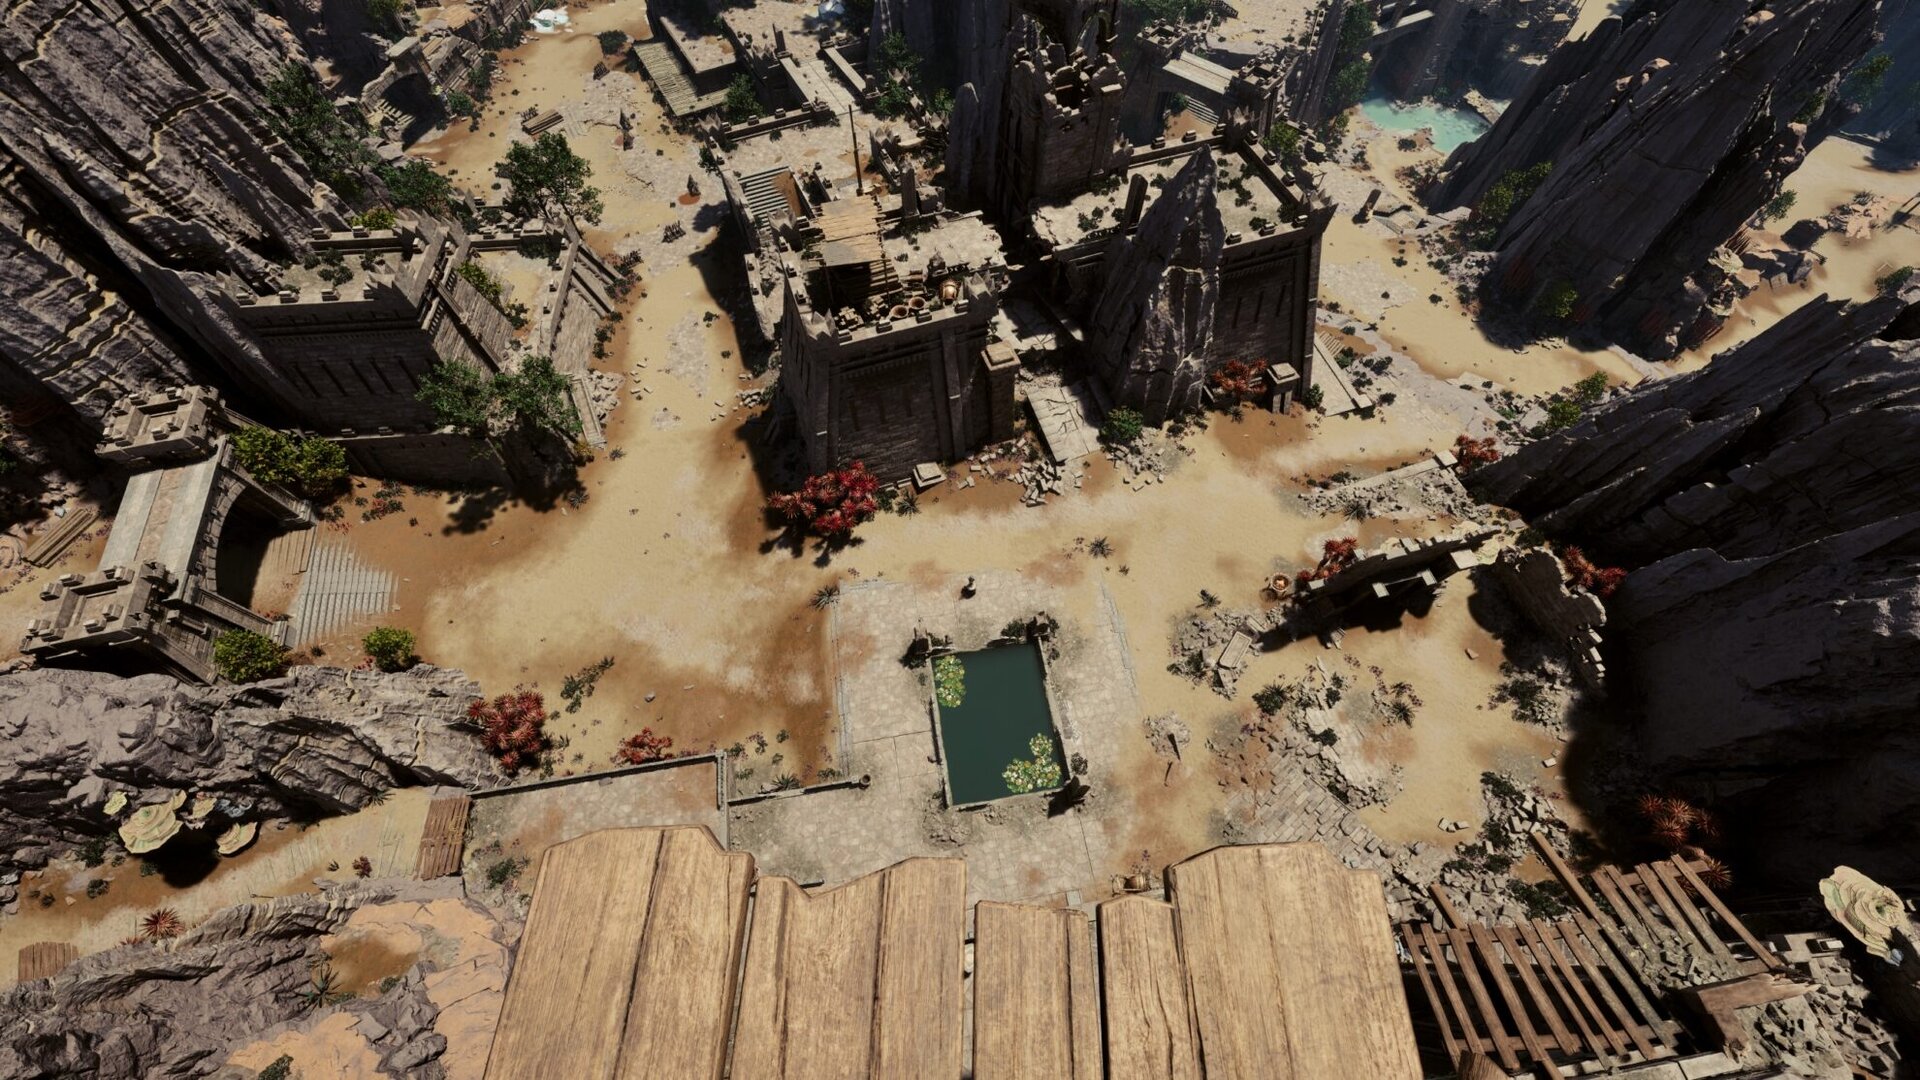
At the crossroads, if you turn left, you will go behind the tower, where you will find another treasure chest.
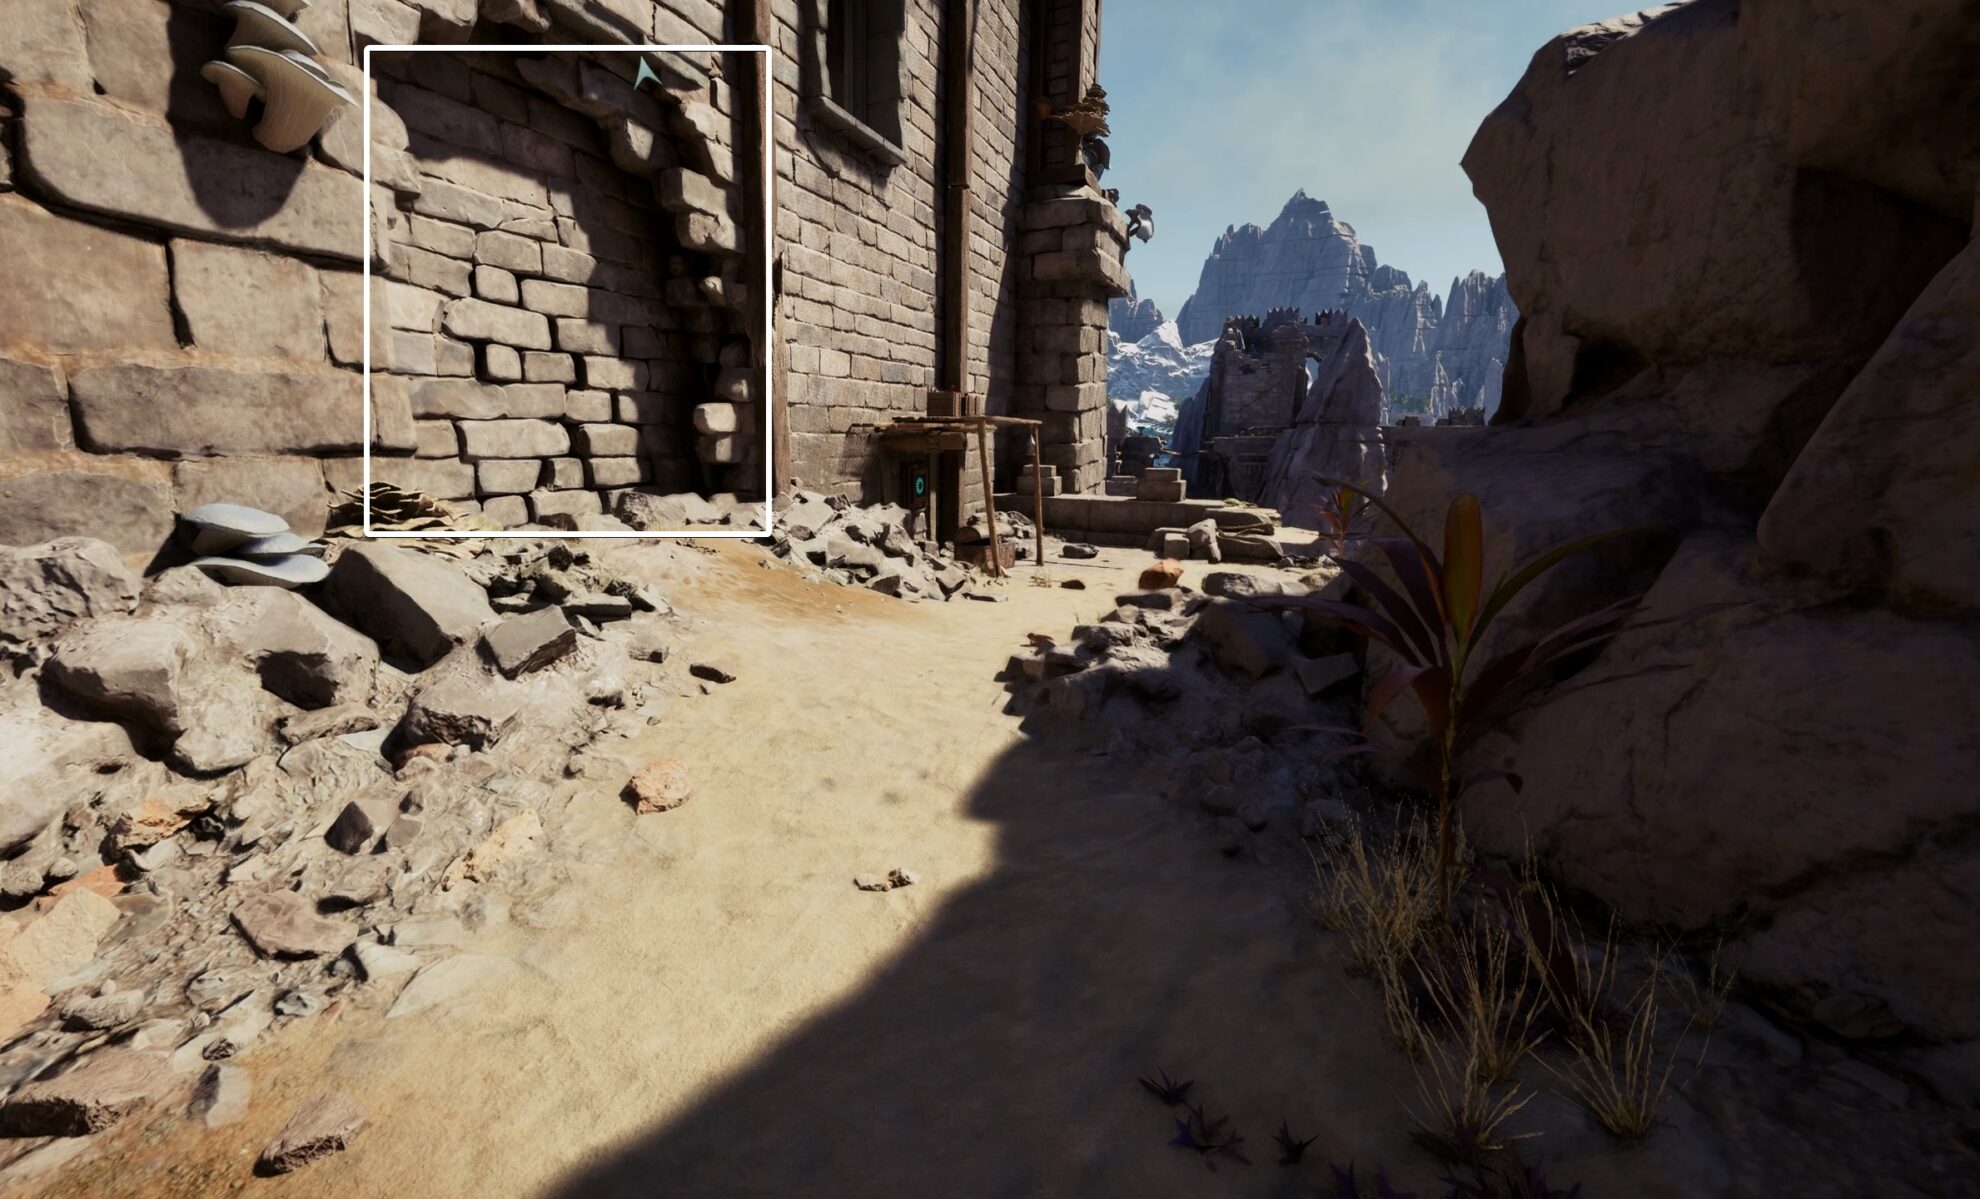
Go back to the crossroads and head north along the stone wall of the tower. The segment of the wall marked on the image below is your entry point (one of a few possible actually) into the tower. Use explosives to break it and access the interior.
Before you enter the tower, check the corpse on the right, behind the pile of stones. He fell victim to a trap while looting that chest. You will find the same Aedyran Orders paper on the body of this soldier as the one on the first corpse.
The interior of the tower is full of trip wires. We will not show every single one but be careful when walking and climbing. Also worth mentioning that there is more than one way to navigate in and around the tower.
Climbing Tago’s Tower
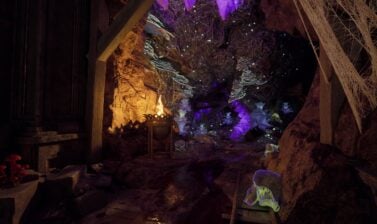
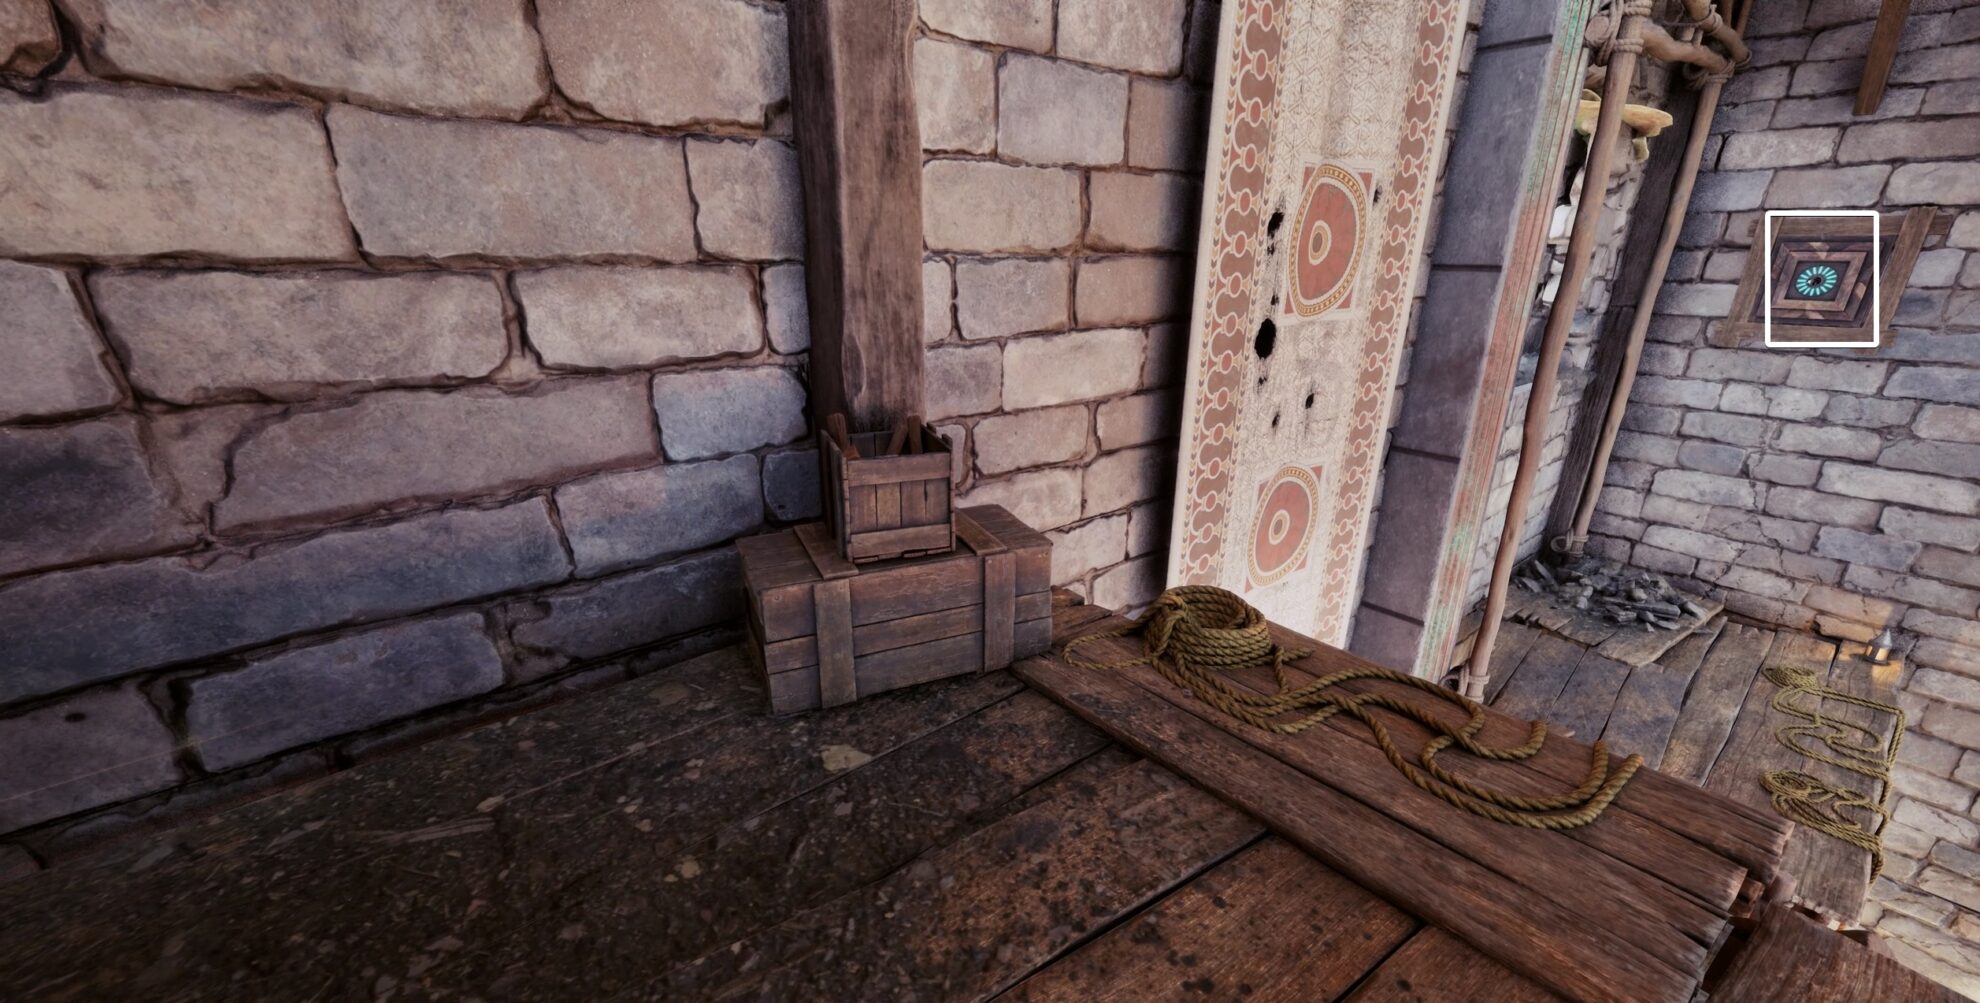
As you enter the tower, go to the corner on the right and loot the treasure chest sitting in the dark, below the scaffolding. Then climb up.
Before you start climbing, you can drop down to the lowest floor and unlock the tower’s main gate. This will allow you to access it from the ground level should you need to return.
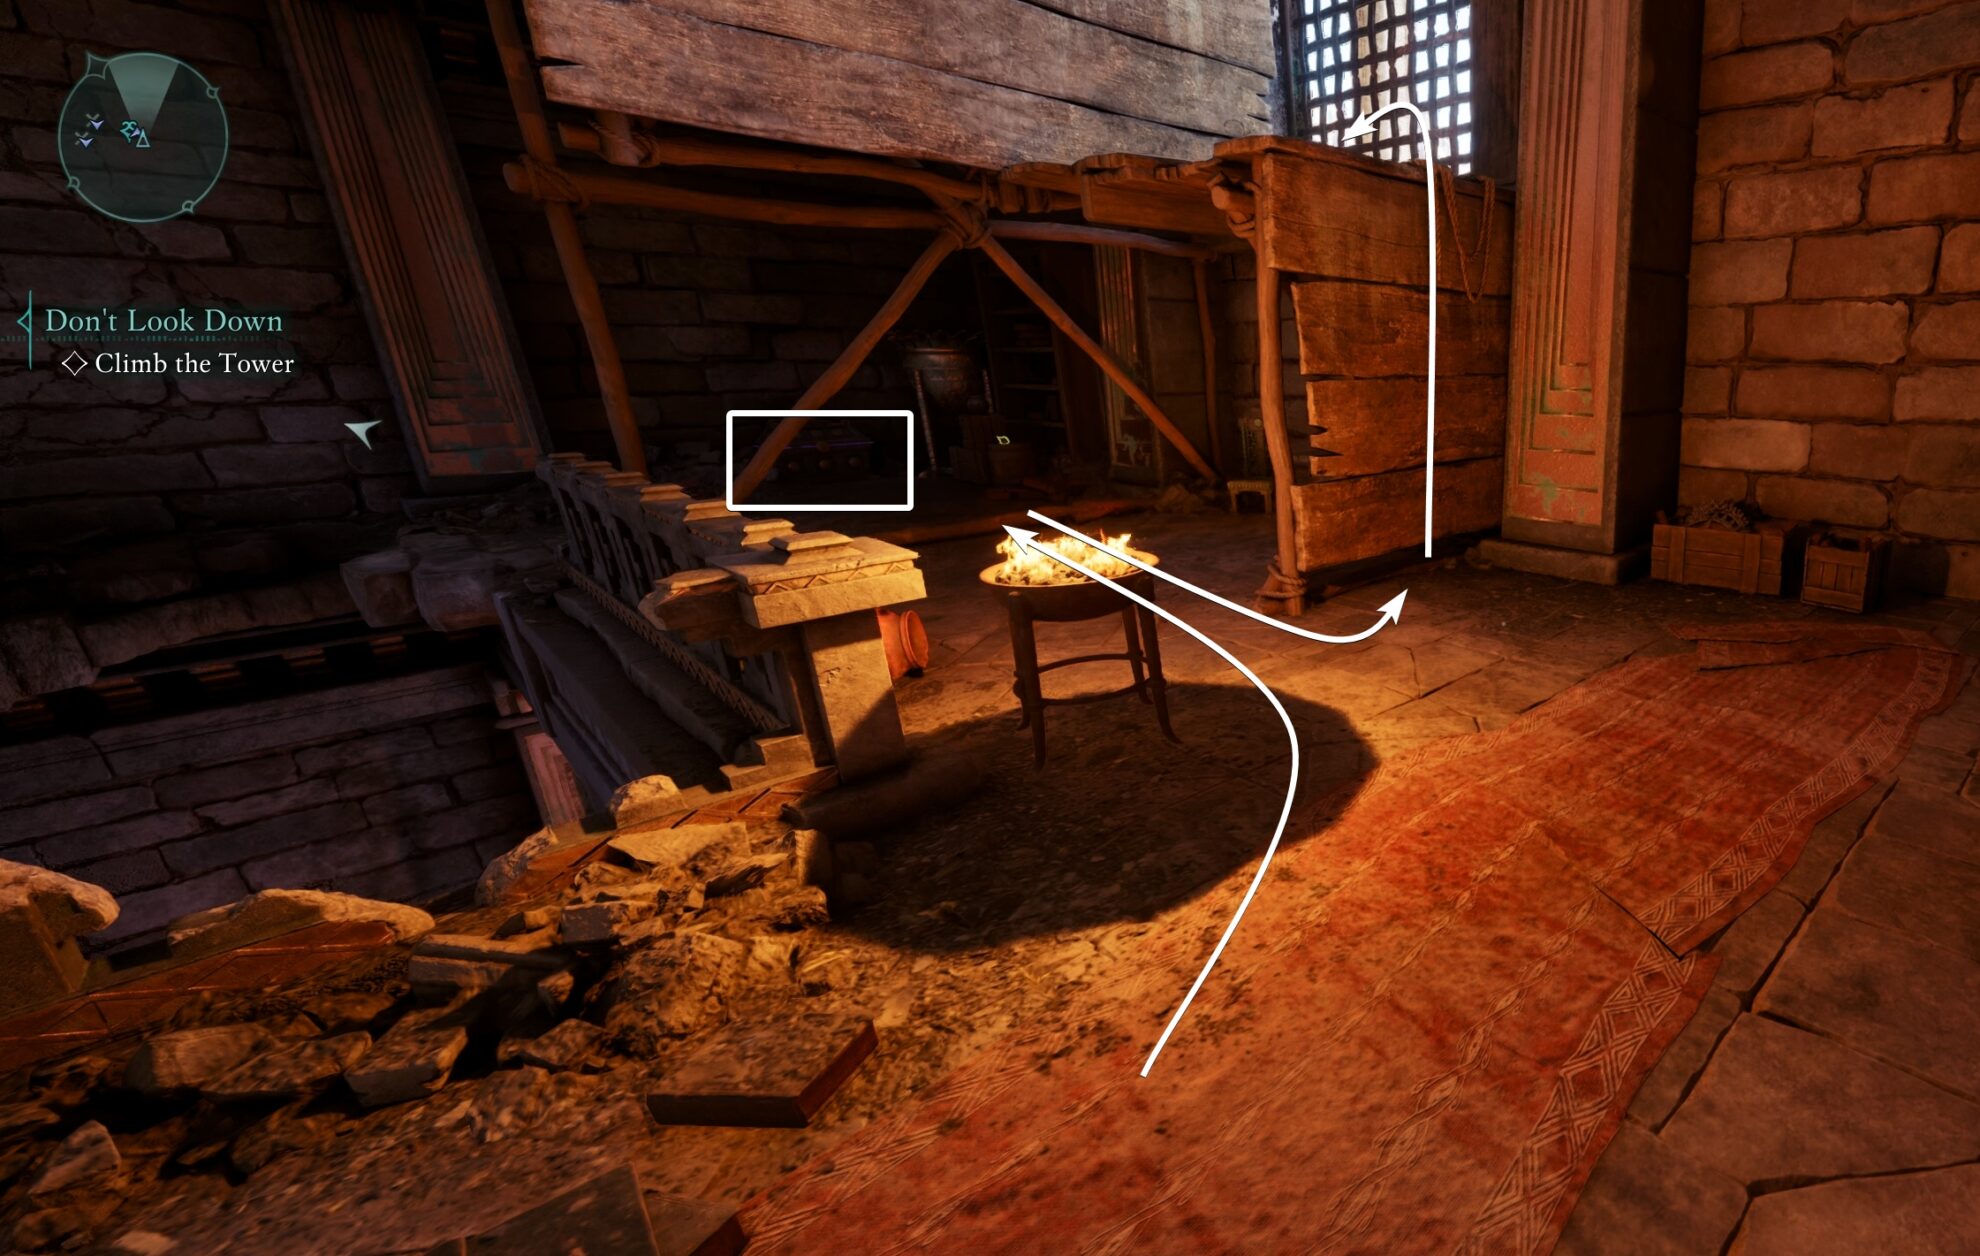
On the first step, turn to your right and break the window grate. Jump out on the terrace and loot the next treasure chest.
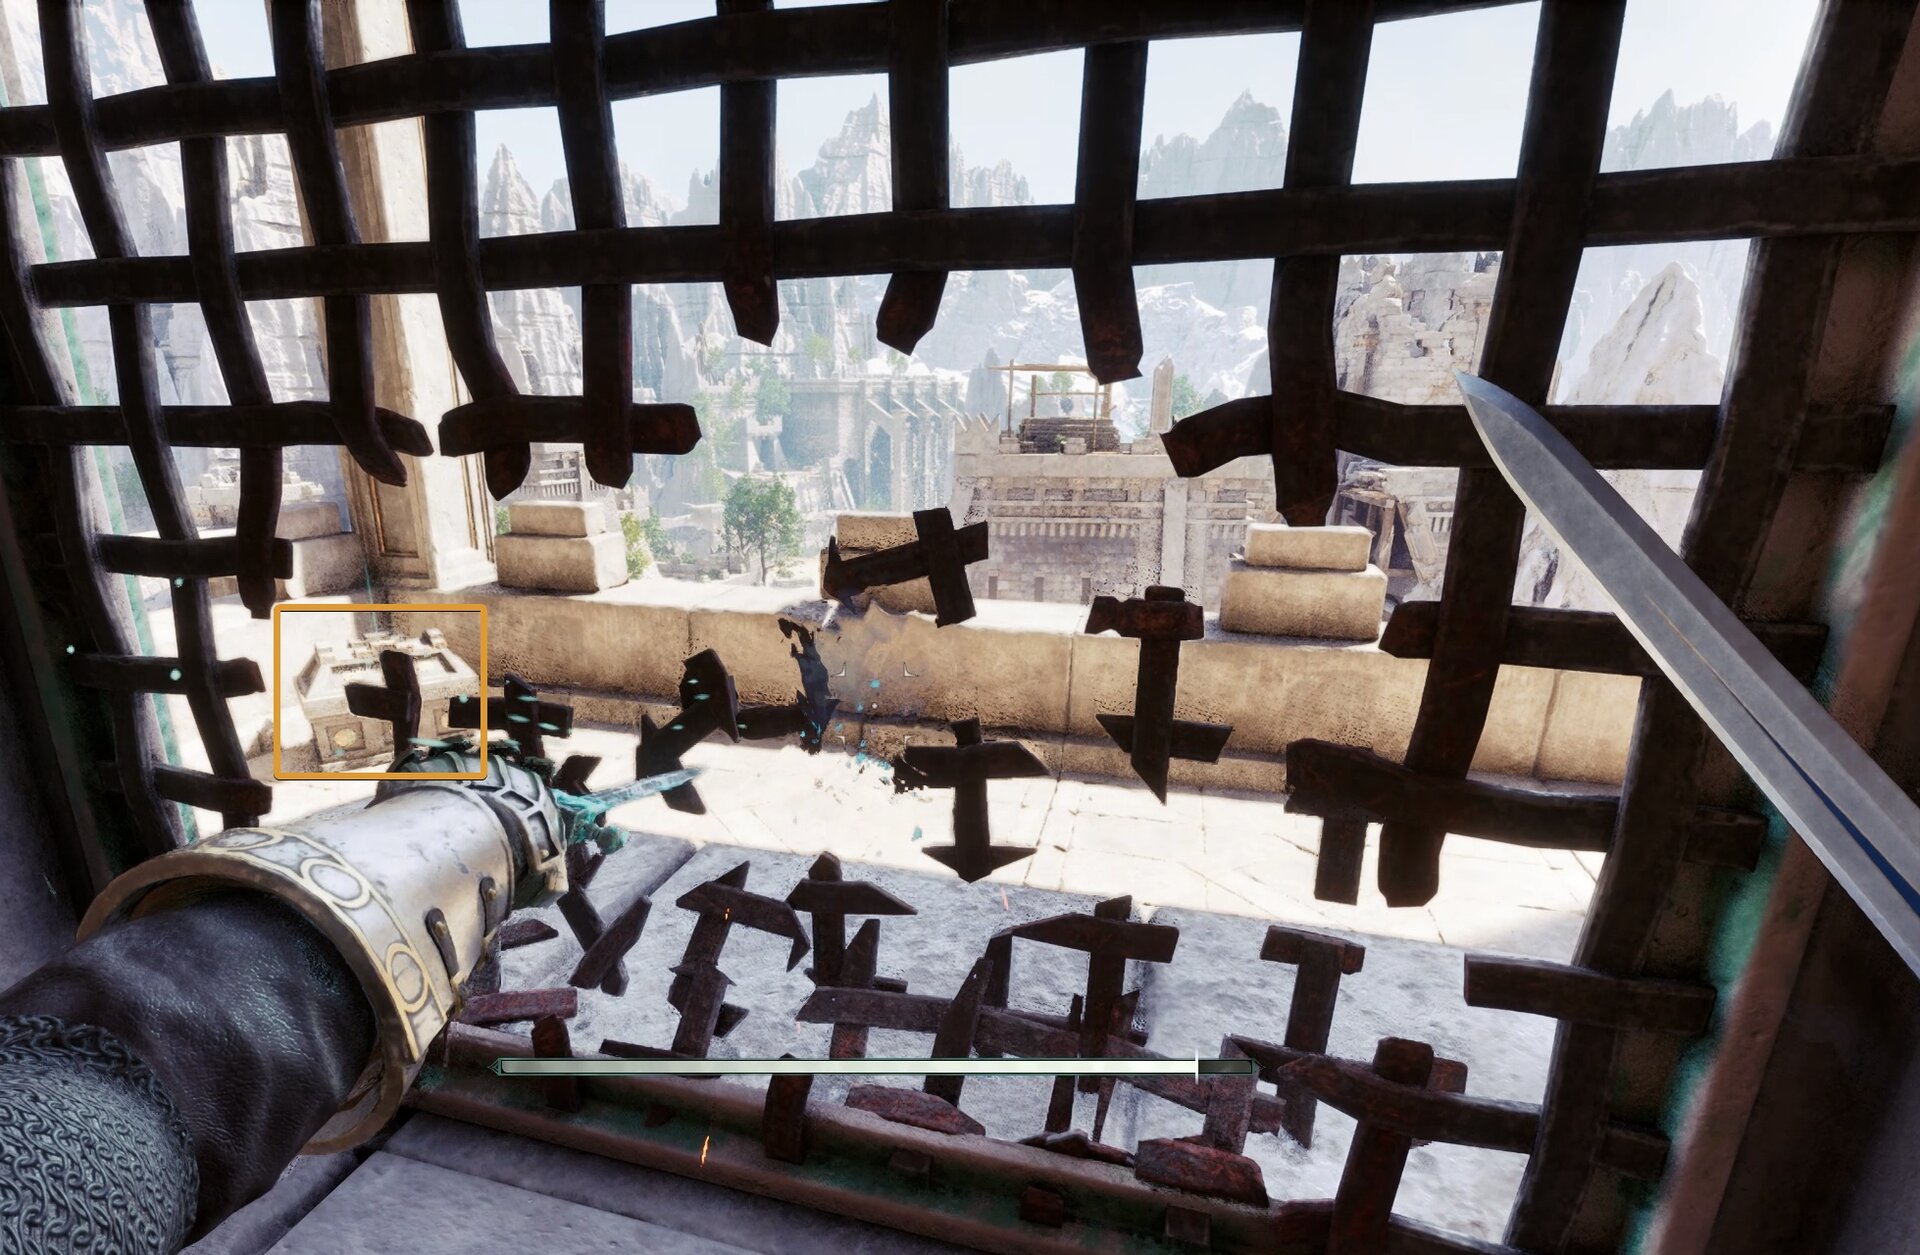
Head up the broken stairs and jump to the higher floor. Stand on its edge and start disabling the trip wires. There are plenty here.
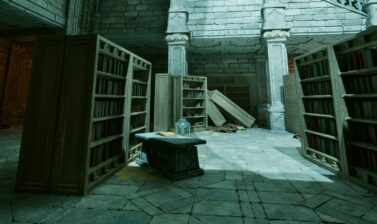
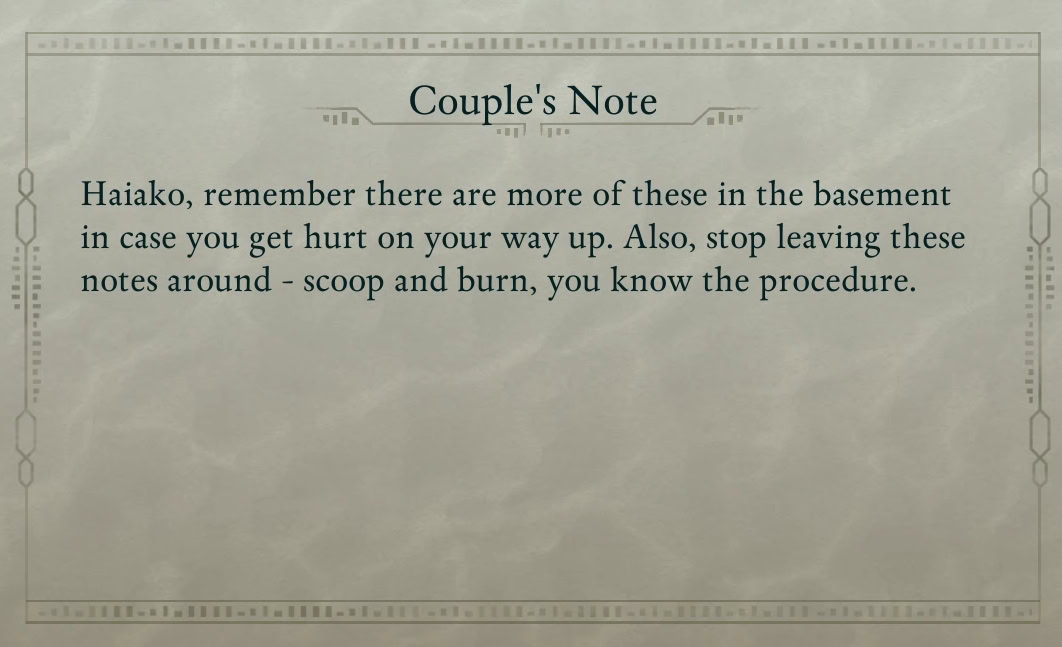
In front of the library on the left side, there is a skeleton with a note addressed to Haiako you can pick up.
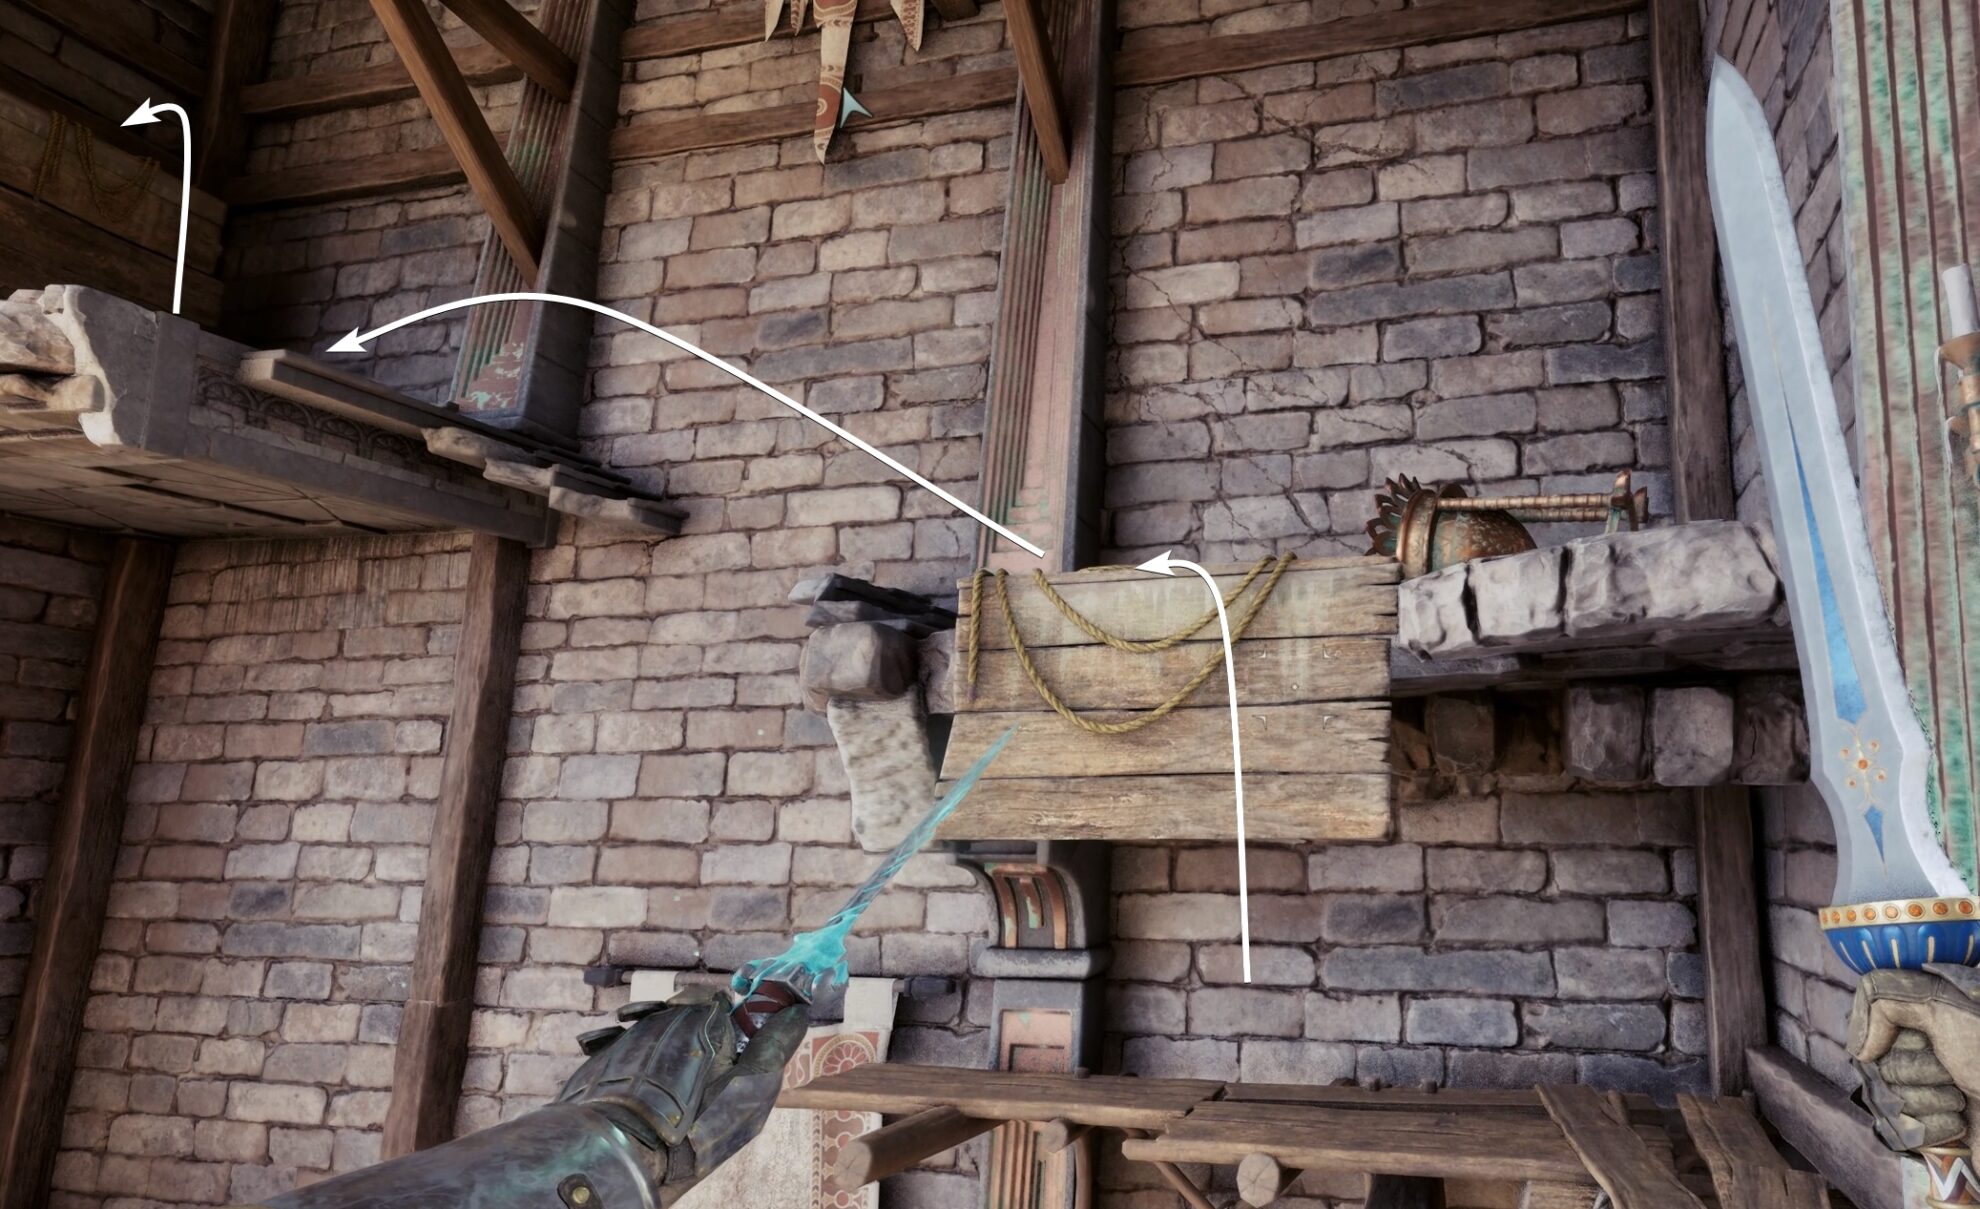
In the southwestern corner on this floor, there is a lockbox sitting on top of some rubble from the broken shelves.
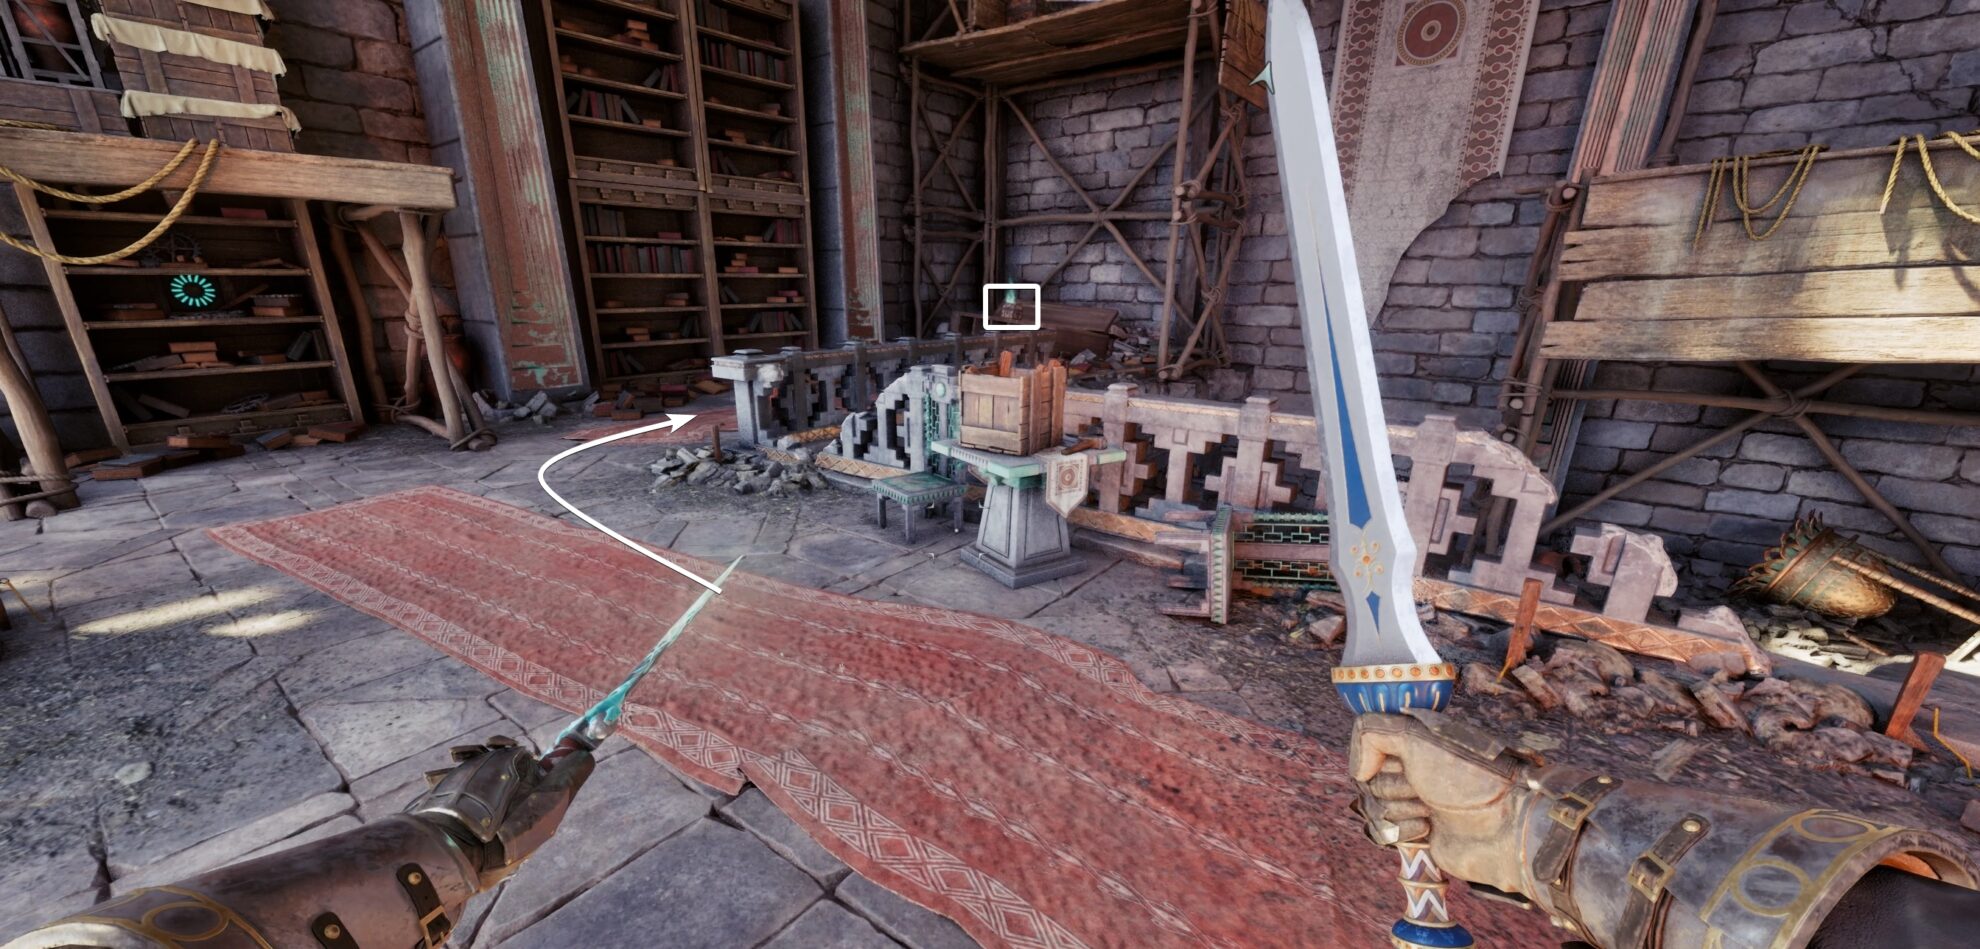
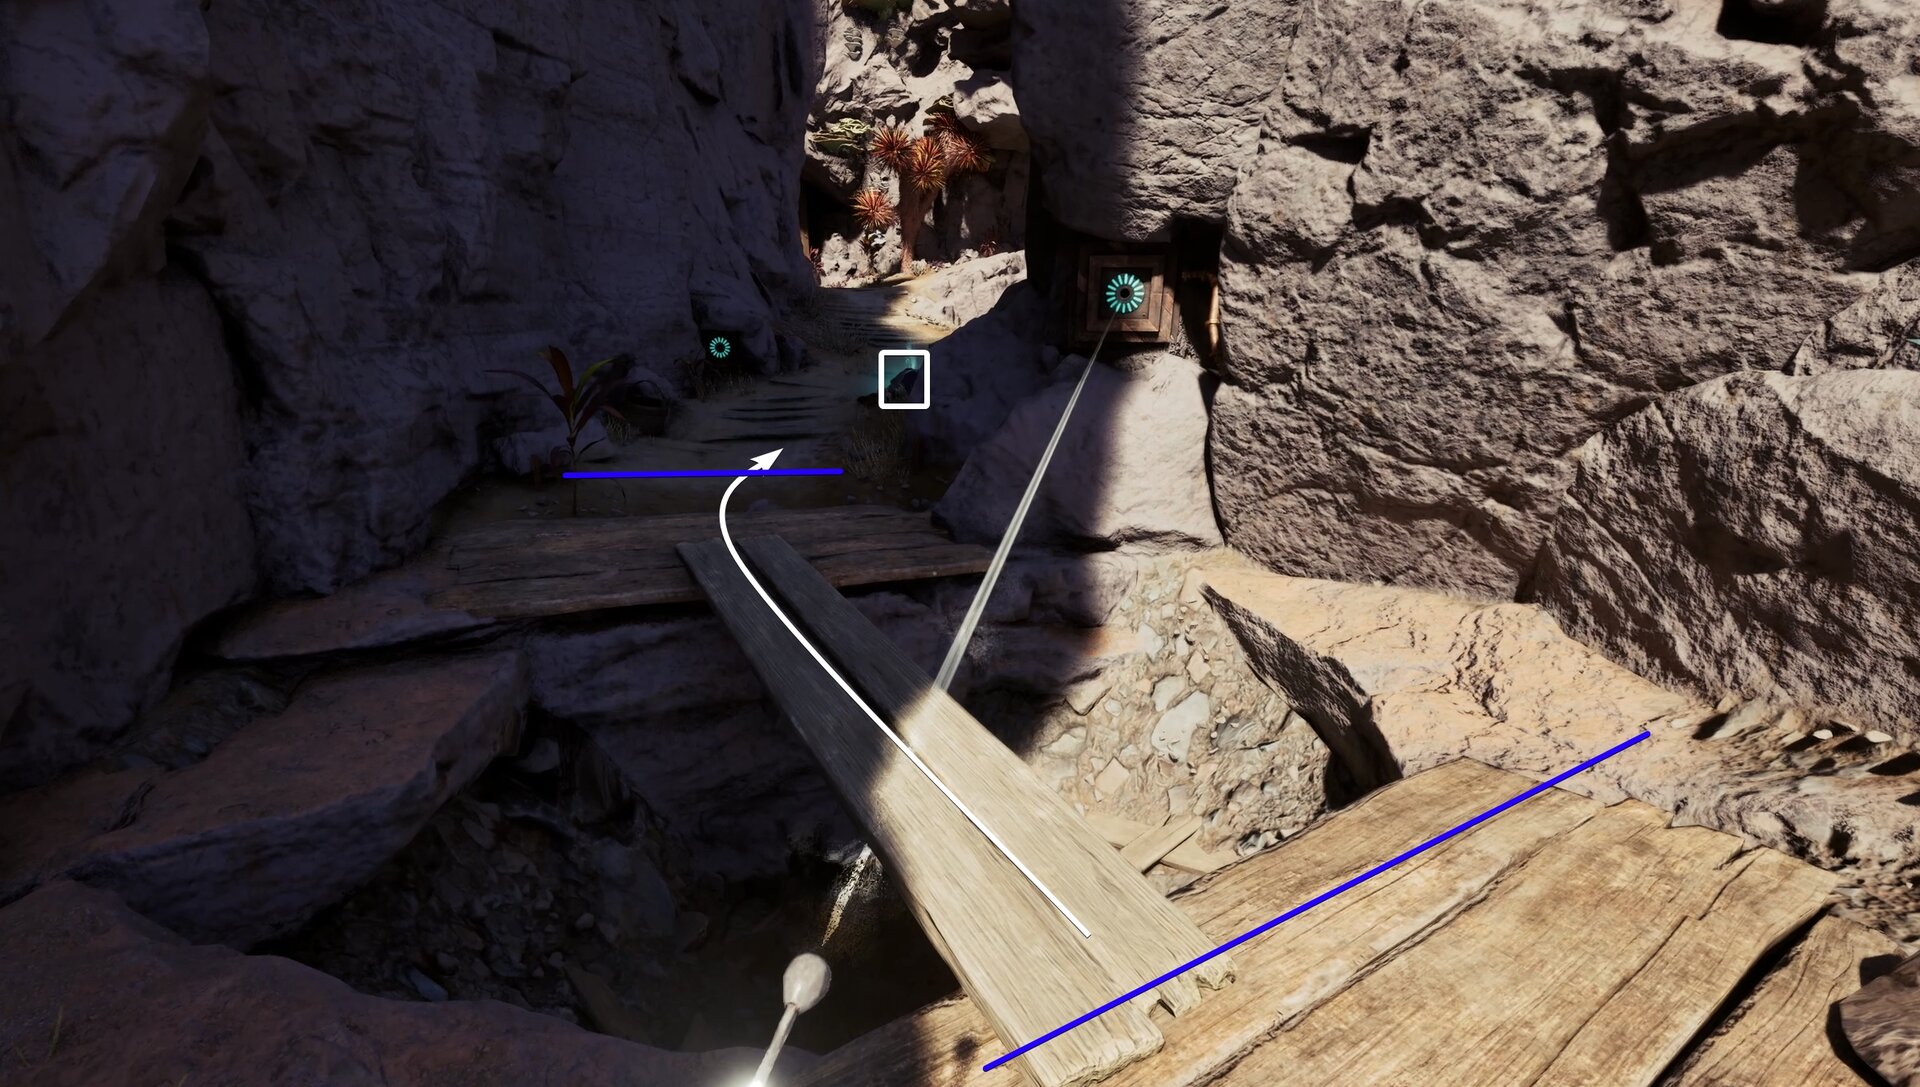
A broader look at this floor will reveal an entry point, which you can use as an alternative to reach a treasure chest located on a platform above the lockbox you just looted (#1 on the image below), a swinging battering ram (#3), a shooting trap mechanism (#2) and trip wires (#4).
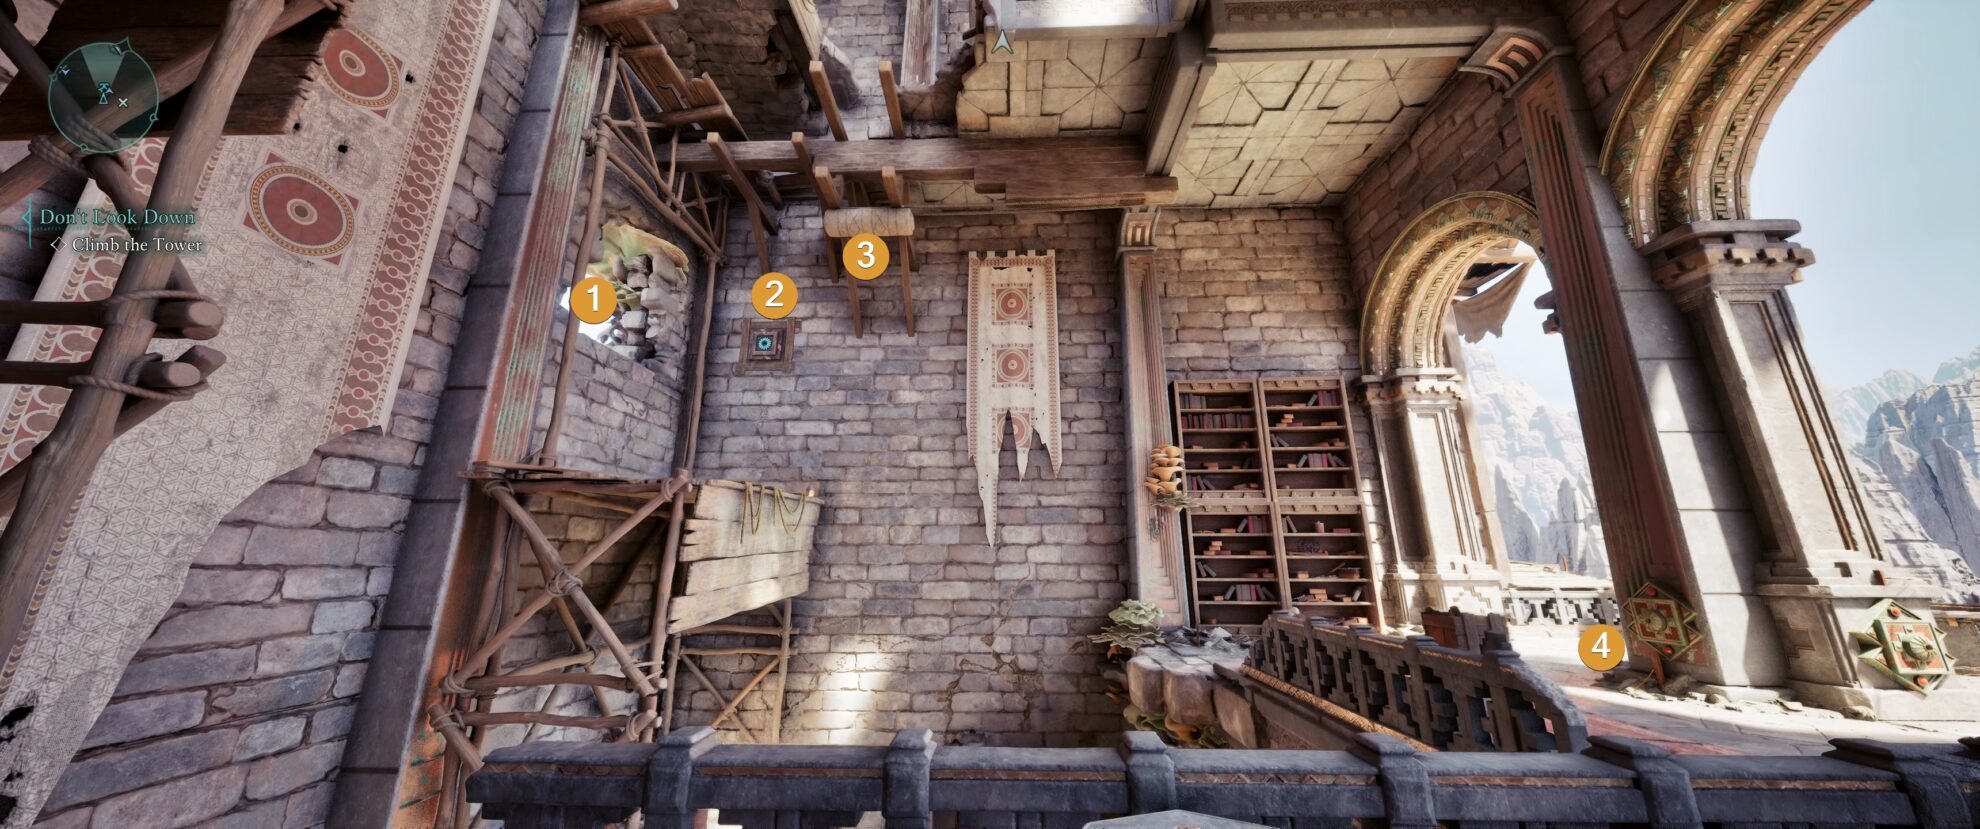
You have two ways to access the treasure chest:
Climb onto the scaffolding and the wooden boxes next to the south wall. Then exit outside of the tower and turn to your right. Hop onto these wooden platforms until you reach the hole on the west wall that I showed you in the previous image. Then jump in and jump up to reach the treasure chest.
Alternatively, you can make a long jump and reach the top of the scaffolding from this floor without going out and around the tower.
A trap will be activated the moment you open the chest. As soon as you open the chest, move to the side to avoid getting hit or wait until you disarm all the traps and come back for this one.
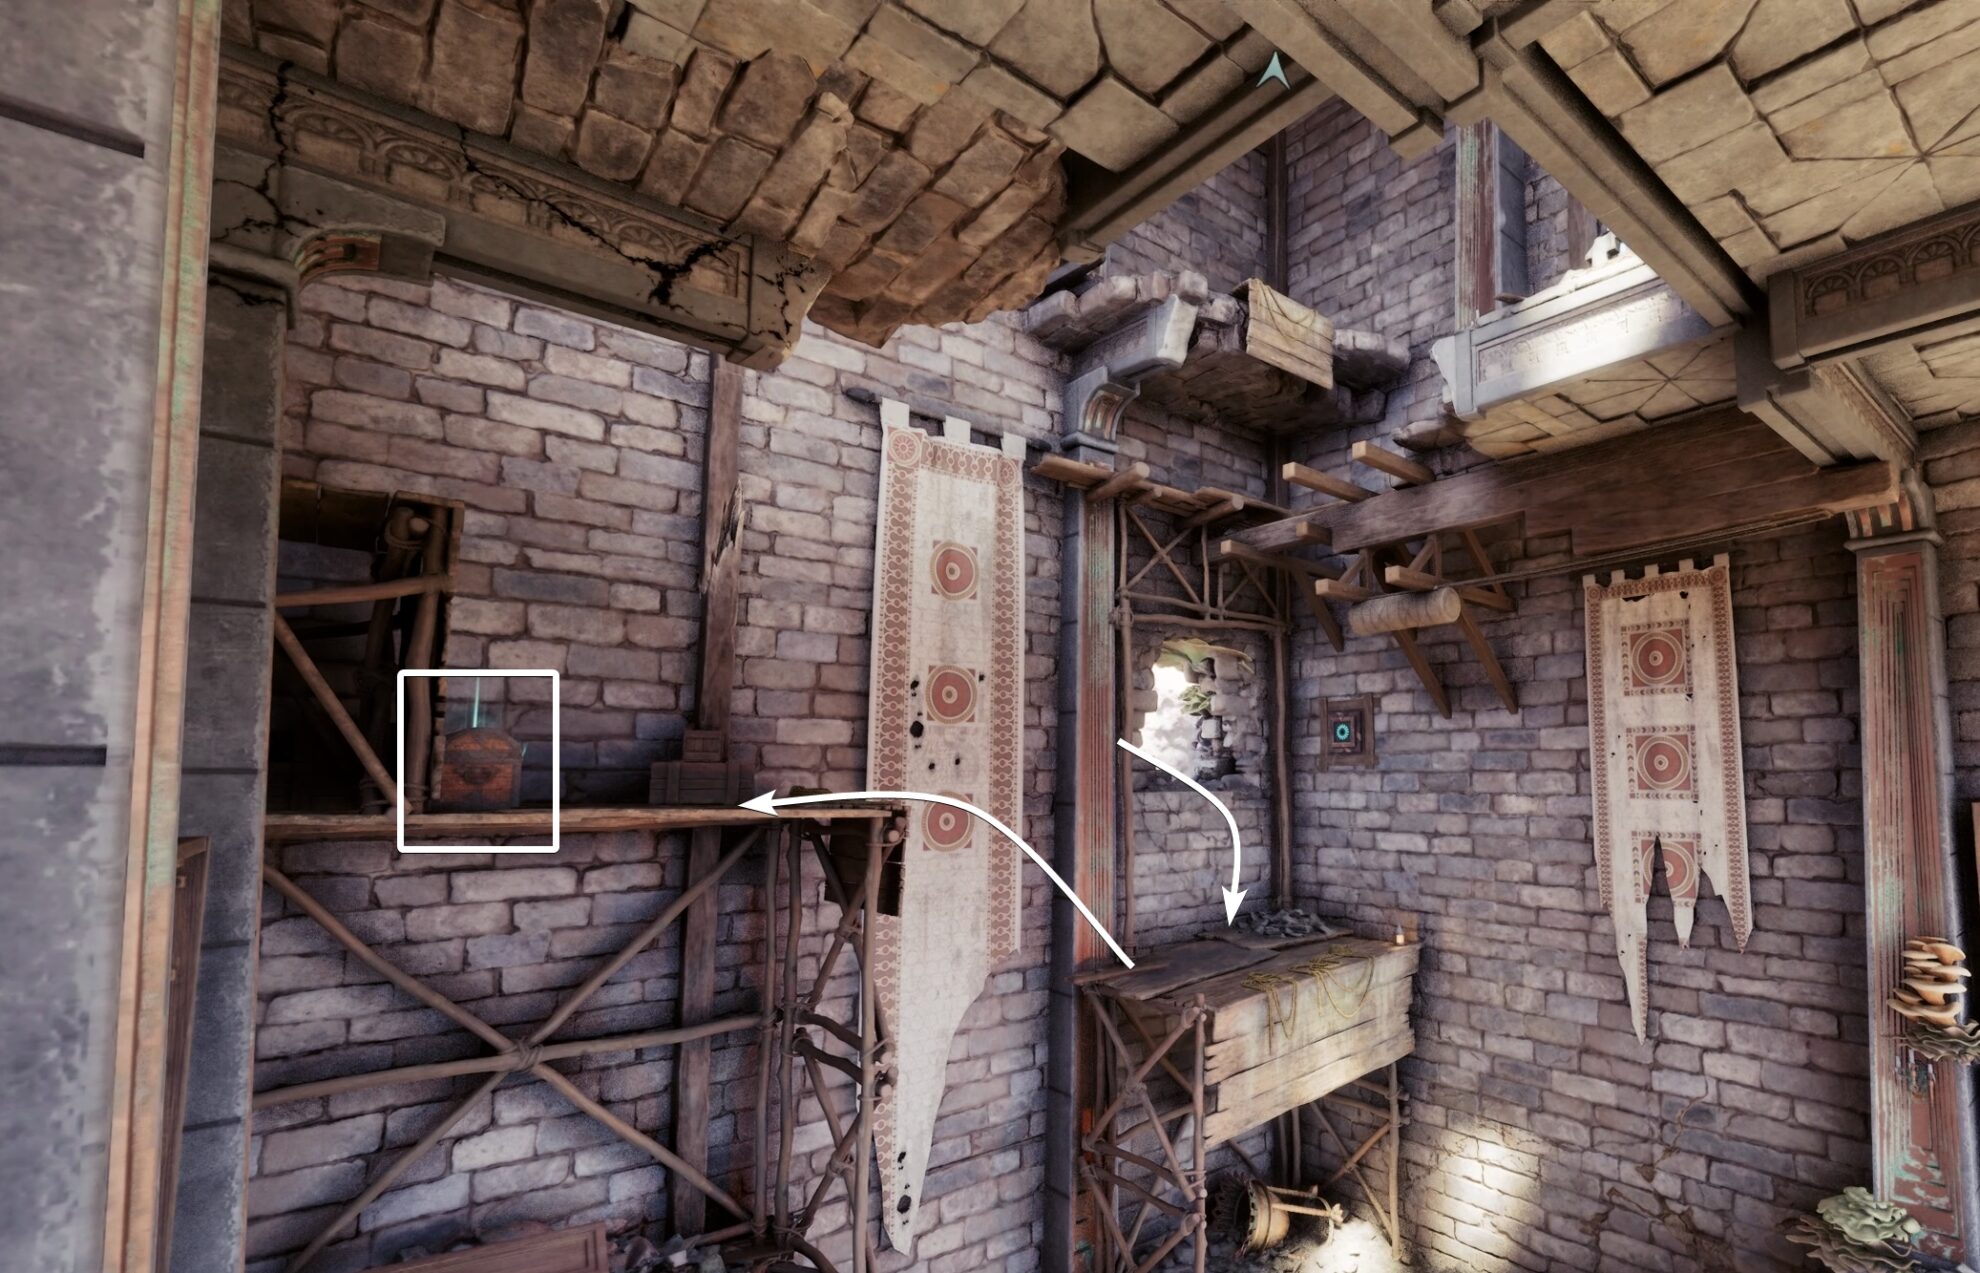
Climb on top of the platform behind the treasure chest. Then jump and grab the ledge to get up to the next floor of the tower. Pull the lever down to deactivate all traps in the tower. Keep in mind that some trip wires outside the tower will remain live.
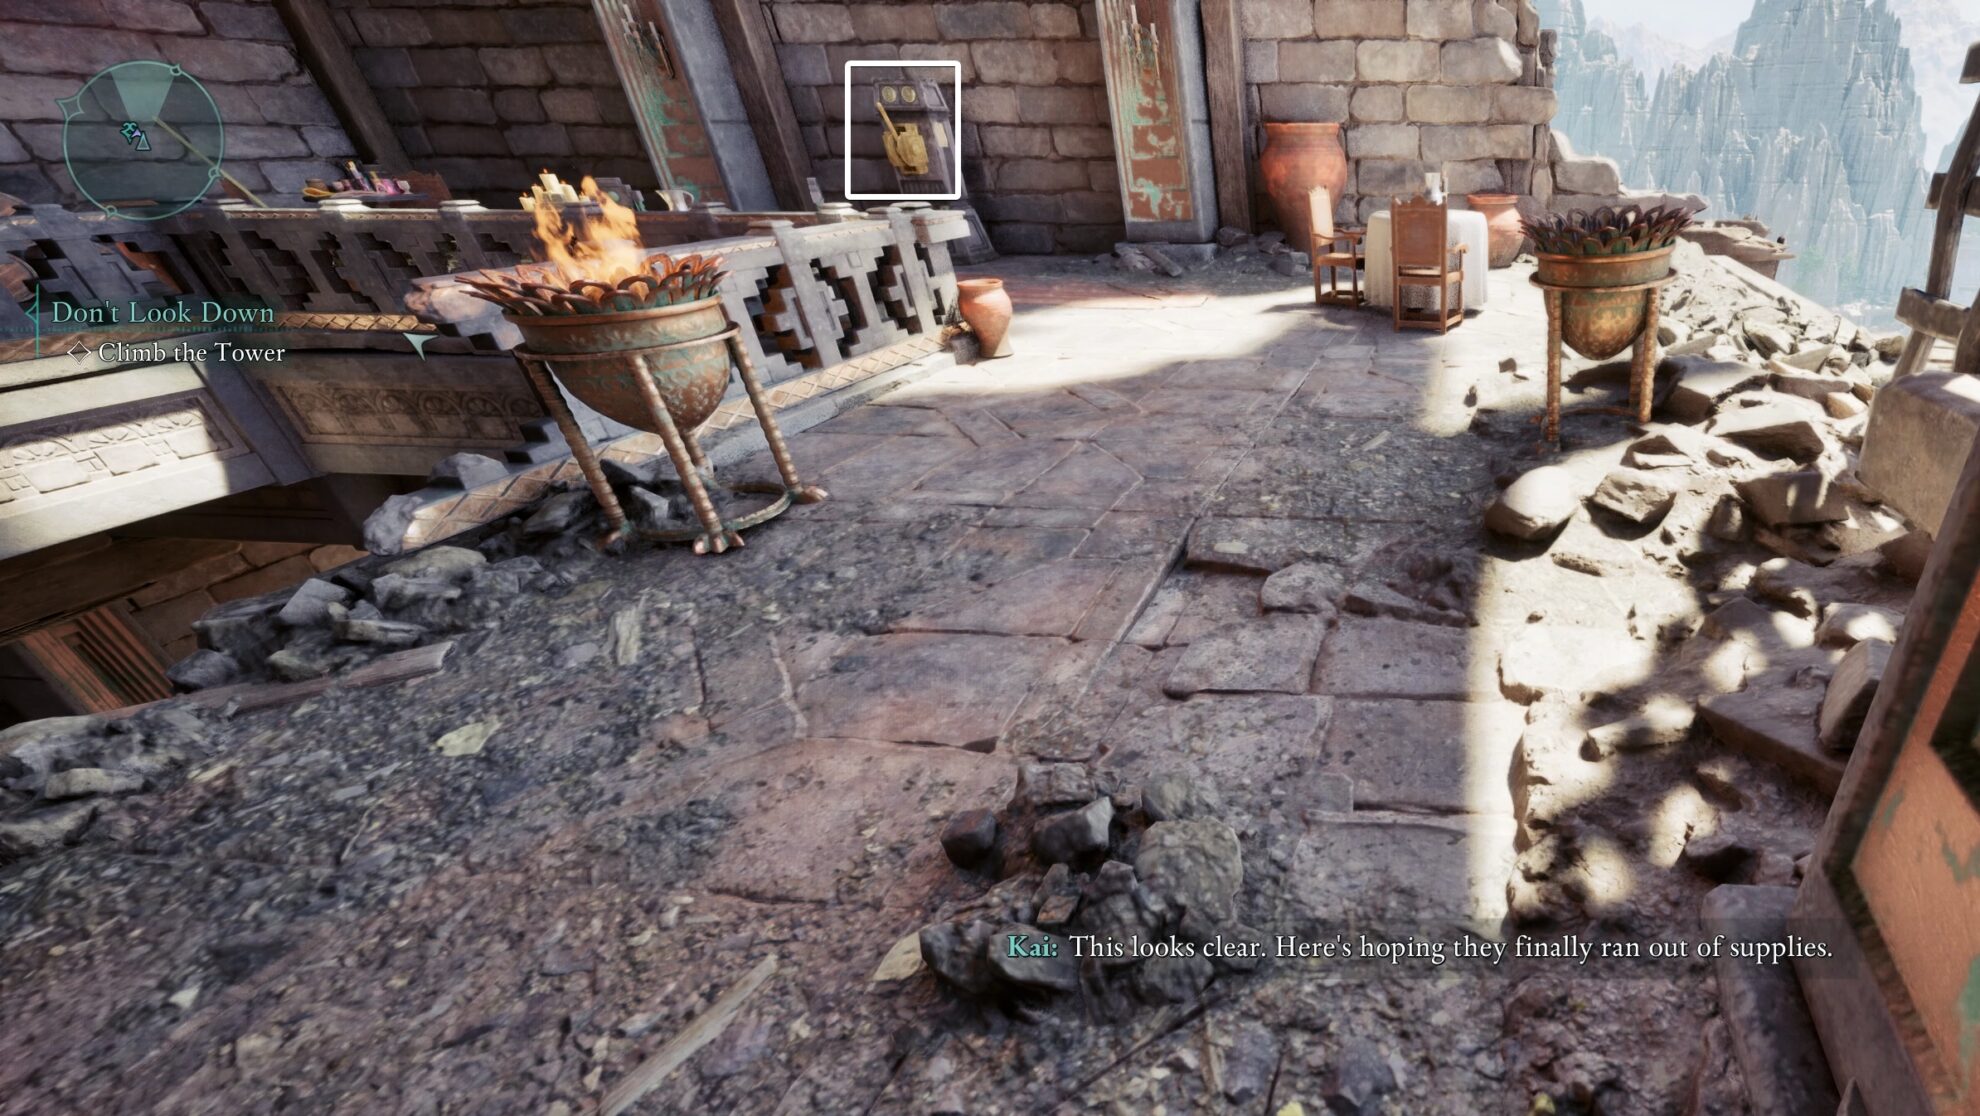
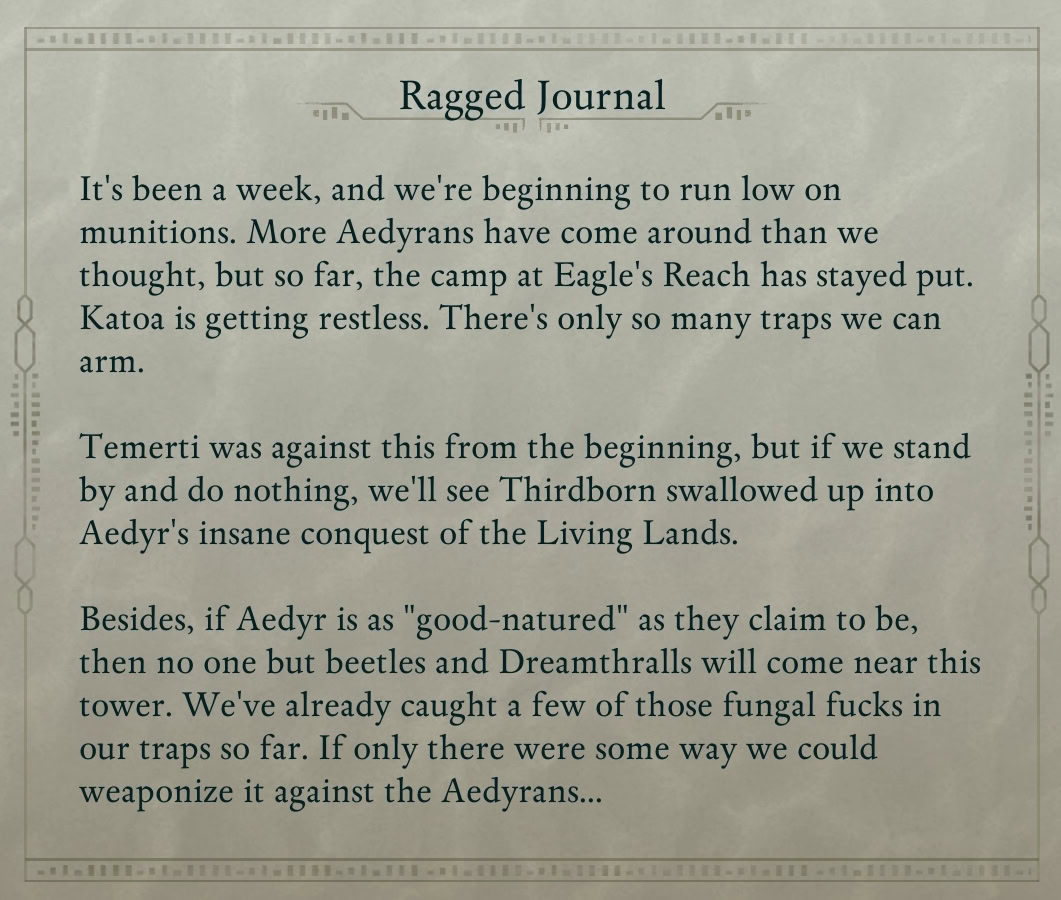
Past the lever, on the wooden table in the corner, you can read a Ragged Journal.
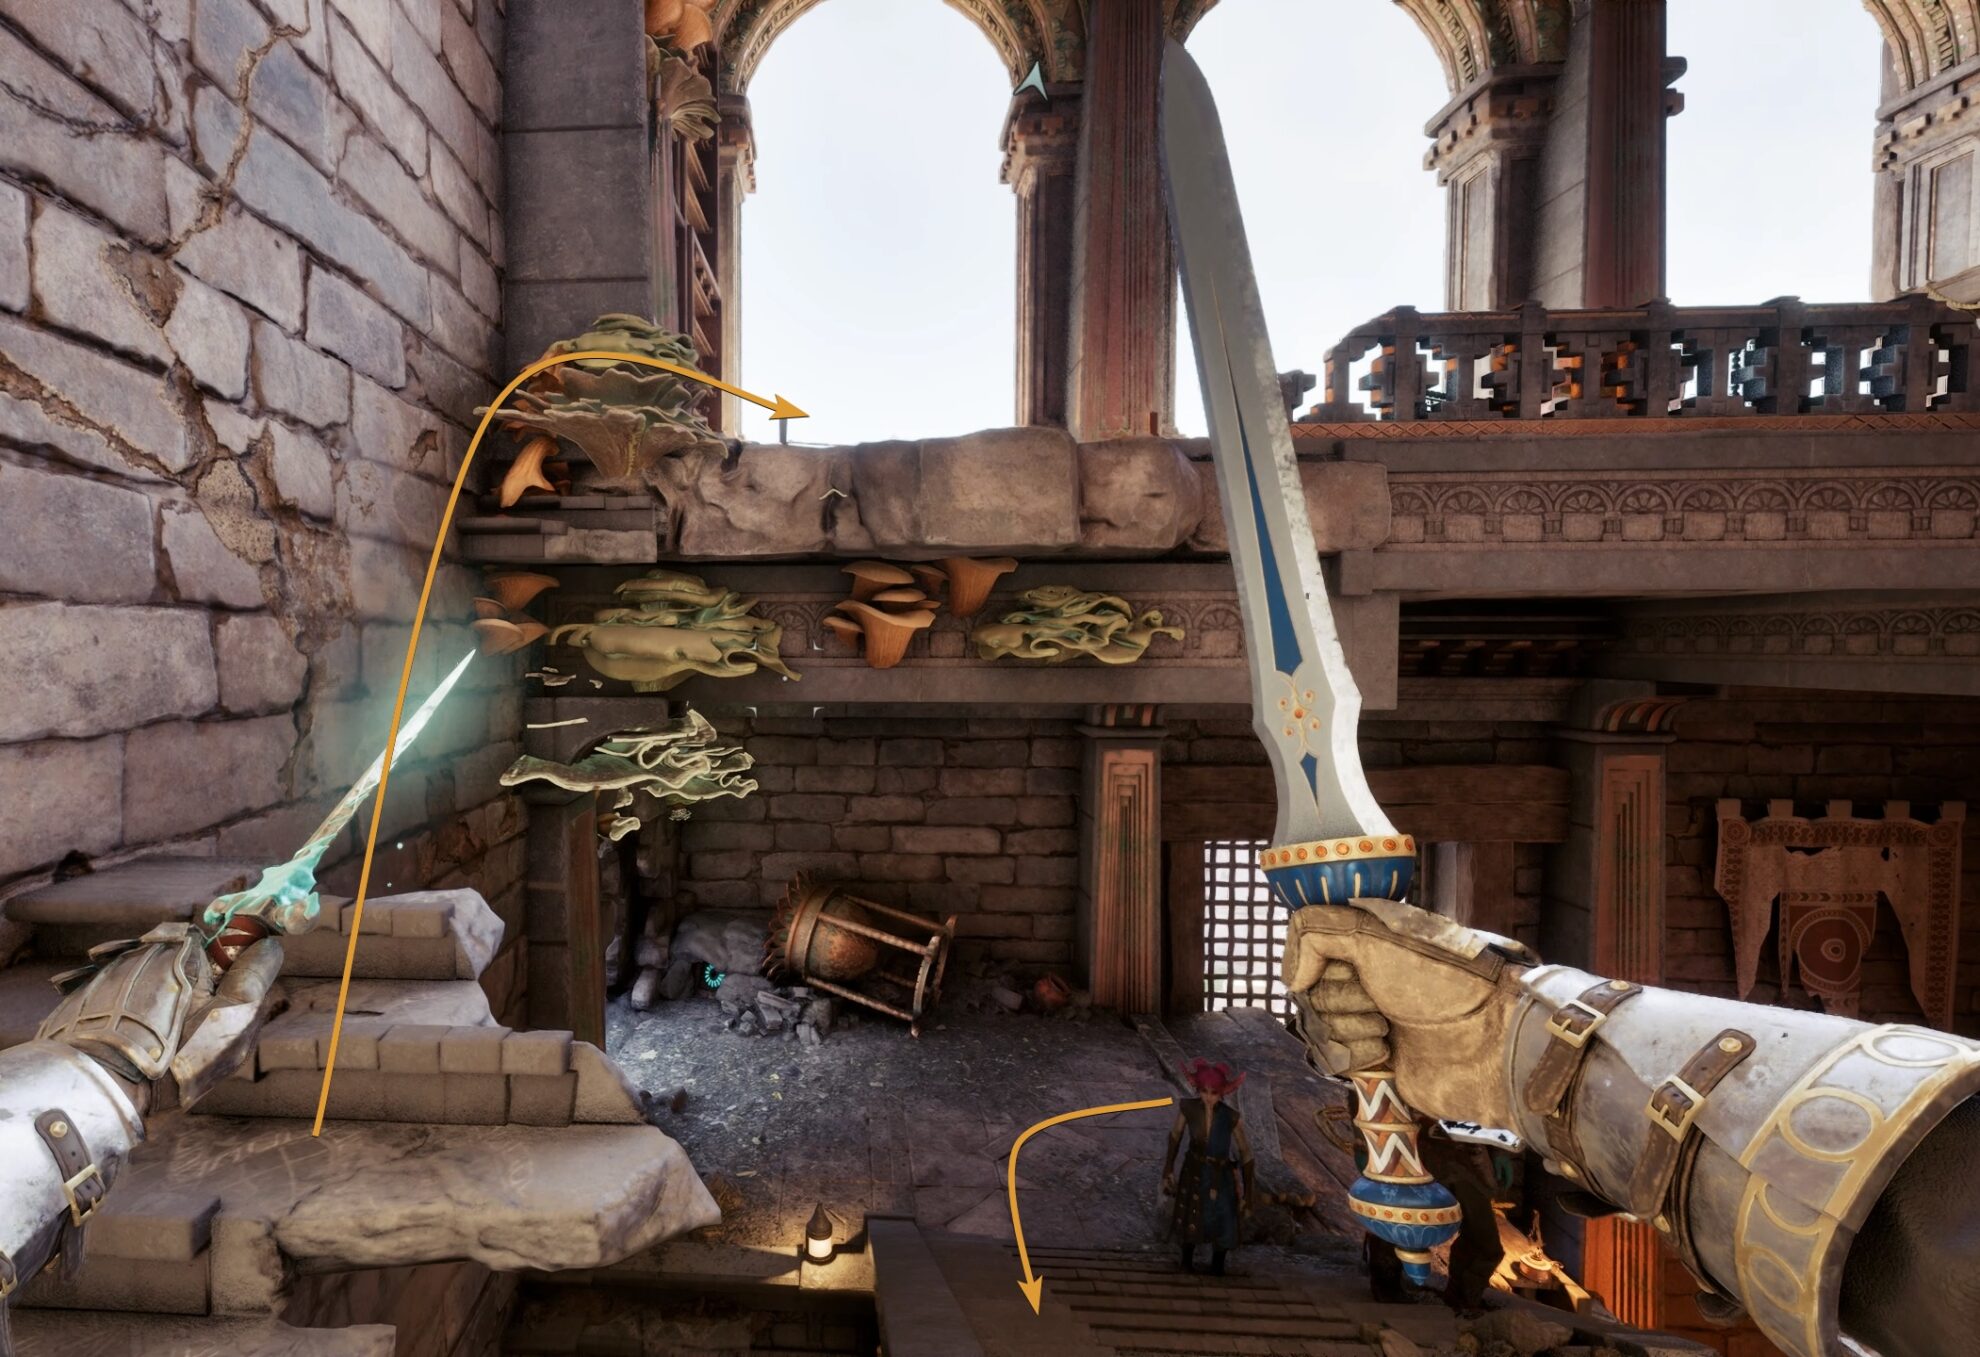
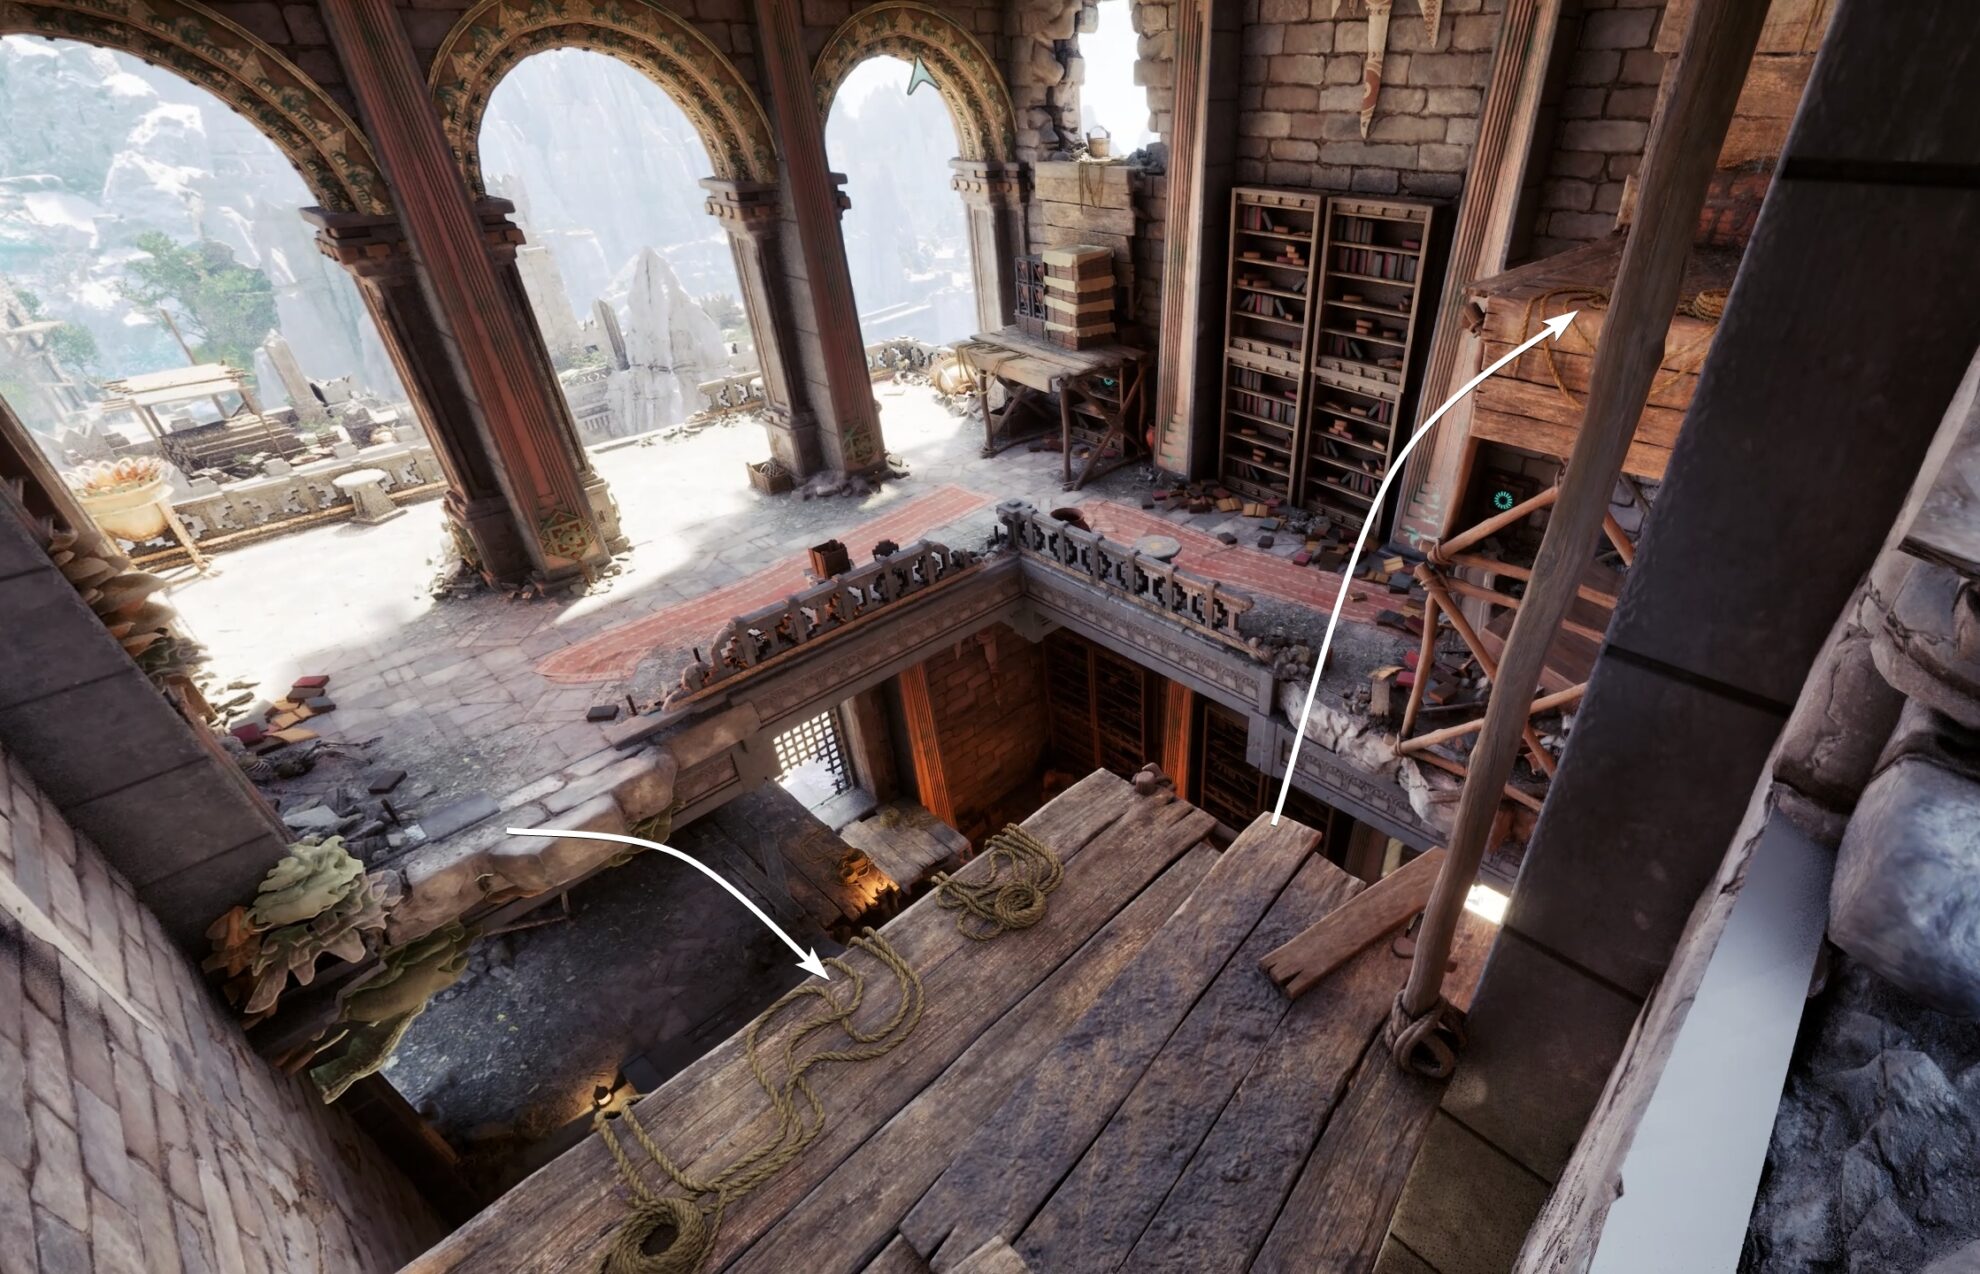
Keep climbing up to the top of the tower. Jump onto the broken stone platform in the corner and from there, jump onto the next level.
When you get on top of what used to be a wooden ceiling, climb the ladder to reach the roof. You can eavesdrop on a conversation between Haiako and Katoa, who are standing there talking to each other.
Choice: Agree, Persuade, or Kill Haiako and Katoa
After a short conversation with Katoa and Haiako, you have a choice:
- Agree with them and show understanding;
- Try and persuade them it’s a bad idea;
- Kill them both.
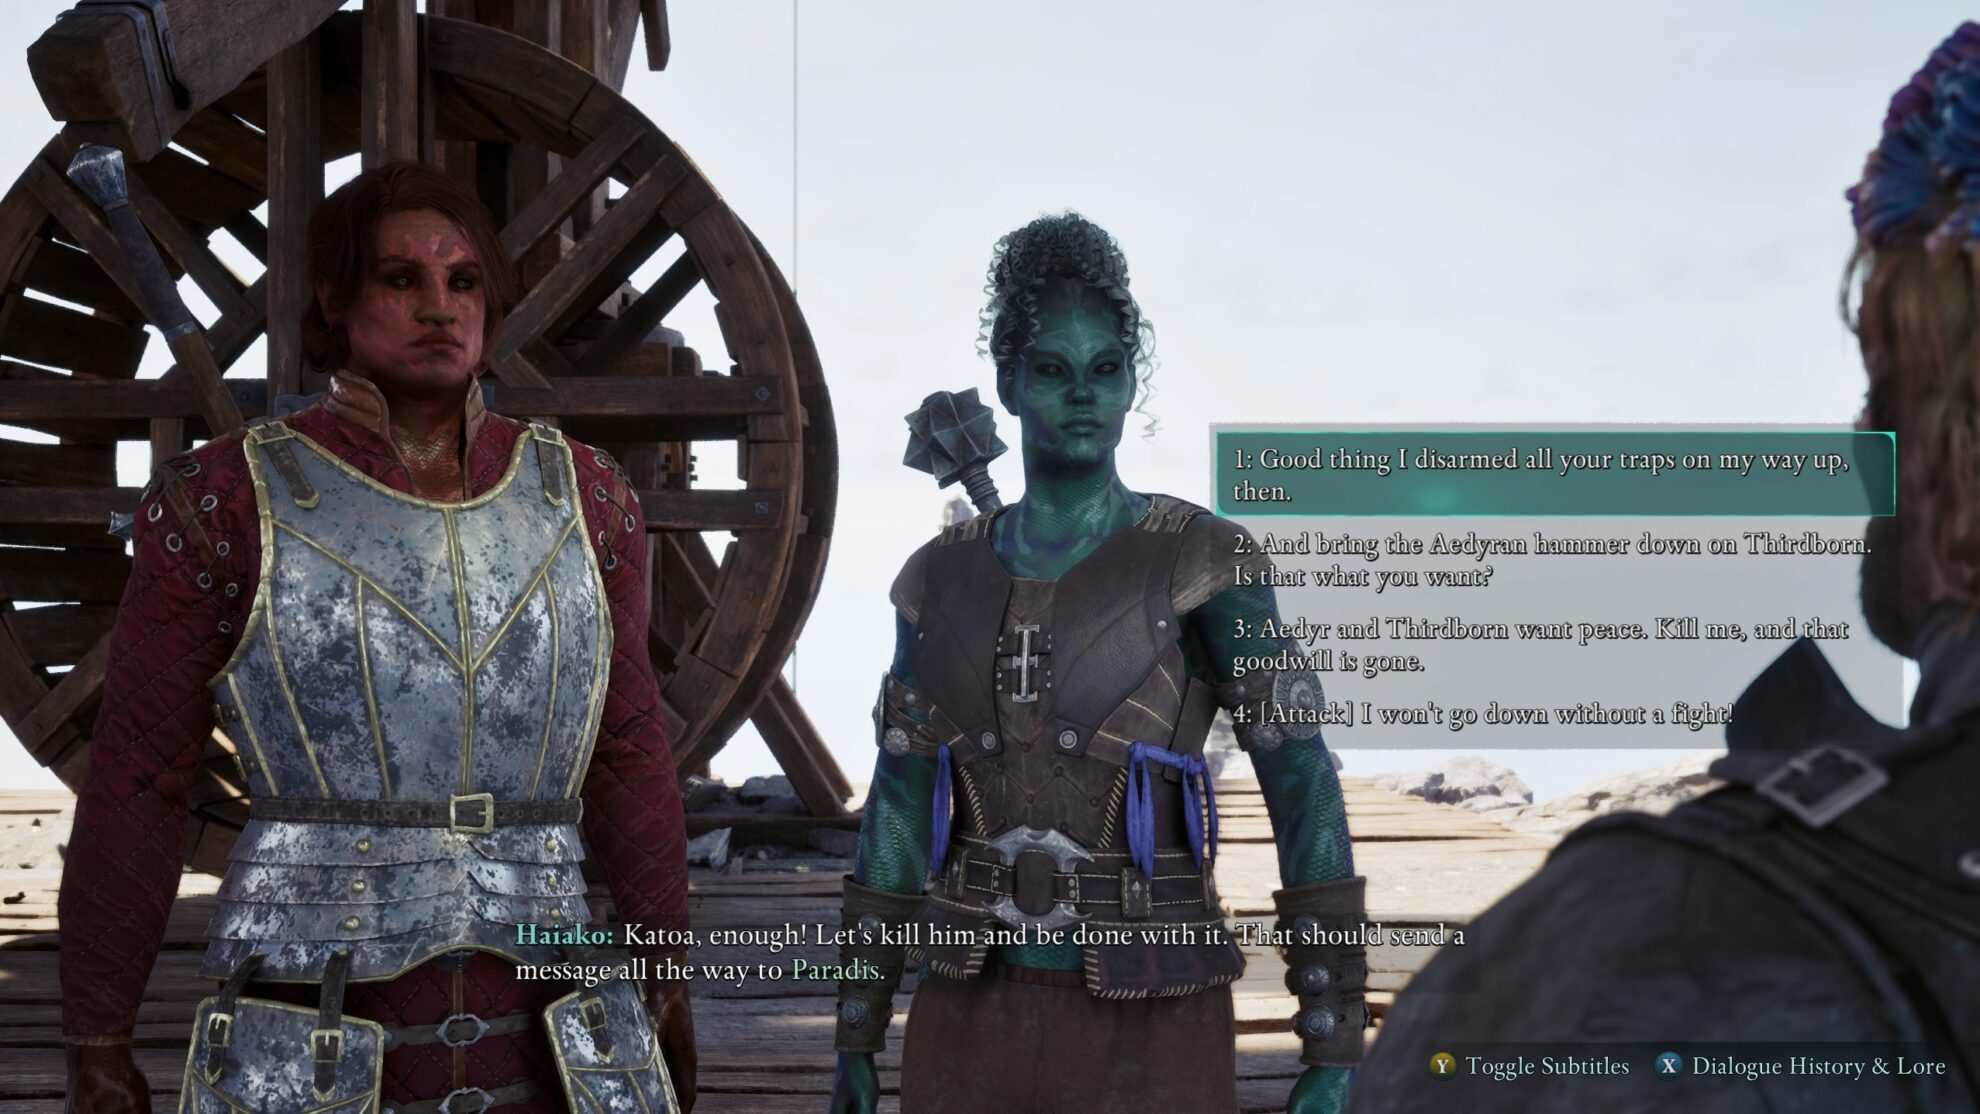
There aren’t any broader consequences for this particular choice nor any Unique loot that drops from them, so be true to your Envoy and attack them for the XP.
There is a treasure chest nearby that contains the Thirdborn Brigandine Jack, which is your main reward for this quest.
Thirdborn Brigandine Jack
The Thirdborn Brigandine Jack is Heavy Brigandine Armor, meaning it has 25% damage reduction and -45 Essence/Stamina. Its buffs are generic but emphasize increasing Carry Capacity.
Blessing of the Oasis
Slowly regenerate Health while wet
Porter
+25 Carry Capacity
The other pieces of this stylish set can be purchased from Merchants in Thirdborn.
Explore Tago’s Tower Surroundings
Before or after you deal with Haiako and Katoa, you can freely explore the outskirts around the tower. There are plenty more trip wires and dead soldiers lying around. They all have the same Aedyran Orders papers on their bodies along with coins and other valuables.
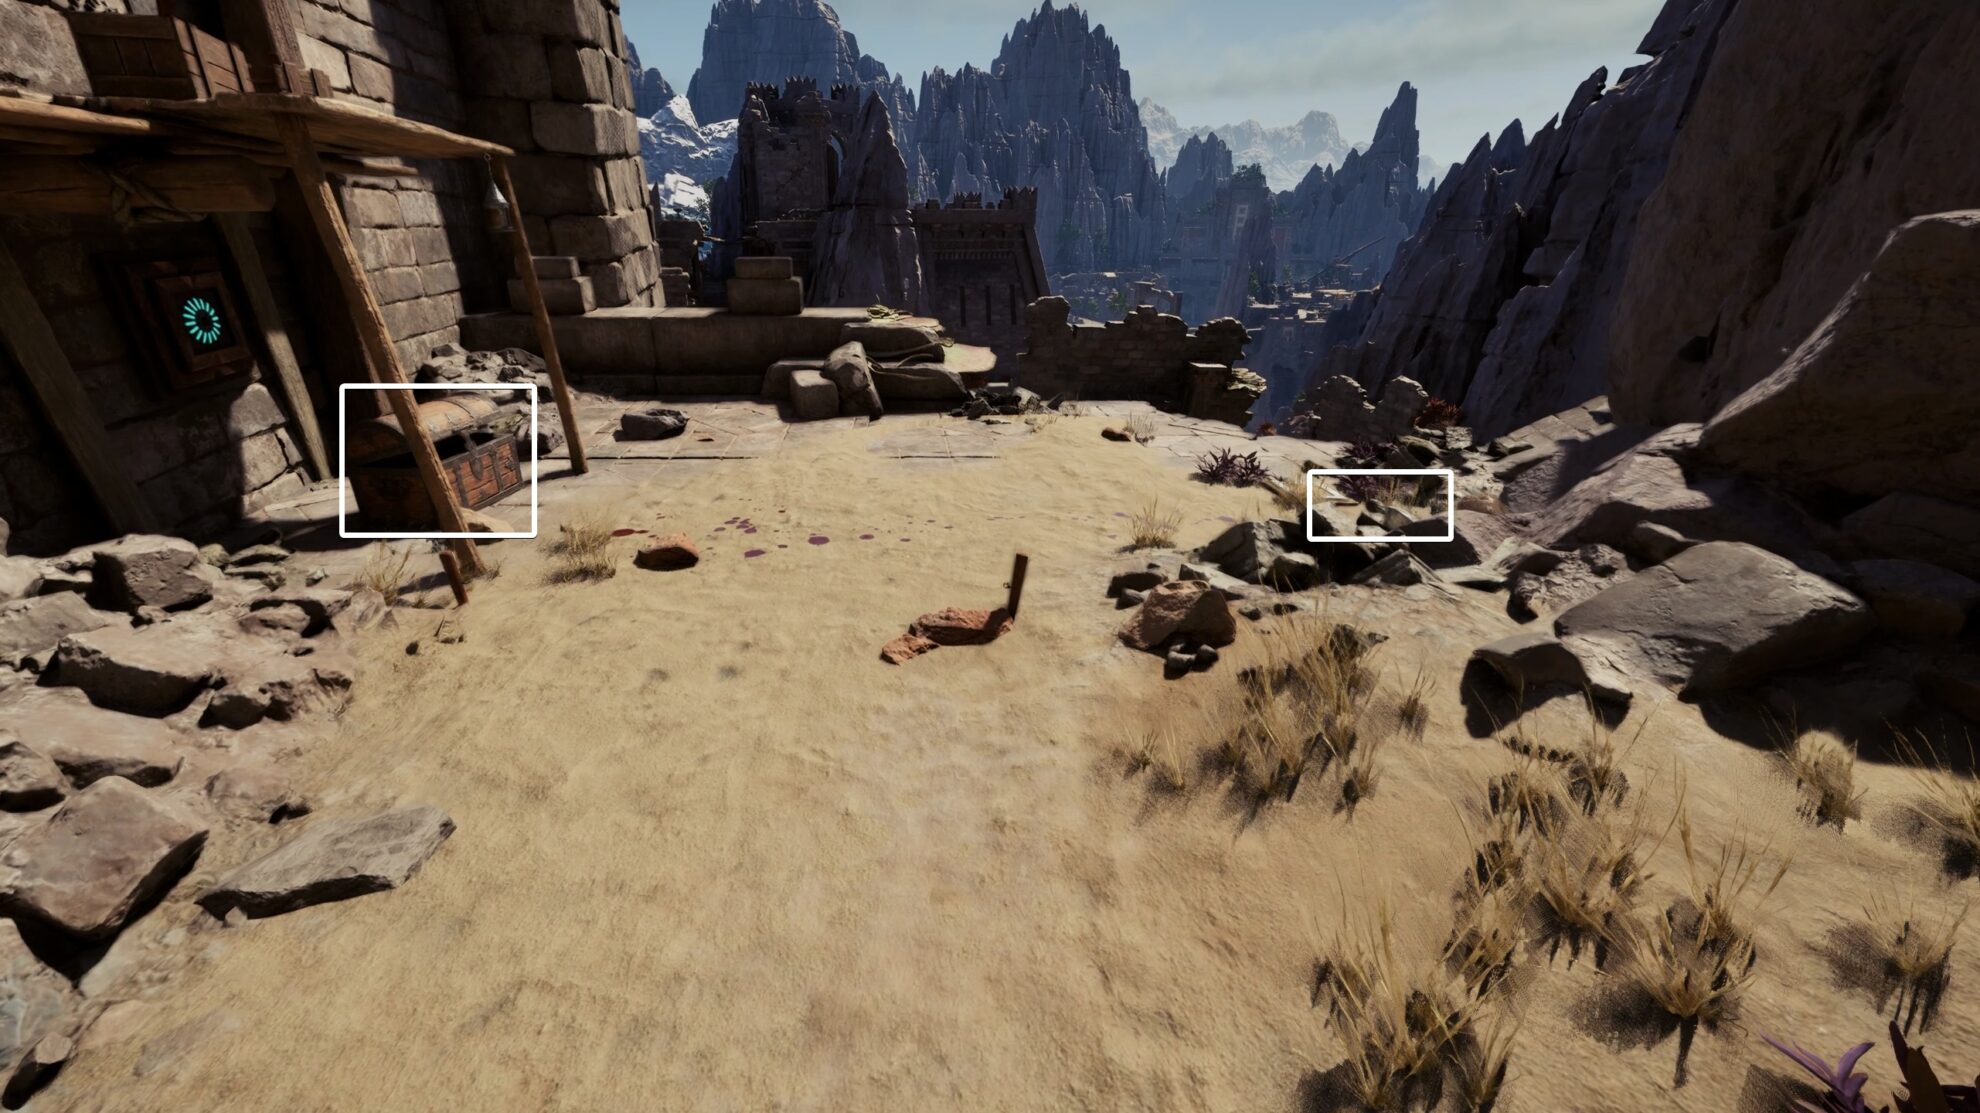
Behind the tower, on the south side, there is a treasure chest you can loot. If you do it after you have climbed the tower and switched off all trap mechanisms, it will be safe too loot. Otherwise, beware of the shooting mechanism on the stone wallbase of the tower aiming directly at the chest.