Full list of all Castles and Forts in Assassin’s Creed Shadows and what loot they offer. Learn how to approach castles and forts exploration as both Naoe and Yasuke, and everything else you need to know about this activity.
Table of contents
Castles and Forts in Assassin’s Creed Shadows
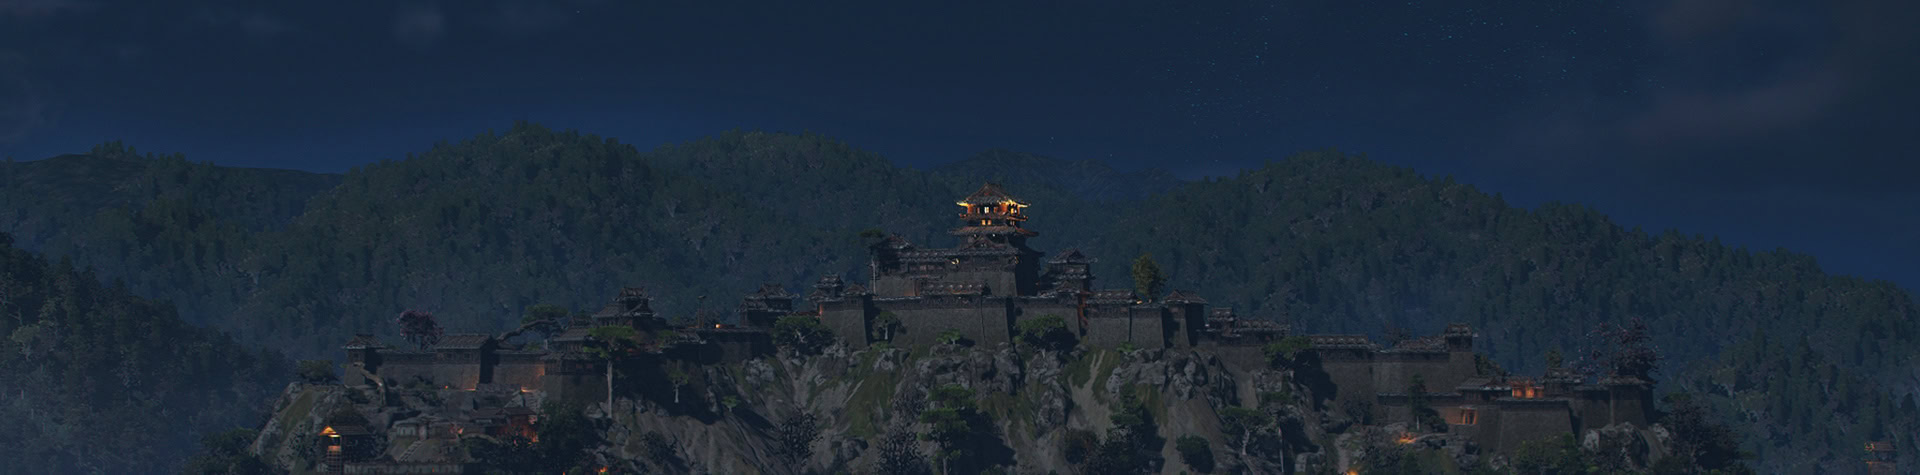
Castles are the biggest and most fortified areas in the game. They are always surrounded by walls and heavily guarded by different types of enemies.
Depending on their size and type, castles are divided into up to three areas. The first one is the outer wall that connects with the city. While the security isn’t as tight, enemies are already alert to any unwanted presence. Smaller castles do not have this zone.
The second area is the one closest to the keep. Some castles have water ponds dividing this area from the first one. This is heavily guarded and where you can usually find most of the Samurai Daisho.
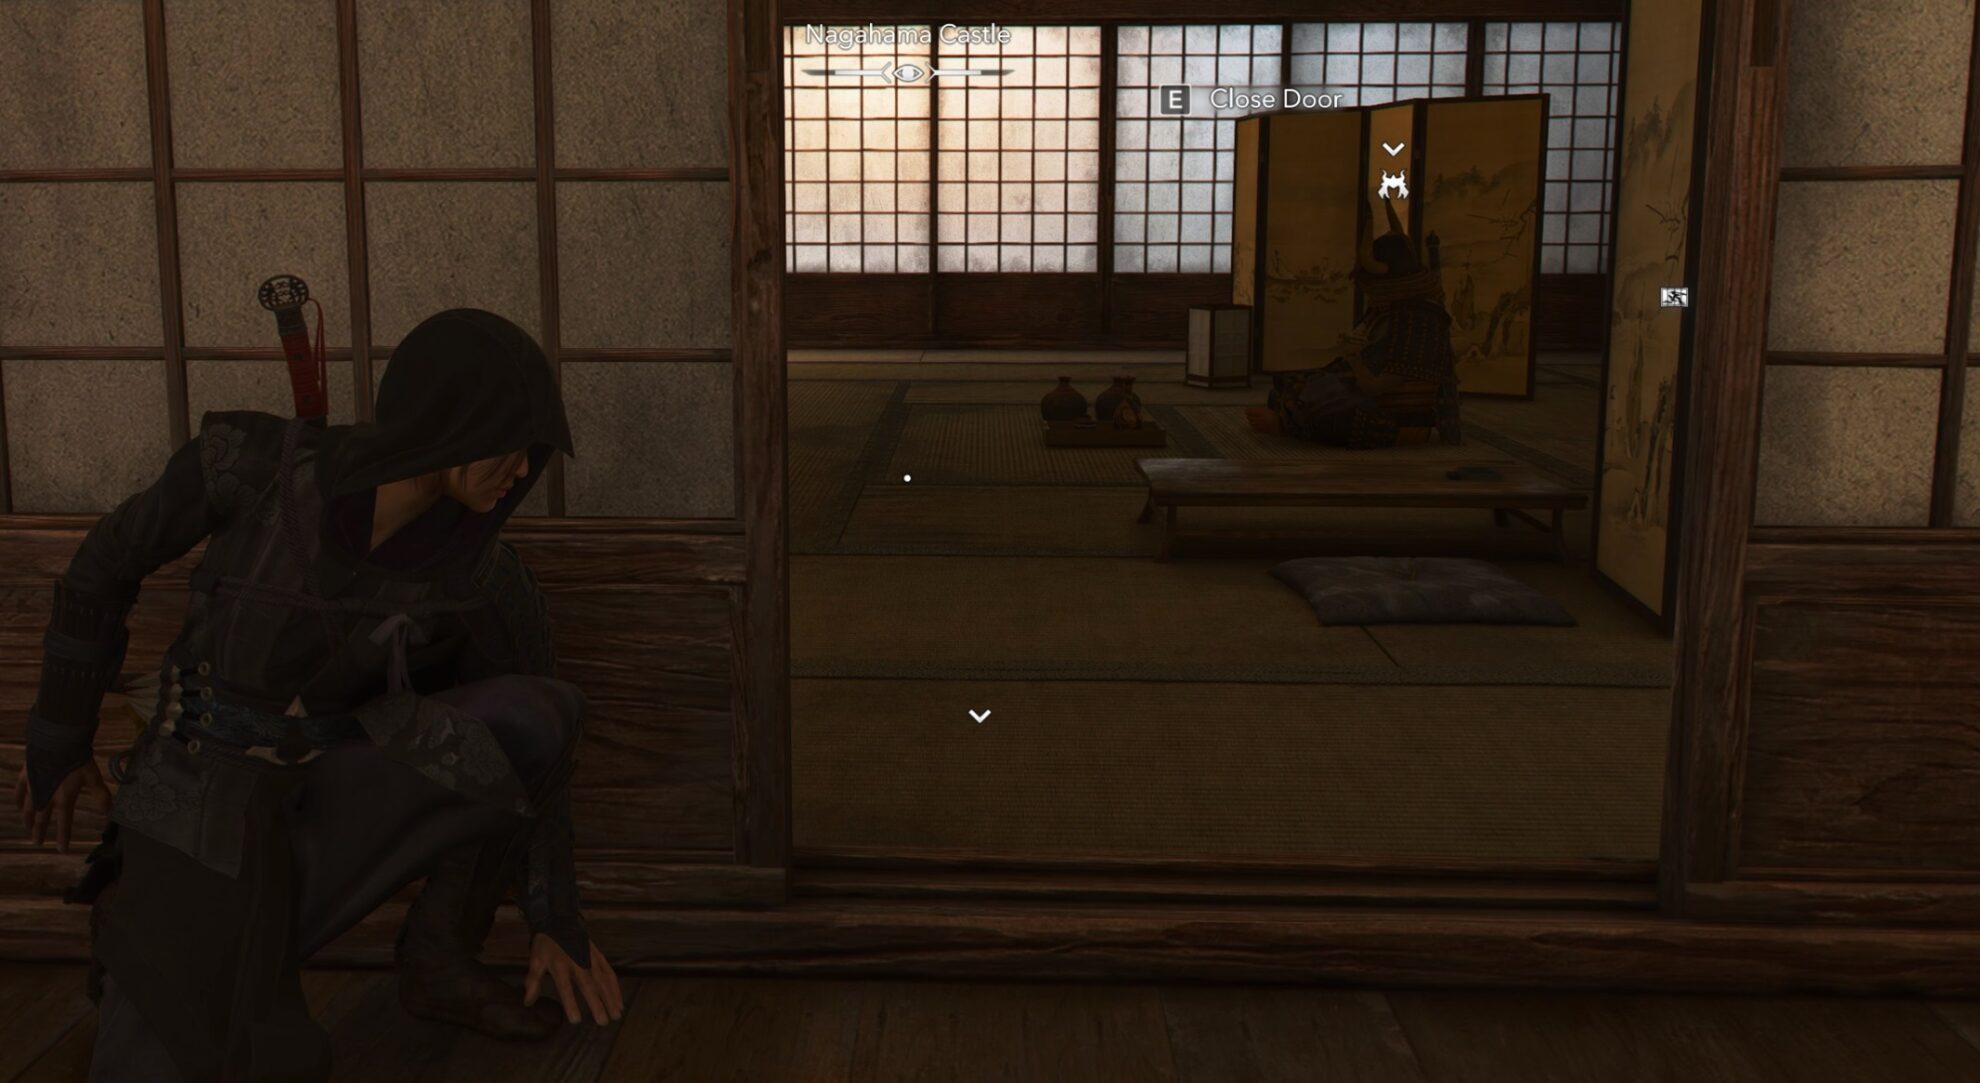
The third and last area is inside the keep itself. Inside of it, you can find servants, a few guards, and sometimes even Samurai Daisho. Servants are no threat, but they can run away and call nearby guards. Some smaller establishments do not have large keeps or tenshu.
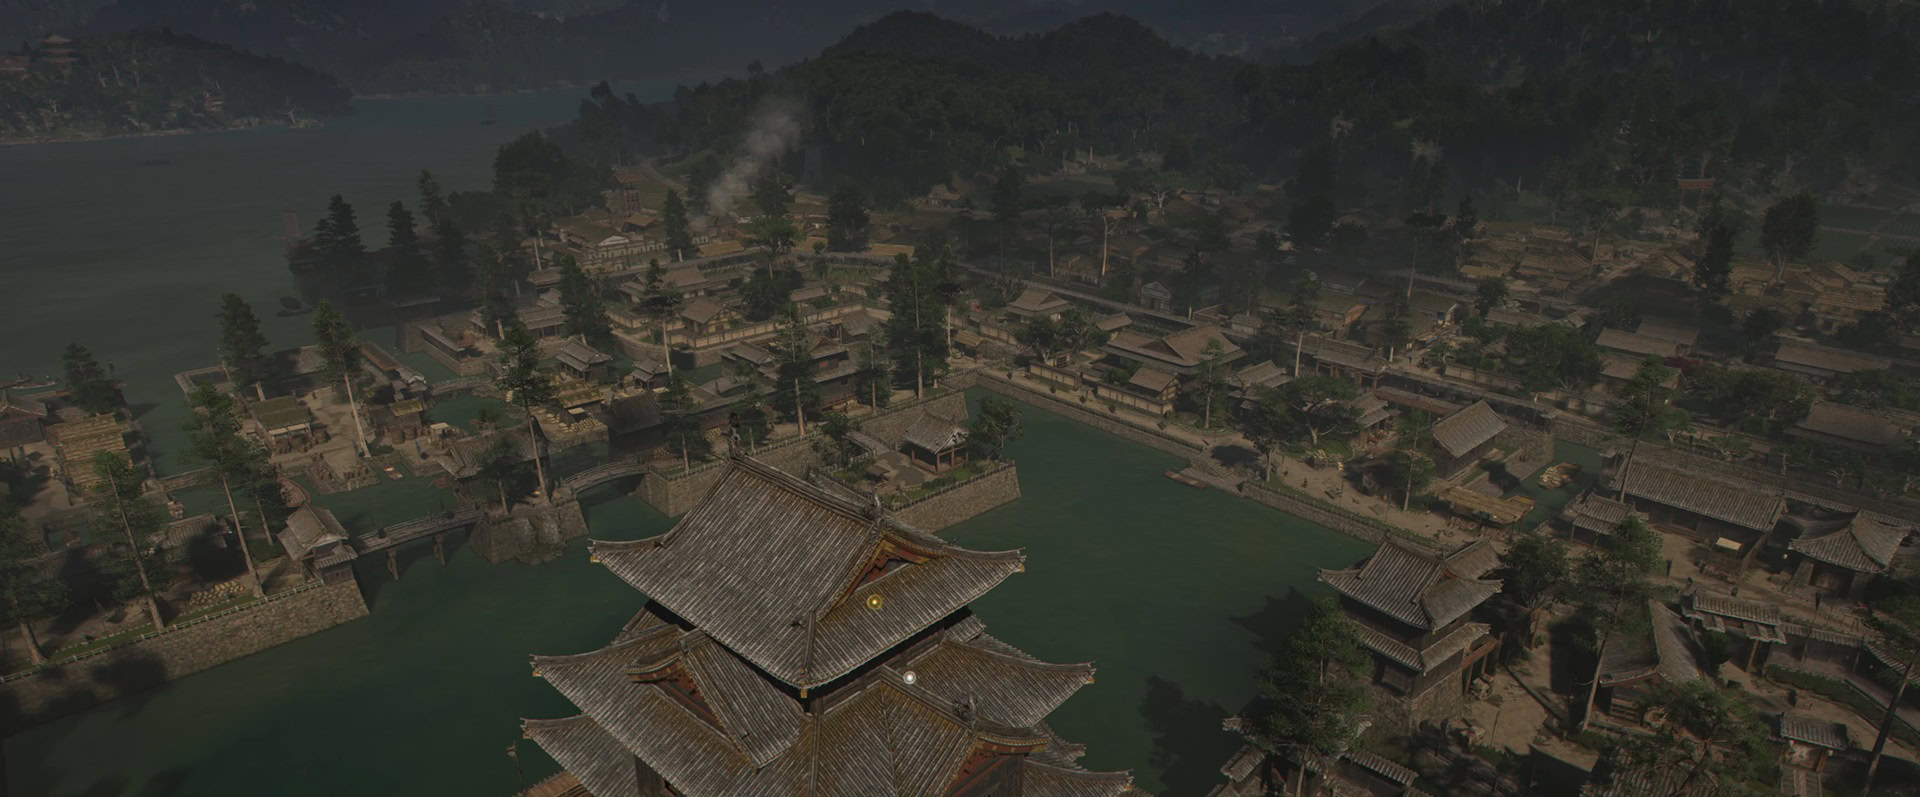
The areas surrounding the keep are usually divided into smaller sections. Most areas have their own alert systems, which you can disable to prevent guards from rising the alarm and changing your status to “Wanted” in the entire region.
Castles can have different levels of wealth but even those with low wealth have valuable stuff available for looting. The most valuable things you can look for are Hideout resources.
They are in the form of stockpiles, and you use your scouts to smuggle them for you. You have to be anonymous to be able to mark a stockpile for smuggling. At the end of the season, your scouts will bring the resources to your Hideout.

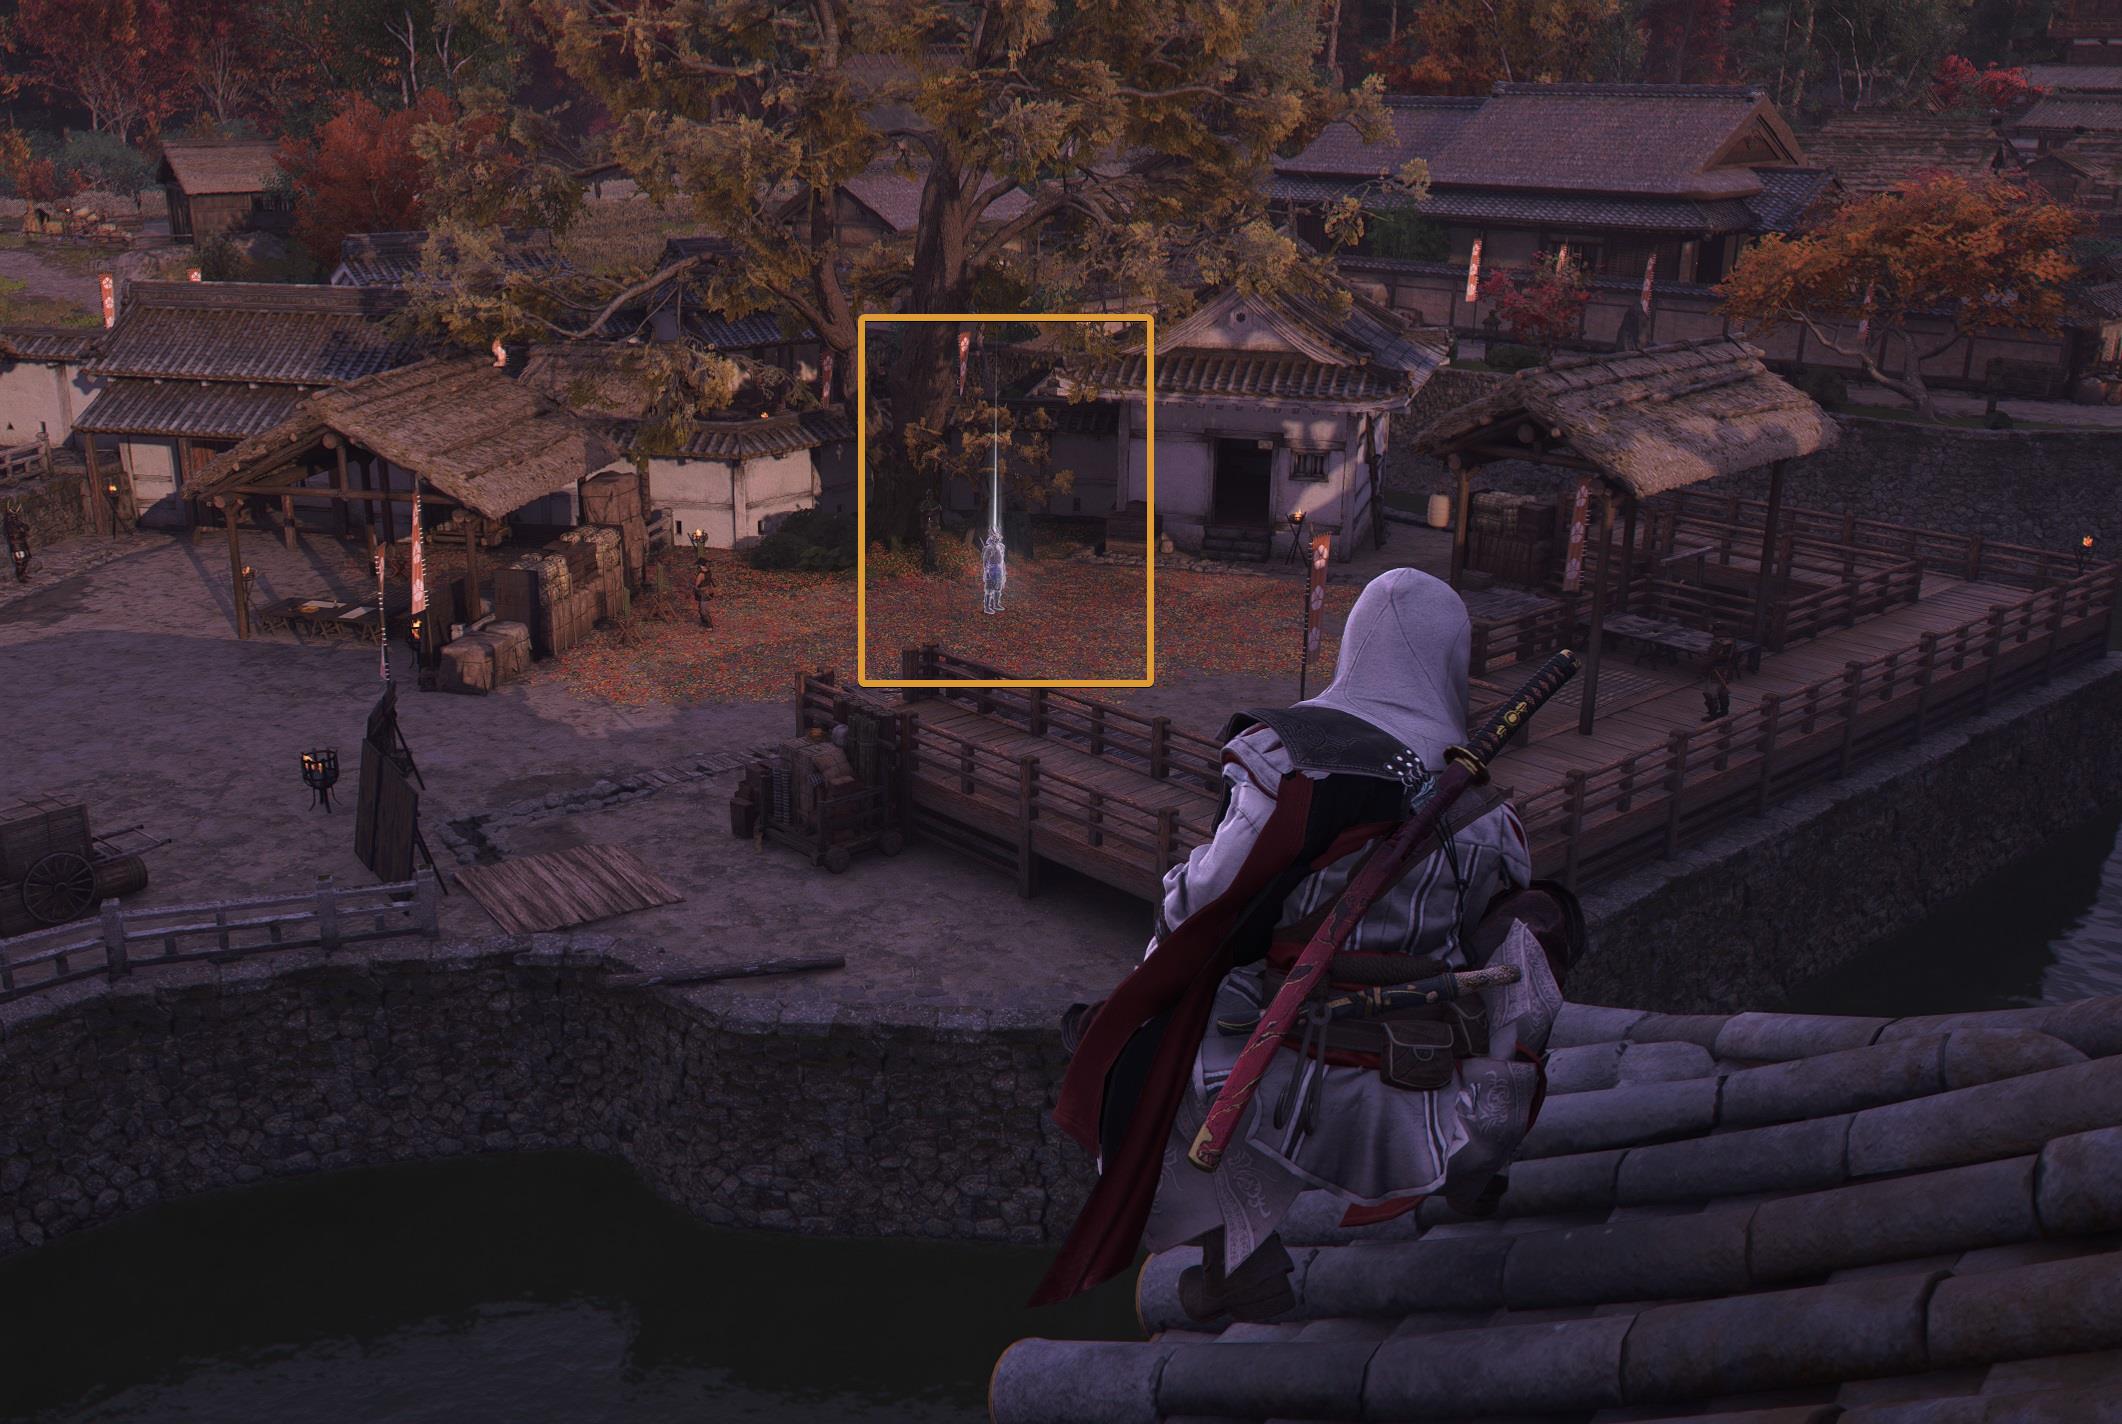
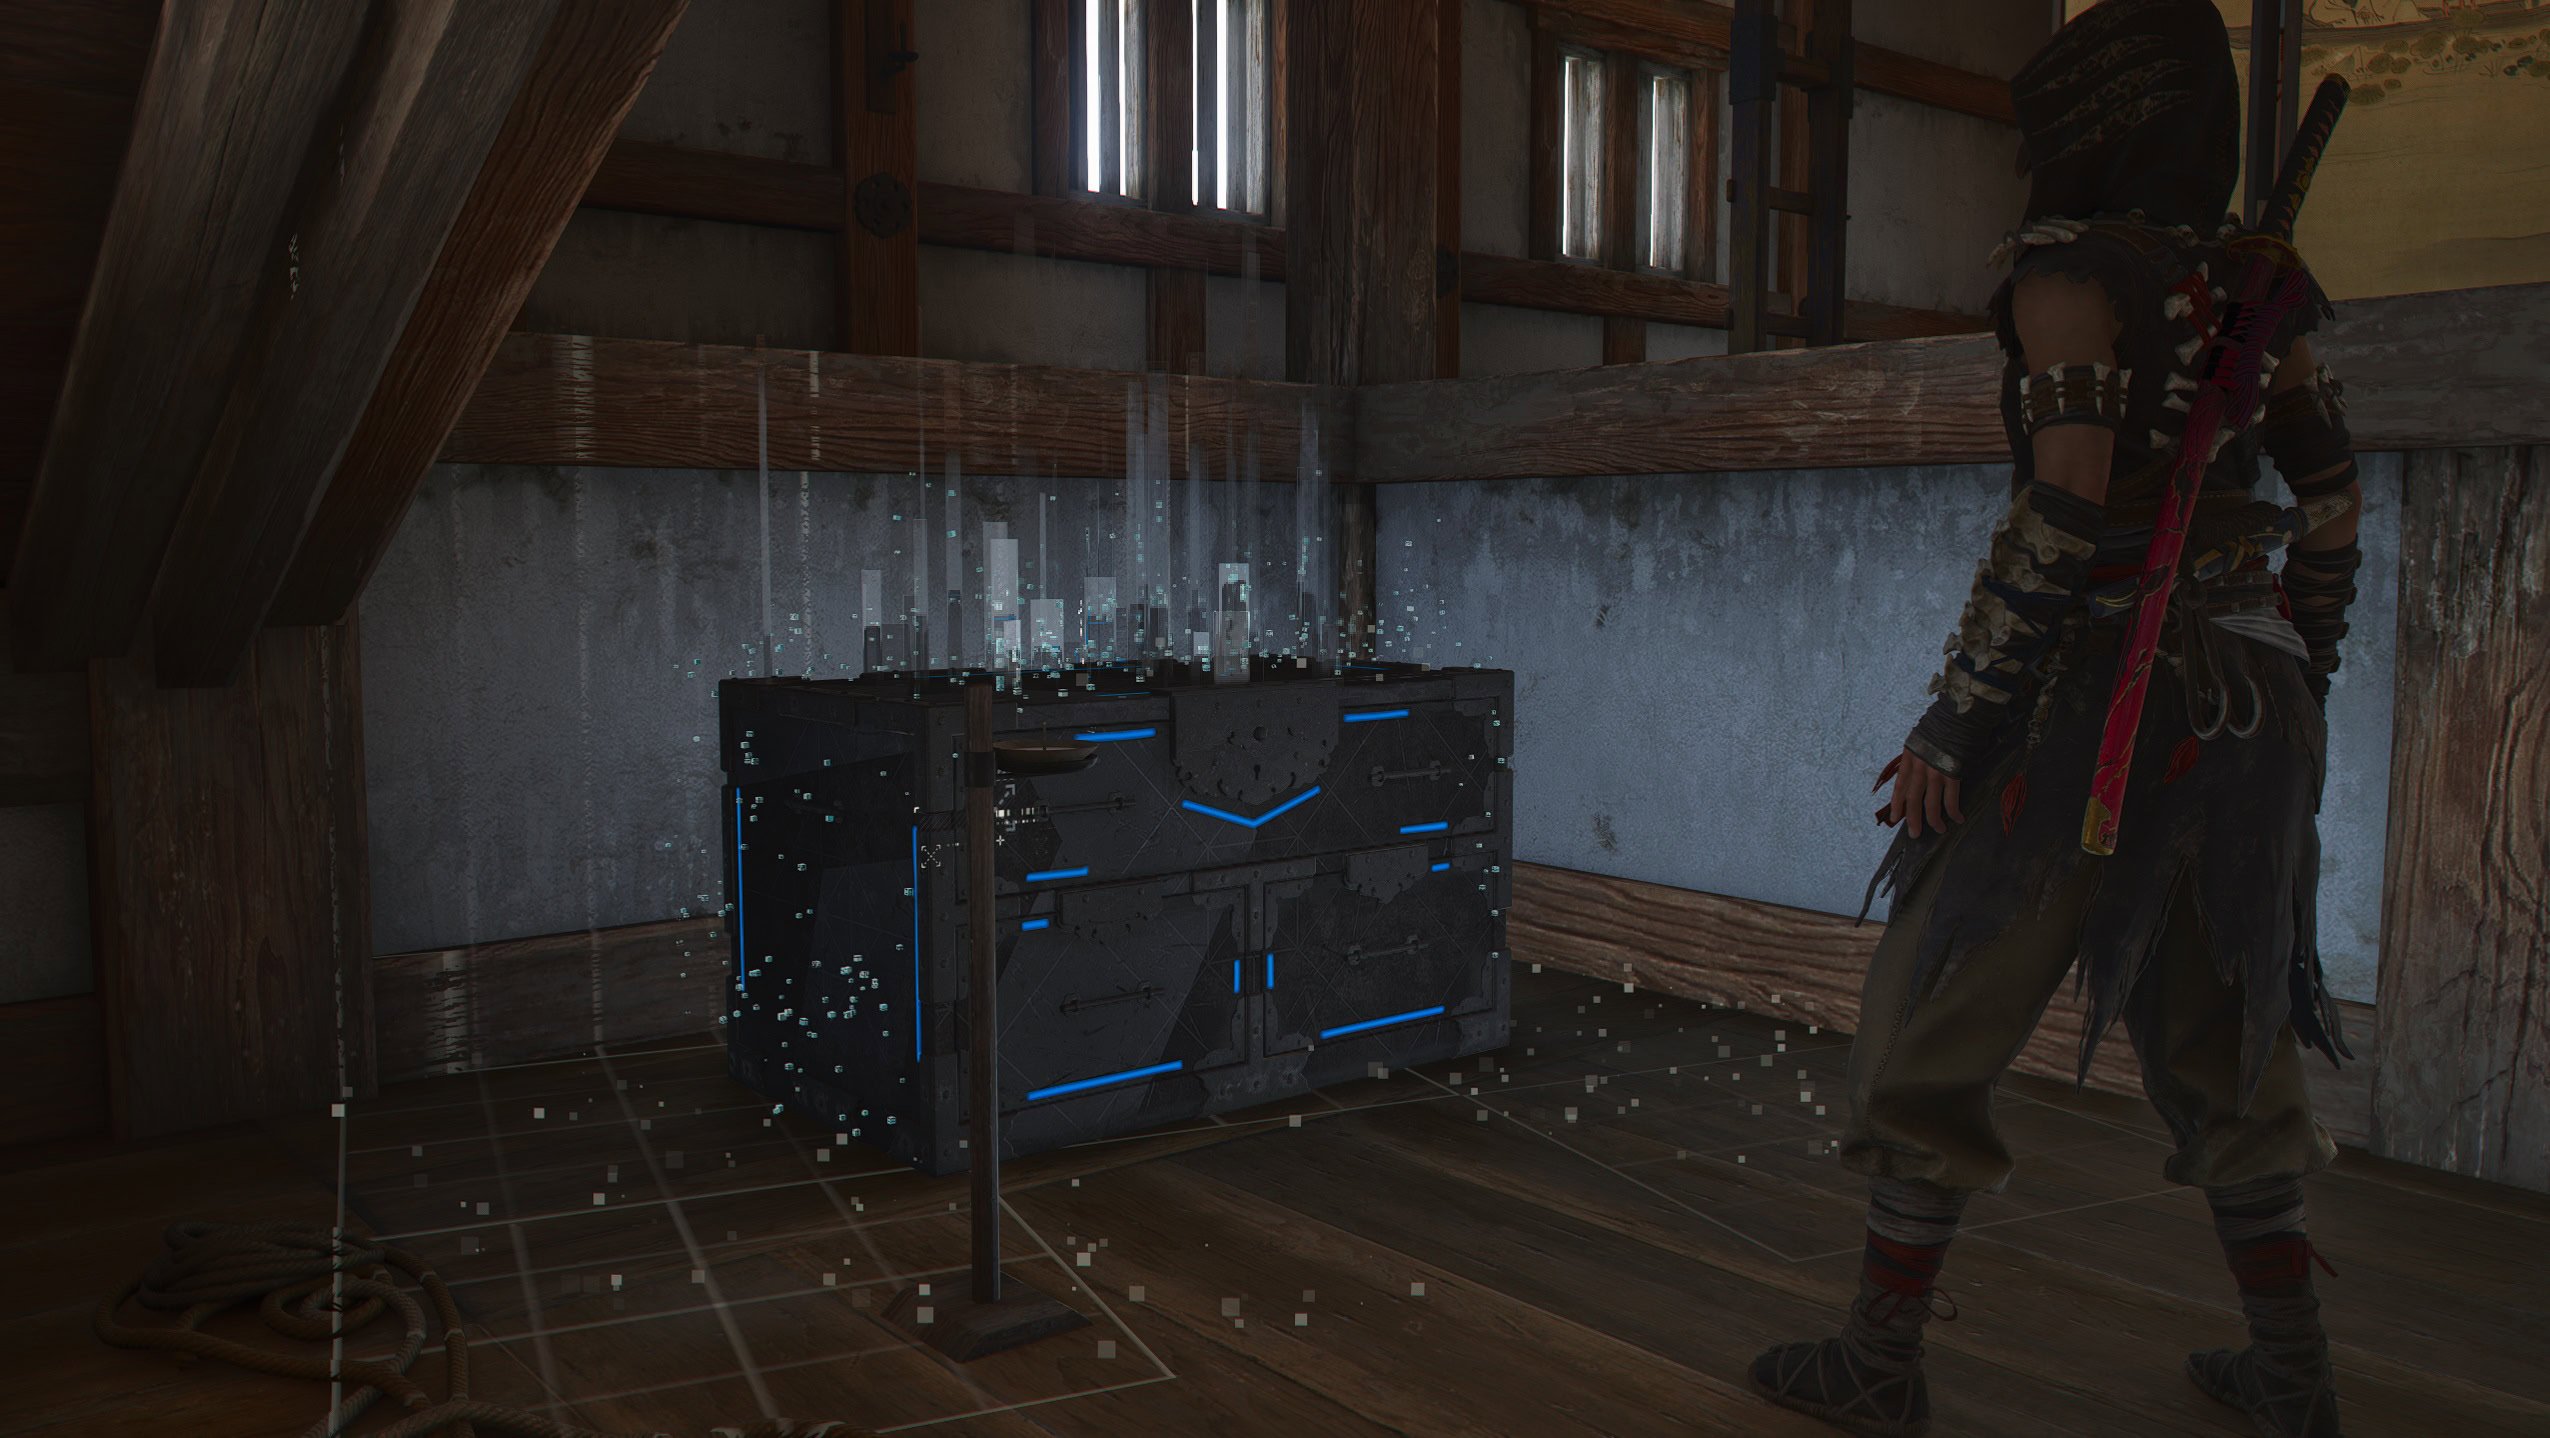
The reward for completing every castle is a legendary treasure chest with legendary gear inside it. You can only loot this chest after defeating all Samurai Daisho within the castle’s walls. The number of Samurai Daisho varies from 1 to 5 depending on the castle’s size.
Forts are essentially the same but on a smaller scale. Less guards, a smaller zone, and not as many Samurai Daisho to defeat. The reward is also a legendary treasure chest.
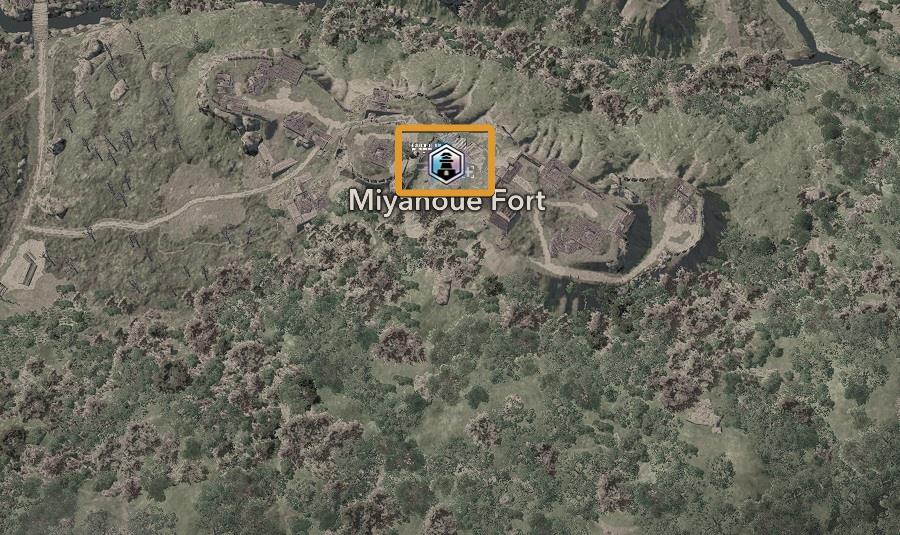
You can open the world map and hover over the castle/fort icon to see its level of wealth, the number of Daisho Samurai, and the legendary reward. Wealth can change.

Samurai Daisho are like mini bosses. They are much tougher opponents than the regular soldiers. Defeating them will grant you Mastery Points. Samurai Daisho do not respawn. Non-legendary treasure chests and Hideout resources do.
Corrupted Castles
Starting at level 30 and after completing at least 3 castles, you will find up to five corrupted castles on the map per season. You can find them thanks to the recolored castle icon that now has blue and pink.
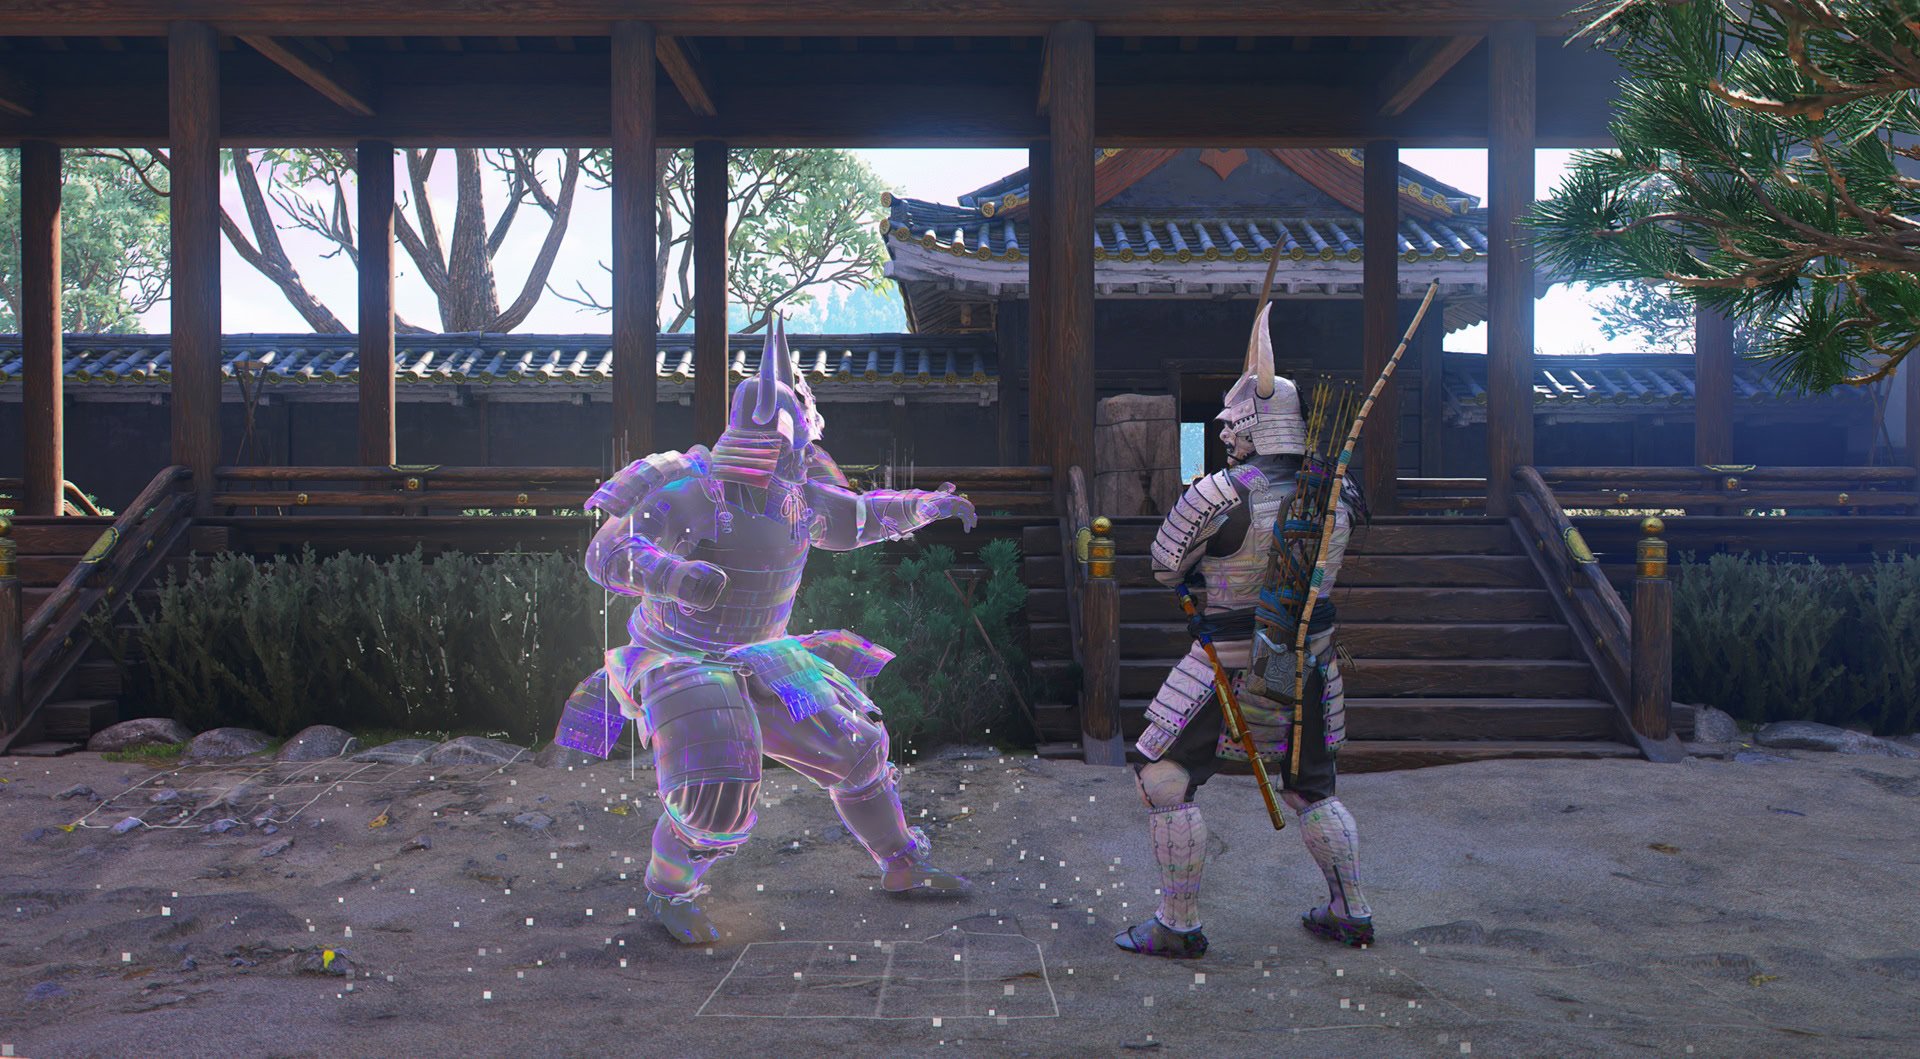
The main difference between regular castles and corrupted castles is that the regular Samurai Daisho are replaced by Corrupted Daisho. These enemies have an ominous appearance and are easy to spot from a distance.
Instead of getting a legendary item, you will receive one, two, or three pieces of gold depending on the size of the castle. Gold pieces are used to upgrade gear, so this is a relatively fast and easy way to acquire it. Each corrupted chest also has random iconic items inside it.
Despite their intimidating appearance, corrupted Daisho are no different from Samurai Daisho. Their health, awareness, and attack patterns remain unchanged.
Exploring Castles as Yasuke or Naoe
Raiding a castle is a challenging and time-consuming task. The gameplay experience will change depending on who you are playing with. We have specific recommendations to aid you when you play as either Yasuke or Naoe.
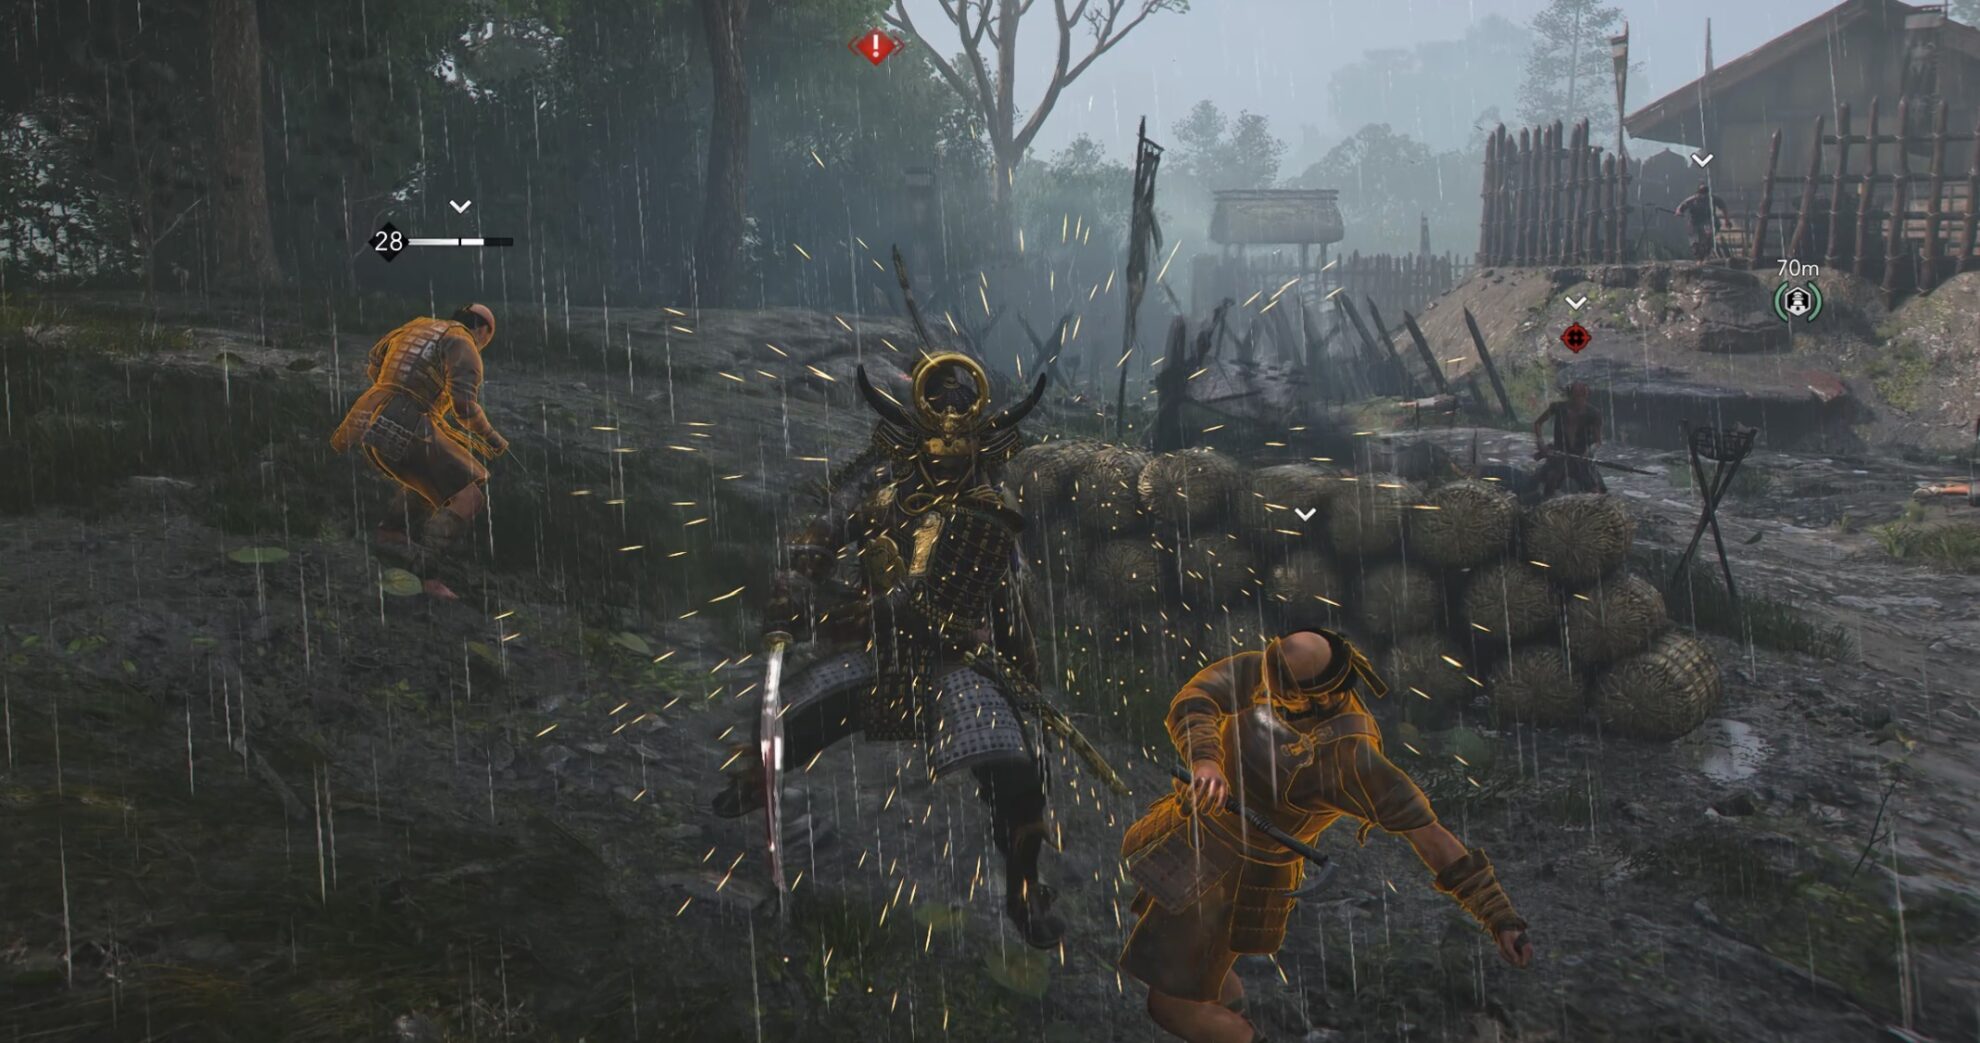
Playing as Yasuke
Yasuke is basically a one-man army capable of taking down any enemy but he’s not invincible. I’ve found it easier to fight in smaller areas where long-range enemies can’t shoot freely.
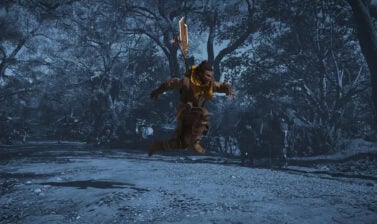
Despite his size, Yasuke can still hide and assassinate enemies. Use this against as many enemies as possible, the more you kill without causing a fuzz the better.
Cutting down alarms is easier with a Bow, Teppo’s precision isn’t the best at long distances.
Unlike Naoe, Yasuke can’t quickly disappear. You will inevitably have to fight against a considerable number of enemies at the same time, all your combos must be on point.
Battle Cry can be useful when you’re surrounded in an uncomfortable position. This will let you reposition.
One of the best abilities for open combat is the Long Katana’s Power Dash. When fully upgraded, it allows you to chain two dashes. If you align your dash properly, you can clear several opponents at once.
Playing as Naoe
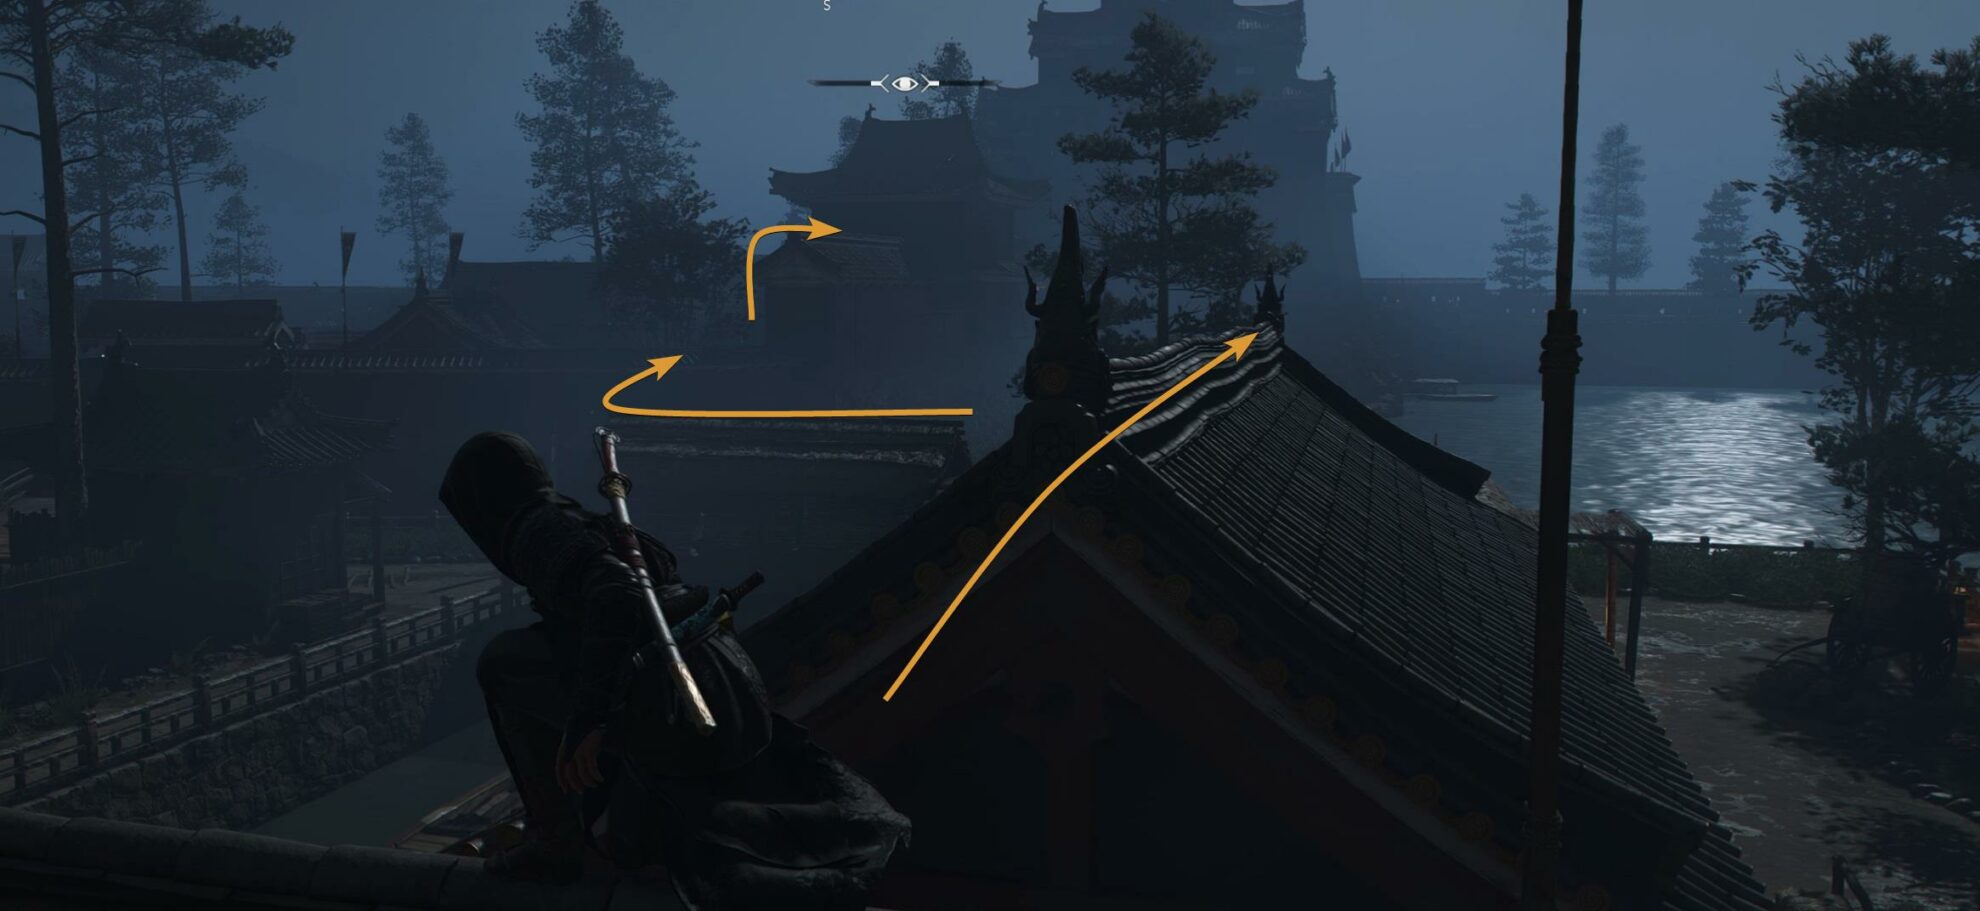
Completing a castle as Naoe requires being more careful and accounting for multiple things. Getting inside is the first place, since there are multiple ways to enter. You should always do some scouting beforehand. Search for the spot with guards who are in vulnerable positions.
Identify all the buildings around and plan a route to the castle. Also, search for an escape route in case something goes wrong.
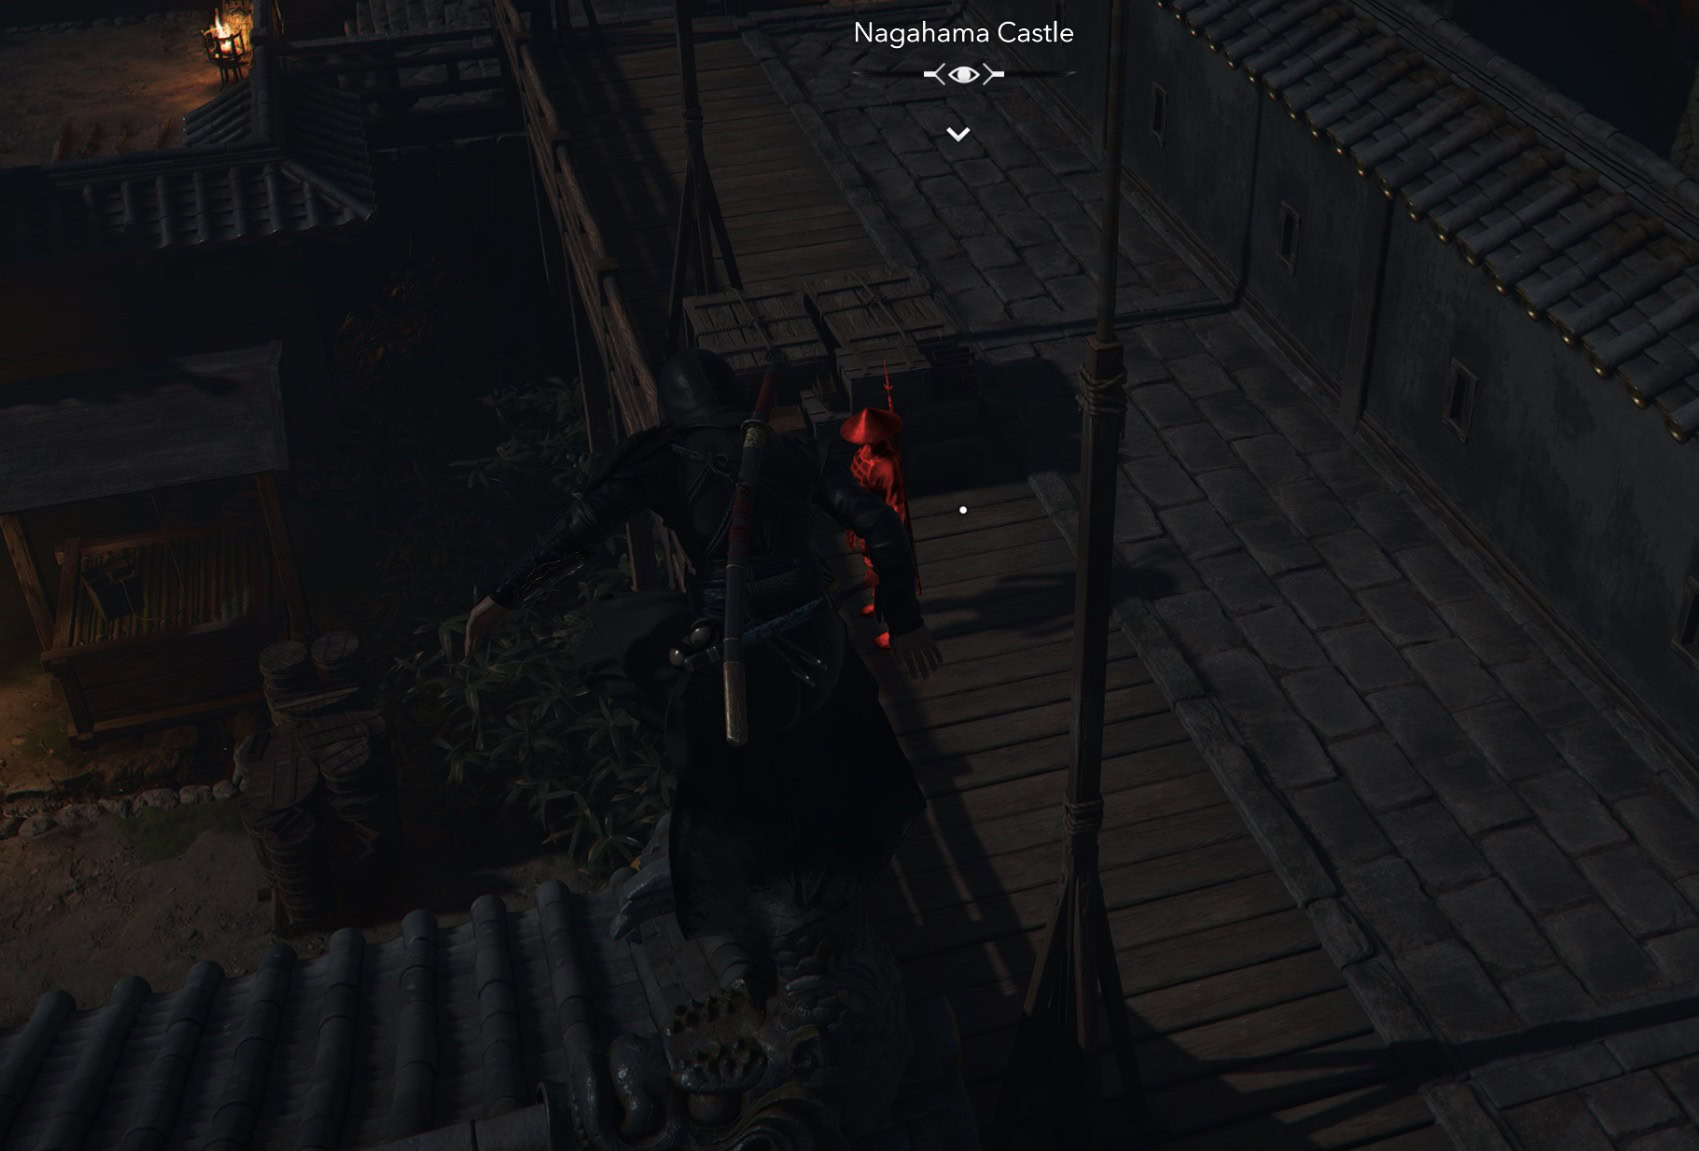
While you can ignore the weaker enemies and kill only the Samurai Daisho to loot the chest, the reality is that Naoe has a hard time assassinating them without high knowledge-rank abilities. I recommend that you take out any other nearby enemies. That way you won’t have to worry about them joining when you inevitably have to duel a Samurai Daisho.
Samurai Daisho are often spread out. If they are not inside the castle, you can find them patrolling an area. On bigger castles, it’s harder to spot them, climb to tall places to look for them, or see an area where you have yet to search.
Speaking of tall places, there is a View Point at the top of each castle. Make sure to unlock it.
A few Samurai Daisho are in the main castle, be prepared to fight in close quarters.
Remember to cut down the alarms as soon as possible. If Guardians show up before you finish the task it will become a lot harder.
If enemies spot you get out of there immediately, the longer you stay the more enemies will arrive. Fighting against multiple enemies as Naoe rarely ends well.
Shadows are your allies, the best time to do this is at night.
How to prepare for raiding a castle
There are a few things you can do to increase the odds of success and make the most out of it.
Generap Prep tips
Double-check your rations, ammo, and tools. Some of the resources found in castles can only be smuggled by scouts, make sure to have them available before you start. You can restock scouts at your Kakurega for 200 Mon each.
Prep tips for Yasuke
When playing Yasuke I wear the Protector Set. This Legendary Armor allows you to parry unblockable attacks while the helmet deals 50% damage to the attacker on Parry.
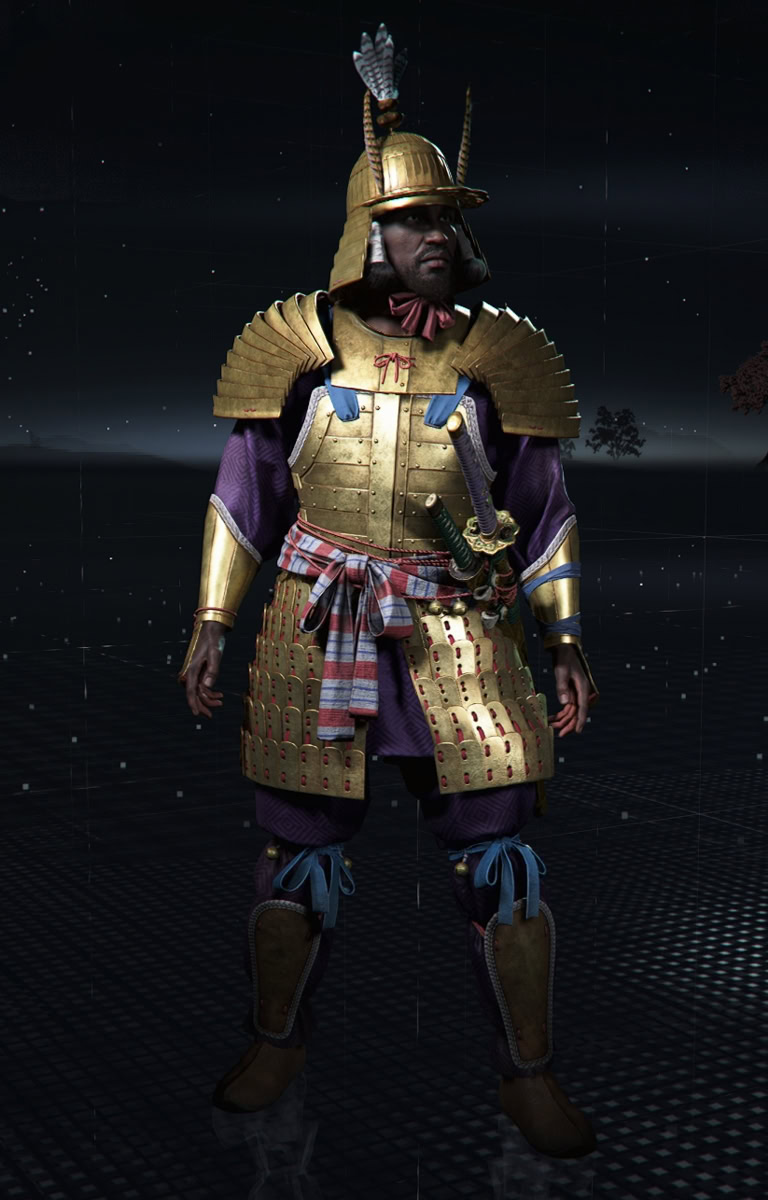
This is an an extremely useful combination given the fact that you will fight a lot of tough enemies simultaneously. Forget about having to dodge those powerful attacks and just focus on parrying.
In terms of abilities, I recommend three specifically:
- Riposte: Lets you perform an immediate Riposte after blocking a hit.
- Energizing Defense: Maxed out, this ability restores 5% Health after doing a Riposte. It also increases the Riposte damage by 40%.
- Payback: Deal 3 powerful strikes to an enemy, each dealing 35% ability damage and restoring 10% Health.
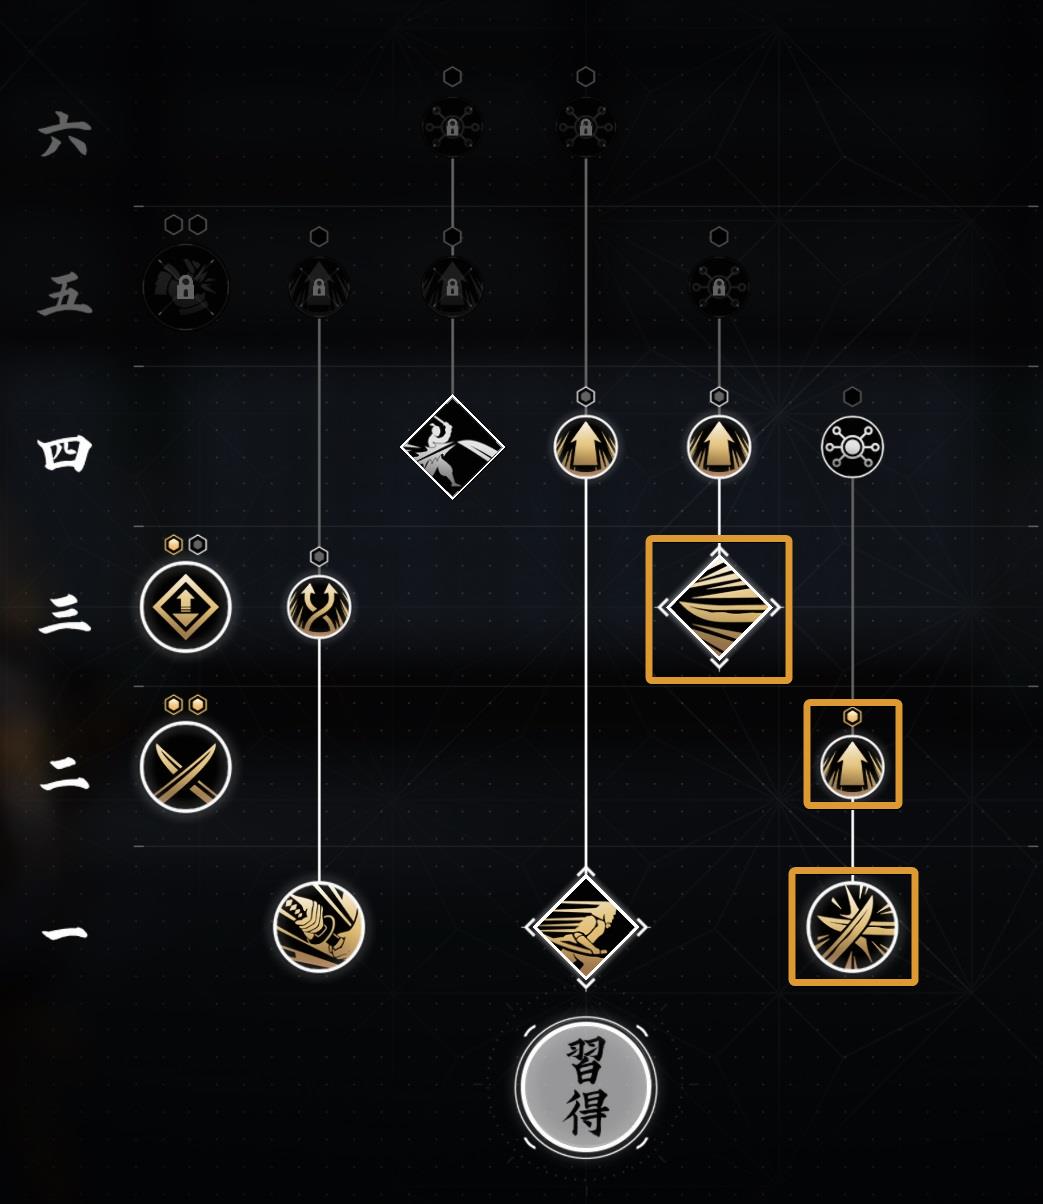
All of them are from the Long Katana Mastery Path. Keep in mind that to use all these abilities you need to unlock Knowledge Rank 3.
With these three abilities combined with the Protector Set you are able to block all hits while dealing damage and also have different ways to restore health.
Prep tips for Naoe
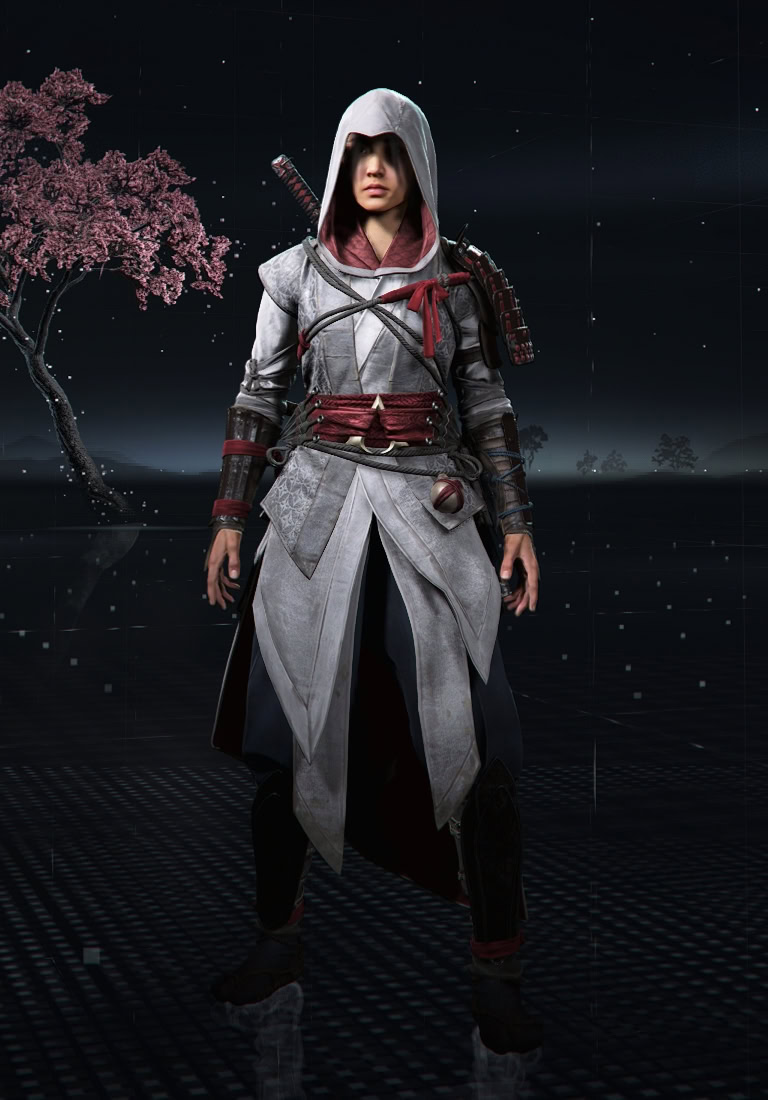
For Naoe things get a little trickier. For gear, I recommend anything with an engraving that removes Health Segment on Assassinations. For the armor, whatever gives you the highest Damage with Tools.
Because of these two needed stats, the Apprentice Assassin Gear is a great choice. Especially because you can get it early in the game.
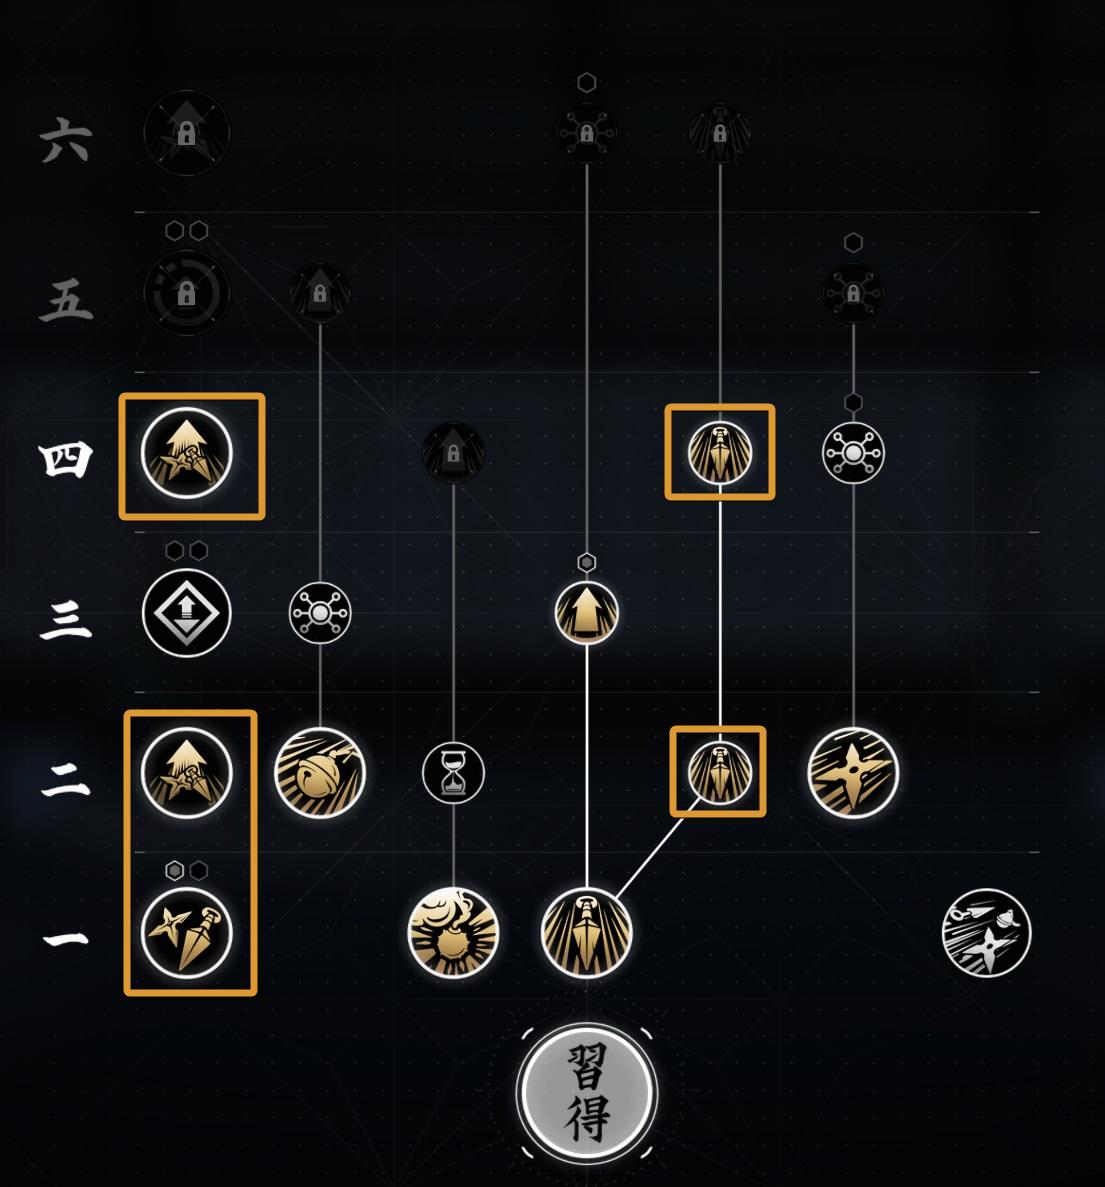
Naoe needs a considerable amount of abilities compared to Yasuke, even from multiple Mastery Paths.
From the Assassin Path you want everything maxed out. If you are low in Mastery Points you can leave Vigor empty.
From the Shinobi Path, unlock Shallow Water Breathing, Grappling Hook, Ascension Boost, Igan Roll, and Ninja Fall. These are all utility abilities that are going to make things easier only on a few occasions, but you will be thankful when that happens
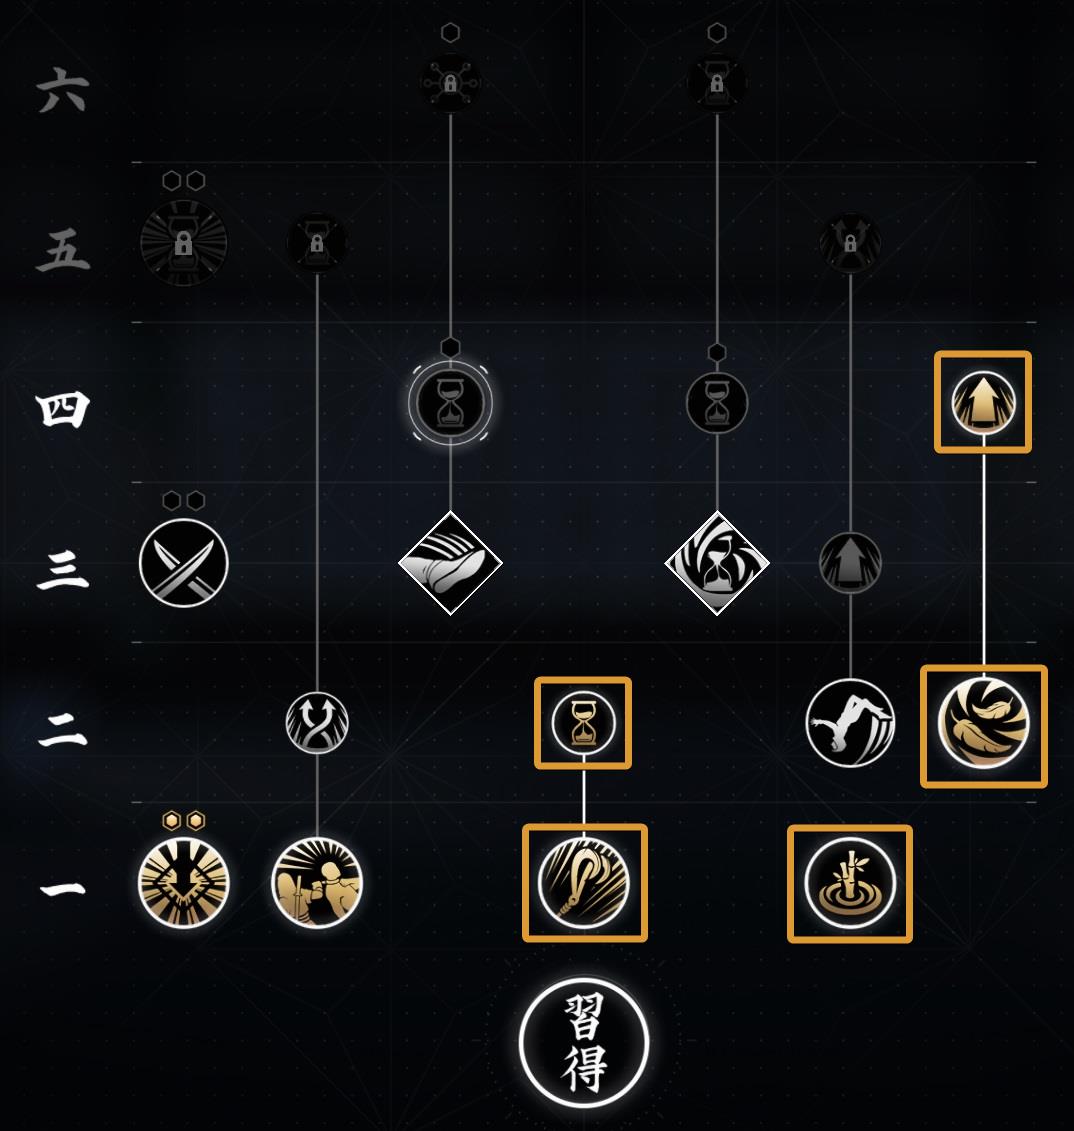
Last but not least, the Tools Path is my favorite one. Being able to kill most Samurai Daisho with a single Kunai saves a lot of time and reduces the risks. Maxing out Kunai Assassination Damage, Larger Tool Bag and Tool Professional is the most important thing for this Path.
List of all Castles and available loot
The following is a list of all Legendary gear pieces that you can find in each one of the castles and forts in Assassin’s Creed Shadows.
The level of the gear you obtain is either equal to your character’s level at the time you obtain the item, or the minimum level of the region the legendary chest is in.
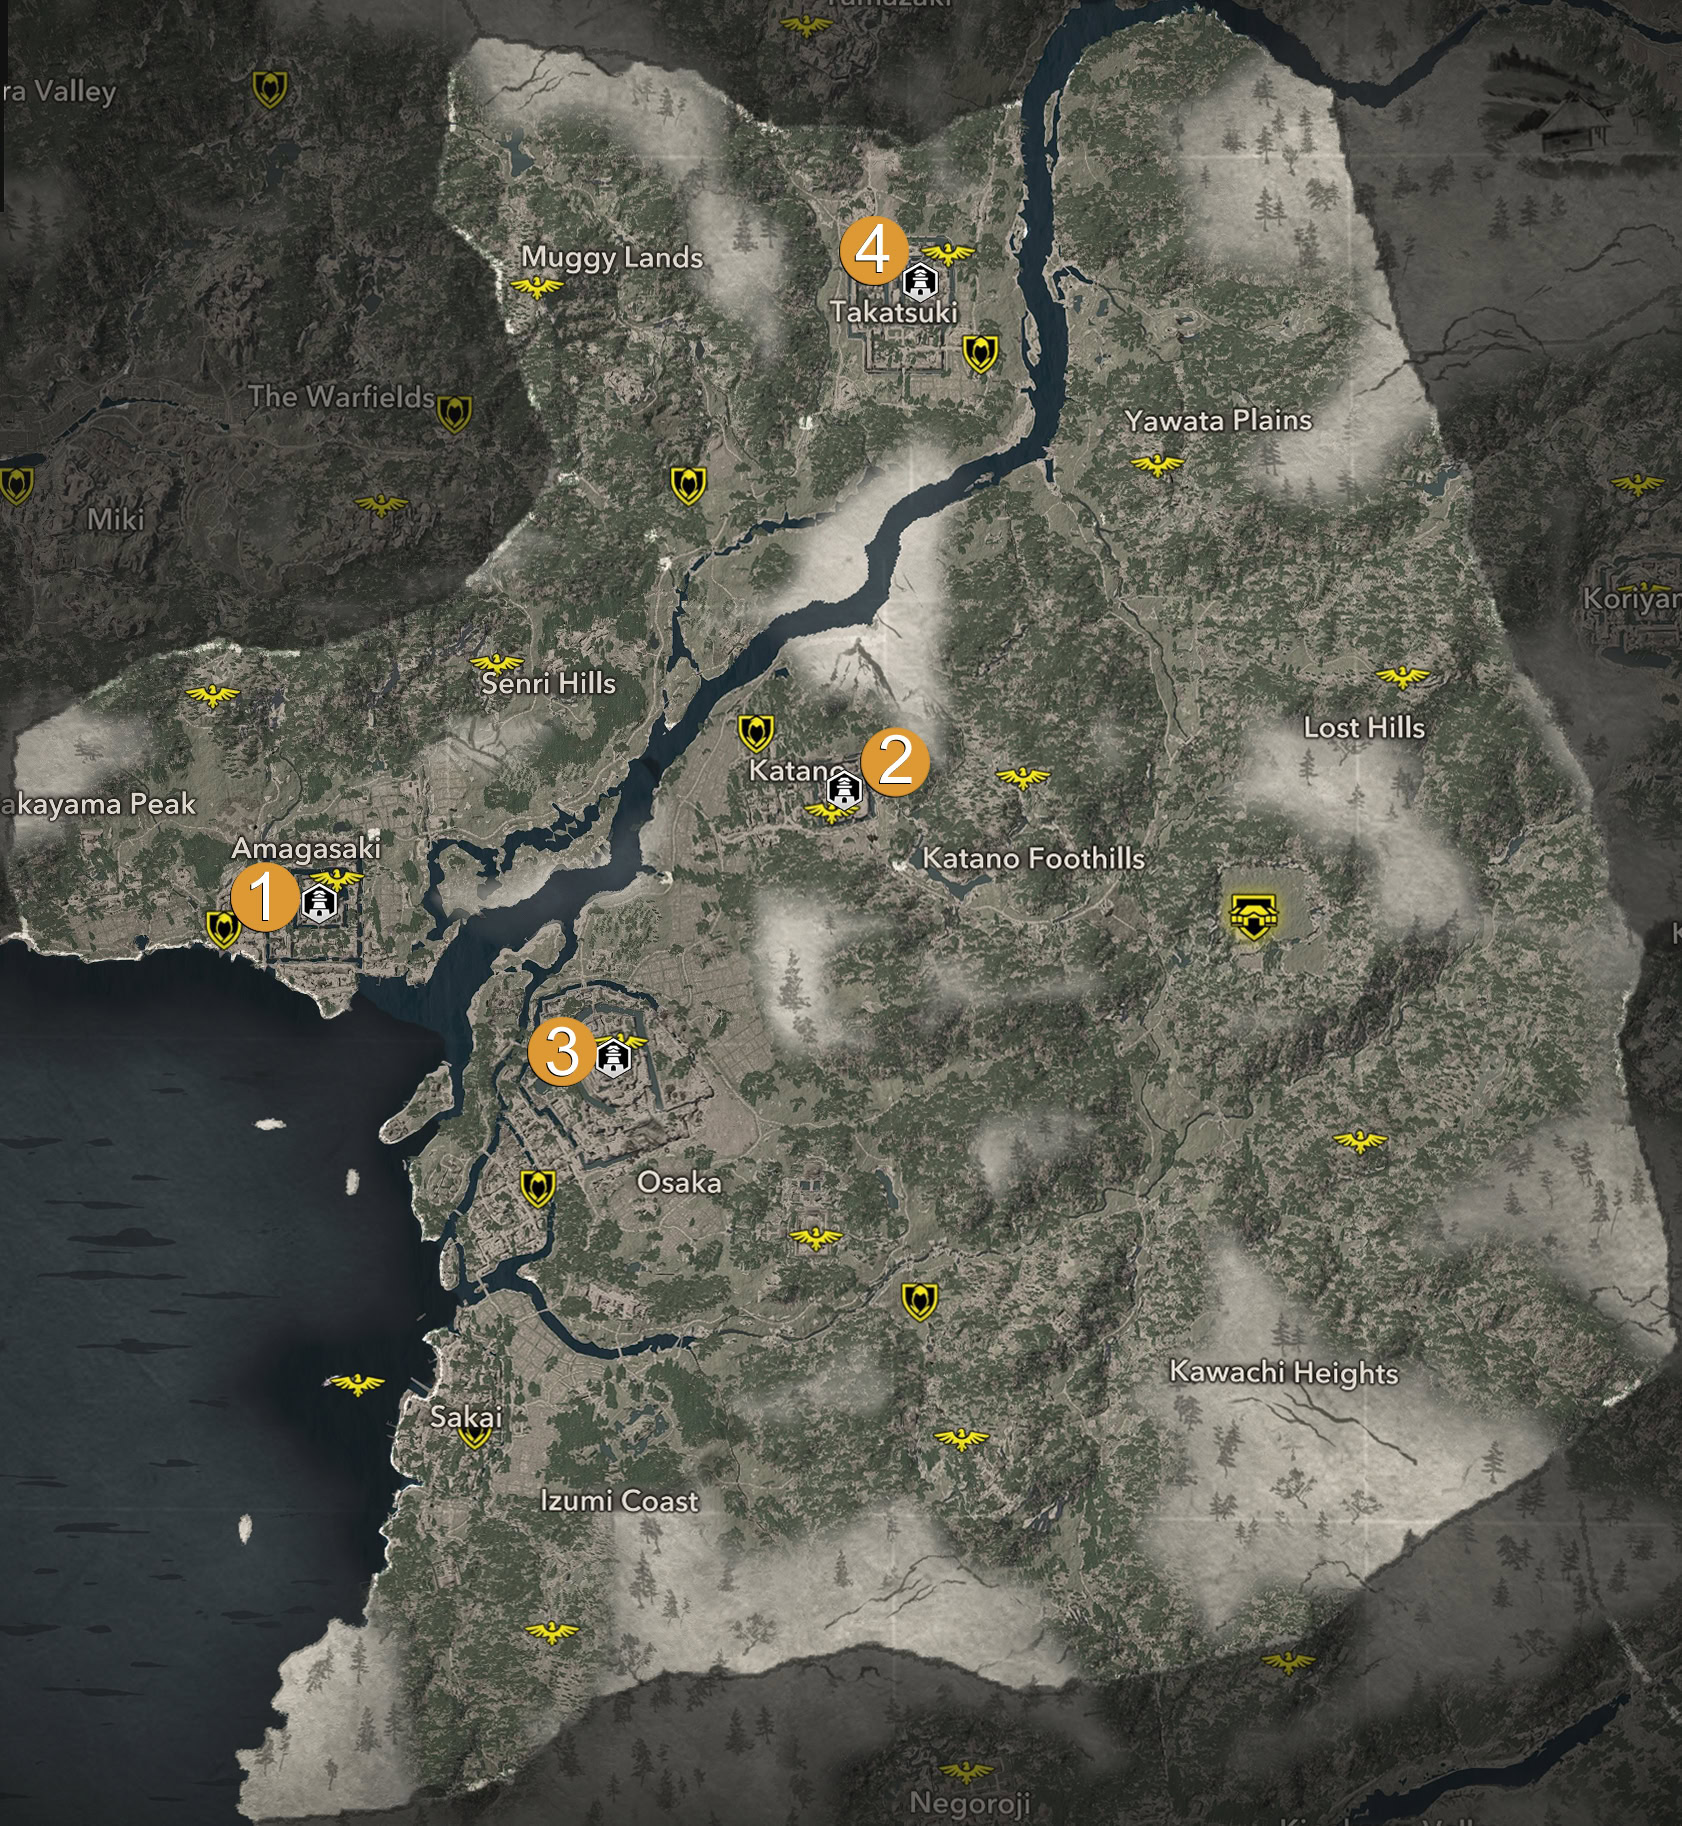
Izumi Settsu Castles
There are a total of four castles in the Izumi Settsu province.
| № | Castle | Icon | Legendary Item | Info |
|---|---|---|---|---|
| 1 | Amagasaki Castle | Tools Master Mask | Samurai Daisho: 5 | |
| 2 | Katano Castle | Tools Master Gear | Samurai Daisho: 2 | |
| 3 | Osaka Castle | Peasant Clothes | Samurai Daisho: 3 | |
| 4 | Takatsuki Castle | Peasant Hat | Samurai Daisho: 3 |
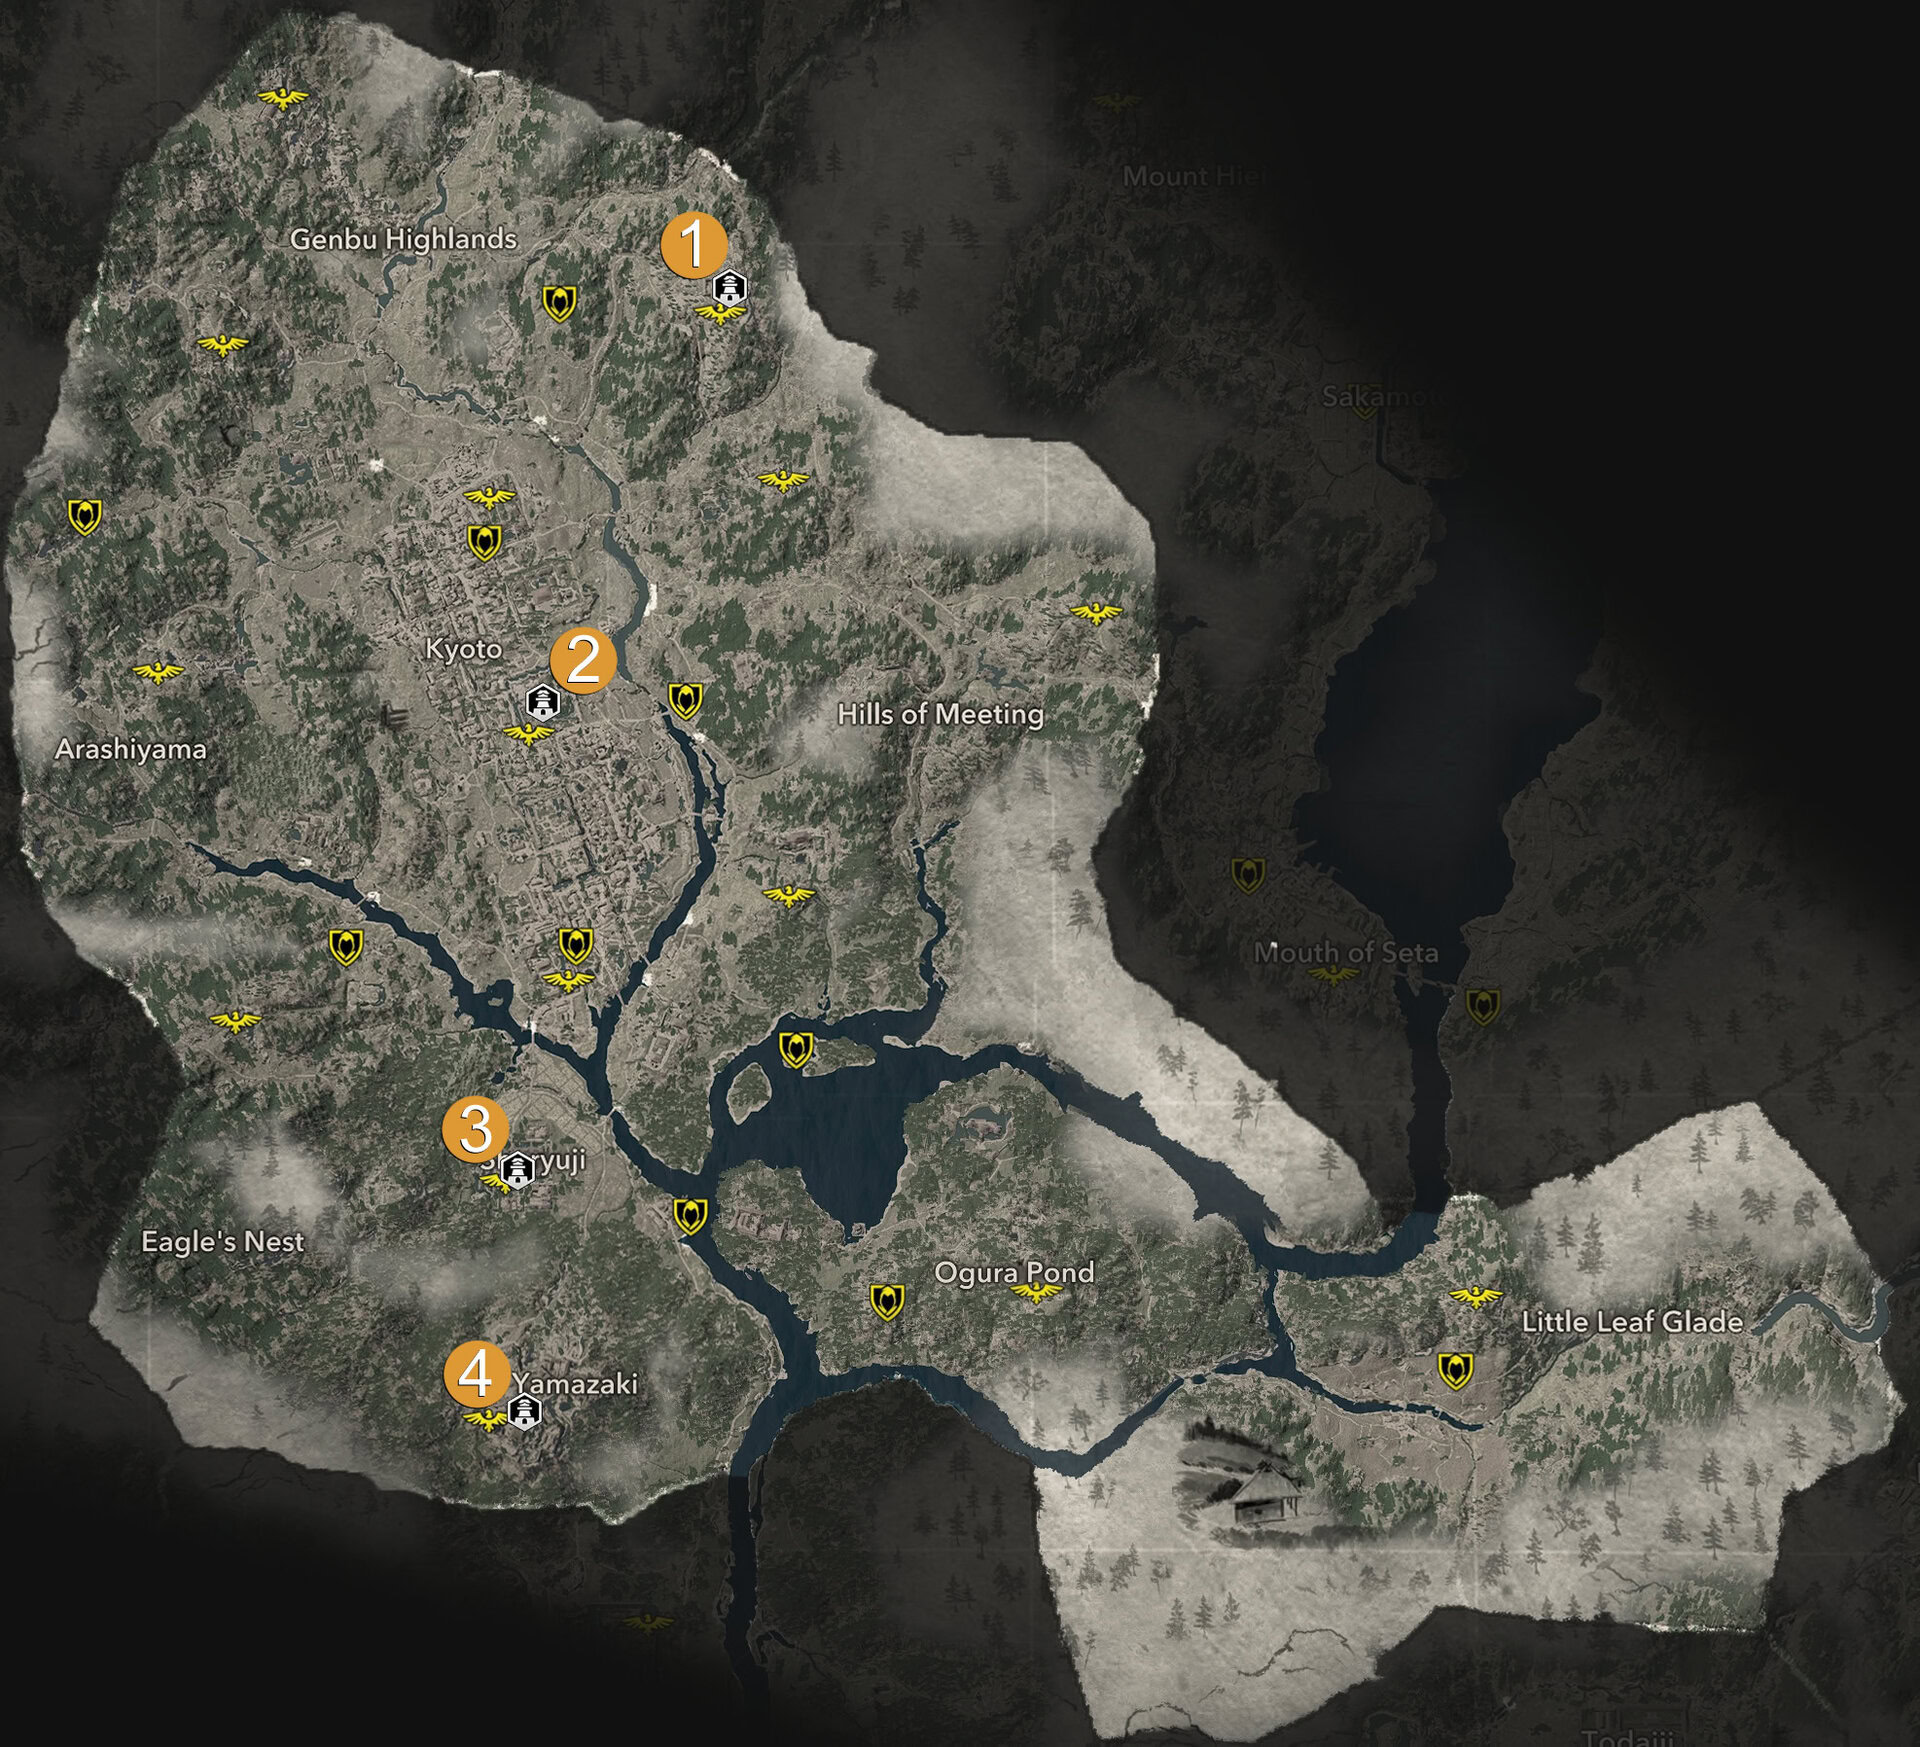
Yamashiro Castles
There are four castles in the Yamashiro province.
| № | Castle | Icon | Legendary Item | Info |
|---|---|---|---|---|
| 1 | Hanazono Castle | Protector’s Helmet | Samurai Daisho: 2 | |
| 2 | Nijo Palace | Protector’s Armor | Samurai Daisho: 2 | |
| 3 | Shoryuji Castle | Yurei-Walker Robes | Samurai Daisho: 3 | |
| 4 | Yamazaki Castle | Yurei-Walker Hood | Samurai Daisho: 5 |
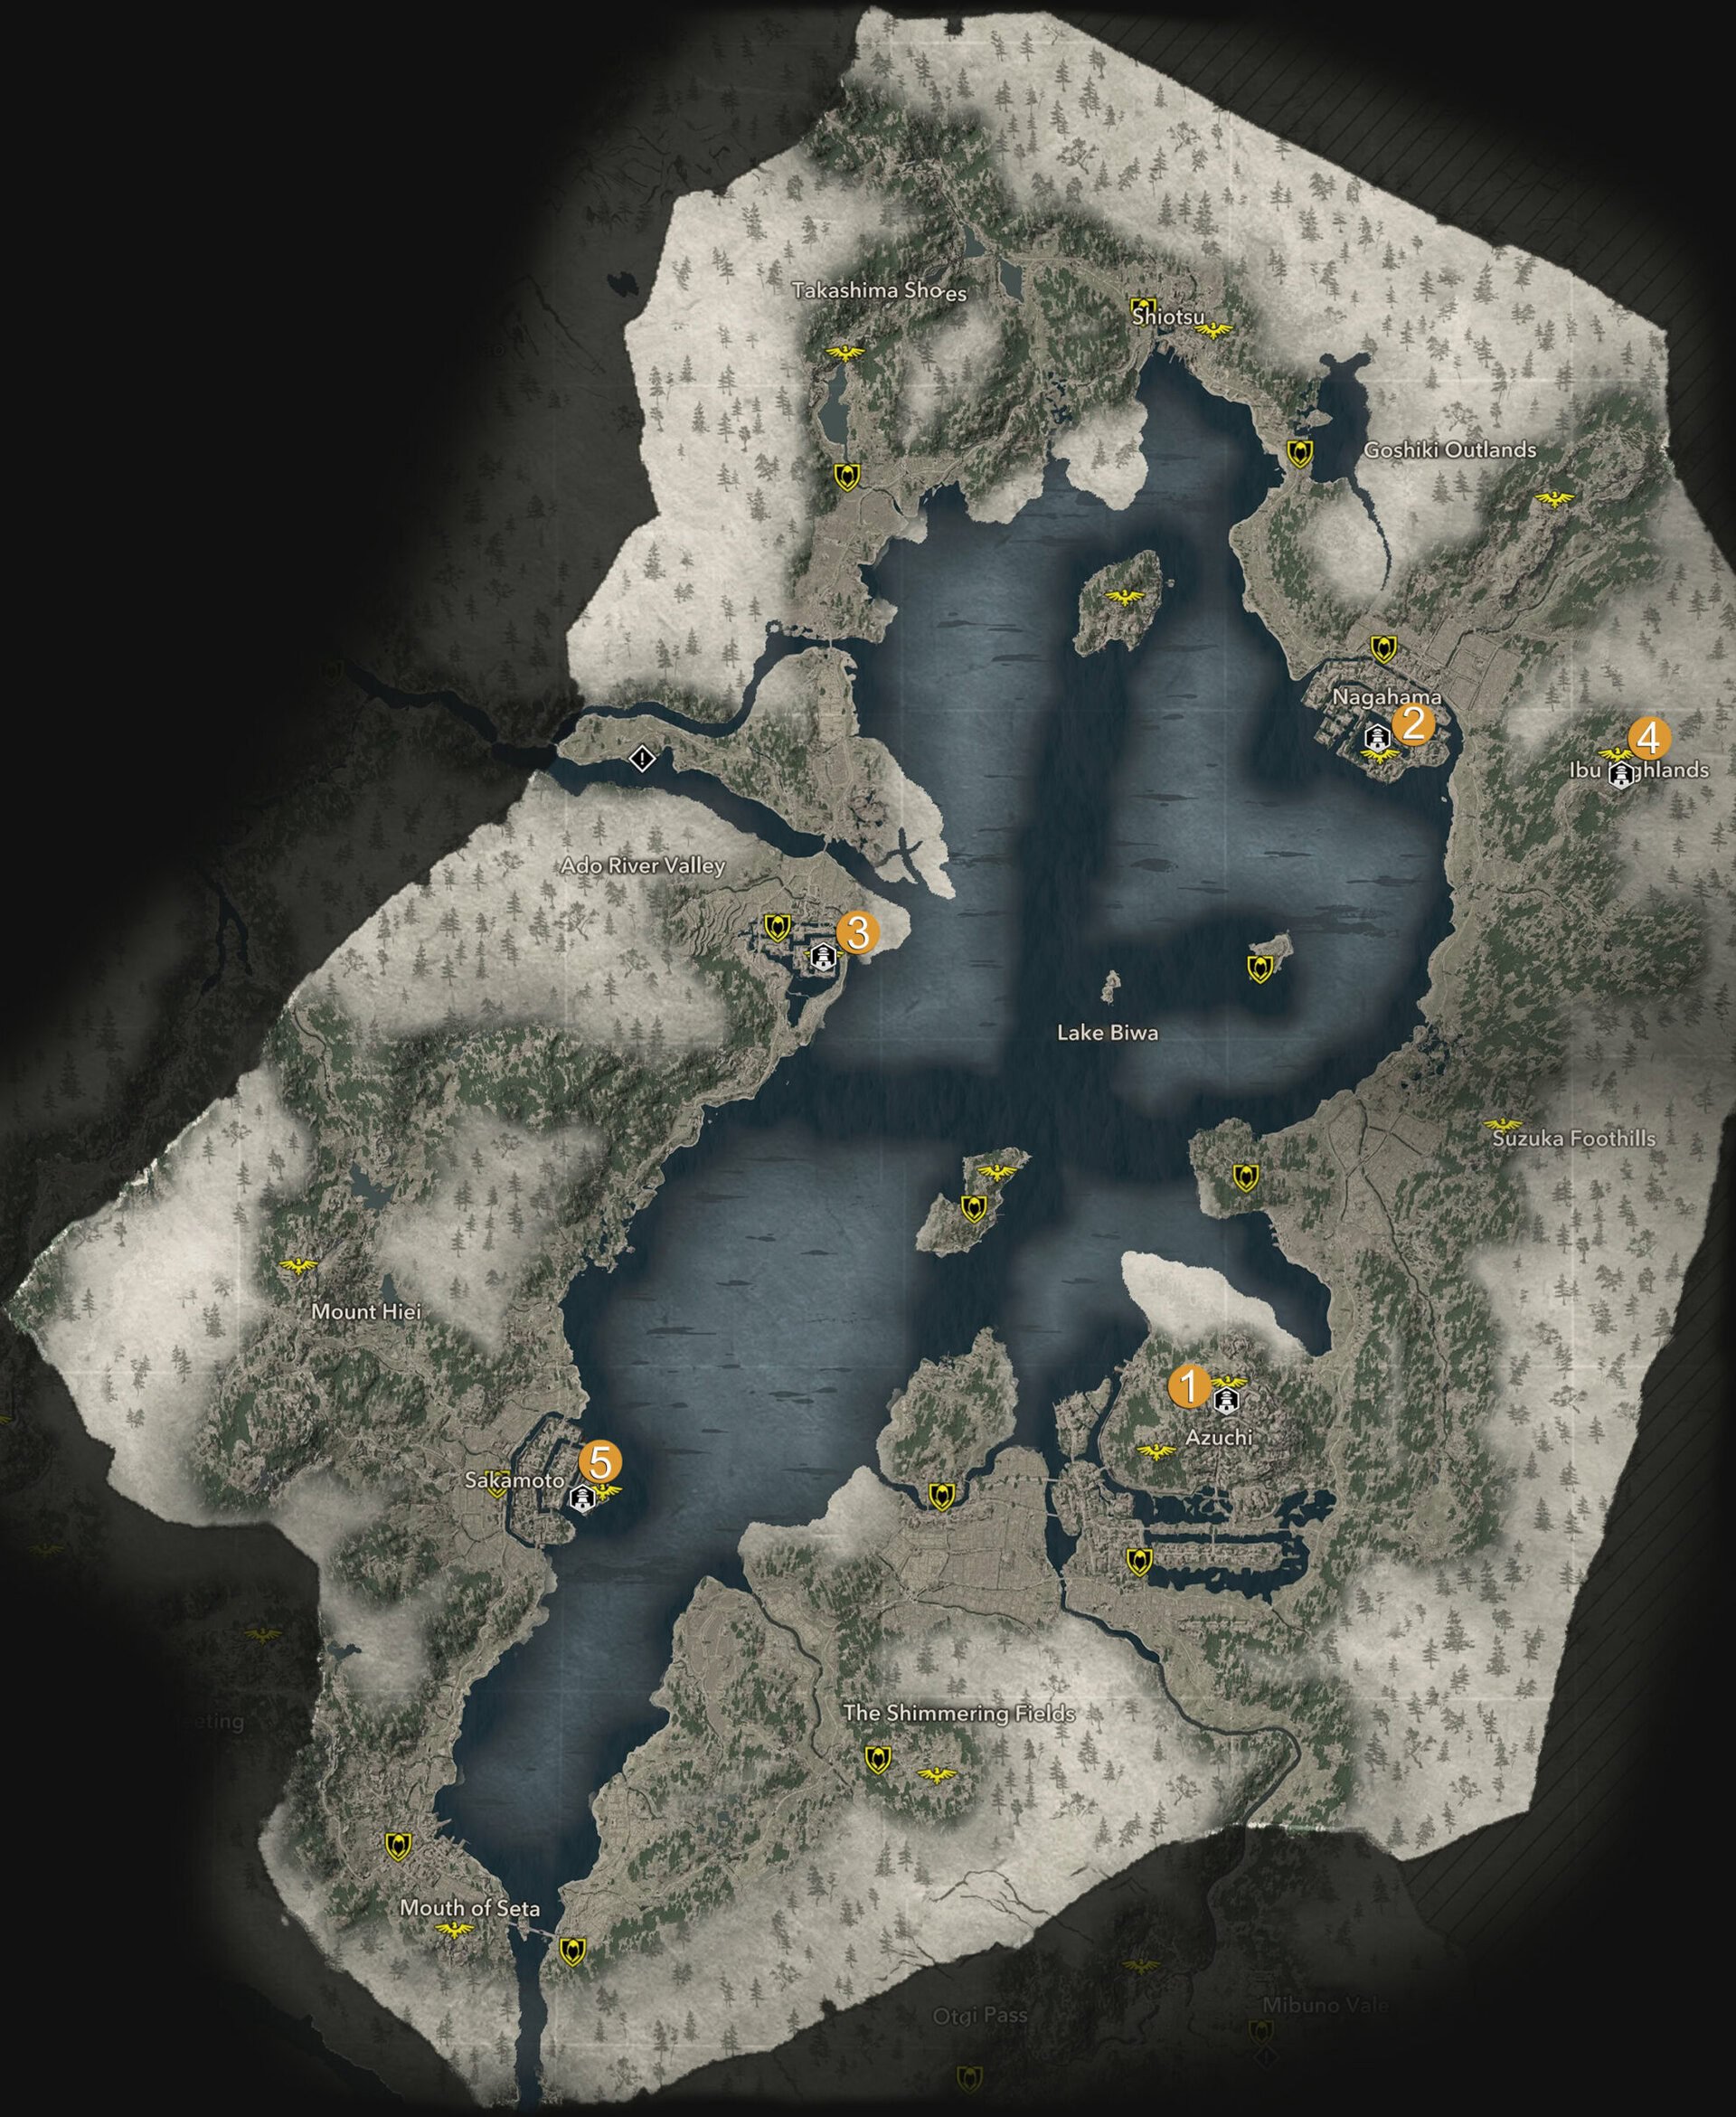
Omi Castles
You can find four castles and one fort in the Omi province.
| № | Castle | Icon | Legendary Item | Info |
|---|---|---|---|---|
| 1 | Azuchi Castle | Ship Captain’s Mask | Samurai Daisho: 4 | |
| 2 | Nagahama Castle | Mamushi Snake Robes | Samurai Daisho: 4 | |
| 3 | Omizo Castle | Mamushi Snake Hood | Samurai Daisho: 2 | |
| 4 | Kashiwabara Fortress | Time-Honored Crescent | Samurai Daisho: 1 | |
| 5 | Sakamoto Castle | Ship Captain’s Gear | Samurai Daisho: 3 |
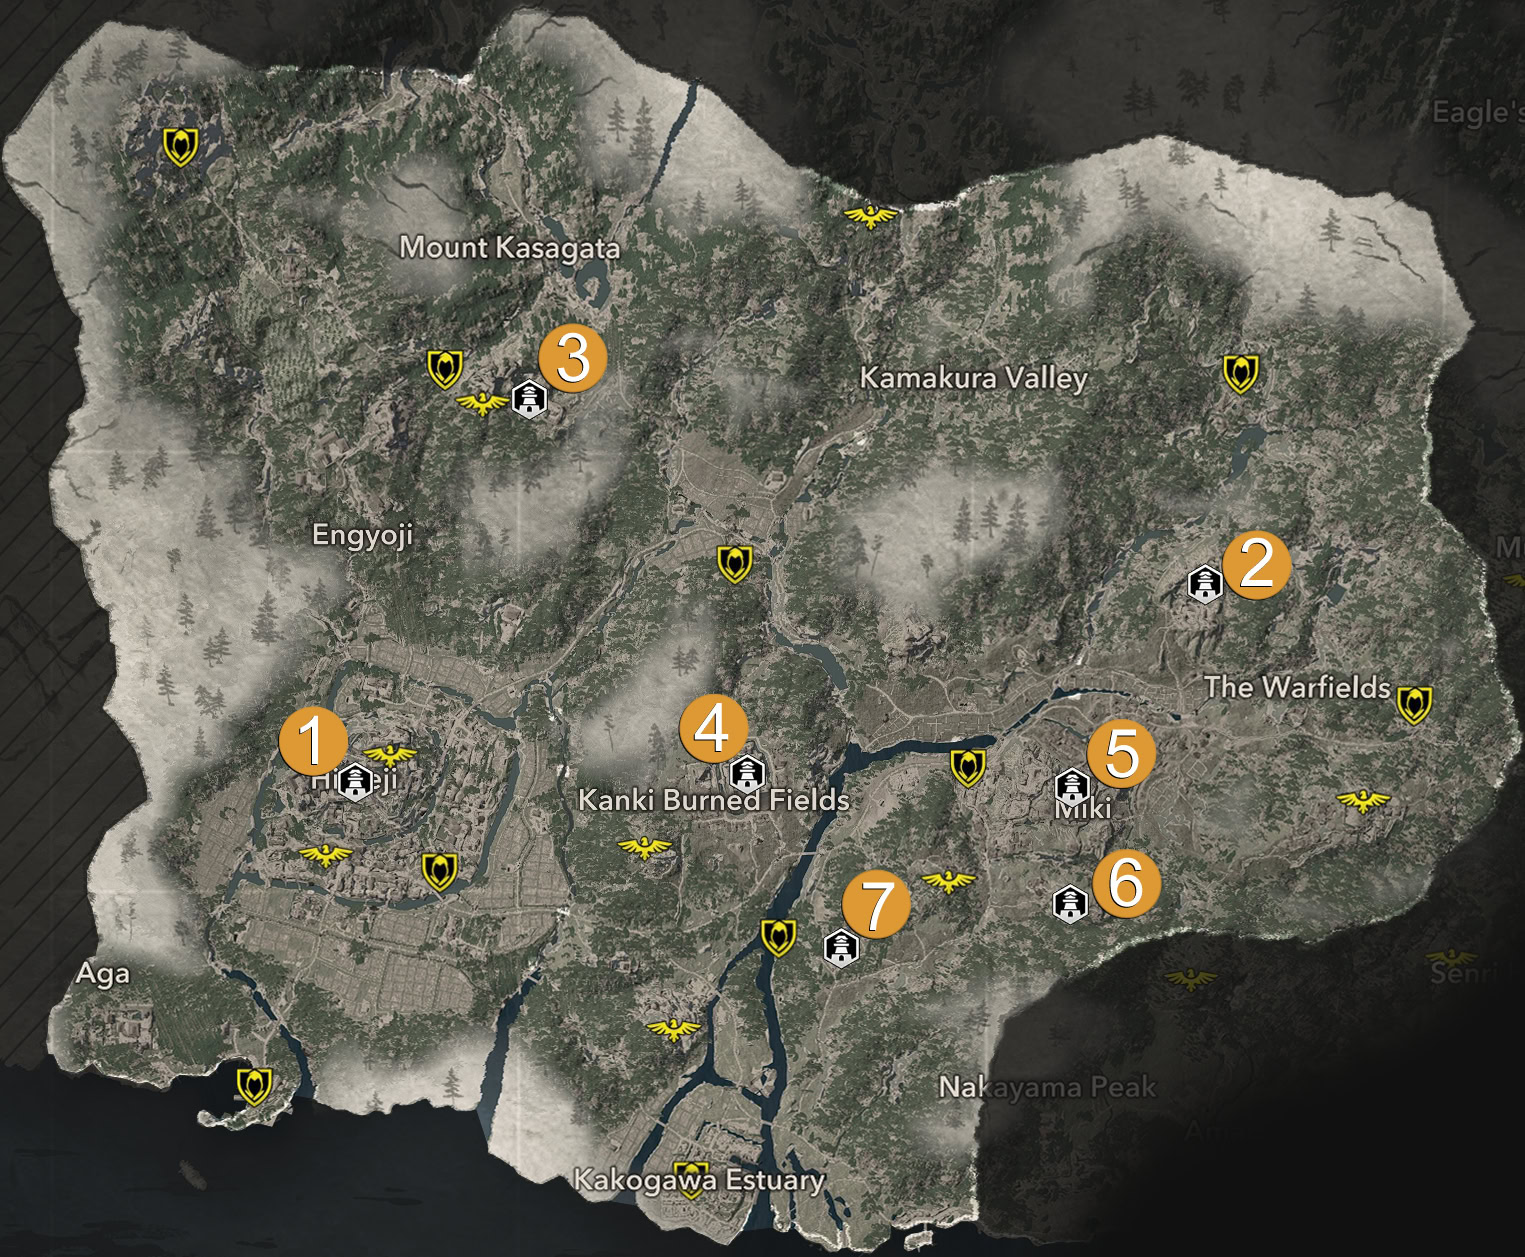
Harima Castles
The Harima province has three castles and four forts.
| № | Castle | Icon | Legendary Item | Info |
|---|---|---|---|---|
| 1 | Himeji Castle | Defense Master Clothing | Samurai Daisho: 5 | |
| 2 | Hiraiyama Fort | Yami no Kage | Samurai Daisho: 2 | |
| 3 | Inariyama Garrison | Funeral Pyre | Samurai Daisho: 2 | |
| 4 | Kanki Castle | Samurai Daimyo Armor of Legend | Samurai Daisho: 2 | |
| 5 | Miki Castle | Defense Master Headwrap | Samurai Daisho: 4 | |
| 6 | Miyanoue Fort | Lethal Lotus Petal | Samurai Daisho: 2 | |
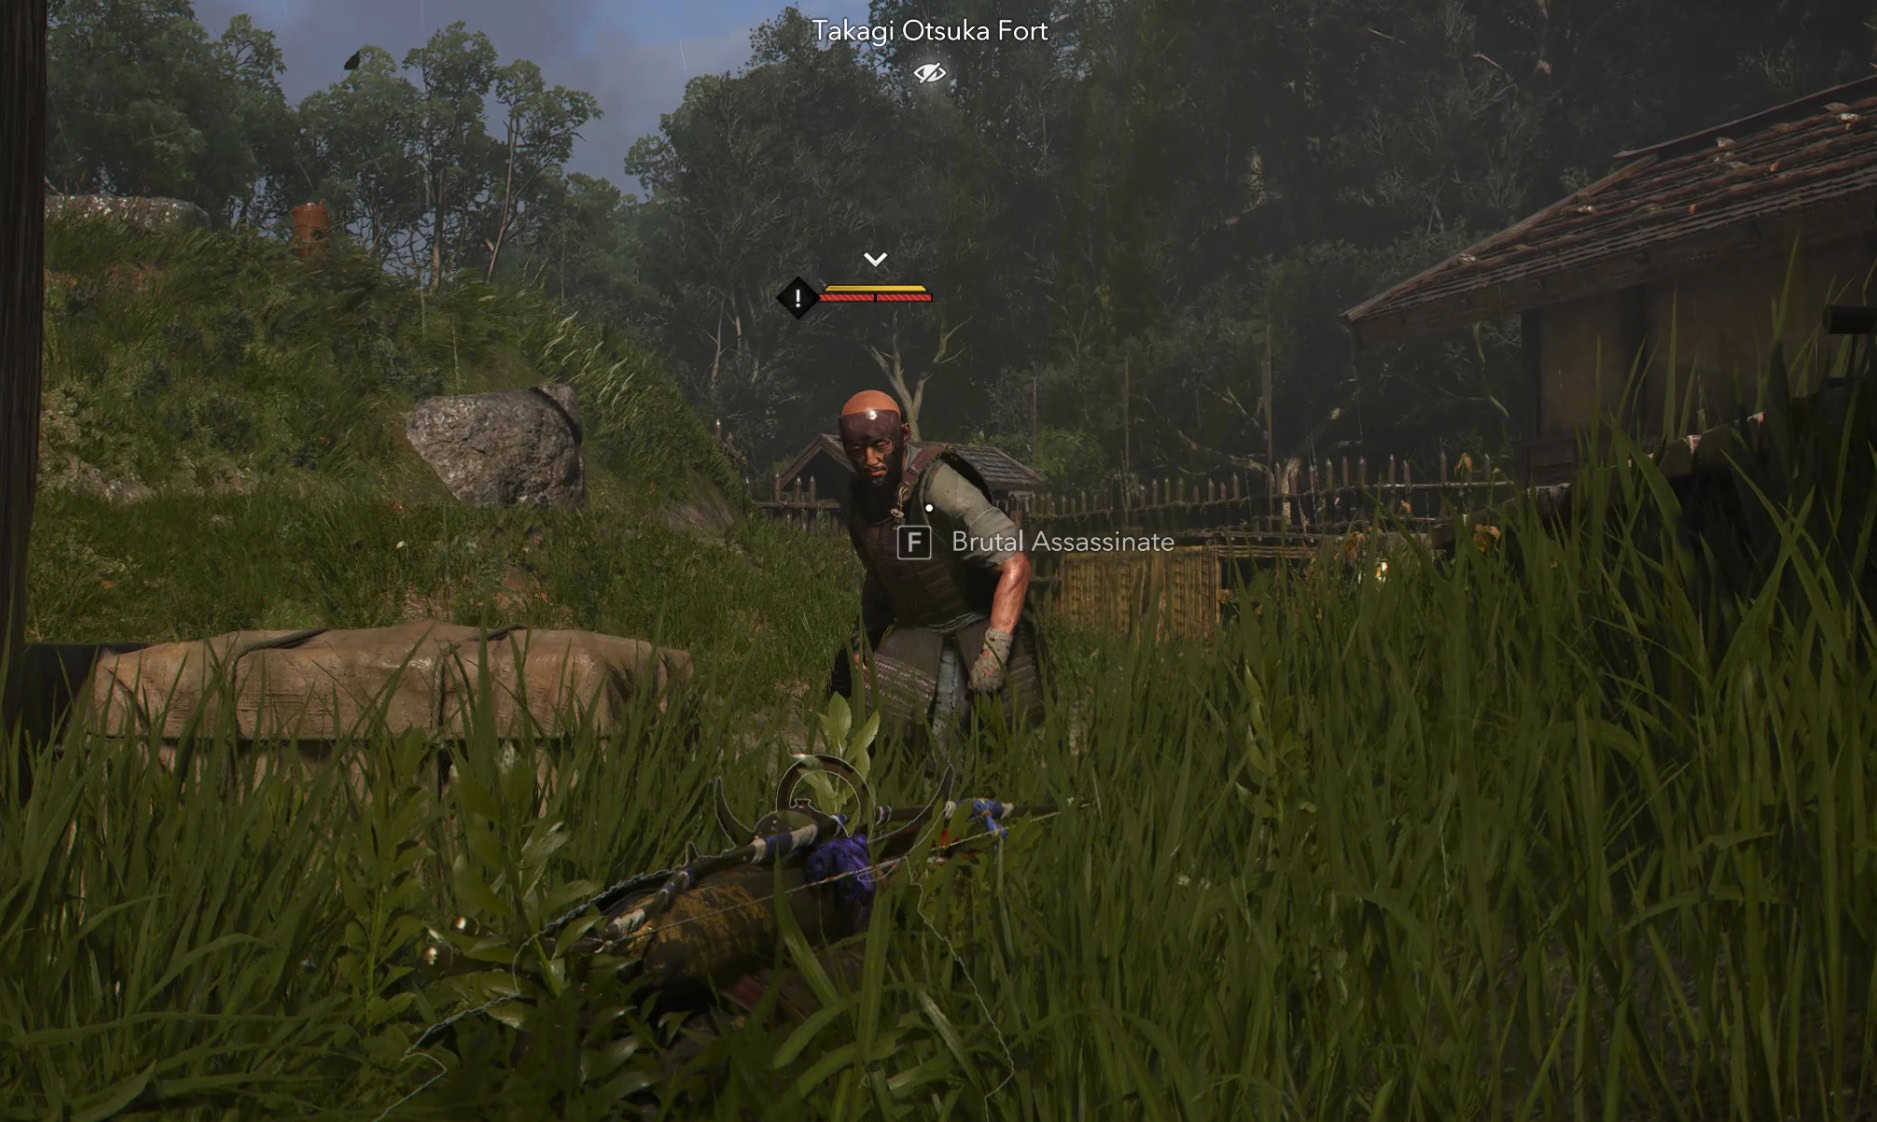
| 7 | Takagi Otsuka Fort | Death’s Bloom | Samurai Daisho: 1 |
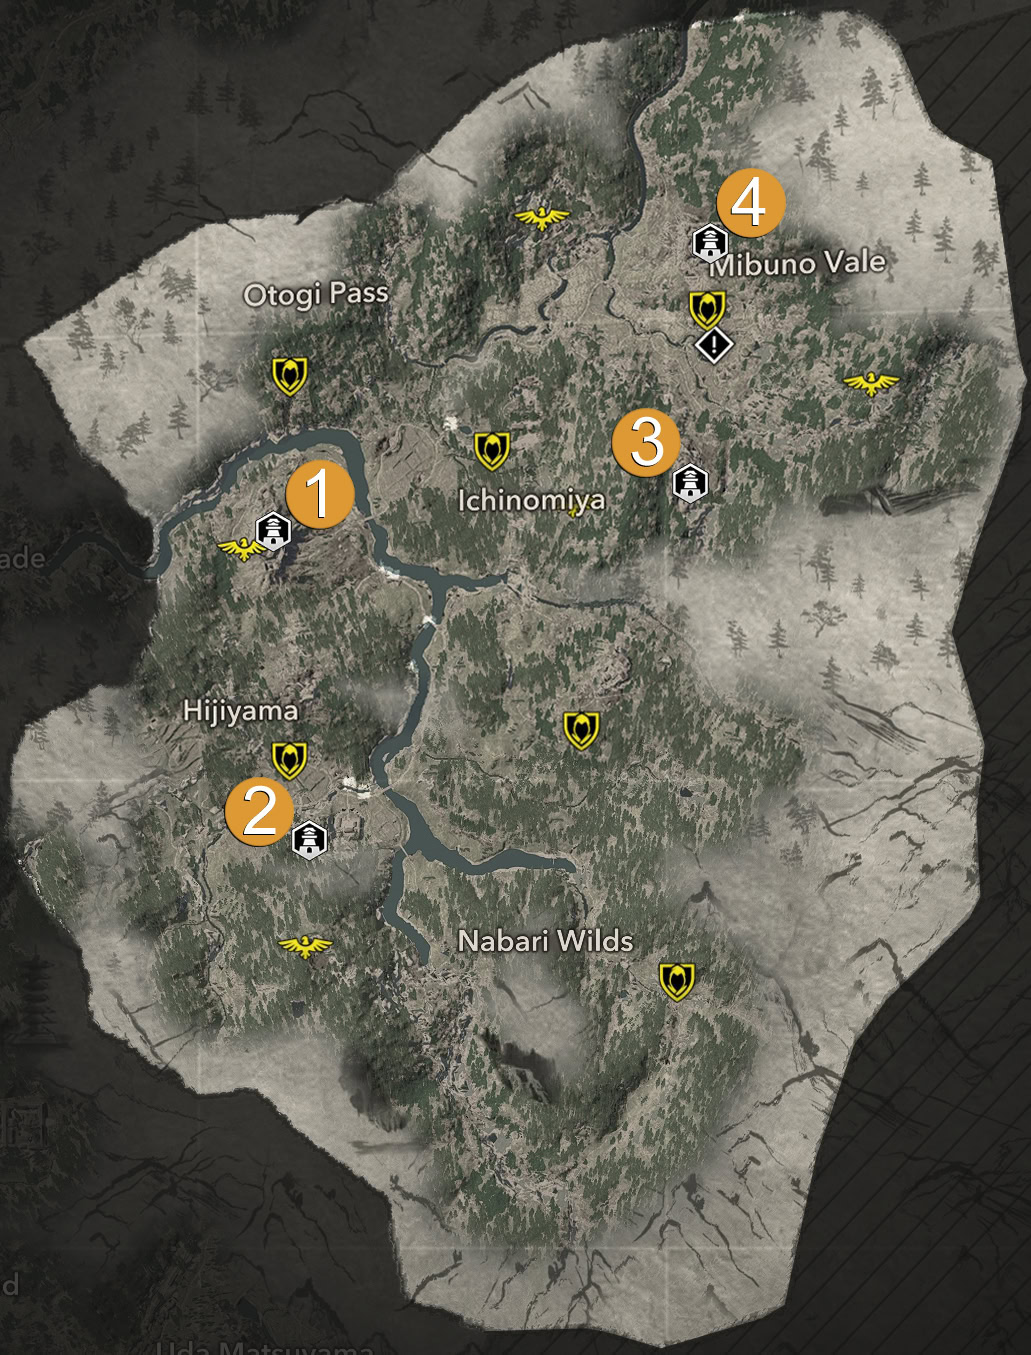
Iga Castles
There are three forts and one castle in the Iga province.
| № | Castle | Icon | Legendary Item | Info |
|---|---|---|---|---|
| 1 | Hijiyama Fort | Swift Shinobi Robes | Samurai Daisho: 2 | |
| 2 | Kashiwara Fort | Bloodletter | Samurai Daisho: 1 | |
| 3 | Kunimiyama Fort | Swift Shinobi Hood | Samurai Daisho: 1 | |
| 4 | Mibuno Castle | Minogame’s Protection | Samurai Daisho: 2 |
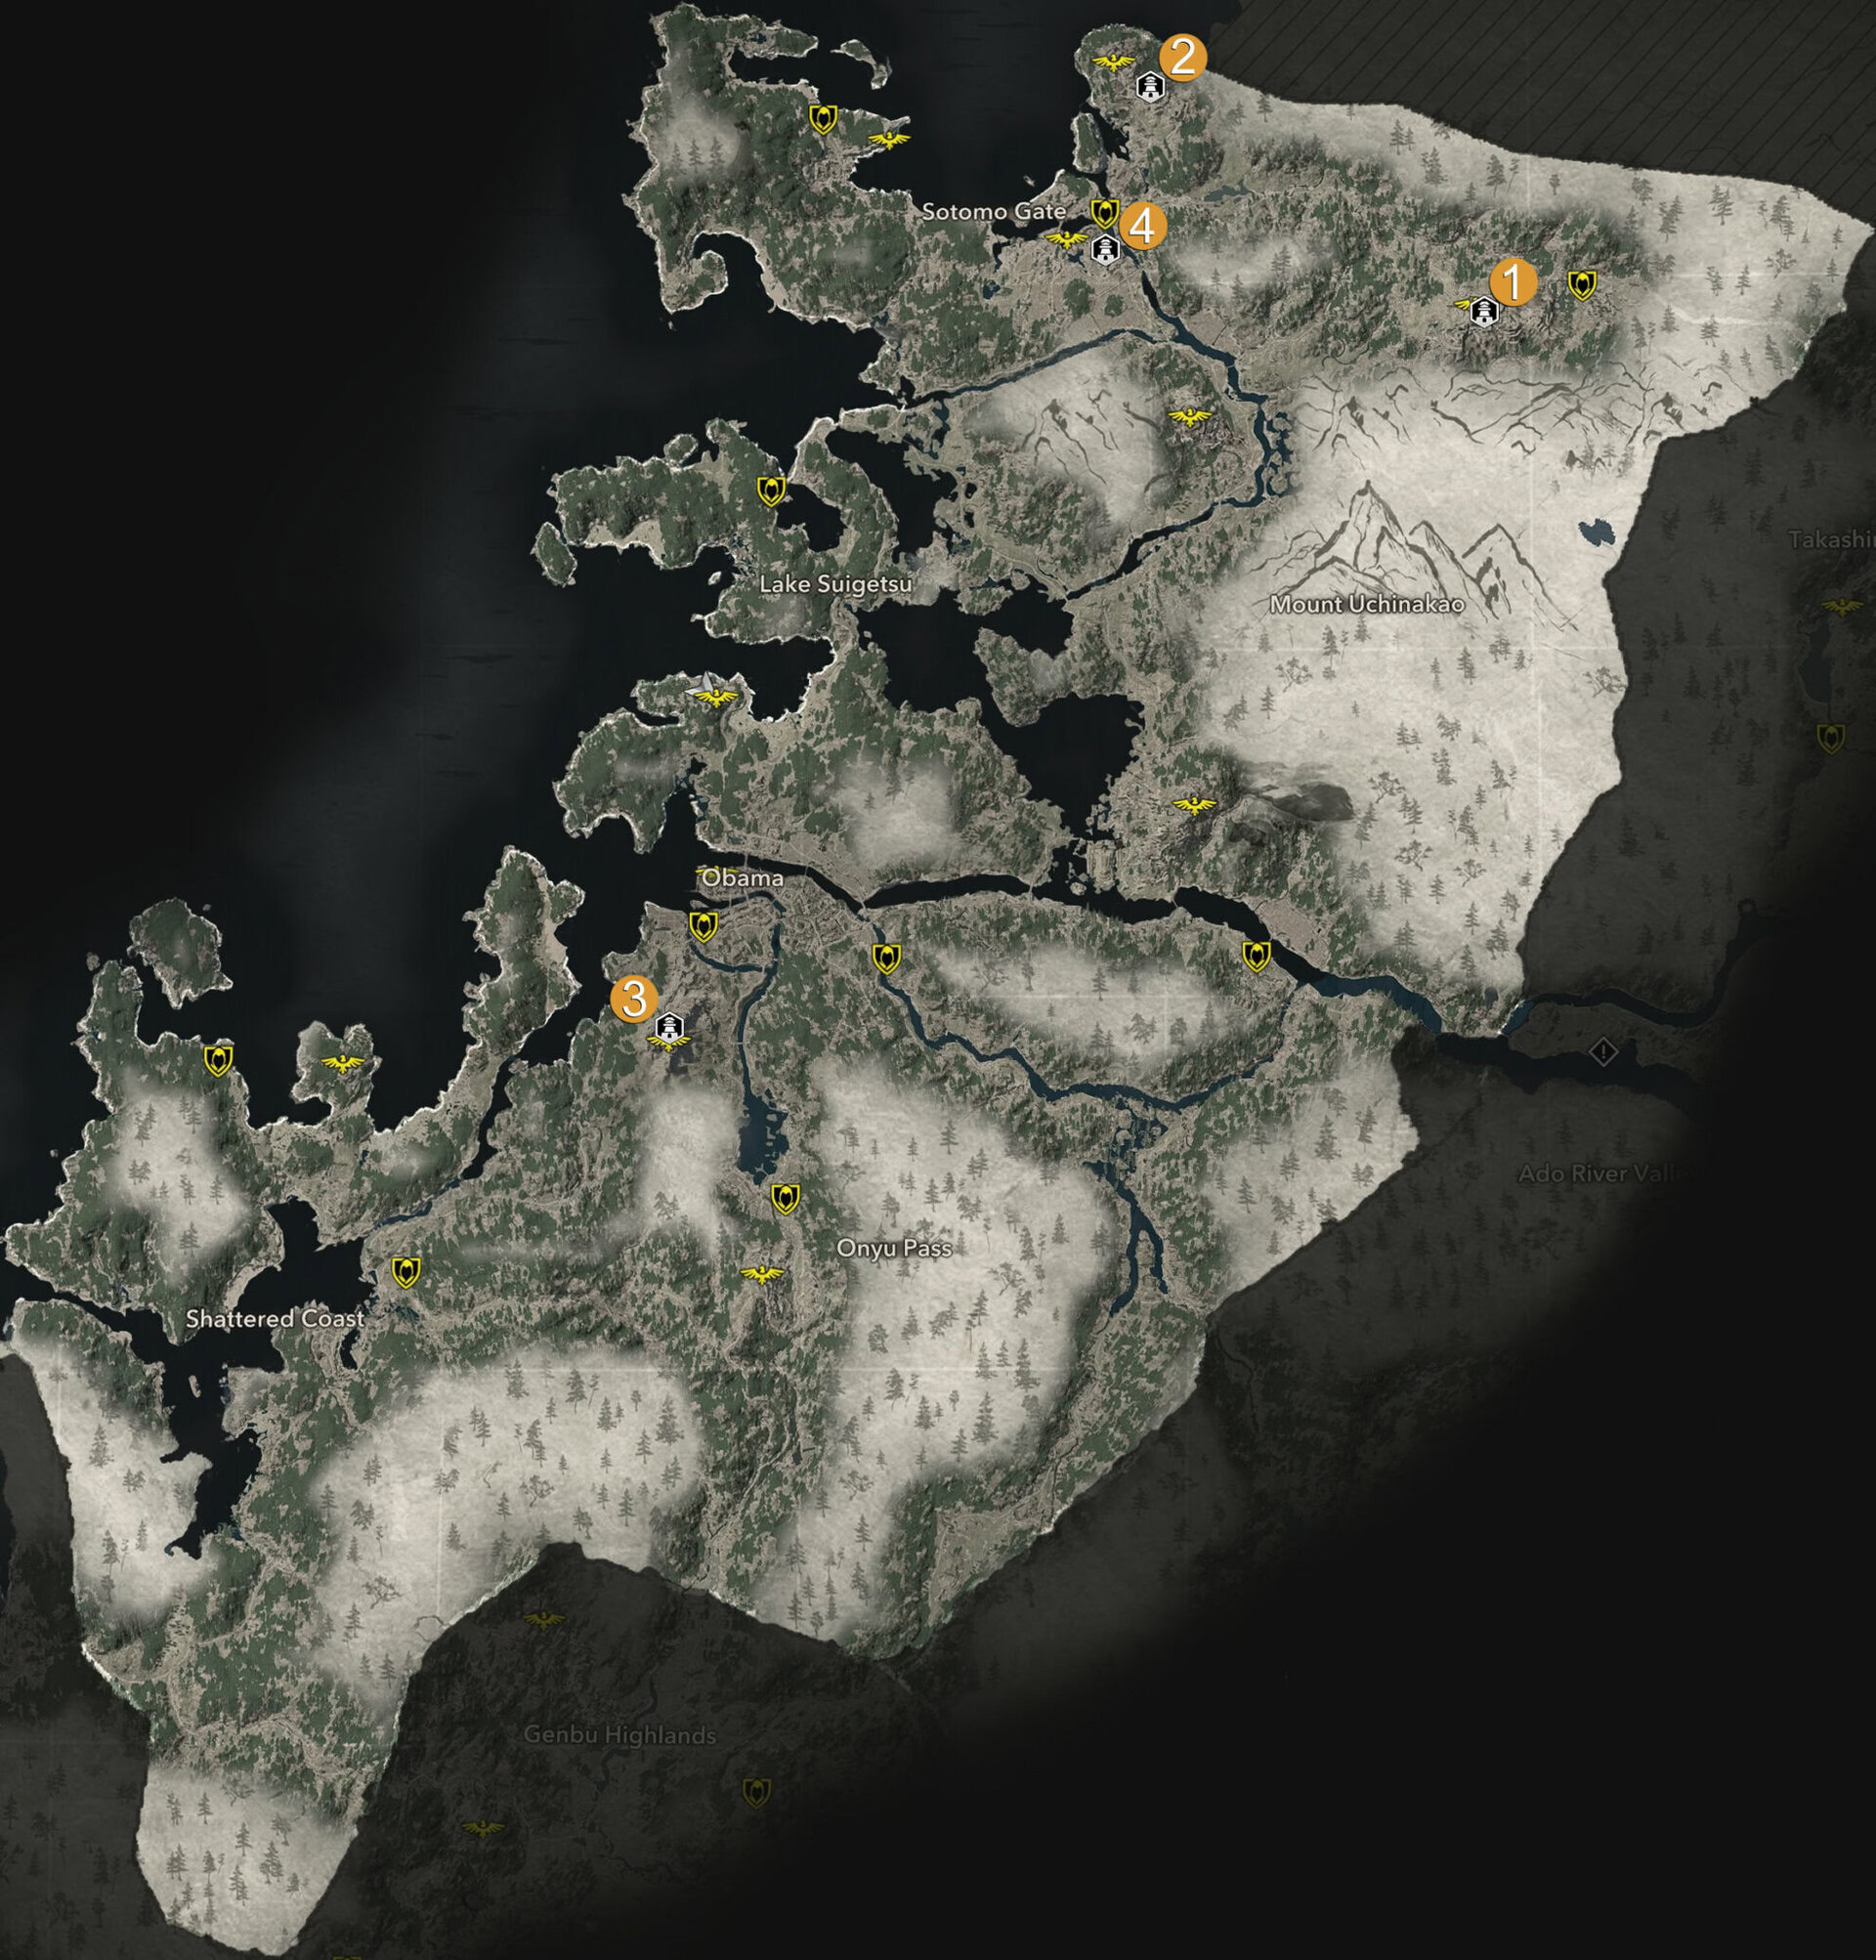
Wasaka Castles
There are three castles and one fort in the Wakasa province.
| № | Castle | Icon | Legendary Item | Info |
|---|---|---|---|---|
| 1 | Genbao Fort | Dynasty Ender | Samurai Daisho: 2 | |
| 2 | Kanegasaki Castle | Master Archer Headband | Samurai Daisho: 4 | |
| 3 | Nochiseyama Castle | Masamune’s Thorn | Samurai Daisho: 3 | |
| 4 | Tsuruga Castle | Master Archer Outfit | Samurai Daisho: 2 |
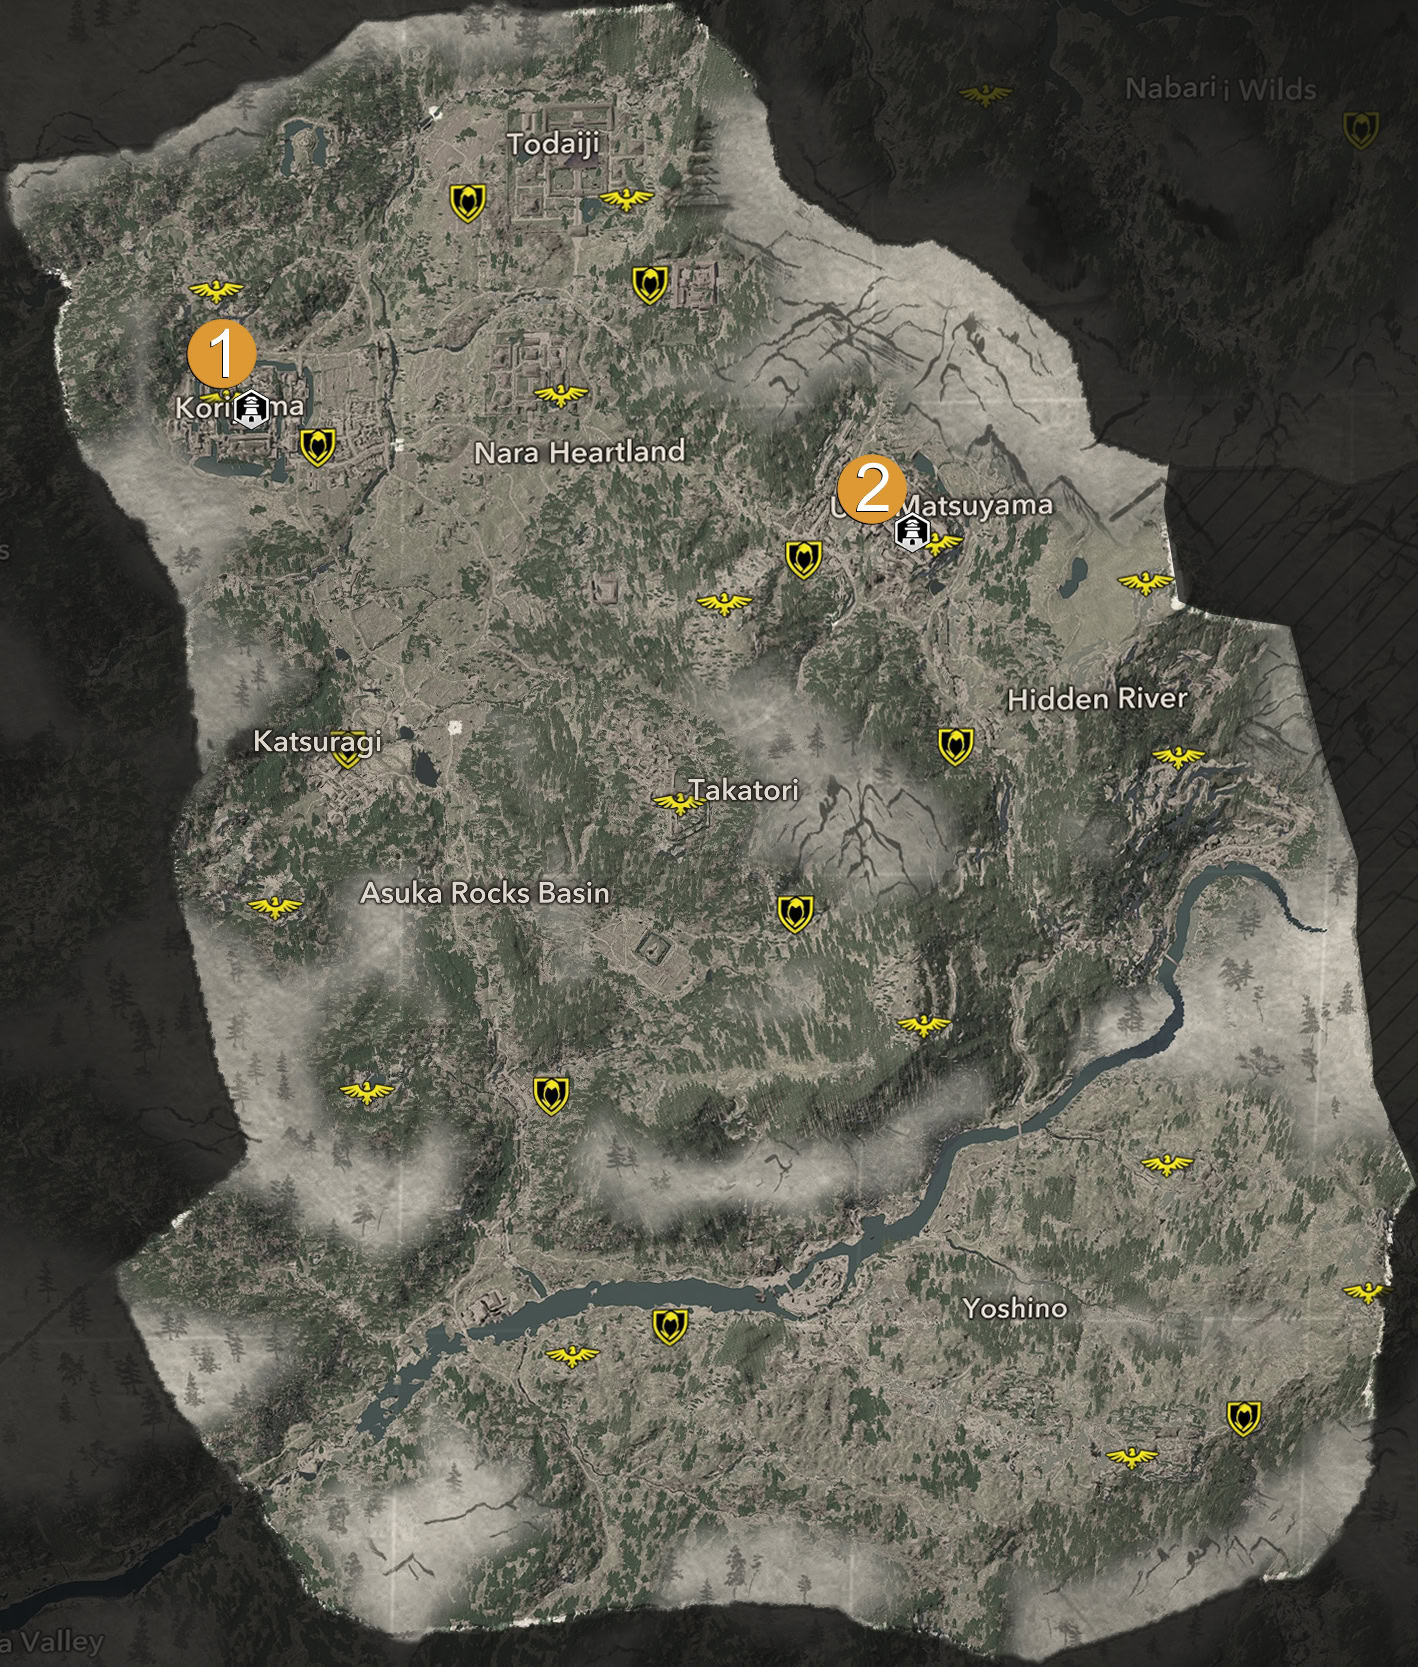
Yamato Castles
There are only two castles in the Yamato province.
| № | Castle | Icon | Legendary Item | Info |
|---|---|---|---|---|
| 1 | Koriyama Castle | Legendary Onna-musha Headband | Samurai Daisho: 4 | |
| 2 | Uda Matsuyama Castle | Legendary Onna-musha Kosode | Samurai Daisho: 4 |
Tamba Castles
There are four castles and one fort in the Tamba province.
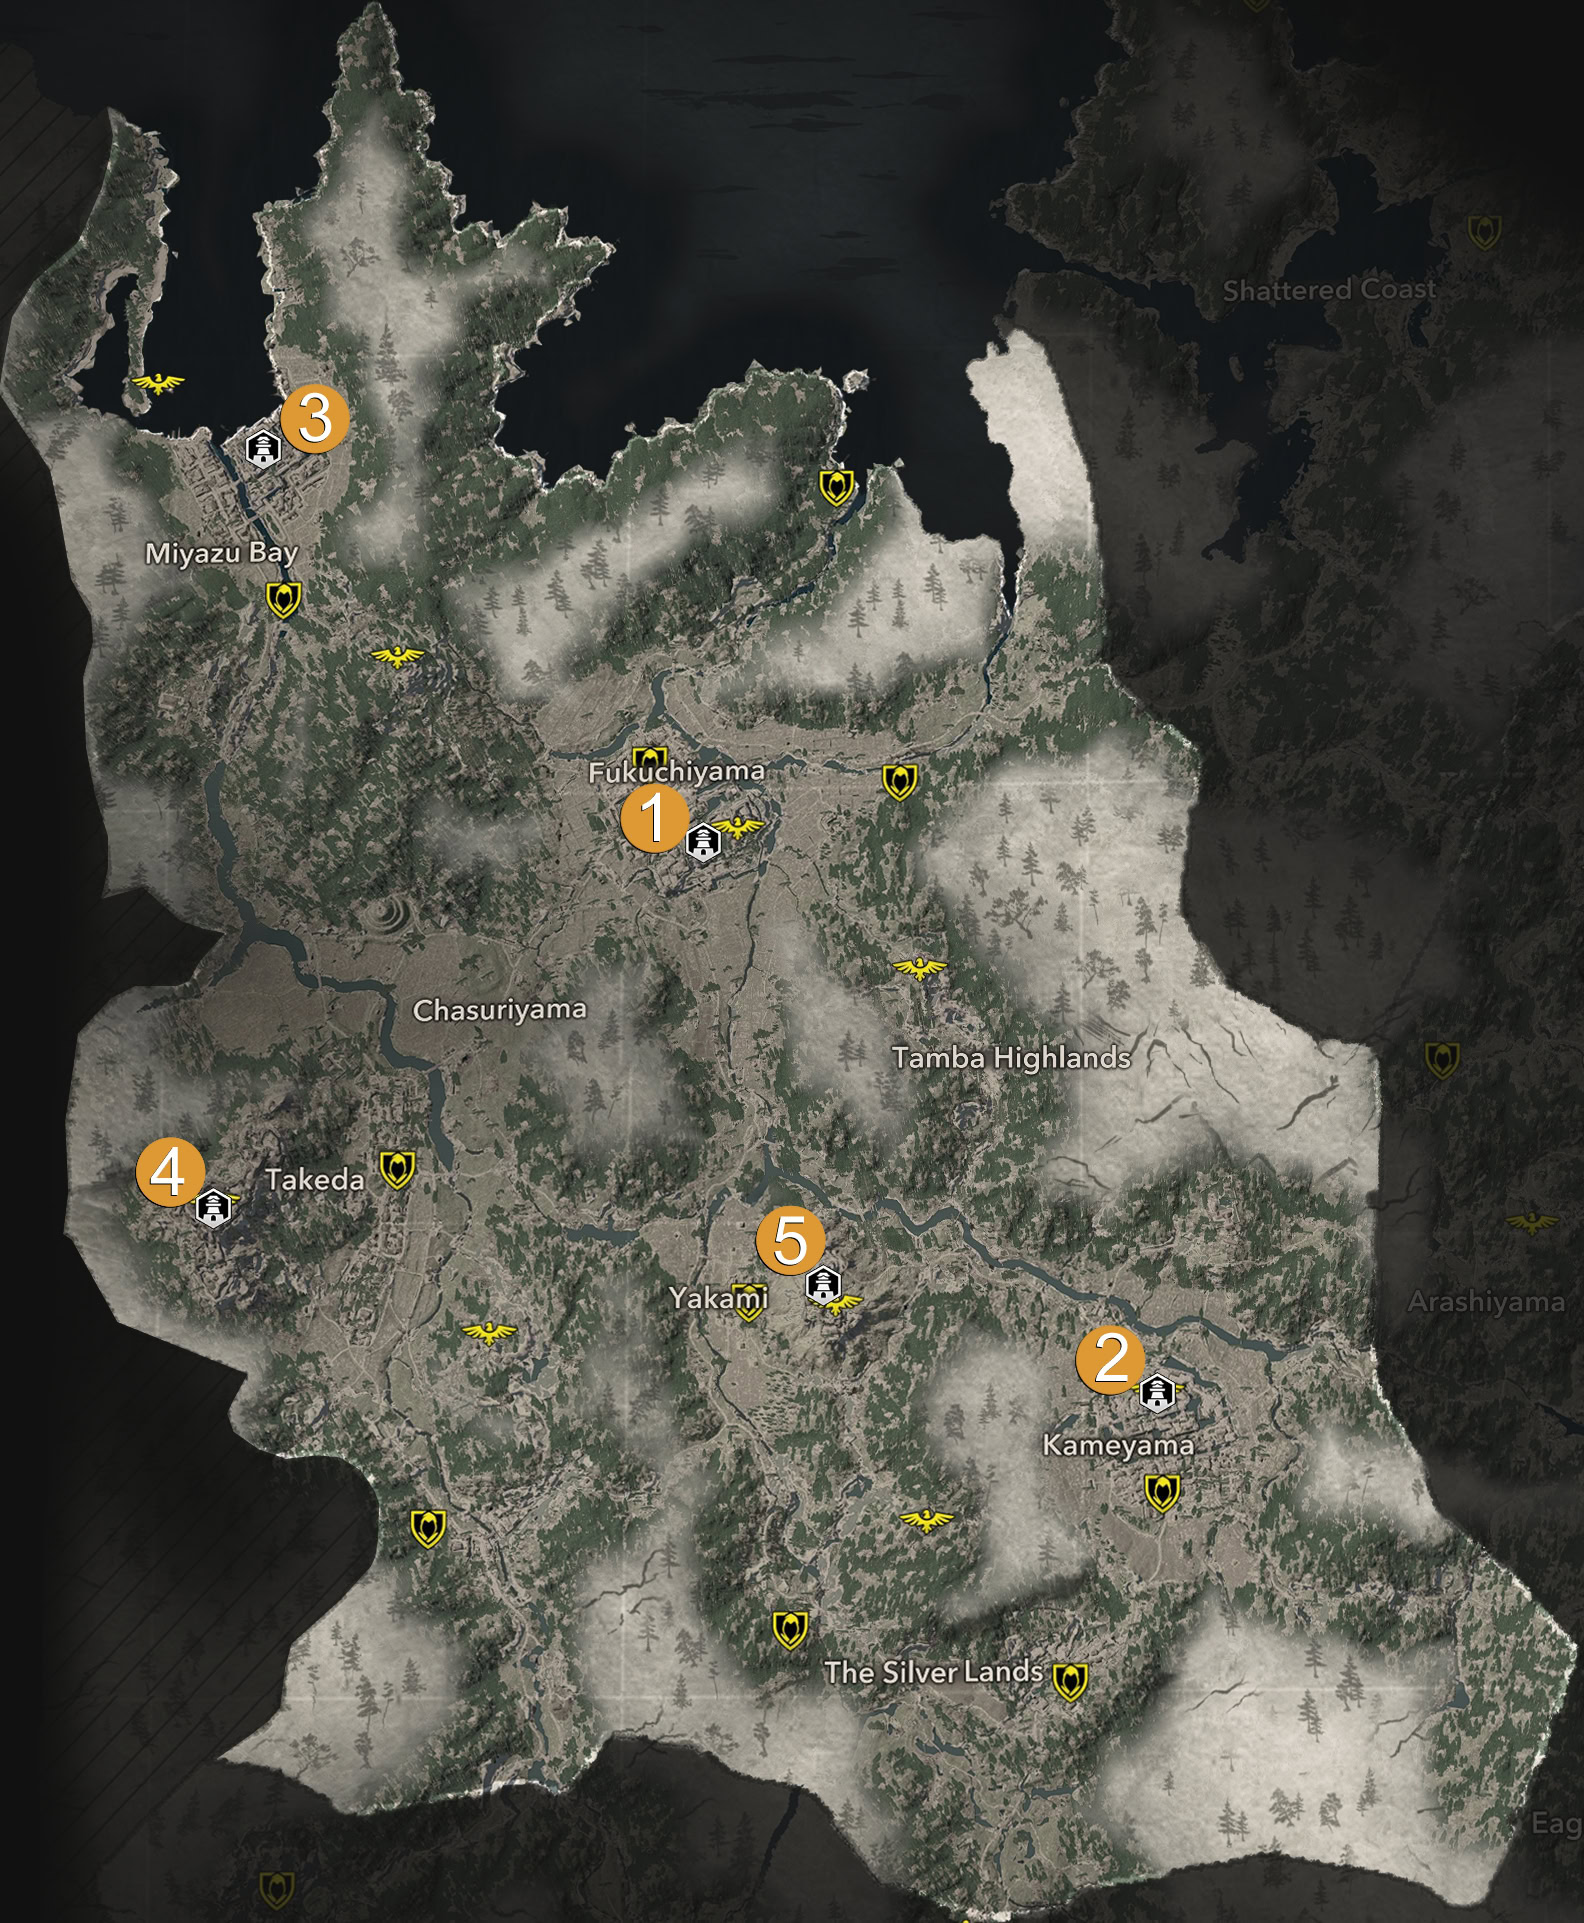
| № | Castle | Icon | Legendary Item | Info |
|---|---|---|---|---|
| 1 | Fukuchiyama Castle | Kasa of the Legendary Ronin | Samurai Daisho: 5 | |
| 2 | Kameyama Castle | Hidden Servant Kosode | Samurai Daisho: 5 | |
| 3 | Miyazu Castle | Outfit of the Legendary Ronin | Samurai Daisho: 4 | |
| 4 | Takeda Castle | Hidden Servant Hat | Samurai Daisho: 5 | |
| 5 | Yakami Fort | Tremor Strike | Samurai Daisho: 1 |
Kii Castles
There are two forts and one castle in the Kii province.
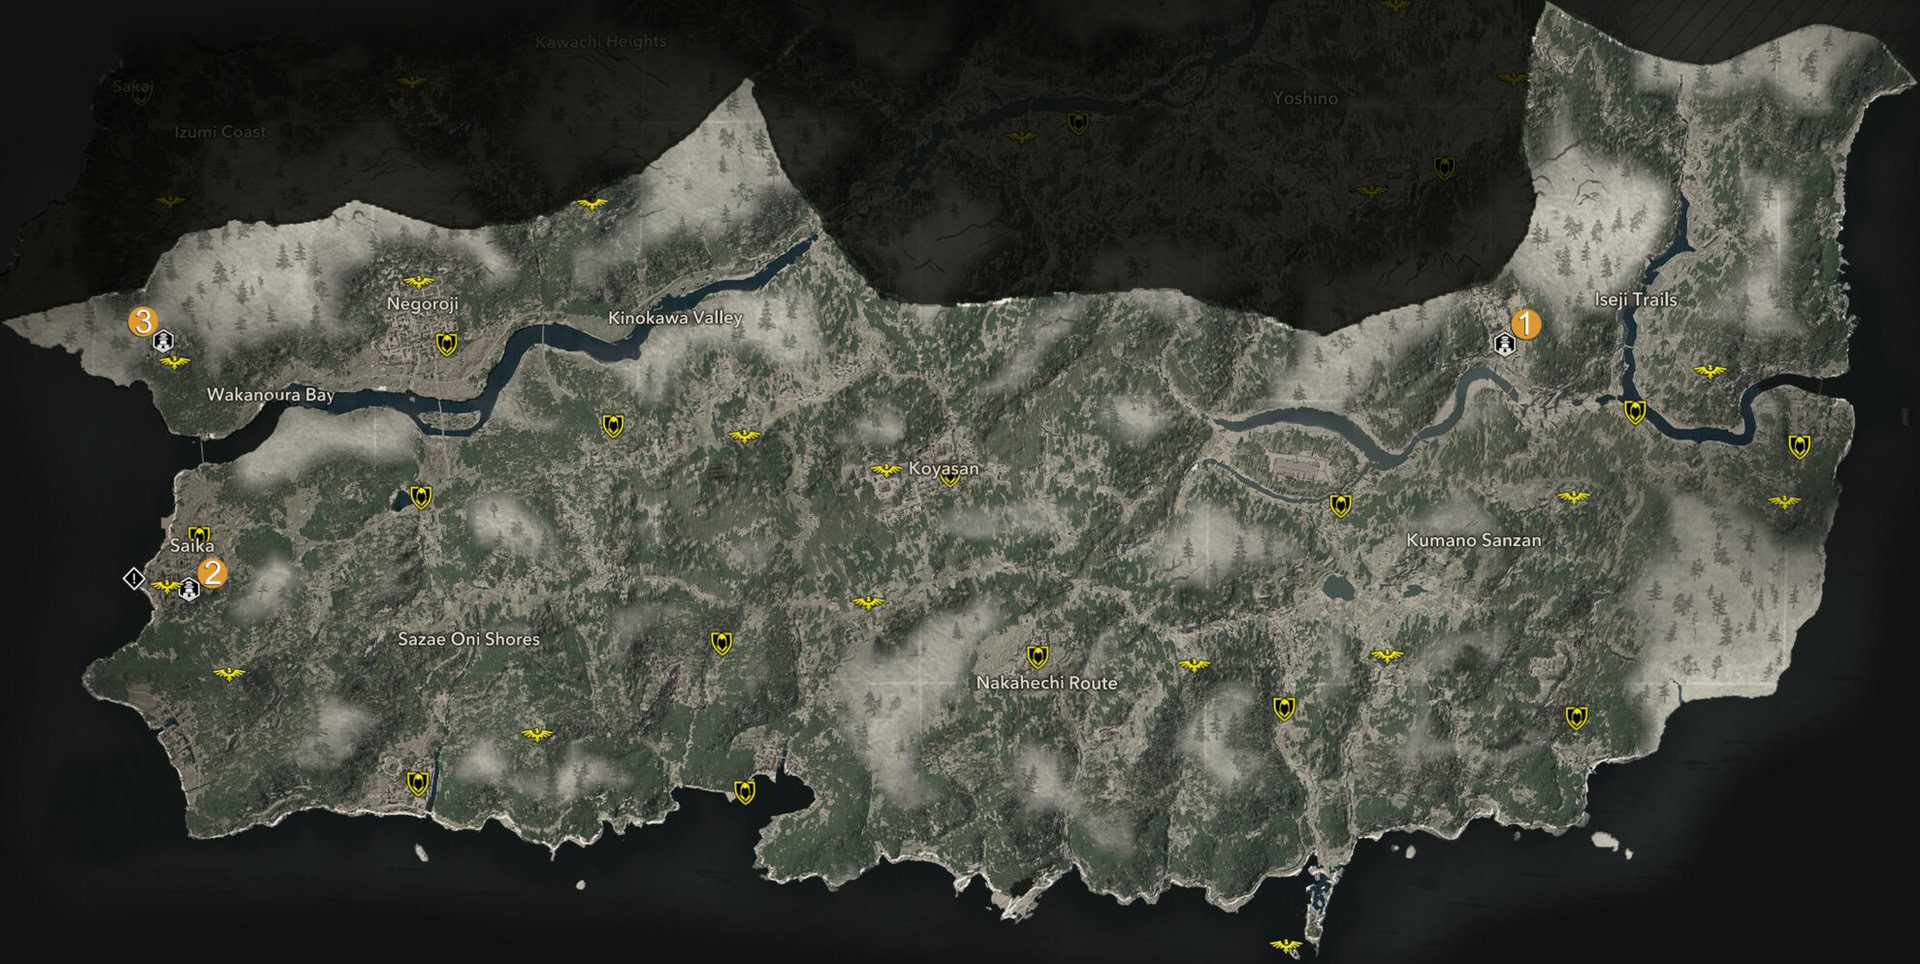
| № | Castle | Icon | Legendary Item | Info |
|---|---|---|---|---|
| 1 | Akagi Fort | Armor of the Legendary Samurai | Samurai Daisho: 2 | |
| 2 | Saika Castle | Tale Smasher | Samurai Daisho: 3 | |
| 3 | Tsuchibashi Fort | Helmet of the Legendary Samurai | Samurai Daisho: 2 |
We have full catalogs to all Legendary gear in Assassin’s Creed Shadows, as well as a complete collection of guides to all Legendary sets you can get. Browse in whatever way you like it.