
Season 8’s new mechanic is Boss Powers, allowing us to collect certain boss skills and turn them against our foes. This guide covers all the details on unlocking, upgrading, and utilizing these powerful effects.
Table of contents
What Are Boss Powers
Boss Powers are secondary abilities collected from defeating Lair Bosses, World Bosses, or the Apparition Bosses that appear in the new Apparition Incursion Events. Except for Lair Boss Powers, all of these are available before entering Torment Difficulties.
Note that Lair bosses only need to be defeated, and their Boss Hoards do not need to be opened to claim these powers.

Each Boss we defeat grants a Unique ability triggered under certain conditions as a Main Boss Power. Every Boss Power can also be used as a Modifer Boss Power, forgoing its ability to provide an additional effect to us or the Main Boss Power we choose.
All Boss Powers are shared across our account, meaning any progress we make on one character will carry over to the next. With the high scaling of most of these effects, it will make a second character ever easier to level.
We’ll go over a full list of these effects later in the guide, discussing builds they may be impactful on.
Using Boss Powers
The Boss Power UI allows us to equip up to one Boss Power as a Main Boss Power and up to three as Modifier Powers.

To equip a Boss Power, we can select it from the lower part of the UI and drag it with the mouse or select the slot in which to place it. When using the button to automatically place Boss Powers, Modifiers are placed first.
Main Boss Powers have a condition that needs to be met to trigger, which means not all builds can use every available Boss Power as a Main Boss Power. This will lead to a bit of diversity in power selection, at least for Main Boss Powers. There are a couple that can stand above the rest, but we’ll talk about that later.
Modifier Boss Powers often boost our Stats, with some directly adding to the effects of other Boss Powers. Nearly Every Modifier effect is absurdly strong, which will lead to a lot of diversity here, too. Unfortunately, just like Main Boss Powers, there are a couple that feel way above the rest.
The only restriction here is that the same Boss Power cannot be used as a Main and Modifier. This means if we unlock a Power that we cannot trigger reliably, we can still use it as a Modifier Power.
Upgrading Boss Powers
Boss Powers are upgraded through a new Currency called Spectral Ash. This currency is mostly limited to the Spectral Incursions until endgame, where Lair Bosses become an option as well.
The most efficient way to farm Spectral Ash early game is to run these Spectral Incursions, because it’s the only option. Once we hit endgame, Lair Bosses become the best source, and award far more Spectral Ash at a faster rate.
Each Boss Power has a maximum of 20 Levels, with upgrade costs changing every few Levels. To briefly summarize how this cost scales, the Table below breaks down the information by each of these breakpoints. Each Tier has a slightly different scaling, with rarer powers being more expensive.
| Level | Cost Per Level | Total Cost* |
|---|---|---|
| Level 2 | 15 / 20 / 25 | 15 / 20 / 25 |
| Levels 3-6 | 30 / 40 / 50 | 135 / 180 / 225 |
| Level 7-12 | 60 / 80 / 100 | 495 / 660 / 825 |
| Levels 13-16 | 120 / 160 / 200 | 975 / 1,300 / 1,625 |
| Levels 17-20 | 240 / 320 / 400 | 1,935 / 2,540 / 3,225 |
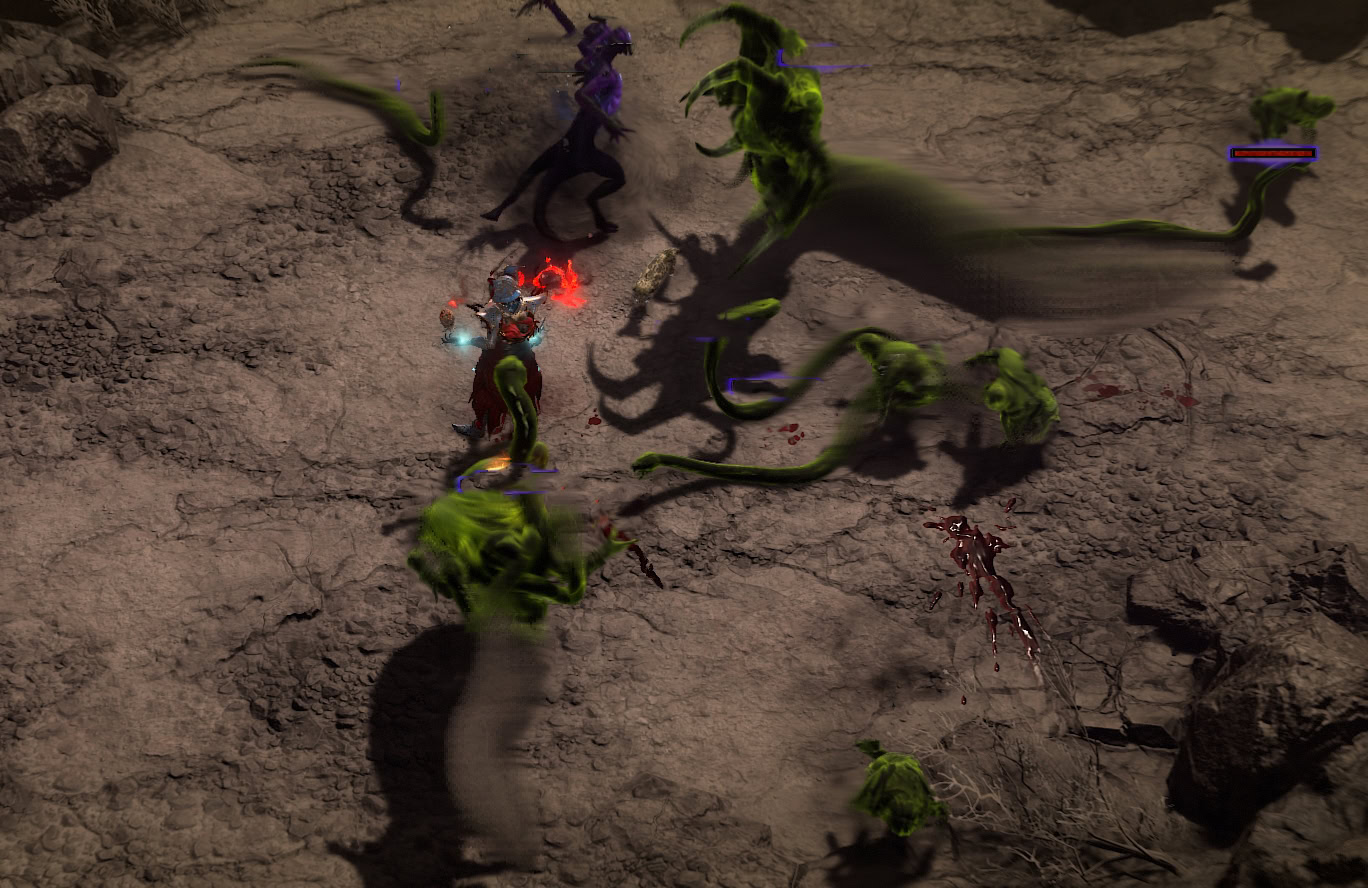
Apparition Incursions
Apparition Incursions are Legion-like events that appear in various regions. These spawn often enough that there’s minimal downtime between Incursions, often with around 3 minutes between each one.

Apparition Incursions are found on the map by the icon shown to the left. This icon will also include a countdown timer to when the event becomes active.
If all players leave the area of the Apparition Incursion, it will immediately end. Deaths won’t count for this, but we can still lose individual access to the event by leaving the area.
Each Apparition Incursion is broken down into two distinct stages, with an extra Boss Encounter at the end if the previous stages are completed within their time limits twice. We’ll refer to these as the Apparition Hunting Stage and the Greater Apparition Stage.
Apparition Hunting Stage
The Apparition Hunting Stage has but one main objective. To clear out enough Apparitions, or the enemies with the green glow around them, to draw out a Greater Apparition. This Stage has a 5-minute timer to complete the objective, or the event will fail.
Plenty of Apparitions will spawn with the start of the event. To spawn the required number of Apparitions we need to progress to the next stage, We’ll need to find Betraying Eyes, which are marked on the map for us.

Upon activating a Betraying Eye, a large number of Apparitions will spawn, typically including a couple of Elite enemies. We’ll want to clear them out quickly and move on to the next Betraying Eye until the next stage starts.
Greater Apparition Stage
With enough Apparitions defeated, there will be a brief window of enemies swarming us before the Greater Appraition spawns. Once they do, we’ll face off against one of ten different Greater Apparitions.

These Greater Apparitions function much like any other Boss you’d see in the game. Each has a distinct set of moves, covering a variety of elements. This means keeping our Armor and Resistance capped will help a ton. Below is a table of the Bosses and their Damage Types.
| Boss Name | Damage Types |
|---|---|
| Allek | Lightning |
| Beastmaster | Physical |
| Blackmailer | Fire and Physical |
| Flesh Reaper | Poison |
| Hatred’s Embrace | Fire and Shadow |
| Kirama | Lightning |
| Outlaw Sharpshooter | Physical |
| Sinerate | Fire |
| Skerg | Poison |
| Torusk | Fire and Physical |
Belial Showdown Stage
Once two loops of the previous stages have been completed, we get to face off against Belial. Just like all the previous stages, we’re given three minutes to defeat this apparition of Belial.

Belial relies on Poison and Shadow Attacks, particularly their Damage Over Time effects Poisoning and Corruption. He’s mostly Immobile, which often makes him an easy target to take down. Just be wary of the AoEs he creates on the floor and the projectiles he fires off.
Once defeated, Belial will drop some loot, including a good chunk of Spectral Ash, as well as some okay drops. Afterward, a Radiant Chest will spawn with more loot, which contains a smaller amount of Spectral Ash as well the typical loot found in Radiant Chests from other events.
How to Farm Spectral Ash
The general way to farm Spectral Ash is pretty cut and dry. We can only get Spectal Ash from Apparitions, meaning we’re limited to Apparition Incursions. However, we still need thousands of it, so there has to be an optimal way to do it.
In the early game, we’re stuck running the Incursions. The best way to ensure we get the most out of them is to either do them Solo or stay near any groups that form in the event area. Being in the XP Range for defeating enemies is key to also getting their drops. Thankfully, drops make up a smaller portion of the overall Spectral Ash, with the bulk of it coming from Belial himself.
Boss Power List and Uses
There are 24 unique Boss Powers to collect and use. Here are the details of all 24 Powers and the best ways to use them as Main or Modifier Boss Powers. We’ll work backward from the highest rarity to the lowest.
Some damage values shown below may not reflect their final in-game values due to changes from the PTR. These will be updated as soon as the information becomes available.

Andariel’s Flaming Skull
Main Power: Standing still for 1 second summons a Skull that rotates around us and Burns enemies for up to 450% Burning Damage at Max Rank.
Modifier Power: Enemies take up to x20% Damage from Damage over Time.
As a Main Boss Power, standing still has some risks outside of some endgame builds, making this very weak until that point is reached. Even then, it’s likely we do enough damage not to need this extra damage.
As a Modifier Boss Power, this is almost assured to be part of many Damage Over Time Builds. This is especially true for Channeling skills like Sorcerer’s Incinerate, which will likely opt for Wandering Death’s Chest Beam as a main power.

Belial’s Eye Beams
Main Power: Health Potions can be used at Full Life. Drinking a Healing Potion grants 80% Damage Reduction for 2 seconds. Summon Eye Beams that deal up to 438% Corruption Damage over 3.5 seconds. Healing Potion use is disabled for 5 seconds after use.
Modifier Power: Activating a Main Boss Power grants Unbreakable Stealth for 2 seconds. Deal up to x30% increased Overpower Damage while Stealthed.
As a Main Boss Power, Rogues can use this the best as they have many additional bonuses that can be activated by using Health Potions. The High Corruption Damage can also make it decent on a Corruption Necromancer as well.
As a Modifier Power, Rogue also can use this the best with their easy access to Stealth. The only problem is that they generally lack ways to guarantee Overpower Damage. Otherwise, Classes like Barbarian, Druid, and Necromancer that have a ton of consistent ways to trigger overpowered can work just as well, getting insane potential from the Shroud of False Death Mythic Unique.

Duriel’s Burrow
Main Power: Burrow underground for 5 seconds instead of Evading, but Evades Cooldown is increased by 4 seconds and Cooldown Reduction is 50% as effective. When entering and exiting a Burrow, deal up to 100% damage and deal the same damage every second while burrowed.
Modifier Power: Activating a Main Boss Power grants up to 40% Dodge Chance for 5 seconds. When Dodging an Attack, Immobilize nearby enemies for 3 seconds.
As a Main Boss Power, the Burrow isn’t super appealing for anything other than the slight safety it provides. If we get its cooldown low enough despite the penalties, it appears possible to avoid damage frequently.
As a Modifier Boss Power, it’s not worth taking outside of builds that already want to stack Dodge Chance to have an easier time reaching a high value, assuming the use of a Main Boss Power that can be triggered easily and often.

Harbinger of Hatred’s Volley
Main Power: After Damaging a Vulnerable Enemy, Launch Piercing projectiles that last 1.3 seconds and deal up to 250% Fire Damage and apply Vulnerable. Vulnerable Enemies take x40% increased damage from this Power.
Modifier Power: Casting a Basic Skill while at Maximum Resource spends it to apply Vulnerable to all nearby enemies. Activating a Main Boss Power increases Vulnerable damage by up to x30% for 5 seconds. Can only be activated once per second.
As a Main Boss Power, this can be an easy way to keep an enemy consistently Vulnerable on builds that lack consistent means to apply it. It’s also great in builds focused around Fire damage that can scale its damage even higher.
As a Modifier Boss Power, it’s great as a way to apply Vulnerable with Basic Attack Builds that lack a way to apply it at all. Due to being applied to nearby enemies, it works best with shorter range skills.

Lilith’s Wind of Hate
Main Power: When casting any Skill, Attack Enemies with a wave that travels forward for 2 seconds, dealing up to 400% Physical Damage each time it hits an enemy. This damage is increased by x60% for each hit on an enemy, up to x300%.
Modifier Power: Hitting an Elite with a Main Boss Power creates a Blister Clone with 10% of their Maximum Life for 15 seconds. Destroying this clone deals up to 4% of the Elite’s Maximum Life. An Elite can have one active Blister at once, Bosses can have up to 2.
As a Main Boss Power, this power is great for all but Channeling Skills. This is due to Channeling skills not being counted as repeated casting. It will still excel is heavy Physical Damage builds like those of a Barbarian or Rogue.
As a Modifier Boss Power, it has a lot of potential for builds that lack strong Single-target damage but have exceptional AoE damage. This allows those skills to handle tougher enemies much easier with this added burst potential.

Ashava’s Poison Breath
Main Power: Hitting an Enemy affected by Damage over Time spawns an Acid wave that travels forward for 4 seconds dealing up to 280% Poisoning Damage to enemies it hits. This damage is increased by 10% for each 1% of the target’s current life affected by Damage Over Time.
Modifier Power: Once per Activation, damaging an enemy with a Main Boss Power deals up to 315% Poisoning Damage over 3 seconds.
As a Main Boss Power, this will easily find its home in Poison Builds like our Poison Flurry Rogue Build. It will also work well for Druid builds, as many also have means of applying Damage over Time, but tend to lack scaling for Poison itself.
As a Modifier Boss Power, it’s far from good outside of builds that scale Poison Damage, which would rather use this as a Main Boss Power instead.

Avarice’s Explosive Ore
Main Power: When gaining excess Primary Resource, spawn an Explosive Ore. After 2.5 seconds, the ore explodes dealing up to 490% Fire Damage. Up to 3 Ores can be active.
Modifier Power: Activating a Main Boss Power consumes all Primary Resource to increase the damage of the Main Boss power by up to x0.2% per point of Resource.
As a Main Boss Power, this can be exceptional for Basic Skill Builds, as they often do not spend Resources, causing them to spawn an Ore with every hit. Otherwise, builds that can easily and frequently gain excess Primary Resources can be great.
As a Modifier Boss Power, this can still excel in the same builds, allowing potential combos with stronger Main Boss Powers.

Wandering Death’s Chest Beam
Main Power: While Channeling, spawn a beam that deals up to 210% Frostbite Damage per second. Enemies hit by this beam take up to x50% increased damage for 1 second.
Modifier Power: Main Boss Powers can Execute non-Boss enemies hit with less than up to 25% of their life remaining. Gain 25 Primary Resource when executing enemies this way.
As a Main Boss Power, this will find itself easily at home in Incinerate builds for the Sorcerer and other popular channeling builds like Whirlwind Barbarians and Dance of Knives Rogues. While other classes can use this, the only other class that would be able to control the effects is a Druid with Lightning Storm. This added control is what makes it useful.
As a Modifier Boss Power, it’s not terrible by any means, but is still incredibly niche to Pit Pushing, as the Execute will heavily cut down clear times, so long as a Boss Power can be used often, which most can be.

Beast in the Ice’s Sleet
Main Power: After casting 3 Skill that apply Crowd Control or Stagger, release Projectiles that deal up to 5,600% Cold Damage and Freeze enemies for 2 seconds.
Modifier Power: Main Boss Powers Chill for up to 50% when dealing damage.
As a Main Boss Power, this will fit right at home in Frost Sorcerer Builds. It may be a bit weaker for say a Blizzard Build, but would work well alongside Ice Shards or even Frozen Orb builds.
As a Modifier Boss Power, it adds fairly strong Crowd Control to most builds. Chilling and the subsequent Freeze are among the most consistent forms of Crowd Control out there.

Belial’s Crystal Decoy
Main Power: When casting an Agility, Defensive, or Macabre Skill, spawn a decoy that taunts enemies for 3 seconds and explodes, dealing up to 420% Shadow Damage.
Modifier Power: Activating a Main Boss Power Fears nearby enemies for 0.75 seconds and deals up to 350% Shadow Damage to them.
As a Main Boss Power, This will easily find a home with various Shadow Damage builds like Rogue’s Shadow Flurry or Shadowslicer builds or Necromancer’s Sever Build.
As a Modifier Boss Power, it can be great for the added Crowd Control, but would shine the most in builds where it’d be better suited as a Main Power.

Lord Zir’s Blood Pool
Main Power: Damaging an enemy spawns a Pool of Blood that deals up to 280% Bleeding Damage over 4 seconds. Up to 3 Blood Pools can be active at a time.
Modifier Power: Activating a Main Boss Power heals for up to 36% of Maximum Life over 3 seconds.
As a Main Boss Power, this only fits into Bleed Barbarian Builds, as no other classes really have the means to scale Bleeding much. It can still fit into other Physical damage-heavy builds like a Pulverize Druid for added damage, but won’t have as potent scaling.
As a Modifier Boss Power, this compliments most Main Boss powers and builds. It’s far from the first choice for most unless we have reason to overheat and it can easily contribute towards that.

Grigoire’s Lightning Square
Main Power: After Casting a Core Skill, Lightning Tiles outward for 1.2 seconds, dealing up to 250% Lightning Damage per hit.
Modifier Power: Once per activation, damaging enemies with a Main Boss Skill will Stun enemies it hits for up to 5 seconds.
As a Main Boss Power, this will find its home in Shock Sorcerer Builds like Chain Lightning or Charged Bolts or a Lightning Storm Build on a Druid. In builds like Chain Lightning specifically it helps to boost its AoE potential.
As a Modifier Boss Power, it can be a decent way to build up stagger on bosses, especially as it levels and the Stun duration allows more and more impact.

Urivar’s Lobbed Bombs
Main Power: After casting an Ultimate Skill, lob 4 bombs that deal up to 400% Fire Damage and reduce Ultimate Skill Cooldown by 15%. This effect has a 1 second cooldown.
Modifier Power: Defeating an Enemy with a Main Boss Power reduces Ultimate Skill Cooldown by up to 0.58%
As a Main Boss Power, this will be very likely to appear in most Ultimate-focused builds. However Sorcerer has the biggest advantage here having far more scaling for Fire Damage than most classes, save for the growing Fire Barbarian support.
As a Modifier Boss power, it’s still more likely to be found in Ultimate-focused build, but can fit better into builds that can’t scale Fire well and can get better use out of another Main Power.

Varshan’s Life Steal
Main Power: Each time 25% Maximum Life is lost, attach a leeching beam to the attacker that restores 10% of our Maximum Life and deals up to 700% Corrupting Damage over 1 seconds.
Modifier Power: Activating a Main Boss Power deals up to 1,400% Corrupting Damage to nearby enemies.
As a Main Boss Power, this will be more likely to be seen in Shadow Rogue and Necromancer builds, which have access to better scaling for it. It’s not likely to be the first choice due to the requirement of taking damage, but the payoff has the potential to be huge.
As a Modifier Boss Power, this has far more potential to slot into the same builds and be a more practical option without the heavy ask of taking damage.

Allek’s Talons
Main Power: Casting a Basic Skill deals up to 160% Sparking Damage over 4 seconds to enemies it hits. Channeled Skill will trigger this effect repeatedly
Modifier Power: Gain 5% Movement Speed, increased by 0.5% for every 1% Cooldown Reduction, up to a maximum of 30% Movement Speed at max rank.
As a Main Boss Power, this will very easily slot into Spark and Arc Lash builds for Sorcerers or Strorm Strike Druids due to its scaling potential. Outside of this it can be a nice addition to most builds, it just won’t be nearly as impactful.
As a Modifier Boss Power, it’s generic enough to fill a slot and get some free Movement Speed early on. The Cooldown Reduction scaling does a good job of keeping it in line during the early game.

Beastmaster’s Training
Main Power: Casting a Summon Skill or Calling a Mercenary Reinforcement, one Summon or Mercenary will Stun Enemies for up to 4 seconds and gain up to 97% Damage Reduction.
Modifier Power: Summons deal x5% more damage, increased by x0.25% for each 1% Critical Strike Damage from Items and Paragon, up to a maximum of 150% Summon Damage at max rank.
As a Main Boss Power, this will be right at home for Companion Druids and Summoner Necromancers. Companion Druids also have the advantage here thanks to Legendary Aspects that can prevent their Wolves from dying.
As a Modifier Boss Power, all of the same builds apply. However, Lightning Spear Builds actually can make better use of this effect as it is already heavily scaled with Critical Strike Damage.

Blackmailer’s Sabotage
Main Power: When casting a Core Skill with a Barrier active, Knock Down Close enemies for up to 3 seconds. This cannot occur on the same enemy more than once every 5 seconds.
Modifier Power: When gaining Fortify, gain up to 30% of that amount as Barrier.
As a Main Boss Power, this isn’t a particularly exciting power, as while Knockdown can be great Crowd Control, With no supplemental damage it pales in comparison to other Boss Powers for the Main Boss Power slot.
As a Modifier Boss Powr, its far more useful and fits well into many Barbarian, Druid, and Necromancer builds that can easily generate Fortify. While these classes already have solid access to Barriers as well, the less they have to invest into maintaining them the stronger those builds can be.

Flesh Reaper’s Disruption
Main Power: Damaging a Vulnerable enemy remove Vulnerable and stuns it and the enemies near it for up to 5.25 seconds. This Stun applies double the Stagger to Bosses.
Modifier Power: Gain x5% Vulnerable Damage, increased by 0.5% for every 1% Crowd Control Duration, up to a maximum of x20% Vulnerable Damage at max rank.
As a Main Boss Power, despite the lack of damage, this provides insane levels of Crowd Control and Boss Stagger to builds with easy access to Vulnerable. It’s never going to be the first choice, but it’s worth considering nonetheless.
As a Modifier Boss Power, It’s in a weird spot. It’s a great effect, but the stat it scales with is not particularly worth stacking for many builds. It’ll probably find its way into Frost Sorcerer Builds potentially, but even then, stacking CC Duration can be questionable.

Hatred’s Embrace’s Haste
Main Power: Casting a Shadow or Fire Skill grants up to 3% Movement Speed, stacking up to a maximum of 30%.
Modifier Power: Gain 5% Critical Strike Chance, increased by 0.5% for each 1% Shadow Resistance, up to a maximum of 50% Critical Strike Chance at max rank.
As a Main Boss Power, it’s great for adding mobility to the early game of Pyromancer Sorcerer Builds, Shadow Necromancers, and Rogues. It’s not something to use permanently, but early Movement Speed has a lot of value for Leveling Quickly.
As a Modifier Boss Power, this is going to be welcomed in every build not centered around Damage over Time. It’s an insane amount of basically free Critical Strike Chance for a stat every build will have.

Kirma’s Sparks
Main Power: Evading deals 160% Sparking damage over 4 seconds to nearby enemies.
Modifier Power: Evade Cooldown is reduced by 5%, increased by 0.2% per 1% Lightning Resistance, up to a maximum of 30% at max rank.
As a Main Boss Power, this will likely find a place in the Evade Spiritborn or Teleport Sorcerer style of builds that deal extra damage with their Evading. Both of these already scale Lightning Damage as well, making them fit even better.
As a Modifier Boss Power, this fits into the same builds and trades its damage for celebrating the cooldown and DPS of the primary Damage with these Evade builds.

Outlaw Sharpshooter’s Eye
Main Power: Dealing Direct Damage to an enemy slow them and surrounding enemies by up to 78% for 5 seconds.
Modifier Power: Damage dealt to Distance Enemies is increased by up to x20%.
As a Main Boss Power, this could find its place as added Crowd Control for many builds while leveling. Much like some other powers though, it will be outshined by many other powers for the Main Boss Power slot.
As a Modifier Boss Power, this is more likely to find its way onto builds that already play at a distance, like a Rapid Fire Rogue. It’s not the best option by far, but if we have extra space it’s good filler.

Sinerat’s Flames
Main Power: Casting a Mobility Skill deals up to 50% Burning damage over 4 seconds to Close Enemies.
Modifier Power: Gain x5% Elemental Damage. For every 1% of an Element’s Resistance, gain x0.2% damage for that Element up to a maximum of x25% at max rank.
As a Main Boss Power, this is best suited for a Spiritborn as their Jaguar Skills fit perfectly into what this provides and can scale this damage well.
As a Modifier Boss Power, it’s a great option for any Non-Physical build. Since it scales each Element independently, will work with any Element, but scale with its respective resistance.

Skerg’s Toxins
Main Power: When an Enemy applies Damage over Time to you, apply up to 600% Poisoning Damage over 4 seconds to that enemy.
Modifier Power: When taking damage from a Damage over Time effect, there is a 5% chance to be healed instead. This is increased by 50% of Poison Resistance up to a maximum of 50% at max rank.
As a Main Boss Power, it’s a great power for passively dealing with a lot of enemies that deal Damage over Time. This also includes some long-range foes and many bosses, leaving as a niche early option to help with those.
As a Modifier Boss Power, it does a lot of the same thing. It’s decent fill for Bosses that deal a lot of Damage Over Time and can potentially trivialize them.

Torusk’s Rage
Main Power: Damaging a Crowd Controlled enemy makes them and enemies near them Unstoppable. We gain up to x20% Damage, Attack Speed, and Movement Speed for 3 seconds.
Modifier Power: Gain 5% Attack Speed, increased by 0.25% for each 1% Damage to Crowd Controlled up to a maximum of x20% at max rank.
As a Main Boss Power, this has a similar downside as Flesh Reaper’s Disruption but with a more generically useful upside. Combined with Exploiter’s Aspect, it has the potential to be a strong early-game option.
As a Modifier Boss Power, it also shares the same problem with Flesh Reasper’s Disruption, scaling with a stat that’s not often used. This does become great filler in combination with many Paragon boards later, but before then will struggle to really find a ton of value.


