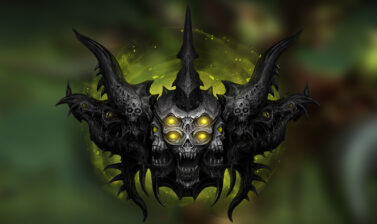
A minion-centric build for Diablo 4’s Necromancer that uses Army of the Dead to boost its minions and output high damage.
This necromancer build guide assumes you’re level 60 and have completed enough of your Renown to have gained the 12 additional Skill Points available.
If you want a great leveling build to reach this point with, try our Overpowering Blood Surge Leveling Build – Which uses the early power of Blood Surge combined with minions for a smooth leveling experience.
If you want to level up with this build, at the end of this guide, we have a leveling section showing you how to develop a new character from level 1 with this build.
Table of contents
Build Overview
To build around Army of the Dead, we’ll need to get Sanguivor, Blade of Zir, to enable it to deal heavy damage. Our minions will still provide a lot of our damage as well as some utility, allowing the build to have more stable damage overall instead of purely focused on burst.
We’ll be making use of many other utility skills like Blood Mist and Corpse Tendrils to improve our ability to survive, as well as boost our and our minions’ damage output. This allows the build to take on most content with minimal issues, with one particular exception.
That exception is Infernal Hordes. Minion AI causes them to spread their damage too thin, so if we’re not able to keep Army of the Dead running at all times during a wave, we lack the AoE needed to excel here. We can still clear it just fine, just don’t expect it to be quite as rewarding or consistent.
Skill and Passive Breakdown
In this section, we’ll be talking about each skill we use. This is the whys and hows of how the build works, and then we’ll cover the skill point distribution.
Skills
These are the main skills for the build. We’ll explain what purpose each serves and how they fit into the build.

Reap
Reap is here primarily to help boost our Attack Speed with Enhanced Reap, which in turn boosts our Minions as well. We’ll upgrade it to Initiate’s Reap for the Execute, as we’ll have minimal issues creating corpses outside of the early game, thanks to Army of the Dead

Raise Skeleton
Raise Skeleton is our primary way to consume corpses, which not only heals and boosts our Minion’s damage , but also triggers many other buffs which boost not only our Minions, but our damage as well.

Blight
Blight is used specifically for Supernatural Blight, granting us a damage boost. We’ll only use it often enough to maintain that effect, or roughly every 6 seconds.

Army of the Dead
In the Early Game, Army of the Dead will be a periodic boost for our minions, or quickly revive them if they go down. In the endgame, it will be our primary damage source alongside Reap.

Blood Mist
Blood Mist is a great skill to avoid damage and break out of Crowd Control as needed. We’ll end up taking Ghastly Blood Mist so it helps us get around a bit more as well.

Corpse Tendrils
The utility skill that somehow still feels mandatory. We’ll use it to group enemies, helping out minions focus fire on the clumps of enemies while boosting the Critical Strike Chance and Critical Strike Damage our horde with the Grasping Veins Aspect. We can also use Plagued Corpse Tendrils early on for some Vulnerable application.
Passives
Below are the main passives that allow the build to function.
Fueled by Death
By consistently consuming corpses with Raise Skeleton, we’re able to keep this damage bonus active at all times.
Titan’s Fall
Combined with Necromatic Carapace and Army of the Dead, this ensure we’ll always have this damage bonus active for Bosses and Elites.
Skeletal Warrior Mastery
Despite not focusing on them too much, Reapers still do decent damage. However, we’re still mainly using this to increase their Maximum Life, helping them survive more easily.
Amplify Damage
We’ll mostly be making use of this effect through Curses, as our access to Fear is limited. Cursed Aura will apply Curses for us, as well as Vampiric Curse from our minions once we get Sanguivor.
Coalesced Blood
Coalesced Blood increases our Damage while we’re Healthy, which also extends to our minions as well. Considering the minions will take more of the incoming damage than us, we’ll be healthy more often than not.
Necrotic Carapace
Necrotic Carapace allow our Reapers and Army of the Dead to very easily keep us Fortified.
Terror
Terror mostly benefits our Skeletal Mages, so we use Shadow Mages just to leverage this boost. It boosts Reap and Blight, but they’re more utility-focused anyway.
Gloom
Effectively the same as Gloom, but strong once fully stacked. Blight and Reap make this very easy to stack.
Finality
Another solid damage boost for us and our minions, which conveniently lasts almost as long as Army of the Dead.
Hellbent Commander
This is one of the largest damage boosts we get, and it applies to Army of the Dead and our minions. Try to boost this with more ranks on an Amulet.
Inspiring Leader
A nice chunk of basically Free Critical Strike, Chance for us and our Minions. Minions should double dip off this effect and get a total of 30% Crit Chance, as they inherit our bonuses, in addition to the bonus specifically for them on this passive.
Key Passive – Kalan’s Edict
With a total of 11 Minions with the Aspect of Occult Dominion, this grants a huge DPS boost to our minions as 33% Attack Speed and x33% Damage. If any of our Minions happens to die, all remaining minions also get a further boost.
Skill Point Distribution
This is an easy-to-reference table for where we’ll be placing all of our Skill points. These are listed in the order they appear on the skill tree.
| Icon | Skill Name | Skill Tree | Points |
|---|---|---|---|
| Reap | Basic | 1 |
| Enhanced Reap | Basic | 1 | |
| Initiate’s Reap | Basic | 1 | |
| Blight | Core | 1 |
| Enhanced Blight | Core | 1 | |
| Supernatural Blight | Core | 1 | |
| Blood Mist | Corpse & Macabre 1 | 1 |
| Enhanced Blood Mist | Corpse & Macabre 1 | 1 | |
| Ghastly Blood Mist | Corpse & Macabre 1 | 1 | |
| Titan’s Fall | Corpse & Macabre 1 | 3 | |
| Skeletal Warrior Mastery | Corpse & Macabre 1 | 3 | |
| Grim Harvest | Corpse & Macabre 1 | 1 | |
| Fueled by Death | Corpse & Macabre 1 | 3 | |
 | Decrepify | Curse | 1 |
| Enhanced Decrepify | Curse | 1 | |
| Abhorrent Decrepify | Curse | 1 | |
| Amplify Damage | Curse | 3 | |
| Death’s Embrace | Curse | 3 | |
| Skeletal Mage Mastery | Curse | 3 | |
| Death’s Approach | Curse | 3 | |
| Precision Decay | Curse | 3 | |
| Corpse Tendrils | Corpse & Macabre 2 | 1 |
| Necrotic Carapace | Corpse & Macabre 2 | 2 | |
| Coalesced Blood | Corpse & Macabre 2 | 3 | |
| Reaper’s Pursuit | Corpse & Macabre 2 | 3 | |
| Gloom | Corpse & Macabre 2 | 3 | |
| Terror | Corpse & Macabre 2 | 3 | |
| Crippling Darkness | Corpse & Macabre 2 | 2 | |
| Army of the Dead | Ultimate | 5 |
| Prime Army of the Dead | Ultimate | 1 | |
| Supreme Army of the Dead | Ultimate | 1 | |
| Inspiring Leader | Ultimate | 3 | |
| Hellbent Commander | Ultimate | 3 | |
| Finality | Ultimate | 3 | |
 | Kalan’s Edict | Key Passive | 1 |
Gearing and Stats
In this section, we’ll cover all the things you’d want to keep an eye out for to enhance the final build. This includes our Recommended Weapons, Book of the Dead, Aspects, Runewords, and of course, Uniques.
This section will also make note of any Borrowed Power Mechanics that come with more Seasonal Realms. If you’re not playing the build in a Seasonal Realm, these can be ignored, and the build will function without them.
Recommended Weapons
This Build uses a Unique Two-handed Sword, Sanguivor, Blade of Zir. Before acquiring this Unique, a Two-handed Scythe is recommended for the bonuses Summoning Damage.
A two-handed Sword can also be a great option to stack up Critical Strike Damage as well. Alternatively, as One-handed Sword for its Critical Strike Damage and a Focus for access to more Cooldown Reduction can work just as well.
Ideal Stats
The table below details the ideal stats for our gear, be on the lookout for gear that matches at least two of the three rolls below. We’ve also included Aspects here for easier viewing, refer to the Aspects section for additional details on why these are selected.
Affixes that are CAPITALIZED are the Priority Affixes to get as a Greater Affix, though further Greater Affixes are welcome. These are not required for most content, but are a good way to push the build further. Affixes in Bold are the ideal Affixes to boost with Masterworking.
In cases where multiple Affixes are listed, the secondary option is for when another stat reaches its cap. This is most common with Armor, where it’d be substituted for another affix.
Scroll the top row horizontally
to see more gear tabs.
Recommended Unique
Sanguivor, Blade of Zir
Stats below are for any weapon used prior.
Affix 1
Maximum Life
Affix 2
Intelligence
Affix 3
CRITICAL STRIKE DAMAGE
Tempered Affix 1
Chance for Skeletal Mages to Attack Twice
Summoning Augments – Weapon
Tempered Affix 2
Skeletal Mage Damage
Minion Finesse – Offensive
Legendary Aspect
Aspect of the Great Feast
Affix 1
COOLDOWN REDUCTION
Affix 2
Maximum Life
Affix 3
Critical Strike Chance
Tempered Affix 1
Chance for Skeletal Mage to Attack Twice
Minion Augments – Weapon
Tempered Affix 2
Skeletal Mage Damage
Minion Finesse – Offensive
Legendary Aspect
Aspect of Reanimation
Optional Mythic
Heir of Perdition
Affix 1
COOLDOWN REDUCTION
Affix 2
Maximum Life
Affix 3
Armor or Intelligence
Tempered Affix 1
Total Armor OR Maximum Life
Worldly Endurance – Defensive
Tempered Affix 2
Lucky Hit Chance
Worldly Fortune – Utility
Legendary Aspect
Aspect of Might
Affix 1
MAXIMUM LIFE
Affix 2
Armor
Affix 3
Intelligence
Tempered Affix 1
Total Armor or Maximum Life
Wordly Endurance – Defensive
Tempered Affix 2
Lucky Hit Chance
Worldly Fortune – Utility
Legendary Aspect
Aspect of Hardened Bones
Affix 1
MAXIMUM LIFE
Affix 2
Armor
Affix 3
Intelligence
Tempered Affix 1
Armor or Maximum Life
Worldly Endurance – Defensive
Tempered Affix 2
Ranks of Spiked Armor
Thorns Army – Utility
Legendary Aspect
Occult Dominion
Affix 1
Intelligence
Affix 2
ATTACK SPEED
Affix 3
Critical Strike Damage
Tempered Affix 1
Skeletal Mage Damage
Minion Finesse – Offensive
Tempered Affix 2
Corpse Tendrils Size
Profane Innovation – Utility
Legendary Aspect
Aspect of Frenzied Dead
Affix 1
MOVEMENT SPEED
Affix 2
Details
Affix 3
Details
Tempered Affix 1
Movement Speed
Necromancer Motion – Mobility
Tempered Affix 2
Lucky Hit Chance
Worldly Fortune – Utility
Legendary Aspect
Aspect of the Cursed Aura
Unique Item Option
Ring of Mendeln
Can be used until swapping to Sanguivor
Affix 1
Maximum Life
Affix 2
ATTACK SPEED
Affix 3
Critical Strike Damage
Tempered Affix 1
Skeletal Mage Damage
Minion Finesse – Offensive
Tempered Affix 2
Ultimate Skill Cooldown
Necromancer Efficiency – Resource
Legendary Aspect
Aspect of Grasping Veins
Affix 1
Maximum Life
Affix 2
ATTACK SPEED
Affix 3
Critical Strike Damage
Tempered Affix 1
Skeletal Mage Damage
Minion Finesse – Offensive
Tempered Affix 2
Ultimate Skill Cooldown
Necromancer Efficiency – Resource
Legendary Aspect
Aspect of Apogeic Furor
Affix 1
RANKS OF HELLBENT COMMANDER
Affix 2
Maximum Life
Affix 3
Cooldown Reduction
Tempered Affix 1
Ultimate Skill Cooldown
Necromancer Efficiency – Resource
Tempered Affix 2
Skeletal Mage Damage
Minion Finesse – Offensive
Legendary Aspect
Unyielding Commander’s Aspect
Gems and Runewords
This build uses Emeralds in our Weapons, Runes and Topaz in our Armor, and Diamonds or Skulls in Jewelry.
We opt for Emeralds in our Weapons as Critical Strike Damage is a great way to boost our damage overall. For Season 8 in Particular, this helps empower Beastmaster’s Training, granting even more Summon Damage.
We use Topaz in our Armor, as Intelligence gives us both damage and some Elemental Resistance.
We go with Diamonds or Skulls for Our Jewelry, with priority on Skulls until we’re Armor capped, as Armor can be tougher to cap on an Intelligence class. After this, we can fill the remaining slots with Diamonds or specific gems to fill gaps in our Elemental Resistances.
For Runeword there are multiple great combinations we can use, below are our recommended Runewords for Different stages of the builds.
For additional information regarding Runewords, check out our Runewords Guide, which covers all the available runes as well as common and useful combinations.
| Stage | Ritual | Invocation | Result |
|---|---|---|
| Leveling | Yax | Qua | Drinking a Healing Potion grants 40% Movement Speed for 5 seconds. |
| Leveling | Cir | Lum | Casting 5 Skills restores 60 Resource. |
| Midgame | Cir | Gar | Casting 5 Skills grants 25% Critical Strike Chance for 5 seconds. |
| Midgame | Neo | Zec | Dealing Damage after not taking any for 2 seconds reduces Ultimate Cooldown by 2 seconds. |
| Endgame | Nagu | Zec | Every 5 seconds, Ultimate Cooldown is reduced by 1 second for every active minion, up to 6. |
| Endgame | Bac | Que | Traveling 30 meters casts Earthen Bulwark, granting Barrier. |
| Endgame | Bac | Gar | Traveling 5 meters grants 2.5% Critical Strike Chance for 5 seconds, stacking up to 25%. |
Book of the Dead
The Necromancer’s Book of the Dead allows a Necromancer to slightly customize, or even sacrifice, any of these three Minion Arachetypes, Skeletal Warriors, Skeletal Mages, or Golems.
Skeletal Reapers are our Warriors of choice. We’ll take the Corpse Upgrade for the early game, to help keep us Fortified, but swap to Cooldown Reduction late game to help spam Army of the Dead.
Shadow Mages are our Mages of choice. We’ll make use of the extra hit every 3rd attack early game to bump their DPS up, but Late game, we’ll want the Damage per Shadow Mage instead.
We’ll Sacrifice our Iron Golem, as the Critical Strike Damage it provides is easily the best option here. We’ll want to sacrifice Bone Golems when we first unlock them, as the Attack Speed is more impactful early game before we stack Critical Strike Damage.
Boss Powers
Boss Powers are exclusive to Season 8, and offer us a wide variety of options. But we’ve narrowed down the best choices for all stages of the game.
For more information on Boss Powers, check out our Boss Powers Explained guide, which details how to get and upgrade each power, and potential uses for them.
| Stage | Power | Reason |
|---|---|---|
| Leveling | Allek’s Talons (Main) | Adds a ton of damage to Reap, applying Damage over Time to a wide area. |
| Midgame | Varshan’s Lifesteal (Main) | Decent damage and consistent healing. |
| Endgame | Urivar’s Lobbed Bombs (Main) | Huge boost of CDR and decent damage once we’re able to frequently cast Army of the Dead. |
| All | Beast Master’s Training (Modifier) | Huge increase to Summon Damage for stacking Critical Strike Damage, which we already do. |
| All | Hatred’s Embrace’s Haste (Modifier) | Free Critical Strike Chance for keeping our Shadow Resistance capped. Almost caps us alongside Grasping Veins |
| All | Blackmailer’s Sabotage (Modifier) | Converts a portion of our Fortify into Barrier, allowing easy barrier Generation, especially in the Endgame. |
| Endgame | Torusk’s Rage (Modifier) | A huge boost of Attack Speed, but relies on the Control Paragon Glyph to get anywhere near its full value without sacrificing stronger Tempers. |
Aspects
We’ll cover the Aspects recommended for maximizing the build’s potential. The Ideal Stats section above lists the recommended slots for these, but they can be arranged however necessary, except for ones placed in 2H Weapons or Amulets.
Aspects marked with an Asterisk (*) below are swapped in or out at different stages of progression, noted in their details.
Unyielding Commander’s Aspect
Unyielding Commander is great for our final build but also provides a good boost of damage even while progressing, thanks to its huge Summon Damage increase.
We’ll slot this in our Amulet, as it can remain there consistently without sacrificing anything.
Aspect of Grasping Veins
Grasping Veins allows Corpse Tendrils to greatly boost our Critical Strike Chance and Damage, making it a mandatory slot.
We’ll slot this in our Gloves, as we don’t need to boost it, despite how powerful it is.
Aspect of Frenzied Dead
Frenzied Dead allows our minions to ramp their Attack Speed. This also becomes a larger damage bonus when we pick up the Cult Leader Paragon Node.
We’ll slot this in one of our Rings, as it also doesn’t need to be boosted.

Aspect of Apogeic Furor*
Apogeic Furor isn’t something we want to use right away, only using it when we fully swap into relying on Army of the Dead.
Aspect of the Great Feast*
Once our minions are strong enough to deal most of our early damage, we can use Great Fest to further boost them, since we have no use for Essence anymore.
Aspect of Reanimation*
Reanimation is here an additional Aspect to slot in for One-handed weapon sets, since we’ll have an extra slot open.
Aspect of Hardened Bones
Hardened Bones provides us with a significant chunk of Damage Reduction and is a mandatory slot.
Aspect of Might*
The Aspect of Might is a good temporary Filler on our Helmet until we get Heir of Perdition.
Aspect of Occult Dominion
Occult Dominion allows us to summon four extra skeletons, two Warriors, and two Mages. This makes Kalan’s Edict stronger, and in turn, Cult Leader.
Aspect of the Cursed Aura
Cursed Aura is the best way we have to spread our Curses to large groups. Since we get a ton of benefits for doing so, it’s hard to go without this Aspect.
Unique Items
The Unique items listed below are beneficial to the build, but not required for the build to function unless stated otherwise. Unique Items can drop in any difficulty, but are more common in Torment Difficulties.
Sanguivor, Blade of Zir
This build’s endgame heavily relies on Sanguivor, Blade of Zir. This Unique Two-handed Sword gives us a huge boost of Summoning Damage, Intelligence, Maximum Life, Ranks to all of our Minion Mastery Passives, and a high chance for Army of the Dead to deal double Damage.
Ring of Mendeln
The Ring of Mendeln is a great interim Unique Ring that allows our minions to deal amazing damage, by adding a high damage burst to every 6th attack. This also comes with Minion Attack Speed, Ranks to all of our Minion Mastery passives, Damage, and Intelligence.
We can use this until we get a good Greater Affixes on our Armor to better enable Sanguivor.
Blood Moon Breeches
While not an ideal option as we’d prefer a more defensive set of Pants, Blood Moon Breeches pack a punch for our build. They allow our Minions AND Army of the Dead to apply Decrepify and Iron Maiden. Not quite as reliable as Cursed Aura, but it’s not bad. In addition, they offer us ranks of Hellbent Commander, which is by far our best passive to get ranks for.
While we don’t require Golem Mastery, everything else about this is great for the build.
Heir of Perdition
This Mythic Helmet is insane. Heir of Peridition gives us a huge x60% damage multiplier, on top of also giving us 20% Critical Strike Chance, Lucky Hit Chance, and Movement Speed, in addition to ranks for Core Skills. Except for those skill ranks, all of this is highly beneficial.
Paragon Boards and Glyphs
Paragon Boards and Glyphs are a feature that becomes available at level 60. Below are our recommended Paragon Boards and Glyph Choices. These are listed in the order we recommend them, as well as their pathing.
With the abundance of Paragon Points we can earn, we’ve split the pathing into Initial Pathing and Additional Pathing. Initial Pathing is the clusters we pick up while pathing through the board, while Additional Pathing are ones we come back for later for additional stats once we’ve gotten all of our Glyphs socketed.
Starter Board
Starter Boards offer a lot of generic offensive and defensive stats. In this case, Damage, Elite Damage, Armor, and Maximum Life are worth picking up.
Initial Pathing
- Prime
- Glyph Node
- Grasp
- Knowledge
- Upper Gate
Additional Pathing
- Resilience
- Intelligence for Glyph
This board offers a lot of accessible Intelligence, so we’ll socket Control here to take advantage of this.
This Glyph grants Damage to Crowd-Controlled Enemies per Intelligence allocated in range. With 40 Intelligence allocated, it grants x20% increased damage to Crowd-Controlled Enemies. At Glyph Level 45, it also grants a multiplicative bonus to Damage.
Cult Leader
Cult Leader offers a wide variety of minion bonuses, including some generic ones near the Glyph Node we’ll take advantage of. Cult Leader is great, as it turns the Aspect of Frenzied Dead into a very powerful damage increase for our minions.
We’ll need to rotate this board so that the Glyph Node is in the Bottom Right.
Initial Pathing
- Custody
- Glyph Node
- Overlord
- Puppeteer
- Cult Leader
- Right Gate
Additional Pathing
- Infused Caster
- Armor-Clad
This board offers a lot of accessible Intelligence, so we’ll socket Deadraiser here to take advantage of this.
This Glyph boosts Minion Damage and Damage Reduction Paragon Nodes allocated in range, granting us extra Summon Damage and Minion Damage Reduction. With 40 Intelligence allocated, it grants 1% Damage to an enemy each time it’s hit by our minions, up to 15%. At Glyph Level 45, it also grants a multiplicative bonus to Crowd-Controlled Damage.
Scent of Death
Scent of Death offers a ton of generic offensive and defensive bonuses, which include Scent of Death itself.
We’ll need to rotate this board so that the Gyph Node is closer to the bottom.
Initial Pathing
- Restorative (Max Life Only)
- Glyph Node
- Seethe
- Deathmarked
- Scent of Death
- Suffused Resilience
- Upper Gate
Additional Pathing
- Intelligence for Glyph
- Deathbringer (Armor only)
- Shadow Resilience
This board offers a lot of accessible Intelligence, so we’ll socket Mage here to take advantage of this.
This Glyph grants Increased Skeletal Mage Damage per intelligence allocated in range. With 40 Intelligence allocated in range, it grants 35% All Elemental Resistance to all Minions. At Glyph Level 45, it also grants a multiplicative bonus to Damage.
Fraility
Friability offers a good amount of Vulnerable Damage, Crowd-Controlled Damage, and some generic Defenses. Frailty causes enemies to take increased damage the longer they remain cursed, great for both Cursed Aura and Vampiric Curse.
We’ll rotate this board so that the Glyph Node is on the left side of the board.
Initial Pathing
- Relentless
- Eradicate
- Glyph Node
- Fraility
- Preservation
- Left Gate
Additional Pathing
- Dexterity for Glyph
- Meticulous
- Shadow Resilience
This board offers a lot of accessible Dexterity, so we’ll socket Exploit here to take advantage of this.
Exploit grants Vulnerable Damage Per Dexterity allocated in range. With 25 Dexterity allocated, it grants x1% Damage per hit on a Vulnerable enemy, stacking up to x10%. At Glyph Level 45, it also grants a multiplicative bonus to Vulnerable Damage.
Flesh-eater
Flesh-eater offers us even more generic offensive and defensive bonuses, making it easy to make use of. Flesh-eater itself grants us a huge damage bonus for 6 seconds when we consume 5 corpses, and refreshes for each corpse consumed within the duration.
We’ll rotate this board so that the Glyph Node is on the right side of the board.
Initial Pathing
- Glyph Node
- Targeted
- Rend
- Flesh-eater
- Recuperate
Additional Pathing
- Dexterity for Glyph
- Erudite
- Poison Conditioned
This board offers a lot of accessible Dexterity, so we’ll socket Essence here to take advantage of this.
Essence grants Critical Strike Damage Per Dexterity allocated in range. With 25 Dexterity allocated, it grants x22% Damage with Critical Strikes against Non-Healthy enemies. At Glyph Level 45, it also grants a multiplicative bonus to Critical Strike Damage.
Leveling Order
If you want to play this build from level 1, the next segment of this build guide is for you. Below, you will see the exact leveling order in which you should acquire your skills and passives to maximize damage and overall performance.
| Levels | Icon | Skill | Purpose |
|---|---|---|---|
| 2-4 | | Acolyte’s Reap | Early consistent corpse generation. |
| 5-7 |  | Paranormal Blood Surge | Good AoE and damage with guaranteed Overpowers. |
| 8-10 | | Ghastyle Blood Mist | Ghastly Blood Mist |
| 11-13 |  | Skeletal Warrior Mastery | Extra survivability for our Warriors. |
| 14-16 |  | Abhorrent Iron Maiden | Strong early curse with no cost and provides extra damage when enemies hit us or our minions and heals us when the enemy dies. |
| 17-19 |  | Skeletal Mage Mastery | Huge damage and defense buff for our Mages. |
| 20-23 | | Blood Surge | Max our main skill for the early game |
| 24-26 |  | Death’s Embrace | More damage for Blood Surge |
| 27-29 | | Supreme Army of the Dead | Good damage, creates a lot of corpses, and revives minions. |
| 30-32 |  | Hellbent Commander | More damage for our minions. |
| 33-34 |  | Necrotic Carapace | Allows Army of teh Dead and our Reaper to grant us Fortify. |
| 35 | | Kalan’s Edict | Good boost for our minions, especially with Aspect of Occult Dominion |
| 36-38 |  | Inspiring Leader | Critical Strike Chance for us and our Minions. |
| 39-41 |  | Death’s Approach | Movement Speed to get around faster. |
| 42-44 | Titan’s Fall | More damage to Elites and Bosses. | |
| 45-47 |  | Coalesced Blood | More damage while we remain healthy |
| 48-50 |  | Tides of Blood | More Overpower Damage for Blood Surge |
| 51 |  | Reaper’s Pursuit | Taken to reach other passives for now. |
| 52-54 |  | Gloom | Great damage bonus our Mages can stack for for themselves |
| 55-57 |  | Terror | More damage for our Mages against Elites and bosses. |
| 58-60 |  | Amplify Damage | More Damage for everyone. |
| Respec | | Supernatural Blight | Now at Level cap, we’ll swap to Blight, dropping the points from Blood Surge and Tides of Blood, freeing up 7 additional points for other passives. |
| Respec | | Abhorrent Decrepify | Move the points from Iron Maiden to Decrepify instead. |
| Respec | | Ultimate and Passives | Place some of the freed up passives from earlier into Reaper’s Pursuit and Army of the Dead |
| Respec + R1 | Finality | With the remaining respec point and one of our renown points, grab more damage for Army of the Dead | |
| R2 |  | Grim Harvest | Take this to reach Fueled by Death. |
| R3-R5 |  | Fueled by Death | More generic damage for consuming a corpse |
| R6 | | Corpse Tendrils | Take the basic skill and swap it with our Curse on the hotbar, Aspect of Cursed Aura applies our curse for us. |
| R7-R9 | Precision Decay | Gives us a nice boost to Lucky Hit Chance to help trigger Abhorrent Decrepify. | |
| R10-R12 |  | Crippling Darkness | Chance for stun with Darkness Skill, including our Mages that can now stagger Bosses quite well. |
This concludes our Diablo 4 Necromancer Build focusing on the Army of the Dead skill. You can find more leveling and endgame Diablo 4 builds here on VULKK.com to try new things with your characters and spice up your gameplay.
To learn how to maximize your damage in Diablo 4, consult with our guide on that topic. Learning how to deal the highest possible damage with your build is crucial to succeeding in the Endgame and highest tiers.