Tips on parkour sections, all the hidden chests locations, and how to escape the titan in Attack on Titan quests in Assassin’s Creed Shadows.
Table of contents
Requirements and Time Limits
This Collaboration Event is only available from November 25, 2025 through December 22, 2025. Be sure to complete the quest and claim its rewards before time is up!
The quest chain is only available after you update the game to Patch 1.1.6 or newer. You don’t need the expansion and the story is available to all players on all platforms.
How to start the Attack on Titan Crossover Quests
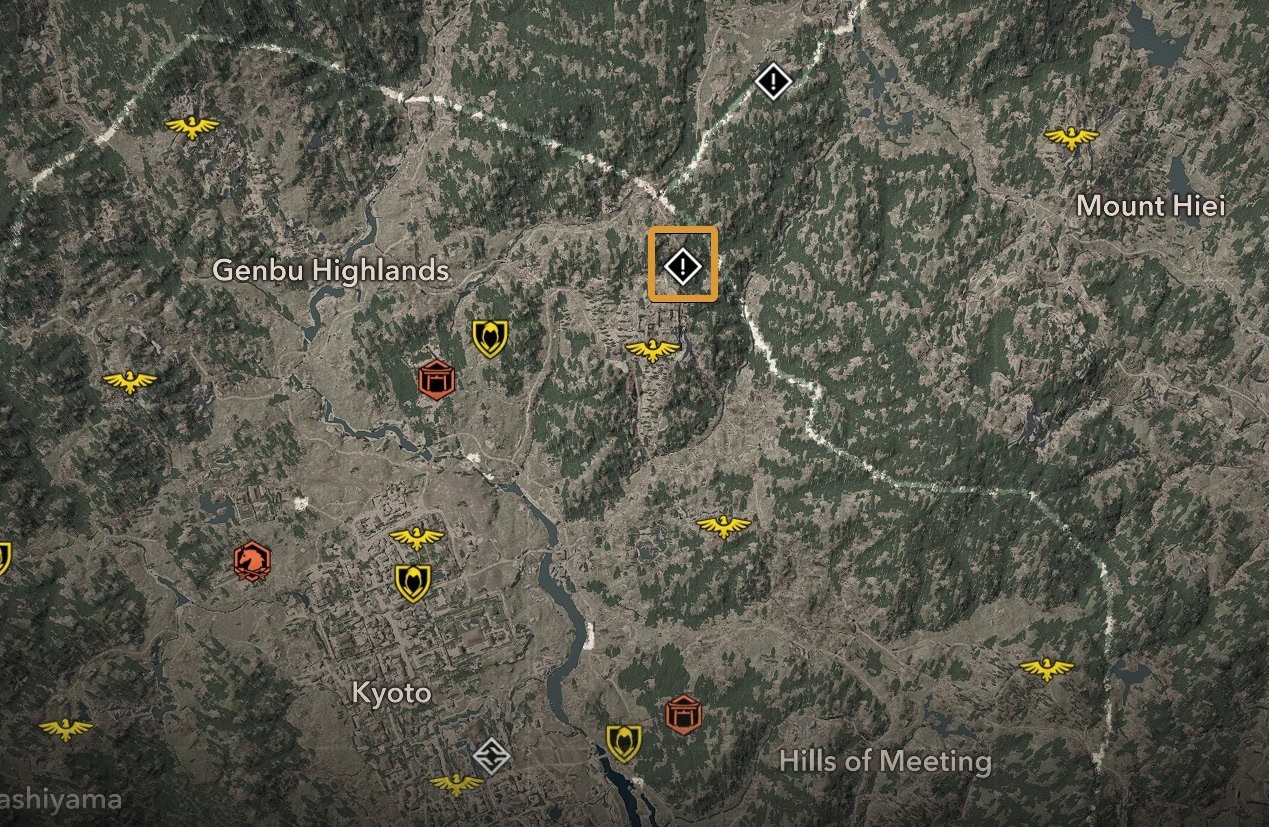
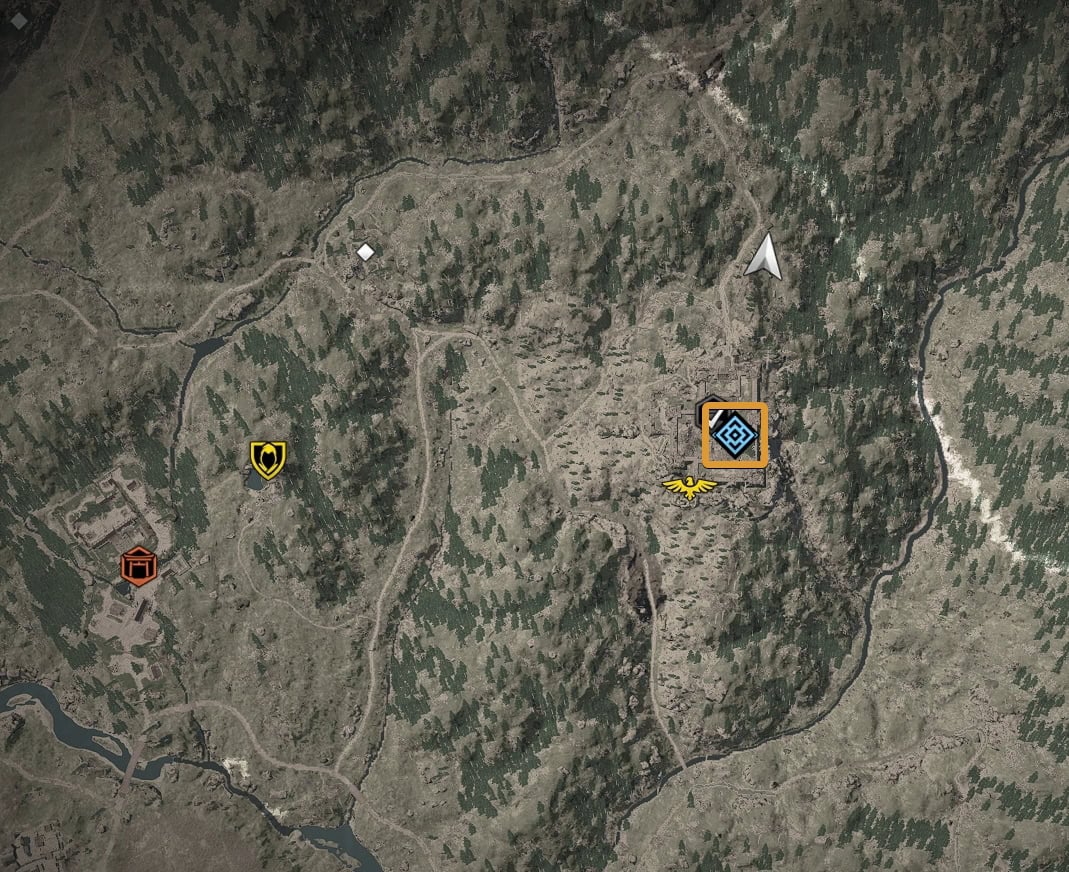
Before you can start these quests, you’ll need to unlock Yasuke after completing Act 1 of Assassin’s Creed Shadows. Once he’s unlocked, you’ll get the quest marker for “Beyond the Walls” near Hanazono Castle.
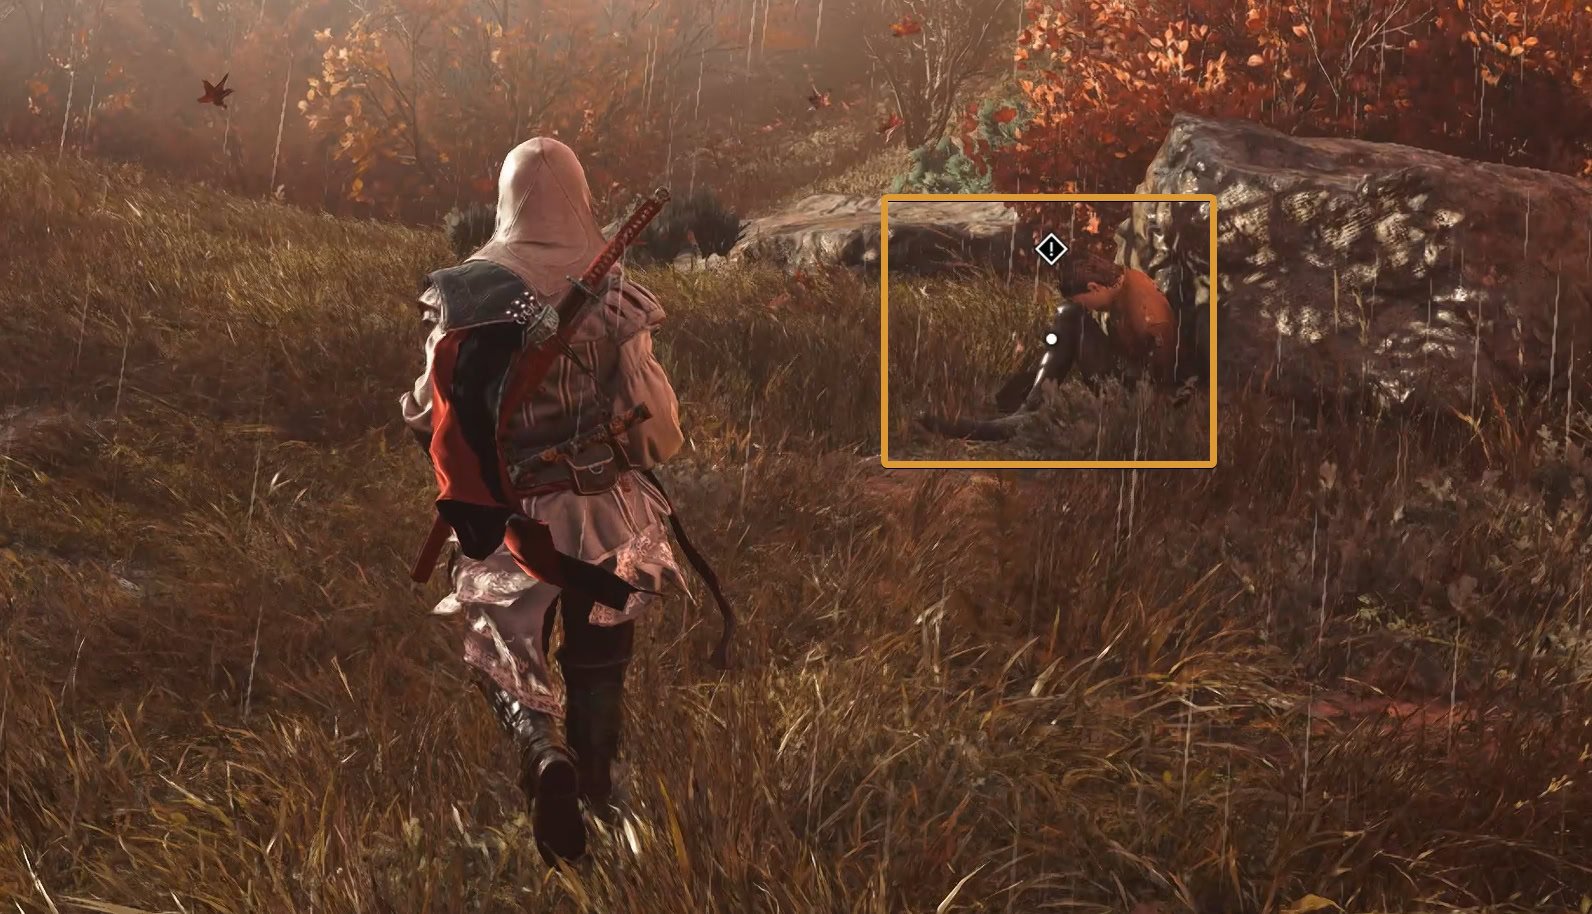
This area is a ruined castle that is a short trip northeast of Kyoto in the Yamashiro region. Look for the corpse of a Survey Corps member and loot it to find a journal.
Beyond the Walls
After reading the journal, head southwest to Hanazono Castle and look for a stranger being held captive. Defeat any bandits in your way and kill the Elitrasi Fanatics. Once dead, talk to the stranger to release her.
After introducing the nature of the scenario, the stranger named Ada will ask Naoe and Yasuke for help saving someone named Gautwin. Select “I’m ready to follow Ada” when you’re ready to begin and you’ll have a cutscene with exposition.
Descent
You can find Gautwin’s journal and a Military Police Brigade banner. Refill on supplies in this room if need and squeeze through the crack in the wall.
Open the Barricaded Door
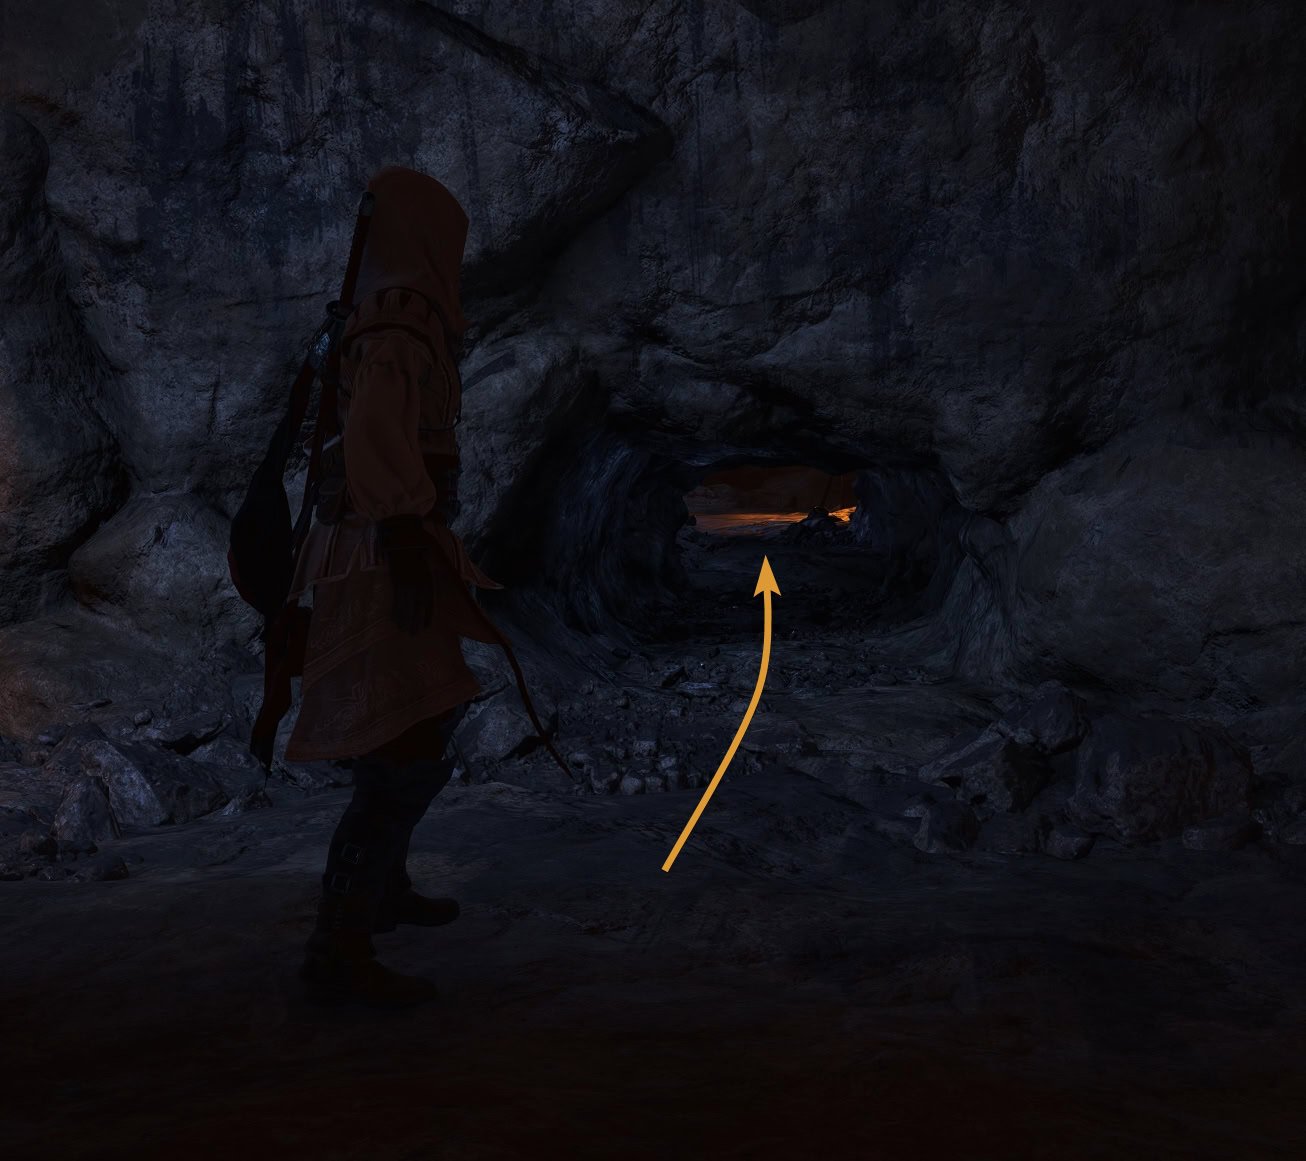
This cave you entered appears to have only dead ends. Look for a tunnel on the west wall of the cave and crawl underneath.
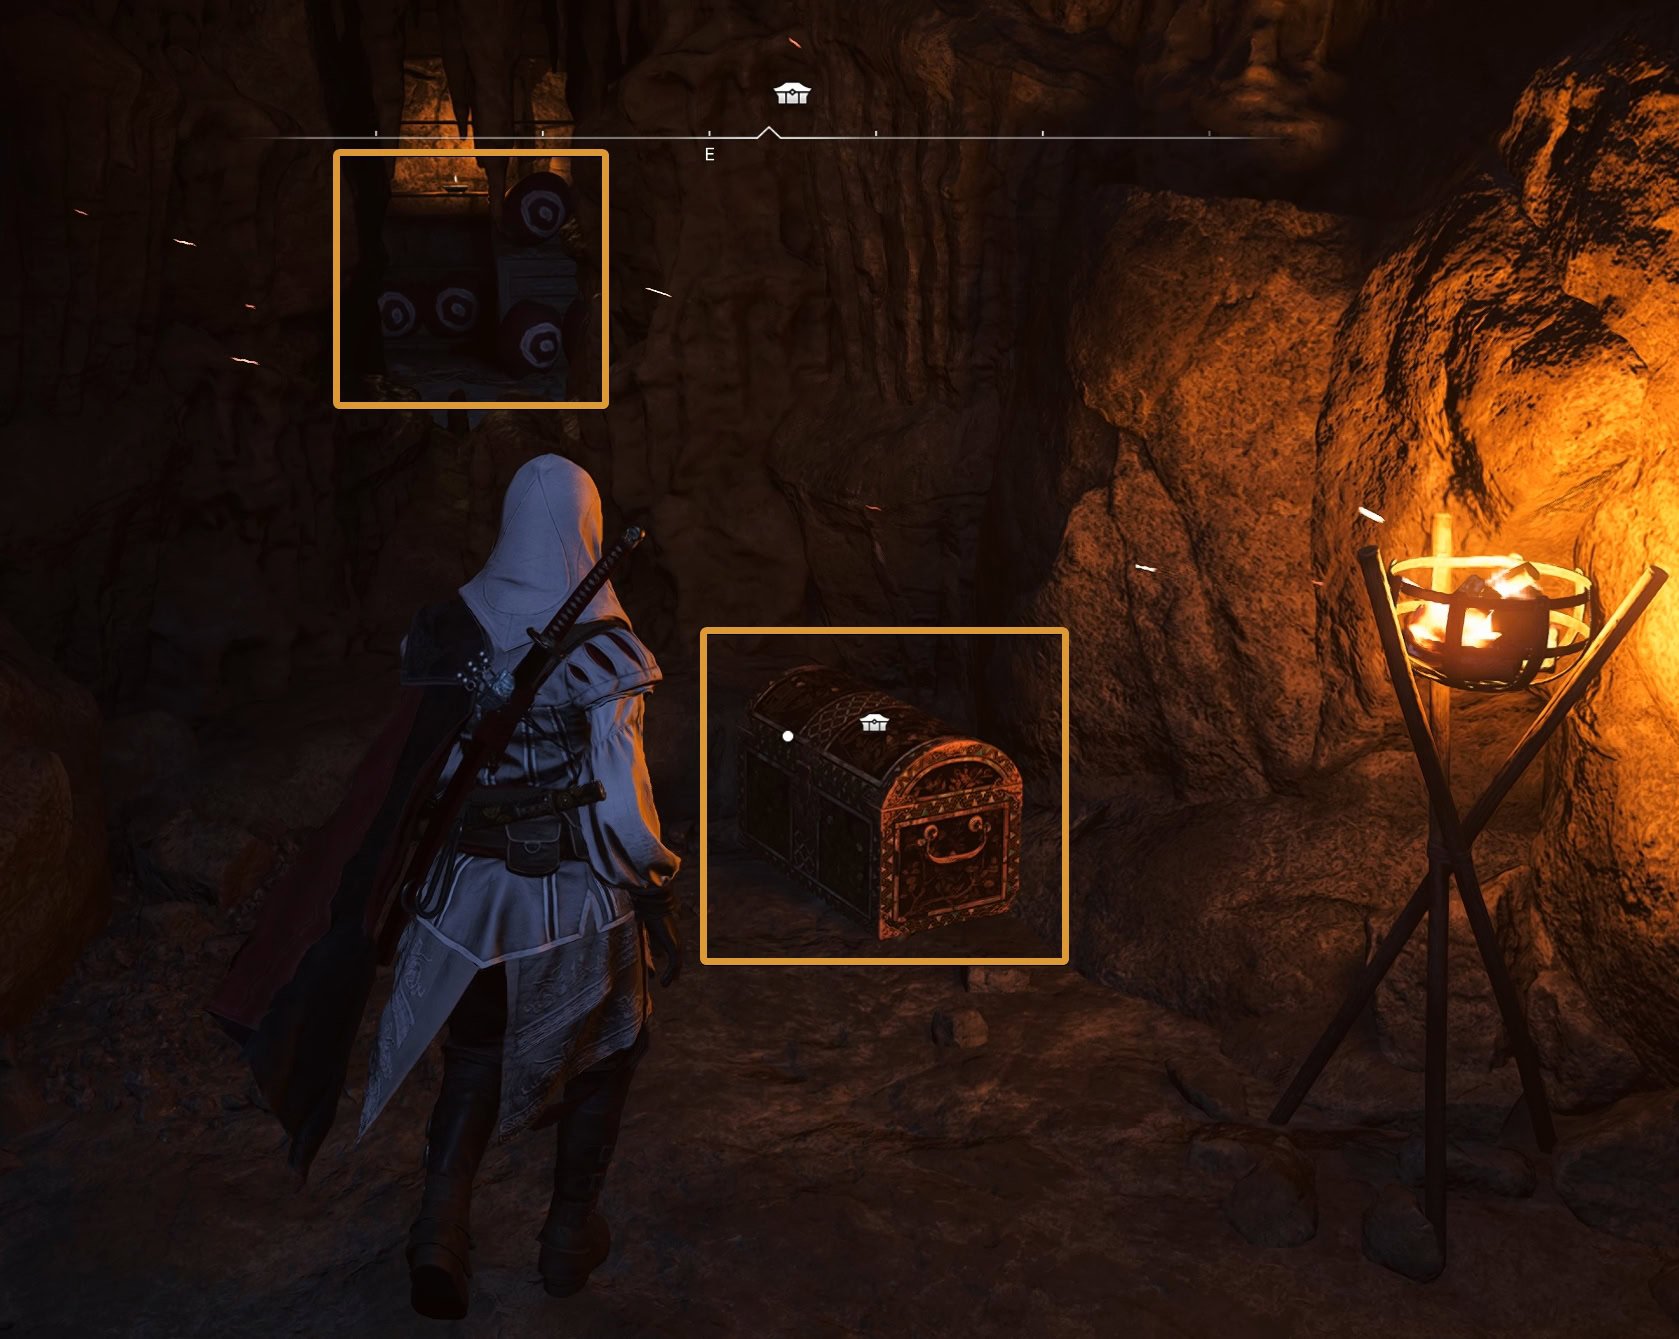
Follow the cave to find a chest and a hole in the wall. Loot the chest for a Training Corps Emblem Banner, then destroy the explosive jars with shuriken or kunai.
Find a way to reach Gautwin
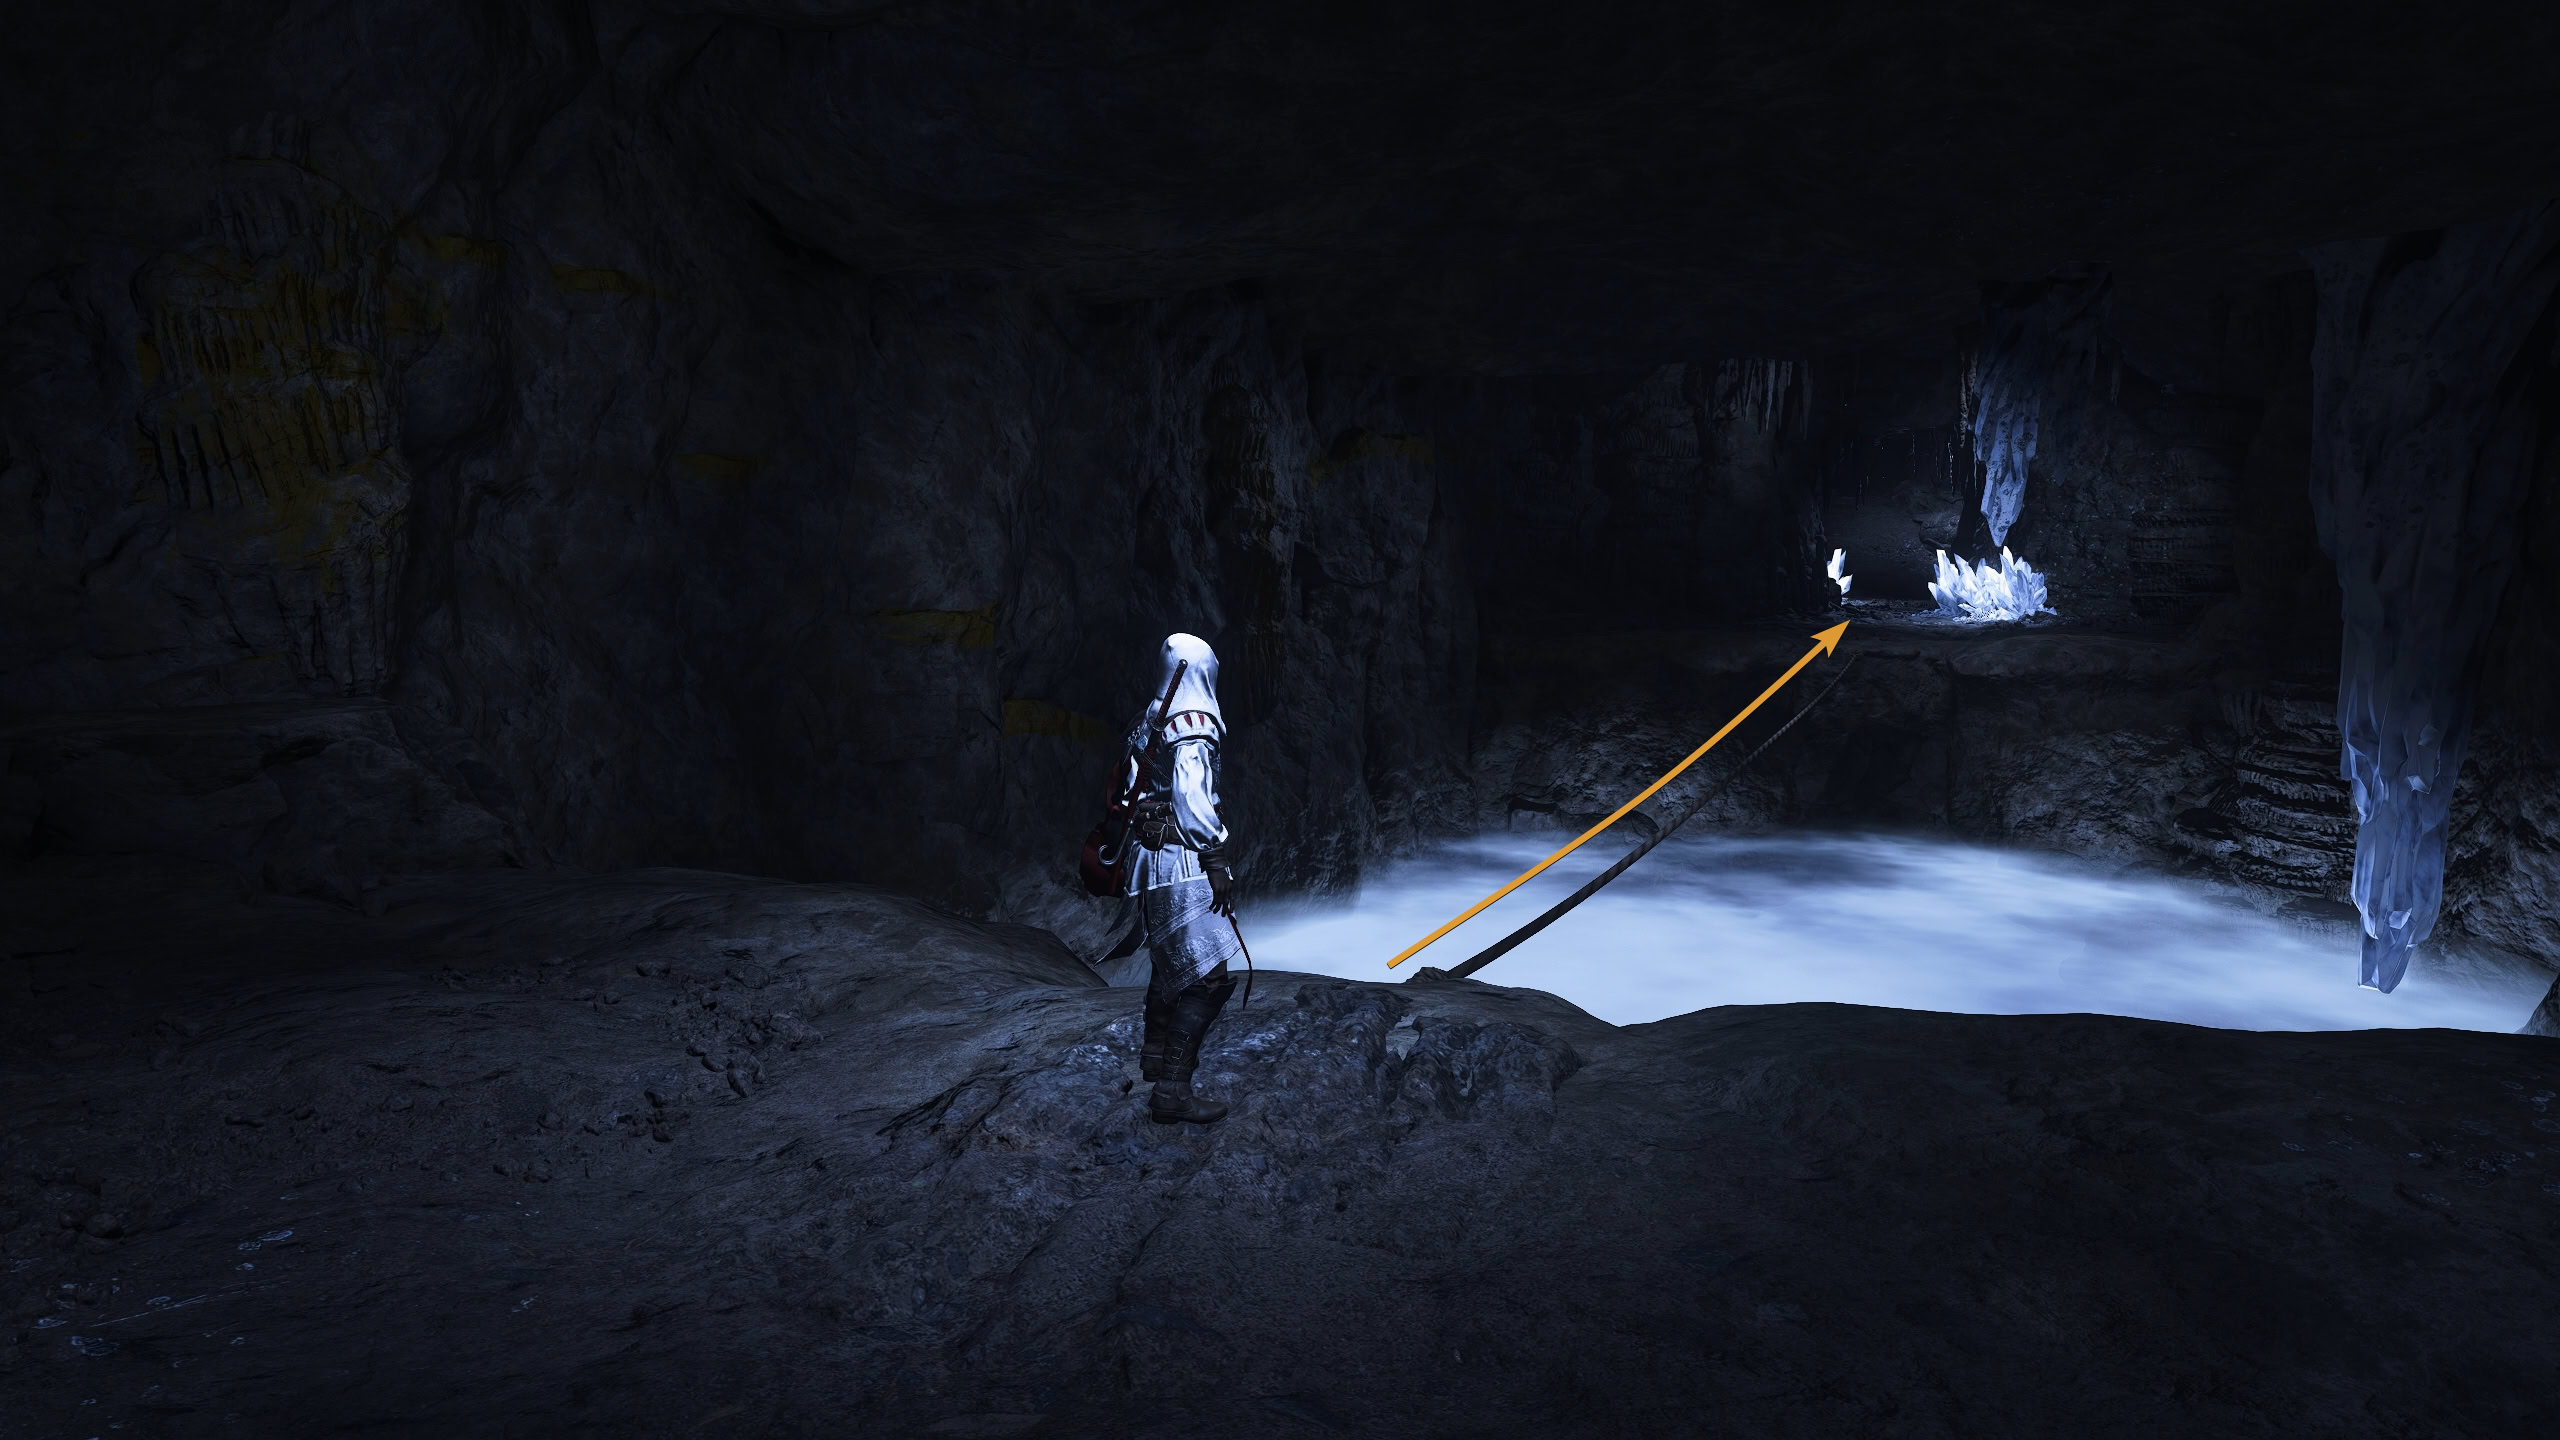
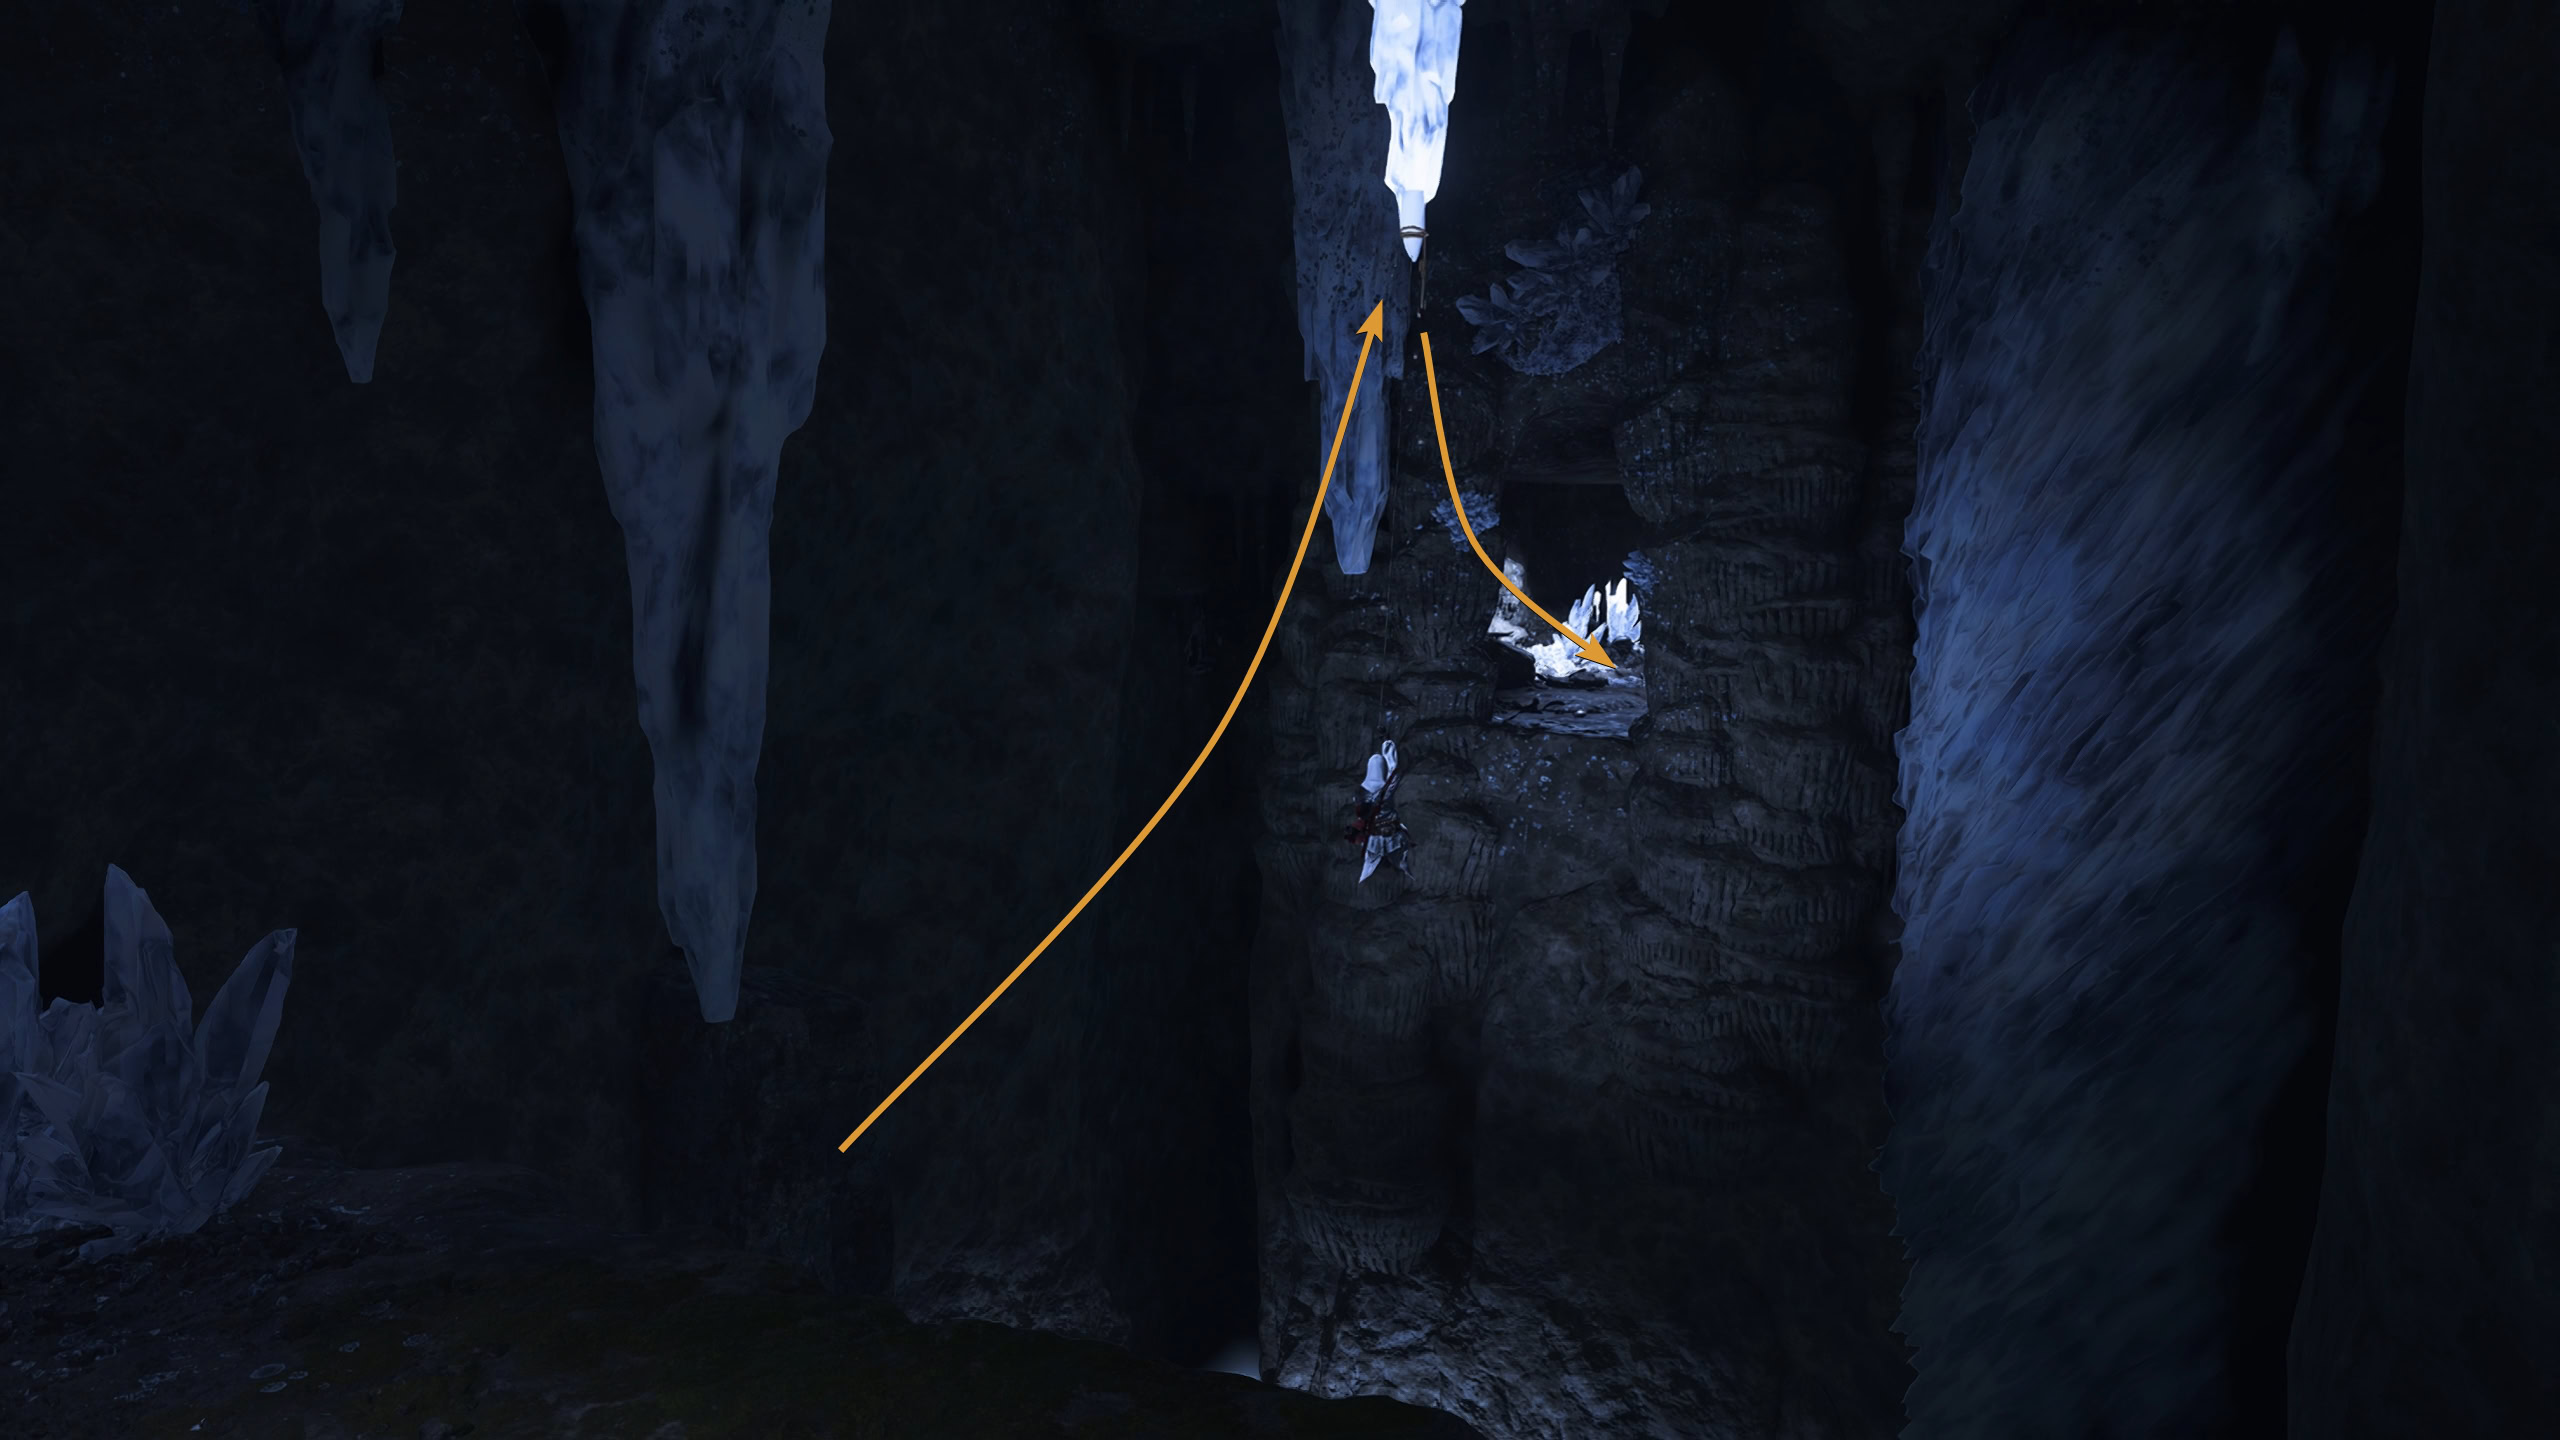
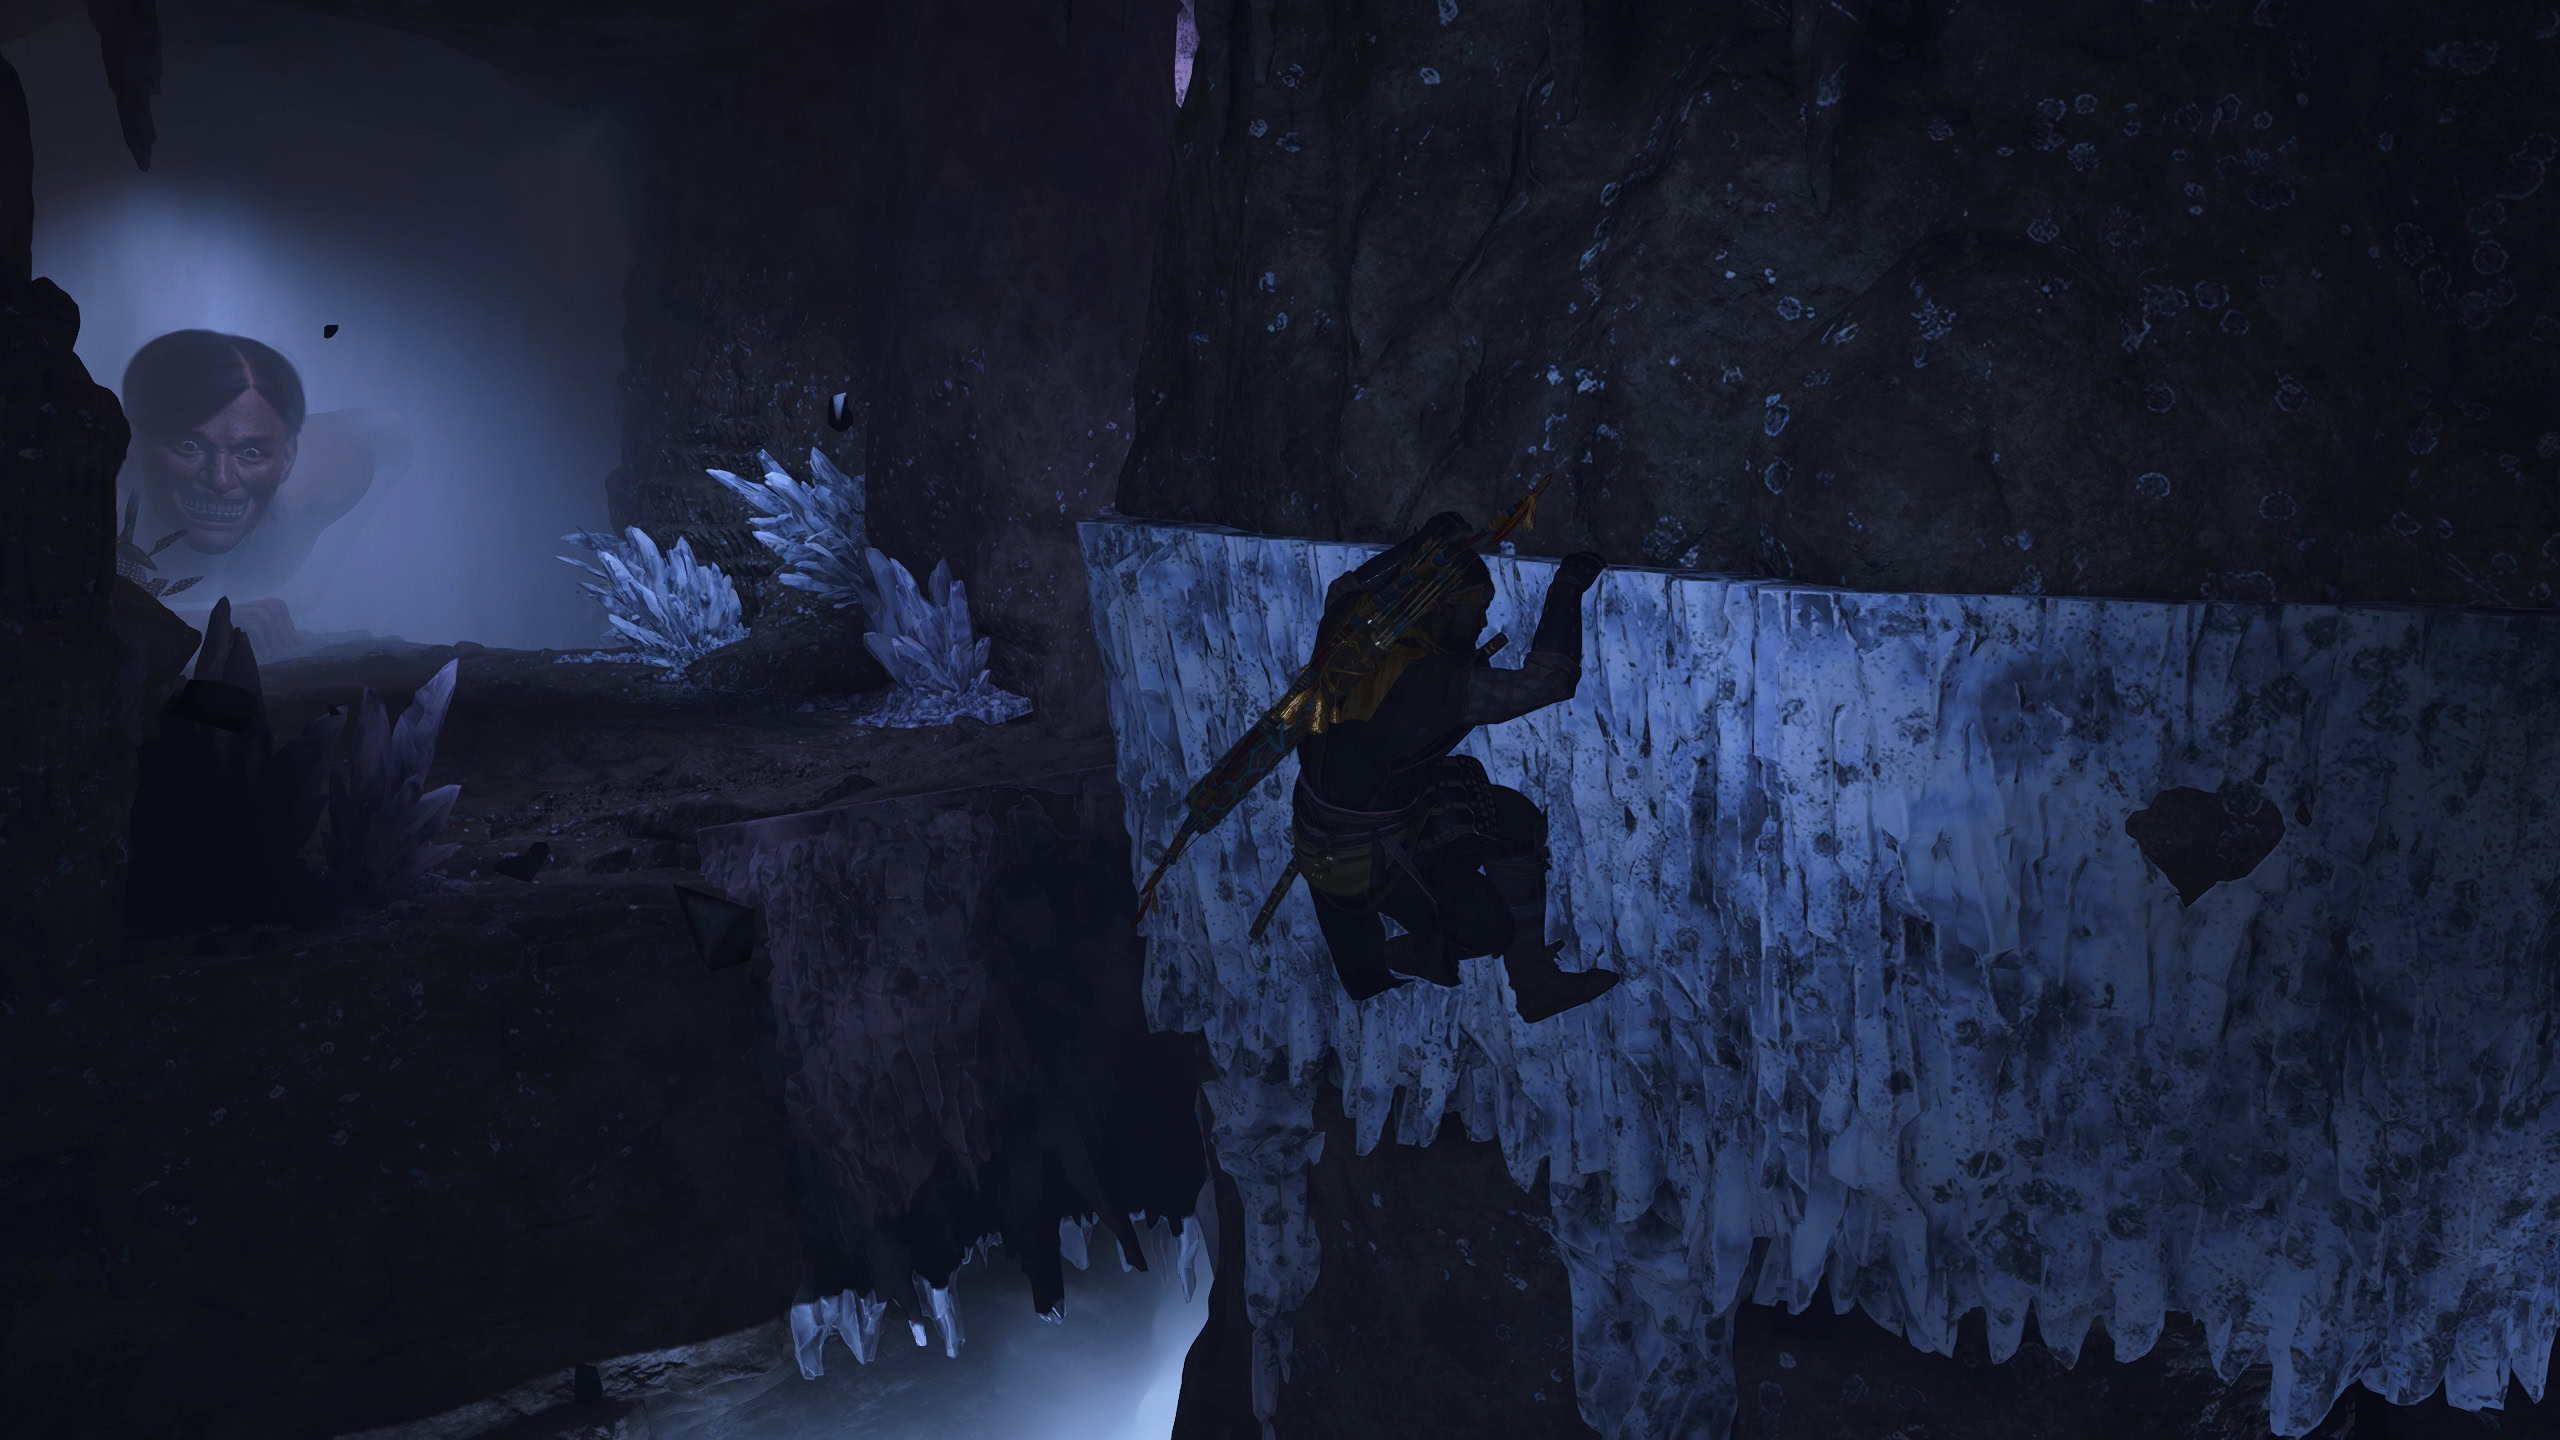
Crawl back under the tunnel you came here in, and go north where there’s a new entrance. Go through and descent into the cave where you’ll find some crystals. Attack them to go forward, grapple onto the crystal overhead, and descend downwards.
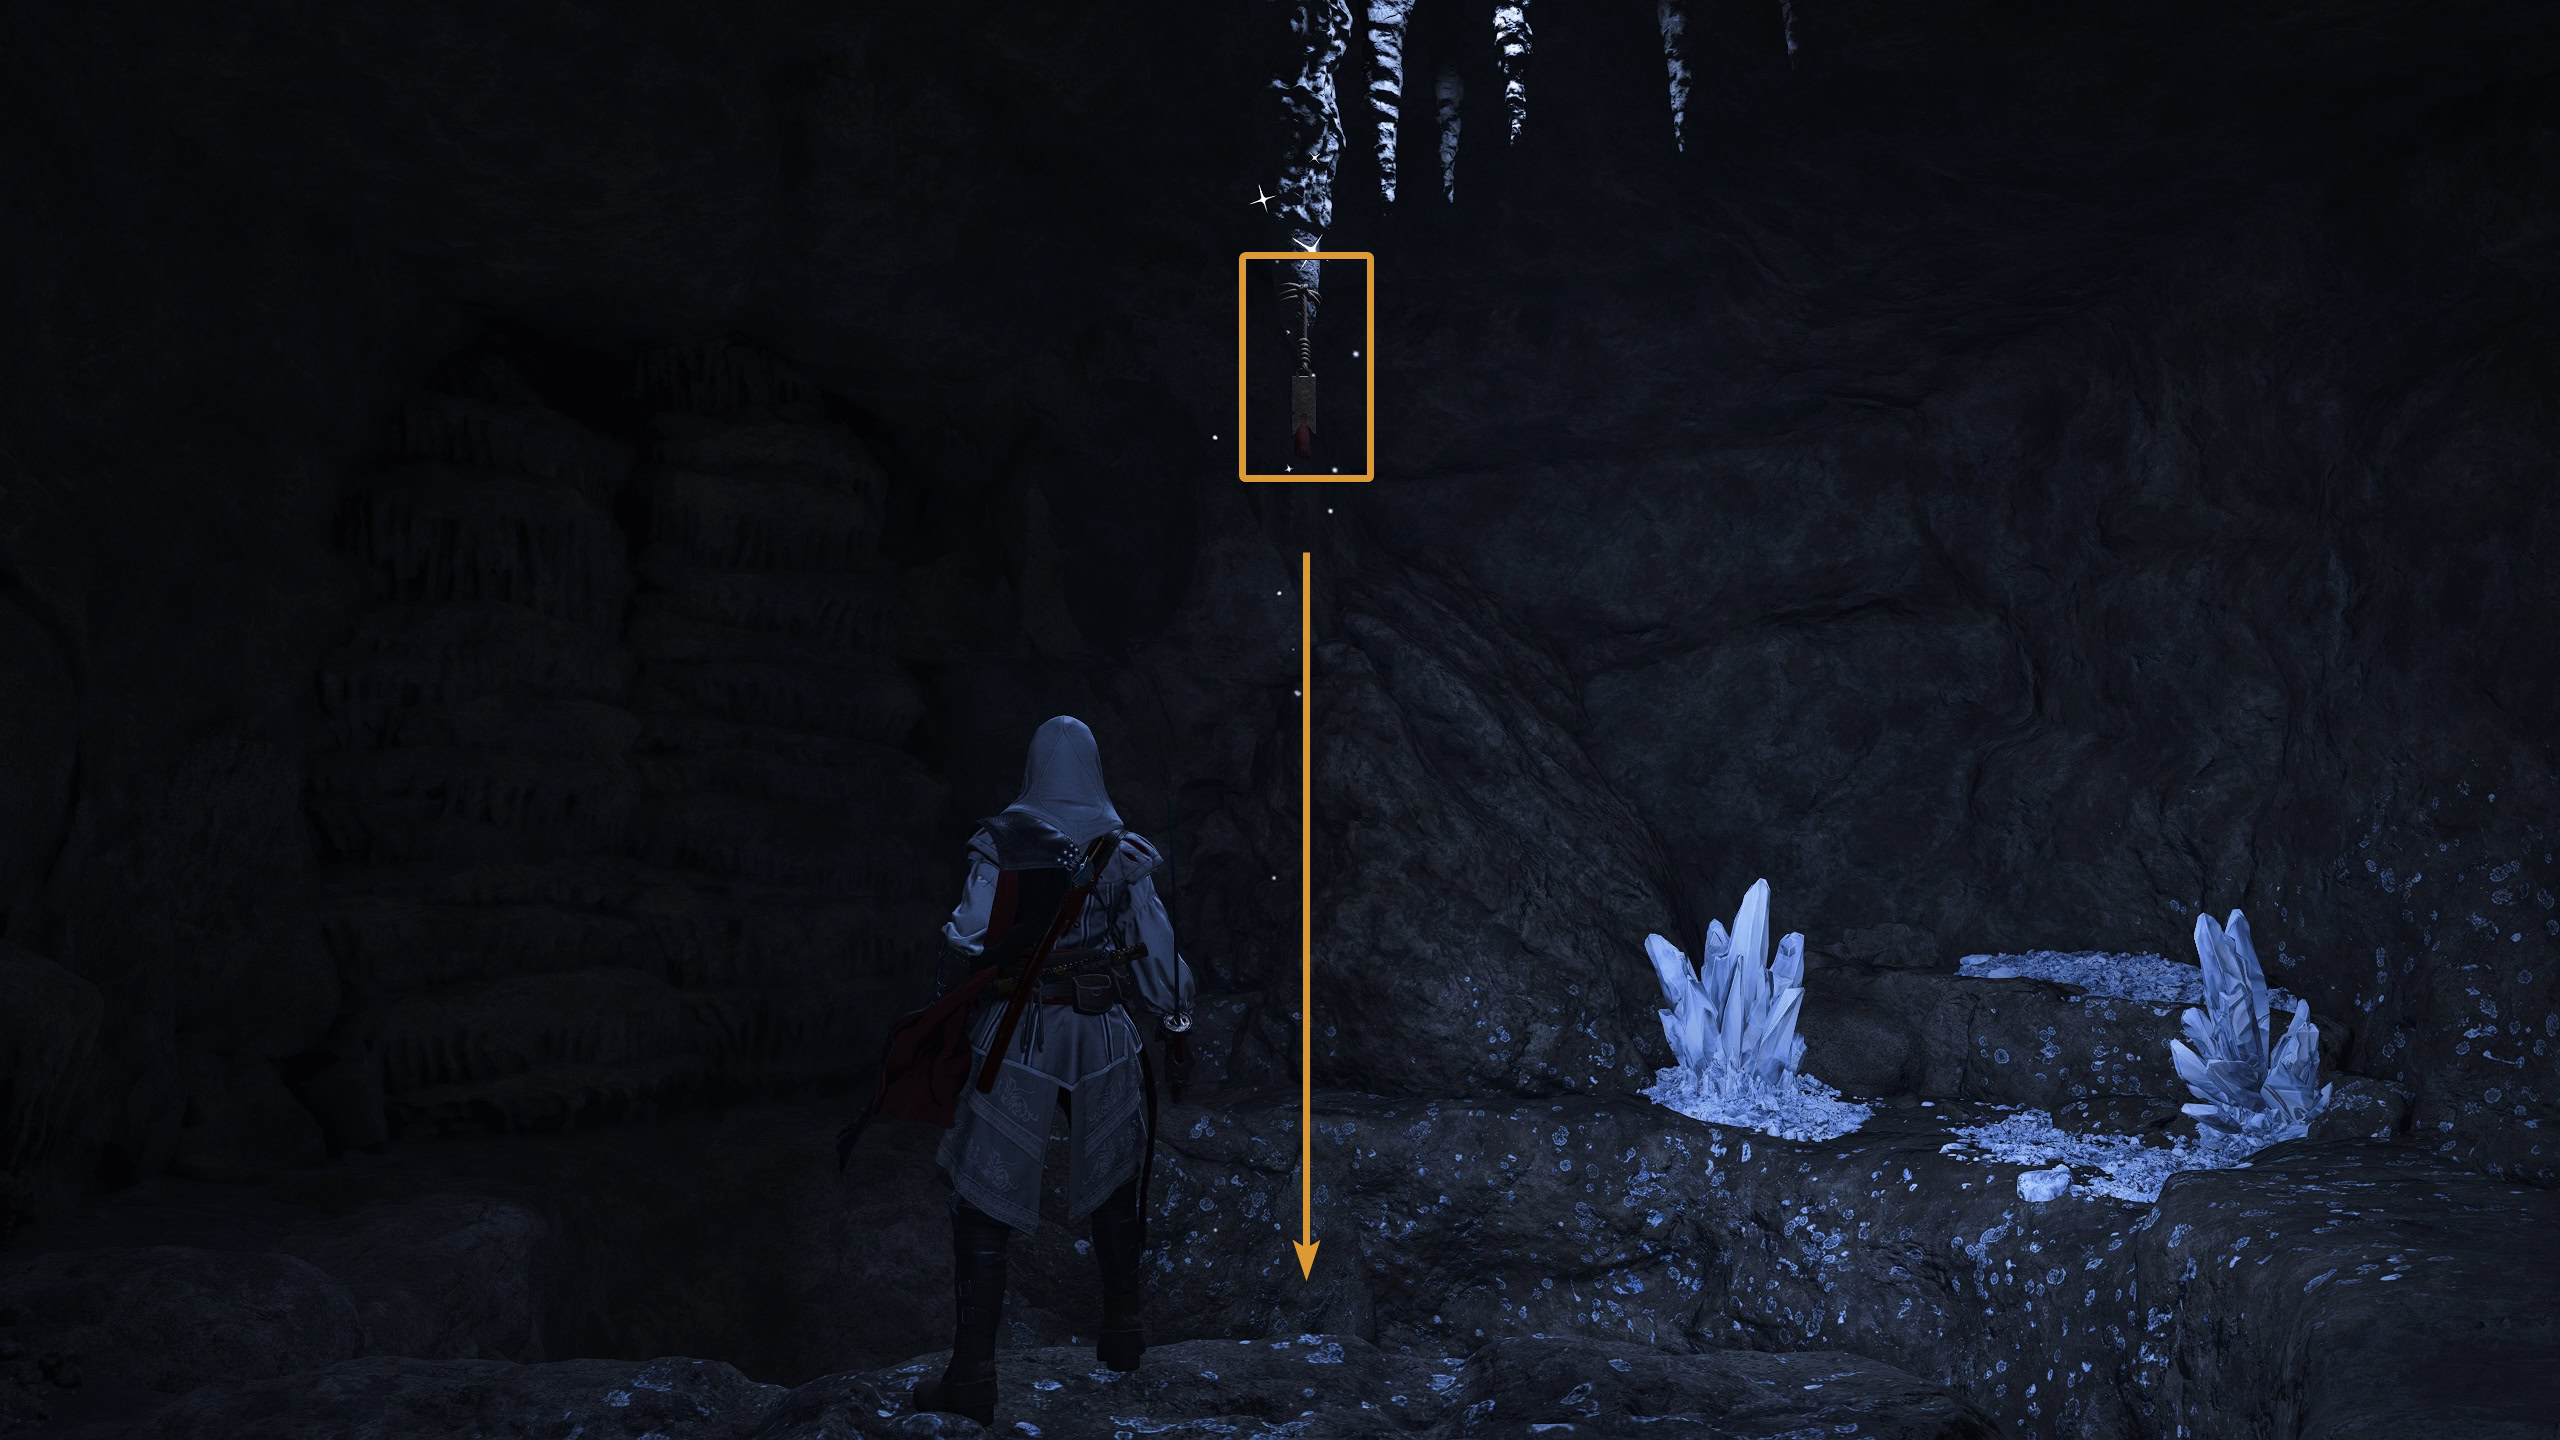
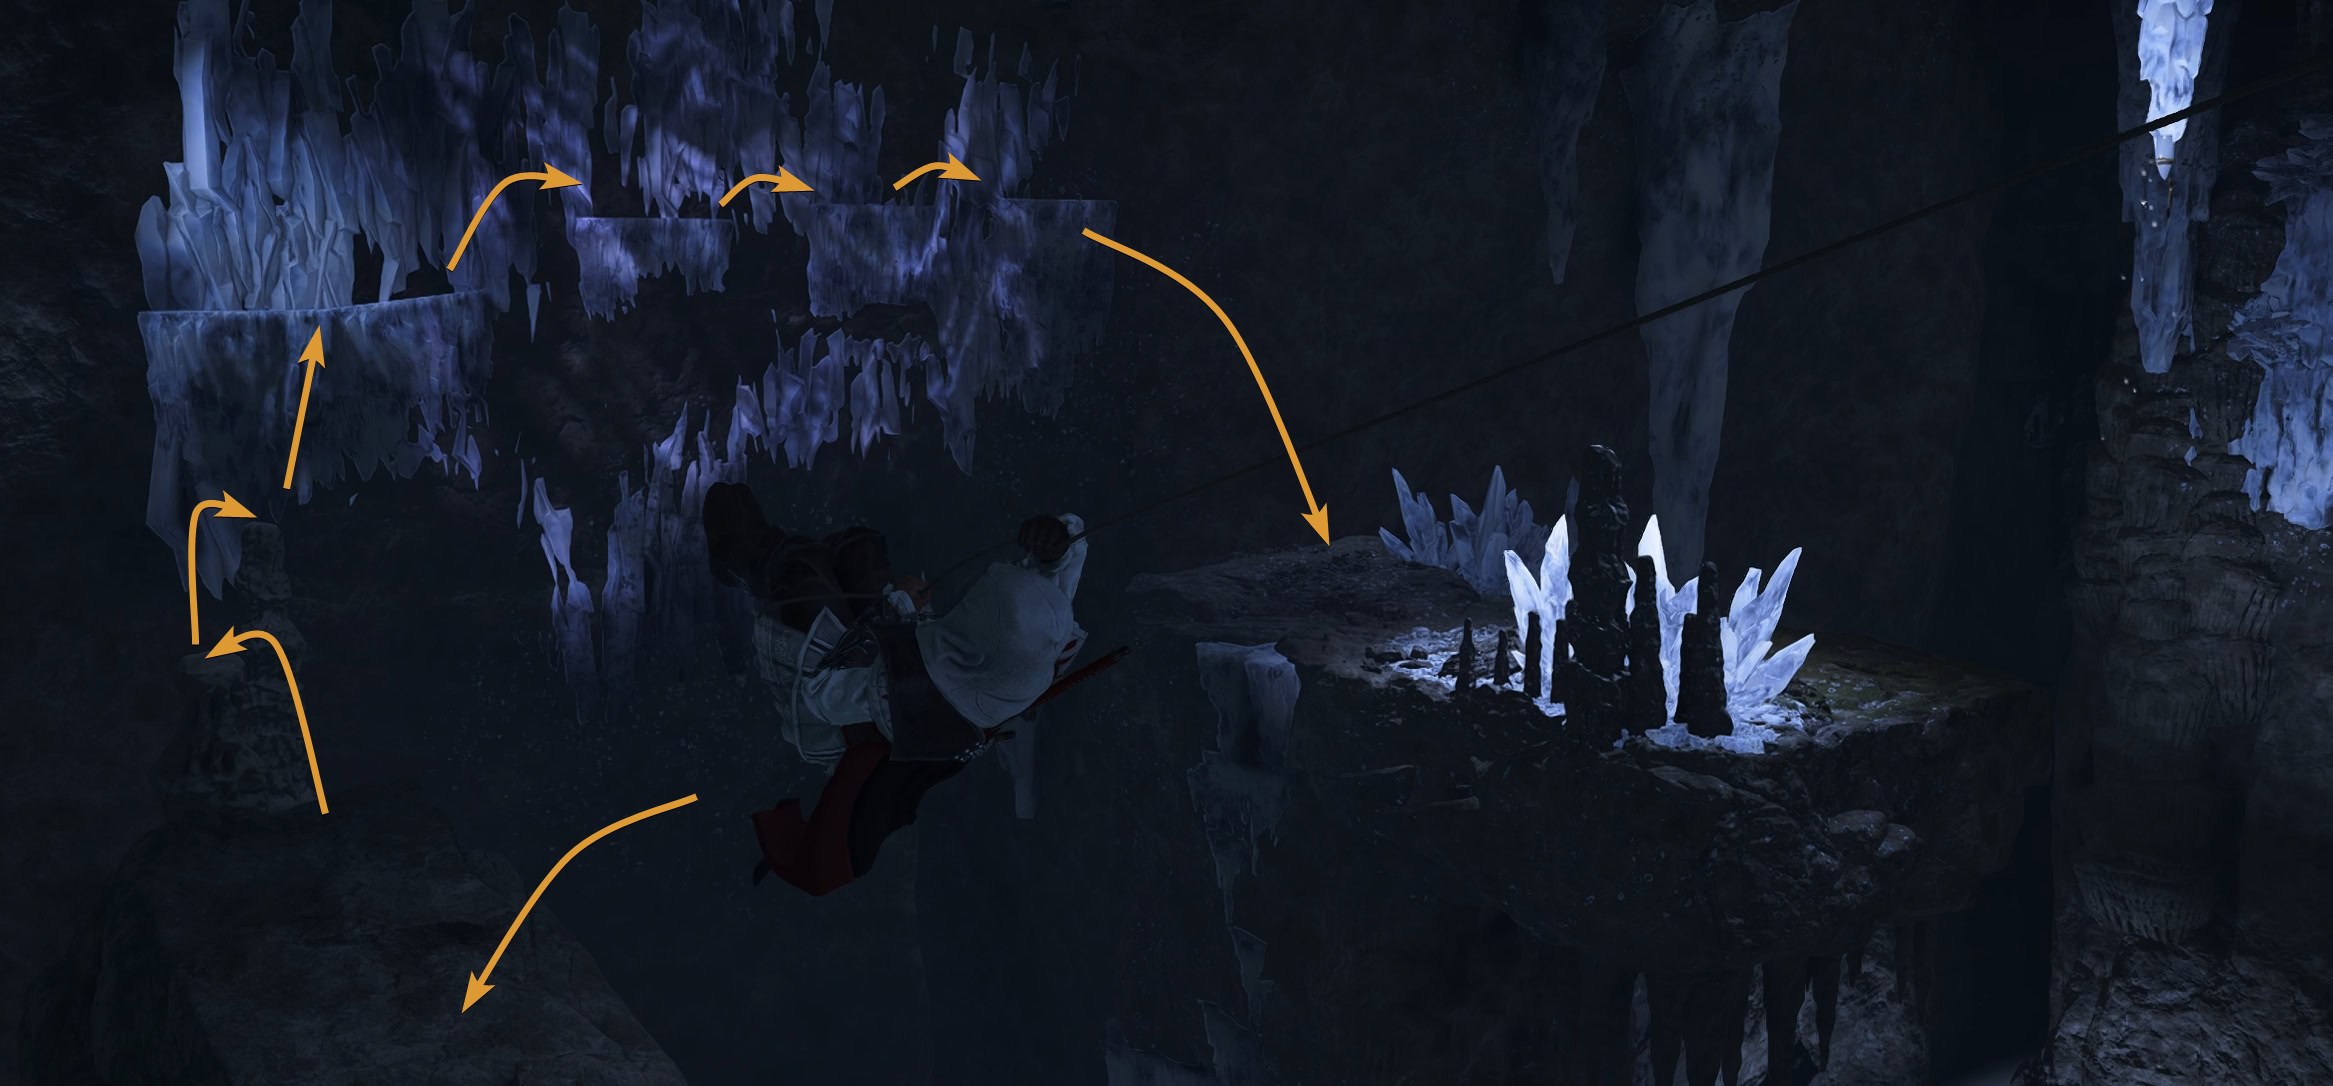
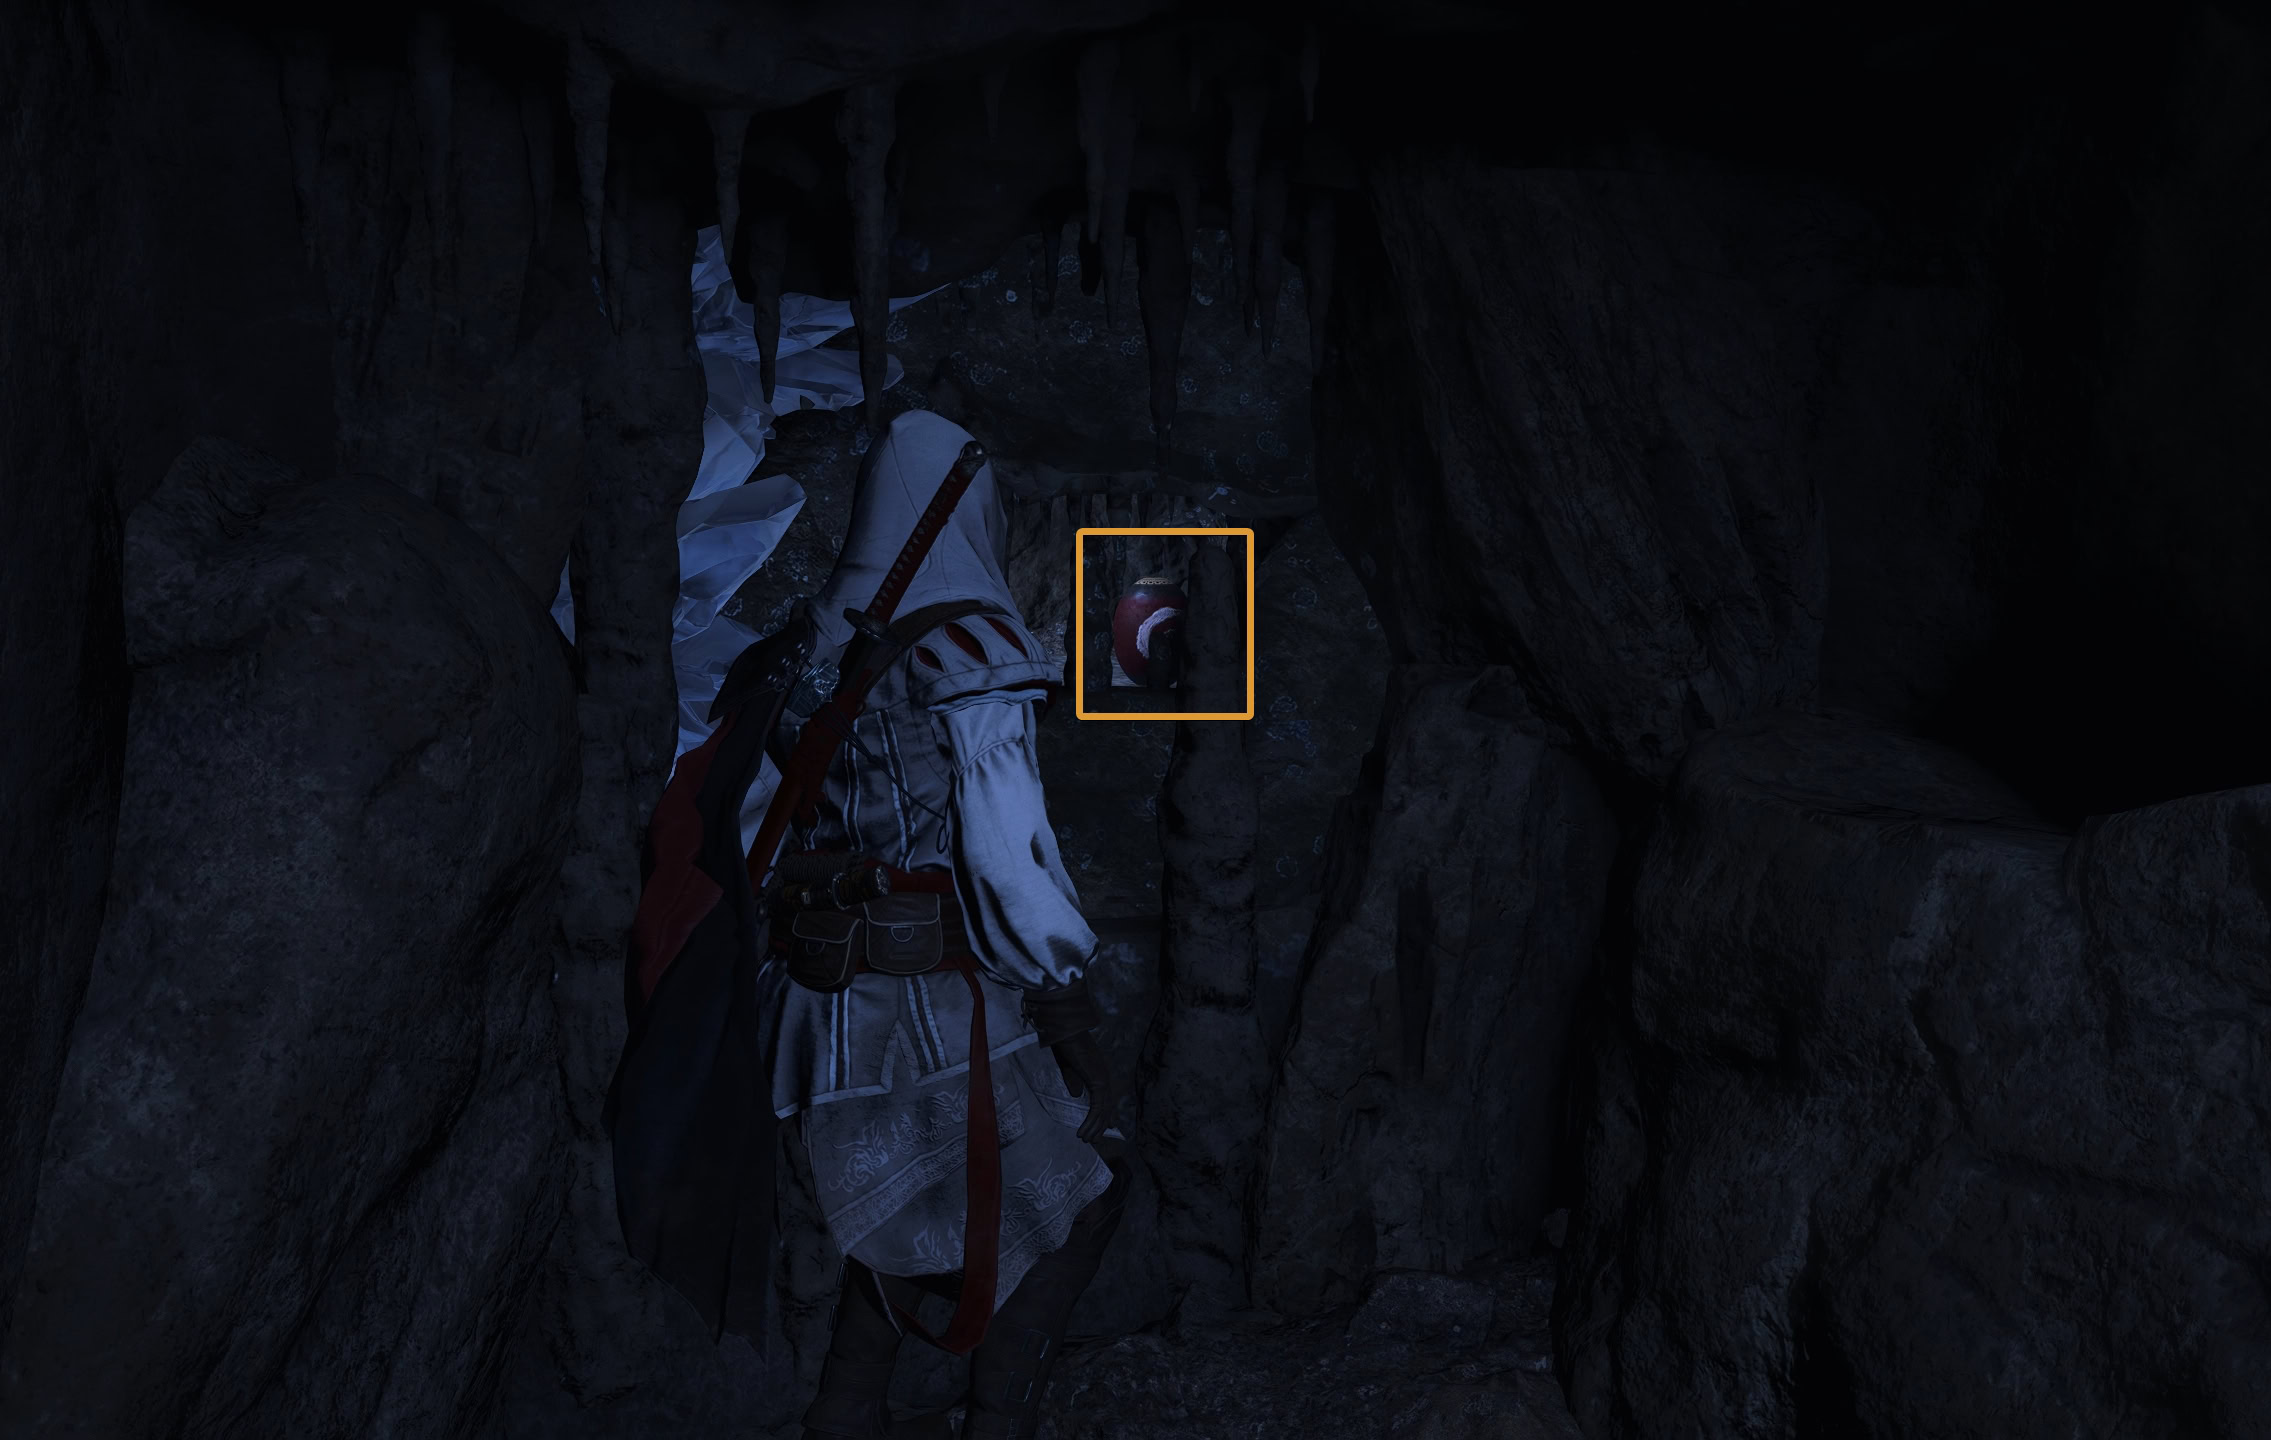
You’ll reach a large room where you can grapple onto a stalactite. Before you do, zoom in to find a chest in the area. Go down and open the chest for a Military Police Banner decoration. Go back up and swing on the stalactite and proceed forward.
It’s tricky to tell at a glance, but the crystals on the wall can be climbed assuming they form a flat horizontal line. Jump across the stalagmites and onto the crystal wall, then climb up.
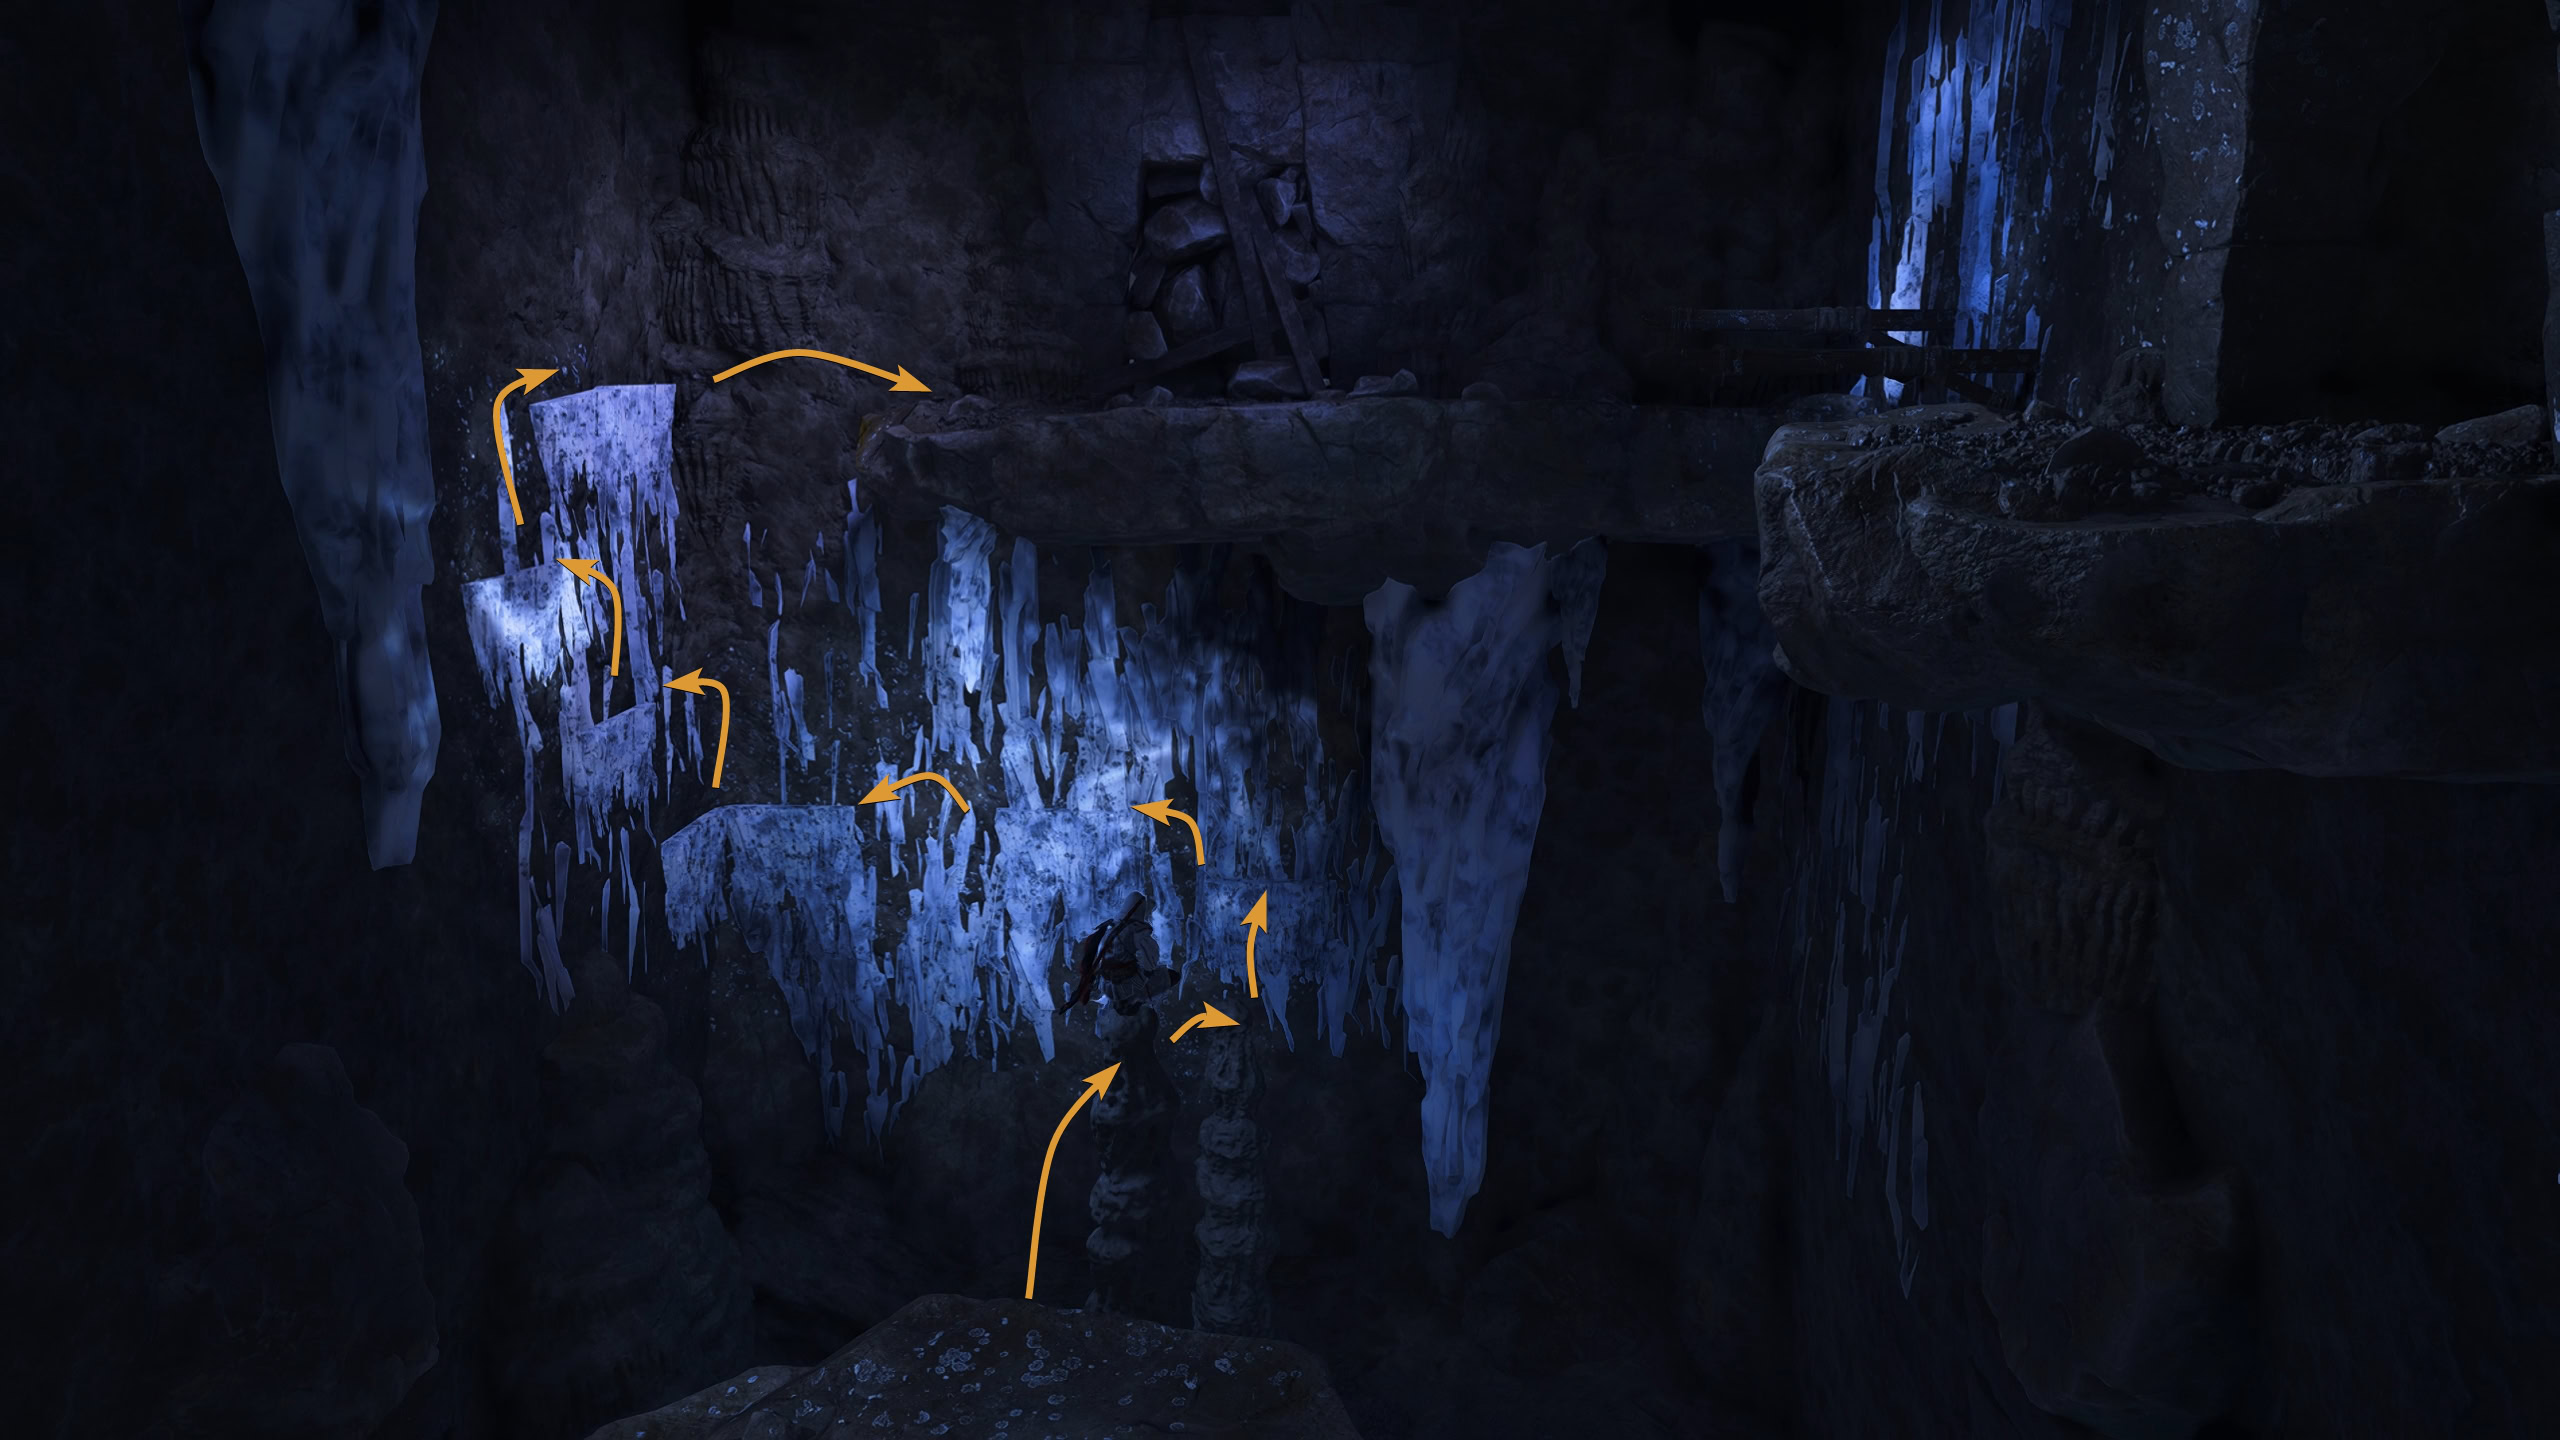
Jump across the wooden beams and crawl through the narrow hole on the cave wall. Destroy the explosive jar through the hole in the wall, crawl back out the way you came, and go through the new entrance in the wall.
This next room introduces the fog. This fog indicates that falling in that area will desynchronize you. Run across the rope to continue forward.
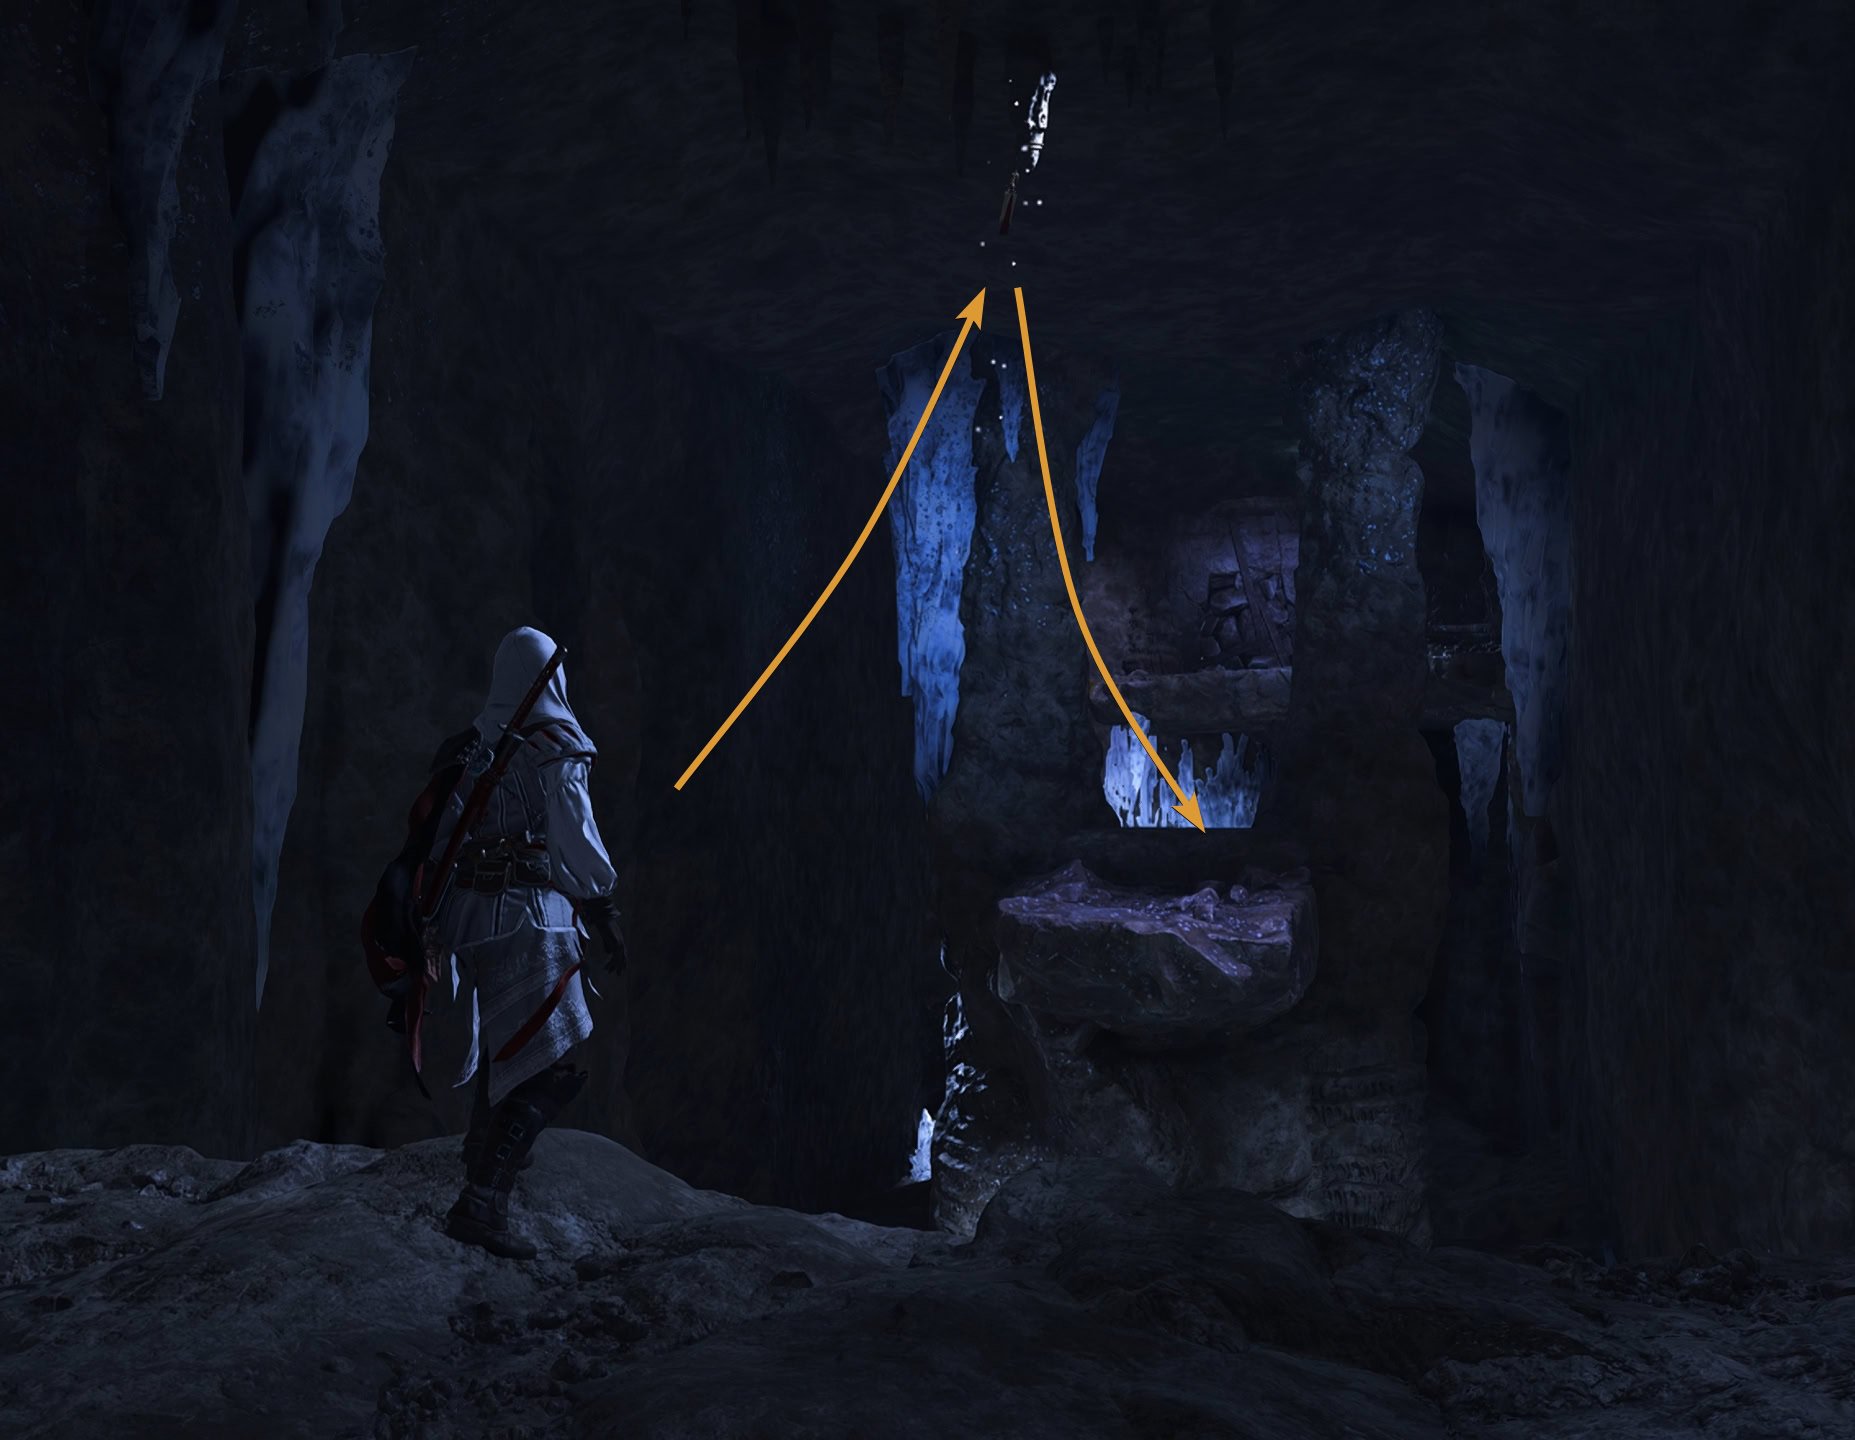
Up ahead you’ll hear a Lord Ritter and a Lord Albrecht talking to one another. Crawl underneath the hole and crawl beneath the floorboards. You’ll find a large cave room you enter in by grappling on a stalactite. Reach the crystal wall and climb across to reach the central platform.
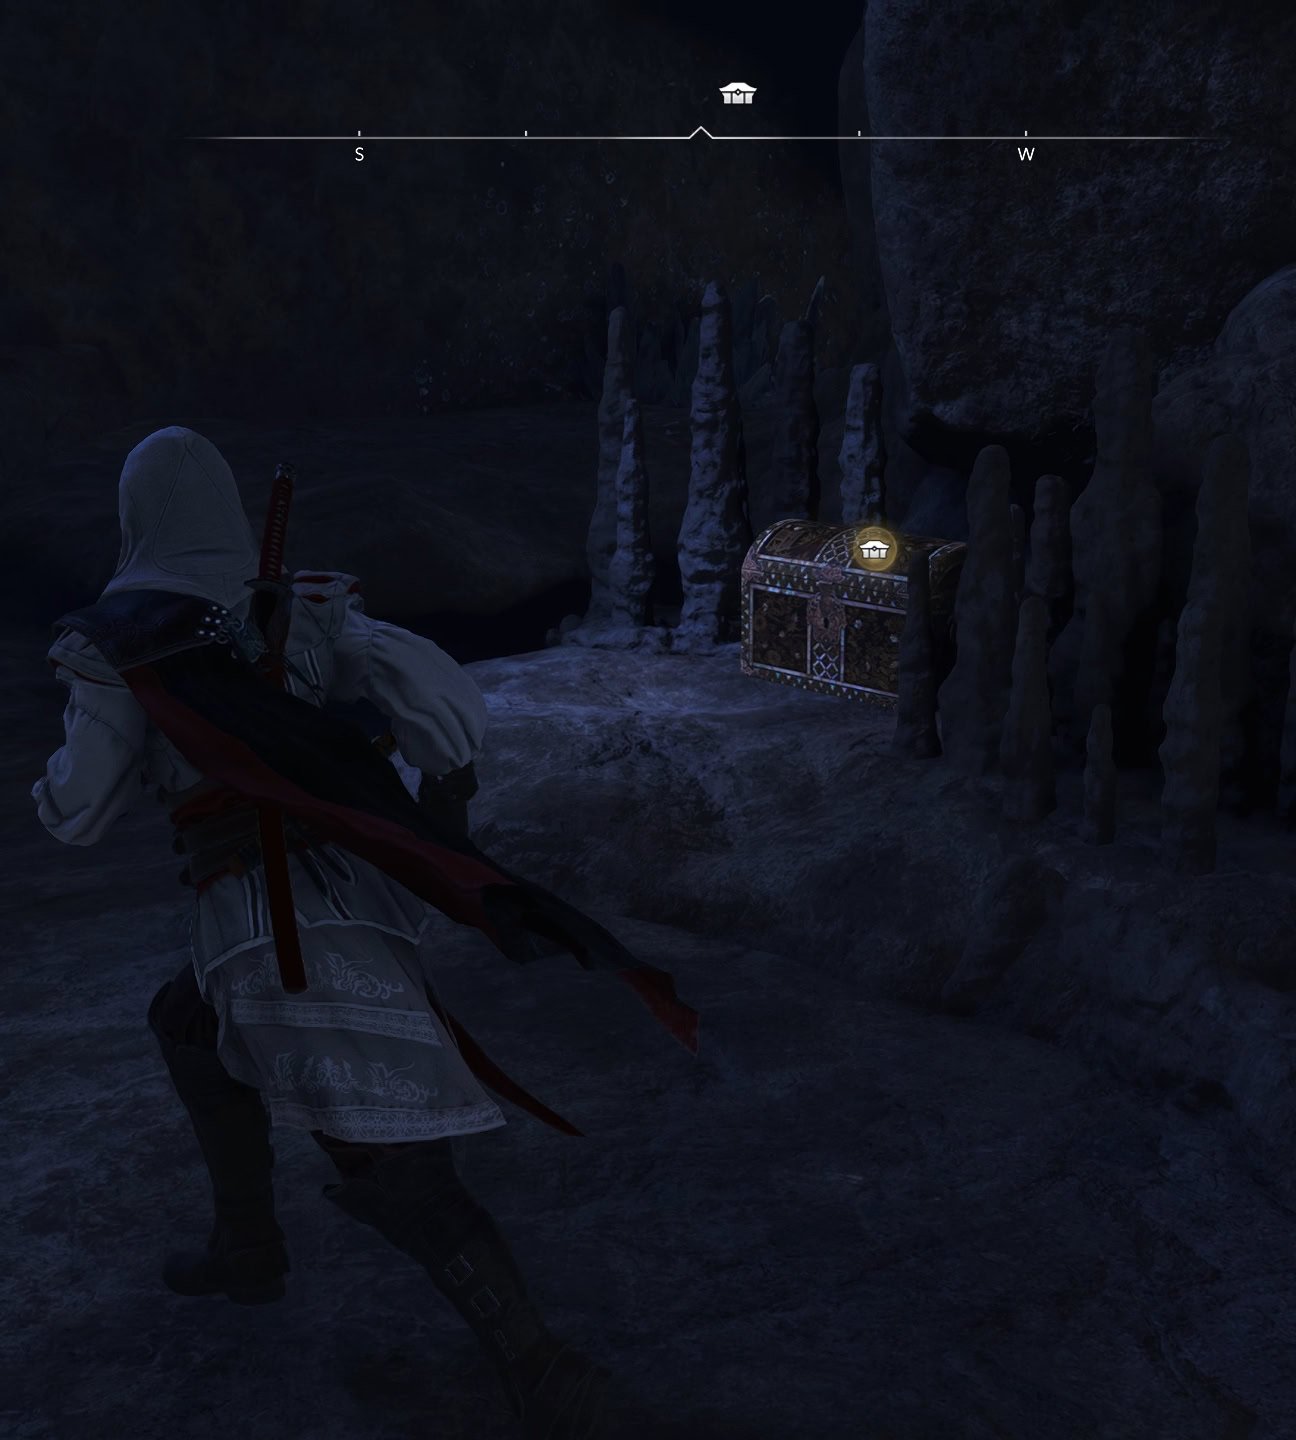
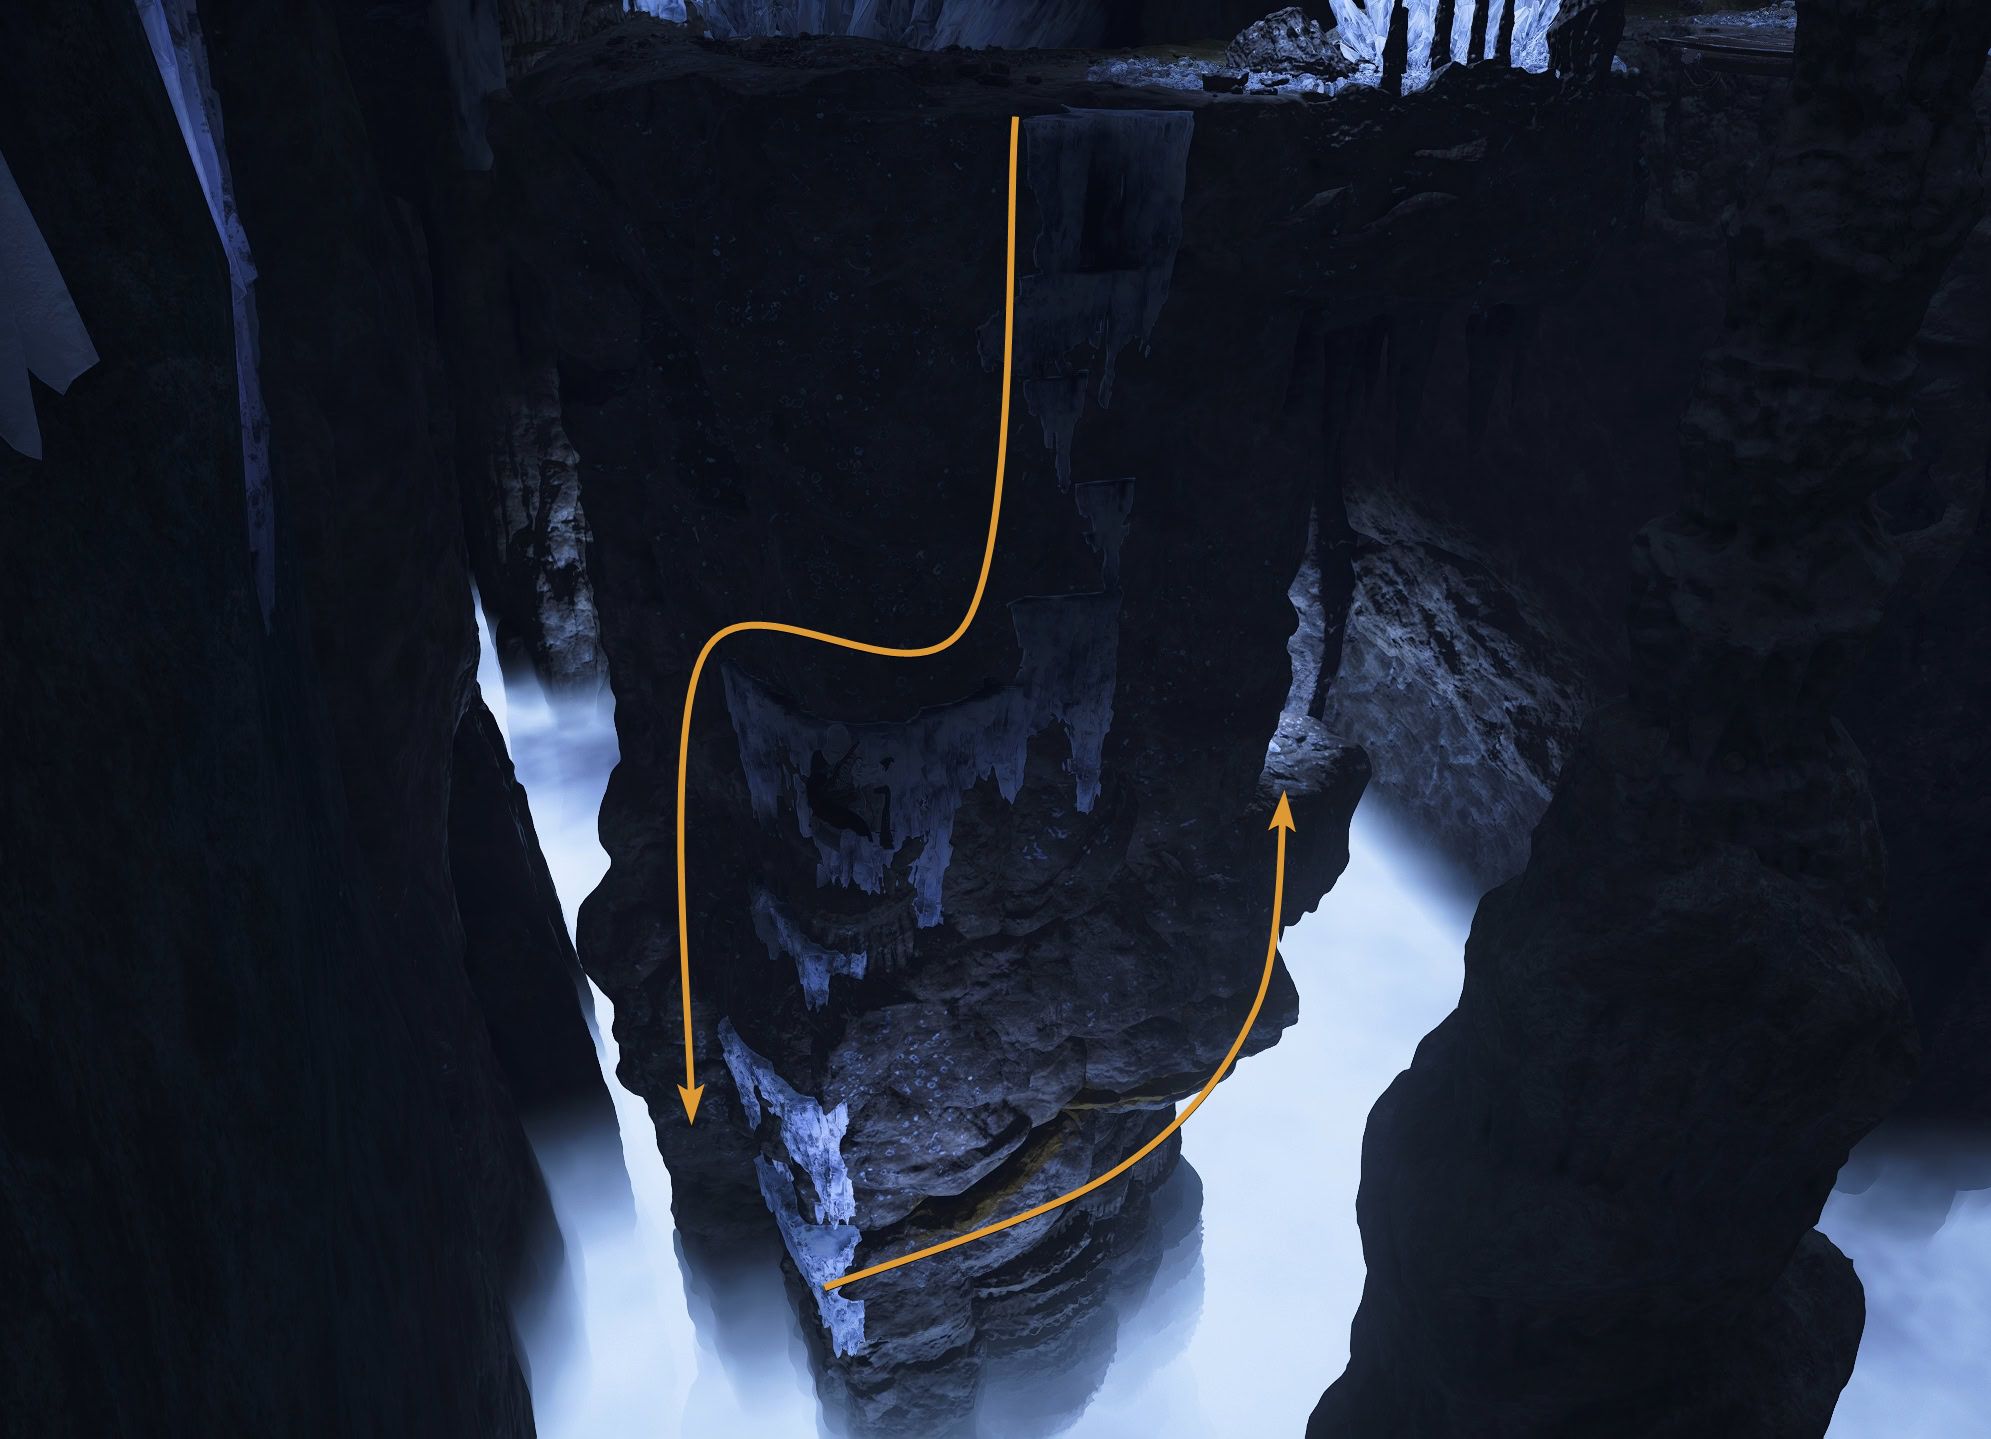
There’s a chest beneath the platform. Reaching it is simple as you climb down the crystal wall on the platform, follow the yellow rocks, then climb up to the chest. This chest contains the Garrison Banner.

Climb back up to the top of the central platform and jump across the gap to a wooden platform. Climb up the ladder, crawl through the opening, and destroy an explosive barrel through a hole.
When you find the exit, jump onto the crystal wall before you fall into the fog. This is the same wall used to reach the chest from earlier. Grapple onto the stalactite and swing into the new entrance.
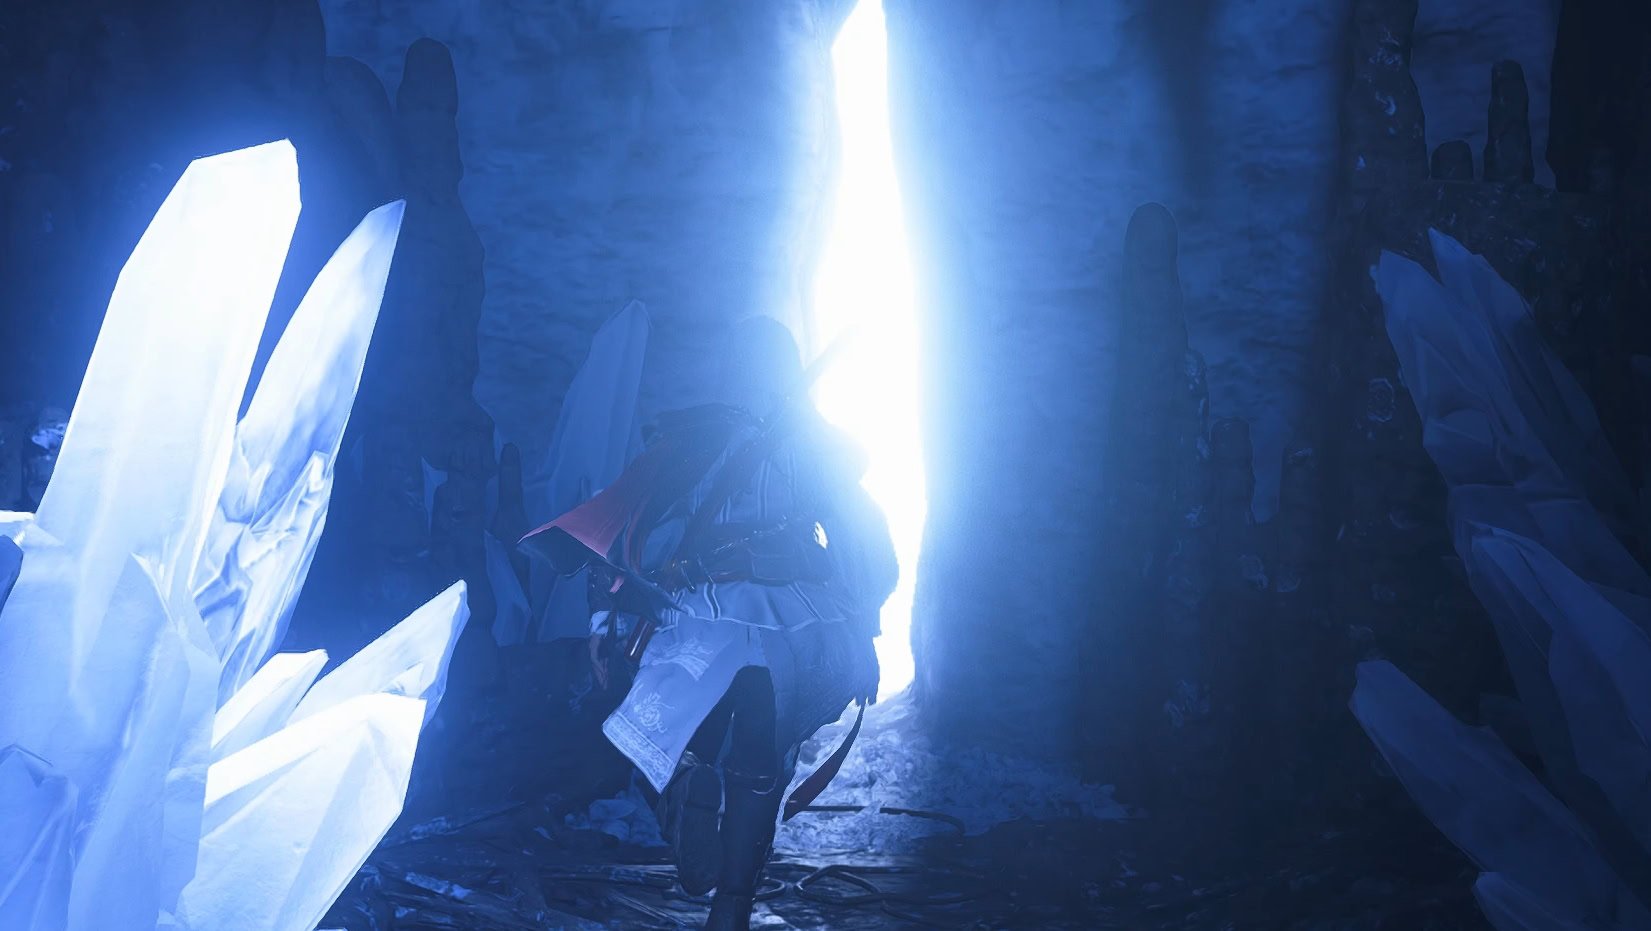
Descend deeper into the cave and assassinate the Elitrasi Fanatics. Continue down the cave and go through a crack in the wall emitting a bright light.
Free Gautwin
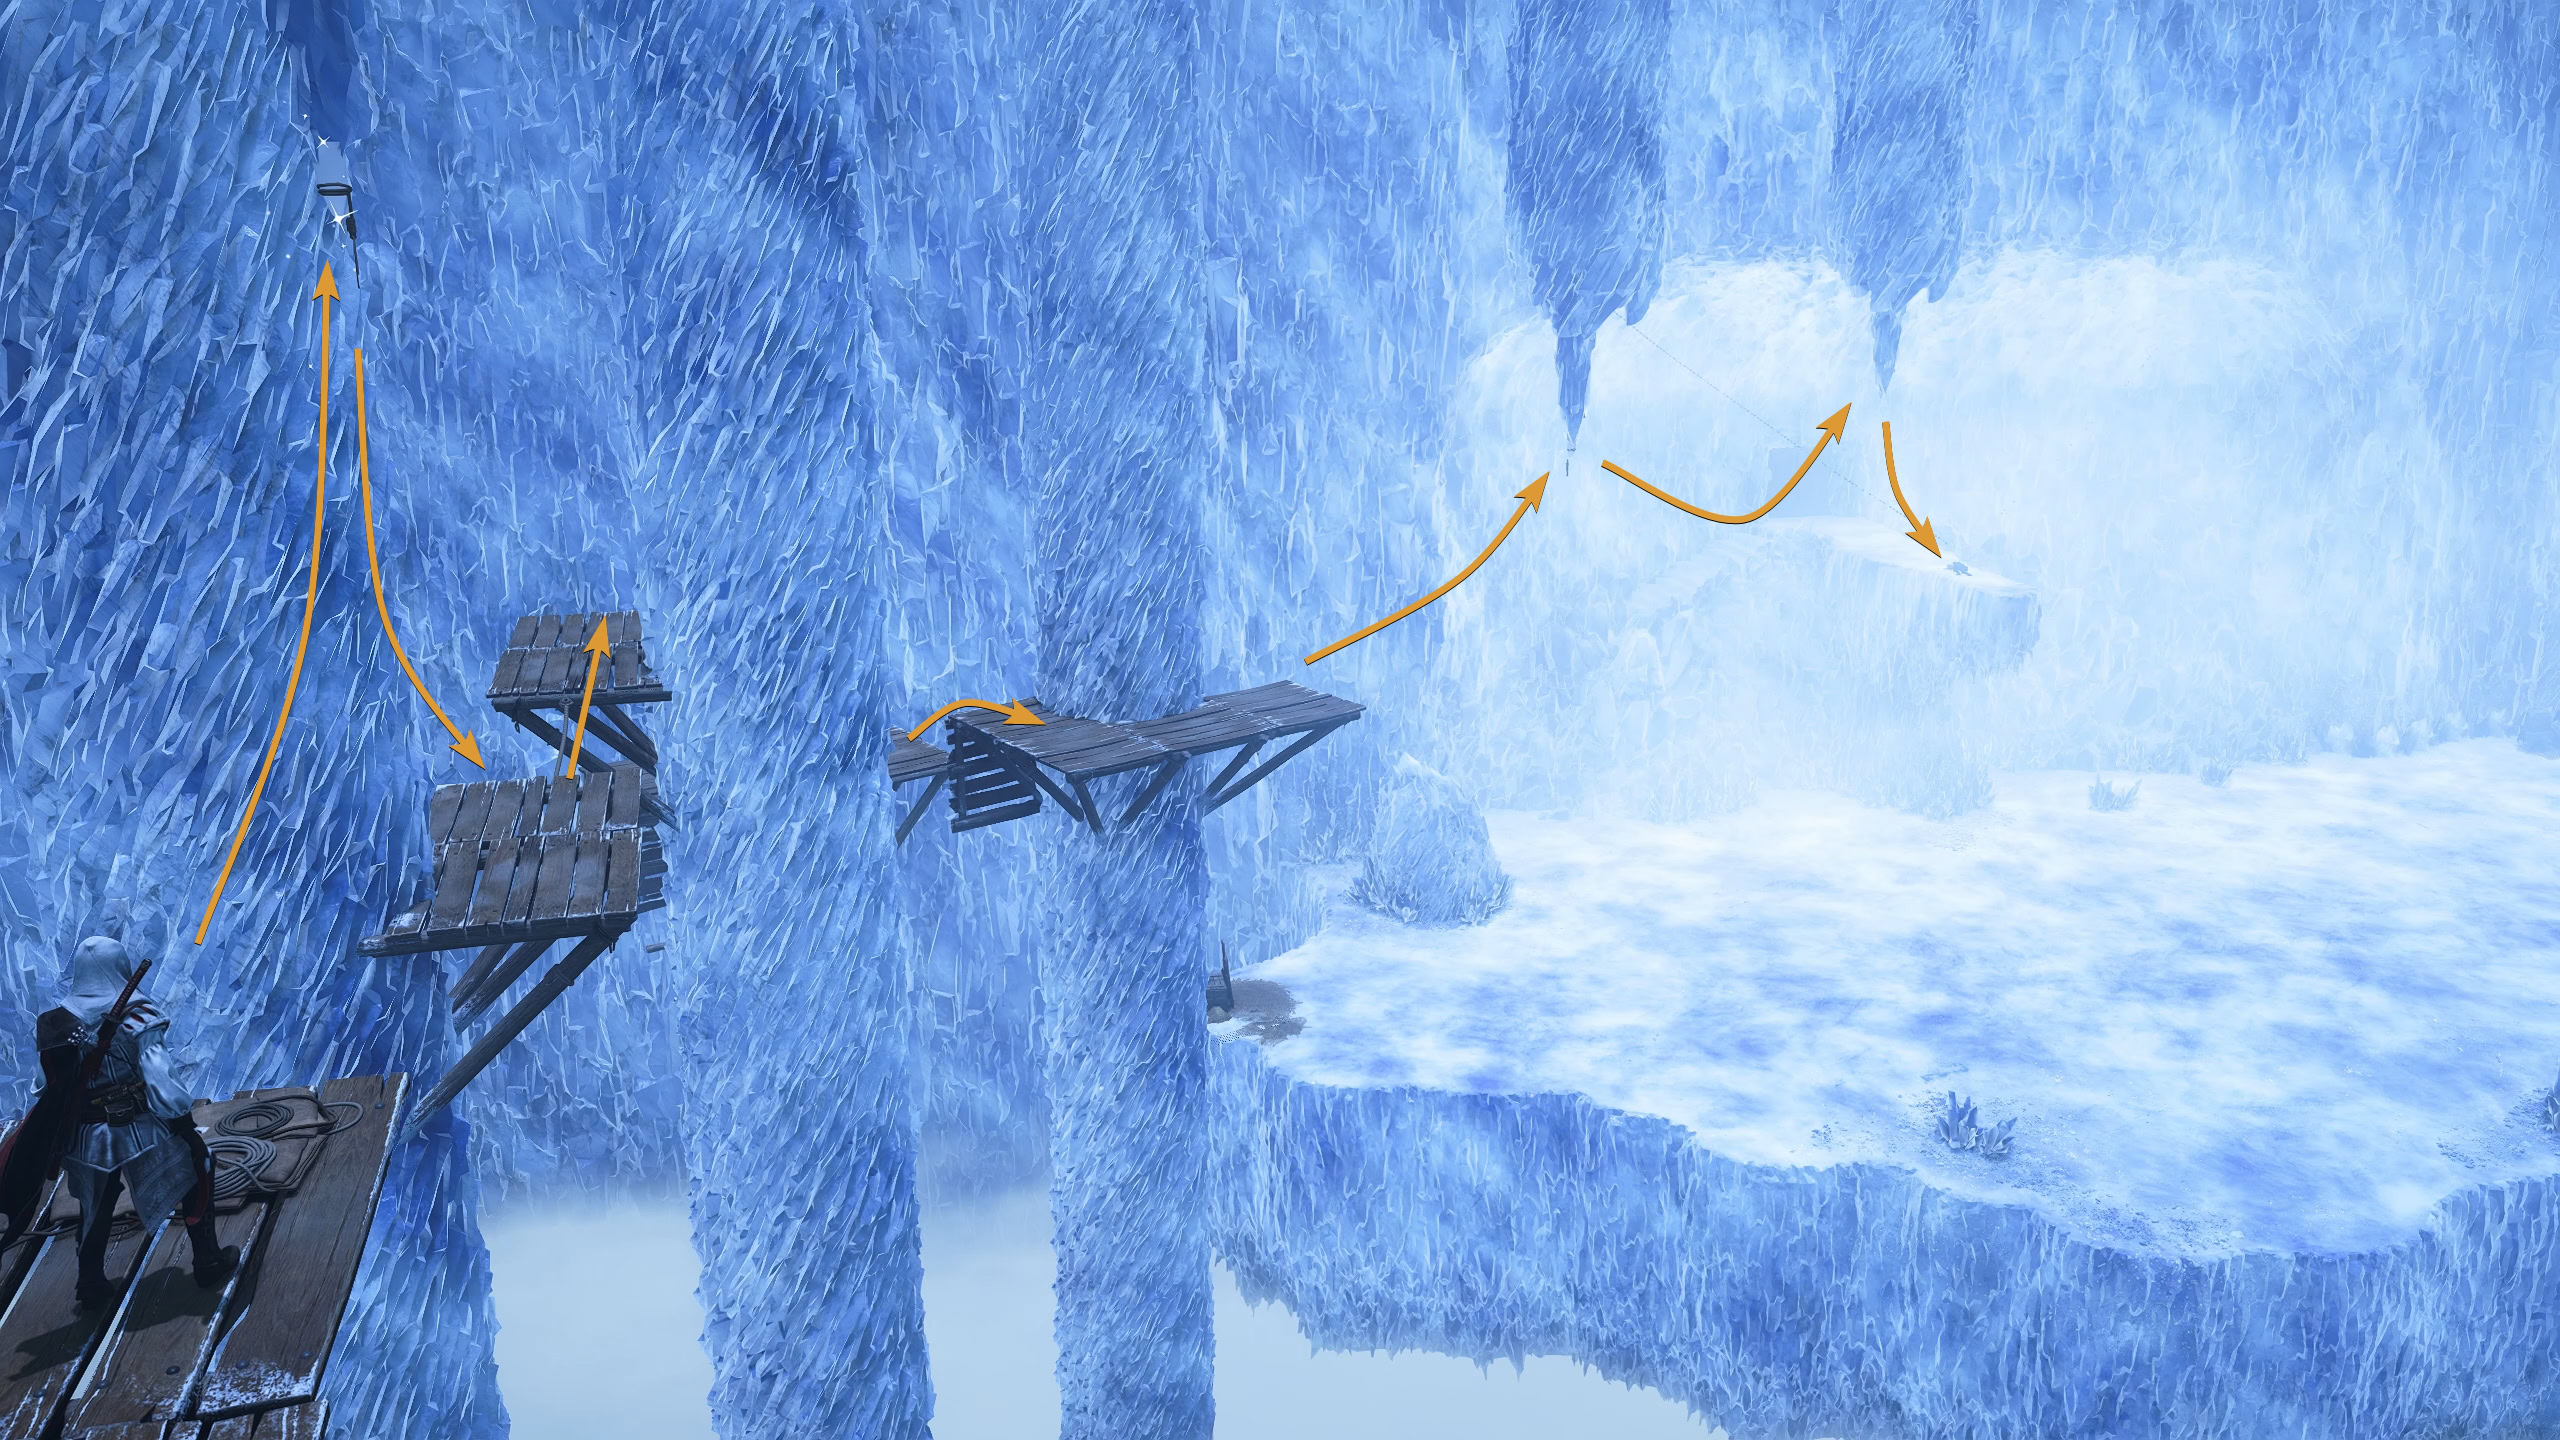
I hope you like grappling and platforming, as this next section is mostly that! Don’t let the scale of the room put you off, the platforming sections are fairly straightforward. Start by swinging across the crystal stalactites to reach the wooden platform ahead.
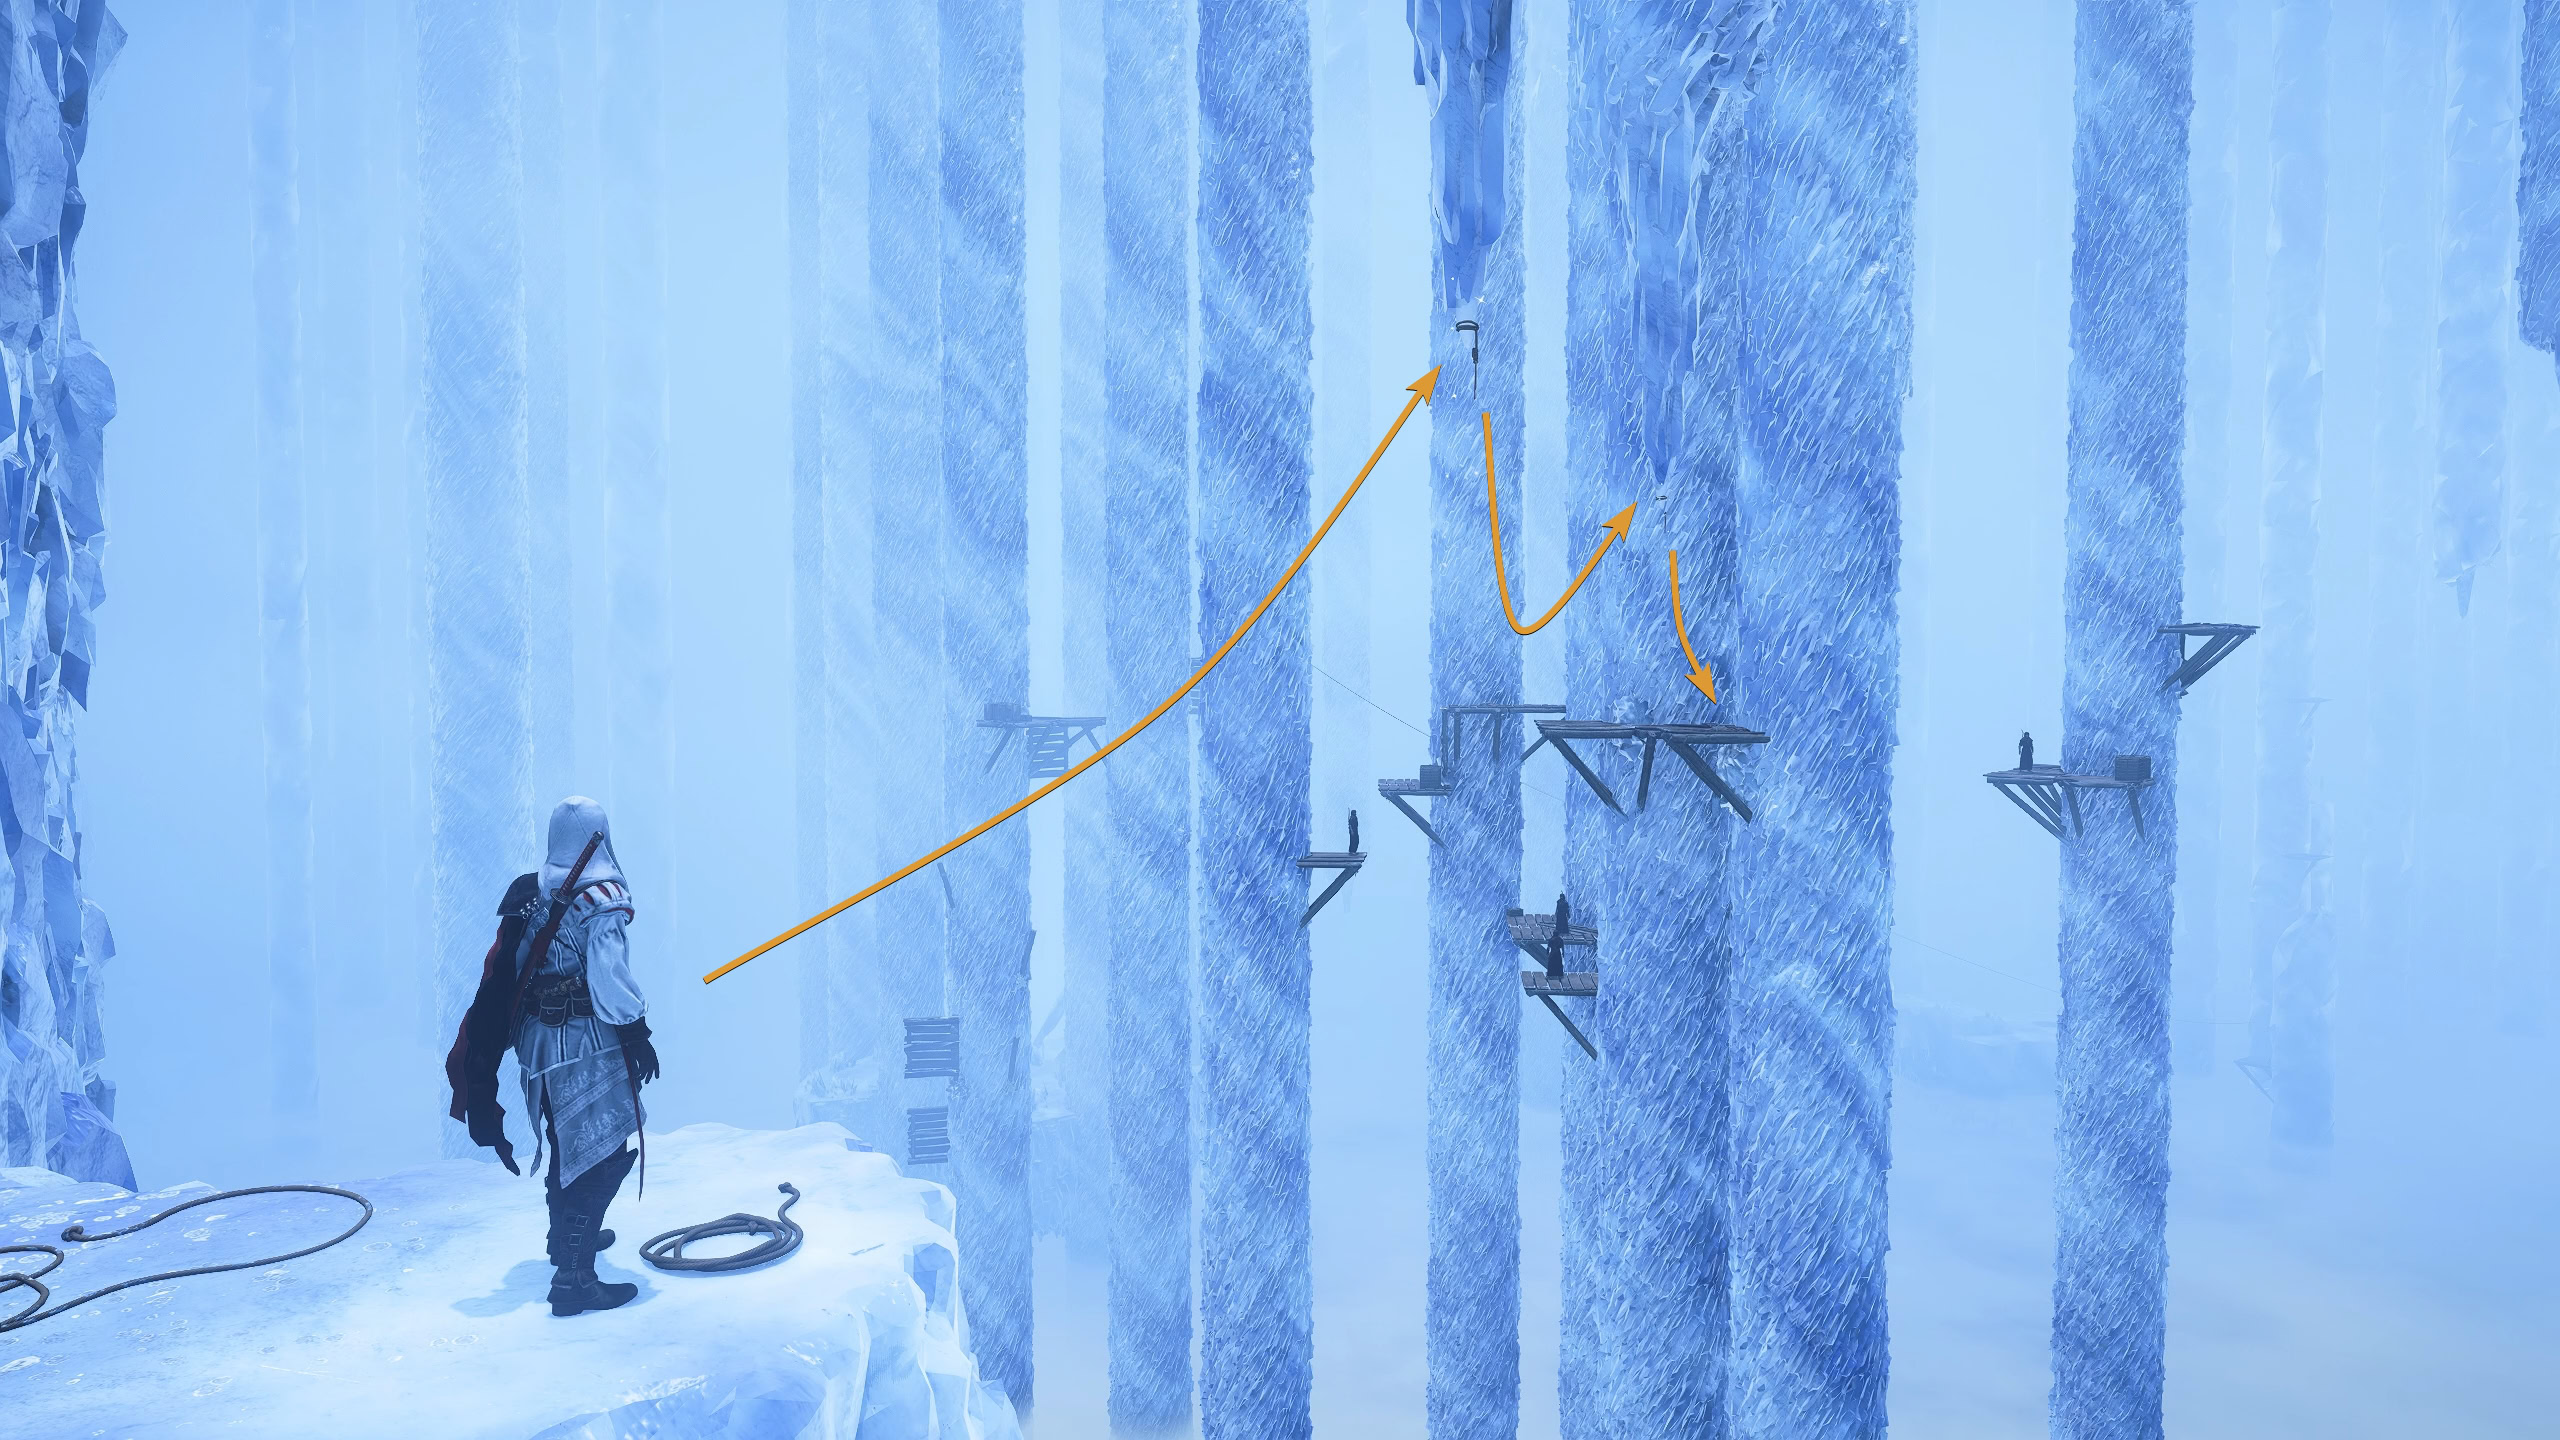
Kill the nearby fanatics, starting with the ones at a distance then the one below. Walk across the rope and climb up the crystal pillar by jumping across the wooden beams.
Assassinate the two fanatics after climbing up, throw a kunai to the fanatic across from you, and swing to the platform ahead. Climb up and swing across two more stalactites onto another platform.
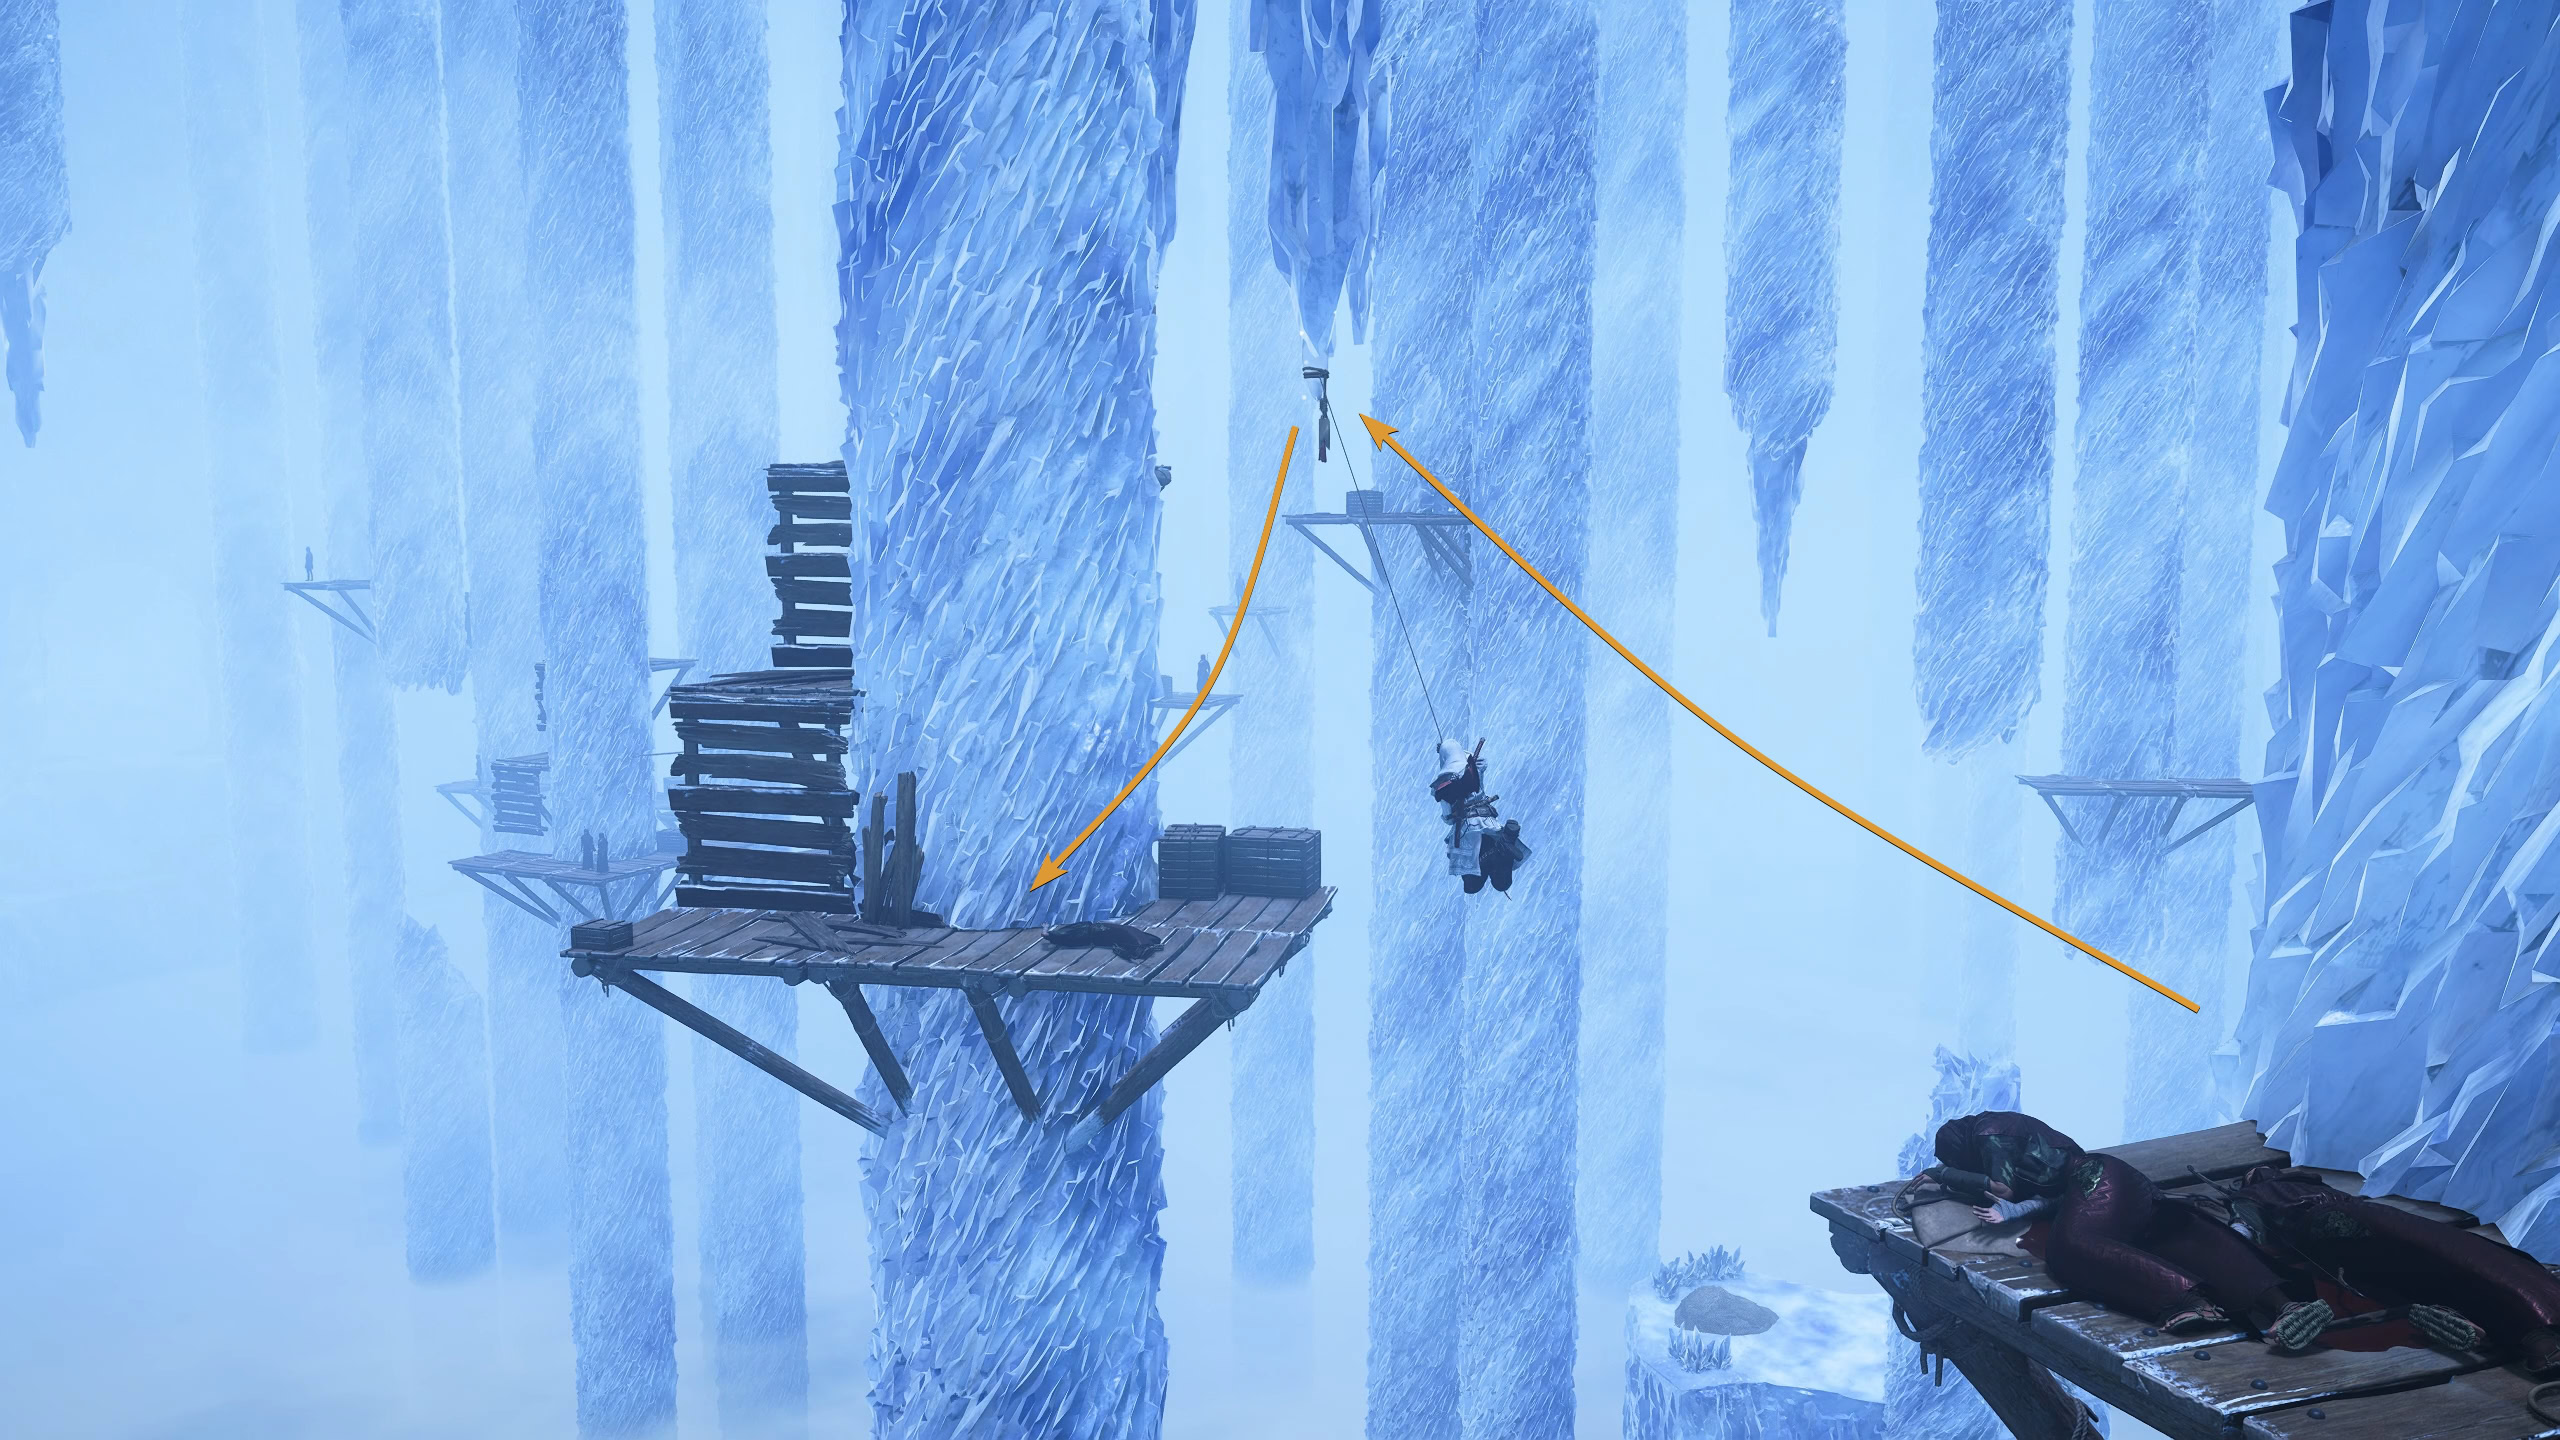
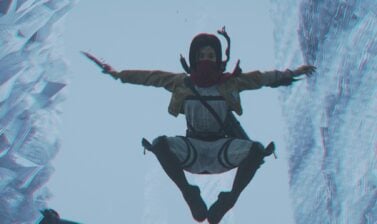
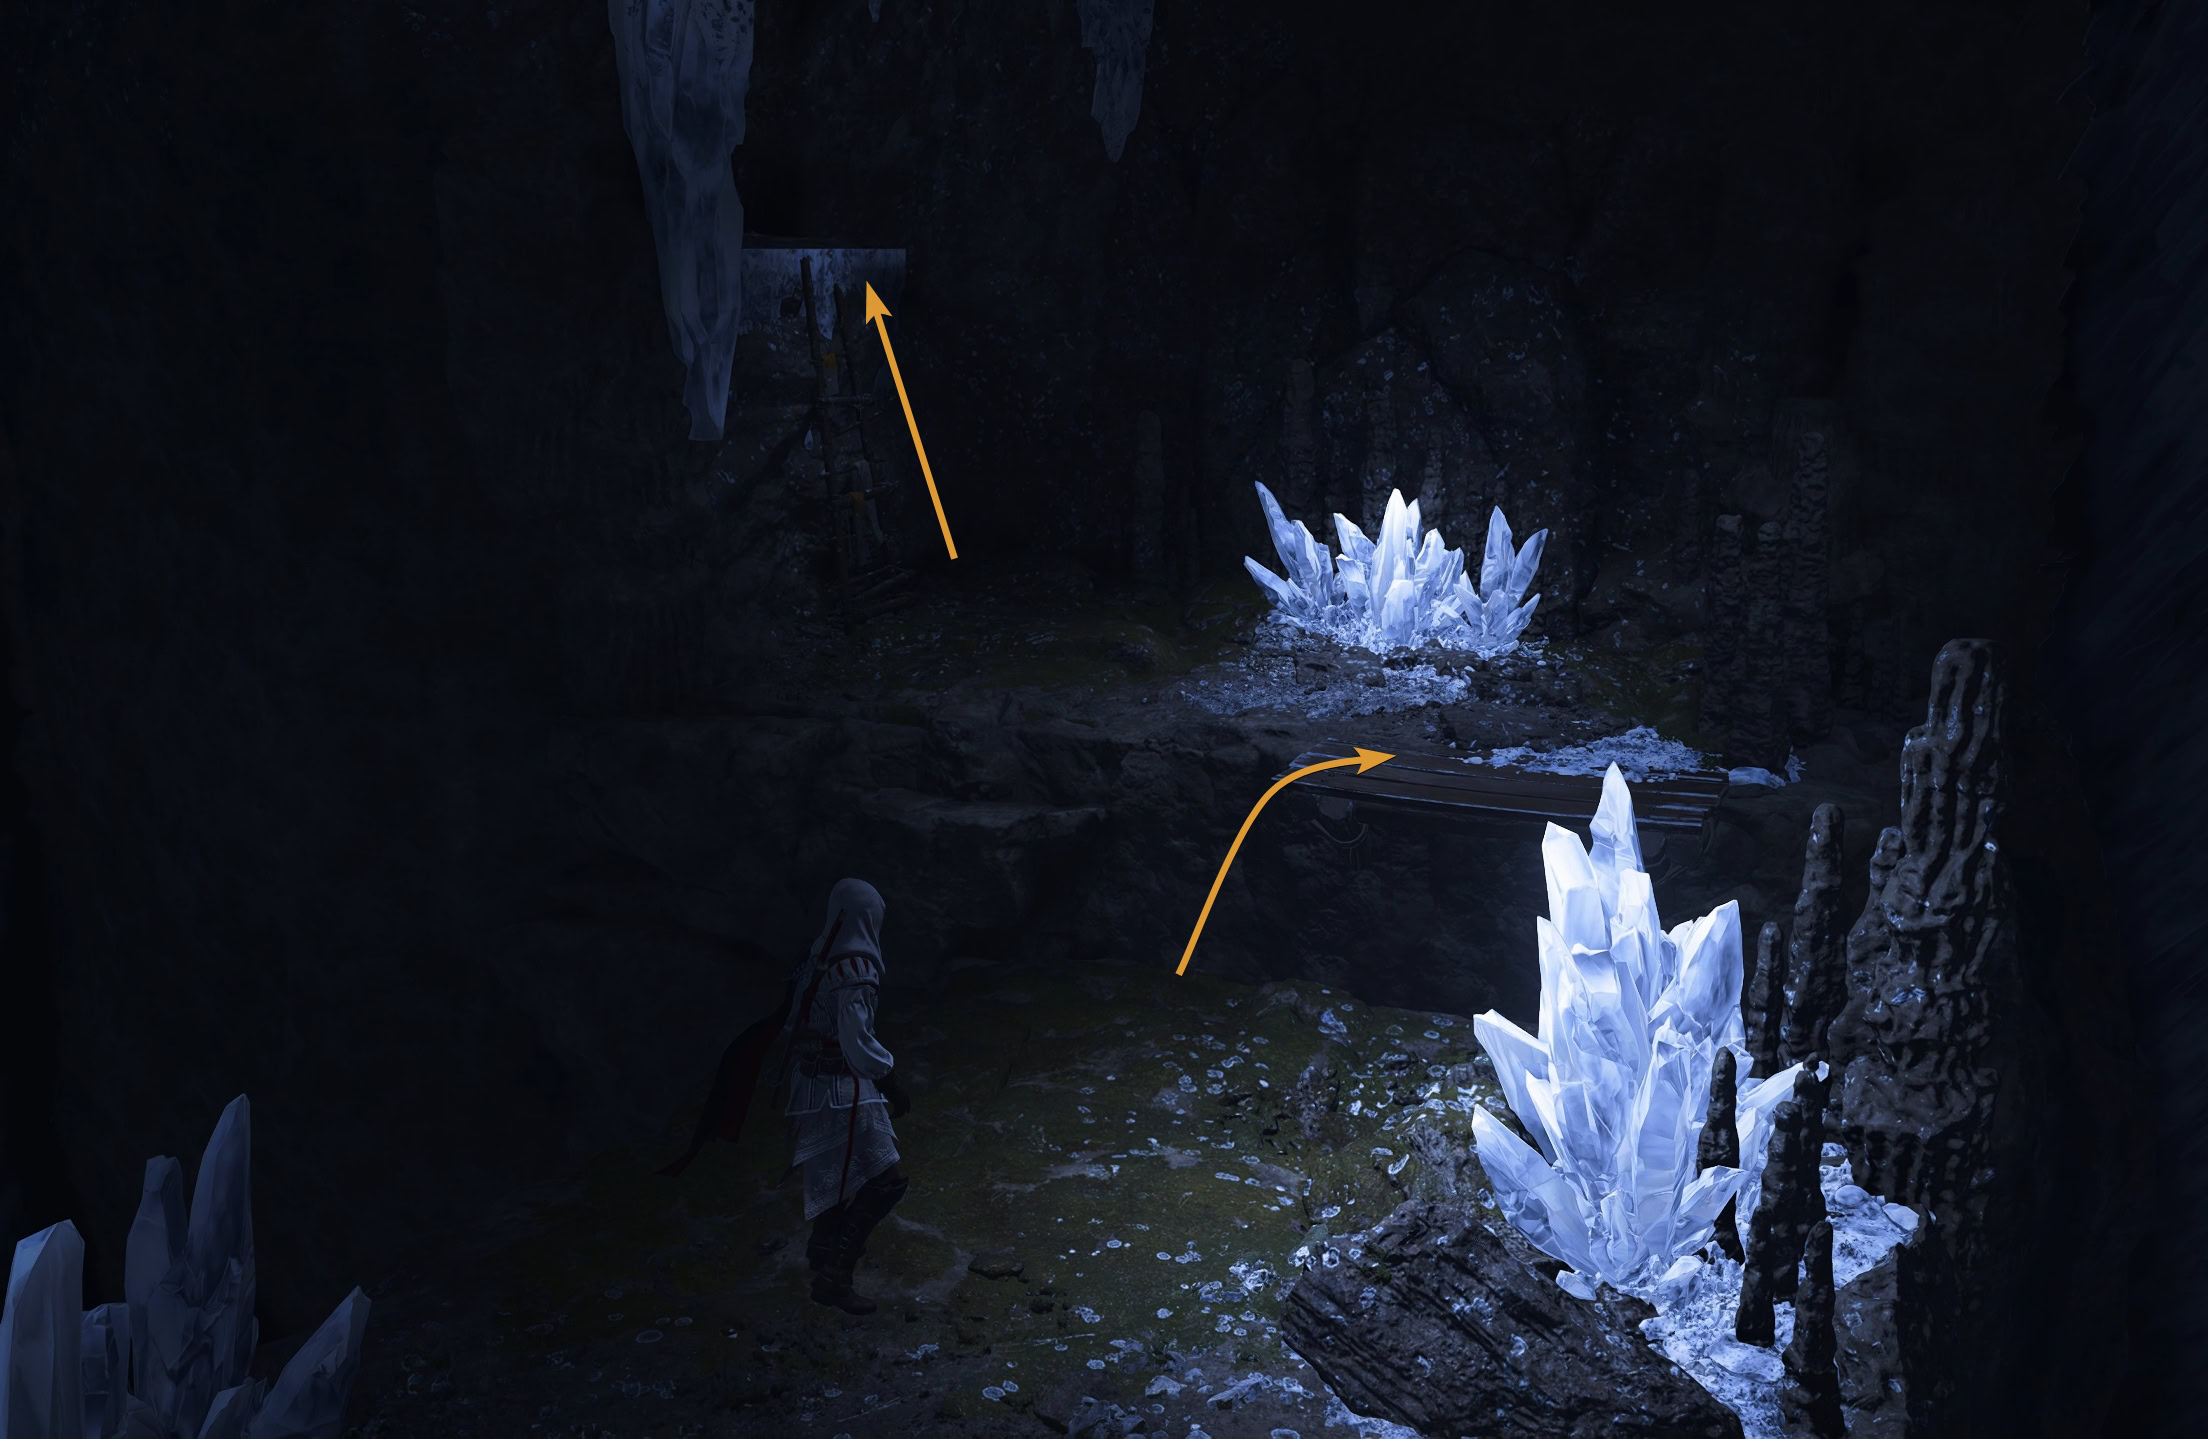
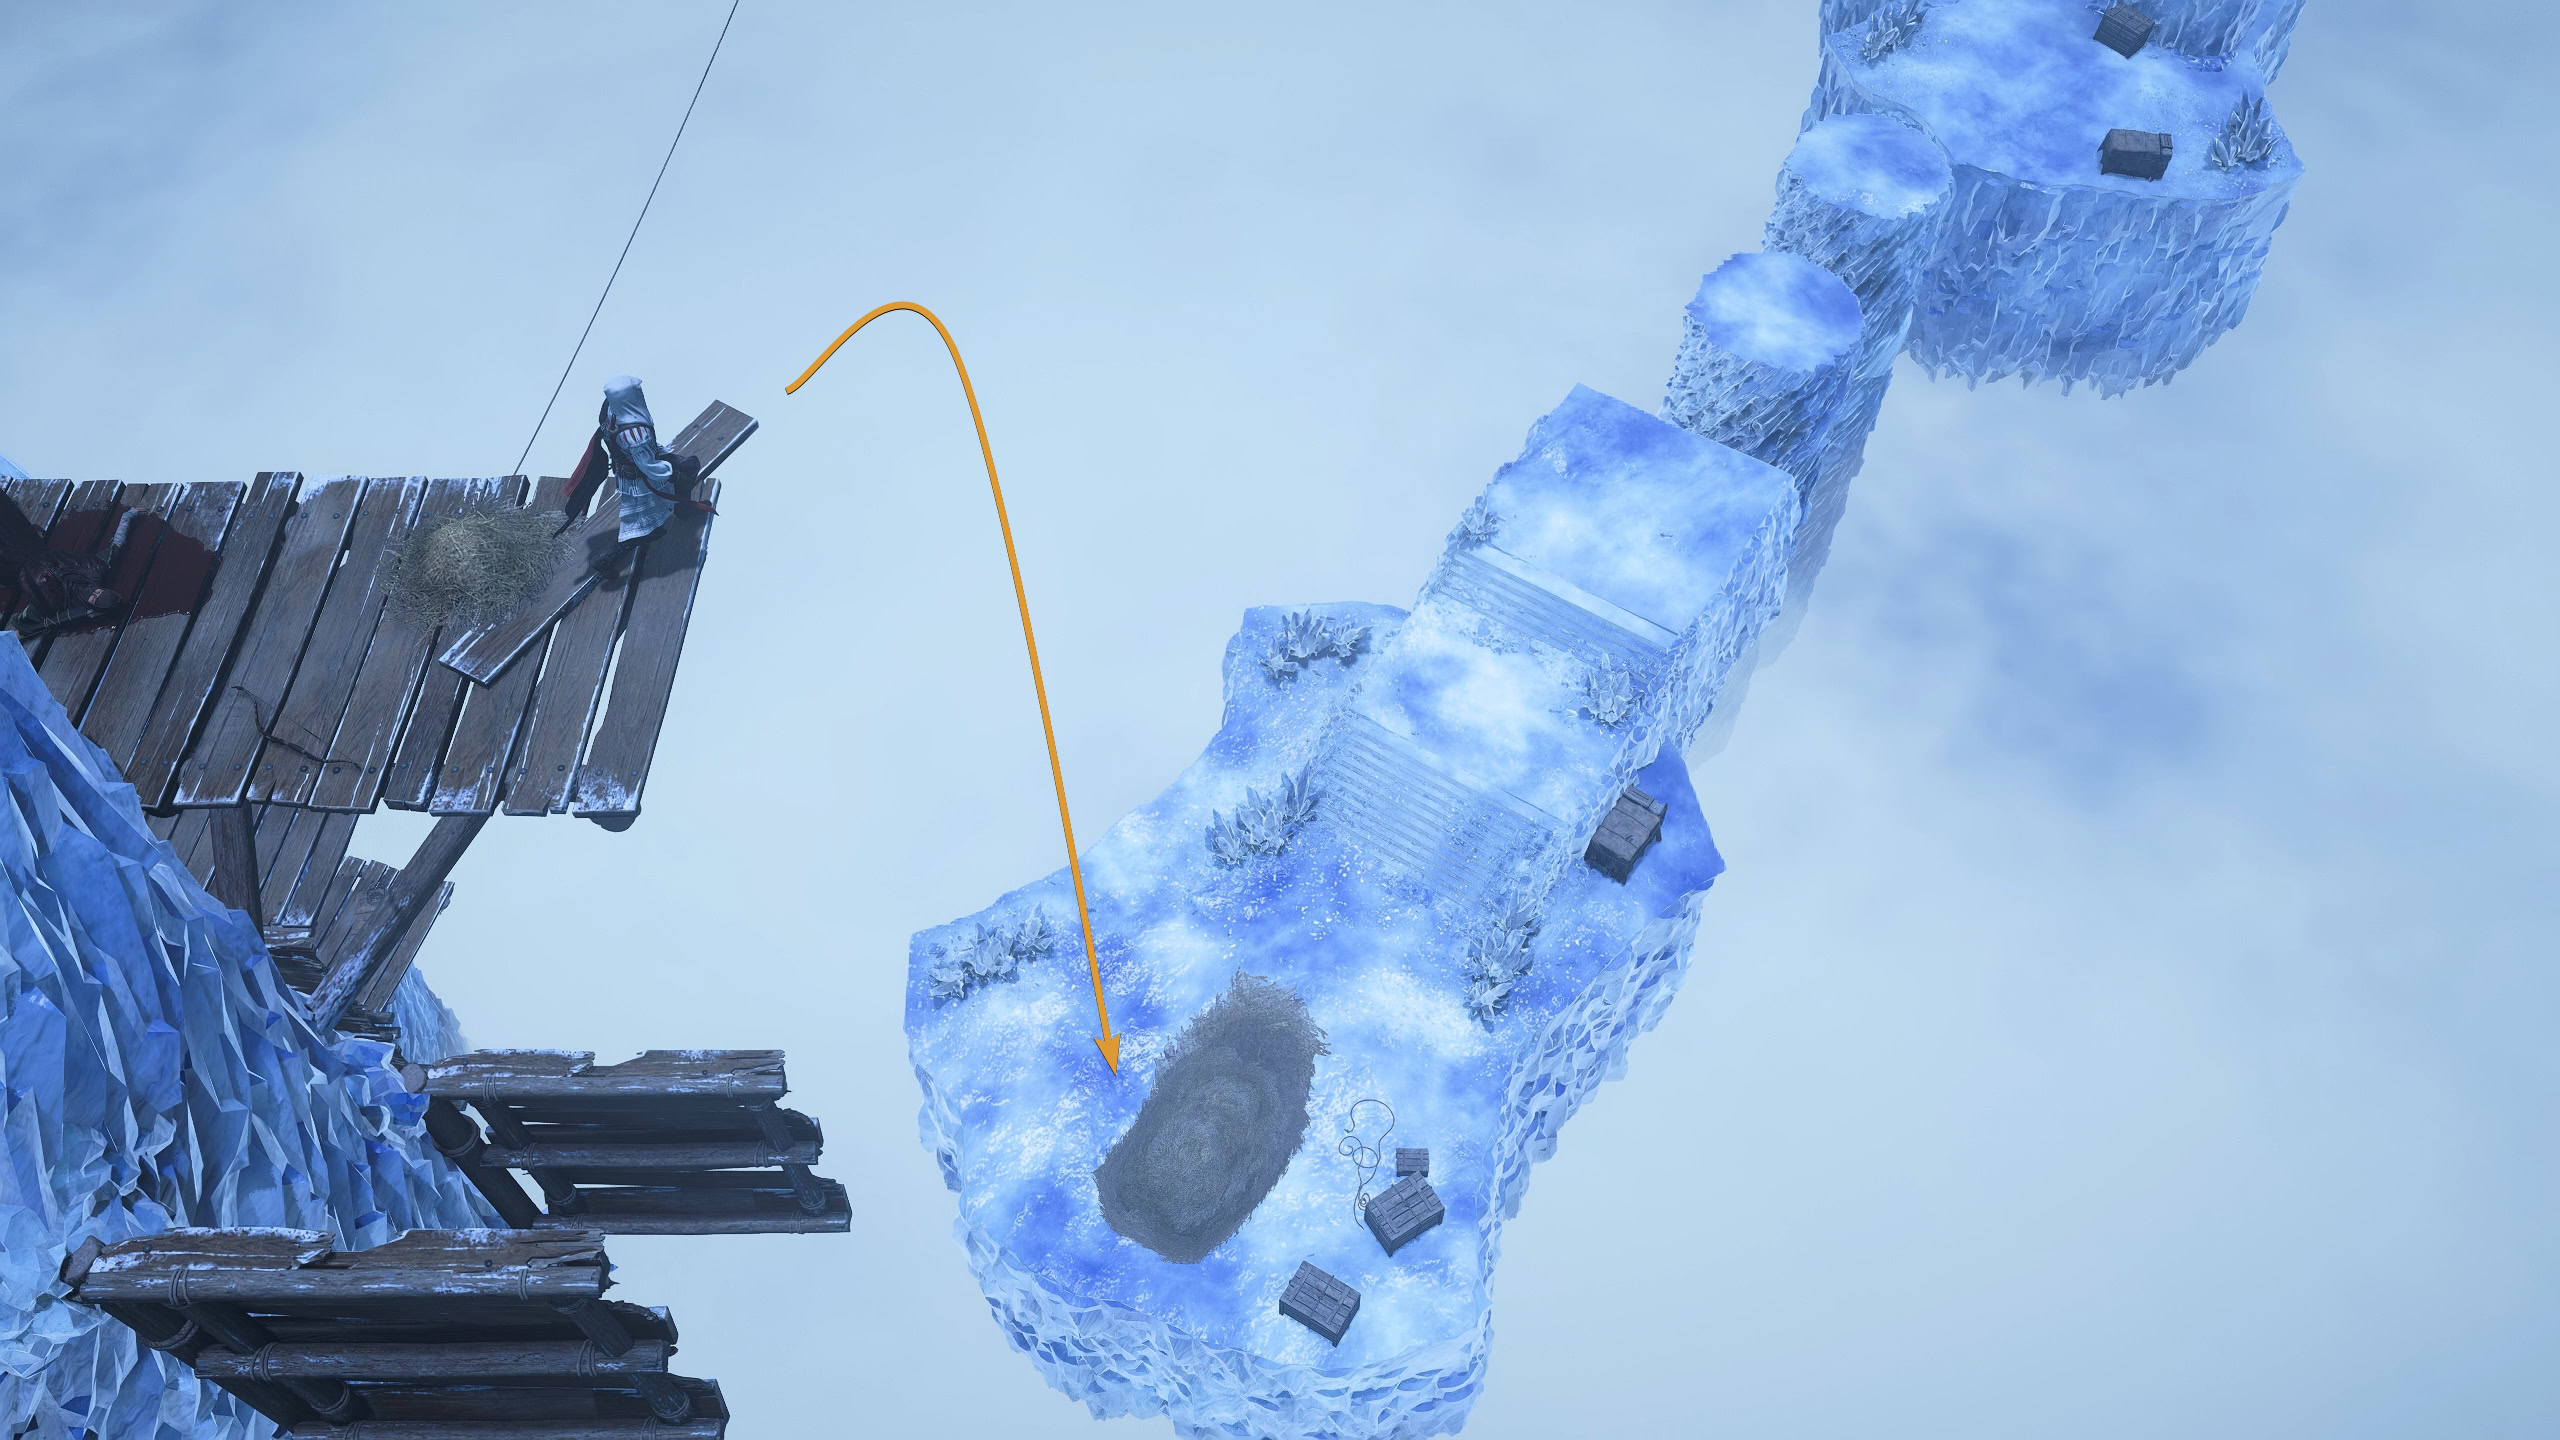
On the right side of this wooden platform is a toolbox and a small pile of hay. The area seen ahead leads to a chest, so take a leap of faith down the plank and into a pile of hay below.
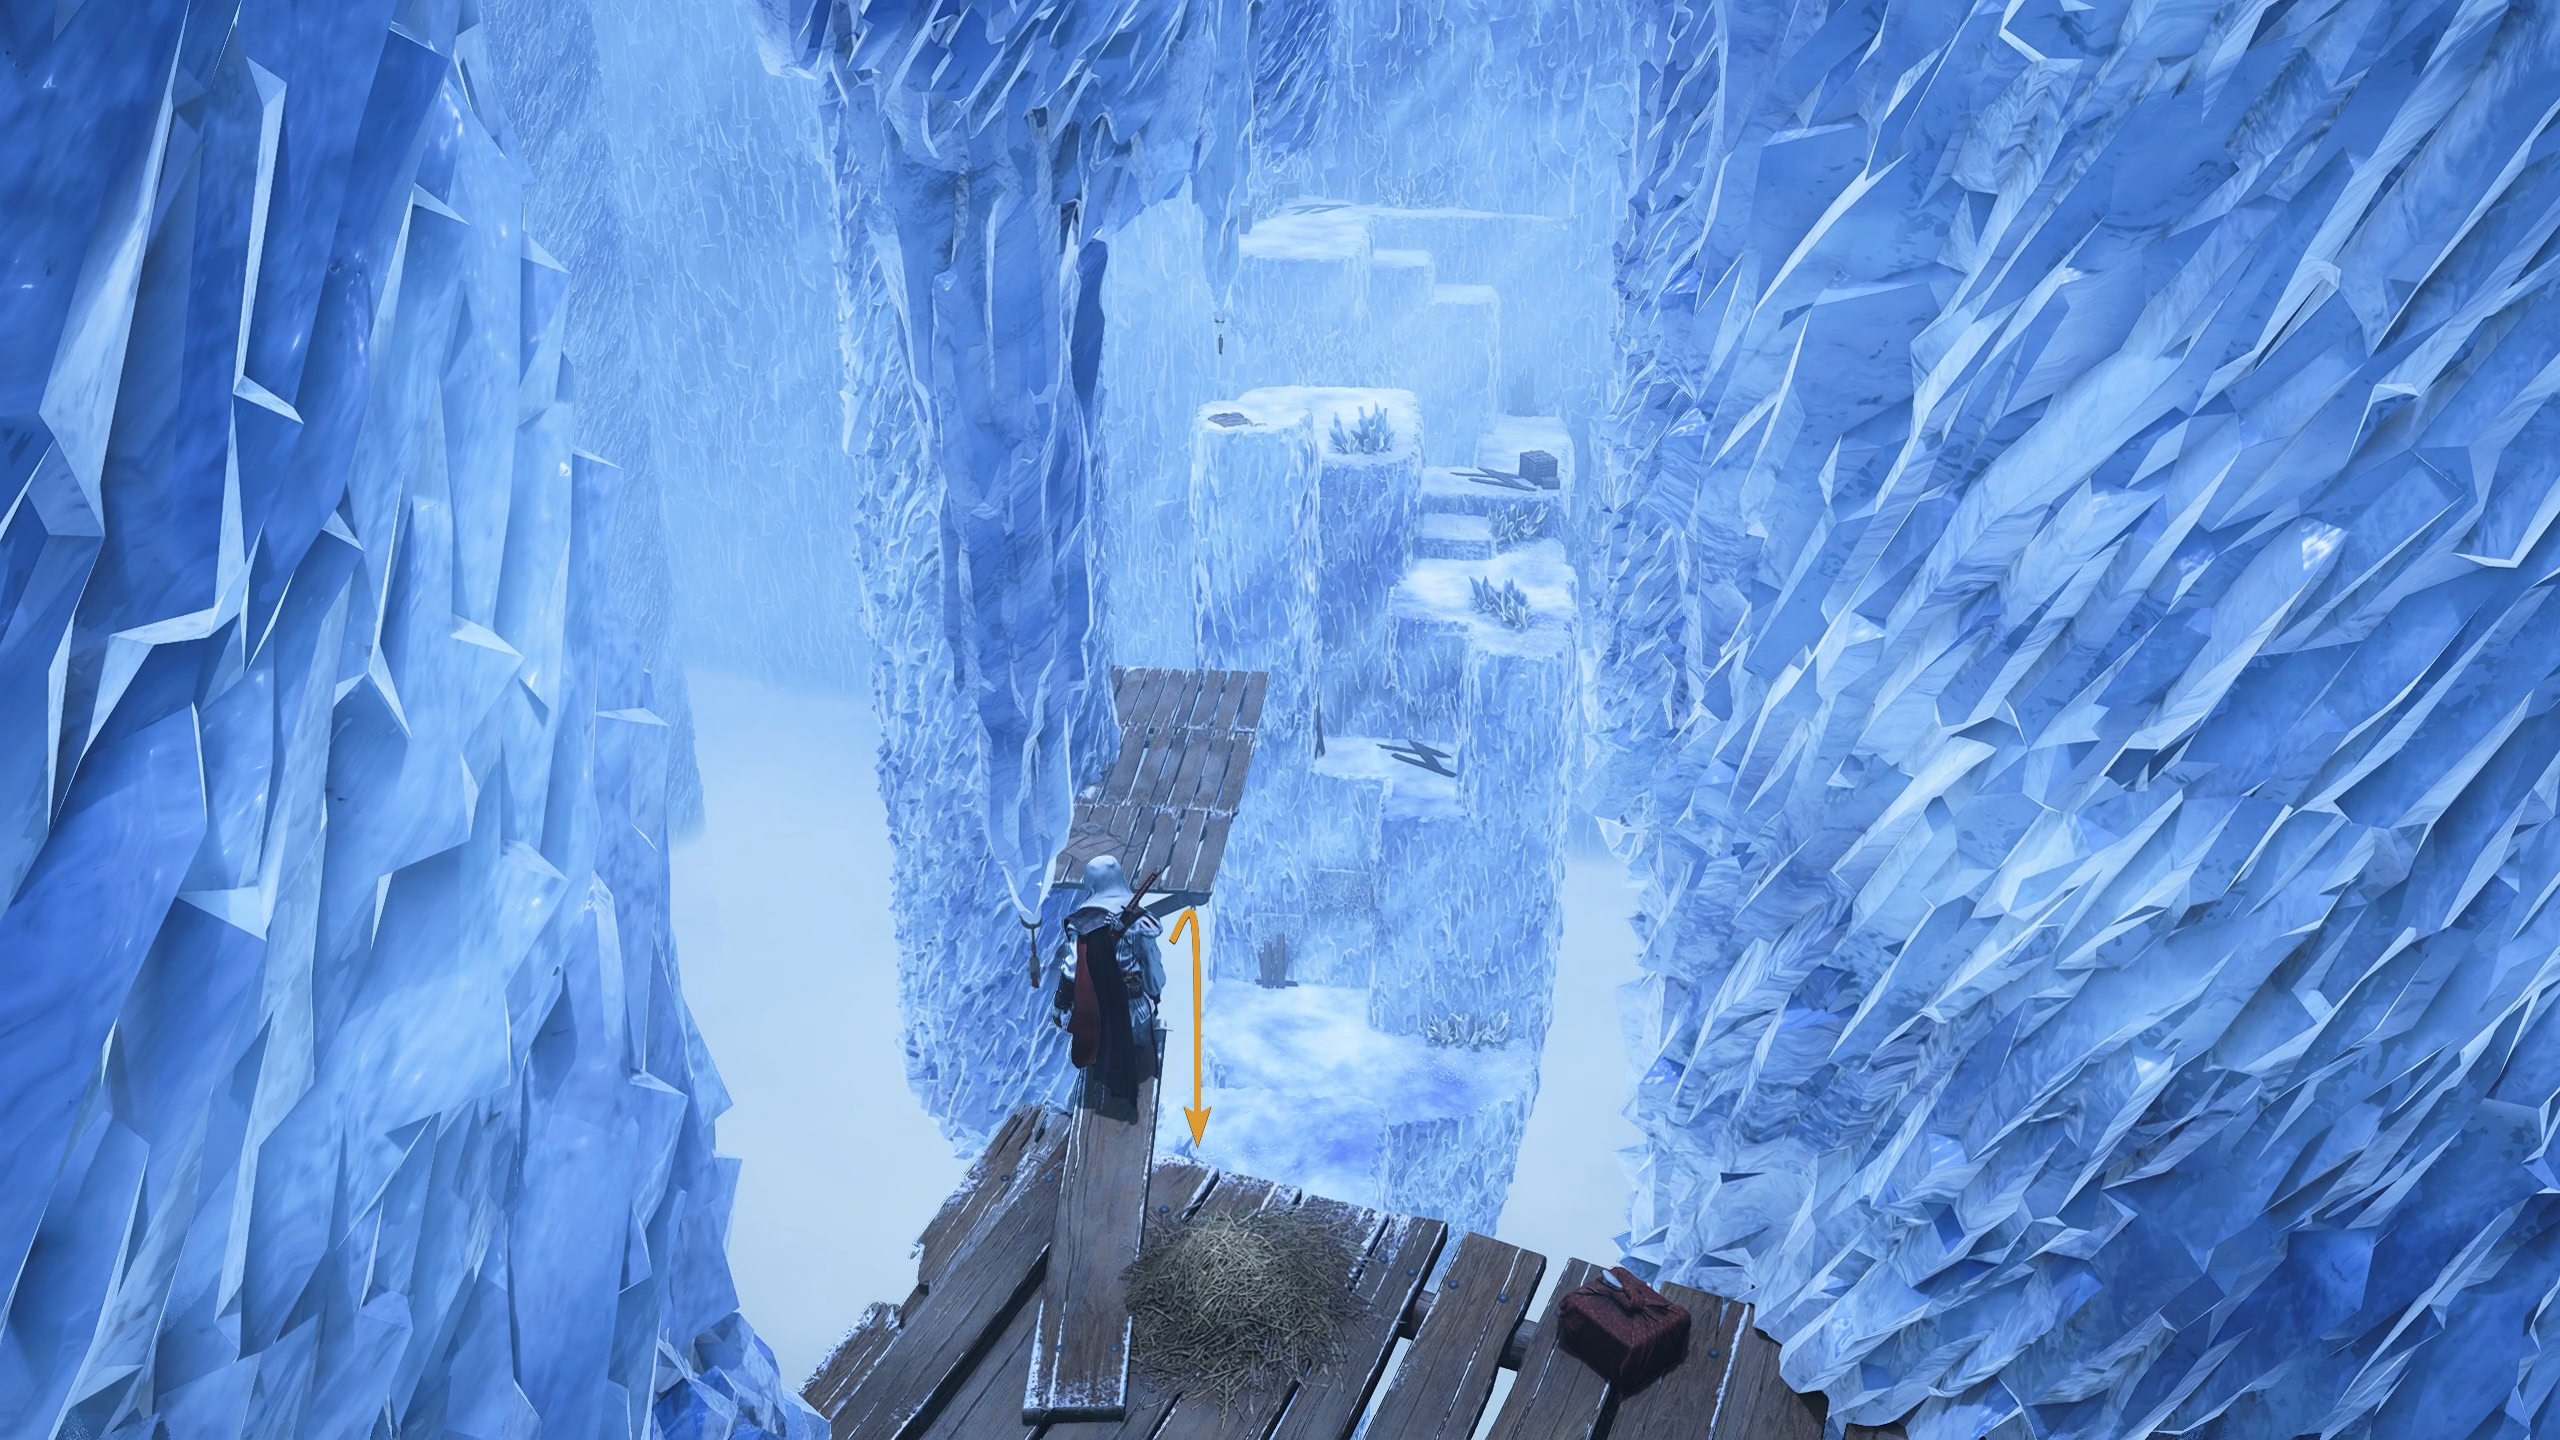
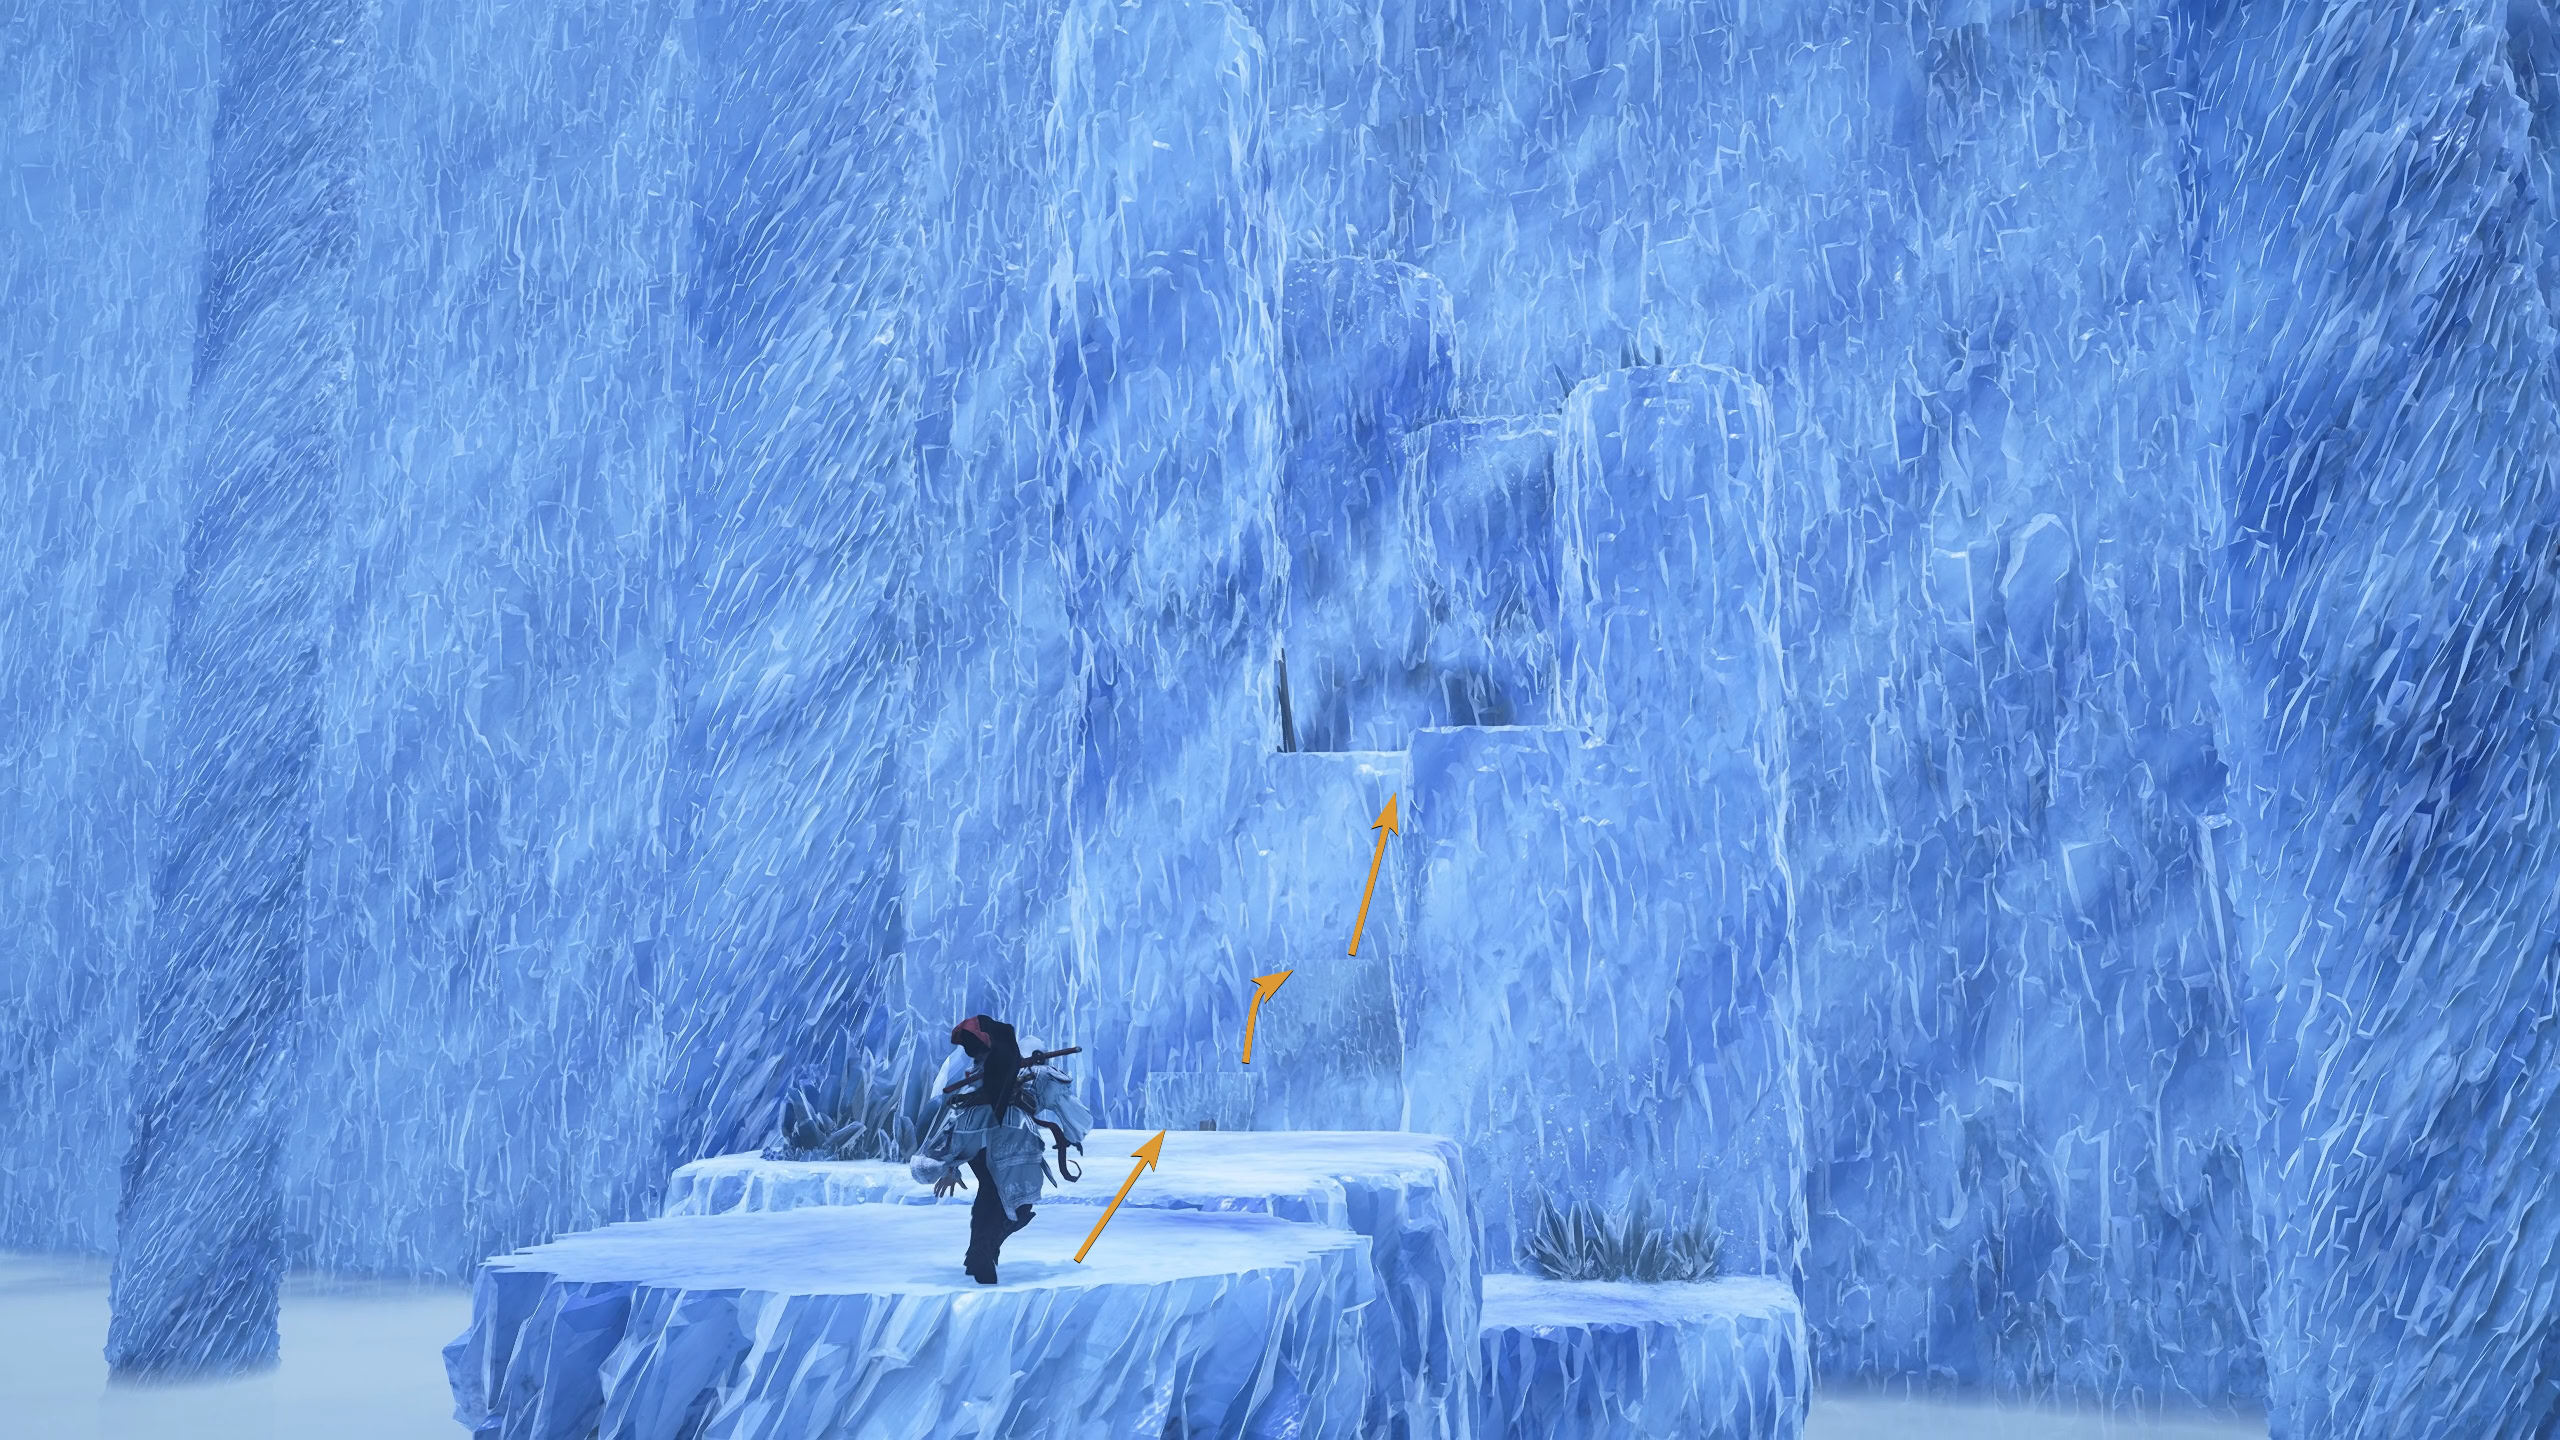
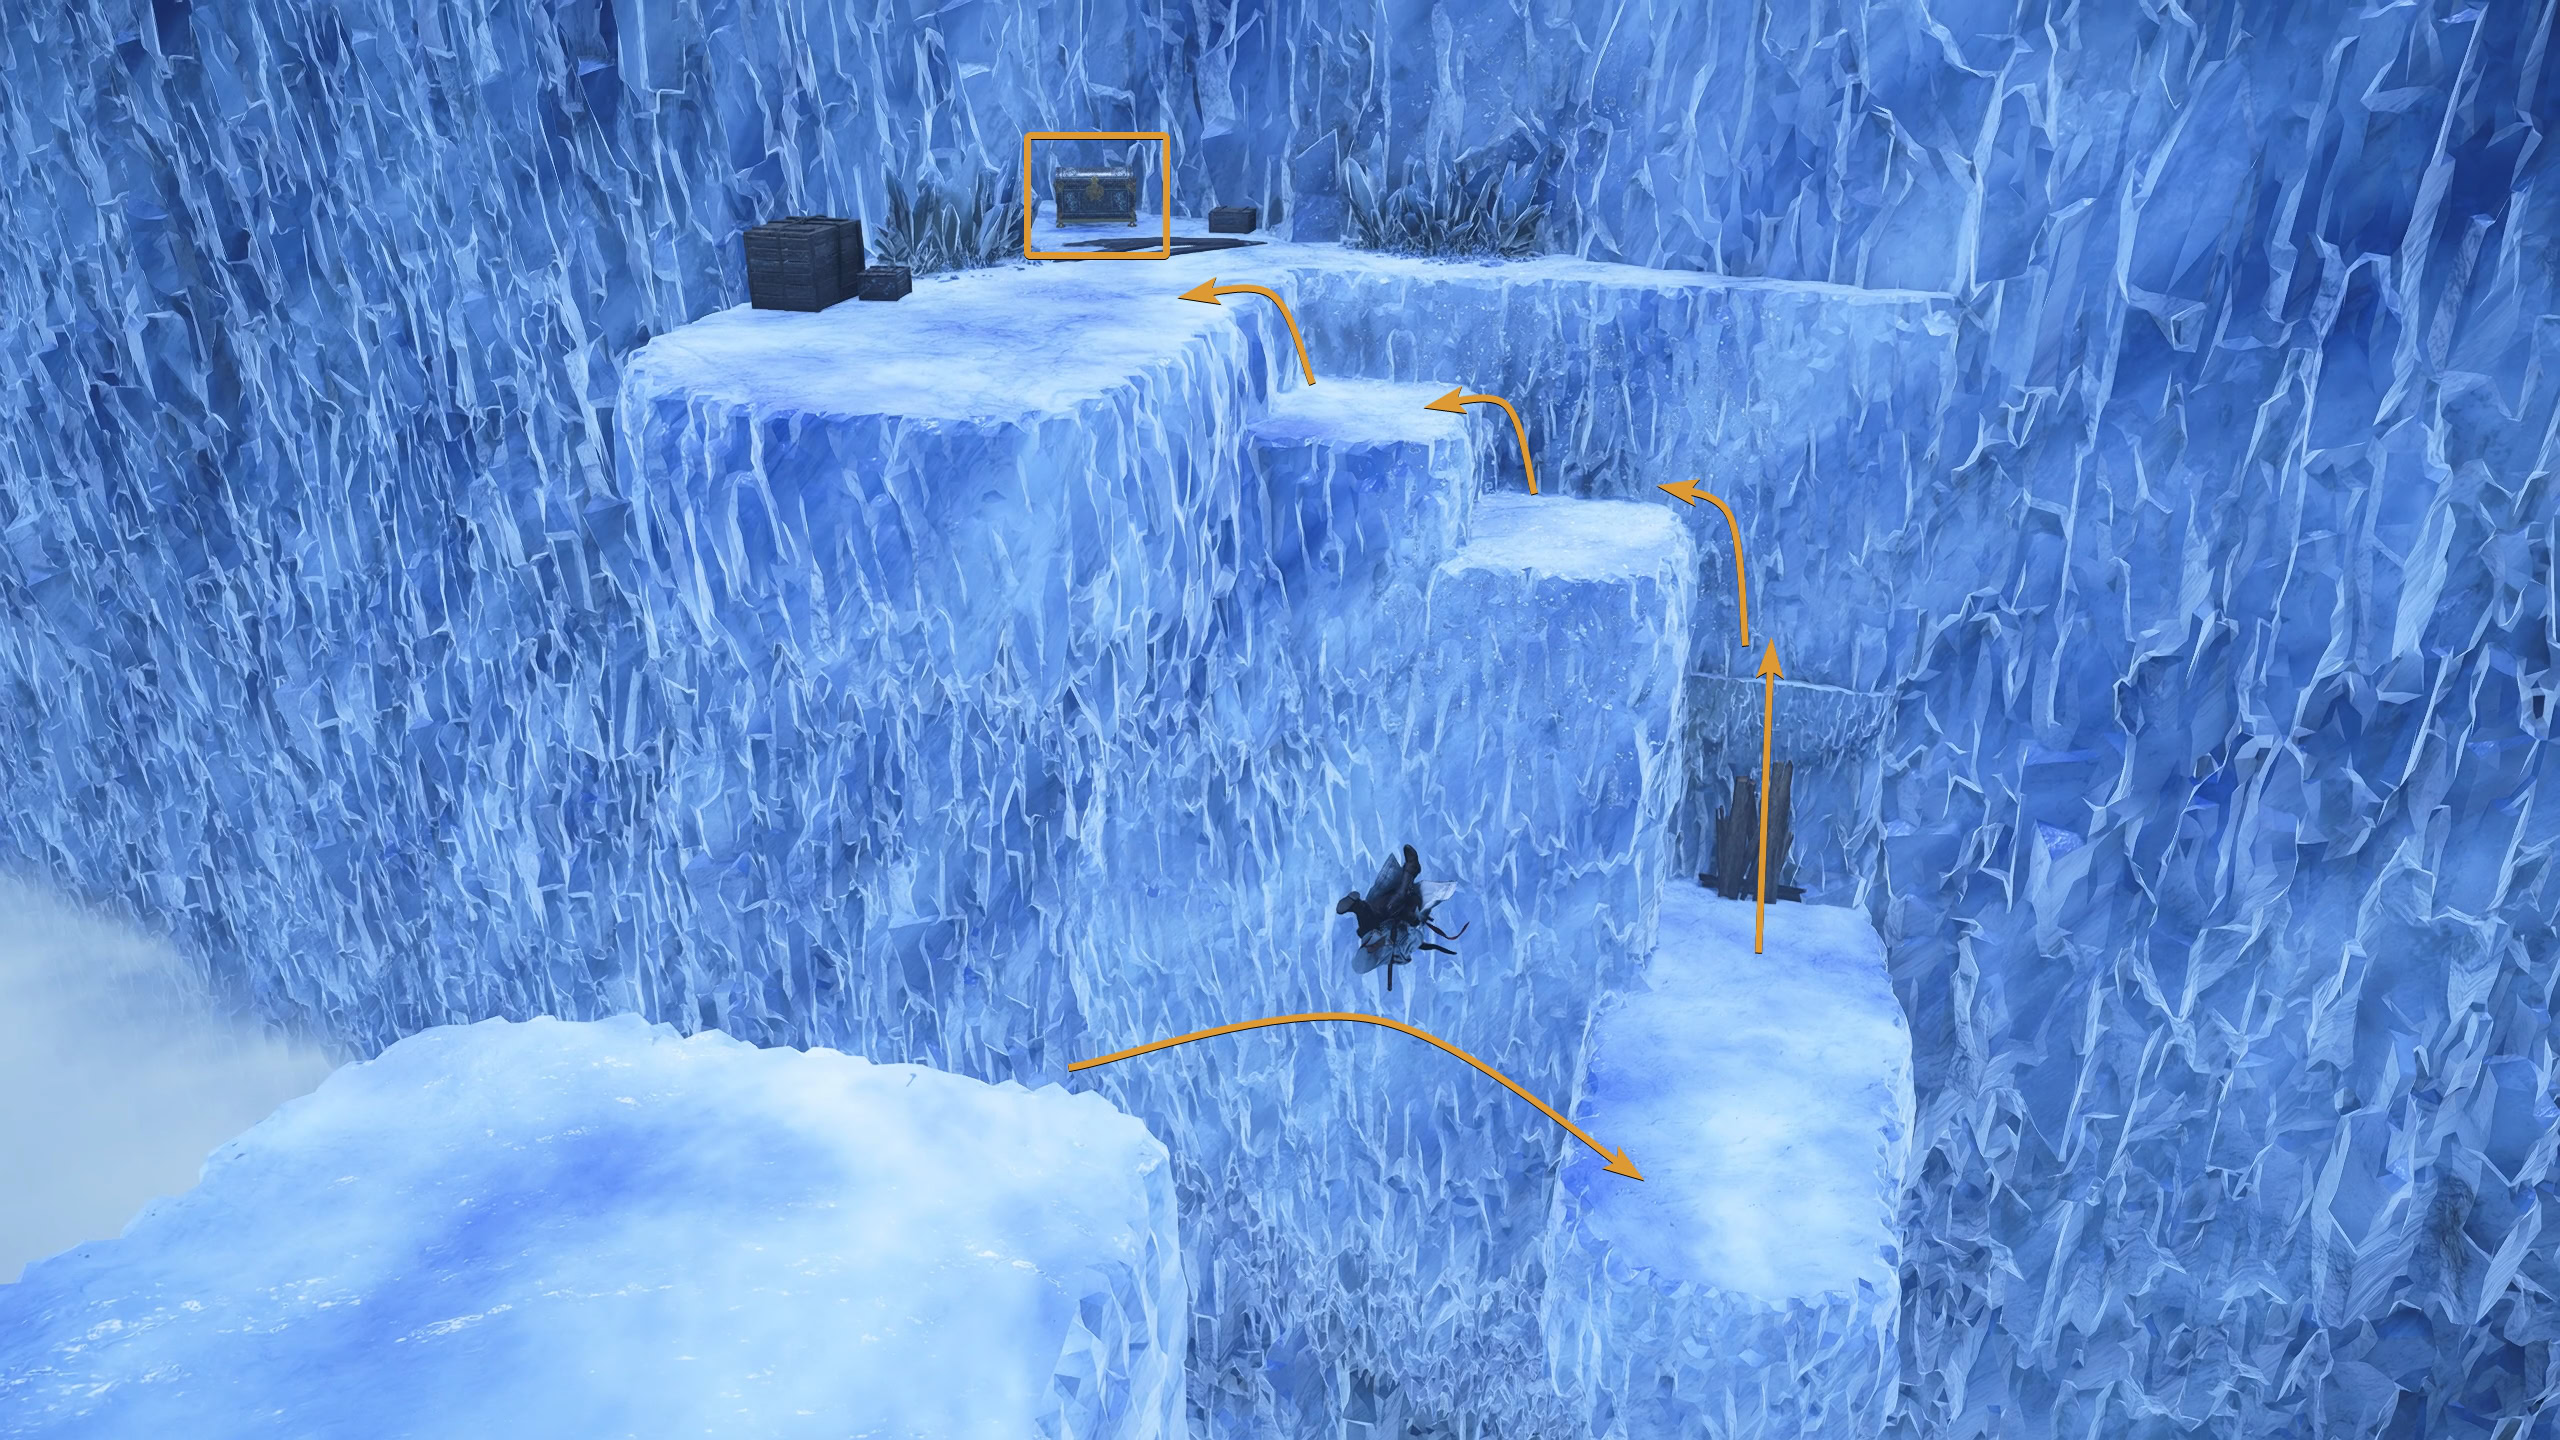
Go forward and up the wall where there are some wooden planks, and climb up the crystal ledges. Jump across to the crystal platform below, then climb up to the chest to find a Scout Regiment Banner.

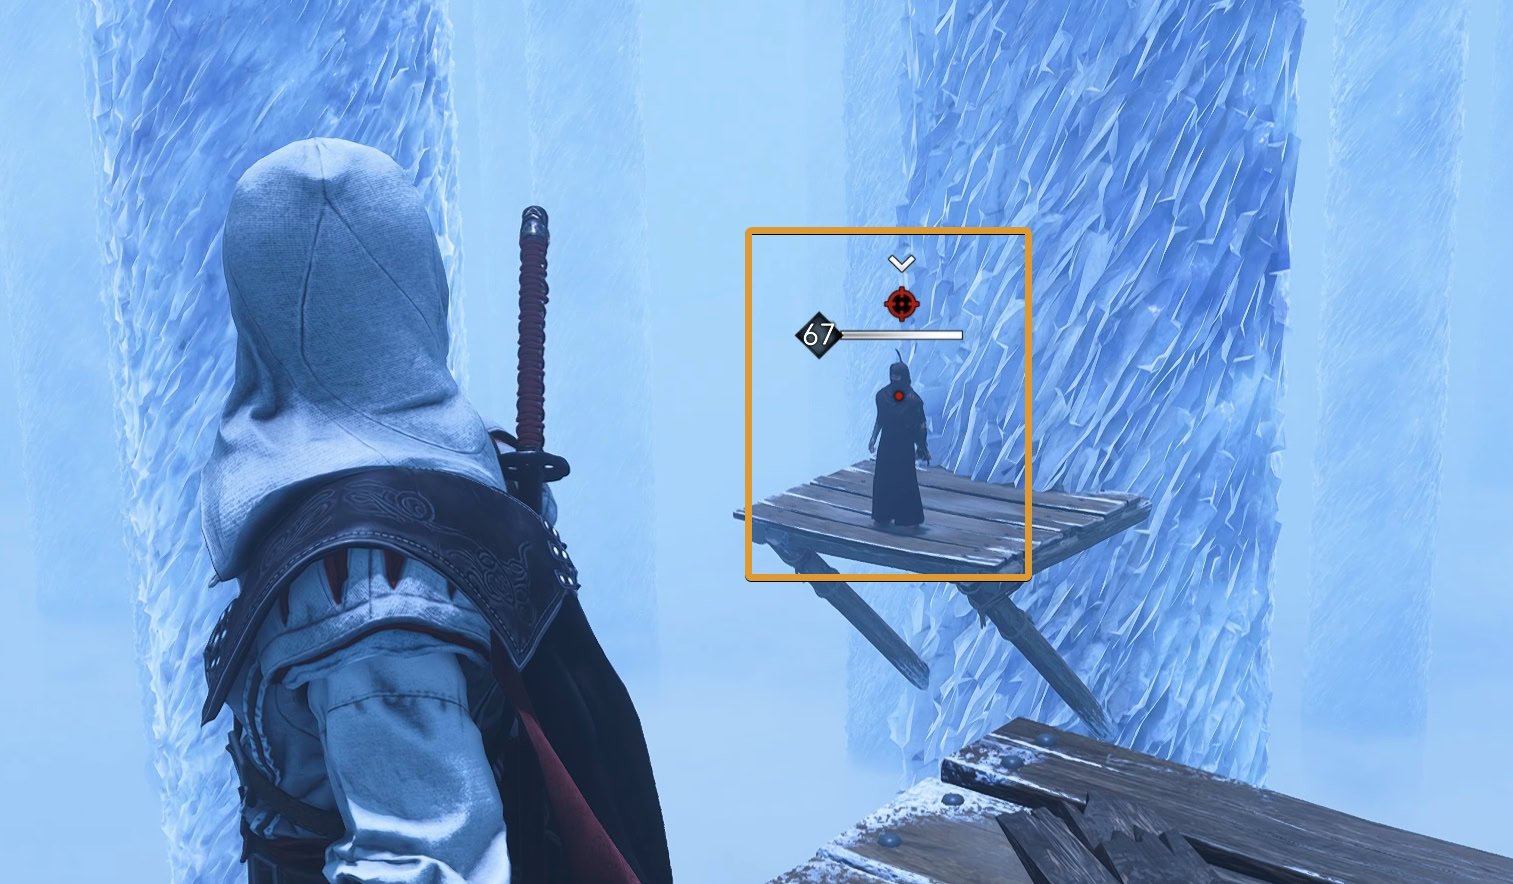
Look for a stalactite to grapple onto, and swing across the chasm to find your way back to where you started. To the right is a fanatic on a platform, kill him with a kunai and assassinate the fanatic on the platform below you.
Go across the rope and assassinate the two fanatics below. Throw kunai at the fanatics in the distance. If for whatever reason the kunai don’t assassinate them, throw shuriken to stagger them off their platforms.
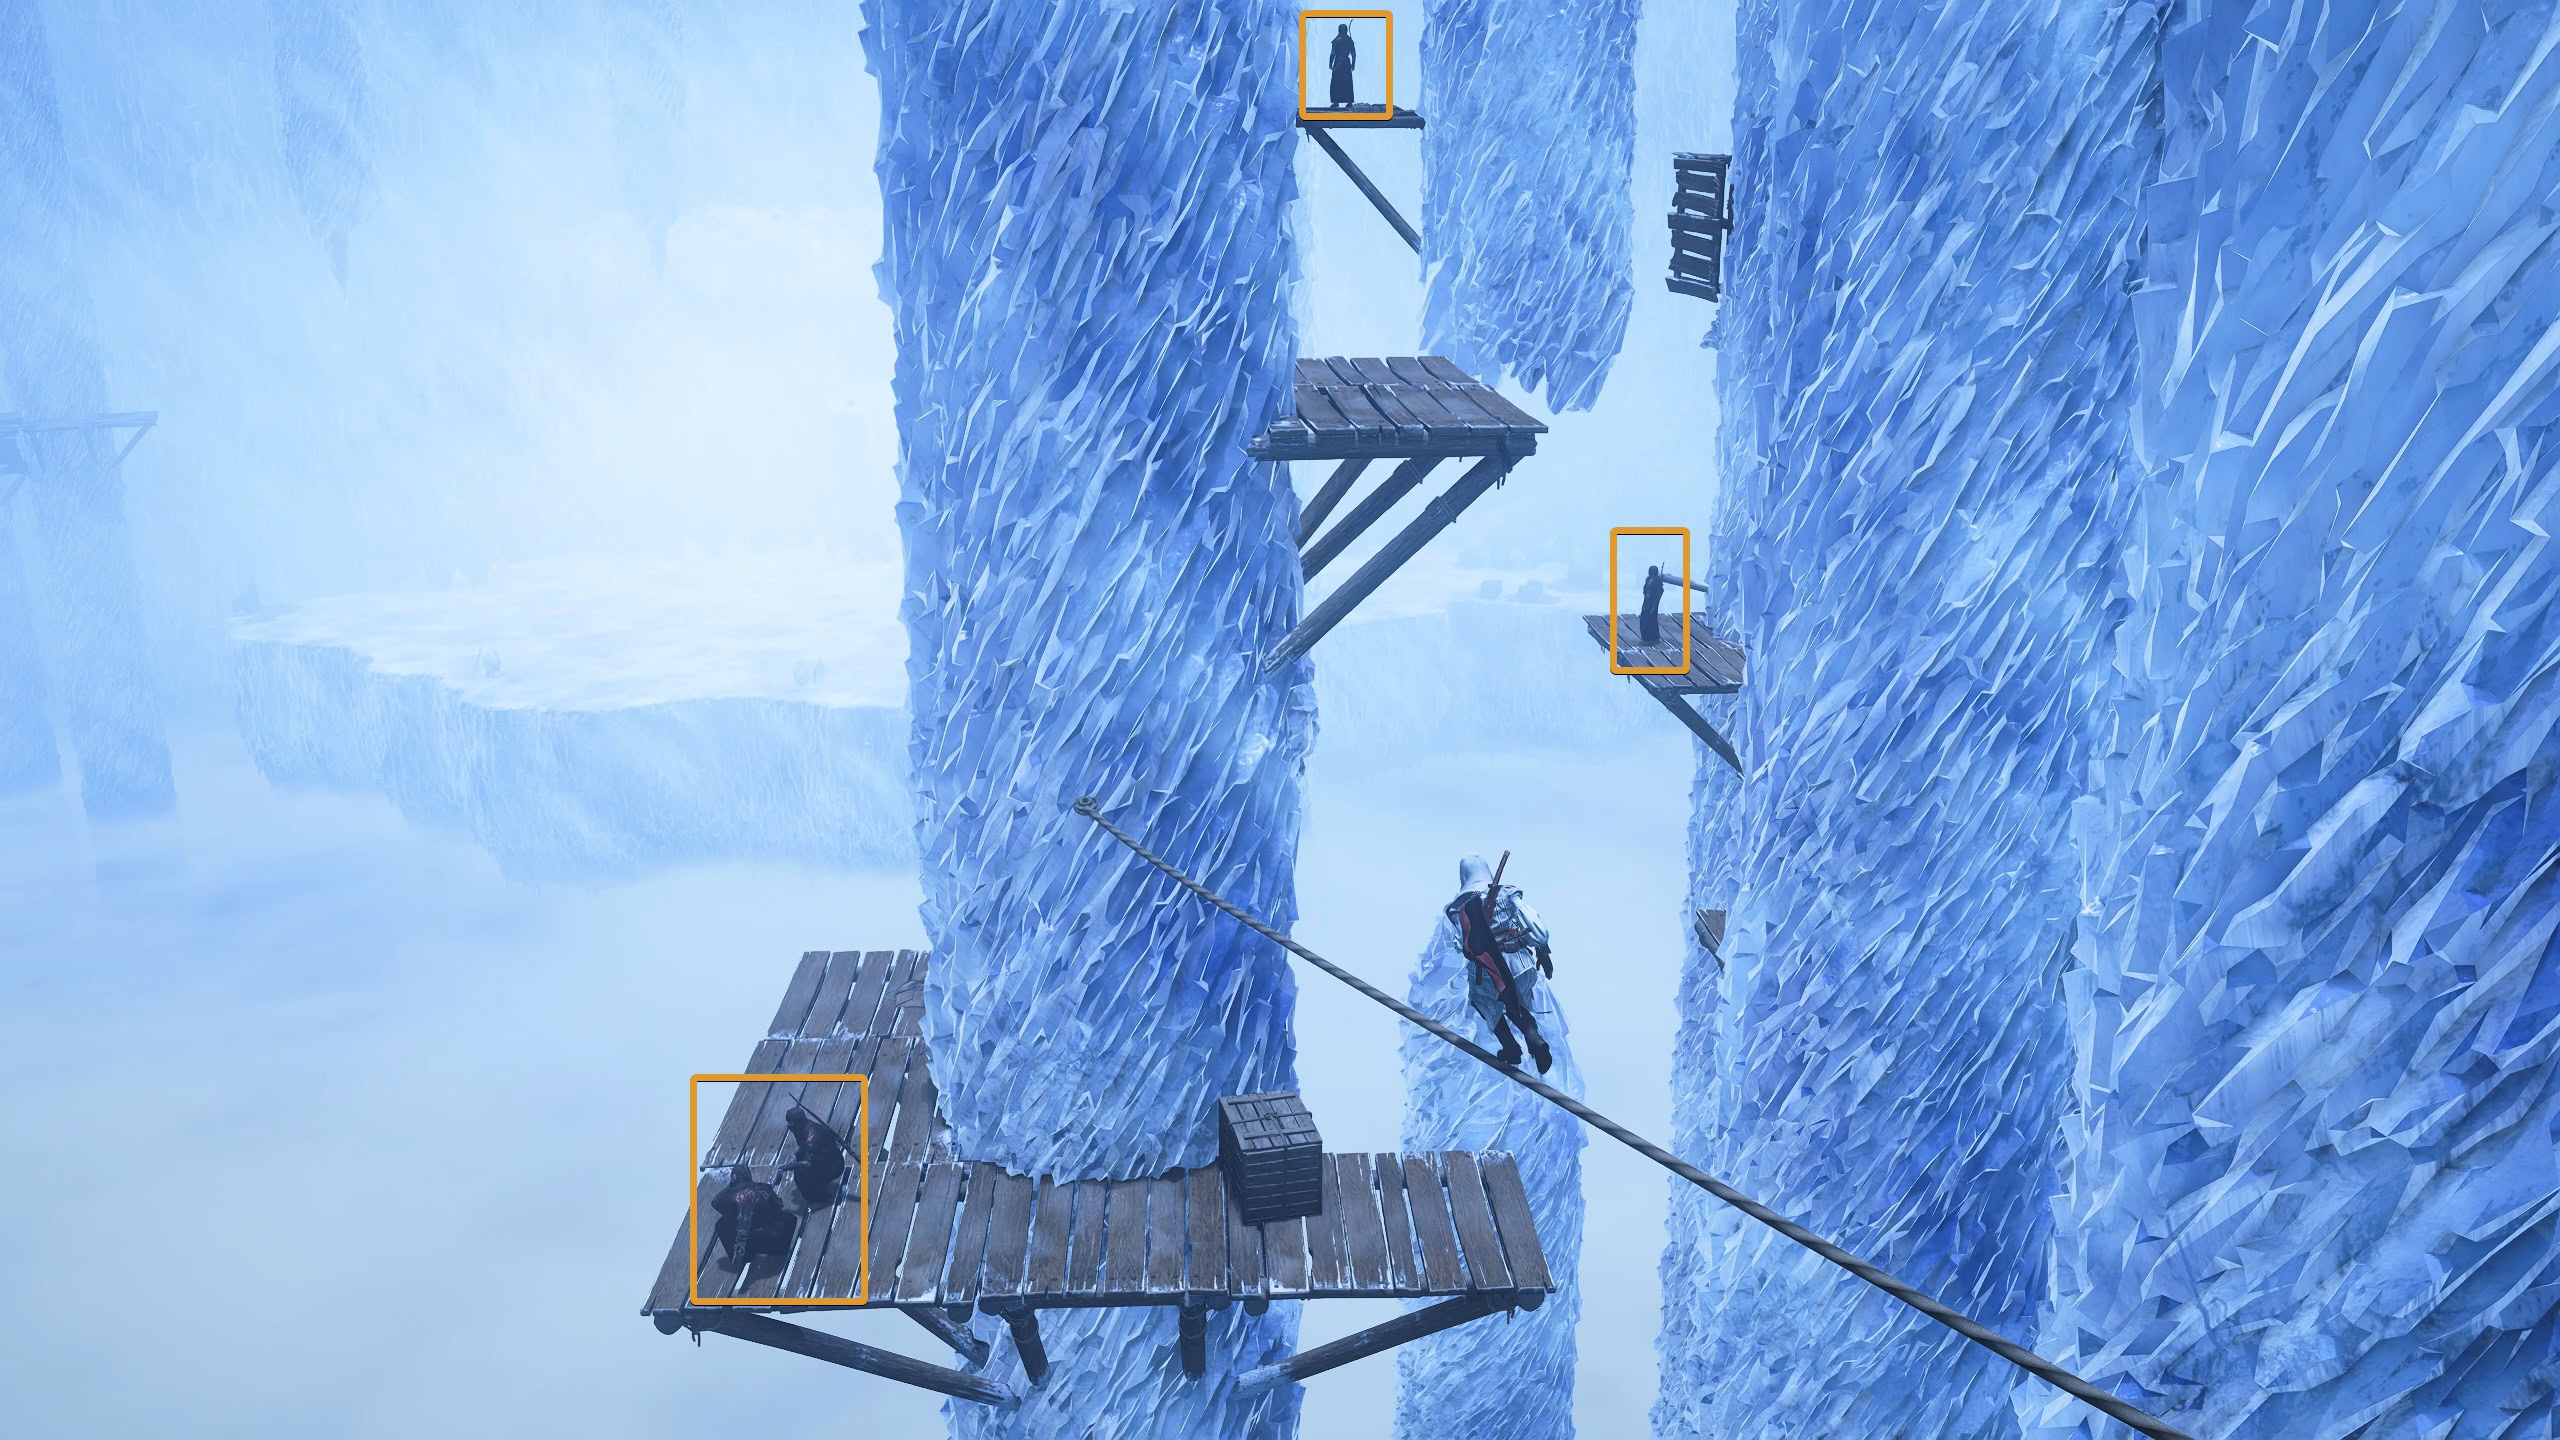
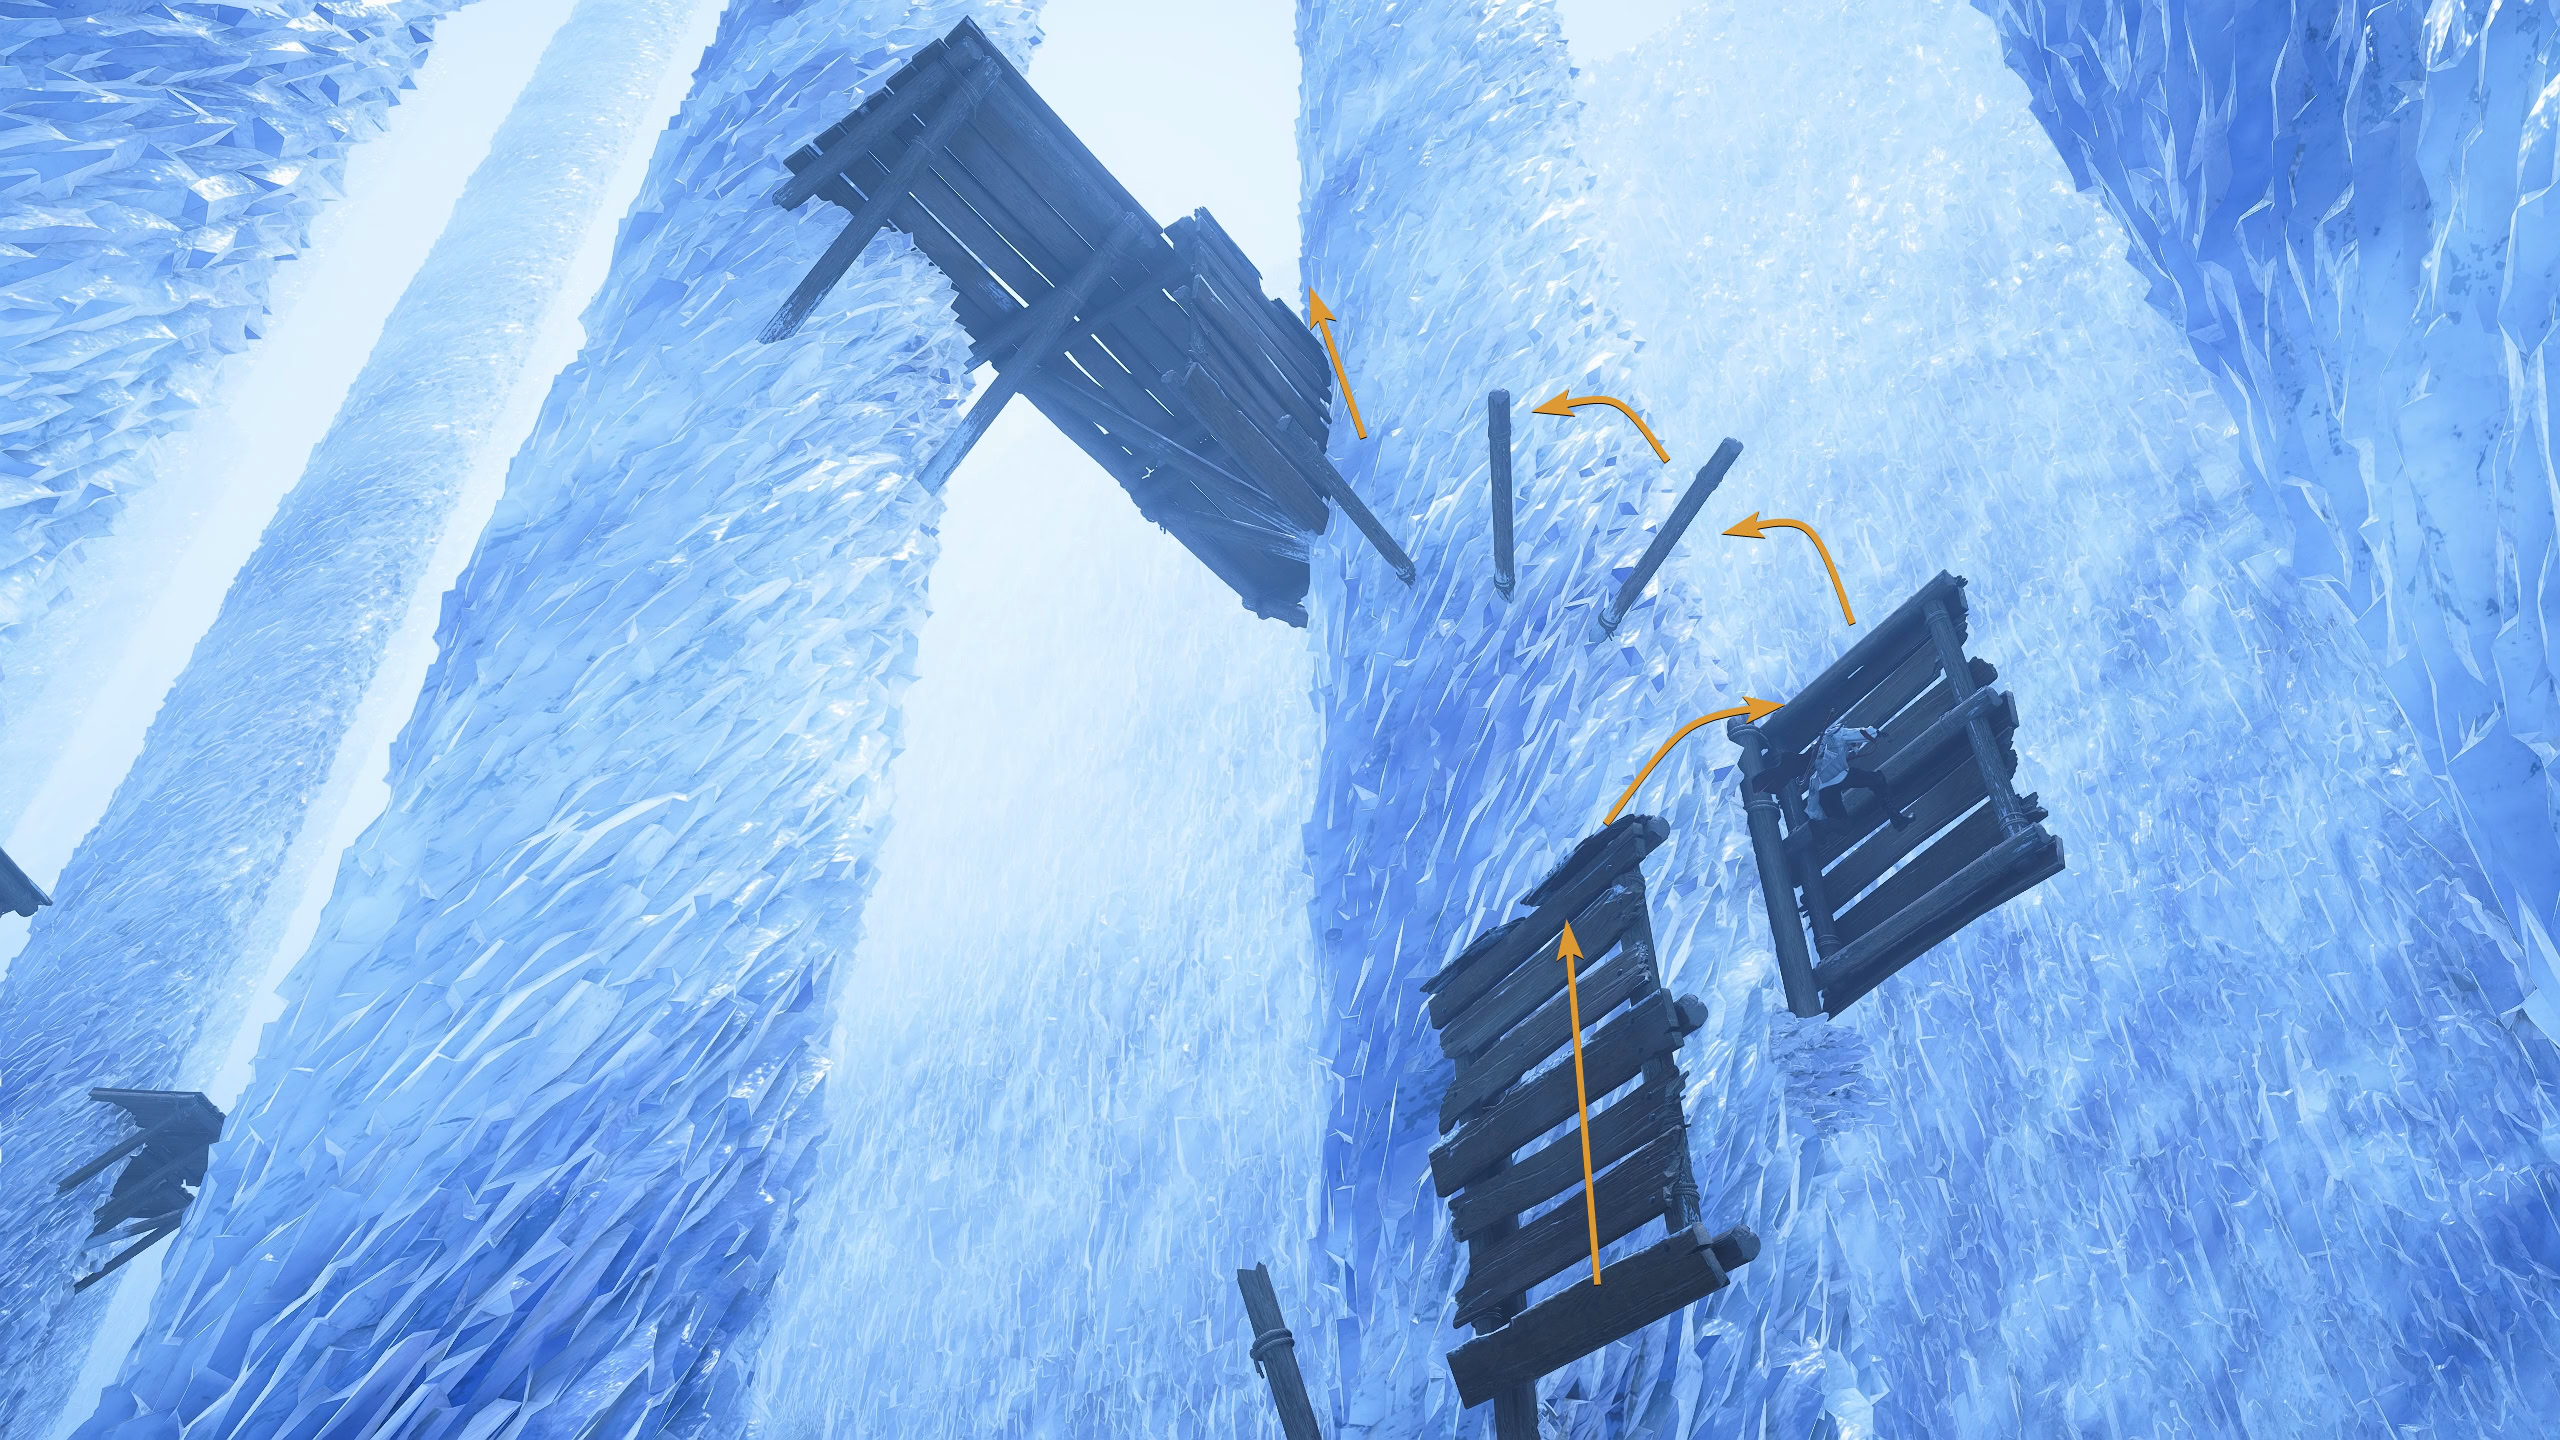
Climb up the wooden wall near the two fanatics, then air assassinate a fanatic on a platform below. Go up the wooden beams, climb the wooden walls, then swing across three stalactites and jump onto a wooden platform.
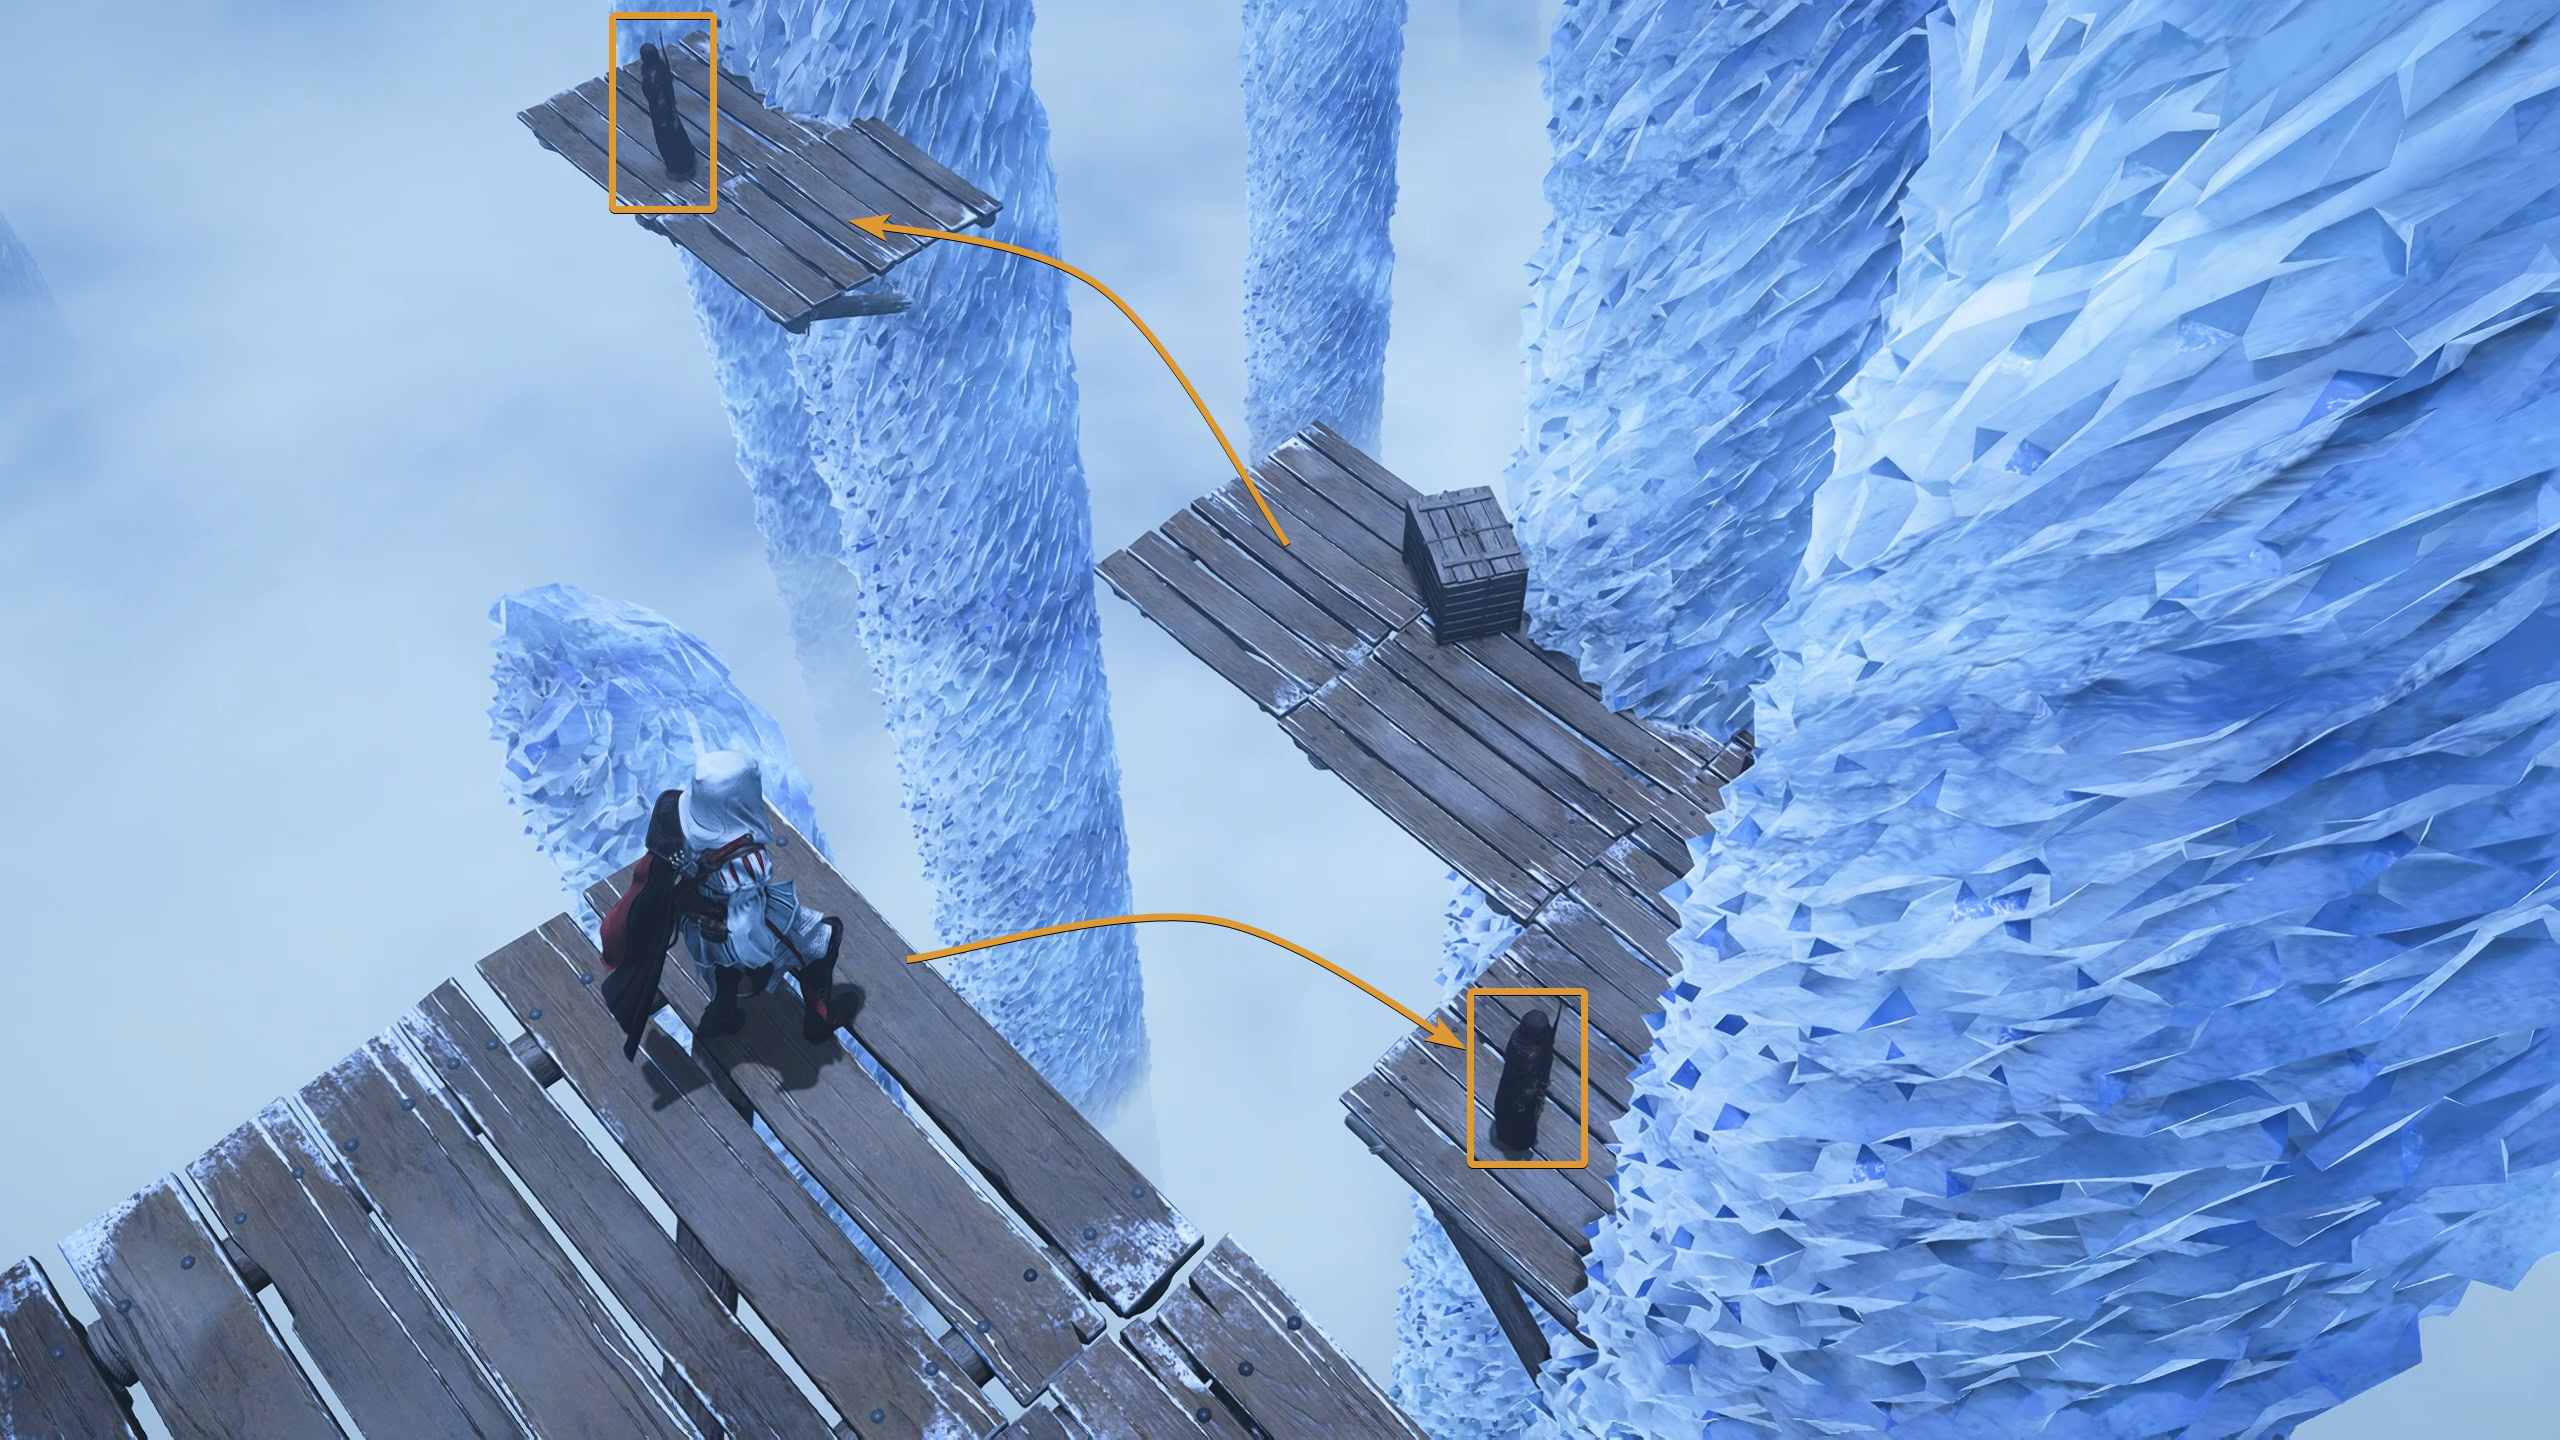

Assassinate the fanatic below and look for the plank and small pile of hay. This path leads to the final chest in this quest. Take a leap of faith down into the hay below.
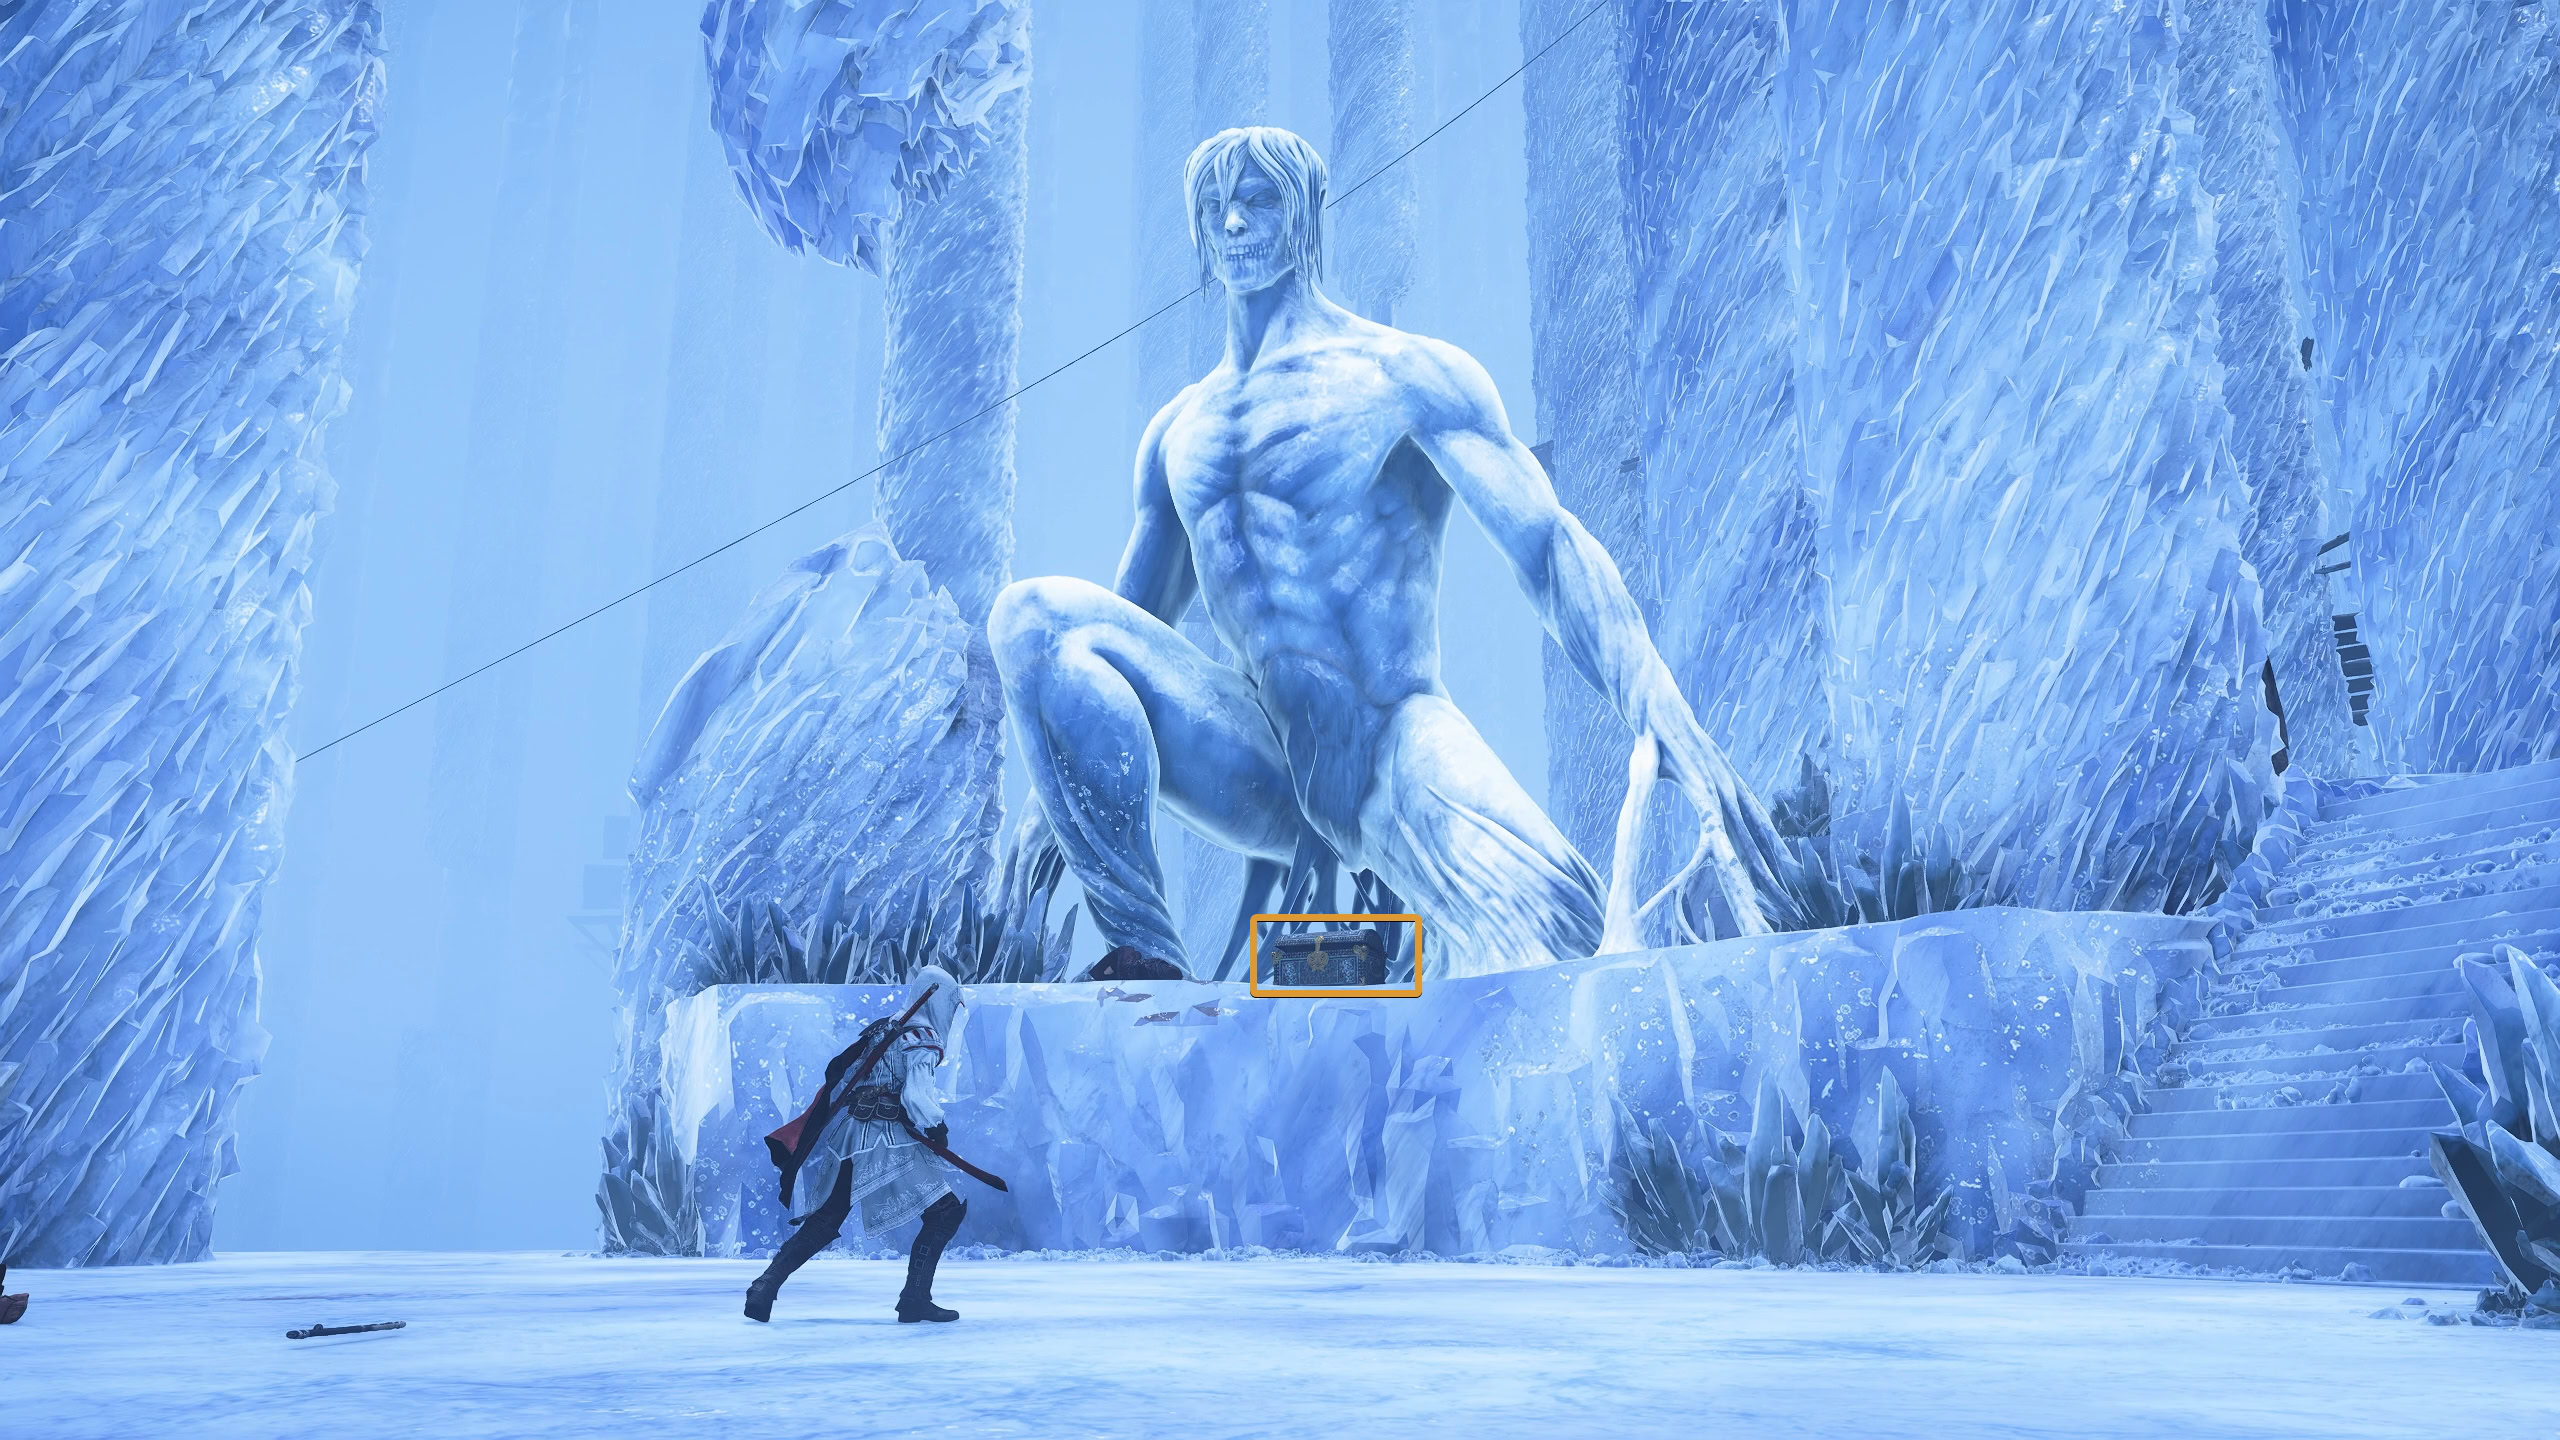
Go across the crystal platforms, climb up, and swing across a stalactite to reach some fanatics ahead. Among them is Lord Ritter who’s wielding a teppo. Defeat the fanatics and Lord Ritter to claim the chest beneath the titan statue.
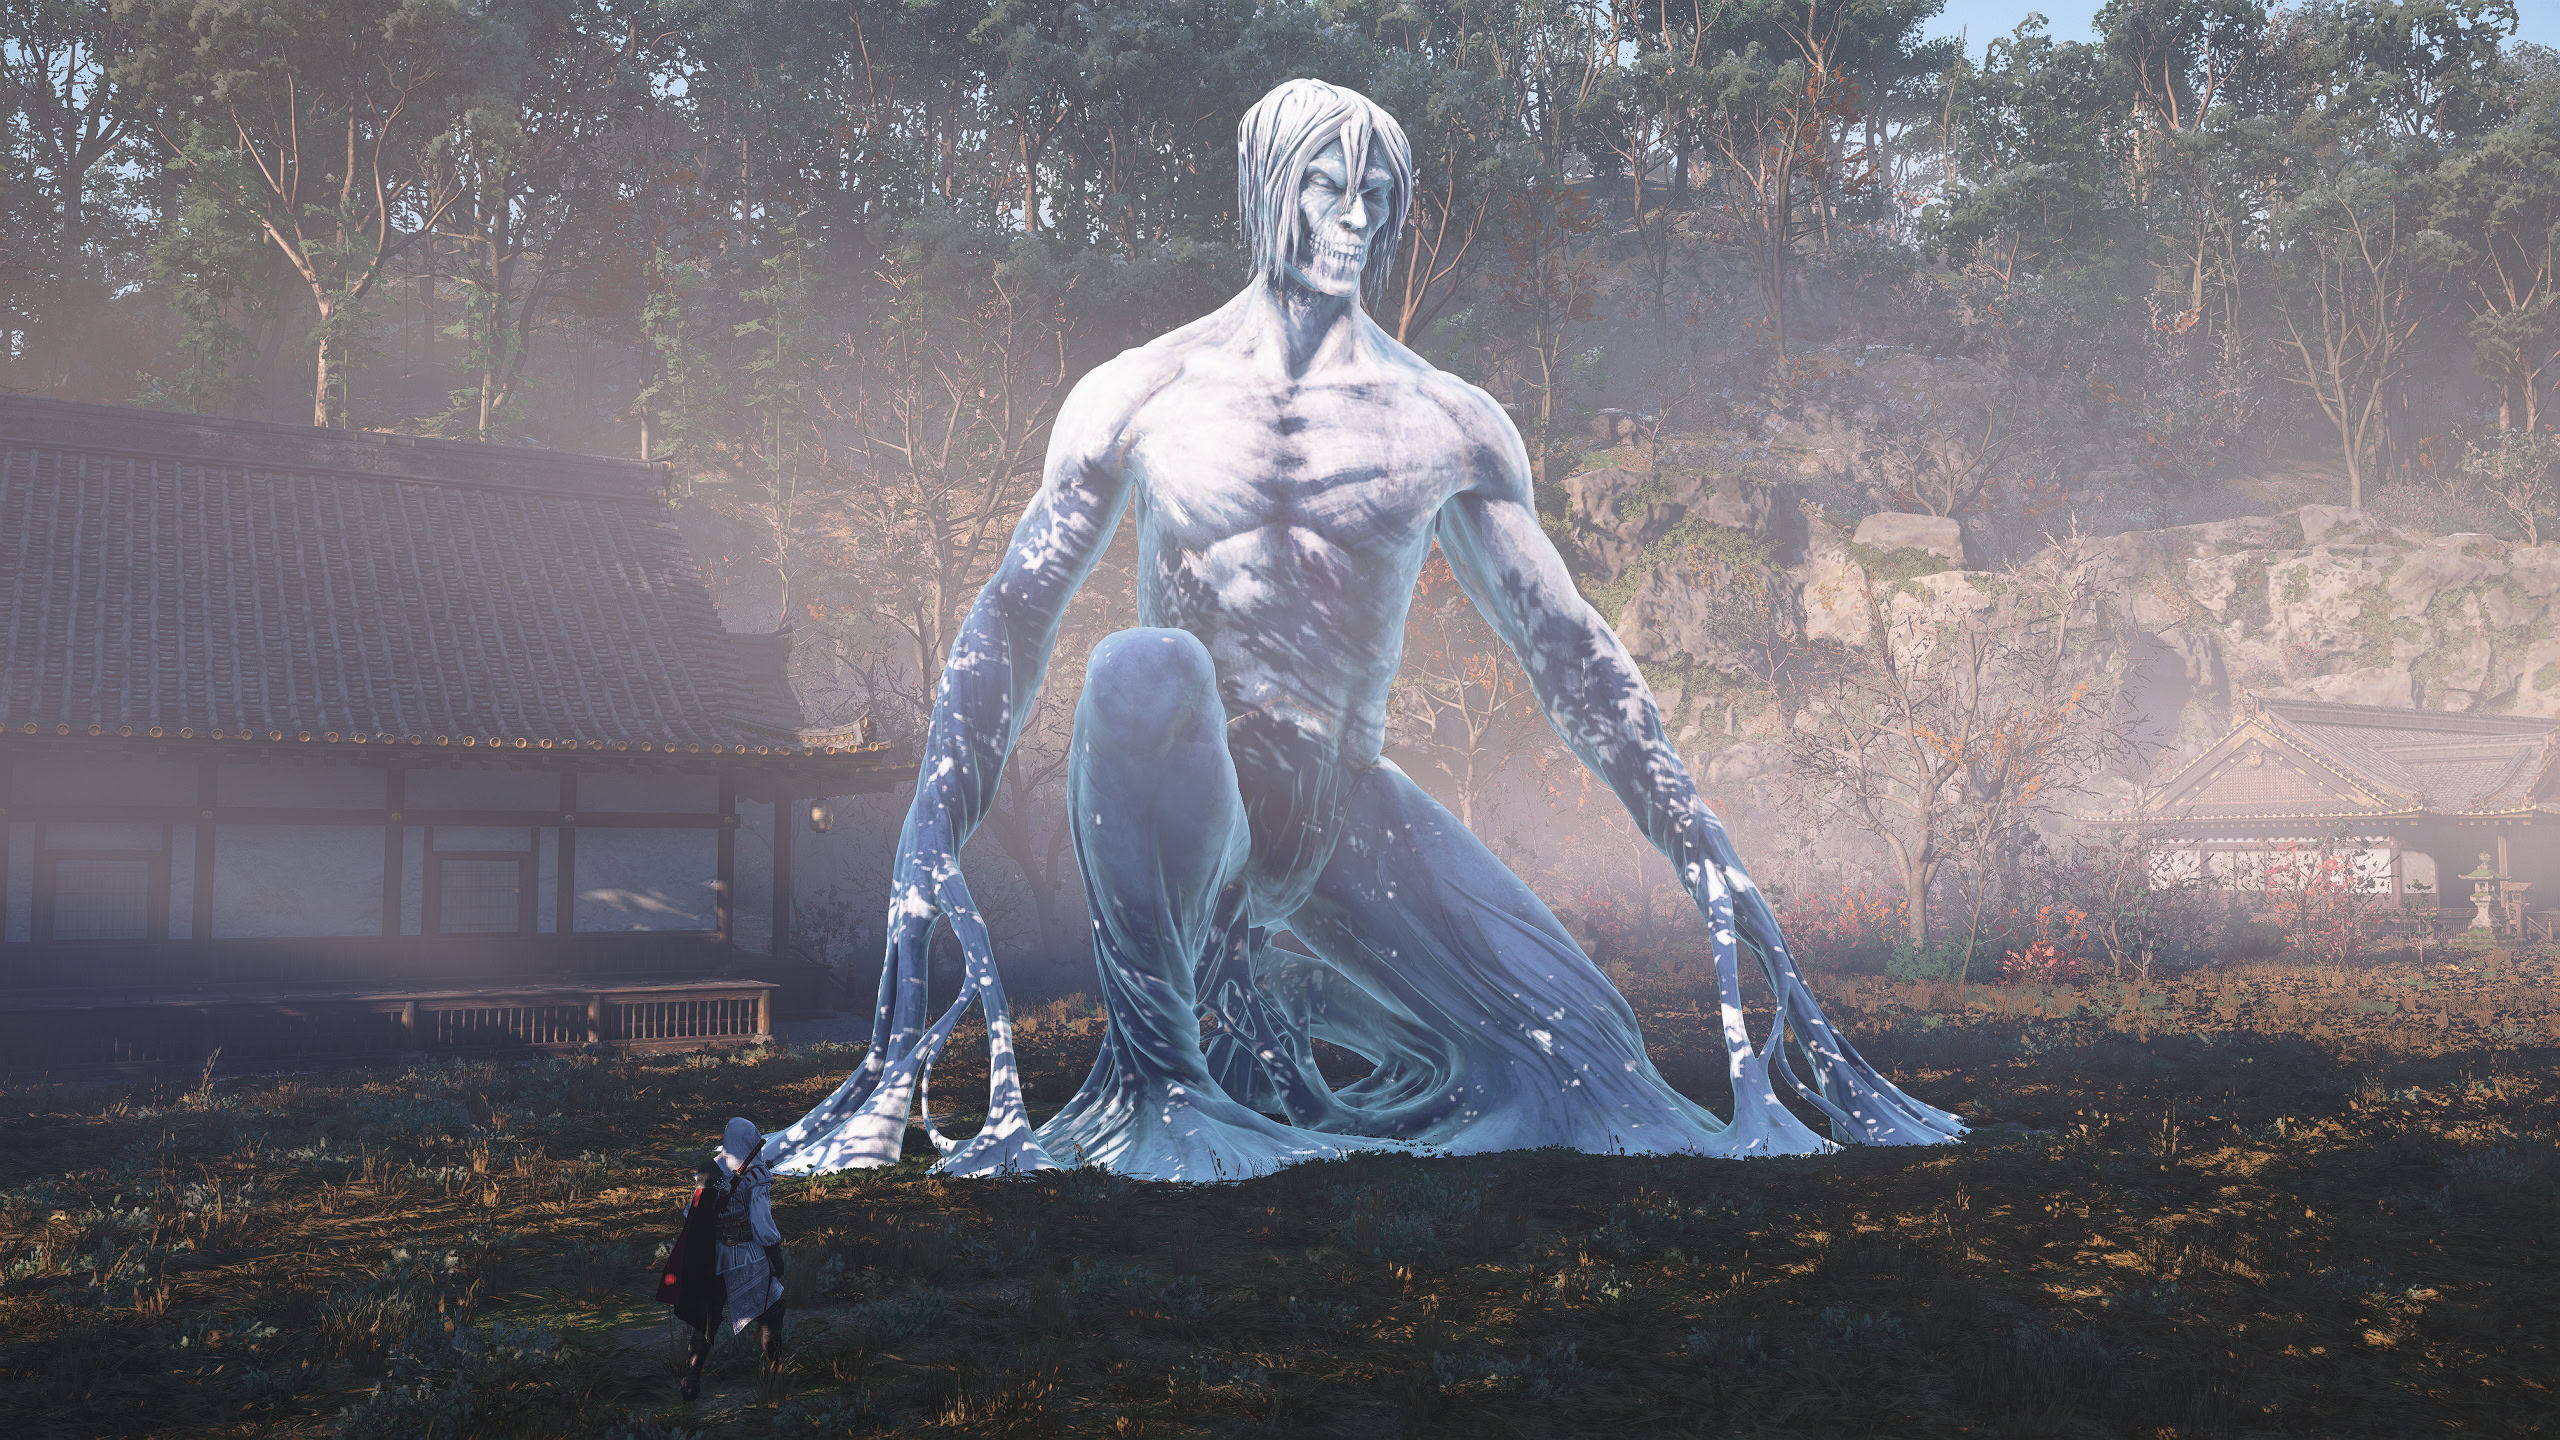
The chest will grant you the Crystal Statue decoration. It’s the same one you’re standing under and is quite large, but you’ll see pictures of that at the end of this guide.
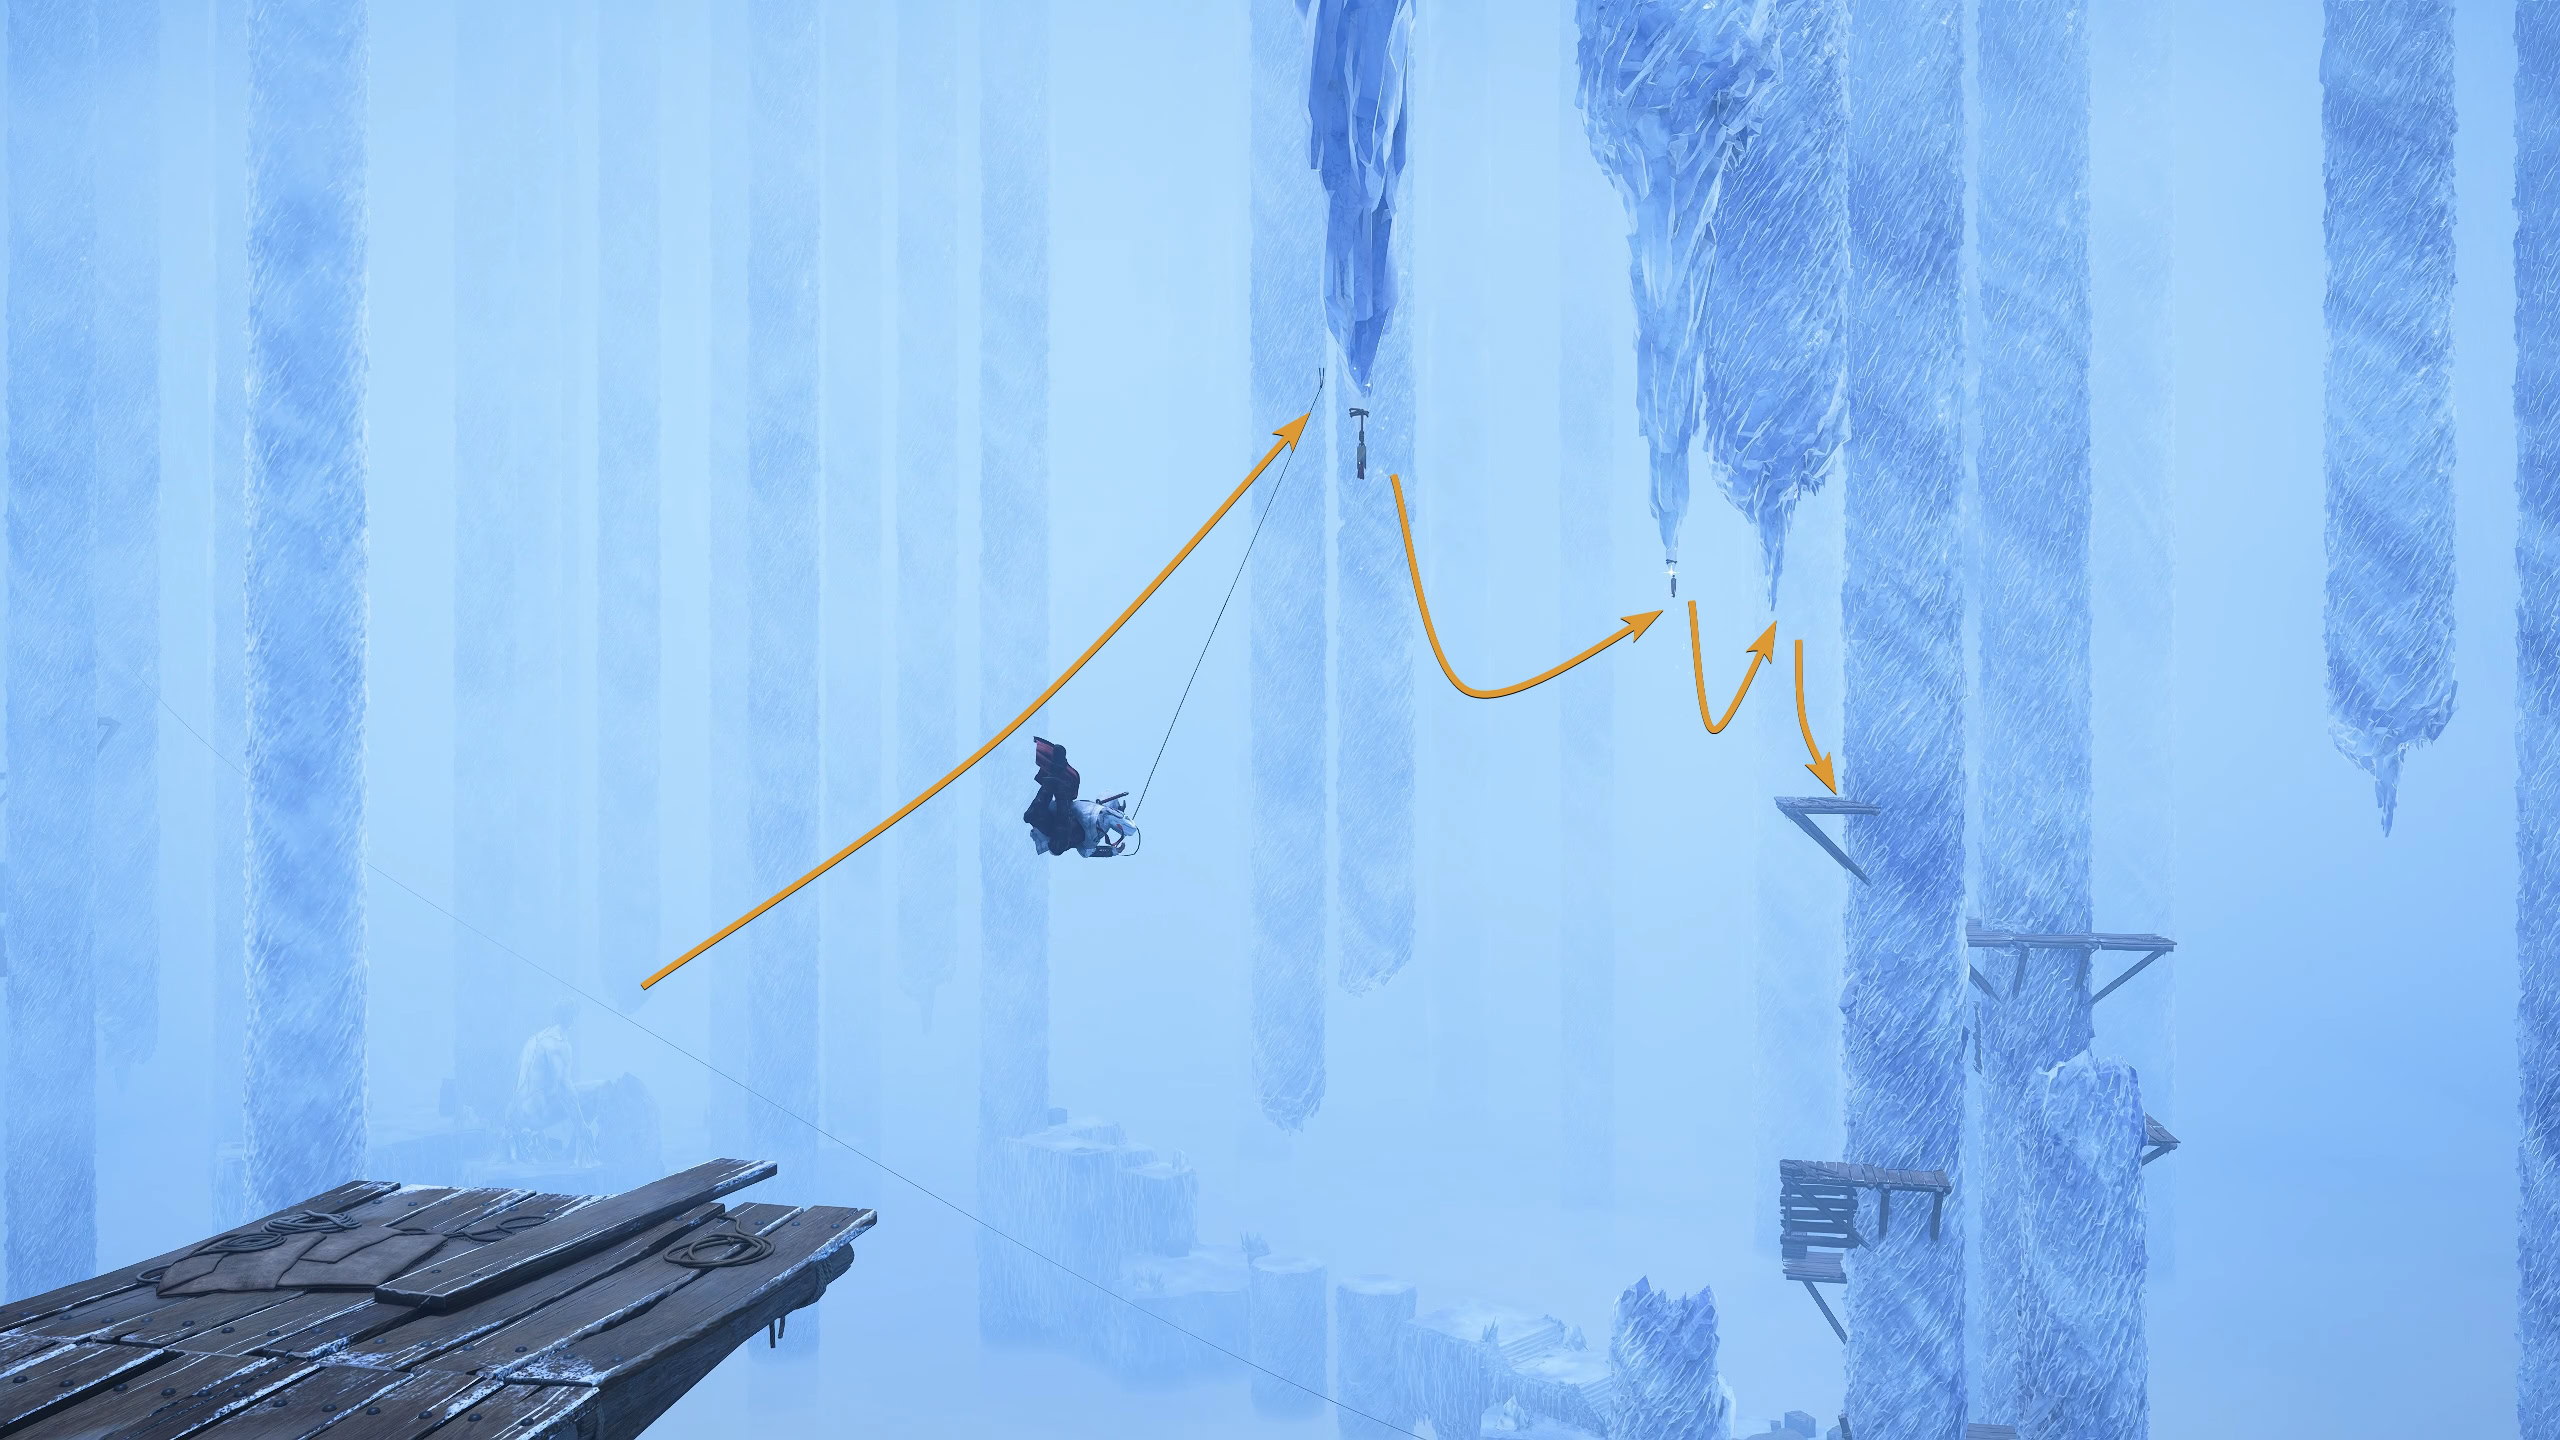
Go up the stairs near the statue, grapple onto a stalactite ahead, and climb your up to reach a long rope. Slide down the rope while somehow avoiding serious friction burns, and continue climbing to end up back where you started before taking the leap of faith.

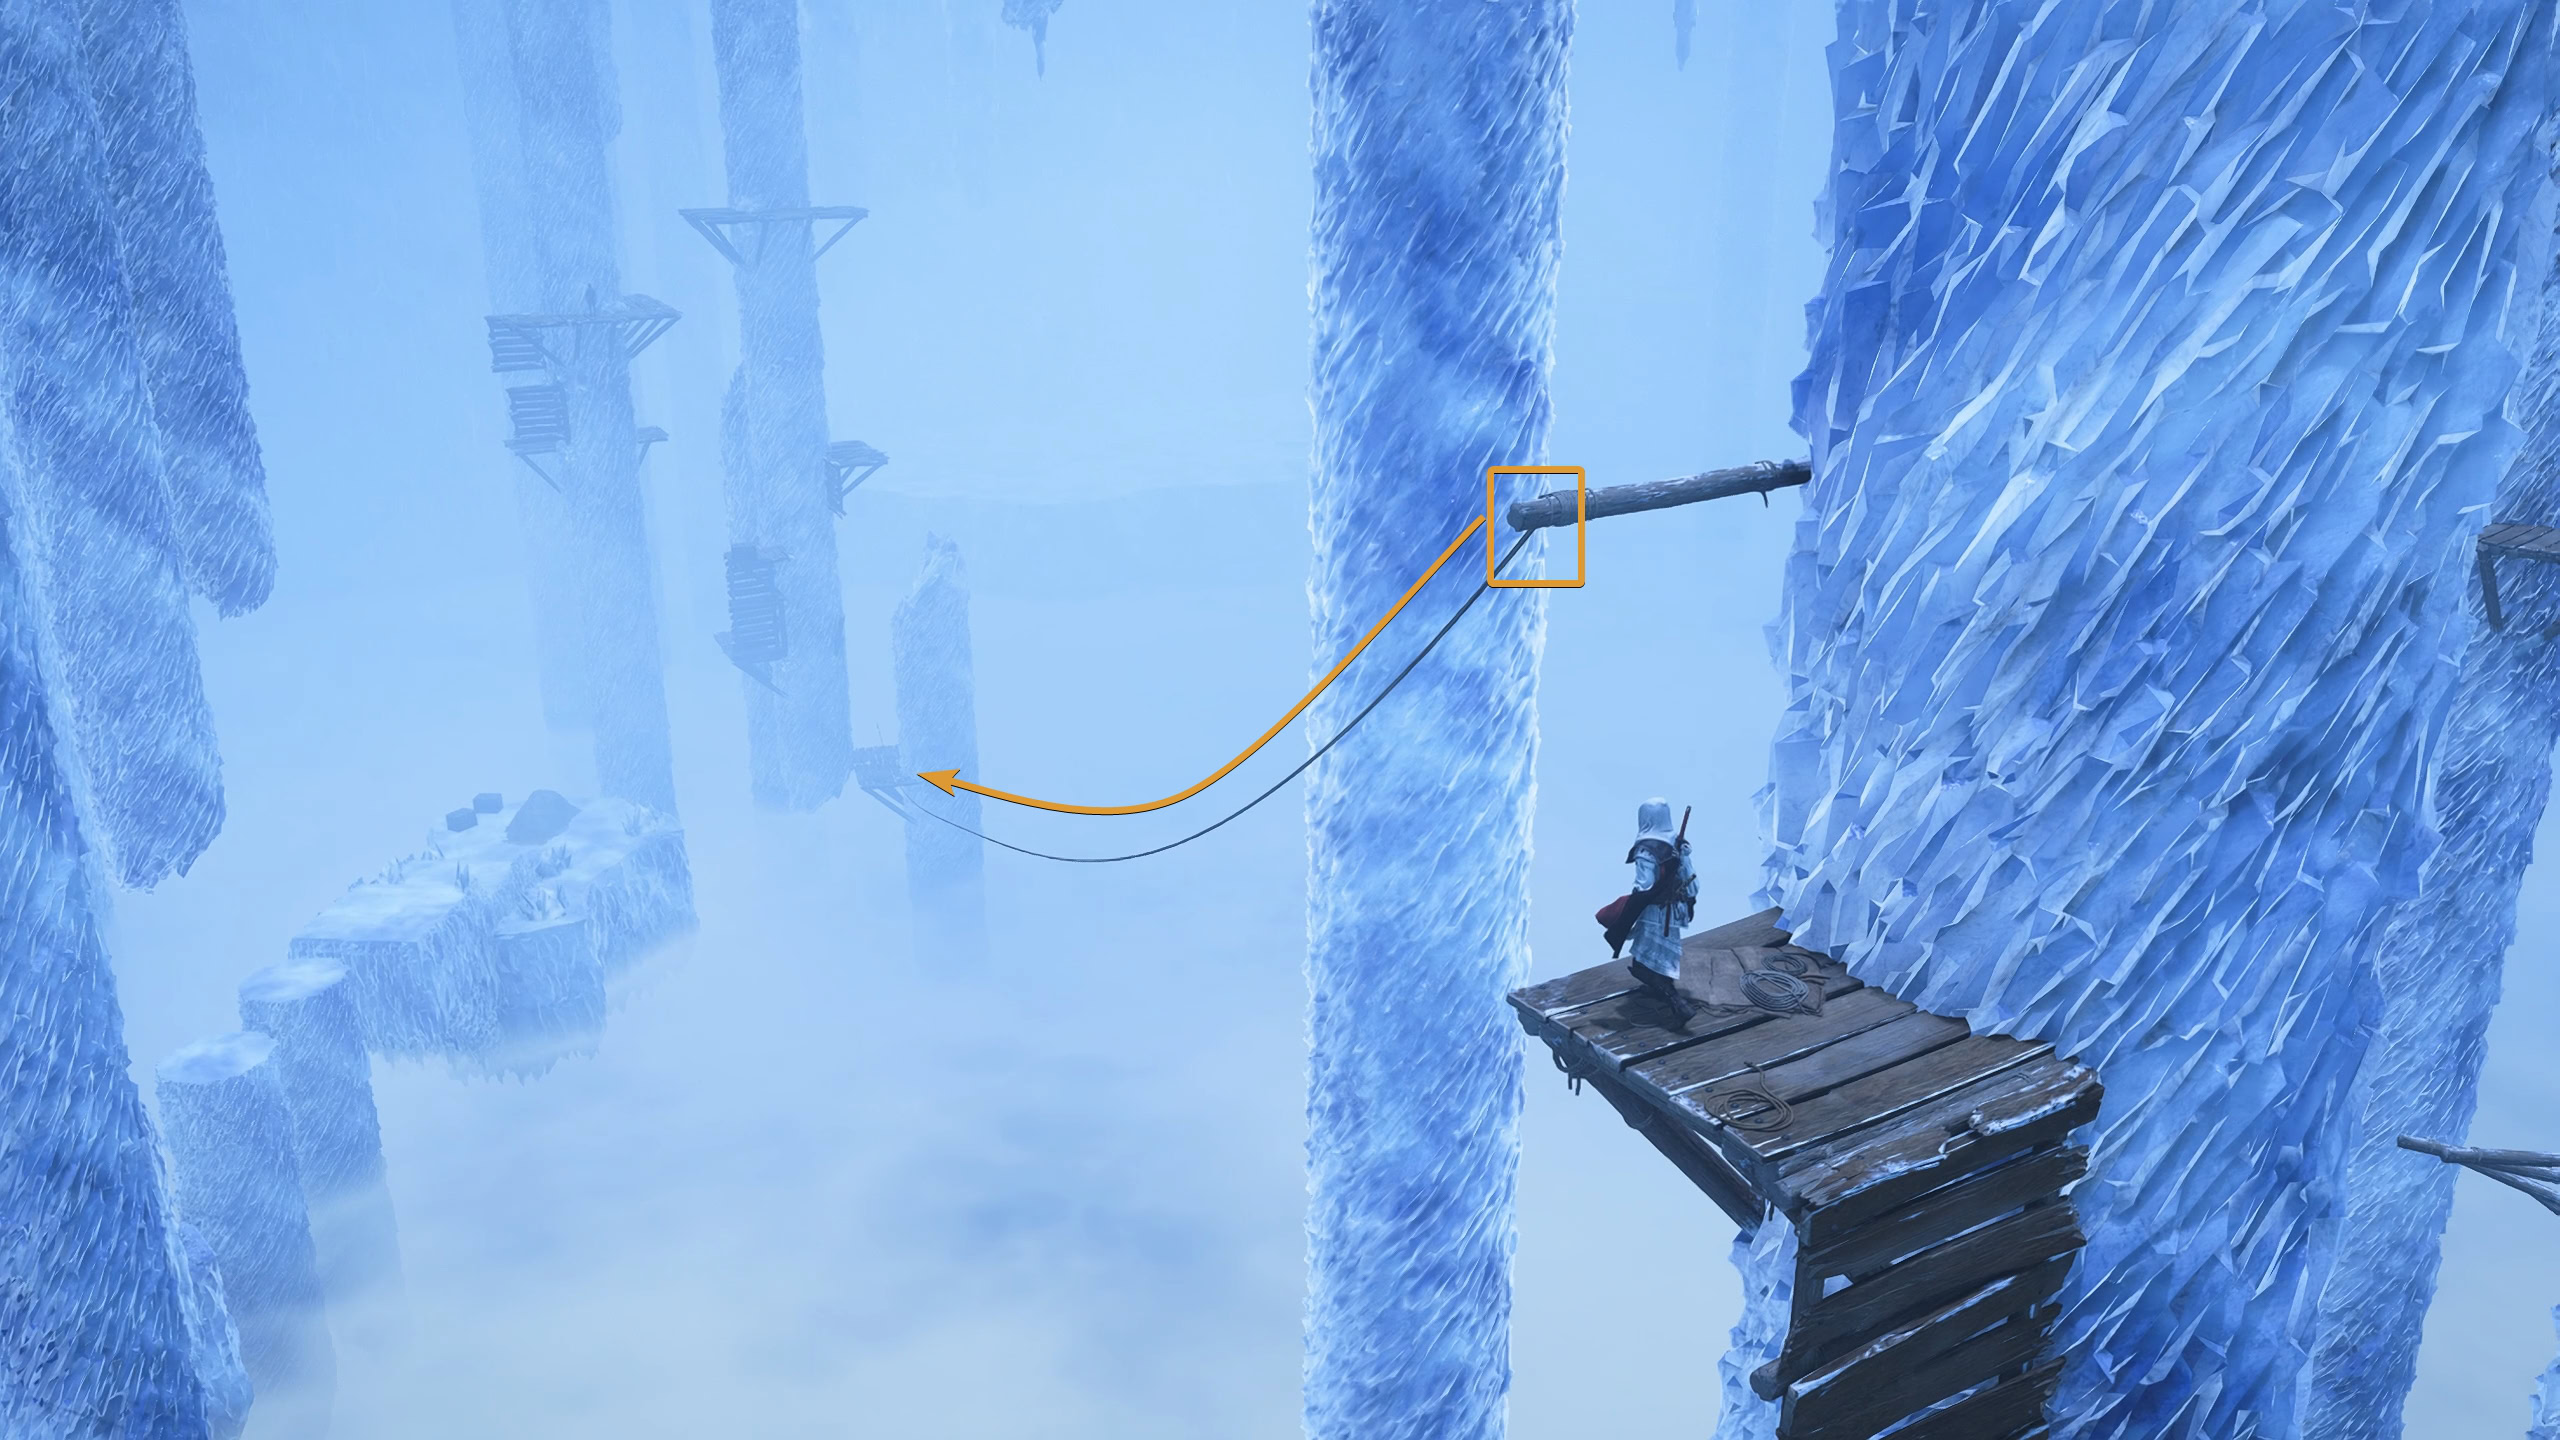
The final area is up ahead where you can see Gautwin being chained up. Swing to the wooden platforms ahead, then swing across the stalactites to reach Gautwin. There’s nothing of value in the area below, you’re not missing anything.
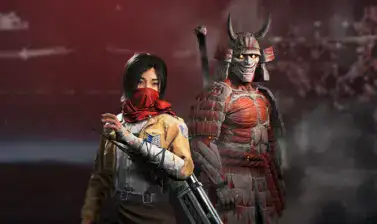
Defeat Lord Albrecht
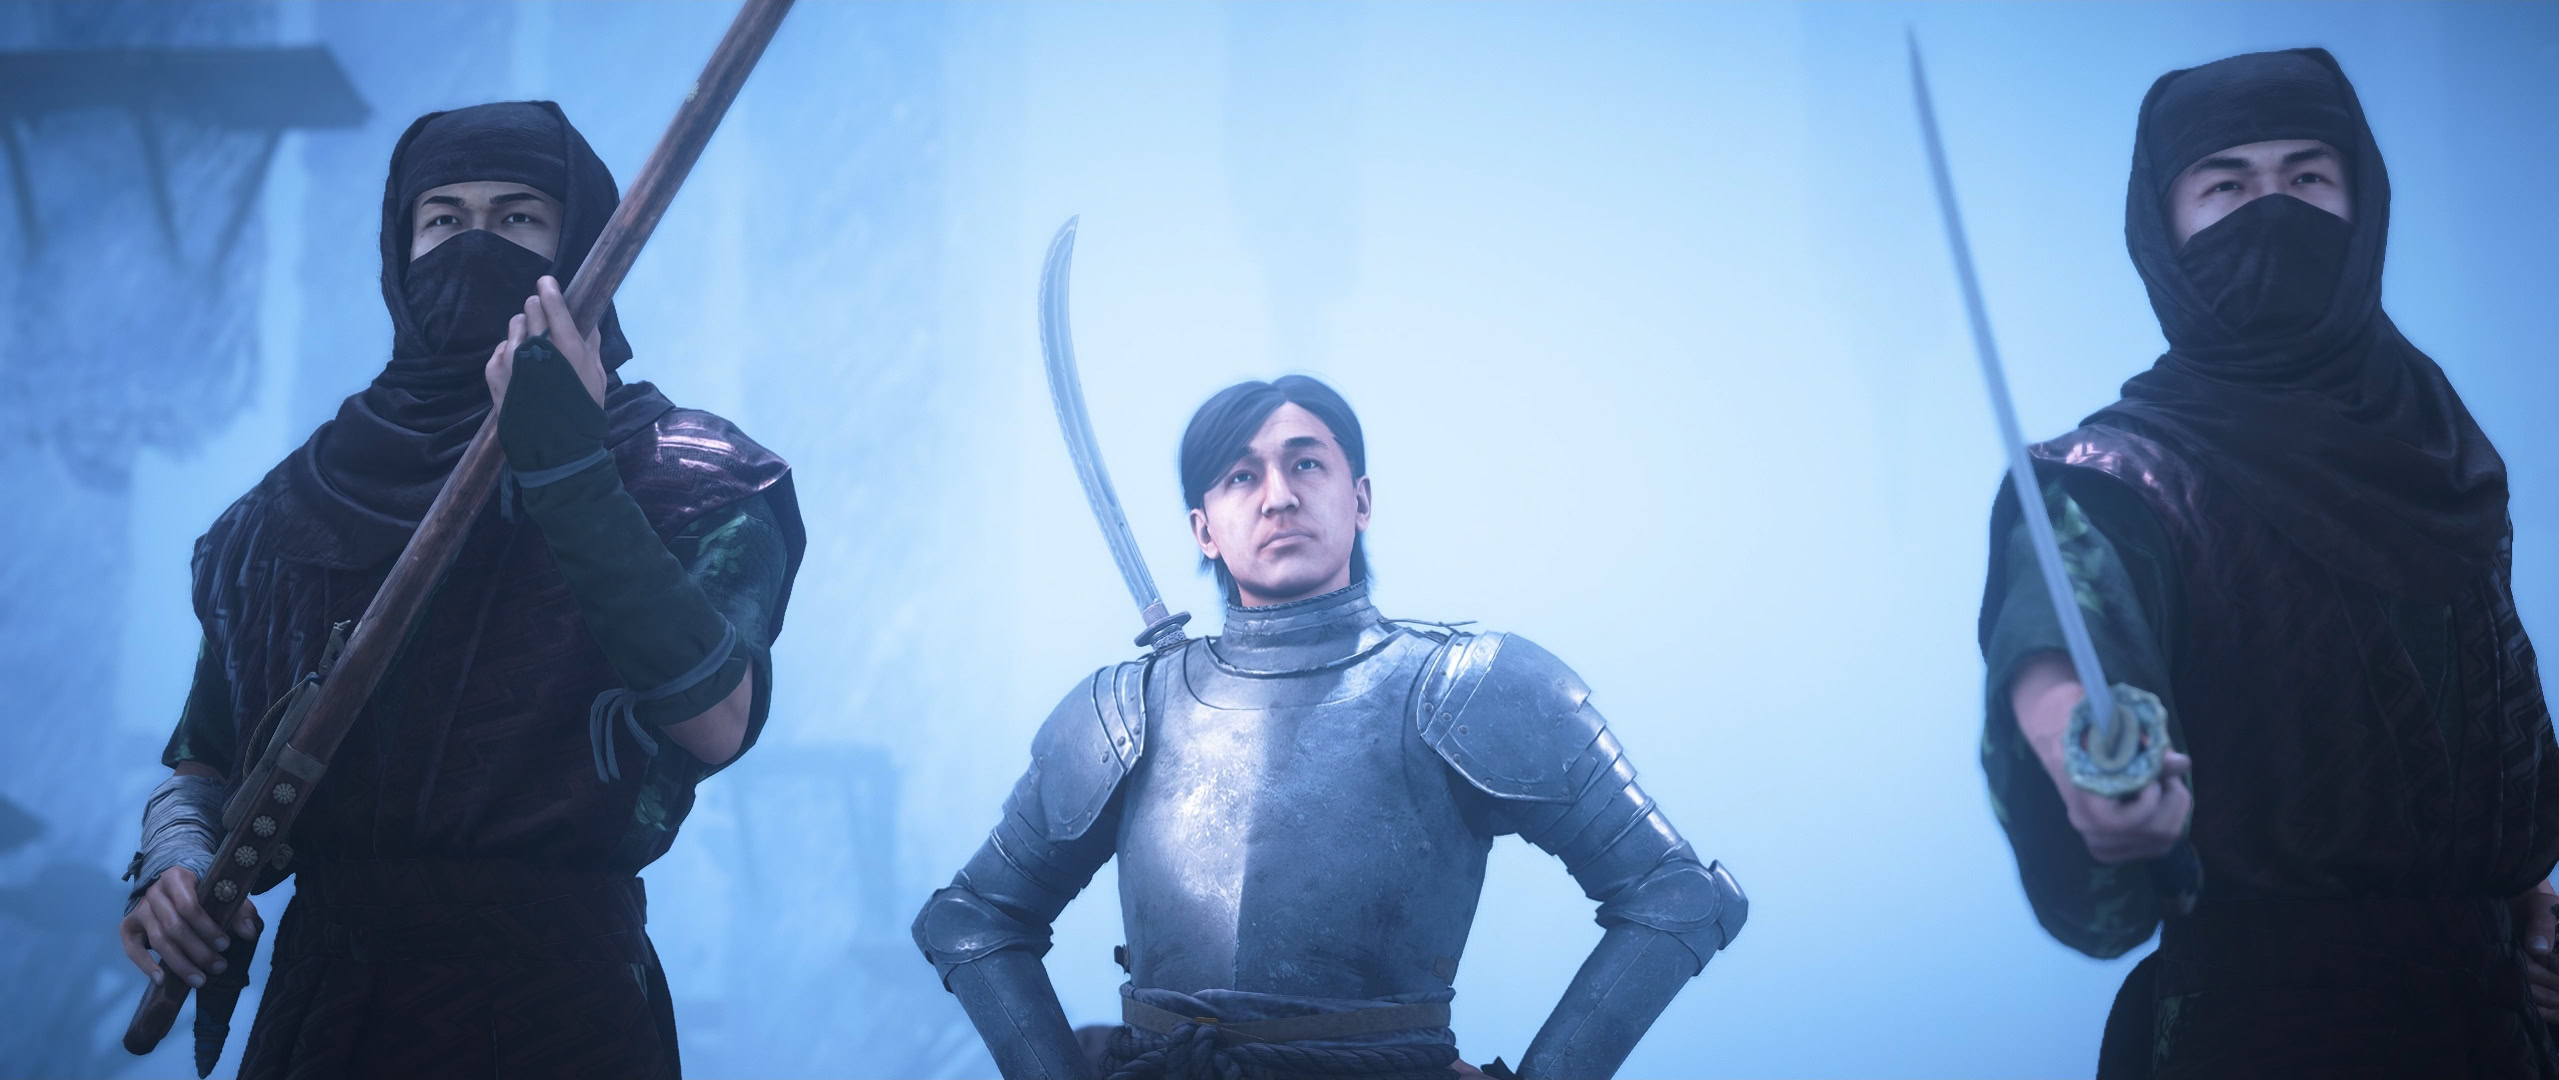
After a cutscene, Ada and Yasuke will catch up. Unfortunately, Lord Albrecht and his men also catch up. From this point on, you’ll be playing as Yasuke as Naoe is helping Ada get Gautwin to safety.
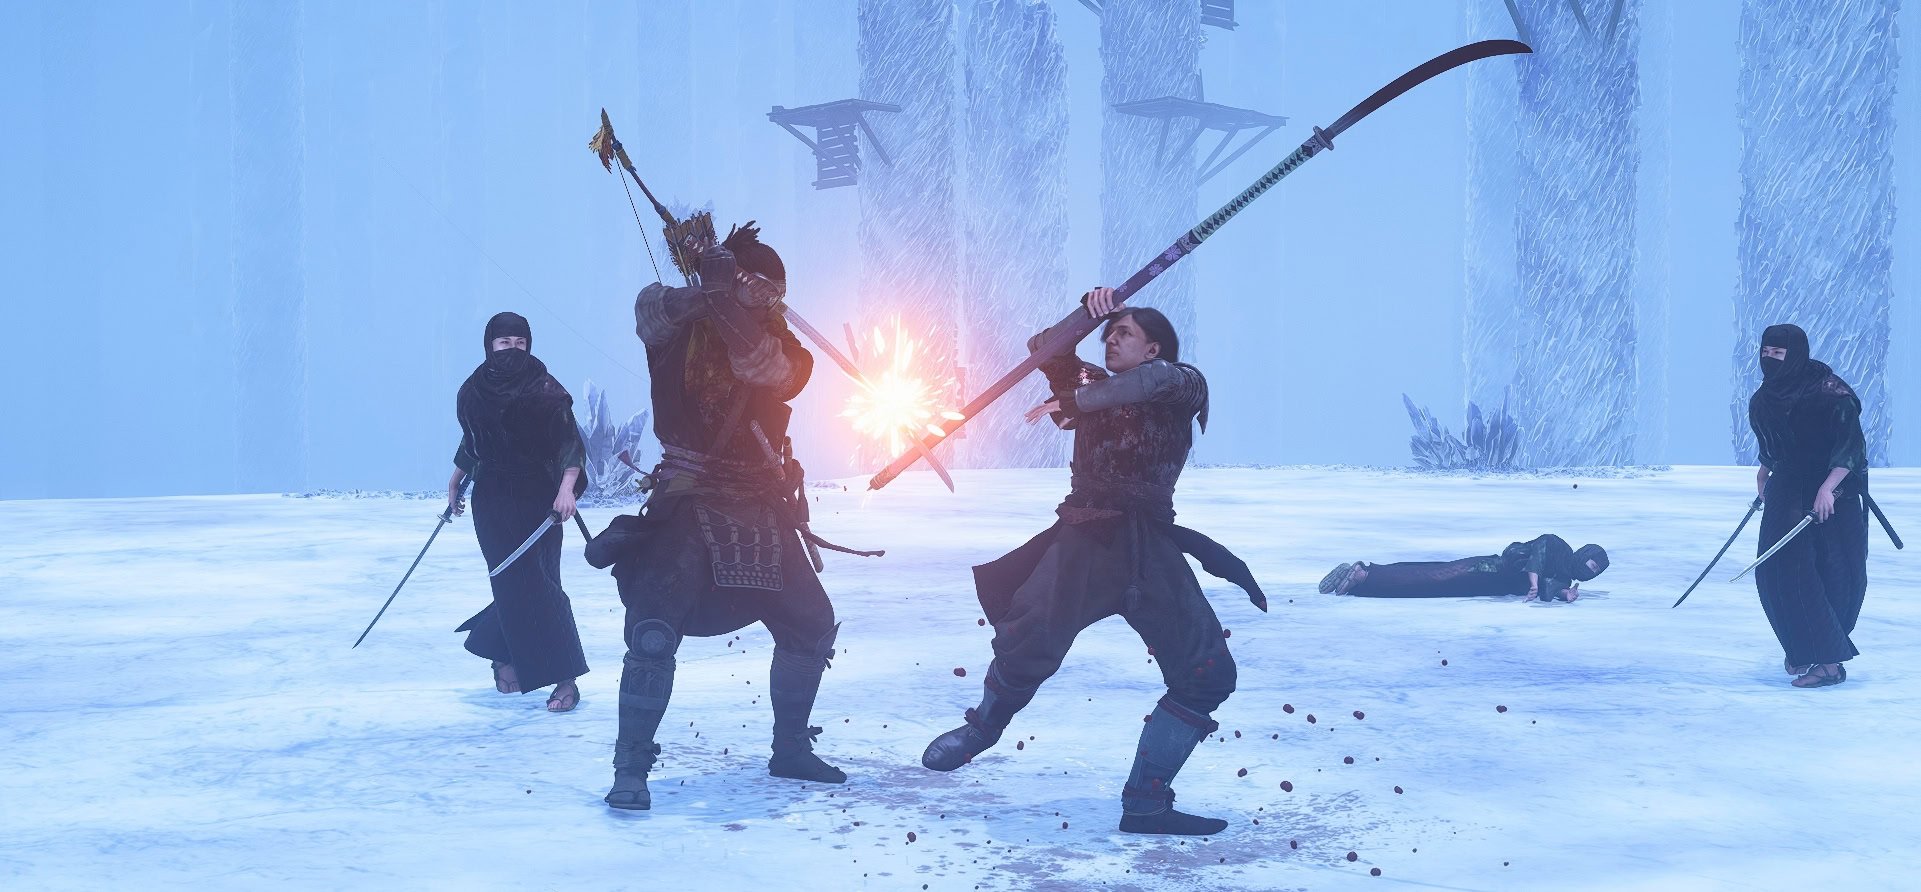
Start by defeating Aldbrecht’s men, focusing on the one with the teppo and explosives first. He’s both annoying and the squishiest one there. Once the fanatics are defeated, Lord Albrecht isn’t very hard to defeat as his combos are very basic despite their flashiness.
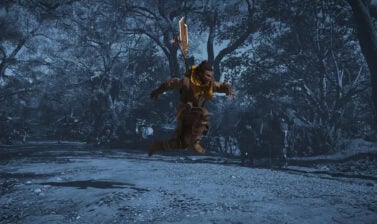
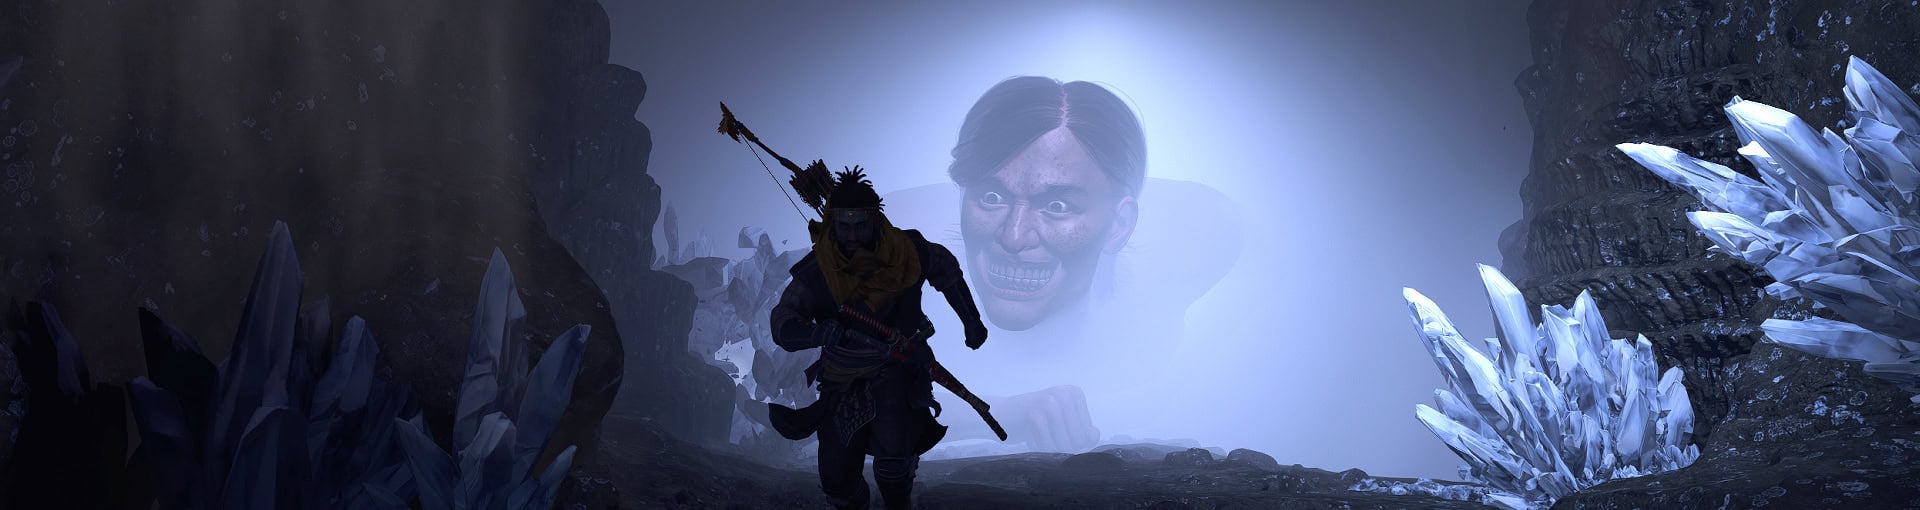
Run away and don’t stop running!
Being a sore loser, Lord Albrecht injects the Titan Serum into himself and becoming a titan in the process. There’s no way you can kill him, all you can do is run.
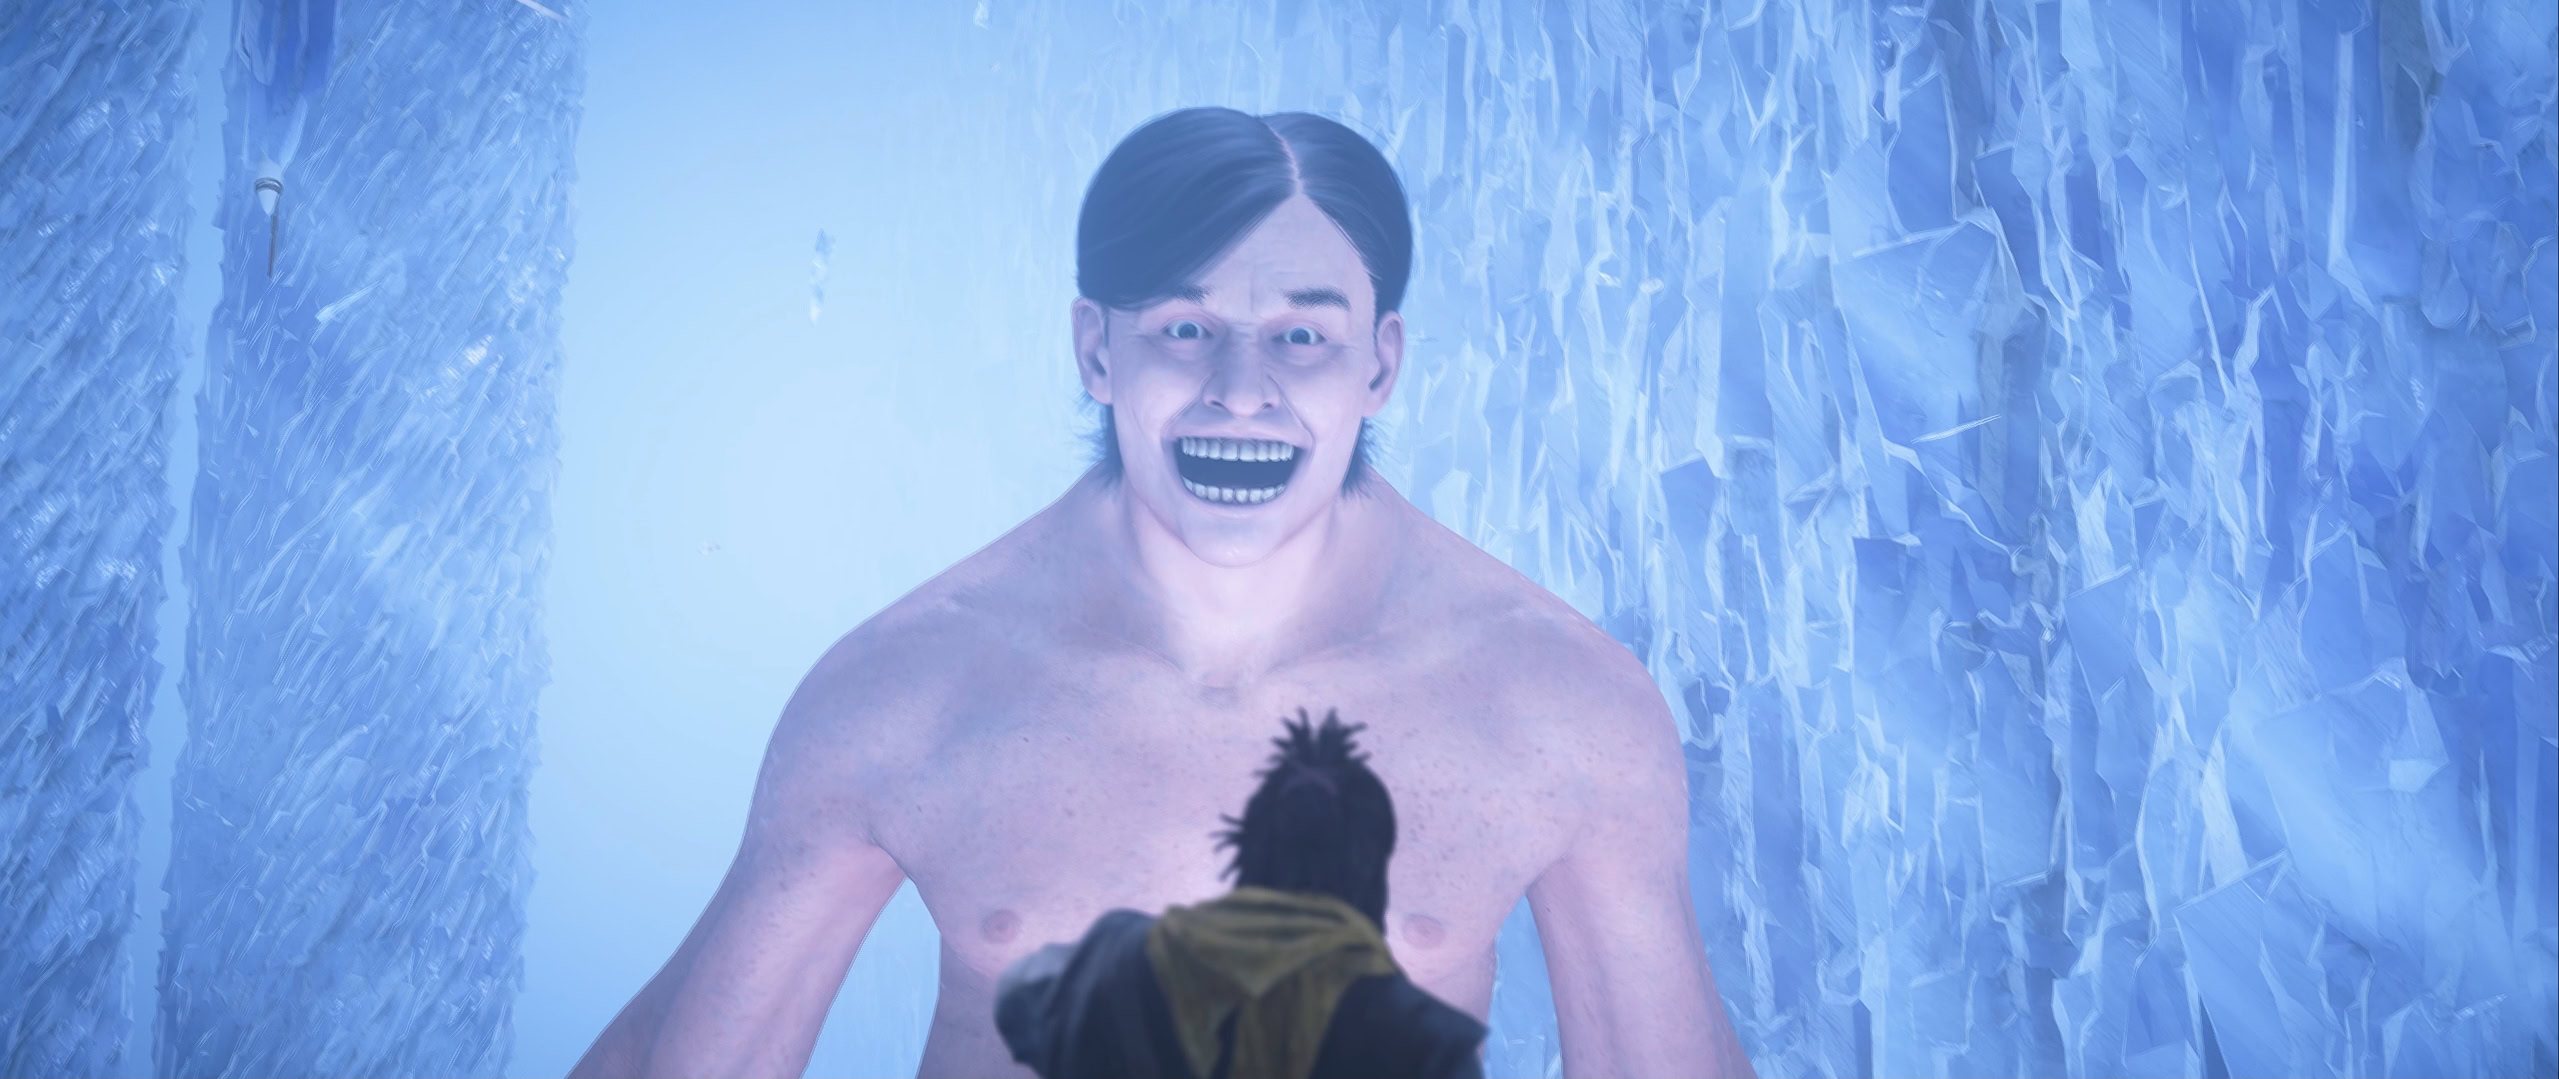
Seriously, do not stop sprinting otherwise you’ll get squashed like a bug. The path ahead is very simple, just jump across any gaps and charge through any paths blocked by crystal walls.
You’ll reach an area where you have to climb along a thin ledge. If you’ve been too slow at this point, this area is a death sentence. Climb along the ledge to the other side and keep running.
The World Outside
After escaping the titan, a cutscene will start with Ada, Gautwin, and Naoe outside. Yasuke narrowly escapes a cave-in and the quest ends after the cutscene. You’ll earn the Cavern Shard Legendary Katana and the Reactive Shell Legendary Engraving for completing the crossover event!
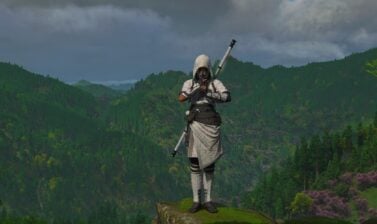
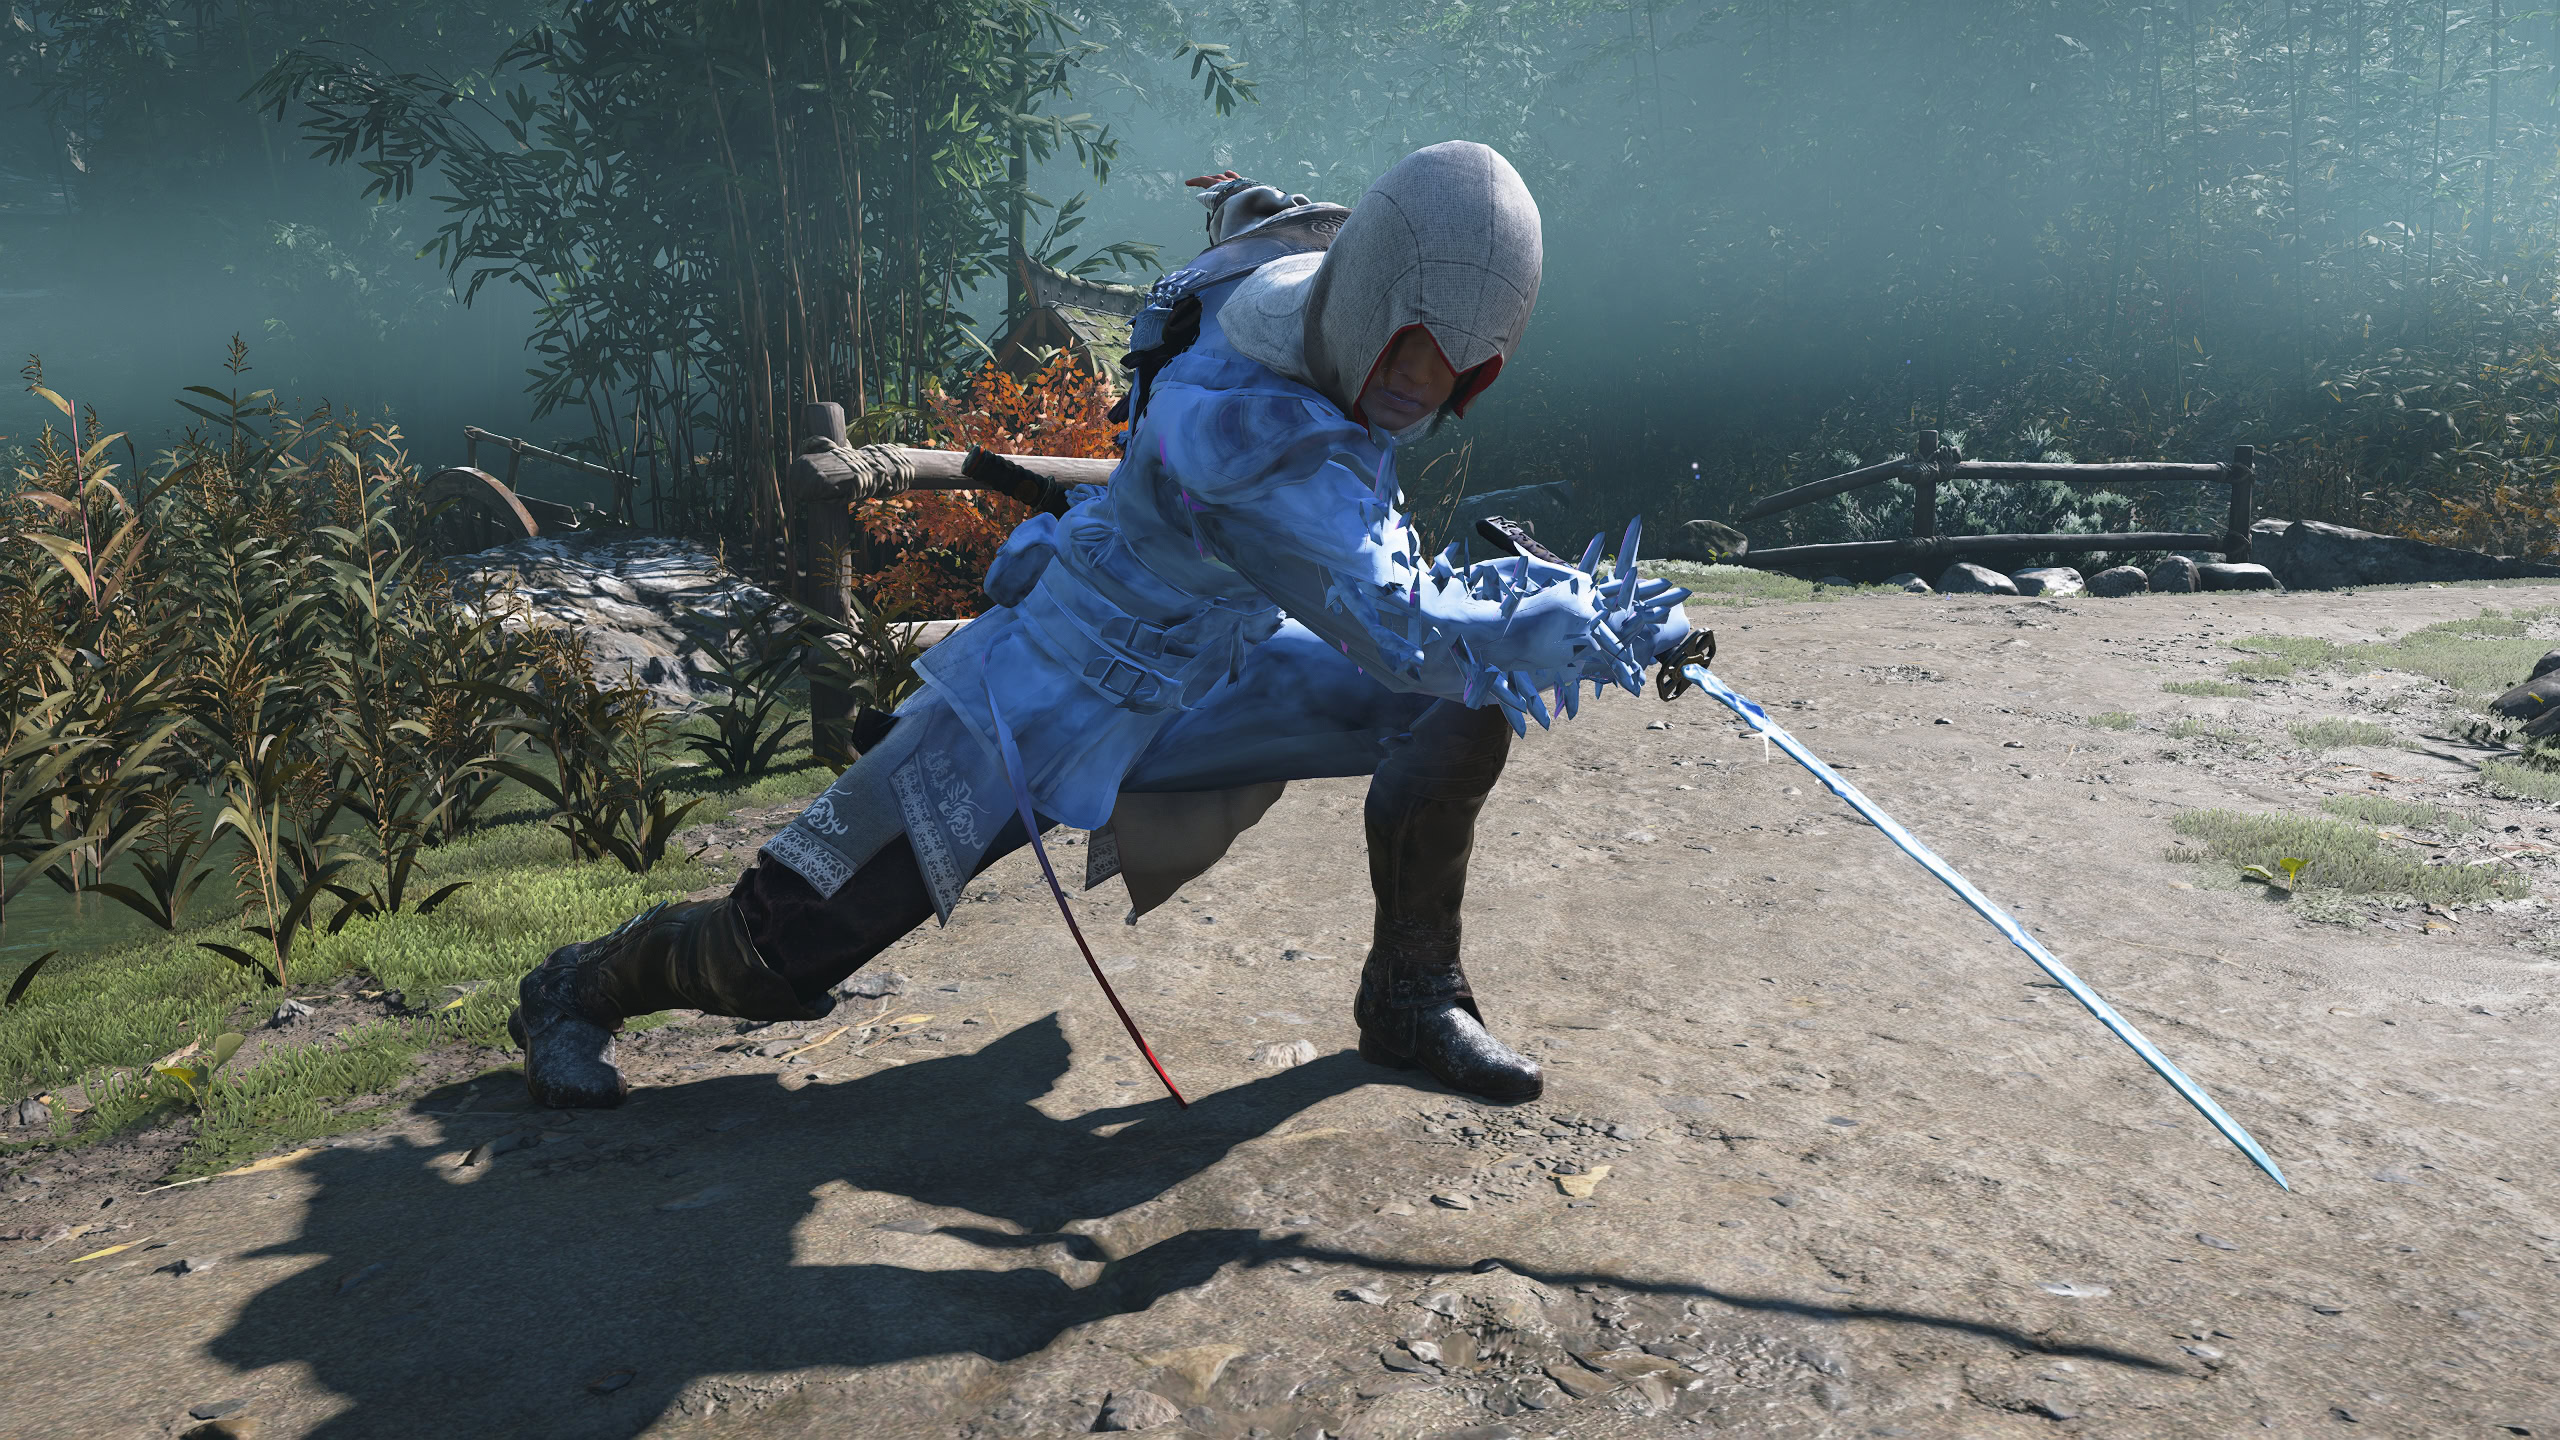
Cavern Shard
Stats Boost
+ Weapon DPS
+ Posture DPS
+ Ability Damage
+ Ability Gain
Engraving

Getting hit while striking makes the attacker’s blow bounce off

While equipped, the Cavern Shard will crystallize Naoe’s right arm and part of her torso. It’s just a visual effect has has no effect on gameplay.
Decorations
Now let’s take a look at all of the decorations you should have been gathering throughout these quests. You got four banners that represent the Training Corps, Garrison, Military Police, and Scout Regiment from Attack on Titan.
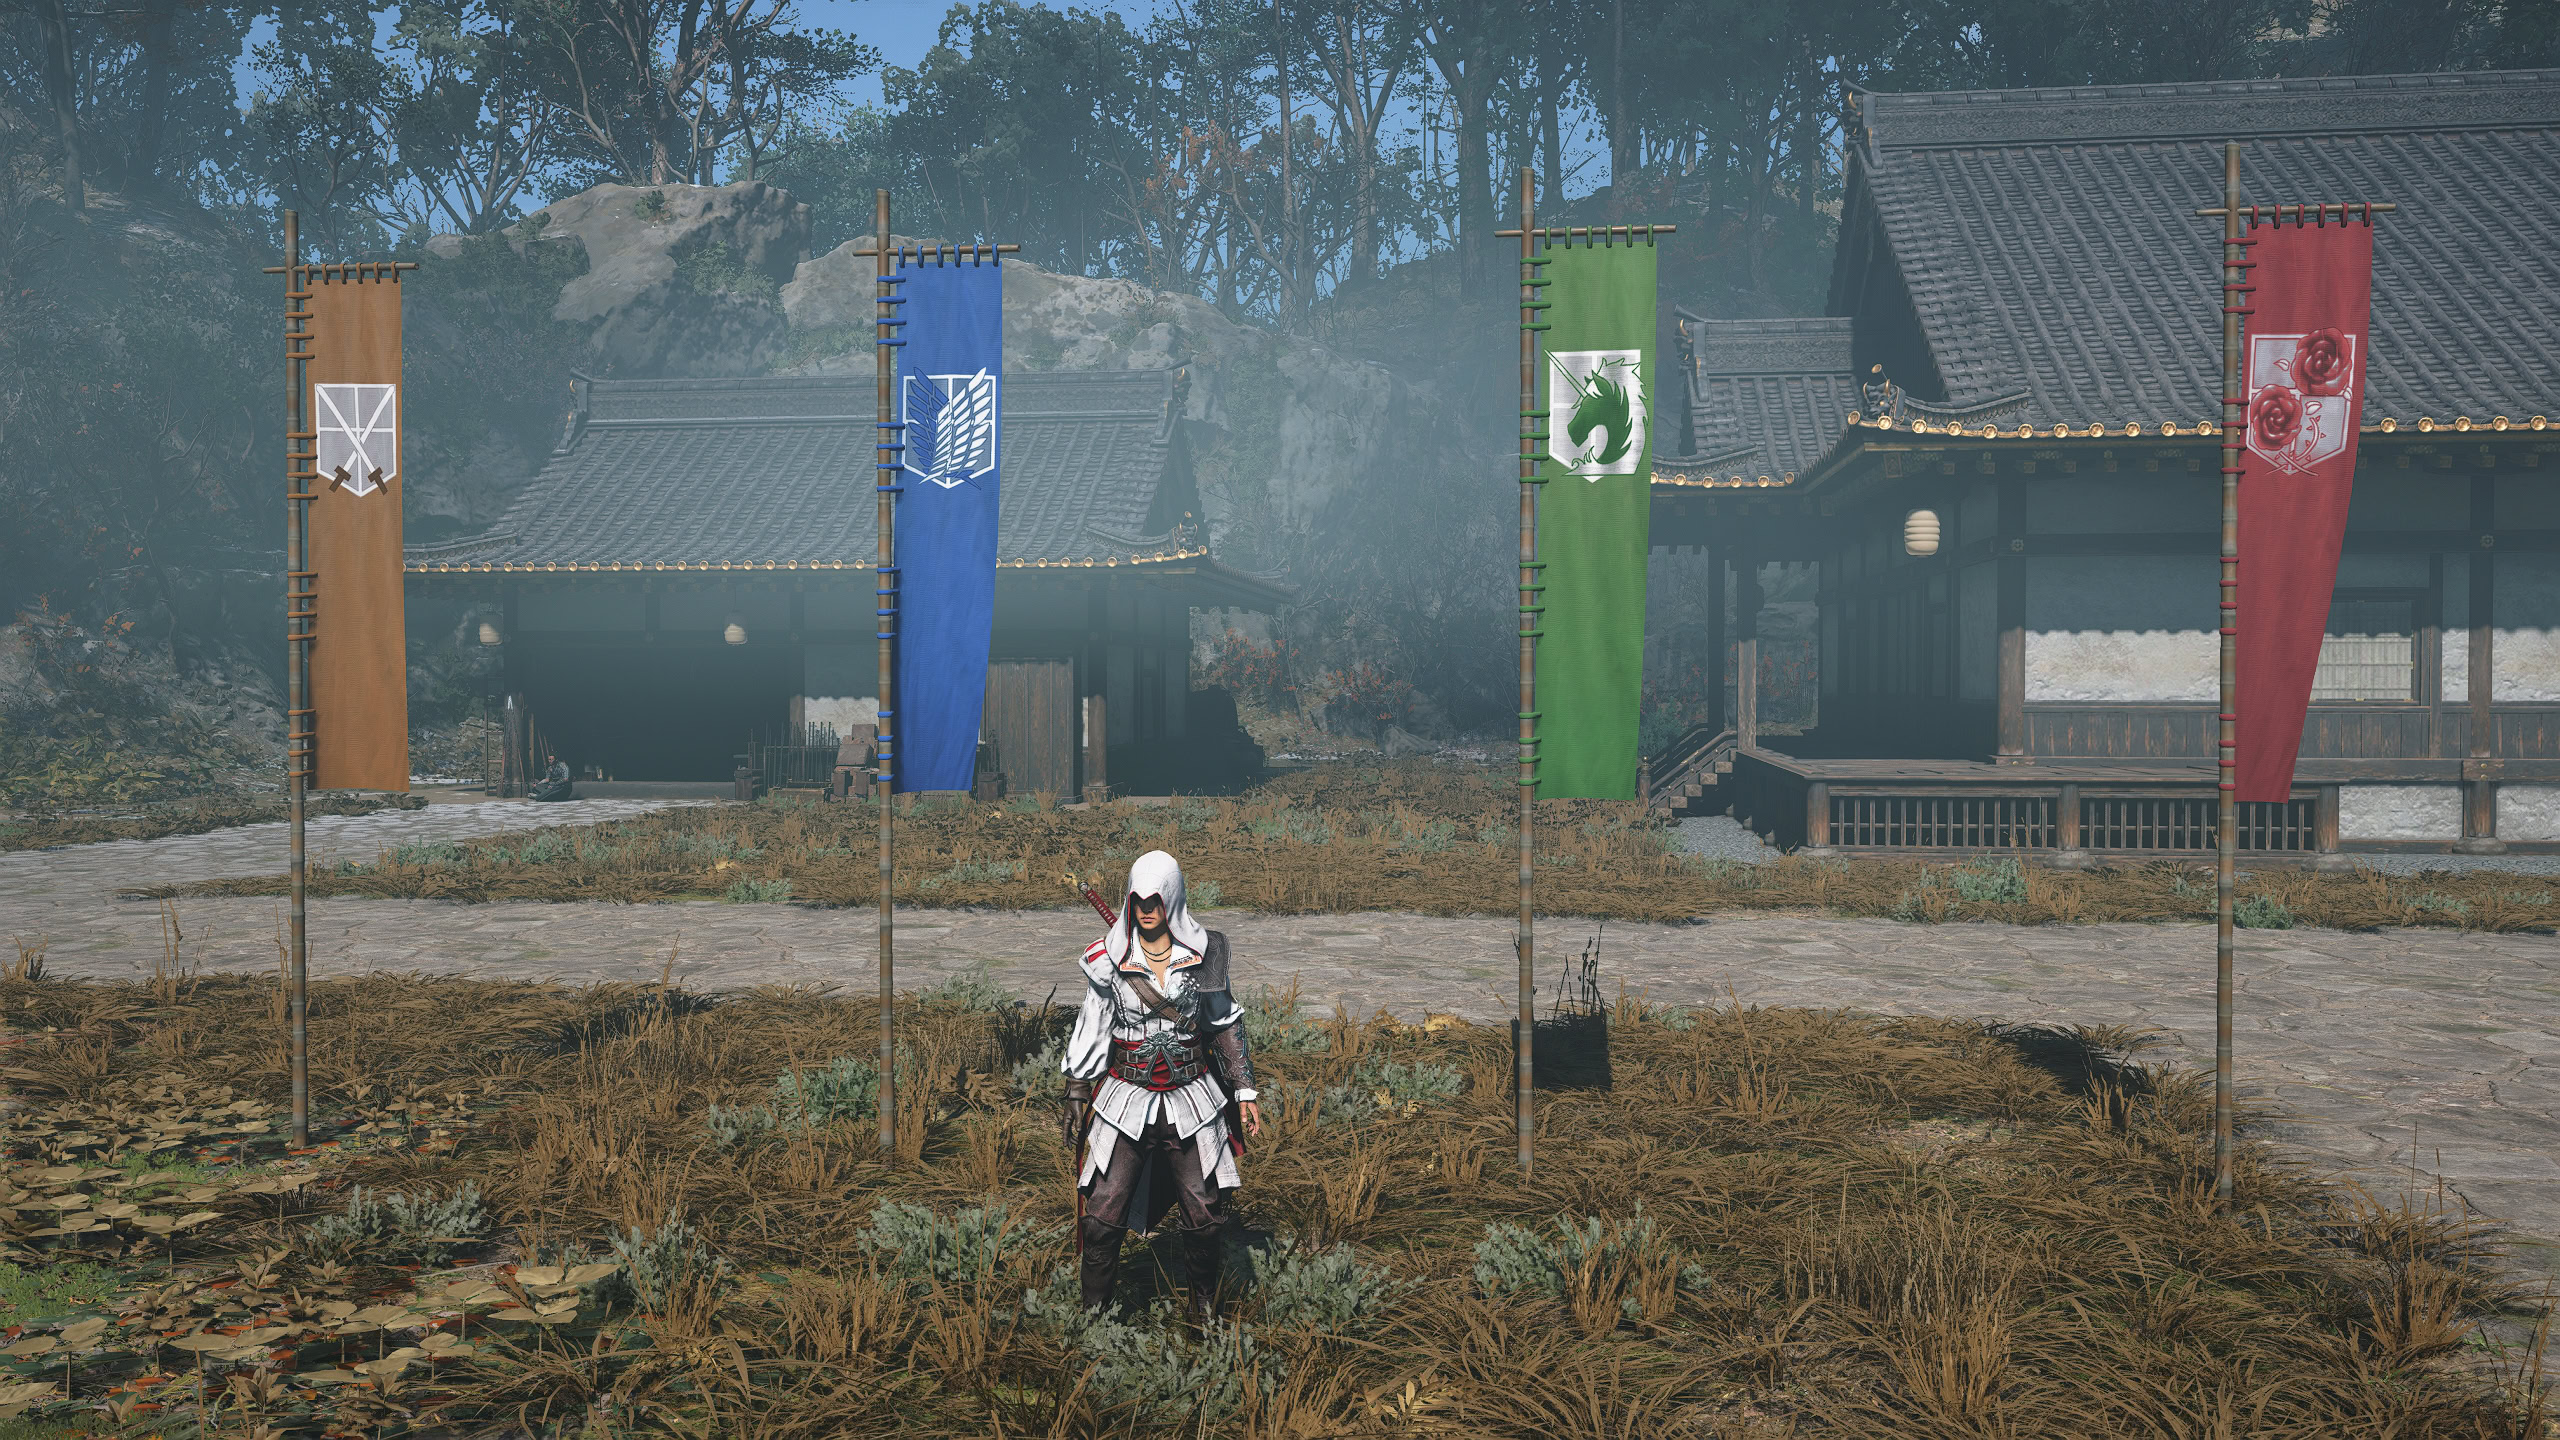
You also have that crystal statue of what appears to be Eren Yeager’s titan form. That’s about it for the decorations, be sure to get them all before the event ends as you won’t get another chance!