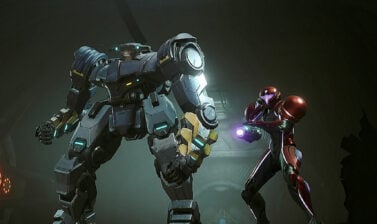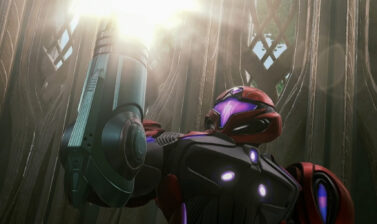
Learn how to control Samus Aran in Metroid Prime 4: Beyond! This guide includes the default control schemes, information on how to modify the controls to your liking, and goes over setups for JoyCons, Pro Controller, and Mouse Controls.
Table of contents
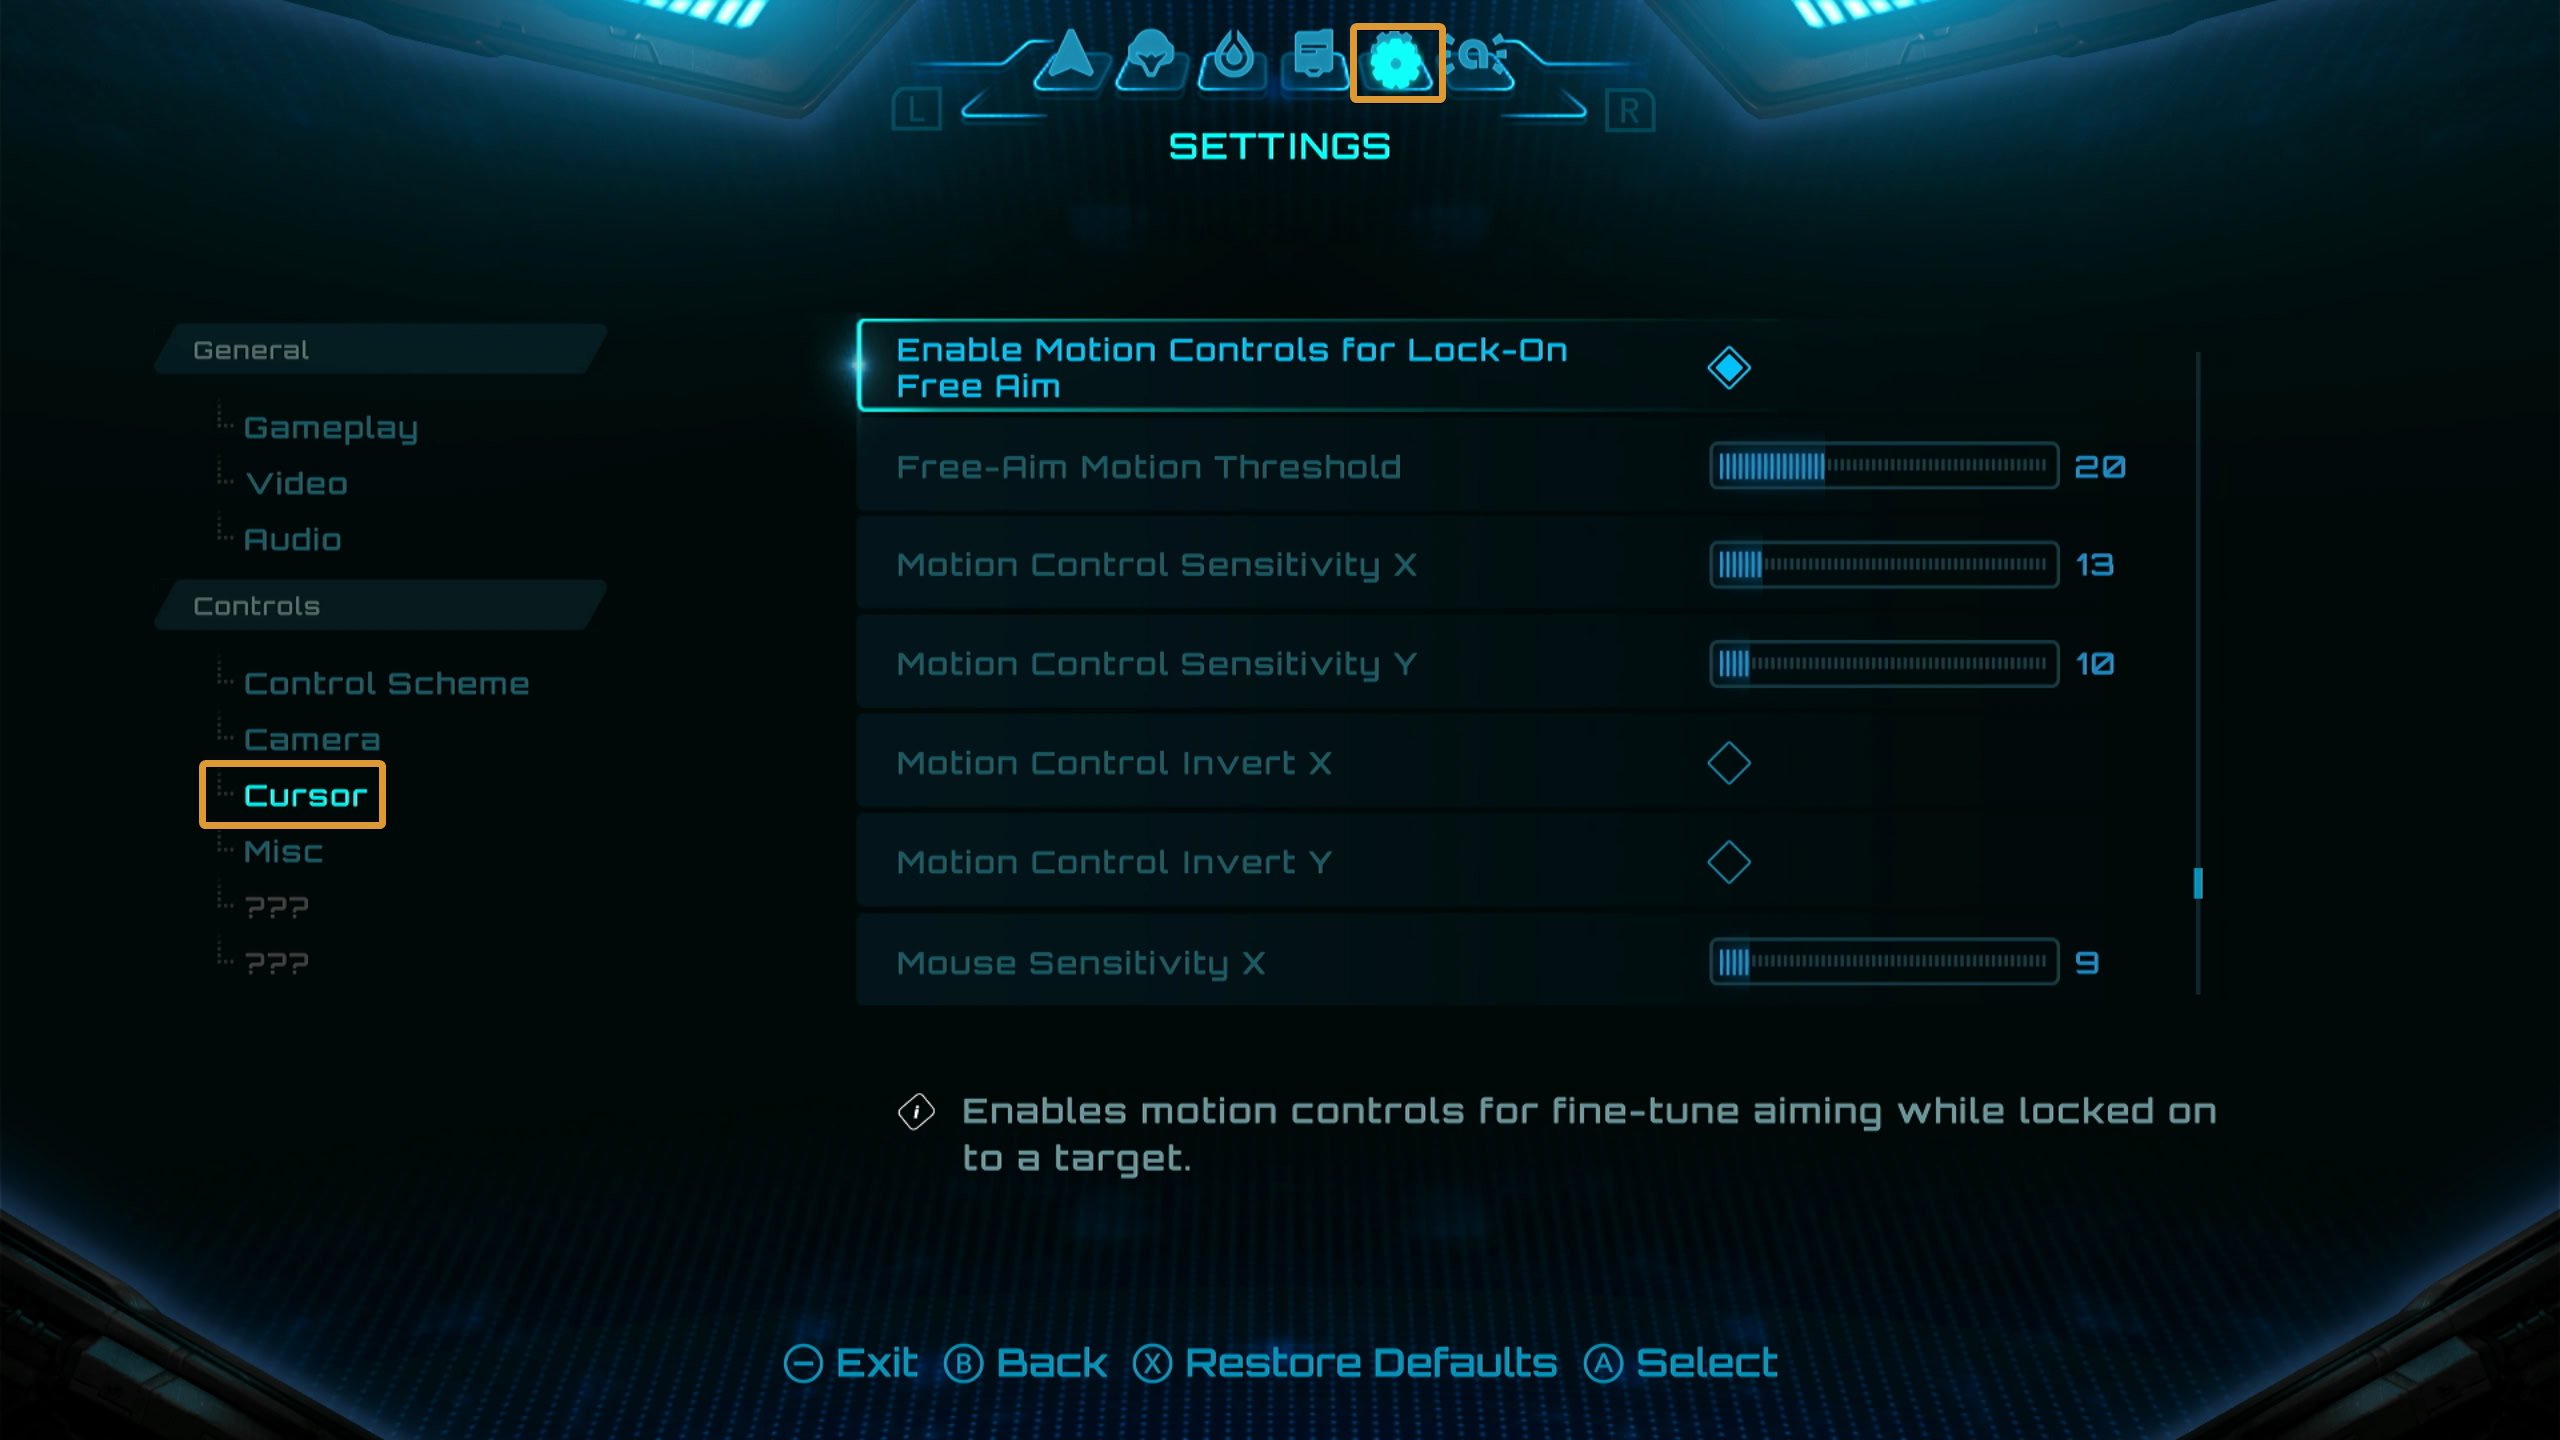
How to access the Control Settings
To access the Control Settings, press the – button on your controller while you’re in-game. You cannot change the controls from the Settings option in the Main Menu.
Use L or R to swap tabs and select the Settings tab as seen by the Gear Symbol. Look for Controls and select which setting you want to change. You can modify your Control Scheme, Camera Settings, Cursor Settings, and Misc.

Changing Control Schemes
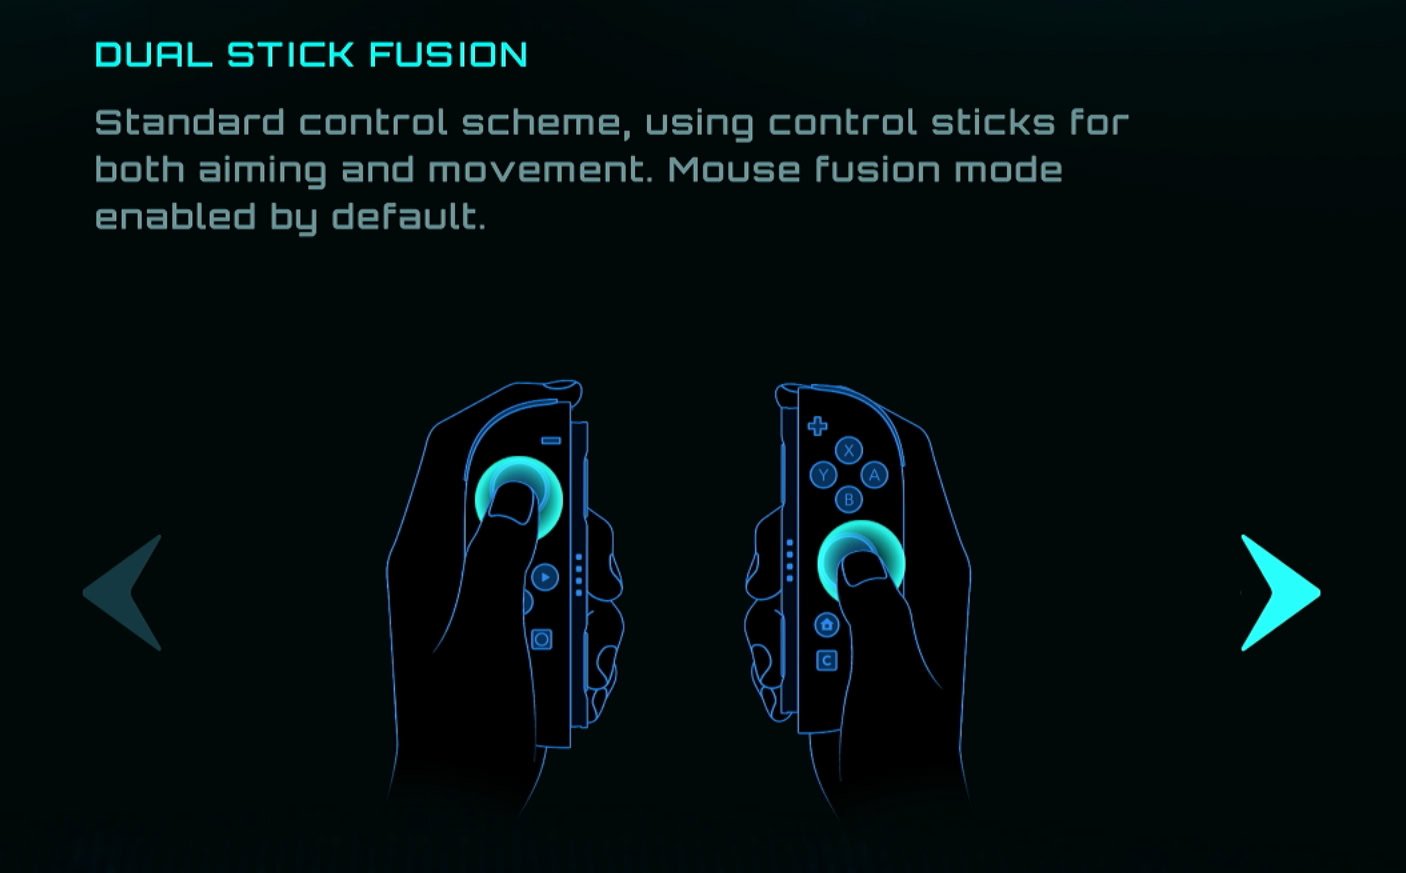
There are two Control Schemes available in Metroid Prime 4. These are Dual Stick Fusion and Pointer Fusion. If you’re looking for a control setup similar to other FPS games that use a gamepad, use Dual Stick Fusion. If you liked the controls of Metroid Prime 3, use Pointer Fusion.
Use the Left Stick or Directional Buttons/D-Pad to choose your scheme, and press A to View or Edit your Controls. In this menu, you can view all of your currently accessible controls.
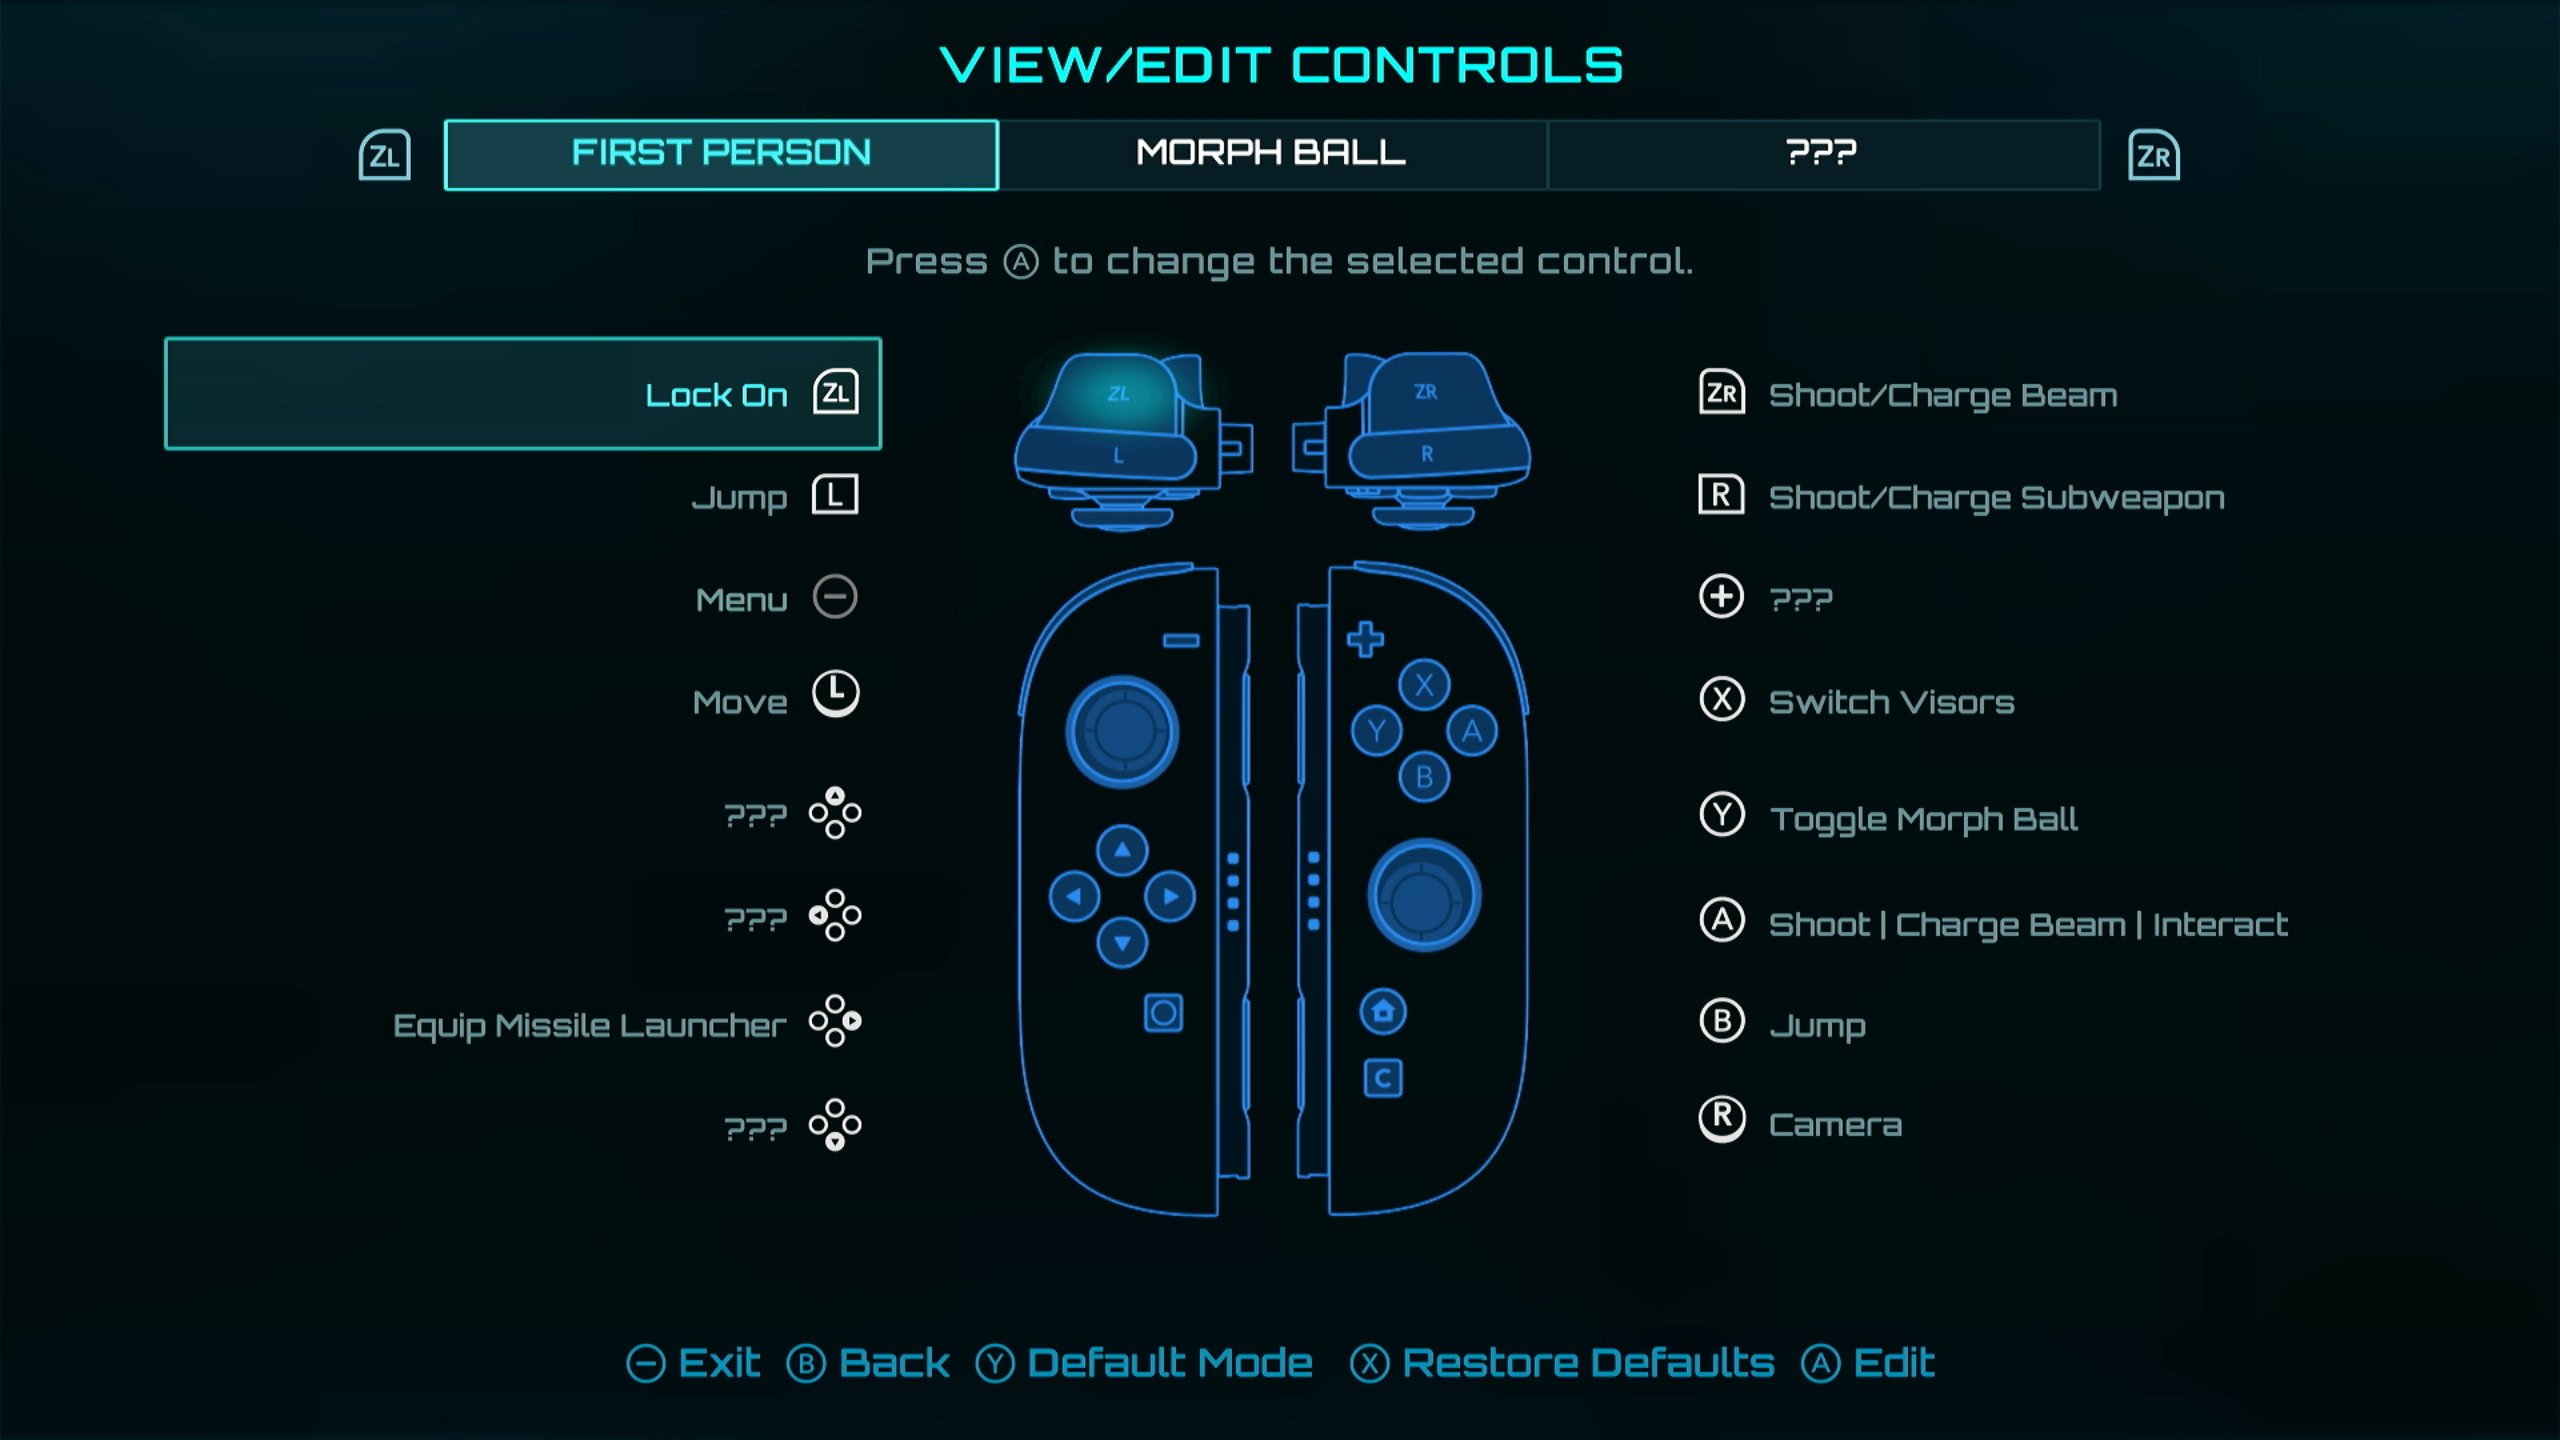
You can edit what each input does with the A button and swap the action with another button’s action. This will swap the two and should you want to revert it, press Y to change that one input to it’s default. To reset everything, press X to restore all buttons to their default.
The Menu button cannot be remapped. By pressing Y while in this menu, you can enter Advanced Mode. This allows you to swap controls with the ??? Action. It’s probably best to leave these be until you unlock the abilities and the ??? Actions become known.
Dual Stick Fusion
This should be your default control scheme when using your Joy-Cons whether they’re detached or connected to your Joy-Con Grip. It’s also what you should be for standard controllers such as the Nintendo Switch Pro Controller.
First Person
| Action | Button | Type | Dual Stick First Person |
|---|---|---|---|
| Lock On | ZL | Hold | Dual Stick First Person |
| Jump | L | Tap | Dual Stick First Person |
| Menu | – | Tap | Dual Stick First Person |
| Move | Left Stick | Tap | Dual Stick First Person |
| Psychic Lasso | Left Stick | Tap | Dual Stick First Person |
| Equip Ice Shot | ▲ | Tap | Dual Stick First Person |
| Equip Thunder Shot | ◀ | Dual Stick First Person | |
| Equip Missile Launcher | ▶ | Tap | Dual Stick First Person |
| Equip Fire Shot | ▼ | Tap | Dual Stick First Person |
| Shoot/Charge Beam | ZR | Tap/Hold | Dual Stick First Person |
| Shoot/Charge Subweapon | R | Tap/Hold | Dual Stick First Person |
| Toggle Vi-O-La | + | Tap | Dual Stick First Person |
| Switch Visors | X | Tap | Dual Stick First Person |
| Toggle Morph Ball | Y | Tap | Dual Stick First Person |
| Shoot | Charge Beam | Interact | A | Tap | Hold | Tap | Dual Stick First Person |
| Jump | B | Tap | Dual Stick First Person |
| Camera | Right Stick | Dual Stick First Person | |
| Reset Camera or Cursor | Right Stick | Tap | Dual Stick First Person |
Morph Ball
| Action | Button | Type | Dual Stick First Person |
|---|---|---|---|
| Psychic Spider Ball | ZL | Dual Stick Morph Ball | |
| Boost Ball | L | Hold | Dual Stick Morph Ball |
| Menu | – | Tap | Dual Stick Morph Ball |
| Move | Left Stick | Dual Stick Morph Ball | |
| FREE | ▲ | Dual Stick Morph Ball | |
| FREE | ◀ | Dual Stick Morph Ball | |
| FREE | ▶ | Dual Stick Morph Ball | |
| FREE | ▼ | Dual Stick Morph Ball | |
| Bomb | ZR | Tap | Dual Stick Morph Ball |
| Psychic Power Bomb | R | Dual Stick Morph Ball | |
| Toggle Vi-O-La | + | Tap | Dual Stick Morph Ball |
| Spring Ball | X | Tap | Dual Stick Morph Ball |
| Bomb | A | Tap | Dual Stick Morph Ball |
| Boost Ball | B | Hold | Dual Stick Morph Ball |
| Camera | Right Stick | Dual Stick Morph Ball |
Vi-O-La
| Action | Button | Type | Dual Stick First Person |
|---|---|---|---|
| Brake | Scan | ZL | Hold | Dual Stick Vi-O-La |
| Brake | L | Hold | Dual Stick Vi-O-La |
| Menu | – | Tap | Dual Stick Vi-O-La |
| Move | Left Stick | Dual Stick Vi-O-La | |
| ??? | ▲ | Dual Stick Vi-O-La | |
| ??? | ◀ | Dual Stick Vi-O-La | |
| ??? | ▶ | Dual Stick Vi-O-La | |
| Toggle Minimap | ▼ | Tap | Dual Stick Vi-O-La |
| Accelerate | ZR | Hold | Dual Stick Vi-O-La |
| Accelerate | R | Hold | Dual Stick Vi-O-La |
| Toggle Vi-O-La | + | Tap | Dual Stick Vi-O-La |
| Switch Visors | X | Tap | Dual Stick Vi-O-La |
| FREE | Y | Dual Stick Vi-O-La | |
| Fire Projectile | A | Tap/Hold | Dual Stick Vi-O-La |
| Boost | B | Tap | Dual Stick Vi-O-La |
| Power Slide | B | Double Tap | Dual Stick Vi-O-La |
| Camera | Right Stick | Dual Stick Vi-O-La |
Pointer Fusion
If you want a more immersive experience, the Pointer Fusion control scheme is for you! This offers motion controls similar to Metroid Prime 3: Corruption. You use your right Joy-Con to aim and turn around with gyro aiming.

If you’re using a gamepad such as a Pro Controller, you can use gyro aiming to aim and turn as well. Using the gamepad this way can be a tad odd. If you want to turn left or right sharply, you need to rotate your gamepad as if you were steering a car.
First Person
| Action | Button | Type | Dual Stick First Person |
|---|---|---|---|
| Lock On | ZL | Hold | Pointer First Person |
| Jump | L | Tap | Pointer First Person |
| Menu | – | Tap | Pointer First Person |
| Move | Left Stick | Pointer First Person | |
| Psychic Lasso | Left Joy-Con | Motion Control | Pointer First Person |
| Equip Ice Shot | ▲ | Tap | Pointer First Person |
| Equip Thunder Shot | ◀ | Pointer First Person | |
| Equip Missile Launcher | ▶ | Tap | Pointer First Person |
| Equip Fire Shot | ▼ | Tap | Pointer First Person |
| Reset Camera or Cursor | ZR | Tap/Hold | Pointer First Person |
| Shoot/Charge Subweapon | R | Tap/Hold | Pointer First Person |
| Toggle Vi-O-La | + | Tap | Pointer First Person |
| Switch Visors | X | Tap | Pointer First Person |
| Toggle Morph Ball | Y | Tap | Pointer First Person |
| Shoot | Charge Beam | Interact | A | Tap | Hold | Tap | Pointer First Person |
| Jump | B | Tap | Pointer First Person |
| NONE | Right Stick | Pointer First Person |
Morph Ball
| Action | Button | Type | Dual Stick First Person |
|---|---|---|---|
| Psychic Spider Ball | ZL | Pointer Morph Ball | |
| Boost Ball | L | Hold | Pointer Morph Ball |
| Menu | – | Tap | Pointer Morph Ball |
| Move | Left Stick | Pointer Morph Ball | |
| FREE | ▲ | Pointer Morph Ball | |
| FREE | ◀ | Pointer Morph Ball | |
| FREE | ▶ | Pointer Morph Ball | |
| FREE | ▼ | Pointer Morph Ball | |
| Reset Camera or Cursor | ZR | Tap/Hold | Pointer Morph Ball |
| Psychic Power Bomb | R | Pointer Morph Ball | |
| Toggle Vi-O-La | + | Tap | Pointer Morph Ball |
| X | Spring Ball | Tap | Pointer Morph Ball |
| Y | Toggle Morph Ball | Tap | Pointer Morph Ball |
| Bomb | A | Tap | Pointer Morph Ball |
| Boost Ball | B | Hold | Pointer Morph Ball |
| NONE | Right Stick | Pointer Morph Ball |
Vi-O-La
| Action | Button | Type | Dual Stick First Person |
|---|---|---|---|
| Brake | Scan | ZL | Hold | Pointer Vi-O-La |
| Brake | L | Hold | Pointer Vi-O-La |
| Menu | – | Tap | Pointer Vi-O-La |
| Move | Left Stick | Pointer Vi-O-La | |
| ??? | ▲ | Pointer Vi-O-La | |
| ??? | ◀ | Pointer Vi-O-La | |
| ??? | ▶ | Pointer Vi-O-La | |
| Toggle Minimap | ▼ | Tap | Pointer Vi-O-La |
| Reset Camera or Cursor | ZR | Tap/Hold | Pointer Vi-O-La |
| Fire Projectile | R | Tap/Hold | Pointer Vi-O-La |
| Toggle Vi-O-La | + | Tap | Pointer Vi-O-La |
| Switch Visors | X | Tap | Pointer Vi-O-La |
| FREE | Y | Pointer Vi-O-La | |
| Accelerate | A | Tap | Pointer Vi-O-La |
| Boost | B | Tap | Pointer Vi-O-La |
| Power Slide | B | Double Tap | Pointer Vi-O-La |
| NONE | Right Stick | Pointer Vi-O-La |
Mouse Controls
Mouse Controls is a feature unique to the Switch 2 Joy-Cons. By placing your Right Joy-Con with its edge on a flat surface, you can aim as if the Joy-Con was a mouse. This is compatible with both Dual Stick Fusion and Pointer Fusion control schemes.
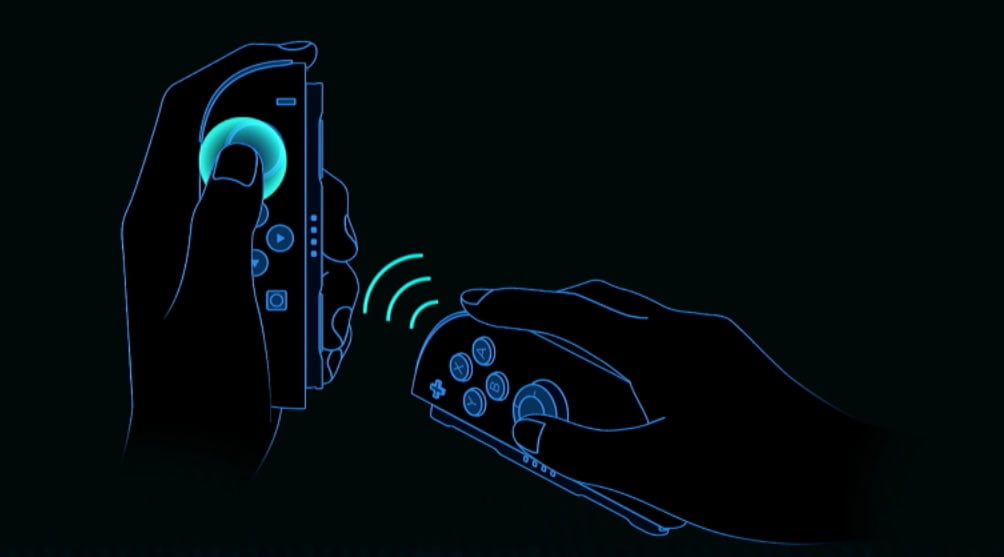
Like with any mouse, it’s generally good practice to use a mousepad or playmat if available. You don’t want to risk damaging delicate surfaces such as that on a wooden dining table!
While some games are compatible with a mouse and keyboard, Metroid Prime 4 will not recognize a computer mouse hooked up to the Switch via USB (I tried).
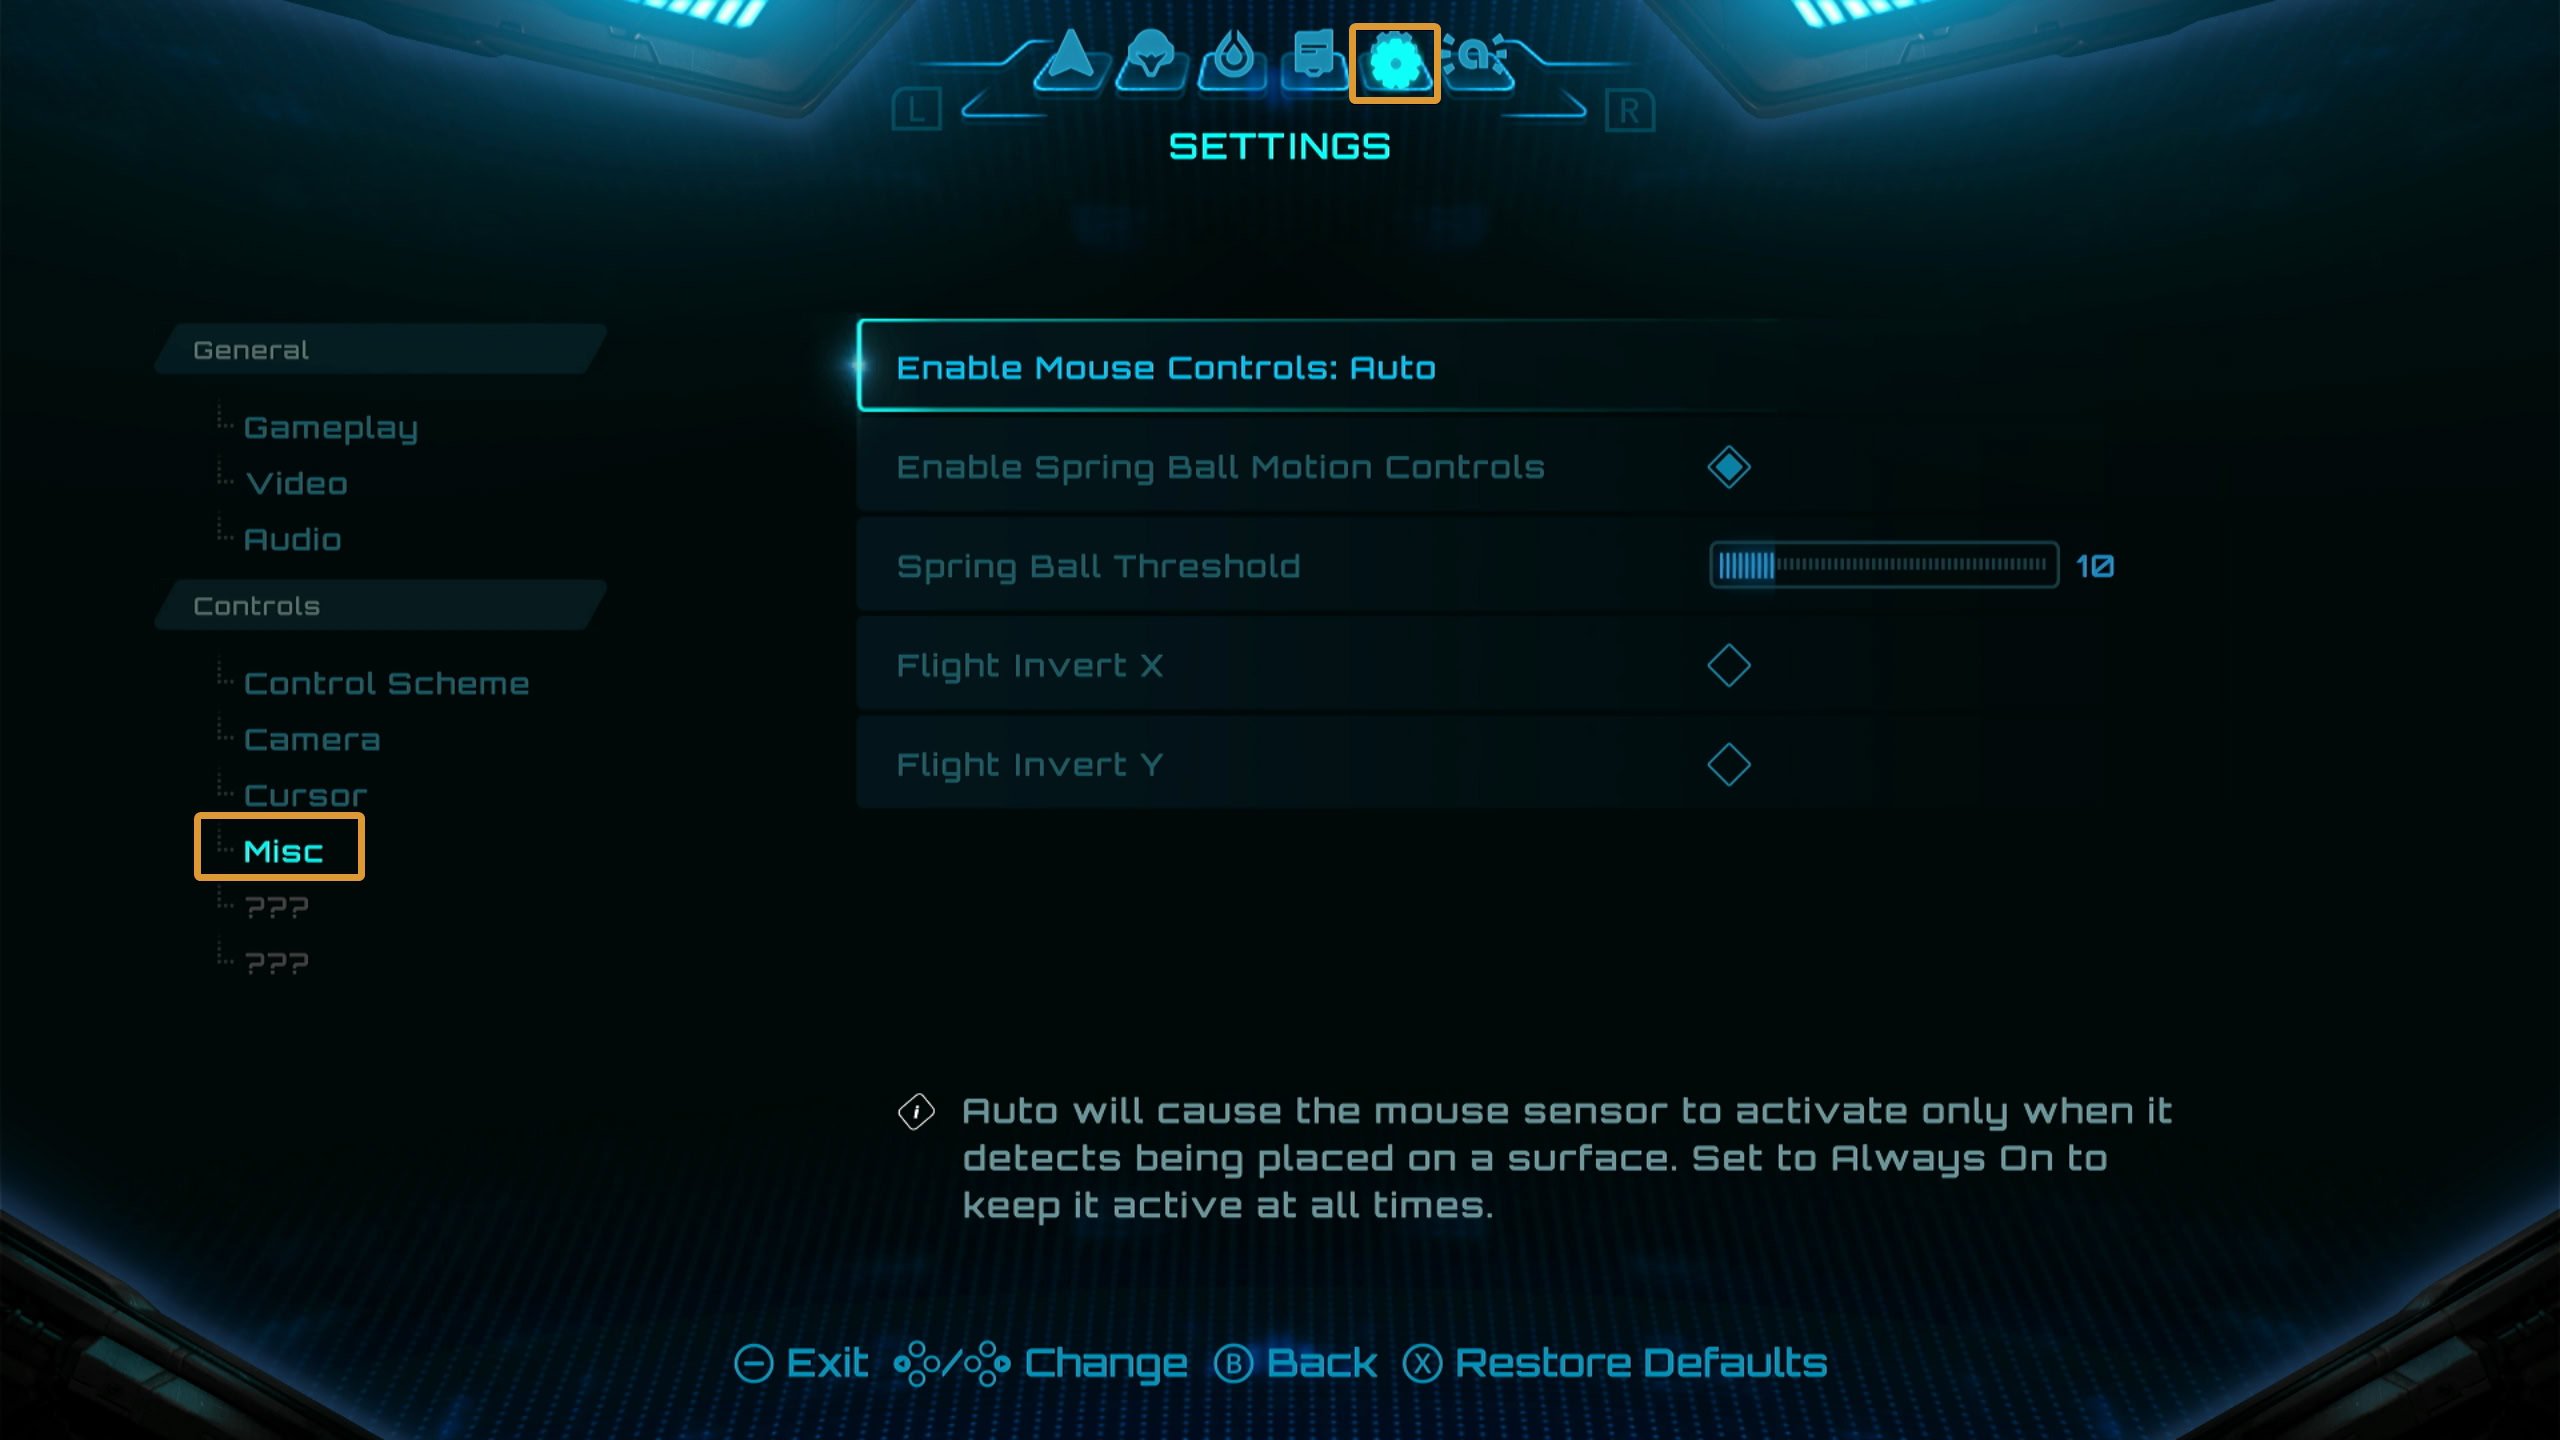
By default, the game will automatically detect when the Joy-Con is being placed onto a surface for mouse controls. By going to Settings then Misc, you can toggle whether mouse controls are Auto or Always On.
To adjust the Mouse Sensitivity, go to the Camera or Cursor Settings and adjust Motion Control Sensitivity X/Y to your liking. Camera Sensitivity is for general looking around, while Cursor Sensitivity is for when you’re locked onto a target.
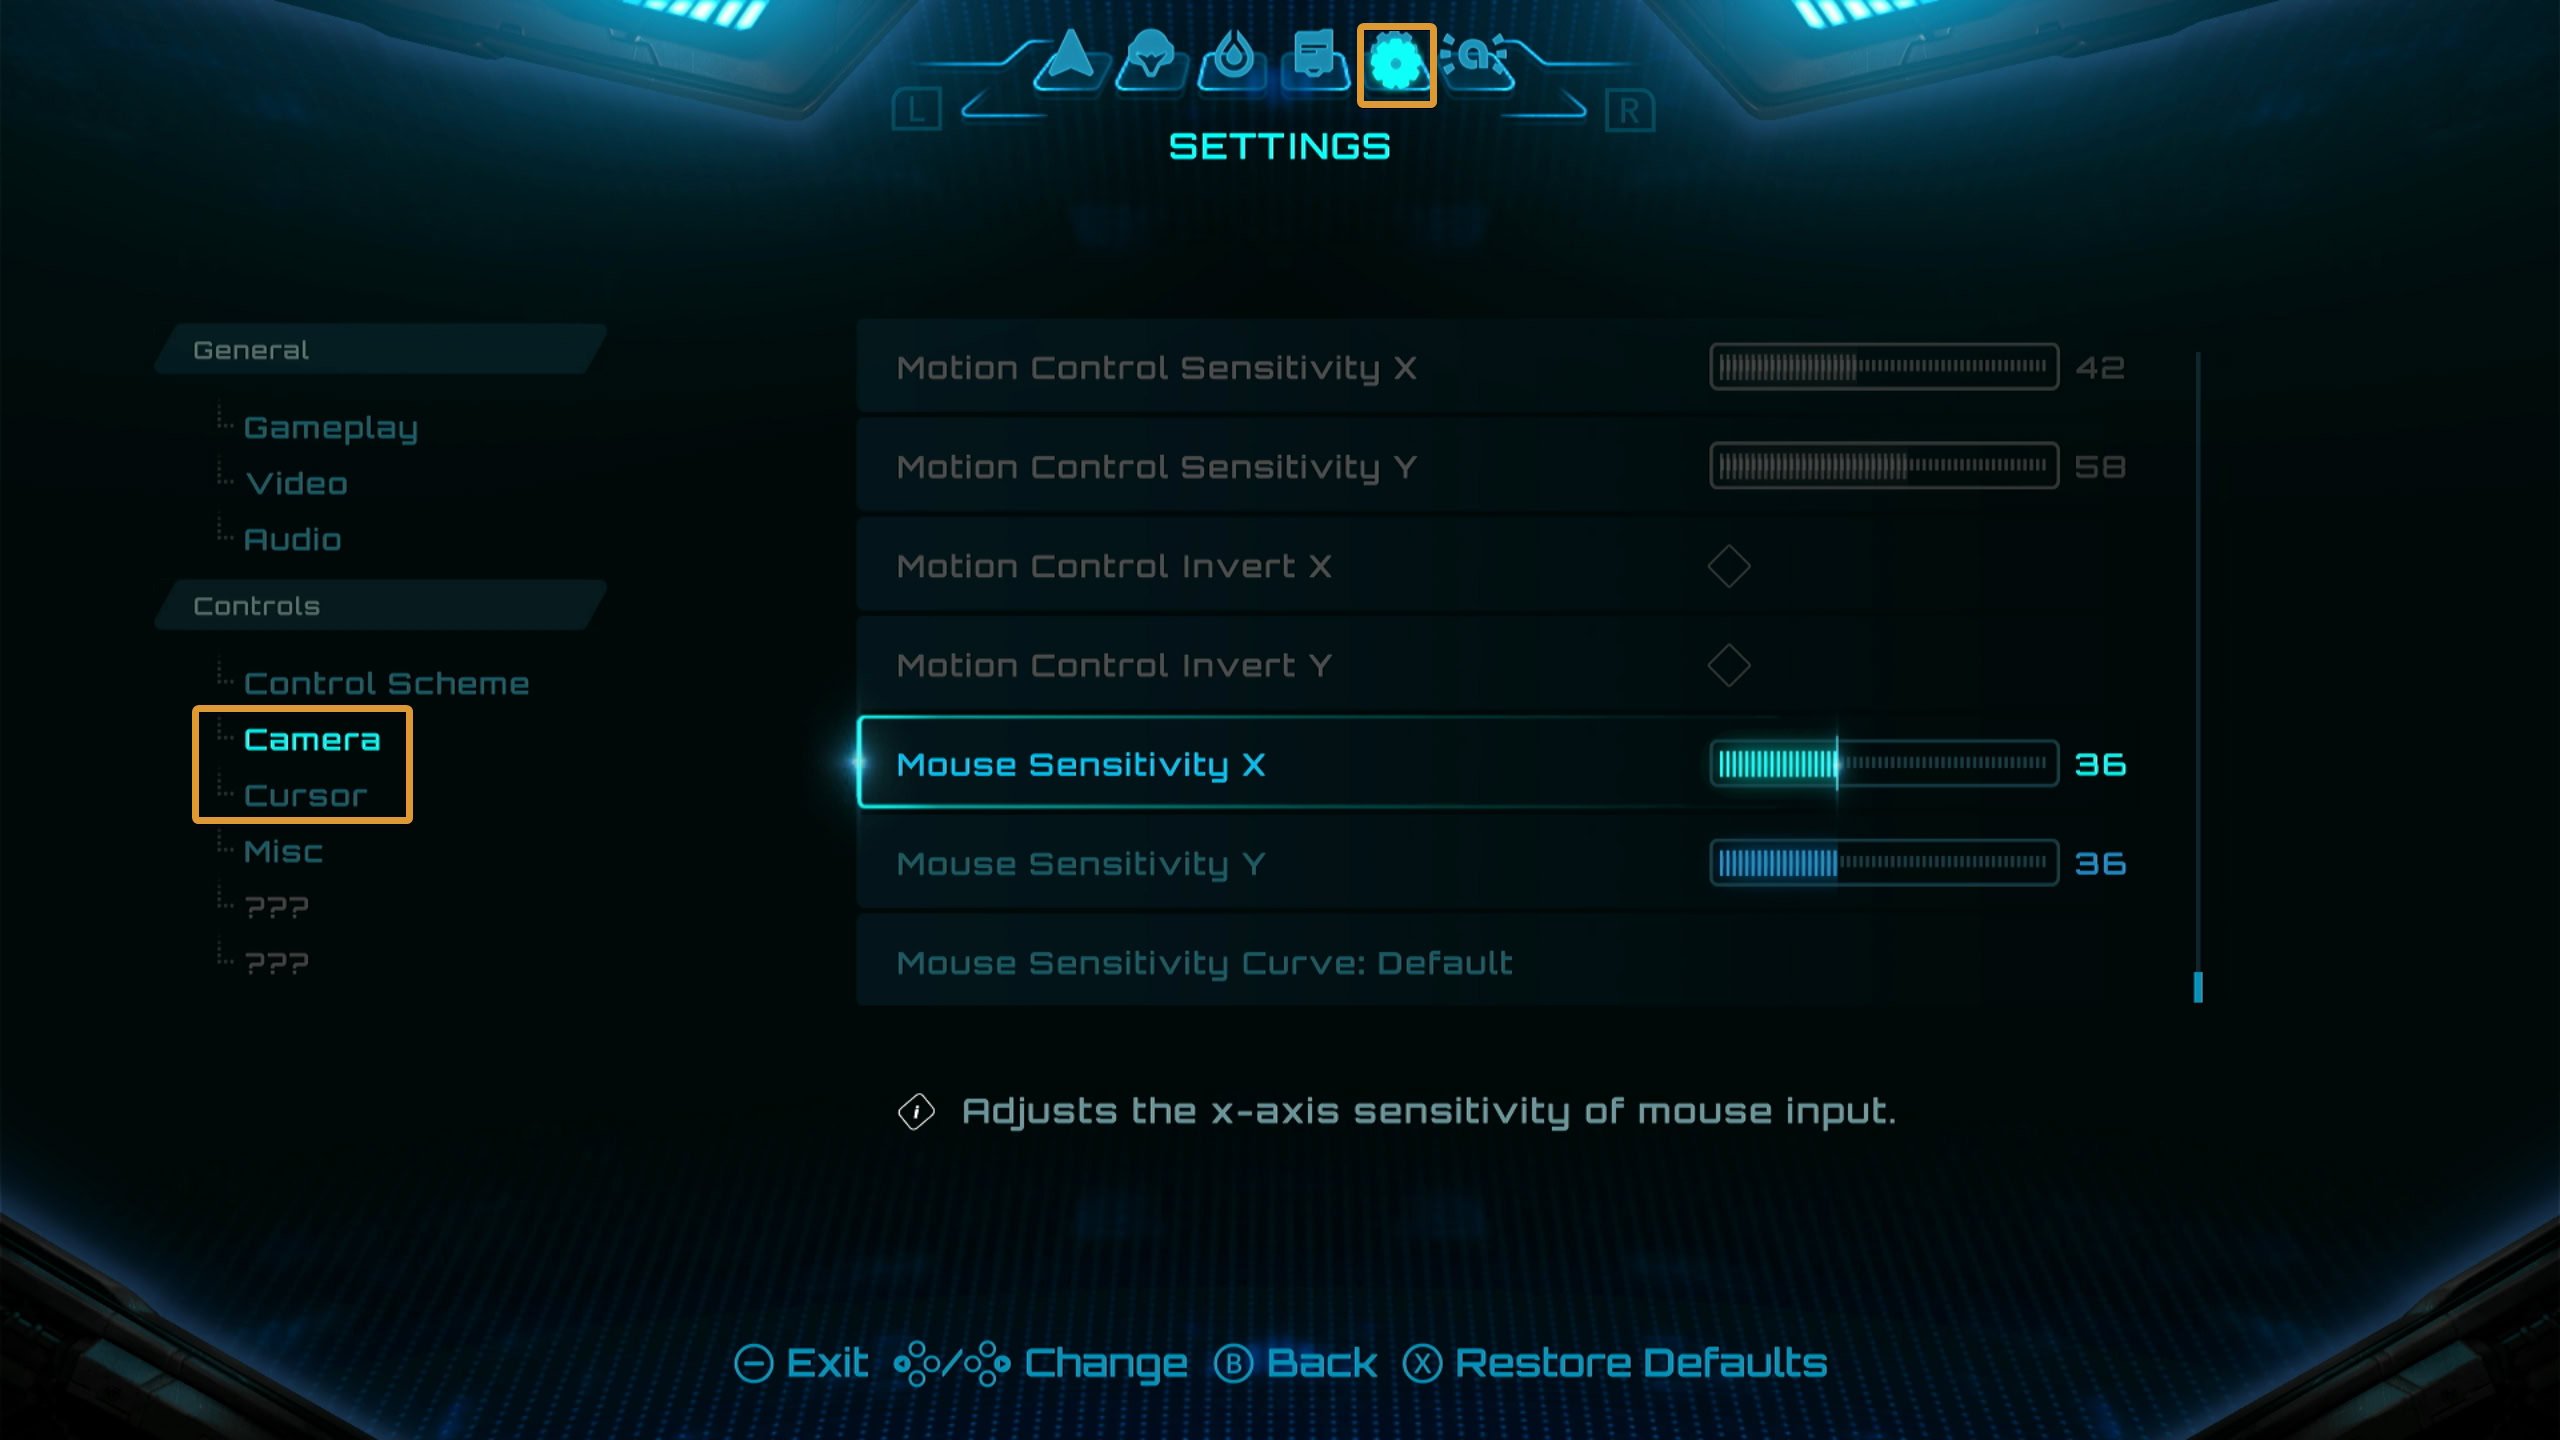
Under the Camera settings at the very bottom of the list is the Mouse Sensitivity Curve. This has two settings of Default and Linear. Default is a great option for fine-tune aiming or turning around. Linear is directly proportional to the speed based on input.
Using Free-Aim while Locked On
If you’re using the Dual Stick Fusion controls but want the precision of gyro aiming, worry not! While locked on, move the Right Joy-Con or your gamepad to enable Free-Aim. You may also use the Right Stick while locked on to use Free-Aim.
This is a great feature if you’re fighting multiple enemies at once. It’s also a good feature to use when you’re fighting a boss that has multiple weak points.
Free-Aim by default has a Motion Control Dead Zone of movement range before Free-Aim is activated. If you want to increase, decrease, or remove this dead zone, you can do so under the Cursor Settings.
By default, the Free-Aim Motion Threshold is set to 30. At 0, the dead zone is non-existent but at that point, you might as well use the Pointer Fusion control scheme. You can also adjust Motion Control Sensitivity and invert the X or Y axis if desired.
Use Burst Fire
If you’re new to the Metroid Prime games, one trick you might overlook is Burst Fire. While you can fire individual shots of your Power Beam or charge it, holding down ZR for half a second will have Samus fire three shots.
Get a feel for this as there are some instances where multiple basic shots are preferable to Charge Beams. Hold down ZR for half a second, release, and repeat to get a steady stream of shots without tiring out your trigger finger.
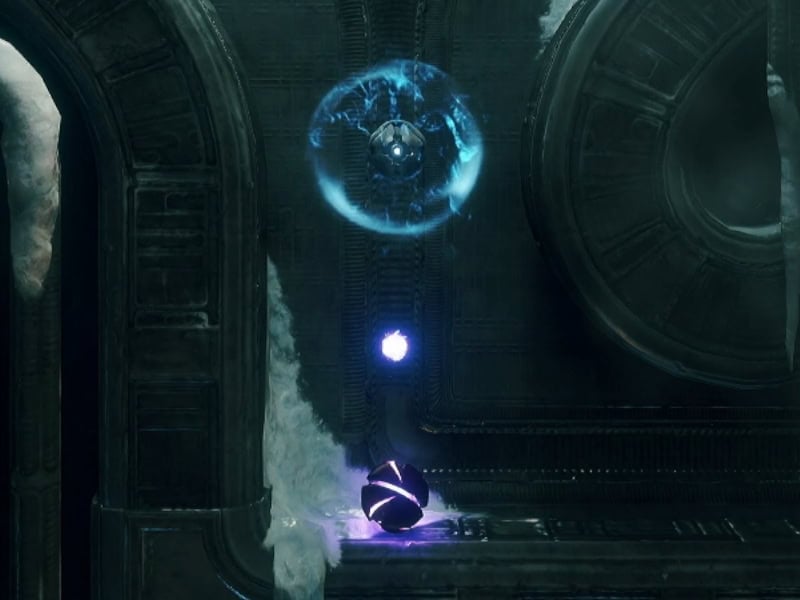
Morph Ball Double Bomb Jump
While you’re in Morph Ball mode, you can jump with the Spring Ball action, or by staying on top of a Morph Ball Bomb. If you need some extra height, combine the two! First you’ll need to place a bomb on ground level:
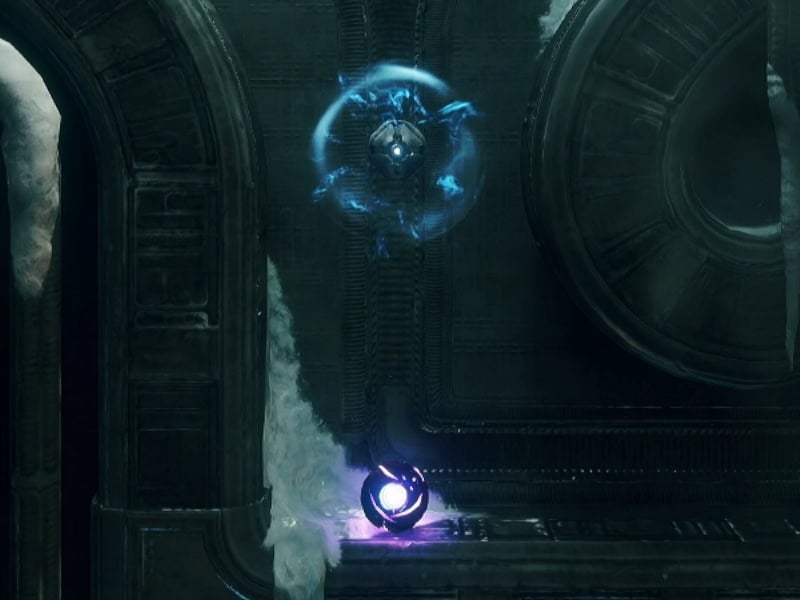
When the first bomb explodes, plant a bomb at the peak of your jump. Before it blows, use the Spring Ball to jump to the bomb and let the explosion carry you higher. This leaves you one bomb to spare if you need to hit something up high.

Switch 2 Pro Controller – GL and GR Recommendations
If you’re using a Switch 2 Pro Controller, you can have add some convenience to your gameplay with the GL and GR buttons! Adjust these settings for Metroid Prime 4 by holding down the Home button and adjust your GL and GR buttons from there!

I would recommend mapping the GL button to the Jump button. You’ll be jumping a lot and freeing up your right thumb for aiming around helps immensely.
Meanwhile, set the GR Button to Shoot/Charge Subweapon or Switch Visors. The former allows you to more easily use subweapons without moving your trigger finger. The downside is that you’ll need to develop the habit of not pressing it while exploring and wasting a missile.
Switch Visors is a good alternative for GR if you don’t want to develop that habit. If you’re a veteran Metroid Prime player, you know the important of scanning everything. Making scanning easy access helps you achieve this goal!