Learn how to find Ice Belt’s Master Transporter Key in Metroid Prime 4: Beyond! With the unforgiving terrain and ice cold enemies, you’ll need to know how to navigate the labs to unlock all of the secrets hidden within the ice.
Table of contents
Enter Flare Pool
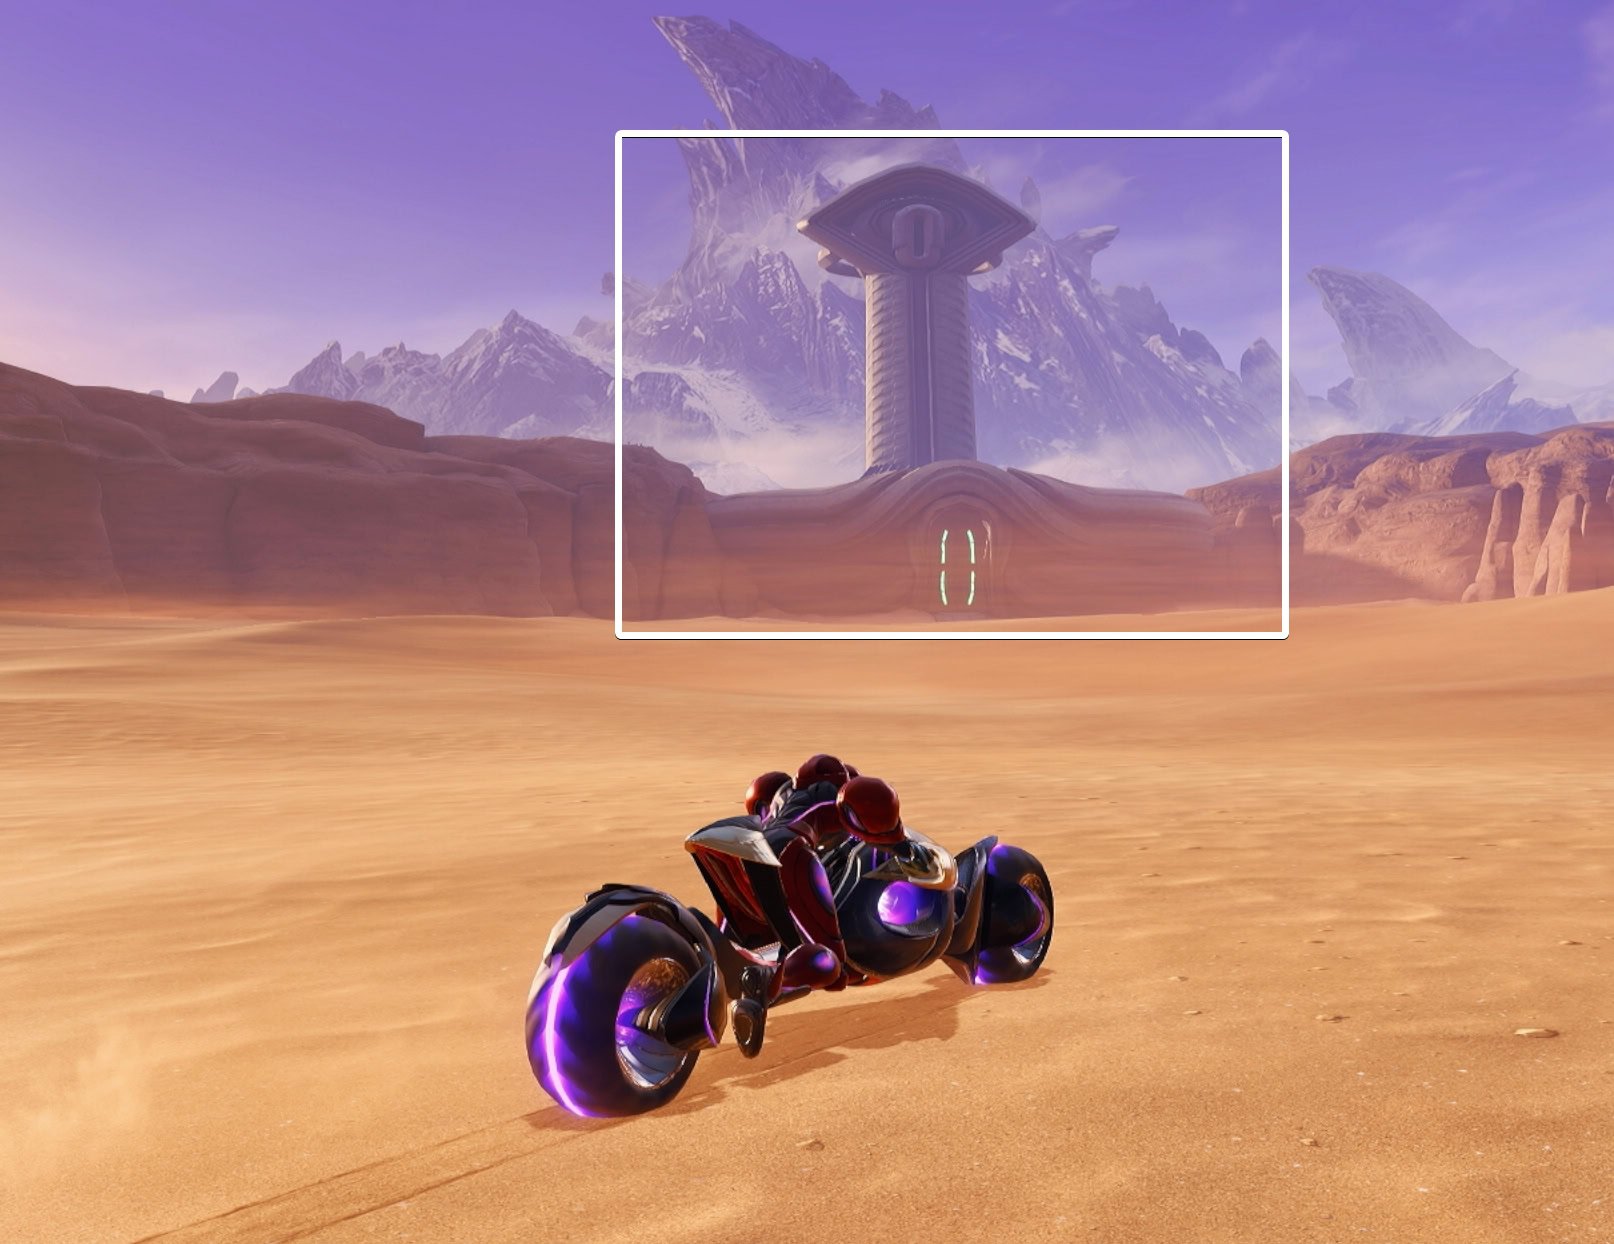
When you’ve unlocked Vi-O-La at Volt Forge, you can efficiently traverse across Sol Valley. With Ice Belt to the northwest and the mysterious location to the northeast being inaccessible, your only choice remaining is to head to Flare Pool.
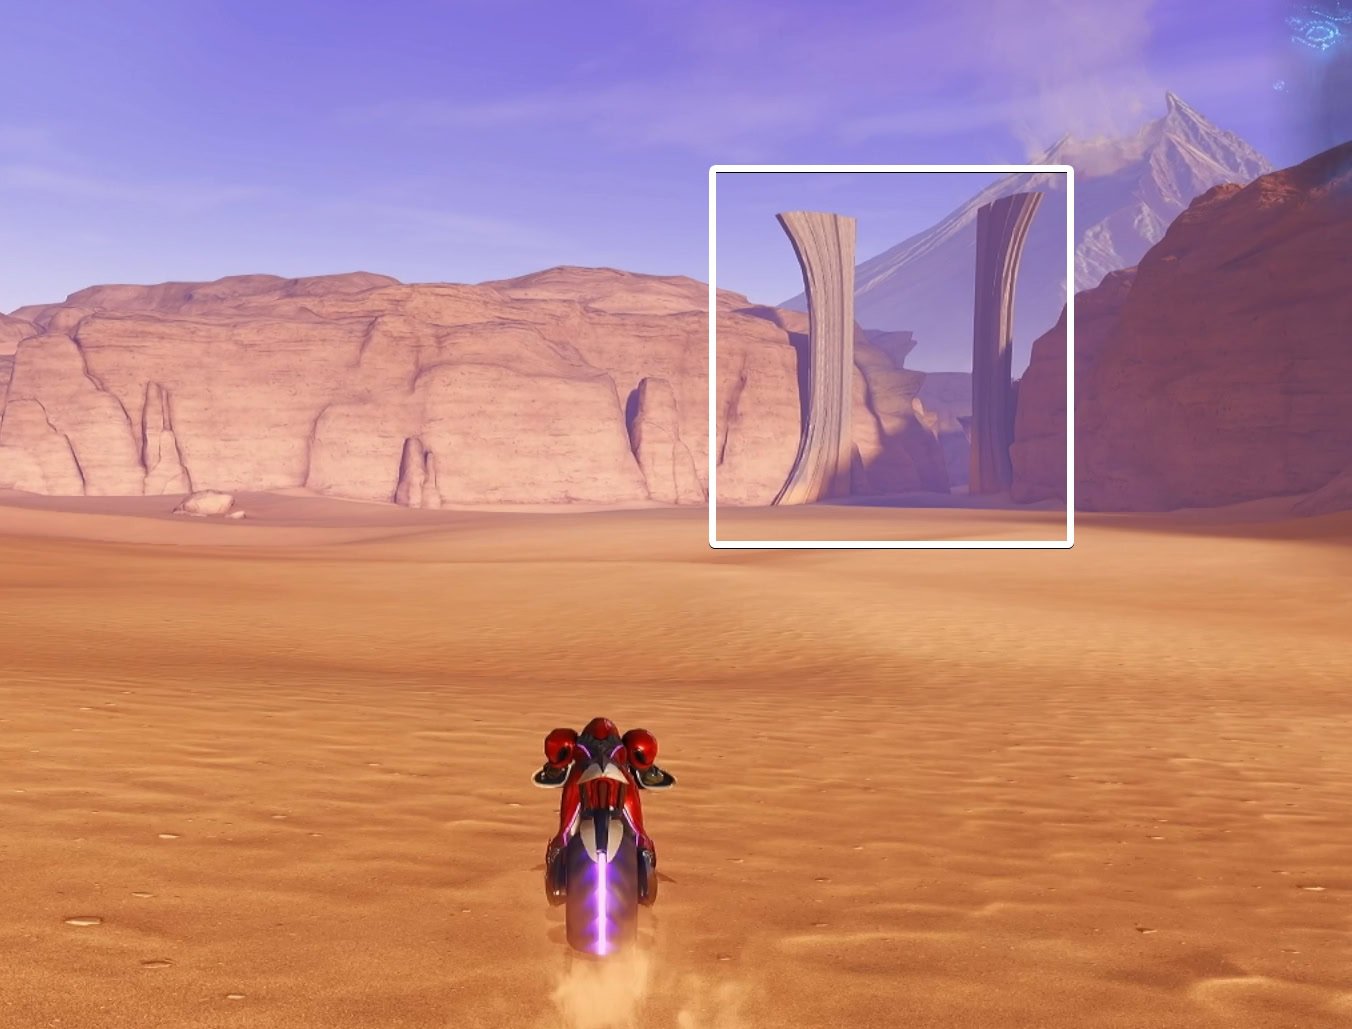
Drive towards the volcano to the southeast, it’s impossible to miss given its size. You’re looking for two large pillars, this will lead you to the entrance of Flare Pool. Place your bike into the hologram and rev it up to activate the tunnel.
Your map will indicate that the Teleporter Key is in the Volcano Heart. Drive through the Magma Overflow, into Shoreline Access, then to Lava Lake Bridge. Activate the bridge with your bike and a cutscene will play.
Someone doesn’t want you crossing this bridge, and you’ll be unable to cross. Return to Shoreline Access, defeat the Psy-bots with Vi-O-La’s projectiles, and take the door on the south side of the hall. This hall leads to a save station and the Scrapyard.
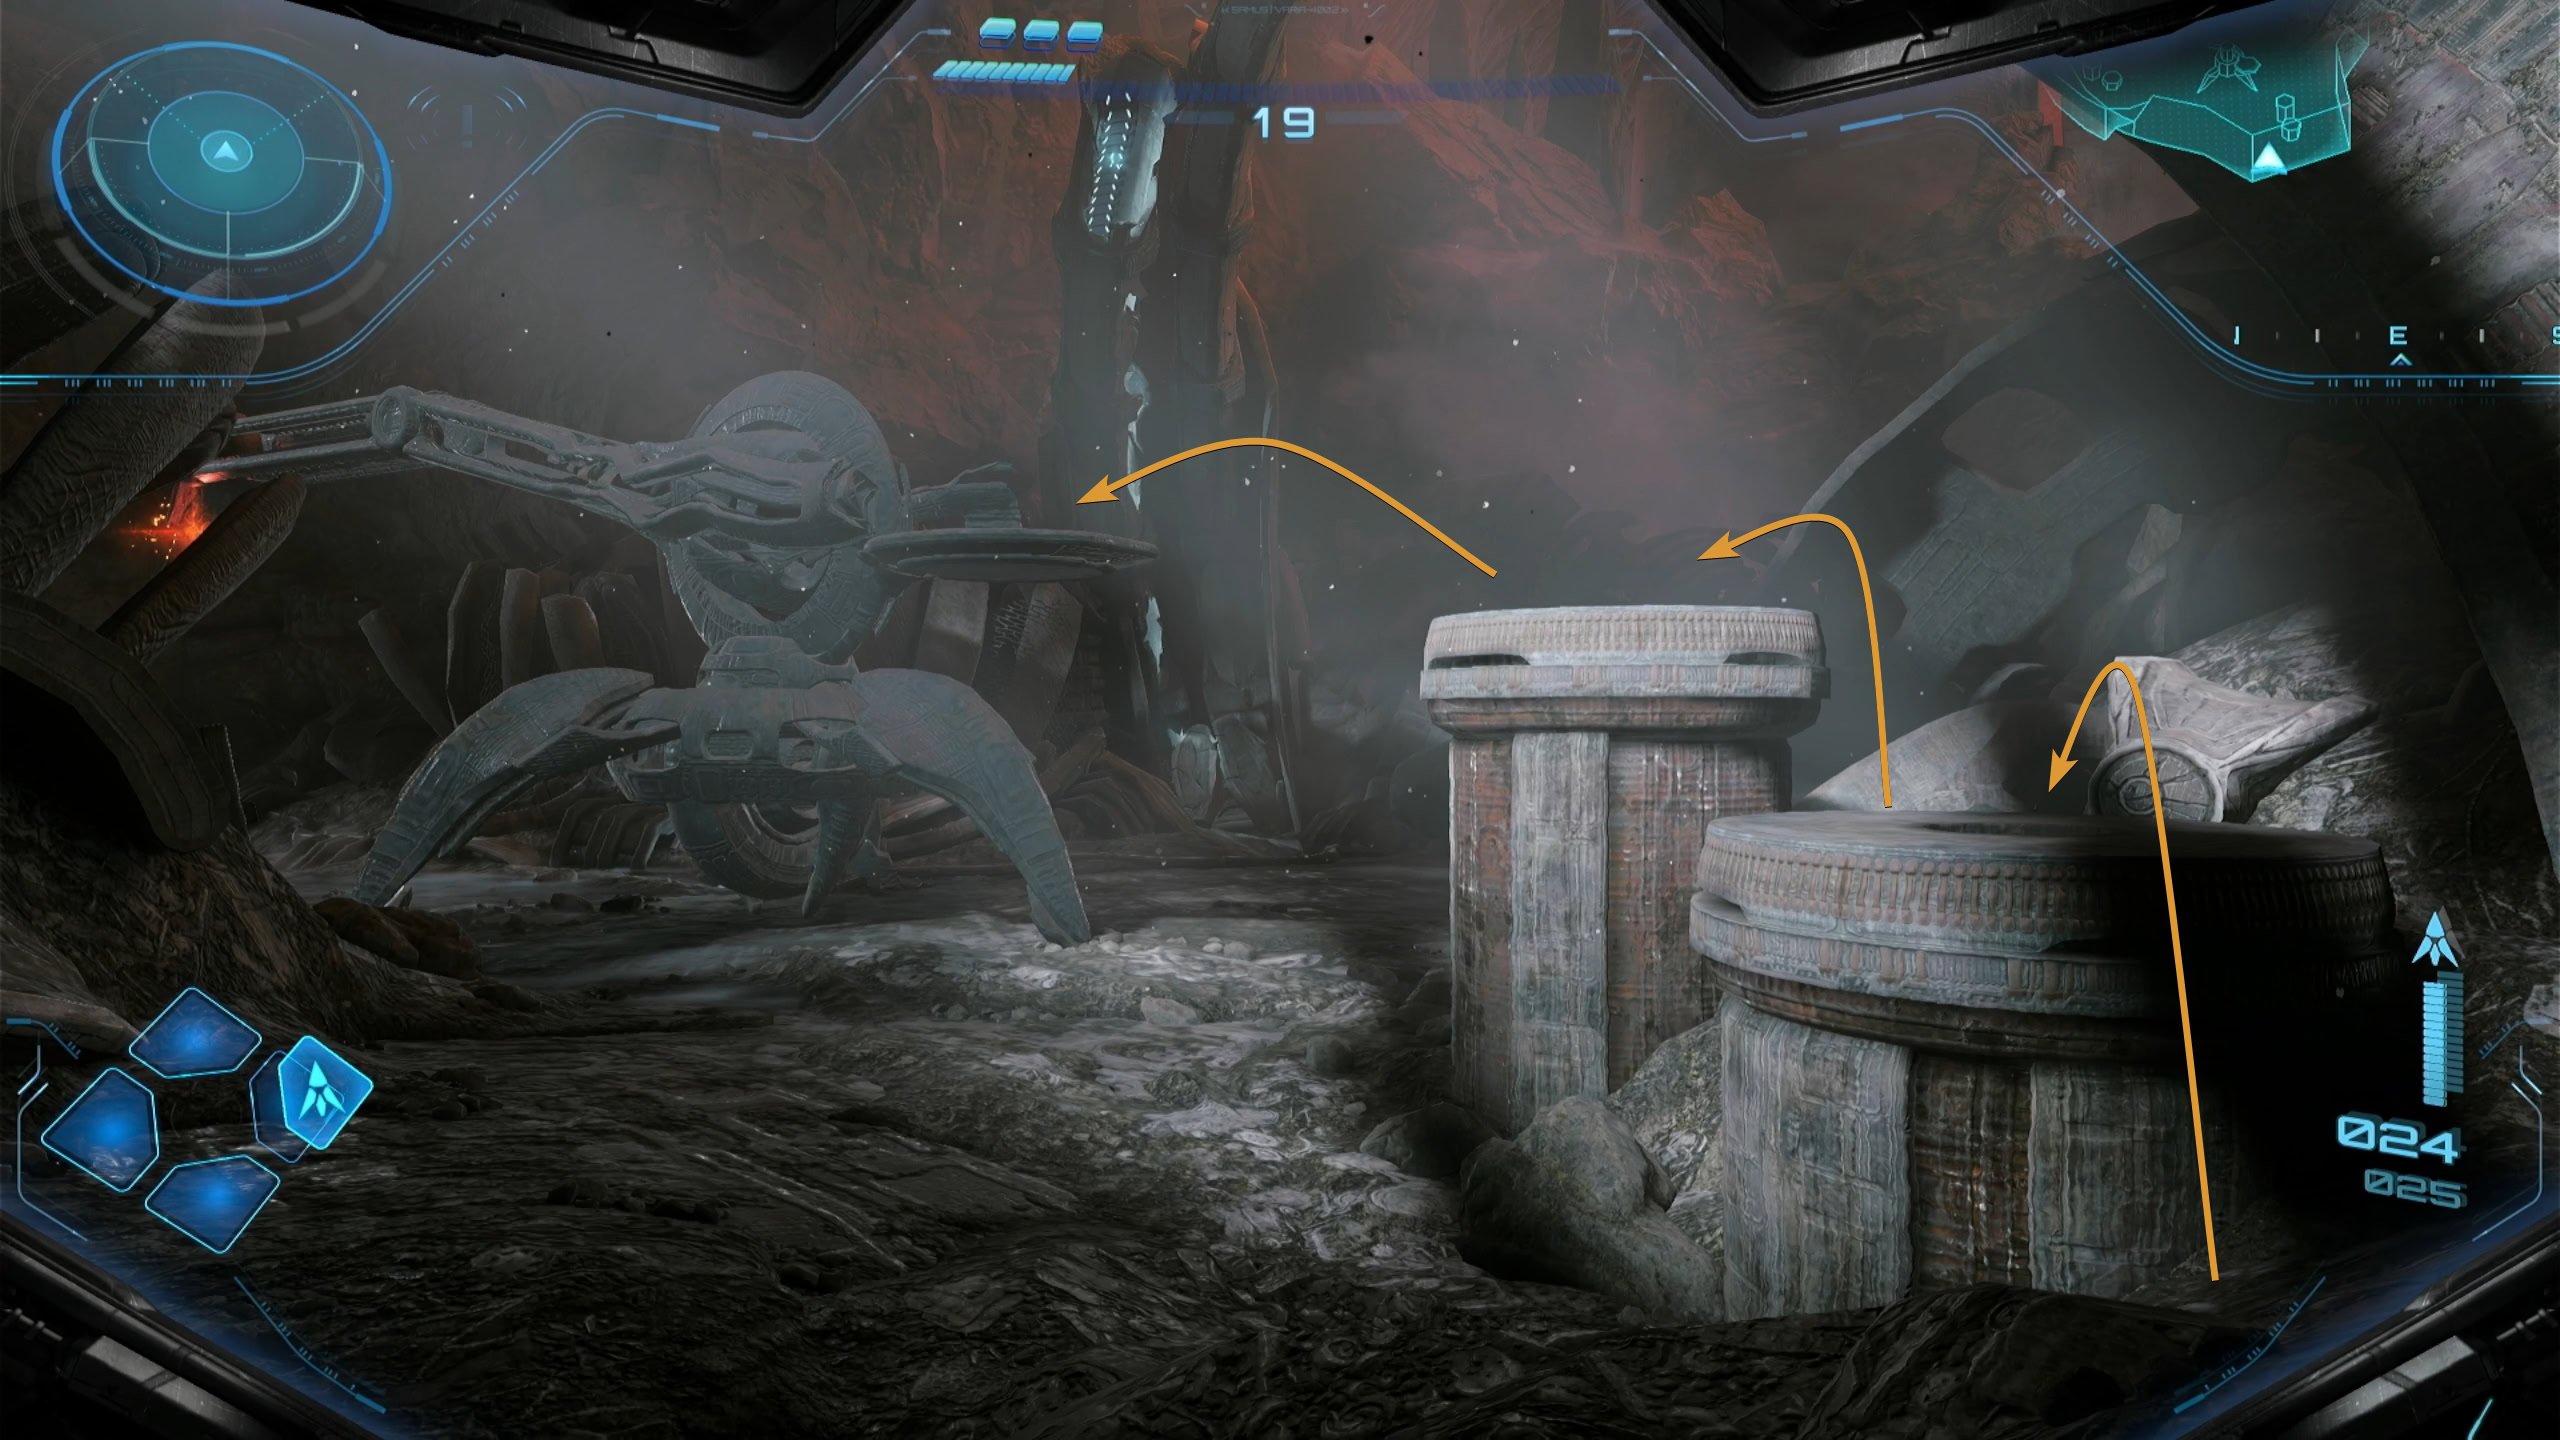
Defeat the Pyremites in the scrapyard, go behind the crane, and jump up the platforms and onto the crane. Morph Ball through the crane and reach the tip, then bomb the red glowing object to free it.
Interact with the device to pick up the Fire Chip. Return to Fury Green, taking the cargo launcher to quickly access base camp. Talk to MacKenzie when you arrive. He’ll modify the chip and allow Samus to use it as a weapon, unlocking the Fire Shot.
The Fire Shot
The Fire Shot is a subweapon that deals high-heat damage. When fired at a target, they can catch on fire while taking burning damage. This is also useful for melting ice, such as that ice wall blocking the path into Ice Belt.
This subweapon has a slower rate of fire when compared to the Psychic Beam, and it has limited ammo known as Shot Ammo. You’ll initially start out with 30 shots and can reload by picking up Shot Ammo from enemies and boxes, or by using a save station.
Once acquired, you can unlocked the door with the heat lock in the Cleared Path, the room before Fury Green’s cargo cannon. Pop it open to enter the Sacred Flame Ceremony.
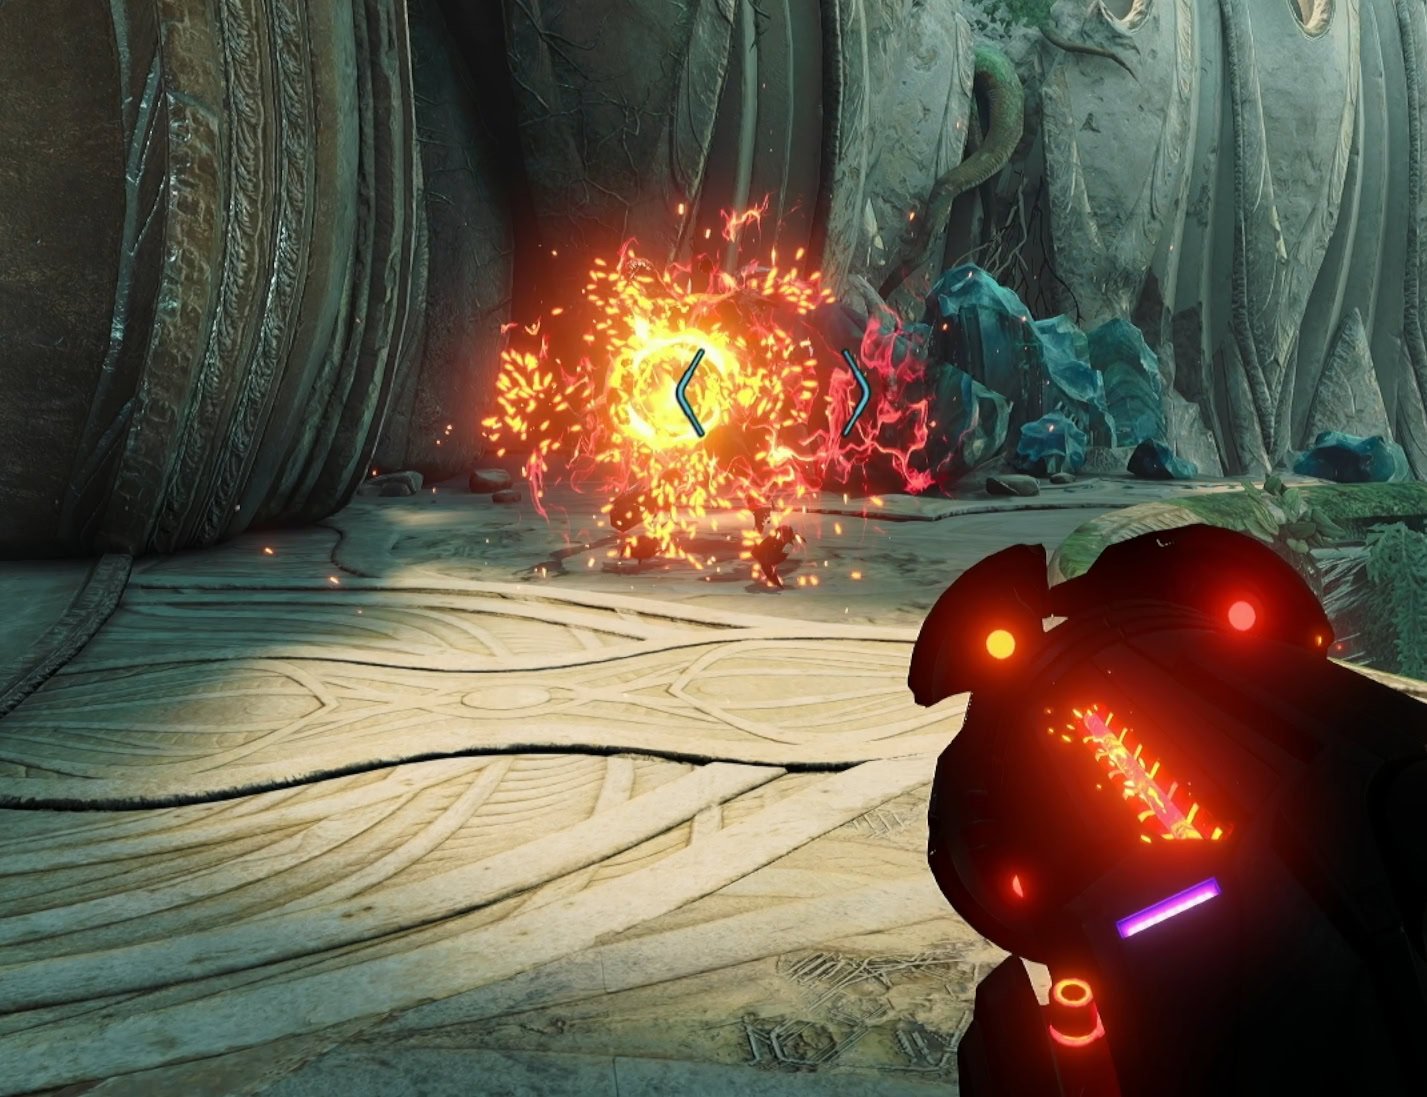
This puzzle is simple as all you do is stand on the pressure plate, and use the Psychic Glove to move the ring along the rail. Align the ring to the statues to have them open up, then shoot the torch wicks with the Fire Shot through the ring.
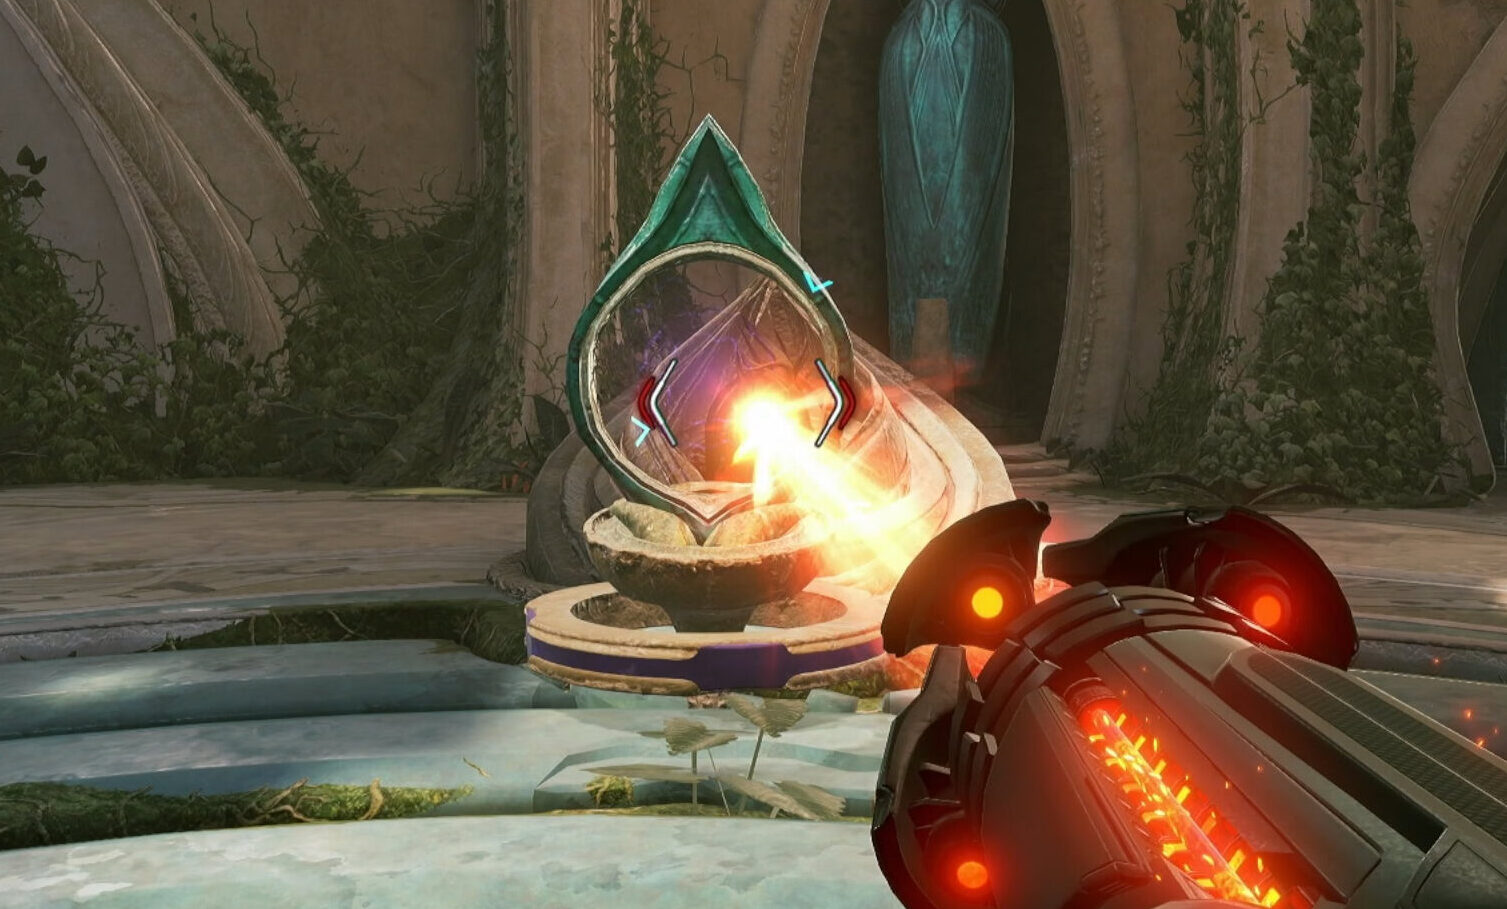
Repeat this process with the remaining two torches to open the gate ahead. In front of the Lamorn Statue is a Shot Expansion, an upgrade that will increase your shot ammo by 10.
You’re going to need this ammo when you reach Ice Belt. Speaking of, leave Fury Green and make your way to Ice Belt in the northwest area of Sol Valley.
Enter Ice Belt
When going northwest towards the snowy mountain, you’re looking for a building with a long, vertical door. Go through and look to the right with your Psychic Visor. Activate the Psychic Platforms, go up, then take the tram to Ice Belt.
When you find the Loading Crane room, use the south door to access a save station. Once you’ve saved, take the west door in the Loading Crane room and melt the ice wall with the Fire Shot.
You might be tempted to shoot the Ice Crawlers with your Fire Shot for giggles, conserve your ammo for now. Go through the newly accessed door to find the Snowfield.
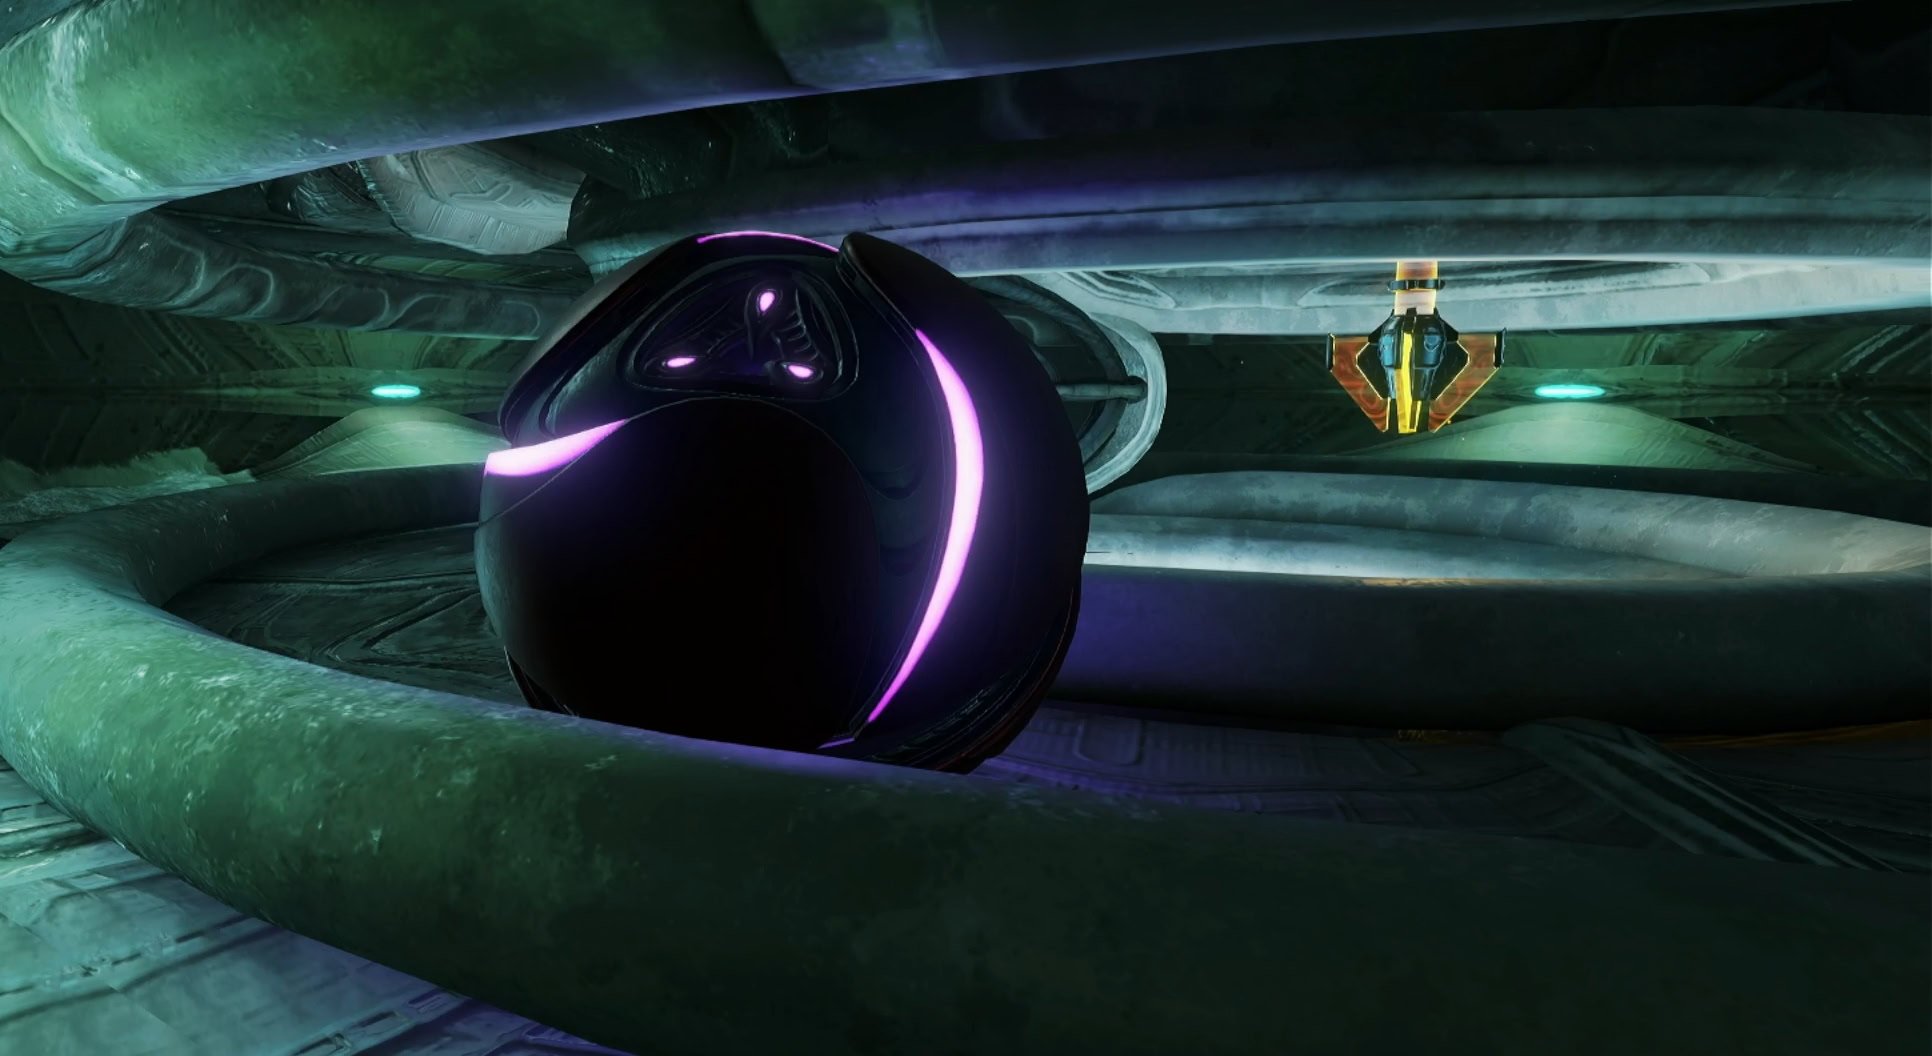
Walk to the facility ahead of you and a cutscene will start, you’ll be attacked by an excessively large pack of Snow Wolves.
Survive the Snow Wolves
The Snow Wolves will form an arena around you by running around in circles, knocking up snow and making it impossible to get through. While you can melt a snow wolf with one fire shot, conserve your ammo for now.
Never stop moving, double jumping, and NEVER stop looking around you. The wolves can come towards you from any angle, charging at you which deals a good chunk of damage. Your radar on the top left of the screen will help you monitor them.
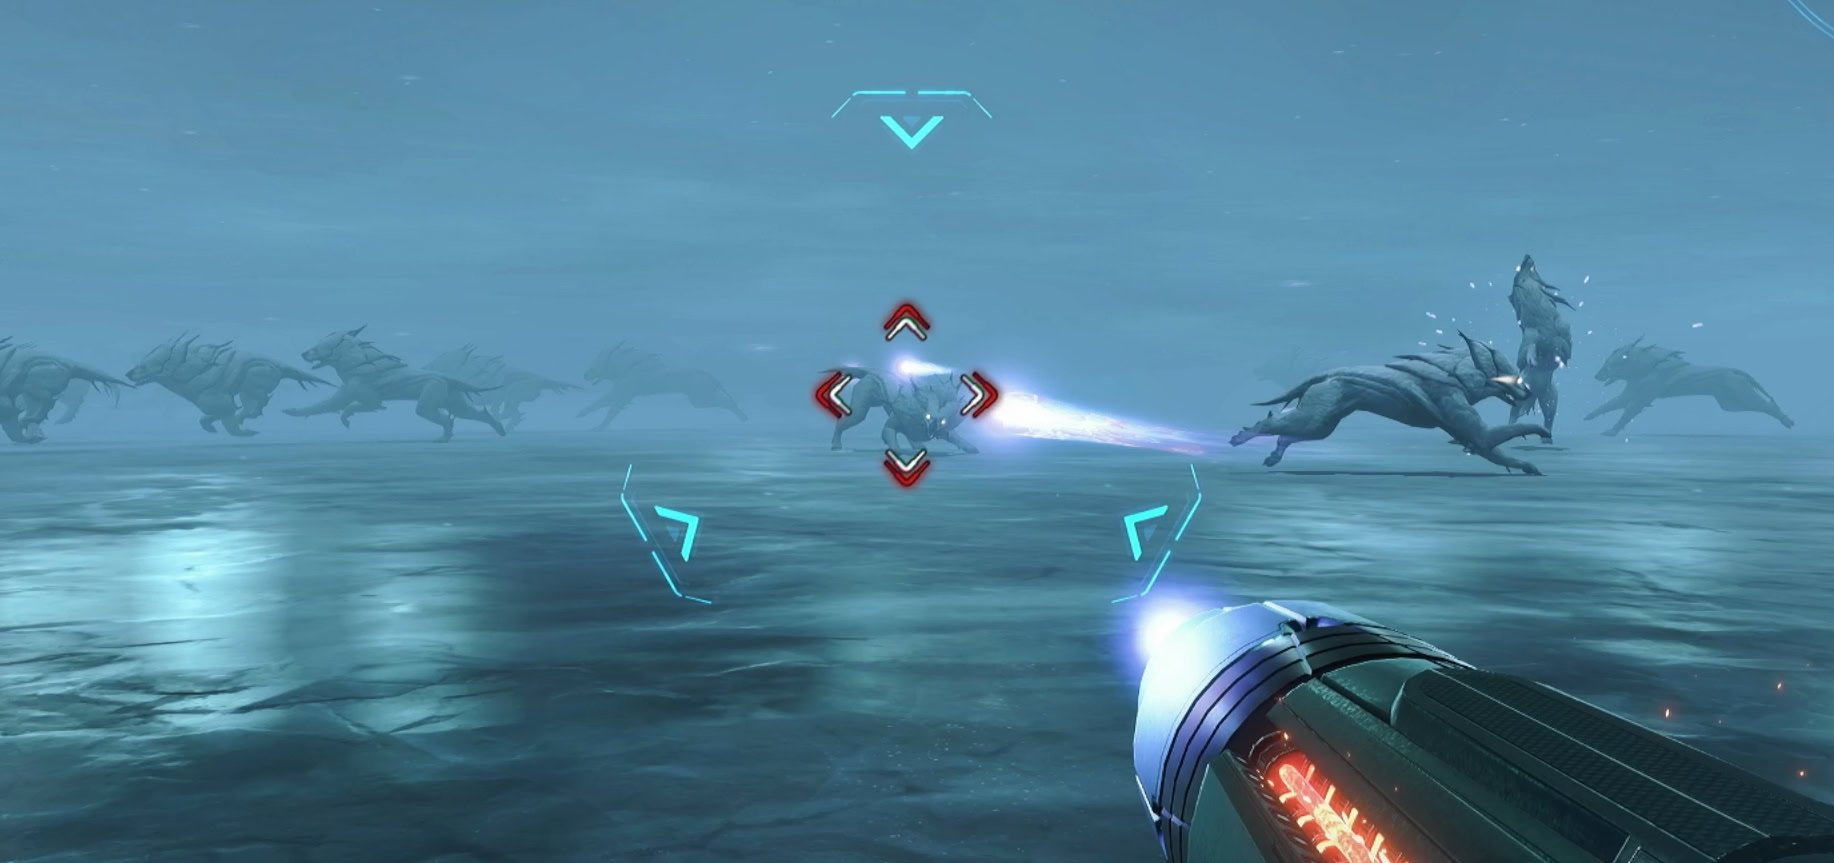
A general rule of thumb is to use beam shots if there are 3 or less wolves. If there are more than 3, use the fire shot until there are 3 wolves left then switch to the standard beam.
As the fight progresses, more and more wolves will attack you. Make sure you land your fire shots as you’ll need to survive the attack until a cutscene starts. Dying will not start the cutscene, do your best to stay alive.
Enter the Lamorn Laboratory
Turret fire will come from the facility ahead, scaring off the snow wolves. Head inside to find out who that was. In the Lobby, take the passage to the west and jump upstairs, then go through the south door.
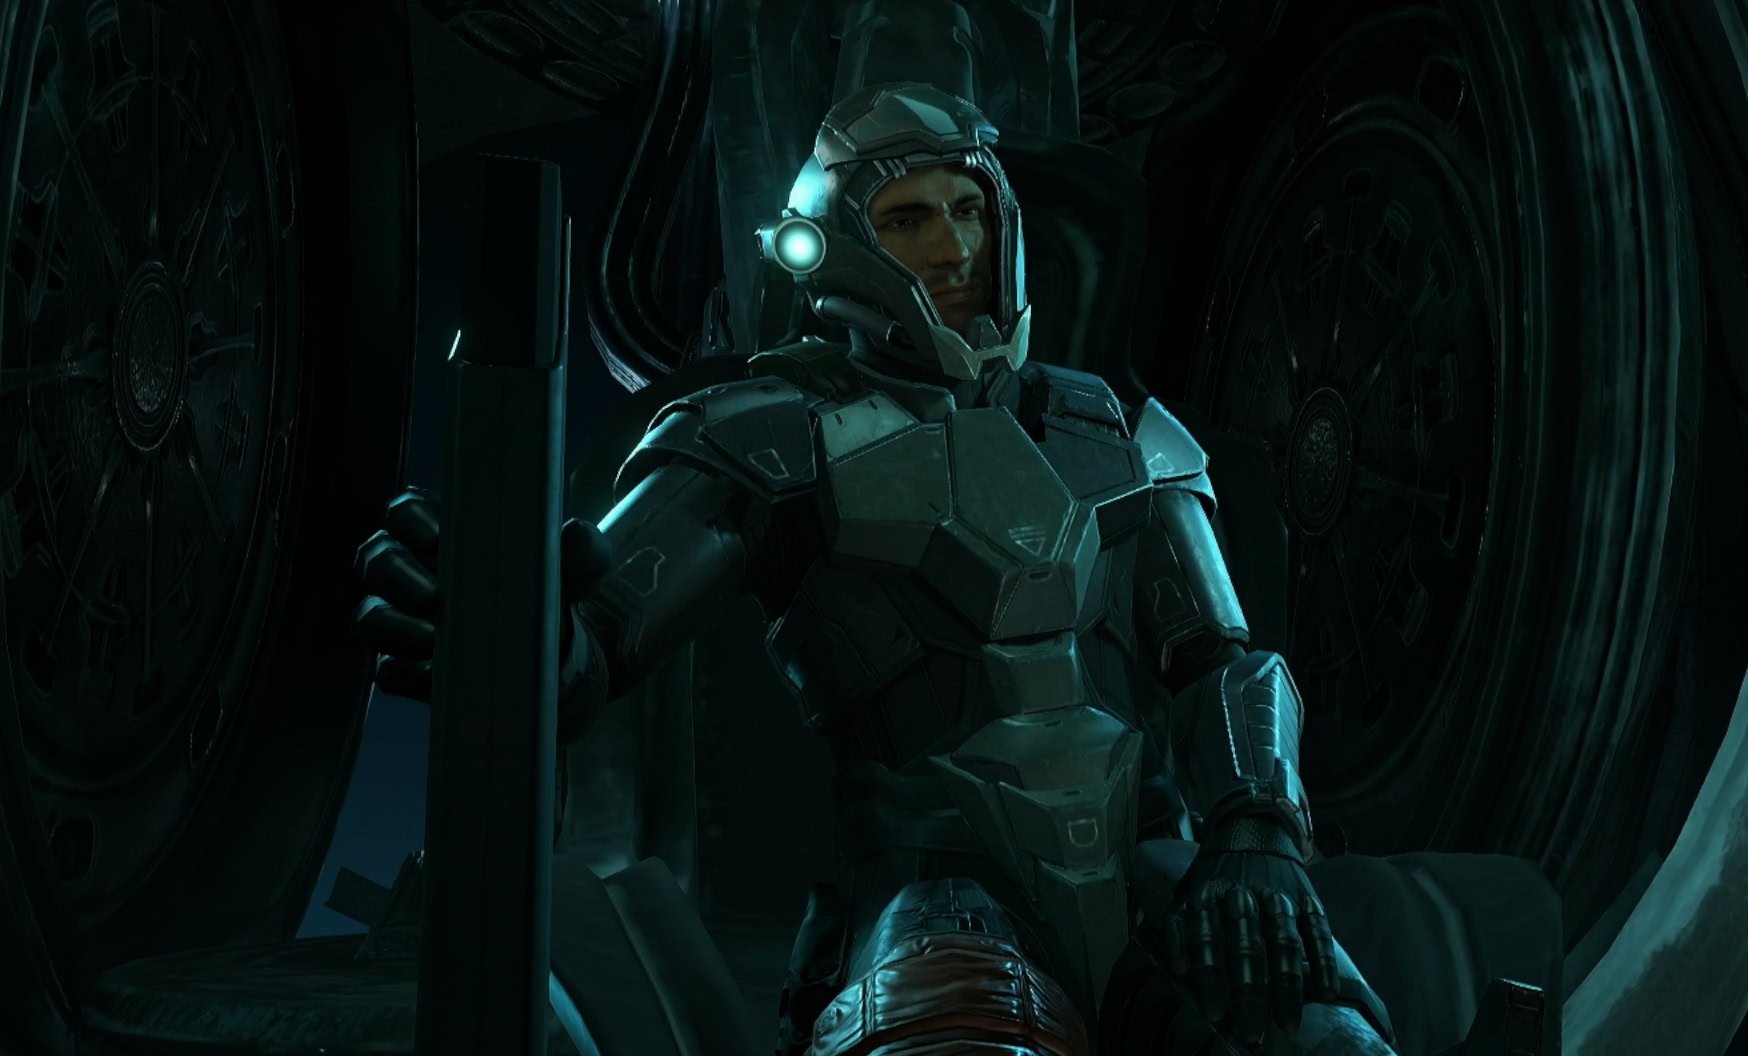
Walk towards the circle door ahead and you’ll be introduced to another Galactic Federation soldier, Corporal Reger Tokabi. Scan the terminal he shows you to download the area map.
With the facility on ice, you’ll need to find the facility’s power generator and bring it back to life. Return to the lobby and go through the west door upstairs.
Blast the safety hatch open with a charge beam and jump down. Go through the Cryopod Conveyor to reach the Bio-Labs.
The Bio-Labs
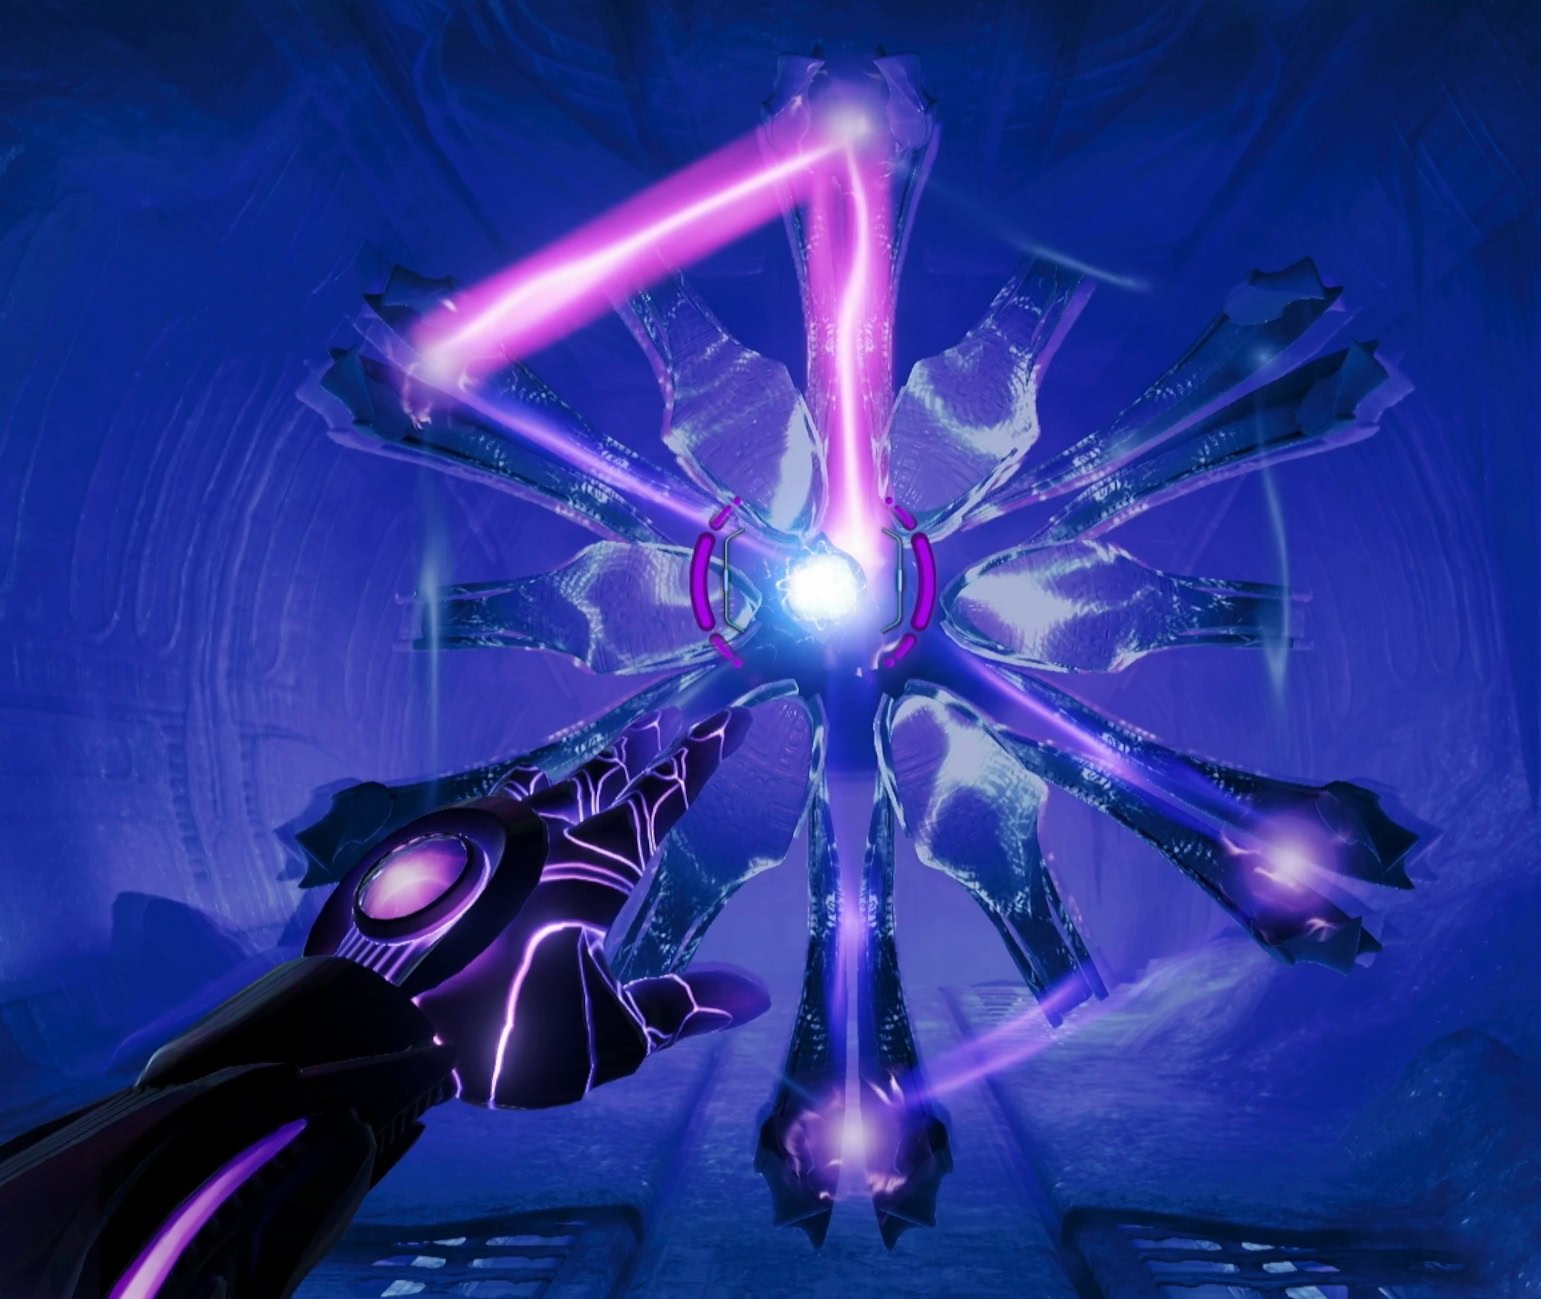
The Bio-Labs will have numerous locked doors and a mysterious floating object at the end of the hall. This object is a Psychic Lock Unit, and it’s prevent you from going deeper into the facility.
You can interact with it using the Psychic Glove, though you’ll be unable to remove the lock without the proper code.
Go through the door west of the psychic lock to access Bio-Labs Security. On the left side of the security room will be a Lamorn Research Diary.
You’ll be finding a lot of these and they contain very interesting lore. They’re also necessary if you want to get 100% of the game’s scans.
On the northeast corner of the room is an ice wall you can melt to reveal a bomb slot. Bomb the slot to power up the room, and interact with the security console. This will open up all the doors in the Bio-Labs. Search these rooms to find the TK Code.
Cryopod Prep
You can find a Research Diary on the left side of the Cryopod Prep Room. This entry, “Security”, will give you information on how the cryopods seen in the facility are used.
Specimen Labs
Inside the specimen labs are three green pods containing specimens. Scan the center specimen to find a TK Code. Purple fragments will appear and you’ll need to rotate them until they form a cohesive shape. You’ll know you’re on the right track when the fragments begin to resist movement.
This is one of two TK Codes that you’ll need to find before you can remove the Psychic Lock. Exit the Specimen Labs and enter DNA Sequencing.
DNA Sequencing and Tracking Operations
Blast open the tunnel on the right side of the room and go through. This will lead you into the Tracking Operations room. Scan the Research Diary in this room, then unlock the Psychic Crate to unlock the Psychic Lasso.
The Psychic Lasso
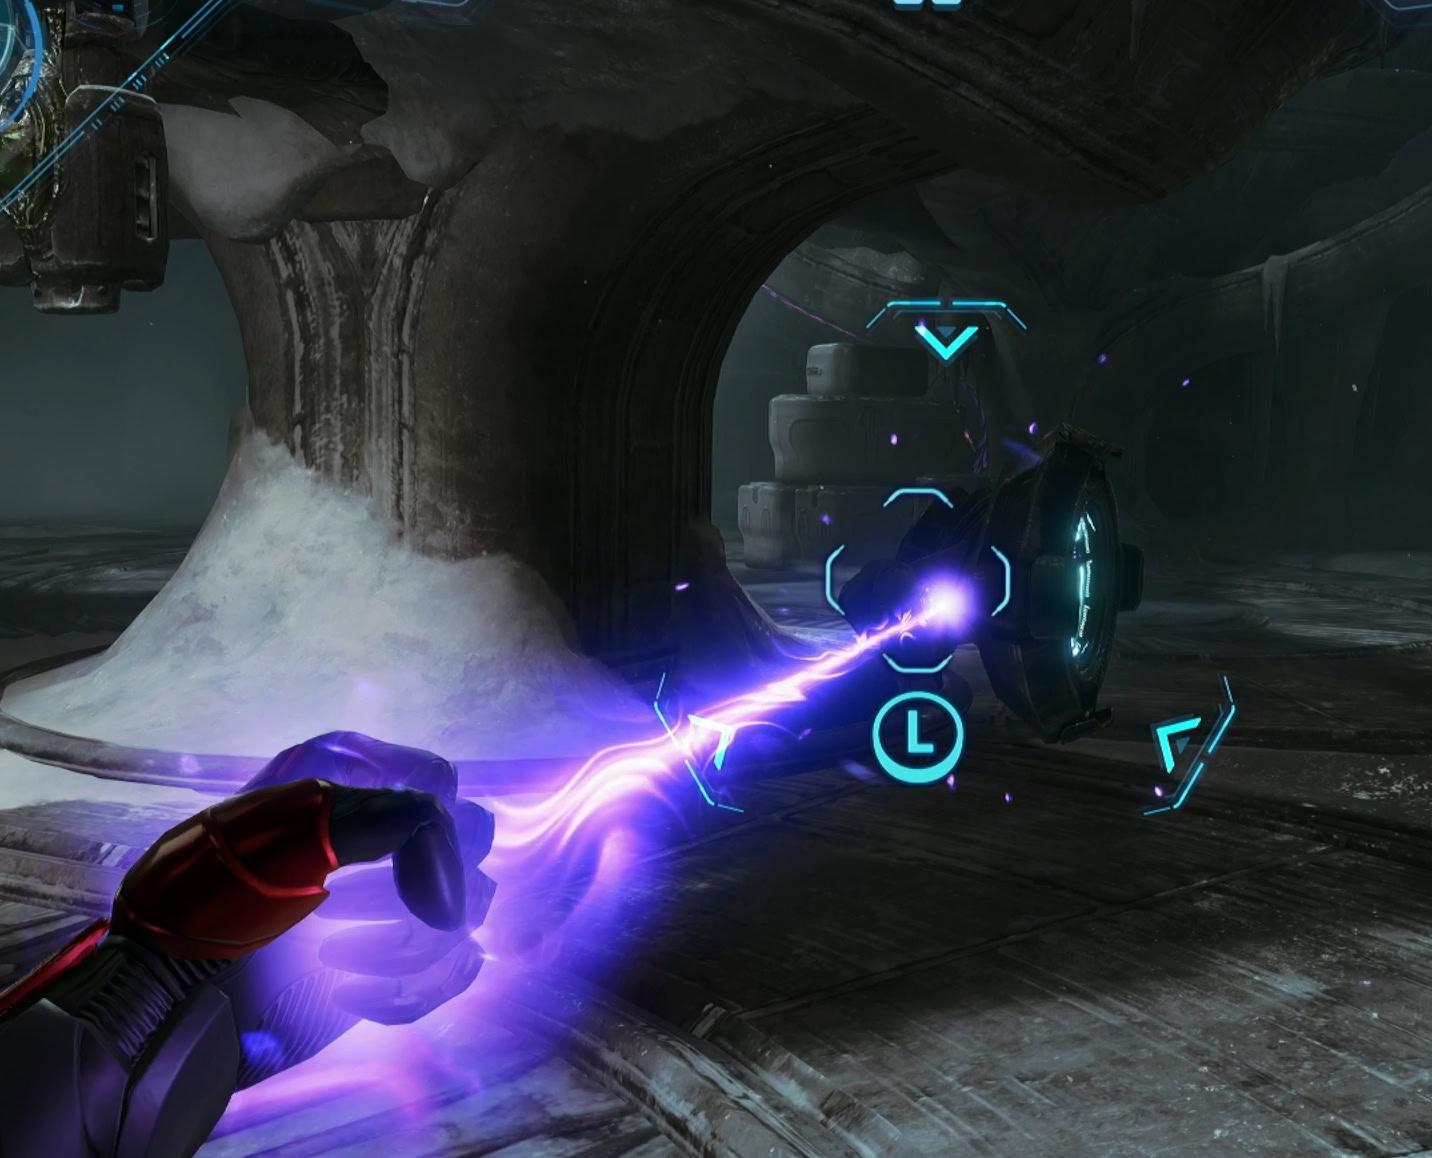
Not to be confused with the Psychic Grapple, the Psychic Lasso allows you to hook onto compatible objects and pull them. This is most commonly used to pull open locks or switches that activate via pulls.
Compatible objects will have a blue pincer icon with green chevrons. Lock onto these targets and lasso them by pressing down the Left Stick or using Motion Controls depending on your control scheme.
Tracking Operations Shot Expansion
With the bomb slot cleared, bomb it to activate the lift inside the maintenance hatch. Before going up, look at the ceiling of the room for 3 more lasso points. Pull down the shafts then go up the maintenance hatch. Going through these shafts will take you to a Shot Expansion upgrade.
Return to DNA Sequencing and pull off the lock on container northwest of the terminal. Scan the DNA Sample inside to find another TK Code.
Unlock the Bio-Labs Psychic Lock
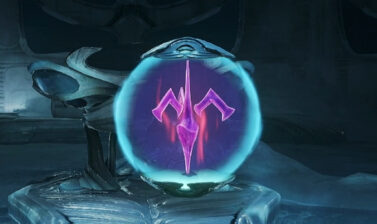
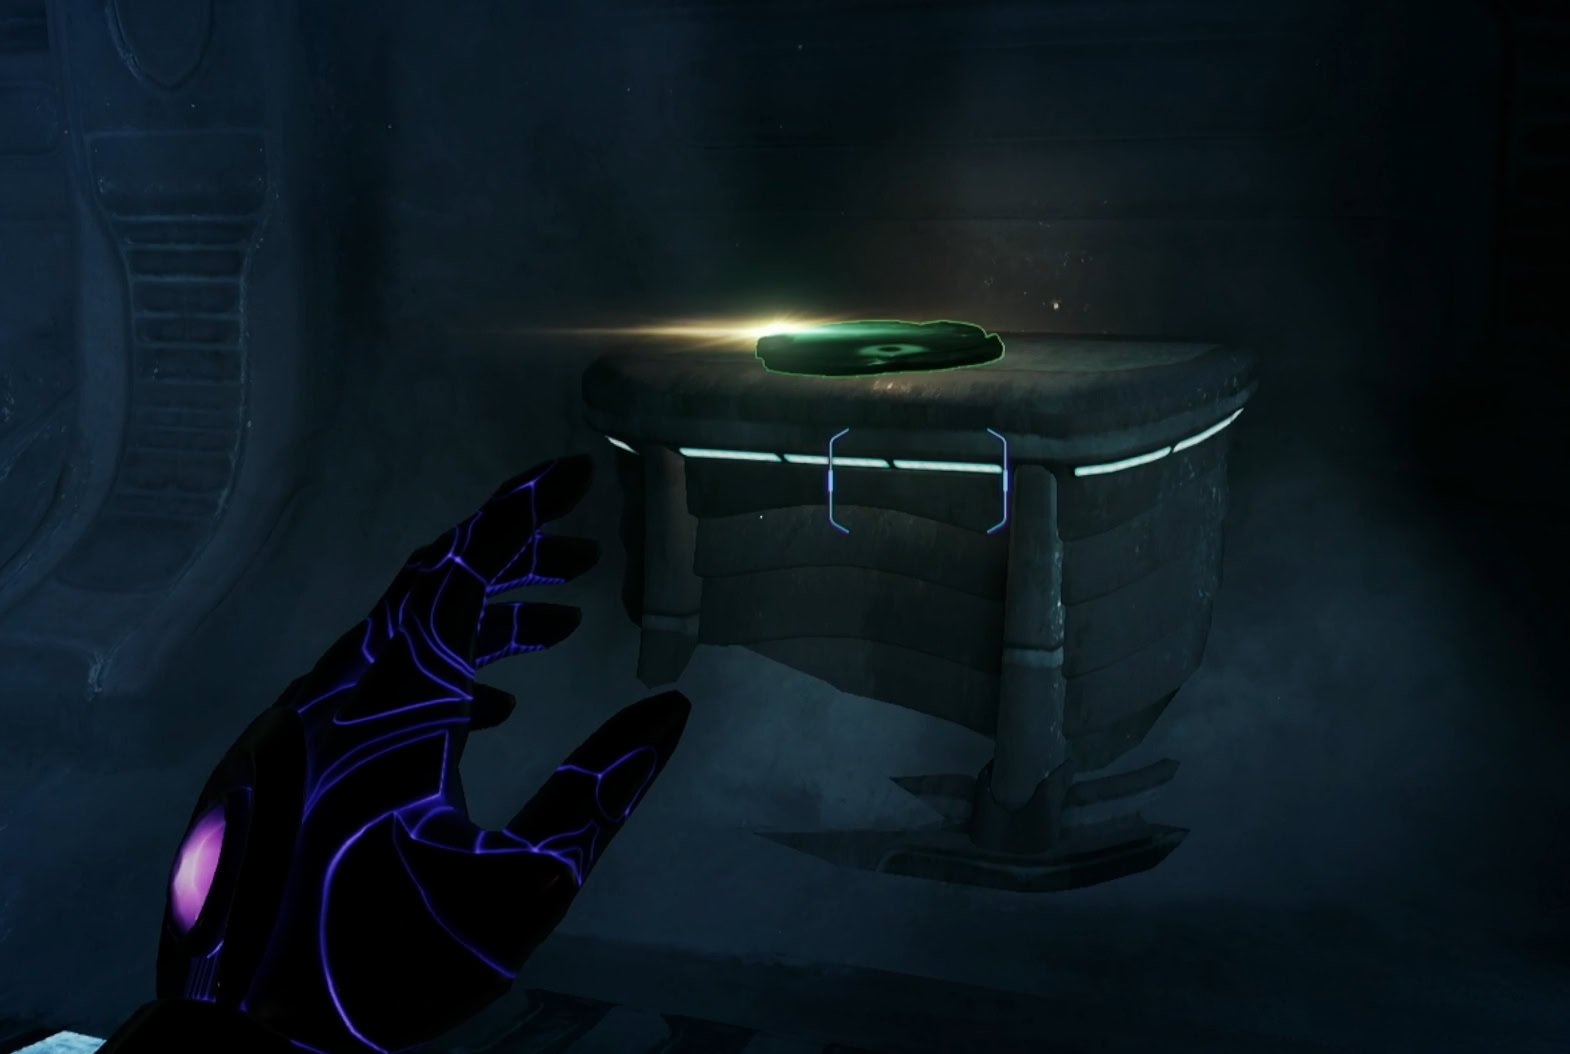
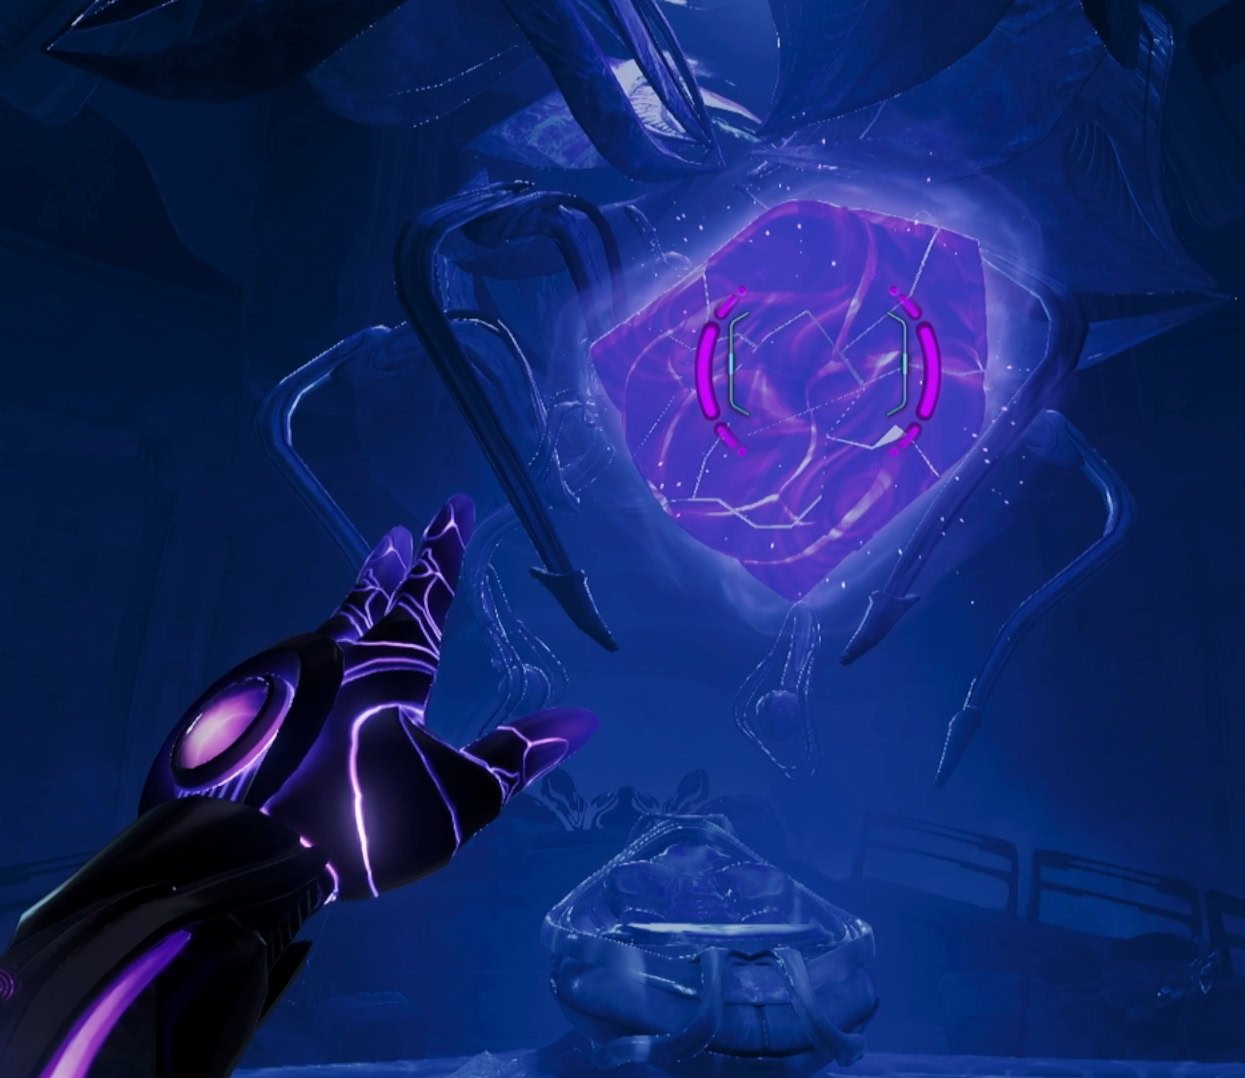
Return to the Psychic Lock and go to the right. Here’s a Pull Lock you can now open to access the Map Station. Download the map and return to the lock. With your TK Codes, more nodes on the lock will light up.
On the right side of your screen will be the shape you want to create with the lock. Make this shape using the Psychic Glove to take down the lock to reach the Medical Bays.

The Medical Bays
At the start of the Staging Corridor is another Psychic Lock blocking the way to the Power Generator. The west door leads to a Save Station, use it to refill on health and ammo as you might not have had a proper chance to since the snow wolves.
Scan the Research Diary on the counter, then shatter the window to the right of the diary. This will be your way inside as the doors here are virtually indestructible.
Staging Corridor
All but two of the doors in the Staging Corridor are locked. Go through the door on the far right end of the hallway and blast open the maintenance shaft. Morph Ball through and scan the second capsule from the left. This contains one of four TK Codes you’ll need to find.
Go back through the maintenance shaft and go through the door to access the Medical Hub. Defeat the Maintenance tanks and pull the locks off the three doors. You have your choice of which door to go through first.
Storage Bay
Taking the east door will take you to the Storage Corridor. On the left side of the corridor is a Research Diary near the Cryopod Rail System. Go into the Storage Bay, take the right path, and pull off the lock on the door.
Enter the central room, look to the left and up and you’ll find some ice you can melt with the Fire Shot. Melt the ice to bring down a cryopod, interact with the terminal to open it, and scan the frozen Griever Specimen for a TK Code Fragment.
Surgery Corridor Missile Expansion
The south door leads to the Surgery Corridor. The left side of this corridor has another Research Diary. When you reach the door at the end of the corridor, turn around to find an ice wall. Melt it, pull the lock off the maintenance shaft, and Morph Ball through to find a Missile Expansion.
Surgery Bay
Activate the terminal at the end of the Surgery Bay to activate the surgery bed. Scan the active Balsallae System to gain a TK Code.
Recovery Bay
Taking the west door leads into the Recovery Corridor and Recovery Bay. Scan the Research Diary on the right side of the corridor, then enter the Recovery Bay. Take the right path, blast open the damaged grate, and go through with the Morph Ball.
Scan the Research Diary in the office and melt the ice left and above the window. Pull down the terminal and scan it for the final TK Code.

Unlock the Medical Bays Psychic Lock
Return to the Staging Corridor and unlock the Psychic Lock to access the Ice Canyon. Don’t forget to scan that Research Diary as you descend down the Staging Corridor!

Bug Warning: It’s possible that the TK Code on the right will not disappear after you disengage the lock. If this happens, save at Save Station and close Metroid Prime 4. It’ll be gone when you reload your save.
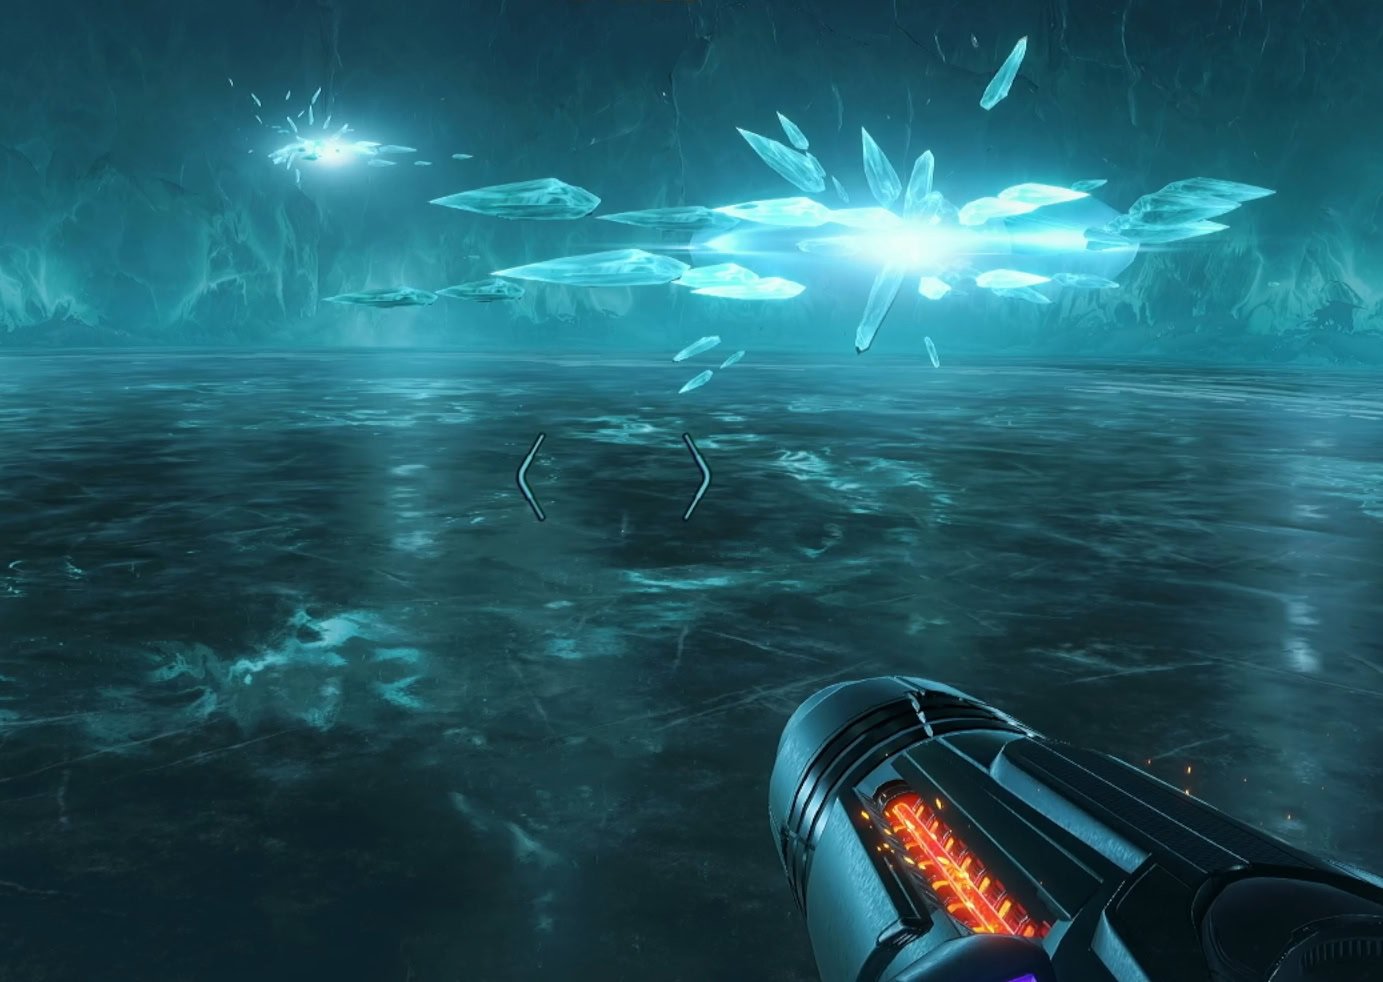
The Ice Canyon
Go through the Upper Airlock and scan the Research Diary, then go to the Ice Canyon. When you get outside, jump down to the ledge below facing northwest, then to north towards the start of a suspension bridge.
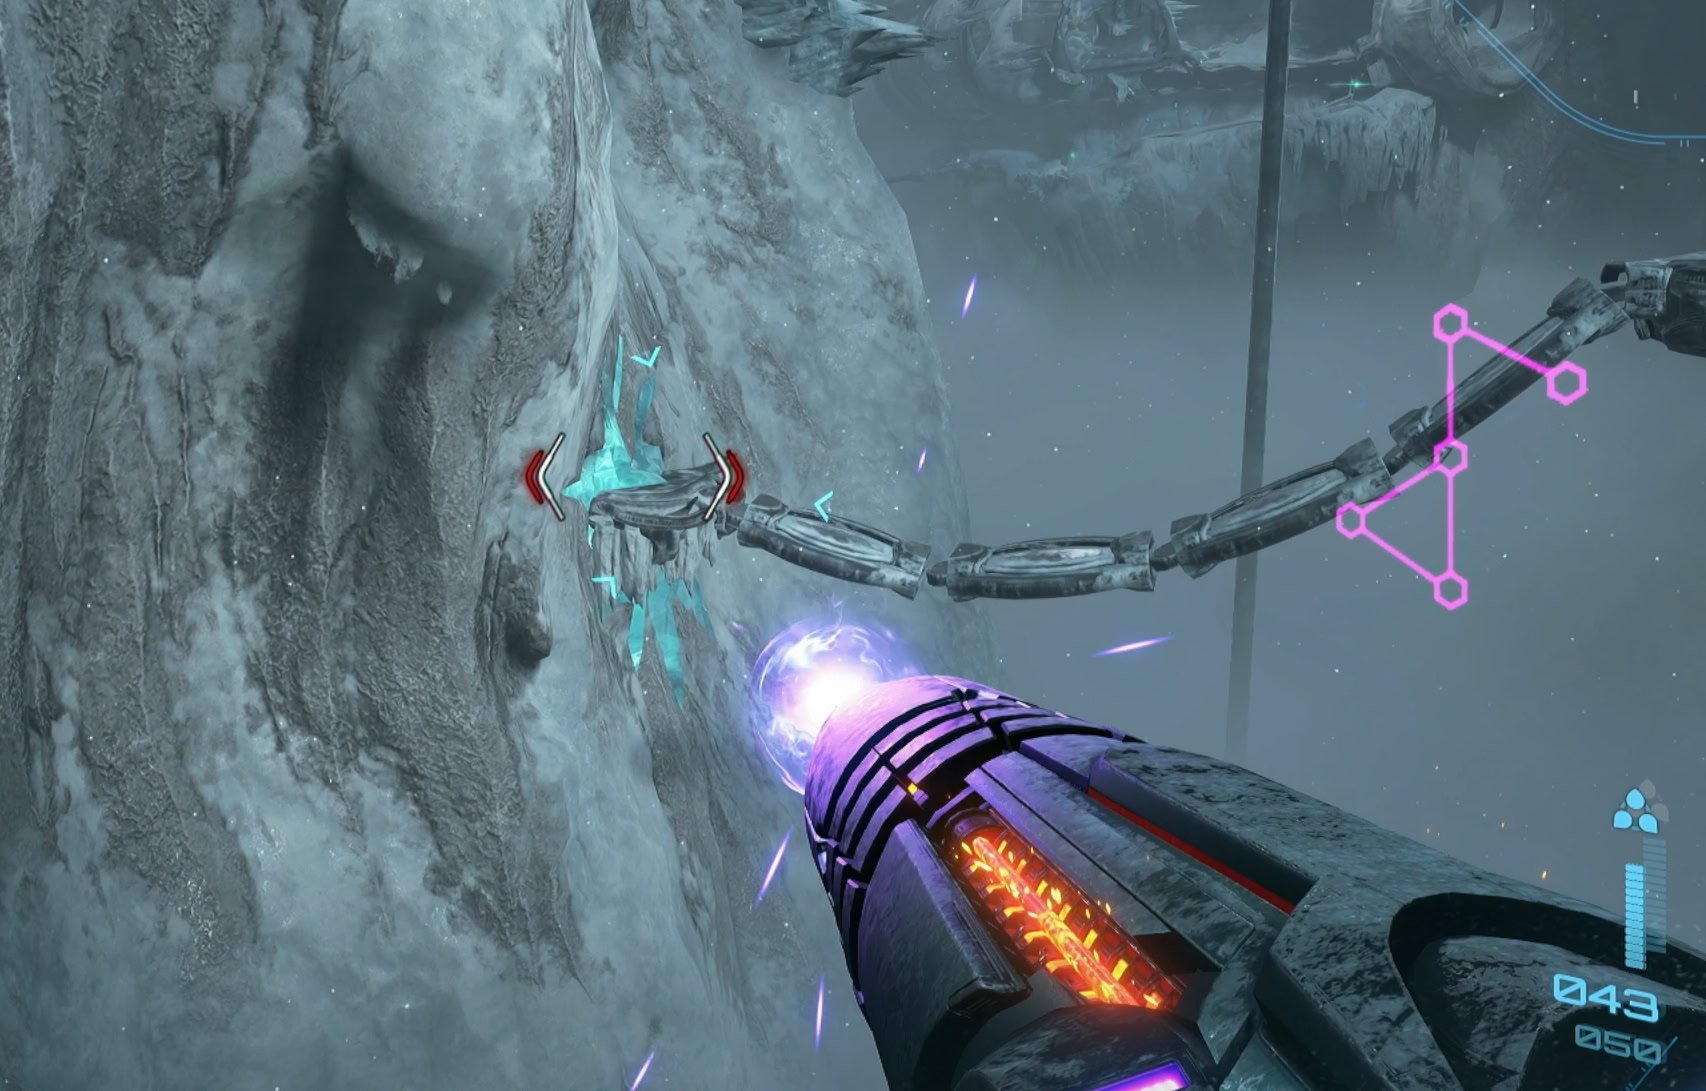
Don’t cross the bridge until the wind stops, it’ll push you off if you try. Continue making your way across the bridges. When you reach a dead end, look east and use a charge beam on the bridge stuck on a frozen wall.
Cross the platforms and bridge, blast open the canopy, and jump inside. Go through the Lower Airlock where you’ll find a Diary, then go through the Data Archives and into the Maintenance Access hall. Use the Save Station on the door to the left to save your progress.
The Power Station
When you access the Power Generator, you’ll see three large turbines ahead. Take the left ramp down, scan the Diary, then melt the ice below the platform. Pull the Bomb Slot to the other side where the Slot Connector is. Pull down the slot connector and bomb the slot to power the terminal above.
Activate the Backup Power Sockets
Start the turbines with the terminal and a Backup Power Socket will appear on the first fan. A Charge Beam or Control Beam will start it up, then use Control Beams to activate the next two Power Sockets. The second one is on the left wall, while the third is on the right wall.
Power Generator Energy Tank
With the fans activated and power restored, Tokabi will ask you to return. Before you do, use the Mobile Ramp Terminal on the west side of the Power Generator room to lower a nearby ramp.
Go down the ramp, blast away a crate blocking a tunnel and Morph Ball in. Get past the electrical currents, taking cover behind the pillars or between the electricity. Bomb past the blockage to claim your Energy Tank!
As you make your way back up to Tokabi , various parts that were frozen have melted. This can mean you’ll find new Research Diaries! You’ll find one of these at the end of the Heat Exchange Column on your way back.
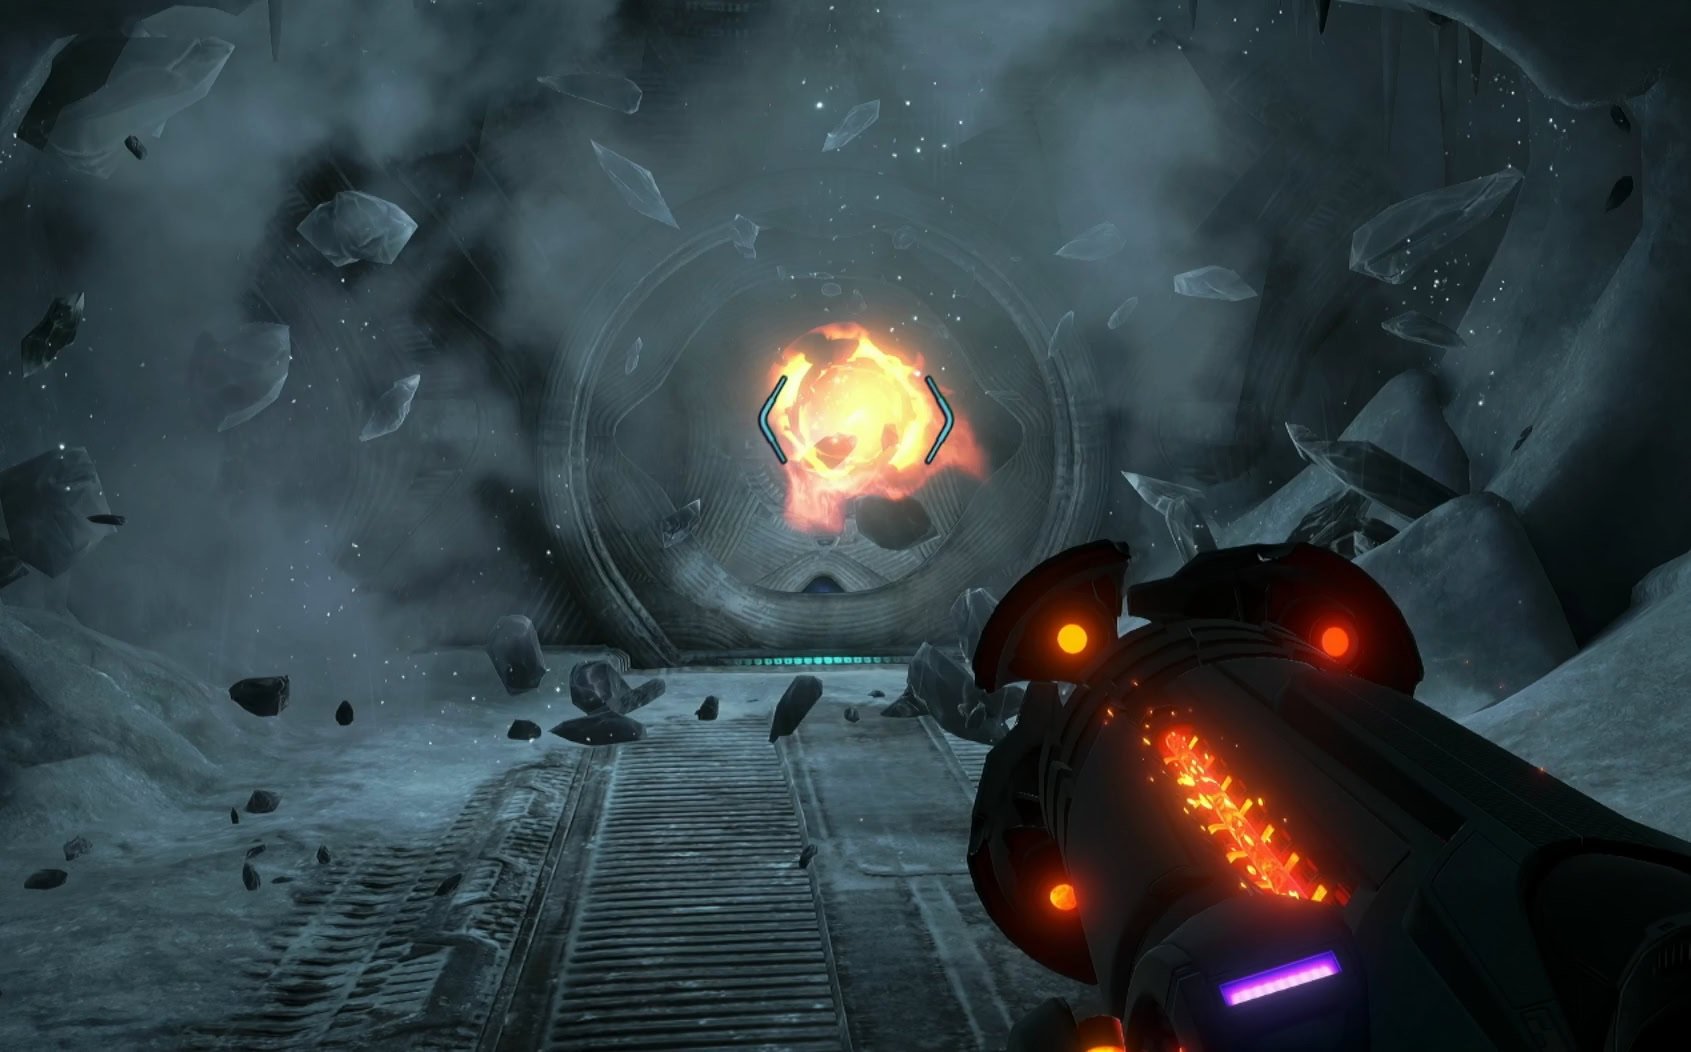
Get back to the Deep Archives and activate the Bomb Slot to unlock a cutscene through a terminal. The only way back up is through the Morph Ball tunnel on the north wall. When you’re outside at Ice Canyon, go right and activate the tram to return to the Upper Airlock.
Containment Breach
Upon reaching the Upper Airlock, an alarm will sound and the door ahead will lock. You’ll be using previously locked Morph Ball Tunnels to get your way back, start by going through the one on the east wall.
It would appear that as you activated the generator fans, something has hit them as well. The Frostburn Griever specimens are now active and attempting to escape. Circle around Storage Bay to find a Diary and take the Morph Ball tunnel out to the Surgery Bay, then to the Recovery Bay.
Defeat the Grievers in the Medical Hub and blast off the Broken Shutter on the door that leads to the Staging Corridor.
Staging Corridor Missile Expansion
Going back through the Staging Corridor, take the second door on the right and go through the Morph Ball tunnel to get a Missile Expansion.
Bio-Labs Access Missile Expansion
When you return to the Bio-Labs, go to the Bio-Labs access, the hall that leads to the Map Room. Pull off the debris to clear a path to a frozen wall, hiding a Missile Expansion behind it.
Return to Tokabi
Use the Morph Ball tunnel in the Cryopod Conveyor room. When you find the steam vents below the Spider Ball tracks, bomb it to activate it and be launched up.
Help Tokabi fight off the Grievers in the Lobby. When the room is clear, take the elevator below to enter the Quarantine level. When you’ve made it down, go through the door on the left for the save station.
Security Gates Shot Expansion
On the north wall of the Security Gates room is a small shattered panel of tempered glass. Blast it open to gain access to a Shot Expansion.
When you’re ready to fight the boss, pull the locks of the quarantine gate and go into the Quarantine Chamber below.
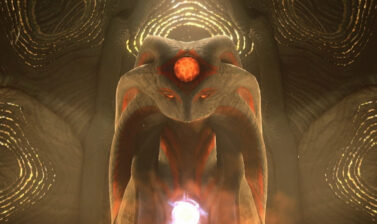
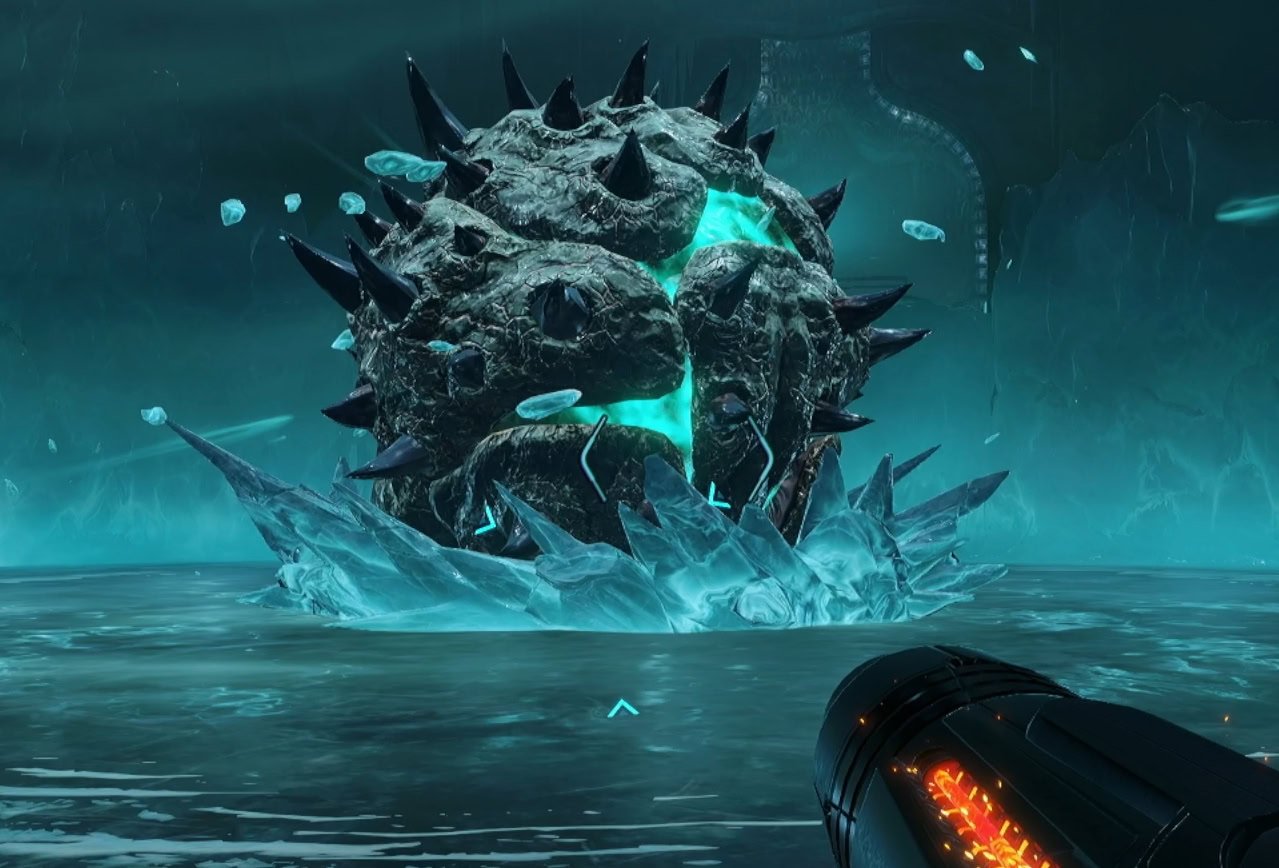
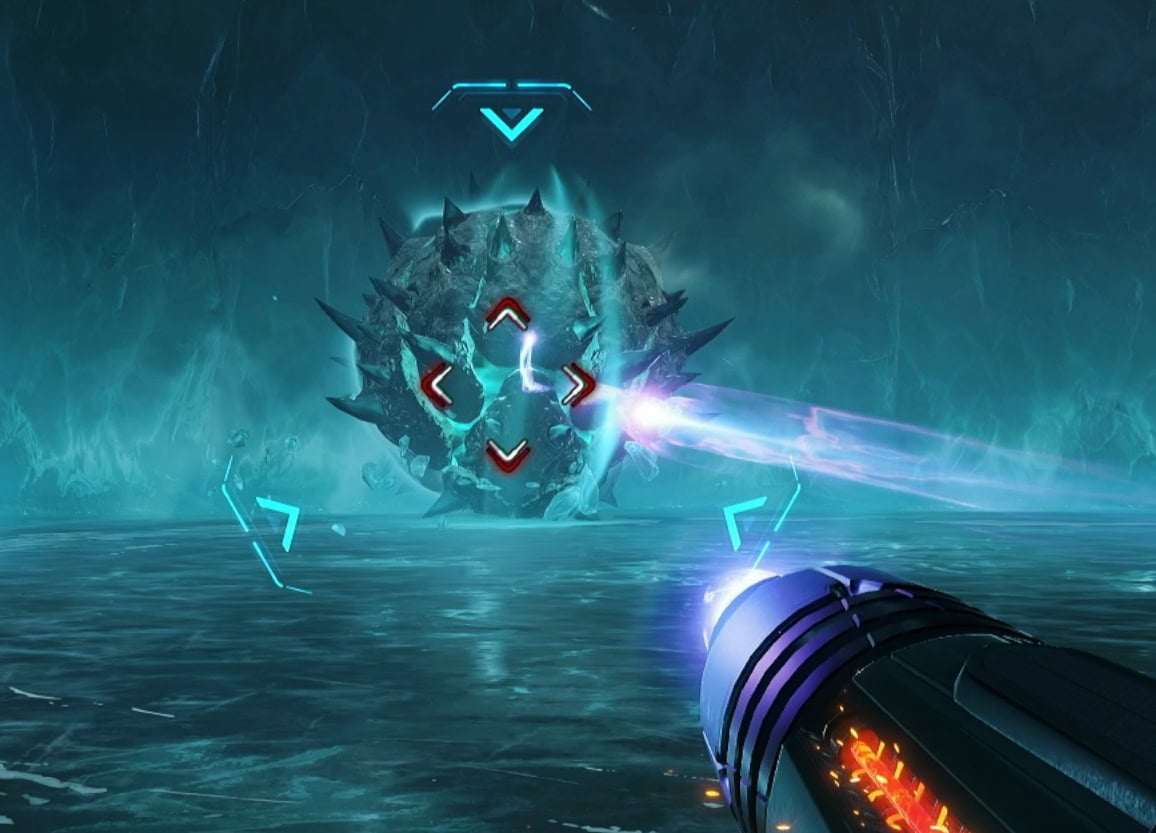
Defeat Keratos
Keratos attacks primarily through ice projectiles, ramming into you, or creating rings of ice spikes you need to jump over. It’s impervious to all damage, even if you shoot its eye or between its armor plates. Regardless, shoot its eye with your Psychic Beam whenever you can.
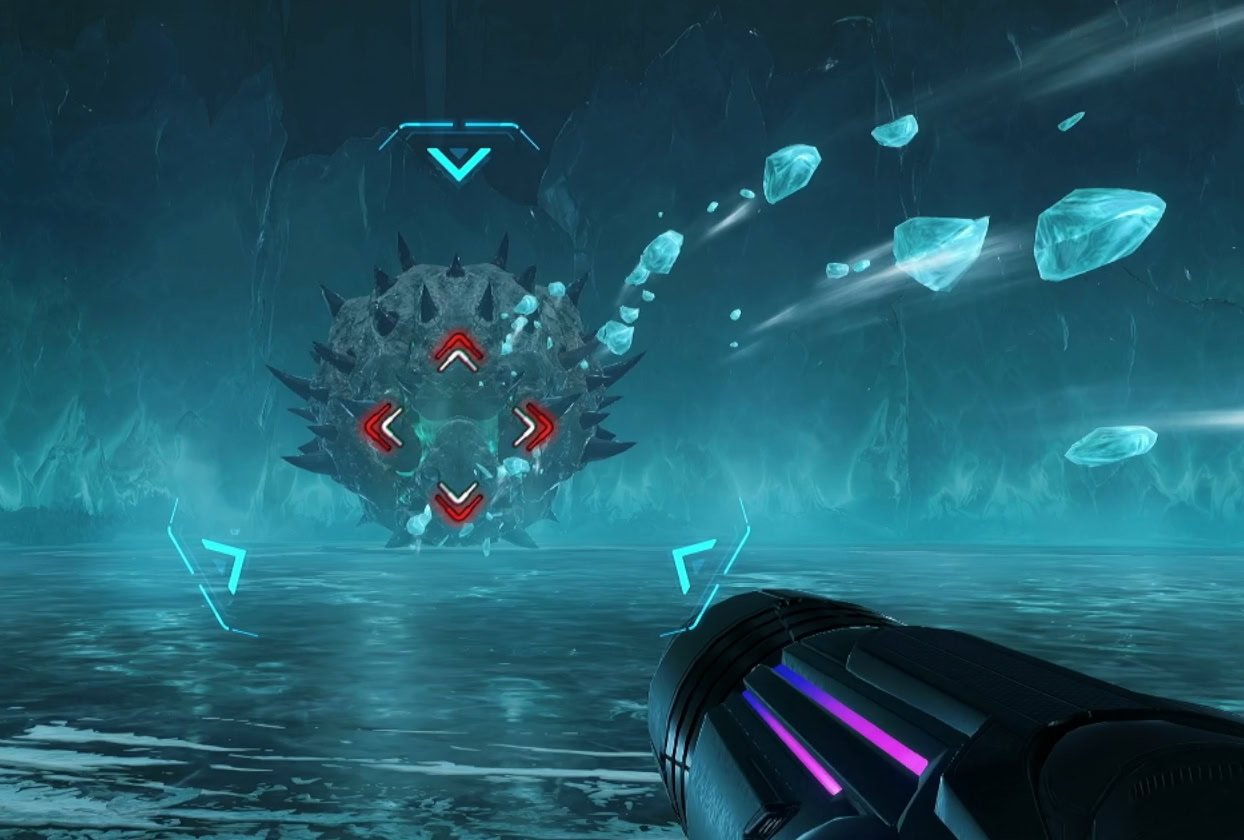
Keratos launches slow moving ice spikes that shoot even smaller spikes around it. When destroyed by you or hitting terrain, the large ice spike will drop Energy or Ammo.
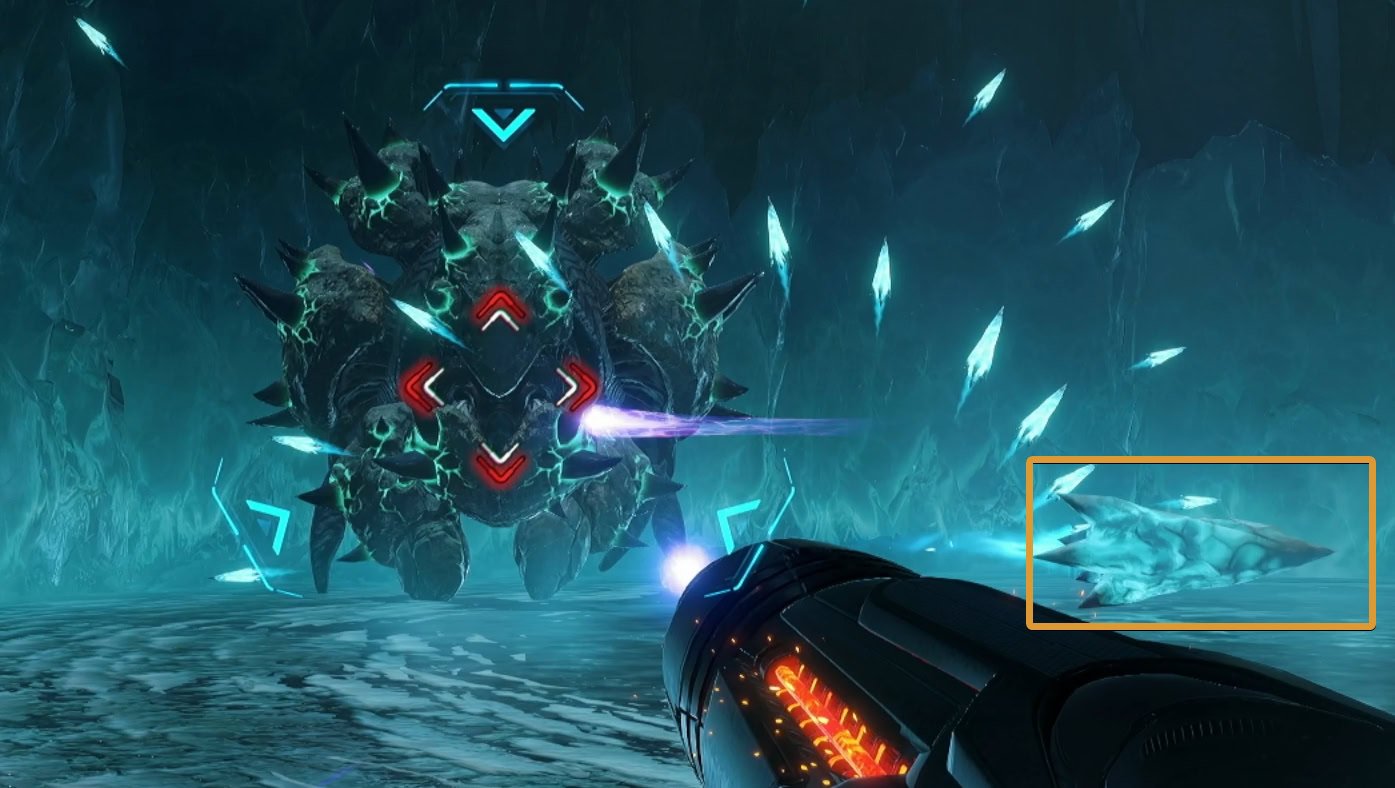
Keratos can form a small ice spike wall around itself. It will start spinning in the center of the room, pulling you towards the spikes. Destroy that ice wall as soon as you can.
Destroy any spinning ice discs that come your way. Not only do these follow you, but they’ll freeze you if you get hit by them, leaving you open to attacks.
When you shoot Keratos’s eye enough times, he has a short pop animation. This means you’ve shot him enough times that he’ll roll at you. Make sure there’s an ice wall behind your back.
Keratos will roll to you, side dash away from it before it hits you. It’ll get stuck in the wall and expose its weak spot. If there’s no ice behind you, it won’t get stuck. Use your Fire Shot on the Weak Spot and switch back to standard shots when it get back up.
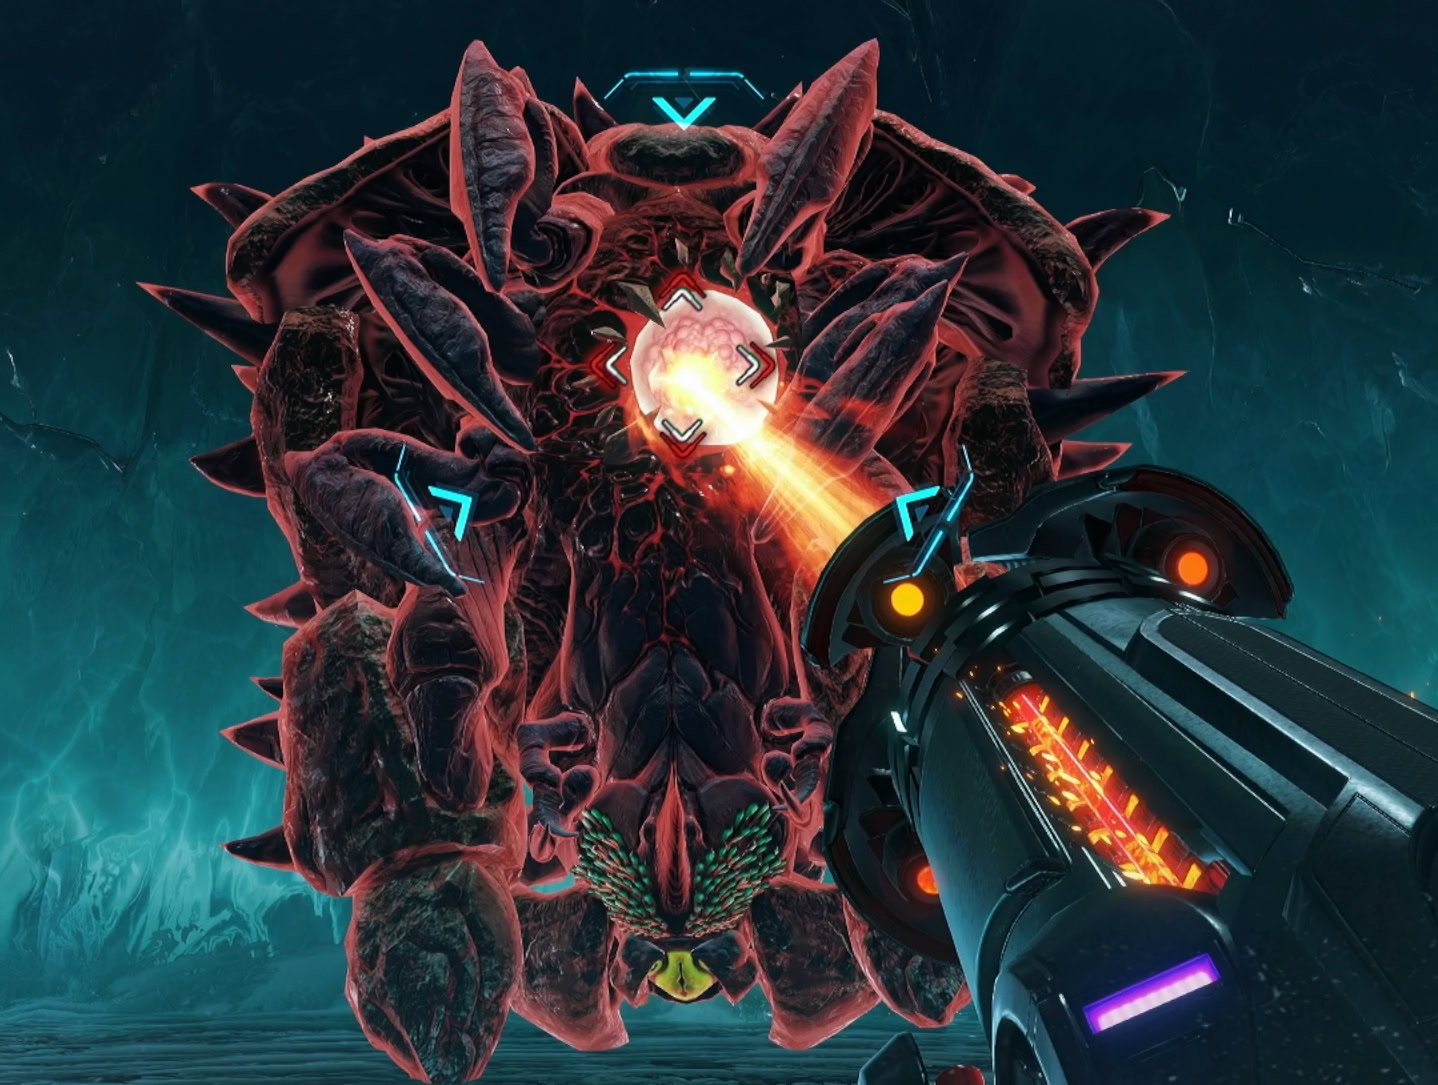
When Keratos gets back up after taking damage for the first time, it’ll get new abilities. On top of making taller ice rings to jump over, it can spin and launch shards of ice at you.
Keep an eye on its spins from here on out. If it doesn’t have a blue glow while spinning, it’s going to launch ice spikes. When there are blue glowing bits, that’s your time to bait it into an ice wall.
Slow moving Gust Crystals will follow you, destroy them before they freeze you to get some Energy. These aren’t too much of a threat as they’re very slow and Keratos will likely destroy them by trying to ram into you.
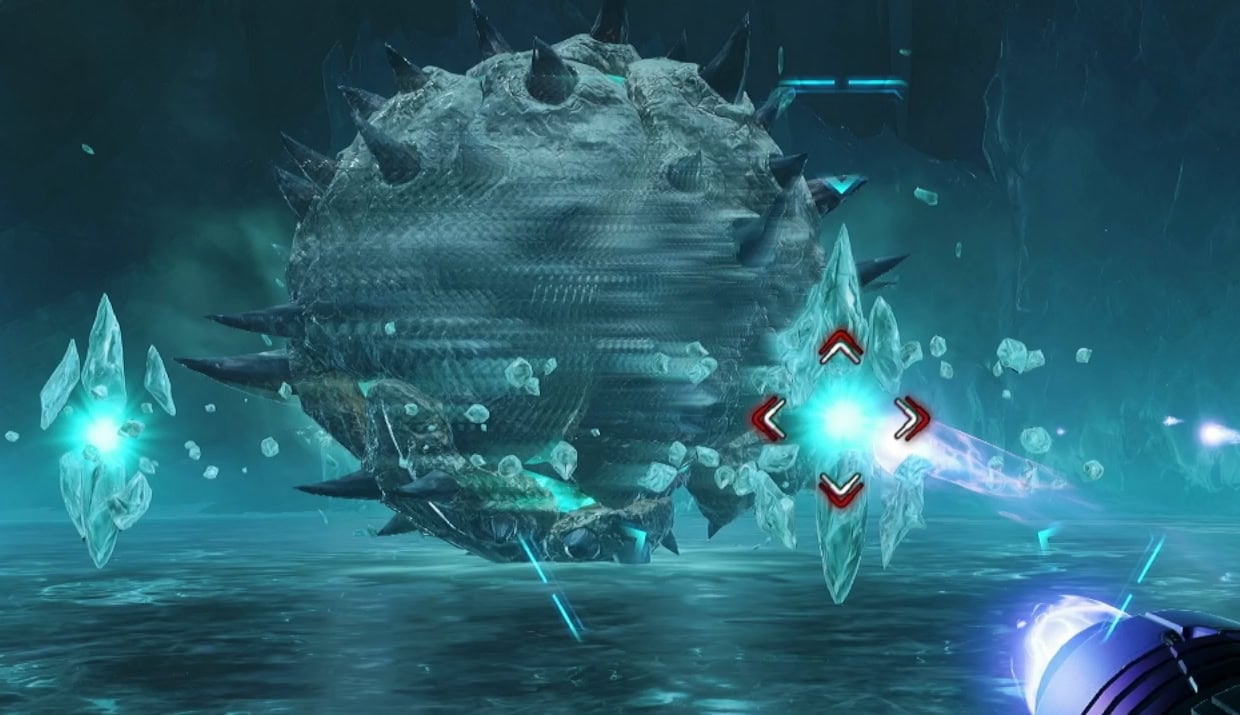
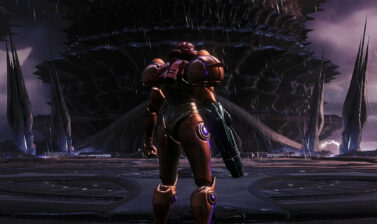
Aside from an ice beam attack that you have to jump over, that’s all there is to Keratos. When defeated you’ll earn yourself the Psychic Boost Ball ability!
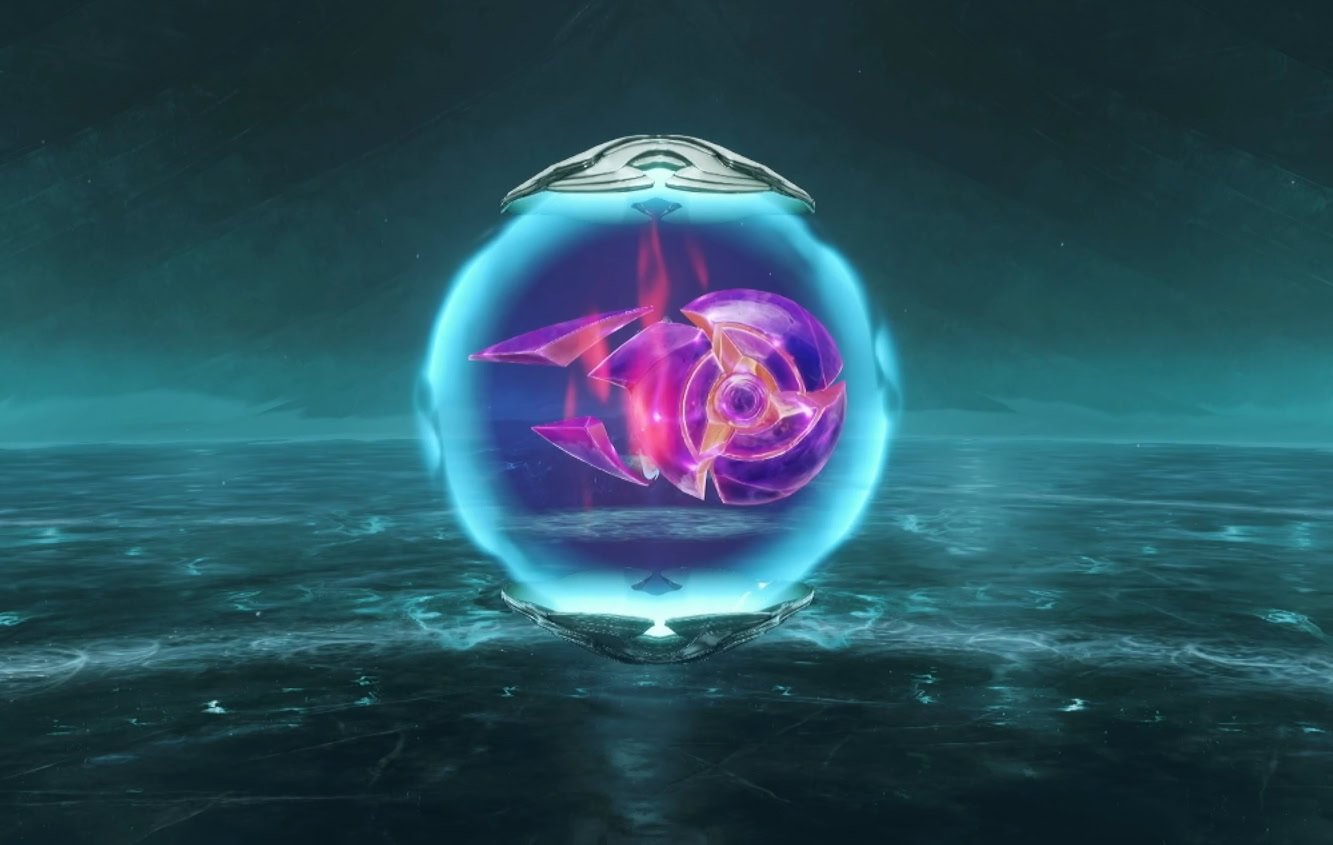
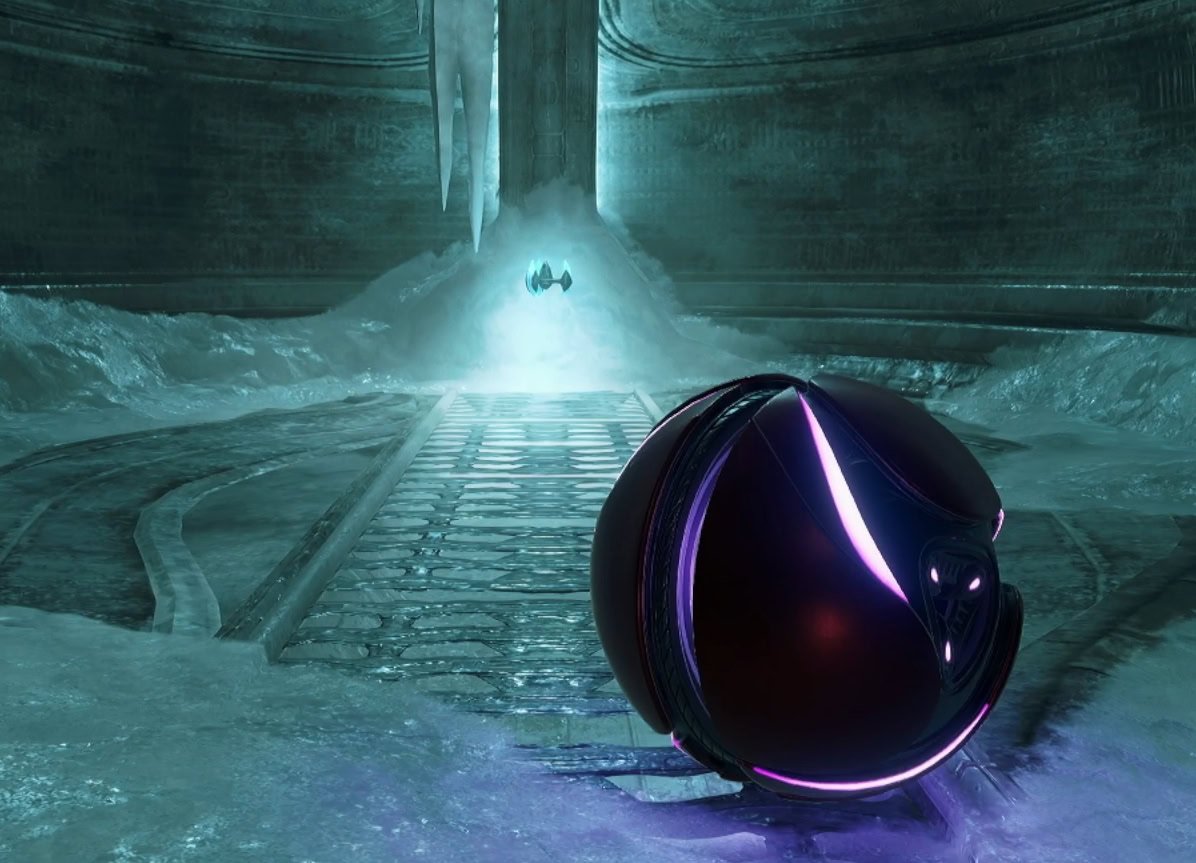
The Psychic Boost Ball
The Psychic Boost Ball allows you to develop a kinetic charge while in Morph Ball mode. Hold and release the Boost Ball button to gain a speed boost. The longer the charge, the stronger the boost. This is useful for activating specific switches, powering up generators, or going up half-pipes.
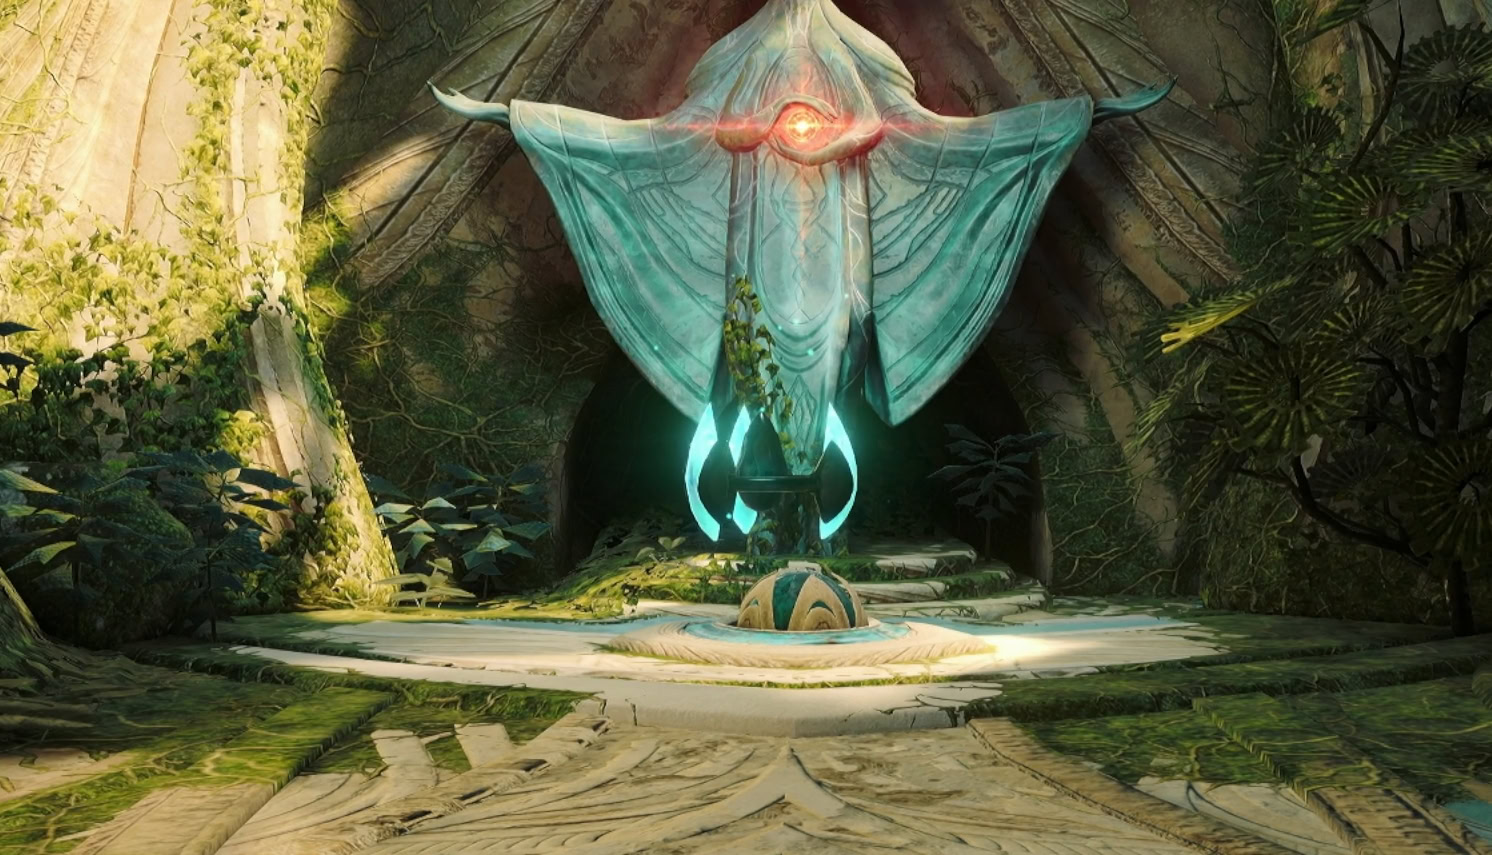
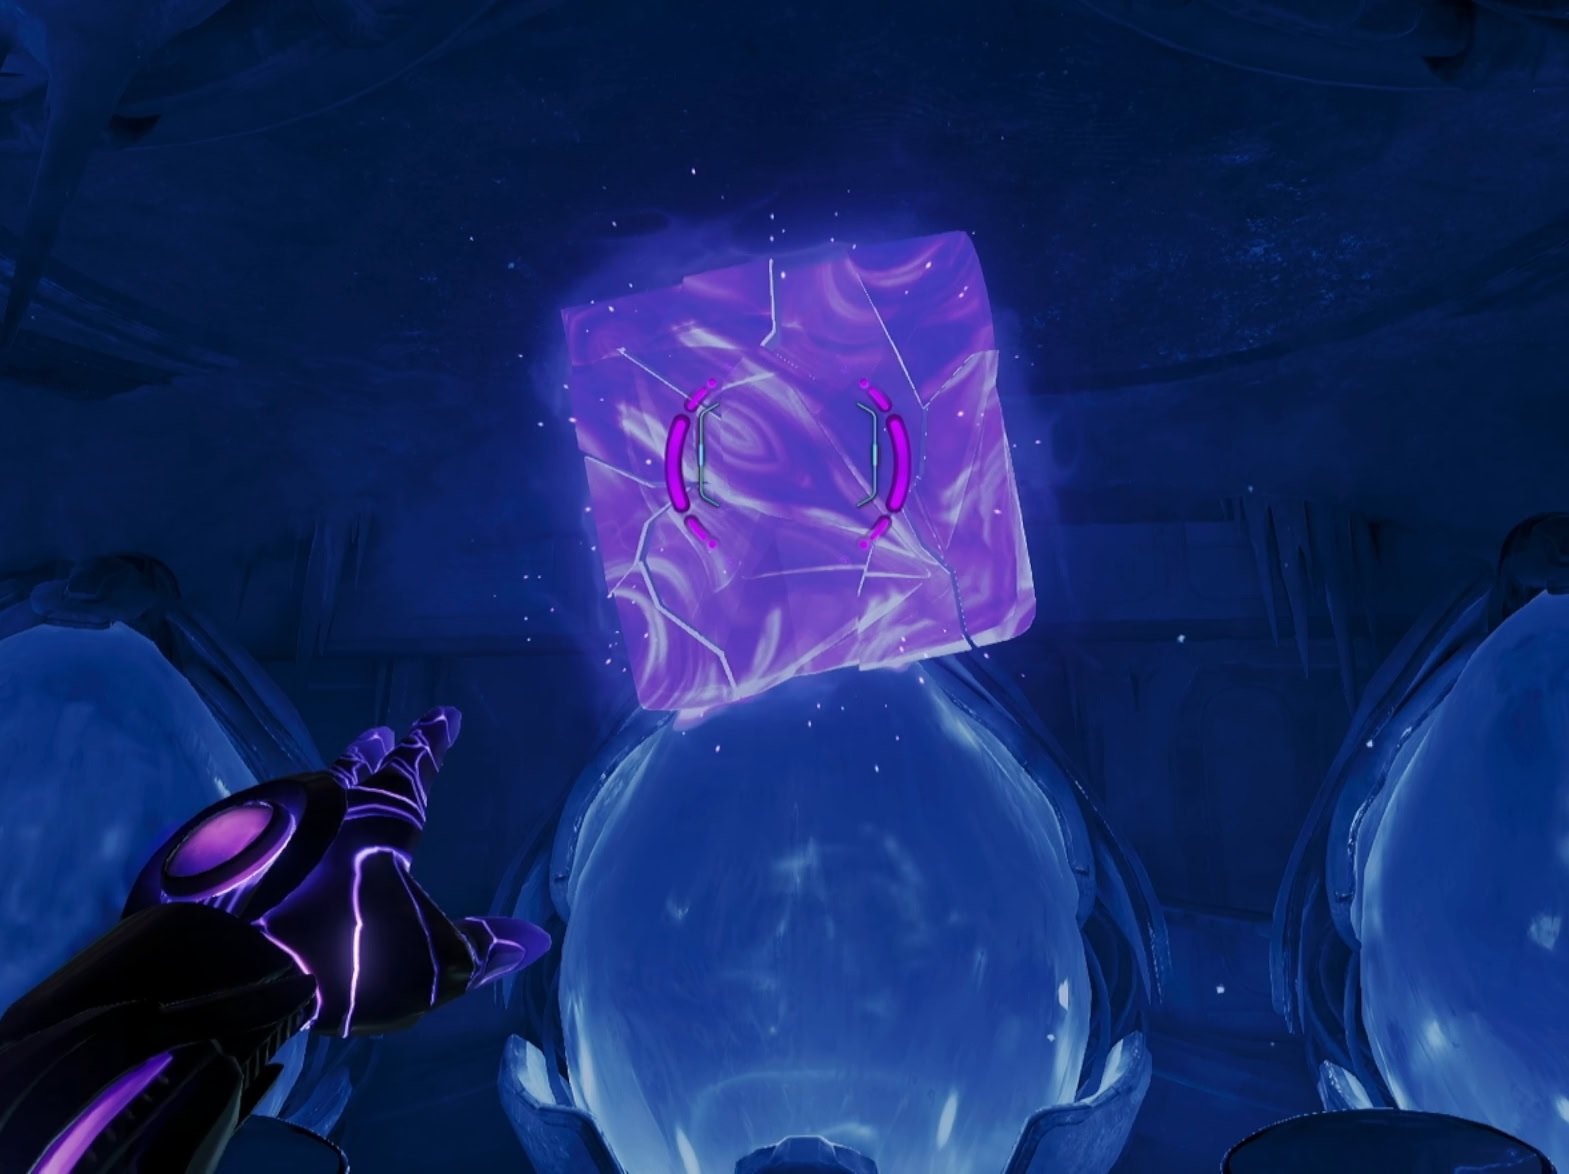
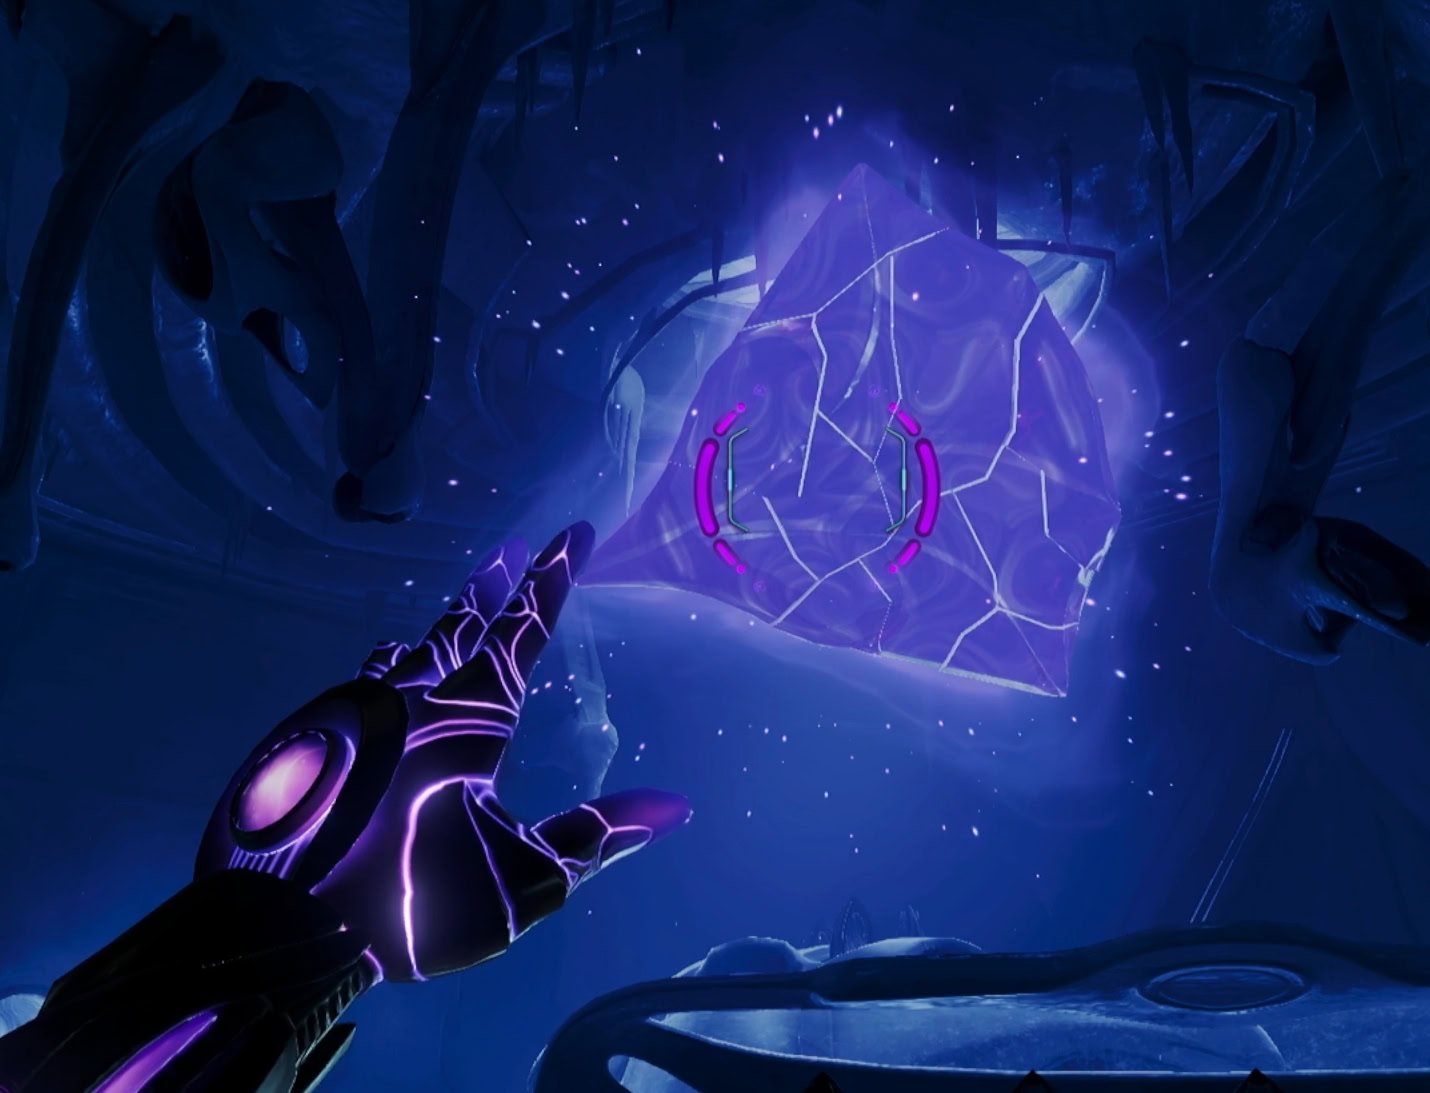
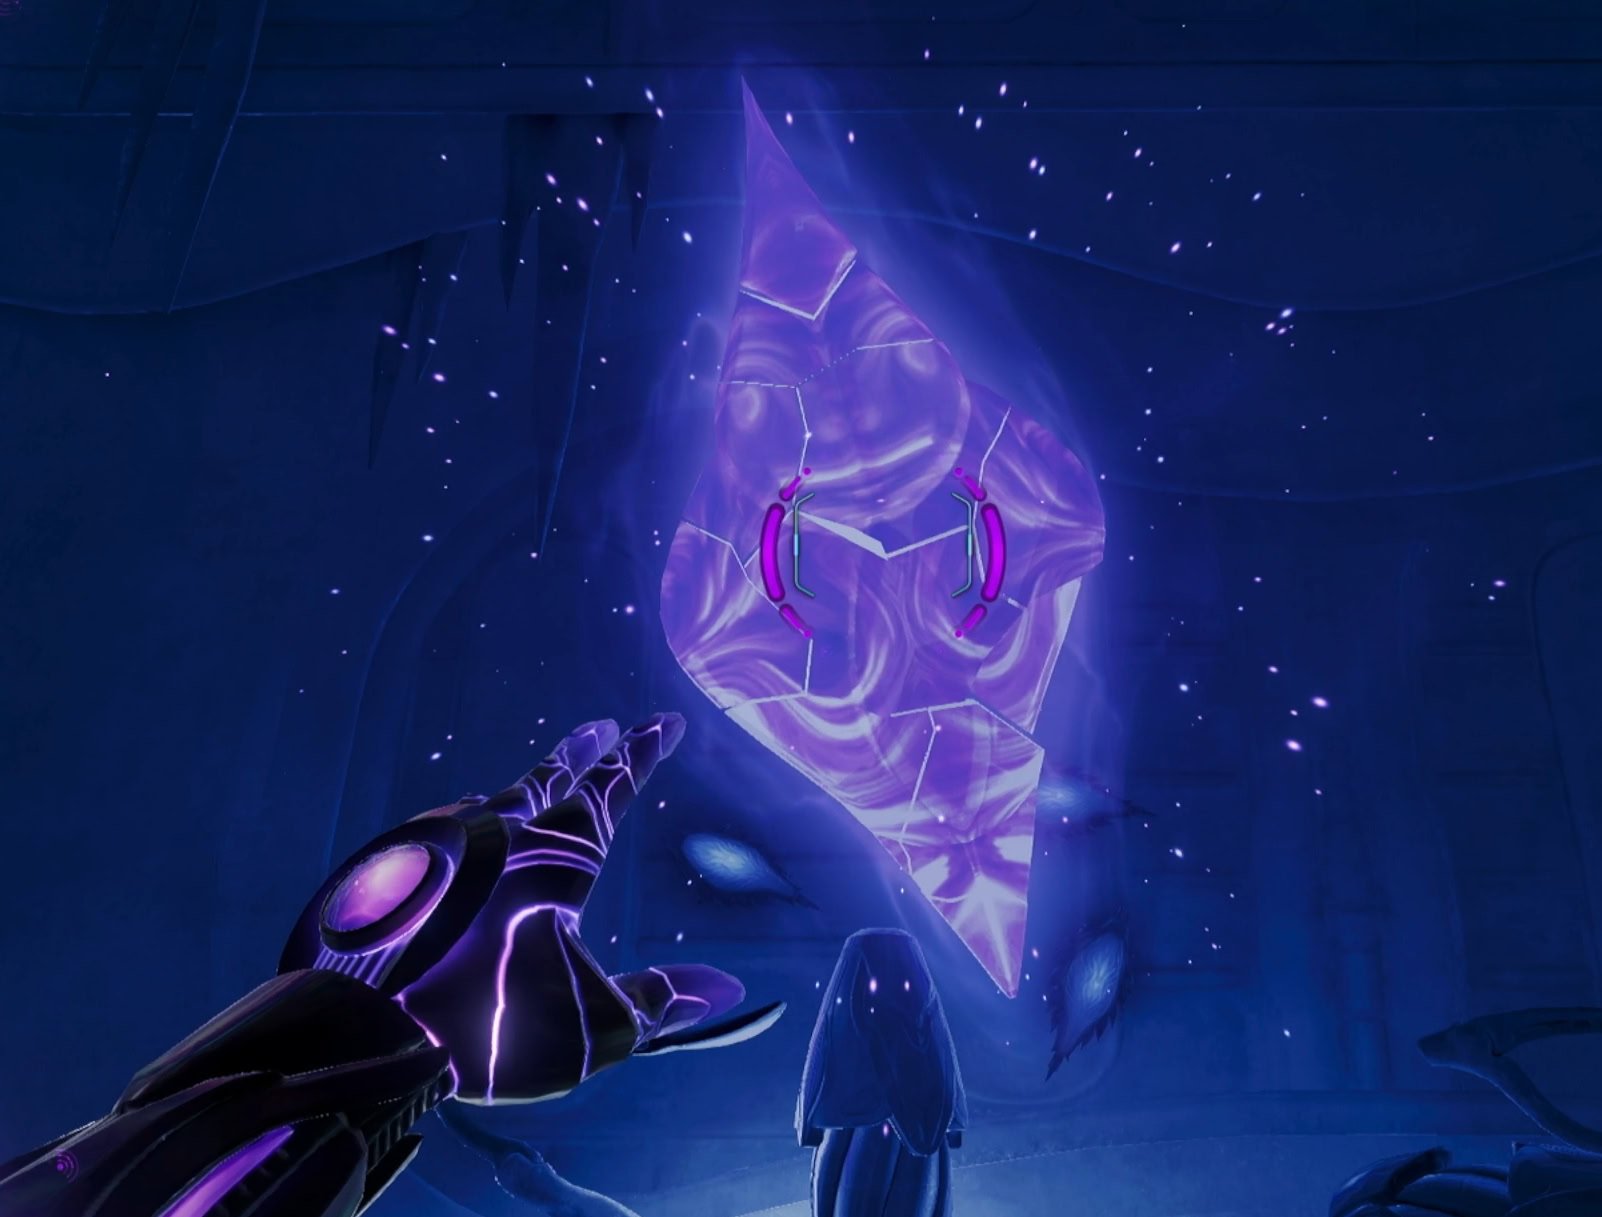
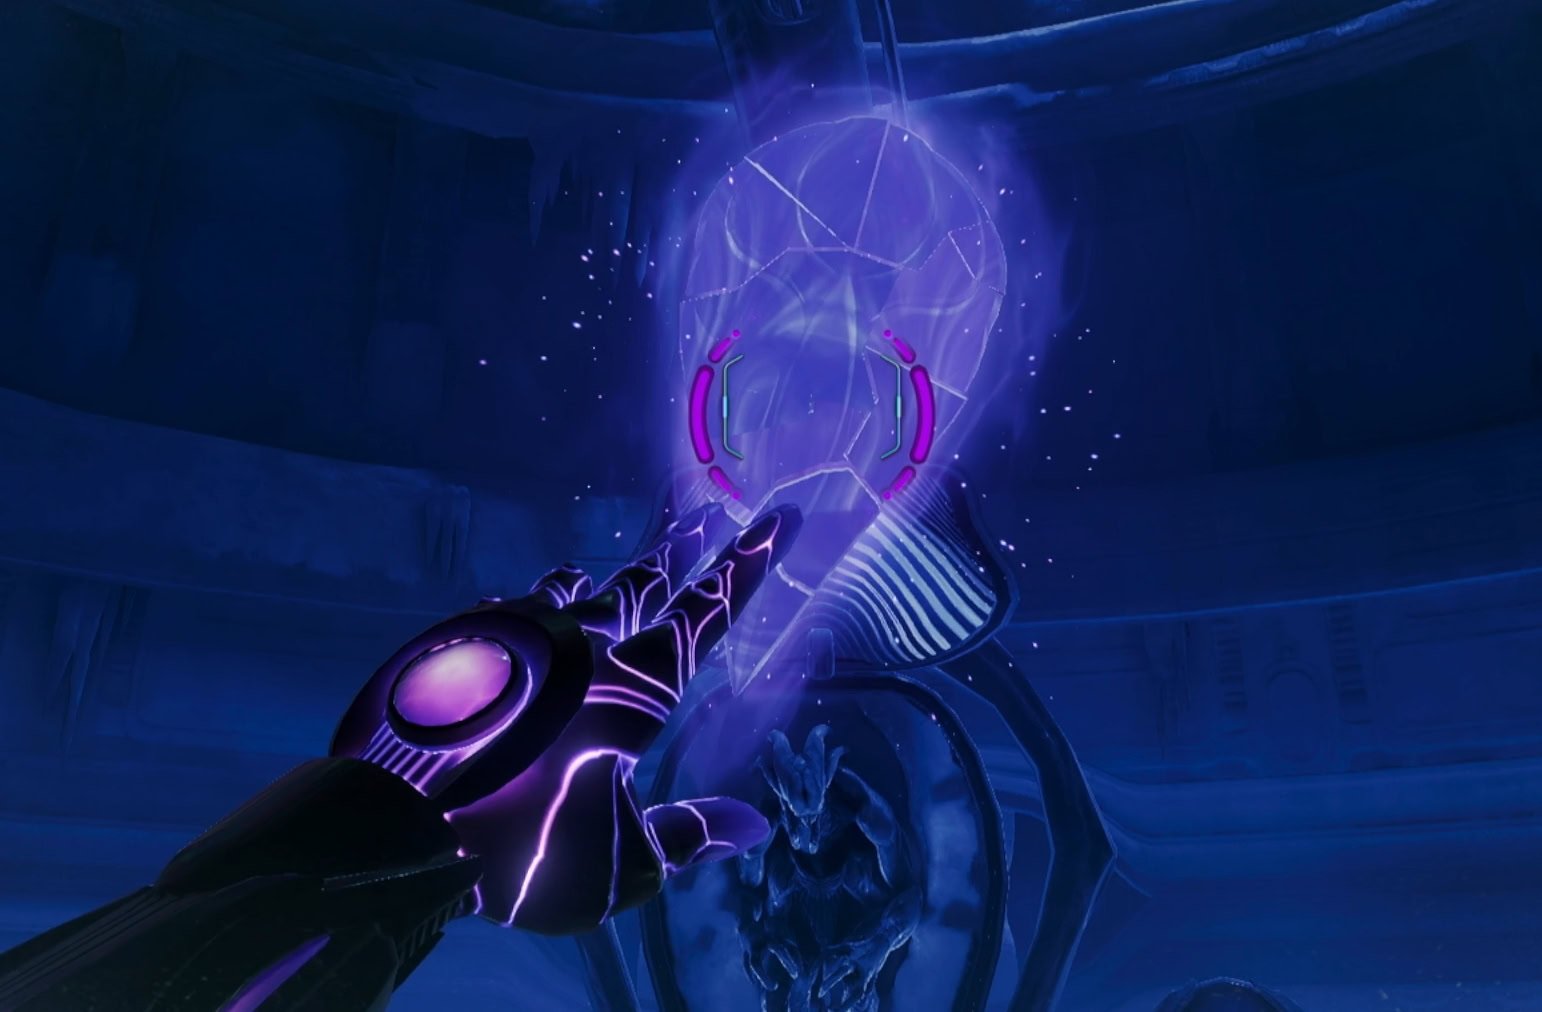
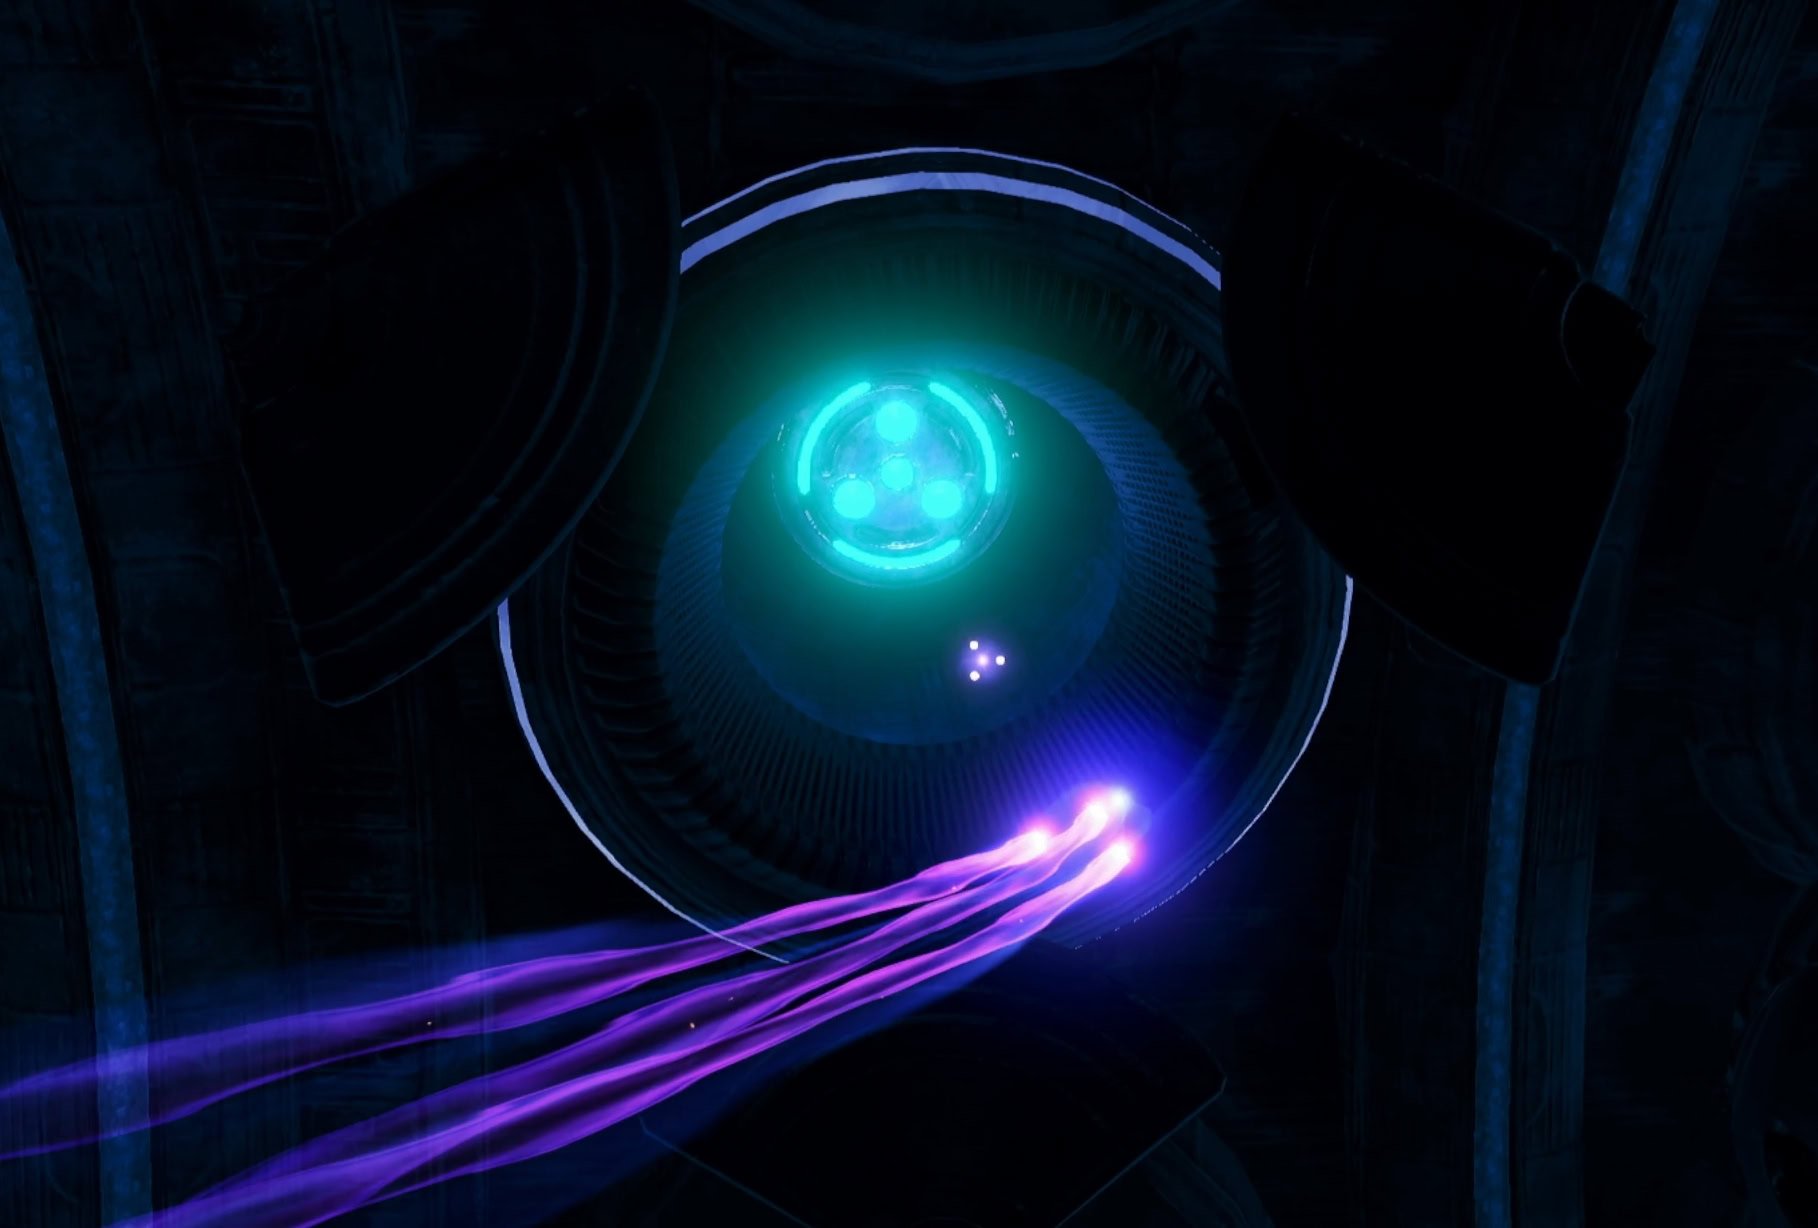
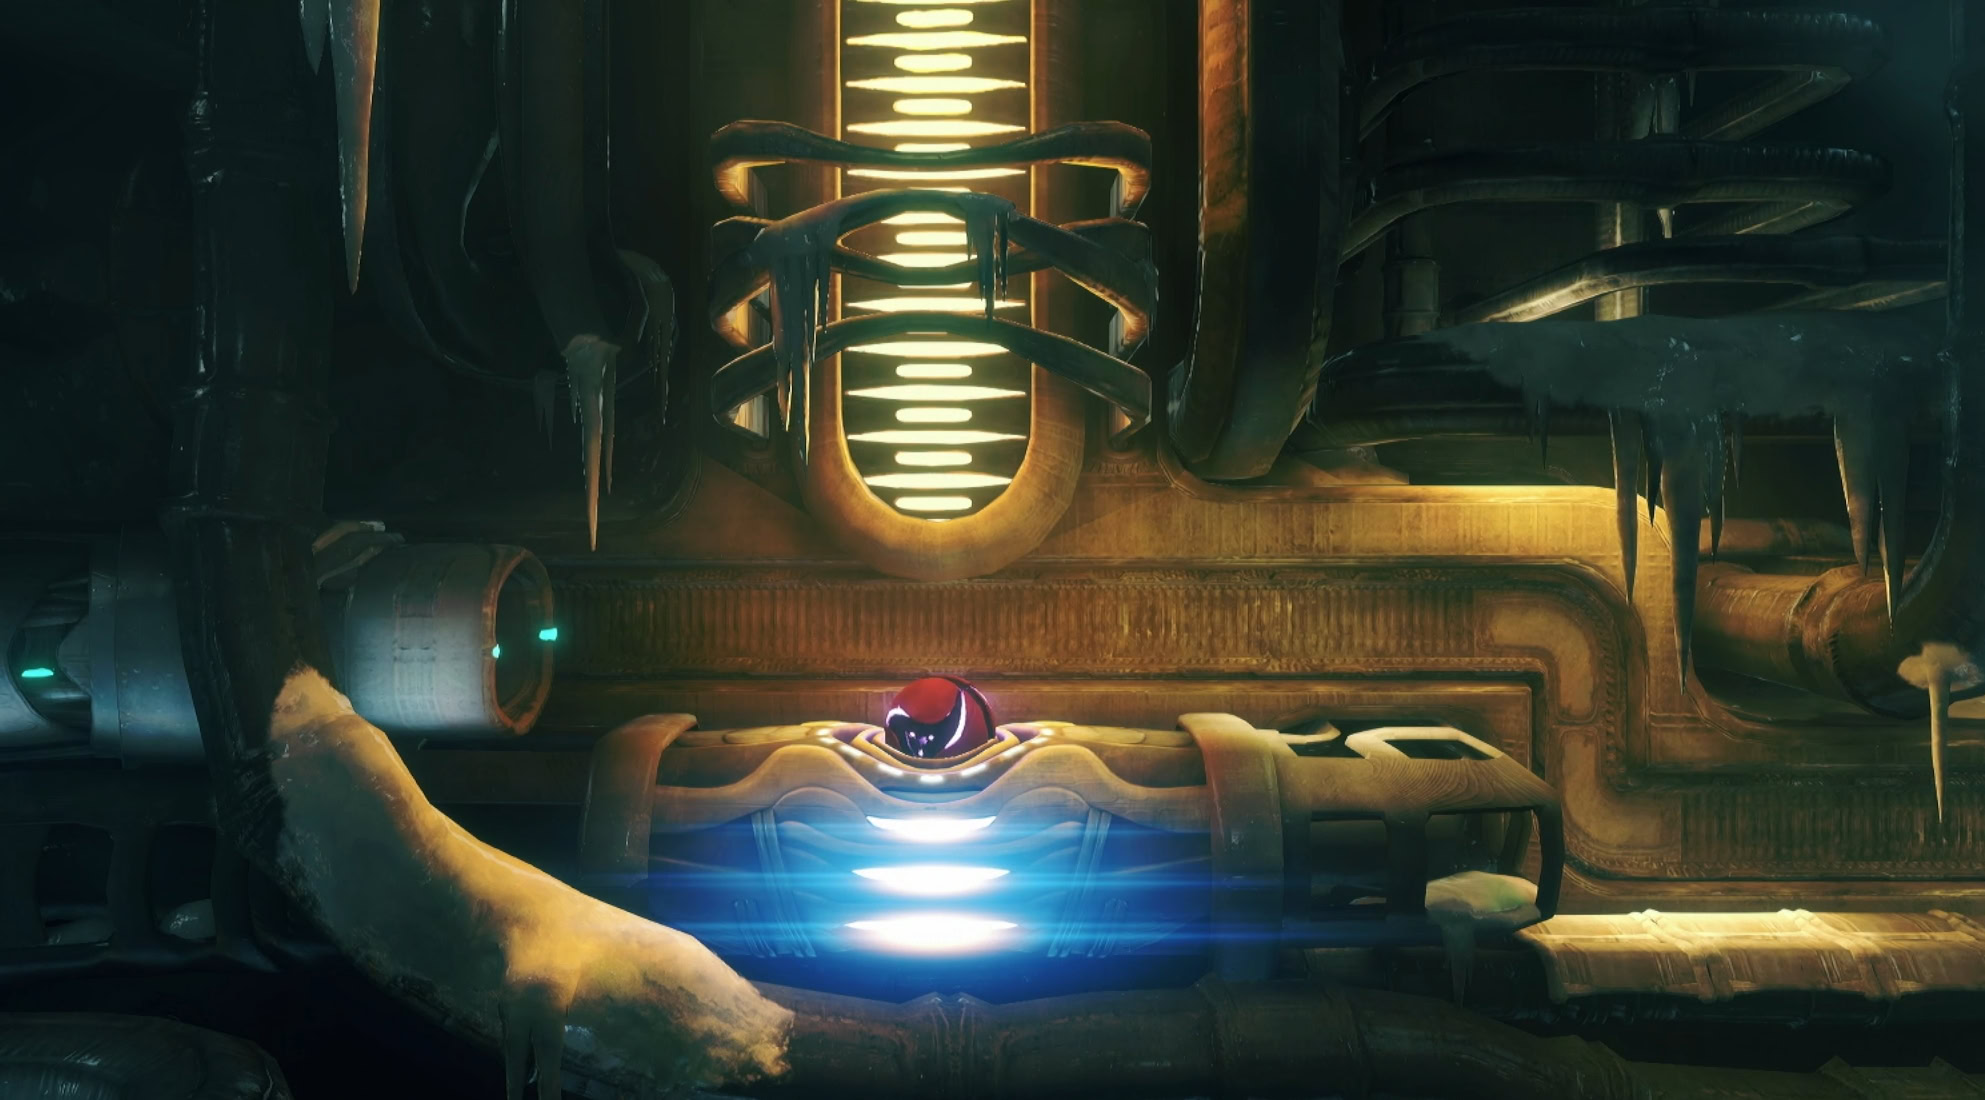
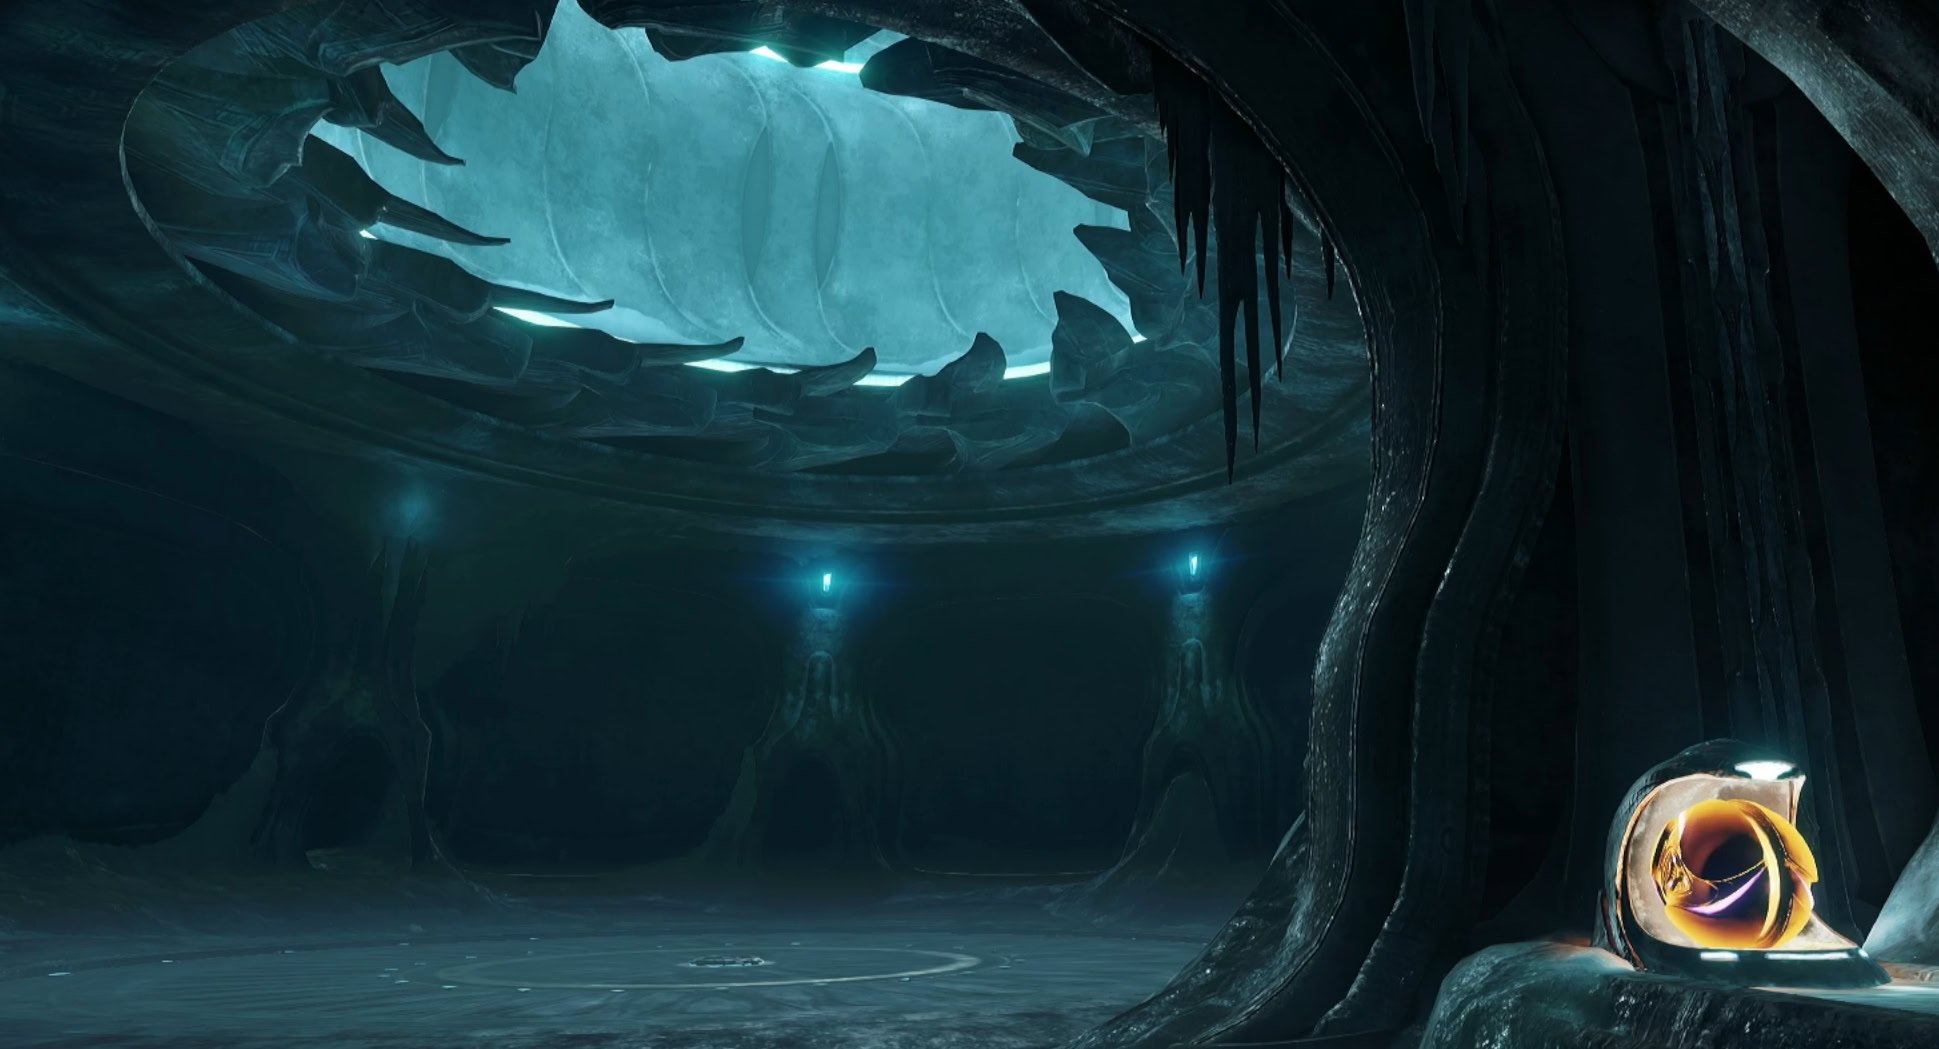
One way you can power up a switch or generator involves you rolling around a circular tunnel and spinning around until the device activates. You’ll do this with the Sacred Shrine after unlocking the Psychic Boost Ball.

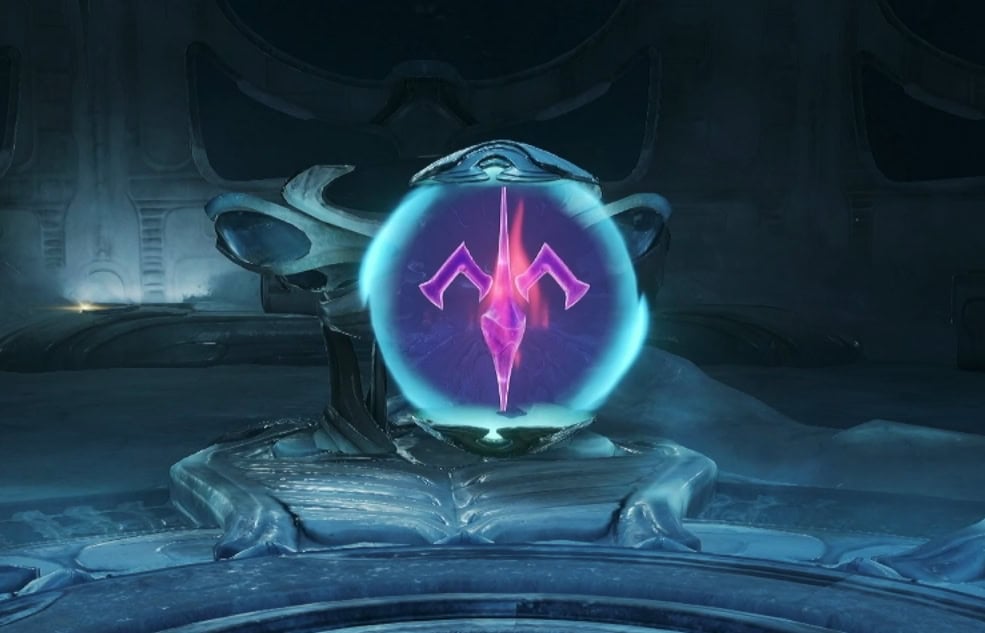
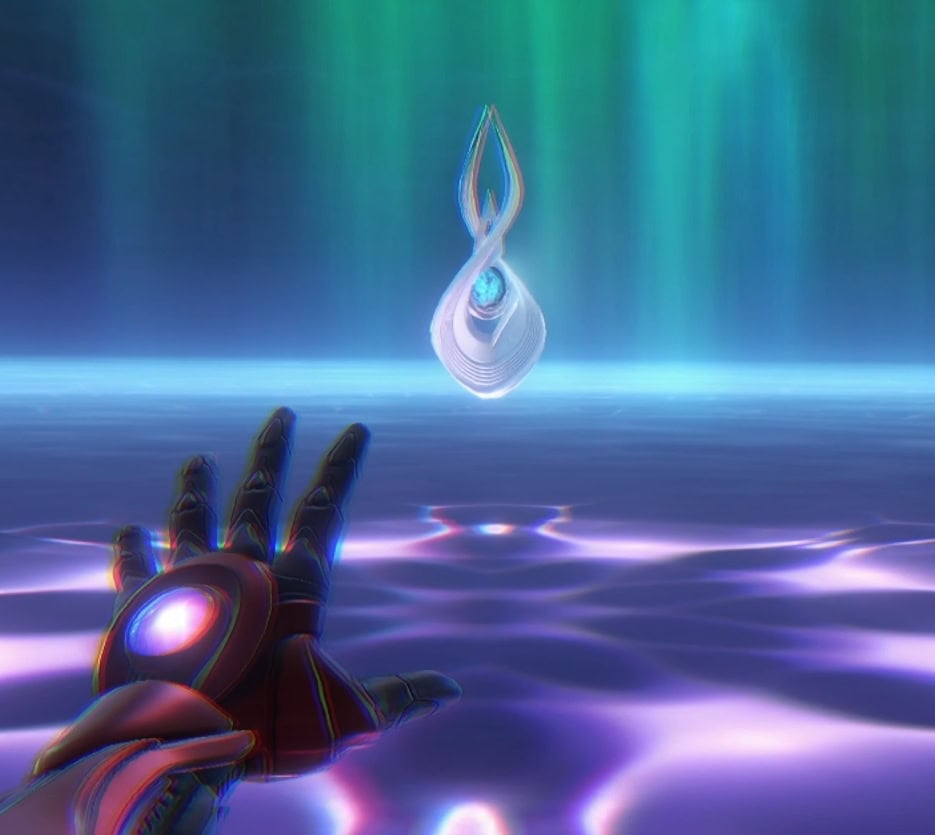
Activate the Shrine and look into the eye of the statue for the third Master Teleporter Key. With two keys left to go, you’ll need to find a way back into Flare Pool. For now, head back towards the entrance of the Quarantine Chamber.
Leaving Ice Belt
You’ll find a half pipe in the Quarantine Chamber. Turn into a Morph Ball and jump on the half pipe. To get up half pipes, use the Psychic Boost Ball to charge up and dash up, releasing the energy right before you curve up. It’ll take a few tries to build up enough energy, but you’ll be able to boost yourself onto higher terrain.
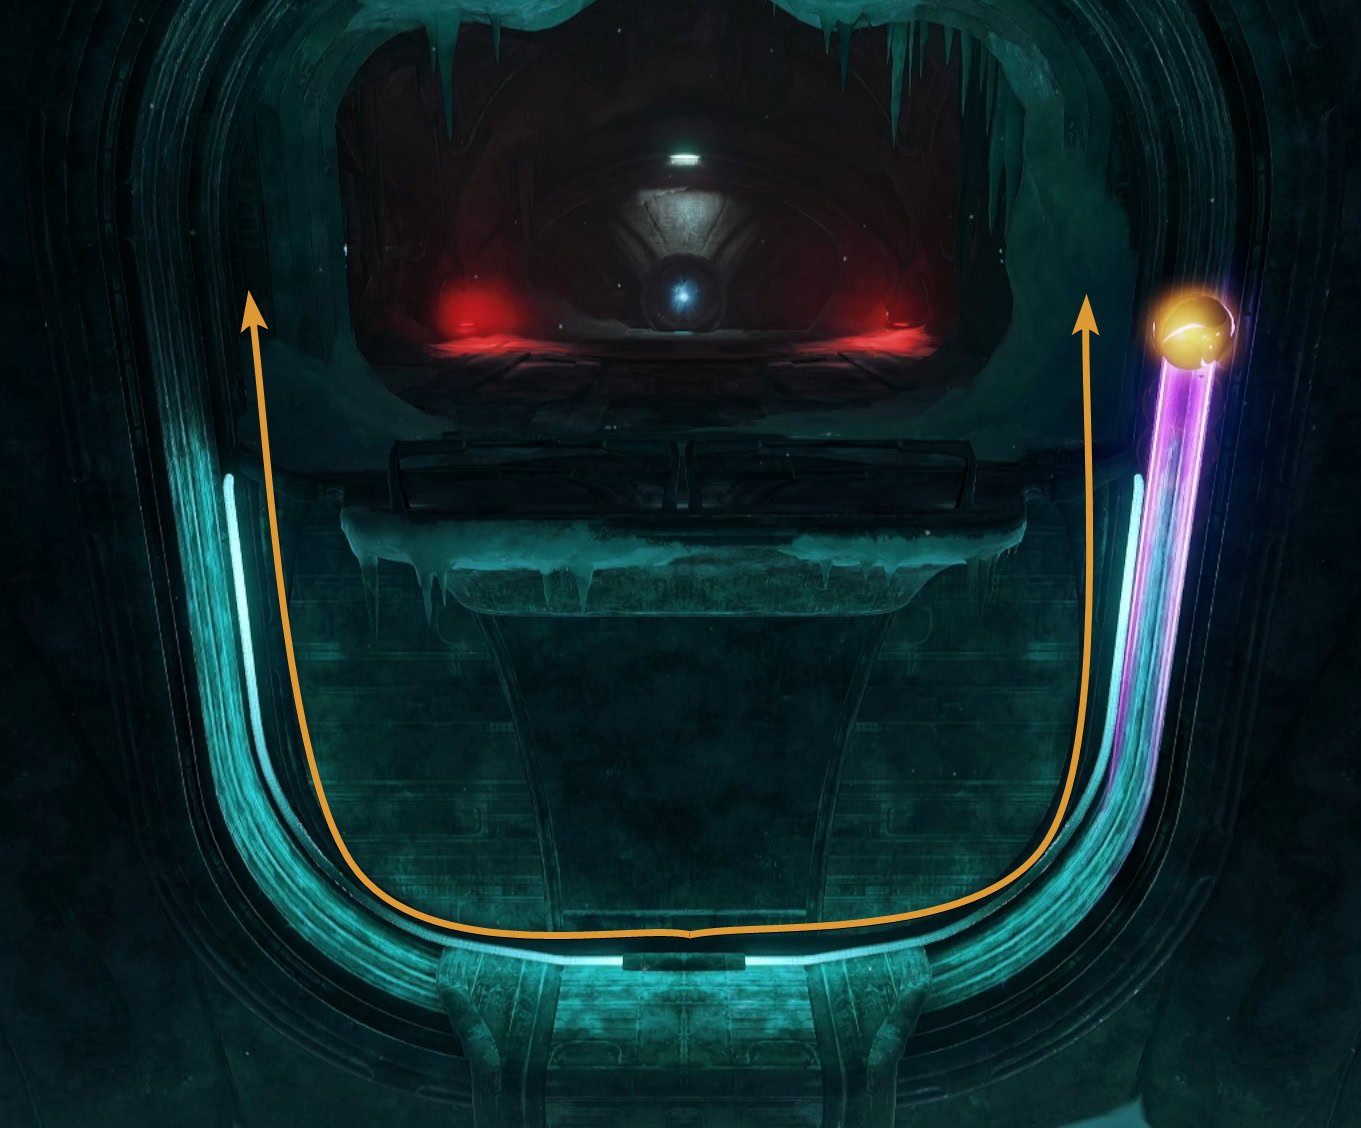
To reactivate the elevator, go into the Spinner with the hologram of a Morph Ball. Use the Speed Boost within the Spinner to open the aperture above and you can take the elevator out.
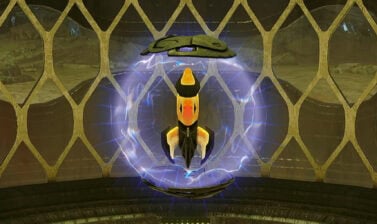
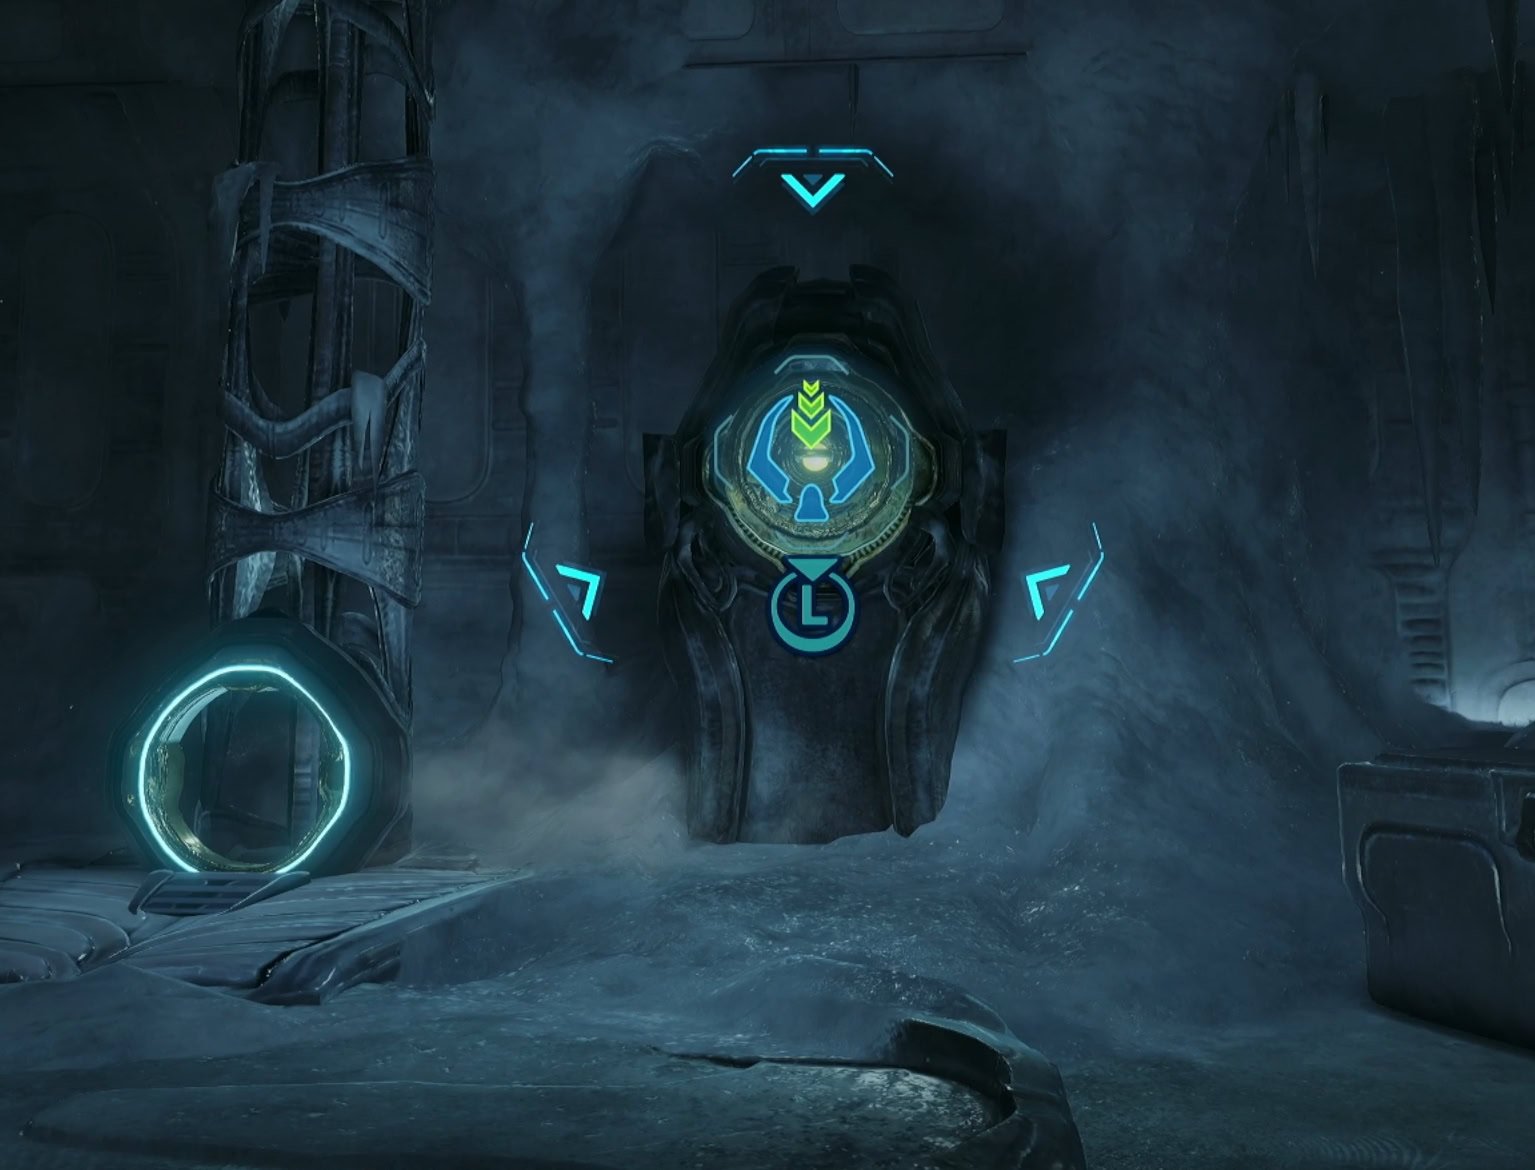
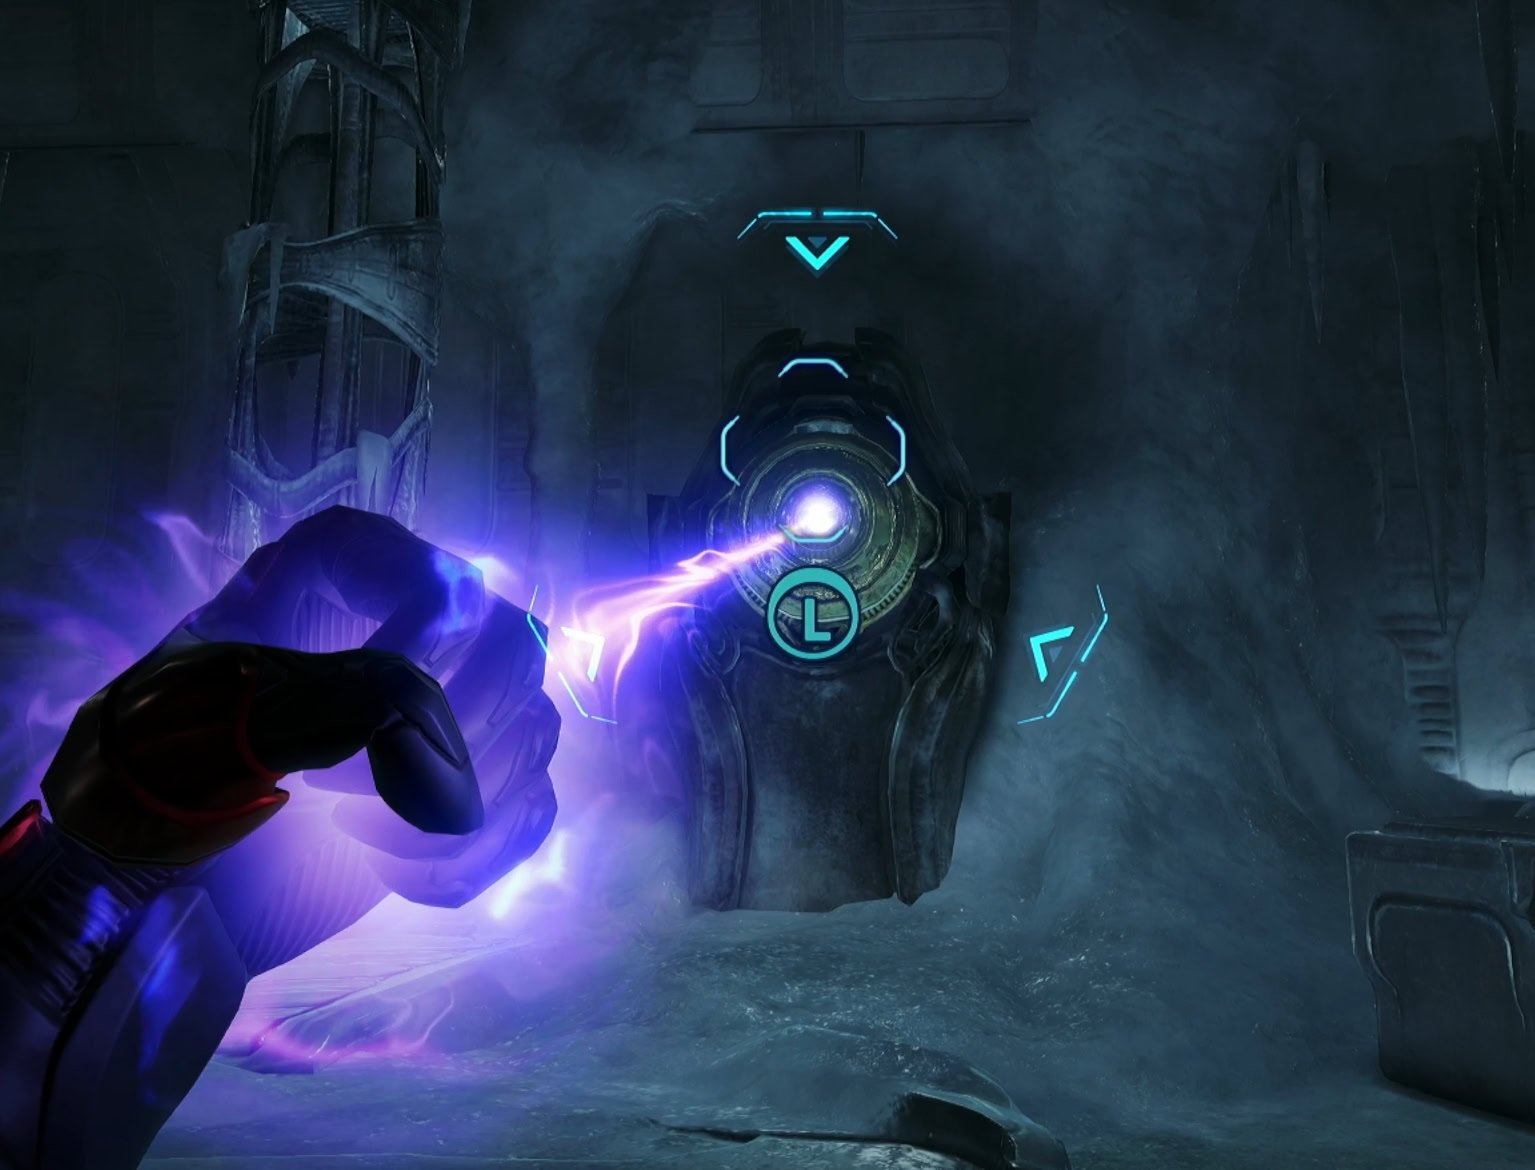
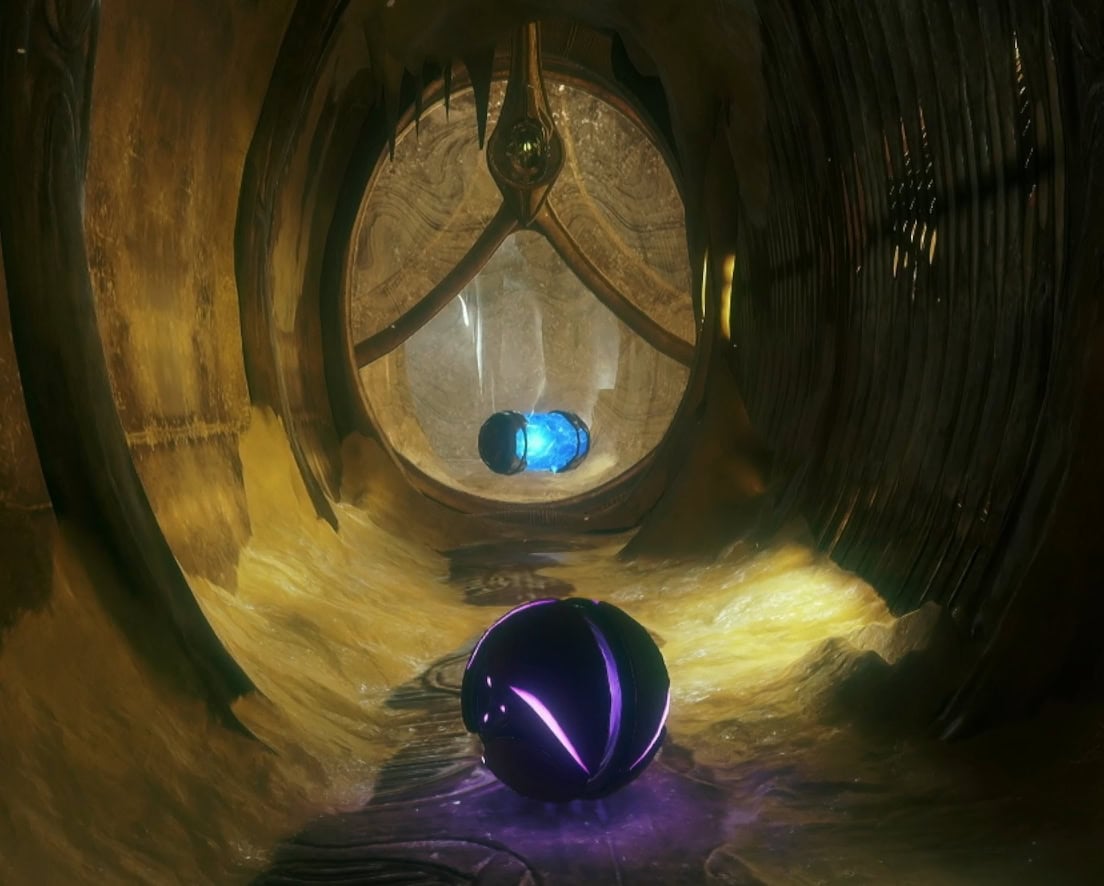
When you reach the Loading Crane near the entrance to Ice Belt, you’ll get a cutscene showing a glowing blue object being held up by the crane. The door going upstairs is malfunctioning, use a control beam to activate it from the other side.
Activate the Spinner with the Boost Ball, use the terminal, and the crane will drop its cargo. It’s an Ice Chip that you’ll need to give to MacKenzie for another upgrade! This is your key to access Flare Pool again, so return to Base Camp and talk to MacKenzie.