Bioware showed the full 20 minutes long demo of Anthem from E3. Now I can finally dissect it frame by frame and show you all new things about gameplay, mechanics, story and more!
Let’s dive in straight into the action!

The demo begins with a short conversation inside your Strider between the main character (you) which is voiced over with a female voice in this case. The first shot worth mentioning is the image of the Colossus Javelin exosuit, sitting ready and waiting in your forward base of operations. Here you can tweak your Javelin with any modifications, upgrades and new appearances you have obtained or crafted.
The Strider is your mobile forward base of operations. It is not controlled physically by the player, but from lore perspective this is how you move around the world when you use the “Fast Travel” option. The Strider is not an alternative to Fort Tarsis. It’s too small and you are expected to jump in, prepare your loadout for the upcoming mission and jump out.
As I have mentioned before, while you are in your base, you play from first person perspective. When you get out into the wild on a mission, you watch and control your Javelin from a third person perspective.
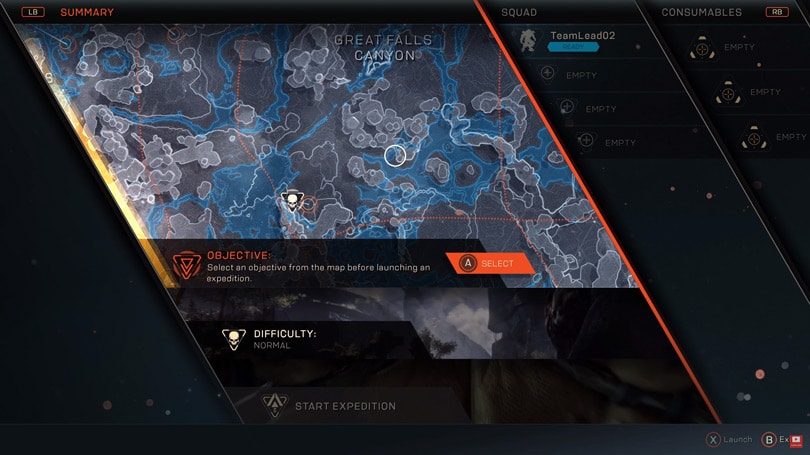
On the next image you can see a portion of the map where the current mission is. In the right side is the group information as the player in the demo invites two friends to join them. In the middle is your current mission objective, below it is the difficulty for the mission – Normal in this case and at the bottom is the “Start Expedition” button. The maximum number of players in a team is four, but you can choose how many to invite – go with less for a greater challenge or form a full team and make your journey a little easier and simpler.
On the very right there are three empty slots for consumables. More information about these will be revealed later.
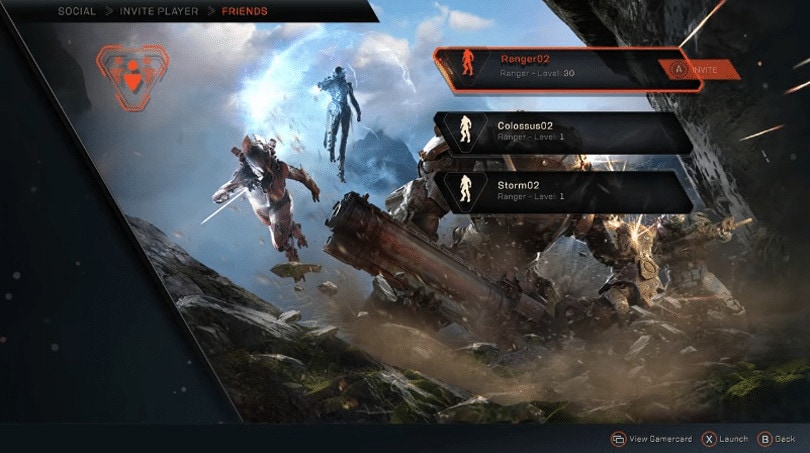
Notice the Interceptor holding a sword in this image (shows up for a split second during the social grouping up moments).
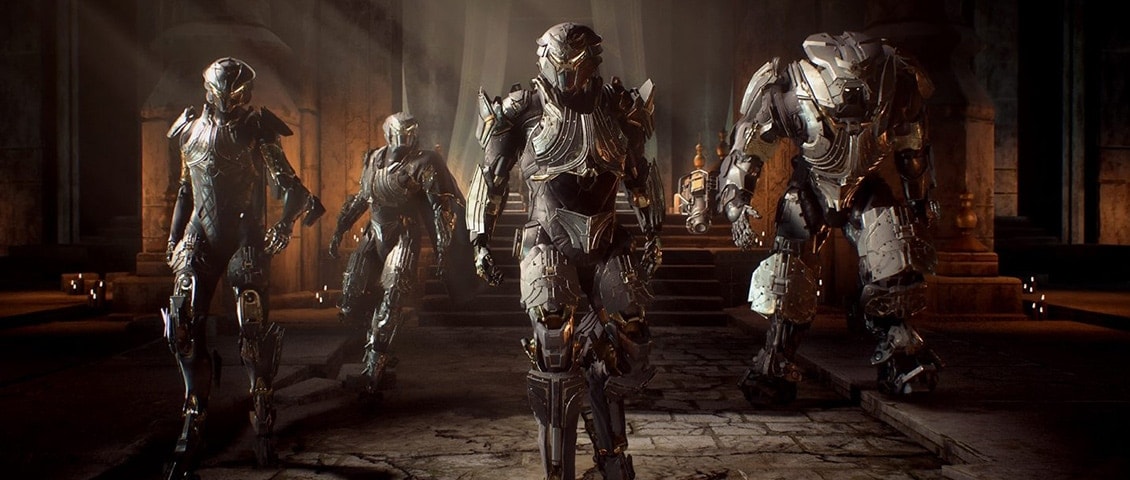
After the party of four players is done, the demo continues with a short, but stunningly looking In-Game Engine cinematic, showing the Javelins emerging from the top of the base and preparing for their adventure into the wild.
The team for the demo consisted of two Colossus and one Ranger javelins. The two colossus players, however, were using totally different builds (loadouts) and appearances. The main player was using what might be considered the standard type of Colossus class loadout – heavy artillery and heavy armor at the expense of agility. The second Colossus was using a more close-range combat build with the main attraction being the flamethrower ability. The third player was using a Ranger exosuit – built for mobility and longer range weapons.
The narrative from the NPCs continues even outside of the base in the form of audio chat. No dialogues, of course. Just brief conversations between the mission givers (your crew) and the Freelancer.
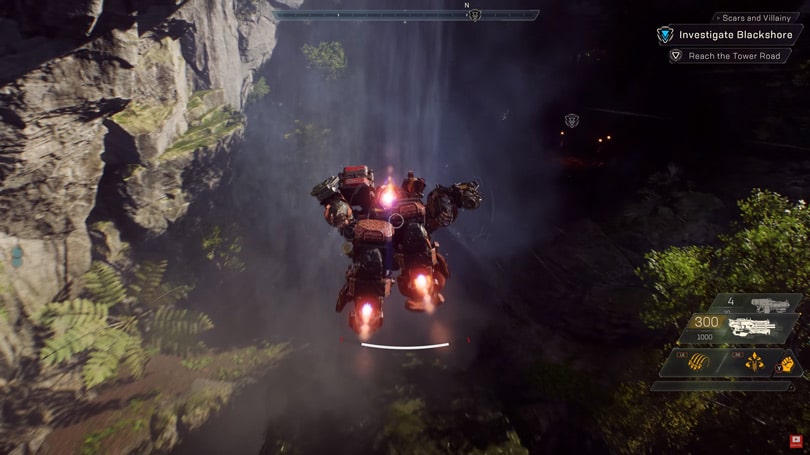
This frame shows us the jets of the Colossus overheating (the bar below the character in the middle). Infront of the player there was a waterfall, which was used as a cooling mechanism to reset the cooldown of the overheating jets.
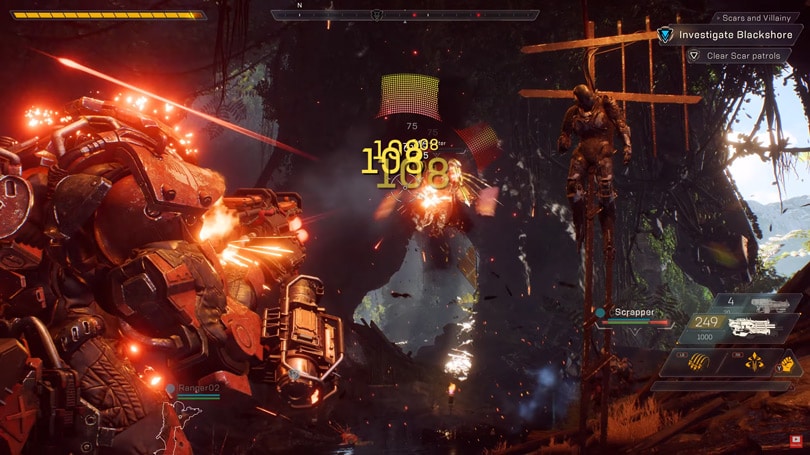
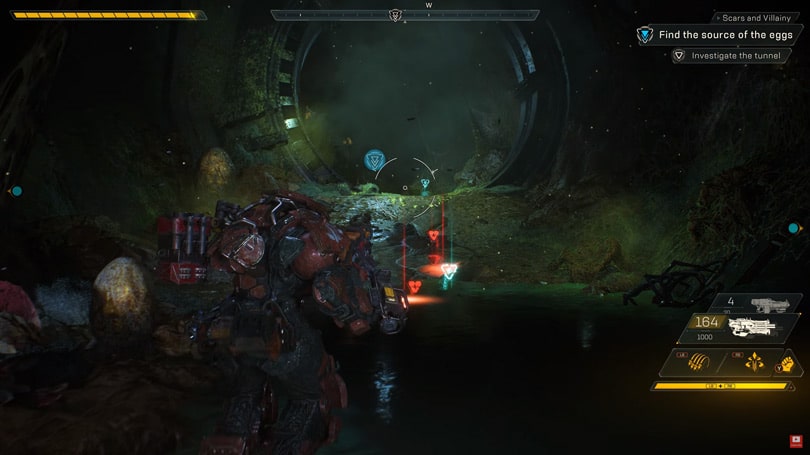
When they entered combat, a visual indicator appeared on the screen, showing the direction from which the danger (attack) is coming. In the image above you can see the semi-transparent red pointing to the top and top-right.
In the middle you can also see the circle, which indicates roughly the “area of effect” or how precise the weapon is. With the current weapon the Colossus was using, you can see in the demo that the target circle was getting narrower. Also, on the screen you can see flying damage in different colors. It is not confirmed yet, but judging by the numbers, the white might be damage affected by the opponent’s resistance, armor and shields, while the yellow is direct damage. Another possibility could be that the white numbers are damage from a secondary weapon. Unfortunately, I can’t make this 100% clear for myself just yet.
The first set of mobs they defeated felt like a thrash pull with nothing special in terms of mechanics. An Epic Pistol dropped from one of the corpses. Loot in Anthem is personal – no fighting for loot. Each player gets whatever the game/system assigns to them. When you loot something, it appears on the right side of the screen, above the mini-HUD.
In the top middle of the UI we have a compass with important and special locations and objectives marked. In the top right corner we have the missions with their objectives. Below that in the bottom right corner we see the weapons arsenal of the player together with the special abilities and their shortcuts. On the 2017 demo these abilities were located in the middle. It is unknown at the moment if the UI can be customized so you can place different parts wherever you please or perhaps the devs decided to free up some space in the middle, where mos of the action is.
An interesting thing to point out is that parts of the UI are automatically hidden while you fly. Namely the right side of the HUD containing the weapons and abilities disappears, leaving the mission objectives and the compass only to be visible.
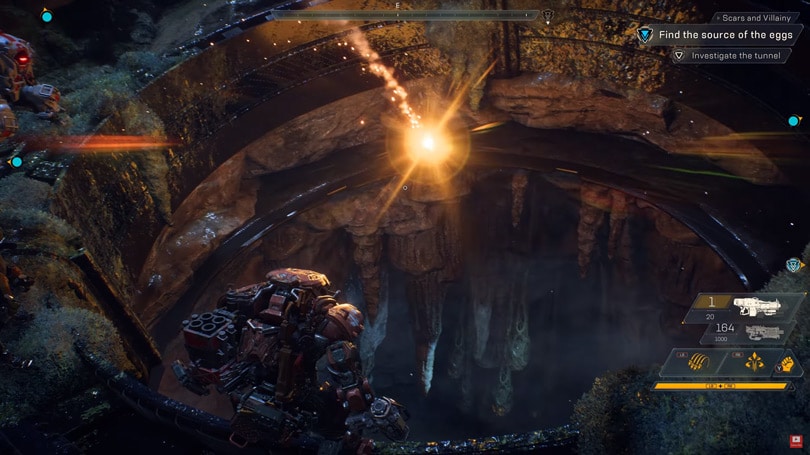
Next the team hit a Scar watchtower. The Scars guarding it were using some kind of a long-range detection device and were able to detect the Colossus and start aiming. The player used what seems to be a rail gun to annihilate the whole tower with one shoot. This was one of the special abilities. It activated after a very short channel and then went on what looked like 12-15 seconds of Cooldown. Of course, by the time the game is released, timers of cooldowns and abilities in general may change significantly, so don’t take this too serious.
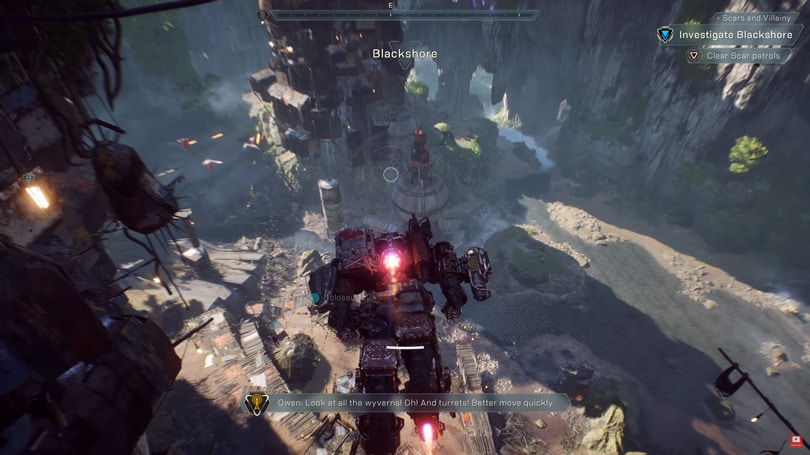
After that, the team headed down. I mean really DOWN. The verticality of Anthem’s world seems to be a huge part of the exploration process and it is involved and used in pretty much each mission and objective.
Squad members can join up in the middle of the mission. This was the case with the fourth member of the team that was running the demo of the game. She played a Storm – a Glass-Canon class with powerful elemental attacks and light armor. This player was only level 1, but this is no problem as the game matches the teams up to the appropriate level to balance things out and allow all players to enjoy the content together.
How exactly the level balancing is done, this is still a little shady. Devs have confirmed, however, that a level 1 player, that is being “carried”, will only get loot for their current level, regardless of the level of the mission or area they are venturing into.

The team passed by a Titan – giant enemy monster that was apparently too powerful for them to take on. This was a world event boss that the team decided not to bother with at the moment. You can see the pop-up in the right side of the UI for this World Event Mission in the image above.
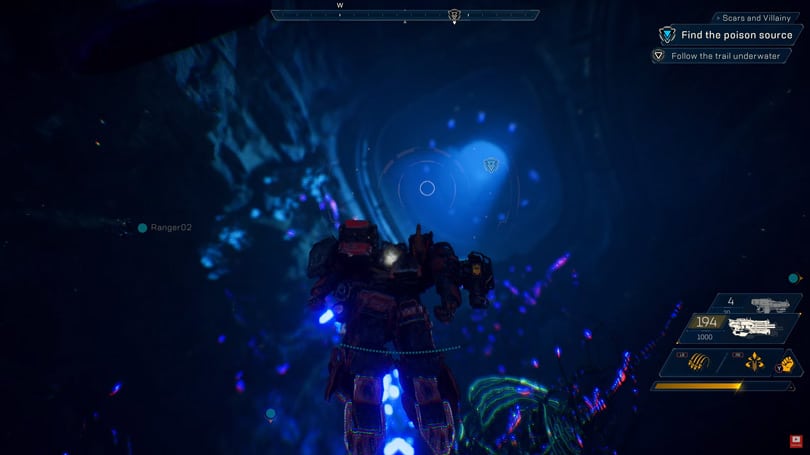
The next section took them underwater. You can see the light blue bar indicating how long your Javelin can spend underwater before you have to get back up to the surface. The duration is quite long, so don’t worry.
This “swim moment” was short and followed by another cinematic scene, showing the four Javelins going back to the surface of the world to continue their exploration mission.

The team discovered the secret underwater entrance to the Scar Stronghold. Strongholds are instanced four-player mode content with greater challenges and rewards for your efforts. Once you discover an entrance to a Stronghold, you will be able to access it later directly from your map at the start of your expedition.
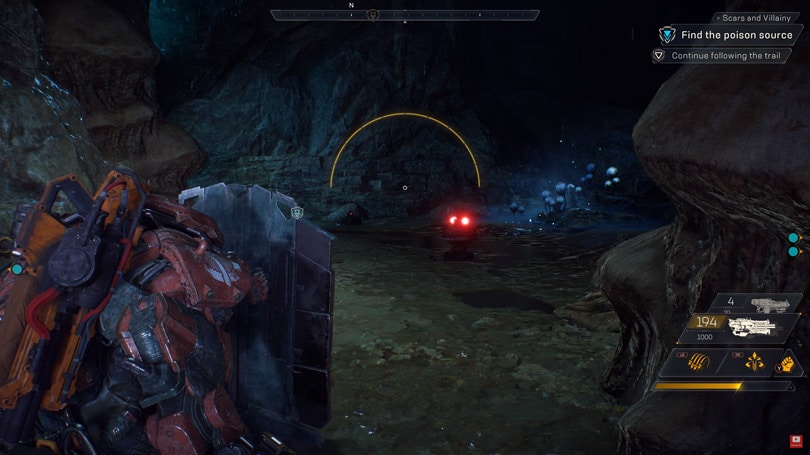
The mine beneath the entrance to the Stronghold was full of mines. The colossus spawned a giant heavy shield and ran across all of them, exploding them and clearing up the path for the other three members.
The yellow semi-circle on the screen displays the amount of damage the shield can absorb. When you deactivate this shield, it quickly returns back to 100%.
Combos are a very important part of the gameplay. Certain abilities from different classes can be used to create powerful effects and deal devastating damage to enemies. Much like in the Mass Effect Andromeda, one ability is used to prime the target for a combo and another ability is then used to trigger it.

In this case the Storm used a Lightning Storm attack, then the Colossus used its rail gun to trigger the combo and destroy most of the Scrapper enemy NPCs. This encounter featured a tougher enemy called Elite Enforcer, which took a little bit longer, but the enemy (who was using a large shield, by the way) fell down in the end under the massive and heavy firepower of the four team players.

That light-blue spherical thing ahead is a Shaper relic. By collecting the Echoes and bringing them to the Shaper Interface, the Freelancers shut down the relic and calmed the environment around it.
The game features full night and day cycle as well as a wide range of weather and atmospheric effects. Mark Darrah, producer of the game, mentioned that one full cycle from day to night and to day again takes about an hour or less. The time of the day reflects on what you can encounter in the world. Some creatures roam the wilderness only at night, for example.
Surrounding the Relic, in the Monument Valley location (which was just discovered by the team), there were several key areas that the team had to capture and secure. There are a number of possible ways for this to be done. Players had to take on snipers in the right, the Shapers interface below in the middle and two turrets to the left.
In the first encounter – the snipers, we saw the Colossus using his Ground Stomp (name not confirmed) ability. this is the Fist icon to the most right of the abilities HUD (marked with “Y” shortcut).
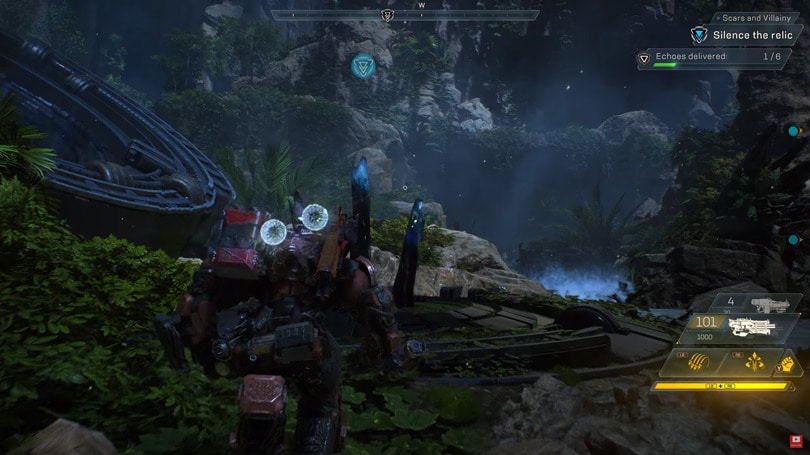
The objective in this area is for the players to pick up six Echoes and deliver them to the Shapers Interface in the middle. This was done by simply walking on top of the items that were laying on the ground, marked with red flair, then running to the Interface to deliver them. In the image above you can see that the Colossus is carrying two Echoes (the light blue spheres on his back).
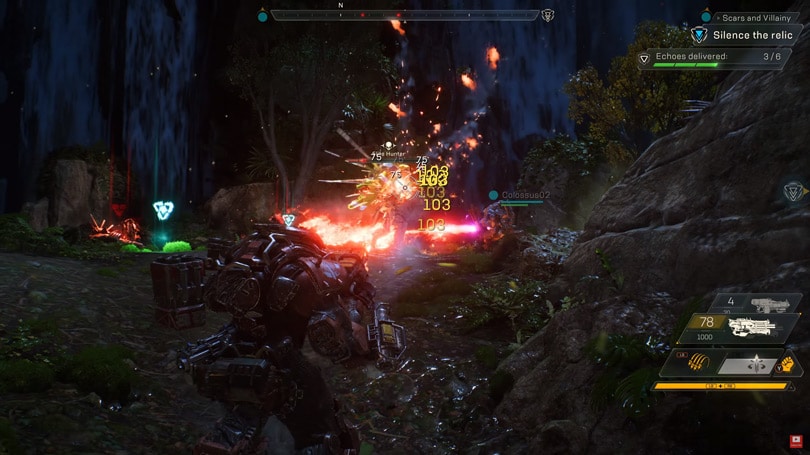
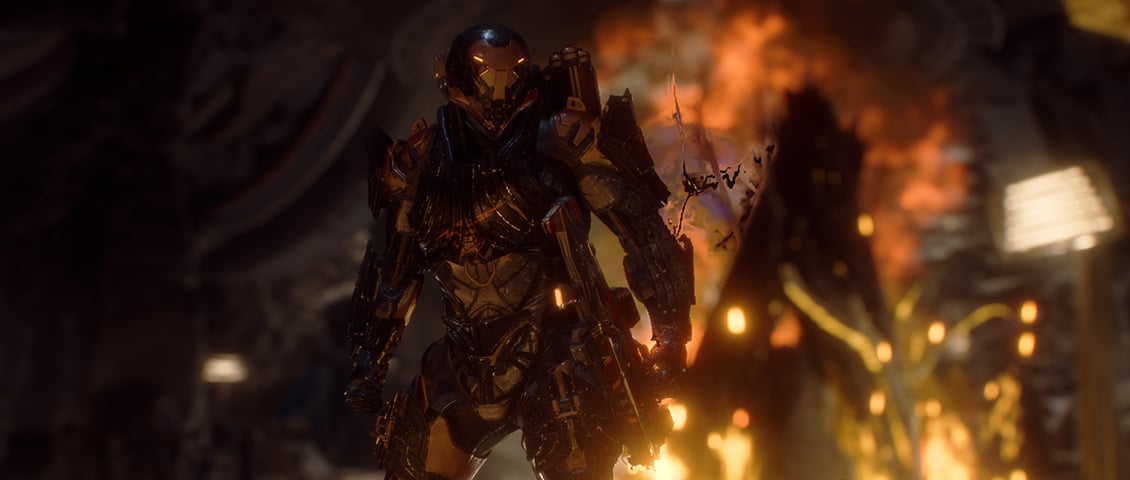
The Colossus used his Rail Gun to knock down an Elite Hunter enemy NPC from the sky and then take it apart quickly. In the image above you can clearly see the Flamethrower ability being used by the second Colossus player. Awesome, isn’t it!

Another massive combo was demonstrated by the Storm and Colossus – the Ranger used a Frost Grenade (Legendary) and the Colossus obliterated everything with the Multi Mortar (Legendary, first ability on the left in the HUD, marked with “LB” shortcut).
In this pull the team had to take down a Legendary Enforcer enemy, once again, using a giant metal shield to protect himself. Nothing could save him from the devastating fire coming from all four Freelancers.
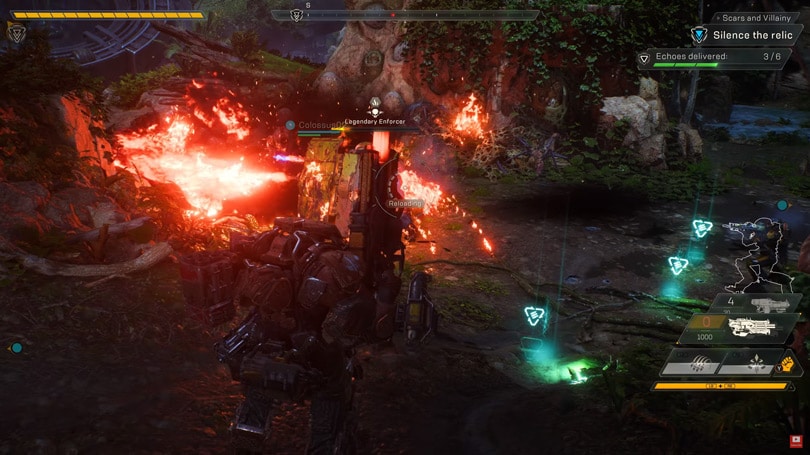
Reloading is never pleasant, but it’s especially annoying if it’s forced during combat. In the image above you can see the Colossus reloading its weapon. The cartridge’s contents can be seen next to the weapon on the right side of the screen – displaying 0 at the moment of reloading. The reload process is displayed with a short channel in the middle of the screen for the player.
In this same image you can also notice that both the Rail Gun and the Multi Mortar are on cooldown, as indicated by the grey color of the abilities with a slider moving down towards full ready. Both abilities have different cooldowns.
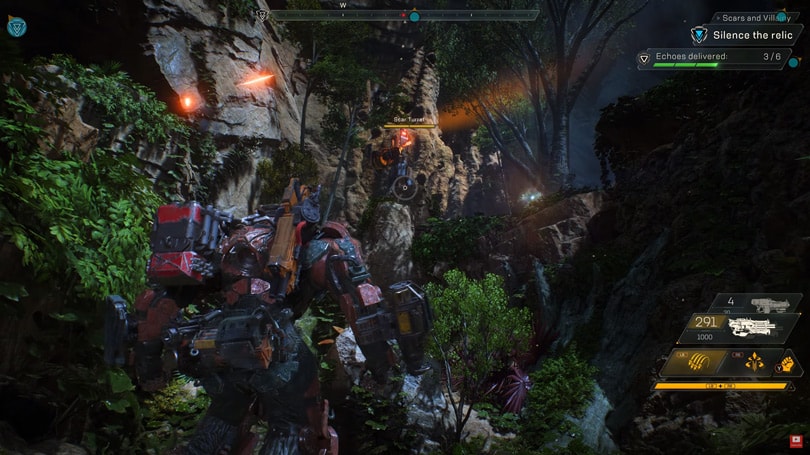
That’s the turret I mentioned earlier. Nothing special about it, just takes a bit of time to be destroyed. These two turrets that were located on the left side of the area do have weak points. The Colossus moved behind them to finish them down after an initial artillery strike with all of its heavy weaponry.
Hard to tell why, but the turret did not turn towards the Colossus while he was firing at it from behind. Could be because it was unable to pivot that way or perhaps another one of the Javelins was drawing its attention at this time.
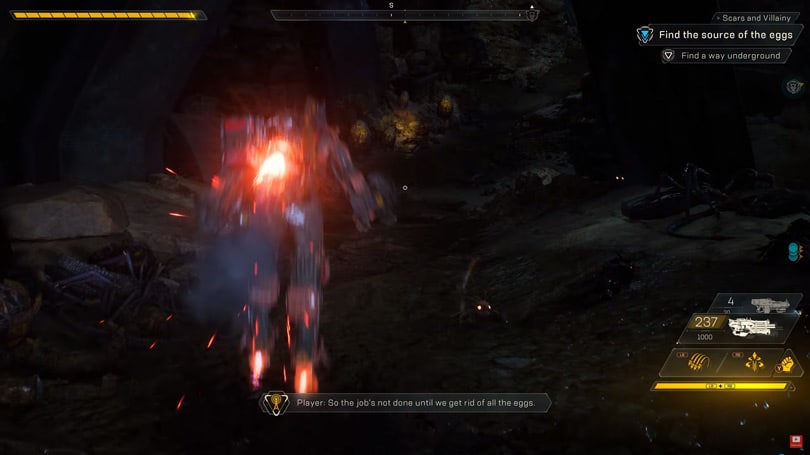
Once the team got the rest of the Echoes and finished the objective, they silenced the Relic. They thought this was what was supposed to be done and things would calm down, balance would be restored. Boy an earthquake and a strange noise from even deeper into the stronghold provoked them to continue their exploration and reach the source that laid all the eggs you could see around the area with the Relic.
Can you spot the little critters in the dark? They were everywhere in this area, but ran away scared as soon as the Javelins approached. Nothing of great importance about these things, I suppose. But they make this place look alive and breathing indeed!
As the team continued down the Scar stronghold seeking whatever was making the strange noises, earthquakes and laying eggs, the team encountered a few more Scar thrash pulls.
The red items ahead replenish the HP of the player (the yellow bar in the top left of the screen), while the blue ones seem to be ammo.
Strongholds can take a bit of time and in the interest of keeping the video interesting, pumping and exciting, the devs skipped a little ahead into the cave and stronghold in general.

Here you can see the Colossus’s Grenade Launcher and the other Colossus’s Flamethrower spreading fire and destruction all over the place. To make things clear, the Grenade Launcher is the top gun on the player’s HUD. As you can see, it can fire up to four grenades before reloading and it holds a total of up to 20 grenades.
The Storm threw a golden light ball to light up the area below where the team was heading in order to continue their search.
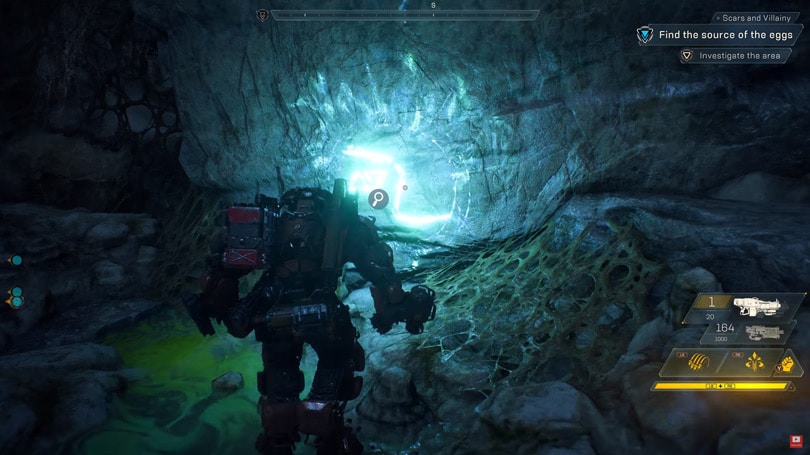
Here the Freelancer discovered an ancient Arcanist resonance – a Rune. Various lore, items and crafting materials are scattered throughout the world of Anthem and to discover them, you simple need to explore.
When you see something strange (among many other strange things :P), like this glowing thing on the wall, approach it and investigate.
While the narrator did not even mention this giant frozen insect-like monster, there was a brief explanation of how loot works in the game and the differences of items rarities. In short (because we still don’t have the details fully revealed, heh), you can find all sorts of rate items as you venture out into the world. However, legendary tier items are the most rare and the most powerful as well. Each weapon or modification for your armor has different special bonuses that can alter your performance or even completely change the gameplay experience with your favorite class.
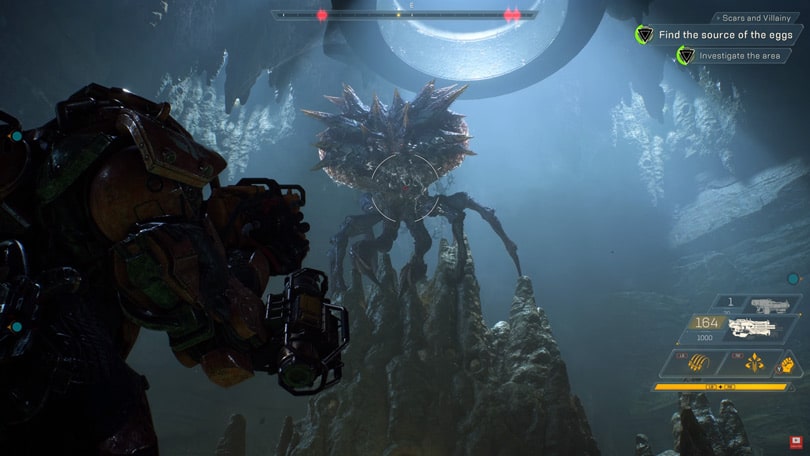
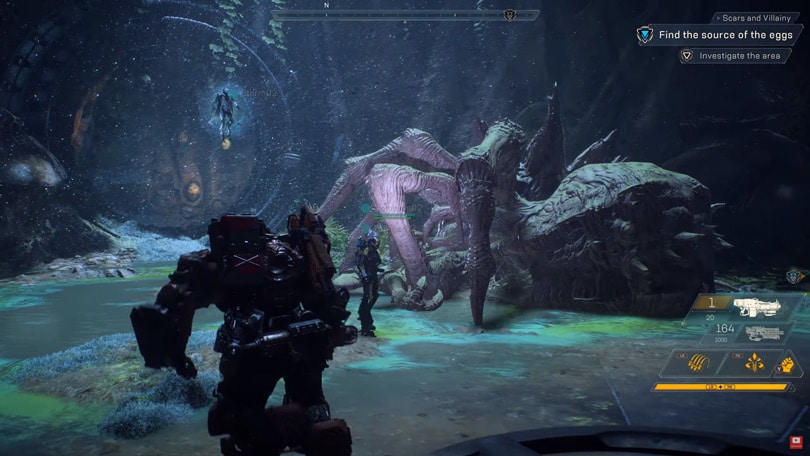
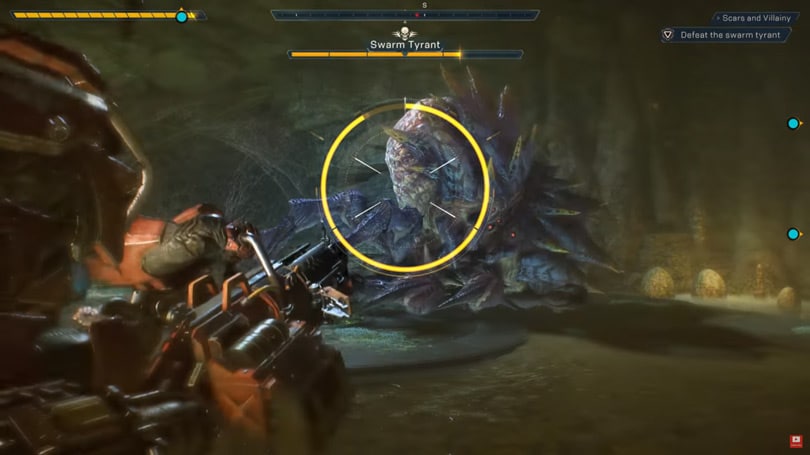
At the end of the cave, the Freelancers discovered what most likely was laying the eggs, making the earthquakes and causing all the trouble. It’s big. It’s ugly. It’s a boss! This is the Swamp Tyrant and it’s surrounded by smaller adds that if left alone, will swarm the team.
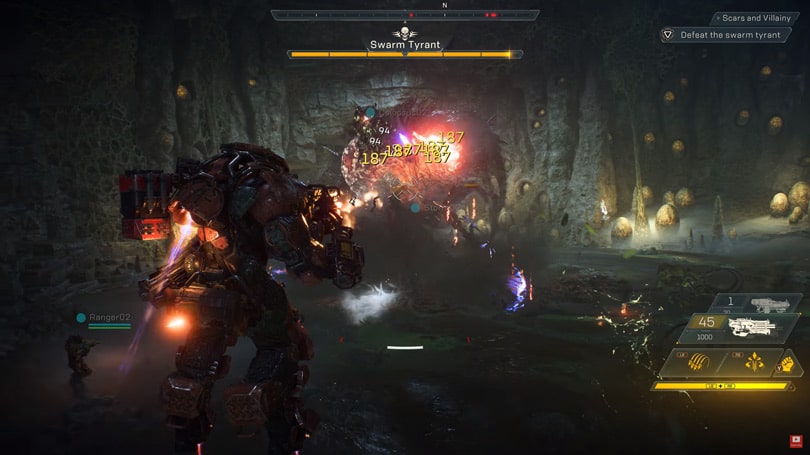
The boss has three big sacs on its back – those are the weak points the team has to focus on in order to take the monster down. Targeting these sacs grants bonus damage to the boss.
This boss deals a massive amount of damage with its close-quarters frontal AoE attack.
Because I mentioned the white and yellow numbers and in relation to these weak spots of the boss, I have yet another assumption (guess, if you will) – the yellow numbers cause full damage as they land on the weak spots of the enemy you are targeting, while the white, smaller, numbers are hitting the stronger parts of the armored body of the boss.
Every Javelin class has its own unique Ultimate ability. This is the Colossus’s one! You can see the ready-check of the Ultimate ability in the bottom of the HUD (below the three other abilities) – it’s the gold horizontal bar.
Instead of describing this boss fight in greater details – none of which are essential at this point in time (because a lot will be changed for release and I will have a separate up-to-date guide on this encounter most likely, I will leave you to enjoy the full video of the Anthem Gameplay Demo from E3.
Anthem releases on 22nd of February 2019. It is available for pre-order now in two different packages. To learn more about what’s in each one of them, check the link below: