This is a massive guide covering absolutely everything from the Anthem Cataclysm. Here you will learn about the event and its new features, the instance and all of the arenas with their own respective objectives and challenges, scoring, timing, hidden mechanics and more. Let’s not forget about the secret items, passages and bonuses spread all over the place! It’s quite a long guide that will prepare you for the raging Storm inside the Cataclysm! Each section of the guide has also a video walkthrough attached at the end! If you are looking for a specific area or challenge, use the Table of Contents to find exactly what you are looking for!
This guide was created for VULKK.com by xJVIayhem (Origin: RubyJavelin)!
CATACLYSM BASICS
To play the Cataclysm, you need to have completed the CritPath mission called “Incursion”.
Before detailing the Cataclysm and its events, it’s worth explaining some of the core mechanics behind the Cataclysm.
INVERSIONS
Inversions are new and currently exclusive to the Cataclysm. These are a pair of bonuses that are active for each run of the Cataclysm and Rotate in and out on a weekly basis. They tend to be very worth building around, and can often end up complementing certain Javelins or builds. These are also fully listed in a section under Tutorials in the Cortex.
As an example of one such pair: Turbo Gear and Ultimate Boost. Turbo Gear makes your abilities recharge faster. Ultimate Boost grants increased Ultimate charge from ability kills.
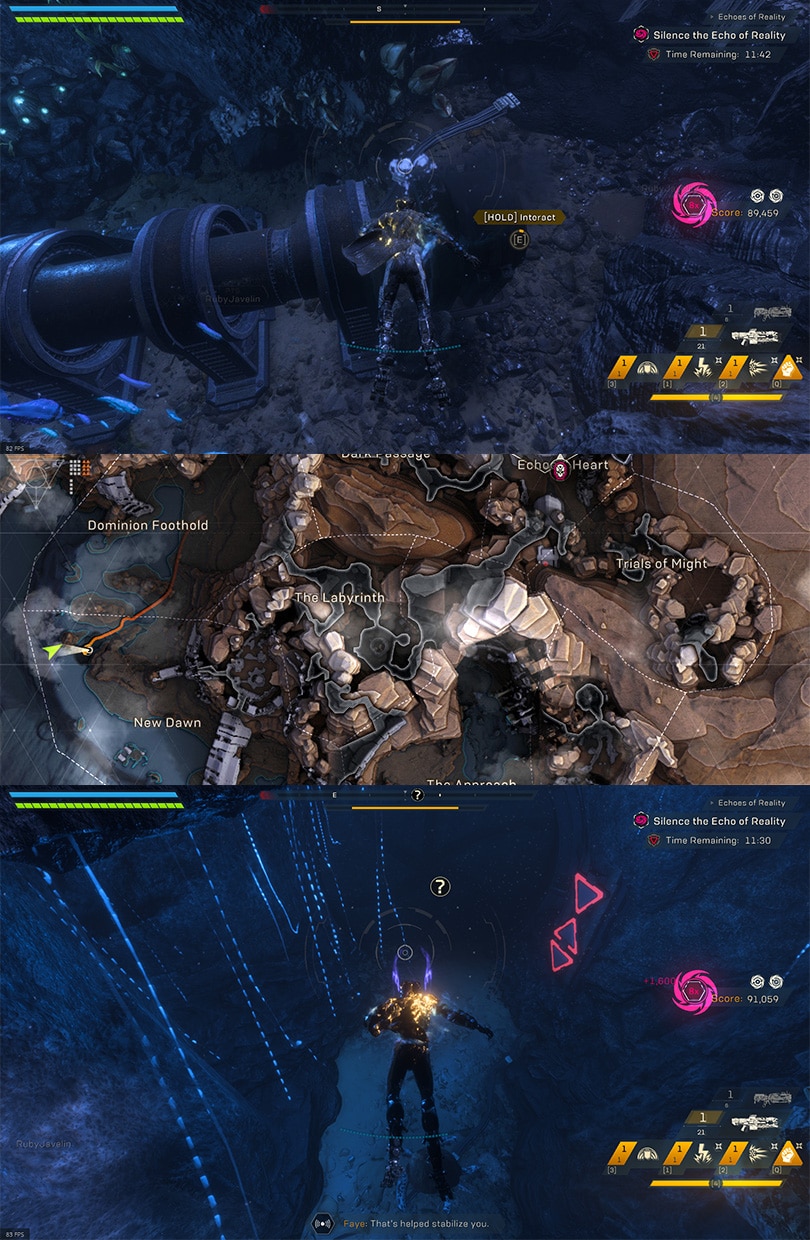
STABILITY
Stability is a core and important mechanic to the Cataclysm. It depletes over time while in the storm and not a safe area. There are safe bubbles around the map, as well as Rifts you can hit in each event area you can use to restore and protect your Stability.
Notes, which are scattered around and can drop from enemies as well will also restore some stability. The amount restored is dependent on the tier of Note.
Each event you complete adds 30 seconds to the duration of your stability bar.
NOTES
Notes are a collectible in the Cataclysm. Each tier is found in different ways. So here’s a quick understanding of each note, their score value and stability value.
- Orange notes are restricted to Secrets. These are worth 500 points, and will fully restore Stability.
- Purple notes are also commonly from secrets, but also found in a few places around the Cataclysm. These are worth 200 Points each and restore a moderate amount of Stability.
- Blues notes are found in some secrets but are most commonly scattered around the map. These are worth 50 points each, and restore a low amount of Stability
- Green Notes are restricted to Kills. These only award 1 point each and restore a small amount of Stability (close to blue but slightly less).
SCORING
In addition to Notes, you can increase and affect your score in a variety of ways.
Score is also influenced by a multiplier. This base Multiplier is doubled in the Storm. So the more stuff you kill or collect under a higher multiplier leads to a higher score.
Clearing events also provides score, as well as increasing your base multiplier for score. Events increase your base multiplier by +1.
Upon defeating Vara, your final base score is doubled. You also receive another bonus multiplier to your score based on difficulty, the scale for these multipliers looks like this:
- Easy: 1x
- Normal: 1.5x
- Hard: 2.25x
- GM1: 3.3x
- GM2: 5x
- GM3: 7.6x
These multipliers are rounded for simplicity. All of the GM difficulty multipliers are slightly higher.
Kills will provide points based on what is killed. Here are the values per enemy type and tier. Keep in mind that these are base points per kill, not taking any multipliers into account.
- Normal
- Fury: 200 points
- Elites
- Trooper: 20 points
- Brute: 100 points
- Hound: 20 points
- Turret: 50 points
- Valkyrie: 100 points
- Legendaries
- Trooper: 10 points (probably bugged currently)
- Brute: 150 points
- Valkyrie: 150 points
- Thunder Fangs: 100 points
- Riftmaster: 400 points
CRYSTALS
Crystals come in two variations, Minor and Major. These are the currency awarded for Cataclysm related content.
You will get the most from Completing the Cataclysm Event, however Crystals in Freeplay, The Freeplay Crystal Events and Storm Gate Freeplay event (Conjunctions) will also reward Minor Crystals in small amounts. You can also get a mix of Minor and Major Crystals from Cataclysm related Dailies and Challenges.
Crystals are used as Currency in the Seasonal Store. The Seasonal Store has rotating weekly offerings. Offering range from War Chests, which hold only New gear/weapons at a higher Power Level than what is currently available; to a selection of cosmetics; as well as the option to convert Major and Minor crystals between each other. Both currencies are typically used for most purchases.
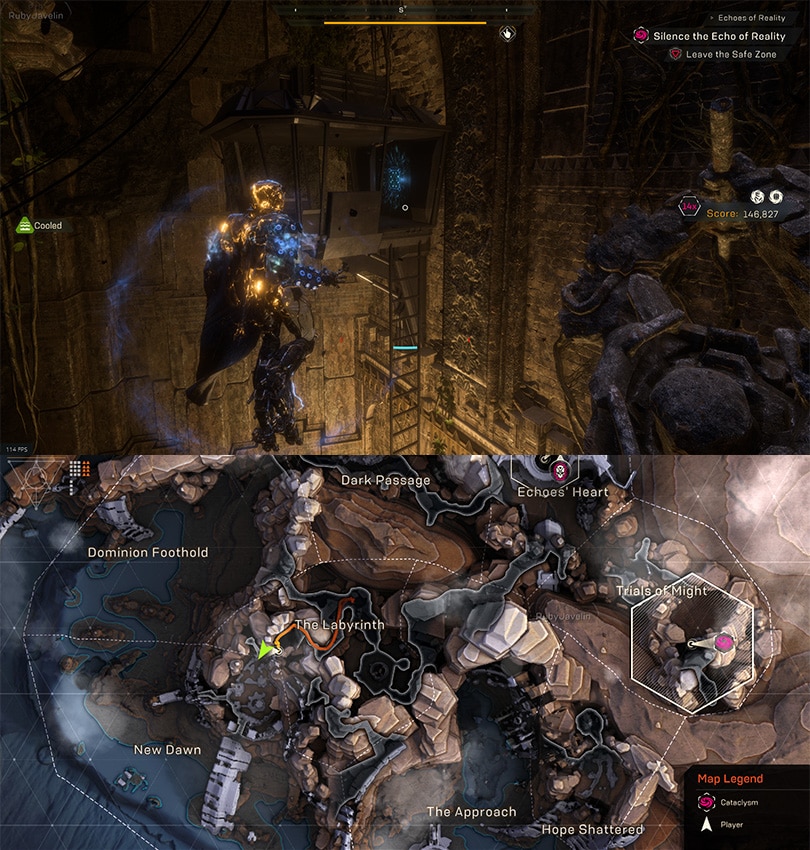
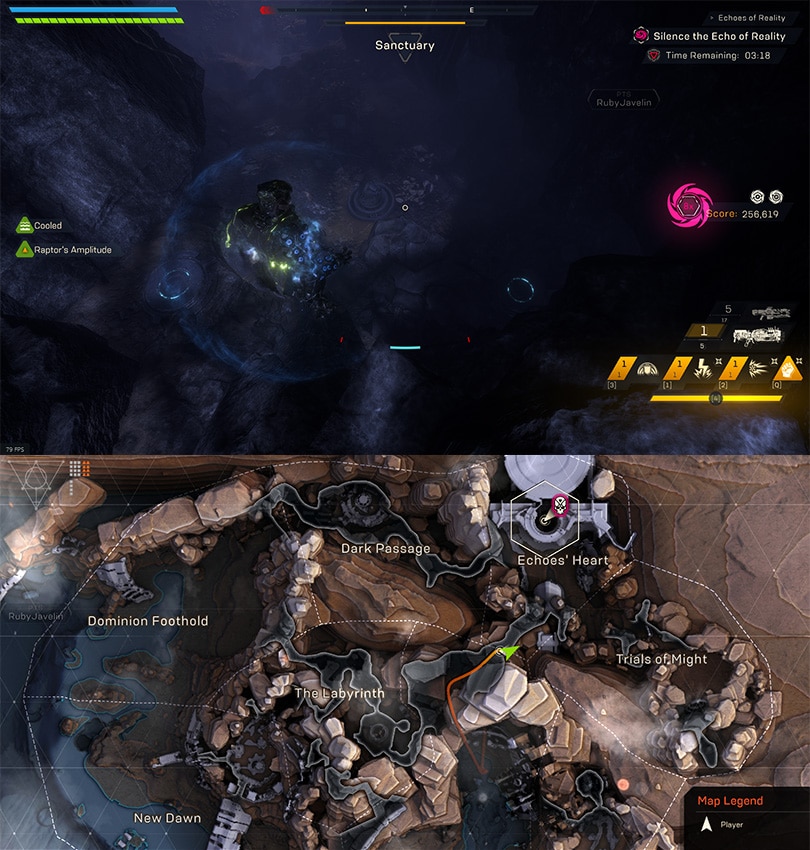
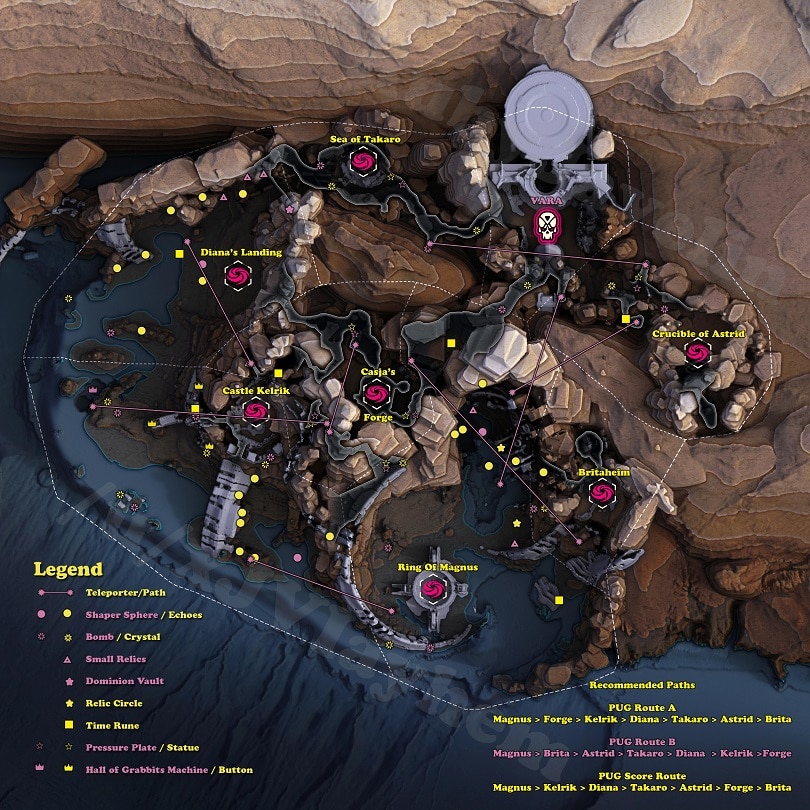
THE CATACLYSM MAP
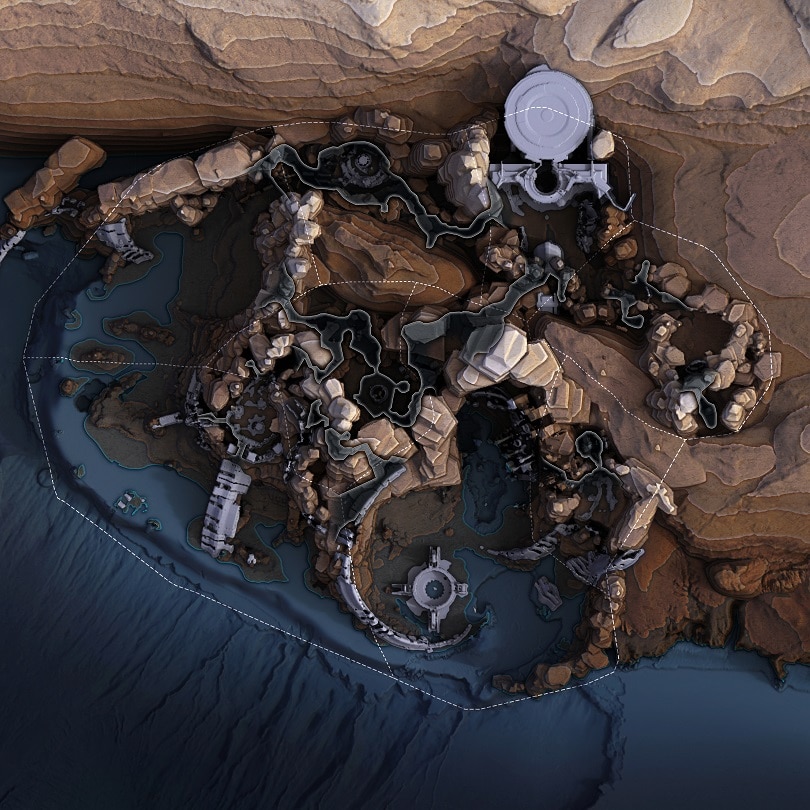
This is the full Cataclysm map with all of its zones and arenas. In the following segments is all the information you need in order to complete the Cataclysm event along with all of its objectives, the final boss and all of the secret objects and mechanics in the instanced map.
At the end of the guide you will find two versions of the same map with two different styles of markings.
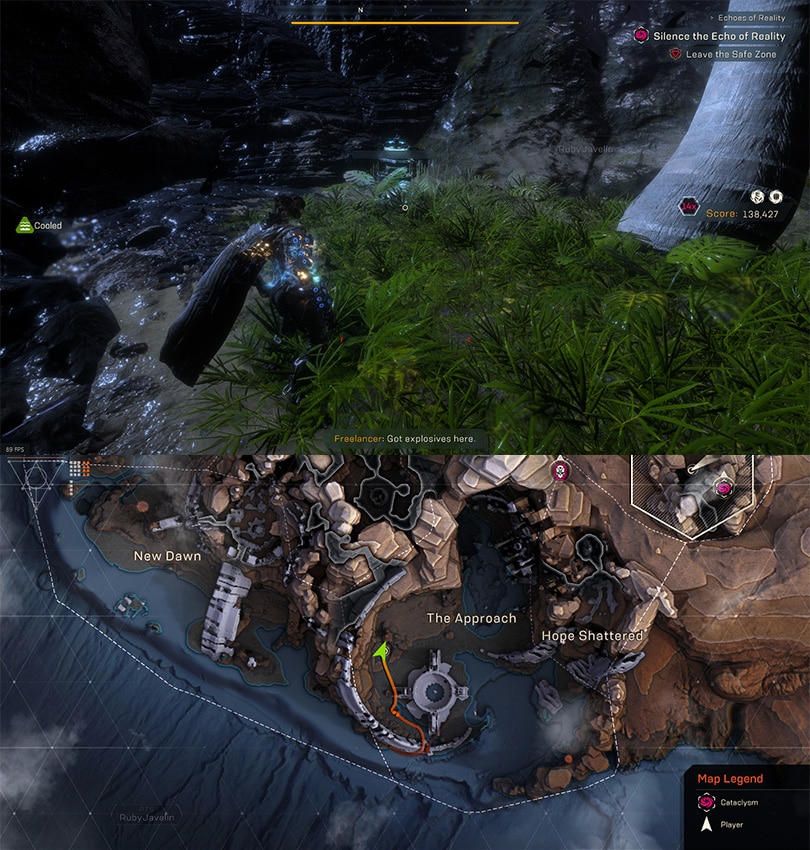
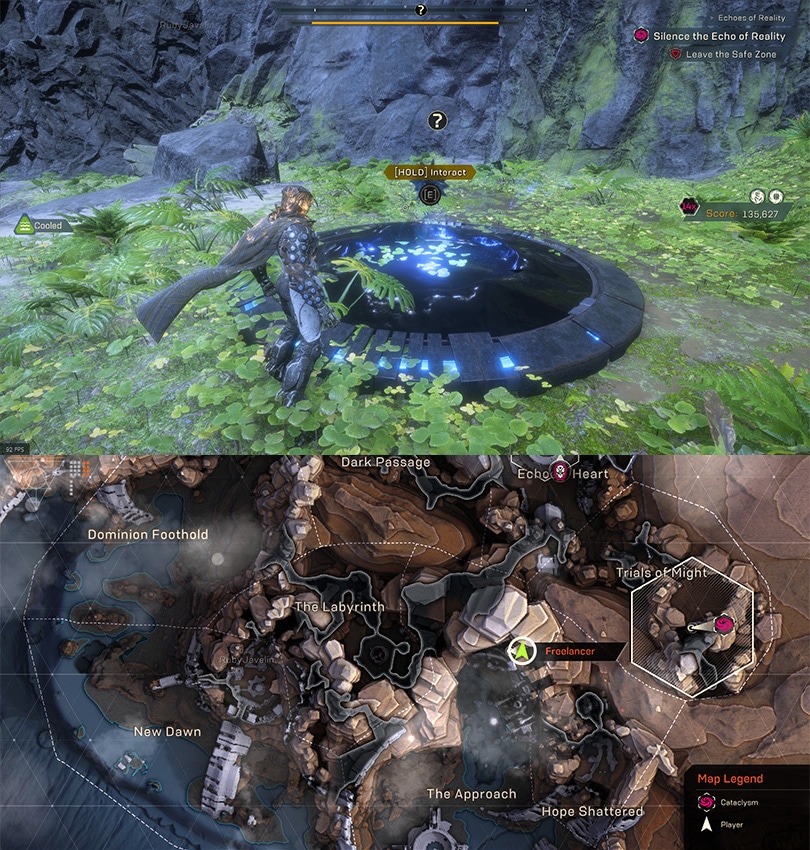
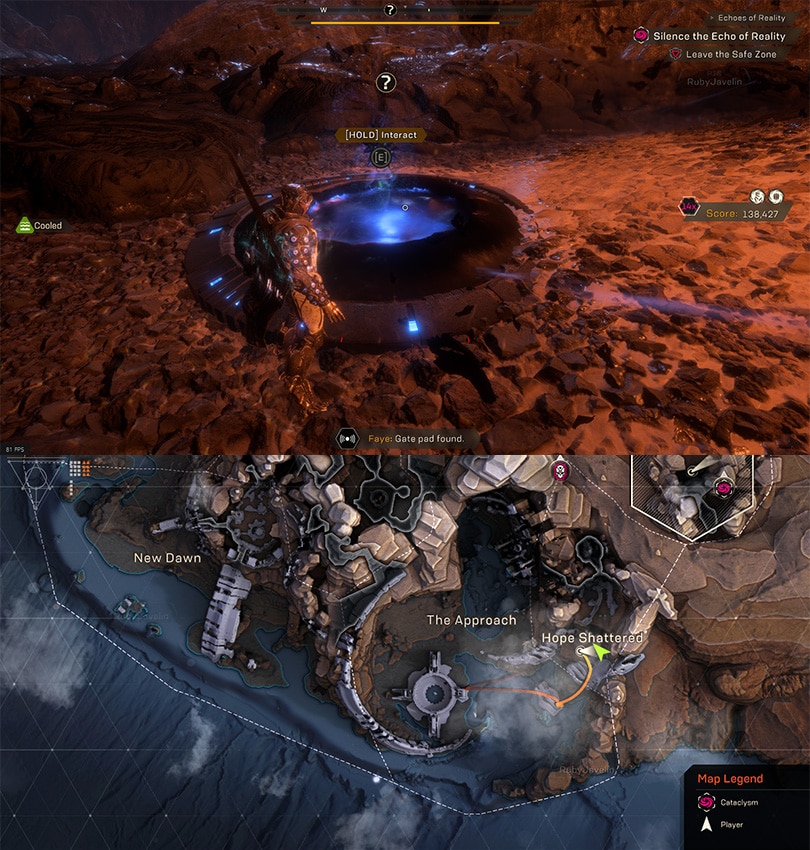
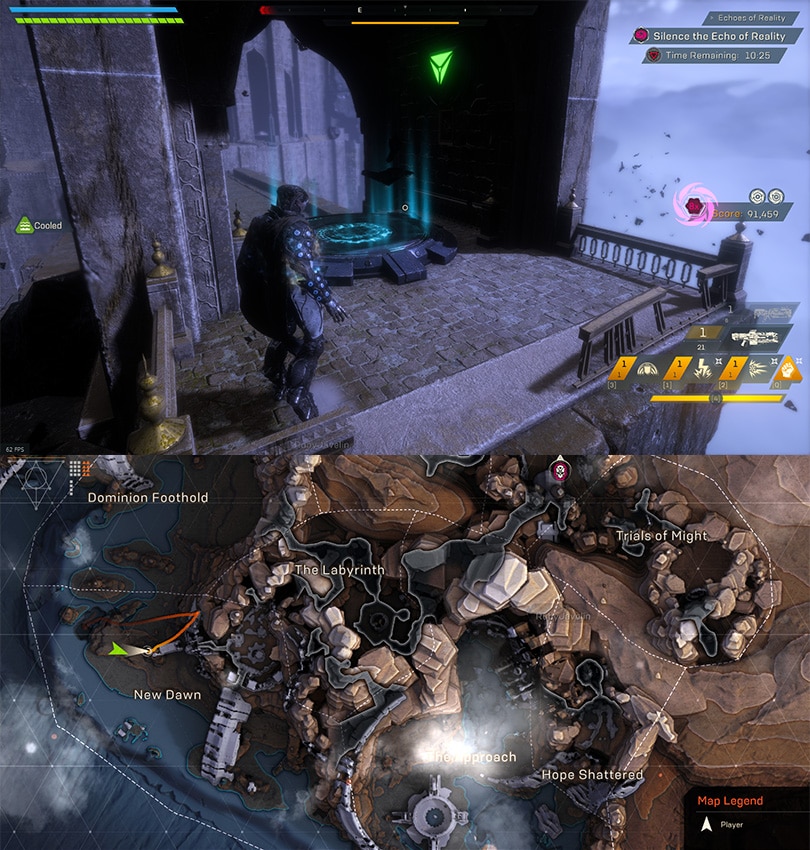
THE APPROACH
The Approach is one of the largest sections of the map, alongside New Dawn and Dominion Foothold. It contains the Ring of Magnus event, as well as a good amount of secrets.
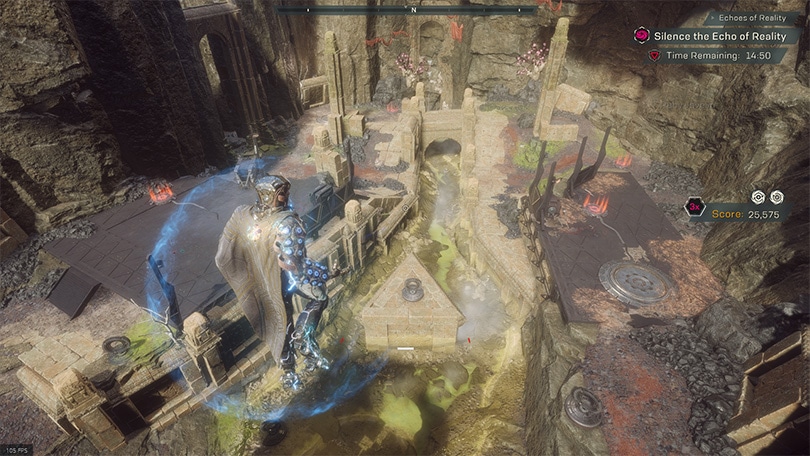
CATACLYSM EVENT: RING OF MAGNUS
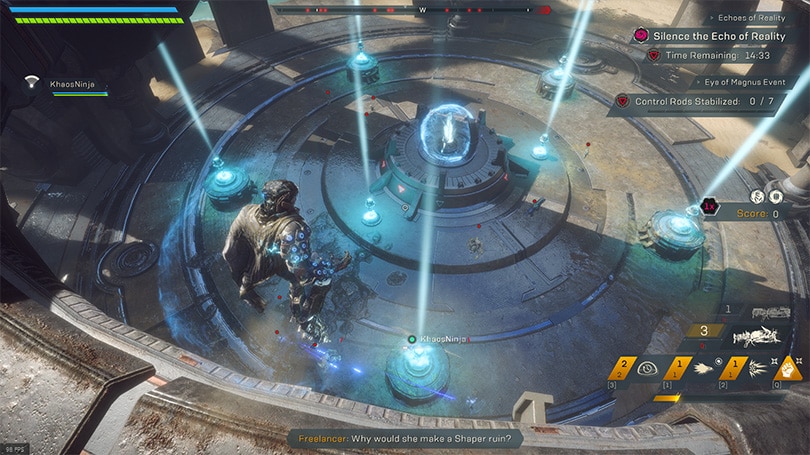
The Ring of Magnus is a simple and straightforward event. Inside the arena are seven Control Rods. Once all seven Control Rods are active the Crystal is exposed and can be destroyed to complete the event.
These rods are on a timer and will begin resetting if all are not active within ~90 seconds. If this starts, it’s usually best to wait for a full reset and start again, or you risk taking longer than needed to clear the event. When you’re on a time limit, all the extra time you can hold to will make your job easier.
Now this event can also spawn two different high priority mobs; Magnus, the named Legendary Valkyrie and a Fury. Magnus himself will only appear if you smash the Crystal under 55 seconds from when you start the event. The Fury however will spawn if you kill enough mobs. There is room and potential to spawn both in a single run but it requires a lot of coordination and good gear if trying to do so in a higher difficulty.
Here’s a Quick Summary on the Event:
- Activate the Control Rods to Expose the Crystal
- (optional) Kill enemies for points and/or Fury Spawn.
- Smash the Crystal to Complete the event.
- Complete in under 55 seconds to Spawn Magnus
THE SECRETS
The Approach is home to 3 Major Secrets, and 7 Minor Secrets. Major Secrets are the ones you always want to hit in every run as they give a sizable amount of points. Minor Secrets are those that are worth less points, but typically reward at least a single Orange Note (or equivalent points) making them still worth grabbing if you can do so.
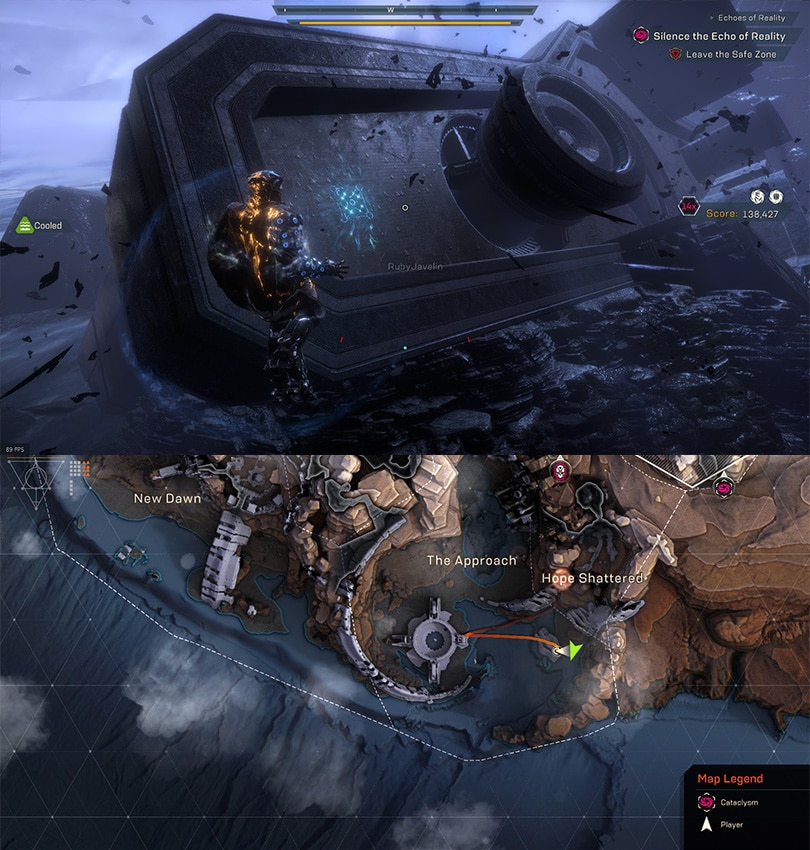
The Major Secrets here are the Shaper Sphere, which grants points equal to 6 Orange Notes; the Beach Relic, which grants one Orange and and a mess of Purple and Blue Notes totaling 2250 points; and the Relic Circle, which grants the same mess of notes for the same value.
All of these can be found along the eastern Beach, opposite side of the water from the Ring of Magnus Event. The Echoes for the Shaper Sphere are scattered about, but one will always be above the western exit of Britaheim.
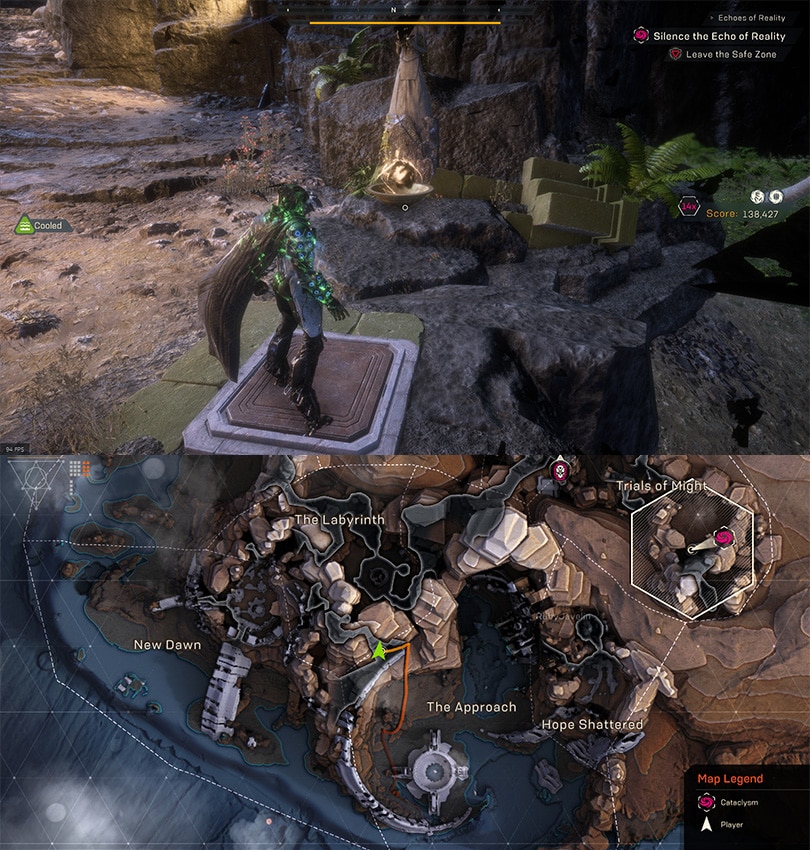
The Minor Secrets include 2 Crystal/Bomb pairings, which grant an Orange Note; a Statue and Pressure Plate, which also grants an Orange Note; and 2 Time Runes, which grants points equal to an Orange Note while increasing your timer by one minute. In addition this area holds 4 Teleporters.
One of the Time Runes can be found on the piece of the Eastern metal construct that has broken away from the rest and rests in the water. It’s on the side closest to Britaheim.
The second Time Rune is on the way towards Vara, near the top of the stone coming up from the bottom, just past the safe area outside Casja’s Forge.
The Statue is located Northwest of the Ring of Magnus, on the cliff just past the small safe area in that direction.
A bomb and crystal pairing can be found south of the Ring of Magnus, along the outer edge of the metal construct.

The second bomb is found just Northwest of the Ring of Magnus, along the cliff; the crystal is a bit of a trek though, requiring you to go north and climb the cliff with the statue on it, where it rests just Northeast of the statue.
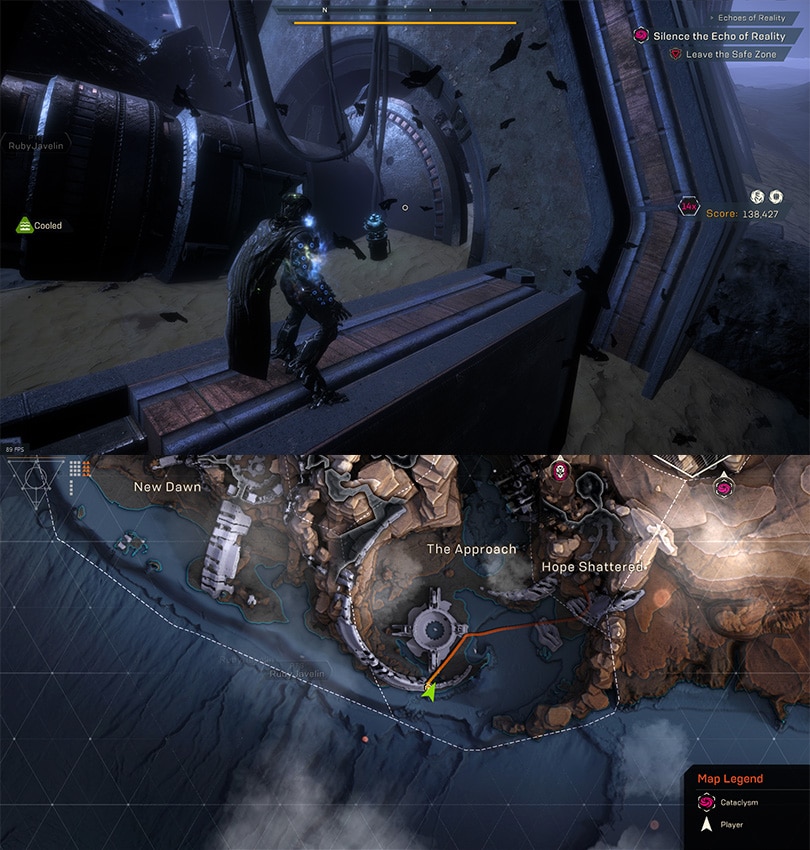
These teleporters are among the most useful of them honestly. There’s the one just slightly west of the Ring of Magnus Event, which leads you to New Dawn; conveniently near a Shaper Sphere, near a majority of the Echo spawn locations.
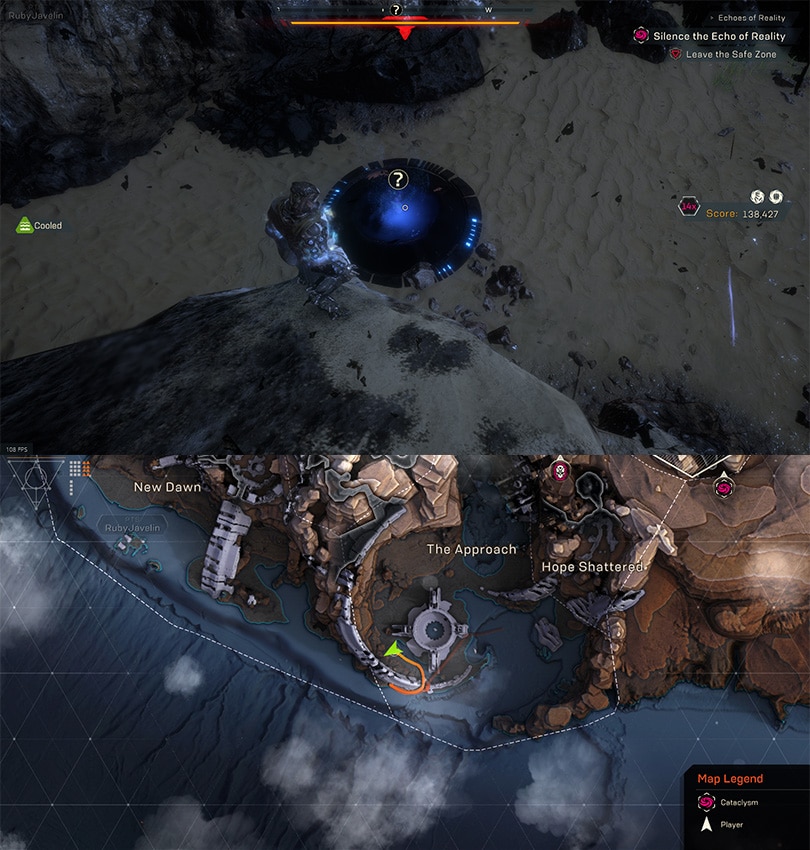
There’s one under the water, just south of the Shaper Sphere on the Beach, which takes you near Vara’s Arena.
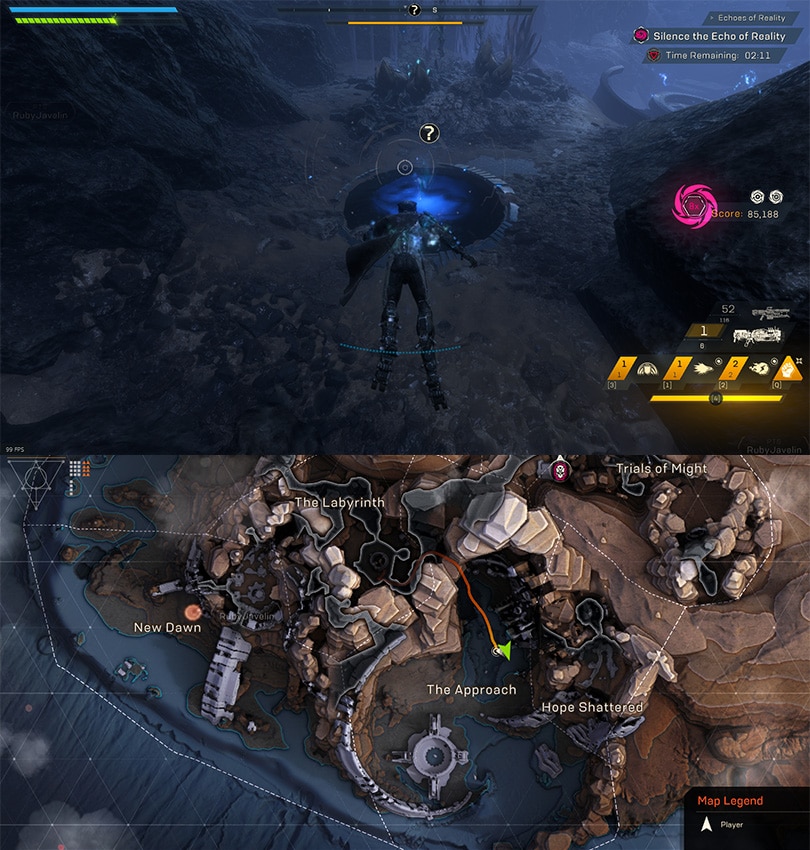
Finally there’s one on the opposite side of the construct as the Shaper Sphere (on the grassy cliff) that will take you to the Trials of Might area, in the southern cave off the main tunnel.
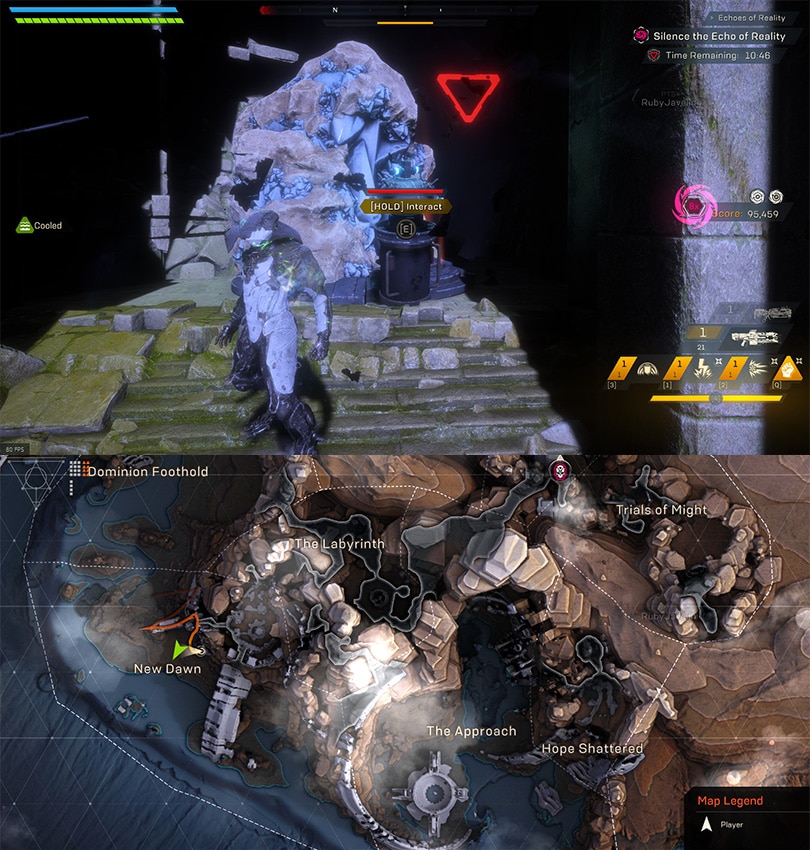
HOPE SHATTERED
Hope Shattered is a small area Northeast of the Starting zone that contains just Britaheim and a few minor secrets.
CATACLYSM EVENT: BRITAHEIM
Britaheim is a simple puzzle, but without communication there can be a lot of problems here. Mostly revolving around getting the Echoes and not getting trapped with echoes underwater by another player. It’s highly recommended to designate 1-2 players to handle the echoes/puzzle for this event!
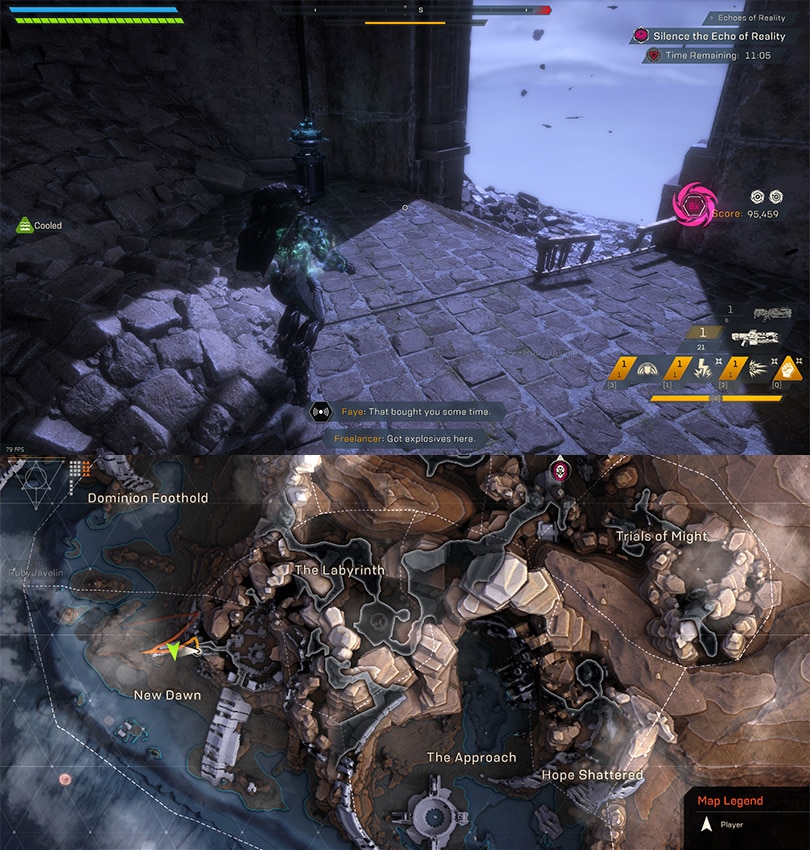
Britaheim contains a total of five Echoes, that must be placed in the devices near the gate at the front of the arena. However one such echo is locked away in the underwater passage and requires the use of the four to remove the barrier and safely retrieve.
To get access to these barrier-ed off Echoes requires the activation of pressure plates. These pressure plates must be held by another player to safely retrieve the Echoes. To find which panel correspond with which barrier, follow the wires (It’s just the closest one in all cases). However, Storm and Interceptor javelins maybe be able to get some or all the echoes with proper timing and use of their mobility. Worth noting this solo method may be considered a bug by the devs, so it could potentially be patched at a later time.
The first step is to take two of these echoes and place them in the devices near the Suppression Field under water. This will disable the Suppression Field allowing echoes to move in and out of this room freely. Otherwise, they will reset on contact if this field is not removed.
Once the Suppression Field is down, take the other two echoes and place them in the empty devices to free the Echo in the middle of this underwater room. Collect the one from the middle and recollect the other two and then escort them safely from the underwater area and place them in the devices outside.
Retrieve the other two Echoes from underwater and place them in the devices to expose the crystal and complete the event.
Britaheim is also home to the named Valkyrie Brita. To spawn her, simply remove any echo from any of the 5 devices once all are placed. The Barrier on the crystal will stay down regardless, however. Once the Crystal is smashed, the Echoes despawn, along with your chance of killing this Valkyrie!
So to recap here’s a quick summary of the event:
Getting The Echoes:
- Locate Echo
- Follow wire along the ground to shield disabling pressure plate.
- Have a player stand on the button.
- Have a second player collect the Echo.
Solving Britaheim:
- (optional) Clear Enemies
- Retrieve 2 Echoes, place underwater to disable Suppression Field. (both arrows on the wall above the Suppression Field will be lit Green when it is disabled)
- Retrieve 2 more, place in the Echo room underwater to remove the barrier from the Echo.
- Retrieve all 3 echoes from this room and place them in the devices on the surface
- Grab the remaining two for the Suppression Field and do the same
- (optional) Remove an Echo to Spawn Valkyrie Brita once all 5 are placed.
- Smash the Crystal
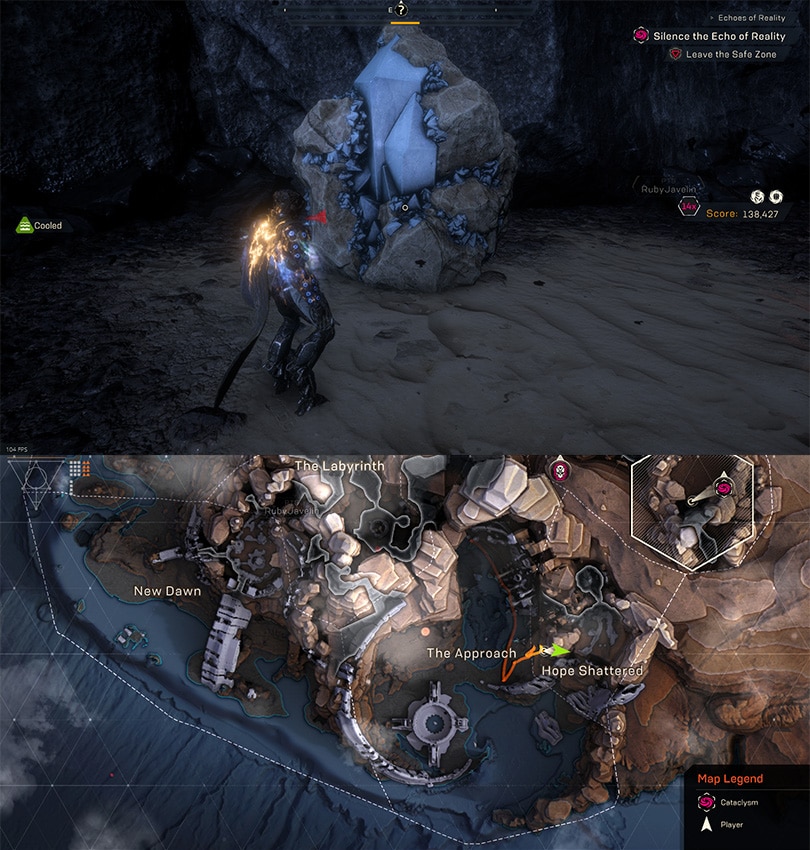
THE SECRETS
Despite the small area that This region covers, there’s a couple of minor secrets. There’s a single Bomb and Crystal pairing, and a Teleporter.
The crystal can be found on the Eastern beach, just past the Relic Circle, with its respective bomb on the cliff above. These are both outside of Britaheim’s Southwestern exit.
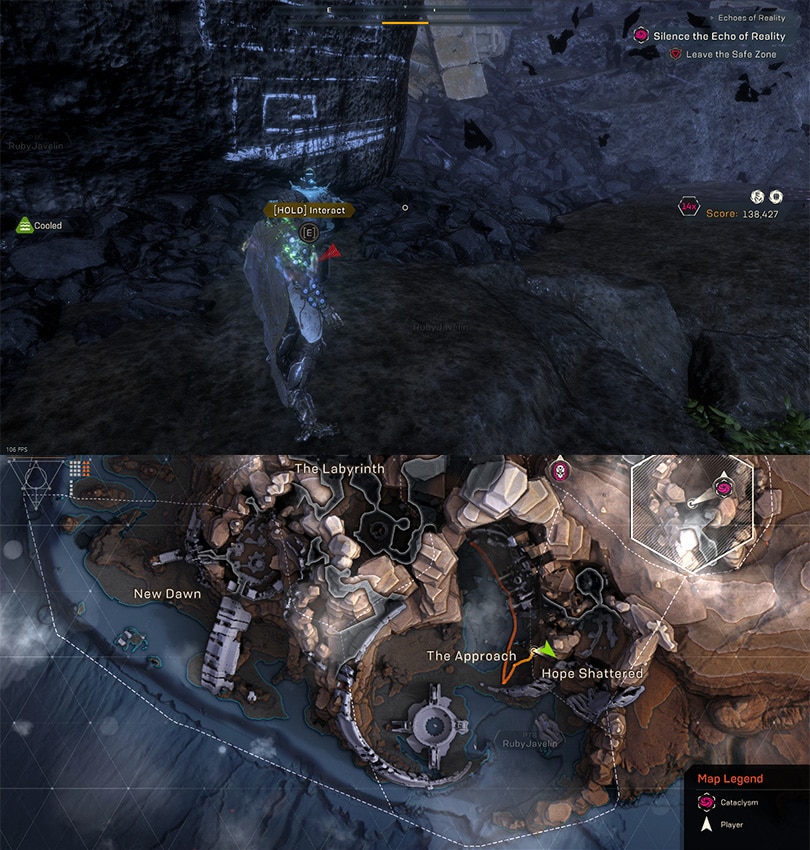
The Teleporter can be found in the lower region of this area, referred to as Lava/Magma Room for its appearance. This Teleporter will take you just outside of the entrance to the Labyrinth area of the map.
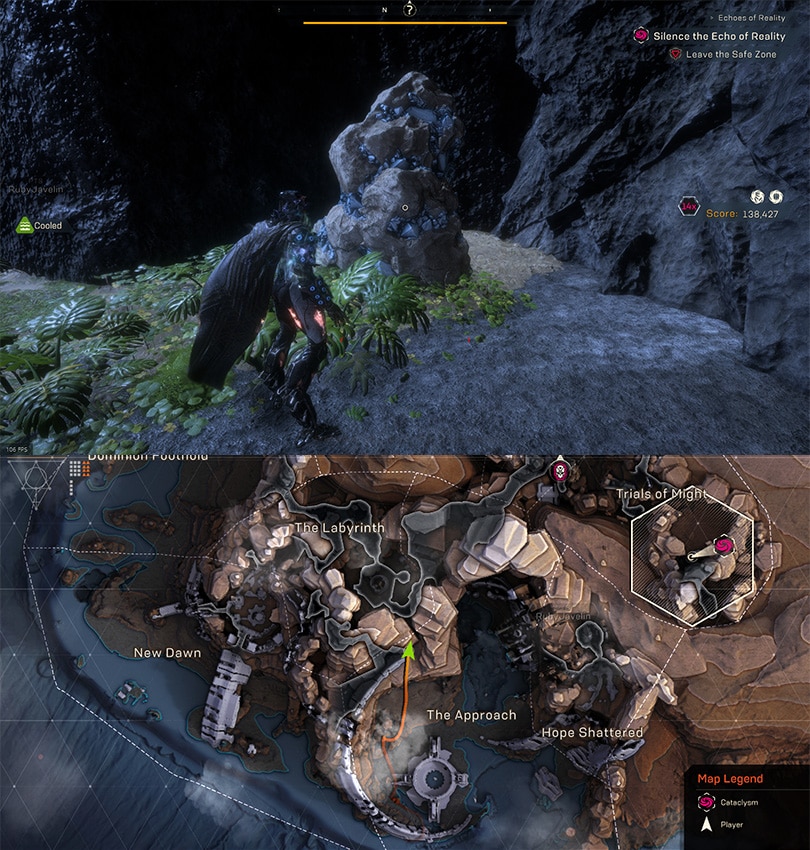
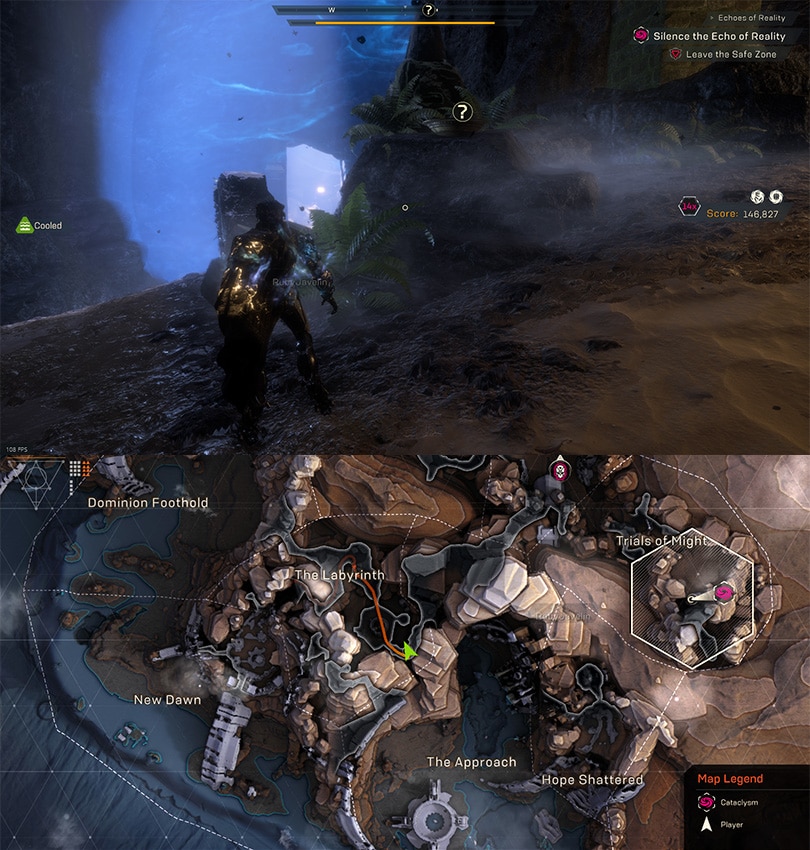
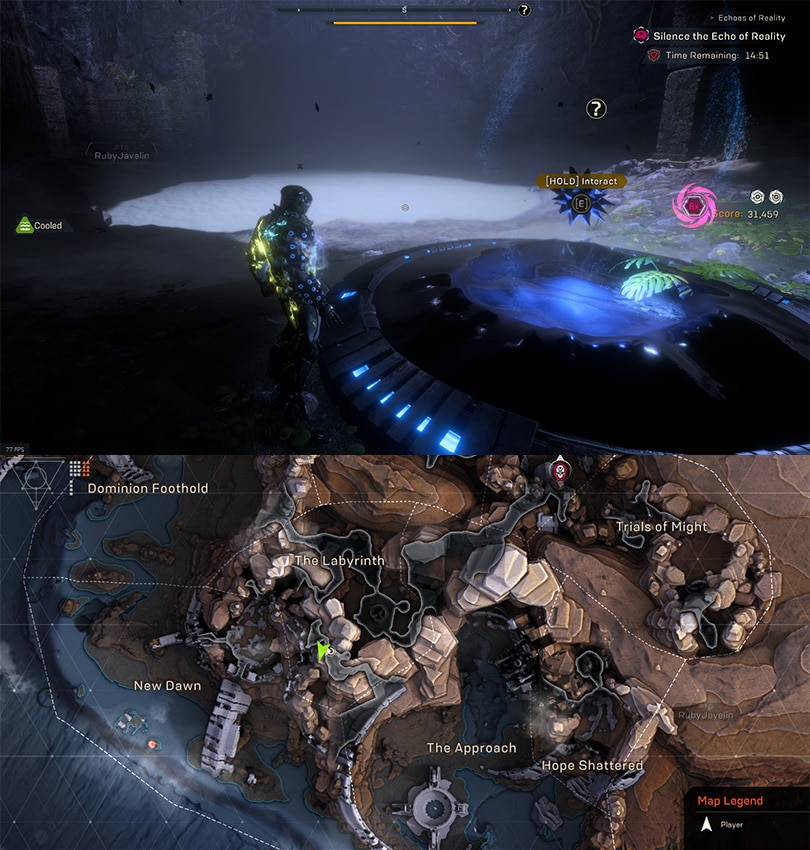
THE LABYRINTH
The Labyrinth is home to the Event known as Casja’s Forge. There’s also a fair amount of secrets for such a small area of the map.
CATACLYSM EVENT: CASJA’S FORGE
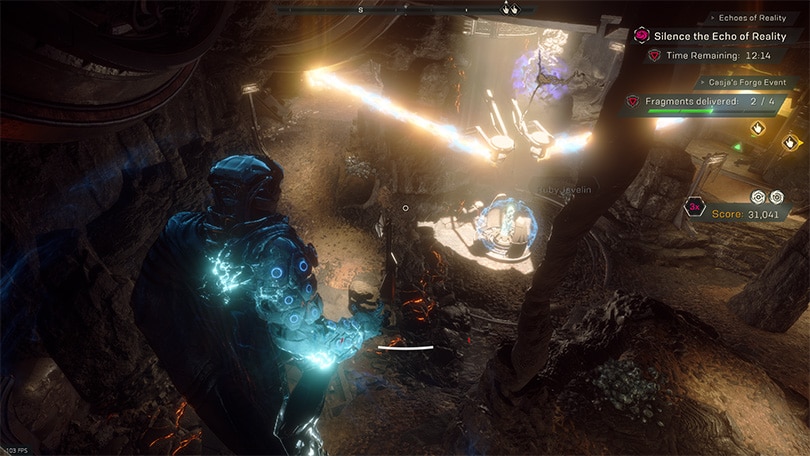
By all accounts, Casja’s Forge is your standard Retrieve the Relic Fragments mission, with some Suppression Fields added in for good measure.
Before the event is explained in full, it’s important to take note of the Valkyrie condition for this room. Spawning Valkyrie Casja requires your party to actually mess up the intended mechanic of the room, avoiding Suppression Fields. You must have four fragments get reset to spawn her, it can be one relic four times if needed. The best method for doing this in a static group (IE with friends, not public) is to have all four players grab a fragment and run to the nearest Suppression Field.
With that explained, let’s briefly explain the event as it’s simple. You are tasked with recovering four relic fragments and bring them to the relic at the front of the room. Again there are Suppression fields here, but they are on a cycle, and do not have or require any manipulation at all by the player.
Once all fragments are delivered the relic will release the Barrier from the Crystal allowing it to be Destroyed.
Quick Event Summary:
- (optional) Kill Enemies.
- (optional) Reset four fragments to spawn Casja
- Deliver the Four fragments to expose the Crystal
- Smash the Crystal.
THE SECRETS
The Labyrinth manages to pack 4 minor secrets into this rather small area. Two Statues, two Teleporters, and a Time Rune.
The Statues are found on each side of the Casja’s Forge event. The pressure plate for the one nearest Britaheim is found on the opposite wall, in the direction the statue faces.
The plate for the one on the opposite side is found just above the teleporter, between the teleporter and the statue.

The first teleporter in this region just outside Casja’s Forge will take you to The Trophy Hall, a small area containing a glimpse at the Hall of Grabbits (see New Dawn Secrets) and some Blue and Purples notes in this room and underwater.

The second teleporter is found just after the Vertical section, just prior to entering the Castle Kelrik Event. At the top of the Vertical Flight Section, as you walk into the next area there is a hole in the wall to your right (left if coming from the Castle Kelrik Event) that contains this teleporter. This will put you near the middle of the Dominion Foothold Area of the map.
The Time Rune in this area is found in the vertical flight section just prior to the Castle Kelrik event
NEW DAWN
New Dawn is easily the largest area of the map and contains the Castle Kelrik Event and a high amount of secrets due to its size, including the biggest score increase available on the map!
CATACLYSM EVENT: CASTLE KELRIK
Castle Kelrik is another simple puzzle, also provided communication is used and only 1-3 players are handling the puzzle. I’d personally recommend for learning purposes, that one person calls out the symbols needed for each stage of the event and the other place the Arcanist Orbs.
This ends up being a matching puzzle, with a few stages to it. You start with two Arcanist Orbs and work your way up to four. All four are needed to finish the event.
Two of the orbs begin locked away behind a solid barrier. To remove this barrier, you need to take the two orbs you do have access to and place them on pedestals with the symbols that match those above either door. Once both are matched for either door, the barrier will drop allowing you to grab your third orb. Repeat the same process for the fourth orb.
Once all four are obtained, repeat the process again, but matching to the images around the base of the pillar the Crystal sits on. Once all four are matched the Crystal is exposed!
To spawn Valkyrie Kelrik here uses the same process. However the symbols you need to match to are the one high up on the Southeastern wall. These have no indicators for them. Once all three are matched, Kelrik Will spawn.
Quick Event Summary:
- (optional) Kill enemies
- Grab the accessible orbs.
- Match them to the pair of Symbols above either Barrier Door.
- Collect the new Orb.
- Using any two of the orbs, repeat steps 2 and 3 for the other barrier door.
- (optional) Use any three orbs to match the symbols high up on the Southeastern Wall to spawn Valkyrie Kelrik.
- Use all four Orbs and match them to the bae of the pillar the Crystal sits on.
- Smash the Crystal.
THE SECRETS
The New Dawn region is home to a number of secrets, including 2 major Secrets and 5 Minor secrets.
The major Secrets consist of the Shaper Sphere on the Southeastern beach in this area (near The Approach section of the map), and the Hall of Grabbits.
The Hall of Grabbits involves a series of events, which are likely easier to understand through images or video, but will be detailed first.
This Secrets starts in the Northwestern section of this area, near the Large Crystal. Near this crystal, are a machine and a Door, both hidden underwater. Activating this Machine is the first step.
This machine then activates three switches in the New Dawn area. There is no order or time limit to activate these. These switches are found in the Northwestern-most part of the Castle , across the bridge from the Time Rune , outside of the Eastern Castle Kelrik exit and slightly further west, near the beach under a Crystal . This Crystal does need to be removed before the button can be pressed.

The bomb for this is found in the same area as the Time Rune as well.
Once all three of these have been activated you can Enter the Hall of Grabbits via teleporter on the other side of the newly opened door underwater.
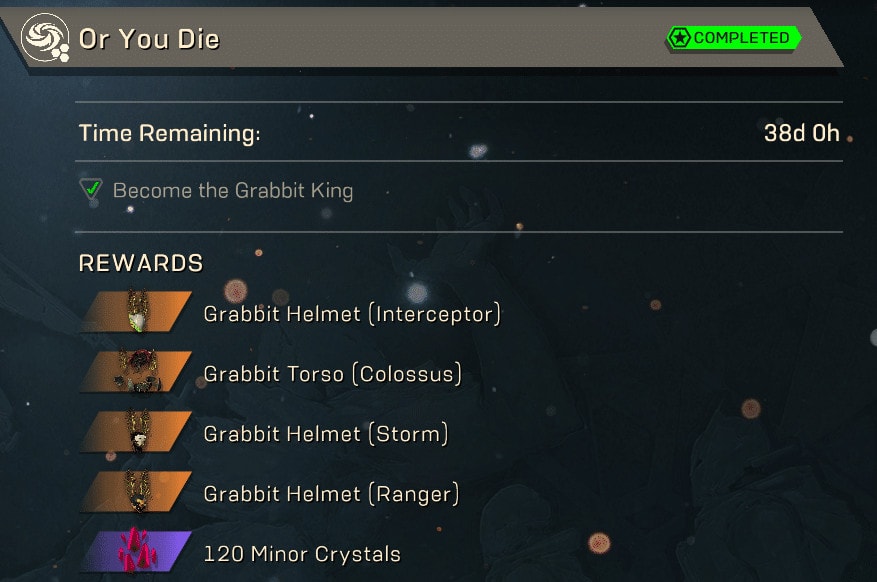
Once in this room The last step is simple. Kill the Grabbits, but quickly. Each grabbit you kill will grant an Orange Note, and done fast enough, will open a Cache that drops several orange orbs as well as complete the “Or You Die” hidden challenge. In total completion of this secrets awards a total of 15 Orange Notes worth of points and an additional 5 points per grabbit kill (total of 45)
This room also has a Statue, which the Pressure Plate is located on the stone pillar directly in front of the statue. Activate this for an additional Orange Note.
The other four minor secrets come in the form of three crystals and a Time Rune.
The Time rune is located on a slightly lower level of the castle, just slightly north of the Western exit to Castle Kelrik.

The first remaining crystal and bomb pairing can be found in the Southwestern water, near a small metal construct.
The second can be in the Northeastern part of the Castle, with the bomb being in the castle in a small room with a balcony, with the crystal on the cliff below.

The Third and final crystal and bomb pairing here can be found right in front of the large Crystal, used to locate the Hall of Grabbits.
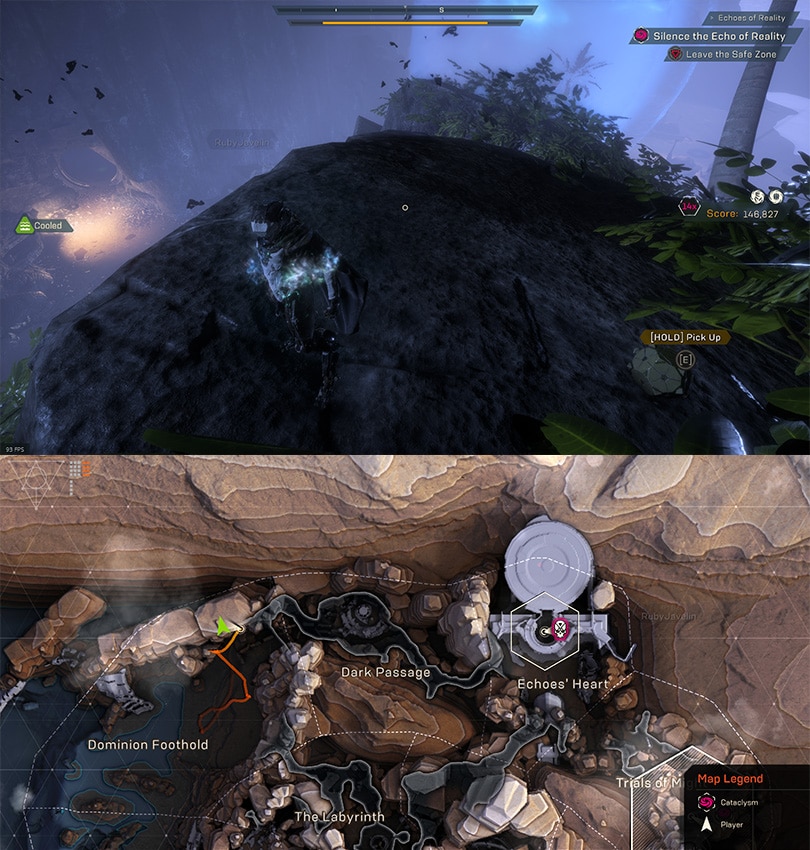
DOMINION FOOTHOLD
Despite the larger section of the map that Dominion Foothold is, it’s limited to the Diana’s Landing Event and just a handful of secrets.
CATACLYSM EVENT: DIANNA’S LANDING
The events don’t get any more straightforward than this one. All you need to do here is kill.
As stated, this event consists of just killing the spawns. This eventually spawns the Riftmaster, who drops a Key that will activate the three panels around the area. Two are used to deactivate the crystal and the third hidden on the northern side of the area will spawn Valkyrie Diana.
Quick Event Summary:
- Kill enemies until Riftmaster Spawns.
- Kill the Riftmaster for Key.
- (optional) Activate the Northern panel to spawn Valkyrie Diana.
- Activate the two marked panel to expose the Crystal.
- Smash the Crystal.
THE SECRETS
Dominion Foothold is home to two major secrets and two minor secrets.
The first of these major secrets I refer to as the Dominion Vault. It requires Three Arcanist Orbs to open and claim the mess of Notes it drops. Same value as the Beach Relic and Relic Circle from The Approach, 2250.
The First orb is found West of the vault, on the other side of the nearby cliff, in the pile of light colored stone.
The Second is Northwest, on top of the cliff across the water.
The Third is found Northwest as well, this time at the bottom of the Cliff near water.
RELATED ► ANTHEM Cataclysm: Dominion Vault Secret Challenge Guide
The Second Major Secret is the Third and final Shaper Sphere.
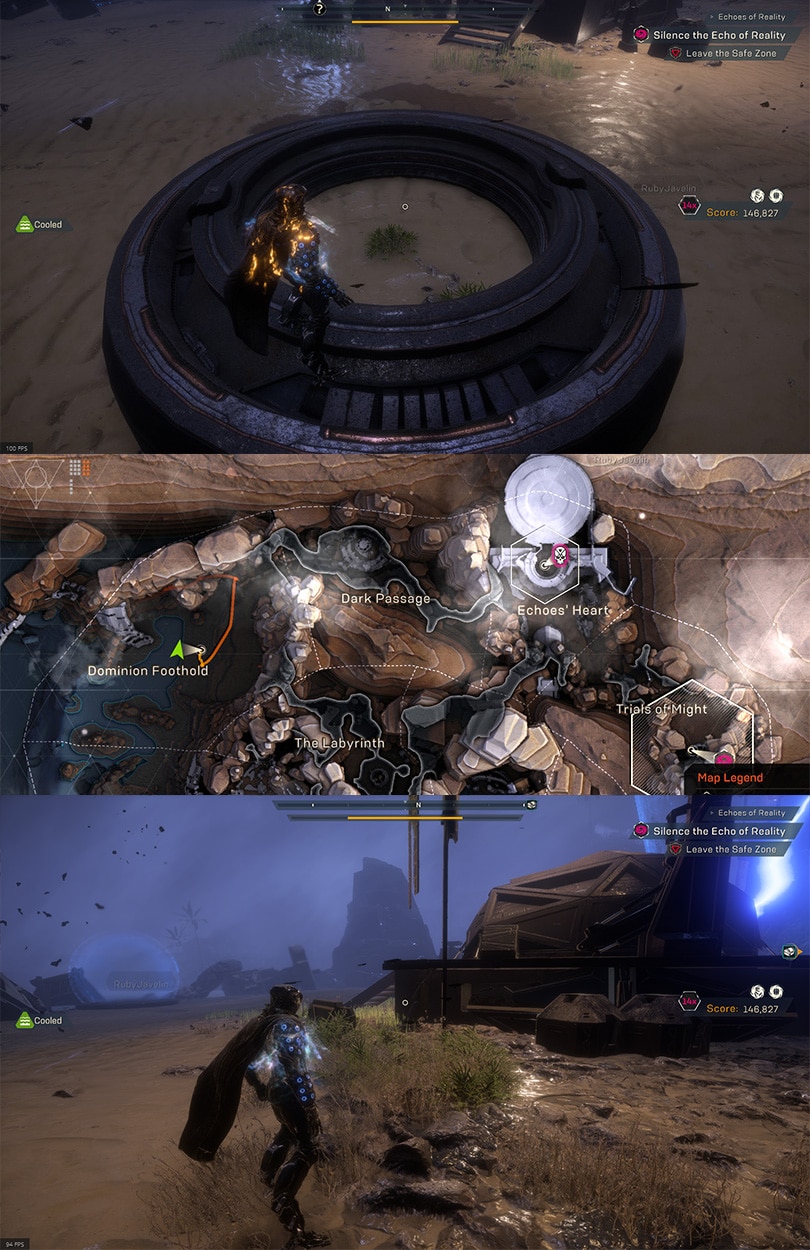
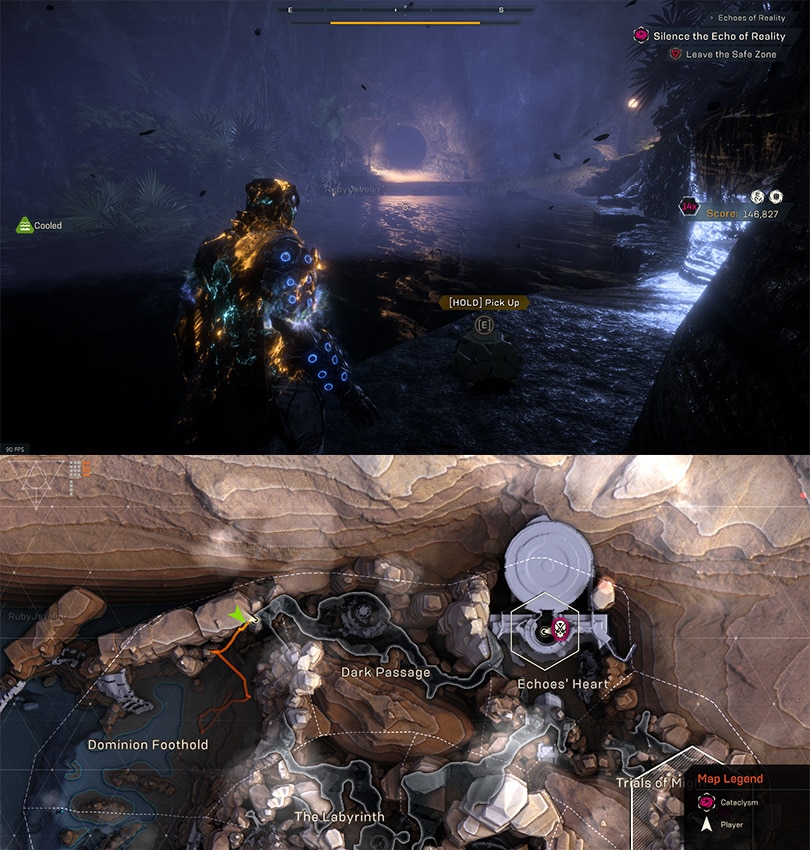
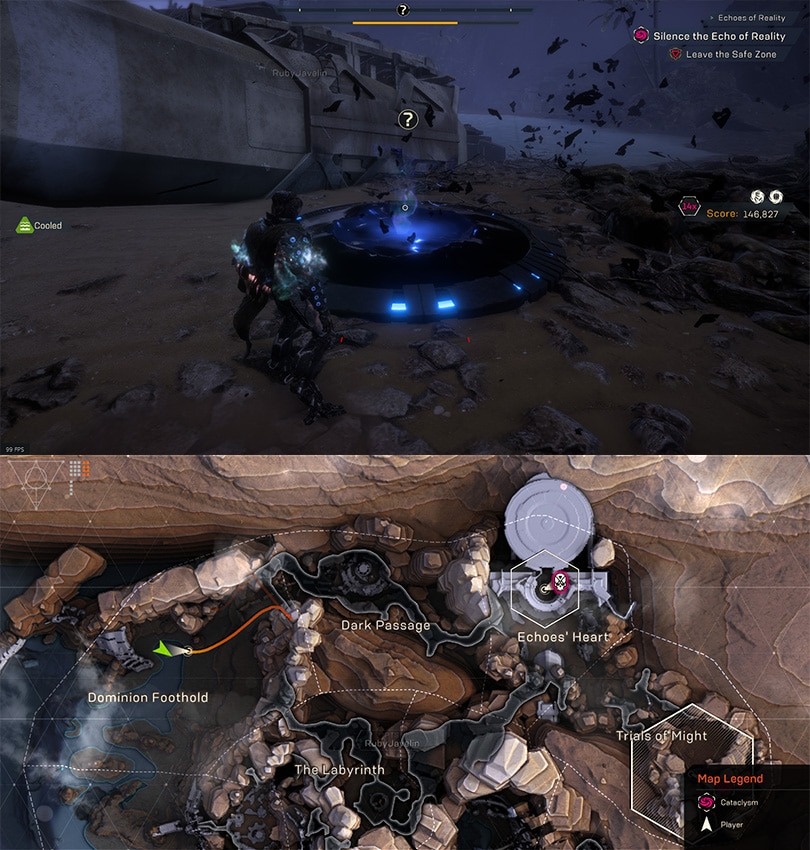
The Minor Secrets consist of a Teleporter and a Time Rune.
The Teleporter is near the center of the area, just north of the small safety bubble found here, near the downed mini-Strider. This Leads to the area behind the hole in the wall, near Castle Kerik.
The Time Rune is just east of the previously mentioned safety bubble, on the inside of the Container in the water.

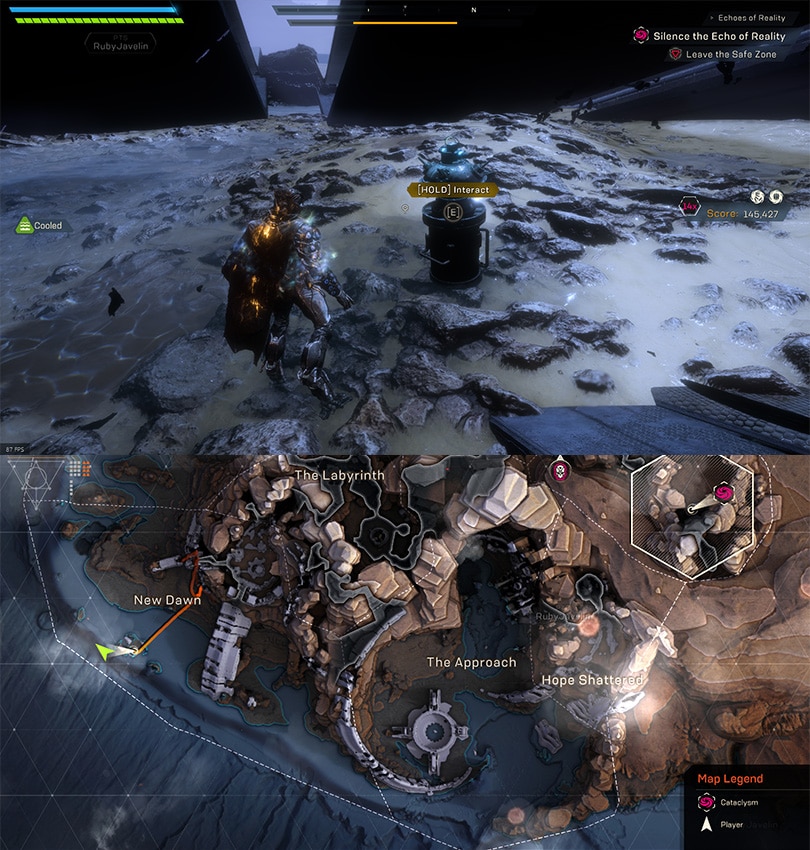
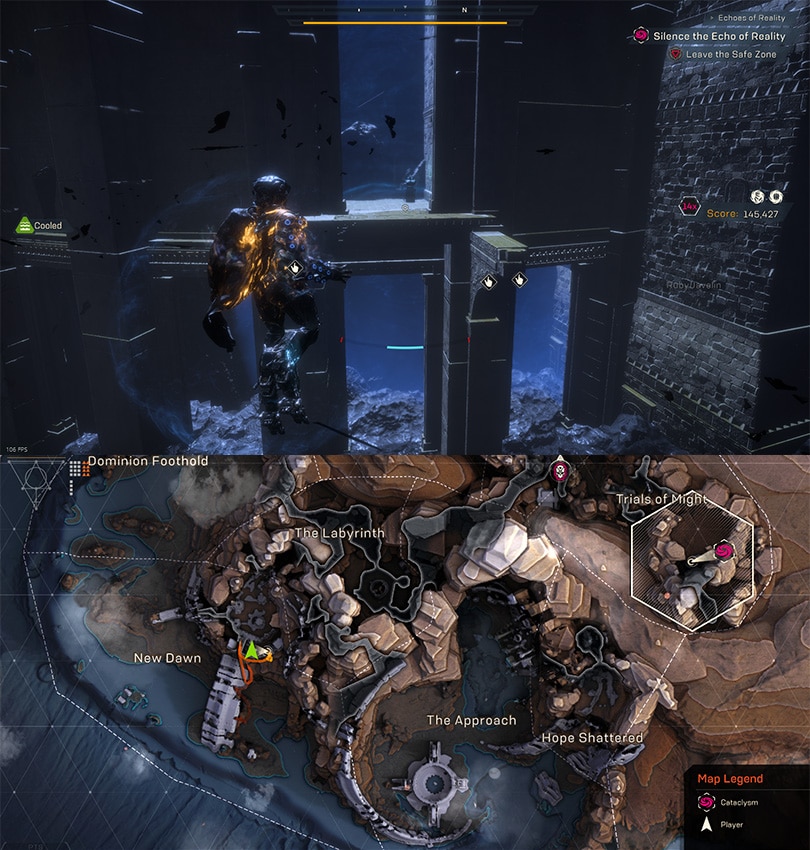
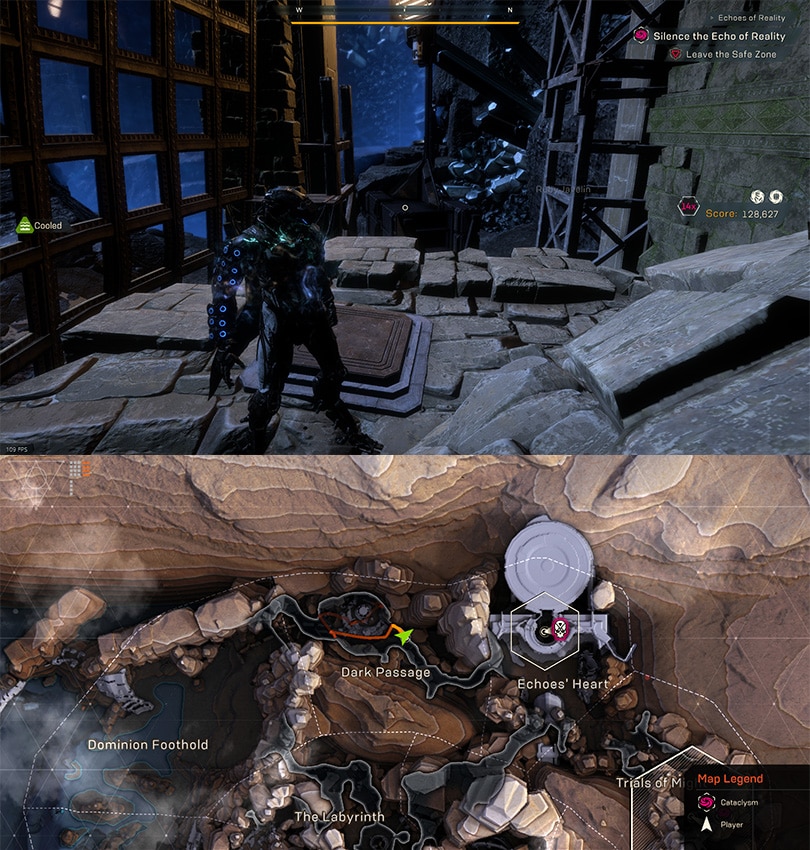
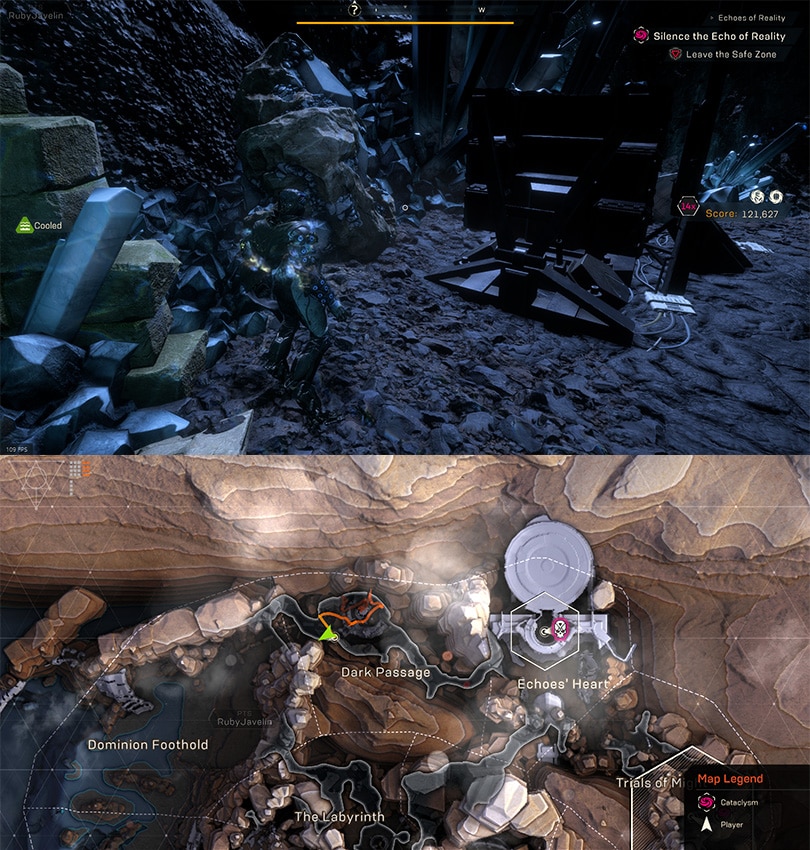
DARK PASSAGE
This area is limited to the Sea of Takaro Event and just a few minor secrets.
CATACLYSM EVENT: SEA OF TAKARO
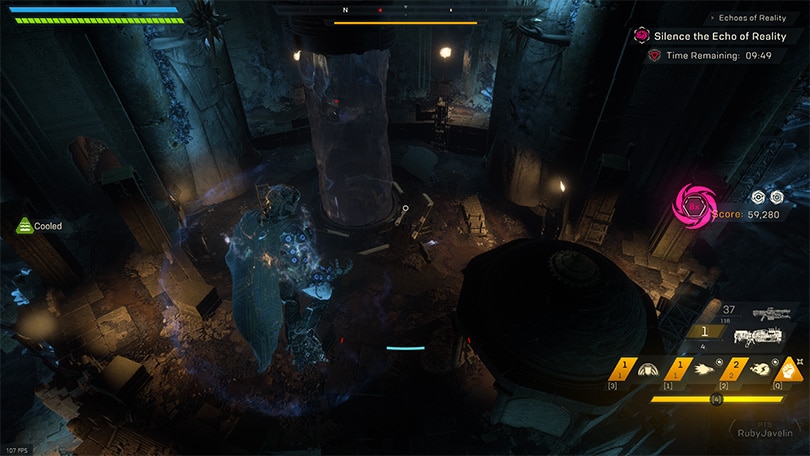
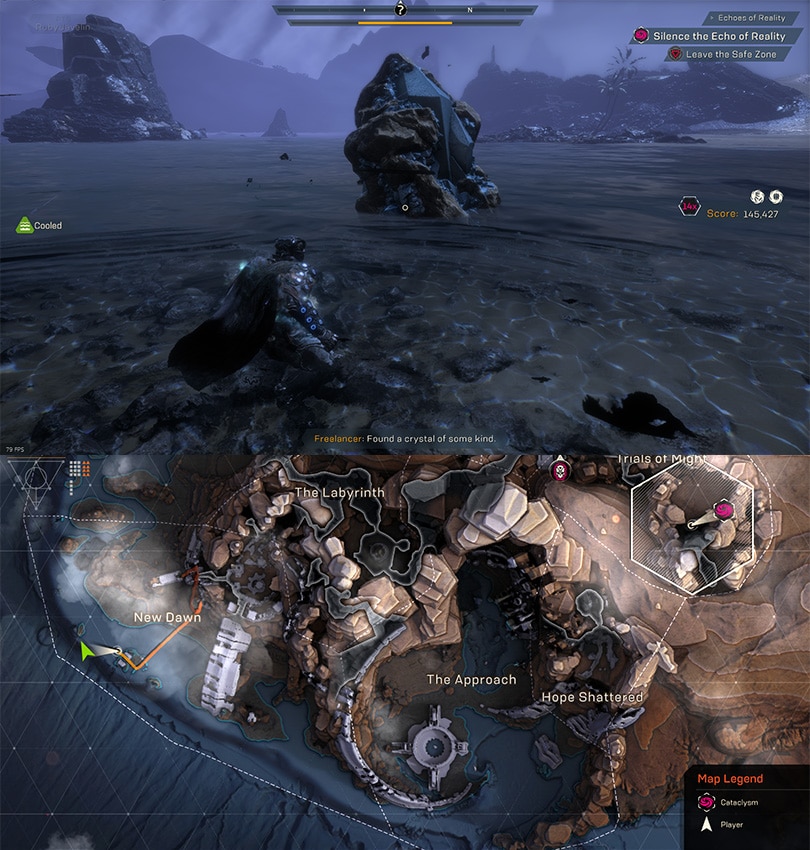
This event consists of a Relic that requires three echoes around the area to be delivered to it to expose the crystal.
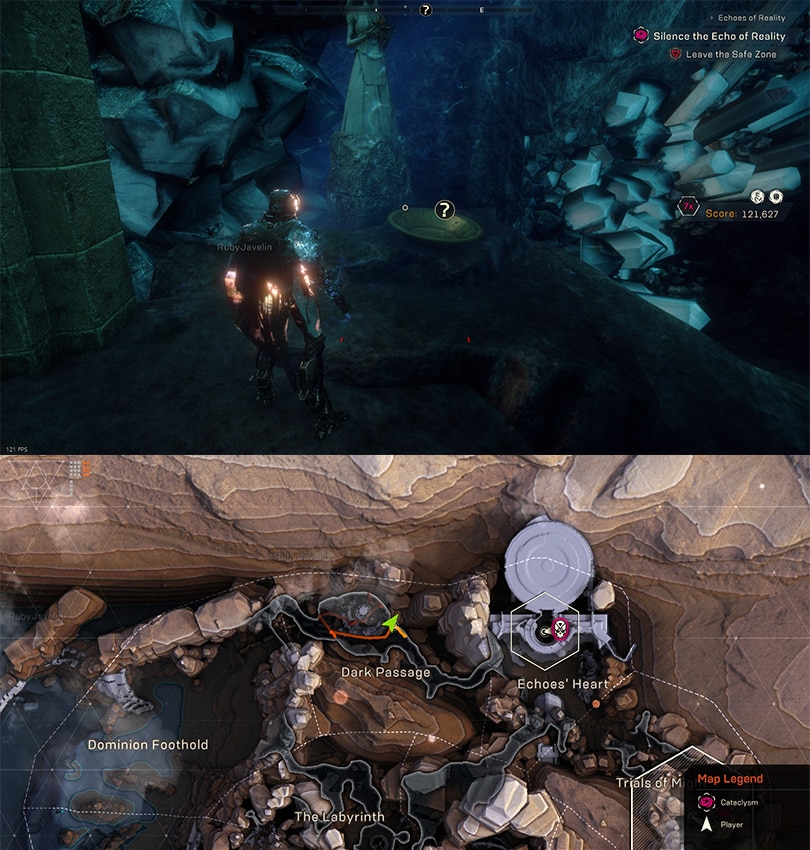
This event can be done solo quite quickly, but can also be done slightly faster by a coordinated group. Solo relies on the use of the weights around the arena. For those going solo or wish to use the weights, they are located in the small room slightly east of the most accessible echo, and the other weights are in the other echo rooms, along the centermost wall.
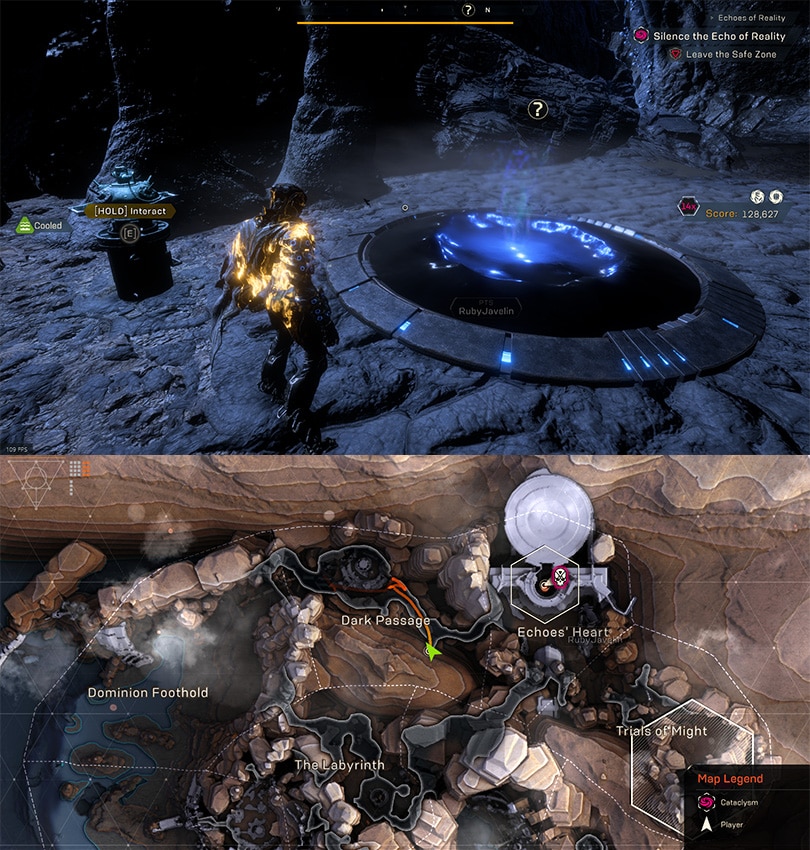
Each of the pressure plates controls a specific Suppression Field(s). They control the one closest to them, aside from the northern one, which control both inner Suppression Fields. The ones to the East and West control those outer ones specifically.
With all three activated, collect and deliver the Echoes to the top of the waterfall in the center of the arena to expose the crystal.
After the Crystal is Destroyed, the Echoes will be able to be delivered again, either back up the waterfall, but most often to another location just east of the waterfall to spawn Valkyrie Takaro.
Quick Event Summary:
- Active the Pressure Plates, either with teamwork or by use of the weights to disable the Suppression Fields.
- Collect the Echoes
- Deliver them to the Relic up the Waterfall in the center of the arena to expose the Crystal.
- Smash the Crystal!
- (optional) recollect and redeliver the Echoes to the desnignated spot to spawn Valkyrie Takaro.
THE SECRETS
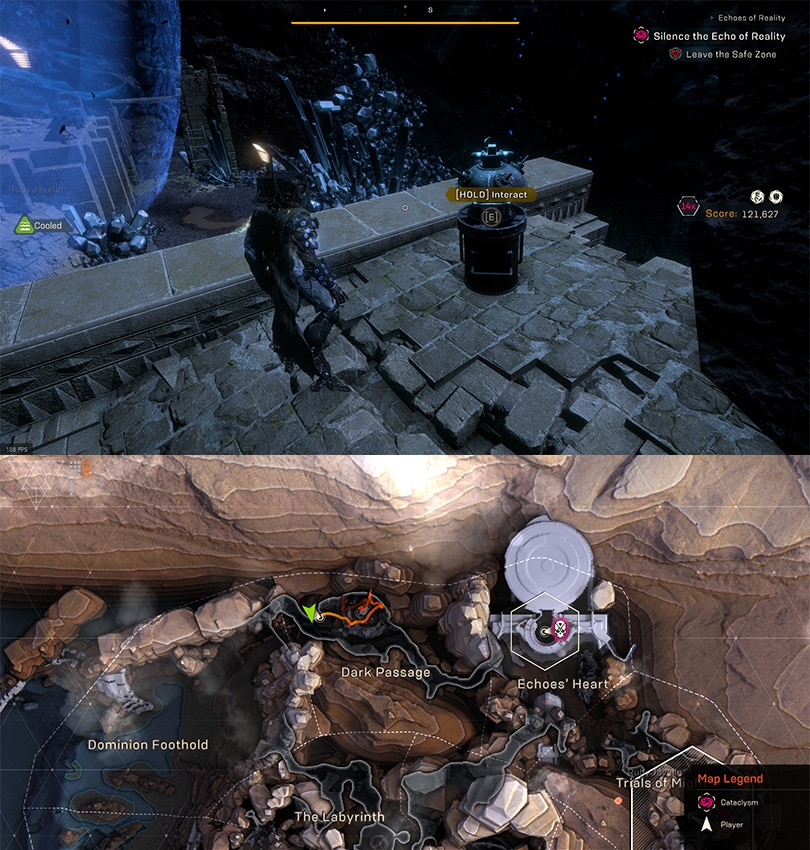
As far as Secrets go, this area only has four minor secrets. Two Crystals, a Statue and a Teleporter.
The Statue and its respective pressure can be found along the Eastern wall just outside of the event.
The first Crystal and Bomb Pairing can be found to the West of the event, with the bomb being up on the small broken bridge, and the bomb being on the opposite wall, behind a wooden structure.
The Second Crystal and Bomb pairing can be found to the East of the event. The Bomb is located near the Teleporter. The Crystal is further East into the cave towards Vara.
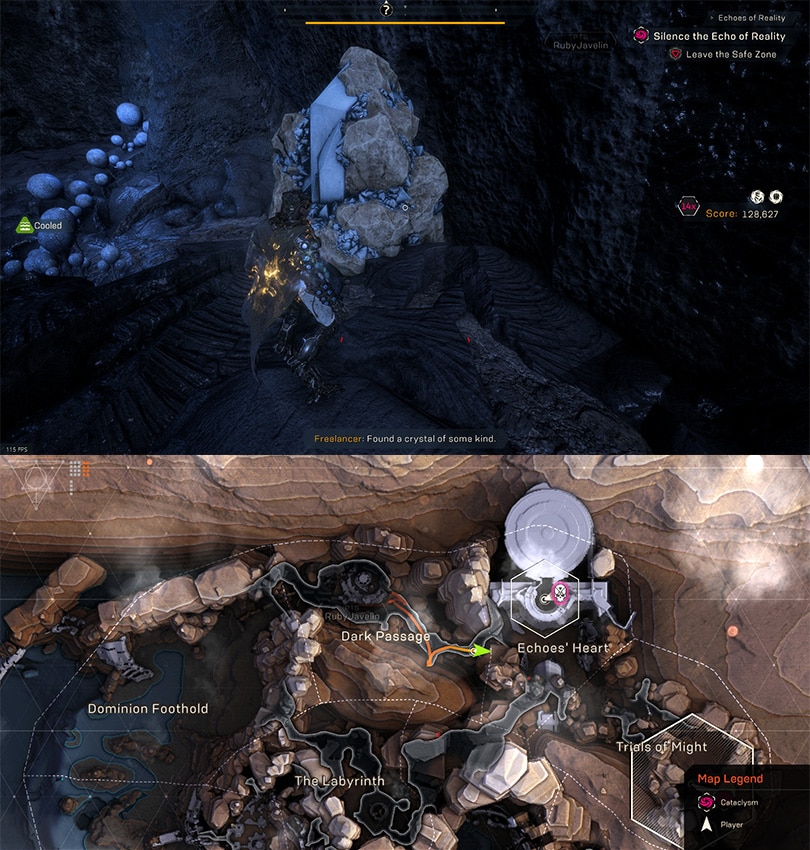
The Teleporter is in the Eastern tunnel, in a small area along the Southern wall. As mentioned a Bomb is also found here behind this teleporter.

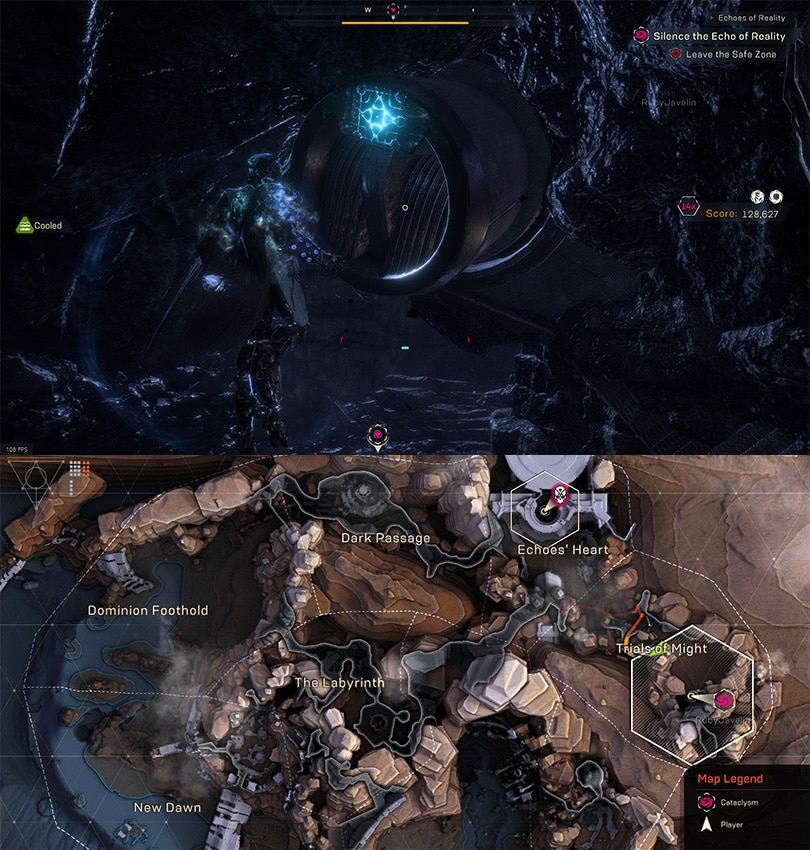
TRIALS OF MIGHT
This area contains the Crucible of Astrid Event and a handful of Minor Secrets.
CATACLYSM EVENT: CRUCIBLE OF ASTRID

This event is like a slightly more complex version of Britaheim, without the Underwater portion. The puzzle here is basically an airlock, which will require 2 people to solve at minimum.
At the Start of the event, there is a single echo, in the device for the Airlock at the back of the arena. This needs to be moved and placed in the device that is closer to the middle of the arena.
Doing this redirects a laser to a location that will drop a Suppression Field. This field has four Echoes behind it, send two players to collect them. These Echoes need to be delivered to the back of the Airlock.
On the way back to the airlock, take the echo back out of the device that controls the Suppression Field that held the echoes, you will need it to control the airlock and get the other four echoes to the rear of the room.
The Airlock has two states On (Echo inside) and Off (no Echo). In the On state, the first barrier is on, while the second barrier in the rear is off and the Suppression Field is also off. In the Off State, only the First barrier is off.
There are also Weights that can be used on the pressure plates in the rear of this airlock. They are found around the area, mostly on the outer edges.
To get stuff to the rear, put the Airlock in the Off position. Have a player carrying Echoes and/or a weight in the first section of the airlock, past the first barrier, but before the Suppression Field. Once they are there the player controlling the airlock and cycle it to the On state, allowing all the weights/ Echoes to be dropped off. Cycle as needed until all necessary weights and Echoes are delivered to the rear of the airlock.
If you need an extra player in the rear of the airlock, say for a duo. The player cycling the airlock can also go back. After pulling the echo out and setting the Airlock to the Off state, Simply fly to the rear. The Echo will be placed back in the airlock device and the player will make it all the way through.
To limit the need for cycling, there is also a one-way teleporter in the back of the airlock for an easy exit. This will drop you in the Northern side of the room.
Once all of the pressure plates are powered and activated a laser will shoot out, deactivating all the barriers and suppression field, enabling two panels. The first, just outside the tunnel will expose the crystal. The second just a bit Northwest will Spawn Valkyrie Astrid.
Quick Event Summary:
- Grab Echo from Airlock Device.
- Place in Laser Device north of the center of the event.
- Collect the four echoes from behind the now disabled Suppression Field.
- (optional) Grab any needed weights.
- Remove Echo from the Laser Device and return to the airlock.
- Players holding weights or echoes enter the first section of the airlock.
- Player controlling Airlock places their echo into the Airlock Device.
- Players in Airlock deliver the items they are carrying.
- Repeat Steps 4-7 until all Devices have an Echo and all pressure plates can be activated.
- Activate the Pressure Plates to reveal the two panels.
- (optional) activate Western panel to spawn Valkyrie Astrid.
- Activate the Panel outside of the airlock to expose the Crystal.
- Smash the Crystal.
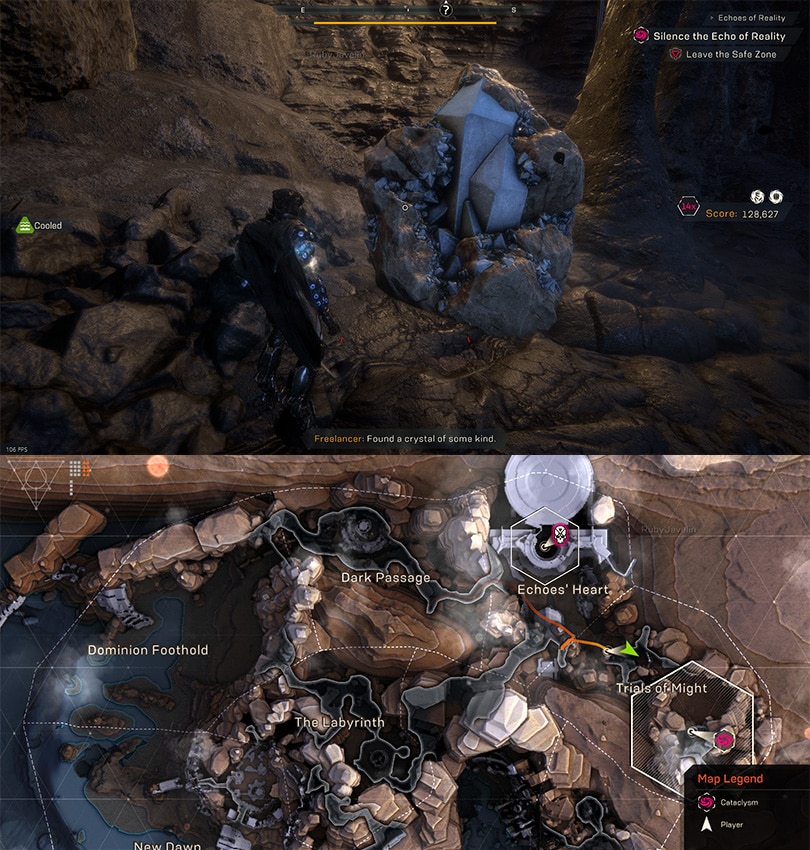
THE SECRETS
This area only contains 5 Minor Secrets. A Crystal, a Statue, two Teleporters and a Time Rune.
The Crystal is located near the start of the tunnel, at the bottom of the ledges close to Vara. The Bomb for it is located to the South of the metal constructs found in the tunnel (to the right heading to Crucible of Astrid), which are just outside Crucible of Astrid.

The Statue and Pressure Plate are near the middle of this tunnel. With the statue being on the northern ledge and the pressure plate on a stone pillar just south in the middle of the tunnel.
The Middle of this tunnels splits into two smaller tunnels, each of these have a Teleporter. The Teleporter to the North, connects to the one near Sea of Takaro.
The Teleporter to the South, connects to the teleporter on the Grassy Cliff in The Approach.

In this Teleporter area to the south of this tunnel is also a Time Rune. it can be found on the metal construct, just above the entrance. There is a bit of Shaper Wind here, so approach this Rune slowly and carefully. The Wind will just force you to the ground.
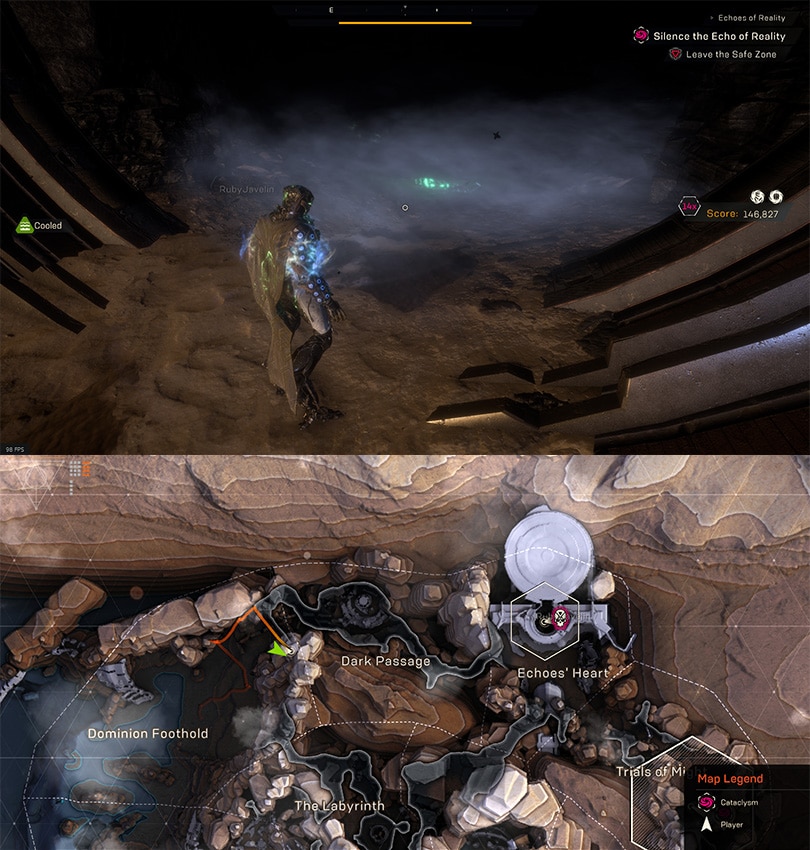
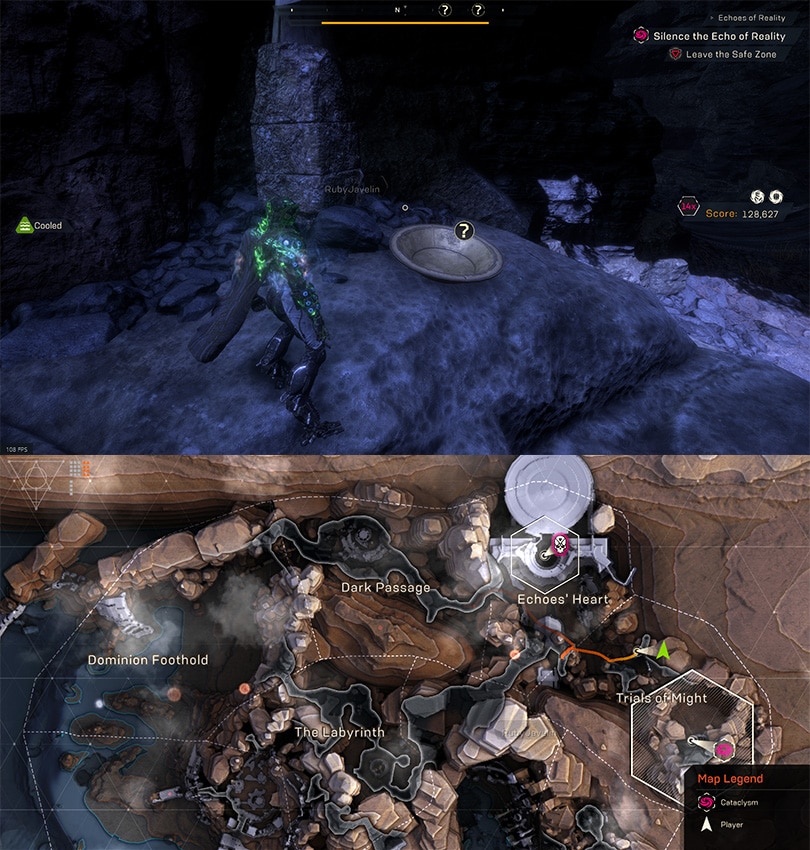
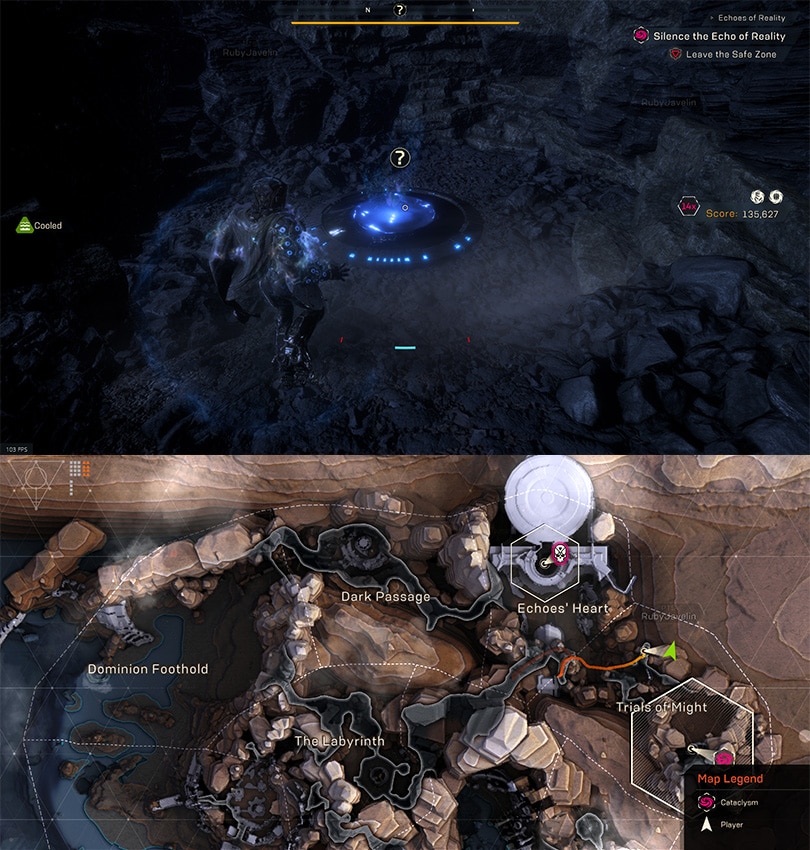
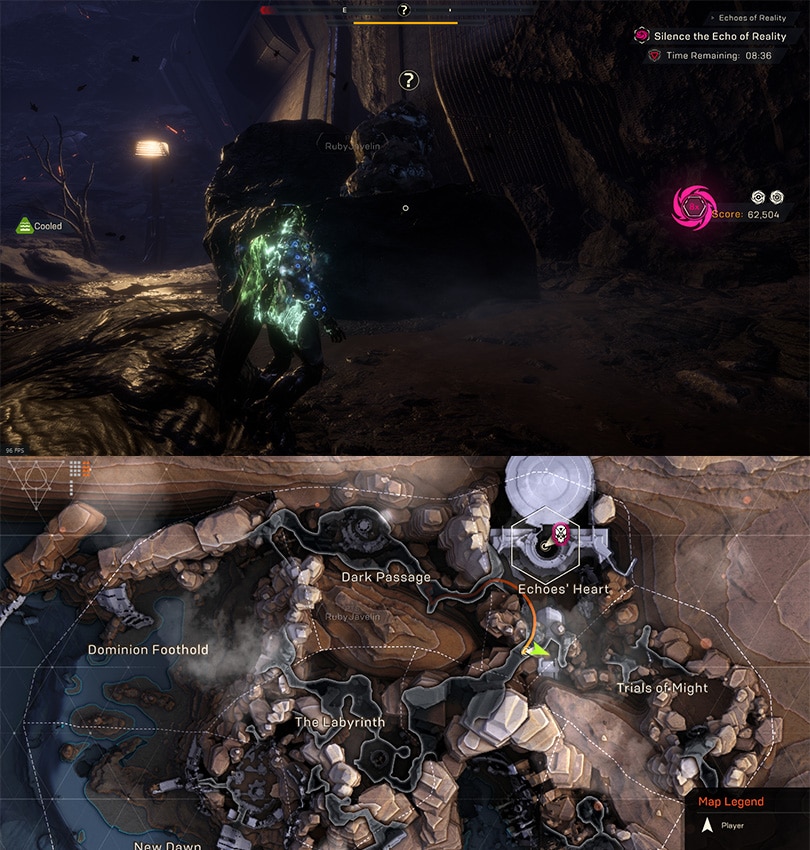
ECHOES’ HEART
This area primarily hosts the Vara Boss Fight, but has one small secrets as well.
THE VARA BOSS FIGHT
Vara is a Boss that has two distinct phases, which she switches between at 66% and 33% health. Below 33% she can also cycle between phases occasionally, but is not guaranteed. The Rift in the middle of the Arena must be active to deal damage to Vara.
VALKYRIE PHASE
This is her basic Phase – above 66% and below 33%. She’s almost an oversized Valkyrie, with a variety of attacks but no shield.
Attack List:
- Flame Waves: Vara targets all players in the arena with small fire waves. These are similar to the lighting ones The Monitor uses, but much smaller and will not cover the arena.
- Ring of Fire: Vara spawns a Ring of Fire at the edge of the arena which slowly closes in towards the center. This attack is an instant kill on all difficulties. Stand in blue area in the center of the arena to avoid.
- Ice Barrage: Functions similar to the Attack of a Frost Valkyrie, but has a higher chance to freeze. Getting Frozen will Trigger Charged Fire Beam as a follow-up attack.
- Charged Fire Beam: This is a powerful beam that Vara will fire off if you get Frozen by Ice Barrage. This attack can deal very high damage, and due to the damage of Ice Barrage can often result in death.
FLOOR IS LAVA PHASE
The aptly named Floor is Lava phase is exactly as it sounds. Vara sets the majority of the arena on fire, leaving only the Pillars as a safe area. While in this phase, she only has one attack, which she uses frequently, forcing players to reposition.
Instead of being in the middle of the arena, she will relocate between the three outer pillars of the arena. Most classes will be unable to melee her, leaving ranged skills and weapons to deal damage.
Attack List:
- Stationary Fireballs: Similar to the Attack of an Ash Titan where it can spawn a Fireball on your location. However Vara’s Version lingers of a bit, which forces more repositioning on top of the pillars.
- Blazing Floor: Coming in contact with the floor will set you on fire. Can drain health really quickly on higher difficulties, but not too much of a threat.
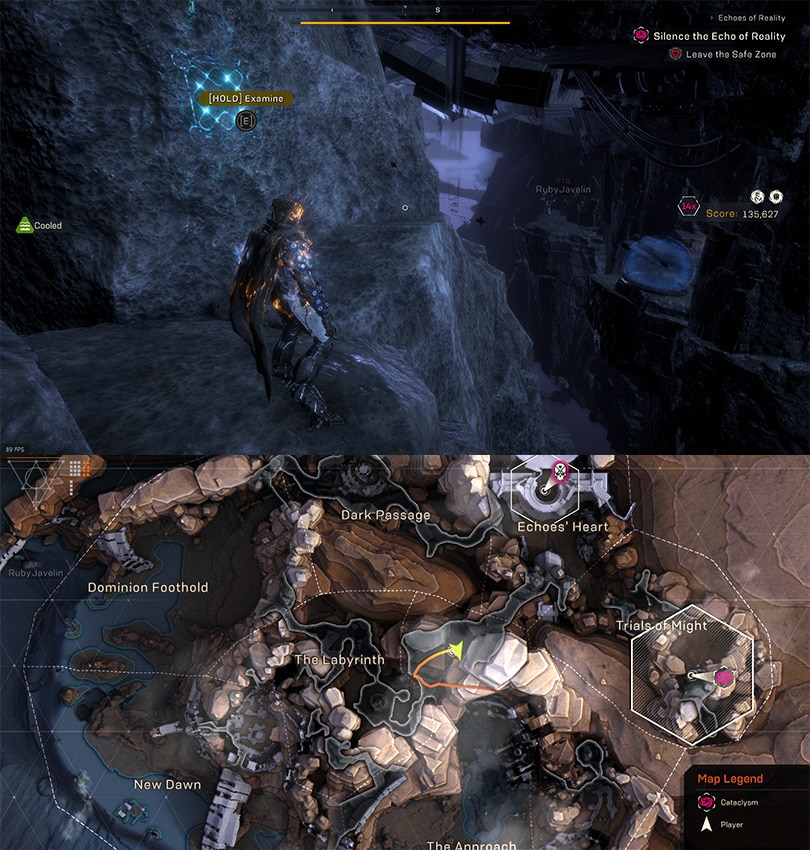
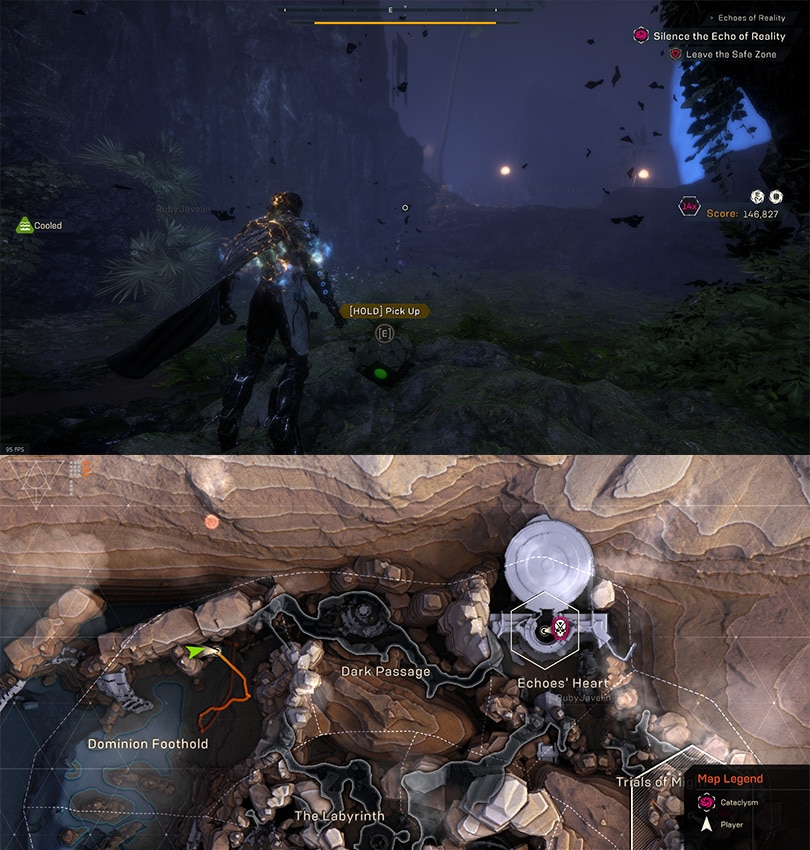
THE SECRETS
Echoes’ heart only contains one minor secret, a Crystal. However this Crystal is instead destroyed by a Laser Device. Both of these are located to the south of here arena, closer to The Approach.
The Device needs to be aimed at the Crystal by standing on the Eastern Pressure plate (right side facing towards the crystal) and activating the panel here twice. To trigger the laser, step on the other pad. Wait a second for it to destroy the Crystal and collect the Orange Note.
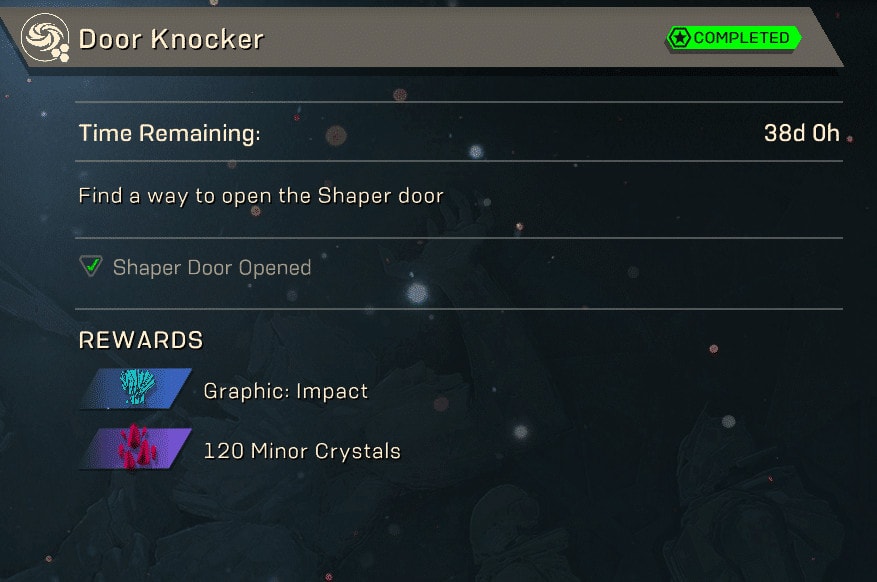
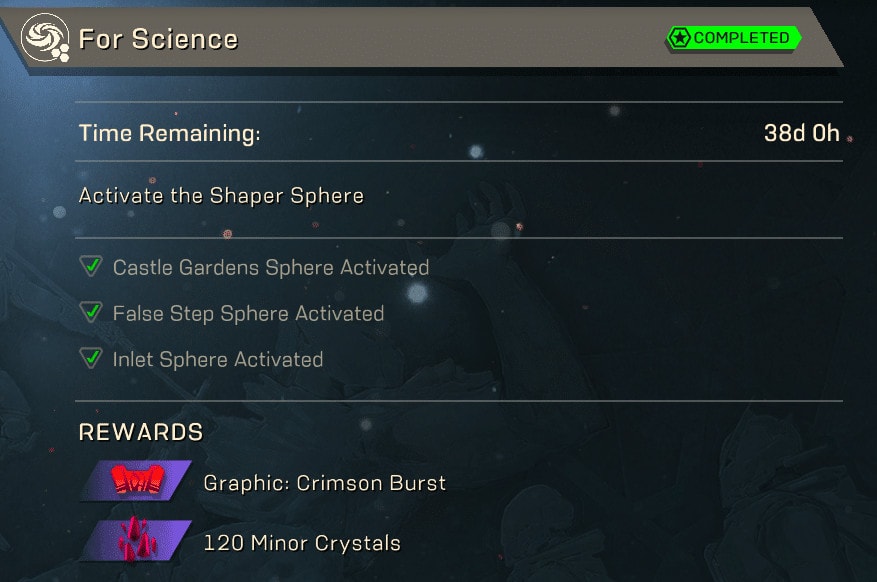
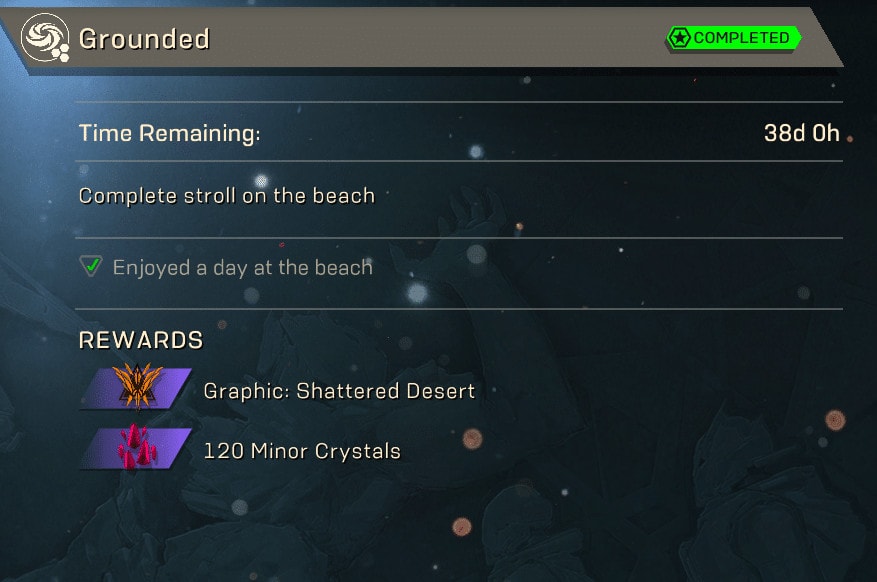
THE SECRET CHALLENGES
When you open your Cataclysm Challenges category, you will notice a few Challenges at the bottom of the list, marked as “???”. These are actually completed automatically if you follow the guide to the secrets in each region. Here is a list to all of them:
- Dominon Vault (Dominion Foothold) – “Door Knocker”
- Shaper Spheres (All 3 – The Approach, New Dawn and Dominion Foothold) – “For Science”
- Beach Relic (Near Inlet Sphere, The Approach) – “Grounded”
- Use any Teleporter – “Travel Advisory”
- Relic Circle (The Approach, south from the Sphere) – “Perfect Alignment”
- Grabbit Hall (New Dawn) – “Or You Die”
- Missions: Clean Sweep – one of the two final remaining “???” Challenges can be completed in Week 7 of the Cataclysm by simply defeating Vara. There is a mission for it with a short conversation with Harkon before and after you enter the Cataclysm.
- Missions: All Clear – This is the second and final “???” Challenge that everyone had up until Week 7. Now it can be completed by simply defeating Vara and watching the final cinematic after that.
CONCLUSIONS
A few final words before we let you go and enter the Storm!
RUBY’S COLOR-BLIND FRIENDLY CATACLYSM MAP
Now that you have gone through the incredibly detailed descriptions, images and video walkthorughs, check out what I like to call RubyJavelin’s masterpiece – the full map of the Anthem Cataclysm with every single place and item of interest marked on it.
Large resolution version can be found on this link. Please, keep in mind that this is not a permanent link. If it doesn’t work for you, ask in the comments and I’ll see if I can get it updated.
VULKK’S COLOR-FULL CATACLYSM MAP
The map below is a reworked version of Ruby’s original map (in the above paragraph). It is also based on this very same guide you have been reading. It is your choice to use whichever map you prefer and find more useful.

A THANK YOU NOTE
I approached RubyJavelin with a request to expand and upgrade a bit his own quick guide to the Cataclysm in Anthem over at the EA Forums. He did a lot more and not just expanded it, but completely blew my expectations. With nearly 200 images, a ton of short videos and an insanely detailed presentation in written form plus video walkthroughs, I am most proud and honored to present before you his Complete Guide to the Anthem Cataclysm Event!
I hope you find this article useful and if so, don’t forget to spread the word and share it with all of your friends, guild members and all the Freelancers you think might benefit from xJVIayhem’s knowledge and this guide!