This guide covers the new version of Anthem’s Cataclysm – the Season of Skull version. There are a few changes, some new elements to discover and a few new tactics related to the arenas and encounters. If you are completely new to the map, I strongly suggest you check out the original Anthem Cataclysm Guide first. In this one Ruby shows us all the new or changed elements and features!
This guide was created for VULKK.com by xJVIayhem (Origin: RubyJavelin)!
Cataclysm is back for another round, this time with some Halloween influence. Not a ton has changed in regard to the events, but there are more secrets and the like scattered around.
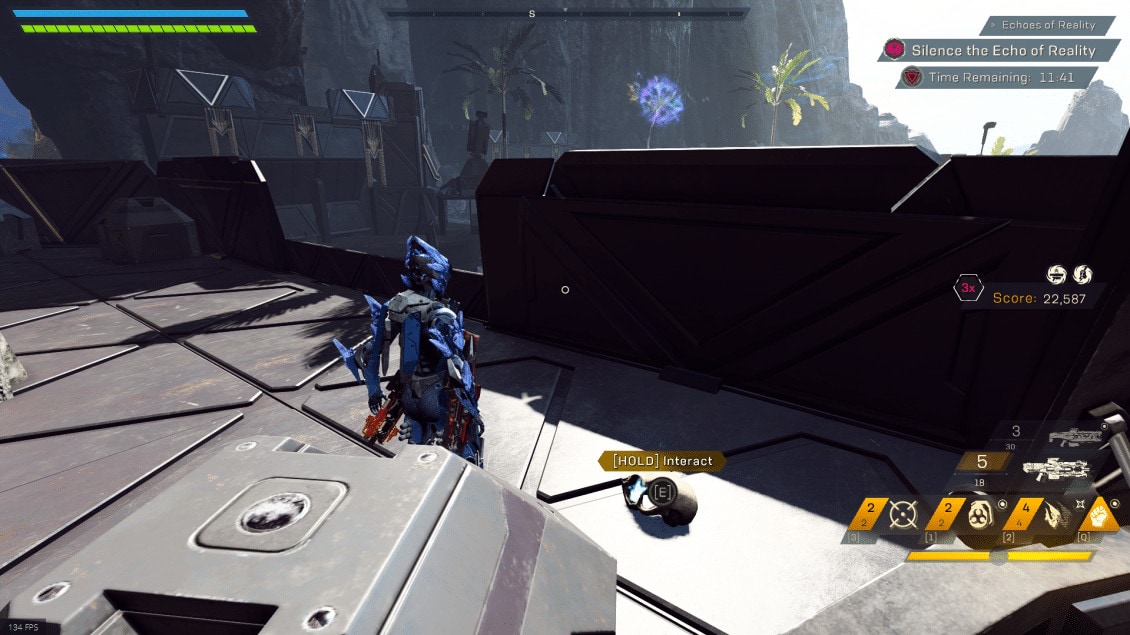
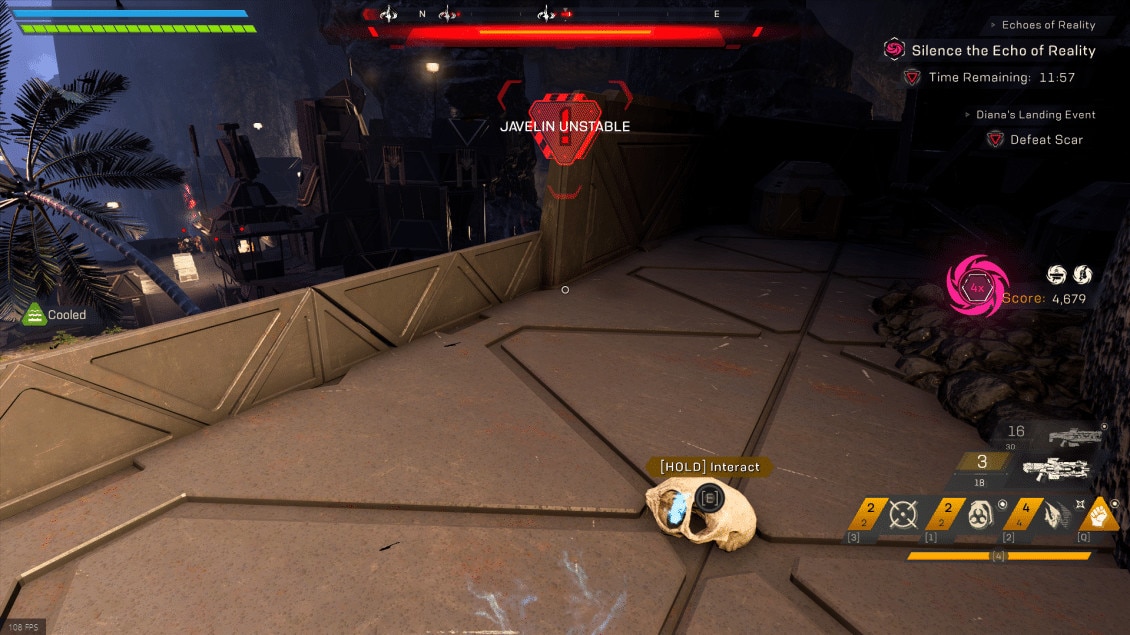
Included in these secrets are a new collectible, Skulls. These are scattered around the Cataclysm. While they provide no bonuses to the Cataclysm itself, they do contribute to challenges for the season.
This time you’re fighting Scar, no more highly shielded Valkyries to deal with. However you do start at a new location, and teleporters take you to different locations. All elementals have been replaced by ghostly Skorpions, many of which spawn as Legendary.
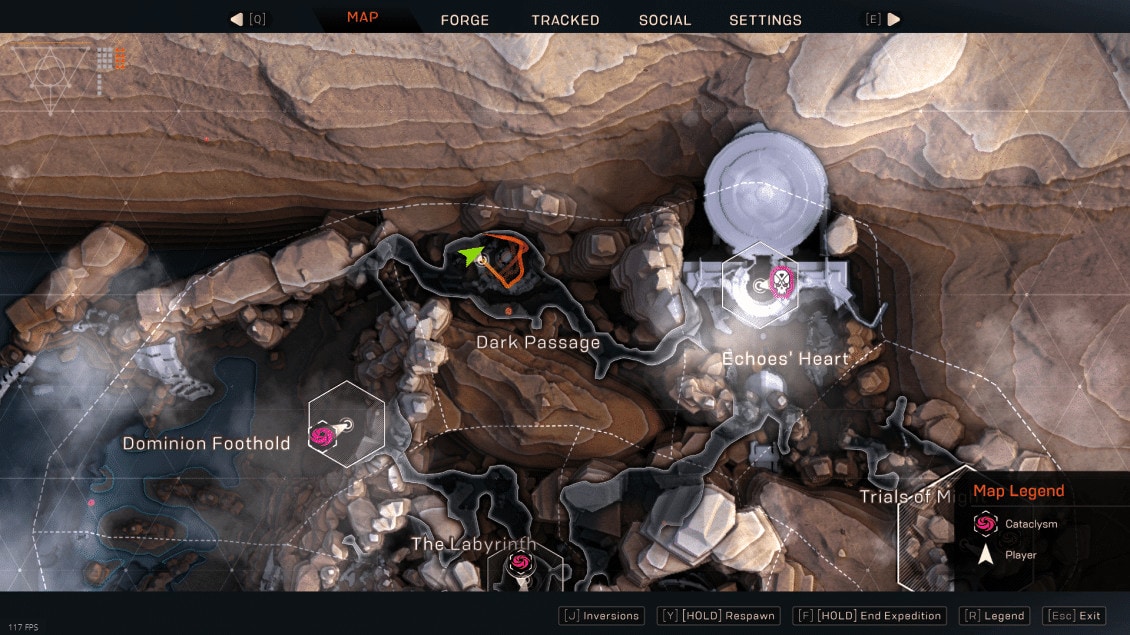
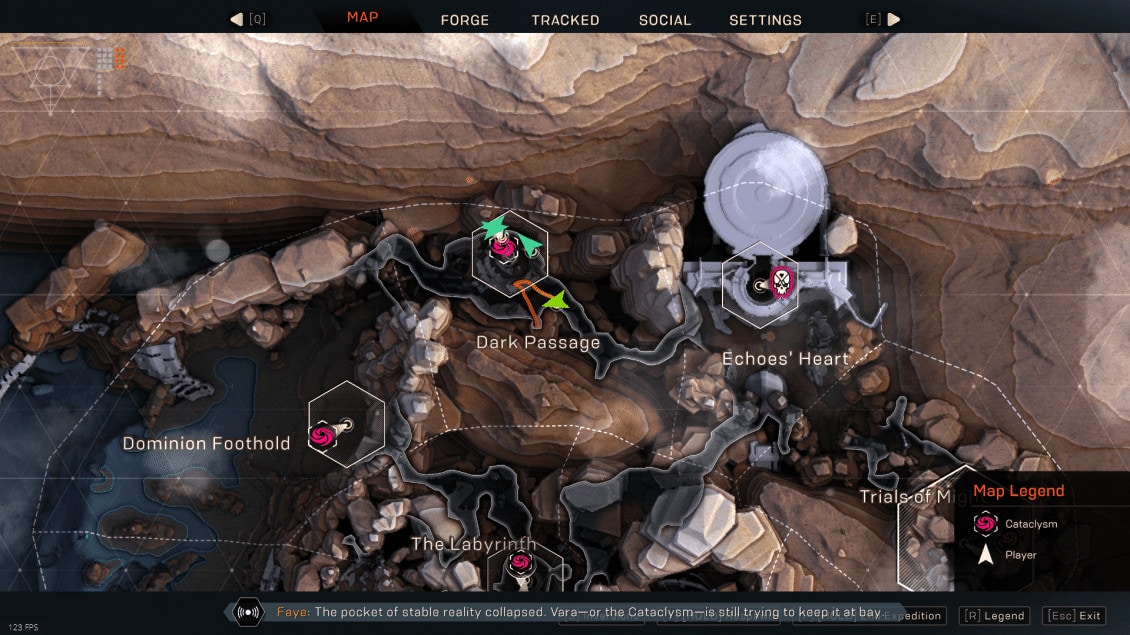
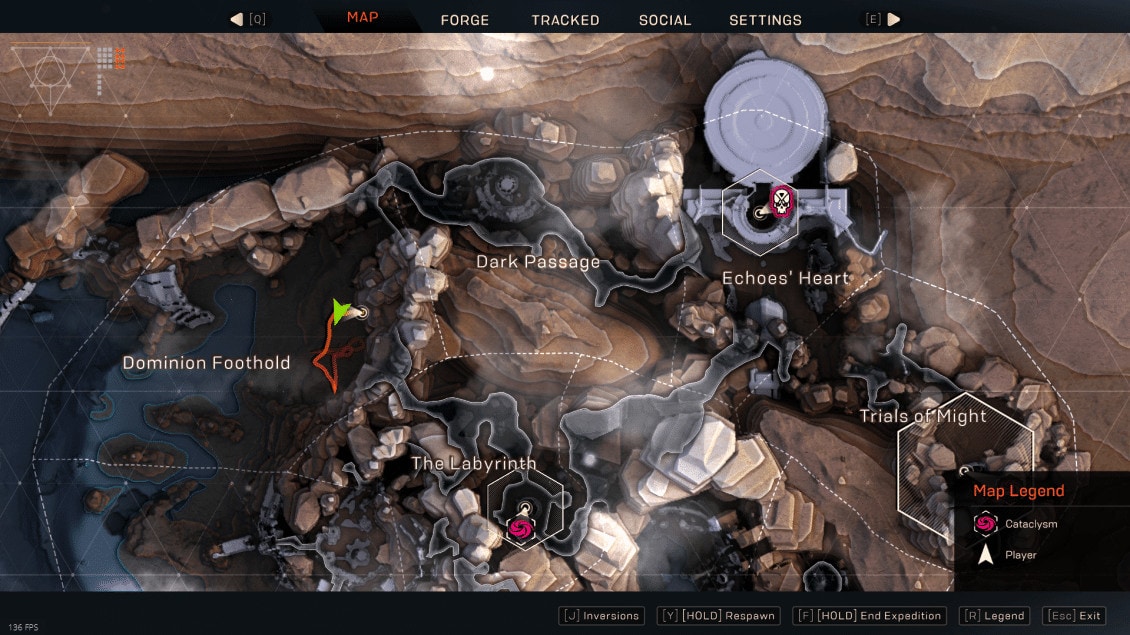
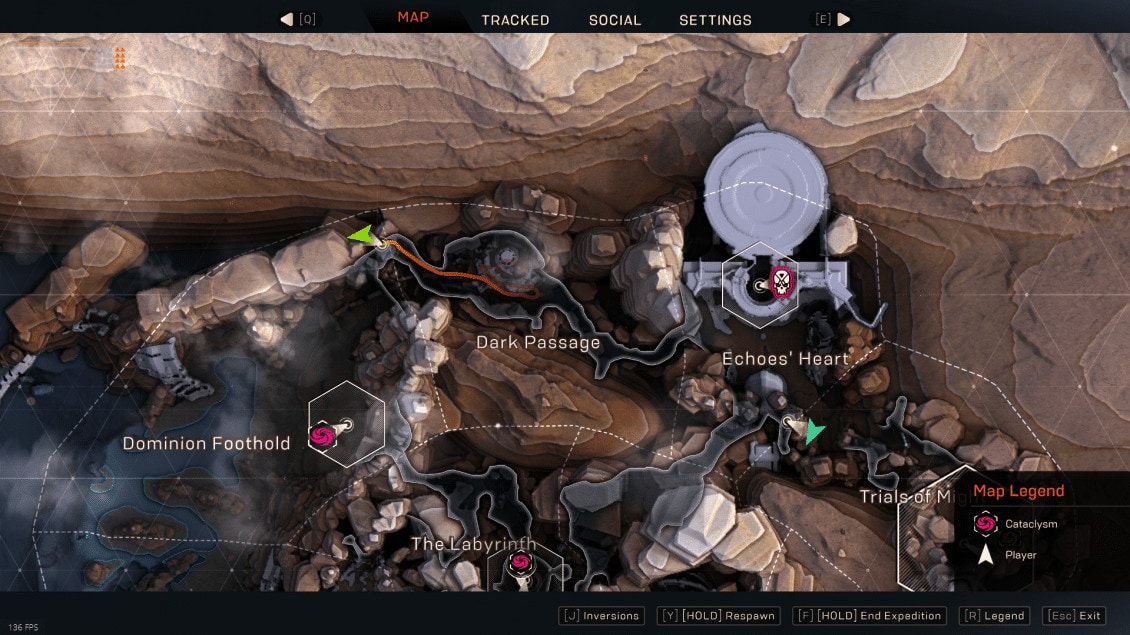
DARK PASSAGE
This time around, Cataclysm starts off in the Dark Passage area, just outside of Sea of Takaro. Takaro has four skulls available to be collected.
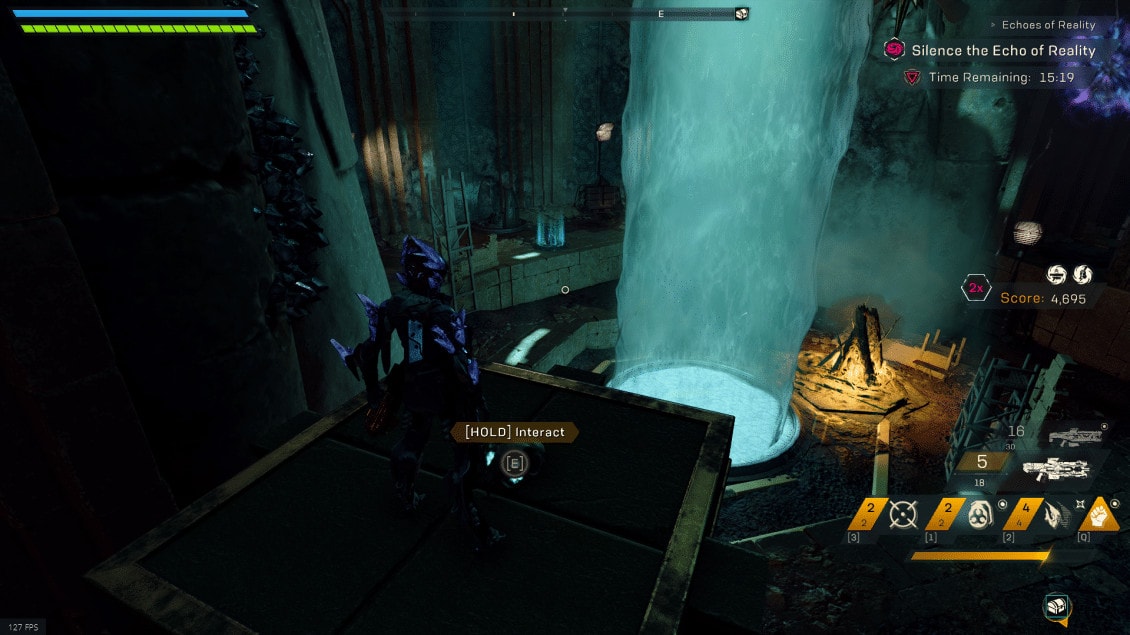
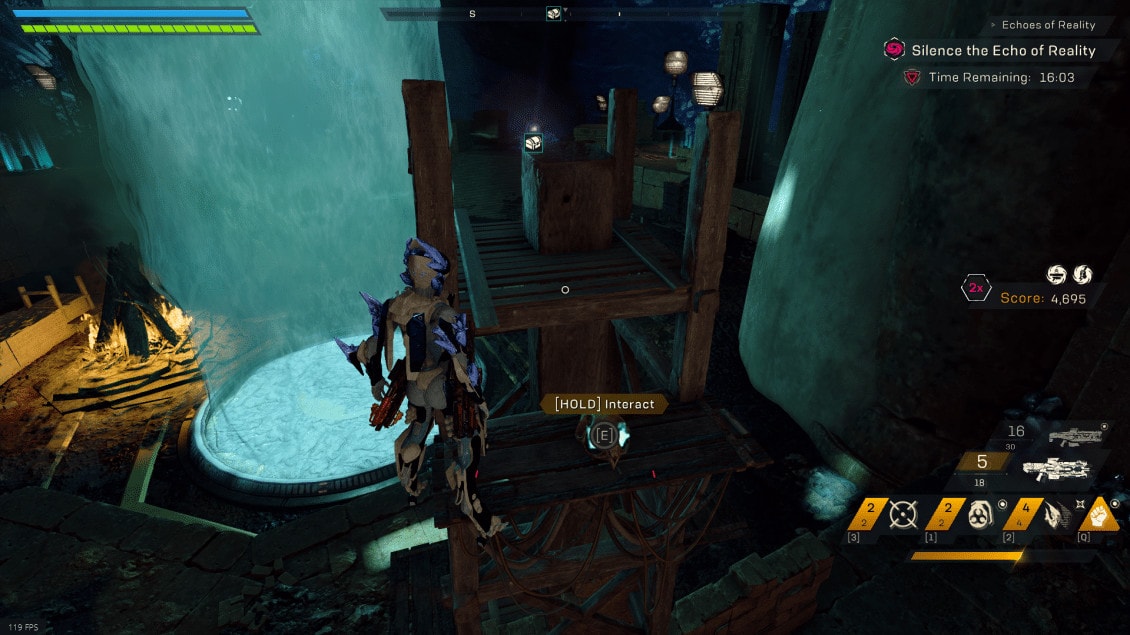
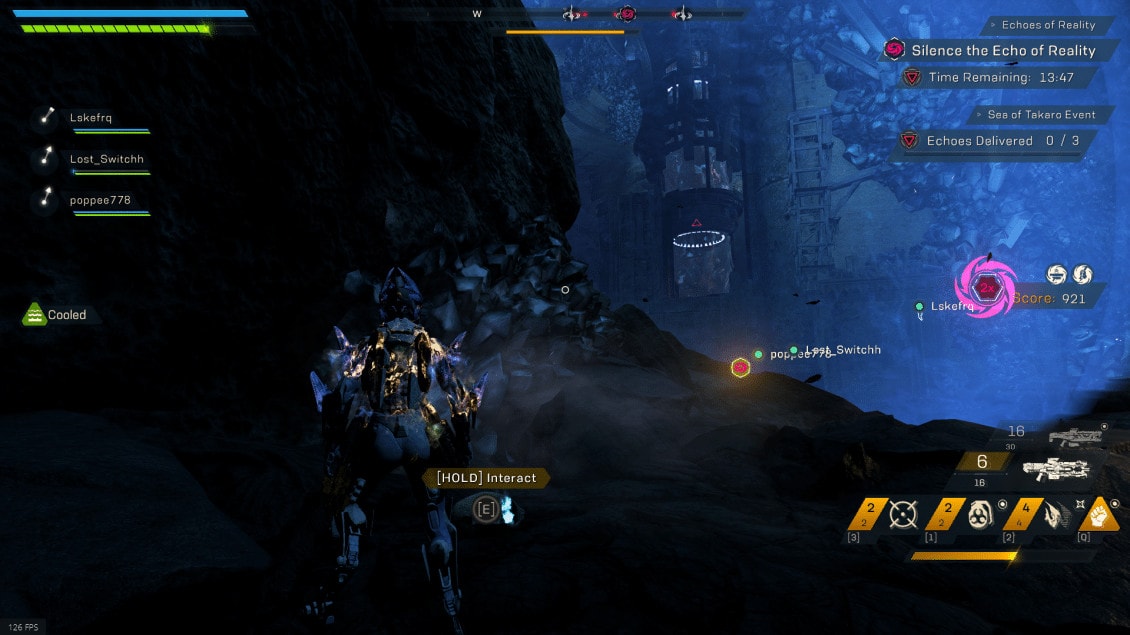
Event: Sea of Takaro
Nothing different here, outside everything being Scar and a new spawn trigger for the extra boss.
Here’s a quick recap on how to complete this event:
- Grab the weight in the small room without barriers.
- Place it on any of the three spot it allows.
- Repeat for the next two relics as they become available by lowering the suppression fields.
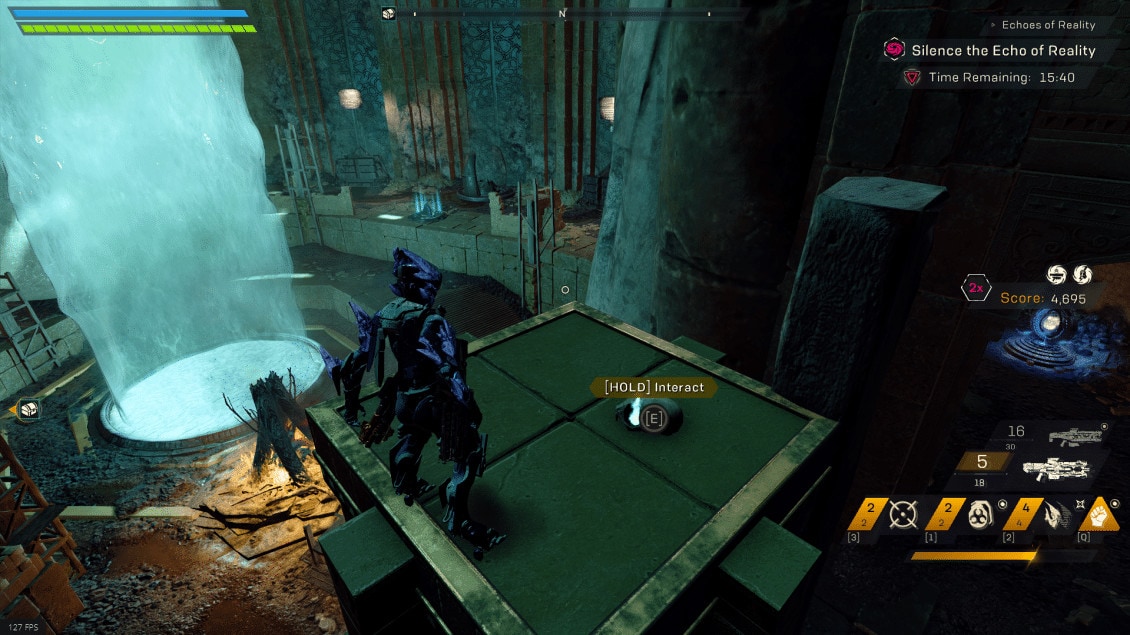
- Collect all three Echoes around the arena.
- Deliver the Echoes up the waterfall to expose the crystal
- Destroy the Crystal.
Mini-Boss Spawn: Blackfire Voice
Spawn Method: Smash the Crystal quickly after delivering the first Echo up the waterfall.
This mini-boss is an Enforcer. This one should spawn nearly every run, as long as echoes are only being delivered when you’re planning to move on. There is a time frame between exposing the crystal and smashing it that has to be met, or the extra spawn will not happen.
Skull Locations
Dark Passage has one regional skull and three tied to the event area. It’s possible the event skulls may have a fourth spawn location, in which case they could appear in any three spots. This does not seem to be the case though.
The first event skull spawn is located on the stone pillar directly to the West of the waterfall.
The second is located on the wooden construct North of the waterfall.
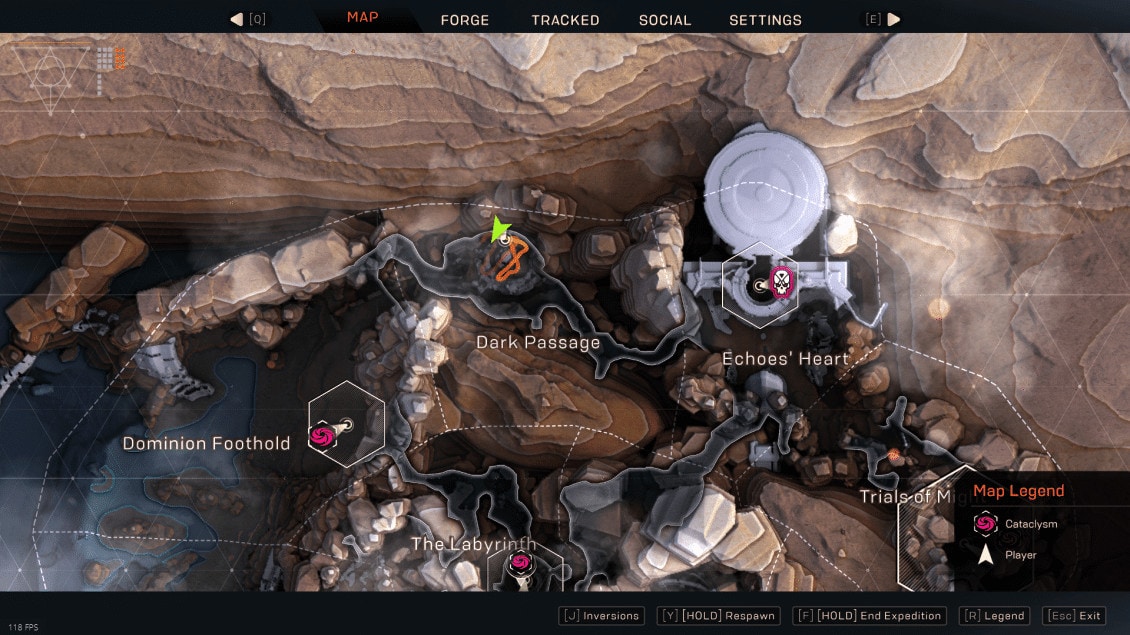
The third event spawn is located on the stone pillar directly to the East of the waterfall.
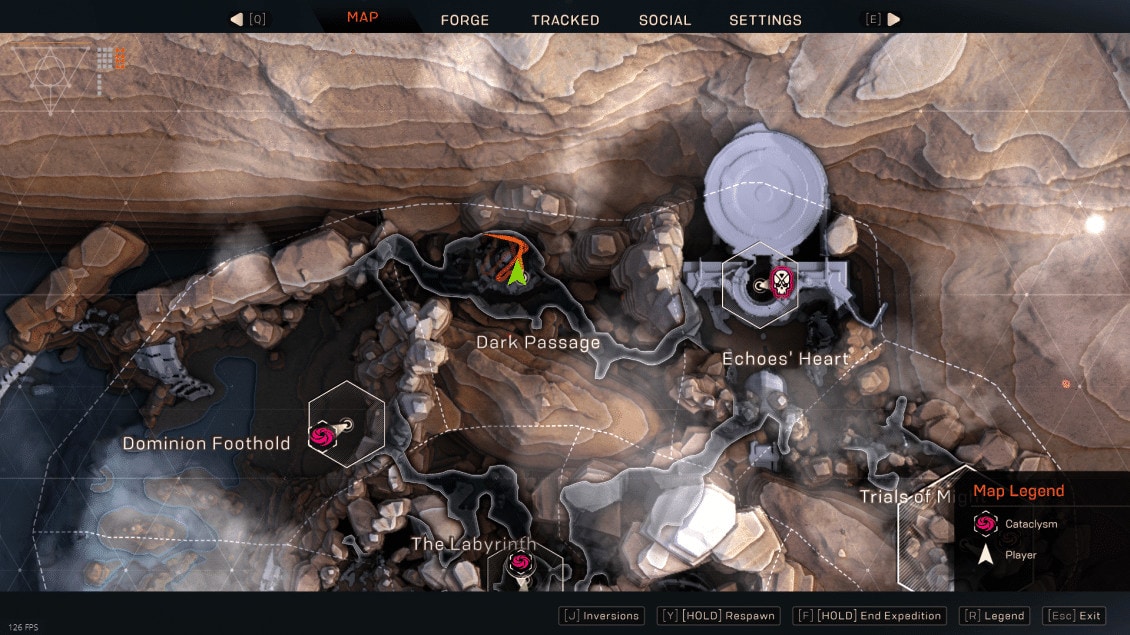
The regional skull is located just outside of the event. It can be found on the ground in the entrance of the tunnel towards Vara.
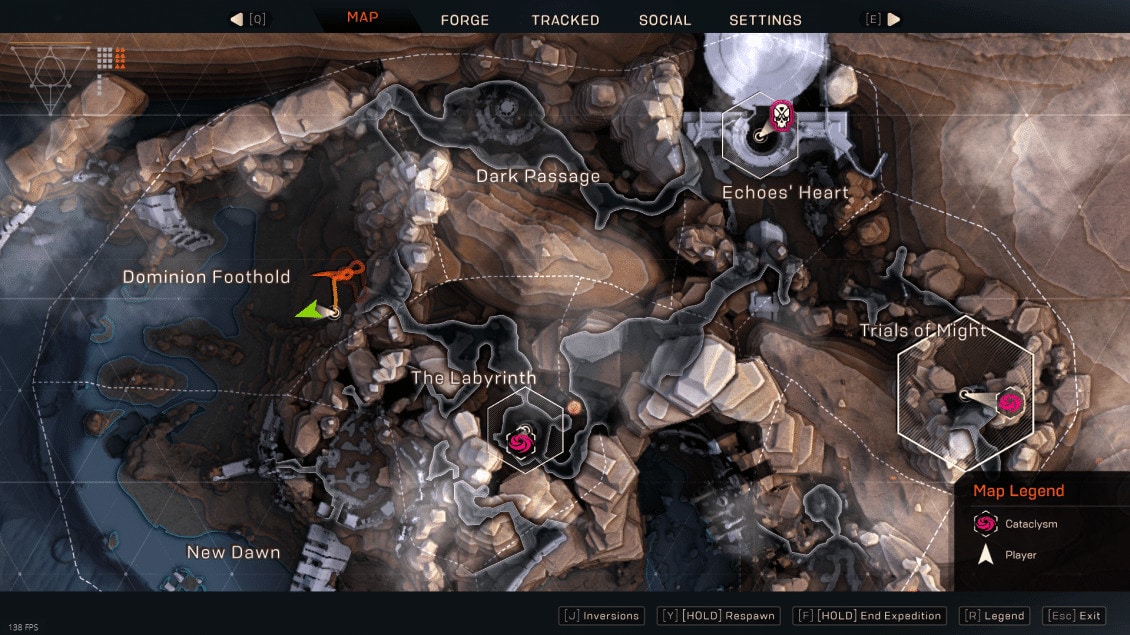
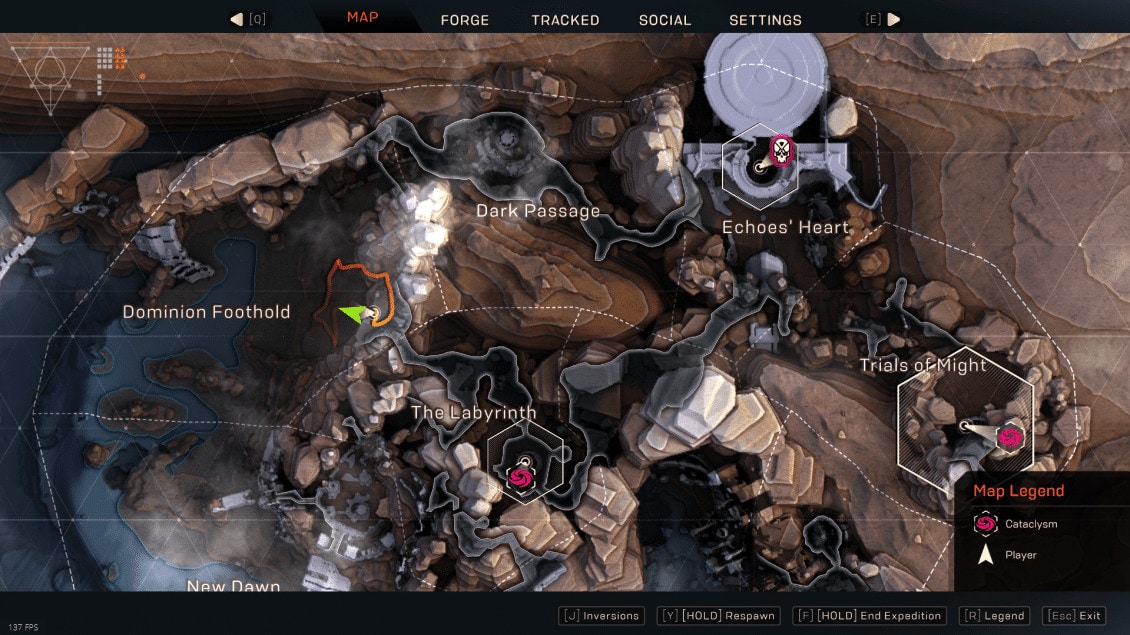
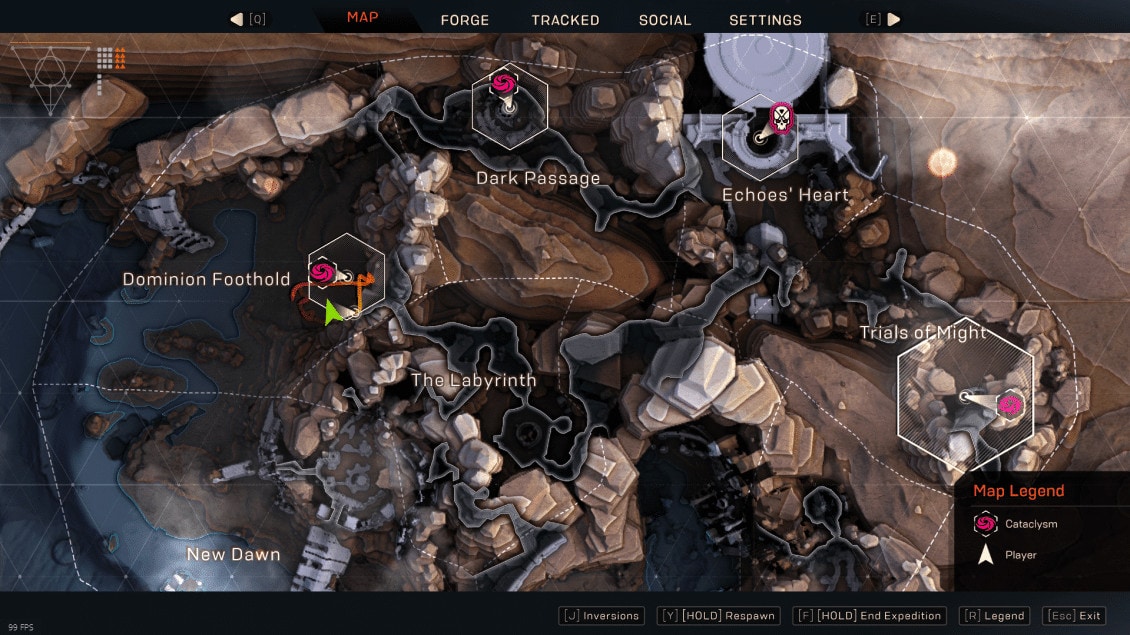
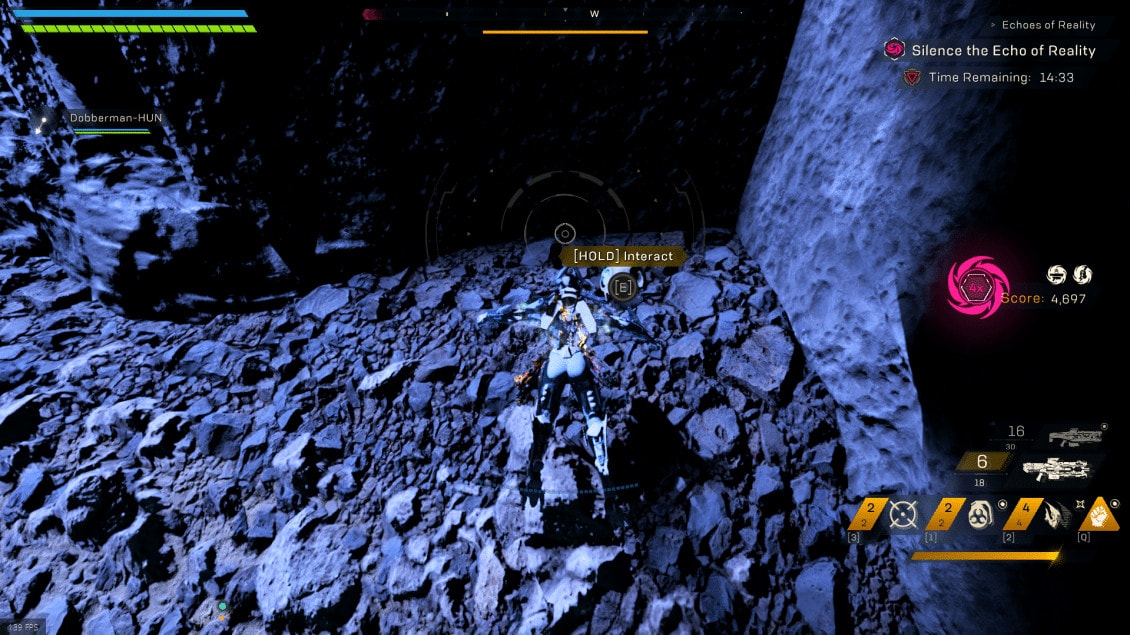
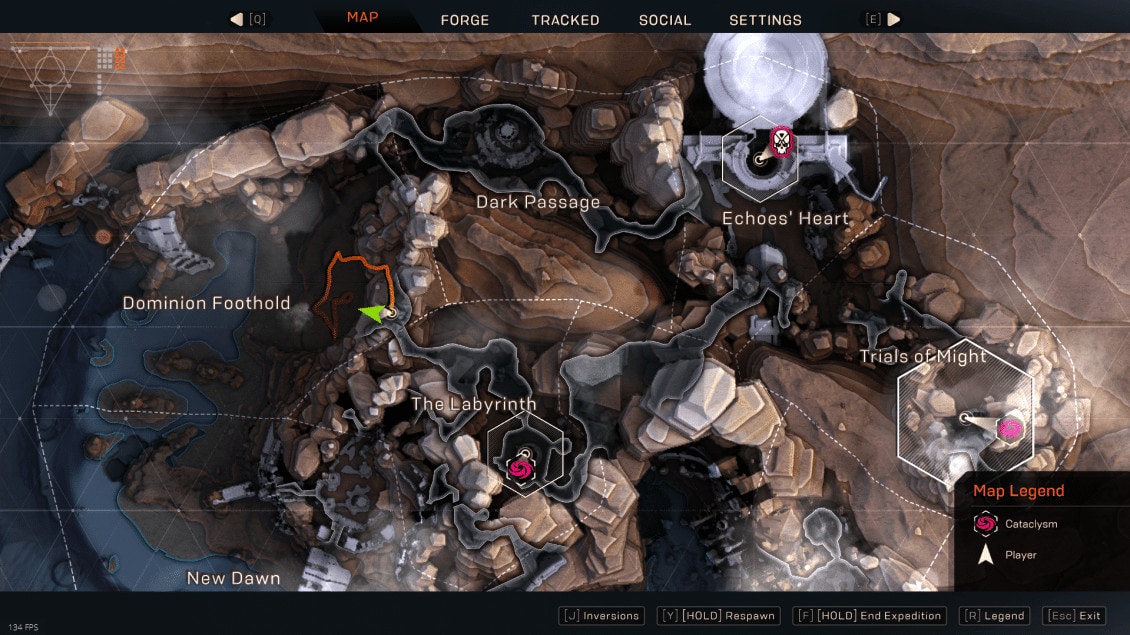
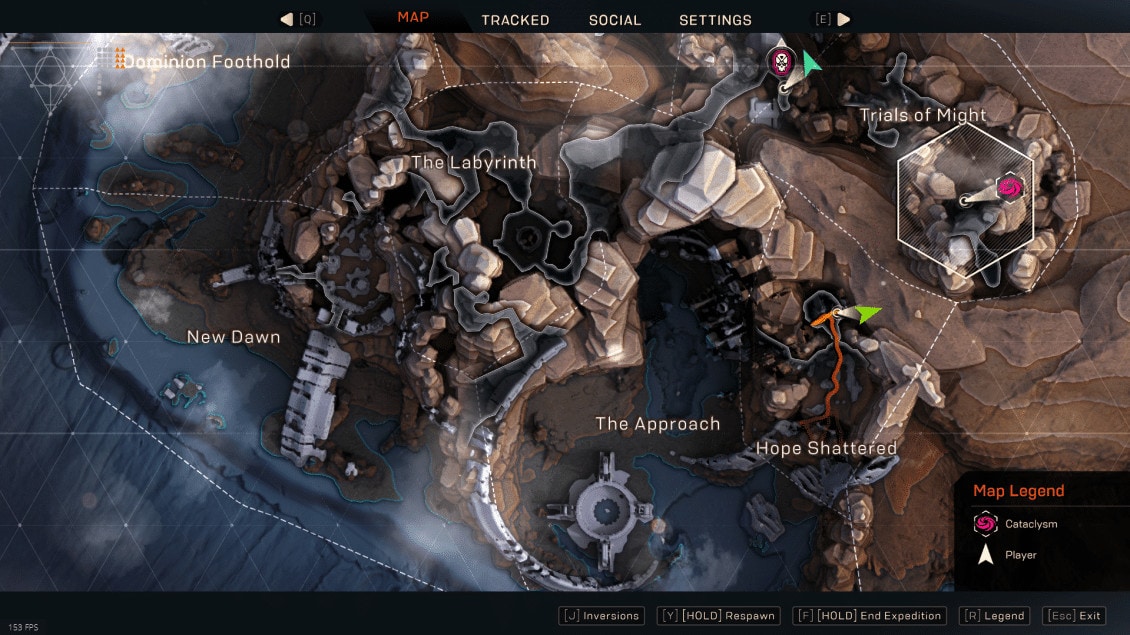
DOMINION FOOTHOLD
Dominion Foothold is home to a total of six skulls and the Diana’s Landing Event.
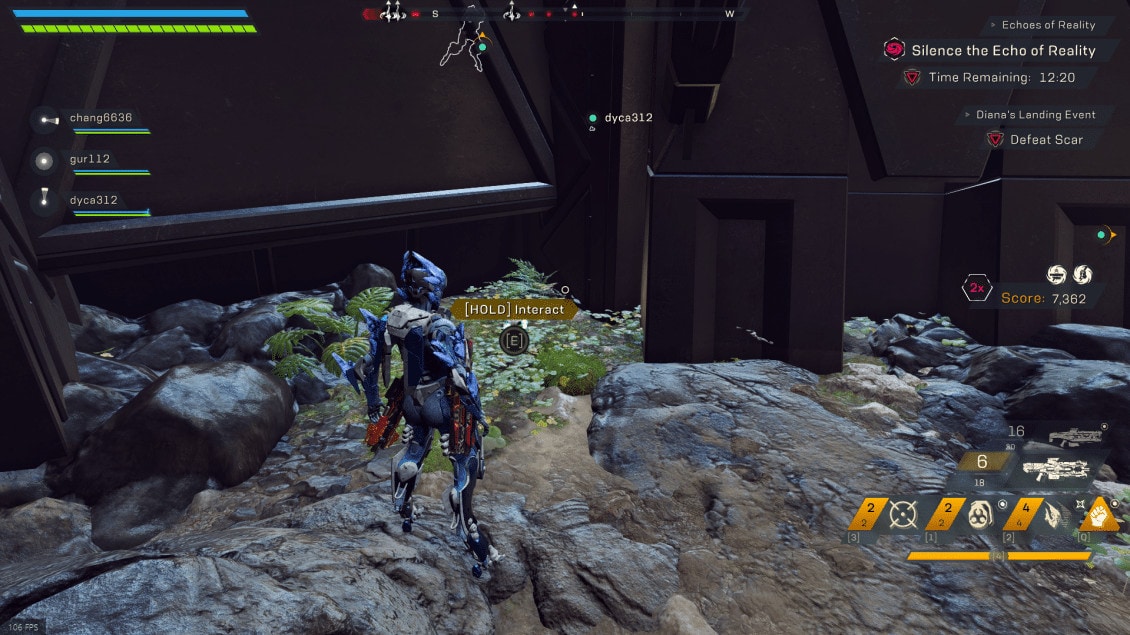
Event: Diana’s Landing
This event is the same old kill event it was before. Kill until the Riftmaster spawns and then kill him for the key to the panels.
Quick Recap:
- Kill Enemies.
- Kill the Riftmaster once he spawns.
- Collect the key.
- Activate the panels.
- Smash the Crystal.
Mini-boss Spawn: Doom Inferno
Spawn Method: Active the panel in the South-East, near the tower
Again, this one is an Enforcer. This one will spawn every run, assuming you activate the panel.
Skull Locations
Dominion Foothold is home to six Skulls; three event and three regional.
The Event skulls are a little trickier this time, having four potential spawn locations. They can be randomized between the locations, but typically land on the first three mentioned spots.
The first event skull can be found on the upper platform to the north, or the one just to the left as you enter the event from Takaro’s direction.
The second can be found on the ground directly in front of this platform, tucked in a corner.
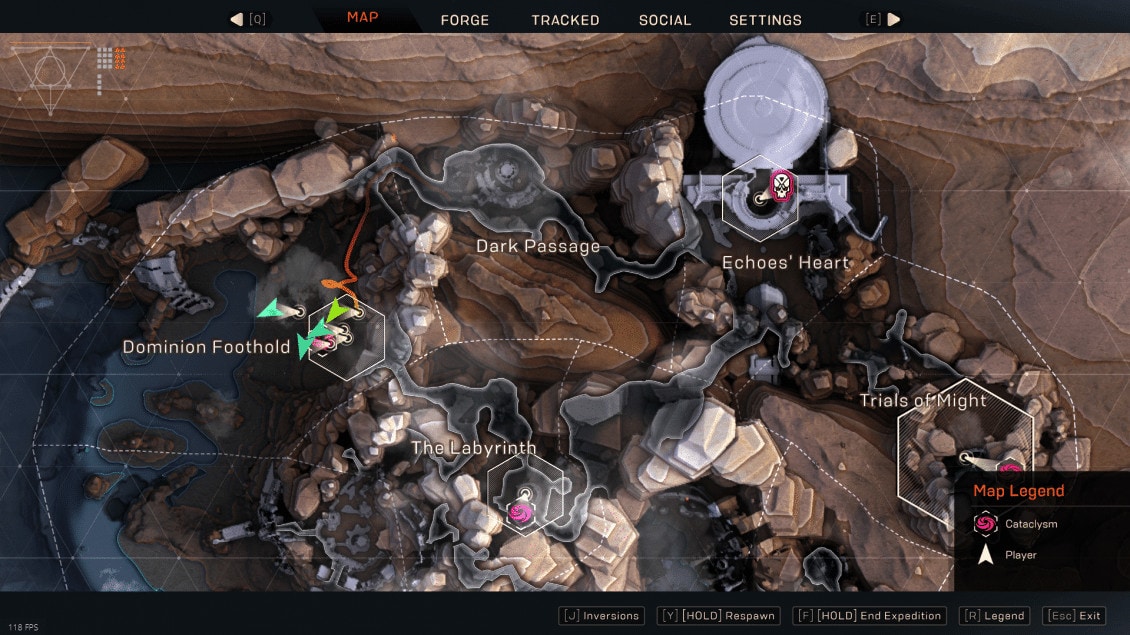
The next can be found on the next raised platform to the East, on the other side of the Rift that controls the cataclysm.

The fourth location is located on the south side of the event, on the platform straight across from location one and two.
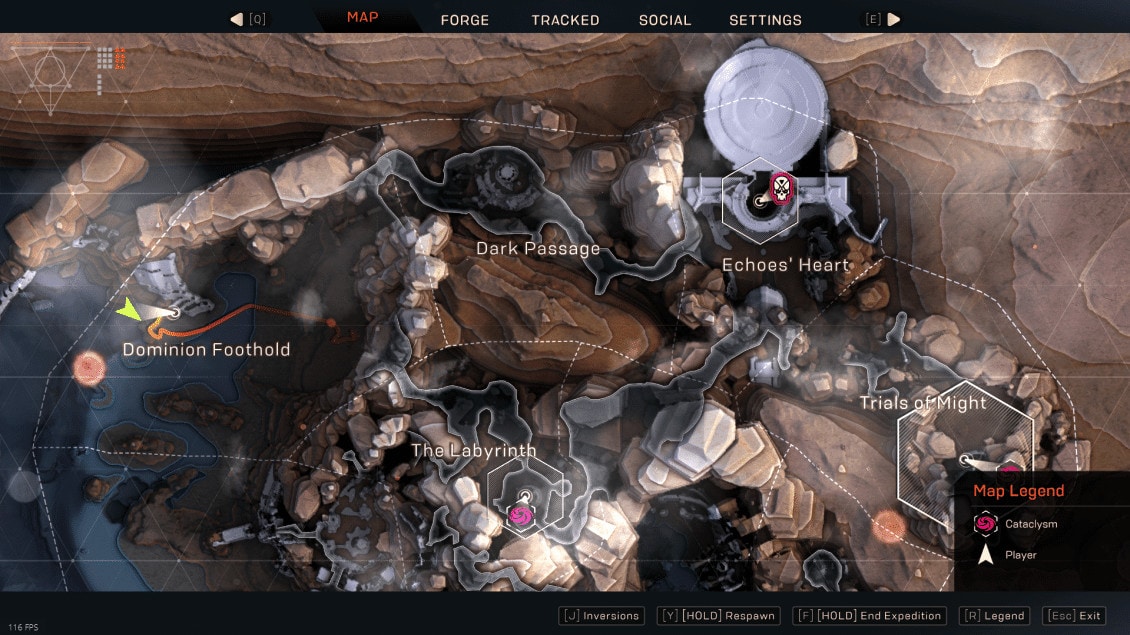
The first regional skull is found underwater, near the turn in the middle.
The second is located directly behind the Diana’s Landing event, on top of a stone outcropping before entering the tunnel towards Casja’s Forge or Castle Kelrik.
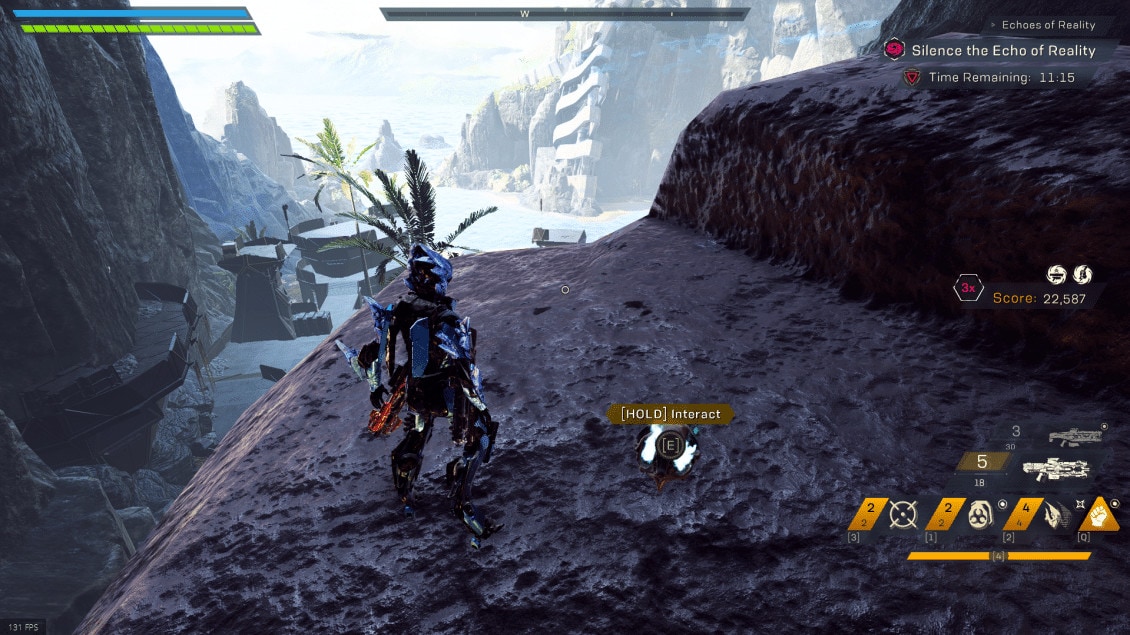
The third is located south of the large metal construct, above the Echo spawn location on the nearby rocks.
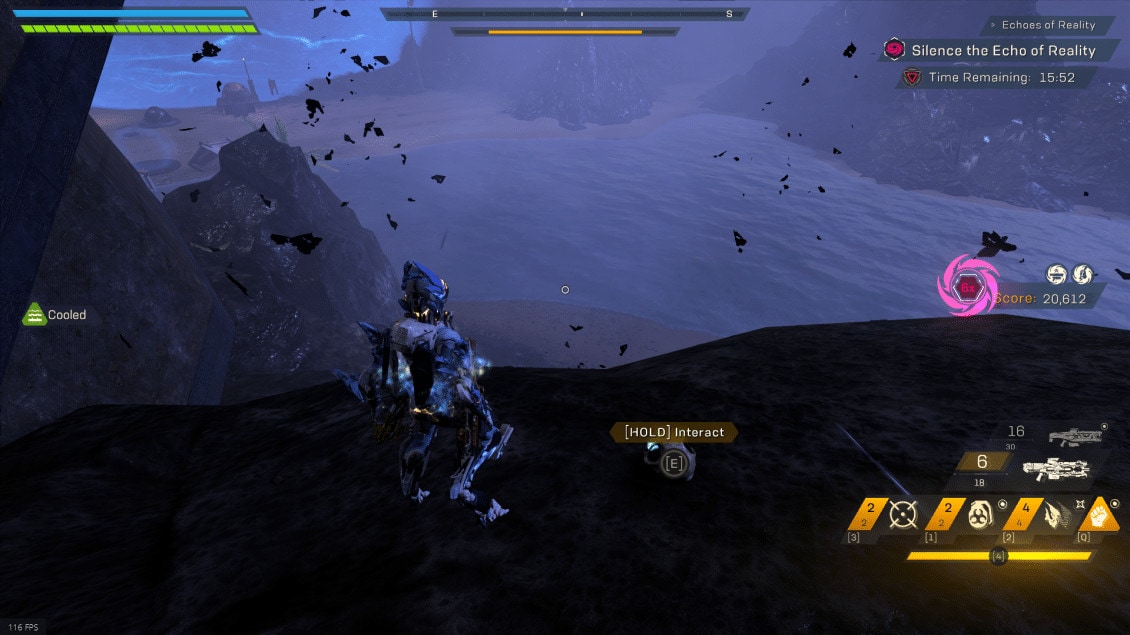
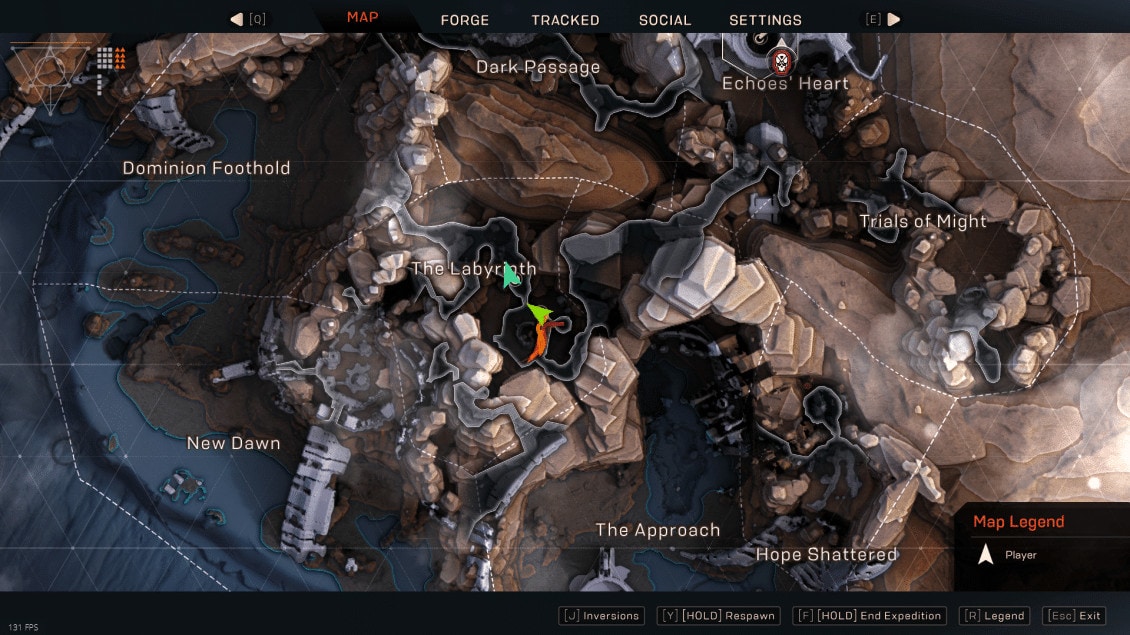
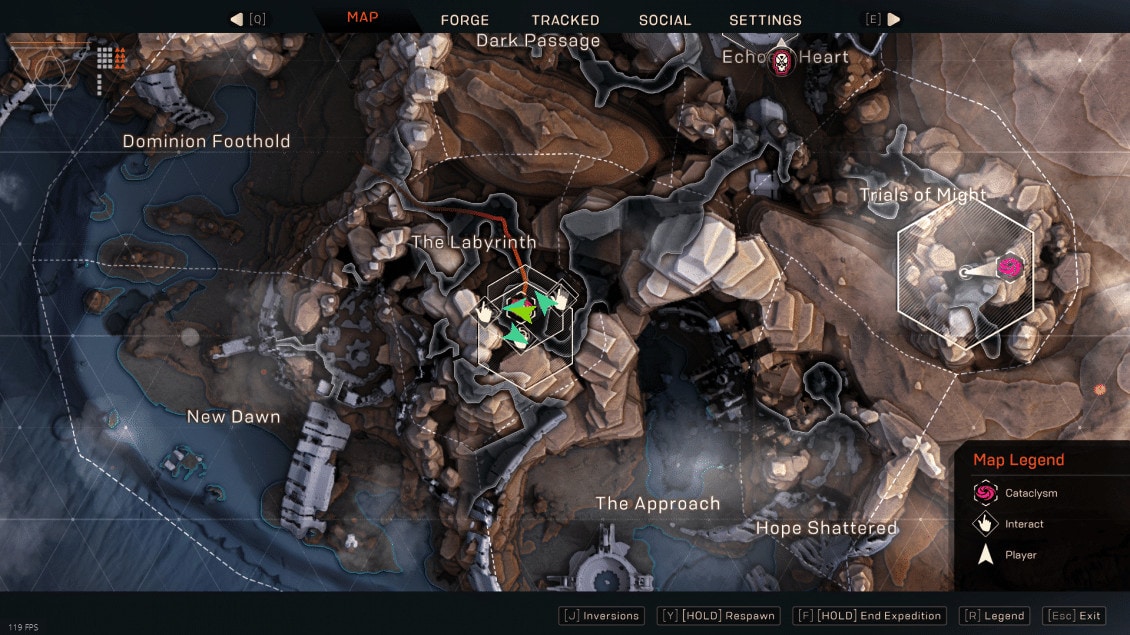
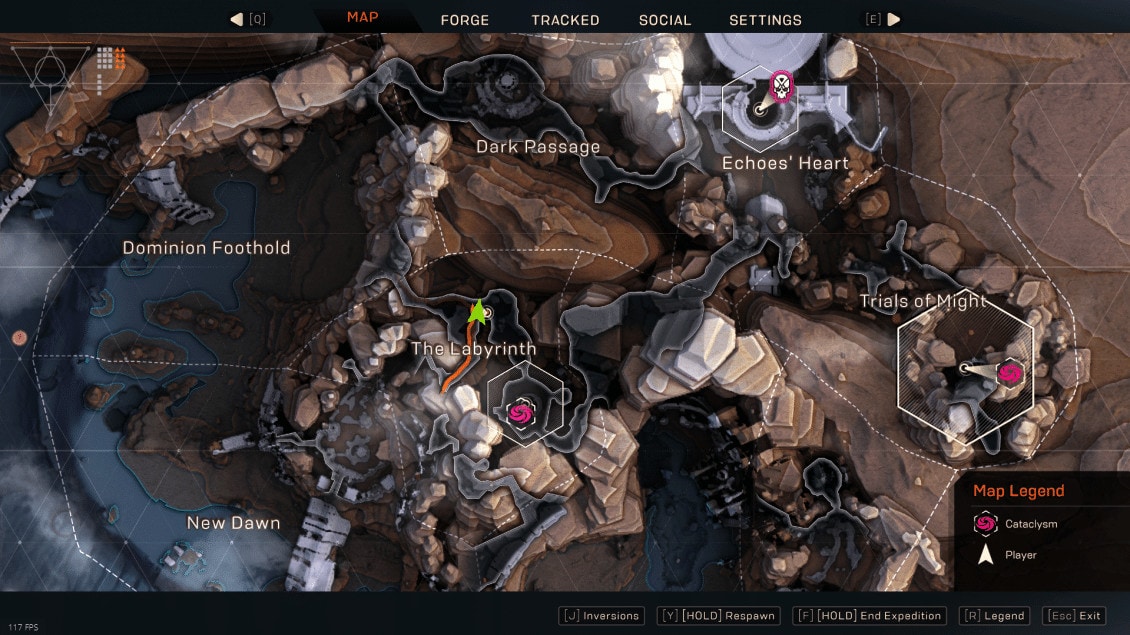
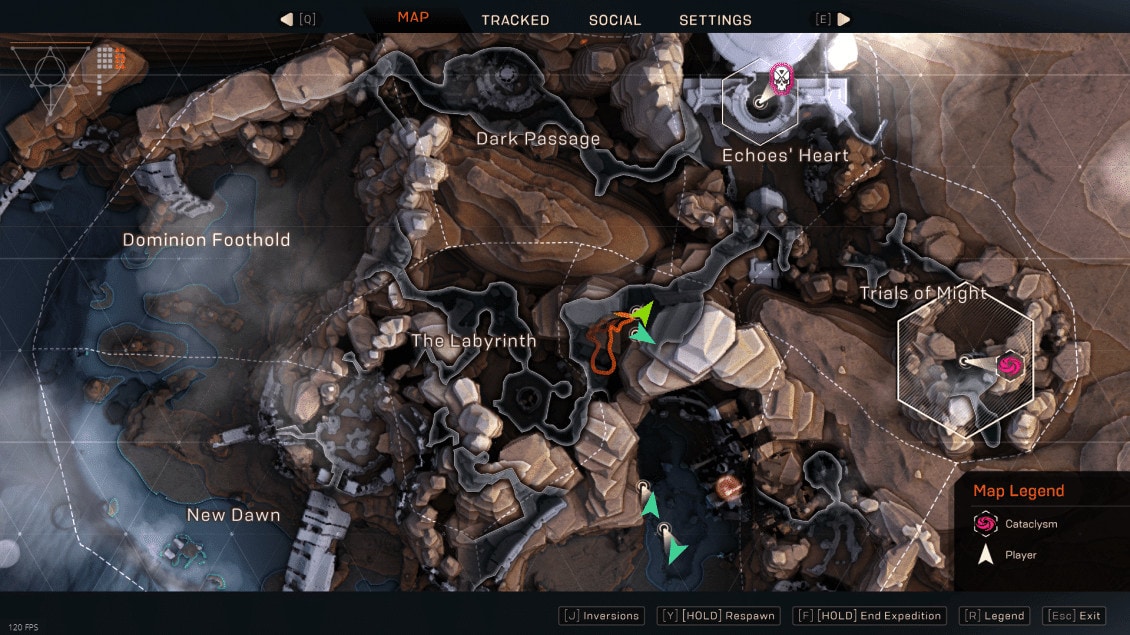
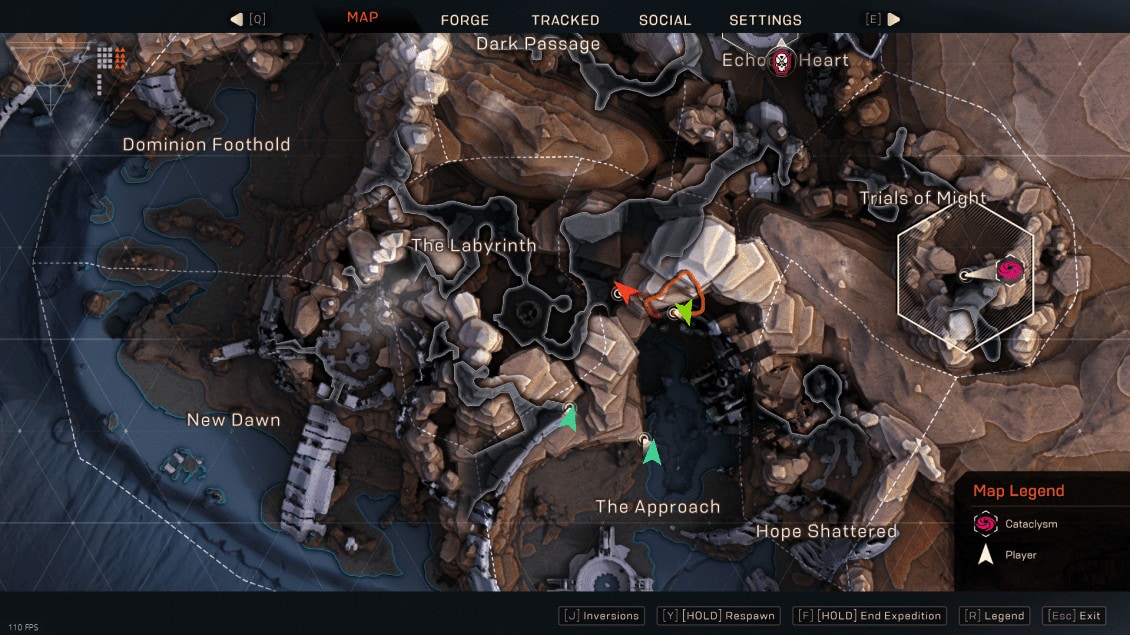
THE LABYRINTH
The biggest change here is the method of spawning the mini-boss. Worth noting the teleporter in the cave will send you to New Dawn, directly near a Skull spawn location.
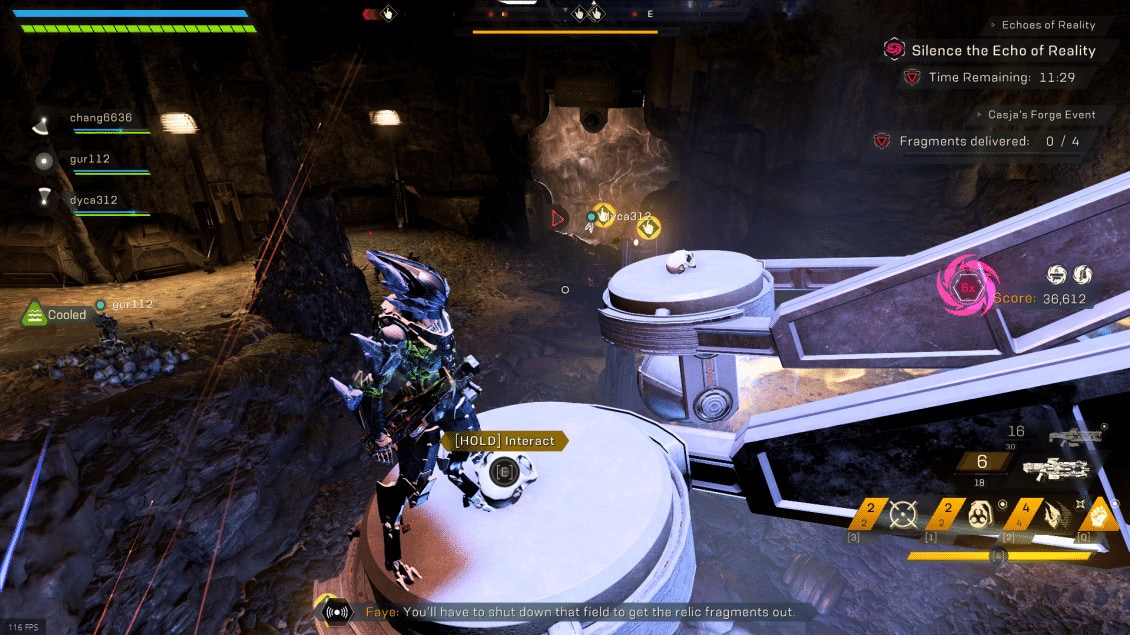
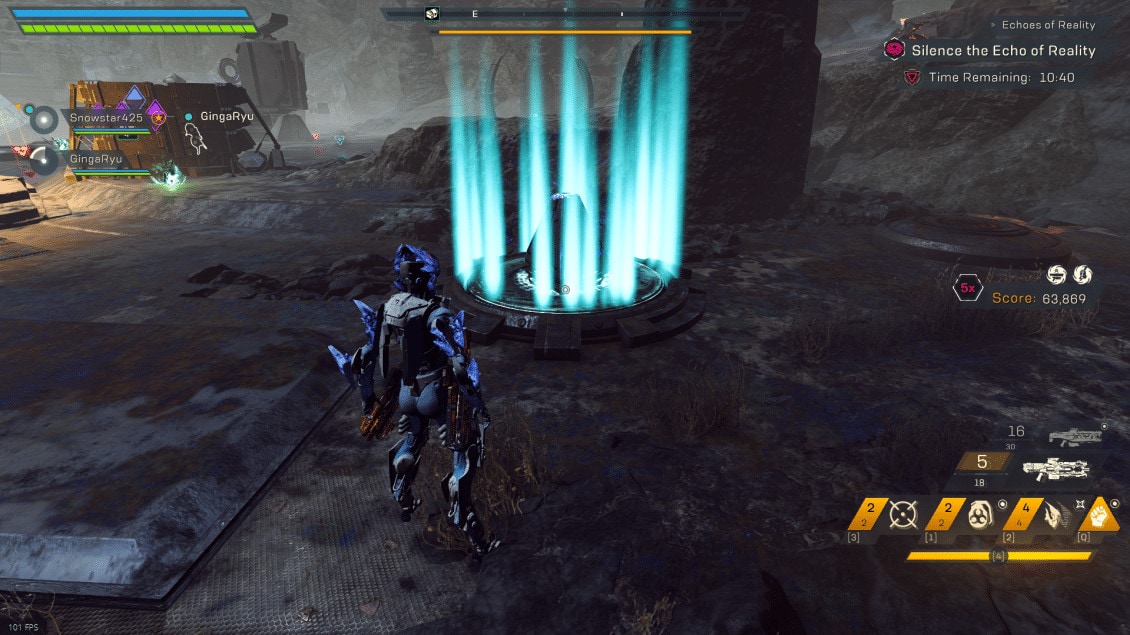
Event: Casja’s Forge
This event remains unchanged outside of the mini-boss spawn method. Collect the fragments and deliver them to the relic to expose the crystal.
Quick Recap:
- Grab a Relic Fragment.
- Deliver it to the Relic.
- Repeat for the other three fragments
- Smash the Crystal
Mini-boss Spawn: Smokefell Gnasher
Spawn Method: Complete this Event first.
Like the others so far, the boss here is another Enforcer. However the spawn for this one seems to be tied to doing this event first. It’s unclear whether it’s tied to time or event order, but doing this event first typically results in a spawn.
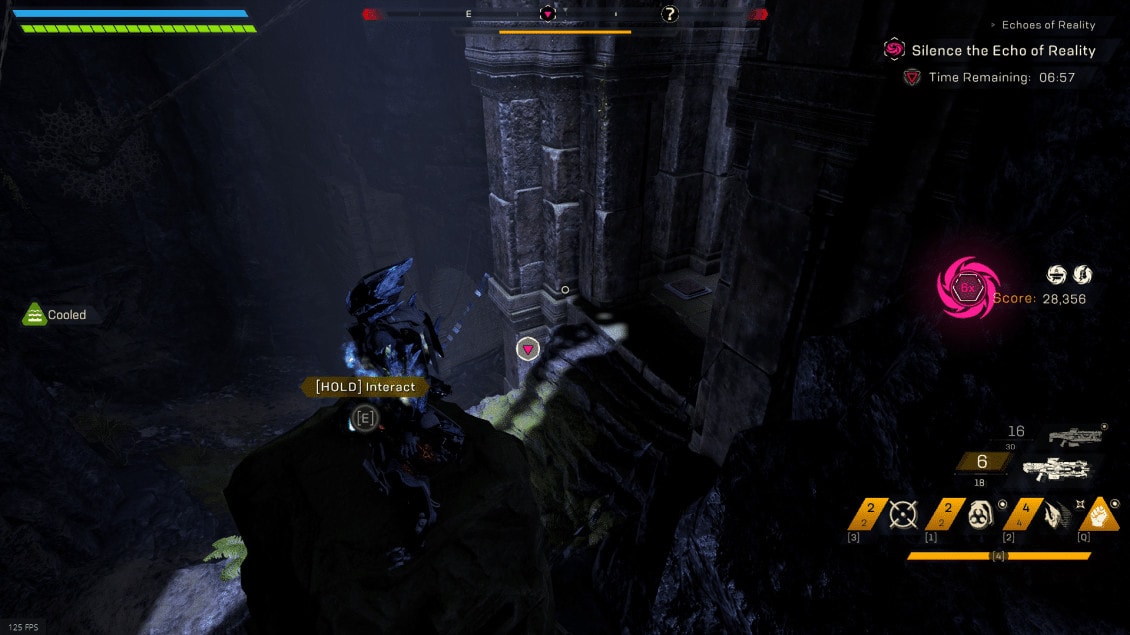
To reach this event first, as well as safely.. Exit spawn and keep along the wall to your right until you reach the teleporter. This Teleporter brings you across the way from the Forge. Fly over the the safe area there to recover stability before entering the event.
Skull Locations
Labyrinth is home to five skulls, three event and two regional. Event skulls are slightly more tricky having five locations this time.
The first spawn location is on the ground, along the North West wall, between a metal container and the wall to the right.
Spawns two and three can be found on top of the metal arches on either side of the Relic.
Spawns four and five can be found on top of the laser devices, above the Crystal.
The First regional Skull can be found on the path towards Castle Kelrik, in the fungus filled cave. It can be found in the small alcove here. As you reach the turn that heads right towards Kelrik, turn left and face the alcove and you should see it at the back.
The second Regional Skull can be found on a small stone pillar near the statue just outside of Casja’s Forge, between Casja’s Forge and Diana’s Landing.
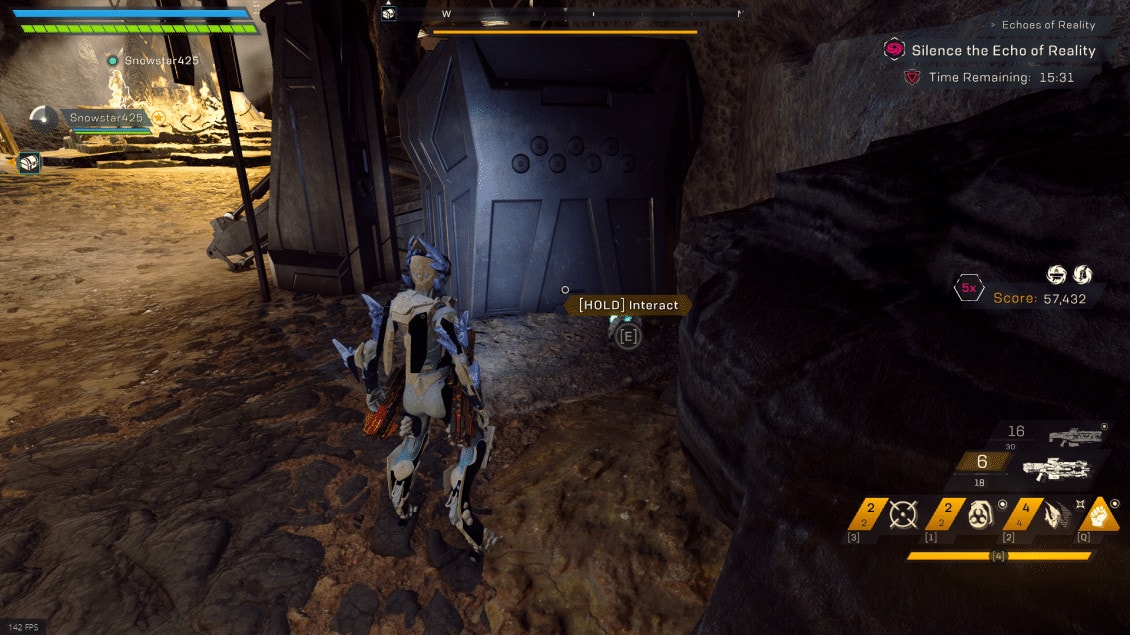
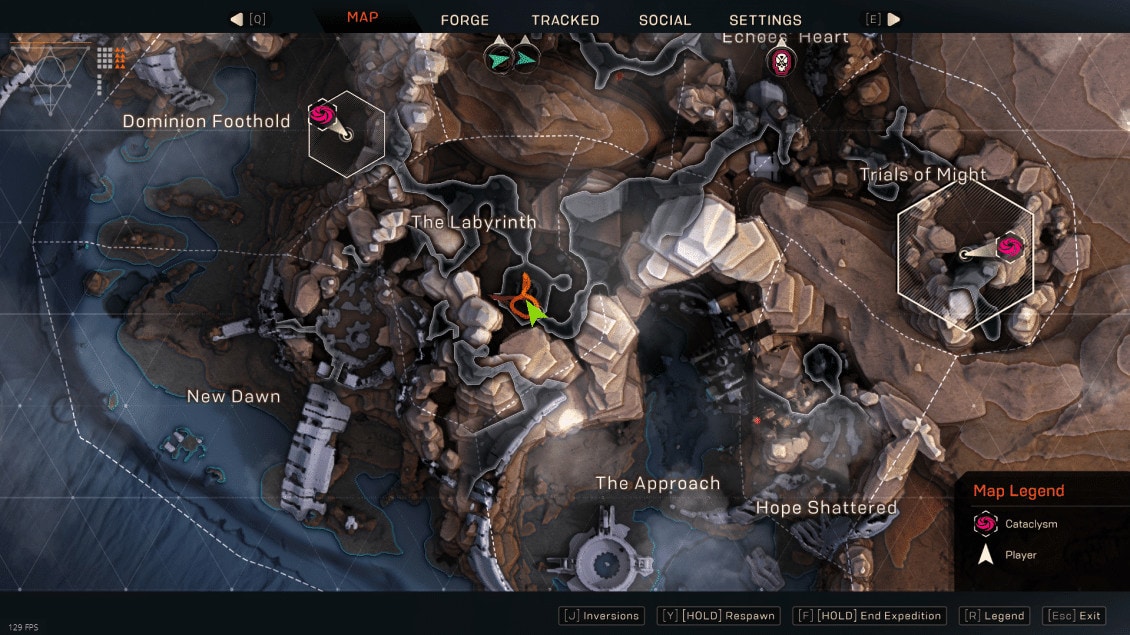
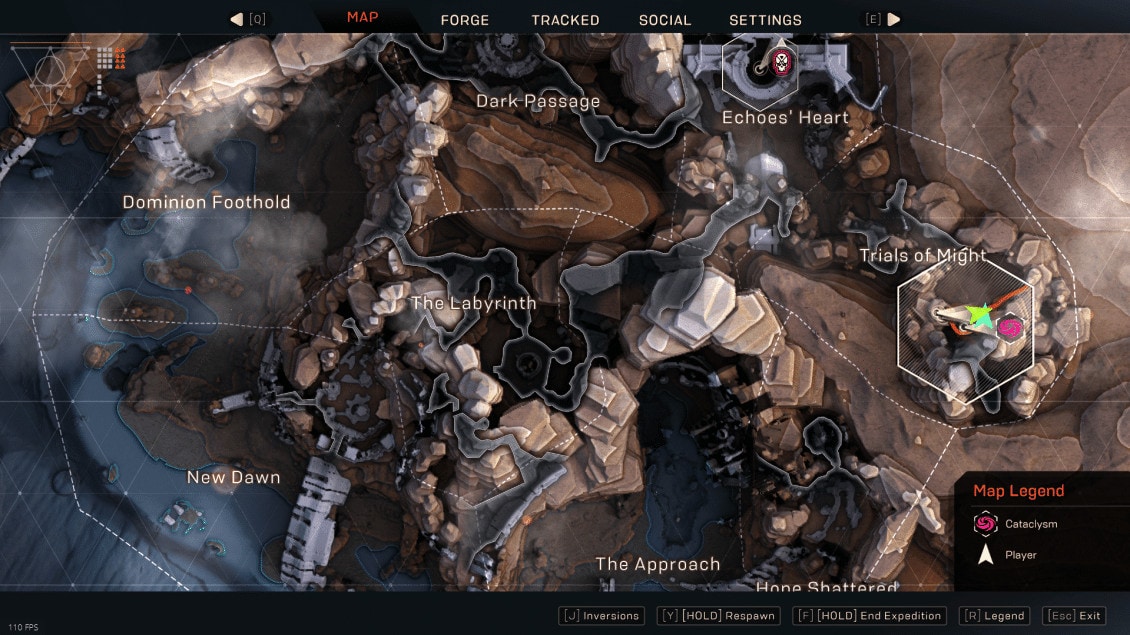
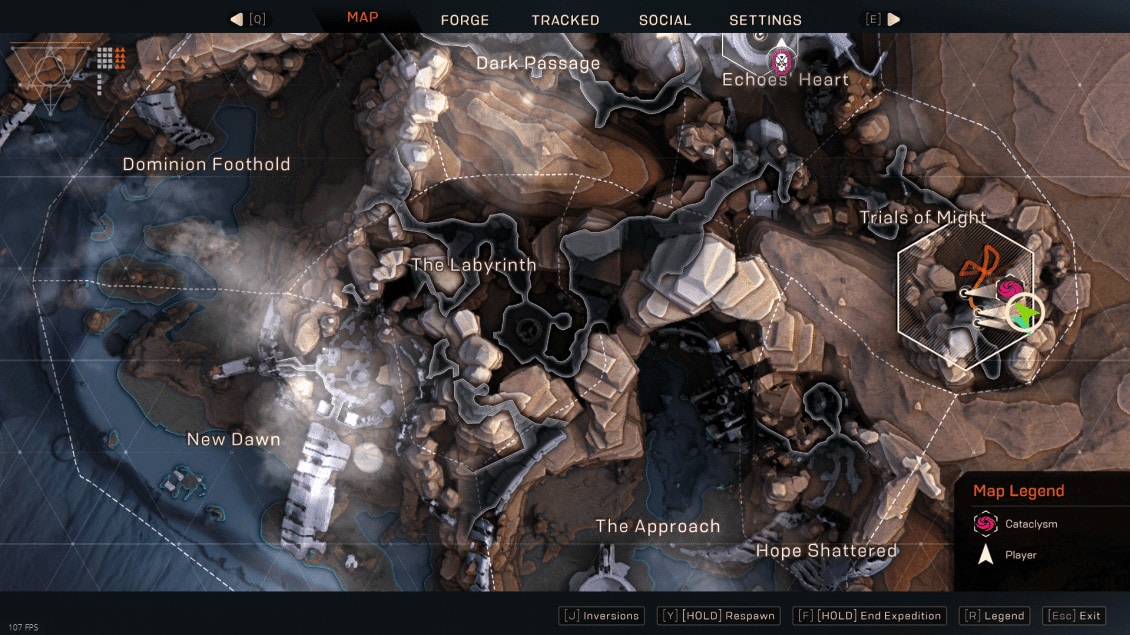
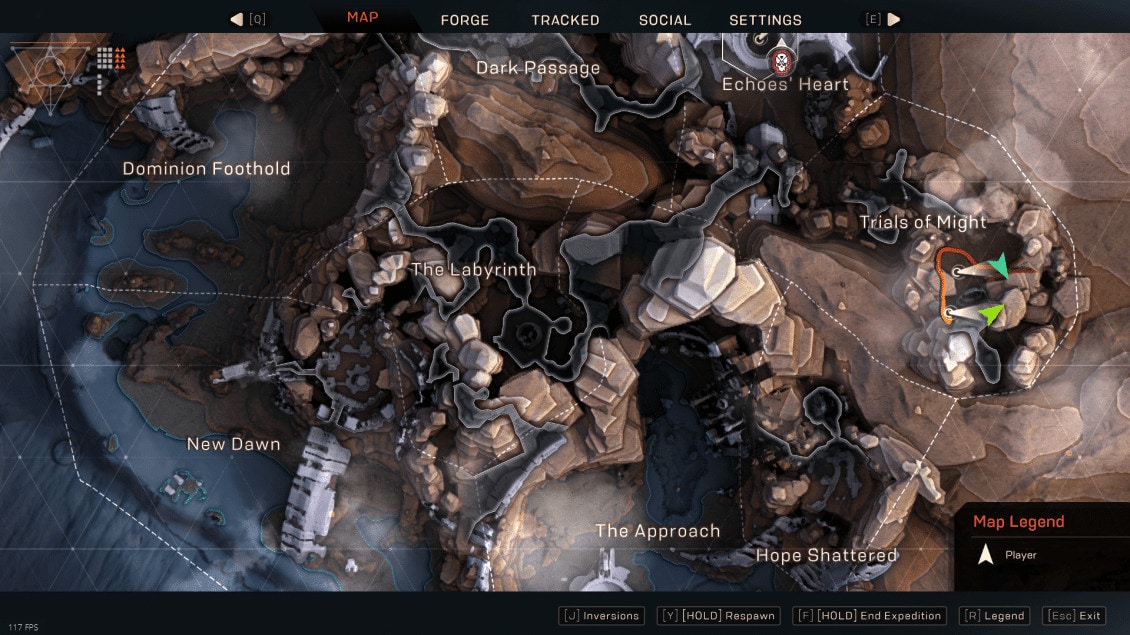
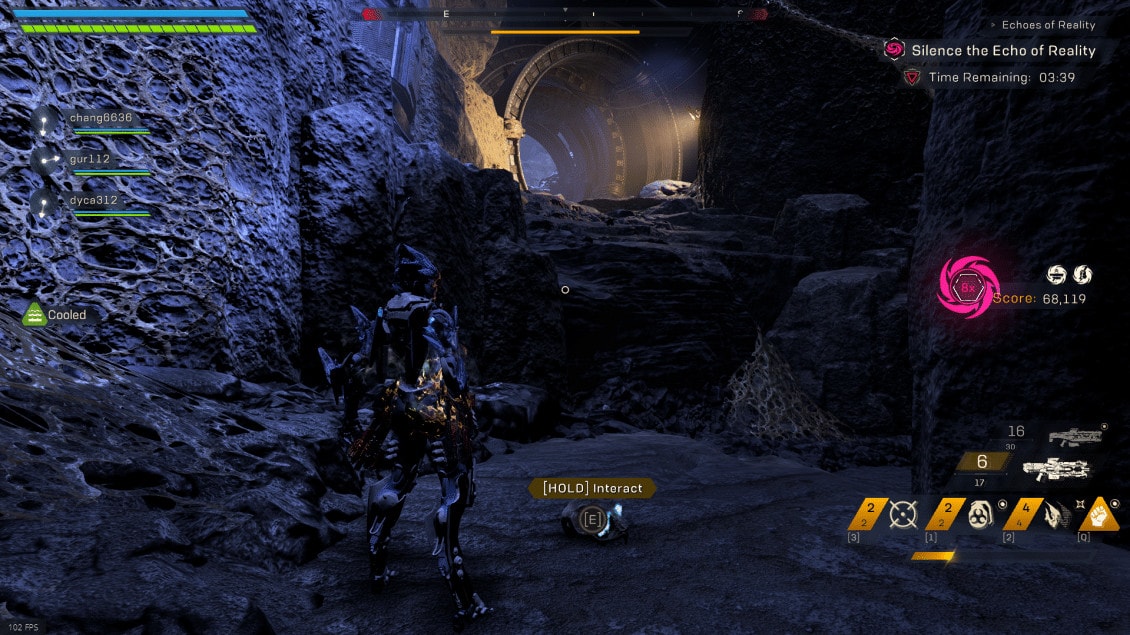
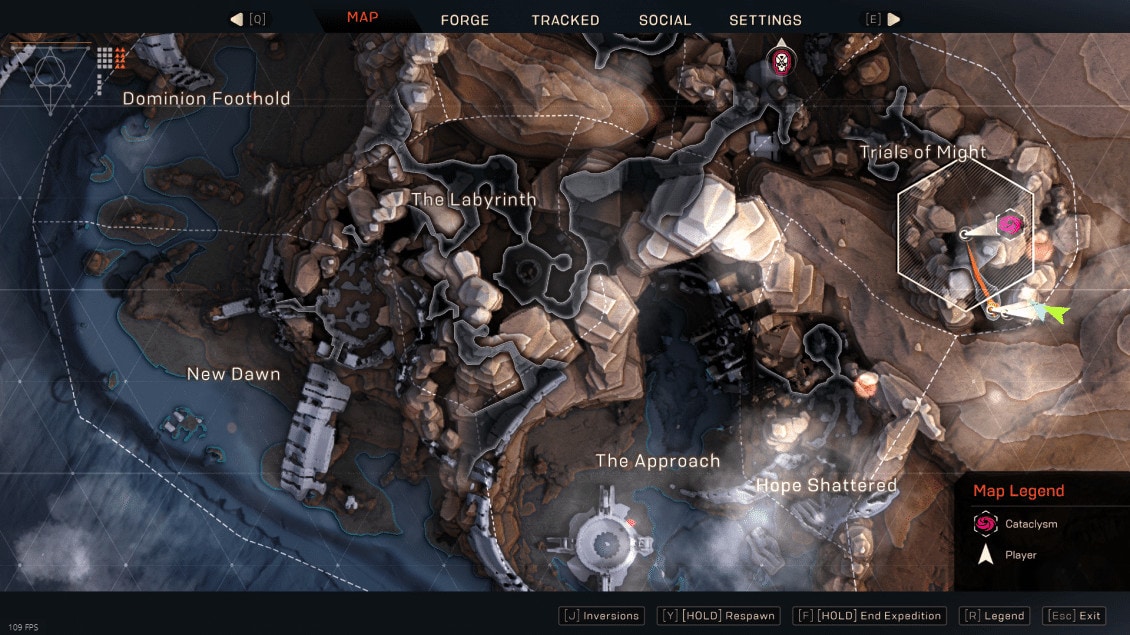
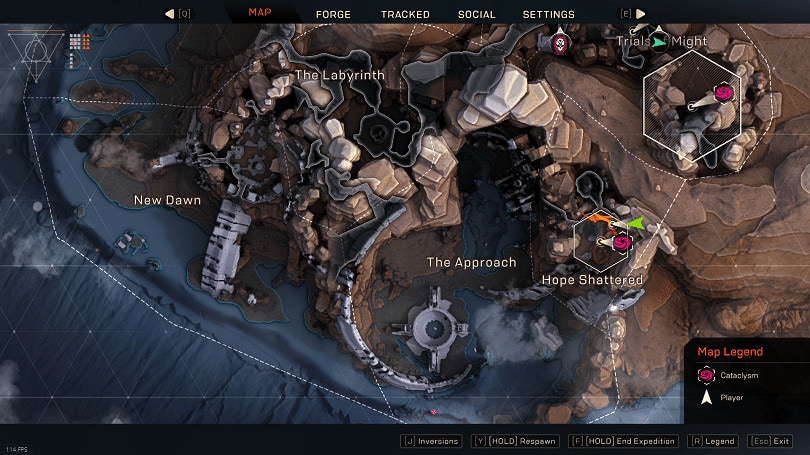
TRIALS OF MIGHT
Trials of Might is home to five skulls and the Crucible of Astrid event.
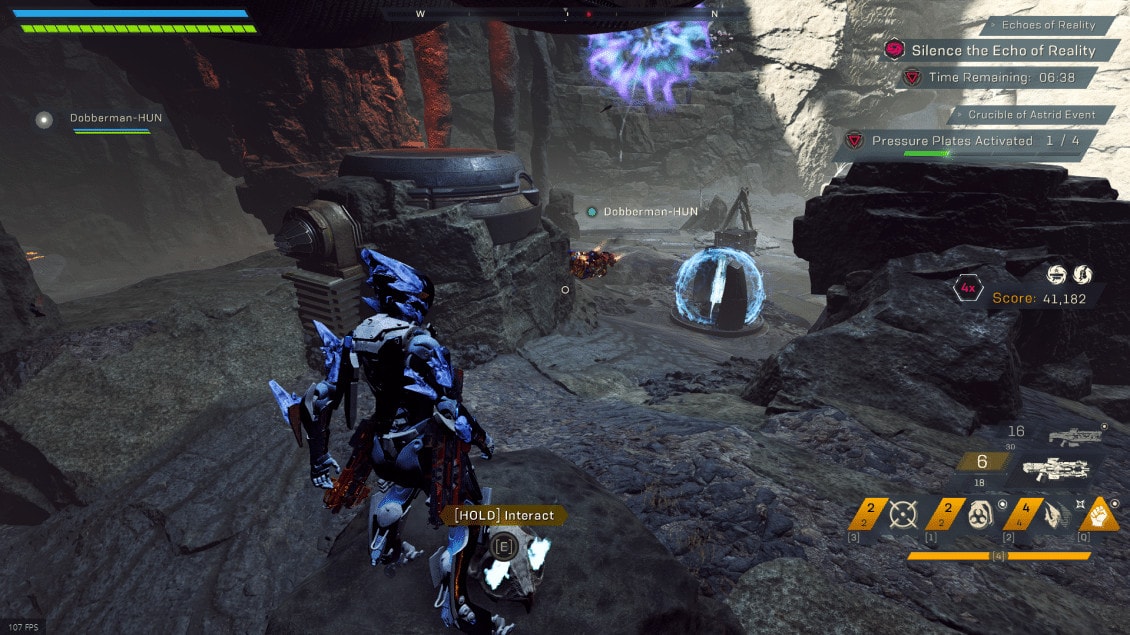
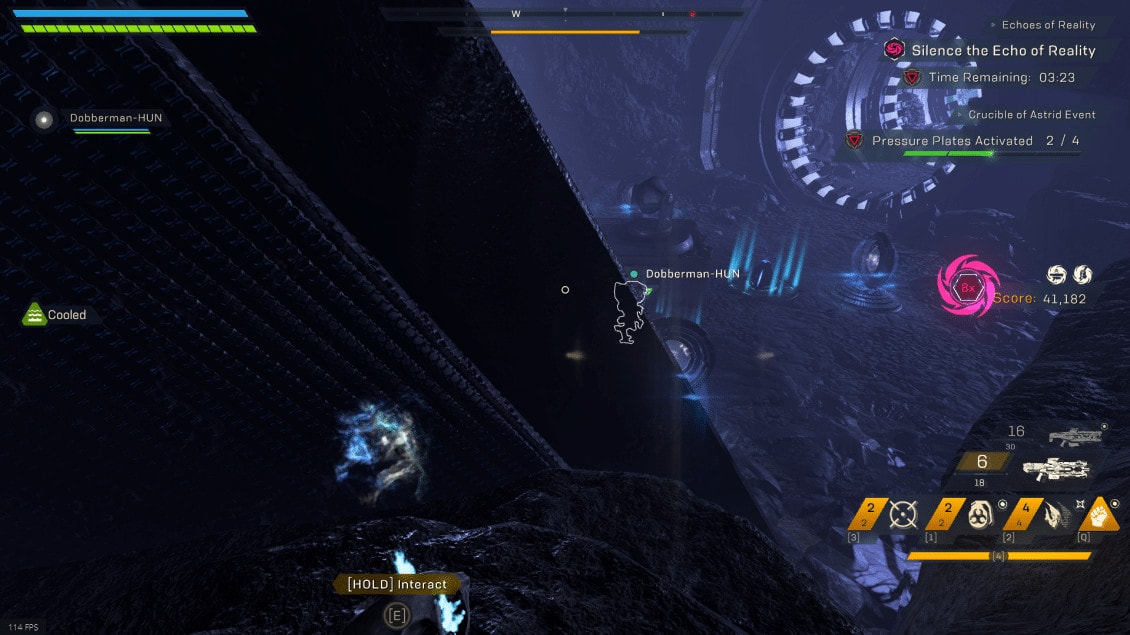
Event: Crucible of Astrid
The only changes to this event were fixes to bugs to force more team cooperation and change the mini-boss spawn method.
The fixed bugs consist of one that allowed a single person to activate all four pressure plates with a single echo and a minor one that allowed Storm and Interceptor to trigger multiple pads via dodging.
However the event itself remains the same. It’s worth noting that you will need at least 3 players to consistently spawn the mini-boss as it involves the use of a weight, so keep that in mind, with there only being two weights available.
Quick Recap:
- Remove the Echo from the “airlock control” reservoir.
- Place echo into reservoir that controls the laser to lower the suppression field.
- Send 2 players to collect the four echoes located on the cliff.
- Remove echo from the laser reservoir.
- (Optional) Players carrying echoes can carry any weights that are needed to ensure all fourpressure plates at the back of the airlock can be pressed.
- Players with echoes enter the first section of the airlock, stopping before the suppression field.
- Player holding the echo from the laser device places it in the airlock control.
- Players in the airlock can now move to the back and places any echoes or weights they hold.
- Player at the airlock control removes the echo and flies through the suppression field to join their team to active the pressure plates.
- With all plates active, the team can now fly out of the airlock and activate the panel that lowers the barrier from the crystal.
- Smash the Crystal.
Mini-Boss Spawn: Baleful Host
Spawn Method: Place a weight on the pressure plate on the east side of the arena.
This Hunter mini-boss can be spawned reliably in a full group, or a group of at least three players. With there being two weights available, if you need to use both for pressure plates to solve the puzzle here, you effectively disable the ability to spawn the boss, or vice versa (please don’t throw away the multiplier by accident!)
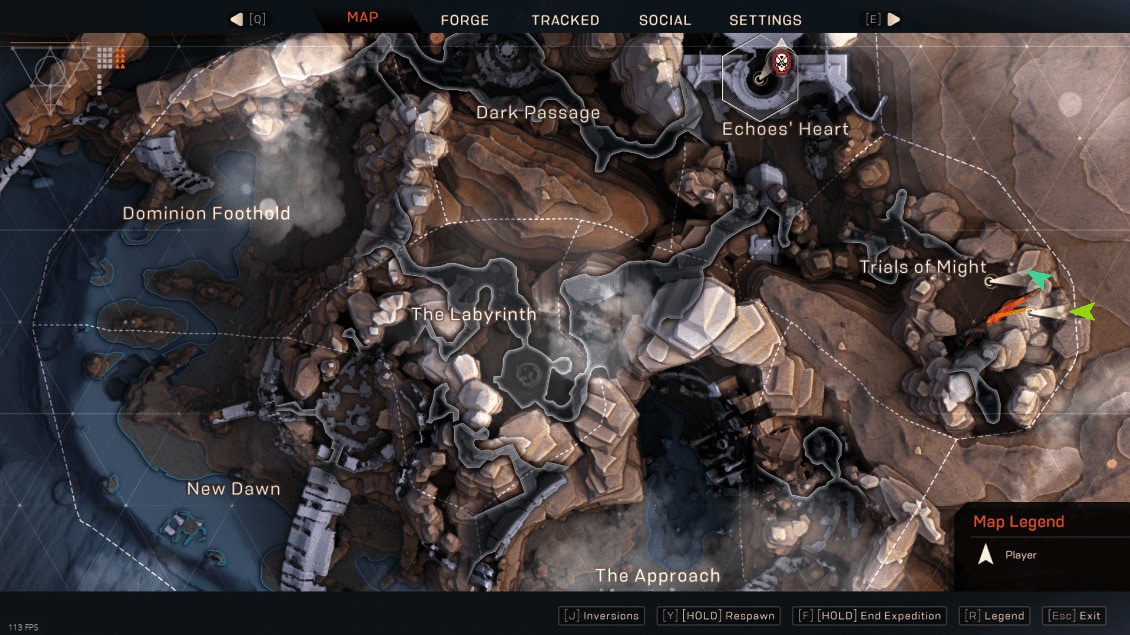
Skull Locations
Trials of Might has five skulls, three Event and two Regional. There are four possible spawns for event Skulls here, so they can change locations now and again.
The first Event skull is located on the east side of the arena, between two stone outcroppings near each other.

The second Skull is located on a rock outcropping to the South-East, just outside of the airlock.
The Third is located on the edge of the cliff with the Suppression field, just behind the rocks up there.
The fourth is located in the SouthWest of the event, near a small ledge there.
The first regional skull can be found on the ground in the tunnel on the way to Crucible of Astrid. It can be found just before the last ledge of the tunnel, before the metal rings.
The second is found at the back of the airlock, between the left wall and the metal construct there.
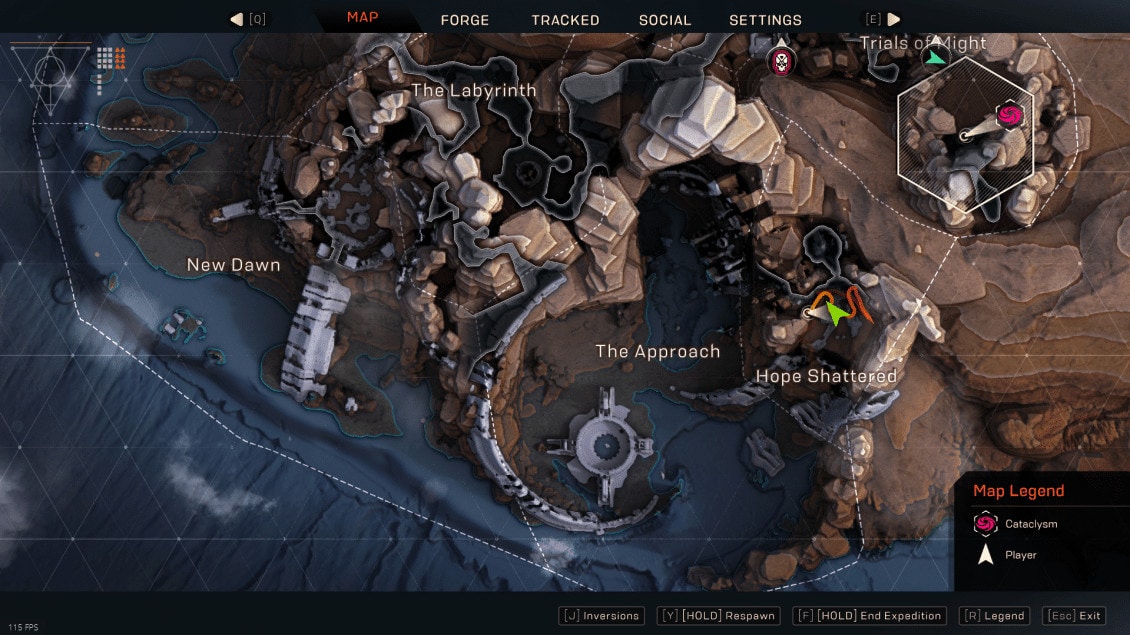
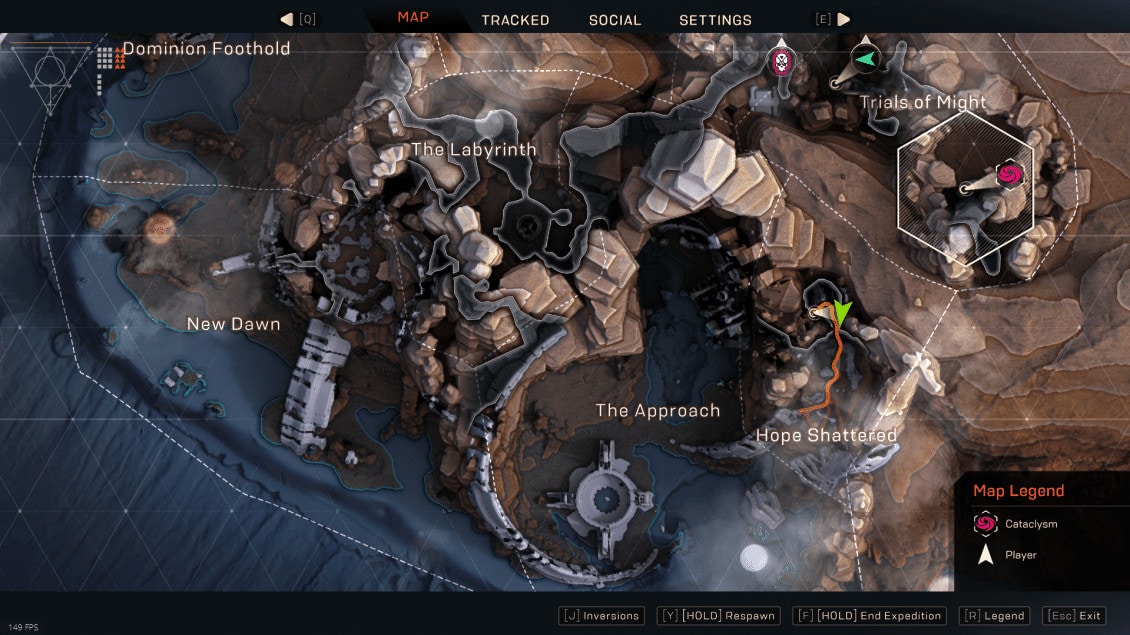
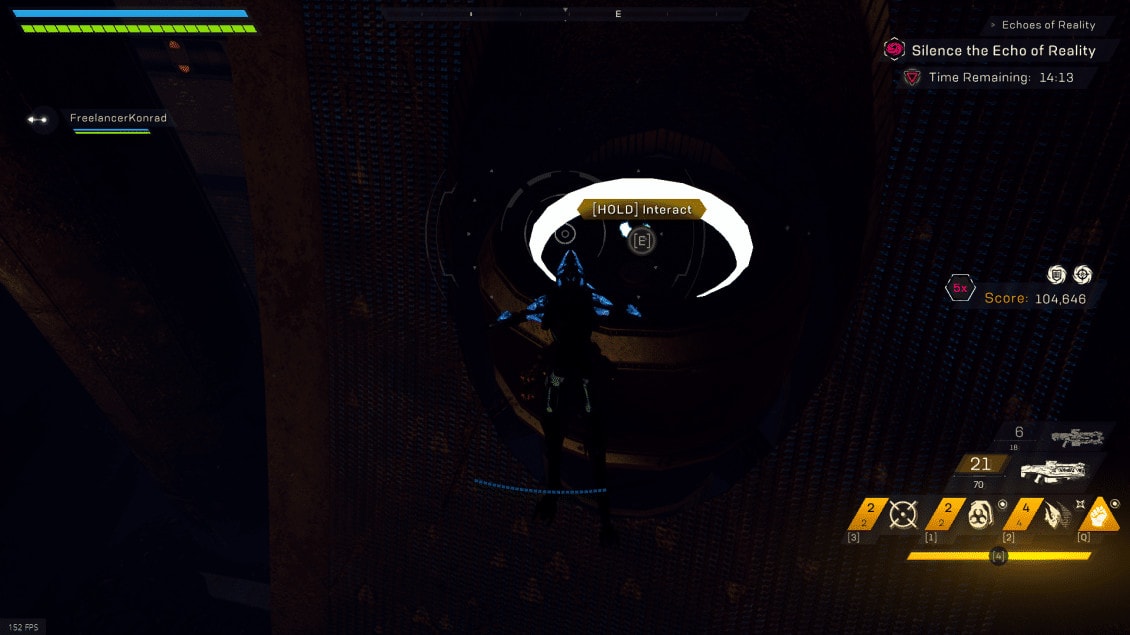
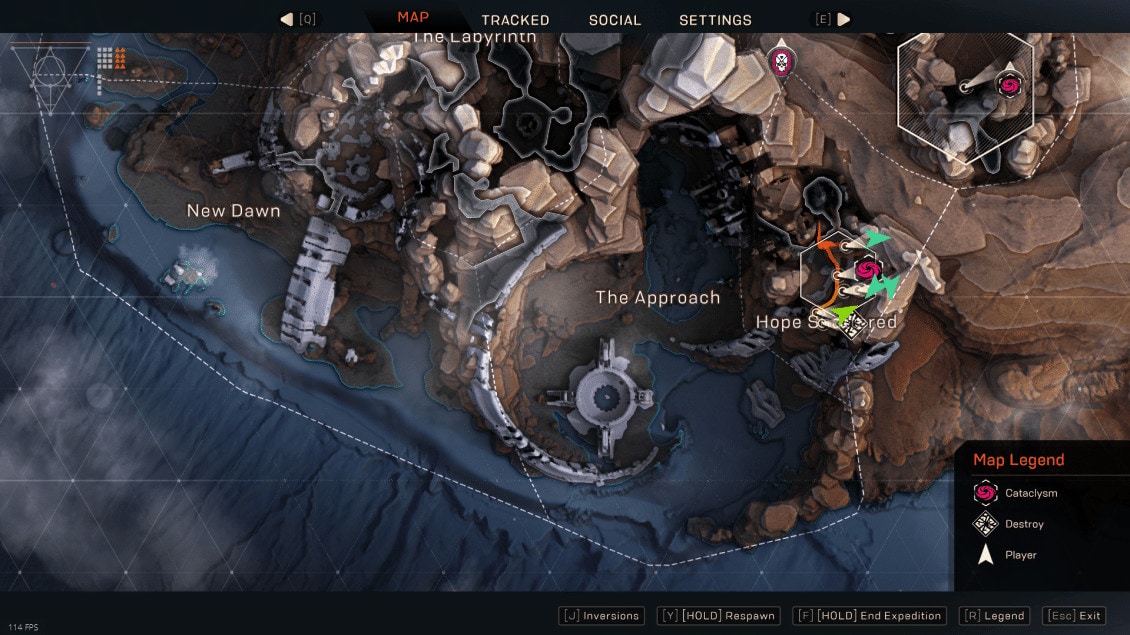
HOPE SHATTERED
Britaheim remains unchanged, like most events. It doesn’t appear any regional skulls have been added here yet, despite the event now being active.
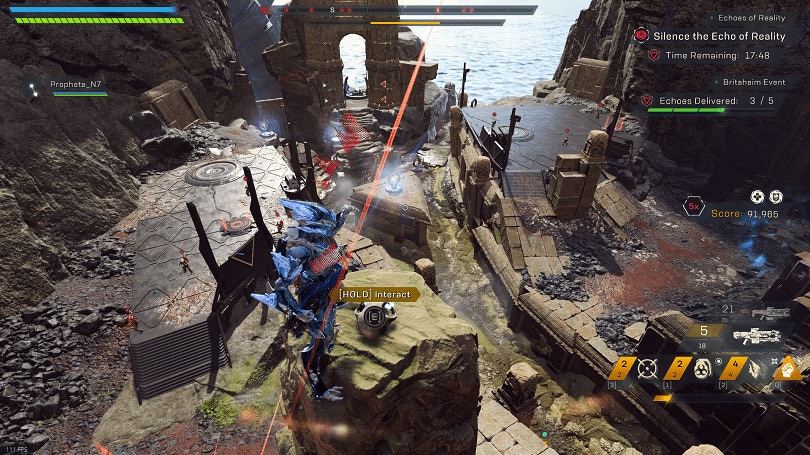
Event: Britaheim
This event remains exactly the same mechanically. No time-saving tricks patched out here. So you can still dash as Storm or Interceptor to solo collect echoes.
Quick Recap:
- Stand on pressure plates to remove a small barrier from a nearby echo.
- Have another player collect the echo. (or grab solo with Storm/Interceptor)
- Repeat for all four Echoes.
- Place the first two echoes in the devices outside the suppression field to remove it.
- Place the next two in the reservoirs in the second underwater section to collect the 5th Echo.
- Pickup the 5th Echo, as well as the two used to reveal it.
- Head back out, grabbing the other two echoes controlling the supression field once all echoes are out of the room safely. (you can still respawn out without losing them if a player does accidentally trap you)
- Place all five echoes in the reservoirs to expose the Crystal.
- Smash the Crystal
Mini-Boss Spawn: Dusk Blight
Spawn Method: Collect 5th Echo in under 2 minutes.
Dusk Blight is another Hunter, to go alongside the one at Crucible of Astrid. This spawn method can be done solo or in a team with practice. So long as nobody deliberately tries to prevent it, you should get this spawn every time solo or in a group as the timer is quite lenient.
Skull Locations
There haven’t been any discovered regional skulls yet, but there are currently three discovered skulls for the event itself.
The first of these skulls can be found on the ground, just as you enter from the Western entrance.
The second and third are mirrored, similarly to how they are in the Forge, but these are underwater on the open platform-like areas to the sides of the entrance to the Echo Chamber, where the 5th echo is.
The fourth skull is the next most common, spawning on the lower section of the stone building near the Crystal.

The fifth skull can be found on the tallest stone pillar in the middle of the arena
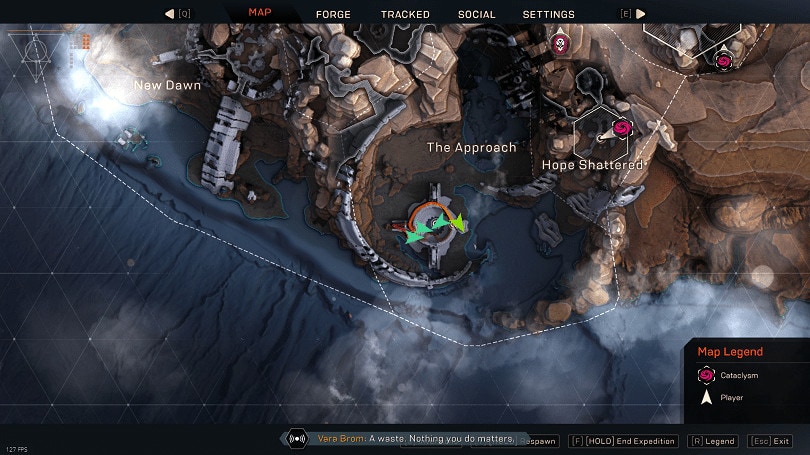
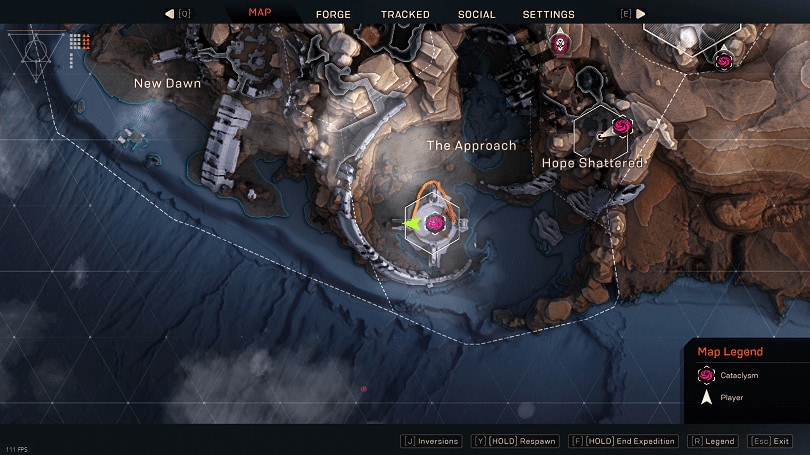
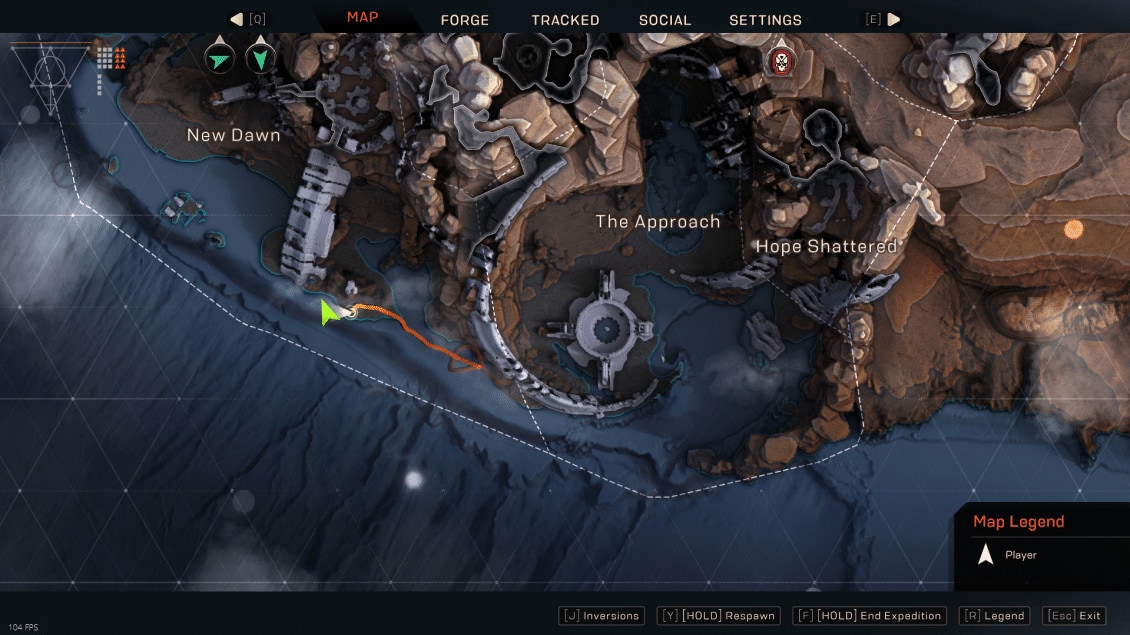
THE APPROACH
Home to Ring of Magnus and two regional Skulls.
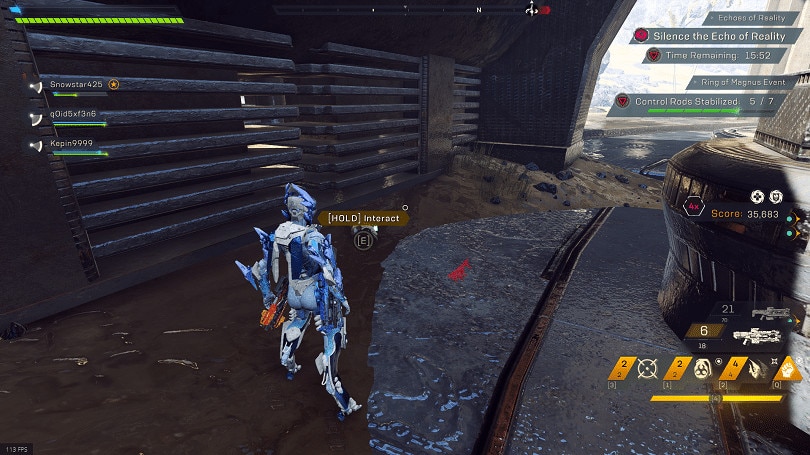
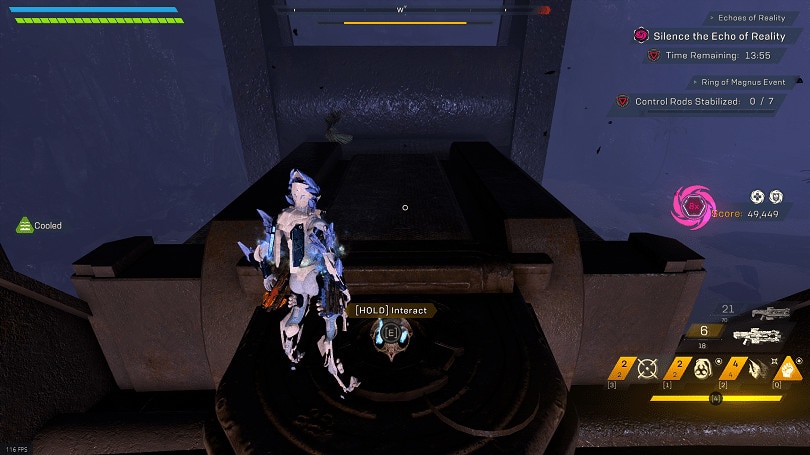
Event: Ring of Magnus
Another event where only the boss spawning mechanic has changed, thankfully it’s a simple one.
Event Recap:
- (optional) Kill Enemies to spawn a Luminary and subsequently the mini-boss
- Activate pillars in any order.
- Activate all 7 before they reset (around a 90 second time window) to remove the barrier protecting the Crystal.
- Destroy the Crystal
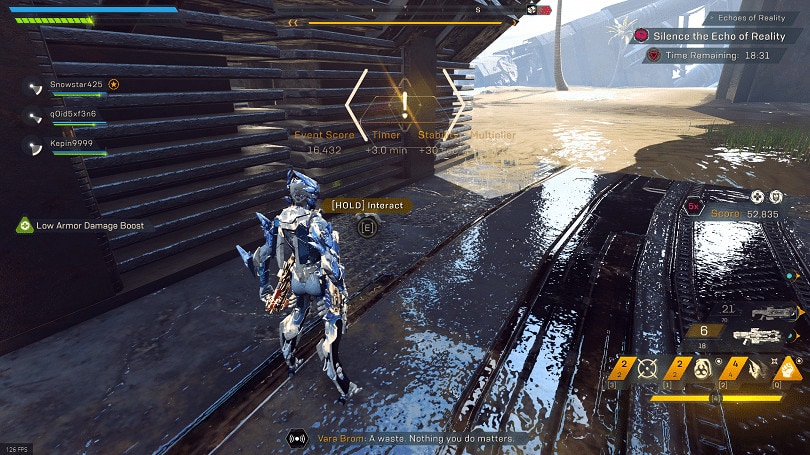
Mini-Boss : Rot Weaver
Spawn Method: Kill the Luminary that spawns in the later waves of enemy spawns during the event
Rot Weaver is another Hunter, and thankfully very hard to miss unless you’re used to the old Ring of Magnus. This time, speed is not a factor other than how fast you kill. You just need to kill the Luminary to spawn him, so it should happen nearly every run as long as you don’t rush the objective.
Skull Locations
The ring of Magnus currently has four known skull locations, all of which are around the outside of the arena near the metal panels and constructs.
The first is on the inside of the arena, along the ground under the Construct to the West.
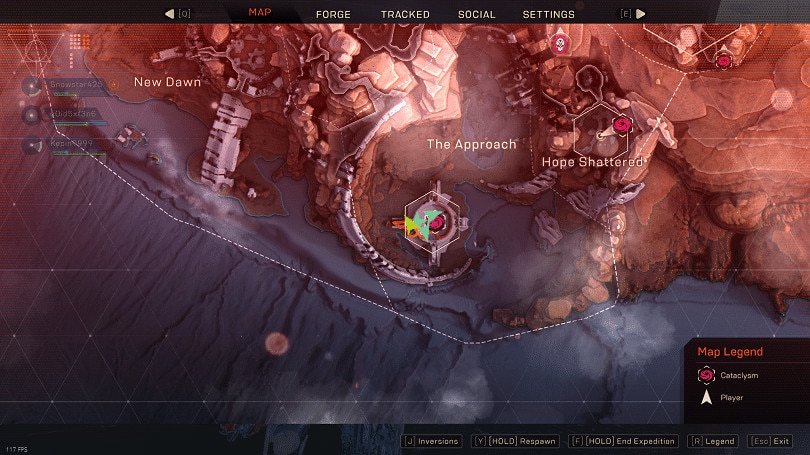
The second is under the Eastern construct, along the edge of the arena.
The Third is in the North West Corner, on the outside of a metal panel.
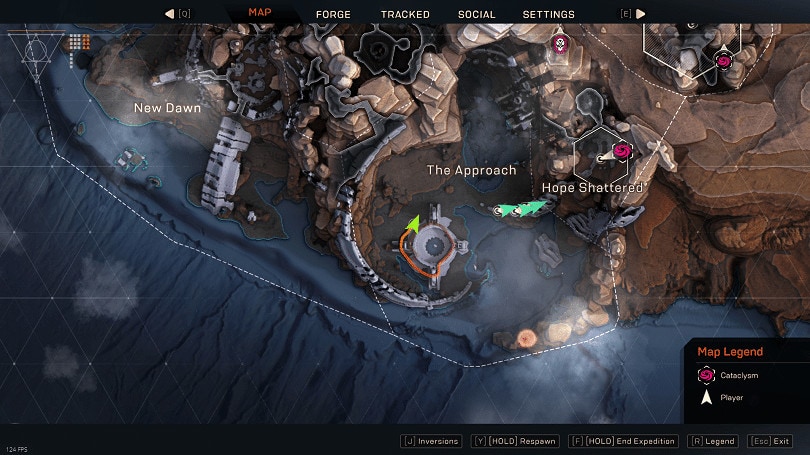

The Fourth is on top of the Western Construct, near the inner edge.
Currently the only known regional skulls are located just outside of the entrance to the Forge.
The First skull is located in the Northernmost section of the Approach. It is located underwater and can be found in the corner closest to Vara.
The Second can be found on top of the metal construct across the way from the Forge.
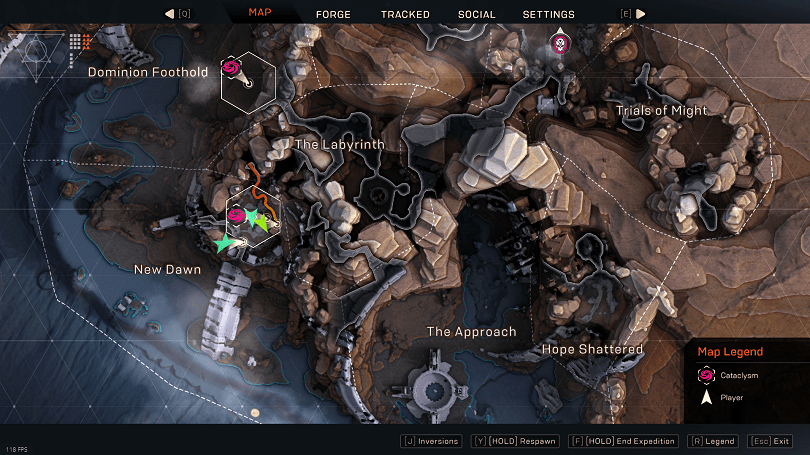
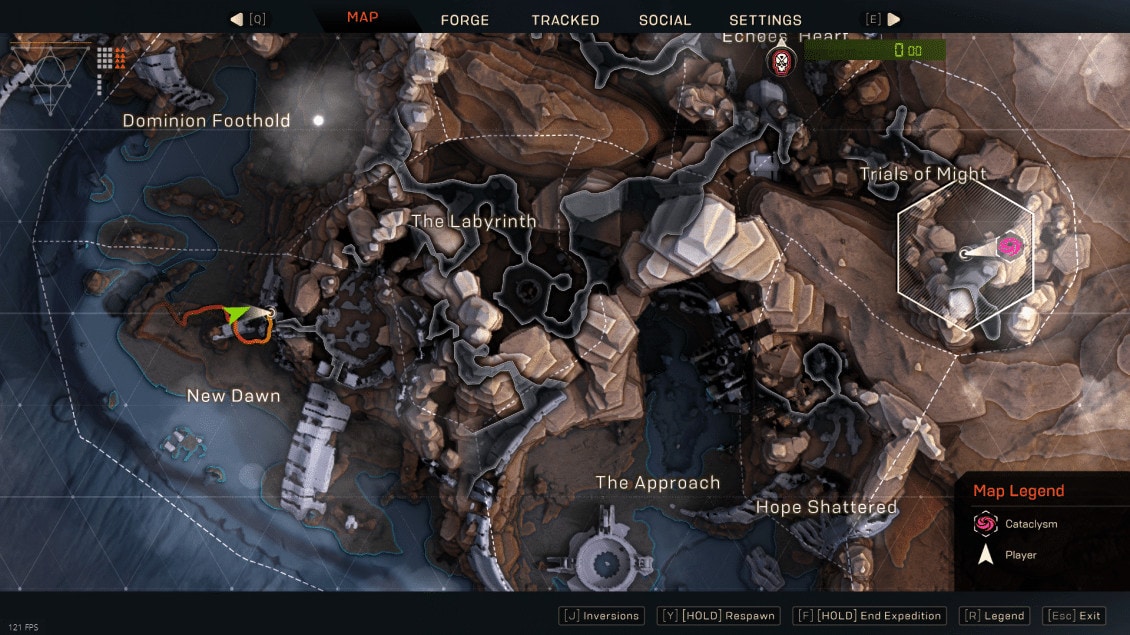
NEW DAWN
Castle Kelrik was brought back last this time around, and it’s safe to say it’s completely unchanged outside of skulls being added.
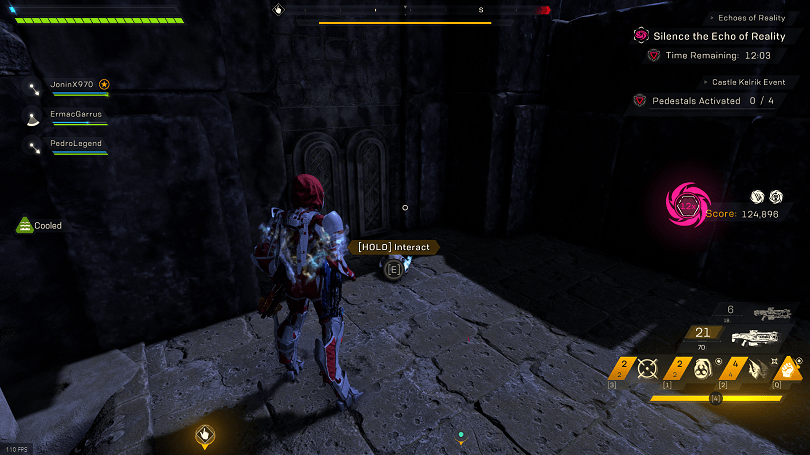
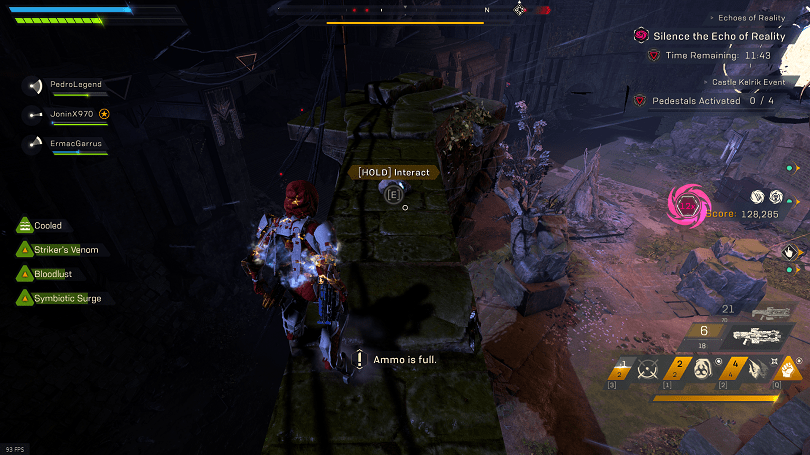
Event: Castle Kelrik
As said before, Castle Kelrik is actually unchanged, even the Mini-boss spawn. Here’s a quick recap for it as a refresher
Event Recap:
- Grab a Relic from either side of the room.
- Place it on a pedestal with a symbol that matches over a barrier door.
- Repeat with a second relic to remove the barrier.
- Repeat 1-3 for the second barrier
- Use all 4 relics to match the symbols on the column the crystal sits on to drop the barrier.
- Smash the Crystal.
Mini-Boss Spawn: Rustfire Father
Spawn Method: High up on the Southeast wall are three symbols. Places relics to match those symbols.
Skull Locations
New dawn has five skulls in total, three from the event and two in the area surrounding area of the map.
Castle Kelrik’s skulls can be found in these five locations, but only three will spawn at any time:
The first location is along the Western wall, on top of a destroyed Structure.


The second location is on the same structure as the first, but a lower level of it
The third location is on the Pillar North of the Crystal, towards the end.

The fourth is on the Pillar to the East of the Crystal.
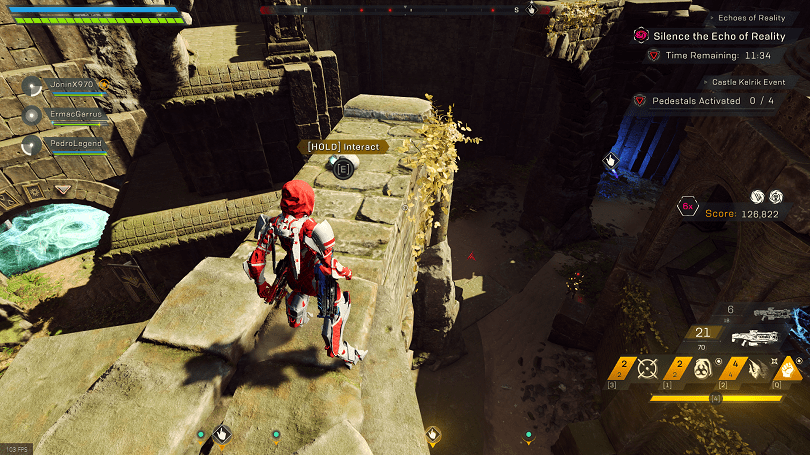
The fifth is on Pillar to the South of the Crystal.

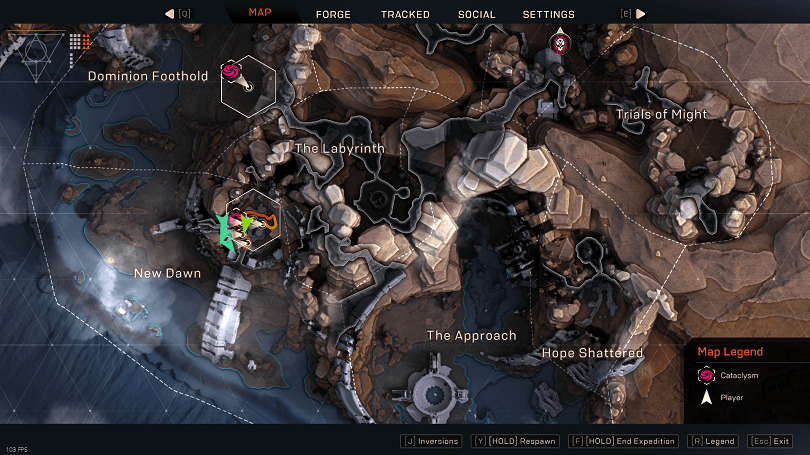
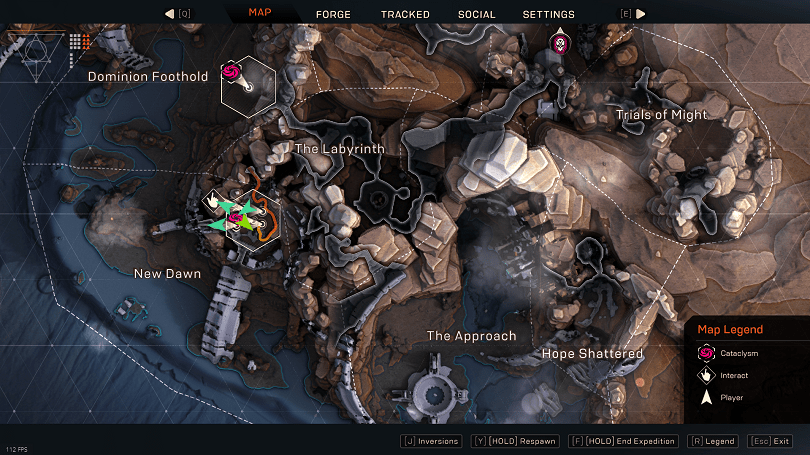
The first of the regional skulls can be quickly gotten using the teleporter from the Labyrinth cave, outside of Casja’s Forge on the way towards Diana’s Landing. From this teleporter, fall behind the structure and cliff to the south. It’s near the base of the cliff here.
The Second can be found in a previously empty section of the outside of the castle, a section just below the bridge.
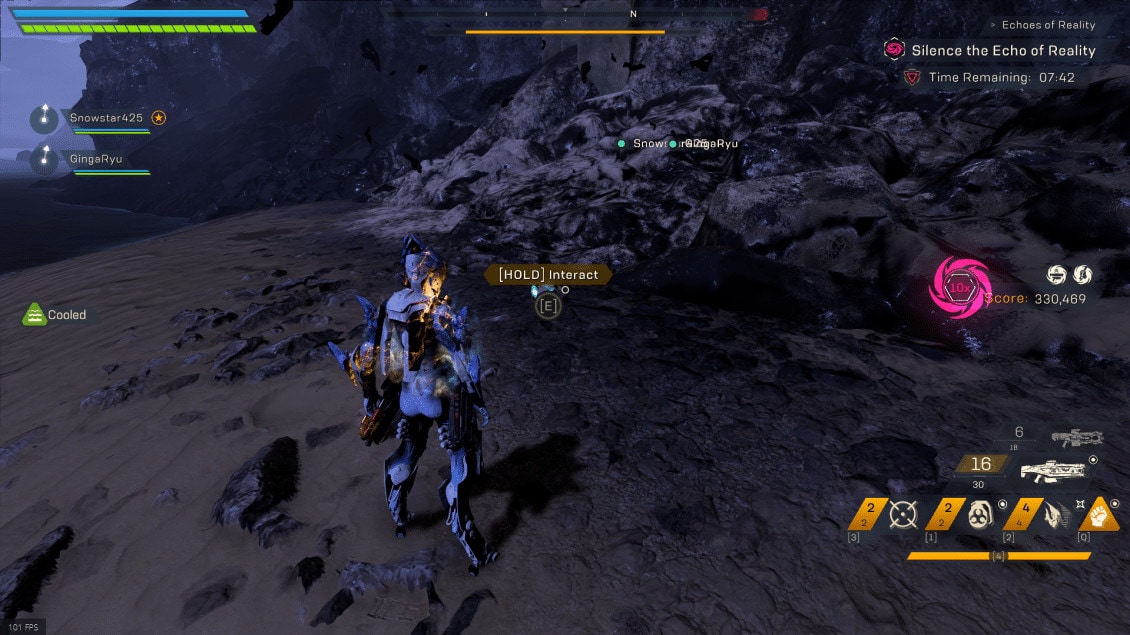
ECHOES’ HEART
Echoes’ Heart is where Vara, the final boss of the Cataclysm lies. This fight is unchanged aside from a few small details that really only matter for high score runs. Outside of this, this area has two skulls going for it.
Boss Fight: Vara Brom
Same old song and Dance here, keep the protection bubble up and fire away at her health.
This fight was changed to only spawn a limited number of minions, but otherwise is still the same.
Phase 1: Default Phase
This is her standard attack phase. She stands in or around the middle of the arena launching attacks. Occasionally summon a few Dominion troops. Below is a list of attacks I’ve seen.
Attack List:
- Charged Fire Beam: Much like the reworked Fire Valkyries, it’s a charged beam that deals high damage and will always inflict status. Will always follow a Freeze from Ice Barrage.
- Flame Waves: Vara Targets up to two players with an pillar-like indicator. Fire waves will be sent out from these player’s locations at their current height.
- Vara will often say “Burn.” before launching this attack.
- Ring of Fire: Vara creates a ring of fire at the end of the arena and pulls it towards her. Stand in the middle of the room in the small barrier near Vara’s feet to avoid this attack.
- Vara will often say “Get over here” before launching this attack
- Ice Barrage: Vara will launch a small barrage of of Ice projectiles at a player, high chance to freeze on hit. Always Followed up by the Charged Fire Beam if a Freeze is inflicted.
Phase 2: The Floor is Lava
More of the same, but Vara relocates herself to one of the farthest pillars. However if you want to live, I suggest staying on the pillars yourself. She Spreads fire across the entire battlefield, while disabling Flight, leaving the pillars safe.
She will begin transitioning to this phase at ⅔ (66%) HP. She will exit this phase at 33% HP left. After this point she will go in and out of this phase periodically until dead.
Attack List:
- Stationary Fireballs: Casts ~5-7 Fireballs on your squad. These Fireballs leave a lingering AoE for a bit. Be careful these don’t land on your platforms. Depending on javelin, it can be safest to drop to the floor when each spawns, to keep them out of the way.
- Vara often does a short scream before targeting player with a fireball.
- Blazing Floor: This gives the phase its name. Vara grounds all Javelins (aside from Storms, which can still hover), and set the arena on fire. Pillars are left as the only safe areas.
Skull Locations
Both of these skulls are located near the entrance/exit towards the Approach.
The first is in between the Approach tunnel and the small tunnel with the teleporter, on the rocks in between them

The second is on a small, raised ledge along the wall to the left as you enter from the approach. It’s before the Dominion buildings and platforms on this side.

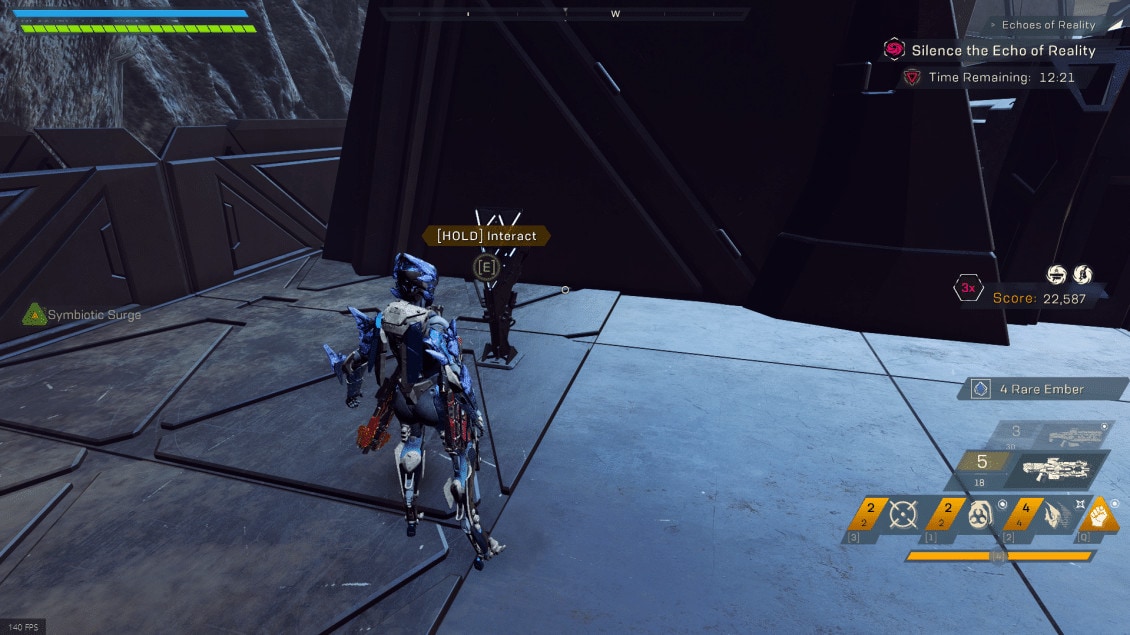
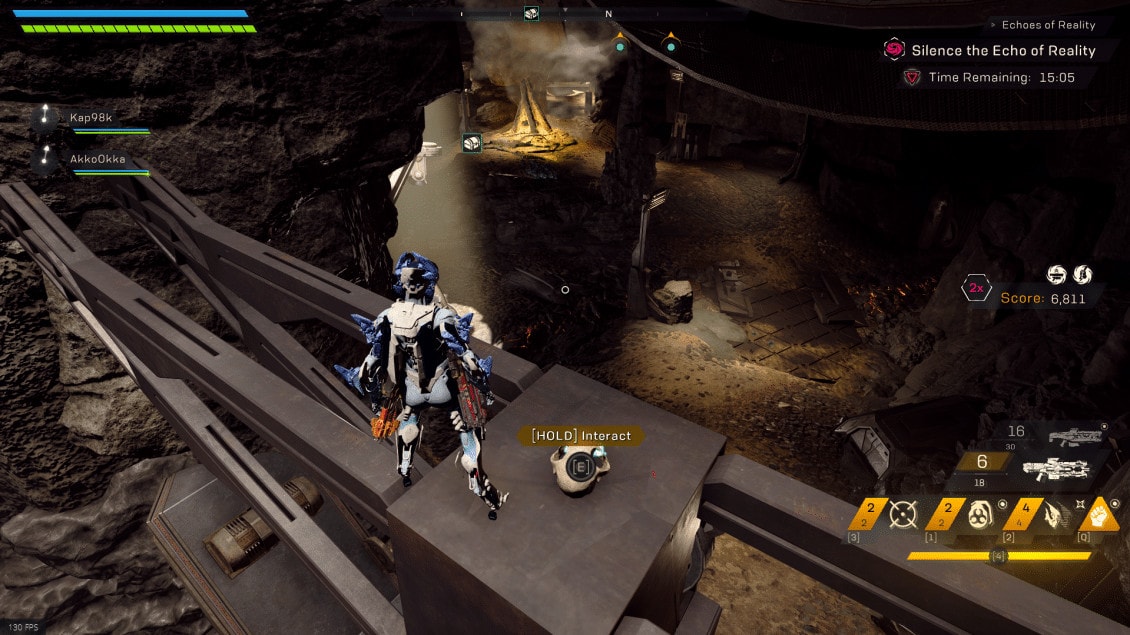
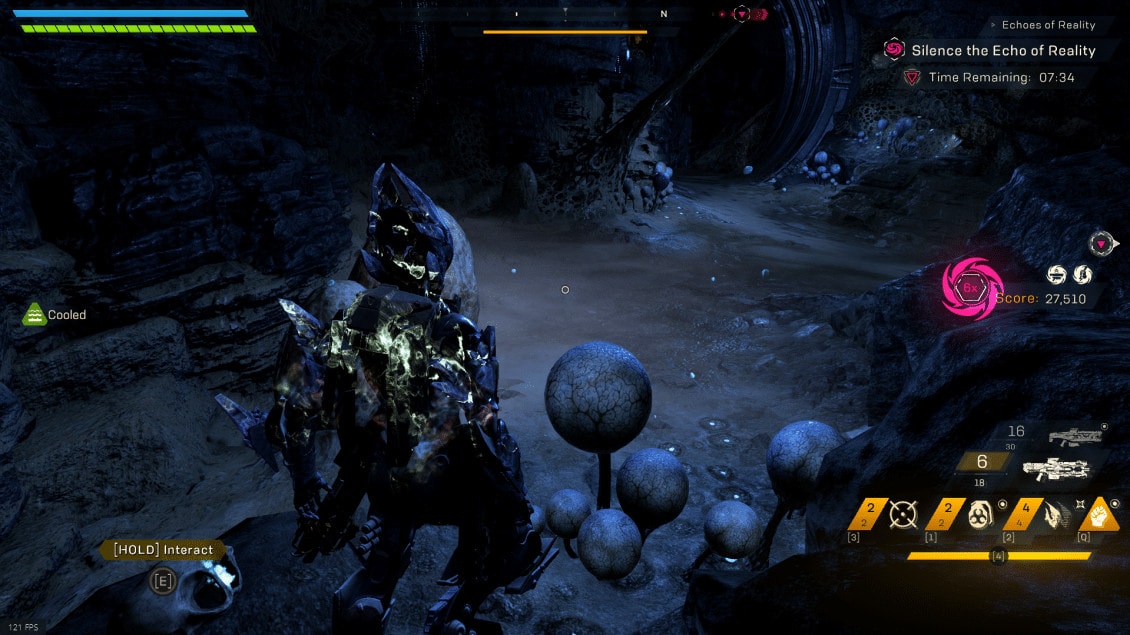
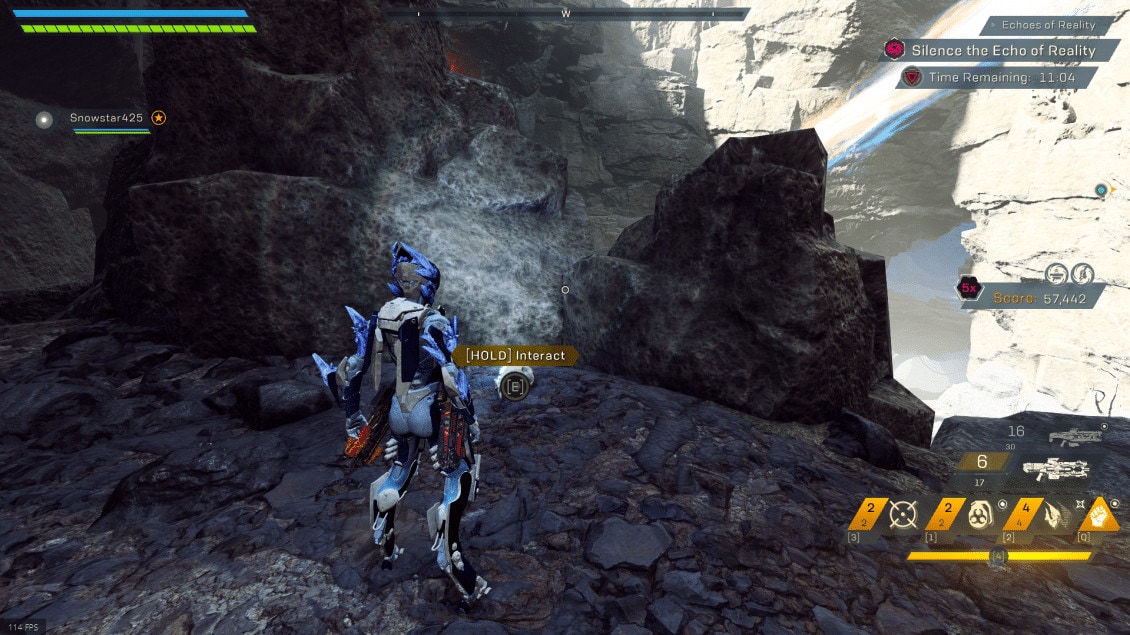
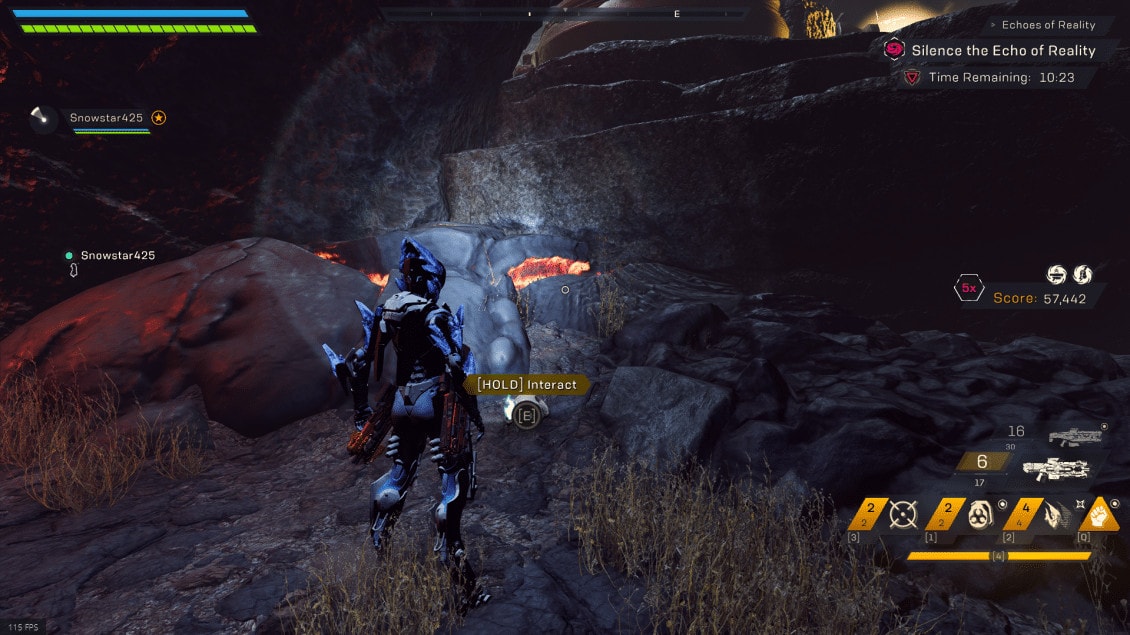
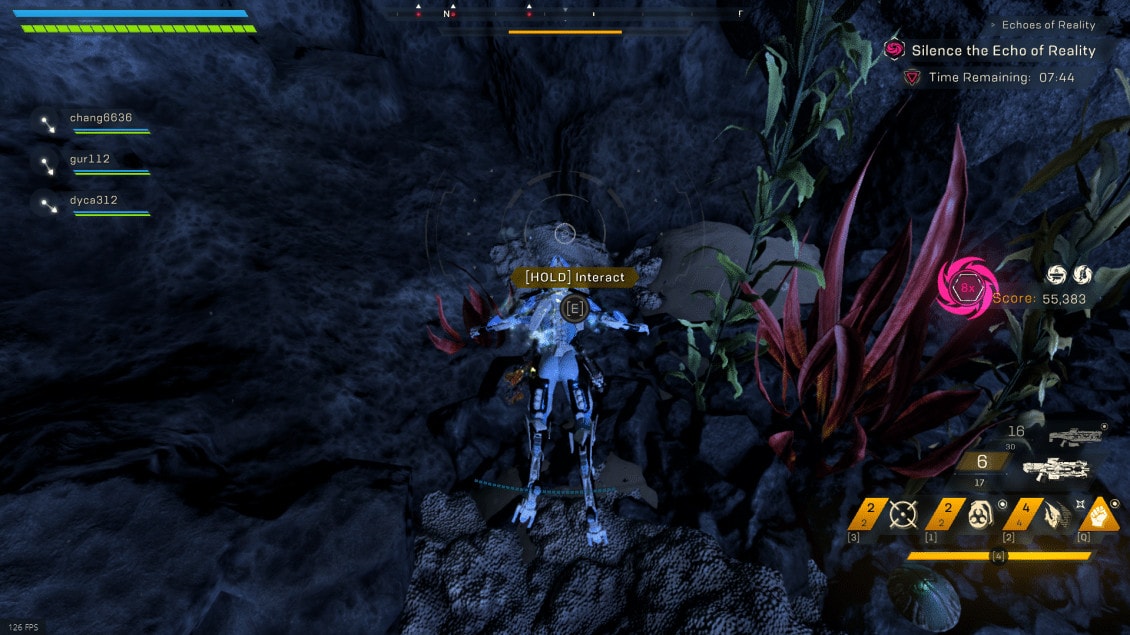
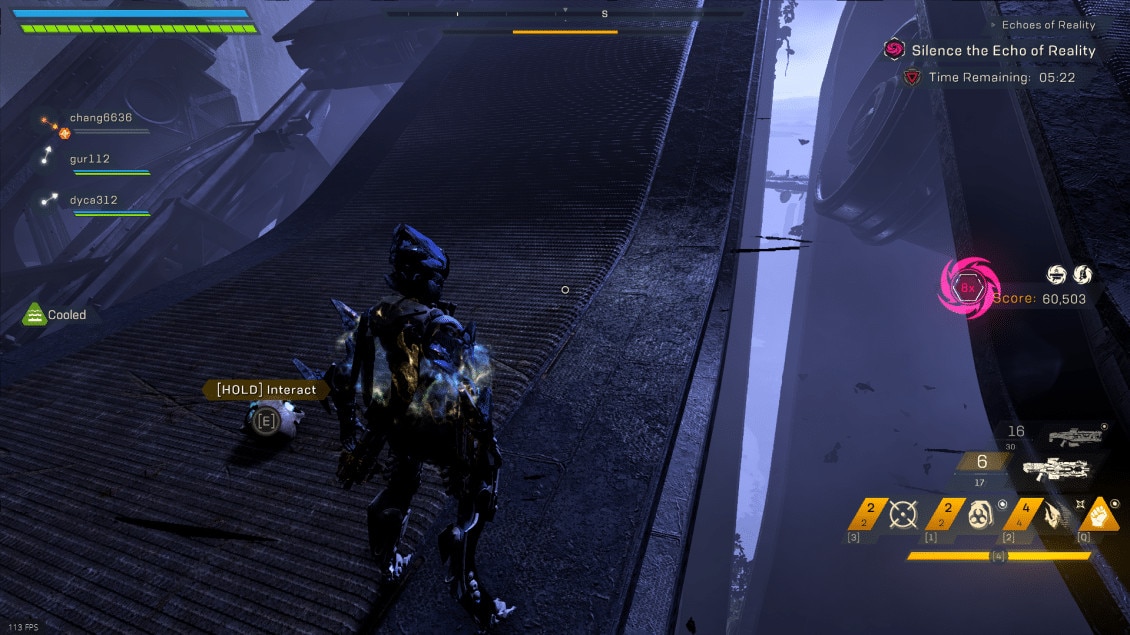
THE MYSTERY OF THE PYRES
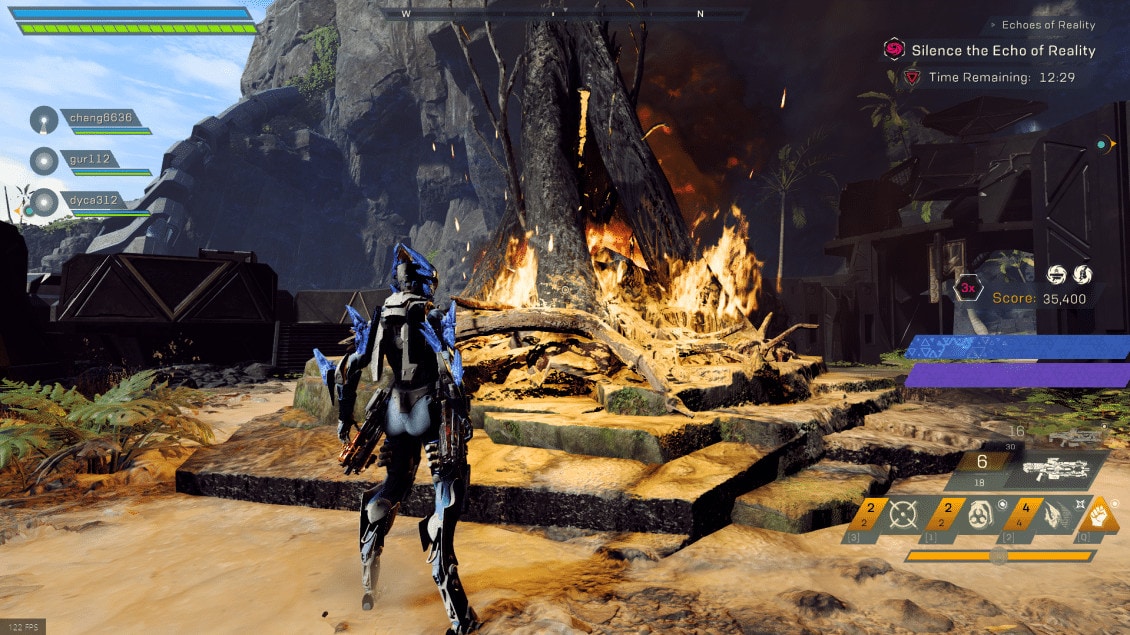
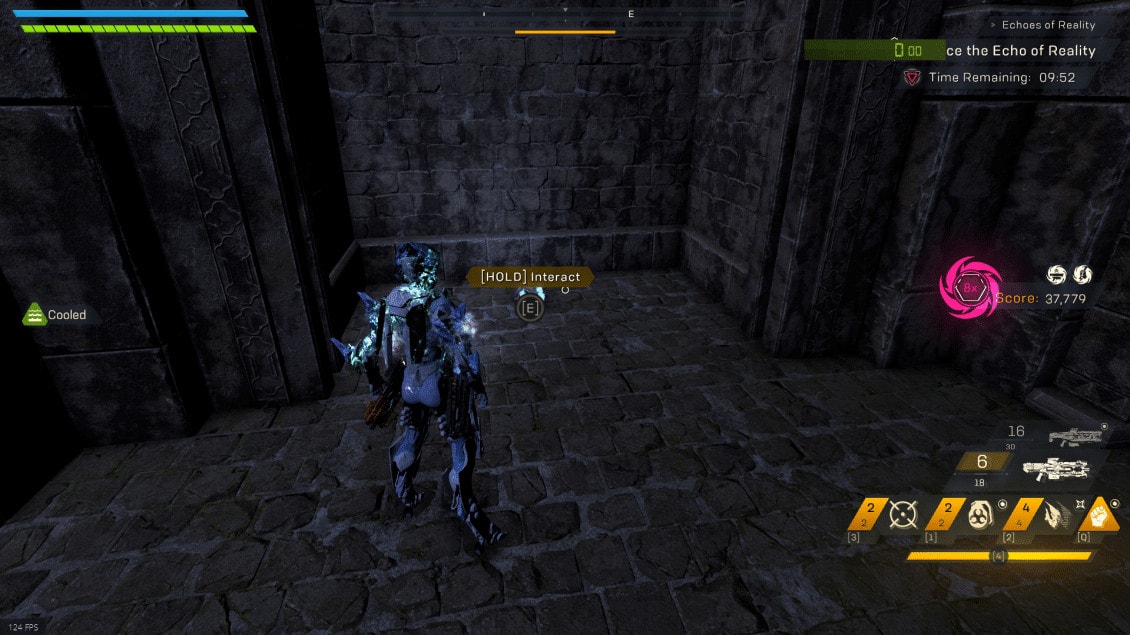
Each event in the Season of Skulls version of Cataclysm has a pyre. This pyre typically spawns after the event starts, and is ignited after the event’s crystal is destroyed. After some time, the Pyre will burn itself out.
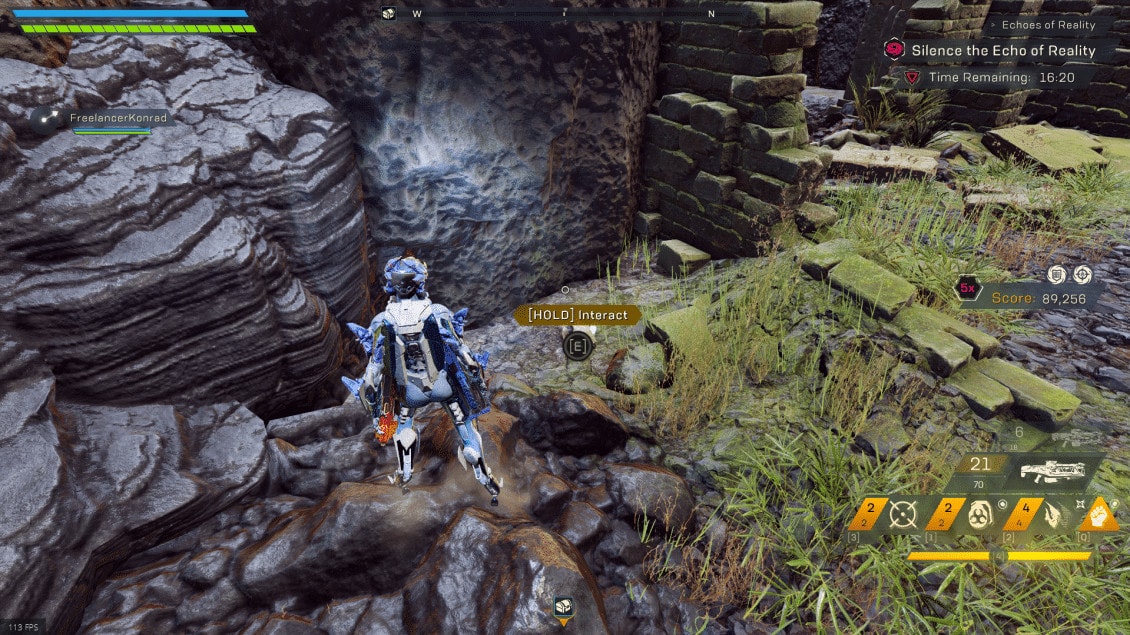
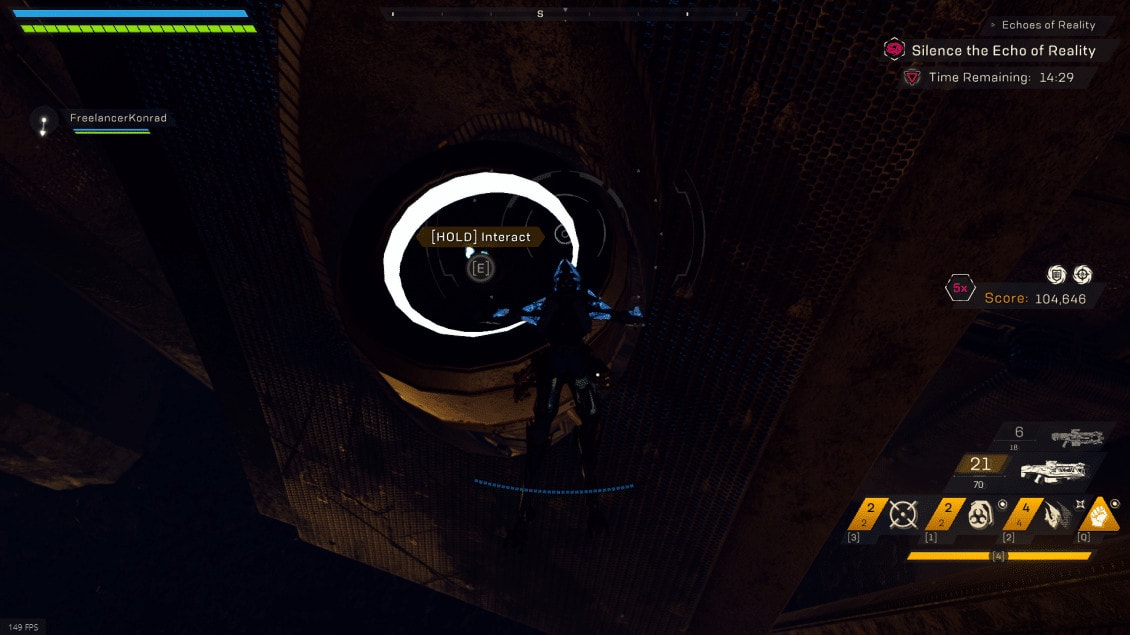
Currently, only the Pyre at Casja’s Forge can be interacted with. This seems to lead to multiple possible paths this secret can go.
It could be a timed thing, where you have to start at the Forge and make your way around and light the other pyres in a certain amount of time. It could require them to all be lit simultaneously.
Currently, Casja’s Forge being the start of something is clear. Beyond that, this remains a mystery yet. Perhaps it does require all seven events to be active
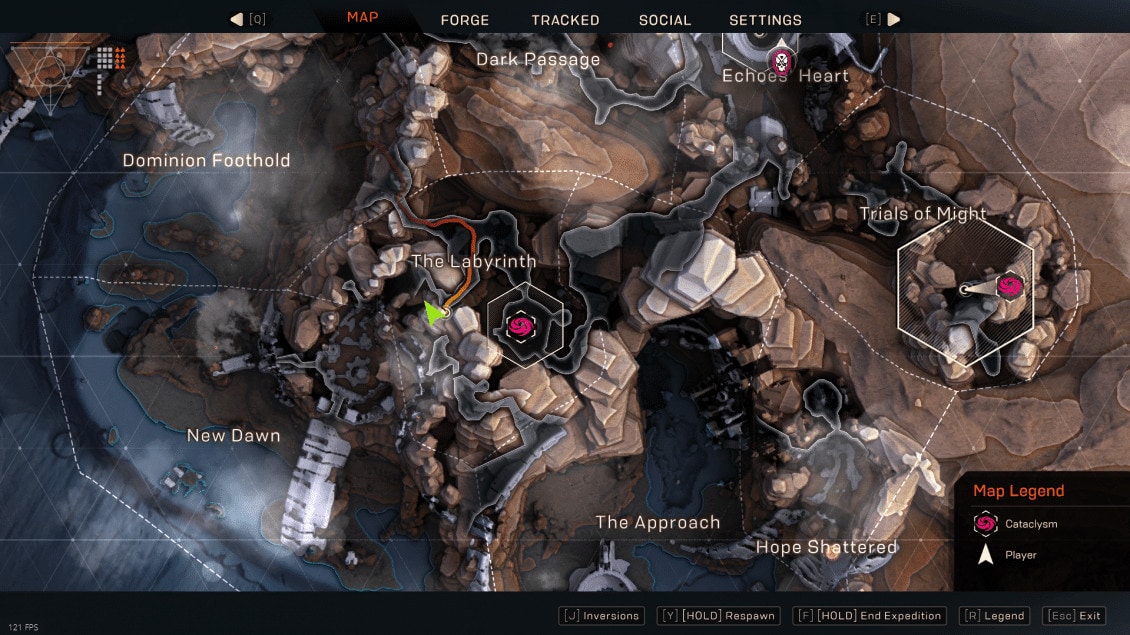
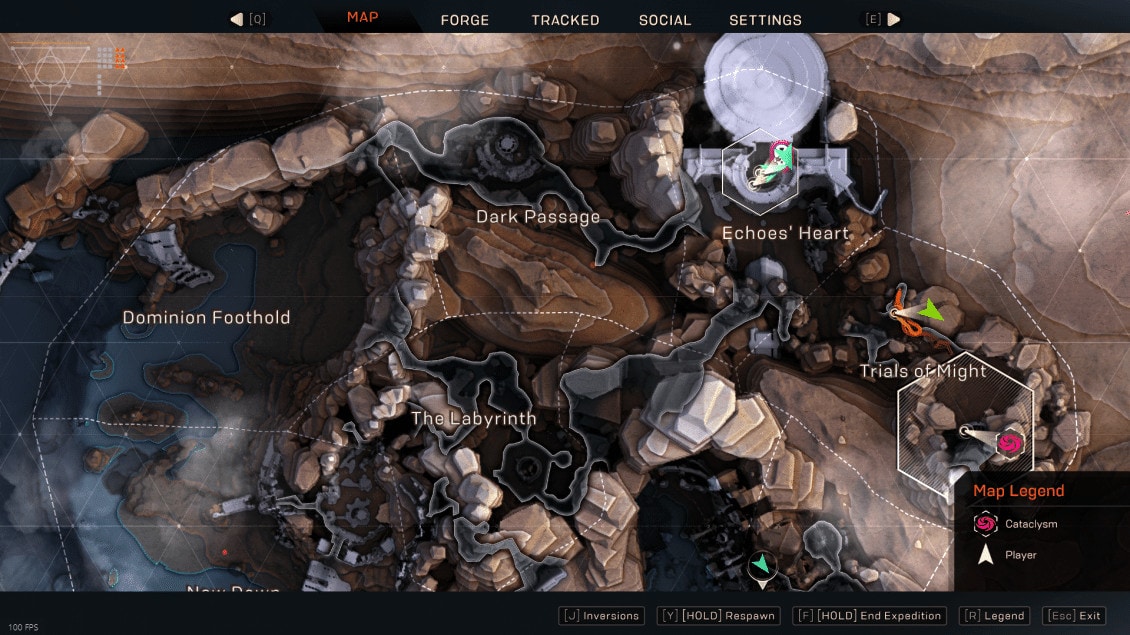
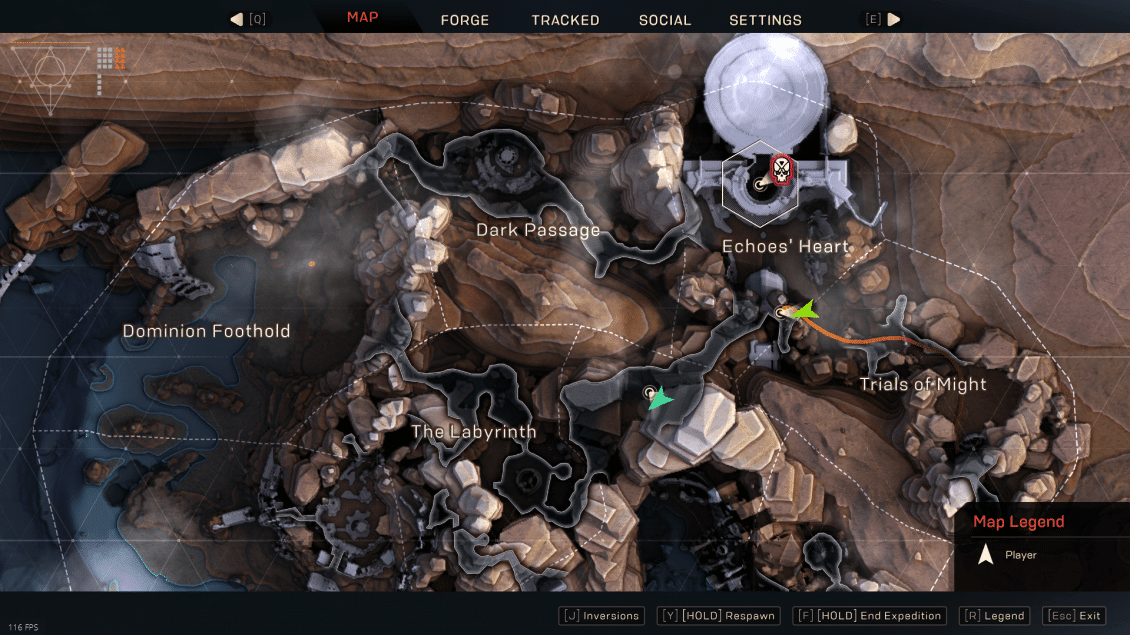
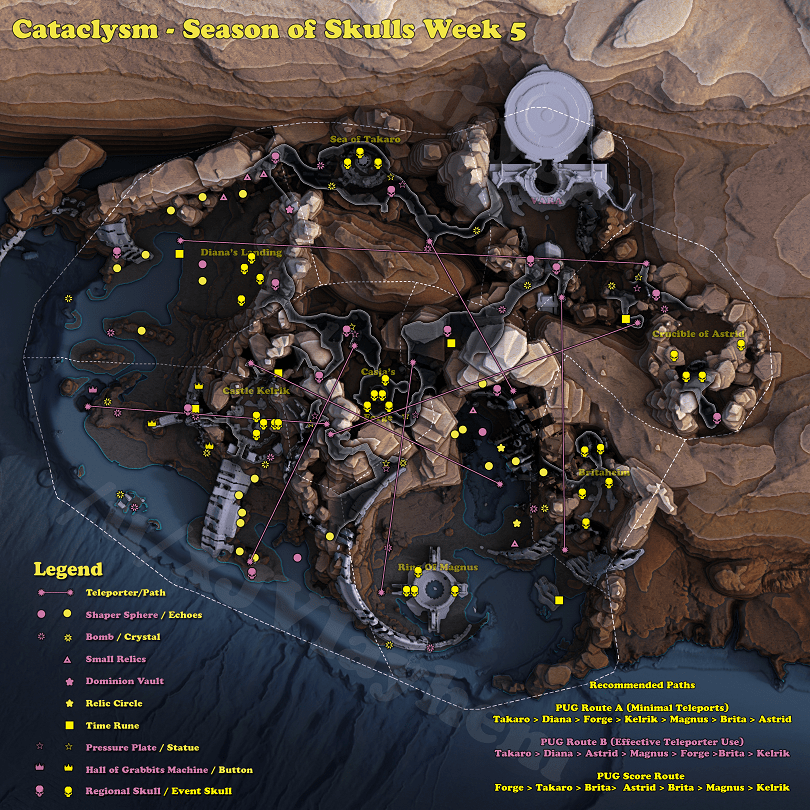
COMPLETE MAP OF THE SEASON OF SKULLS CATACLYSM
FROM VULKK
I would like to thank RubyJavelin for his incredible work now on this guide too. The Season of Skulls Cataclysm Guide is an addition to the original Cataclysm Guide, which he wrote for VULKK.com several months ago. This new one adds all new locations, explains all new mechanics and shows all new secrets.
I hope you find this useful and don’t forget to wave at Ruby if you see him as your teammate on the next expedition. His research and dedication to providing quality guides for VULKK.com and the Anthem community is absolutely fantastic and I am glad he immediately agreed to write an updated version to his own original guide for the Halloween event.