Welcome to the Anthem Interceptor Builds Guide. This article covers everything from introducing you to the javelin and its gameplay specifics, to how gearing works and what to look for and ends with suggested best builds! The guide is written for VULKK.com by RubyJavelin.
Updated for Patch 1.7.0
Note from Vulkk: If you are a skilled and experienced Freelancer with another Javelin and want to share your knowledge with the community, me and VULKK.com will gladly to give you that opportunity. Contact me at info@vulkk.com and I’ll give you more details.
Introduction to Interceptor
What is the Interceptor
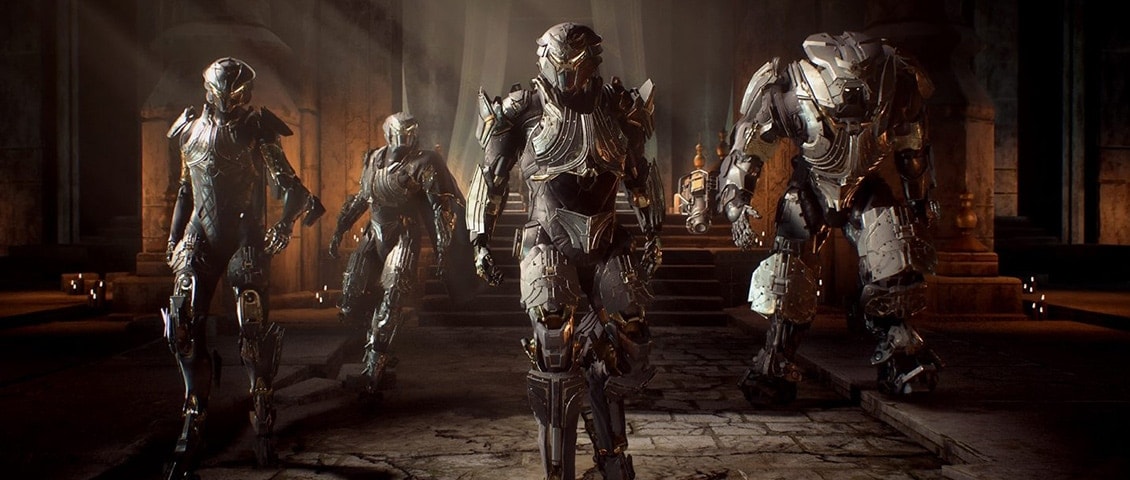
The Interceptor is the javelin that utilizes its speed and mobility to either close distance and deal damage, or to quickly traverse the battlefield and support allies. While the Interceptor has the capability to handle both roles, it cannot really do them simultaneously or will suffer from a lack of power as the ideals for each build are different.
As of 1.7.0 The current meta builds for Interceptor is as follows:
- Acid Melee
- Ultimate-focused
- Hybrid Melee/Ultimate
I’ll touch on these builds more in-depth after I talk about the abilities and components first so anyone reading has a general understanding of why certain components might be used in a build. There are other fun and viable builds that do exist, so don’t feel pressured to run a meta build if your current build works for you. Meta builds are just stronger, or at least easier to build for in most cases.
Perk vs Inscription
To be able to accurately understand the information here it’s worth clarifying the difference between the terms “Perk” and “Inscriptions”.
A Perk is a term used to refer to the bonus effect on a Masterwork or Legendary item. Under the various items, these will be listed as Masterwork: “Effect” or Cataclysm: “Effect”. These effects are conditional and vary item to item, some being harder to trigger but more valuable or some being easy to trigger but less useful. All of them are fixed to their specific item though, so two weapons of the same name will always have this as an effect.
An Inscription refers to the bonus stats on any piece of gear, shown at the bottom of the item. These are mentioned briefly, typically what is recommended to look for, but that’s more towards the builds section. There are a few that are universally good and a few that are universally awful, most are in between though. These bonus stat will be random for every drop, and there’s no current way to control what an item drops with. However higher tier items do have more generalized stats which hit a broader range, so they’re better more often.
RELATED ► ANTHEM Inscriptions Guide and Complete List
Abilities, Components and Masterworks
Addressing individual abilities and Masterworks, both with praise and problematic things being noted. There’s a lot I liked here, and a lot I hated here. So let’s just touch on everything this Javelin has to offer in terms of skills, components and how they all handle and interact.

Support Skills
We’ll start with the quickest section, Support Skills. You get Target Beacon and Rally Cry. Both serve a purpose and both can be good, but both just aren’t. The masterwork perks do give both their niche
 Target Beacon
- Effect: Enemies resistances are reduced by 33% while marked by Target Beacon
- Masterwork – Slayer’s Furor: Target Beacon spread to targets near the initially marked target.
Definitely the better of the two options the Interceptor has available. Solid damage increase on a relatively short cooldown that also transfers on death. When combined with Acid effects, it allows for a ton of extra DPS, without much additional assistance.
The masterwork is pretty decent too, allowing you to debuff entire packs instead of single enemies. It makes it that much more effective to use.
Rally Cry
 Rally Cry
- Effect: Cleanse Elemental Statuses from yourself or allies in range.
- Masterwork – Voice of Courage: Instantly revives downed allies in range to 50% HP.
So what’s wrong with this skill? First, it’s a single party-wide effect of cleansing a status and nothing more. This will only work on Elemental Statuses. Yep, nothing else, not even something like the Tyrant’s Webbing or other misc. effects that appear. Once it’s used it’s down for a whole minute. No Lingering resistance or prevention, no other effects at all for the base skill. It’s basically just not worth using because it’s an instant effect. Granted it can combo with a Masterwork Component potentially, it’s just not worth taking over Beacon for any reason.
If you want to lower the cooldown, it’d be in an okay spot. Some status melt HP harder than Scar Hunters can sometimes. If you want to make it compete, add a residual effect; preferably status resistance or immunity for a brief period after.
The Masterwork version is a bit of a saving grace. It can be very useful in certain situations, but it only helps if you’re aiming for a support type build. Even then, Target Beacon still offers a better support effect, especially if you aren’t also building to deal damage yourself.
Melee Weapons
Like all classes, the Interceptor has just two melee weapons.
Twin Blades
 Twin Blades
- Damage Type: Kinetic
- Combo Type: Detonator
- Masterwork – Blades of Warding: Hitting an enemy grants 10% damage resistance. Stacks up to 5 times, up to 50%.
This weapon isn’t the greatest. It’s a reliable detonator but that’s really all the base weapon has going for it. Kinetic typing leaves it doing less damage to Armor and Shields, which doesn’t help it at all, despite Interceptor Melee supposedly ignoring resistances. That only bypasses an enemy’s ability to ignore damage, like hitting an Anrisaur from the front.
The masterwork version however does allow you to be more durable. That’s a nice plus. The bonus it offers, alongside Vengeance Matrix’s or Softened Blows’ bonuses being active, it can prevent damage for a little bit.
Venomous Blades
 Venomous Blades
- Damage Type: Acid
- Combo Type: Primer
- Masterwork – Deathstalker Blades: Deals additional damage against targets below 50% health.
The base version has a nice damage type to it. While it still suffers against shields, it does more to armor which is a good plus, as armored targets tend to be quite bulky as-is. Being a Primer is a nice bonus as it allows you to use Tempest Strike to detonate and deal some bonus damage on top of applying acid without Venom Bomb.
The Masterwork is amazing for damage. When an enemy drops below half health, the damage increase is quite good, as it doubles the damage of every melee hit (shown as two instances of damage). It’s very much the star of the Acid Melee build for this reason.
Components
For the sake of fairness, I’ll tackle these in Alphabetical order, by Base Component Name, with one exception.. Lots to talk about here, so I’ll try to be brief here.
Amphibious Component
 Amphibious Component
 Effect: +20% Acid Damage and Resistance, +20% Oxygen Capacity.
Masterwork – Way of Integration: On Gear Hit-streak (2), +30% to all damage for 10 seconds.
The base stats offered by the component are kind of lackluster. While Venom Spray does have potential as a damage ability, it’s not always an ability you want to stack with damage, while Venom Bomb never stacks damage for itself because of the low DPS it offers.
Very few enemies proc Acid, being limited to Mordent Elementals, Scar Destroyers, Skorpion Digesters and Skorpion Workers. Meanwhile Oxygen capacity rarely is useful, due to the capacity already being high enough, and there being very few reasons to swim outside of some mild exploration in Freeplay.
The Masterwork makes this an easy pickup in the early stages of quite a few builds. 30% is a solid damage boost, and is comparable to the current max roll for a Epic-tier javelin-wide Damage inscription. So it gives a decent bump to damage regardless of the build, but ends up being quite good in caster type builds, or any build that debuffs with Target Beacon and Venom Bomb. It’s also one of the few components that can boost the damage of your Ultimate.
Assault and Strike System Augments
 Assault and
  Strike System Augments
Assault System Augment
- Effect:+10% base Assault System damage.
- Masterwork – Way of the Swift: Using Q ability boosts E ability damage by 60% for 10 seconds.
Strike System Augment
- Effect: +10% base Strike System damage.
- Masterwork – Talisman of Power: Using E ability boosts Q ability damage by 60% for 10 seconds.
Grouping these two together, They’re similar in every regard. Pretty basic outside of the Masterworks. The give a pretty small buff overall, usually resulting in a few hundred damage, since it scales off base damage.
These bonuses absolutely need to be Multiplicative rather than additive, or at least apply to total damage, rather than base. 10% is an abysmal damage bonus and doesn’t make it a compelling choice in endgame for this effect, and they typically only would be used for the Masterwork perk instead.
I still personally use Way of the Swift more, as the [E] Ability slot is generally stronger and usually offers AoE damage as part of their masterworks (Sudden Death) or a secondary effect (Detonating Strike). Talisman of Power could be useful if you can run a strong Ruthless Stalker or Absolute Zero as both can hit quite hard.
Battle Inscription
 Battle Inscription
- Effect: +25% Base Weapon Damage.
- Masterwork – Elusive Talisman: Dashing 3 Times refills Equipped Weapon Magazine.
This is both a solid component and Masterwork. The MW heavily enables a lot of Weapon based builds, due to triple dashing providing free ammo while being a slightly faster reload for a lot of weapons.
Blade Inscription
 Blade Inscription
- Effect: +10% Melee Damage.
- Masterwork – Way of Resolve: On Dash, +40% Melee Damage for 10 seconds.
Honestly, the Masterwork is the only saving grace for this Component. As far as melee goes, the way Interceptor’s Melee damage is split between the hits of the combos.. This just isn’t enough as a base component. The Masterwork is very good though, encouraging mobility in melee combat. In all situations, Double Edged Component is just better in terms of the output it can provide.
The base effect of this component is now outmatched by Melee Inscription Universal Component in every way outside of the MW perk. It can roll additional damage on top of having a higher base increase.
Conductivity Augment
 Conductivity Augment
- Effect: +20% Electric Damage, Electric Resistance and Gear Recharge speed.
- Masterwork – Conductive Lattice: On melee hit, detonate an electrical explosion once every 2 seconds
The base stats this component offers are great. Interceptor has two strong Electric abilities, Spark Dash and Detonating Strike. Both which can work together and bring a solid build together. The Gear Recharge Speed is a solid Bonus as well for most builds. With both abilities being considered melee and able to proc this component’s effect, it adds solid burst to both of them.
The Masterwork was heavily nerfed in 1.0.4, previously requiring 3 melee hits (A single melee combo, if all attacks connect) to every 2 seconds. This heavily nerfed the DPS of the augment, making it just as worthwhile as the base one. It’s still a solid burst for Cariff’s Talon and Sudden Death to get, but outside of that very situational due to stats.
Would personally love to see this explosion double-dip and scale with melee/elemental modifiers as well as be considered a melee kill for the combo buff. That’s all it needs really to have the Masterwork at least be useful.
Diverted Energy Circuit
 Diverted Energy Circuit
- Effect: +35% maximum shields, – 35% maximum Armor
- Masterwork – Survival Algorithm: Clearing a negative status recharges shields by 40%, can occur once every 10 seconds.
This component has potential, should you be able to stack enough Shield Delay inscriptions. Without doing so, it can be rough to use. Best to stick to Armor based builds until then.
The masterwork effect will proc any time a status ends, naturally or by Rally Cry. It gives it some potential use if you wanted to run a shield based Interceptor over an armor based one.
The 1.0.4 buffs were okay, the cooldown on it is still kind of unappealing for the effect. It’s still buffed to be stronger, but still not entirely viable unless stacking Shield Max and Shield Delay inscriptions.
Double-Edged Inscription
 Double-Edged Inscription
- Effect: +35% Incoming and outgoing damage
- Masterwork – Vengeance Matrix: Base effect altered to +50% Damage dealt, +25% damage taken. At low HP: Damage is reduced by 50% for 10 seconds.
This component is a pretty big powerhouse in early Endgame builds, before you get the inscriptions you need to make certain things work. It comes with a bit of a penalty, but the damage increase is quite substantial.
The Masterwork takes this to a higher level by increasing the bonus and reducing the penalty. On top of that, it even offsets the penalty with its effect, reducing the damage you take for a bit when you hit low Armor.
Gunner’s Inscription
 Gunner’s Inscription
- Effect: +30% Magazine size, +50% Ammo Drop Rate
- Masterwork – Way of Salvage: on Ammo Pickup, weapon damage is increased by 40% for 10 seconds
On its own, This component isn’t the greatest. While it does have a nice combination of stats, both of these are also common inscriptions seen on most other components and easier to get more of in other ways.
The Masterwork bonus does however make it worth consideration of early Endgame Weapons Builds. It’s a decent bonus, while offering you okay buffs to your weapons and ammo economy.
Interceptor Combo Augment
 Interceptor Combo Augment
- Effect: +40% Aura Pulse Frequency
- Masterwork – Way of the Bold: Base effect altered to 40% pulse strength. On Melee Kill: restores 40% armor
With the current state of Auras for Interceptor, the effects of the base and Masterwork variants of this component are a bit lackluster. Having it apply status effects faster can be good, but also very niche. They certainly won’t be providing much damage and thus are relegated to being more crowd control focused, mainly being the Ice Aura. While the Fira aura has some damage potential, access to it is quite limited.
The Masterwork effect can make this a great component for a melee build, offering a good amount of much needed sustain/recovery to what is often a high-risk build.
Assault Systems
Overall this ability slot tends to be utility. Some of it comes with burst, some are just disappointing. Your better primers, being Cryo Glaive and Venom Bomb are in this slot. But everything here is pretty solid in general, one skill aside.
Cluster Mines
 Cluster Mines
- Ability: Medium damage, Low AoE proximity mine cluster
- Masterwork – Bitter Harvest: Cluster Mine gains an extra charge.
- Cataclysm – Tesilar Trap: Deals electric damage and always procs Electric status.
Cluster Mines as an ability are just unimpressive. This is largely due to their long arming time. Otherwise, they can do a fairly good amount of damage. Unfortunately the only use I’ve found for them is to toss them at the various spawns/gates in missions or strongholds. You can also throw them at the feet of slower enemies, but anything that’s not a slow moving enemy will just move away before they can detonate usually.
Both the Masterwork and Cataclysm variants are just as lack luster. The Masterwork version needs a better passive, I think drastically decreasing the Arm time (or increasing the arming speed, which ever wording makes more sense) would go much farther than a second charge would.
I think the Cataclysm version is a step in the right direction, but would honestly have also liked to see them do something a little more than just proc status. Perhaps covering a wider area and dealing an Electric across the entire area it covers, and above it (so it’s not useless against the flying enemies, and can be useful for taking down shielded enemies.)
Cryo Glaive
 Cryo Glaive
- Ability: Low damage freezing Glaives.
- Masterwork – Absolute Zero: Hitting an enemy detonates an ice explosion. (~2675 base damage, approx.)
This is both a good ability and great masterwork. The base ability offers solid crowd control and a source for Ice Aura which offers equal crowd control potential.
The masterwork helps the ability deal some damage, though not impressive amounts. The Ice explosion is very helpful, priming several enemies at once however, assuming they’re in the rather small AoE.
While this ability does have the potential to do some damage, the recent changes to proc effects leaves this is a questionable state, being a bit harder to scale compared to before. Since it no longer scales with Gear damage, and only +Elemental Dmg or +Dmg inscriptions, that removed a lot of potential it had for damage.
Searching Glaive
 Searching Glaive
- Ability: High single target Physical damage
- Masterwork – Ruthless Stalker: Hitting an enemy increases weapon damage by 110% for 20 seconds.
This is another solid ability and masterwork. It’s supplemental to a gunner playstyle, while itself offering solid burst damage. Can be a nice alternative to Serpent’s Veil (Venom Bomb) if you’d rather have the potential burst damage, or your weapon is seriously lacking damage to not benefit as much from Acid.
Spark Dash
 Spark Dash
- Ability: Brief charge, followed by a medium damage electric dash that provides mobility.
- Masterwork – Raneri’s Charge: Killing an enemy recharges this ability
This is one of the Interceptor’s better electric abilities. While the slight windup time can often get you injured or killed when used inappropriately, it’s quite the powerful ability in terms of damage and mobility.
The Masterwork allows for it to be a decent opener or finisher. It allows it to recharge instantly regardless of what kills it. This makes it exceptionally versatile, while offering high damage and high mobility.
Venom Bomb
 Venom Bomb
- Ability: Medium Aoe, low damage Acid DoT
- Masterwork – Serpent’s Veil: On melee hit, increases acid damage by 200% for 10 seconds.
Overall a good primer ability. Ranged, deploys on impact, fast projectile, applies a very good status. One of my most used abilities in all honesty. Works really well in a melee build, even more so with the masterwork.
The Acid status really makes it shine in terms of damage and team support over the Masterwork version of Searching Glaive.
The masterwork really only serves to boost Venom Spray and Deathstalker Blades. It’s potent enough for melee, but really needs a ton of gear damage to work for Venom Spray.
Strike Systems
These skills are mostly a collection of high damage, low range abilities. Lots of AoE here as well, but mostly melee focused and melee ranged skills.
Detonating Strike
 Detonating Strike
- Effect: Medium single target/AoE hit, High electric damage AoE explosion
- Masterwork – Cariff’s Talon: Instantly restores 50% health after killing an enemy.
This is a really solid ability and masterwork. It’s a really good choice for an elemental melee setup, even more so as a masterwork. It’s considered melee as well, at least the initial hit so it will scale off melee damage, as well as gear and elemental damage..
The fact you can use it as an aerial melee and potentially hit multiple enemies makes it quite potent. Because each can be primed by it as far as I’ve noticed, making each explode for huge damage.
Plasma Star
 Plasma Star
- Effect: Medium Single target damage aimable projectile.
- Masterwork – Sanadeen’s Respite: Hitting a weak point restores 35% Shields.
Plasma Star is quite a solid option for this slot. This ability has reasonable damage potential, especially against armored targets thanks to the Armorbreaker damage type. The fact that it can also crit can definitely contribute to a very high skill cap build around it, with the right rolls. However, there are abilities that are more versatile that overshadow it.
The Masterwork doesn’t help in this regard either. Interceptor rarely build shields, let alone enough to make the 35% restore impactful. I still wish it rewarded the high skill factor more, or at least made them “true” plasma stars, allowing them to proc Fire status, either on weak point hit, or multiple weak point hits. That would also allow the Interceptor to have easier access to the Fire aura, without locking a weapon slot to Ralner’s Blaze or relying on teammates as much.
I really dislike that this ability requires all charges to refill before any can be cast if all charges are expended. It’s weird, as no other ability with multiple charges works quite this way.
Tempest Strike
 Tempest Strike
- Effect: High single target Physical melee strike
- Masterwork – Sudden Death: Triggers a fire explosion when hitting an enemy with this skill.
This is a go to skill for a Physical or Elemental-based Melee setup. It’s a very strong skill in general, being very quick while also being able to be used as an AoE via aerial melee.
The masterwork give it a more reliable AoE and extra burst to armored targets. Sadly this explosion does not prime, which would help with Inteceptor’s lack of access to fire status. This however would overload the ability
Wraith Strike
 Wraith Strike
- Effect: Ranged projection, multi target attack for medium physical damage, applies Aura effect
- Masterwork – Shadow Claw: Creates 2 Projections instead of one.
- Cataclysm – Specter’s Flash: Can Detonate Combos
The Base ability is quite good, between it being a multi target attack, and being able to spread your aura as a status that can be comboed. It’s a very versatile and reliable ability.
The Masterwork essentially doubles the damage output, or has the ability to prime more targets than usual. It’s quite powerful in its own regard, but still outshined by it’s Cataclysm counterpart.
The Cataclysm variant is meta for a lot of builds, because it functions as both a reliable primer and a reliable detonator. With multiple charges, this ability alone can keep your aura active almost indefinitely, and quickly generate a lot of ultimate charge.
Venom Spray
 Venom Spray
- Effect: Low range cone of high Acid damage.
- Masterwork – Viper’s Bite: Hits with this ability gives 7 Ultimate Charge (~5% charge).
This ability can be quite powerful on its own as a damage tool. While it can prime Acid, it won’t do so all too often. The ability does also appear to have a high base force value, as it does stagger enemies quite often, making it a decent choice for melee play with its shorter range.
The masterwork can be very powerful for an ultimate centric build. With additional charges you can build ultimate quickly, and it also allows you to build ultimate charge on bosses a bit more effectively, compared to combos which anyone can detonate or relying on adds.
Builds
We’re finally going back to the builds now that we’ve covered the abilities, components, and what they all do. Will also try to keep these brief, but not nearly as much as the abilities section. I’ve tried a handful of builds so there’s a mix of successful and unsuccessful builds here. The ones that aren’t so successful will be at the end with priority given to the more reliable meta builds.
Note: All builds mentioned below would be for the start of endgame (Level 30 and your first Masterwork/Legendary items. Universal components tend to take over in the very late game, letting you stack high amount of damage or other global inscriptions. The ones you’re looking to pursue will be listed with each build.
Acid Melee

- Weapons:
 Unending Battle
 Any Stat-stick (DPS or Defensive) or Boss DPS weapon
- Deathstalker Blades
- Components:
- Way of the Bold
- Way of Resolve
- Vengeance Matrix
- Way of Integration
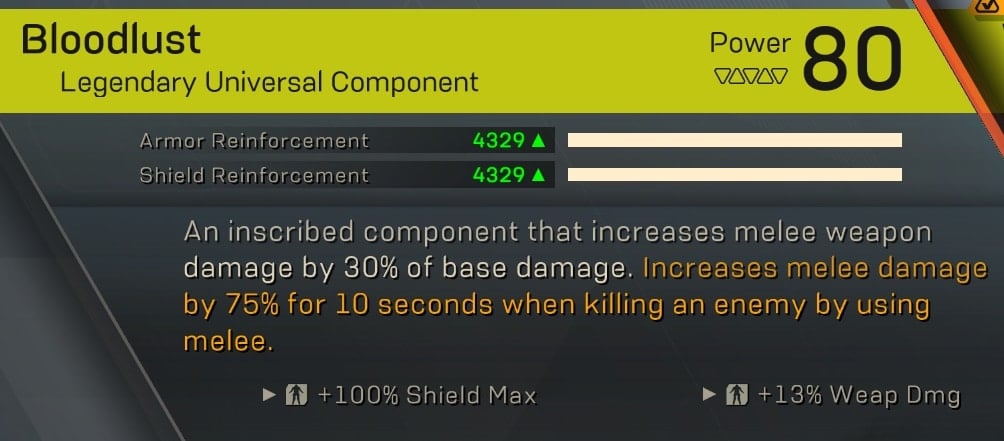
- Bloodlust
- Softened Blows / Symbiotic Surge
- Assault System:
- Serpent’s Veil
- Strike System:
- Sudden Death or Specter’s Flash
- Support System:
- Slayer’s Furor
- Ideal Inscriptions:
 Melee Damage
- All Damage (%Dmg)
- Weapon Damage
- Armor
- Gear Recharge
- Repair/Resupply Drop Rate
- Pickup Radius
 Melee Damage
This build tends to be the easiest to start with, as there’s a lot of components that support it on a basic level while also having very high scaling potential with Universal Components and inscriptions.
The whole playstyle of this build is as the name suggests, getting right in the face of the enemies and meleeing them. Toss your Target Beacon (Slayer’s Furor) and Venom Bomb (Serpent’s Veil) into a pack of enemies and then tearing through them with your Deathstalker Blades quickly.
This cycle of debuffing then jumping in setups up all your buffs and and absolutely prepares you to deal a one of damage. Landing both debuffs will trigger Way of Integration, then dashing in will trigger Way of Resolve and Close Encounter’s dash related buffs. The instant something dies to melee, you get Bloodlust. Picking up Health packs (with Symbiotic Surge) will give you another damage boost. Then you have Way of the Bold, Vengeance Matrix and maybe Softened Blows to help you out defensively. As you take damage.
As far as Inscriptions, Melee Damage is your highest Priority. It can roll higher than All Damage or Weapon Damage rolls, and thus provide more damage. These others will still boost your damage, but Melee Damage should take priority over them. As you get Melee rolls on Universals, you can start to replace certain components. Start with Way of Resolve or Vengeance Matrix as soon as you get any roll above 50%.
Eventually, you’ll want Bloodlust, Softened Blows and Symbiotic Surge all with Melee damage inscriptions at the very least. Once you get further into endgame, the base component stops matter outside of those three, and you will use things just for their inscriptions.
For Melee Weapon Inscriptions, Deathstalker Blades matters the most. Ideally you’re aiming for 300% ![]() Weapon damage inscriptions on it as a Legendary. With the other stats being some combination of Repair/Resupply and Pickup radius. Maybe if you’re lucky you can also get a bit of extra weapon damage.
Weapon damage inscriptions on it as a Legendary. With the other stats being some combination of Repair/Resupply and Pickup radius. Maybe if you’re lucky you can also get a bit of extra weapon damage.
For your Ranged Weapon inscriptions, Close Encounter is a Stat-stick while the other can be a stat-stick or Boss DPS weapon. Close Encounter will be after javelin-wide Weapon damage or All Damage inscriptions. I personally like my Other weapon as an Armor stat-stick, getting 150%+ total armor on a single slot is very nice as you don’t need too much more than that to stay alive easily once you get used to the playstyle.
For gear inscriptions, Serpent’s Veil is a stat-stick. Go for All Dmg or Weapon Dmg as javelin-wide rolls. Gear Charges, Gear Recharge are also acceptable here. For your second ability (Sudden Death/Specter’s Flash), you want ![]() 250% damage and
250% damage and ![]() 100% charges ideally. These serve as extra burst, so it’s good to have extra charges as they are your main Detonator. Your Support slot, you want to get Javelin-wide Gear Recharge here along with extra charge(s).
100% charges ideally. These serve as extra burst, so it’s good to have extra charges as they are your main Detonator. Your Support slot, you want to get Javelin-wide Gear Recharge here along with extra charge(s).
Ultimate Build

- Weapons:
- Any Boss DPS weapon
- Any stat-stick gun
- Stat-stick Blades of Warding
- Components:
- Way of Integration
- Vengeance Matrix
- Emergency Power
- Elusive Talisman
- Softened Blows
- Symbiotic Surge
- Assault System:
- Serpent’s Veil
- Strike System:
- Viper’s Bite or Specter’s Flash
- Support System:
- Slayer’s Furor
- Ideal Inscriptions:
- Ultimate Damage
- All Damage
- Weapon Damage
- Repair Drop Rate
- Pickup Radius
- Armor
- Gear Recharge
- Ultimate Speed
This build focuses on your Ultimate as your primary damage, with a weapon serving a secondary means of doing damage, especially for bosses when your Ultimate is down. This generally means you should be using your Ultimate when it’s up.
The main goal is to use combos with Specter’s Flash or the charge of Viper’s Bite to maintain a high up time, with Emergency Power giving you a full ultimate in critical situations. Any time in between ultimate uses should be spent rebuilding and using the DPS weapon to kill any remaining priority targets. Make sure you keep targets debuffed with both Acid and Target Beacon, as these will make a lot of your early damage outside of your Gear Score.
In this build having Blades of Warding as a stat stick really helps. It pairs well with Softened Blows to prevent wasting Emergency Power’s recharge effect earlier than needed. It also works the same way with Vengeance Matrix, pausing health loss yet again. This let you get away with using much less armor and instead of focusing on damage.
Like the Acid Melee Build, Way of Integration will proc as you toss out Serpent’s Veil and Slayer’s Furor. This time though, it should be followed up by casting your ultimate where possible or needed Elusive Talisman serves as a faster reload for your DPS weapon, as most of the stronger weapons have a slow reload. Finally, Emergency Power,Symbiotic Surge and Vengeance Matrix are your main offensive Components.
This build is incredibly Inscription and Gear Score reliant and will not put out great damage until 900+ Gear score with at least 100% Ultimate Damage between inscriptions and Emergency Power’s 30% boost. As such it is not a great build to start with in the endgame unless you have access to these.
For inscriptions, you’re mainly going to prioritize Ultimate damage over everything else. All Damage and Weapon Damage are acceptable on things like weapons where Ultimate damage cannot appear. For components that cannot roll ultimate damage, you want the usual Repair Drop Rate and Pickup Radius to help out Symbiotic Surge. Ultimate Speed is an option, but should just be something you take if nothing else is really available. You build ultimate too fast for it to be super helpful. You can take Armor too, but the high uptime on your ultimate generally makes it less of a requirement.
Your choice of Boss DPS Weapon is preference, but Riza’s Ripper tends to be my go-to due to rolls. Gravedigger, Rainmaker, Shard Storm as well as classics like Truth of Tarsis all have potential as well, it’s all perference. Regardless of the weapon your goal is 300%+ ![]() Weapon Damage for it’s primary rolls.
Weapon Damage for it’s primary rolls.
Weapon Build

- Weapons:
- DPS Weapon
- Stat-stick Close Encounter
- Stat-stick Blades of Warding or DPS Deathstalker Blades
- Components:
- Elusive Talisman
- Vengeance Matrix
- Way of Salvage
- Way of Integration
- Symbiotic Surge
- Softened Blows
- Assault System:
- Serpent’s Veil
- Strike System:
- Specter’s Flash
- Support System:
- Slayer’s Furor
- Ideal Inscriptions:
- All Damage
- Weapon Damage
- Weak Point Damage*
- Armor
- Gear Recharge
- Repair Drop Rate
- Pickup Radius
This is a very versatile build that works with nearly any weapon you want to use for it, however there are weapons that tend to work better than others. Most of these are the ones popular for bossing. It’s not heavily demanding on Inscriptions, but the more damage you can get the better. Your melee can even do damage in this build, if you’d rather run a DPS version of Deathstalker Blades over a stat-stick version of Blades of Warding.*Some weapons can even benefit more from Weak Point Damage past a certain point of stacking damage.
The build is flexible, but what are my go-to weapons for this build? Personally, I like to run a Boss DPS weapon and an AoE weapon. I typically run Shard Storm or Jarra’s Wrath alongside either Riza’s Ripper or Wyvern Blitz. Jarra’s Wrath and Shard storm are such power houses for clearing weak enemies, while Riza’s Ripper and weapons like Wyvern Blitz can deal so much damage to high HP targets that shooting a weaker enemy would be a waste.
Starting out it’s definitely better to run one of the mentioned weapons, or your weapon of choice alongside a stat-stick Close Encounter. Close Encounter offers a very good boost, and when paired with Elusive Talisman you can reload and trigger the buff at the same time. Fire your Primary weapon or empty the magazine, depending on the weapon; swap to Close Encounter, then dash to reload and buff up. Generally depending on the weapon you might have to do this every reload, every other, or reload early so you can maintain the buff.
As far as components go, Way of Salvage is kind of wasted here and should be replaced first. However you can still trigger it. Elusive Talisman just makes it unreliable as a buff, since your ammo will nearly always be full if you’re making good use of Elusive Talisman. You could replace it with any of the Universal Weapon components, Emergency Power, or whatever rolls decent damage inscriptions.
As with the other builds, Way of Integration procs when you’re debuffing enemies with Serpent’s Veil and Slayer’s Furor. Elusive Talisman is a small damage boost, but removes all ammo concerns, and with most of the stronger weapons having limited ammo, this makes it incredibly valuable in this build. Symbiotic Surge and Vengeance Matrix round out the usual trio of components used for damage. Softened Blows rounds out the build and gives you a solid defensive layer.
All Damage and Weapon Damage are prioritized due to their broad nature, allowing them to boost weapons of all kinds. Though your main weapon(s) will still want to prioritize 300% ![]() Weapon damage themselves still. Depending on the weapon, Weak point Damage can be incredibly powerful; though this typically stands on the most on Riza’s Ripper, Truth of Tarsis and Wyvern Blitz.
Weapon damage themselves still. Depending on the weapon, Weak point Damage can be incredibly powerful; though this typically stands on the most on Riza’s Ripper, Truth of Tarsis and Wyvern Blitz.
Fire/Electric Aura Build

- Weapons:
- Stat-stick Ralner’s Blaze
- Another Stat-stick gun (probably some kind of shotgun)
- Stat-stick Blades of Warding
- Stat-stick
- Components:
- Elusive Talisman
- Vengeance Matrix
- Feedback Loop
- Emergency Power
- Symbiotic Surge
- Softened Blows
- Assault System:
- Raneri’s Charge (Or Serpent’s Veil, if you want accidental Acid Auras or to min-max and get acid debuff on things.)
- Strike System:
- Cariff’s Talon or Specter’s Flash
- Support System:
- Slayer’s Furor
- Ideal Inscriptions:
- All Damage
- Elemental Damage
- Gear Recharge
- Armor
- Repair Drop Rate
- Pickup Radius
This build is extremely inscription reliant. To the point that you will end up dropping Vengeance Matrix for another Universal Component. You need to stack a ton of All Damage or Elemental Damage to be able to scale your Fire procs to high levels. Yes, even on Ralner’s itself. Even going as far as only using Universals, though Elusive Talisman remains useful. Highly recommend going for a good Acid Slugs component and making your second weapon a Stat-stick shotgun because it’s the more reliable way to apply acid, without accidentally detonating something early and give the most control of when you use the Acid Aura, if ever.
This build is not the highest DPS, but it is possible to push it to a fairly reasonable amount, though nothing incredible, but can break into well over 50k a second if you have the components to support it.
It makes use of both the Fire and Electric Aura, each with a different purpose. Electric being your high Aoe Damage, due to the Electric DoT being applied rapidly and chaining to nearby targets, then the chains just overlap and you can see everything ticking for 40-50k per second. Fire is your Anti-Armor or High single target aura. This is because Electric simply does very little damage when there’s just 1-2 enemies, and most of the ones that survive the AoE tend to be armored The Fire Aura will also stack it’s DoT on top of itself too, occasionally doubling it’s damage letting it easily reach higher numbers.
This build utilizes the Blades of Warding as both a defensive layer and a reliable detonator. Since both gear slots are taken up by Priming gear (or in the case of Raneri’s, a sluggish detonator) we need to shove these one for a detonator, as weapon detonations will not provide the Auras. Cariff’s In particular has a unique synergy with this weapon, as explosions from an enemy tagged by Cariff’s dying will fully stack BoW passive if there’s enough things in range.
As far as Inscriptions, you already know what to look for; All Damage and Elemental Damage. In this build, either ability can be your burst damage, but your choice of Wraith Strike’s variants tends to be better as both are high damage and also spread the status to prime. Raneri’s becomes a stat-stick, used as a gap closer and detonator to start off fights.
About the Author
I (Vulkk) would like to thank Ruby for this wonderful content addition to the Anthem category here on VULKK.com. This is as detailed guide as it can possible be.
I hope you have found it useful and interesting! I hope it has helped you find your path and keep your progress as an Interceptor Freelancer steady and in a firm direction knowing what you are aiming for in terms of gear and gameplay mechanics.
I would like to thank Ruby for his continuous dedication to VULKK.com and to Anthem. His guides have been an extraordinary addition and a resource for the community.
You can check out more of his content over on his YouTube channel.
If you wish to become a guest-author on VULKK.com and produce an Anthem guide covering ground that has not yet been explored (like other Javelin guides), contact me at info@vulkk.com or anywhere you see/follow/know me.
Check out these as well: