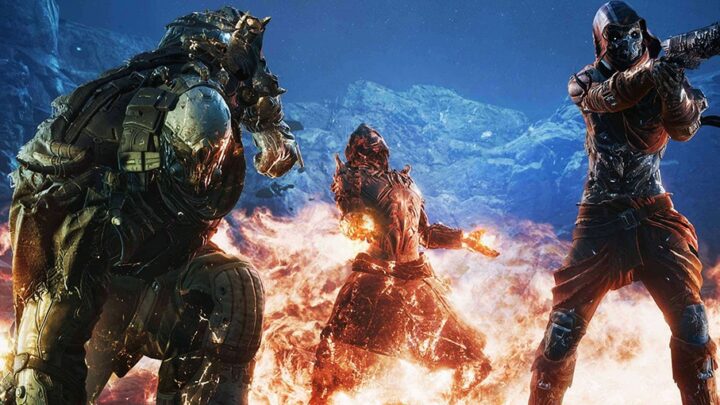
This is a dedicated Outriders Devastator Guide. We’ll be covering everything from skills to builds, and all in between. The guide is designed to help you get started, show you the basics, teach out how to play the class to its highest potential and what are the best and most useful builds for the early, midgame and endgame!
Table of contents
What is the Devastator?
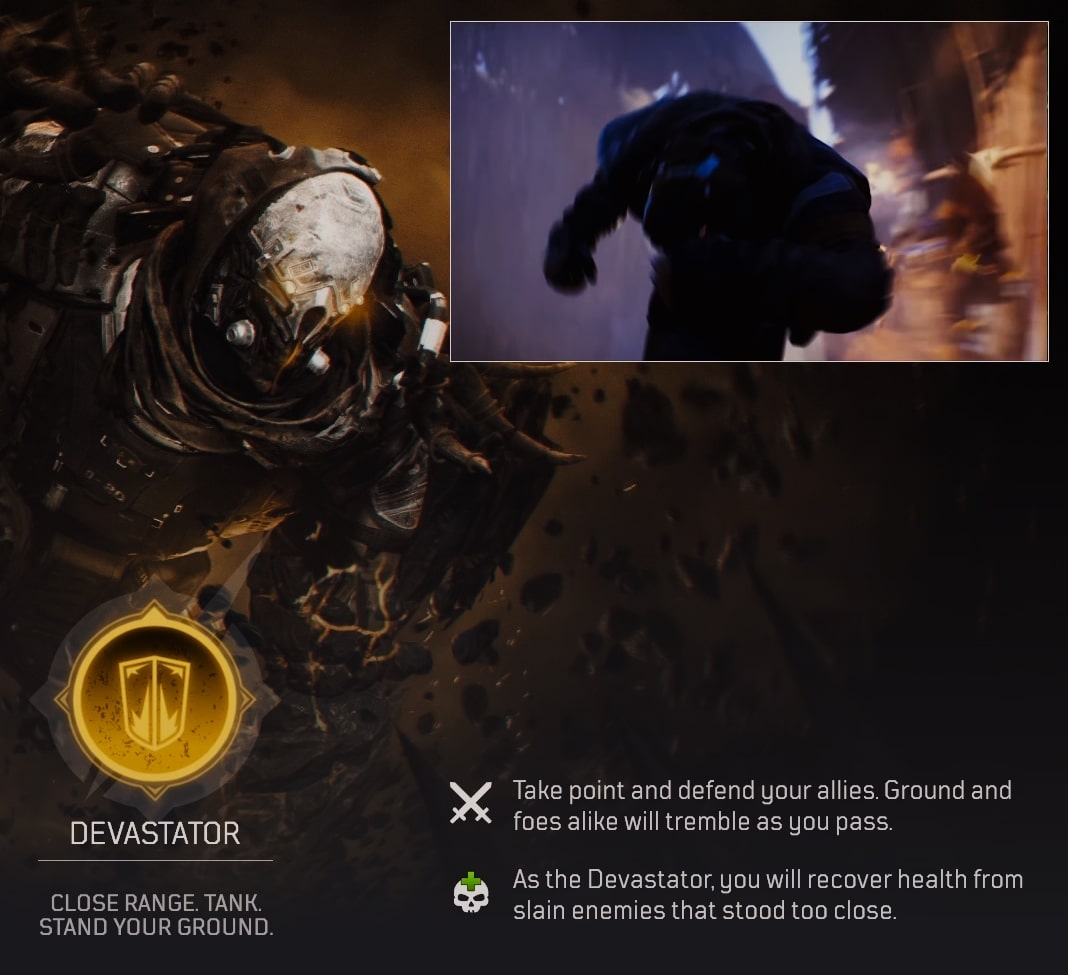
The Devastator is a walking tank, an Altered that controls earthen abilities. They can shrug off all but the hardest of hits with their defensive abilities .Despite their tank-like appearance they can just as easily be a train, plowing their way through hordes of foes. With a good mix of offensive and defensive abilities, their path lies open ahead of them.
We’ll be covering those build options later in the guide. For now we need to start by covering the basics. We’ll talk Skills and Mods, then hop into some of the build options for the Devastator.
Devastator Skills Overview
Like all other classes in Outriders, the Devastator has 8 Skills. Even though these were covered previously in our Outriders Class and Role Guide, we’ll be covering them again and making note of their ability tags, which determine how the passive tree affects them and their usage in combat.

Earthquake
Releases a shock wave, dealing Seismic damage and interrupting targets in front of you.
Tags: Seismic, Interrupt | Earned at level 2.
Notes: Best used for Mobbing or interrupting boss skills, Strongest with Seismic Shifter branch of the Skill Tree

Golem
The Devastator fortifies themselves, reducing incoming damage by 65% for 8 seconds.
Tags: Protection | Earned at level 3.
Notes: Used for damage mitigation, Works well with Any of the Skill Tree branches.

Gravity Leap
The Devastator leaps into the air and hovers for a few seconds. You can optionally target an enemy and recast to slam down on them to dealing AoE Seismic damage to the targets and nearby Targets, interrupting them.
Tags: Kinetic, Interrupt |Earned at level 4.
Notes: Best used for initiating fights with large packs, Strongest with the Vanquisher or Warden branches of the Skill Tree.

Reflect Bullets
The Devastator projects a force field, stopping bullets from hitting any ally behind it and preventing damage. On Recast or expiration, you will launch the stopped projectiles at nearby enemies.
Tags: Protection | Earned at level 6.
Notes: Best used when surrounded by enemies that attack from range, Strongest with Seismic Shifter or Warden branches of the Skill Tree.

Impale
The Devastator Impales a few nearby enemies, dealing damage and interrupting them. On a Lethal Hit, enemies are speared by a Stone spike, granting Bonus Armor and Health Regeneration for 9 seconds.
Tags: Seismic, Interrupt | Earned at level 9.
Notes: Best used to interrupt boss skills or execute low health enemies, Strongest with Seismic Shifter branch of the Skill Tree.

Tremor
The Devastator releases a series of explosion around them in a medium range. Each explosion deals damage and drains health from enemies.
Tags: Seismic | Earned at level 13.
Notes: Best used when surrounded by enemies, Strongest with Seismic Shifter branch of the Skill Tree.

Boulderdash
The Devastator charges forward, dealing damage and interrupting all enemies in their path. At the end of the charge, you smash the ground dealing damage in a small radius.
Tags: Kinetic, Interrupt | Earned at level 17.
Notes: Best used for encounter initiation, Strongest with Vanquisher or Warden branches of the Skill Tree.
Endless Mass
Encase a target in stone, inflicting Bleed and pulling enemies in a small radius towards the created obelisk. The obelisk will then explode dealing damage to enemies in the radius.
Tags: Kinetic, Bleed | Earned at level 22.
Notes: Best used for grouping enemies for focused bursts of damage, works well with any branch of the Skill Tree.
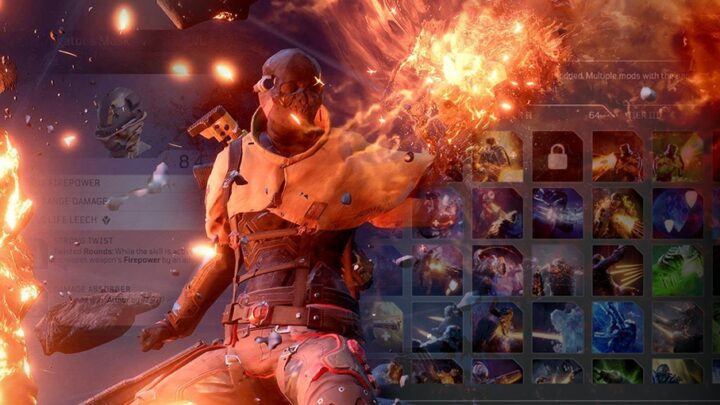
Devastator Skill Mods Overview
Mods help this class diverge from it’s inherently tanky nature. If desired, they can also be used to lean even further into its ability to tank and become an absolute juggernaut on the battlefield. Regardless of the path you choose, the Devastator is up for the job.
Note: The current information on Tiers and Drop Info below may be incomplete and will be updated as information becomes available.
 Earthquake
Earthquake being a basic damage skill has mods that reflect that, being mostly damage increases. There is some utility in bonus armor and a team heal, but very limited. The Armor mod has potential to be useful for the Warden branch of the Skill Tree.
| Name | Tier | Effect |
|---|---|---|
| Armor Boost | I | Hitting an enemy increases your armor for a short time, can stack up to 10 times. Found on: Armor, Rare+ |
| Asunder | III? | Earthquake Permanently reduces the Armor of the enemies that are hit. Found on: Armor, Rare+ |
| Blood Shock | I | Earthquake will inflict Bleed on enemies it hits. Found on: Armor, Rare+ |
| Earth’s Legacy | I | Increases Earthquake’s Range. Found on: Armor, Rare+ |
| Extra Quake | I | Allows a second cast of Earthquake before starting its cooldown period. Found on: Armor, Rare+ |
| Second Quake | III | Allows a second cast of Earthquake before starting its cooldown period. Found on: Legendary Armor, Seimic Commander’s Boots |
| Ground Crush | I | Increases Earthquake’s base damage. Found on: Armor, Rare+ |
| Heal Per Kill | I | Each enemy killed by Earthquake will restore 10% Health to all allies in a 20 meter radius. Found on: Armor, Rare+ |
| Panzer Drain | I | Hitting enemies with Earthquake will steal a portion of their Armor. Bonus Armor lasts for 5 Seconds. Found on: Armor, Rare+ |
Golem
Golem may not have the most diverse set of mods, but it does have potential as a strong support skill. With access to high duration and the ability to extend it through kills, it’s best to not sleep on it.
| Name | Tier | Effect |
|---|---|---|
| Bleeding Impulse | I | Golem spawns radial pulses that inflict Bleed in a small radius. Pulses occur every 2 seconds. Found on: Armor, Rare+ |
| Golem of Death | I | Each kill while Golem is active extends its duration by 1.5 seconds. Found on: Armor, Rare+ |
| Golem Squad | III | Increases Golem’s duration and applies a shorter duration of the skill on allies. Found on: Legendary Armor, Statue’s Legs |
| Made of Marble | III | While Golem is active, incoming bullets have a chance of be reflected back at the enemy. Found on: Legendary Armor, Statue’s Feet |
| Perseverance | I | Increases Golem’s duration by 50%. Found on: Armor, Rare+ |
| Resistance | I | Golem increases your Resistance by 33% while active. Found on: Armor, Rare+ |
Gravity Leap
Gravity Leap may have the shortest list of mods, but has a diverse enough set to allow it to be strong in several possible builds. Bleed, Damage, Debuff and Self Healing effects all make it a pretty well-rounded skill.
| Name | Tier | Effect |
|---|---|---|
| Bloody Crush | I | Gravity Leap inflicts Bleed on all enemies hit. Found on: Armor, Rare+ |
| Despair | III | Enemies within the damage radius are debuff, having all incoming Anomaly Damage multiplied for a duration. Found on: Legendary Armor, Marshal’s Footgear |
| Double Jump | III | Allows a second cast of Gravity Leap before triggering its cooldown. Found on: Legendary Armor, Marshal’s Gauntlets |
| Human Comet | I | Increases Gravity Leap’s damage. Found on: Armor, Rare+ |
| Life Absorption | I | Heal for 100% of the damage dealt by Gravity Leap. Effect doubled to 200% if the target dies. Found on: Armor, Rare+ |
Reflect Bullets
While normally a defensive skill, the mods for Reflect Bullets make it a very capable AoE clearing skill as well.
| Name | Tier | Effect |
|---|---|---|
| Auto Reflect | I | Can fight while Reflect Bullets is active, however damage mitigation is reduced to 50% and cannot be ended manually. Found on: Armor, Rare+ |
| Blood Primer | I | Reflected bullets inflict Bleed on enemies. Found on: Armor, Rare+ |
| Bullet Acceleration | I | Increases the damage of reflected bullets. Found on: Armor, Rare+ |
| Extra Time | I | Increases the duration of Reflect Bullets. Found on: Armor, Rare+ |
| Increased Duration | I | Increases the duration of Reflect Bullets. Found on: Armor, Rare+ |
| Hollow Point | I | Reflected bullets apply Vulnerability on hit. Found on: Armor, Rare+ |
| The Strongest First | I | The enemy with the highest health takes increased damage. Found on: Armor, Rare+ |
Impale
Impale is much like Earthquake, as the majority of its mods increase damage. There’s a small boost to its utility in some Health Regeneration, but otherwise becomes a damage powerhouse.
| Name | Tier | Effect |
|---|---|---|
| Impaler | I | Impale can be activated an additional time before trigger its cooldown. Found on: Armor, Rare+ |
| Ultimate Impaler | III | Impale can be activated two more times before triggering its cooldown. Found on: Armor, Rare+ |
| Palisade | III | Increases Impales target count. Found on: Armor, Rare+ |
| Restoration | I | Impaled enemies generate additional Health Regeneration for all allies. Found on: Armor, Rare+ |
| Rivers of Blood | I | Increases Impale’s damage against targets with Bleed. Found on: Armor, Rare+ |
| Sharpened Spike | I | Increases Impale’s damage. Found on: Armor, Rare+ |
| Spike Forest | I | Increases Impales target count. Found on: Armor, Rare+ |
| Vlad’s Grasp | I | Increases the range of Impale. Found on: Armor, Rare+ |
Tremor
Tremor seems to be focused on a mix of both damage and sustain, with a little bit of utility added in. There’s potential for it to be used in some builds though, as a couple of its mods are found on Legendary Gear.
| Name | Tier | Effect |
|---|---|---|
| Crush Sequence | I | Increases Tremor explosion count by 2. Found on: Armor, Rare+ |
| Give me More | I | Increases Tremor explosion count by 1. Found on: Armor, Rare+ |
| Grand Blast | III | Increases the range of Tremor’s explosions. Found on: Legendary Armor, Statue’s Head |
| Human Fortress | I | Gain Bonus Armor and Health Regeneration while the skill is active. Found on: Armor, Rare+ |
| Power of the Stones | III | Grants allies a Weapon Damage bonus while Tremor is active. Found on: Legendary Armor, Statue’s Torso |
| Stolen Life | I | Increases the effectiveness of the health drain-. Found on: Armor, Rare+ |
Boulderdash
With the number of buffs and debuffs available through mods, this becomes a very versatile initiation tool. I don’t see it being a skill that’s worth stacking mods on though.
| Name | Tier | Effect |
|---|---|---|
| Primal Armor | I | Doubles your Armor for a short time after Boulderdash ends. Found on: Armor, Rare+ |
| Primal Chain | I | Each enemy damaged by Boulderdash increases its damage for a short duration. Effect stacks up to 5 times. Found on: Armor, Rare+ |
| Primal Chaingun | III? | Each enemy damaged by Boulderdash increases your Weapon Damage for a short duration. Effect stacks up to 5 times. Found on: Armor, Rare+ |
| Primal Constitution | III? | Each enemy damaged by Boulderdash increases your Maximum Health for a short duration. Effect stacks up to 5 times. Found on: Armor, Rare+ |
| Primal Gutting | I | Enemies hit by Boulderdash are afflicted with Bleed. Found on: Armor, Rare+ |
| Primal Knuckle Duster | I | Increases Boulderdash’s damage. Found on: Armor, Rare+ |
| Primal Rage | I | Reduces Boulderdash’s cooldown. Found on: Armor, Rare+ |
| Primal Weakness | III? | Permanently reduces the resistance of enemies hit by Boulderdash. Found on: Armor, Rare+ |
Endless Mass
Endless Mass has very high potential as a strong debuffing skill thanks to its mods. Vulnerability, alongside increases to Anomaly and Weapon Damage make for a potent combination of debuff to boost your whole team’s damage.
| Name | Tier | Effect |
|---|---|---|
| Bleed Them All | I | All enemies pulled in by Endless Mass are afflicted with Bleed. Found on: Armor, Rare+ |
| Bone Crusher | I | Increases the damage of Endless Mass. Found on: Armor, Rare+ |
| High Intensity | III | Anomaly Damage against affected targets is increased for a short duration. Found on: Legendary Armor, Marshal’s Armor |
| Mosh Pit | I | All enemies pulled in by Endless Mass are afflicted with Vulnerable. Found on: Armor, Rare+ |
| Shattered Armor | I | Weapon Damage against affected targets is increased for a short duration. Found on: Armor, Rare+ |
| Wide Horizons | III | Increases Endless Mass’s range. Found on: Legendary Armor, Marshal’s Helmet |
We’ve got a great guide on how gear and mods work in Outriders for you with detailed information on the gearing process, priorities and full lists of armor and weapon mods for you.
When we talk about modding your gear, this is done in a very specific way in Outriders – through the crafting system. Crafting in Outriders is the single most thing when it comes to creating a powerful build. And we have a great guide to help you learn how to do it – check out the Outriders Crafting Guide for the full overview of this well-made system that supports your character from early game all the way into the Endgame.
Devastator Builds
Now with the basic information covered, we can dive into some builds for the Devastator. For the purpose of this guide we’ll cover one early game build, with the rest being focused on the late game.
Each of the Devastator’s paths on the Skill Tree focus on some key aspects of their kit.
The Path of the Vanquisher focuses on gunplay, with a few bonuses from Kinetic and Protection skills.
The Path of the Warden focuses on raw durability, offering plenty of Armor, Health, Health Regeneration and Resistance
The Path of the Seismic Shifter focuses on your Anomaly Powers and Bleed, offering plenty of bonuses to all skill types.
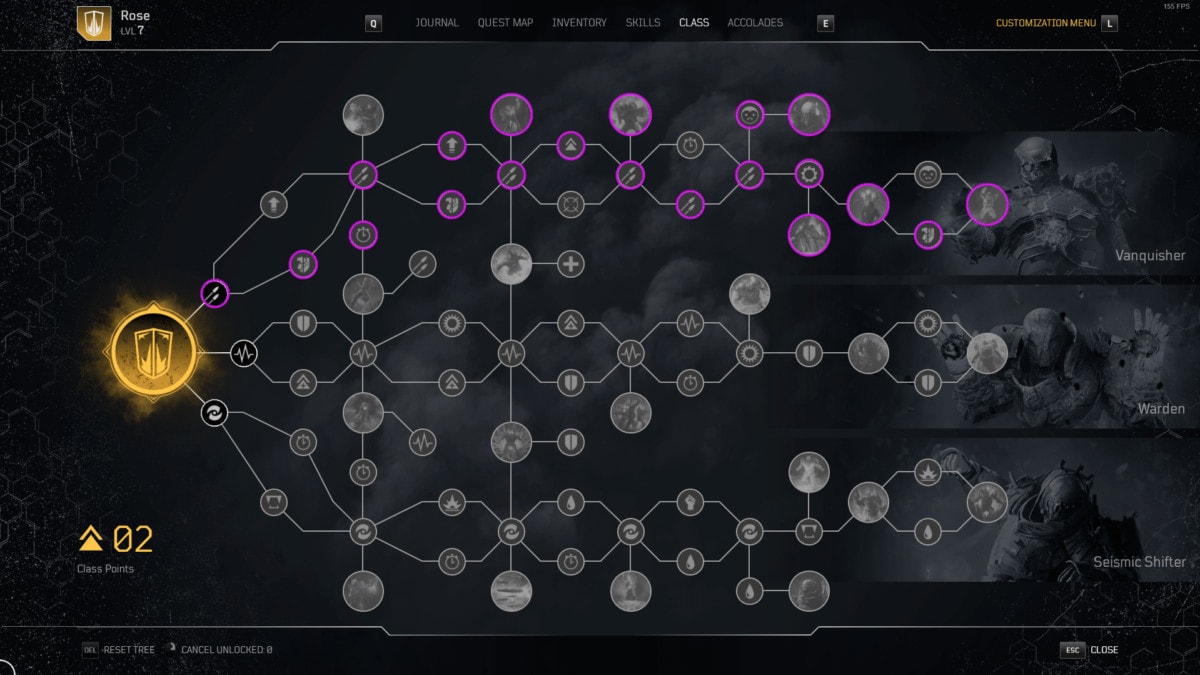
Early Game Seismic Shifter build
This is a build that focuses on a mid-level Devastator, just prior to obtaining Boulderdash and Endless mass. In addition to being roughly level 16 and not having all of their skills, this will also be limited to rare gear which halves the amount of mods we can have and assumes we don’t have any Tier 3 mods.
This is going to be a build that’s fairly versatile, but will focus on on the early skills of Earthquake, Gravity Leap, and Reflect Bullets. This tree isn’t particularly focused on any one skill, or damage option but rather being a well rounded build to help you progress into the later stages of the game. So our Skill Tree for this build looks like this.
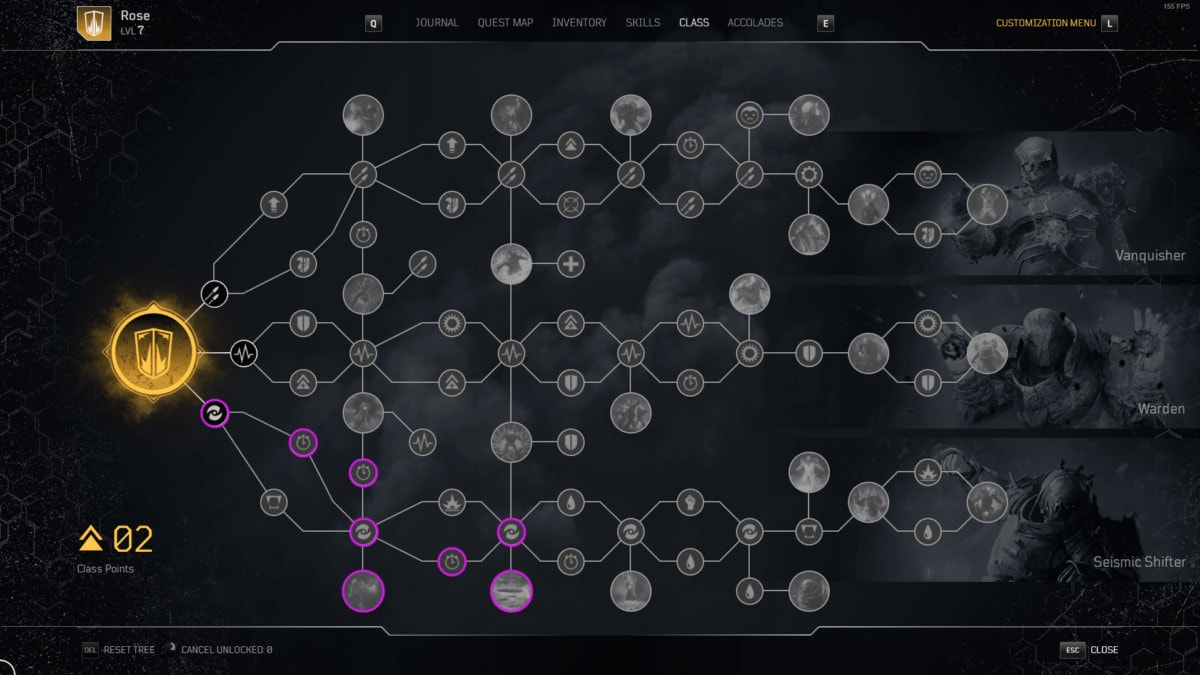
This basic tree gives us everything to help us both progress but be flexible in our play style. We get 18% bonus Anomaly Power and 15% Cooldown reduction for all of our skill types. It’s not a lot, but it does enough alongside our other boosts.
We also take Paladin which gives us a pretty hefty 45% Anomaly Power boost for using a Protection Skill, which will definitely help us get more damage out. Then there’s also Anomaly Bullets which also gives us a boost to Firepower equal to 15% of our Anomaly Power, letting us freely stack Anomaly Power and not having to worry about our weapons being too weak.
For our armor mods, we’re going to focus most of them on Reflect Bullets. First, we take Auto Reflect so we can deal damage alongside what gets relflected. We then boost the reflected damage through the use of Bullet Acceleration and The Strongest First, giving us enough damage to kill most anything with ease from just reflect alone.
Our other two skill will get one mod each, with Gravity Leap getting Life Absorption. Life Absorption makes sure when we initiate an encounter, we’ll be at or nearly at full health, while making taking out a couple weak enemies in the process.
Earthquake has two viable options it can use for its mod. The first is Ground Crush, which boost its damage enough to easily dispatch weaker enemies. I personally prefer and recommend Extra Quake though, as the second charge offers more consistent damage and interrupt power.
For our weapon mods, we’re just going to want mods that increase our damage. This makes Vulnerability Bullets, Ricochet, Anomaly Surge, Hot Blood or Fireworks good options. All of these can provide extra damage though hitting multiple targets and most have low cooldowns. Vulnerability Bullets is highly recommended for bosses as the extra damage will be very noticeable.
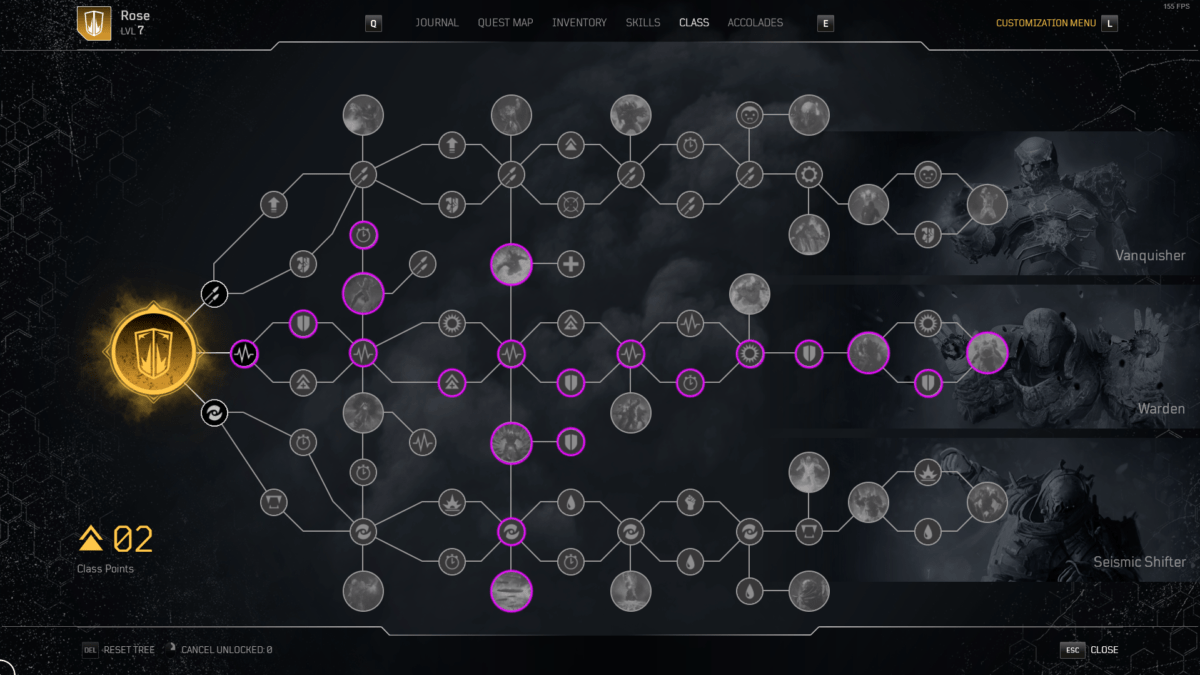
Blood Vortex Seismic Shifter build
This build is an expansion of the Early Game one above, but forces more on consistent damage output from skills and Bleed. Between the passive Tree and the selection of skills, there’s no shortage of healing or damage. The skills we’re focusing on for this build are Impale, Earthquake and Endless Mass. If you can, hunt down the Seismic Commander Set for this build. That said, there’s the tree we’re using for this build.

This tree heavily focus on Anomaly Power, picking up the 30% available to us through the nodes on the Seismic Shifter path. We also Prioritize grabbing Cooldown Reduction (CDR) for both Seismic and Kinetic skills, getting 30% CDR for Seismic and 15% CDR for Kinetic. This keep us casting often and dealing a good amount of damage in the process. Thanks to Earth’s Heritage, Impale and Earthquake get a nice boost of 50% damage, making up the the lack of extra Anomaly Power.
Since Bleeds are a core idea to this build, we pick up Blood Donation and both of the Bloodbath nodes. This makes our Bleeds 60% stronger, while healing for 35% of the damage they cause. Add in the 6% Skill Leech, 20% extra Health, Health Regen, as well a boost to all healing from Outrider Commander and it’ll be difficult to knock us down as we dish out damage.
Impale will easily be our biggest damage dealer, but at it’s base it’s only a single target skill but we use mods to boost its power and fix that downside. To do this, we take Spike Forest, Palisade, Ultimate Impaler, Sharpened Spike and Rivers of Blood. This results in an Impale that can be cast multiple times, and hit several enemies with each cast. Each cast also has bonus damage, and further bonus damage to enemies afflicted with a Bleed.
Earthquake is our secondary damage, but a lot of its damage will come from bleeding, since we have limited mod space after Impale takes half of it. It will simply run Blood Shock and Extra Quake. This gives it two charges and allows it to inflict Bleed allowing for fairly consistent damage.
Endless Mass is our last skill to mod for, and it has two primary goals; Make enemies take more damage and group them up to get the most out of Earthquake. To achieve this, we use Wide Horizons, High Intensity and Mosh Pit. This increases the range of Endless Mass, making it easy to hit plenty of enemies with each cast. Enemies that are pulled in are afflicted with Vulnerable and take increased Anomaly Damage, significantly increasing the damage of both Earthquake and Impale.
Our weapons should focus on dealing damage, specifically through powerful AoE effects. So mods like Ultimate Anomaly Surge, Wrath of Moloch, Ravenous Locust, and Shadow Comet work exceptionally well with the grouping and debuffing from Endless Mass.
You could also go for a combination of Ricochet or similar mods, paired with Resistance Breaker. A combination like this would help Earthquake and Impale deal a bit of extra damage, on top of all the bonuses from their own mods as well as Endless Mass’s debuffs.
In terms of Attributes, Status Power is a big stand out and will put in decent work for this build. Since you’ll consistently be making things Bleed, increasing the power of those bleeds helps a ton with overall damage.
For Armor, our priority top-line stat is Anomaly Power. This buffs our Bleeds and as a skill focused build, there’s no reason to not go for this stat. Our third line stat should be Skill Life Leech. Skill Leech will turn our Bleed damage into consistent sustain and regeneration almost as well as healing for decent chunks of health when a skill gets used. Cooldown Reduction can be used instead of Leech. Though, you will still want mostly Leech, swapping a little for Cooldown reduction can help with uptime of your skills and therefore your bleeds.
For Weapons, our priority top-line stat is Crit Damage. While Weapons aren’t our main source of damage, then can still output decent damage so Crit Damage makes the most sense here. Our third line stat here should be Close Range Damage. It’s a small boost, but the extra damage will help us out.
Wrecking Ball Warden build
This Warden build capitalizes on a strong synergy between several powerful passives and mods. Not only do you get to be a durable tank, your weapons get supercharged through Armor. This build uses Earthquake, Boulderdash and Reflect Bullets to become a wrecking ball. Here’s the Tree for this build.
This tree looks almost purely defensive, with there being a total bonus of 80% Armor, and 50% Health with no damage anywhere. This is where Mighty Tank comes in, boosting your Anomaly Power and Firepower based on your Armor. This combined with Heirloom Armor and Through the Mob guarantees that enemies will be constantly boosting your armor. Heirloom Armor grants 10% of an enemy’s armor on kill, while Through the Mob boosts you while they are in close range.
Mighty Tank isn’t our only source of damage though, as we also head down to Seismic Shifter’s branch to grab Anomaly Bullets. This will further increase our Firepower based on Anomaly Power. Assuming this interacts the way it should, this means Armor becomes Firepower and Anomaly Power, and that Anomaly Power becomes even more Firepower. This setup lets us stack Armor without having to put too much focus on other stats.
For extra durability, we also pick up Into the Fray which will active every time we cast Boulderdash. This will give us 15% further damage reduction on top of what we get from skills. We also grab Stone Circle on the way down to Anomaly Bullets. This will increase the range at which our healing mechanic works, which is boosted by Overload of the Battleground. On top of the healing mechanic, it also boost the range of Through the Mob and Resist the Mob, which increase our Armor by 7% and Resistance by 15% respectively for each enemy in close range.
Going into our skill mods, we’ll start with Boulderdash, as it ends up taking quite a few slots. We’ll end up taking Primal Armor, Primal Chain, Primal Chaingun and Primal Rage. Primal Rage cuts our cooldown by a good amount, on top of what we get from the passive tree. If you get the Deathproof Set Bonus, you may not even need this mod. Primal Armor is one of our synergy mods, increasing our Armor for each enemy hit. We also get a couple other stacking buffs that increase Boulderdash’s damage as well as our Weapon damage for each enemy hit in the form of Primal Chain and Primal Chaingun.
Next is Earthquake, which is mostly used as another Armor booster, but also does damage thanks to that. For this skill, we want Armor Boost, Earth’s Legacy, and Panzer Drain. Earth’s Legacy increases the range, making it easier to hit multiple targets for the other mods to be more beneficial. Armor Boost gives us a flat amount of armor from each enemy hit, up to it’s maximum stacks. Panzer Drain steals their armor, which increases our Armor by a percentage of theirs, while they lose the same amount.
Finally, we have Reflect Bullets which we mod with Auto Reflect, Bullet Acceleration, and Strongest First. This allows us to use it for damage reduction, while still providing a reasonable amount of damage. Auto Reflect allows us to continue shooting and casing our skills while it’s active.
For weapons, since they also see a sizable boost in power from this setup we do want to prioritize damage over utility. So mods like Ultimate Anomaly Surge, Wrath of Moloch, Ravenous Locust and Shadow Comet tend to be incredibly strong options here. The single target options like Brain Eater or Killing Spree also work well here.
If you want a set that can make the most of this setup, look no further than the Deathproof set. This set will drastically reduce the cooldown of Boulderdash, letting you use it frequently.
For Armor Attributes, our priority top-line stat is Anomaly Power. This boosts our skill’s damage and generally helps us our more than the other options. Our other stats should be Skill Life Leech and Close Range Damage. Skill Life Leech makes it so every enemy we charge through and every bullet we reflect heals us. Since we’re charging in head first, Close Range Damage will be a fairly consistent damage increase if we stack it up.
For Weapon Attributes, our priority top-line stat is Crit Damage. While Weapons aren’t really a focus and may rarely be used, we will have opportunities to use them and it’s good to get the most damage out of them. Our other stats should be Close Range Damage and Skill Life Leech. They’re here for the same reasons they are on our Armor.
Run ‘N’ Gun Vanquisher build
This build focuses on gunplay almost entirely, using skills to get into combat and support the gunplay. Compared to the other Devastator builds, this one will be a bit more simple. For Skills we use Boulderdash, Endless Mass and  Golem. This build is setup to take advantage of the set bonus of the Statue set, though in a slightly more limited way. Let’s take a look at the Skill Tree for this build.
This skill trees gives us a bit of everything we need. In general, we end up with 32% Weapon Damage, 32% Assault Damage (thanks to Assault Master) and 30% Close Range Damage; totaling to 94% for Assault Weapons. We also get 45% Armor Piercing, 50% Magazine Size, 20% Crit Damage, 5% Weapon Leech and a 20% faster reload. This makes our weapons fairly strong to start with.
Once we add in some of the other bonuses, our weapons really start picking up in damage. The first of these is Champion, Which grants another 45% Weapon damage when we use a Protection Skill, in our case Golem. Then there’s Bounty Hunter, which lets us deal 15% more damage to Elites, while also taking 15% less damage from them. Finally, there’s Altered Charge, which gives us another 70% Weapon Damage when a Kinetic skill ends, or Boulderdash in our case. These add up to another 115% after using two skills, or another 130% against Elites, for a total of 224% Weapon Damage against Elites.
For mods, we’ll start with Boulderdash. For what we need out of it, we’ll just be using Primal Chaingun and Primal Rage. This cuts the cooldown of the skill down and gives us a decent Weapon Damage bonus to stack with the rest of them. We don’t really need much else out of it, but it could be modded with Primal Chain or Primal Knuckle Duster for a bit more upfront damage.
Endless Mass we’ll be using to increase our damage output significantly. To achieve this, we’ll be using Mosh Pit, Shattered Armor and Wide Horizons. Wide Horizons increases the range of the skill, so it can affect more enemies and group them up while applying the other mod effects. Mosh Pit will inflict Vulnerable on all enemies affected by Endless Mass, while Shattered Armor will reduce their armor.
Lastly we have Golem, which will be used to give us a good defensive buffer. We’ll be using Golem of Death, Made of Marble, Perseverance, and Resistance. Made of Marble is totally optional here, but it does let Golem deal some damage on top of the defensive layer it provides. Perseverance and Golem of Death are used to extend the duration of the skill. Resistance just adds a bit more defensive stats to us.
Before we move into Weapon mods, since there are a couple optional mods here, one of the general armor mods may prove to be more useful. Mods like Stare Into the Barrel can be useful for increasing your firepower, should you manage to find them. Plate Piercer can also make good use of our high Armor Piercing.
For Weapons, since we’re looking to get the most out of them for this build, Mods that provide high damage or extend our ammo pool are all good options. Most damage mods from legendary weapons, so mods like Ultimate Anomaly Surge, Wrath of Moloch, Ravenous Locust and Shadow Comet are great options. Mods like Brain Eater which can help you manage your ammo easier also work incredibly well.
For Armor Attributes, our priority top-line stat is Firepower. With a heavy focus on weapons, this choice is an easy one. Our other stats should be Close Range Damage and Cooldown Reduction. Since we’re charging in, Close Range Damage makes the most sense to get the most damage out of our weapons. Cooldown Reduction makes it so your buffing and de-buffing skills are up more often.
For Weapon Attributes, our priority top-line stat is Crit Damage. With all the buffs we have going, this will provide the most damage. Our Other stats should be Close Range Damage and Status Power. Close Range Damage helps us get more damage out of our gun. Status Power gives us just a little bit longer of a time where Vulnerability get applied to enemies.
Outriders Class Guides and Best Builds
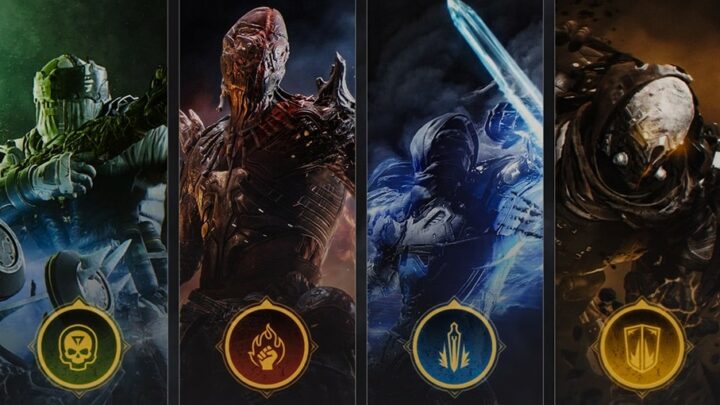
This is a list of individual Outriders Class Guides. Each guide goes far beyond the normal and generic overview of the class you would see anywhere else. RubyRose has done a lot of work, research and testing so that we can offer you here on VULKK.com the most detailed and informative guides for all four classes in Outriders.
Learn how to play the class, get the basics, build upon them as you level up and master your role and gameplay style to be ready for the EndGame. FInd out what the best and most useful builds are for each class and be ready for any situation and combat scenario People Can Fly and Square Enix have designed for you in the game.

Outriders Pyromancer Class Guide and Best Builds
Complete Outriders Pyromancer Guide explaining the basics of the class and sharing builds for early game as well as the EndGame at level cap!
Outriders Technomancer Class Guide and Best Builds
Complete Outriders Technomancer Guide explaining the basics of the class and sharing builds for early game as well as EndGame at level cap!
Outriders Trickster Class Guide and Best Builds
Complete Outriders Trickster Guide explaining the basics of the class and sharing builds for early game as well as the EndGame at level cap!
Outriders Essential Beginners Guides
This list showcases some of our top Outriders Beginners Guides - instructional content to help you get into the game, learn the basics and get a nice smooth start with your adventures on Enoch.
Outriders Classes and Roles: A Beginners Guide
Beginners friendly guide to Outriders Classes. What Devastator, Pyromancer, Trickster and Technomancer can do and which role best fits you.
How Gear and Mods Work in Outriders: A Complete Guide
Guide explaining how gear works in Outriders, what types and rarites are there, how mods work and how to effectively gear up your character.
Outriders User Interface Guide: Everything You Should Know
Guide explaining how the Outriders User Interface works. What each little detail in each window and tab means and how to create your own HUDs.
Outriders DOs and DONTs Guide: Beginner Tips and Tricks
This Outriders DOs and DONTs guide is a large collection of tips to help you get a smooth start in the game and teach you helpful tricks!
Outriders Crafting Guide: make your gear stronger
Crafting in Outriders is different to other RPGs or Looter games. This guide will show you how to use the system to make your gear awesome!
Outriders Expeditions Preparation Guide and Tips
This Outriders Expeditions Guide will help you best prepare for the Endgame content with tips on how to fast climb Challenge Tiers and more!