This is a dedicated Outriders Pyromancer Guide. We’ll be covering everything from skills to builds, and all in between. The guide is designed to help you get started, show you the basics, teach you how to play the class to its highest potential and what are the best and most useful builds for the early, midgame and endgame!
Table of contents
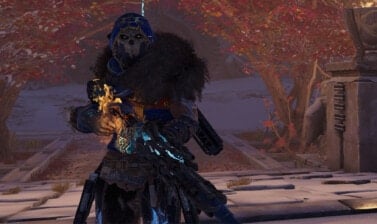
What is the Pyromancer class?

The Pyromancer is a hellish wildfire, an Altered setting anything and everything on fire that their mid-range caster powers allow. They can be very burst focused or focused on high DPS, depending on how you build them. While being a mostly damage focused class, the Pyromancer has tamed their flames into a very controlled force, using it both offensively and defensively to open many build options.
We’ll be covering those build options later in the guide. For now we need to start by covering the basics. We’ll talk Skills and Mods, then hop into some of the build options for the Pyromancer.
Pyromancer Skills Overview
Like all other classes in Outriders, the Pyromancer has 8 Skills. Even though these were covered previously in our Outriders Classes and Role Guide, we’ll be covering them again and making note of their ability tags, which determine how the passive tree affects them and their usage in combat.
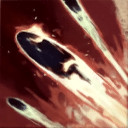
Heatwave
The Pyromancer creates a fiery wave, dealing damage and burning enemies in its path.
Tags: Ignite, Burn | Earned at level 2.
Notes: best used for Mobbing, Strongest with the Fire Storm or Tempest branches of the Skill Tree.

Feed the Flames
Select and pull and enemy towards you. The enemy has its health drained and is afflicted with Ash and Immobilized.
Tags: Immobilize, Ash | Earned at level 3.
Notes: Best used for Immobilizing a single target, Strongest with the Ash Breaker branch of the Skill Tree.
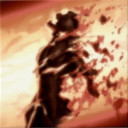
Thermal Bomb
Target an enemy to inflict damage, Ignite and Interrupt. If the target hit by Thermal Bomb is killed while still under its effect, the enemy will explode and deal damage in a large area.
Tags: Explosive, Interrupt |Earned at level 4.
Notes: Best used for Mobbing, Strongest with the Fire Storm or Tempest branches of the Skill Tree.

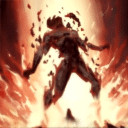
Overheat
Deals damage to all enemies in a large radius and Interrupts them. If the enemy is afflicted with a Burn, damage is increased significantly while consuming the Burn status.
Tags: Explosive, Interrupt | Earned at level 6.
Notes: Best used for Mobbing, Strongest with the Fire Storm or Tempest branches of the Skill Tree.
Volcanic Rounds
The Pyromancer replenishes and charges their current Magazine with Igniting rounds. These rounds Inflict Burn, ignore armor and can pierce. The effect lasts until you empty the magazine, Reload, or Weapon Swap.
Tags: Ignite, Burn | Earned at level 9.
Notes: Best used for Single Target, Strongest with the Fire Storm or Tempest branches of the Skill Tree.

Ash Blast
Creates an anomalous blast, afflicting enemies in a large radius with Ash and Immobilizing them.
Tags: Immobilize, Ash | Earned at level 13.
Notes: Best used when surrounded, Strongest with the Ash Breaker branch of the Skill Tree.
F.A.S.E.R Beam
Projects a beam that deals damage, Inflicts Burn and Interrupts the target and a small radius around you.
Tags: Ignite, Interrupt, Burn |Earned at level 17.
Notes: Best used for Mobbing, Strongest with the Fire Storm or Tempest branches of the Skill Tree.
Eruption
Creates a volcanic Eruption under a selected target. This Eruption deals damage to the target and other in a small area near the target.
Tags: Explosive, Interrupt | Earned at level 22.
Notes: Best used for Mobbing, Strongest with the Tempest branch of the Skill Tree.
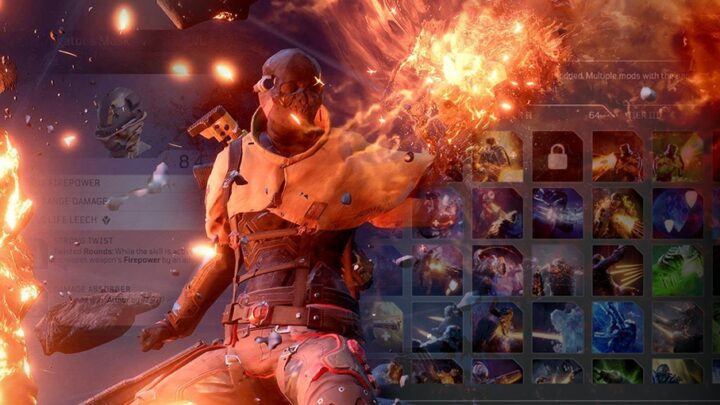
Pyromancer Skill Mod Overview
Mods help this class diversify it’s builds away from pure damage and a bit of lock down. You can also use them to lean more heavily into the caster Archetype. Regardless of your chosen path, you’re sure to leave a trail of charred remains in your wake.
Note: The current information on Tiers and Drop Info below may be incomplete and will be updated as information becomes available.
 Heatwave
For being the earliest skill the Pyromancer has, it’s expected most of the mods would focus on damage and range. It also has a debuff and couple buffs mixed in that could see some niche use in some builds.
| Name | Tier | Effect |
|---|---|---|
| Burnt-Out | I | Enemies damaged by Heatwave take additional damage. Found on: Armor, Rare+ |
| Fire Tsunami | III | Increases the width of the firewall created by Heatwave. Found on: Legendary Armor, Helmet of the Acari |
| Heat Leech | I | Increases Skill Leech for a duration after casting Heatwave. Found on: Armor, Rare+ |
| Hellfire | I | If Heatwave damages 3 enemies, all subsequent enemies take additional damage from Heatwave. Found on: Armor, Rare+ |
| Inferno Wave | I | Increases Heatwave’s Damage. Found on: Armor, Rare+ |
| Irradiation Wave | I | Enemies hit by Heatwave are afflicted with Weakness. Found on: Armor, Rare+ |
| Strength from Fire | III | Increases your Weapon Damage for a short duration for each enemy hit by Heatwave. Found on: Legendary Armor, Guantlets of the Acari |
| Ride the Wave | I | Increases the number of times Heatwave can be cast before triggering its Cooldown. Found on: Armor, Rare+ |
| Tidal Wave | I | Increases the number of times Heatwave can be cast before triggering its Cooldown. Found on: Armor, Rare+ |
Feed the Flames
Feed the Flame stays solid in it’s identity as a crowd control option, but managed to expand its range and target count. It also can get a bit of utility in Magazine replenishment and can scale off Skill Leech slightly.
| Name | Tier | Effect |
|---|---|---|
| Anomaly Hunger | I | Increases the damage of Feed the Flames based on Skill Leech. Found on: Armor, Rare+ |
| Bullet Absorption | I | Restores a portion of your Magazine for each Enemy affected by Feed the Flames. Found on: Armor, Rare+ |
| Final Breath | I | Feed the Flame’s Health Drain efficiency is increased. Found on: Armor, Rare+ |
| Fire Eater | I | Increases Feed the Flame’s Health Drain efficiency against Burning targets. Found on: Armor, Rare+ |
| Flame Grasper | III | Allows you to drain two additional targets. Found on: Legendary Armor, Waistcloth of the Reforged |
| Wide Grip | I | Allows you to drain one additional target. Found on: Armor, Rare+ |
| Nova | I | Increases the Range of Feed the Flames. Found on: Armor, Rare+ |
Thermal Bomb
Thermal Bomb gets a bit of utility, though still focuses on Damage. Ash Grasp in particular seems like it has potential to let it scale a bit better, depending on how you build. Otherwise, it’s all damage and ignite.
| Name | Tier | Effect |
|---|---|---|
| Ash Grasp | I | Inflict Ash on enemies near an exploding Thermal Bomb. Found on: Armor, Rare+ |
| Big Boom | I | Increases the explosion radius of Thermal Bomb. Found on: Armor, Rare+ |
| Branded | III | Enemies marked by Thermal Bomb take additional damage. Found on: Legendary Armor, Armor of the Reforged |
| Burning Ground | I | Exploding Thermal Bombs leave behind burning ground. Enemies in this area are ignited and Burn for additional damage. Found on: Armor, Rare+ |
| Double Fun | III | Thermal Bomb can affect two targets. Found on: Legendary Armor, Cowl of the Reforged |
| Fire Frenzy | I | Thermal Bomb can be cast an additional time before triggering its cooldown. Found on: Armor, Rare+ |
| Lasting Fire | I | Increases the duration an enemy is marked and will become a Thermal Bomb on death. Found on: Armor, Rare+ |
| True Blast | I | Increases Thermal Bomb’s explosion damage. Found on: Armor, Rare+ |
| Wildfire | I | Thermal Bomb explosions will inflict Burn on hit. Found on: Armor, Rare+ |
Overheat
Overheat becomes a true swiss army knife for the Pyromancer. It can provide a boost to Armor, Resistance, Anomaly Power and Weapon Damage depending on the mods used. This makes it one of the most versatile parts of the Pyromancer’s kit.
| Name | Tier | Effect |
|---|---|---|
| Blacksmith | I | Each Status Effect consumed grants an Armor bonus for a short duration. Found on: Armor, Rare+ |
| Cinders | I | Overheat consumes Ash instead of Burn. Found on: Armor, Rare+ |
| Detonator | III | Decreases Overheat’s cooldown. Found on: Legendary Armor, Armor of the Acari |
| Ember Shield | I | Each Status Effect consumed grants a Resistance Bonus for a short duration. Found on: Armor, Rare+ |
| Master Consumer | III | Overheat consumes Ash or Burn statuses. Damage is increased significantly if both are consumed. Found on: Legendary Armor, Boots of the Acari |
| Pants on Fire | I | Increases damage to enemies that were hit but did not have a status consumed. Found on: Armor, Rare+ |
| Phoenix Force | I | Provides a boost to Anomaly Power per status consumed for a short duration. Stacks to 10. Found on: Armor, Rare+ |
| Sunburnt | I | Increases damage to enemies that have a Status Consumed. Found on: Armor, Rare+ |
| Third Degree | I | Increases Weapon Damage against enemies that have been hit by Overheat. Found on: Armor, Rare+ |
Volcanic Rounds
Like most of the other Anomaly Bullet-type skills, capability of getting several buffs on activation and debuffs on hit. However unlike Trickster and Technomancer, there’s no mod to replenish the magazine. This however does not change its status as a powerful single target skill.
| Name | Tier | Effect |
|---|---|---|
| Armor Melting | I | Enemies damaged by Volcanic Rounds have their Armor reduced for a short duration. Found on: Armor, Rare+ |
| Extra Mag | I | Volcanic Rounds lasts for an extra Magazine before Triggering the Cooldown. Found on: Armor, Rare+ |
| Lava Shots | I | Increases your Anomaly Power while Volcanic Rounds is active. Found on: Armor, Rare+ |
| Radiation Flames | I | Enemies damaged by Volcanic Rounds are afflicted with Weakness. Found on: Armor, Rare+ |
| Reload Boost | I | A powerful Weapon Power bonus is granted for a short duration after Volcanic Rounds ends. Found on: Armor, Rare+ |
| Susceptibility | III | Decreases the Resistance of enemies damaged by Volcanic Rounds. Found on: Legendary Armor, Torturer’s Vest |
Ash Blast
The damage potential and range of Debuffs make this an attractive skill to fit into a build. The only confusing thing in these mods is the Weapon Leech bonus, specifically due to it being a higher tier mod in place of a stronger mod.
| Name | Tier | Effect |
|---|---|---|
| Ash Armor Down | I | Ash Blast decreases the armor of affected enemies for a short duration. Found on: Armor, Rare+ |
| Ashes and Leeches | III | Casting Ash Blast increases your Weapon Leech for a short duration. Found on: Legendary Armor, Torturer’s Waistcloth |
| Ash Increase Range | I | Increases the range of Ash Blast. Found on: Armor, Rare+ |
| Death Sentence | III | Your Weapon and Anomaly Damage are increased against affected targets for a short duration. Found on: Legendary Armor, Torturer’s Mask |
| Empowerment | I | Ash Blast deals additional damage. Found on: Armor, Rare+ |
| Extinguisher | I | Ash Blast’s damage is increased against targets afflicted with a Burn, consuming the status. Found on: Armor, Rare+ |
F.A.S.E.R Beam
F.A.S.E.R Beam’s mods focus heavily on offensive power, with a little defensive utility. This skill has high potential to be slotted into a caster focused build for its high damage output.
| Name | Tier | Effect |
|---|---|---|
| Ashen Champion | III | F.A.S.E.R Beam inflicts Ash instead of Burn. Each enemy hit Grants a bonus to Anomaly Power for a short duration. Found on: Legendary Armor, Helmet of the Lava Lich |
| Frequent F.A.S.E.R | I | Reduces F.A.S.E.R Beam’s Cooldown. Found on: Armor, Rare+ |
| Healthy Lifestyle | I | Boosts your Health Regeneration after F.A.S.E.R Beam ends. Found on: Armor, Rare+ |
| Pure Power | I | Increases F.A.S.E.R Beam’s Damage. Found on: Armor, Rare+ |
| Size Matters | I | Increases the radius of the beam. Found on: Armor, Rare+ |
| Volcanic Armor | I | Reduces incoming Anomaly Damage and Weapon Damage while F.A.S.E.R Beam is active. Found on: Armor, Rare+ |
Eruption
Similar to FASER Beam, this skill is highly focused on damage output, and can easily be used in a caster build. In addition to raw power, it also gets access to additional casts, likely making it the premiere Skill Damage option.
| Name | Tier | Effect |
|---|---|---|
| Debris | I | Eruption creates damaging Debris that deals additional damage. Found on: Armor, Rare+ |
| Etna | I | Eruption can be activated one more time before triggering its cooldown. Found on: Armor, Rare+ |
| Pompeii | I | Eruption can be activated one more time before triggering its cooldown. Found on: Armor, Rare+ |
| Giga-blast | I | Increases the radius of Eruption. Found on: Armor, Rare+ |
| Improved Damage | III | Increases Eruption’s explosion damage. Found on: Legendary Armor, Lower Robe of the Lava Lich |
| Increased Duration | I | The duration of Eruption is increased. Found on: Armor, Rare+ |
| Magma Coat | I | Increases Eruption’s lava damage over time. Found on: Armor, Rare+ |
We’ve got a great guide on how gear and mods work in Outriders for you with detailed information on the gearing process, priorities and full lists of armor and weapon mods for you.
When we talk about modding your gear, this is done in a very specific way in Outriders – through the crafting system. Crafting in Outriders is the single most thing when it comes to creating a powerful build. And we have a great guide to help you learn how to do it – check out the Outriders Crafting Guide for the full overview of this well-made system that supports your character from early game all the way into the Endgame.
Pyromancer Builds
Now with the basic information covered, we can dive into some builds for the Pyromancer. For the purpose of this guide we’ll cover one early game build, with the rest being focused on the late game.
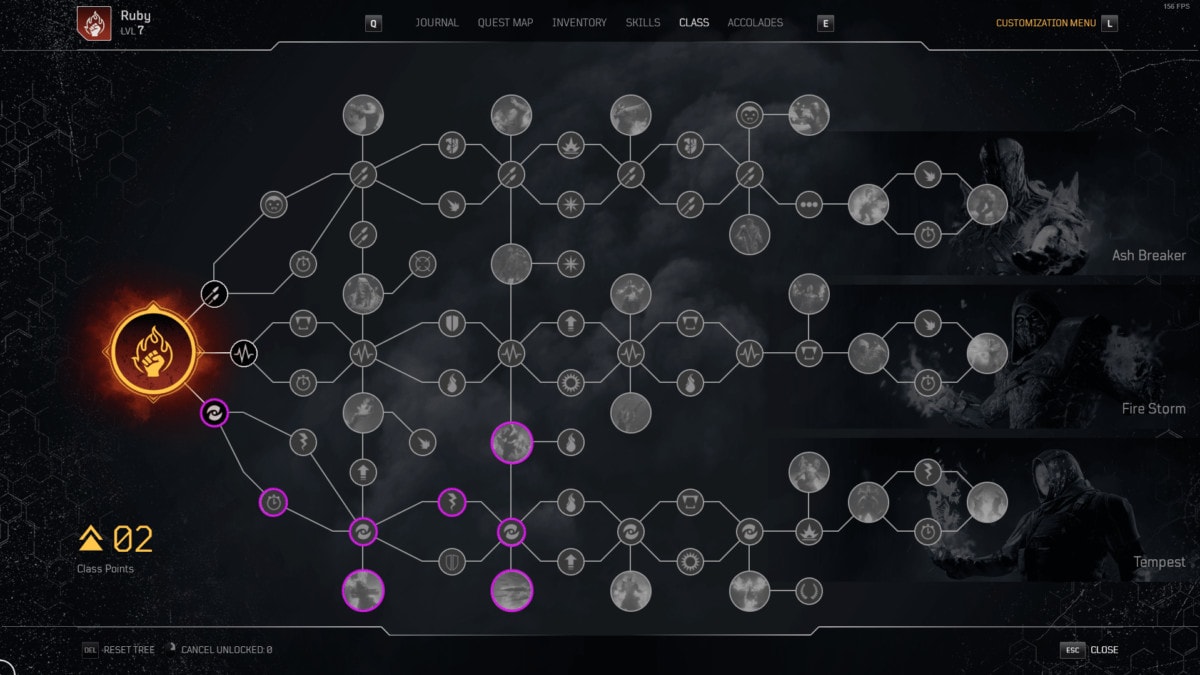
Each of the Pyromancer’s paths on the Skill Tree focus on key aspects of their kit.
The Ash Breaker Path focuses on Immobilizing enemies with Ash and shredding them with weapon fire.
The Fire Storm Path focuses on Igniting enemies and survival through defensive bonuses.
The Tempest Path focuses on casting explosive skills, dealing high and consistent damage output
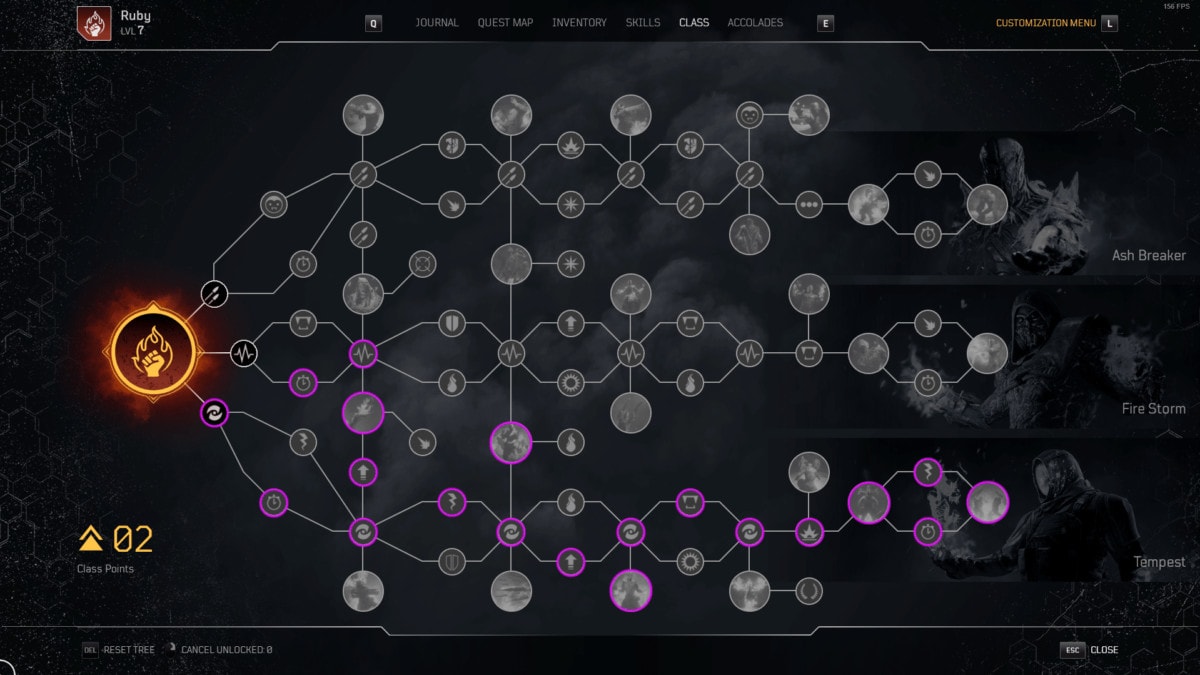
Early Game Tempest build
Tempest is easily the best tree to start with while leveling unless you really want to focus strictly on gunplay. The early Tempest Tree is very flexible, offering options for both casting and gunplay. As such, this section will highlight both the Caster and Gunplay variants of this early game setup. Both will focus on a mid-level Pyro, around level 15-16.
Caster Variant
For the Caster Variant, we want to focus on getting the most damage out of our skills we want to use ones that will be up often. This makes Heatwave and Thermal Bomb our primary skills. the Third slot can flex between Overheat and Volcanic Rounds. With that in mind, here’s the tree.

From this tree, we get 33% bonus Anomaly power, while reducing our Explosive skills by 25%; Ignite and Immobilize skills also get 10% reduced cooldown as well thanks to both the Wildfire passive and the minor node. We also do 10% more damage to a Marked enemy, and an additional 20% damage when they fall below 30% health, thanks to Extinction.
While this doesn’t ensure the high damage possible, it does however let you cast abilities much more often while still allowing them to be strong enough to deal good damage. The added damage after reaching the 30% threshold is also quite good, as Thermal Bomb can set up this damage very easily if it doesn’t just kill instantly. This lets burn or a follow up cast finish the enemy off depending on their health.
If you did want to go for just the raw damage, you’d just follow the main path up to With Fire and Anomaly. This would net you another 18% Anomaly Power, as the cost of the benefits both Wildfire and Extinction.
With our five armor mod slots, we’ll be putting the focus on Thermal Bomb for damage and using other skills for a more supportive role. In which case for Thermal Bomb we’ll pick up Big Boom, Fire Frenzy and Wildfire. This gives us a second cast, larger radius and a follow-up Burn after the explosions.
Heatwave will simply take Burnt-Out, increasing our damage output on any target we hit. This will usually be used first, so the initial Thermal Bomb damage will hit harder and give us an easier time detonating them. Alternatively, you could take Ride the Wave and just use two casts of that skill as well, giving you a good amount of damage per cooldown.
Overheat will pick up Phoenix Force, letting it make use of any post-explosion burn victims for bonus Anomaly Power for any remaining ability casts. This gives us a nice burst window where we can do some serious damage if we get a Thermal Bomb off.
If you opt for Volcanic Rounds instead, we’d want to take Lava Shots, assuming it’s not bound to a Legendary item. It’d work similarly to Phoenix Force by giving an Anomaly Power bonus, but more reliably and less pressure to cast your skills so long as you can hold out on making use of the Volcanic Rounds themselves. The other upside to this is that it can easily affect all of our damage, instead of just the second Thermal Bomb.
In the case of Lava shots being a higher tier mod, it’d be replaced with Extra Mag, to extend the duration of the skill instead if you still want to use it.
Since weapons aren’t our main focus, we can also use the mods here to support our setup, and provide extra ways to trigger the burst window from Overheat or just further increase damage. In particular, we’d want to get mods like Hot Blood, Proliferation or Vulnerability Bullets.
Hot Blood and Proliferation can help us get a few targets ignited for early setup to use with Phoenix Force. Vulnerability Bullets simply applies the Vulnerable status, which can increase our damage. In this case Hot Blood and Proliferation are our options for groups of enemies; whereas Vulnerability Bullets is more of a single target option.
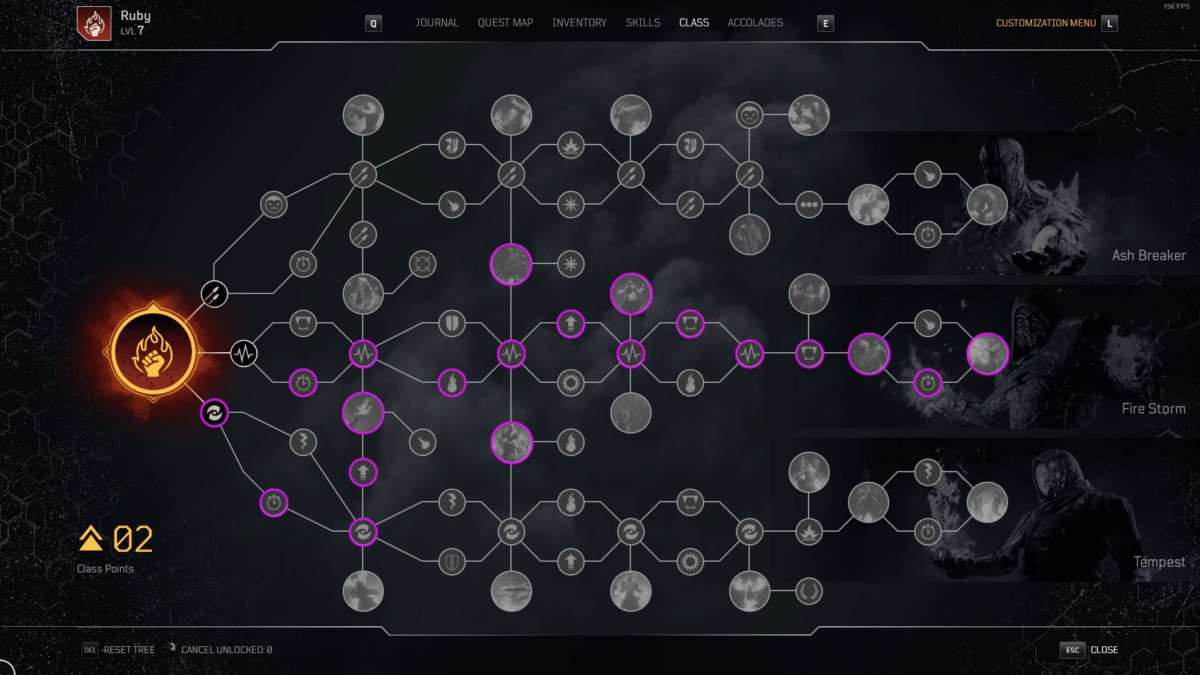
Gunplay Variant
This setup is more focused on making use of our gun to deal damage, with Volcanic Rounds being the primary source of damage and Thermal Bomb being our secondary damage. The last slot is taken by Feed the Flames for a very particular reason. That being said, the Tree looks like this.
With just a few points being shifted around, we have a solid weapon build. We have slightly less Anomaly power, sitting at only 28% after dropping the Wildfire and the node linked before it. We’re also down to just 15% Explosive Skill Cooldown reduction, since we dropped Wildfire. We do still keep Extinction and low health damage bonus it provides.
In exchange however, we pickup two nodes that help out gunplay a fair bit more. First is Inferno Bullets, which gives us 15% of our Anomaly Power as Firepower, this alone mitigates the small loss of Anomaly Power. We also grab With Fire and Rifle, which grants us 45% Weapon Damage for 10 seconds every time we cast an Explosive Skill. With Thermal Bomb being a shorter cooldown compared to Overheat, we can have this up quite often.
With our armor mods, the focus will be on Volcanic Rounds. In this case we want to pick up Armor Melting, Lava Shots and Reload Boost. This gives us a boos of Anomaly Power and the ability to reduce enemy armor while the skill is active, increasing out damage output. Reload Boost will help for those times when the skill gets used up quickly. In the case of Lava shots being a higher tier mod, it’d be replaced with Extra Mag, to extend the duration of the skill instead.
The remaining two slots go to Feed the Flames, where we grab Bullet Absorption and Wide Grip. This makes it so we can drain two enemies per cast and each time cast can therefore get us up to 40% of our magazine back, letting us maintain Volcanic Rounds longer. This leaves Thermal Bomb modless, but this pair of mods are so much better for us than anything Thermal Bomb can provide.
For Weapon Mods, since we’re using Volcanic Rounds quite often we want to extend it as much as possible. This makes Clip of Amalthea a rather ideal mod for general usage, assuming you can consistently land critical hits. For bosses, having a Weapon with Vulnerability Bullets to quickly apply Vulnerable and then swap back is super helpful, so we can get the absolute most out of Volcanic Rounds as possible.
Infernal Fury Tempest build
This build is a further expansion on the Caster Variant of the Early Game Tempest build above. Our skill set for this build is Eruption, Overheat, and Heatwave. Eruption is our main damage skill, with Overheat being a really solid damage tool and potent buffer. Heatwave will also deal a fair amount of damage, but is more focused on supporting the other skills when it can. So our tree looks like the one below.
You might recognize this skill tree as being similar to the one for the Fire Witch build that was showcased by the developers shortly before the game launched. Credit to them, as it is a very optimized tree and build. Just due to the caster nature, this build will play similarly, but at the same offer a higher potential damage output.
In terms of stats that are always active, we get absolutely everything a caster wants. 50% increased Anomaly Power, 15% Resistance Piercing, 6% Skill Leech, 40% Cooldown Reduction (CDR) for Explosive Skills, 25% CDR for Ignite Skills and even 10% CDR for Immobilize skills should we use one. On top of this, once an enemy has been hit by a skill, they get Marked and take an extra 20% damage. We even get another small bonus from Flames that Burn Twice… which give us a 10% damage increase against Elites. These gets a boost when we jump into the triggered passives.
Like the Early game build, we keep Extinction, giving us more damage as enemy health gets below 30% which can be great for bosses and other high health targets. We also grab With Fire and Anomaly for the bonus Anomaly Power after casting an Explosive skill, which while it’s only 12% it’s still a very easy to maintain buff. Then we gave Grave Ablaze which boost the damage of our Explosive skills by 30%, with Eruption and Overheat doing most of the heavy lifting here, this is perfect.
Going into our mods, a lot of focus will be on Eruption. For this build, we want to mod to maximize its damage potential. To do this; we take Debris, Etna, Pompeii, Improved Damage and Giga-blast. This gives us three uses of an Eruption that does a high damage explosion in a good size area, then also deals a fair amount of damage overtime to enemies near the initial eruption point.
For Overheat and it being a secondary damage source we similarly want damage and frequent usage of it. To do this; we take Detonator and Phoenix Force. Detonator significantly cuts the cooldown, letting it constantly maintain Phoenix Force with the help of Heatwave. It will also cast frequently enough that it can detonate every Heatwave as well, dealing good burst damage.
Finally, for Heatwave, we mostly use it as a debuffer, but we have a few charges for it as well. To do this; we take Tidal Wave, Ride the Wave and Burnt-Out. This will give us three charges of a flame wall that can ignite and be initial setup for Overheat as well as debuff anything it hits to increase any damage that is dealt. Burnt-Out is particularly strong in this setup for maximizing single target damage, but can also do well against groups.
For weapon mods, the only thing to keep in mind is that you grab Vulnerability Bullets. Outside of that, anything is really fair game. Since this caster focused build. most of our damage will come from there, so it’s more important for weapons to be more utility focused. Though really whether you want to use a gun for debuffing or extra filler damage when you can fit shots in you can cater the mods to fit those purposes. With also using Phoenix Force, you can also grab things to help setup ignites for Overheat, but it’s not entirely necessary.
In terms of Attributes on Armor, Anomaly Power is our Priority for our top-line secondary stat. The other two stats should be Skill Life Leech and Cooldown Reduction. Skill Leech will help us with Sustain, as we’ll effectively have health regeneration from the Burns we do inflict, on top of direct skill damage. Cooldown reduction increases our DPS, letting us cast our skills more often.
For Weapons, our Top-line stat should be Armor Piercing or Crit Damage. We shouldn’t need direct sustain from our weapon as we’ll get plenty from our skills, so we take damage. For the other stat lines, we want Status Power and Skill Life Leech. Status Power will increase the power (or duration) of our Burns and any other statuses we pick up. Skill Life Leech is still a great option here as well, as it helps a ton with keeping us on our feet.
Eternal Blaze Fire Storm build
This is a build that focuses on sustained damage through low cooldowns and keeping enemies burning. The main set of skills for this build are Heatwave, Overheat and F.A.S.E.R Beam. Overheat is here yet again as mostly a buff, but it can also do quite a bit to help out our damage. Heatwave and F.A.S.E.R Beam do the majority of the damage. With that in mind, here’s the Skill Tree.
Anomaly Power is important for this build, both because it’s ability based but also because Anomaly power affects the strength of our Burns. From this tree we get 42% Anomaly Power, 20% Burn Duration and Damage, 40% Health, 40% Cooldown Reduction (CDR) for Ignite Skills, 25% CDR for Explosive Skills and 6% Skill Leech. All of this comes mainly from the minor passives, with a bit of the CDR coming from Wildfire.
While it’s not a node we could skip anyways, that 6% Skill Leech near the end will do a lot of work by keeping us rather healthy. If we ever fall below 30% Health, Fuel for the Embers will kick in and double it to 12%. So at the very least with the consistent damage output of this build, we should be able to maintain that amount of health easily enough, if we’re not staying topped off in general.
The only triggered damage boost we get is from Magma Elemental which gives us 45% Armor and Resistance Piercing for 10 seconds when we cast any Ignite Skill. This let’s our abilities deal a fair amount more damage. For both damage reasons that will become clear with Mods and for defensive measure, we also pick up Incinerate which inflicts Ash when a Burn ends. We also take Extinction for the easy damage boost against low health enemies, which also affects how much we can heal from leeching.
With F.A.S.E.R Beam and Heatwave being out main damage sources, our mods will mostly be focused there, with Overheat still getting some boosts. The main goal is to keep everything burning as much as possible, for both sustain and bonus damage.
The Mods for F.A.S.E.R Beam focus on pumping out as much damage from it as possible. As such we want pick up Frequent F.A.S.E.R, Pure Power and Size Matters. This will give us a very powerful beam capable of carving through large groups of enemies with a significantly reduced cooldown. Ashen Champion was also a consideration here, but it’d only matter if the Anomaly Power boost lasts long enough for F.A.S.E.R Beam to come back off cooldown to make use of it or sustain it. Using it would also remove a source of Burn, which contributes a bit of extra damage.
For Heatwave, we’re looking at Burnt-Out, Hellfire, Inferno Wave and Fire Tsunami. This is a lot of mods for one skill, but it makes the best use of the slots to increase our damage output. We only need one charge, as it will be up often enough that it shouldn’t matter all that much. Heatwave with these mods will debuff the enemies it hits, while covering more area and inflicting additional damage to large groups of enemies.
The last mods go to Overheat, where we take Detonator, Master Consumer and Phoenix Force. This allows it to be a very consistent Anomaly Power Buff, as each cast will end up alternating between consuming Ash and Burn. Between F.A.S.E.R’s Burn, Incinerate inflicting Ash, and Master Consumer; this should prove to be both high damage on top of a very consistent buff.
For our weapons, we don’t particularly need anything special either. The standard Ricochet or similar mods will be helpful, in particular Hot Blood as it will inflict a Burn that we should be able to leech from, while also helping setup for skill usage. We could also go for Vulnerability Bullets yet again to have access to it as a debuff. We could also just seek out legendary weapons that have powerful damage mods to make them effective filler damage.
This build also greatly benefits from the Acari Armor Set Bonus. With heatwave being a main component in the build, it can provide a huge boost of power setting up devastating F.A.S.E.Rs. With the Bonus itself granting a ton of raw Anomaly Power, it’s hard very hard set to pass up on.
In terms of Attributes on Armor, Anomaly Power is our Priority for our top-line secondary stat. The other two stats should be Skill Life Leech and Status Power. Skill Leech will help us with Sustain, as we’ll effectively have health regeneration from the Burns we do inflict, on top of direct skill damage. Status Power is very beneficial for us, since our main goal is to keep enemies burning as long as we can. This makes the burn deal more damage, and also heal us for more. You can also pick up some Cooldown reduction in place of Status Power if you want to cast a little more often and don’t necessarily care about having the Burn be as strong as possible.
For Weapons, our Top-line stat should be Armor Piercing or Crit Damage. We shouldn’t need direct sustain from our weapon as we’ll get plenty from our skills, so we take damage. For the other stat lines, we want Status Power and Skill Life Leech. Status Power will increase the power (or duration) of our Burns and any other statuses we pick up. Skill Life Leech is still a great option here as well, as it helps a ton with keeping us on our feet.
Ashen Assault Ash Breaker build
This build focuses damage output through weapons, while making heavy use of the Ash status to keep yourself safe and debuff enemies in the process. With weapons being a heavy focus, Volcanic Rounds also becomes our main damage source. We then support it with Feed the Flames and Overheat. With all of this in mind, here’s the Skill Tree for the build.
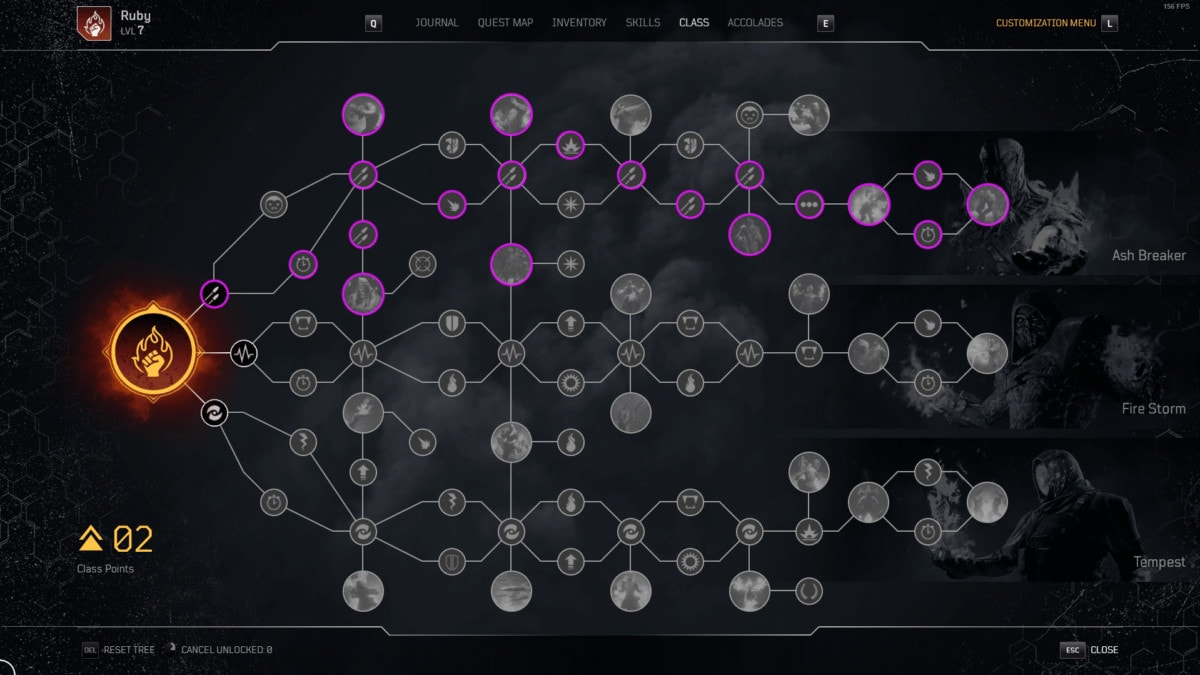
Out of all the Skill Trees so far, this one actually gets the most passives with trigger conditions, and easier access to the Vulnerable status. A lot of passives are focused into increasing Weapon damage, giving us a pretty significant bonus, especially towards marked enemies (which is almost always all of them thanks to Overheat).
Without any conditions at all, we get 16% Weapon Damage, 10% Anomaly Power, 15% Resistance Piercing, 30% Immobilize Skill Cooldown Reduction, and 20% Reload Speed. If we’re using an Assault Rifle, we gain an additional 20% Weapon Damage, due to Assault Master. If the Enemy we’re targeting is Marked by a skill, we also get 30% Armor Piercing from Armor Melting and an additional 40% Weapon Damage between the Mark of the Anomaly minor passives. If they’re inflicted with Ash, we get an additional 40% Damage due to the Trial of the Ashes minor passives. Elites take a further 10% damage, while we also take 10% less damage from them, thanks to Hurt Twice as Long.
When we activate an Immobilize Skill we also trigger two additional passives for a couple sizable bonuses. We trigger Hot Situation, which gives us 45% extra Anomaly Power for 10 seconds. On top of that we also activate Burning Situation which gives us 60% Weapon damage for 10 seconds. Any time we Inflict a Burn, it also leads to triggering Incinerate and Ashes to Ashes, Inflicting Ash and applying Vulnerability when a Burn ends.
With everything put together in the perfect scenario, an Elite or Boss Afflicted with Ash through an Immobilize Skill… We’re looking as bonuses as high as 186% Weapon Damage with Assault Rifles. On top of this, we’ll also have 55% Anomaly Power, 30% Armor Piercing, and 15% Resistance Piercing. This means this will be a very strong burst window, with or without Volcanic Rounds active.
As mentioned before, Volcanic Rounds is going to be our main damage source, alongside our weapons. To do this, we’ll be looking to grab Armor Melting, Extra Mag, Lava Shots, Reload Boost, and Susceptibility. This makes it so when we activate Volcanic Rounds, we get bonus Anomaly Power to take the place of Phoenix Force for Overheat. We Also get two magazines worth of Volcanic Rounds that will reduce Armor and Resistance on hit. When it ends, we also get a huge temporary boost to Firepower to keep our damage high between usages.
We supplement Volcanic Rounds with Feed the Flames, and using mods we’ll have Volcanic Rounds active for much longer. To do this, we’ll be looking to grab Bullet Absorption, Flame Grasper and Wide Grip. This will let Feed the Flames replenish up to 60% of our Magazine with a single use. Depending on the weapon we use, we should be able to cast this one during each magazine of Volcanic Rounds, giving us just over 3 magazines of empowered ammo if used correctly. We should be able to do this roughly every 10 seconds or so, to also maintain other buffs.
Finally, we have Overheat, which takes the last couple mods. to better fill its role as a support Skill, we take Detonator and Third Degree. This lets us cast it frequently and makes enemies hit by the skill take increased Weapon Damage. We opt out of Phoenix Force as Anomaly Power isn’t as important for this build, seeing as it will only buff the Burns we inflict. It will however consume Volcanic Rounds’ Burn, and subsequently apply Ash as well as Vulnerable to all enemies in the area.
For Weapon Mods, the things we want here are Damage and Ricochet-like mods. We want our weapons to deal the bulk of the damage to take advantages of the bonuses from our Skill Tree and Mods. Bonus damage and mods that let your shots chain work really well for that purpose. We can also use Mods to prolong the duration of Volcanic Rounds, using mods that reduce ammo consumption, like Brain Eater.
The Torturer Armor Set bonus works nicely for this setup. Granting more ignite range to Volcanic Rounds and making it take less rounds in general for everything to be ignited. Though the full set may not really be the best in slot option for this build.
For our Armor Attributes, Firepower is the high priority top-line stat. Since this builds is focused on weapon usage and Pyro doesn’t get too many Firepower buffs, we want to stack it as high as it can go for more DPS from our weapons. Our secondary stats should be Skill Life Leech and Long Range Damage. Skill Leech will let us heal from the mass burning cause by Volcanic Rounds and Overheat, giving us decent sustain. We opt for long range damage here, since we want to kill things before they get on top of us. While Skill Leech will help keep us alive, it’s not quite as strong as a safety net.
For Weapon Attributes, our priority top-line stat is Crit Damage. With a heavy focus on weapons and a good amount of armor reduction in our skills, Crit Damage is the strongest option. Our other stats here should be Long Range Damage and Status Power. We take a bit of Status power here instead of opting for more Skill Leech, this will give a slight bump to our Burn damage and allow it to heal for a bit more. Long Range damage is taken for the same reasons it is on armor.
Outriders Class Guides and Best Builds
This is a list of individual Outriders Class Guides. Each guide goes far beyond the normal and generic overview of the class you would see anywhere else. RubyRose has done a lot of work, research and testing so that we can offer you here on VULKK.com the most detailed and informative guides for all four classes in Outriders.
Learn how to play the class, get the basics, build upon them as you level up and master your role and gameplay style to be ready for the EndGame. FInd out what the best and most useful builds are for each class and be ready for any situation and combat scenario People Can Fly and Square Enix have designed for you in the game.

Outriders Devastator Class Guide and Best Builds
Complete Outriders Devastator Guide explaining the basics of the class and sharing builds for early game as well as EndGame at level cap!

Outriders Technomancer Class Guide and Best Builds
Complete Outriders Technomancer Guide explaining the basics of the class and sharing builds for early game as well as EndGame at level cap!

Outriders Trickster Class Guide and Best Builds
Complete Outriders Trickster Guide explaining the basics of the class and sharing builds for early game as well as the EndGame at level cap!
Outriders Essential Beginners Guides
This list showcases some of our top Outriders Beginners Guides - instructional content to help you get into the game, learn the basics and get a nice smooth start with your adventures on Enoch.
Outriders Classes and Roles: A Beginners Guide
Beginners friendly guide to Outriders Classes. What Devastator, Pyromancer, Trickster and Technomancer can do and which role best fits you.
How Gear and Mods Work in Outriders: A Complete Guide
Guide explaining how gear works in Outriders, what types and rarites are there, how mods work and how to effectively gear up your character.
Outriders User Interface Guide: Everything You Should Know
Guide explaining how the Outriders User Interface works. What each little detail in each window and tab means and how to create your own HUDs.
Outriders DOs and DONTs Guide: Beginner Tips and Tricks
This Outriders DOs and DONTs guide is a large collection of tips to help you get a smooth start in the game and teach you helpful tricks!
Outriders Crafting Guide: make your gear stronger
Crafting in Outriders is different to other RPGs or Looter games. This guide will show you how to use the system to make your gear awesome!
Outriders Expeditions Preparation Guide and Tips
This Outriders Expeditions Guide will help you best prepare for the Endgame content with tips on how to fast climb Challenge Tiers and more!