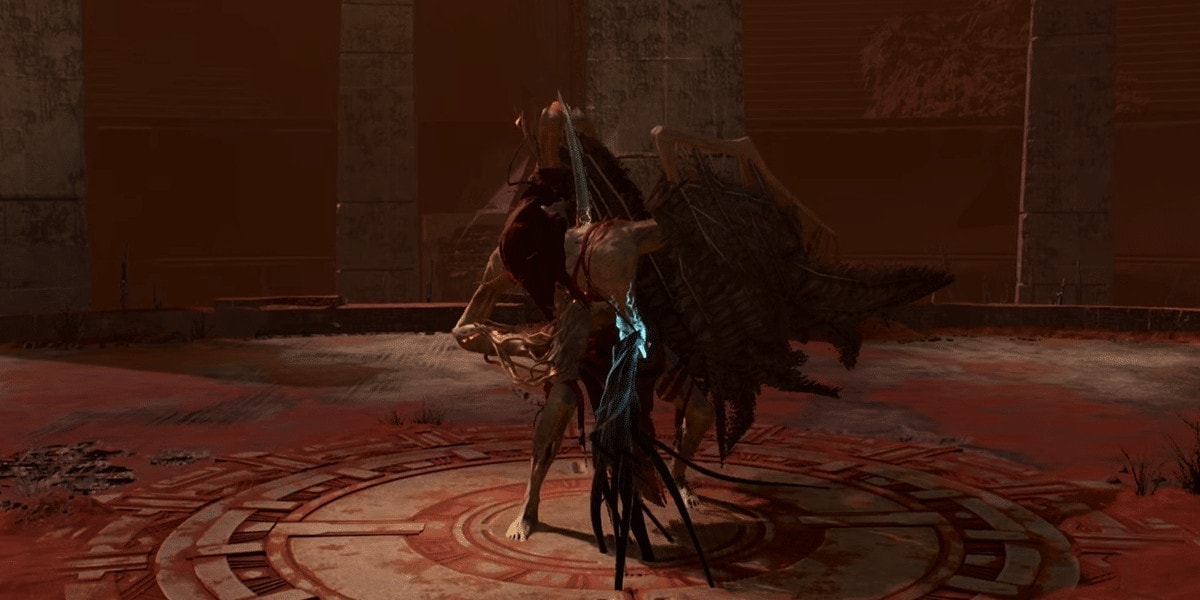
Ixion is the second boss of Returnal, taking the form of a winged demon. This guide will detail How to reach the boss, how to defeat them as well as the rewards for doing so.
This guide contains spoilers. If you haven’t reach this boss yet and wish to fight them blind, it’s best to make an attempt first. If you have fought this boss and just need some strategies for beating them, read on.
Reaching Ixion
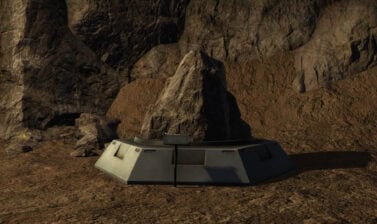
While Ixion themself can be a rough encounter, it’s no easy task getting getting there. You need to traverse the Crimson Wastes, and eventually scale the Mountain here. While reaching the boss Arena doesn’t require any special key like the previous boss Phrike, It’s a much longer journey overall. Eventually, you’ll reach their very obvious arena.
Table of contents
Ixion’s Attacks and Strategies
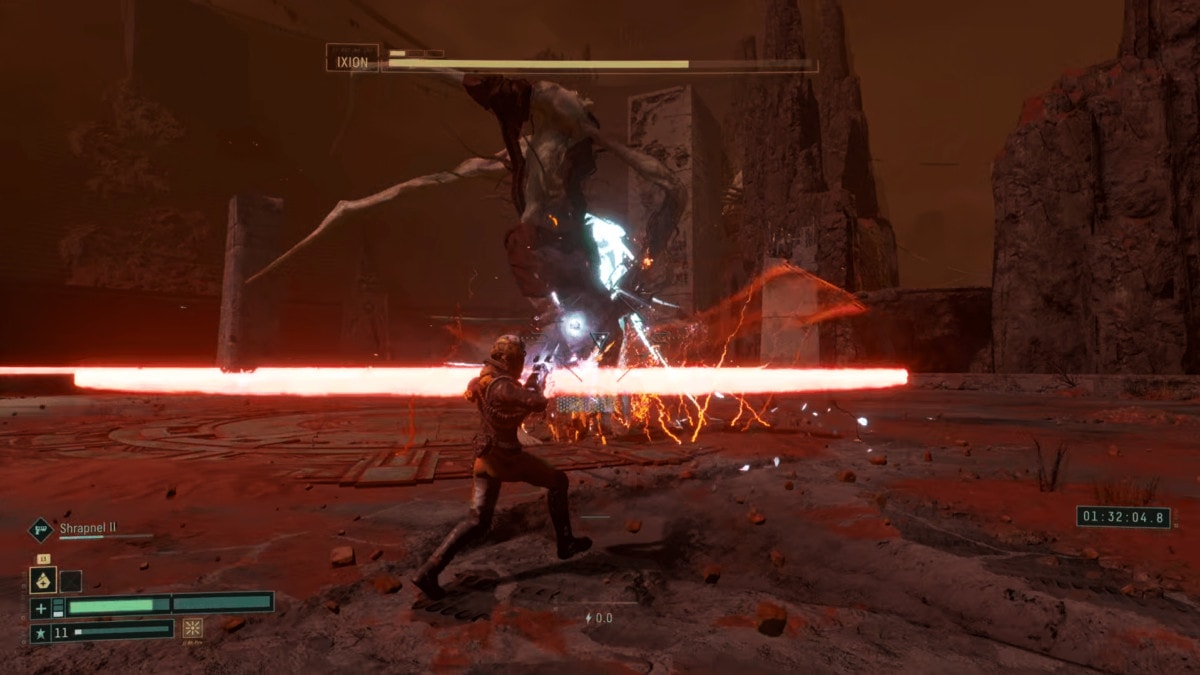
Like Phrike before them, Ixion also has three phases to their fight. Each phase will be broken down independently, noting any changes to previous attacks, if any.
Phase One
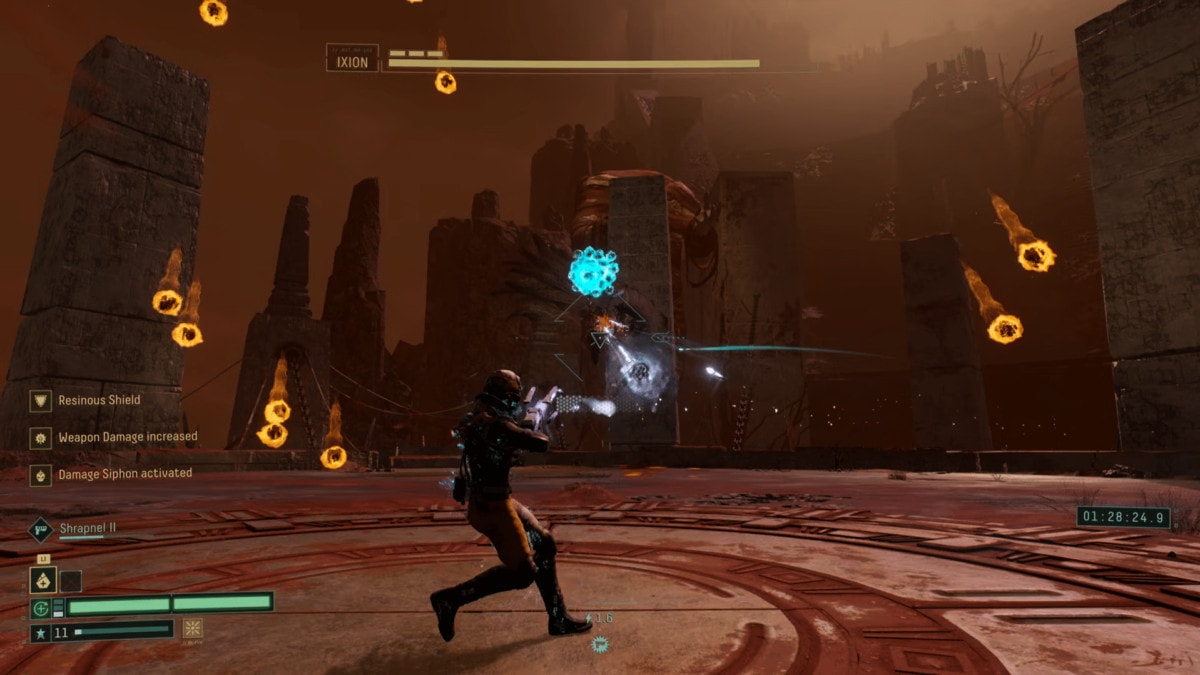
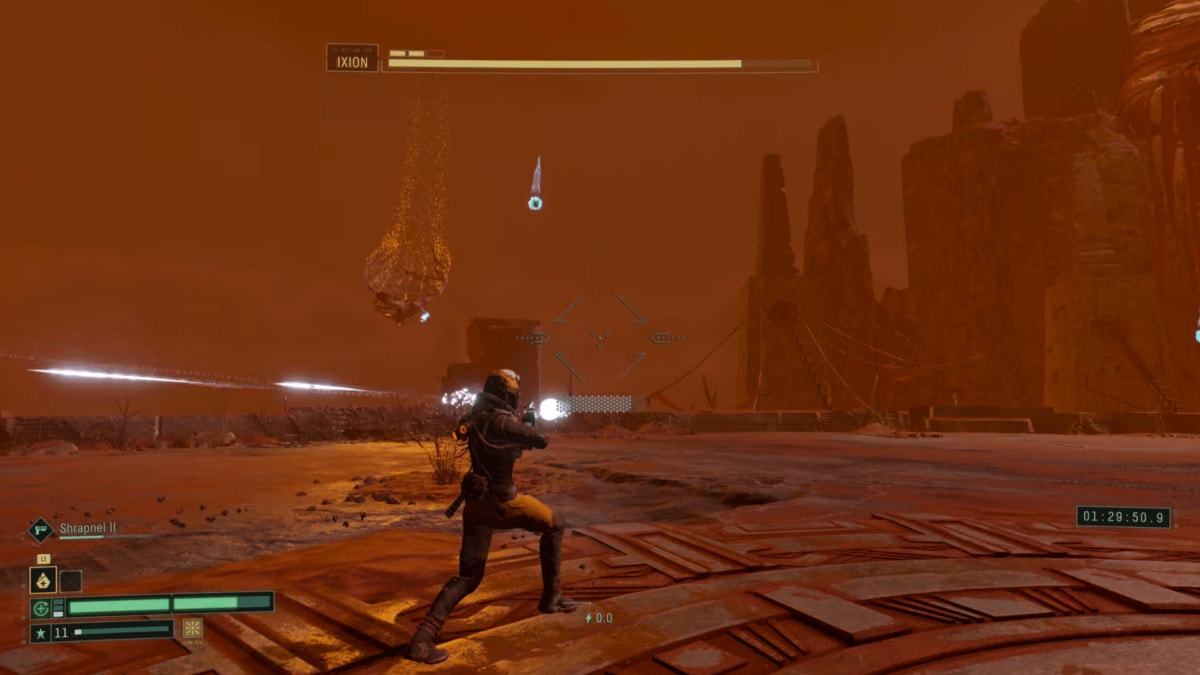
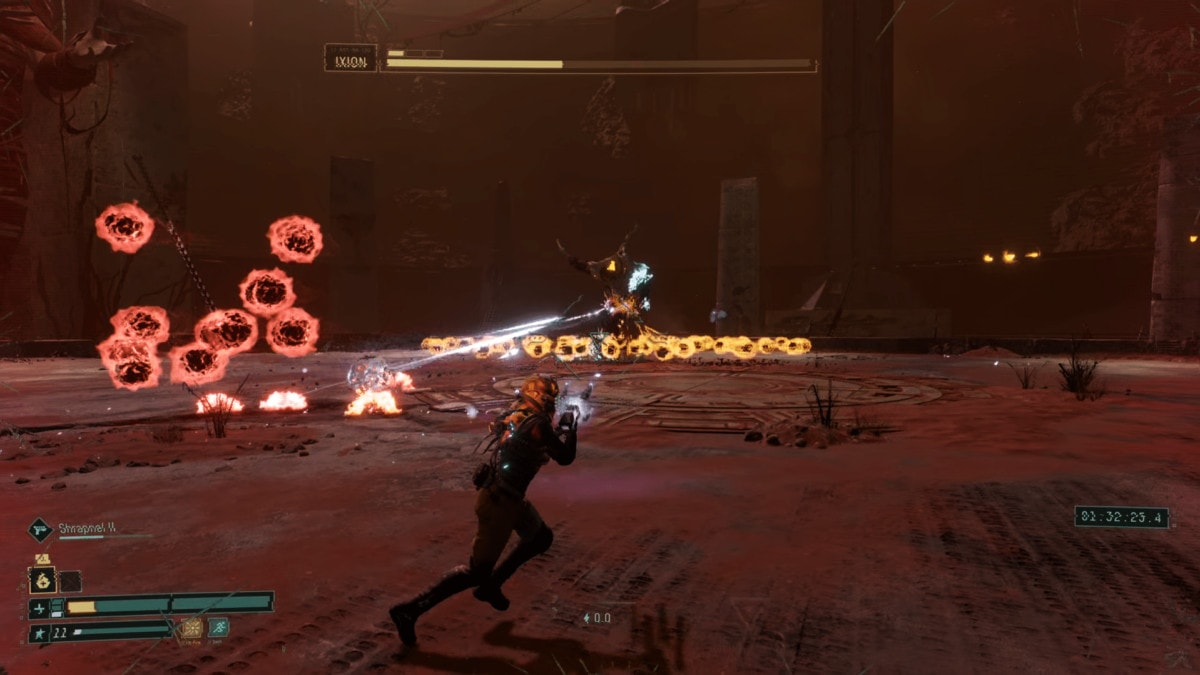
Ixion’s first phase will always start with the attack that I’ll refer to as Projectile Burst. since you start on top of Ixion most times, you’ll need to back up immediately for this attack to be easier to dodge.
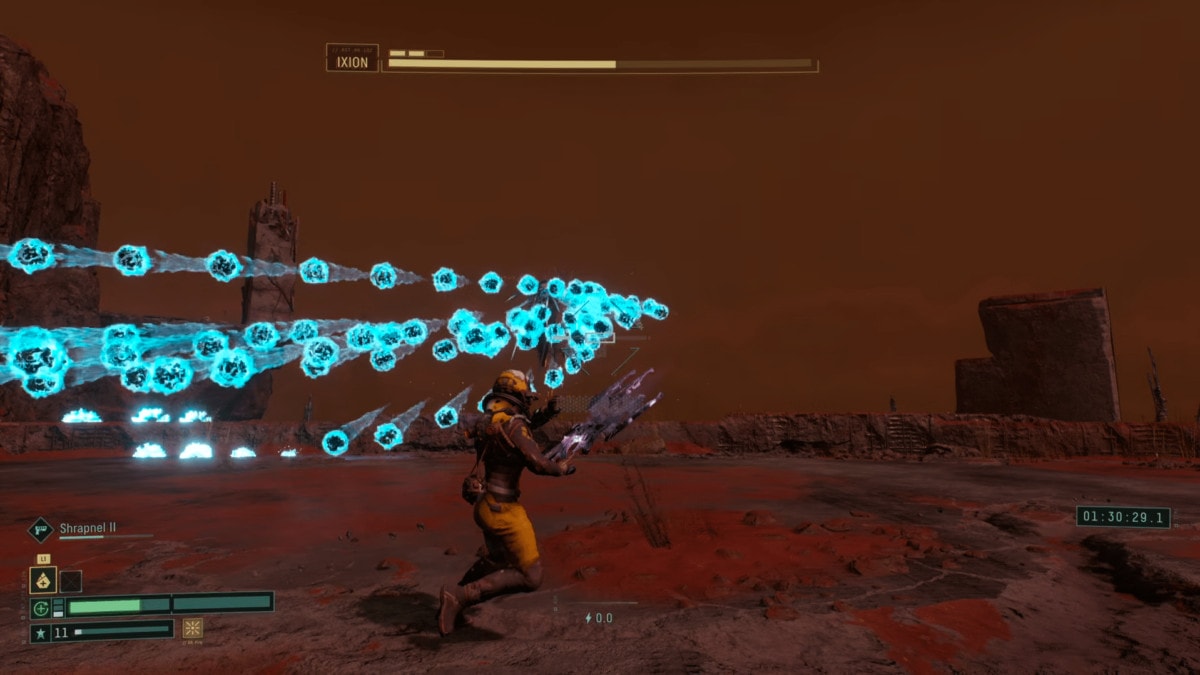
Projectile Burst
With this attack, Ixion will charge itself with a blue colored energy. This charge animation will be the same, regardless of the variation of this attack, but it will always cycle all of these attacks before repeating them.
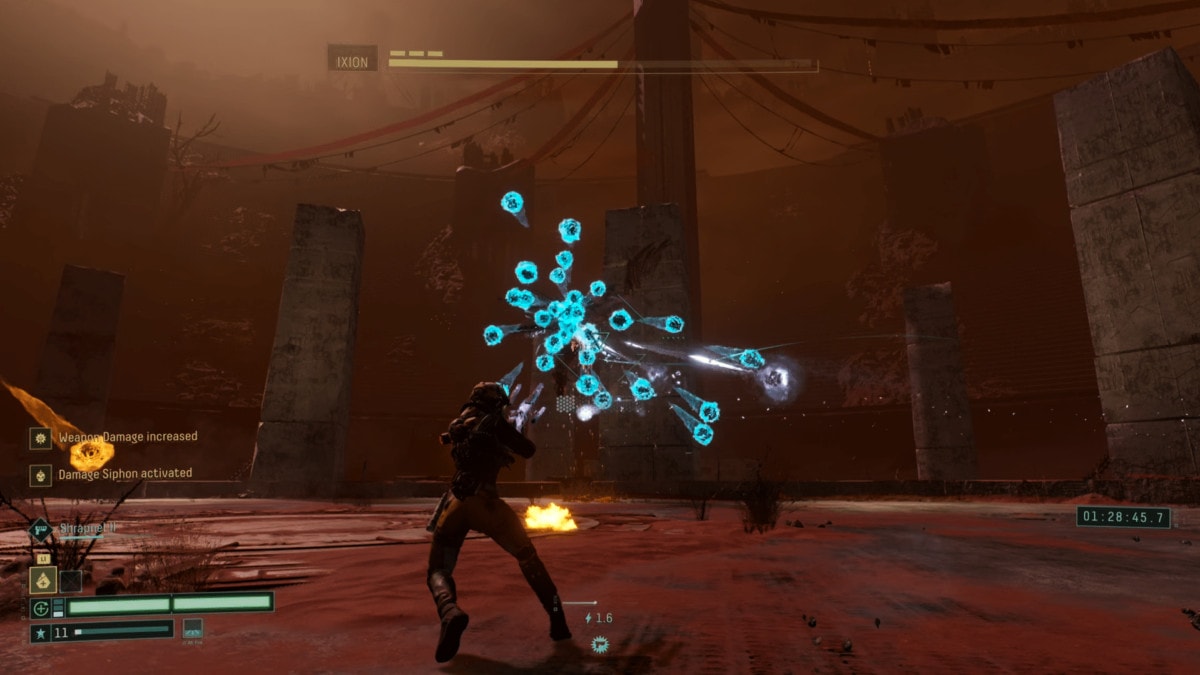
This variant of projectile attack is fired out in a shotgun-like pattern. It’s a wide spread as well, which mean keeping your distance makes it much easier to avoid.
When keeping your distance, this attack can easily be avoided by sprinting to either side of the attack. You can still dash through projectiles if necessary, but usually isn’t.
Charged Dash
In between these Blue Projectile attacks, you’ll see Ixion charging with Orange energy. This indicates Ixion is about to reposition himself for the next attack. Ixion will do this between every attack in Phase One and immediately following projectile attack in Phases Two and Three.
This dash is also followed by a small burst of projectiles from Ixion’s starting location. There’s also a trail of particles indicating Ixion’s movement direction.
These move pretty slow and often only serve to make it slightly harder to maneuver around follow up attacks or just as a distraction.
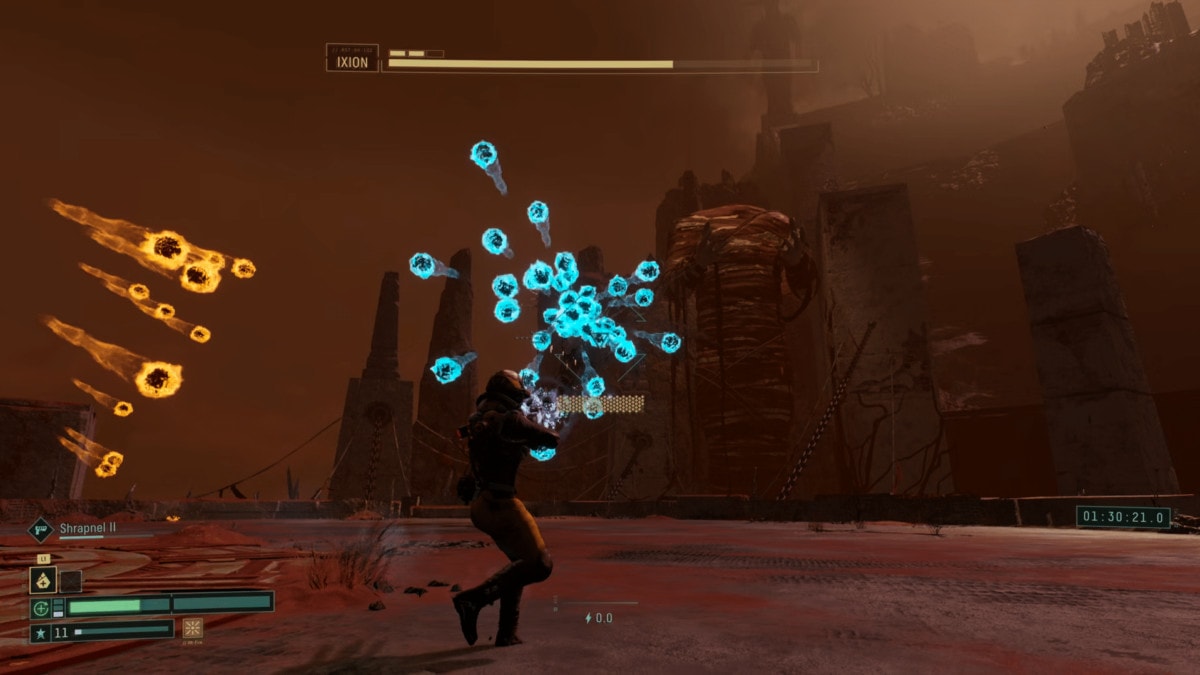
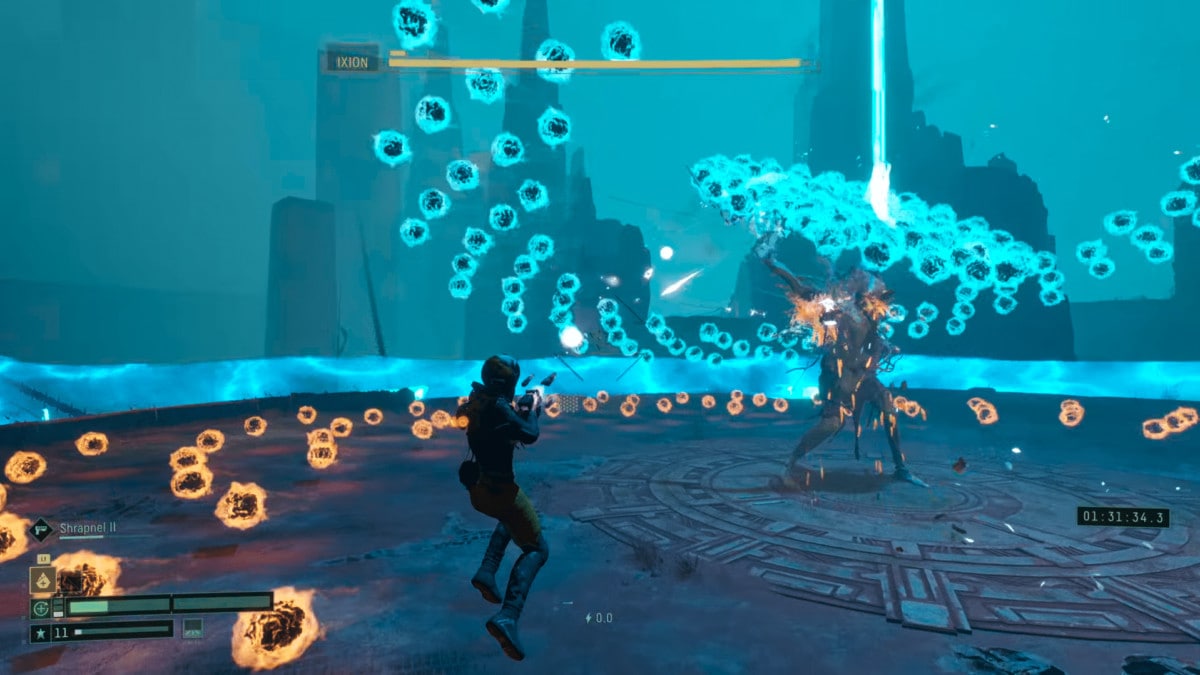
Projectile Stream
This is another attack similar to Projectile Burst, and is one of the attacks mentioned as part of the cycle of projectile attacks. This one has Ixion directly targeting you, sending a small bursts of projectiles at you, and even leading them in some cases. This attack ends with a quick Projectile Burst.
This attack can be easily avoided by sprinting and not trying to DPS the boss at the same time. If you want to squeeze in a bit of damage, alternate between sprinting and shooting, using a dash to avoid any well placed projectiles.
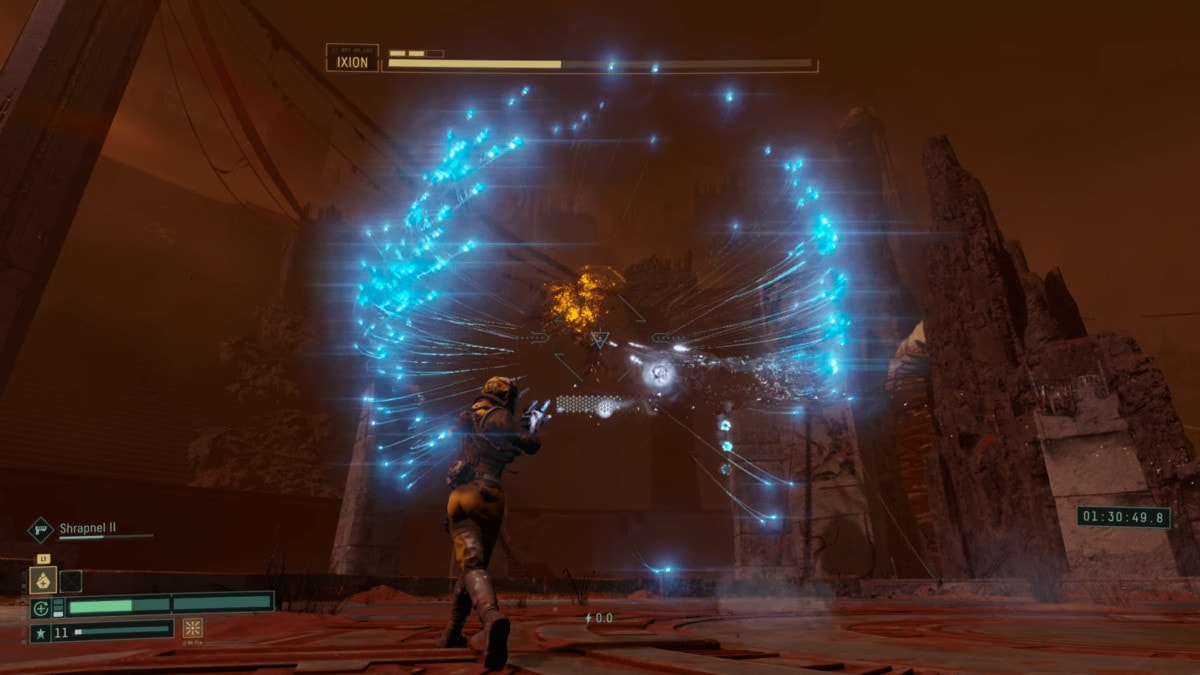
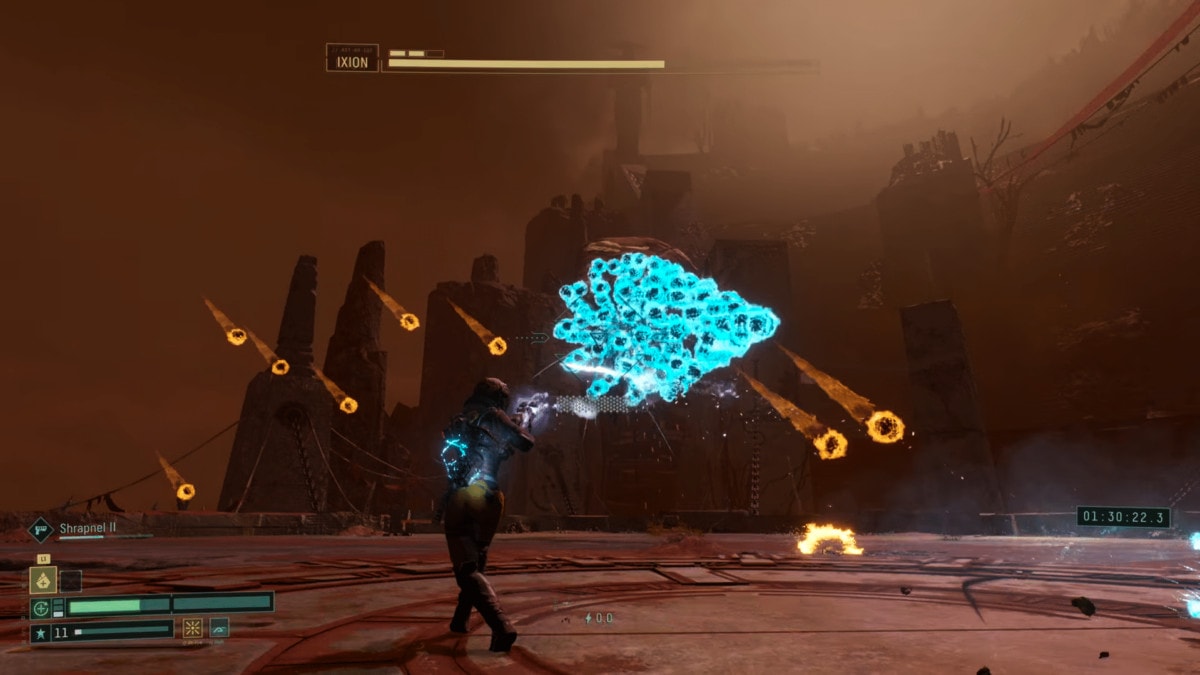
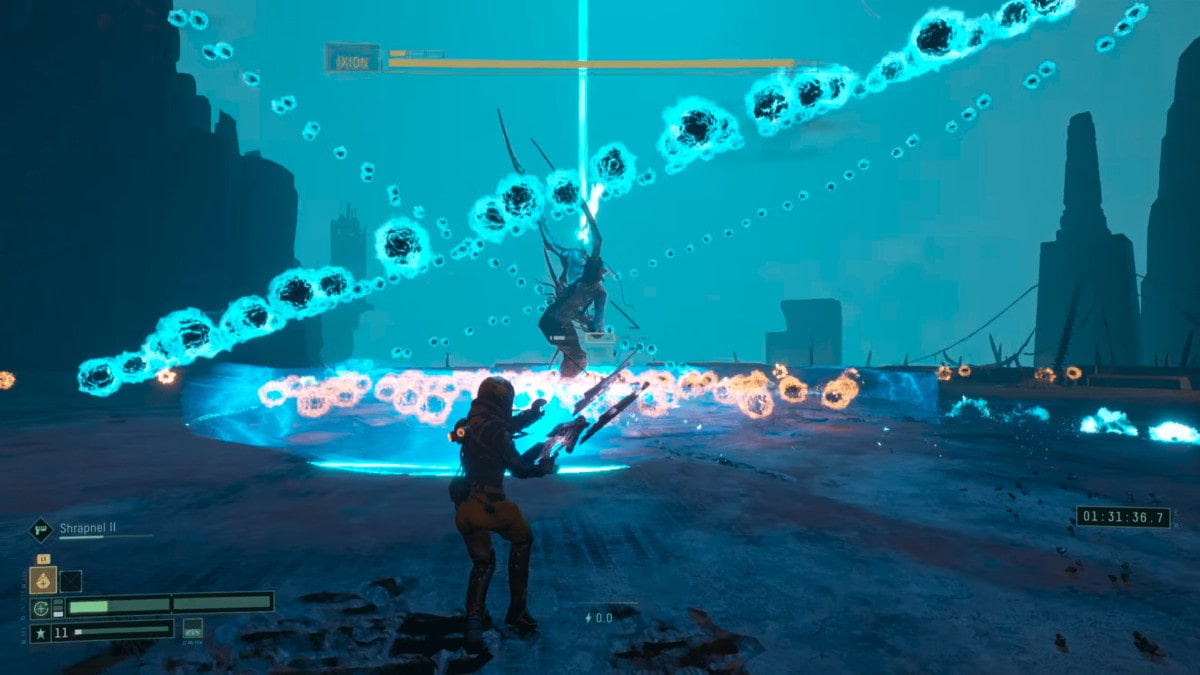
Projectile Spiral
This overly intimidating attack has Ixion launch a massive barrage of projectiles in a spiral pattern, targeting your current location at the start of the cast.

While impressive and mildly intimidating to look at, this attack is very easy to avoid. You can simply move away from it, while firing even and be perfectly fine. As long as you don’t enter Aim mode or double back, it’s rare to be hit by this. If you want to be extra safe, Dash at the very start to give yourself more breathing room.
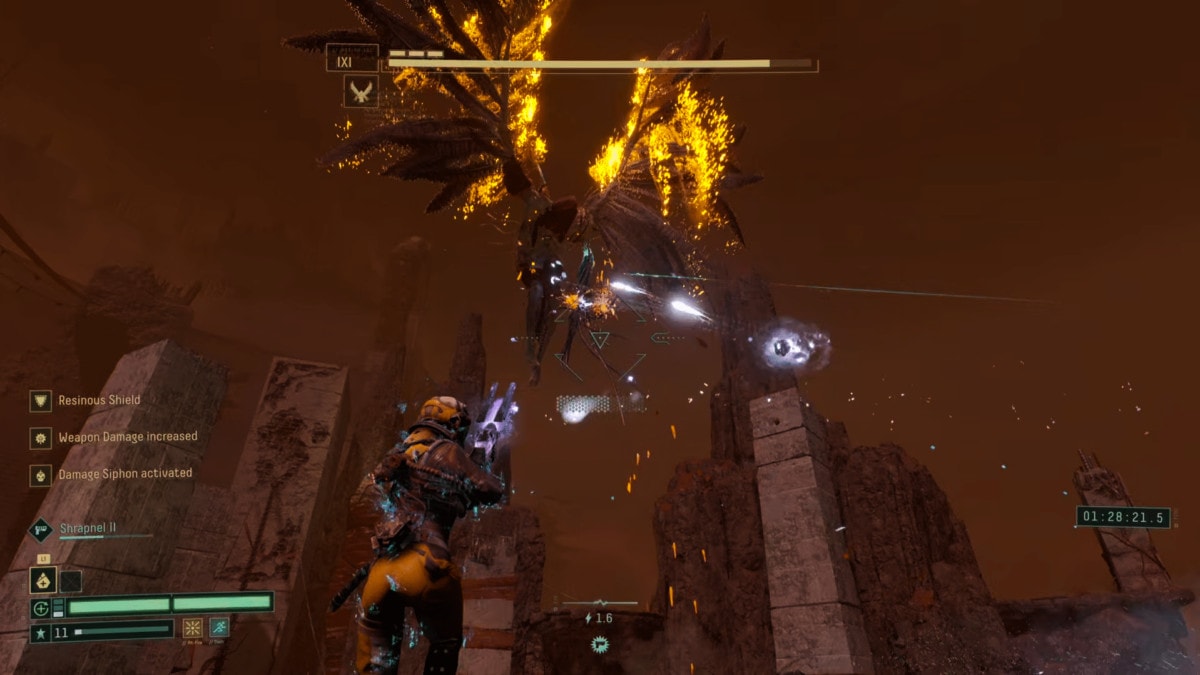
Phase Two
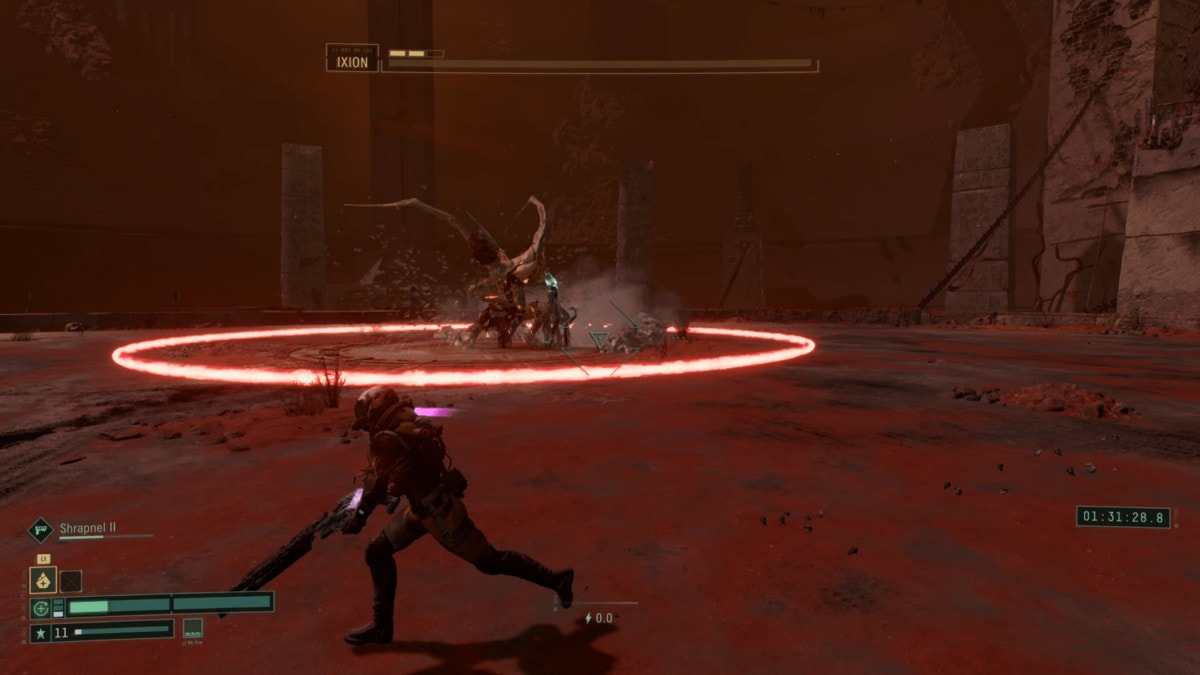
When entering Phase Two, prior to Ixion becoming vulnerable again, Ixion will slam in the middle of the Arena and release a large shockwave. Like other similar shockwaves, this one can be jumped over or dashed though. Ixion will also do this again upon entering Phase Three.
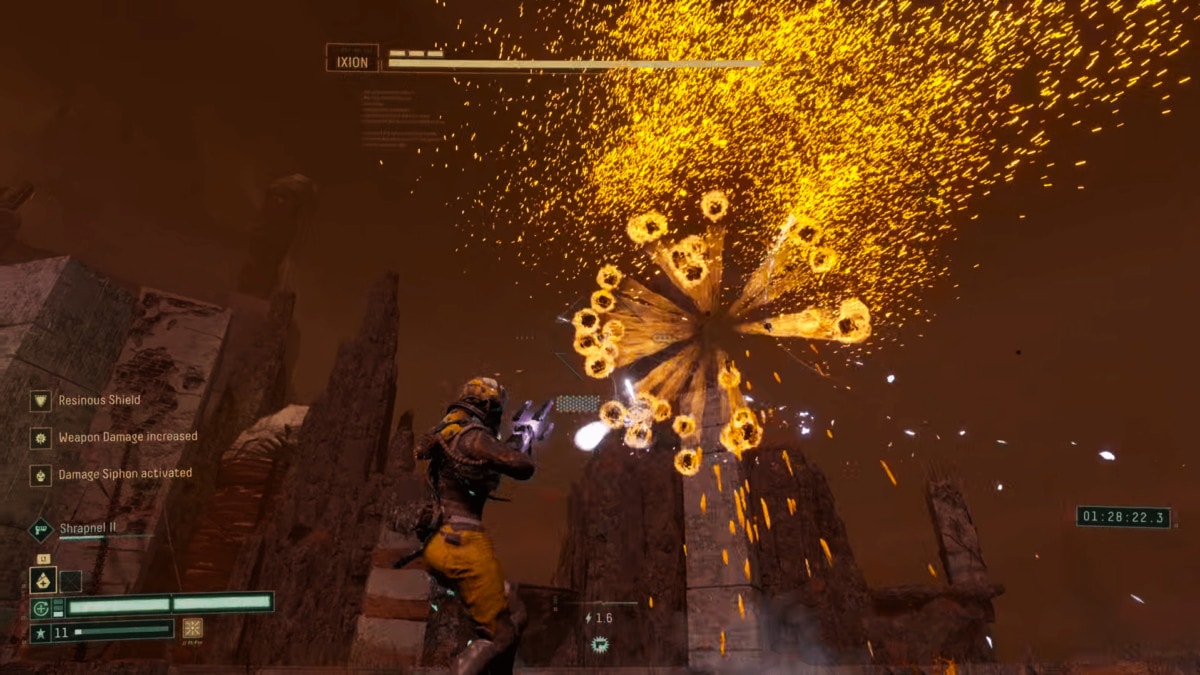
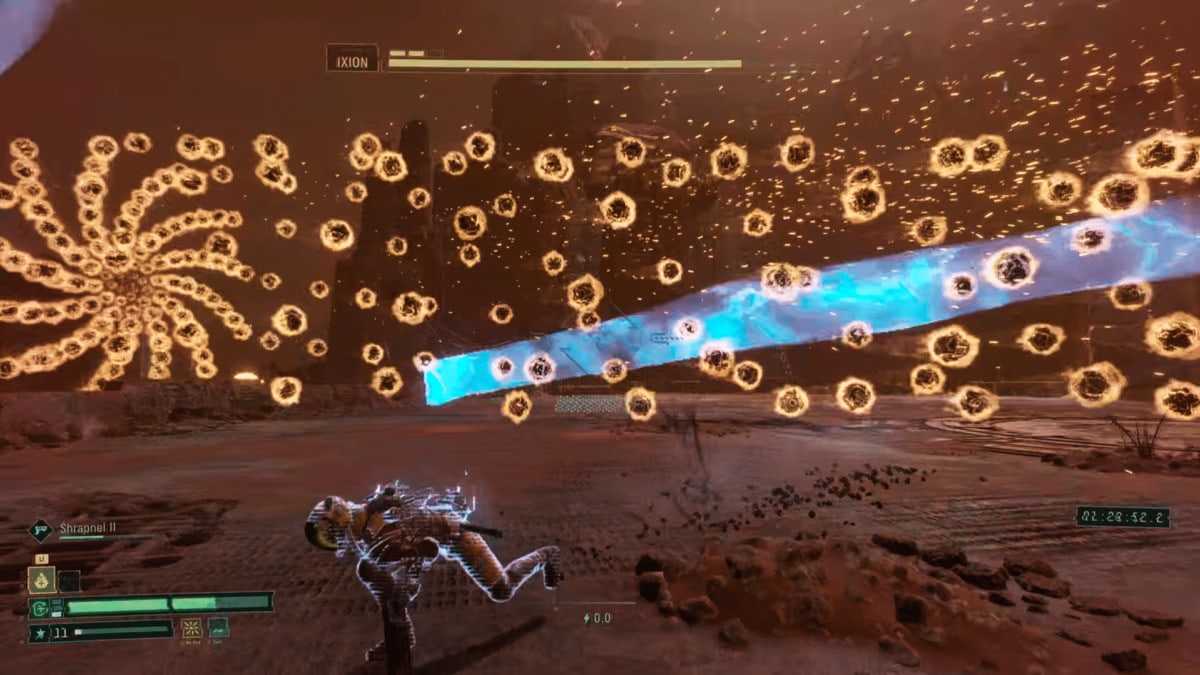
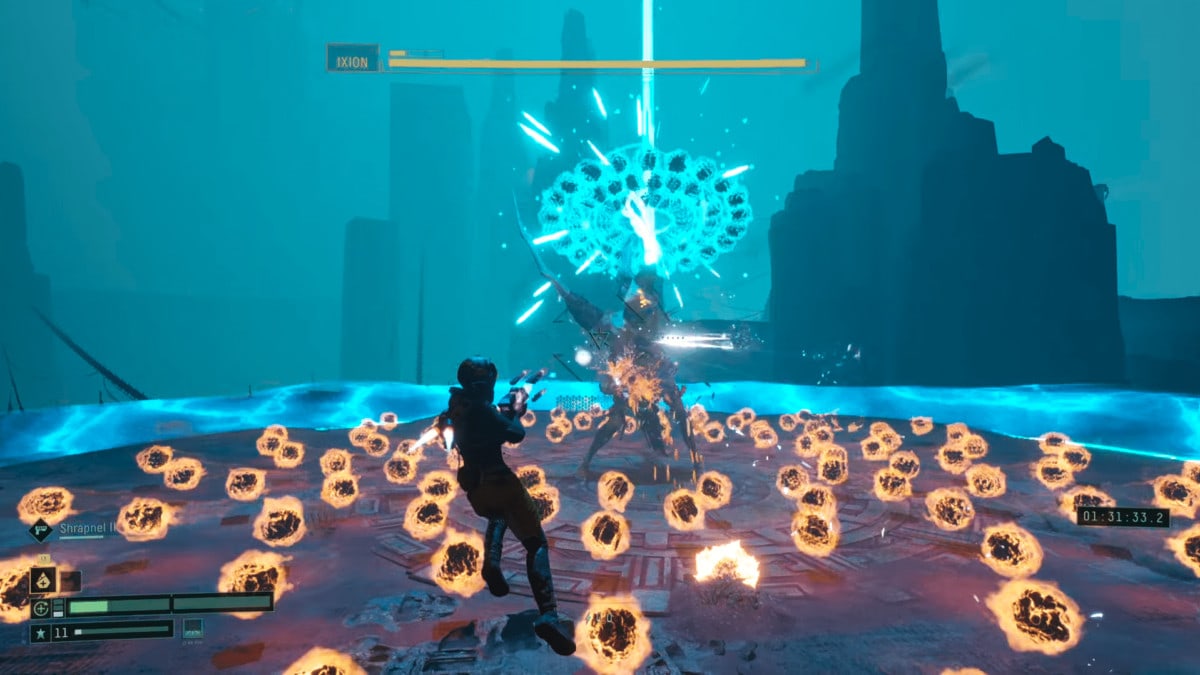
The “Touhou” Attack
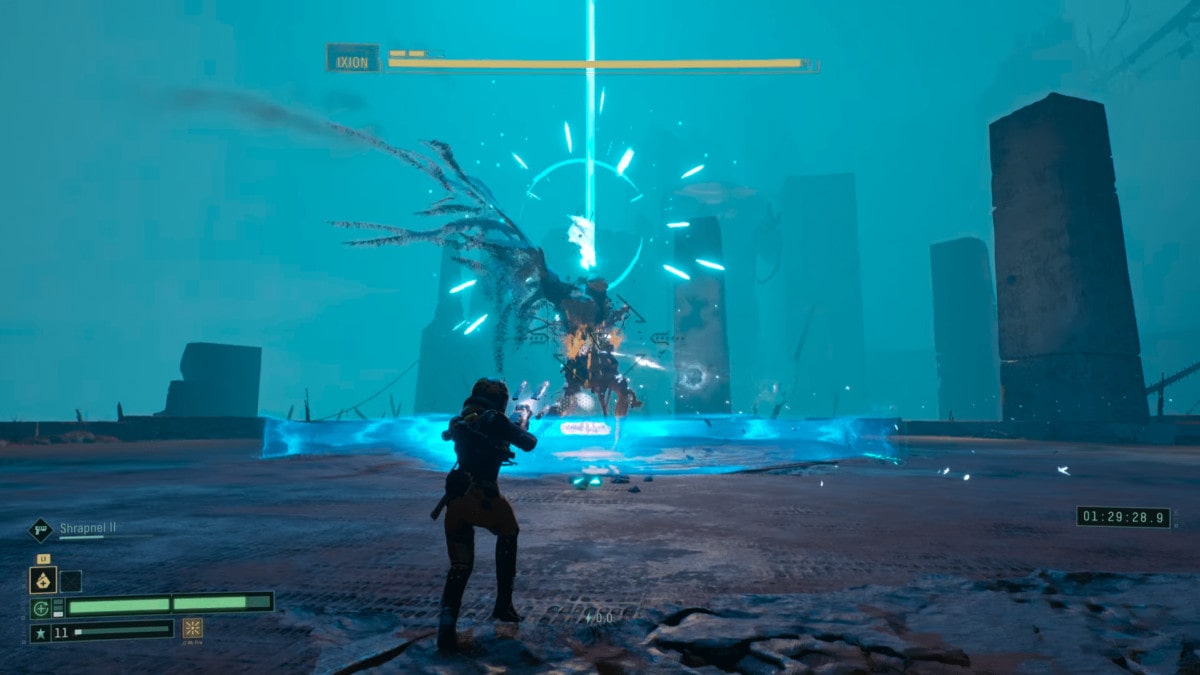
This attack become very apparent when Ixion move to the center of the Arena and starts channel blue energy, this time also making the entire area have a blue tint to it. This massive, lengthy, and dangerous attack leaves little room for attack opportunities, as the first time you deal with it, dodging will likely be your focus.
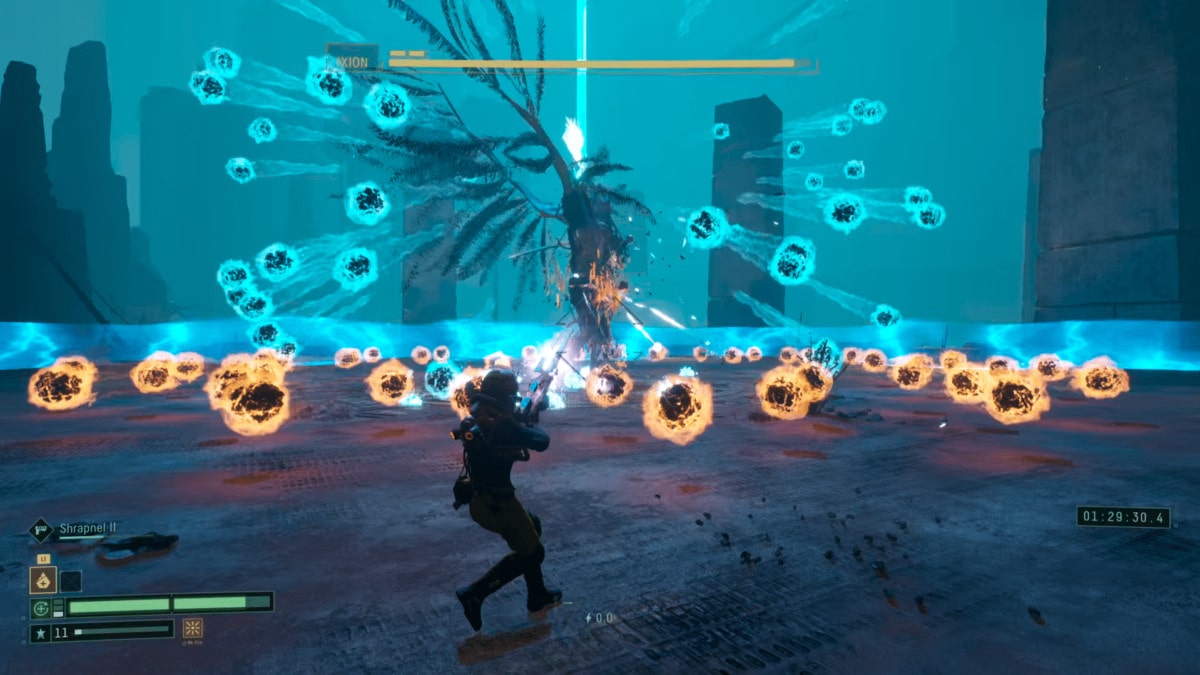
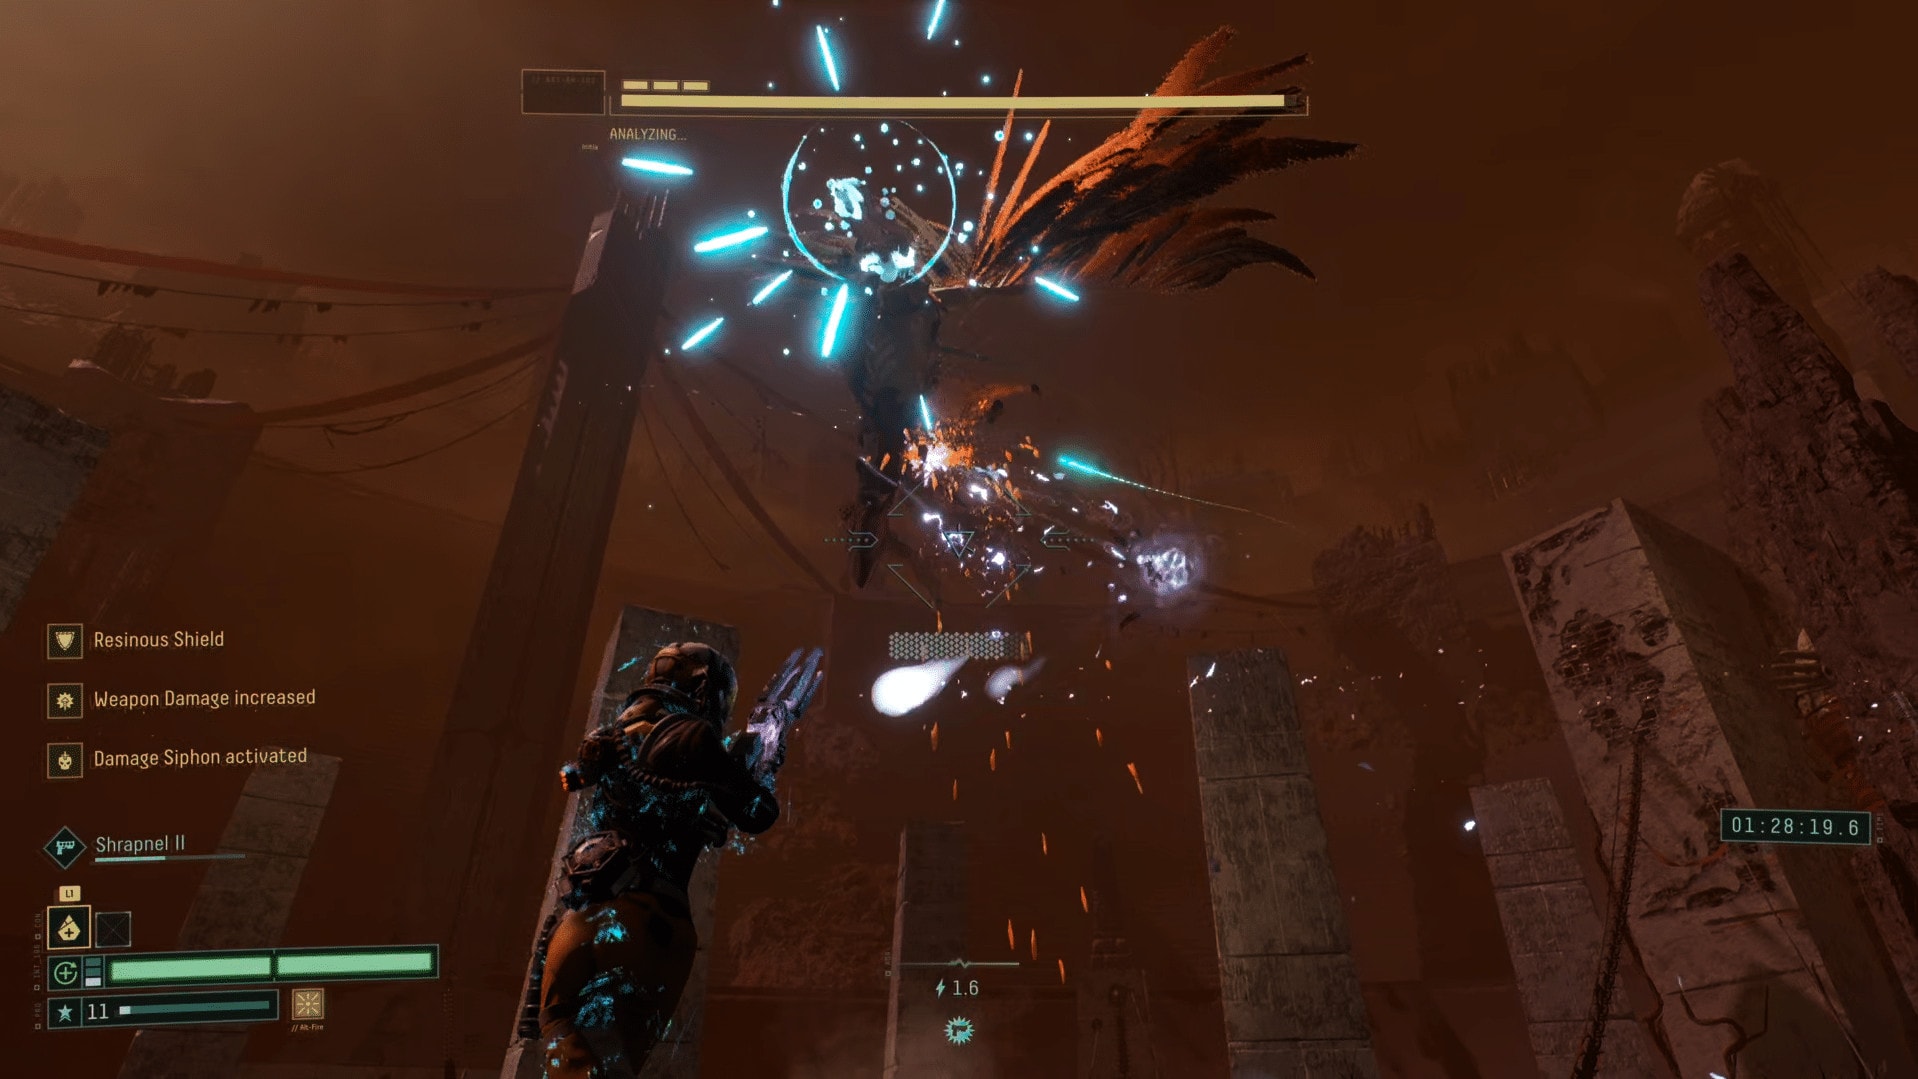
This attack has three parts to it: the Blue Energy Waves, Blue Projectiles, and Orange Projectiles. Ixion will cycle each part Five Times. This makes for a total of fifteen attacks in pretty rapid succession.
The Energy waves can be avoided by simply jumping over or dashing through them, similar to the Red Shockwaves. The Orange Projectiles can be avoided with quick side steps, moving to one side than the other, or by dashing forward though them. The Blue Projectiles only launch in front and behind Ixion, so positioning yourself removes most of the threat of them.
Spiral Wave Dash
Immediately after using the Touhou attack, Ixion will often go to the edge of the arena and charge up with orange energy. You’ll need to find him quickly, or listen for the screech indicating this attack is about to go off.
This attack will have Ixion charge at your current position, releasing an energy shockwave to both sides, and a spiral of orange projectiles along the same path. Ixion will often perform this attack three times in a row.
If you hear the screech, dash immediately after it ends and be prepared to jump over the blue shockwave as the attack will go off right after. If you manage to spot Ixion before the charge dash to either side of the incoming attack and jump over the shockave.
Beam Flurry
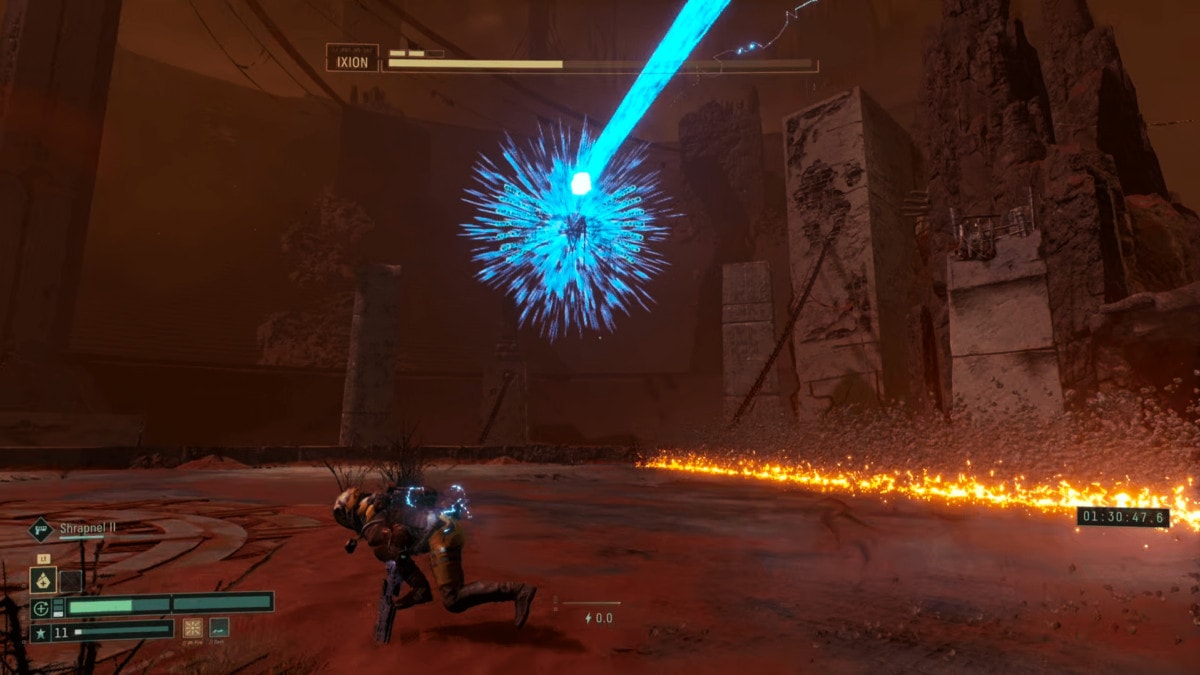
The first part of this attack is very quick, and has Ixion launching a beam straight at you, similar to Phase One of Phrike. It can be dodged with a well timed dash to either side.
Alongside this beam is a flurry of homing projectiles, also reminiscent of Phrike and other enemies from this Biome. These can be dodged by Dashing to the side and then sprinting. The dash helps make the initial projectiles miss, and forces the ones after to re-target slightly. Sprinting makes it so they have a harder time actually re-targeting and connecting.
Projectile Sweep
The last entirely new attack for this phase is another variation of projectile attack with the blue projectiles. Ixion will sweep across the arena with a wave of projectiles. This attack will fully sweep the arena four times, twice in each direction.
Simply staying near the middle and dashing through the projectiles as Ixion sweeps is the easiest way to avoid the attack and fit in plenty of damage. If your Dash has a longer cooldown than normal due to a Malfunction or Parasite, positioning further away will leave bigger gaps between projectiles that can let you avoid them easier, though not without risk.
Projectile Combo
This attack combines the Projectile Burst and Projectile Spiral of Phase One. Ixion launches a burst of projectiles in a shotgun-like pattern first, then follows with the Spiral pattern.
This attack can be avoided by simply Dashing to the side just before the Burst finishes and as the Spiral starts. Since this Spiral doesn’t track you like a lot of the Projectile attacks do and simply towards where you were, a single dash is all you need usually.
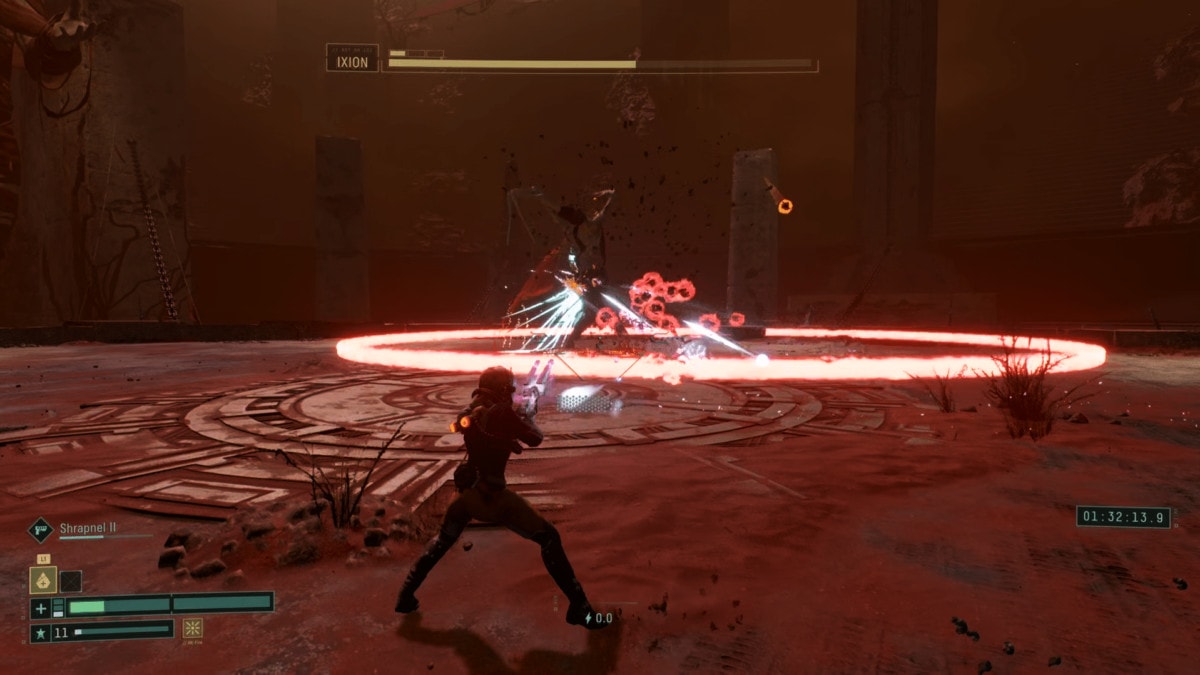
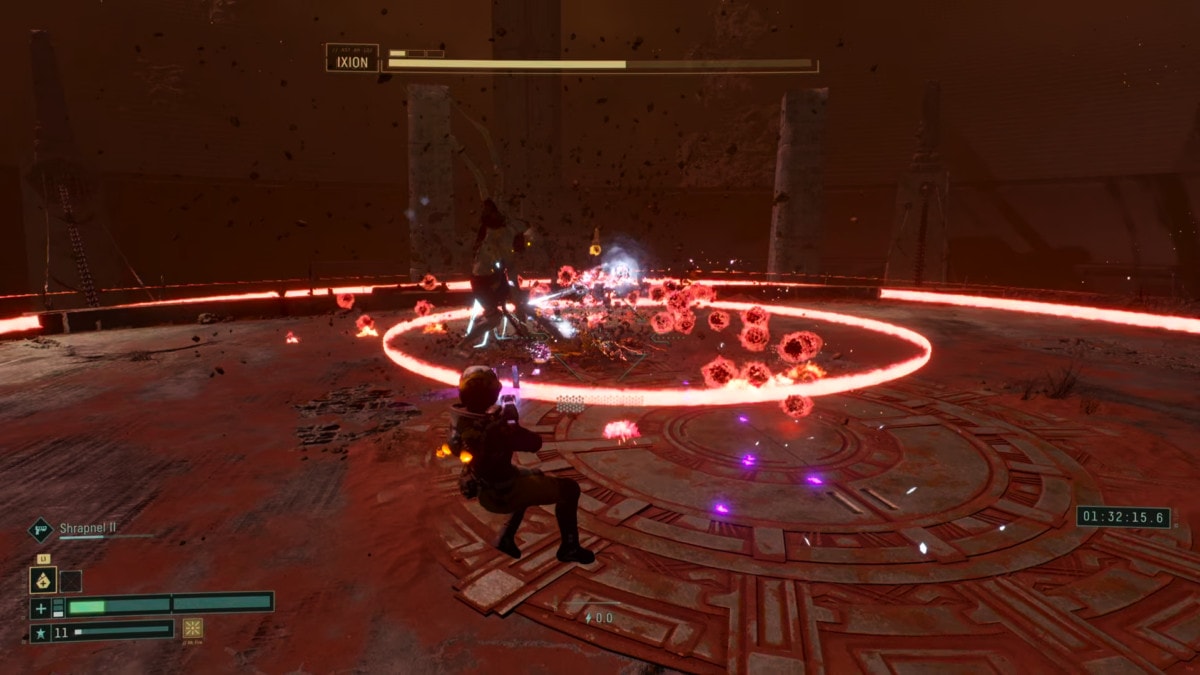
Phase Three
Again, entering Phase Three, will have Ixion slam into the center of the arena, and release a shockwave just before becoming vulnerable. Just like Phase Two, Ixion will also go straight into a modified Touhou Attack. This phase also adds a lot of quick melee attacks, so don’t get caught off guard.
“Touhou” Attack #2
Similar to the one in Phase Two, this attack has five waves of each attack, minus the blue Projectiles which has two less cycles, due to it being longer. It’s still the same rotation of Shockwave, Orange Projectiles, Blue Projectiles.
The main thing to note is the change of pattern for the Blue Projectiles. They release in a circular pattern three times; angled forward, then backwards, then forward again. This longer animation makes the last wave of projectiles line up with the second shockwave and second set of orange projectiles.
Similar to the first variation of this attack, staying to the right or left of Ixion makes avoiding the blue projectiles easier, though there’s still a chance for them to hit due to the new pattern. You should look to jump over the shockwave and immediately dash over the orange projectiles if you’re close enough to do so. If positioned far enough away from the boss, you can get away with only jumping over projectiles and shockwaves as well.
Melee Slam
This attack has Ixion slamming the ground three times, releasing a shockwaves and a small amount of projectiles with each slam.
The projectiles are really only ever a threat if you’re close to Ixion, as they can easily be side stepped. Jumping over these shockwaves is recommended, as you won’t be able to dash though all three back to back very consistently.
Melee Shockwave
All of Ixion’s melee attacks in this phase are accompanied by a shockwave. It’s very risky to melee this boss to begin with, this just adds to that. Ixion will occasionally just do a single melee swipe to launch a shockwave.
Like all other shockwaves, just jump over it, assuming you’re positioned safely away from the boss.
Melee Dash
This attack combines Ixion’s Charged Dash and Melee Shockwave. Ixion dashes to you, releasing projectiles from their starting position and releases a shockwave from the end position following a melee attack.
When Ixion’s arm starts to glow blue as shown above, this is the indicator that this attack is about to occur. Be prepared to dodge this attack. This attack can be avoided can be done by dashing to the side just before the melee swing. it needs to be a long dash, and needs to end near Ixion to avoid the shockwave.
A riskier but more reliable method of avoiding this attack, is to Jump Backwards away from the melee then dash over/through the shockwave. It’s riskier as it requires practice to do consistently, but more reliable compared to trying to perfectly time a long dash.
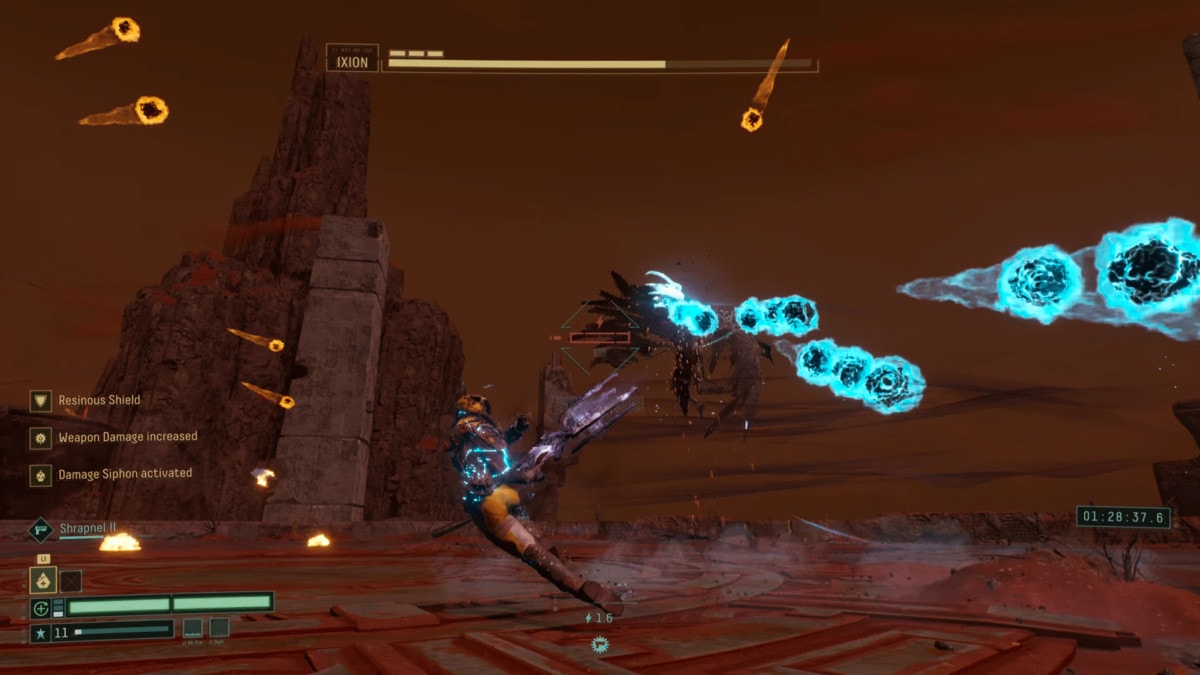
Projectile Shots
This attack has Ixion releasing a series of slower red projectiles and fast blue projectiles. The Blue Projectiles are the only threat, as the red ones only serve as decoys to get you to dash, expecting a faster projectile. At the end, Ixion will release a burst of Orange projectiles along the ground.
To avoid this attack, Simply focus on dodging the blue projectiles, by sprinting or dashing. The Orange projectiles are easier to dodge from further away as they spread out quite a bit allowing you to sidestep them.
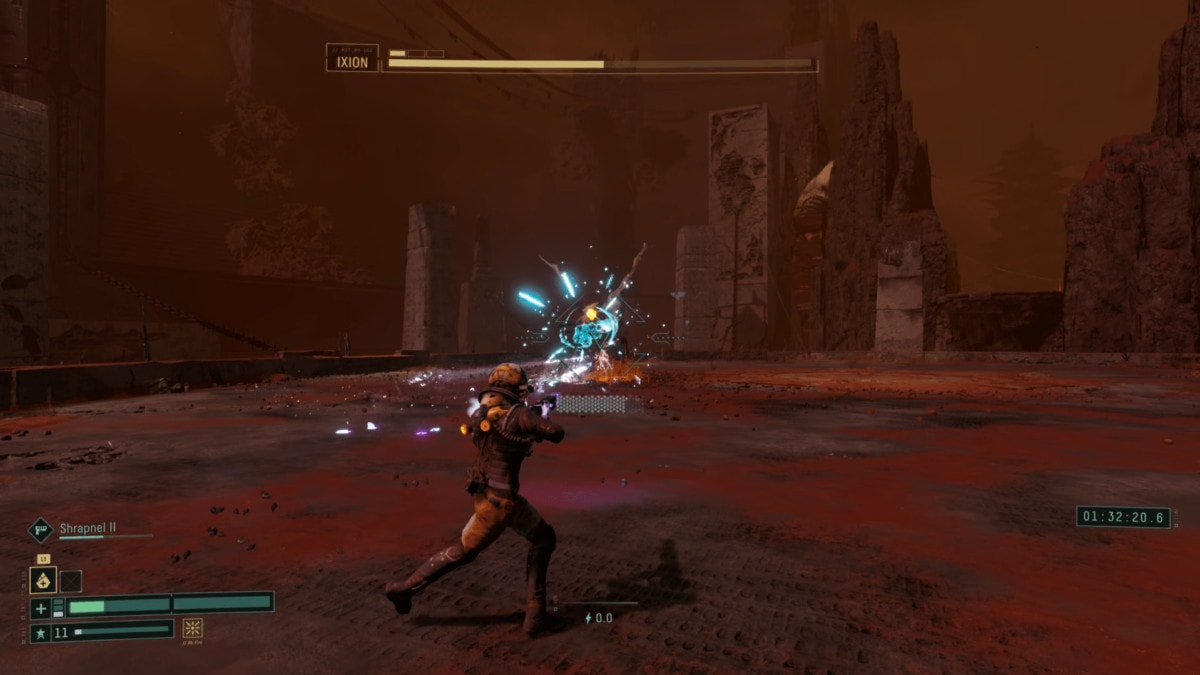
Recommended Gear and Equipment
This last section will cover my personal recommendations for which items I like to have when fighting this boss. Just keep in mind these are only recommendations, as being a Rogue-like game, you may not come across any of these. For a list full list of Artifacts, Consumables and other gear, check out our Returnal Equipment Guide.
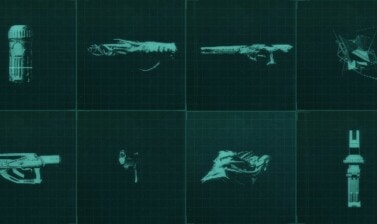
Weapons
So far, my personal favorites for this boss have been the Hollowseeker and Electropylon Driver. Both of these tend to be fairly consistent weapons and let you deal damage while focusing on Dodging. If you’re looking to make a second kill easier, the Rotgland Lobber can also fill a similar role.
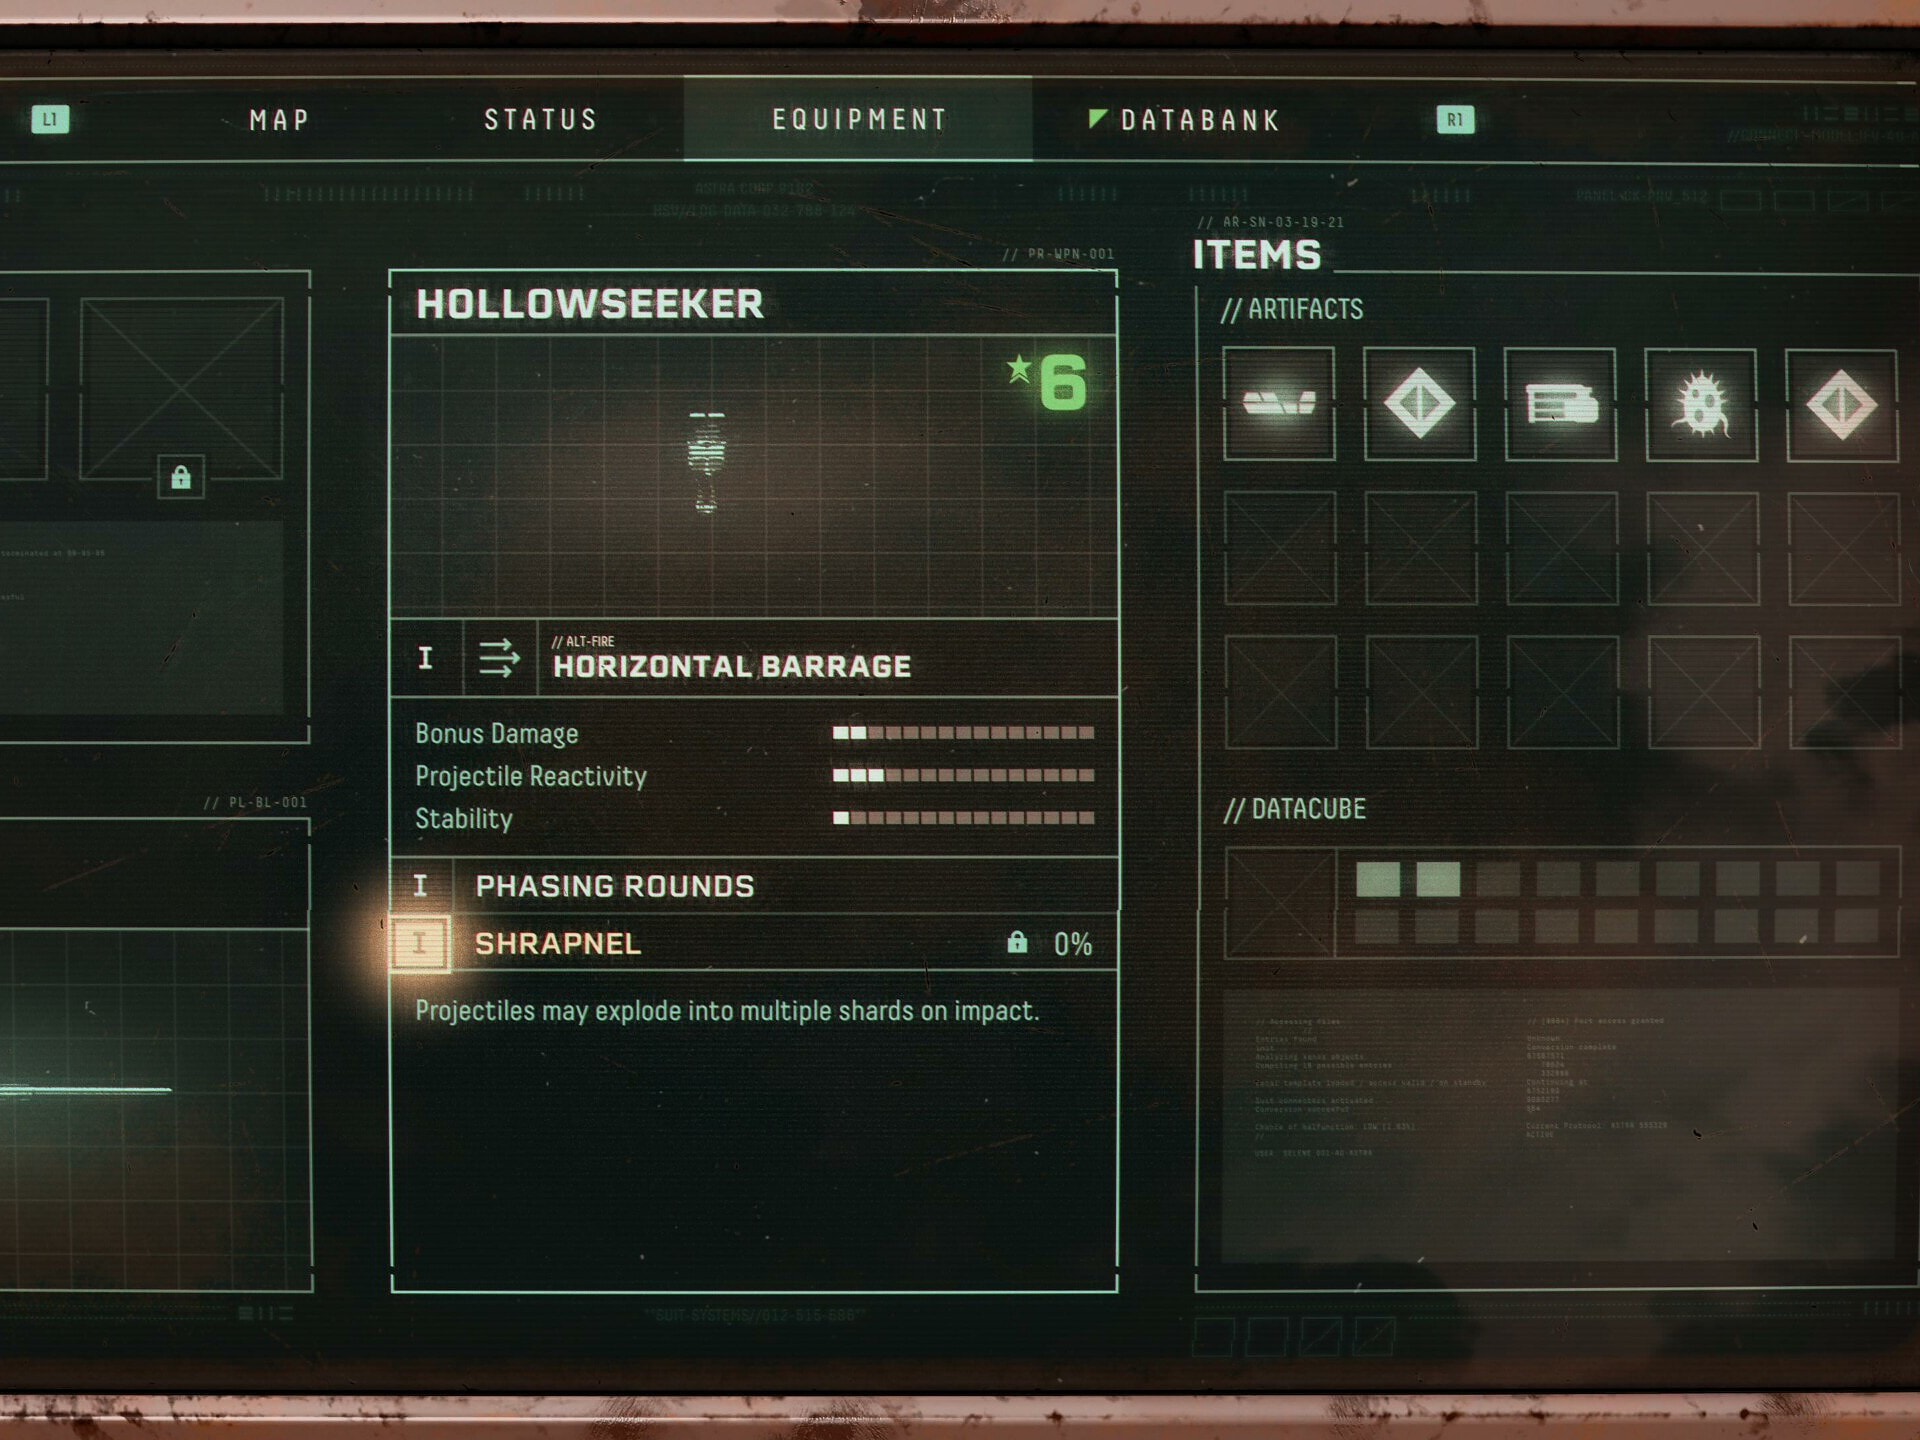
The Hollowseeker should have Serrated Projectiles and Waves as traits, for the highest single target damage output. Alternatively Serrated Projectiles and Retarget would work if you want to use it to clear the biome as well. Ideal stat boosts would be Bonus Damage and Projectile Reactivity.
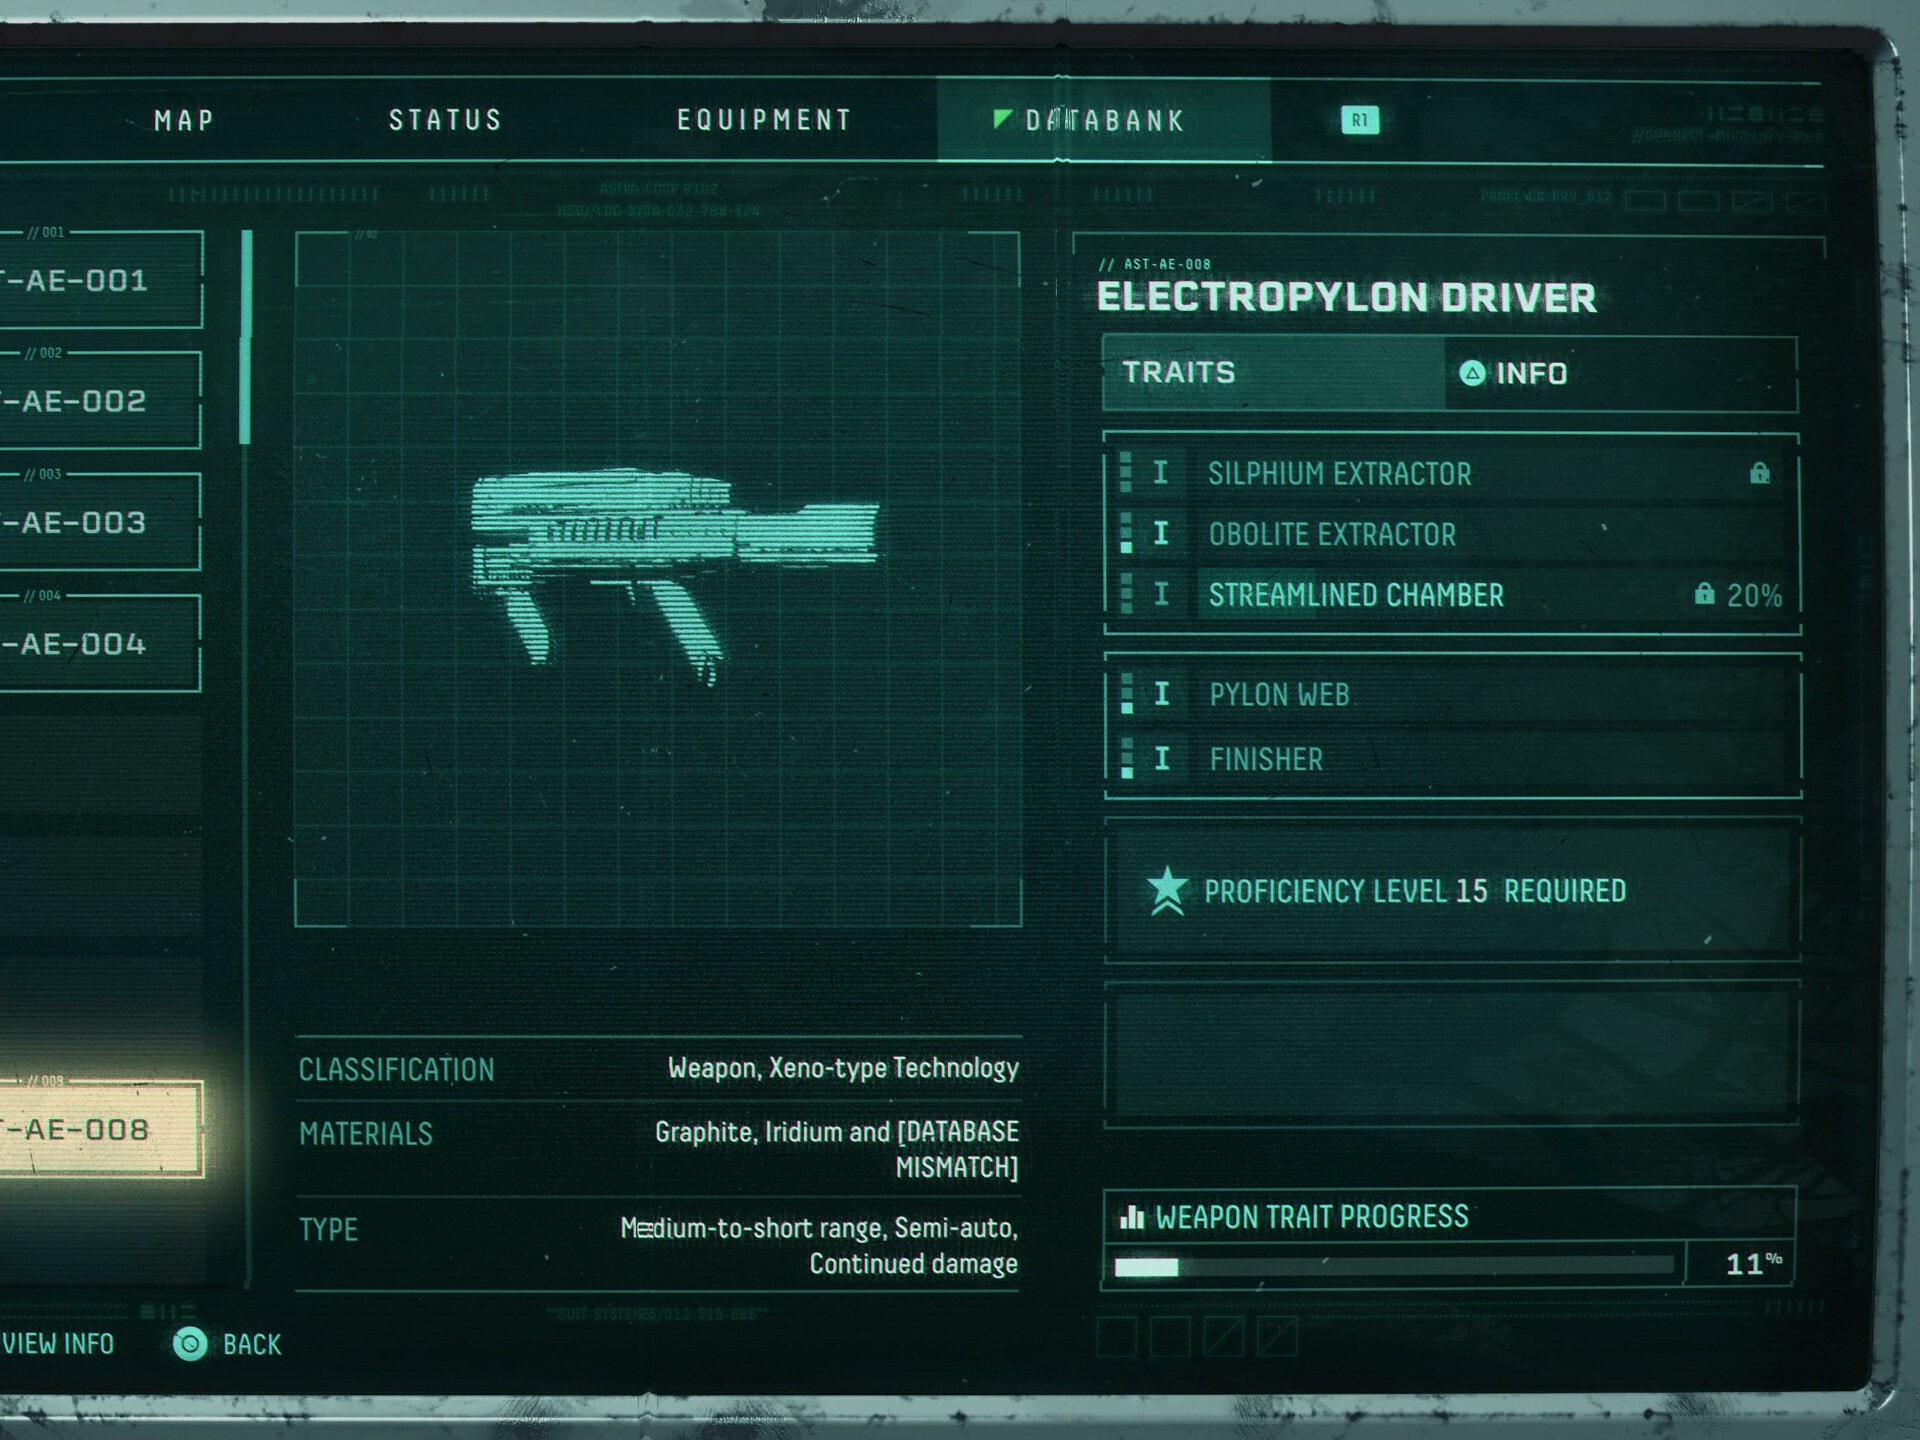
The Electropylon Driver should have Finisher and Pylon Web as traits. Thee combination will boost its damage significantly and give it consistent DPS while reducing the need to actively aim. Ideal stat boosts would be Bonus Damage and Pylon Duration.
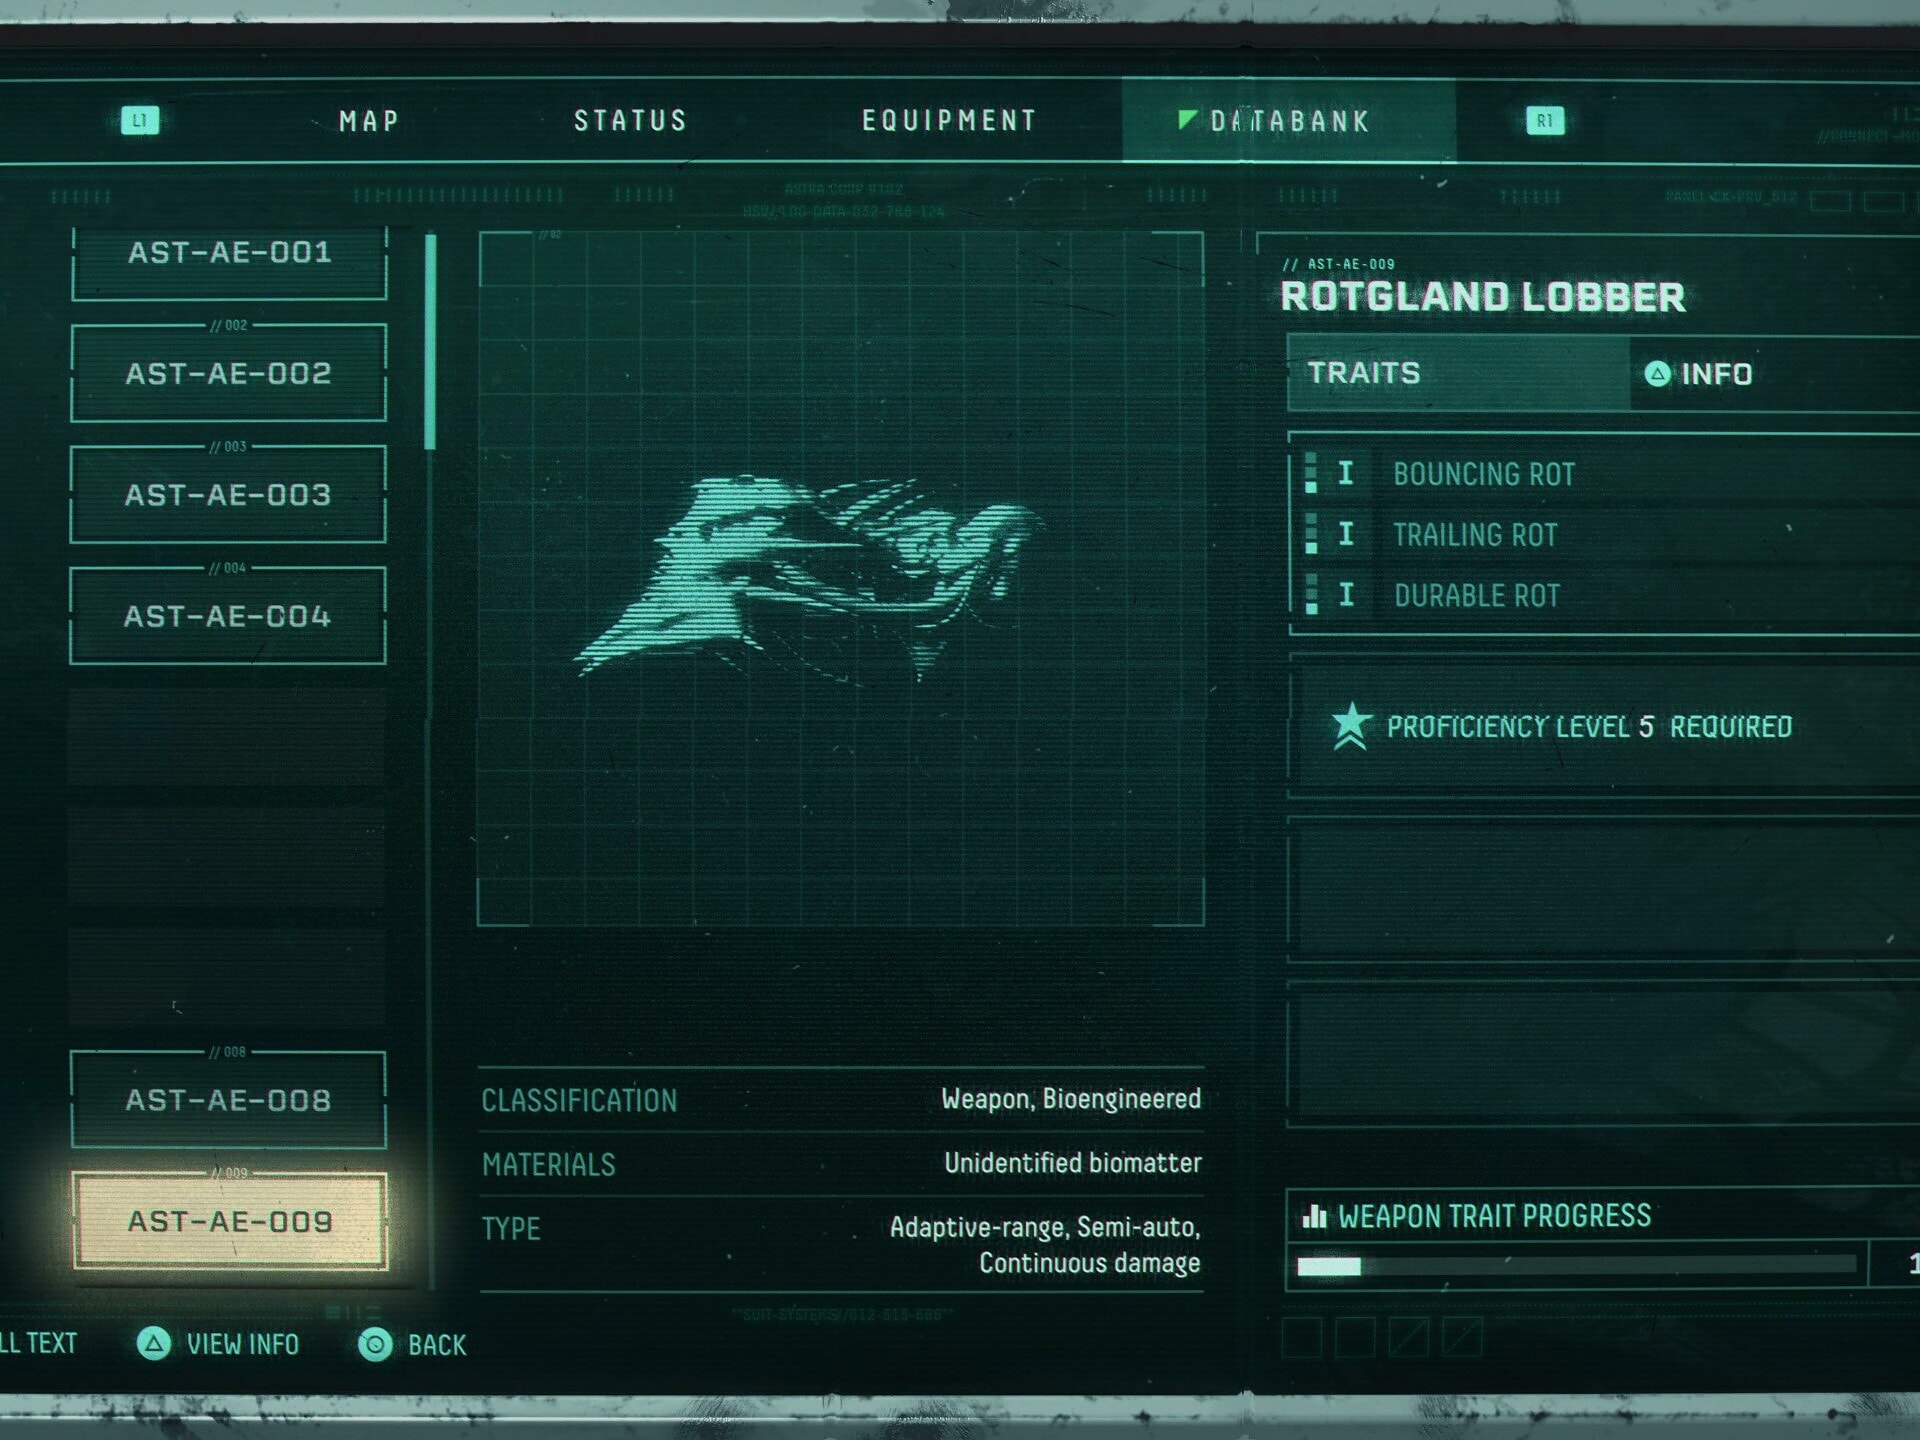
The Rotgland Lobber should have Durable Rot as a trait. This helps the Damage over Time effect last longer, letting you put more focus into dodging. Ideal stat boosts would be Bonus damage and Charge Boost.
Consumables
The two most useful consumable items for this fight are the Energy Barricade and Damage Siphon.
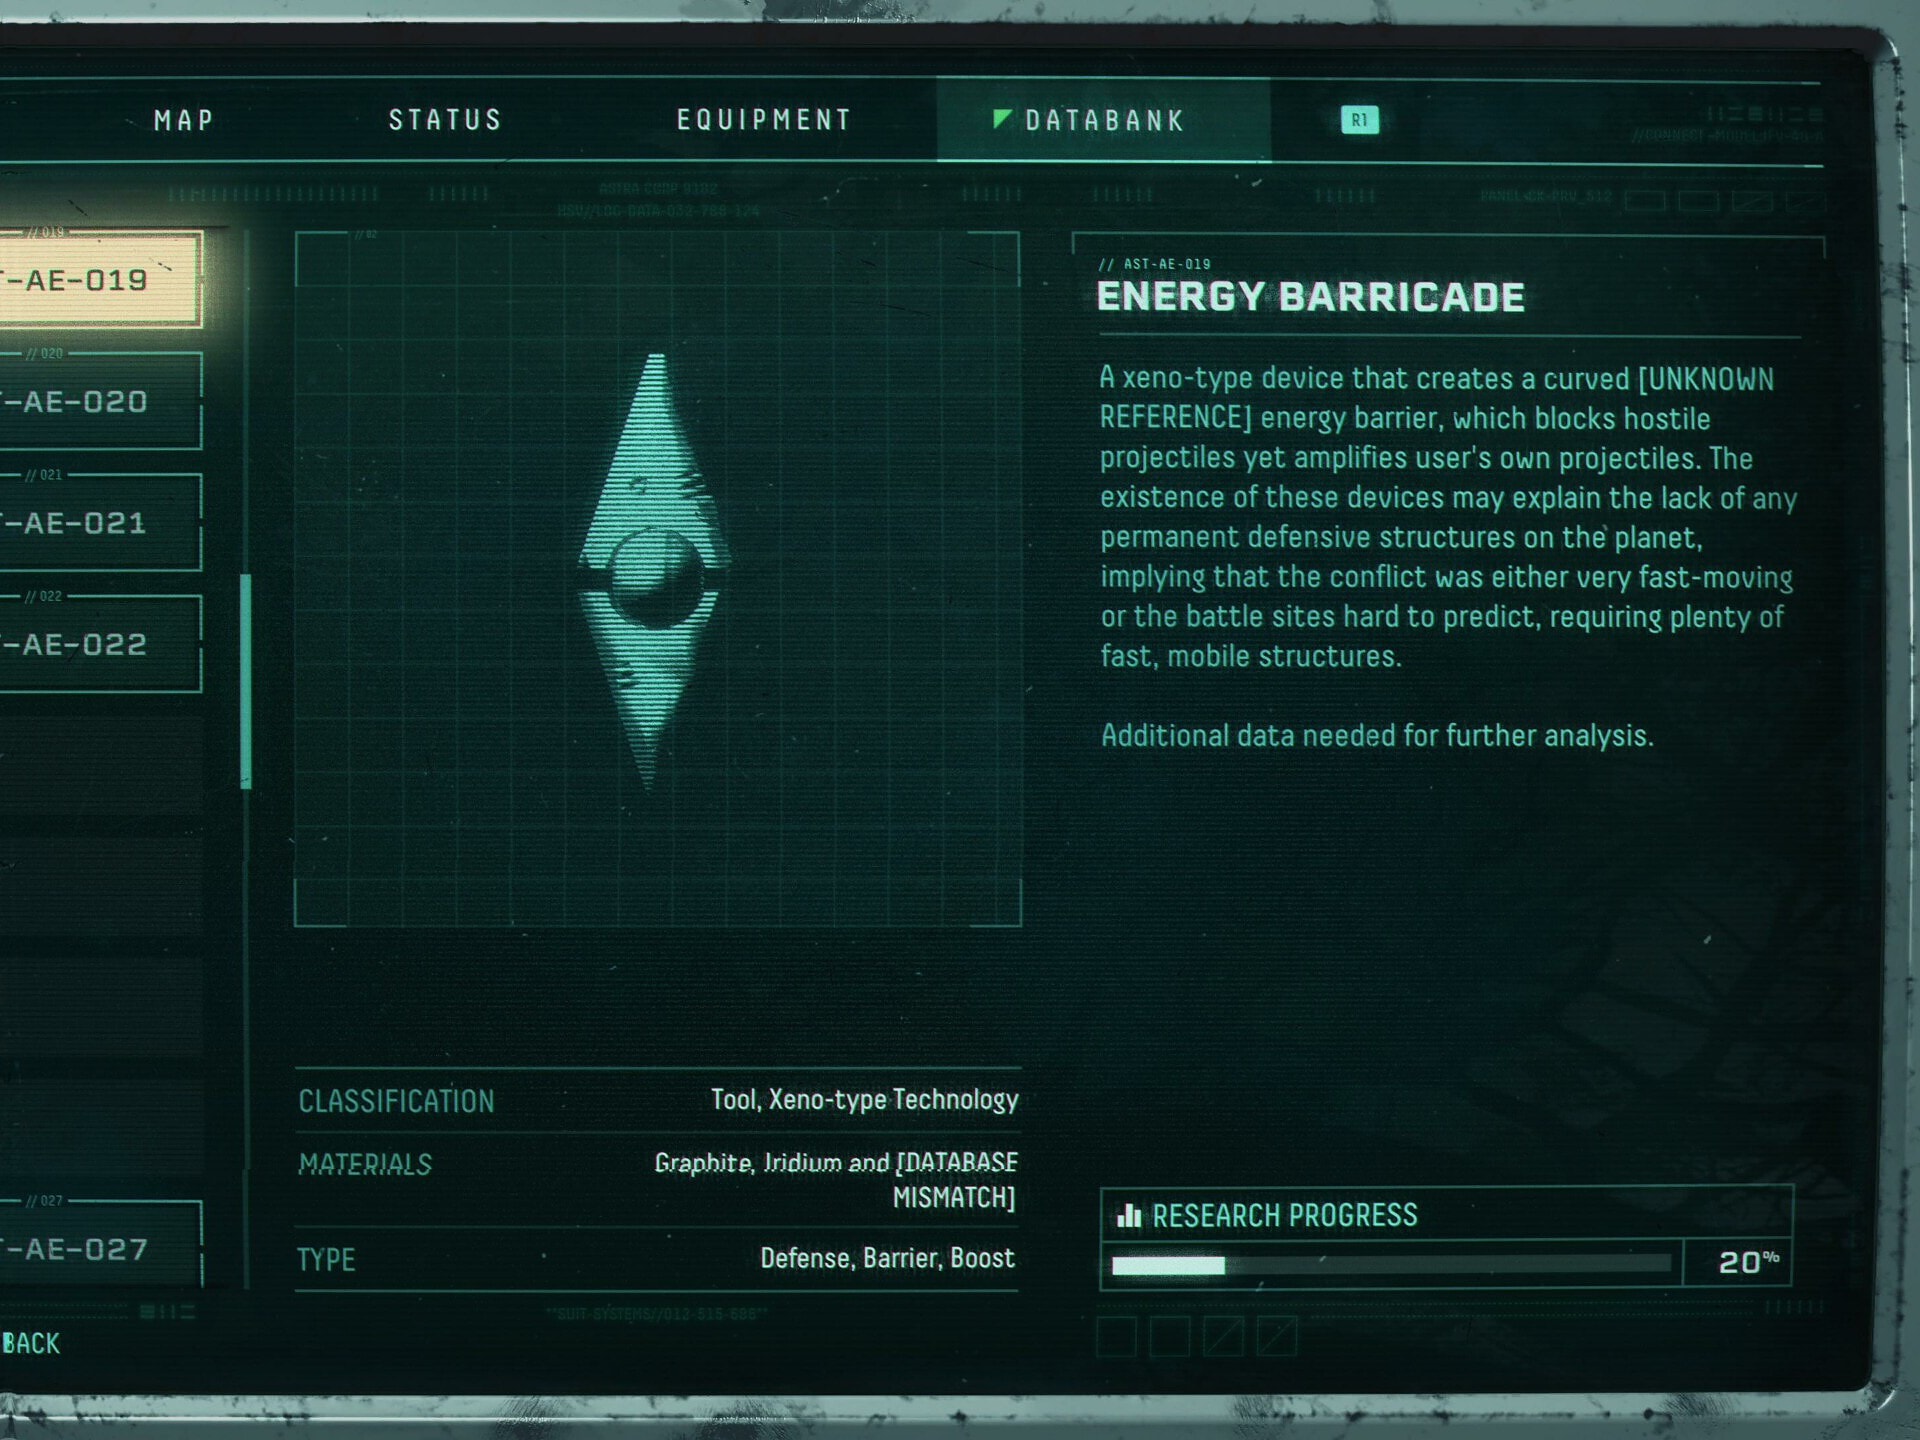
Energy Barricade Helps block projectiles as well as boosts your damage output. It does make you a little stationary though. If you place it closer to the middle before a phase transition, it will help you out a ton by creating a safe lane from projectiles, letting you focus on get a ton of early damage for a phase.
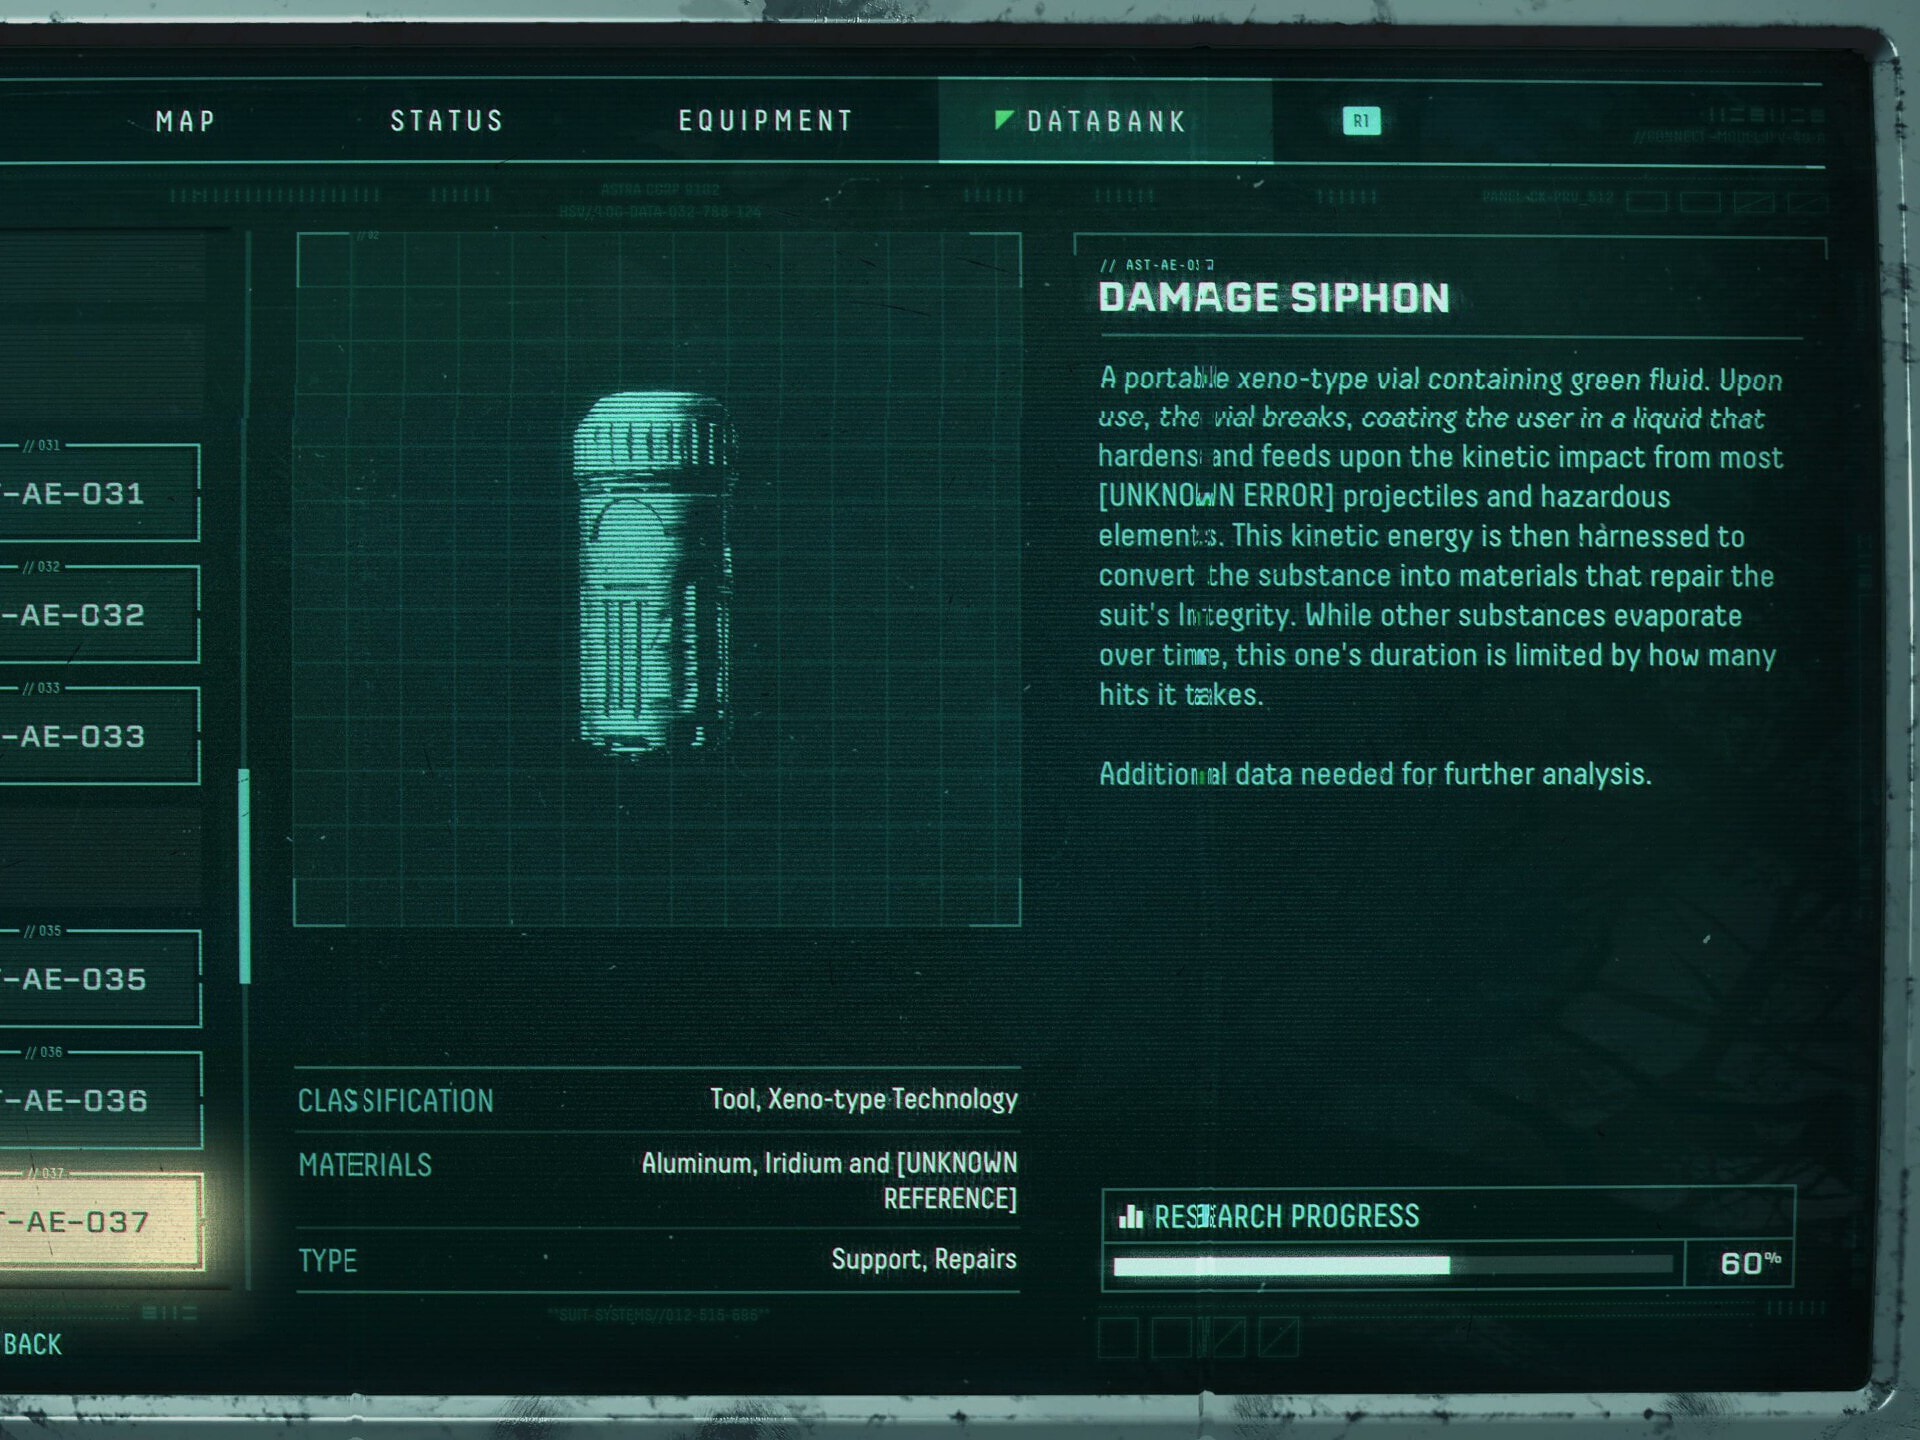
Damage Siphon helps you recover health if it gets low, without an artifact or Adrenaline requirement. If used at the right time, you can very easily go from low health to full before ever taking a hit, as a lot of Ixion’s attacks can be dodged easily enough.
Augments & Artifacts
Realistically speaking, anything that increases your Damage, Integrity or Protection helps a lot. Here’s a few that are a huge help for first fights.
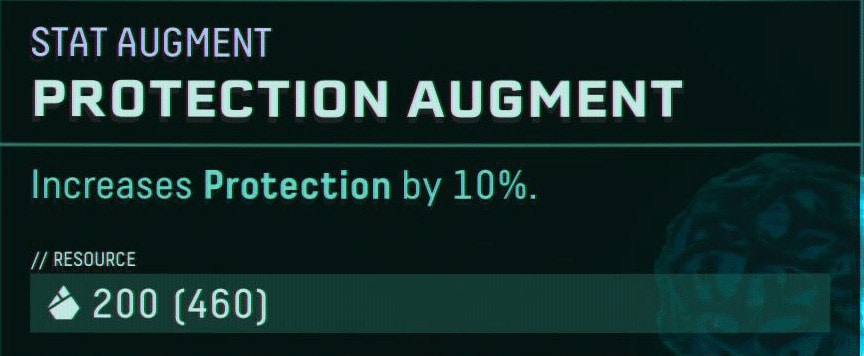
Protection Augment can be picked up prior to this fight, near the middling areas of the Crimson Wastes, alongside the Fabricator. This helps mitigate the damage dealt by Ixion, as getting caught by stray projectiles can happen a lot when you’re unfamiliar with the fight.
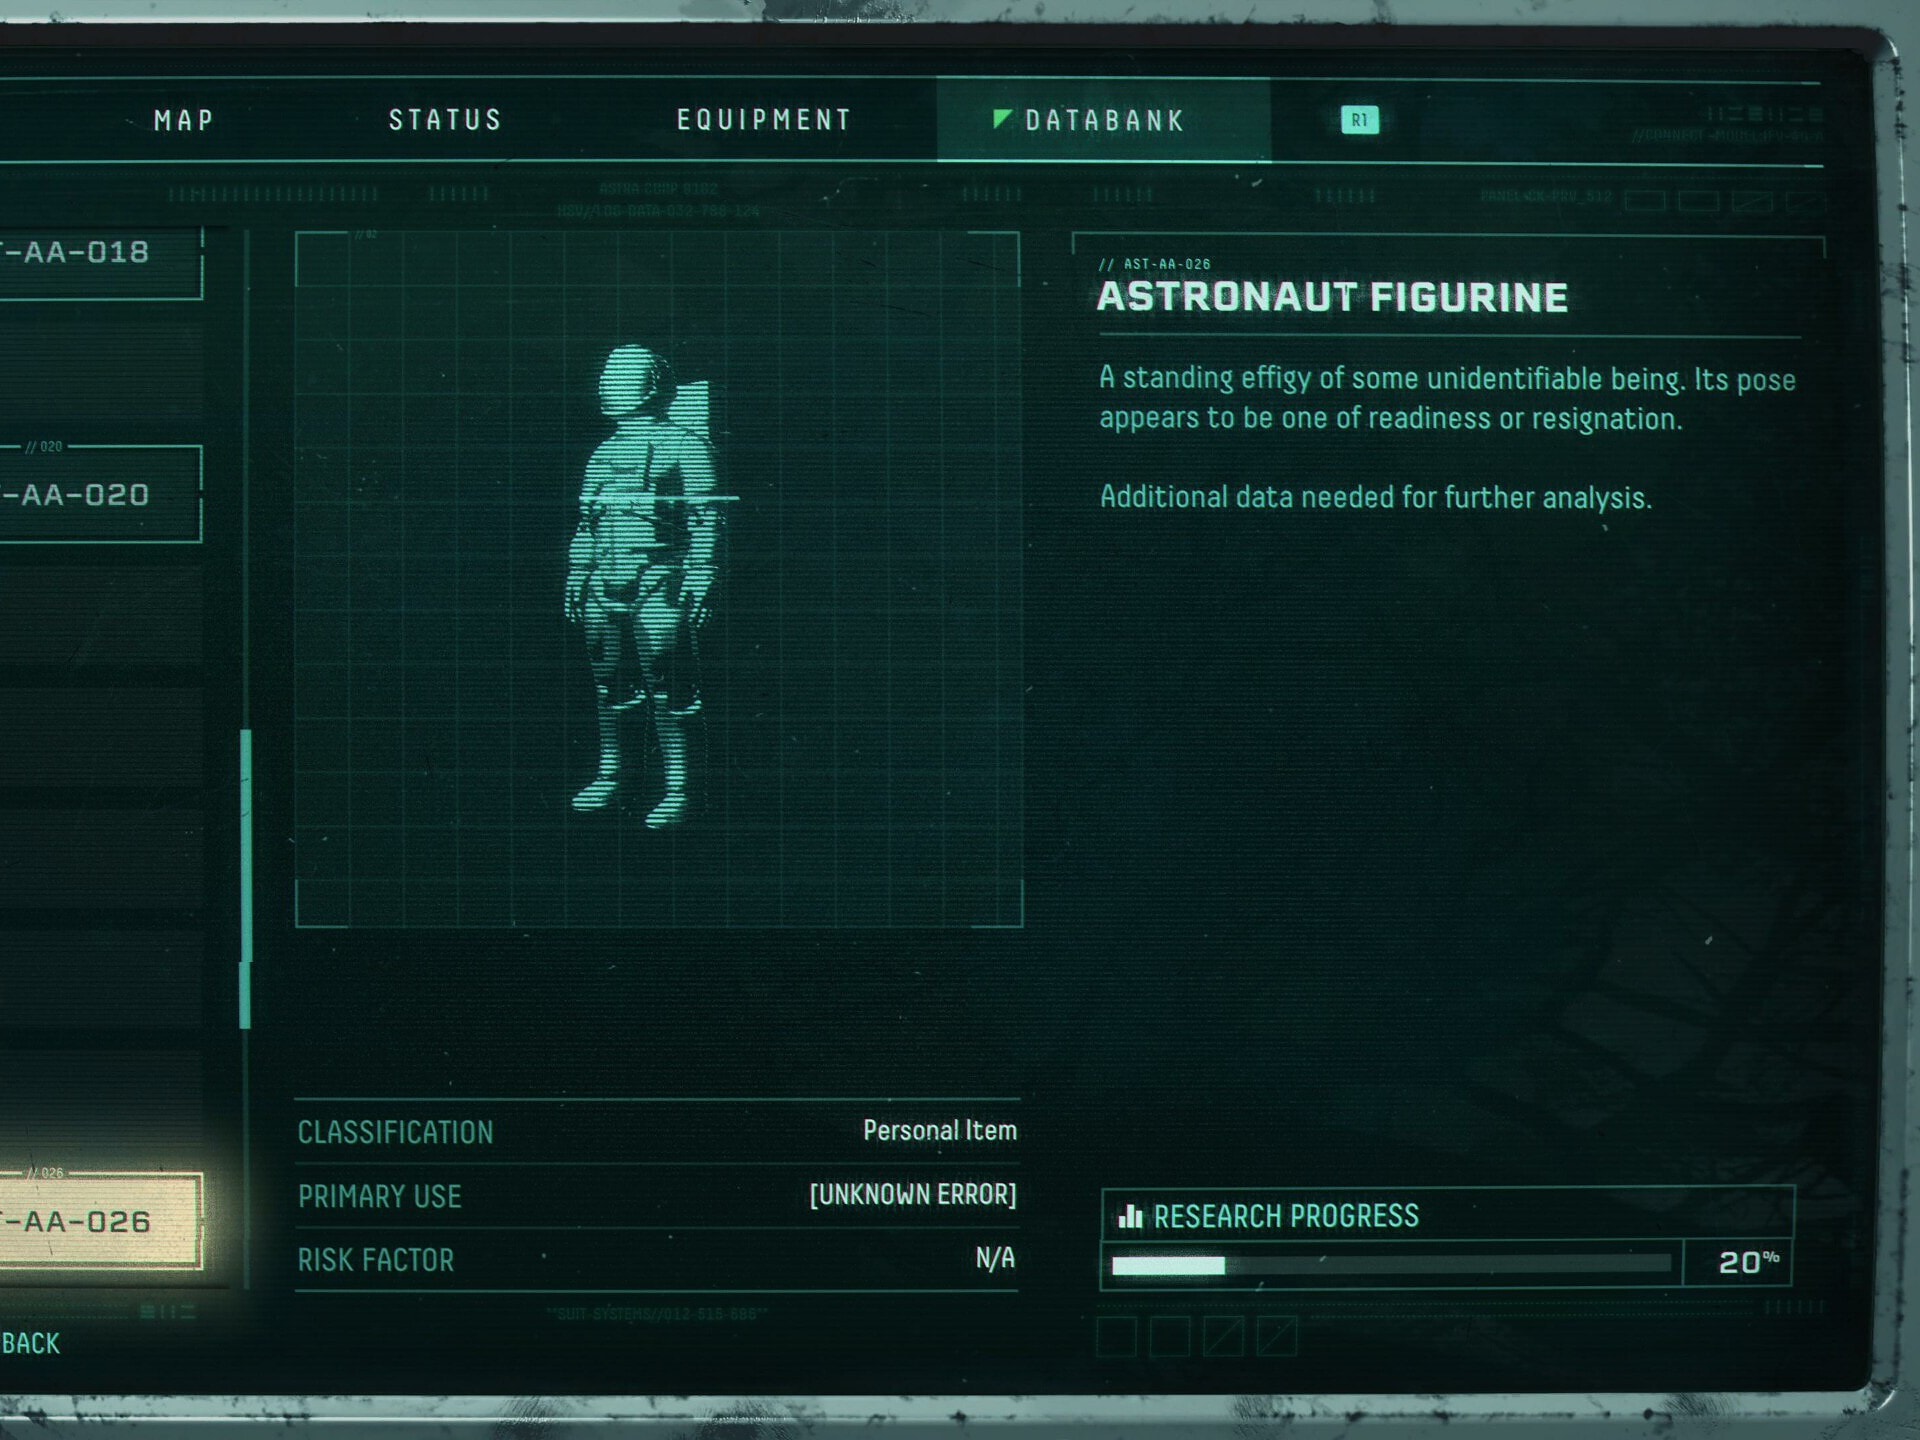
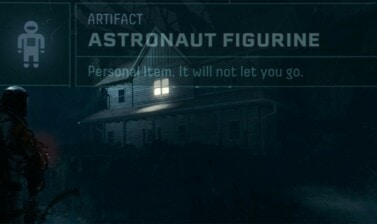
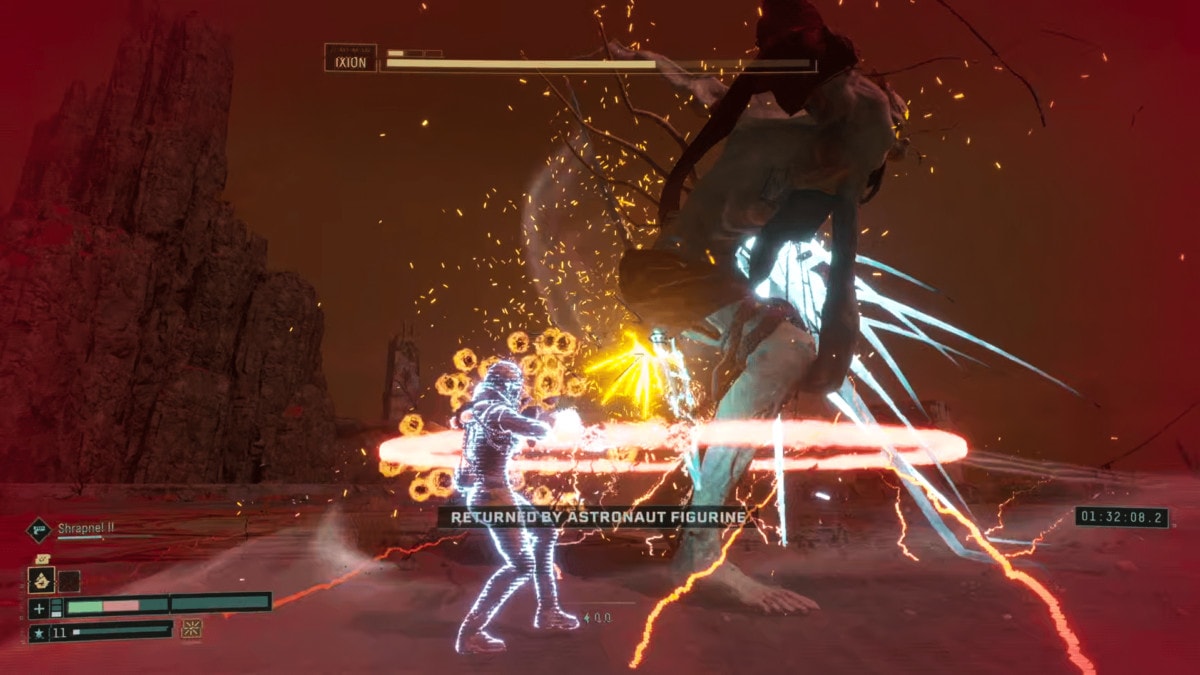
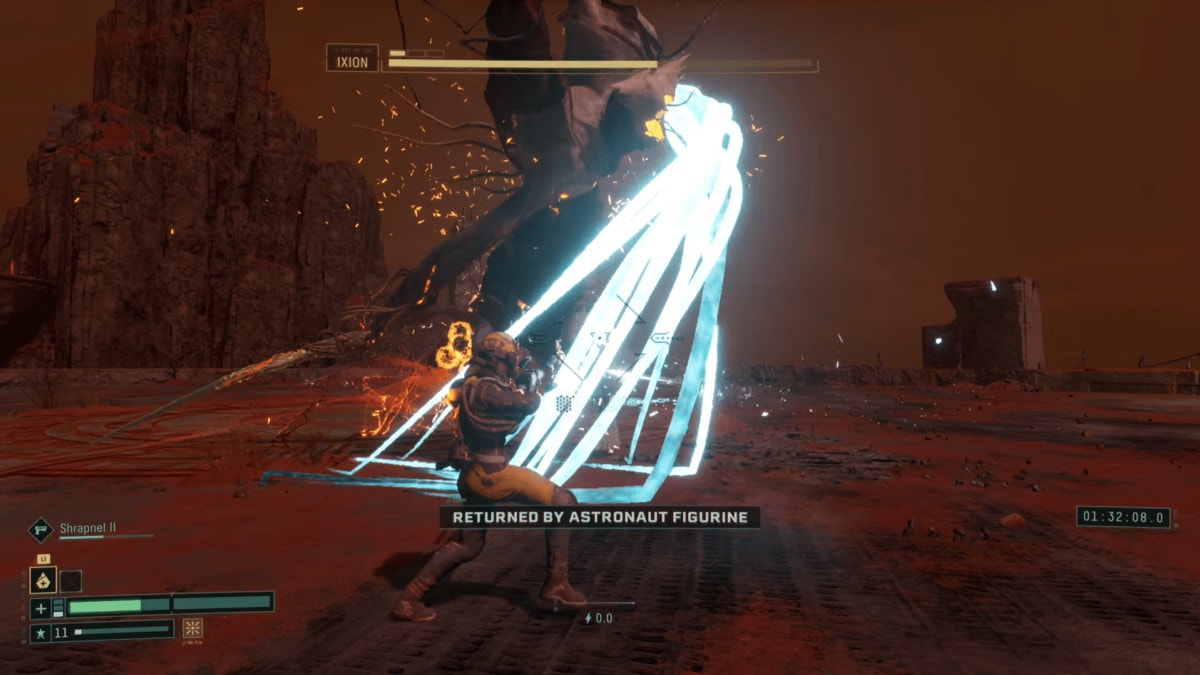
The Astronaut Figurine is a huge help to any part of the game, bringing you back once, and on the spot if you die. They’re better than the Reconstructors that you occasionally find, which make you restart the fight and cost Ether. To unlock the Astronaut Figurine, you can refer to our Guide to Exploring 20th Century House.

Overload Bolts is another fantastic Artifact. It adds a nice bit of conistent damage over the course of the fight. It does even more DPS if paired with the Electropylon Driver and the recommend traits for that above as it will reload often.
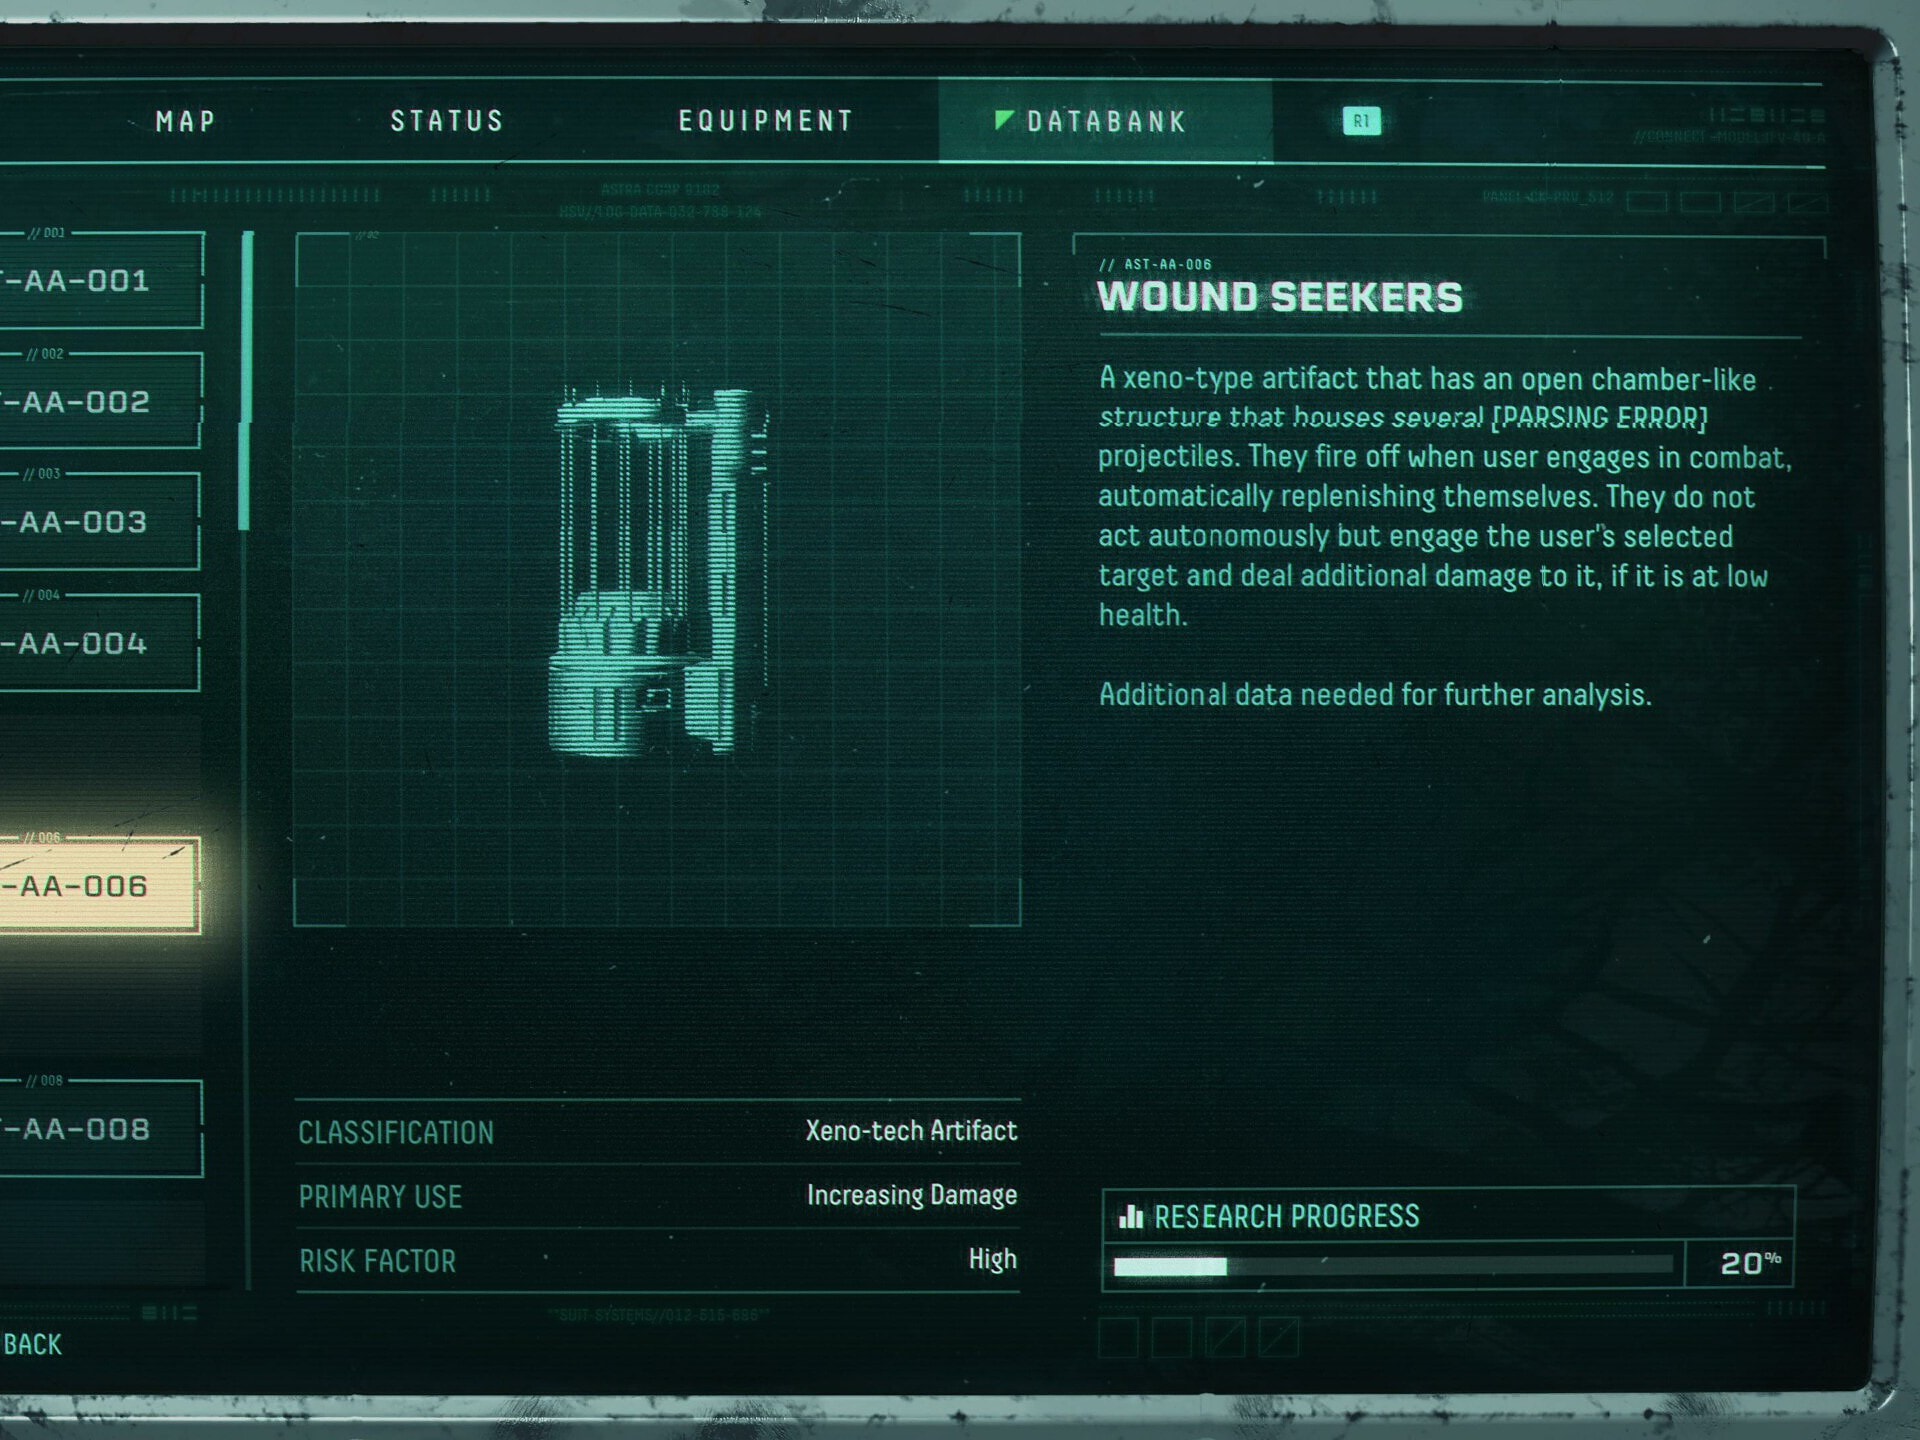
Wound Seekers are the final recommendation. They’ll add a fair bit of damage in the fight, as they kick in during the last third of each phase. Again, combined with the mentioned Electropylon Driver and the recommended traits above, it helps kill this boss quickly.