
Pax Points and the Pax Skill Tree are new additions to the Outriders Worldslayer expansion. This guide breaks down everything you need to know about the Pax Points and each class’s respective Pax Trees.
This Guide has been updated to reflect the July 29 Update.
TABLE OF CONTENTS:
- What are Pax Skill Trees and Pax Points
- How to earn Pax Points
- Devastator Pax Skills
- Pyromancer Pax Skills
- Technomacer Pax Skills
- Trickster Pax Skills
What are Pax Skill Trees and Pax Points
Introduced in the Outriders Worldslayer Expansion is a new progression system, Pax Skill Trees. These are additional Class-Specific Skill Points that can be spent to give your Altered a huge increase in power. Each class has its own unique sets of Pax Skills which cater to a wide variety of build options, all of which can be incredibly strong.
In this guide, we’ll be breaking down where and when you get these Pax Points in the new campaign, and exactly what they can do for each character.
How to earn Pax Points
As you progress through the Worldslayer Campaign’s Storyline, you’ll receive Pax Points after the completion of specific missions, and end up with a total of four of the maximum five before reaching Trials of Tarya Gratar. Upon reaching Trials of Tarya Gratar, you’ll be able to obtain the fifth point.
These specific Story Objectives are as follows:
- Complete the “Trepidation” Questline
- Point obtained upon taking the boat to the next area, after defeating the Fisherman.
- Complete the “Pilgrimage” Questline
- Obtained upon interacting with Atuma’s Hut in the Null Point.
- Complete the “Shards” Questline
- Obtained upon reaching the top of Tarya Gratar and triggering the cutscene.
- Complete the “Wrath” Questline
- Obtained upon defeating Ereshkigal.
- Defeat the Arbiter of the Worthy in the Trials of Tarya Gratar
- Obtained up defeating the Arbiter of the Worthy in the third required room of the Trials of Tarya Gratar.
There are three boss fights in this set of objectives. These start with “Trepediation”, then again in “Wrath”, then finally the Arbiter of the Worthy. Most of these encounters aren’t particularly hard, but can be a little rough if you’re going into them under-modded and unprepared.
The nice thing is that, outside of wanting to re-experience the story again, you can get help from a friend, or another player in general and quickly go through each of the endpoints of these quests. This will allow you to quickly take a new character right into Trials of Tarya Gratar, without having to spend hours doing the full campaign again.
To assist in doing so, below is a list of the checkpoints you must complete to obtain all of your Pax Points:
- Driftwater – Investigate the New Arrival
- Null Point – Follow Salvador’s Coordinates
- Tarya Gratar – Reach the Top of the City
- Exiles’ Capital – Confront Ereshkigal
- Trial of Tarya Gratar – Plaza of the Worthy
Completion of these 5 checkpoints alone takes less than an hour, which is significantly faster than re-doing the whole campaign again. Depending on the Apocalypse Tier of your co-op help, you should end right around Apocalyse Tier 7, assuming they carry you at their maximum tier. Otherwise, you’ll be left at Apocalypse Tier 1.
Devastator Pax Skills
The Devastator’s Pax Tree is split between Firepower Options and Anomaly Power options. The “Tectonic Shifter” side of the tree offers many bonuses to Anomly power, as well as powerful passives for Kinetic and Seismic Skills. The “Wrecker” side of the tree offers many bonuses to Weapon Damage, Firepower, and Protection skills.
Against Devastating Odds
Against Devastating Odds is the upper capstone passive for the “Wrecker” side of the Devastator’s Pax Tree. It offers a bonus to Armor Piercing, or 100% Crit Rate depending on the number of enemies hit by Kinetic Skills.

There’s really no better Pax Node for a Firepower Devastator. The Armor Piercing will help you shred through weaker mobs, who already have low Armor; while the Critical Bonus enables you to deal significantly more damage to bosses, without the need to hit Weakpoints. This plays nicely into their Vanquisher Skill Tree, which offers additional Weapon Damage bonuses for using Kinetic Skills
Armored Division
Armored Division is the node that leads to the Against Devastating Odds capstone passive for the “Wrecker” side of the Devastator’s Pax Tree. It reduces your Kinetic Skill cooldowns based on your Armor Piercing Value, while also boosting your Armor Piercing.

The Armor Piercing helps out Firepower Devstatores quite a bit, as they don’t have access to any form of Anomaly rounds like the other three classes do, meaning they will always be hitting an enemy’s armor.
Come One, Come All
Come One, Come All is the Node that leads to the Elitism capstone passive for the “Wrecker” side of the Devastator’s Pax Tree. This Node enambels your Kinetic Skills to remove Effect Reistance, which allows them to continually disrupt an Elite or Boss’s Attacks.
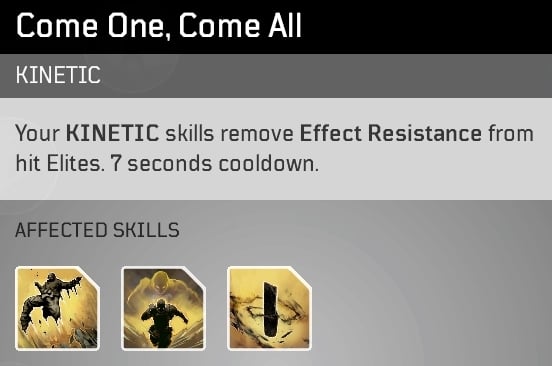
This can be a very helpful passive, as if you’re able to disrupt more of an enemy’s stronger skills, it can make taking them on much easier. While it may not quite let you stagger lock them, since the passive does have a cooldown of 7 seconds; it does let you easily disrupt major skills that can increase their damage or disrupt yours.
Earthen Shell
Earthen Shell is a shared Node just prior to the capstone branches of the “Tectonic Shifter” side of the Devastator’s Pax Tree. This passive converts damage dealt with skills into Shields similar to those of the Trickster. After the July 29 Update, this effect has a 0.5 second cooldown.
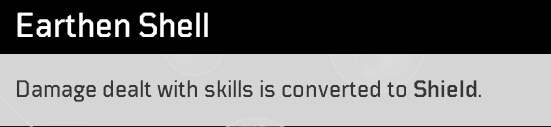
This adds a really solid defensive layer to any Caster build for the Devastator. It’ll be super easy to maintain if you’re using skills that have multiple charges or hit large areas, which is pretty much all of Devstator’s Skills.
Elitism
Elitism is the capstone passive for the middle branch of the “Wrecker” side of the Devastator’s Pax Tree. This node grants both damage reduction from Elites as well as Damage to Elites when shooting Elites. After this July 29 Update, this effect now only has a 1 second cooldown.
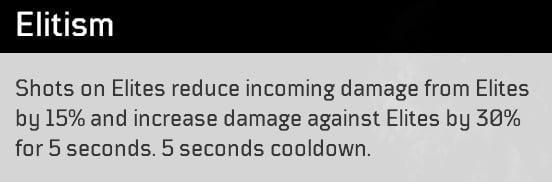
While this seems like a good option for taking on Bosses with a Firepower Devastator, it’s not the greatest. Come One, Come All and Elitism can help makes fights a little safer, but Against Devastating Odds offers much greater damage in most situations.
Energy Transmission
Energy Transmission is the capstone passive for the middle branch of the “Tectonic Shifter” side of the Devastator’s Pax Tree. This passive increases the Damage of Seismic Skills after using Kinetic Skills and reduces the cooldown of Kinetic Skills when hitting enemies with Seismic Skills.
If utilized properly, this can be a fantastic way to get more damage out of an Anomaly Power Devastator Build, as you’ll often be using at least one of each type of skill for this passive. It’ll help you both cycle skills and slightly boost damage. Though Devastator has better options for damage, this can be good for a build that wants to cast more frequently.
Finishing Touch
Finishing Touch is the last shared passive before the capstone branches of the “Wrecker” side of the Devastator’s Pax Tree. This nodes offers Increased Weapon damage based on the percentage of Ammo missing from your Weapon’s Magazine, while also making killing shot replenish your magazine.

This is a really solid damage increase for Firepower Devstators. Unlike the other classes, Devastator really don’t get too many nodes that can boost its Firepower to the same high levels. Despite not being a dramatic damage increase, Firepower Devastators can benefit from every bit of Weapon Damage they can get.
Hardened
Hardened is one of the shared Notable Passive on the “Wrecker” Side of the Devastator’s Pax Tree. This boosts your Damage Mitigation, while offering a fourth Damage Mitigation bonus for each enemy in Close Range.
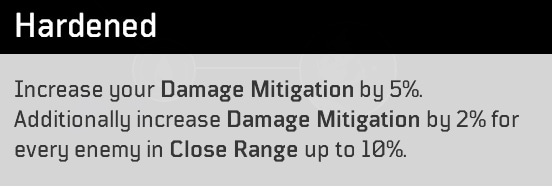
This node isn’t that great, because it does not scale Armor or Resistance, which the Devastator could make better use of. While the added Damage Reduction can be good, it also falls short as the bulk of it come from enemies being in close range, which limits its usefuness.
Harvester
Harvester is one of the shared Notable Passives on the “Wrecker” side of the Devastator’s Pax Tree. This passive grants Weapon Leech, and a further Weapon Leech bonus for having enemies in close range.

Compared to Hardened, this is often a much more beneficial offering to pick up as a Firepower Devastator. Weapon Leech is much more likely to keep you alive, and it while the maximum bonus still requires enemies in close range, it’s not the bulk of the bonus.
Hunting Season
Hunting Season is the first shared node on the “Wrecker” side of the Devastator’s Pax Tree. It offers a pretty decent Weapon Damage Bonus, while also increasing Magazine Size.

With this side of the Pax Tree focusing on Firepower Devastator and bonuses to help that playstyle, this fits in as a great initial offering. While it’s not the best node you can get, it does work well with the nodes that come after.
Impact Point
Impact Point is the first shared node on the “Tectonic Shifter” Side of the Devastator’s Pax Tree. This passive grants additional damage to your Seismic and Kinetic Skills, which scale off your Anomaly Power. In the July 29 Update, this effect has its scaling increased to 50% of Anomly Power.
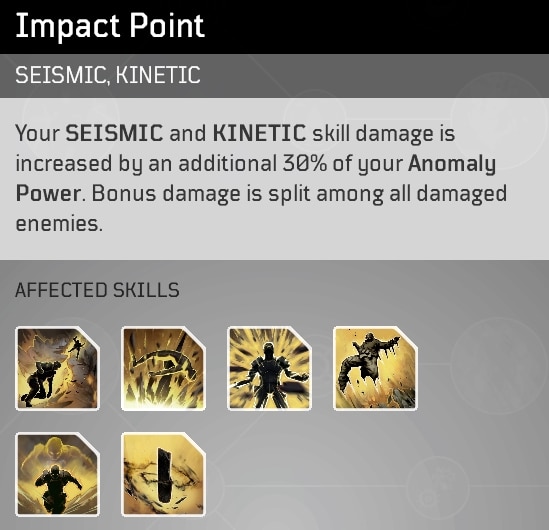
As the first node for the Anomaly Power side of the Tree this is a great offering, boosting both your AoE and Single Target damage with your skills. Since the Damage is split between targets, it offers a strong bonus against single targets, which helps the class a ton.
Momentum
Mometum is the capstone passive on the lower branch of the “Tectonic Shifter” Side of the Devastator’s Pax Tree. This reduced the cooldown of your Kinetic Skills when you deal damage with Kinetic Skills.
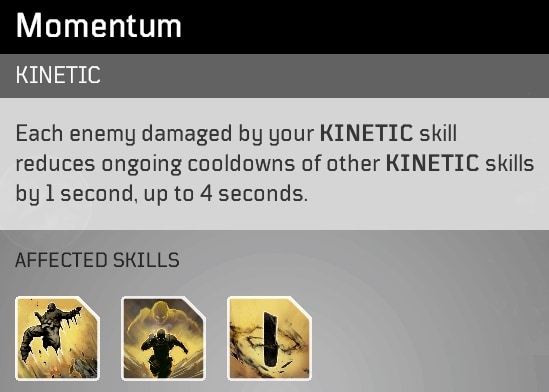
As this passive caps the reduction to 4 seconds for each Kinetic Skill, this is a pretty significant offering if you want to use 2 or more Kinetic Skills in a build. It’ll help you cycle them much quicker, and with all the Kinetic Skills having some degree of AoE, can allow you to quickly rotate through these skills.
Multistrike
Multistrike is the capstone passive on the upper branch of the “Tectonic Shifter” Side of the Devastator’s Pax Tree. This passive increases the damage of your next Seismic skill by a percentage of your previous Seismic Skill. After the July 29 Update, this passive will only store up to a maximum of 700% of your Anomaly Power.
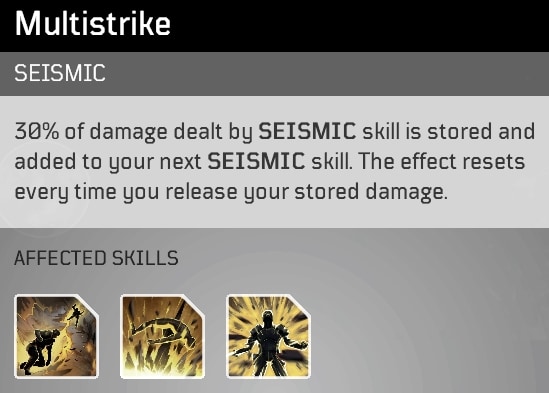
Since the bonus resets each time you release the stored damage, it works best with AoE skills to build up damage, and stronger single target skills to release the stored damage.
Obliteration
Obliteration is one of the shared Notable Passives on the “Tectonic Shifter” Side of the Devastator’s Pax Tree. This increases your Anomaly Power and Resistance Piercing for each enemy damaged. The baseline effect of this passive was increased to 10% Anomaly Power and Resistance Piercing, instead of 6%.
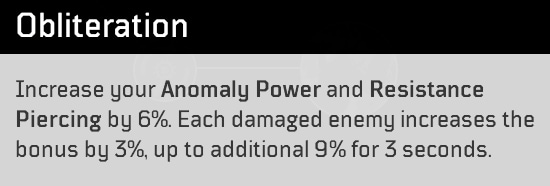
This offers a fairly reasonable amount of Anomaly Power and Resistance Piercing, offering a total of a 15% bonus to each. This can be combined with mods like Unstoppable Force to further boost your Anomaly Power, allowing the Devastator to deal some huge damage.
Overwhelming Force
Overwhelming Force is the capstone passive for the lower bran of the “Wrecker” Side of the Devastator’s Pax Tree. This skill grants shockwaves that deal damage based on your Armor when a Protection Skill is active. In the July 29 Update, the Armor scaling of this effect was increased to 60%.
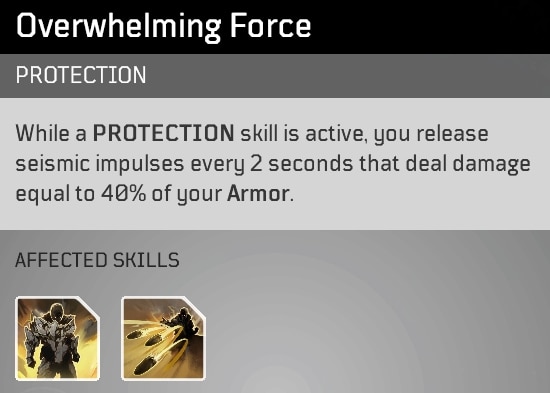
This work nicely into a Tank Builds which already get bonuses from Armor, making a good bit of extra AoE damage. With a Tank Build, any kind of extra damage you can get is usually helpful.
Puncture
Puncture is one of the shared Notable Passives on the “Tectonic Shifter” Side of the Devastator’s Pax Tree. This allows your Seismic Skills to Bleed, while also increasing Anomaly Damage against enemies affected by Bleed.
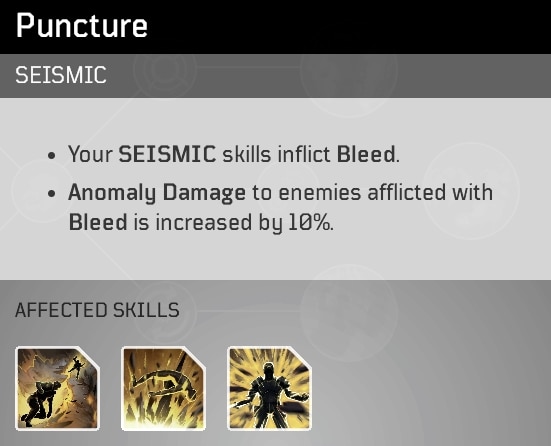
This passive can replace and open up a few mod slots, and works incredibly well with the Seismic Commander Set, which offers a further damage increase against Bleeding enemies. For an Anomly Power Devastator using the Seimic Commander Set, this is easily one of your best nodes to grab.
Richter Rising
Richter Rising is the node that leads to the middle capstone passive on the “Tectonic Shifter” Side of the Devastator’s Pax Tree. This increases the damage enemies taken if they were hit by both a Kinetic and Seismic Skill within 4 seconds.
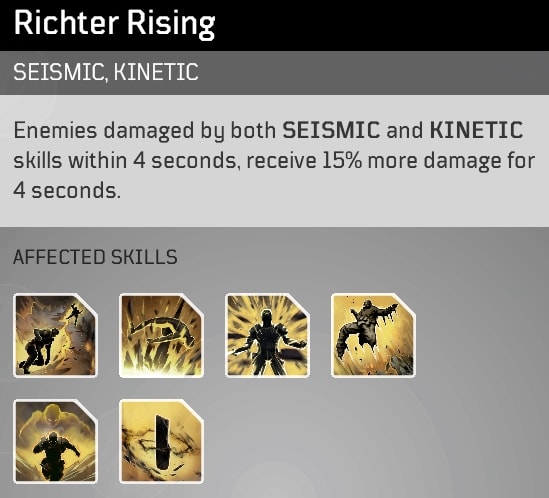
This can be an okay damage node, as you’ll be able to make good use of the damage increase. Since the bonus is multiplicative, it can be a strong offering for scaling damage.
Strange Surgeon
Strange Surgeon is the node that leads to the lower capstone passive on the “Wrecker” Side of the Devastator’s Pax Tree. This allows all weapon shots to inflict Bleed, and while reducing the cooldown of Protection Skills when a Bleeding enemy is defeated in Close Range.

While this node is a little gimmicky, it does lead into Overwhelming Force. Between the two nodes, it should allow you to have the Seismic pulses of Overwhelming Force up much more often, if not constantly.
Terms of Engagement
Impact Point is the node that leads to the lower capstone passive on the “Tectonic Shifter” Side of the Devastator’s Pax Tree. This passive allows you to store a portion of the damage dealt by Kinetic Skills, and add them to the next Kinetic Skill you cast. After the July 29 Update, this passive will only store up to a maximum of 700% of your Anomaly Power.
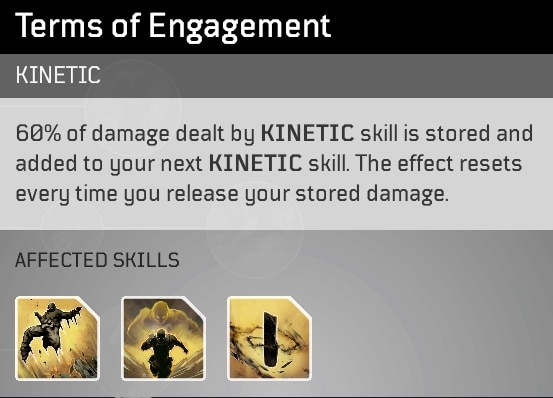
Much like Multistrike, this can add significant damage to Kinetic Skills. Combined with the capstone passive, Momentum, this allows for a fairly strong build focused on Kinetic Skills.
Upheaval
Upheaval is the node that leads to the upper capstone passive on the “Tectonic Shifter” Side of the Devastator’s Pax Tree. This makes Kinetic Skills apply the Upheaved Status, which stores 15% of all damage they receive in the next two seconds, before releasing it.
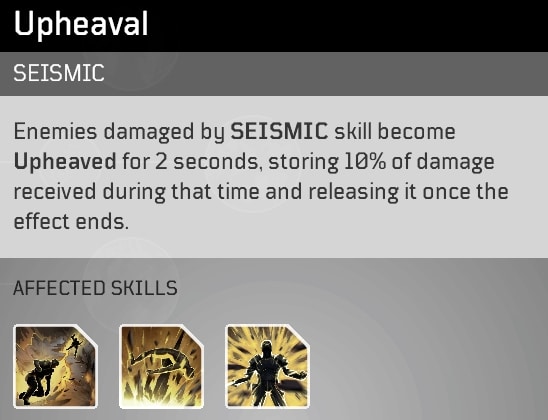
This functionally acts as a delayed damage amp for all damage Devastator deals. In a very cast heavy Seismic build, this can be used frequently, and give a fairly good boost to overall damage.
Pyromancer Pax Skills
The Pyromancer’s Pax Tree is split between Firepower-focused options and Anomaly Power-Focused options. The “Gunblazer” side of the tree offers many bonuses relating to Firepower, Weapon Damage, and Immobilize Skills. While the “Pyromaniac” side of the tree offers strong Anomaly Power, Cooldown Reduction, and skill damage increases.
Arsonist
Arsonist is the middle capstone passive on the “Pyromaniac” side of the Pyromancer’s Pax Tree. This passive grants a chance to reset all skill cooldowns when casting a skill. In the July 29 Update, this effect had its cooldown shortened to 4 seconds.

This passive works best when using skills with multiple charges, as it can allow you to easily reduce the cooldown of some of your longer cooldowns. This can make it exceptionally strong with skills like Eruption, which easily benefits the most.
Ashen Regalia
Ashen Regalia is a shared Notable Passive on the “Gunblazer” side of the Pyromancer’s Pax Tree. This passive grants Damage Mitigation when defeating enemies marked by the Pyromancer’s passive.
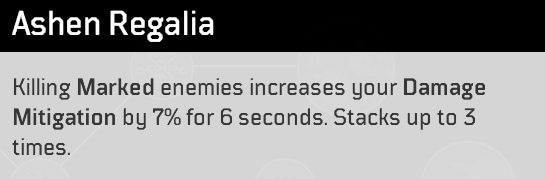
This node offers a pretty good amount of durability. Though compared to the other options available to Pyromancer, isn’t quite as strong. It can still be great early on as a Pyro, making it easier to survive.
Ashen Wake
Ashen Wake is a shared Notable Passive on the “Gunblazer” side of the Pyromancer’s Pax Tree. This passive spreads your weapon damage to all targets afflicted with Ash near your target.
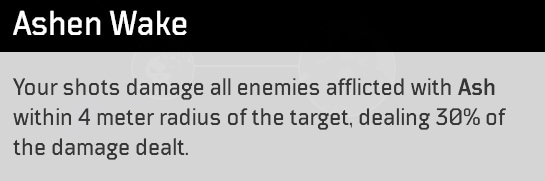
This is easily one of the staple passives of the Firepower Pyro, as they’ll often be running at least Feed the Flame, but also Ash Blast as well. This gives them a lot of Ash Application and a good way to take advantage of it, giving them some solid AoE clearing power.
Backdraft
Backdraft is the passive that leads to the lower capstone passive on the “Pyromaniac” side of the Pyromancer’s Pax Tree. This passive boosts your Anomaly power for each skill on cooldown. In the July 29 Update, this effect was reduced to 25% per stack.

Getting 60% increased Anomaly Power for having two of your skills on cooldown is insanely powerful. This offers a lot of power to skills that can deal high damage and have multiple charges, as each of those charges will take advantage of this passive. This means it great for both Eruption and Overheat Builds.
Bullet Frenzy
Bullet Frenzy is the middle capstone passive on the “Gunblazer” side of the Pyromancer’s Pax Tree. This passive continuously stacks up your Weapon Damage until you stop firing.

Despite the wording of Bullet Frenzy, it is fully capable of making use of Feed the Flames. This allows this passive to continue to stack almost indefinitely, granting a lot of power to Firepower Builds.
Burnt Offerings
Burnt Offerings is the upper capstone passive on the “Pyromaniac” side of the Pyromancer’s Pax Tree. This passive dramatically increases the duration of your Burn, while making Burn damage scale over time as it deals damage. In the July 29 Update, the damage ramp was increased from 10% to 20%.

This passive is incredibly strong in a FASER build. So long as you’re not using any skills to remove the Burn, it scales up quite quickly. While it’s a slower-to-ramp passive, it ends up being exceptionally strong as oftentimes you can just ignite enemies and walk away and have them burn up.
Carbon Ammo
Carbon Ammo is the passive that leads to the middle capstone passive on the “Gunblazer” side of the Pyromancer’s Pax Tree. This passive triples your Magazine Size.

Considering Carbon Ammo leads into Bullet Frenzy, it makes for an incredibly strong pairing of passive points. By itself, it offers much easier ammo management as a Firepower Pyro which can make the playstyle feel much better.
Carbon Footprint
Carbon Footprint is the upper capstone passive on the “Gunblazer” side of the Pyromancer’s Pax Tree. This Passive reduces the cooldown of Immobilize Skills, when enemies are hit by other Immobilize Skills. In the July 29 Update, the cooldown reduction effect was increased to 1 second per hit.
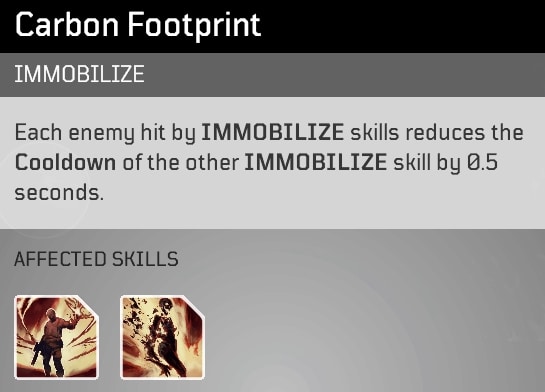
This plays really well into the Firepower Pyro Builds, as they often run both Immobilize Skills. With Ash Increased Range for Ash Blast, this can functionally allow Ash Blast to reset the cooldown Feed the Flames in most situations. Meanwhile, Feed the Flames can reduce the lengthy cooldown of Ash Blast by using the mods that allow it to hit multiple targets.
Carbonization
Carbonization is the passive that leads to the upper capstone passive on the “Gunblazer” side of the Pyromancer’s Pax Tree. This passive Increases the Anomaly damage taken by enemies affected by Immobilize Skills. In the July 29 Update, the damage amp effect was increased to 25%.
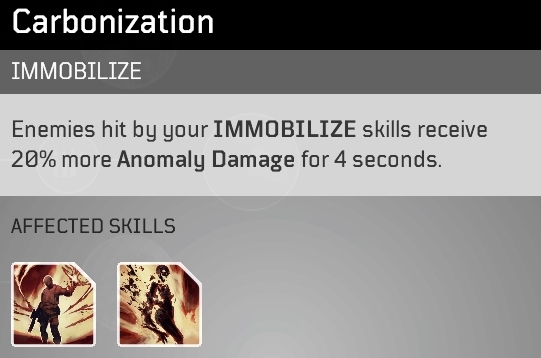
This is a solid multiplicative damage increase for Firepower Pyros. Since they’ll often run both Immobilize skills alongside Volcanic Rounds converting their weapon damage to Anomaly Damage. Combined with Carbon Footprint, the capstone it connects to, it’s quite the strong synergy that shouldn’t be overlooked.
Coming In Hot
Coming In Hot is the first shared passive on the “Gunblazer” side of the Pyromancer’s Pax Tree. This passive gives you a boost of damage when enemies are at nearly full Health, or nearly dead.

The Increased damage to healthy enemies help with clearing weaker mobs, allowing you to more easily dispatch them. The Increased damage against low health targets helps a lot with Elites and Bosses, as they often have quite a bit of health.
Conduction
Conduction is thepasive that leads to the middle capstone passive on the “Pyromaniac” side of the Pyromancer’s Pax Tree. This node simply grants additional skill cooldown.

While this passive isn’t the most amazing thing out there, since it can be far easier to stack up Cooldown Reduction on your gear, it does however mean you won;t need to do so as much. This allows you to pick up more Status Power or Skill Leech, increasing your overall power or survivability.
Convection
Convection is last shared passive on the “Pyromaniac” side of the Pyromancer’s Pax Tree. This reduces the cooldown of your skills by a small amount when all skills go on cooldown. In the July 29 Update, the cooldown reduction effect was reduced to 2 seconds, from 4.

Most Anomaly Power Pyros will want to make heavy use of this passive, as it’s very easy to trigger consistently. It allows for a much more rapid-casting playstyle and really helps to sell the mage fantasy of the Pyro class.
Critical Mass
Critical Mass is the lower capstone passive on the “Gunblazer” side of the Pyromancer’s Pax Tree. This passive makes it so landing a Critical Shot on a marked enemy makes all shot Critical shots. In the July 29 Update, the duration of this effect was increased to 5 seconds.
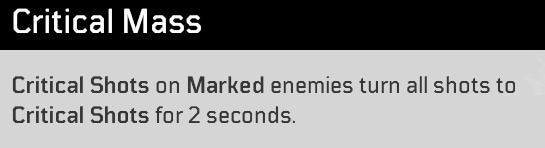
This effectively gives you a nearly permanent 100% crit Rate without the need to aim for weak points. As long as you keep enemies marked, and are able to hit targets within 2 seconds, you’ll be able to maintain this effect for entire encounters. YOu can even pair this with mods like Brain-Eater to reduce ammo consumption, or other strong on-crit weapon and armor mods.
Furnace
Furnace is the passive that leads to the upper capstone passive on the “Pyromaniac” side of the Pyromancer’s Pax Tree. This passive increases your status power for each enemy afflicted with a Burn.

Given that this passive will scale your Burn Damage and precedes Burnt Offerings, it’s quite strong. This passive can even be used alongside FASER to increase its damage substantially.
Hot Streak
Hot Streak is the last shared passive on the “Gunblazer” side of the Pyromancer’s Pax Tree. This passive increases your weapon damage when landing critical shots.
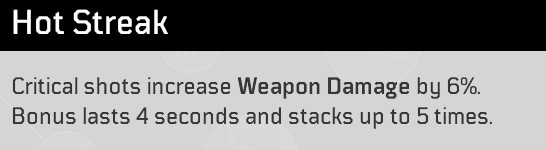
Combined with Critical Mass this is an exceptionally powerful and easy-to-maintain bonus. Considering it’s a shared passive, it can be fit into any combination of Gunblazer passives and works well with just about all of them.
Master Exploder
Master Exploder is the middle capstone passive on the “Pyromaniac” side of the Pyromancer’s Pax Tree. This passive increases the damage of Explosive Skills based on your Resistance Piercing. In the July 29 Update, the scaling was reduced to 50% of Resistance Piercing.

Through a combination of passives and mods, this can offer a significant increase to the damage of Explosive skills, of being capable of boosting damage by 50% or more. While Resistance Piercing is hard-capped at around 80% as far as effects go, any amount past that point will still contribute to this passive, allowing for insane damage boosts.
Melting Point
Melting Point is the first shared passive on the “Pyromaniac” side of the Pyromancer’s Pax Tree. This offers a resistance Piercing bonus to enemies while your at nearly full health, or a much larger bonus for being at low health.

In most cases, this passive will only be providing the smaller bonus, but in builds that don’t apply a DoT effect, you can frequently make use of the low health portion of this passive. Regardless, Resistance Piercing is a great stat to have for Anomaly Power Builds.
Scorched Flesh
Scorched Flesh is a shared Notable passive on the “Pyromaniac” side of the Pyromancer’s Pax Tree. This increases your Status Power when using Ignite skills.
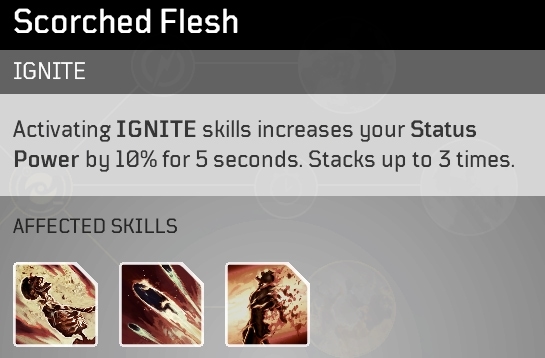
This passive plays really well into Burn or FASER builds, which can both scale their damage off Status Power. It works incredibly well when used alongside Burnt Offerings, to further increase duration.
Solar Flare
Solar Flare is the passive that leads to the lower capstone passive on the “Gunblazer” side of the Pyromancer’s Pax Tree. This increases your Critical Damage when casting skills. In the July 29 Update, the stacking effect was increased from 10% up to 15%.
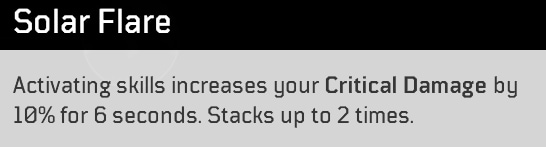
For a Firepower Build, this will be fairly easy and consistent to stack with Feed the Flames. It also works insanely well with the capstone passive that follows it, Critical Mass. This allows for a really solid increase in damage that remains fairly consistent to use and maintain.
Trigger Sequence
Trigger Sequence is the lower capstone passive on the “Pyromaniac” side of the Pyromancer’s Pax Tree. This provides a stacking damage bonus to Explosive Skills, which resets and restacks after multiple casts.
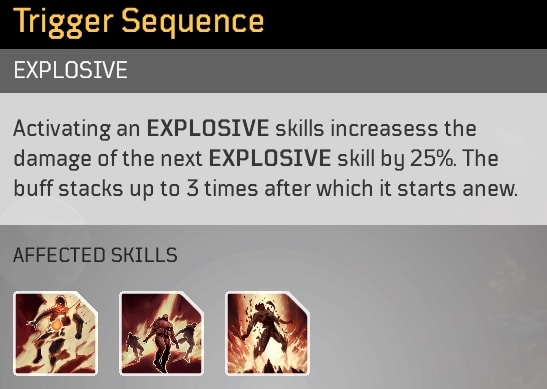
For build using one or multiple Explosive Skills, this can be a strong Damage increase. It’s often strongest paired with skills that can have three charges, and a second filler explosive skill. This allows for a strong damage rotation that easily and consistently boosts damage.
Technomacer Pax Skills
The Technomancer’s Pax Tree is split between one side offering strong supportive passives, while the other offers incredibly strong offensive passives. There’s the “Desolator” side, which offers damage bonuses for various playstyles. While the “Overseer” side of the Tree grants many supportive effects and boosts.
Accelerator
Accelerator is a shared Notable Passive on the “Overseer” side of the Technomancer’s Pax Tree. This passive grants a Weapon Damage increase, equal to your Weapon Leech.

While in theory, this sounds like a great option to pick up, access to Weapon Leech is pretty limited. This results in a very niche node that works well with The Undying, which proceeds it, but not too much beyond that as it only appears on weapons. Despite this, it can offer a significant damage boost, as it should be a multiplicative effect.
Apothecary
Apothecary is a shared passive on the “Overseer” side of the Technomancer’s Pax Tree. This node has you release a healing pulse based on all damage you’ve dealt between each pulse.
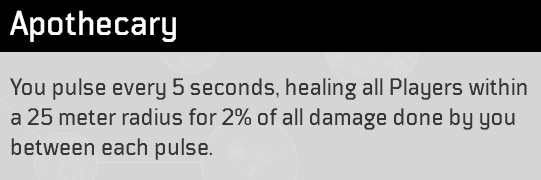
If you’re looking to build pure support Techno, this is a good node to pick up. It pairs well with some of the nodes of each of the branches on the Overseer side of the pax Tree. This allows for some unique build options, while still offering great support.
Biosync
Biosync is the passive that leads up to the middle capstone passive of the “Overseer” side of the Technomancer’s Pax Tree. This passive converts your Overhealing into Health Regeneration.

This passive pairs incredibly well with the mod called ‘The Cycle’. This allows you to scale your team’s damage by healing yourself or your allies if they use the mod. The Technomancer’s ability to easily overheal, alongside the combination of this passive and mod, allows for a solid boost in support power and some personal damage.
Brain Dead
Brain Dead is a shared Notable Passive on the “Desolator” side of the Technomancer’s Pax Tree. It grants a short duration Weapon Damage buff when using Decay or Gadget Skills.

This passive only really benefits builds that are Firepower-based. If you’re able to stack cooldown as a stat however, this works well in combination with the Borealis Monarch Set and Cold Snap, as Cold Snap will be able to apply this and the Borealis Set effect frequently.
Break Their Ranks
Break Their Ranks is the passive that leads up to the lower capstone passive of the “Desolator” side of the Technomancer’s Pax Tree. This skill allows your Interrupt Skills to remove Effect Resistance every 7 seconds, allowing you to continuously interrupt and stagger Elites.
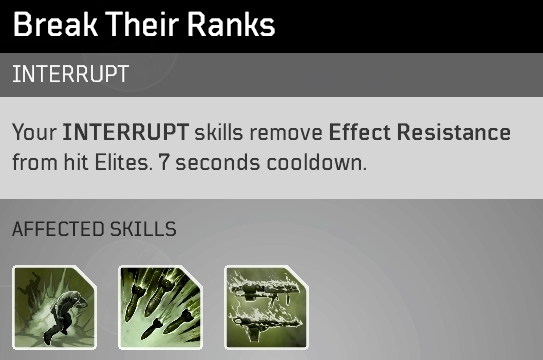
Despite the rather simple effect, this is a quite powerful passive. It plays a big role in Ordnance Builds, which allows them to constantly disrupt Elites, minimizing their effectiveness in combat. It can often trivialize certain boss fights due to this.
Burrowing Charge
Burrowing Charge is the lower capstone passive of the “Overseer” side of the Technomancer’s Pax Tree. This applies a powerful Anomaly Power scaling effect to Critical Shots. In the July 29 Update, this effect has its cooldown reduced to 3 seconds.
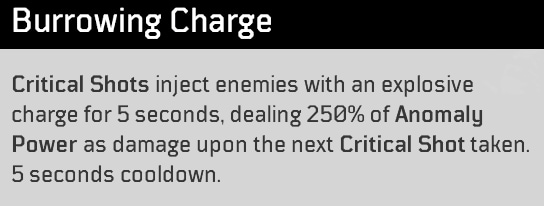
This passive can enable Techno to play a bit more of a Hybrid Build, giving them a strong option to scale weapon damage through Anomaly power, with a strong Anomaly Power boosting node leading up to it. This has some interesting potential paired with Tactical Rifles, allowing the charge to be set and immediately detonated.
Depleted Core
Depleted Core is the lower capstone passive of the “Desolator” side of the Technomancer’s Pax Tree. This allows you to scale the damage of Ordnance Skills with Status Power.
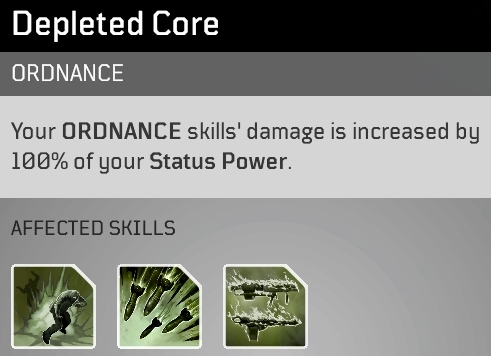
This passive alone enables a high level of scaling for Anomaly Power Technomancer builds, especially if they can stack Status Power. Being a Multiplicative bonus, it also has to compete with Dissection which offers similar levels of power. However, for the skills it does affect, reaching even 50% Status Power allows for an immense and consistent power boost.
Dissection
Dissection is the upper capstone passive of the “Desolator” side of the Technomancer’s Pax Tree. This passive increases your damage for each Status Effect on an enemy.

In combination with Lethal Devices and Permanence, which precede this passive, it offers a lot of damage as all Ordnance and Gadget Skills will apply Toxic, and each application of Toxic will apply for another status. At its absolute peak, it will offer about 40% increased damage, which is multiplicative.
Hastened Influence
Biosync is the passive that leads up to the lower capstone passive of the “Overseer” side of the Technomancer’s Pax Tree. This passive reduces your cooldown as you remove statuses, or your team inflicts them. In the July 29 Update, the cooldown reduction per status was increased to 1 second.

This can be a very strong passive as a support Techno, allowing you to frequently cast Cold Snap or Fixing Wave, allowing for constant crowd control and healing. There’s multiple supportive ways to use it, but it’s fairly limited as far as damage uses, beyond pairing it with Biosync and The Cycle.
Initial Striker
Initial Striker is the first shared passive on the “Desolator” side of the Technomancer’s Pax Tree. This grants a Bonus to Anomaly Power or Firepower when activating skills, depending on which stat is higher.
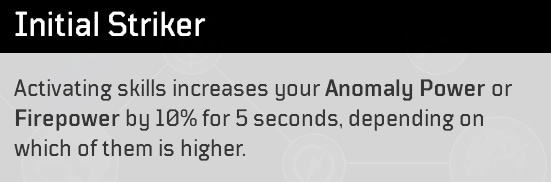
Being a flexible and Multiplicative bonus makes this a great pickup for your first Pax Point. It’s great on most builds except support builds, due to its flexibility. Most Damage builds will be going to into the Desolator side of the tree anyways, as most of the stong damage effects are there, and thus will always have this.
Kinetic Converter
Kinetic Converter is the middle capstone passive of the “Overseer” side of the Technomancer’s Pax Tree. This Passive allows your Critical Shots to heal nearby allies. If this healing effect Overheals, the healed player also gains a 30% increase in damage. In the July 29 Update, this effect cooldown was reduced to 1 second.
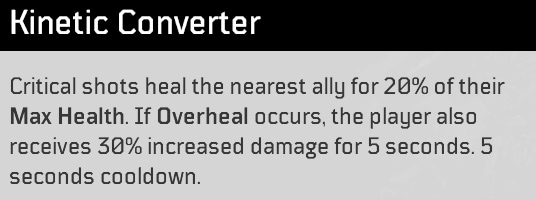
This passive gives you a fairly easy way to make use of Bio Sync, without always having to use a skill to trigger it. Since ideally, most players will stay at or very nearly 100% health, this will always trigger the damage boosting effect as well. It’s a little niche overall, but very usable.
Leadseeker
Biosync is the upper capstone passive of the “Overseer” side of the Technomancer’s Pax Tree. This passive grants an 25-meter pulse to placing your turrets, which restores ammo and increases damage to players affected by the pulse.
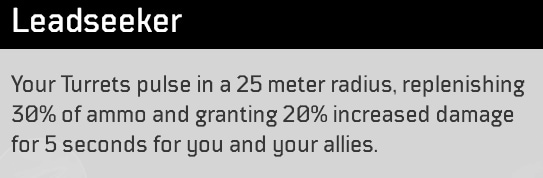
With the low cooldown of Blighted Turret, this can easily be maintained, while constantly cleansing and healing allies through various other effects. The large radius makes it very reliable in most combat areas, allowing for a consistent boost to damage alongside the ammo restoration.
Lethal Devices
Lethal Devices is a shared Notable passive on the “Desolator” side of the Technomancer’s Pax Tree. This passive allows all Ordnance and Gadget Skills to apply Toxic and inflict additional damage when Toxic is refreshed on a target. in the July 29 Update, the damage portion of this effect was given a 0.2 second cooldown.
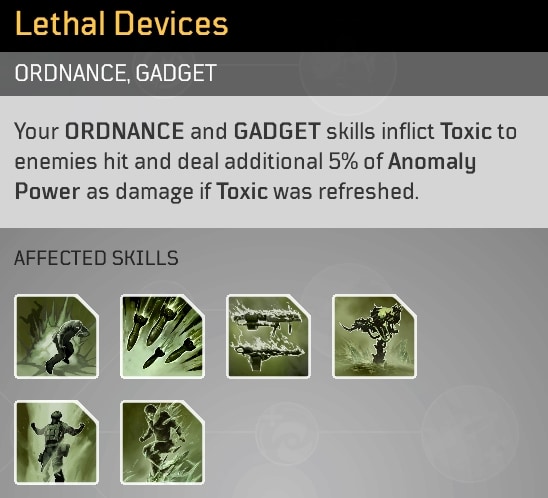
This passive is very much a build enabler. Being able to consistently apply Toxic with all of your skills that don’t apply it naturally allows for a lot of strong synergistic effects. This bonus damage can also Crit, allowing skills like Tools of Destruction to Crit, granting access to many helpful armor effects.
Necrotic Tissue
Necrotic Tissue is the passive that leads up to the middle capstone passive of the “Desolator” side of the Technomancer’s Pax Tree. This grants bonus damage to Elites when using a Sniper-class weapon.
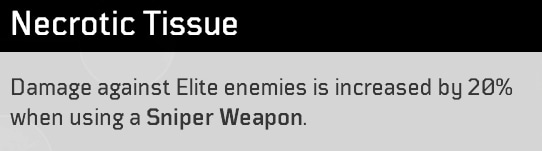
This can be a powerful damage boost, given that it works similarly to Captain Hunter and can even be paired with it for a huge increase in damage. Though, being limited to purely Snipers can be limiting, as you’ll often have a harder time clearing melee enemies.
Override
Override is a shared Notable Passive passive of the “Overseer” side of the Technomancer’s Pax Tree. This grants an Anomaly Power bonus equal to your Skill Leech.

With Skill Leech being able to be stacked on all pieces of gear, this can offer some significant scaling power. With most Anomaly Power builds already stacking Skill Leech anyways, this is often a free boost of power if your build isn’t able to take advantage of the capstones of the Desolator side of the tree.
Pain Killer
Pain killer is a shared passive of the “Desolator” side of the Technomancer’s Pax Tree. This grants Health Regeneration when damaging an enemy.

This passive works great in combination with the mod called The Cycle to boost Weapon damage. Outside of that interaction, it does offer stable healing as well. It won’t protect you too much from multiple quick attacks, but can keep you alive fairly well if you’re not under heavy pressure.
Permanence
Permanence is the passive that leads up to the upper capstone passive of the “Desolator” side of the Technomancer’s Pax Tree. This passive will inflict additional status effect when applying Toxic.

On its own, it’s helpful to Blighted Rounds and Blighted Turret. Combined with Lethal Devices however, it works with every Technomancer skill, giving them access to multiple mods to further increase damage from statuses. In addition, using Dissection on top of this grants a multiplicative boost to damage which does well on most builds.
Purification Protocol
Purification Protocols is the passive that leads up to the upper capstone passive of the “Overseer” side of the Technomancer’s Pax Tree. This allows Turrets to remove one negative status from all players in a 25-meter radius when being placed.
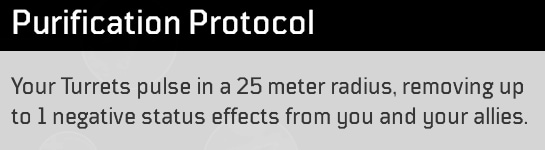
This isn’t all too strong of an effect by itself but can offer a lot of safety in group play. There aren’t too many statuses that would need to be removed, but is an easy way to help your team out of the Frozen status, which can be particularly hard to deal with on some occasions.
The Undying
The Undying is the first shared passive of the “Overseer” side of the Technomancer’s Pax Tree. It grants a bonus to Weapon and Skill Leech, based on your missing health.

The Undying is a node that pairs well with the two Notable Passives that follow after it, but on its own doesn’t do a whole lot. In most situations, it will allow you to more easily stay alive. While it can provide an absolutely massive bonus to Weapon Damage via Accelerator, or Anomaly power via Override, it’s very unlikely to grant all too high of a bonus since you’ll quickly heal up due to it.
Twin Reaper
Twin Reaper is the middle capstone passive of the “Desolator” side of the Technomancer’s Pax Tree. It grants a high chance for Sniper shots to deal additional damage. In the July 29 Update, this Echo damage was increased to 35%.
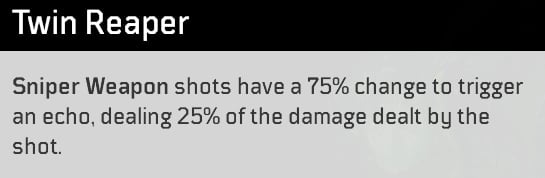
If you’re built entirely around Snipers, this can allow for a huge increase in damage. However since it’s only a chance, it’s not a super reliable effect. Though with the high damage output of Snipers, it has the potential to be quite good.
Trickster Pax Skills
The Trickster’s Pax Tree is split between a variety of Weapon-focused and Anomaly Power-focused passives. The “Specter” side of the Pax Tree offers bonuses that are more focused on the Firepower and Weapon Damage side of things, while still having some Anomaly Power Options. The “Exploiter” side of the tree offers a lot of Anomply Power-focused options, while still having some Firepower related passives.
Adaptation
Adaptation is a shared Notable Passive on the “Specter” side of the Trickster’s Pax Tree. This offers a bonus to Firepower or Anomaly Power when using skills, depending on which stat is higher.
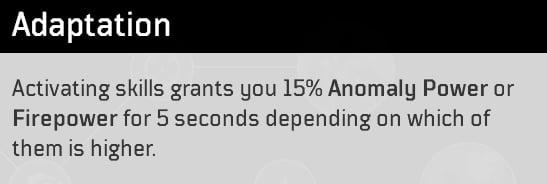
If you’re using the Specter side of the Pax Tree, you’ll likely be using this passive. It offers a flexible bonus that plays well into most builds. Being a multiplicative bonus to either offensive stats makes it incredibly potent.
Cheap Shot
Cheap Shot is a shared Notable Passive on the “Exploiter” side of the Trickster’s Pax Tree. This adds an effect to our melee which reduces an enemy’s Armor and Resistance. In the July 29 Update, the Debuff was increased to 40% Armor and Resistance reduction and extended to a 10-second duration.

Honestly, only the Resistance Reduction is useful to Tricksters, but plays well into multiple builds. Since the effect has a fairly good duration and no cooldown for triggering it, it can be maintained indefinitely for a damage boost.
Damaged!
Damaged! is the first shared passive on the “Specter” side of the Trickster’s Pax Tree. This increases your damage for a short duration after dealing damage with a Damage Skill.
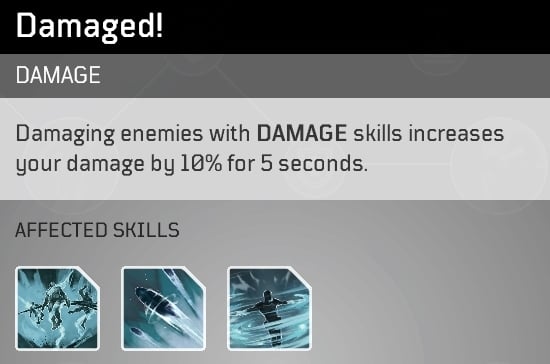
Being a multiplicative bonus to your damage, this can be fairly strong. While not every build will be able to maintain this bonus with 100% uptime, it’s still a fantastic damage option.
Fail-safe Protocols
Fail-safe protocols is the last shared passive on the “Exploiter” side of the Trickster’s Pax Tree. This offers a nice defensive bonus that gives a burst of shields and damage mitigation when your health gets low.
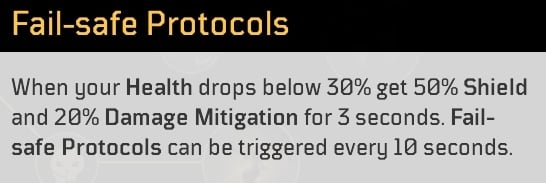
This passive can be nice to have and works well with the Trickster’s new Shield Beast Set, which would allow the burst of shield to double as a boost to damage. Otherwise, it’s a solid defensive node.
Goals Beyond Understanding
Goals Beyond Understanding is the passive that leads to the lower capstone passive on the “Exploiter” side of the Trickster’s Pax Tree. This has a low chance to triple the damage dealt to elites marked by Deception skills.

This passive pairs insanely well with Venator’s Knife and its new mod that increases damage to Elites. It can allow for strong, single hits; and paired with the capstone that follows, huge AoE Damage.
Great Expanse
Great Expanse is the passive that leads to the upper capstone passive on the “Specter” side of the Trickster’s Pax Tree. This extends the distance considered to be close range by 2 meters.
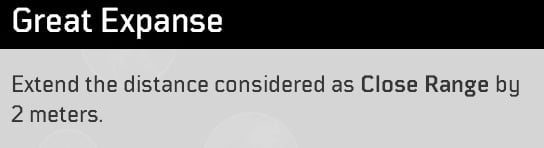
Combined with the Introvert mod and the Cold Calculation passive skills, this can offer a solid boost in damage as your Close range is extended to roughly 14 meters, which is a fairly sizeable area. Outside of that, it just makes it generally easier to benefit from Close Range Damage bonuses or Harrowing if you wanted to opt to grab it.
Harrowing
Harrowing is the middle capstone passive on the “Specter” side of the Trickster’s Pax Tree. This passive increases your Resistance Piercing, and grants a further bonus for each enemy in Close Range.

In most cases, you won’t really need the resistance piercing this provides as its easier to get elsewhere. However, having an extra 12% Resistance Piercing for bosses is usually pretty nice if you’re not currently capped. Combined with Unstoppable Force, it also offers a decent bump in Anomaly Power.
Infinity Slinger
Infinity Slinger is the upper capstone passive on the “Exploiter” side of the Trickster’s Pax Tree. This Passive prevent ammo consumption during and after the use of a Movement Skill for a short time.

This Passive works well with Borrowed Time, granting 30+ seconds of infinite Pistol ammo. It also works well with Hunt the Prey for slower Pistols, but it’s not quite as good. Overall, a really gimmicky passive, but one that can be effective if built around.
Lies, Deception
Lies, Deception is a shared Notable Passive on the “Exploiter” side of the Trickster’s Pax Tree. This grants gradual Shield recovery after using a Deception Skill.

This passive works really well with the Trickster’s new Shieldbeast Set, which allows them to build up its passive bonus to Anomaly Power without needing to defeat enemies for Shield. It’s also a great defensive node, as Shields provide the Trickster with Damage Reduction.
Meticulous Schemer
Meticulous Schemer is the lower capstone passive on the “Exploiter” side of the Trickster’s Pax Tree. This passive spreads the damage of a killing blow against a target marked by a Deception skill among other marked targets.
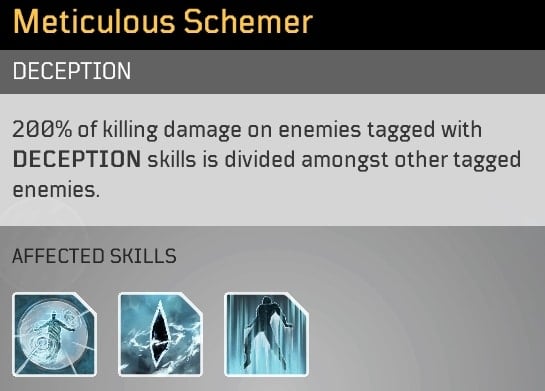
This pairs incredibly well with Goals Beyond Understanding, its preceding node to turn defeating an Elite into a large AoE burst of damage. It works best with Time Rift, modded with Long Range and Double Time to extend its range and duration. It’s okay with the other skills, but much less reliable.
Perpetuum Trickery
Perpetuum Trickery is the middle capstone passive on the “Exploiter” side of the Trickster’s Pax Tree. This grants a Stacking Anomaly Power bonus on Critical Shots that is consumed by the next Damage Skill used, while use of Damage Skill increases Assault Weapon Damage.
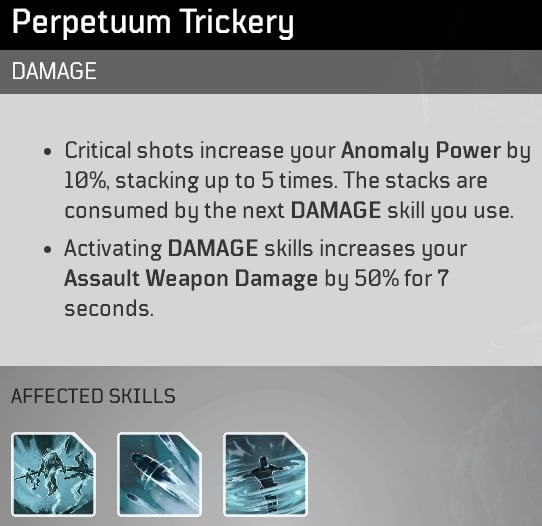
This passive is incredibly powerful in combination with Twisted Rounds, which will be able to consume the bonus Anomaly Power to scale its Firepower bonus, without having to stack it up more than once. Then it will boost the damage of an assault weapon when you activate it, making for a really synergistic set of bonuses.
Phasing
Phasing is the last shared passive passive on the “Specter” side of the Trickster’s Pax Tree. It grants a small portion of shield to you and your allies when you cast a skill.

This can be a fairly good pick-up for Anomaly Power Builds, which allows for a constant supply of shield without defeating enemies, as well as provide a little support to allies.
Power Overwhelming
Power Overwhelming is the passive that leads to the middle capstone passive on the “Exploiter” side of the Trickster’s Pax Tree. This increases your Firepower by a portion of your Anomaly Power.
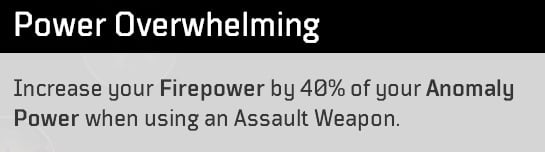
This passive works really well to provide increased weapon damage to Anomaly Power Builds. It pairs exceedingly well with the Anomaly Enhancement Weapon Mod, to further increase Weapon Damage based on your Anomaly Power.
Quantum Entanglement
Quantum Entanglement is the upper capstone passive on the “Specter” side of the Trickster’s Pax Tree. It spreads a portion of your Weapon Damage to all enemies in close Range. In the July 29 Update, the shared damage was increased to 30%.

This can be a nice option for Firepower Builds that want to pick up a little extra AoE for their build. Though, there are still better options for damage available in the Pax Tree. Time Rift’s Pain Transfer Mod also provides a similar effect, with a slightly less restrictive condition
Reactive Shielding
Reactive Shielding is a shared Notable Passive on the “Specter” side of the Trickster’s Pax Tree. This passive increases your Damage Mitigation when activating skills.
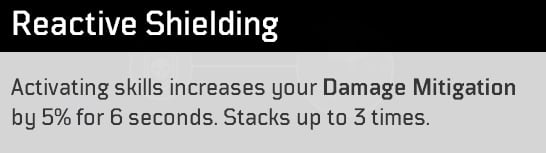
This provides a fairly good amount of Damage Mitigation to builds that will frequently be using skills. This can provide fairly good durability to Trickster looking to play more defensively.
Rigged Game
Rigged Game is the passive that leads to the upper capstone passive on the “Exploiter” side of the Trickster’s Pax Tree. This increases your Critical Damage when activating skills.
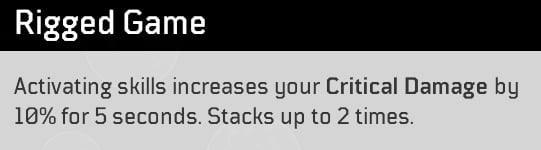
This works great in Firepower Builds with low Cooldowns and can provide a decent boost in damage. However, it’s much easier to get Critical Damage elsewhere without Pax Points, which reduces the usefulness of this passive.
Special Tactics
Special Tactics is the lower capstone passive on the “Specter” side of the Trickster’s Pax Tree. This grants a stacking damage bonus against Elites as you deal damage. In the July 29 Update, this effect had its duration increased to 5 seconds.
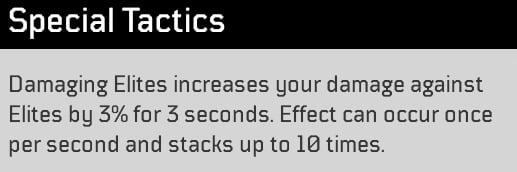
This can be fairly powerful in Firepower Builds, as it can stack it fairly easily and quickly. It can be useful to Anomaly Power Builds as well, but will often take longer to build up without the use of Time Rift’s A Little Bit of Pain mod. If you can stack it quickly and maintain its stacks, it’s a fairly potent damage increase.
Spectral Spike
Spectral Spike is the middle capstone passive on the “Specter” side of the Trickster’s Pax Tree. This grants a stacking Damage bonus for damaging Skills that deals additional Damage based on your Anomaly Power. In the July 29 Update, the cooldown of this effect was reduced to 0.5 seconds, allowing for quicker ramping.
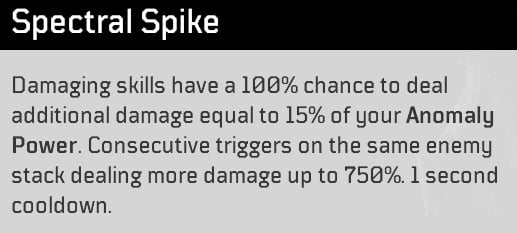
This can be a fairly strong passive, but really has a few use cases where it can be strong. It’ll work best with Twisted Rounds, with Cyclone Slice and Time Rift being close seconds. This is because these skills either apply constant damage, or deal damage over time, allowing it to quickly stack up.
Superposition
Superposition is the passive that leads to the lower capstone passive on the “Specter” side of the Trickster’s Pax Tree. This grants a bonus to Damage Mitigation during and after the use of a Movement Skill.
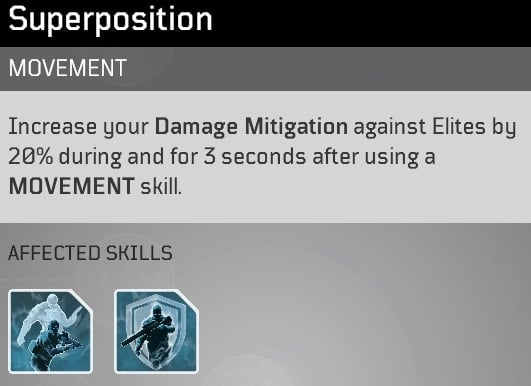
Both Hunt the Prey and Borrowed Time work well with this, as they can both reach low cooldowns. Borrowed Time is slightly better, as it can last for 30+ seconds. It also has other defensive bonuses that can be stacked with this to make you immensely tanky.
Triggerman
Triggerman is the first shared passive on the “Exploiter” side of the Trickster’s Pax Tree. This grants increased damage for each skill on cooldown.
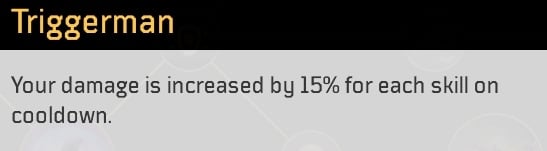
This damage is great for most Trickster build, but builds with low cooldown may have a harder time taking advantage of this passive without constantly putting skills on cooldown.
Check out our full Outriders Guides and News coverage here on VULKK.com. In the game’s category, you will find a number of beginner-friendly guides as well as content that is more suitable for the more advanced players, the completionist and the hard-core farmer as well!