This guide explains how Photo Mode works in Star Wars Jedi Survivor, how to use it, what it is good for and why it’s your next favorite tool!
Table of contents
What is Photo Mode
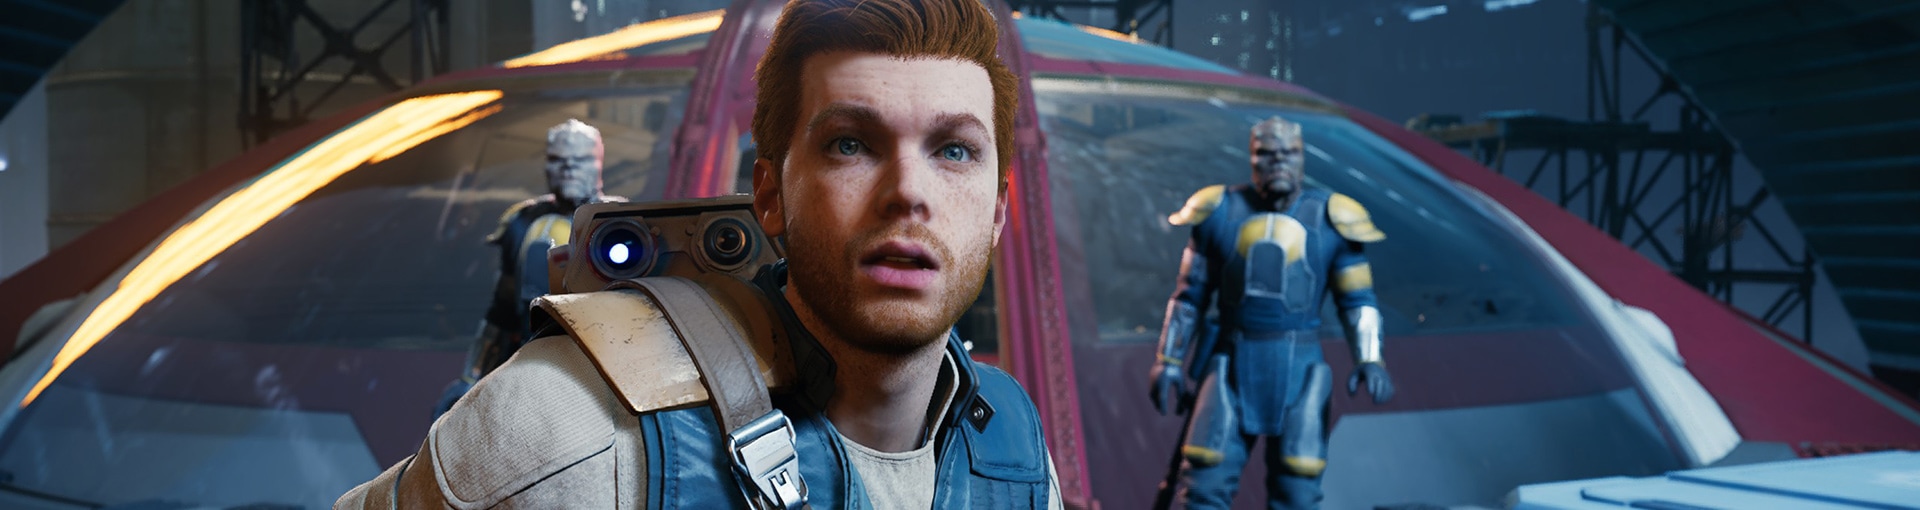
Photo Mode is a tool that allows you to stop your game at any given point and take a highly customizable screenshot of the action you see on your screen without any UI elements.
Photo Mode is not a revolutionary tool in any modern game and it is no surprise that Star Wars Jedi Survivor gets to have one as well.
How to use Photo Mode in Jedi Survivor
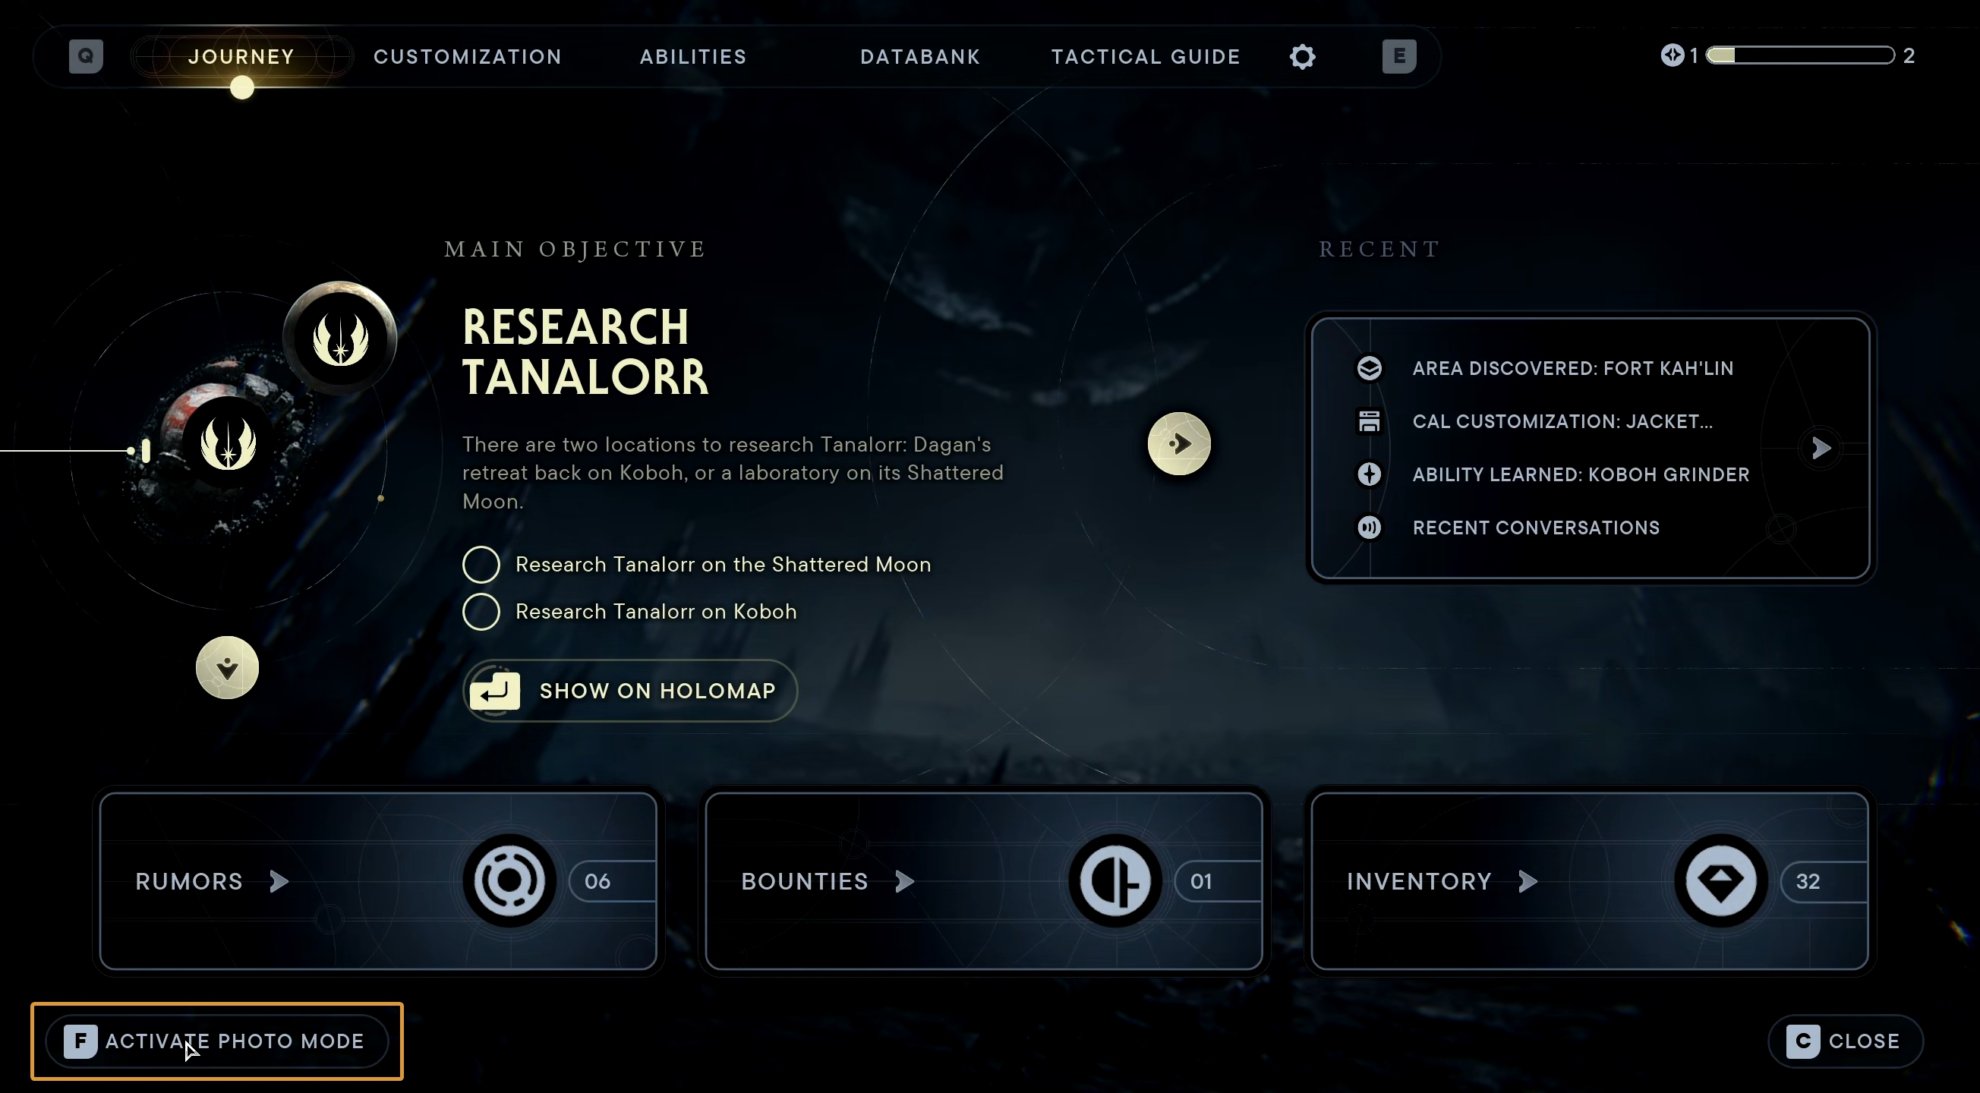
To use Photo Mode in Star Wars Jedi Survivor open the main menu screen by pressing ESC or Keyboard or the Menu/Option key on your controller. At the bottom left corner you will see a button labeled “Photo Mode”. Click to open it.
You can map a dedicated key to activate Photo Mode as a customized shortcut. The default on PC is the Backspace button. On a controller, it’s unbound by default.
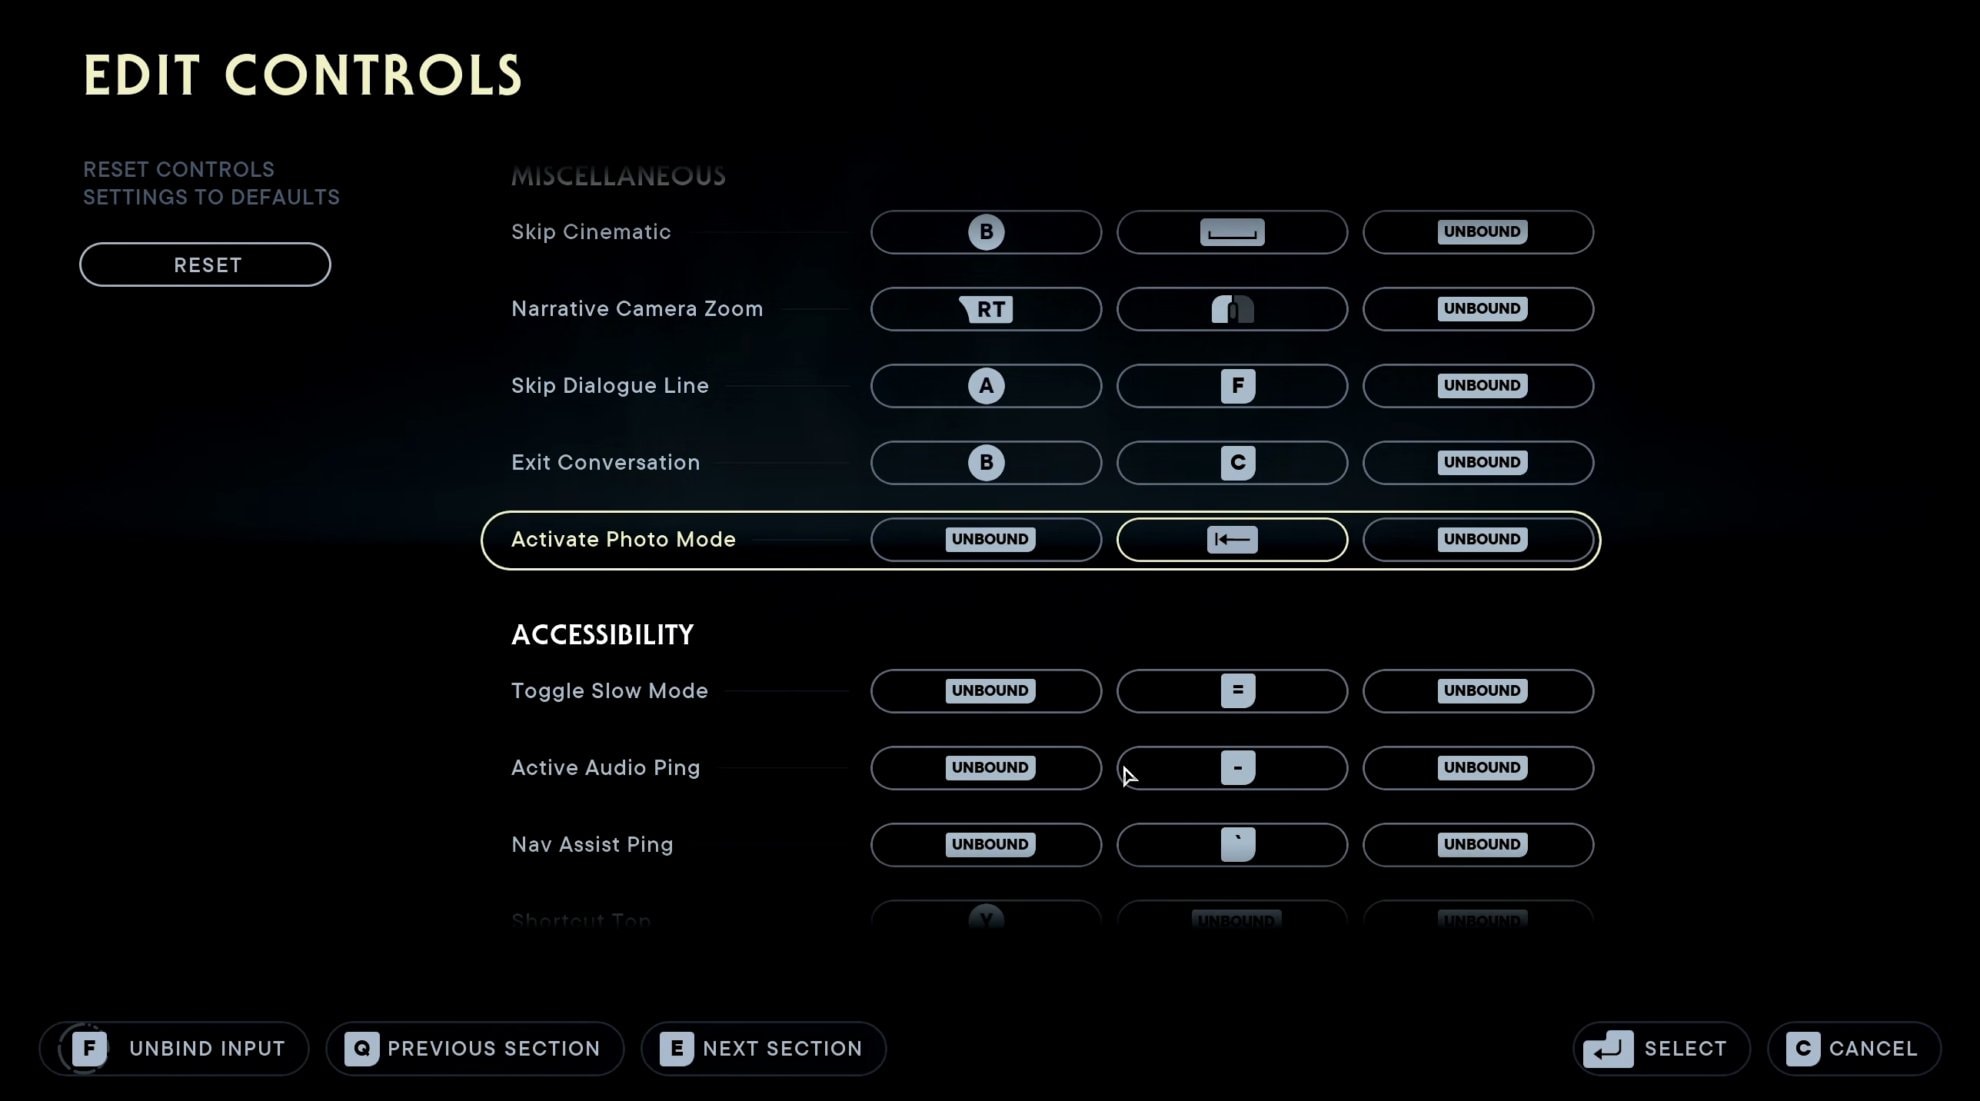
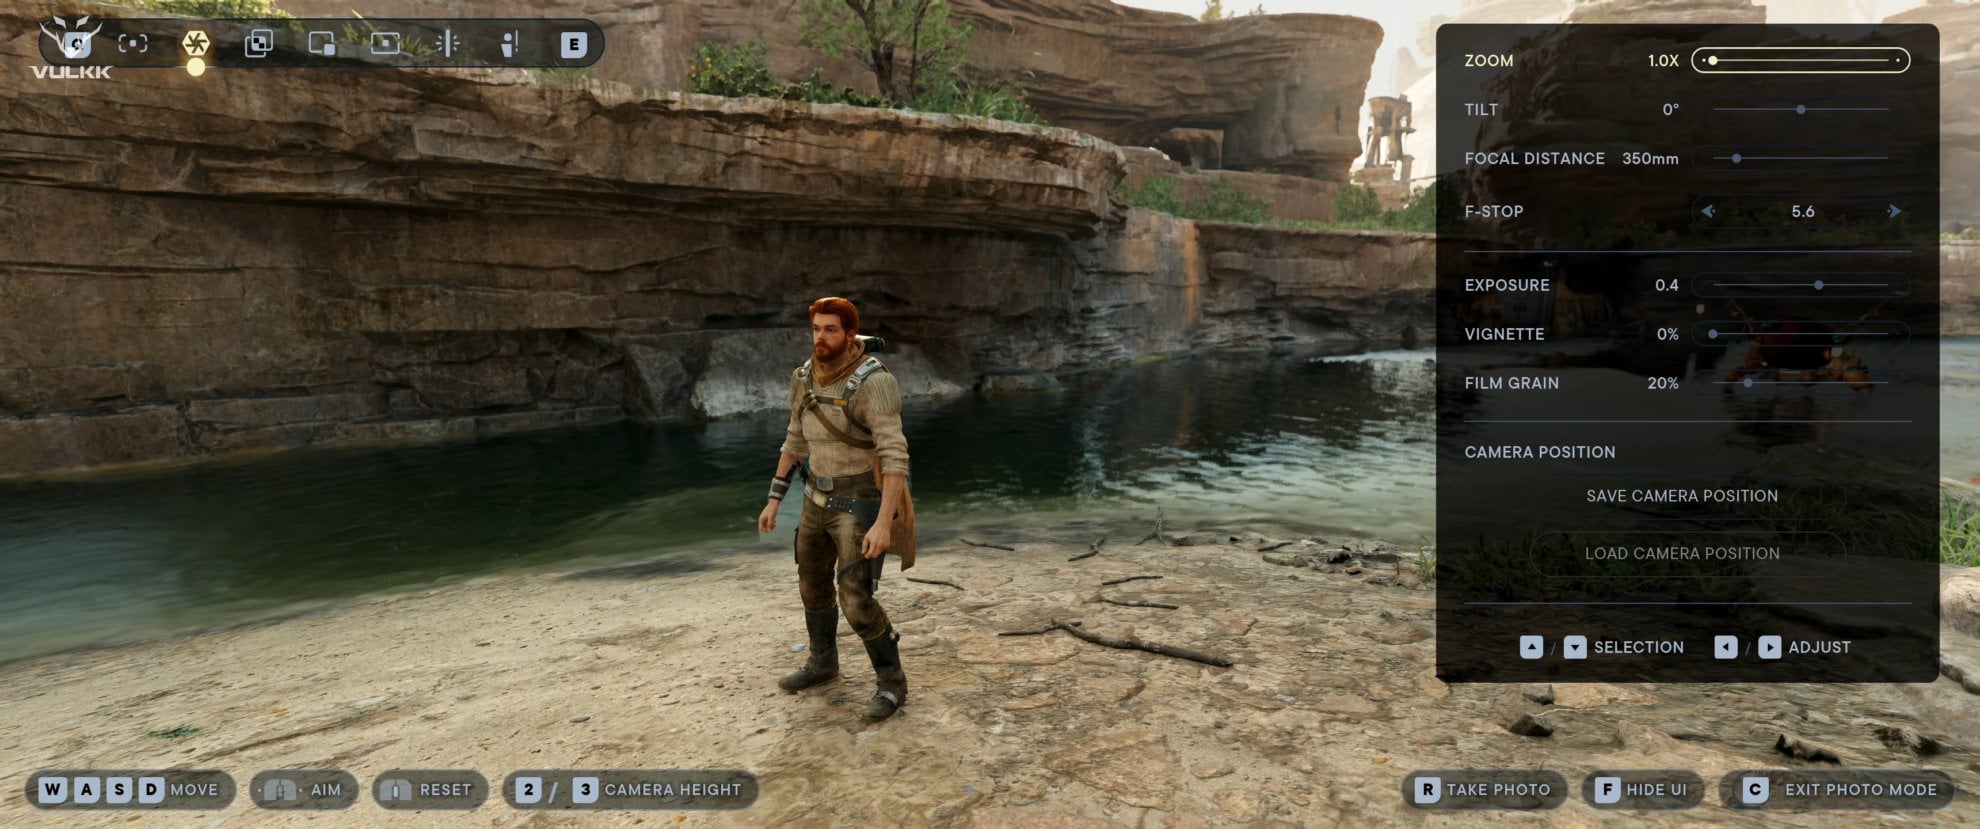
Photo Mode UI and Settings Overview
When you open Photo Mode, you will see a small UI around the bottom left and right and top left on your screen. You can take a screenshot at any time, this overlay will never be visible.
The VULKK logo in the top left corner is an overlay from OBS, the tool I used to capture the video footage and screenshots for this guide, it is not in the game.
My monitor is UltraWide, that’s why the images have extra width. The UI scales nicely on UltraWide resolutions and it doesn’t add black bars in cinematics.
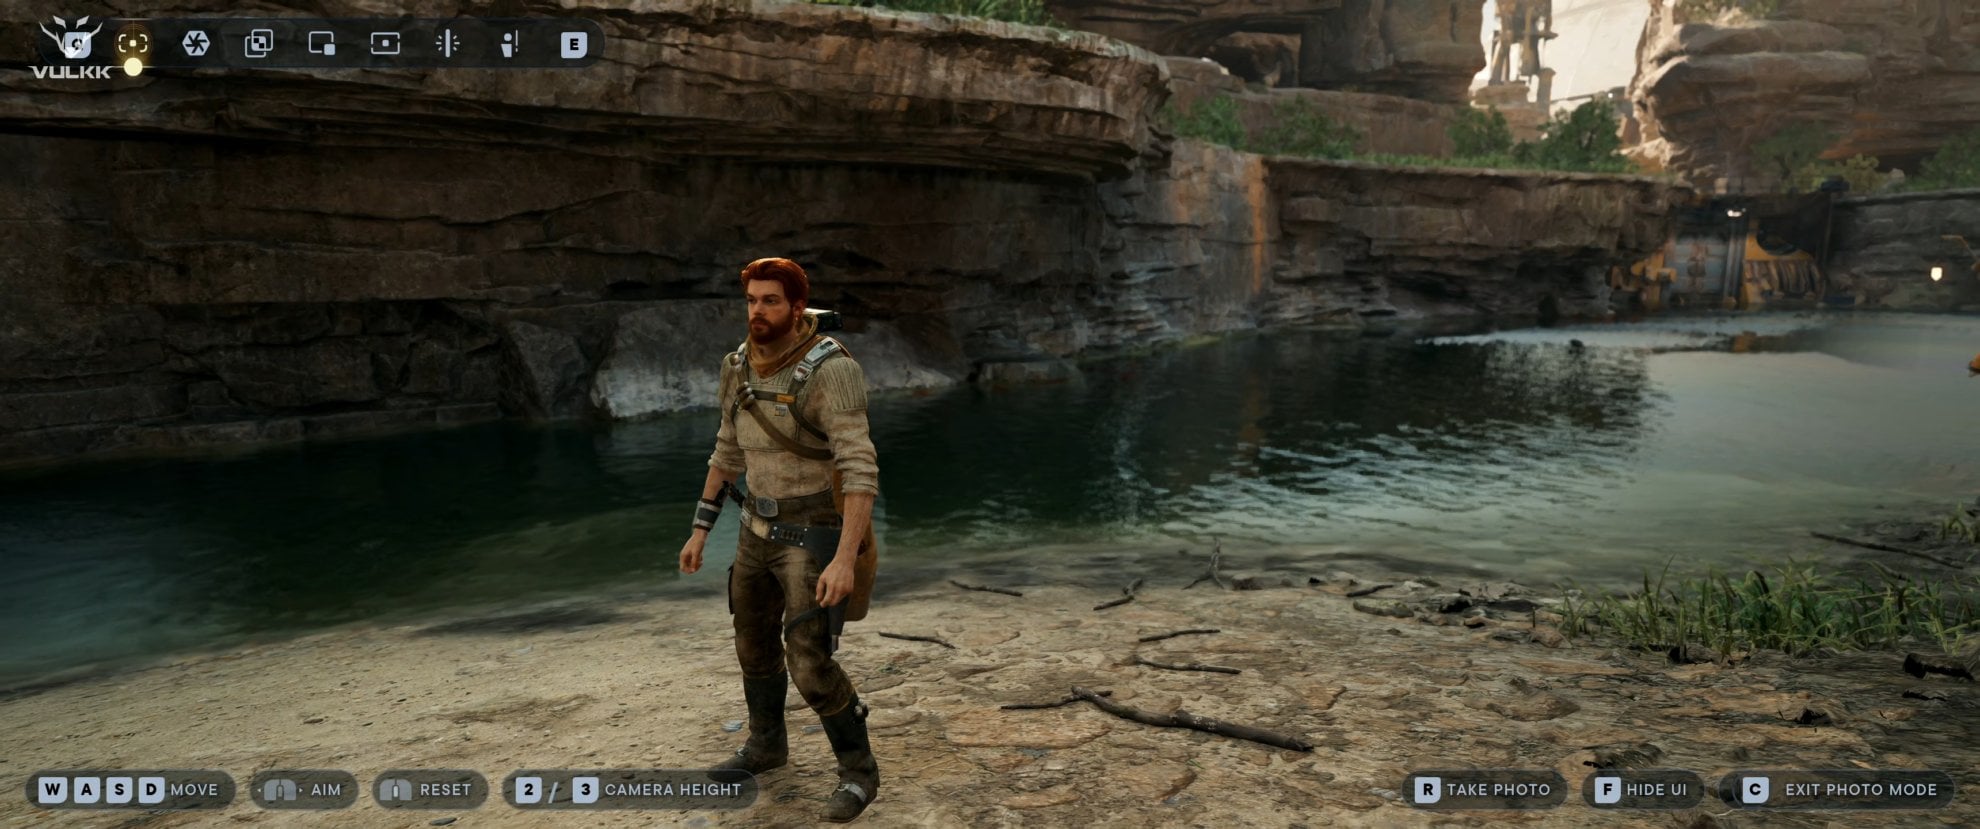
If it bothers you while you are preparing to take the most perfect shot and put a ton of filters on it, you can hide the UI with a shortcut shown at the bottom right. It’s F by default on PC.
In the lower left corner, you have controls for moving the camera around, zooming in and out and a Reset button to bring it to the original shot from when you opened Photo Mode.
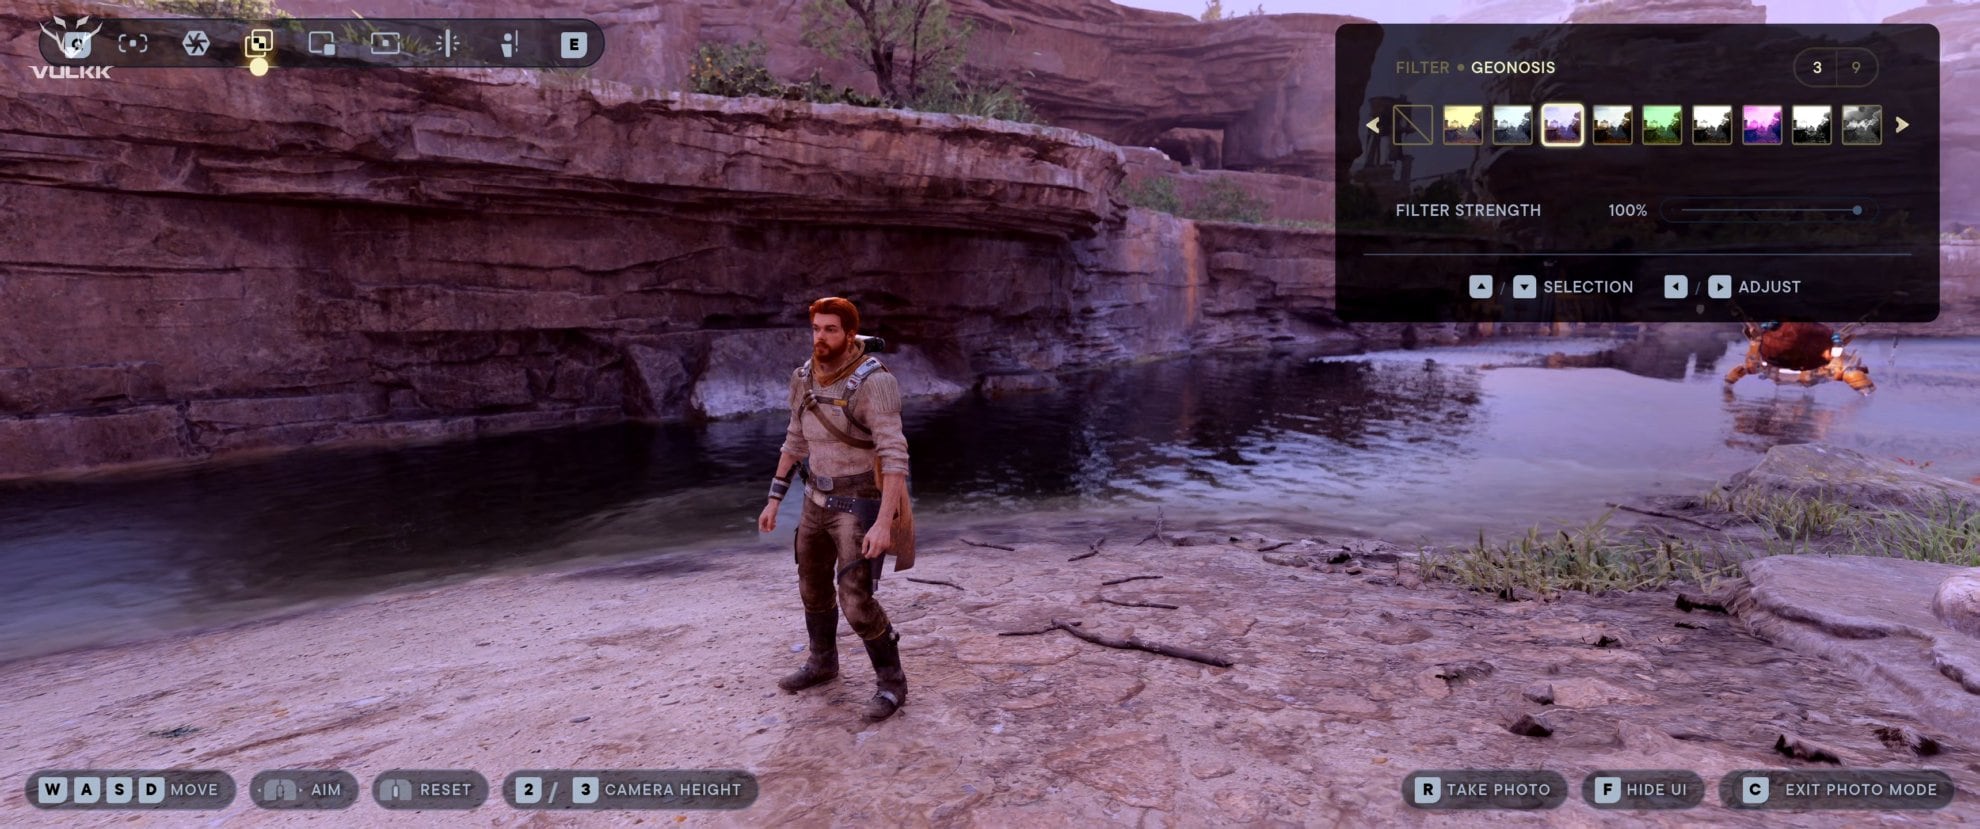
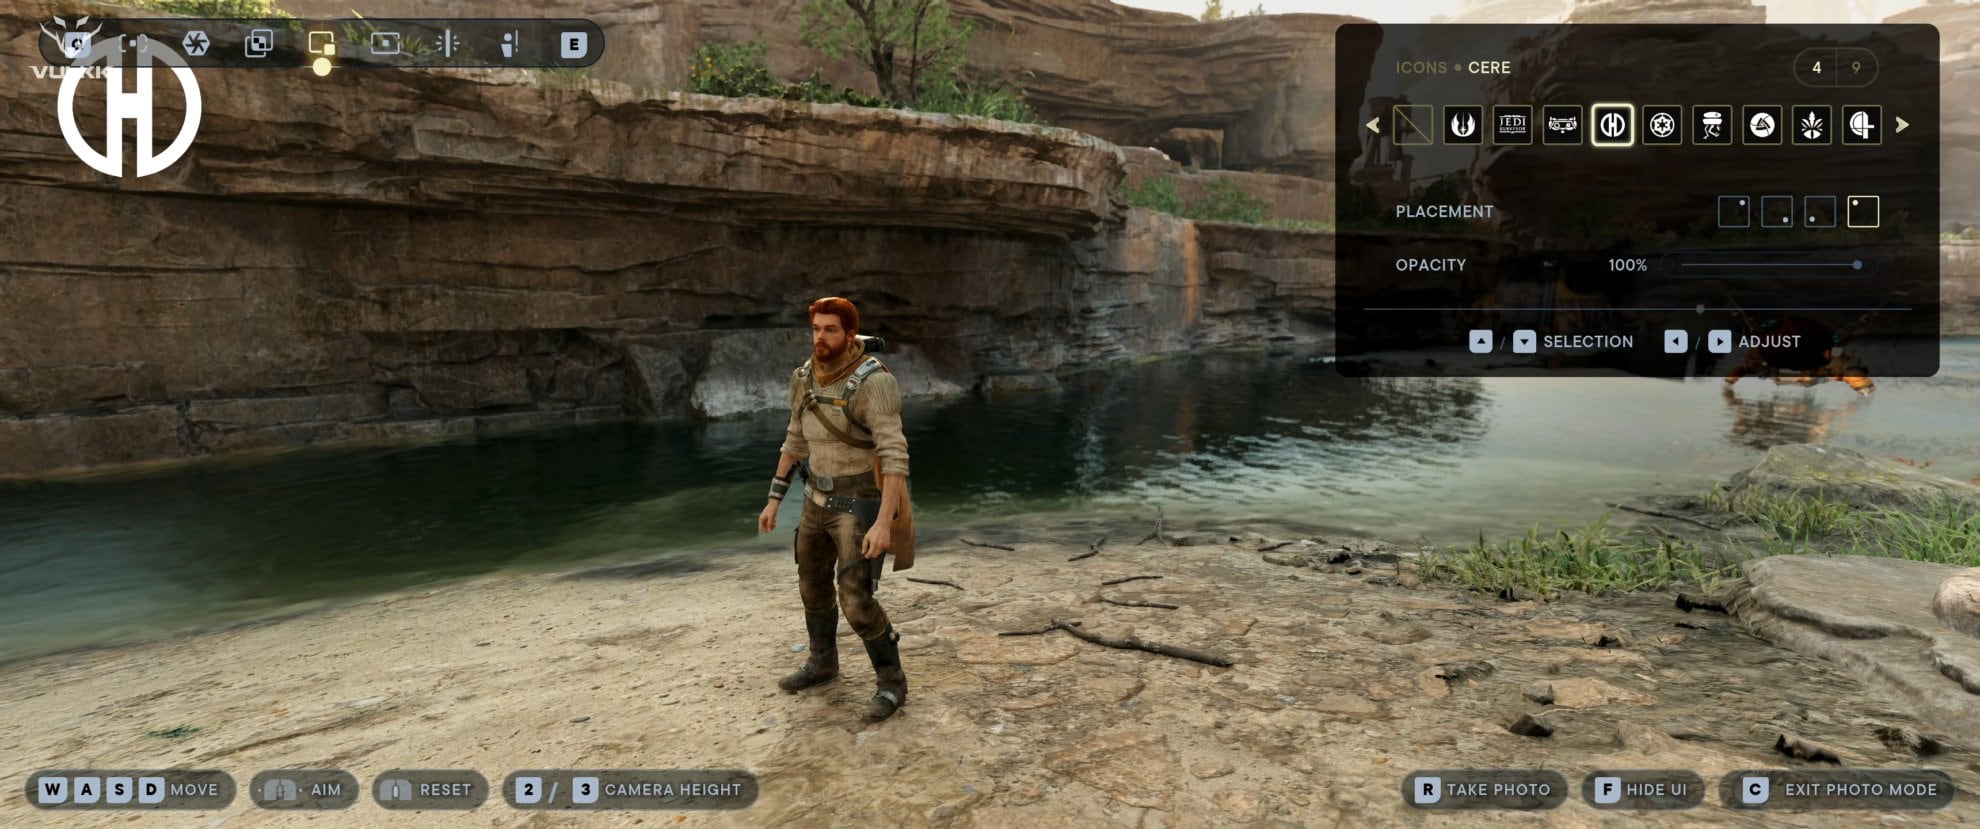
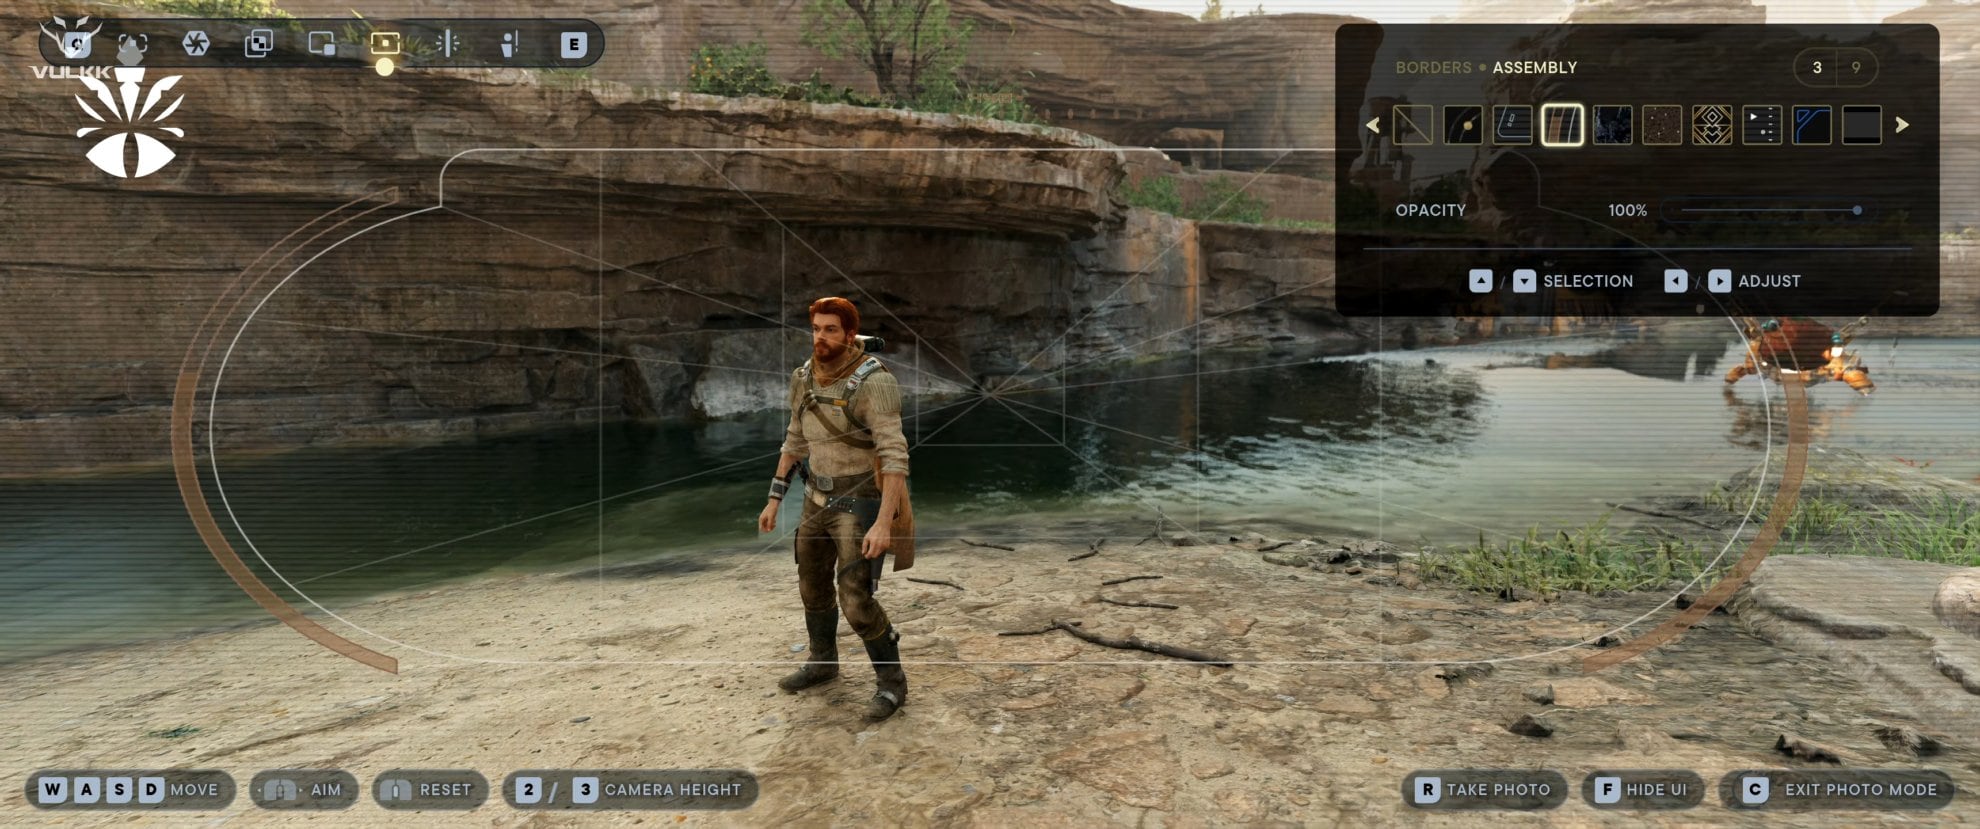
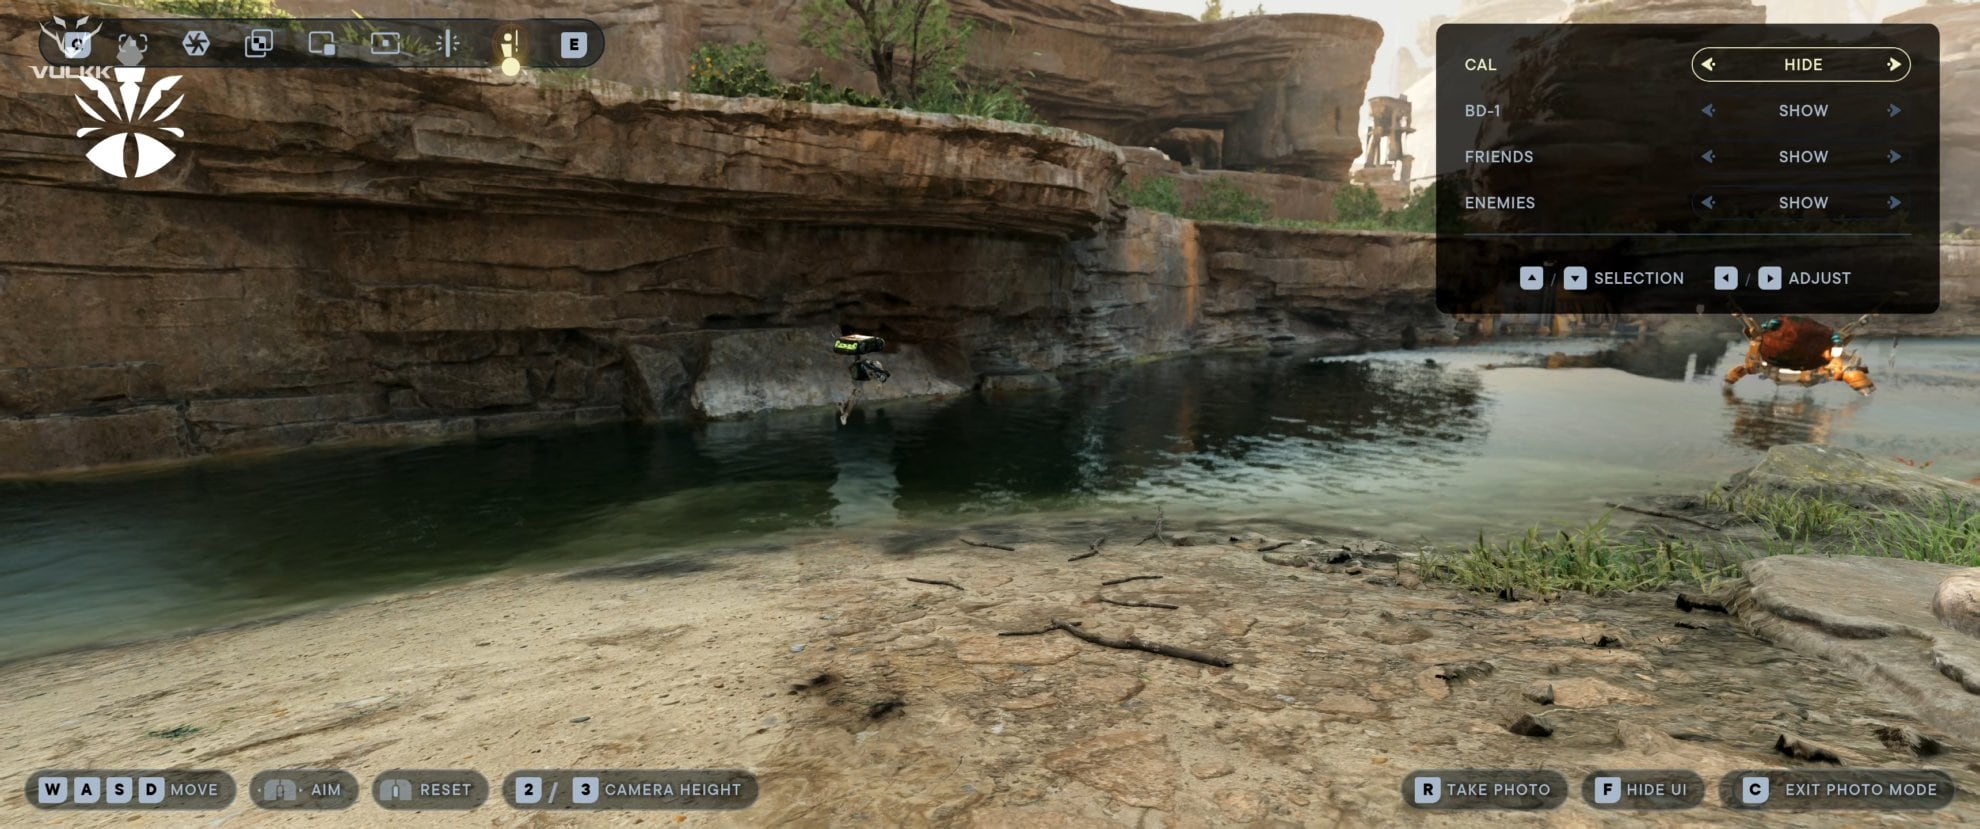
In the top right you have filters and overlays options. From there, you can play around to create the perfect desirable atmosphere for your images. You can apply predefined filters or create your own, add borders overlay and icons, hide and show Cal and BD-1, friendly NPCs, enemy NPCs and more.

Where Jedi Survivor Photo Mode saves Screenshots
Star Wars Jedi Survivor saves the screenshots you take with Photo Mode in its own dedicated “Respawn/JediSurvivor” folder in the Windows Pictures destination.
The default path on Windows 10/11 is:
This PC > Pictures > Respawn > JediSurvivor
If you have changed your default Pictures folder to be a folder of your choosing, the game will go and save the Photo Mode screenshots in that folder. It will again create its own Respawn and JediSurvivor sub-folders. Here’s an example:
This PC > (E:) > Pictures > Respawn > JediSurvivor


