
Star Wars Jedi: Survivor has a fair bit of settings to play around with and this guide breaks down everything you’ll need to get the best gameplay experience with the game and its UI.
Table of contents
Accessibility Settings
We’ll start with these settings, as they often impact how the game looks and plays. This section offers many great options for those with various impairments to help make the game easier to enjoy.
Visual Accessibility Options
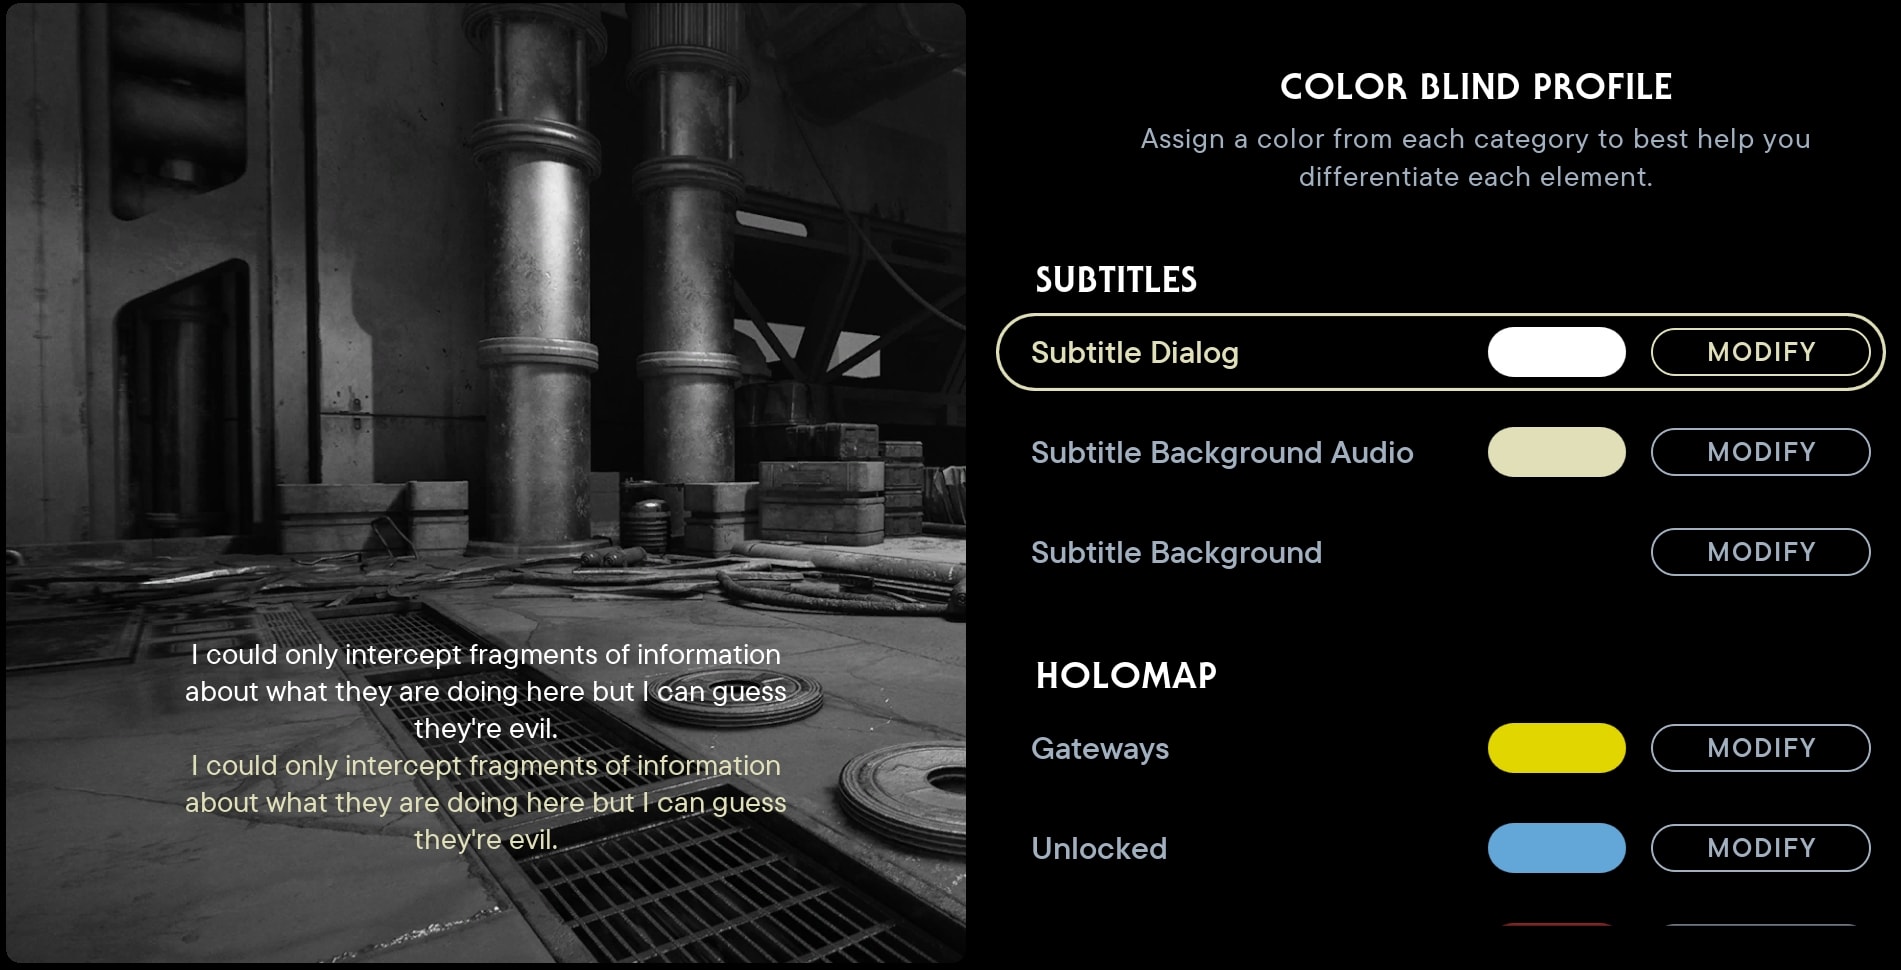
Subtitles
Especially for the Star Wars Universe, Subtitles felt like an absolute must. There are a fair few moments with some overlapping dialogue or various species speaking in their own languages. This doesn’t always translate them, but will definitely help with some speech patterns of different species.
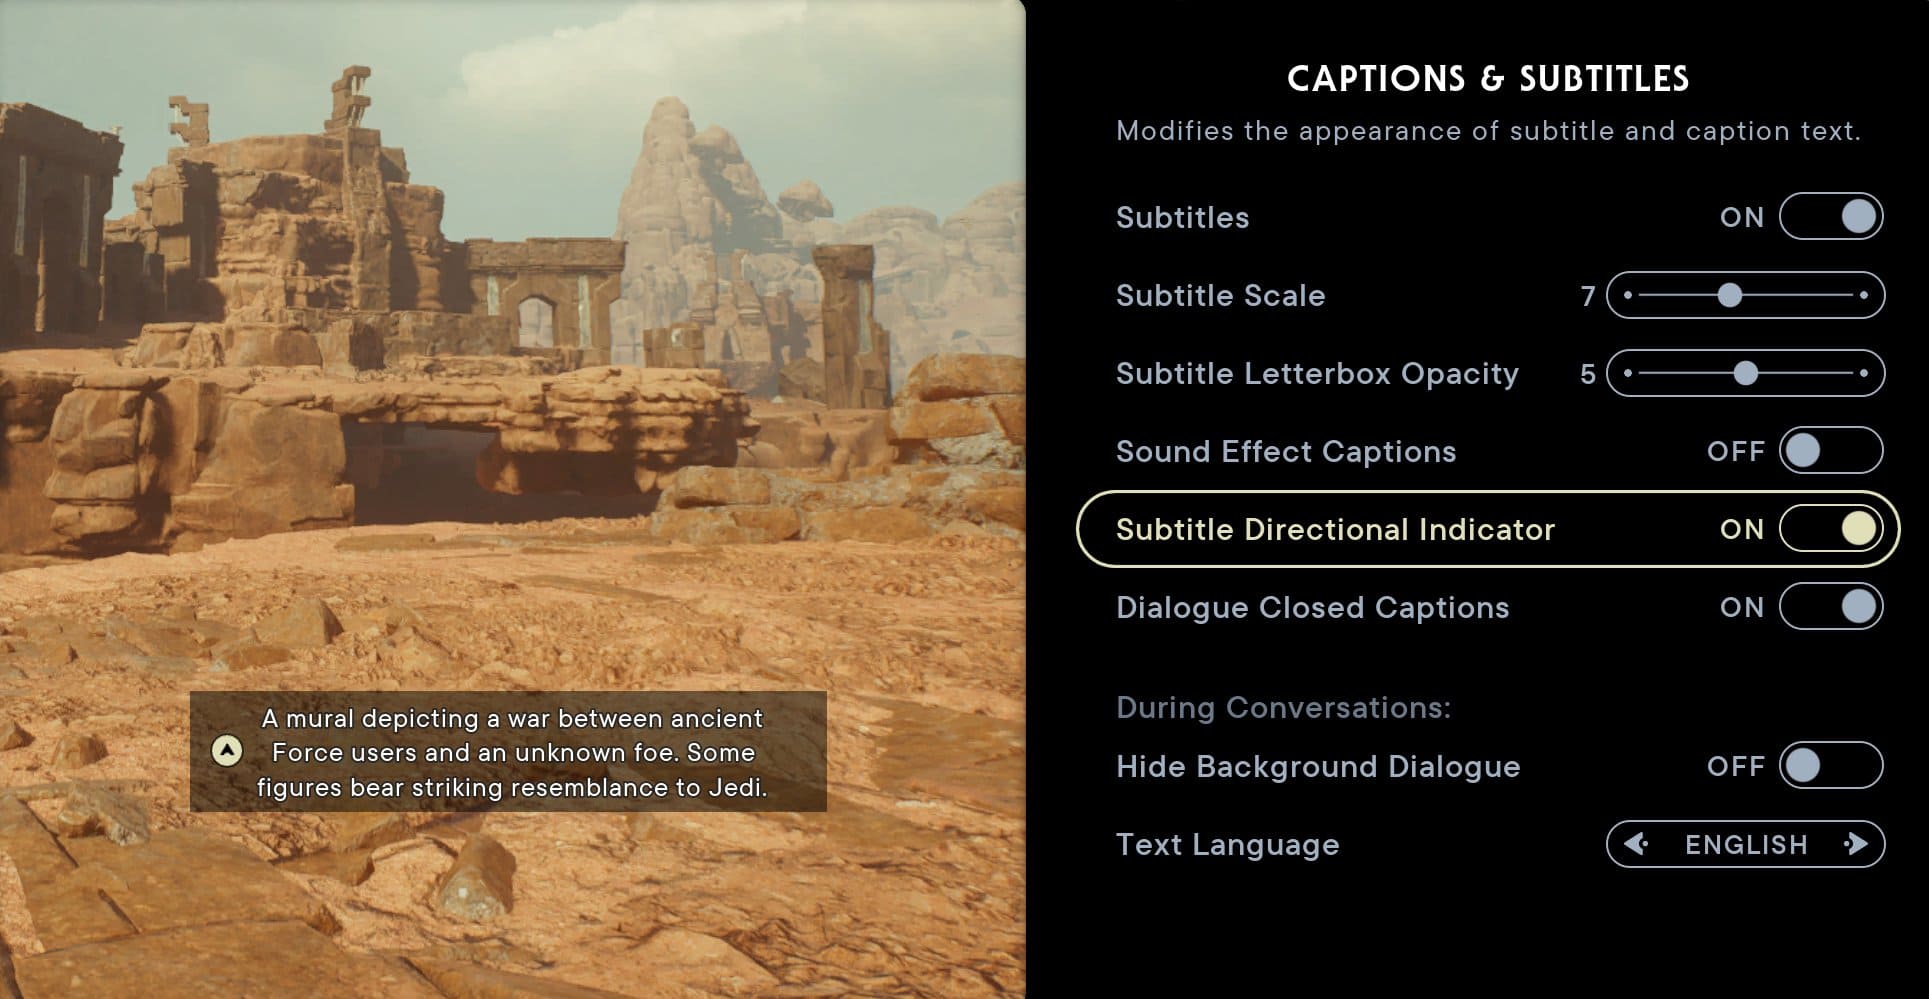
Not only that, but Subtitles have their own customization as well allowing you to modify them. Below are the default settings, and how they look.
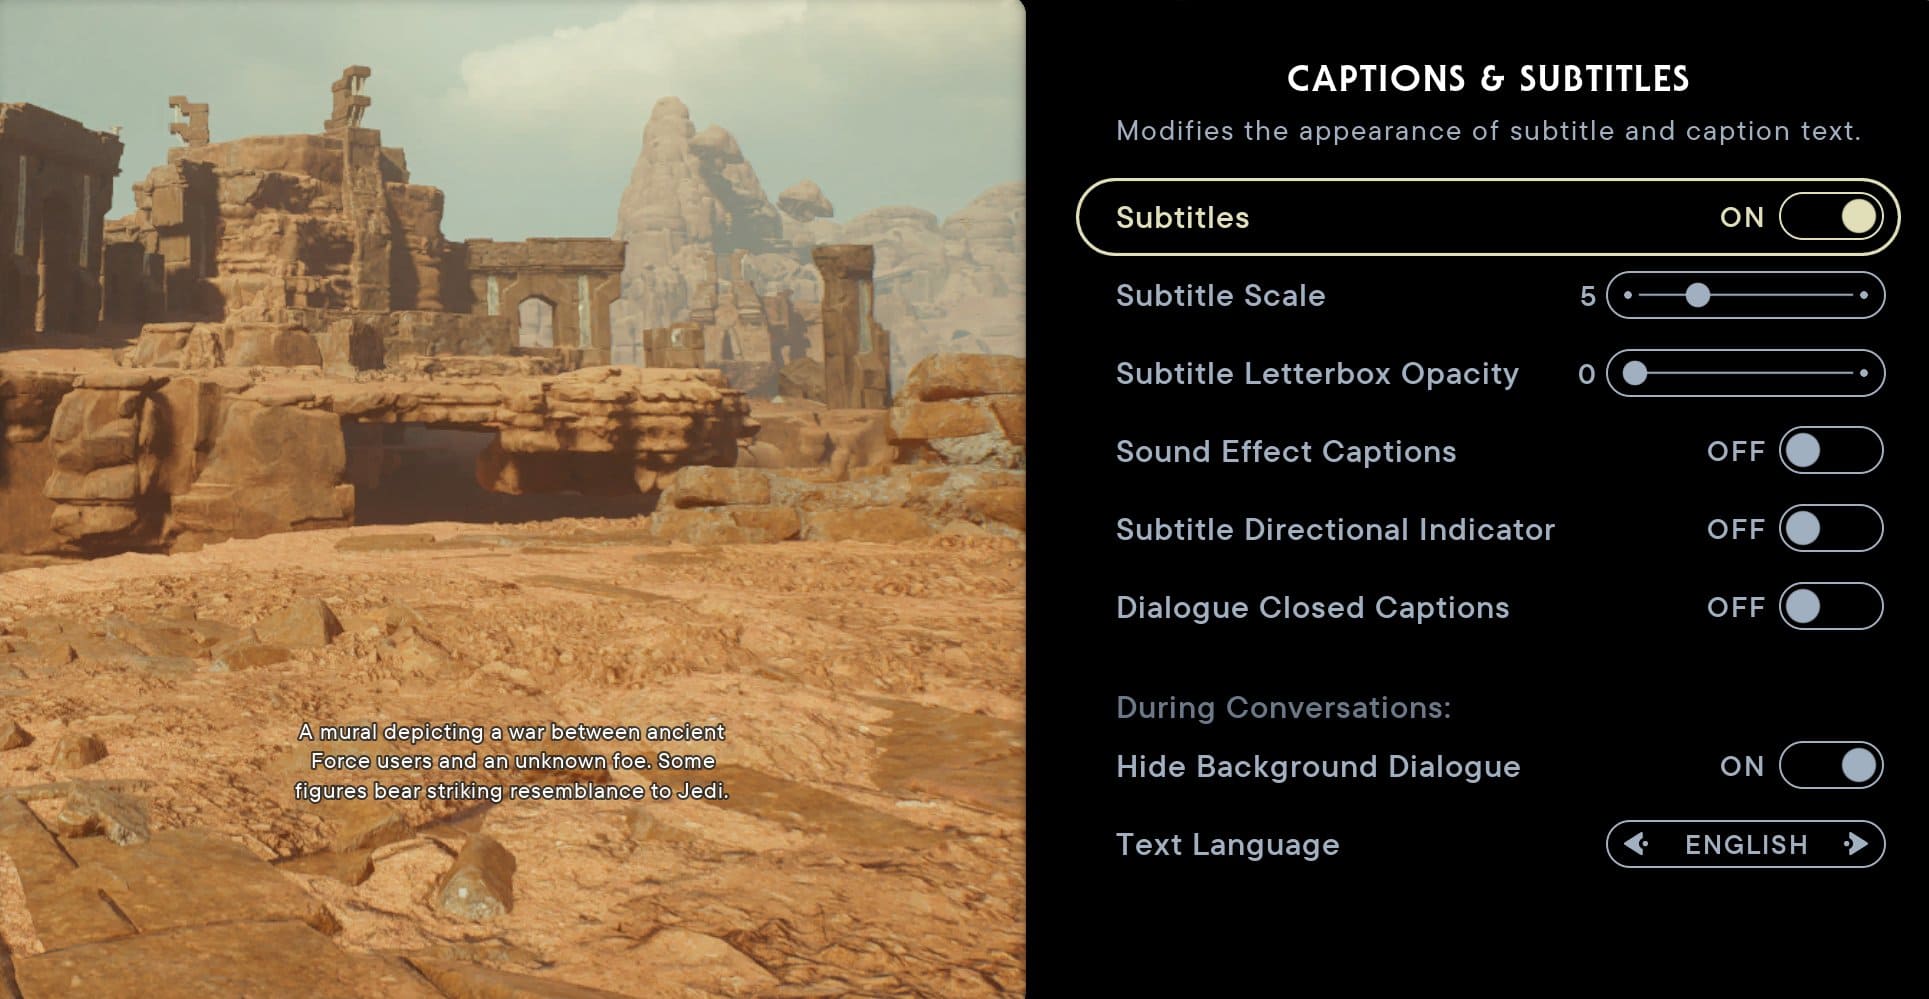
Everyone’s needs are different, but I went with these settings for general-purpose use:
- Subtitle Scale: 7
- Subtitle Letterbox Opacity: 5
- Sound Effect Captions: Off
- Subtitle Directional Indicator: On
- Dialogue Closed Captioning: On
- Hide Background Dialogue in Conversations: Off
With these settings, the resulting subtitles look as they are shown below.
HUD Scale
The HUD Scale options affect UI elements like your Stances, Health Bar, and Interact prompts. I recommend to leave this setting at the default 100% Scale.
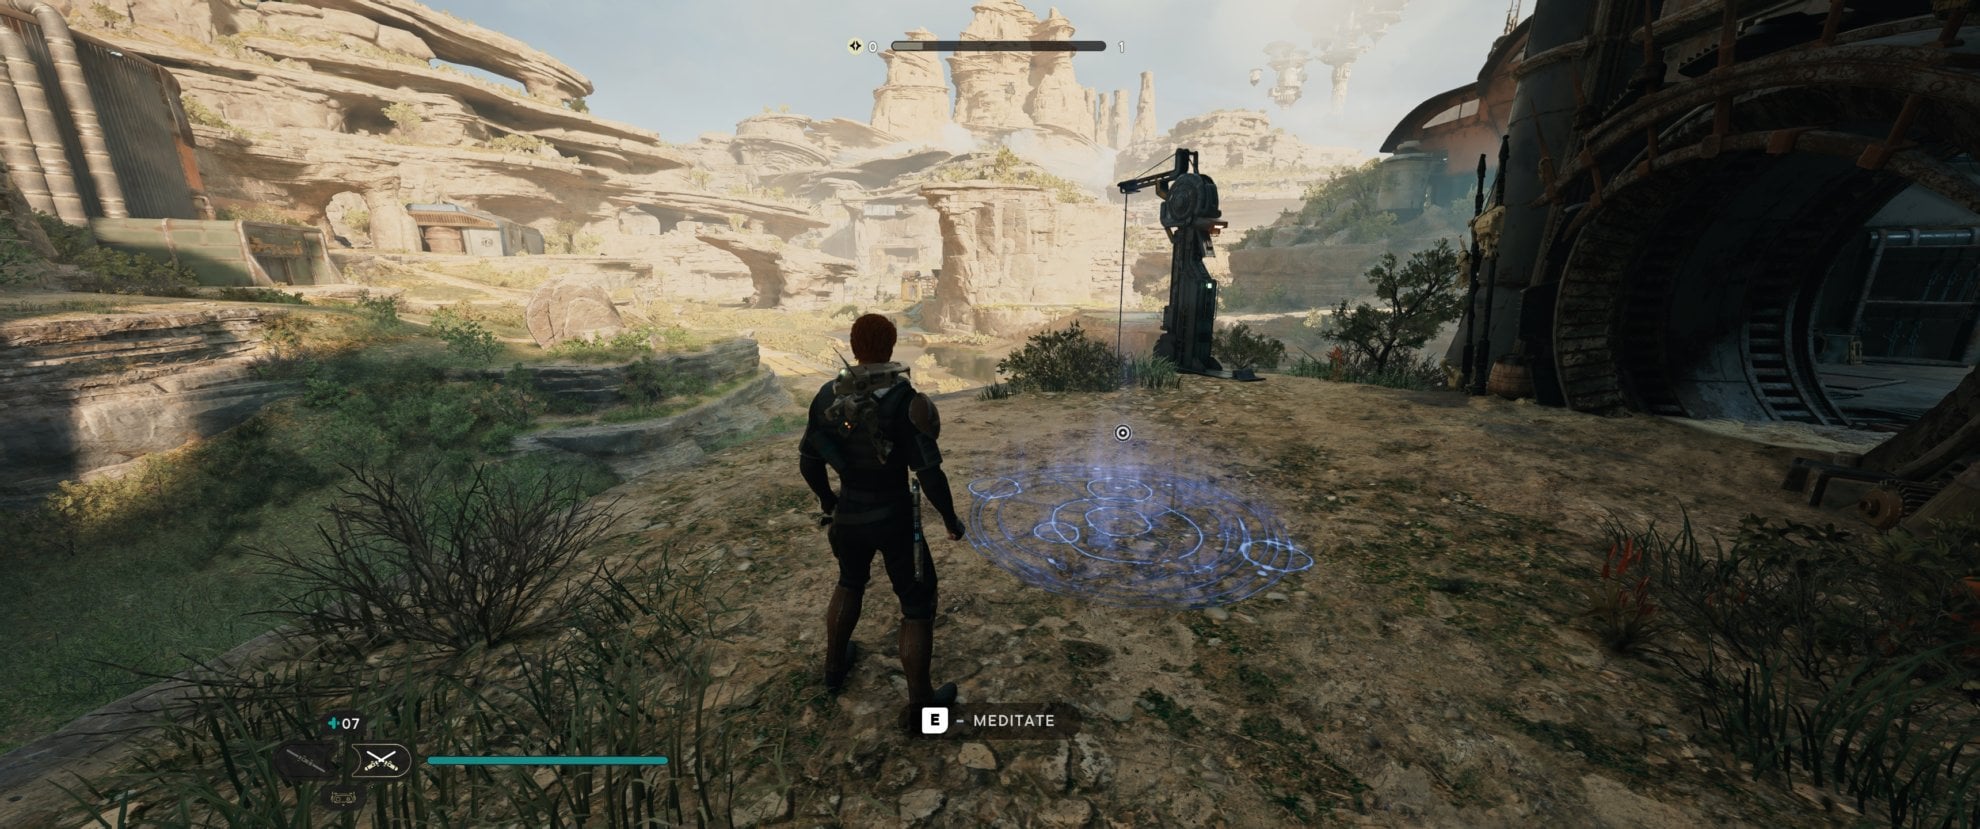
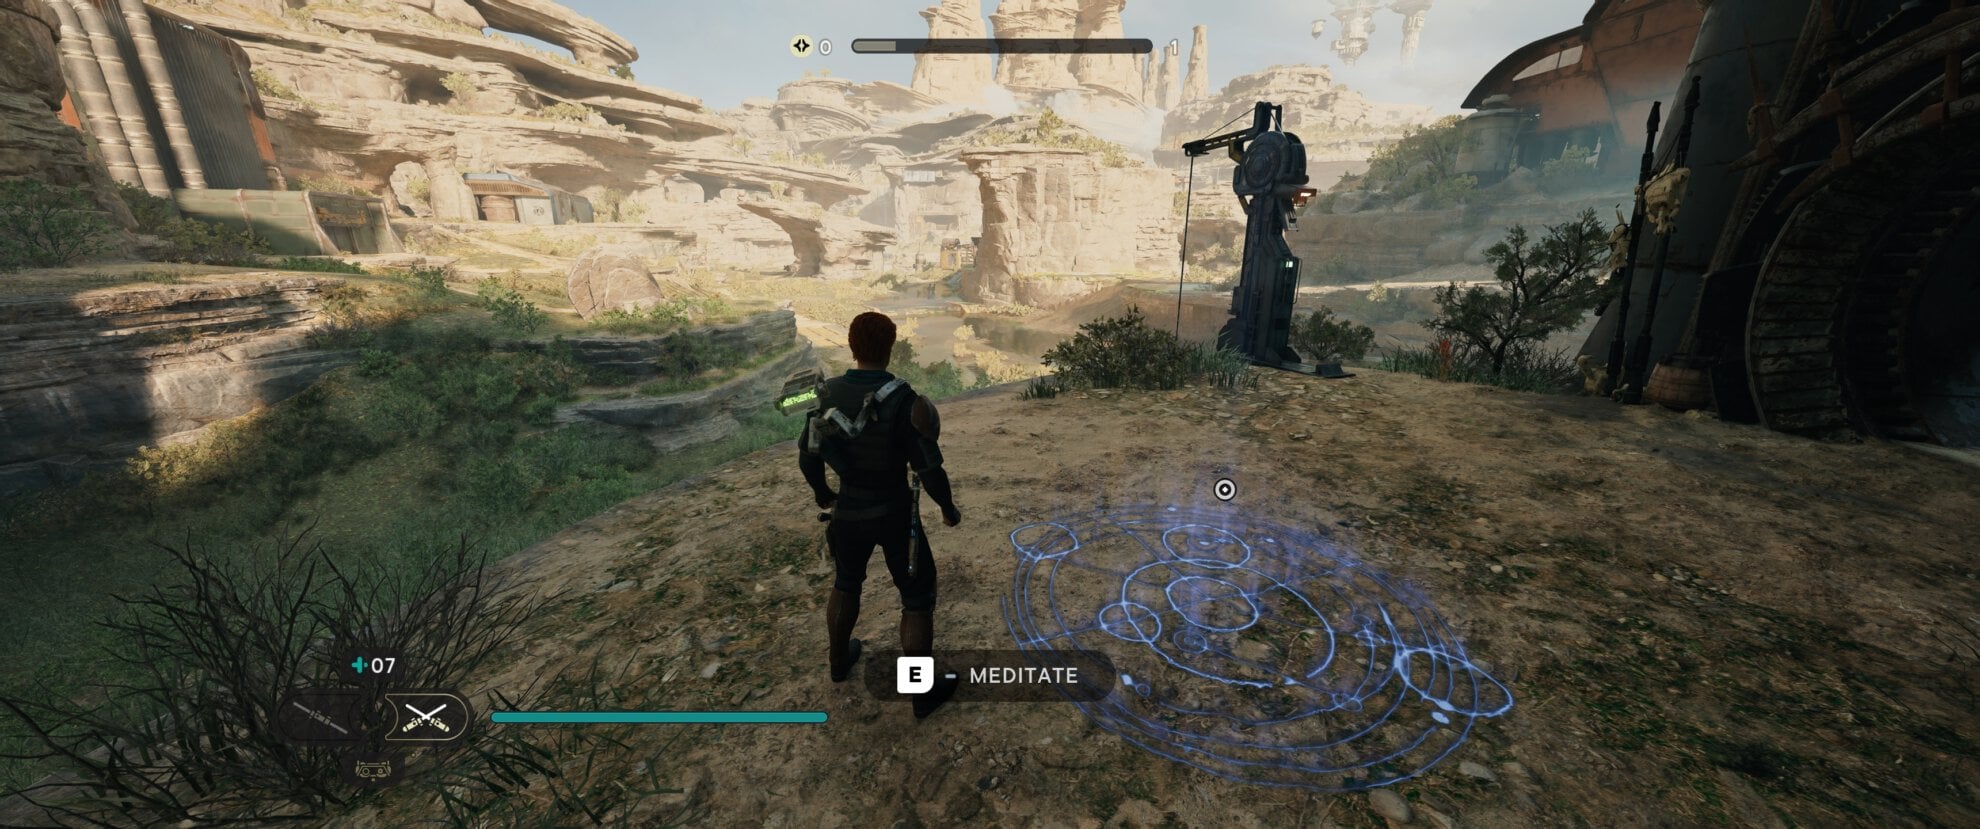
It’s a very minimalist UI so it rarely impedes anything or gets in the way. The setting at 100% is shown above. Below is when the setting is turned up to its maximum value of 140%.
There is also the option to reduce the UI size if desired, where it can be set as low as 60%, shown below.
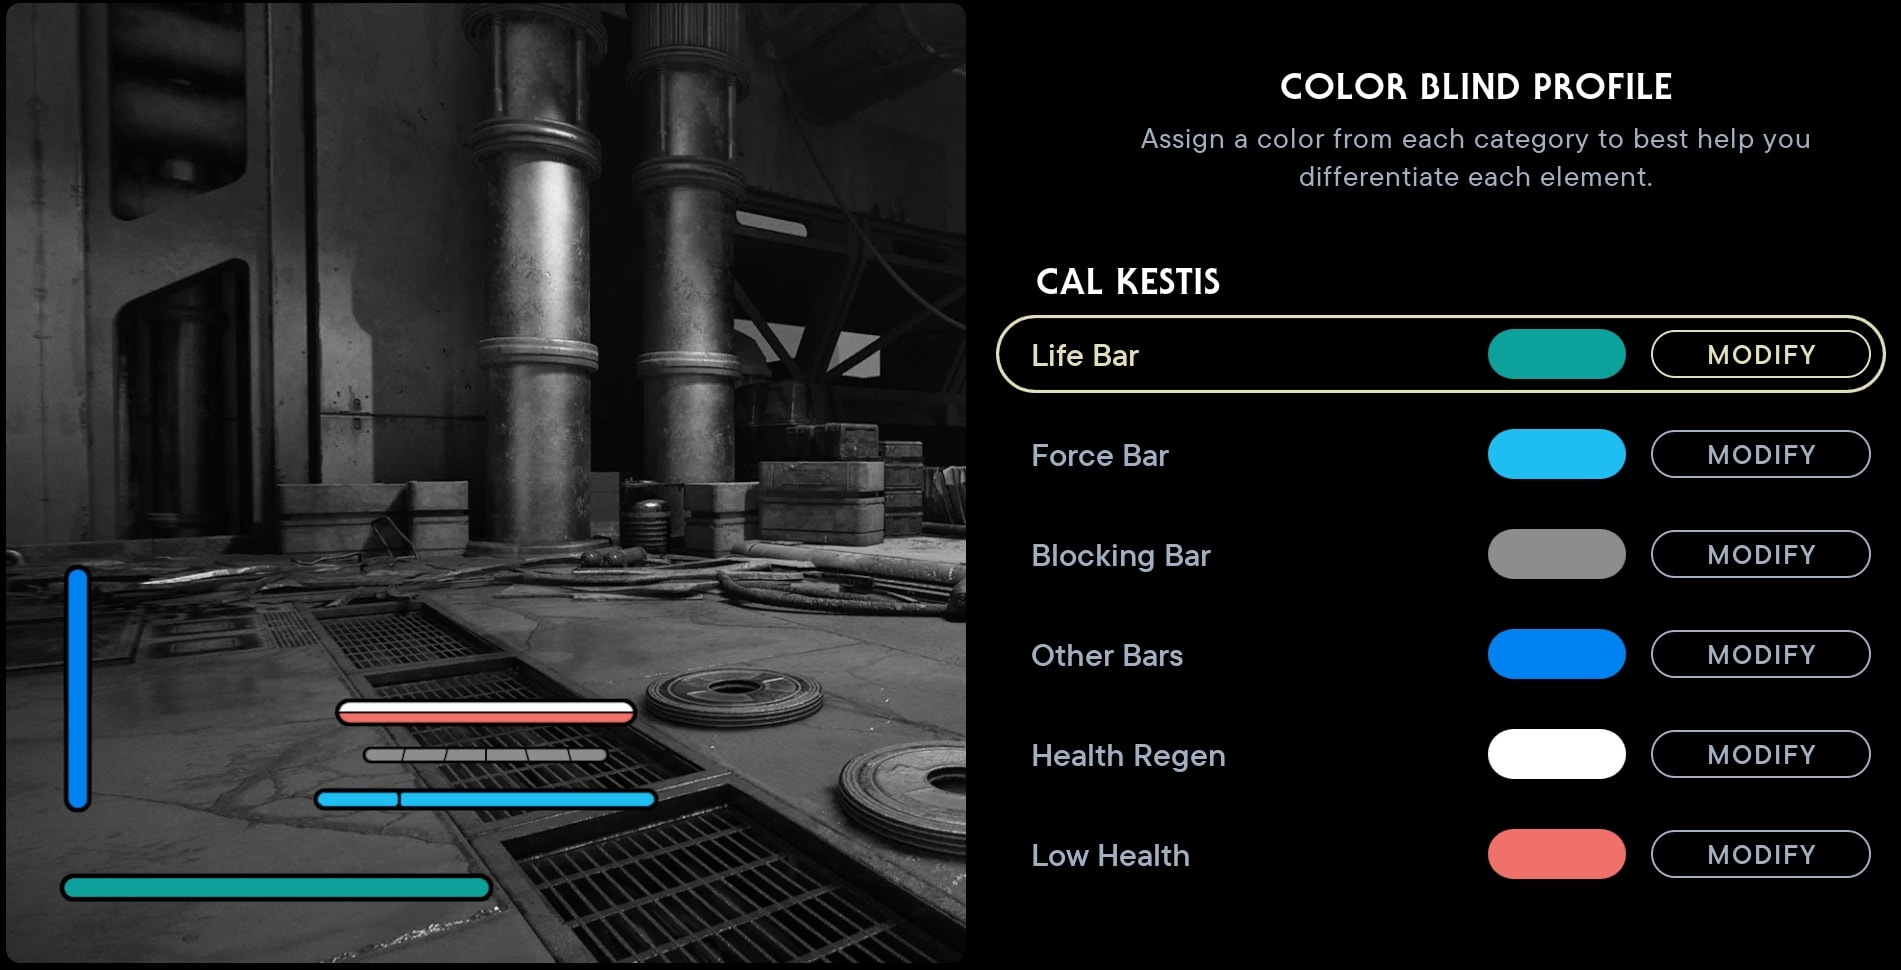
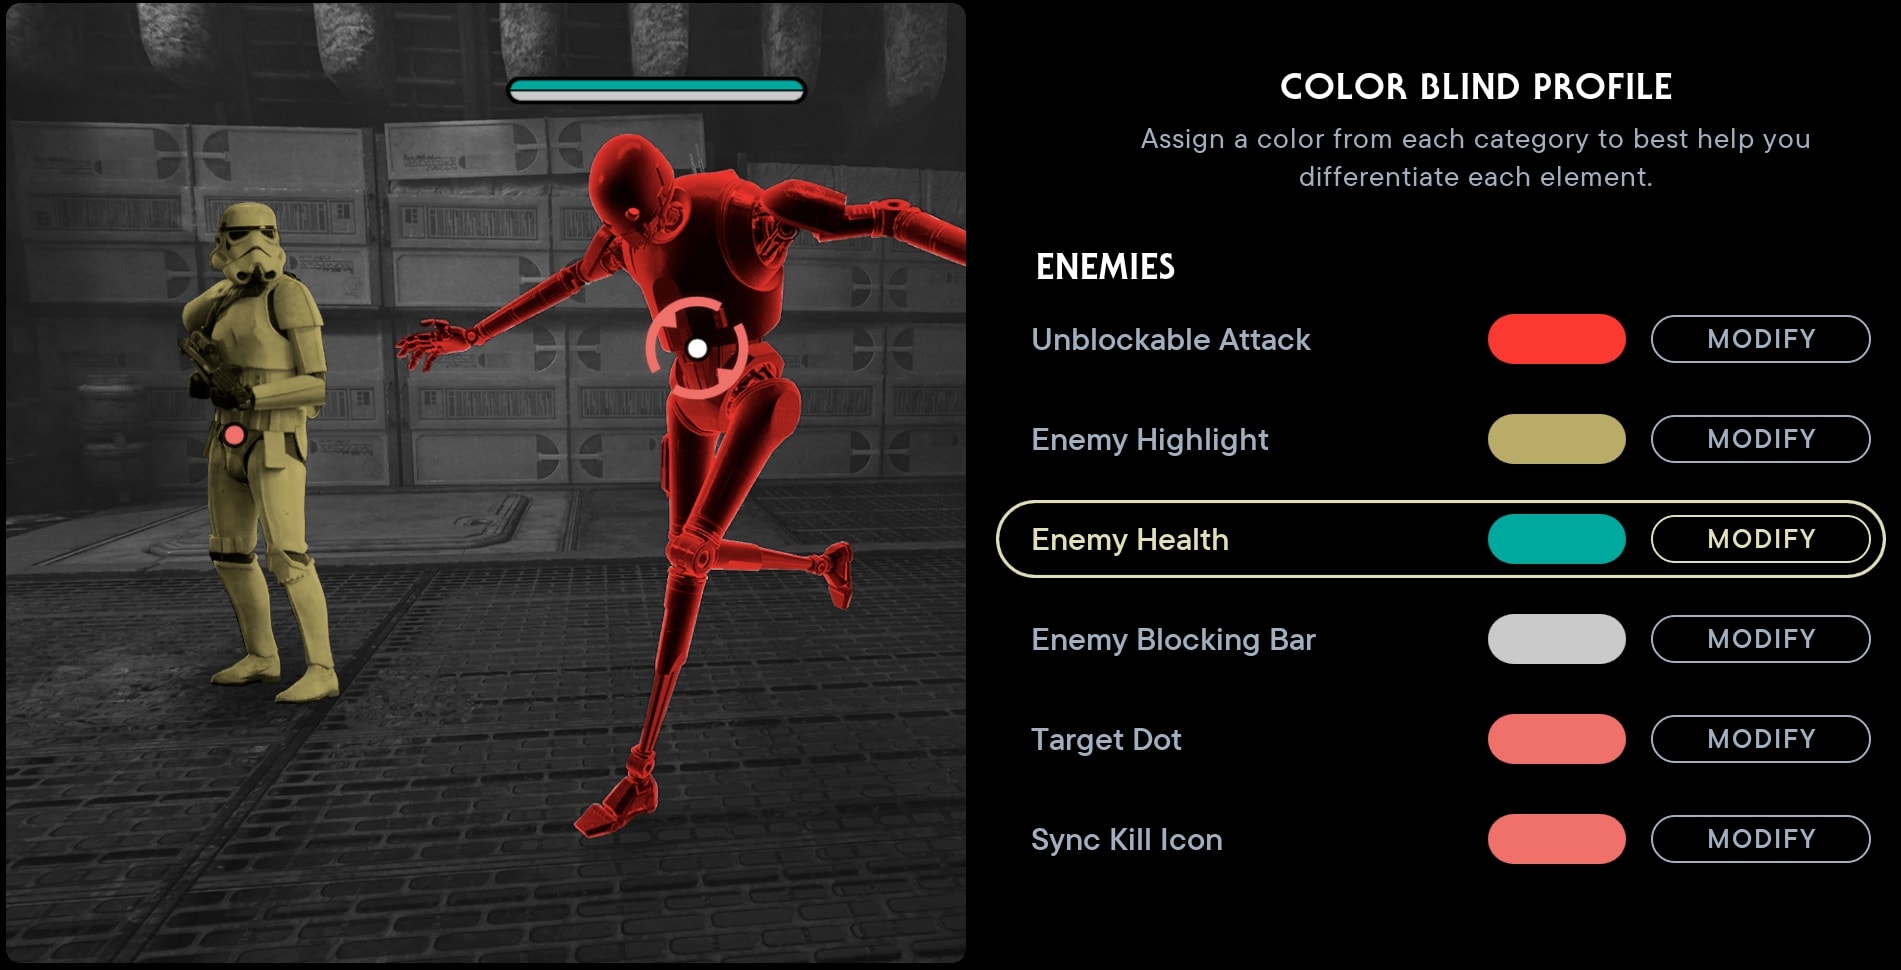
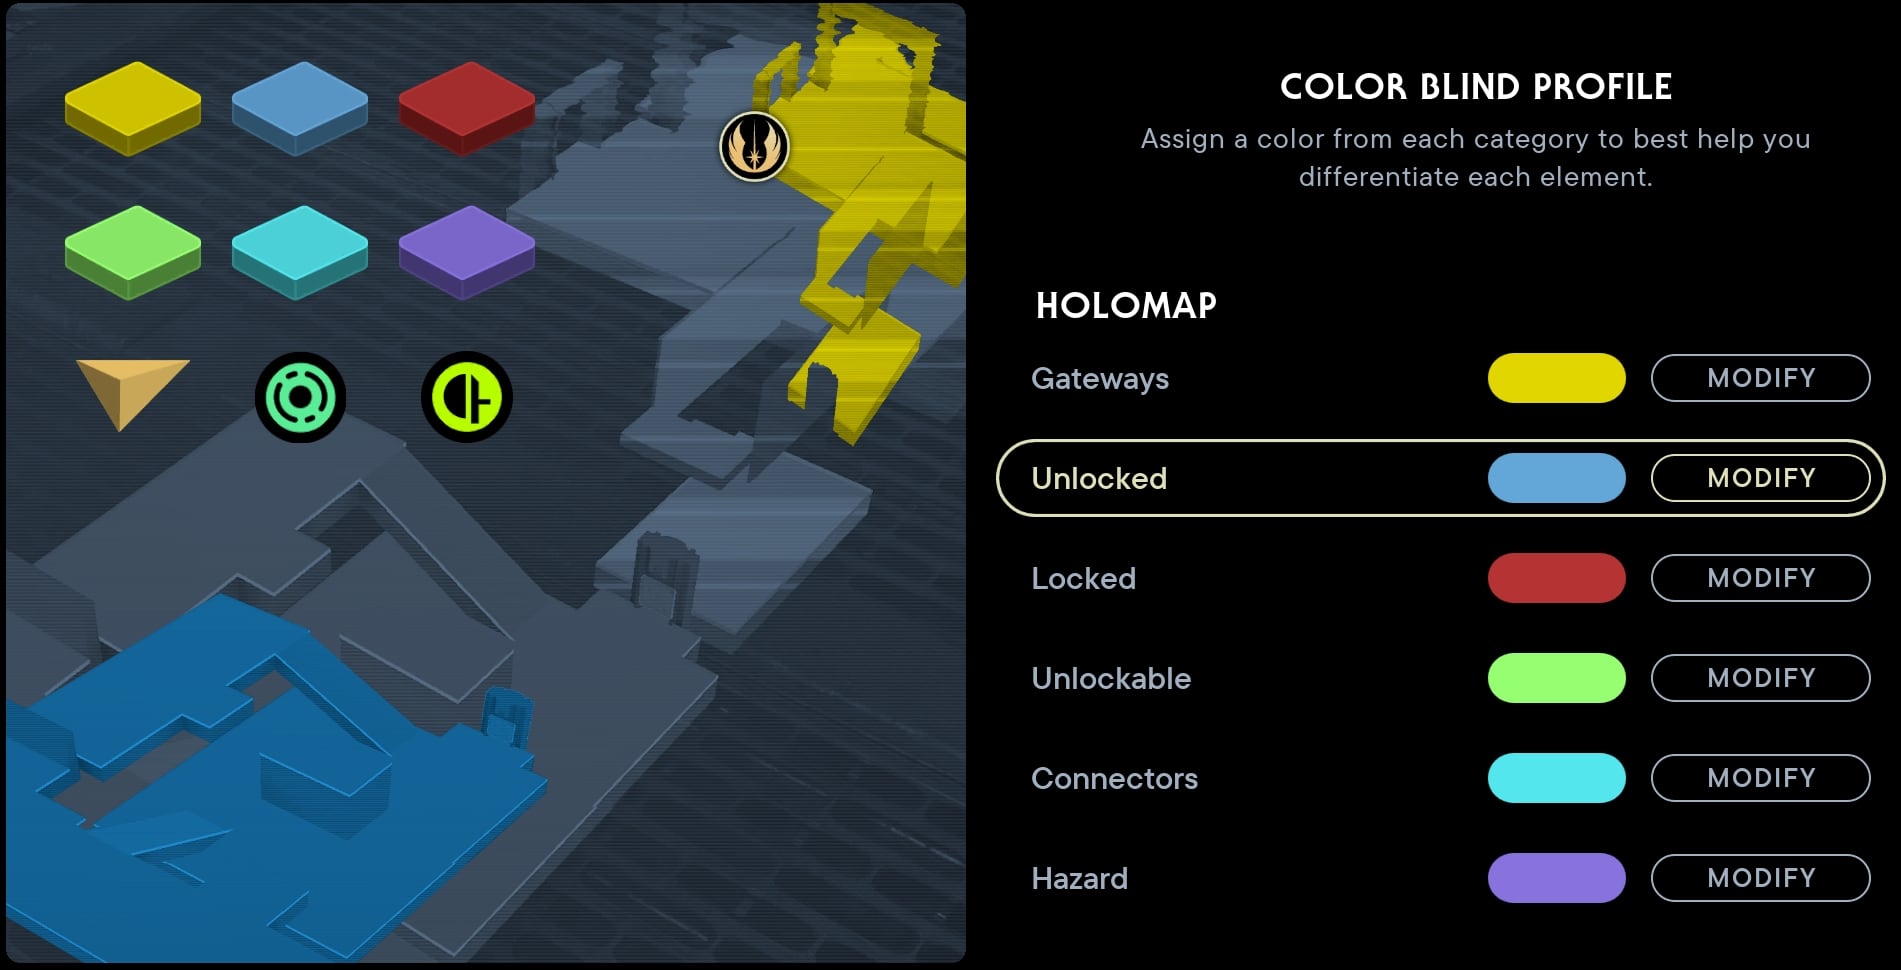
Color Profile Settings (Colorblind Profile)
This opens another UI to enable and adjust your Colorblind settings. There’s a whole slew of colorblind settings here to adjust to your needs. This allows you to adjust the colors used for the following gameplay elements:
Cal Kestis
- Life Bar
- Force Bar
- Blocking Bar
- Other Bars
- Low Health
Enemies
- Unblockable Attack Indicator
- Highlight
- Health Bar
- Blocking Bar
- Target Dot
- Sync Kill Icon
Environment
- Force Target
- Force Target Blocked
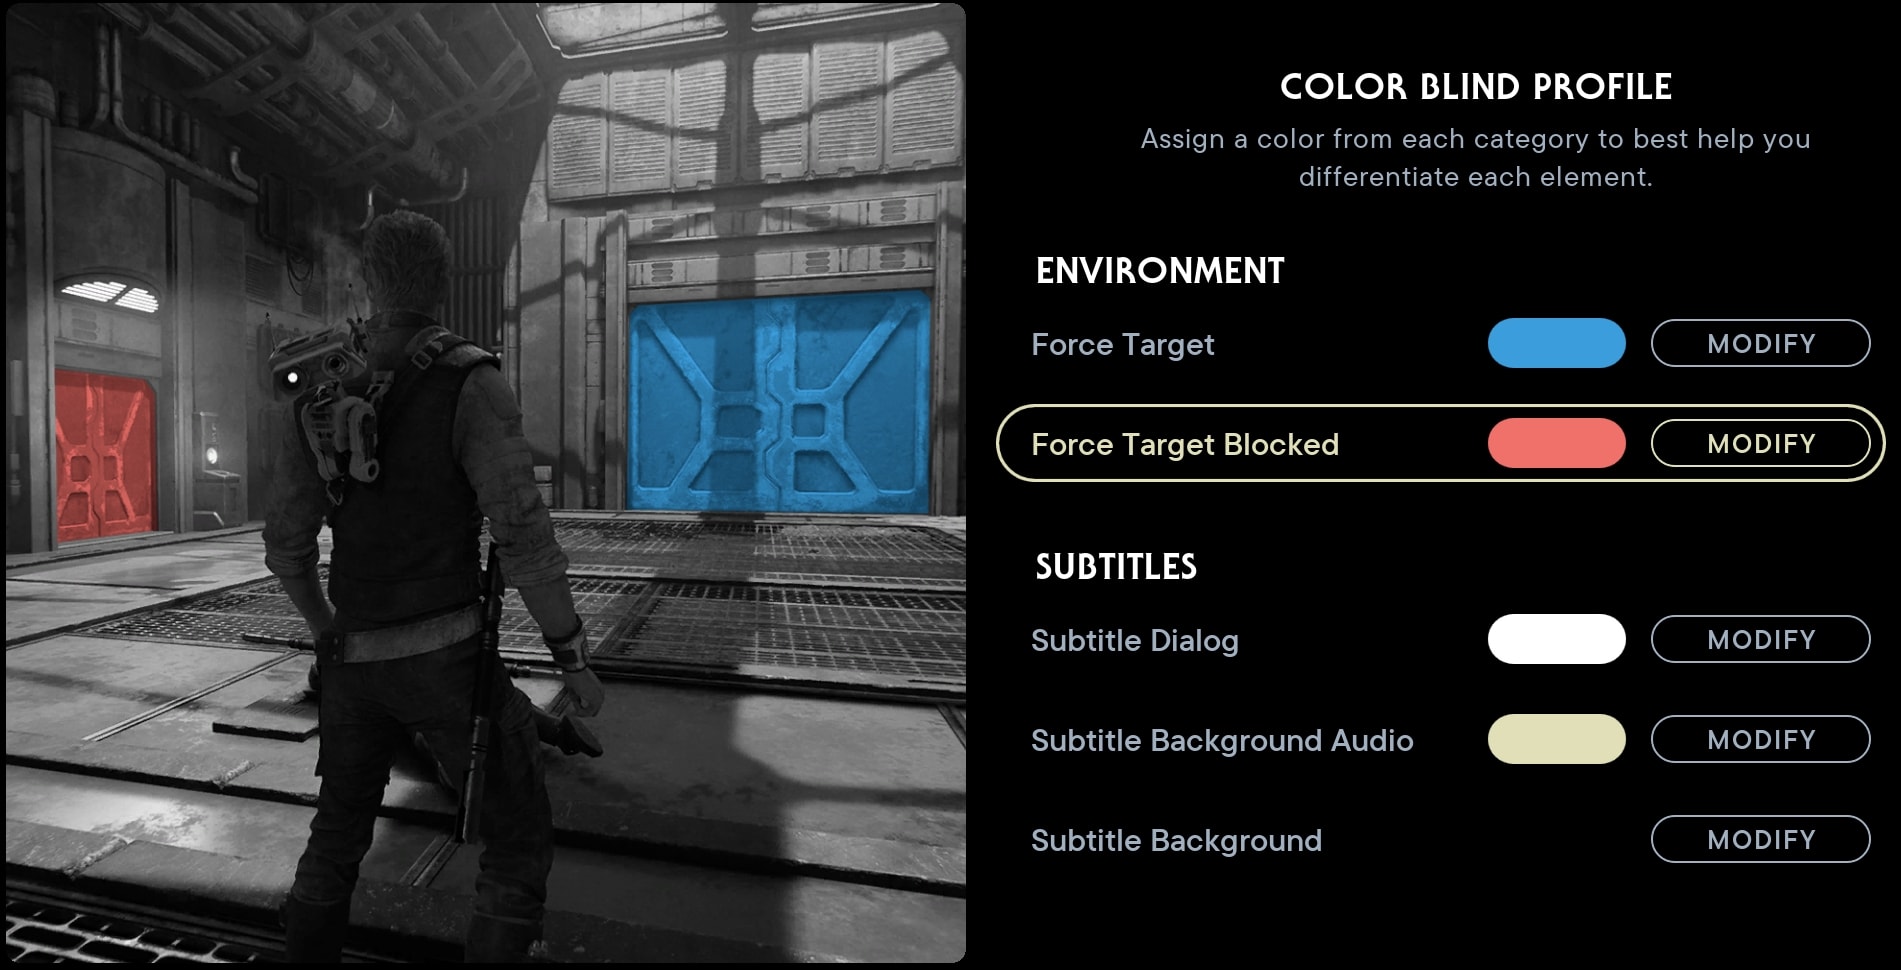
Subtitles
- Dialogue
- Background Audio
- Background (Letterbox)
Holomap
- Gateways
- Unlocked
- Locked
- Unlockable
- Connectors
- Hazard
- Player Arrow
- Rumors
- Bounties
- Background Terrain
- Main Areas
- Main Objective
For those that may be Colorblind with a red or green deficiency, you’ll likely want to adjust the colors for Cal’s Health, Low Health, Unblockable Attack Indicator, Enemy Health, Target Dot, Sync Kill Icon, Force Target Blocked, Locked, Unlockable, and Rumors; as these all default to some variation of red or green.
Even if you’re not colorblind, there is one option I will suggest you at least experiment with, which is the Unblockable Attack Indicator. While its default is a bright red, sometimes changing this setting can help make these attacks stand out even further in some situations.
Camera Shake
I always set Camera Shake to 0%. This helps reduce any visual issues but helps to keep combat clear.
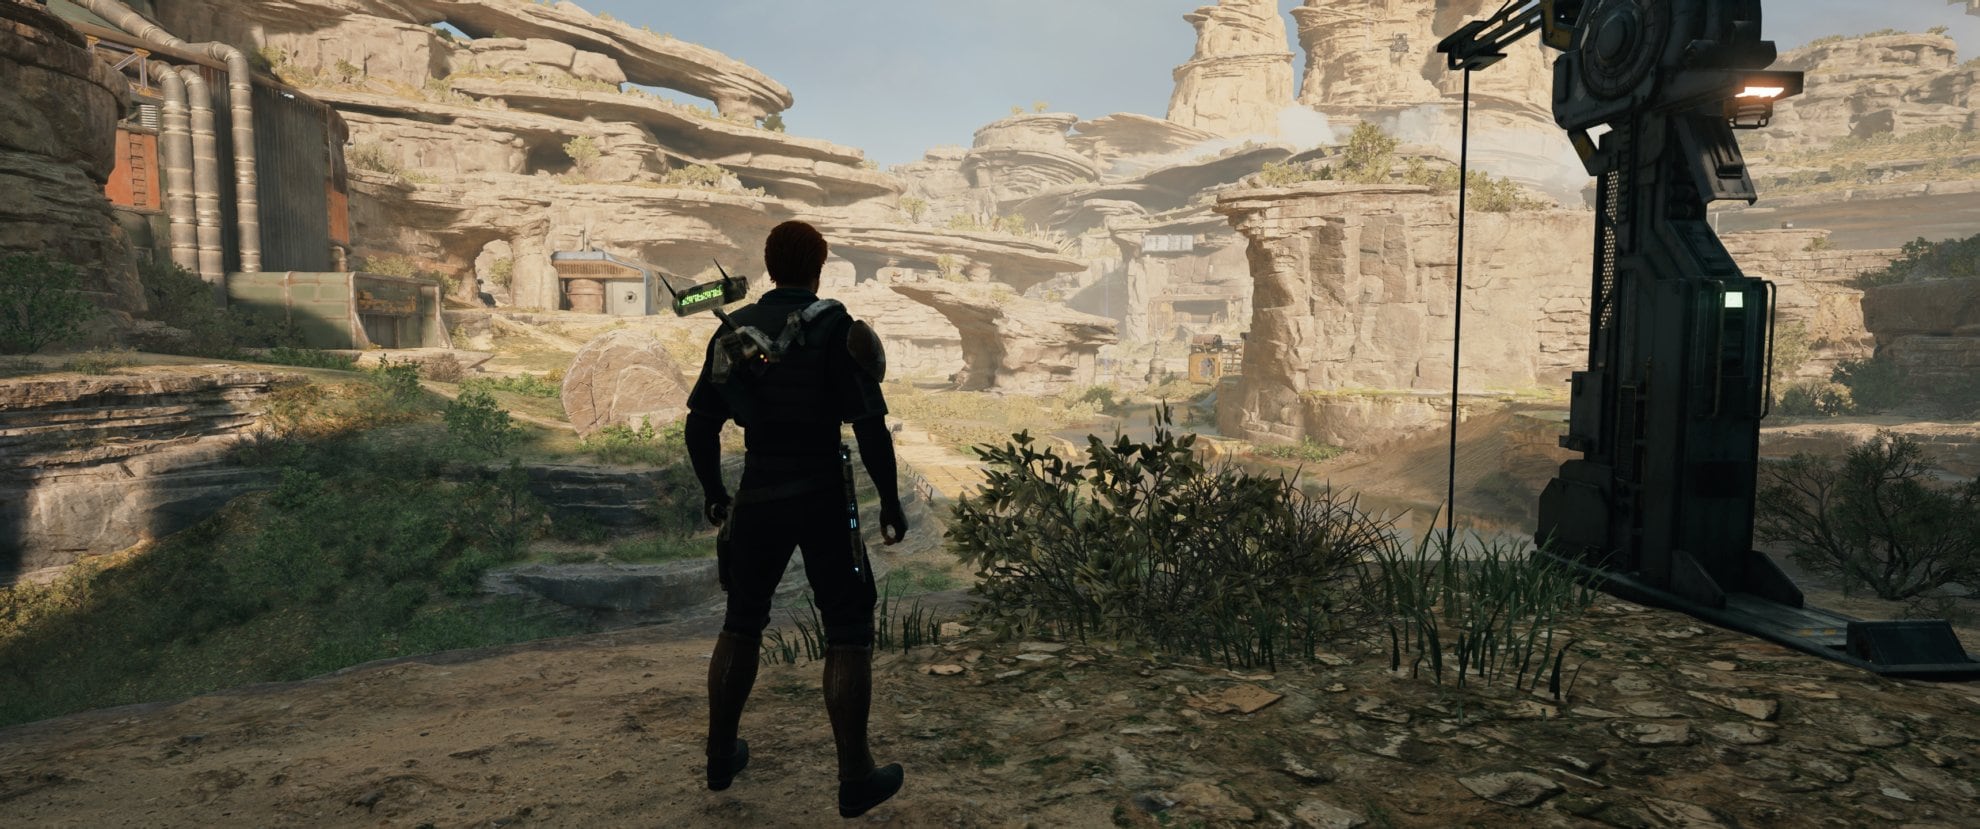
Field of View (FOV)
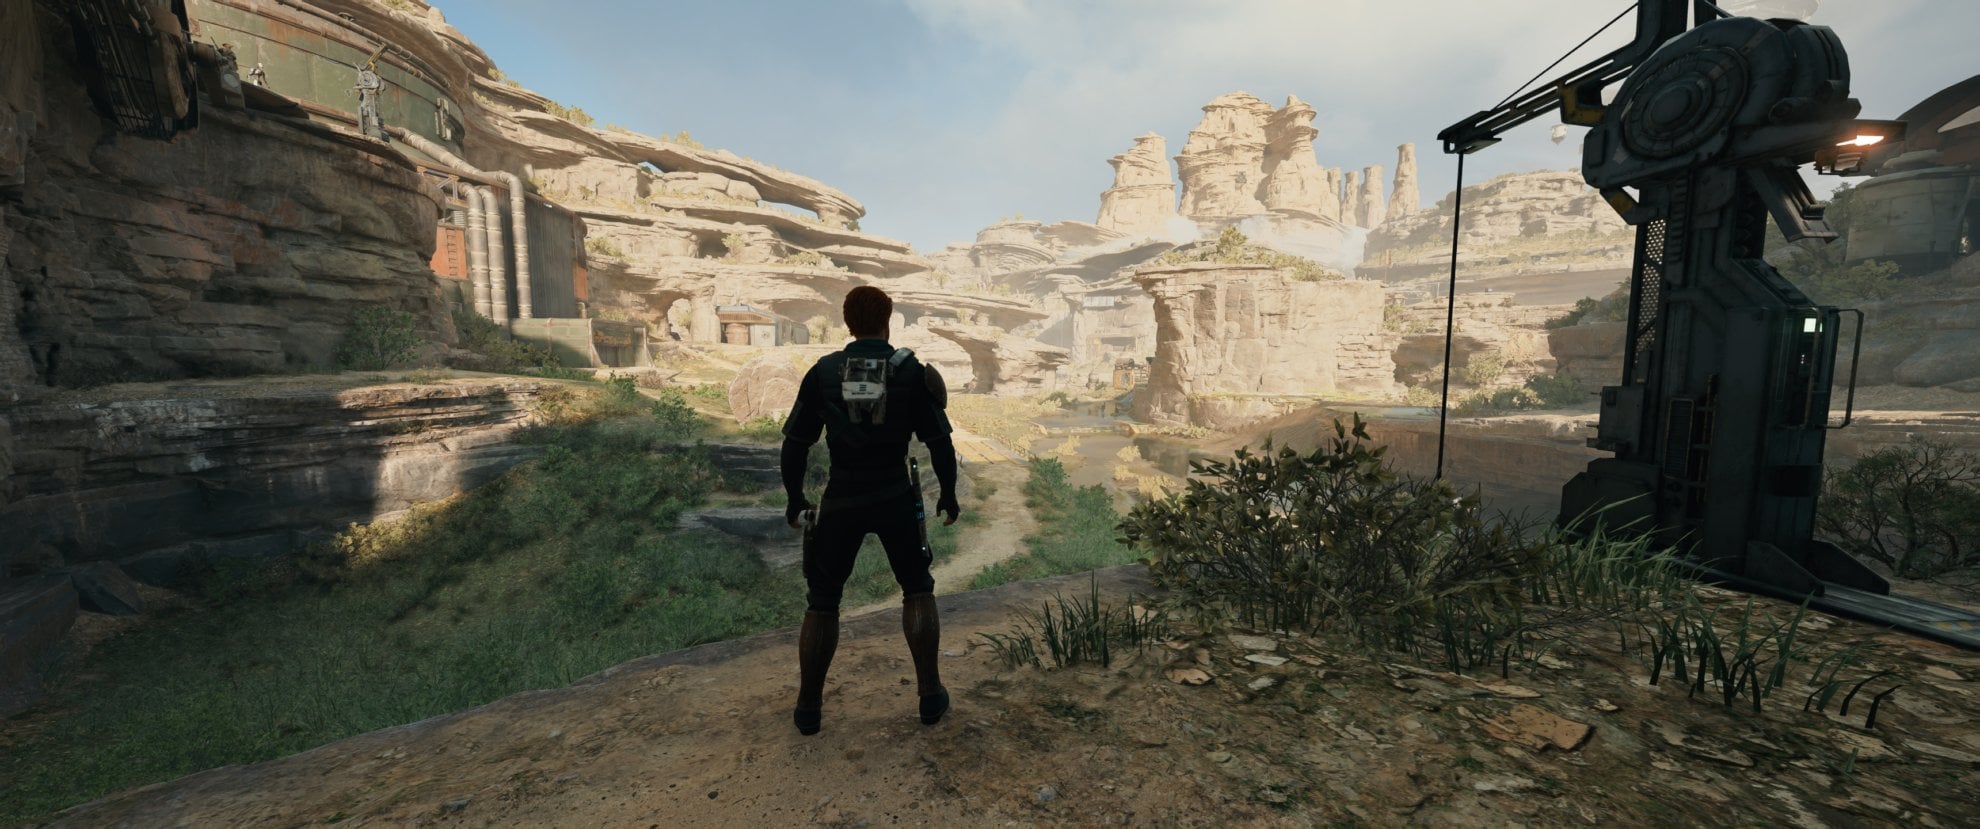
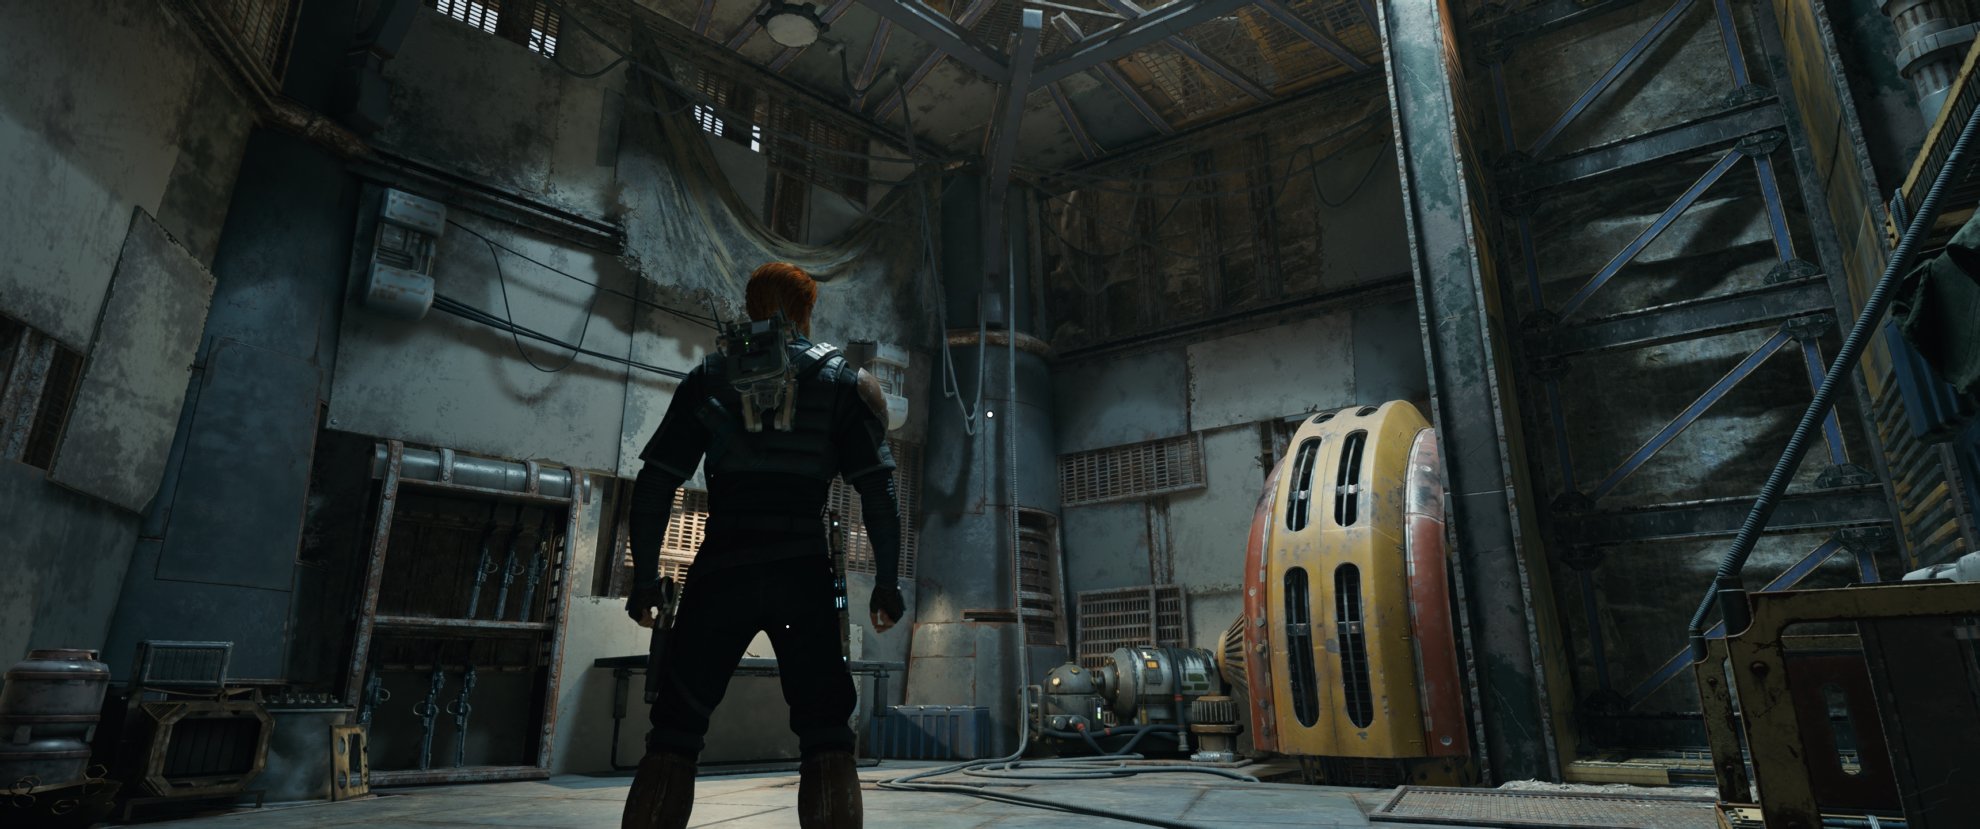
Field of View affects how much of the world you see around Cal at any given time. This is broken down into 5 stages of FOV: Narrowest, Narrower, Default, Wider, and Widest. Below is the Default, which absolutely still works very well if you have issues with Wider or Widest.
While the option for a Narrower FOV is there, I recommend against it. It makes it harder to track multiple targets in combat, especially if some are ranged. But if you did want to turn it all the way down, this is what you’d expect to see.
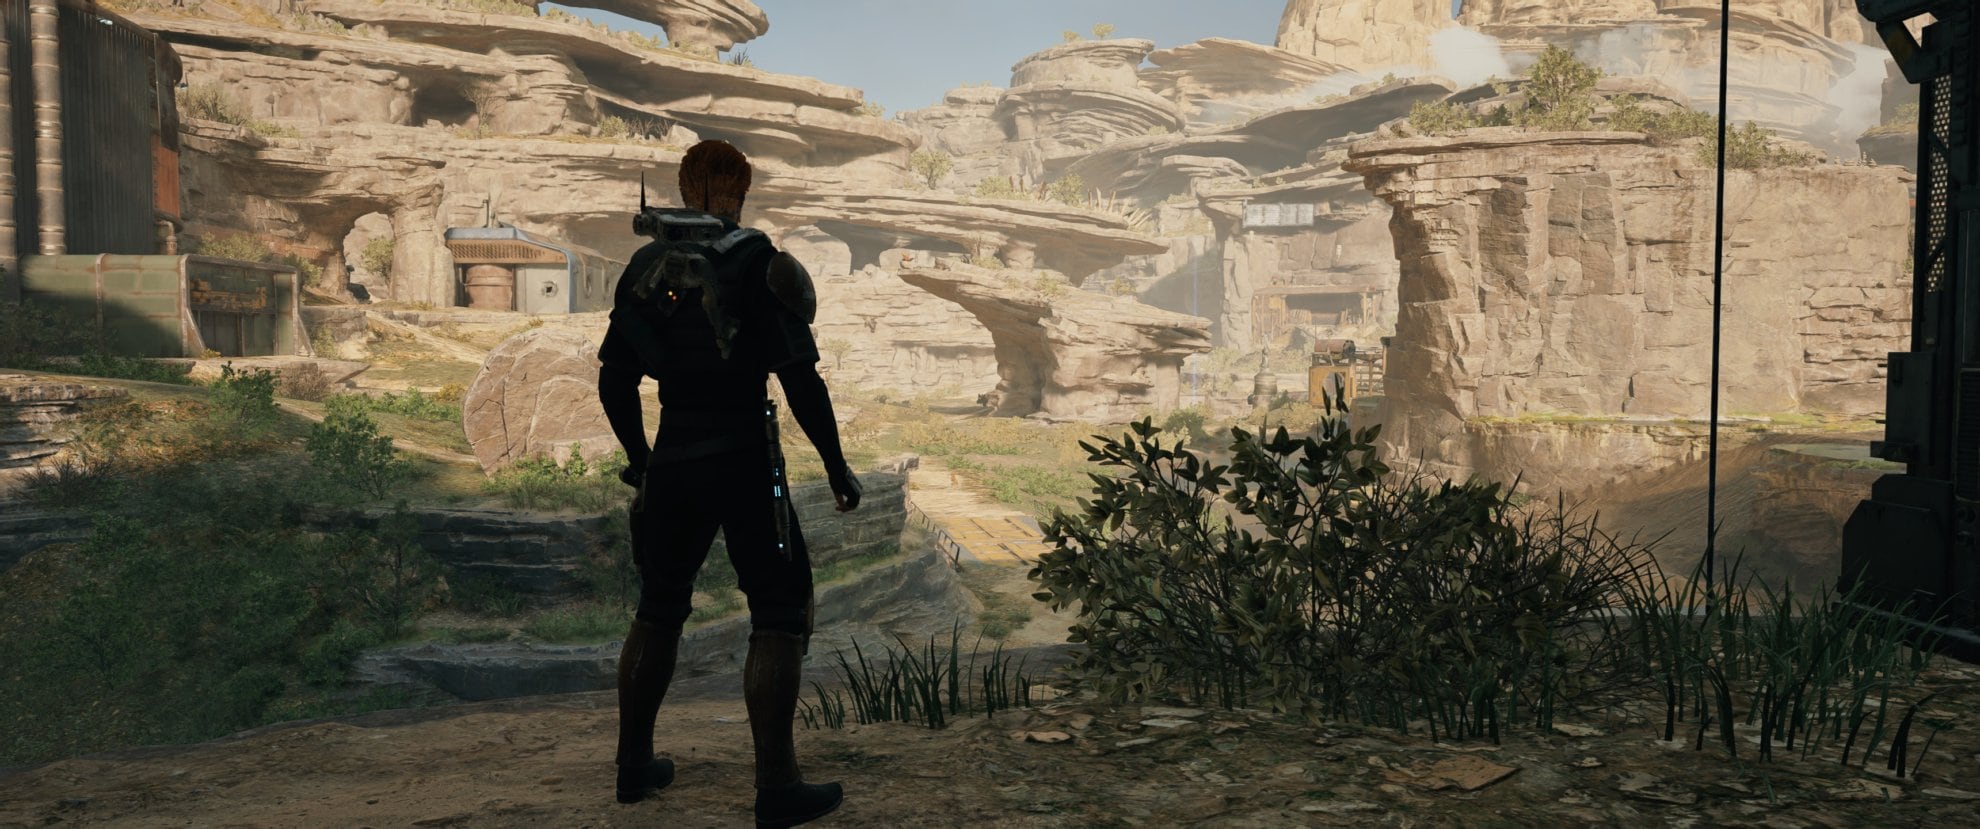
As far as combat and exploration go, Widest is highly recommended. This is shown below
Stabilizing UI Dot
This option is a nice addition to help keep the game accessible to folks that may experience motion sickness. It places a static dot in the middle of your screen, giving those that need it an element to focus on during any kind of shaky or unstable cinematics and gameplay.
Unless you suffer from severe motion sickness, I recommend leaving this setting off. The biggest reason to keep it off is that it also displays over cutscenes as well, which can get in the way if you don’t find yourself needing it.
Gameplay Accessibility Settings
These settings can impact the general flow of combat and are great settings to adjust.
Auto-switch target on enemy death
This setting determines whether your targeting will automatically swap to a new target when your defeat your immediate combat target. This can be set to Off, Visible Enemies Only, or Always.
I recommend using the Visible Enemies Only if not using Auto-lock target in combat. If you are using Auto-lock target in combat, I recommend it to be Off.
Auto-lock target in combat
This setting will automatically target nearby enemies when you attack or otherwise begin combat. I set this to Off, to prevent any accidental targeting.
Disable Fall Damage
This setting when turned On prevents the loss of health if you fall into a pit. This can make traversing certain areas more forgiving. This is very much an option you could set either way, but for new players, I recommend setting this to On.
Button Mash Options
This setting determines how game events that involve Quick Time Events (QTE) and Button Mashing Sequences are handled. By default, these are set to their Default behavior of being required.
I recommend using the Automatically Succeed option instead, as it saves a good bit of time and frustration, especially for those that struggle with these events.
If you’re great at these, the only real benefit it gives you for using the Default setting is breaking certain animations sooner, which often doesn’t do much outside of saving a little extra health.
Toggle Hold Pull
This option enables Force Pull as a toggle, allowing you to pull and hold objects with Force Pull with a single press. This makes it easier to grab with Force Pull and subsequently launch objects or enemies with Force Push.
I recommend having this setting On, which is especially true for those using default Keyboard binds. It feels better to have both functions as a button press rather than having one be a held input and the other not.
Navigation Assist

This option displays this icon on your holomap and while using BD-1’s binocular function to guide you to the next story beat.
If you often find yourself losing track of where you were supposed to go, turn this setting on. Even when that’s not the case, it can still be a helpful reminder that’s not in your way with normal gameplay.
Navigation Assist Audio Ping
This setting will automatically and periodically create an audio ping in the direction of your next objective. Additionally, this can be added as a shortcut to trigger it manually instead.
Camera Follow Lock
This setting determines how strongly the camera will follow Cal’s actions. Personally, I found this to have very little effect on combat and chose to use the default setting of 60%.
Arachnophobia Safe Mode
This setting changes a few enemy types in the game to less closely resemble arachnids. This will also hide their respective images in the Tactical Guide.
Human Dismemberment
This setting allows you to enable Human Dismemberment in gameplay. This only affects combat with humanoids, preventing your sabers from actually causing dismemberment in any way.
Slow Mode
Slow Mode itself is a feature made to make the more accessible, by slowing down the fast-paced nature of combat.
Auto-activated Slow Mode in Combat
When enabled, this setting will automatically activate Slow Mode when entering combat. This is actually a really helpful setting if you intended to make use of Slow Mode at all, as it removes the need to remember the button combination to activate it.
Slow Dilation
This setting allows you to adjust the strength of the slow effect from anywhere between 30% and 90%. The higher this value, the faster the game speed is in Slow Mode.
Shortcuts and Keybinds
We have a separate guide detailing everything you need to know about Star Wars Jedi Survivor’s PC and Console Controls. It explains how they differ, when and if it is better to use a controller or a mouse and keyboard (and why), how to set up customized keybinds to make your gameplay more fun and smooth and many other things.
Graphical Settings
Unfortunately, there isn’t much you can do to fix the stuttering or crashing that you are likely experiencing on PC. On Consoles the performance is not stellar, but the PC port is arguably the worse part of Star Wars Jedi Survivor. By far.
You may have the latest and greatest, the game is just not properly optimized and tuned to work on modern tech.
While we wait for the “many patches” Respawn promised to deliver in the weeks after the launch, here are a few recommendations that may help you, especially if you are on PC.
Turn RayTracing off. RayTracing is the most demanding parameter and is likely to give you the most performance gain.
ADM’s FSR 2.0 is not working as it should or if it is, then Respawn did a poor job implementing it in Jedi Survivor. On lower settings there is a very clearly visible blur (pun intended) and the ghosting effect is just mind-blowing.
Switching the graphics settings from Epic to Low will often yield no results at all. The game just tends to stutter and struggle at specific spots every single time.
Apart from switching Ray Tracing, if you can even enable it at all, lowering the resolution is another safe bet that will net you a performance gain.
Then, there are the standard Windows-related things you should do to your PC:
- Run the game from an SSD.
- Create a decently large Paging File on the drive the game is installed.
- Set the game to the highest performance from the Graphics Settings in Windows.
Fun fact: We had very few crashes while playing the review copy. On the Day 0 Patch, the game crashes much more frequently.
Stay tuned for updates to this guide and eventually our dedicated Graphical Settings Guide to Jedi Survivor when there is a point in making one, meaning we have to wait for Respawn to fix the core issues of the PC port.
This guide was prepared using a review copy of Star Wars Jedi Survivor. Because of that and the fact that there was a Day 0 Patch deployed, we decided to have a separate dedicated guide to the Graphics settings of the game. It will be available very soon, we need a little more time testing the official release of the game to determine if and what has changed with our experience and recommendations.
I highly recommend you take a look at our Jedi Survivor Starter Guide as well as the Jedi Survivor Combat Guide to learn the basics of the game and the basics of the most important part of the game – the combat gameplay. From there, you can take it up to any direction you want with the tons of Jedi Survivor helpful content we have available for you.


