
TEverything you need to know to be able to get a good and smooth start with the game, on any difficulty. This includes explanations of all core gameplay mechanics, recommendations for Best Skills to pick up early, overview of all five Lightsaber Stances and much more.
Table of contents
- Healing, Stims, and Meditation Points
- Lightsaber Stances
- Leveling Up, Skill Points, and the Skill Tree
- Recommended Early Skill Points to unlock
- Perks
- Appearance Customization and Armor
- Vendors, Notable NPCs, and Pyloon’s Saloon
- The Main Story and Exploration Abilities
- How side quests work (Rumors)
- Other Tips and Tricks
Healing, Stims, and Meditation Points
You can only regenerate HP by using a medical Stim stored in your bipedal droid companion, BD-1, or by resting at a Meditation Point. You have a finite number of Stims that you can use and the only way to refill them is to rest at a Meditation Point, though resting also respawns any enemies, except bosses.
You can increase the maximum number of stims you can carry by 1 each time you find a special crate that expands your carrying capacity. Some of them are hard to miss in the main story path, but if you go for the ones that are more hidden, you’ll eventually get more than you need to survive from one Meditation Point to the next.

That said, you can’t warp back, and if you run out of HP, you are defeated and respawn back at the last Meditation Point you rested at. You leave your current progress toward the next Skill Point behind with the enemy that defeated you. It’s risky to not rest at Meditation Points you come across even if you still have stims to spare.
Lightsaber Stances
Jedi Survivor has greatly expanded on lightsaber combat. While Jedi Fallen Order only had two full lightsaber Stances, single and saberstaff, there are now five completely distinct Stances that make you wield the lightsaber differently:
You’ll gain access to all of them before you’re halfway through with the game, though you can only use two at a time and can only swap them out at a Meditation Point or Workbench.
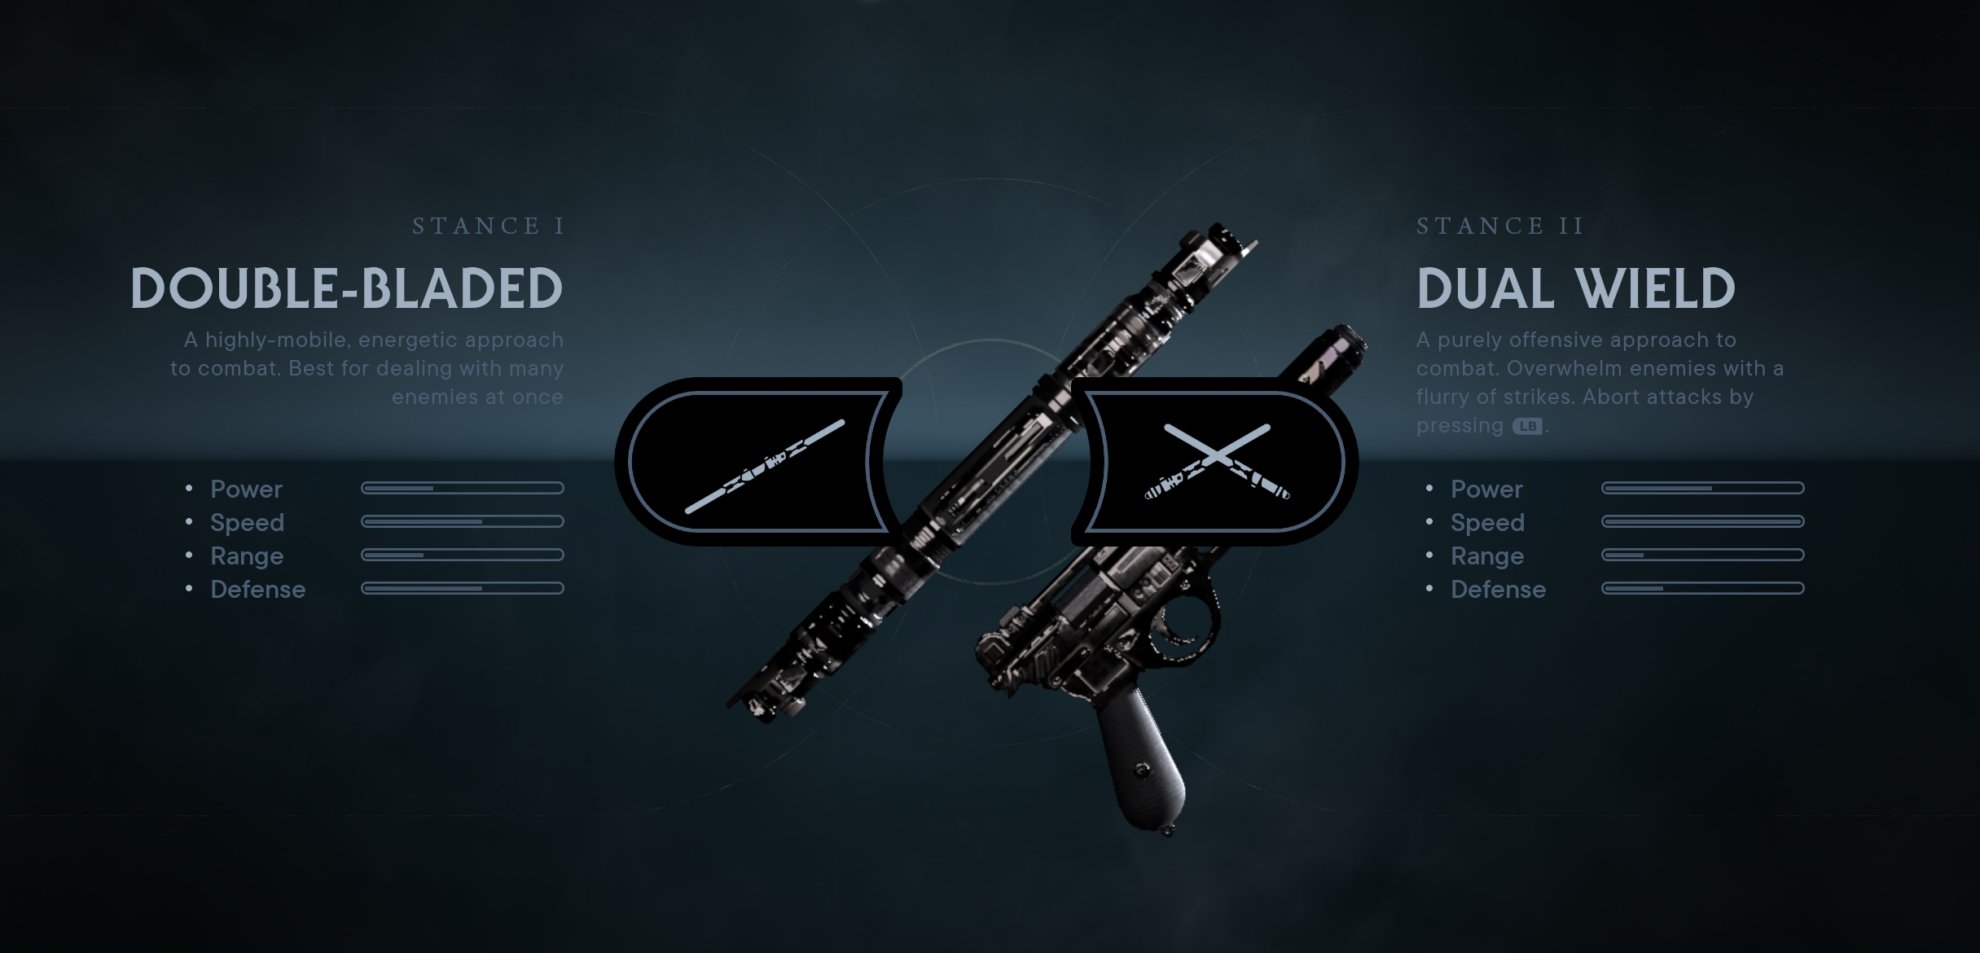
Each stance offers unique advantages and disadvantages and has its own dedicated Skill Tree branch. Since you can only use 2 at a time and Skill Points are finite, you shouldn’t bother with allocating Skill Points to stances that aren’t equipped.
We have covered each Stance, its Skill Tree branch, and good pairings in a series of guides. Check them out below:
Jedi Survivor Single Saber Stance Guide
This guide will teach you about the Single Saber Stance in Jedi Survivor. You’ll learn its strengths and weaknesses, the combos it can use, and how to best utilize it.

Jedi Survivor Double-Bladed Stance Guide: Everything you should know
This guide will teach you about the Double-Bladed Stance in Jedi Survivor. You’ll learn its strengths and weaknesses, the combos it can use, and how to best utilize it.

Jedi Survivor Dual Wield Stance Guide: Everything you should know
This guide will teach you about the Dual Wield Stance in Jedi Survivor. You’ll learn its strengths and weaknesses, the combos it can use, and how to best utilize it.

Jedi Survivor Blaster Stance Guide: everything you should know
Guide about the Blaster Stance in Jedi Survivor. You’ll learn its strengths and weaknesses, the combos it can use, and how to best utilize it!
Jedi Survivor Crossguard Stance Guide: Everything you should know
This guide will teach you about the Crossguard Stance in Jedi Survivor. You'll learn its strengths and weaknesses, combos it can use, and how to best utilize it.

Jedi Survivor Build Guide: Dual Wield and Double-Bladed Stance Pairing
This guide will cover everything you need to know about pairing the Dual Wield and Double-Bladed Stances, including the strengths and weakness of the pairing, what each Stance is best suited for, synergistic perks and where to find them, and early skill tree essentials for the early game.

Jedi Survivor Build Guide: Crossguard and Double-Bladed Stance Pairing
This guide will go over everything you should know about pairing the Double-Bladed and Crossguard Lightsaber Stances. This includes the strengths and weaknesses of this pairing, what each Stance is best suited for, synergistic perks and where to find them, and skill tree essentials for the early game.
Jedi Survivor Build Guide: Blaster and Double-Bladed Stance Pairing
This guide will cover everything you need to know about pairing the Blaster and Double-Bladed Stances, including the strengths and weaknesses of the pairing, what each Stance is best suited for, synergistic perks and where to find them, and skill tree essentials for the early game.

Jedi Survivor Build Guide: Crossugard and Single Stance Pairing
This guide will cover everything you need to know about pairing the Crossguard and Single Saber Stances, including the strengths and weaknesses of the pairing, what each Stance is best suited for, synergistic perks and where to find them, and early skill tree essentials for the early game.
Leveling Up, Skill Points, and the Skill Tree
Leveling up in Jedi Survivor works practically the same as it did in Jedi Fallen Order where you earn XP that fills up a bar and you get a Skill Point to spend on the Skill Tree at a Meditation Point. If 2 skills on the same branch are connected with a line, you can’t purchase the higher one until after you’ve purchased the lower one.
You can respec from the Skill Tree menu whenever you want, and while it does cost a Skill Point, there is little emphasis on your exact level, so you can reset your Skill Point allocations as often as you like.
Skills in the Skill Tree cost anywhere from 1-3 Skill Points depending on (Respawn’s opinion of) a given Skill’s overall value with stronger skills that expand capabilities costing more than minor enhancements.
I don’t recommend putting too much stock into the cost of a given skill, just purchase whatever you think will give you the greatest edge. Don’t feel obligated to purchase everything in a given branch, especially if it’s an offensive capability you don’t use.
For example, I find the capstone for the Double-Bladed Stance, Controlled Throw, too situational and difficult to control, so I prefer to spend those 2 Skill Points on something else that I actually use.
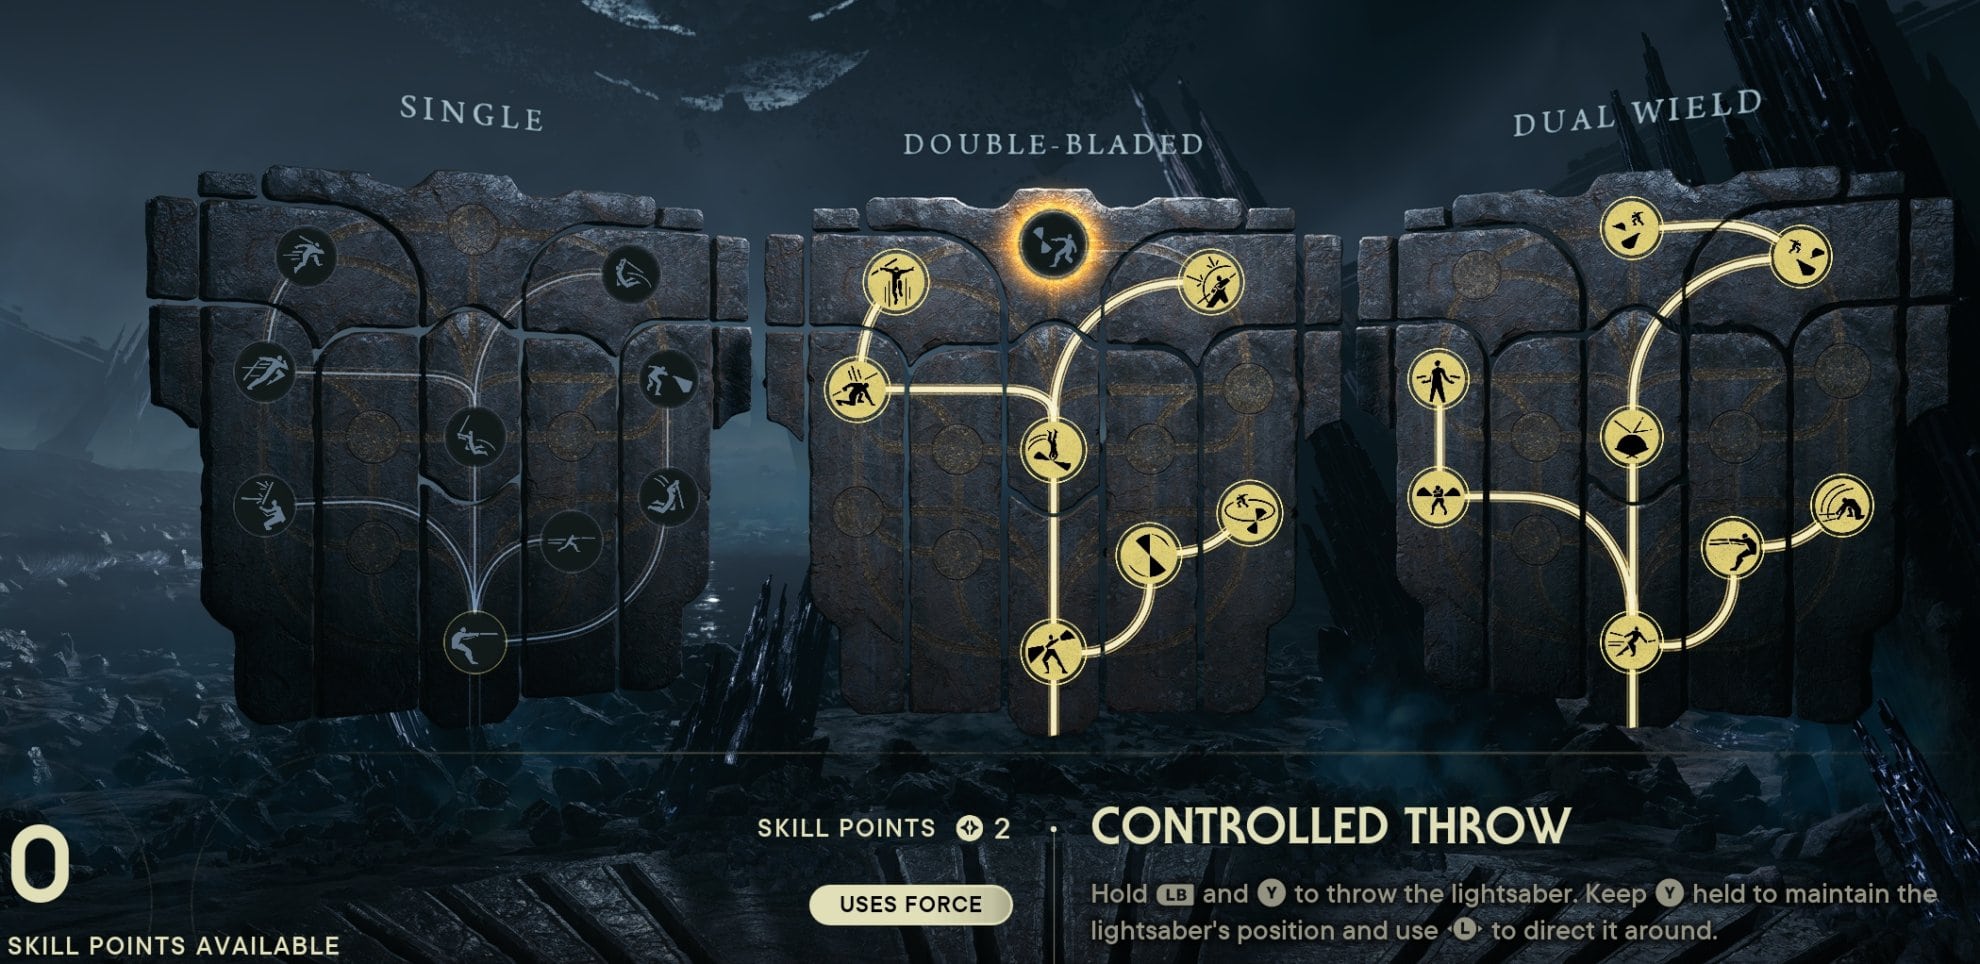
As I mentioned before and in the same vein, there’s no point in spending any Skill Points upgrading Stances you don’t have equipped because they never provide any benefit.
When you are defeated, your progress toward your current Skill Point is left behind at the site of your death, either on the ground or residing in the enemy that bested you. Hitting the enemy or walking into the light on the ground will restore that lost XP and fully restore your HP, Force, and Stims.
Recommended Early Skill Points to unlock
Here are the skill points I recommend picking up early in your playthrough. They should provide substantial value regardless of your Stance, but don’t forget to upgrade your chosen Stances as well.
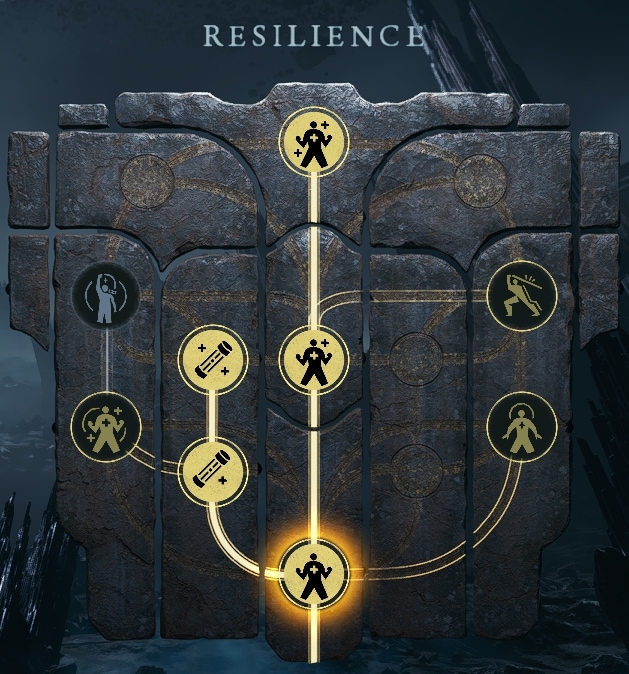
Resilience Skills
Survival Skills (1)
Improved Survival Skills (2)
Expert Survival Skills (2)
Improved Stim Formula (1)
Perfected Stim Formula (2)
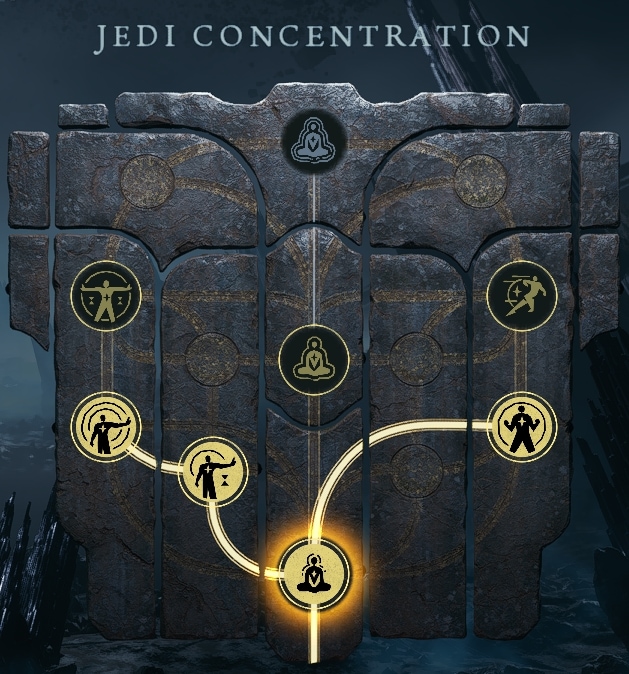
Jedi Concentration Skills
Attunement (1)
Channeled Energy (1)
Greater Hold (1)
Extended Hold (3)
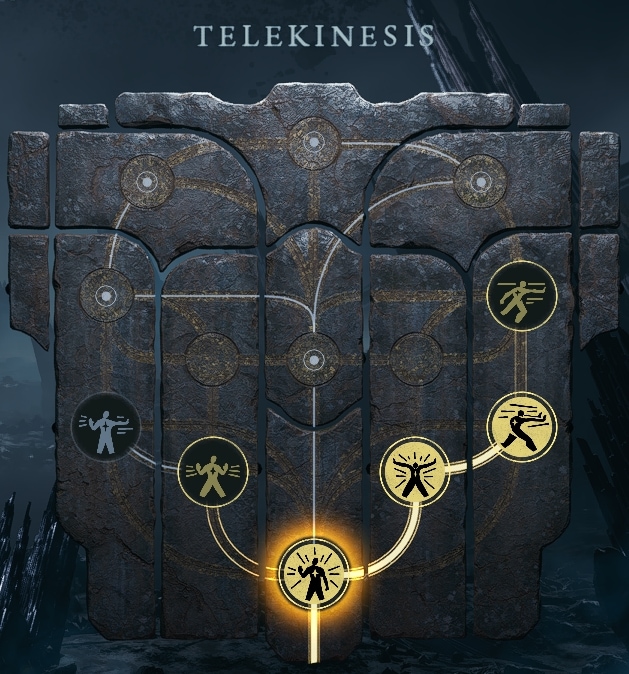
Telekinesis Skills
Wrenching Pull (1)
Radial Push (1)
Howling Push (2)
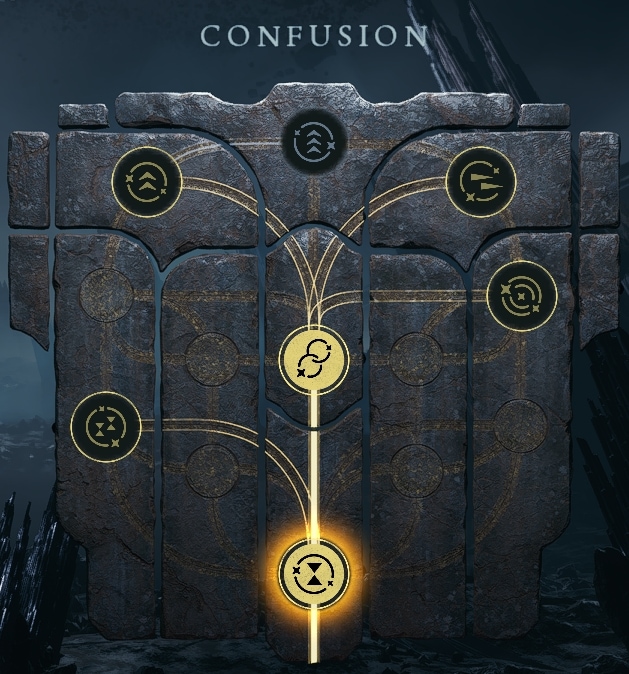
Confusion Skills
Addled Mind (1)
Greater Confusion (1)
The exact order in which you obtain these skills doesn’t matter too much, though the Survival skills are the most valuable in my opinion. Take whichever you feel will be most helpful to you and your playstyle first. Again, don’t neglect the Stance upgrades either.
If you need more Skill Points, we have a few recommended strategies and tips on where and how Farm Skill Points faster in Jedi Survivor. There’s generally no need to do it, but if you are struggling with a tough encounter or just want to max things out way ahead of time, you can speed up this process.
Perks
In Star Wars Jedi Survivor, Perks allow you to further personalize and customize your build by strengthening specific aspects of combat.
There are 25 unique perks available in the game. You can unlock some of them by exploring the game and solving puzzles, others are available for purchase from Zee, and a few unique perks are given to you when you complete the story of the game and start a New Journey + (New Game + mode).

Perks can be combined with Saber Stances and Skill Points to create unique, fun and interesting builds. If you want to learn more about perks and find them all, check out our comprehensive Perks Guide and Locations Catalog.
Appearance Customization and Armor
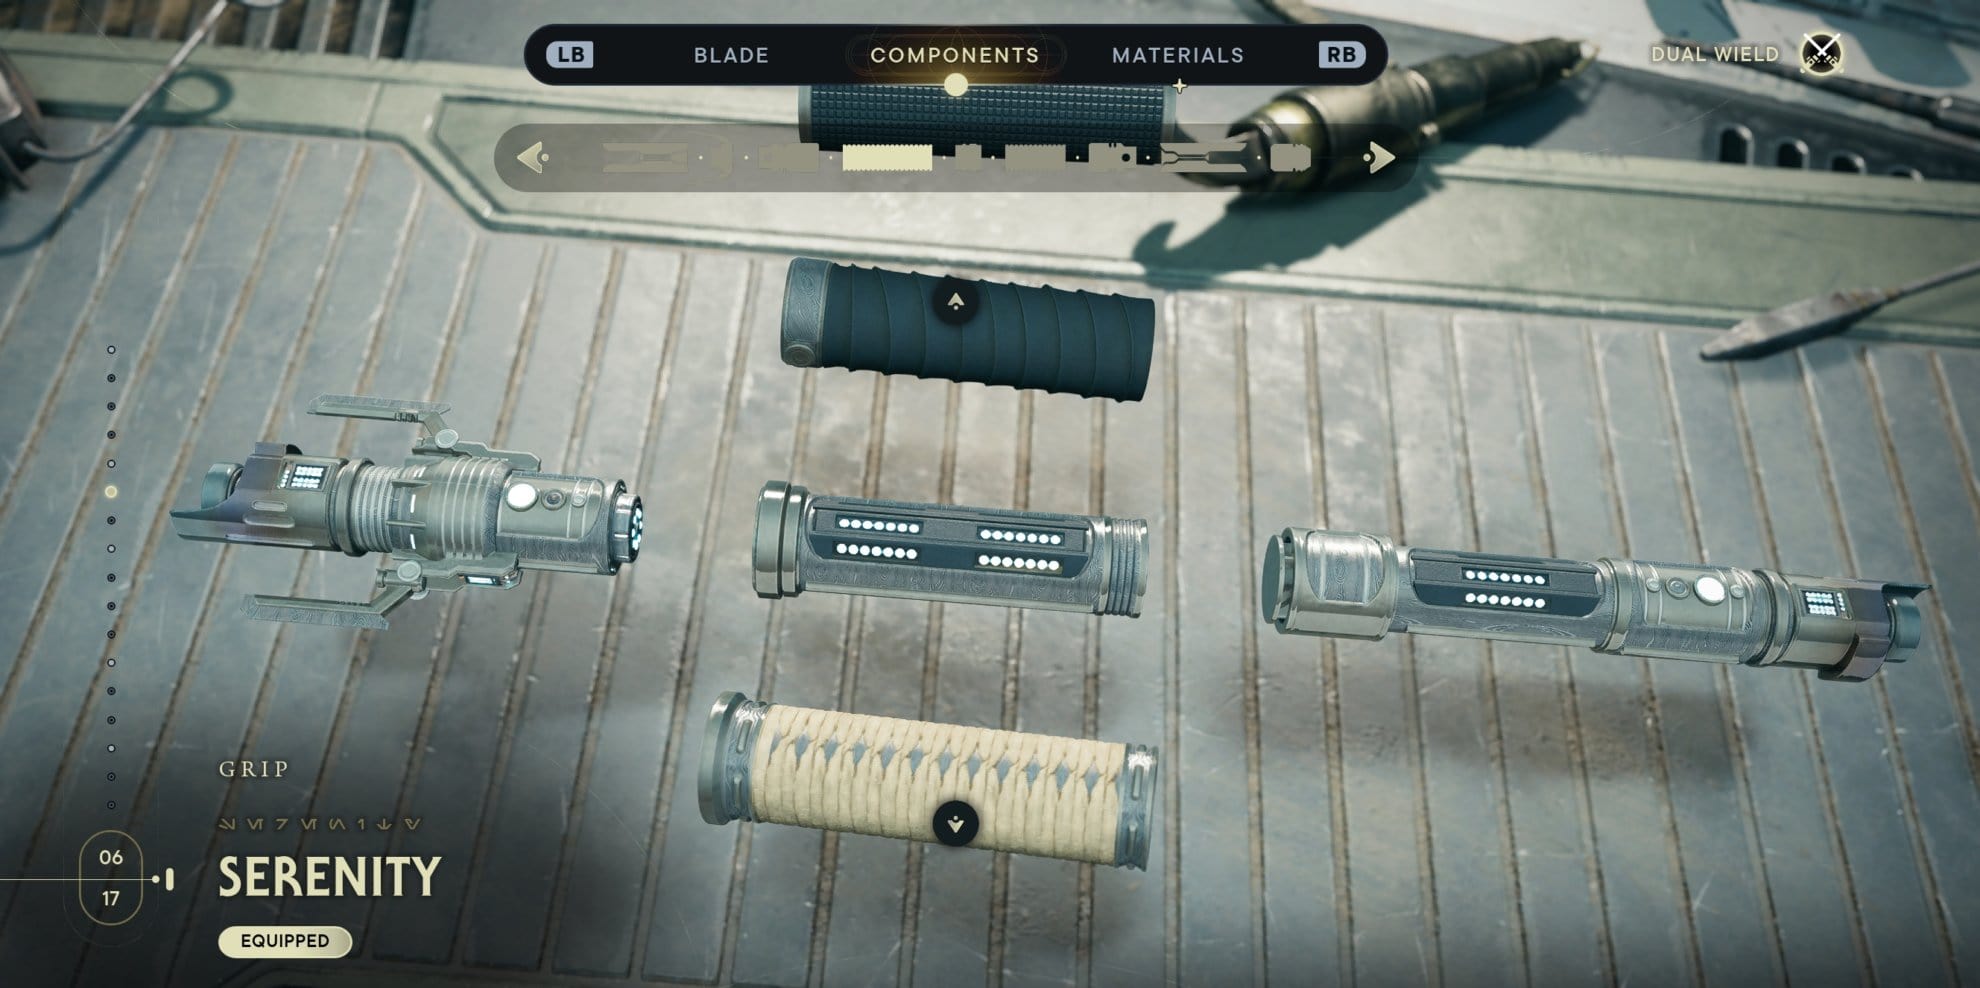
Jedi Survivor doesn’t have any stats that you can modify with gear. All of the customizations to your clothing, weapon(s!), BD-1, and hairstyle are purely cosmetic, so you can wear whatever you want and don’t have to worry about it affecting you in combat.
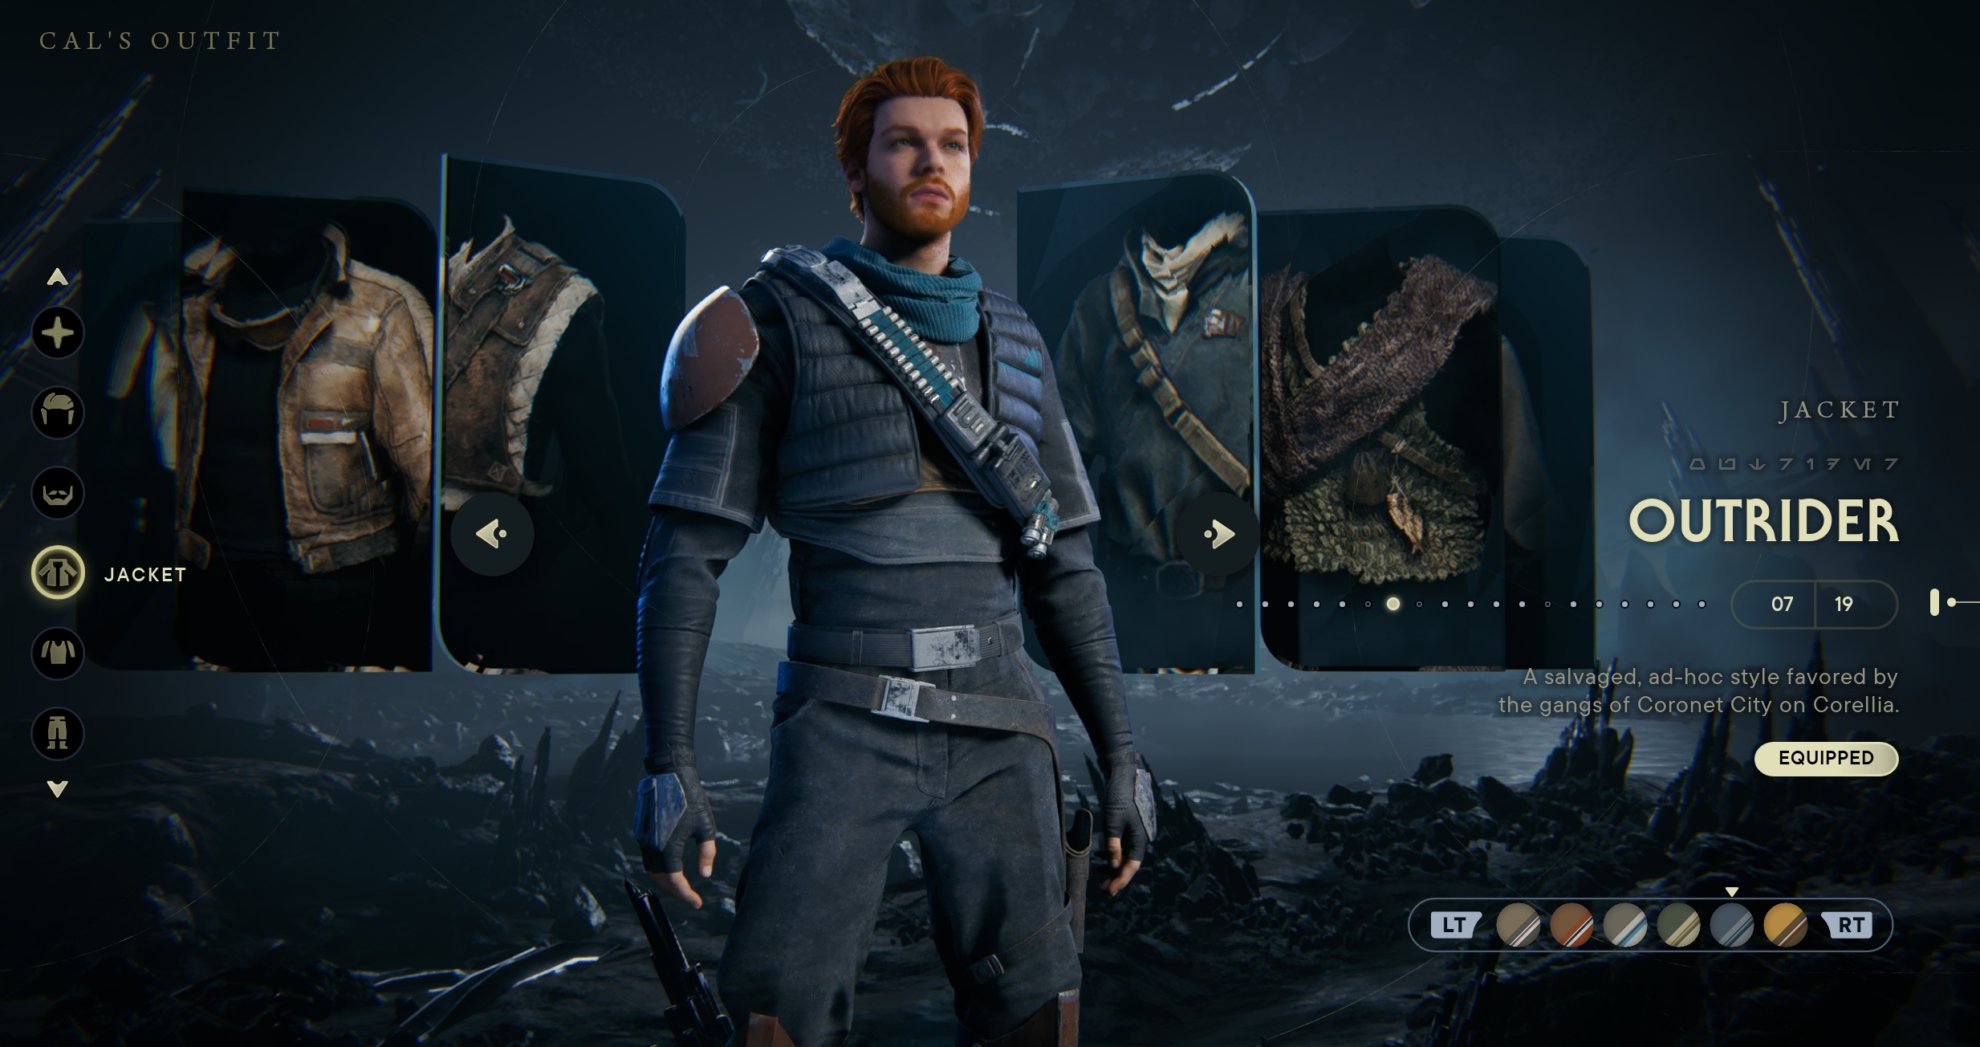
You can customize Cal’s outfit, hairstyle, and facial hair whenever you want in the pause menu, but your weapons and BD-1 can only be modified at one of the Workbenches found throughout the Galaxy.
Workbenches are less common than Meditation Points, though they can typically be found near major Meditation Points where multiple paths and shortcuts converge.
Individual pieces of clothing, weapons, and BD-1 parts come in distinct sets that share the same name (ex. Tactical Jacket, Tactical Shirt, Tactical Pants, Tactical Material).
Sometimes, you can obtain all of the pieces of a set at the same time from a vendor or large chest, but most of the time the individual components of a set will be scattered throughout a single region.
Read our dedicated guide to Customizations and Appearance Options in Jedi Survivor to learn more about this aspect of the game.
Vendors, Notable NPCs, and Pyloon’s Saloon
Pyloon’s Saloon in Rambler’s Reach on Koboh is the main hub of the game. It’s run by Greez and houses nearly all of the NPCs you meet out in the world and recruit to Koboh, including most vendors, rumor-givers, and minigames.
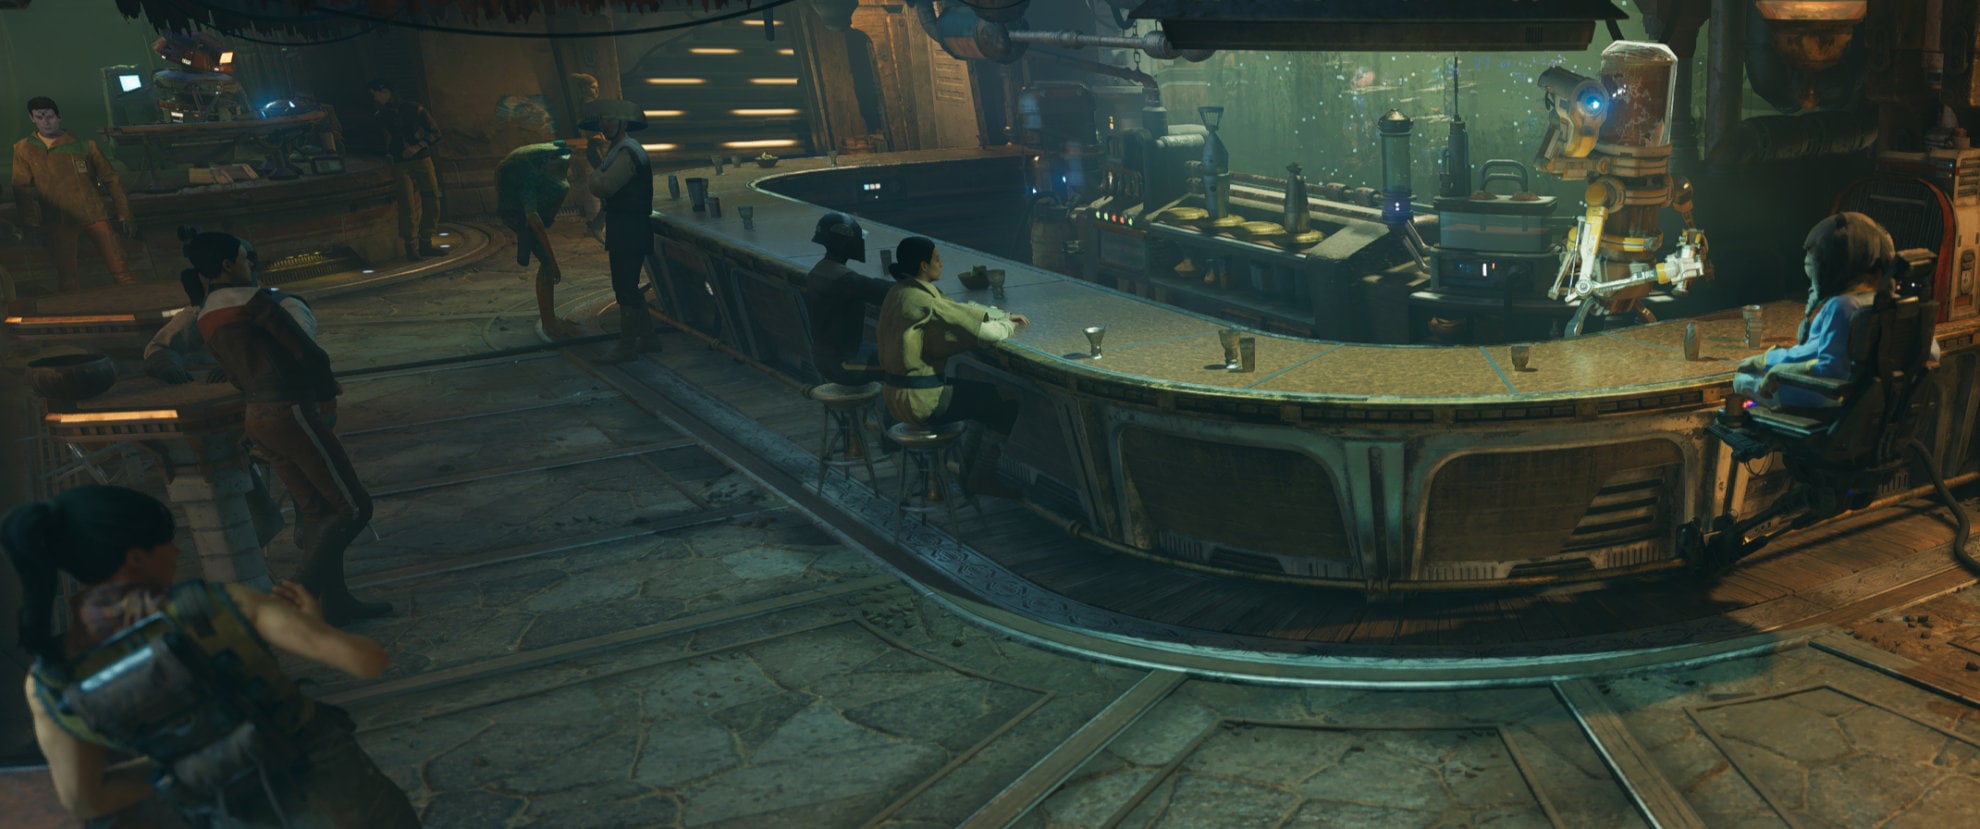
The major vendors can eventually be found at or near Pyloon’s Saloon. Most are associated with a specific currency you can find out in the world.
- ZN-A4 “Zee” (Datadiscs, second floor)
- Skoova Stev (Fishing, second floor)
- Doma Dendra (Priorite Shards, next door)
- Bhima and Tulli (Holotactics, second floor)
- Ashe and DD-EC (Music, main floor)
- Caij Vanda (Bounties, main floor)
- Pili Walde (Gardening, roof)
A few NPCs don’t migrate to Pyloon’s Saloon, like Sister Taske on Jedha, but they’re never far from a Meditation Point or Landing Pad.
Take a look at our Guide to Vendors in Jedi Survivor to learn exactly where and how to find and unlock each one of them and what they offer.
The Main Story and Exploration Abilities
While Jedi Survivor is more open and less linear than its predecessor, you still can’t explore just any area whenever you want. Planets only become available as you unlock them in the main story and some areas on unlocked planets are inaccessible until you unlock the appropriate exploration ability, typically also through the main storyline.
You can look at your Holomap to see if a region contains something you can’t explore with your current abilities or haven’t explored yet. These paths will be denoted in red if you can’t access them, green if you can but haven’t yet, and yellow if it’s just an opening to somewhere unexplored.
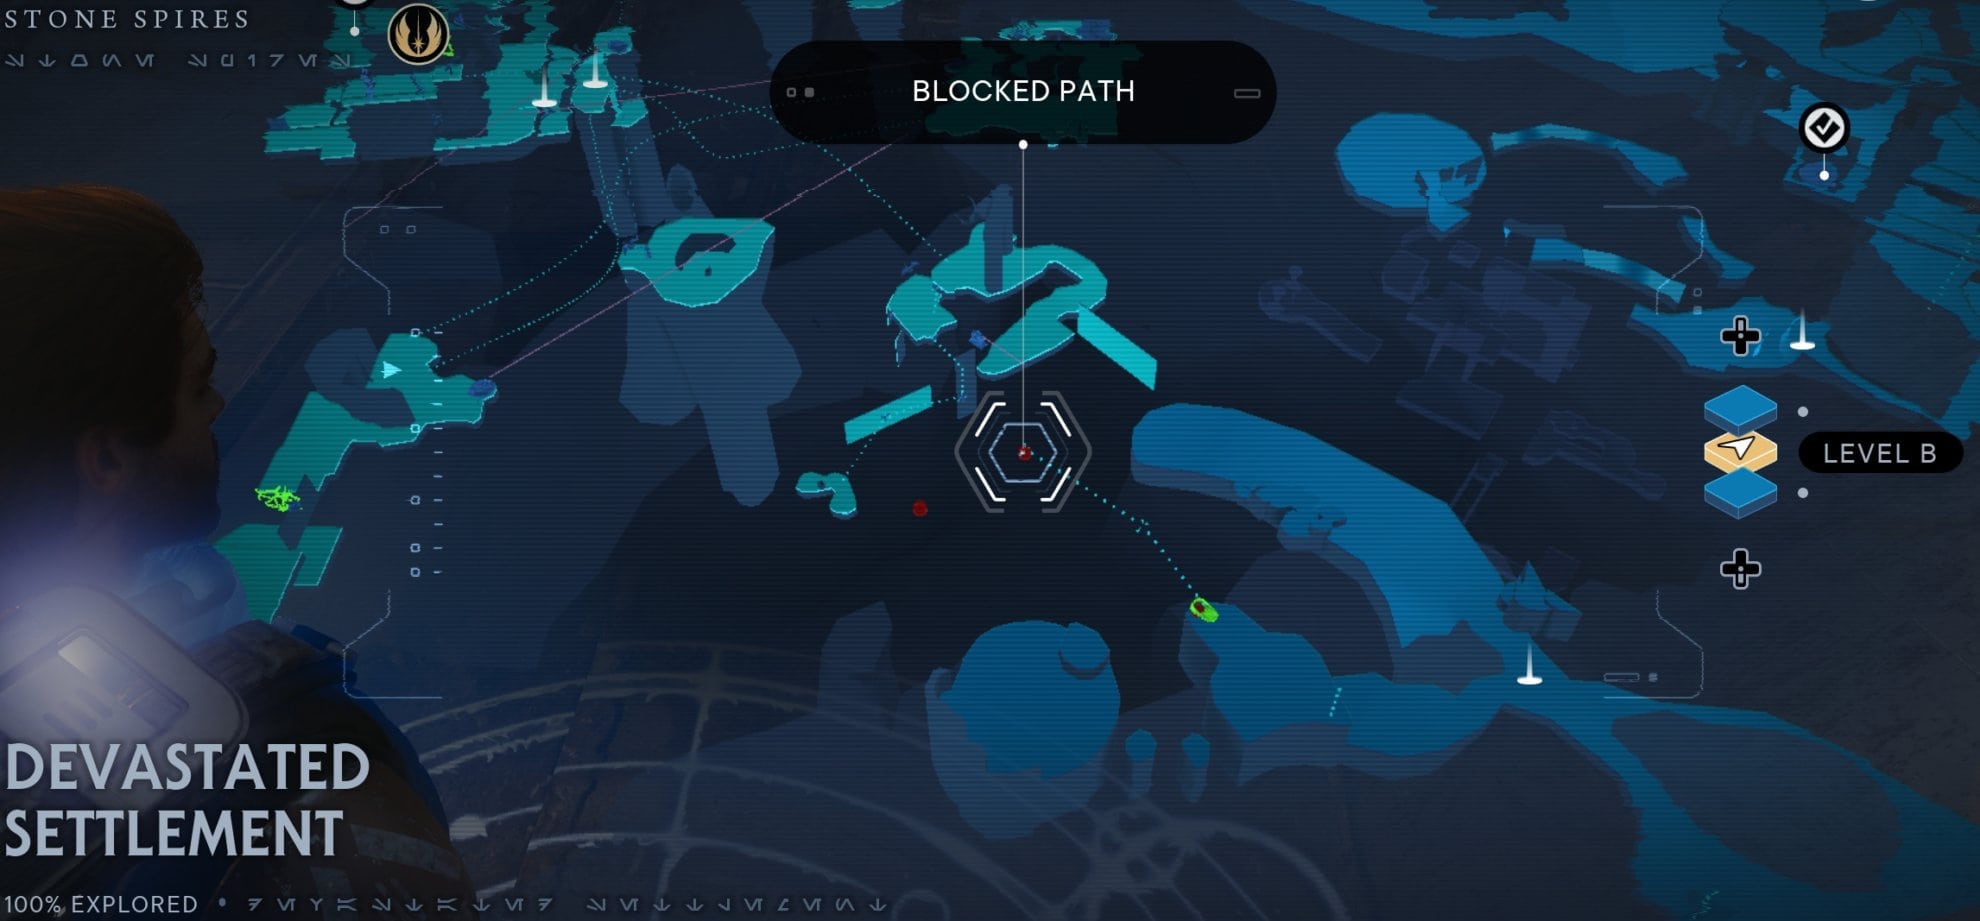
If you see something green or yellow, you should consider checking it out.
If you need a hand with your first steps, we have a detailed Orientation guide to the first mission in Jedi Survivor, taking place on Coruscant and playing the role of a lengthy tutorial introducing new players to the game mechanics.
How side quests work (Rumors)
Jedi Survivor uses a different structure for side quests compared to what you might be used to. These missions are called Rumors and they don’t actually require you to speak with an NPC at all in order to complete them, unless the Rumor is focused on an NPC of course.
The mission givers merely serve to point you toward interesting or noteworthy locations that are worth investigating. All the rewards are found on-location as part of the exploration process rather than being given to you after completing the objectives.
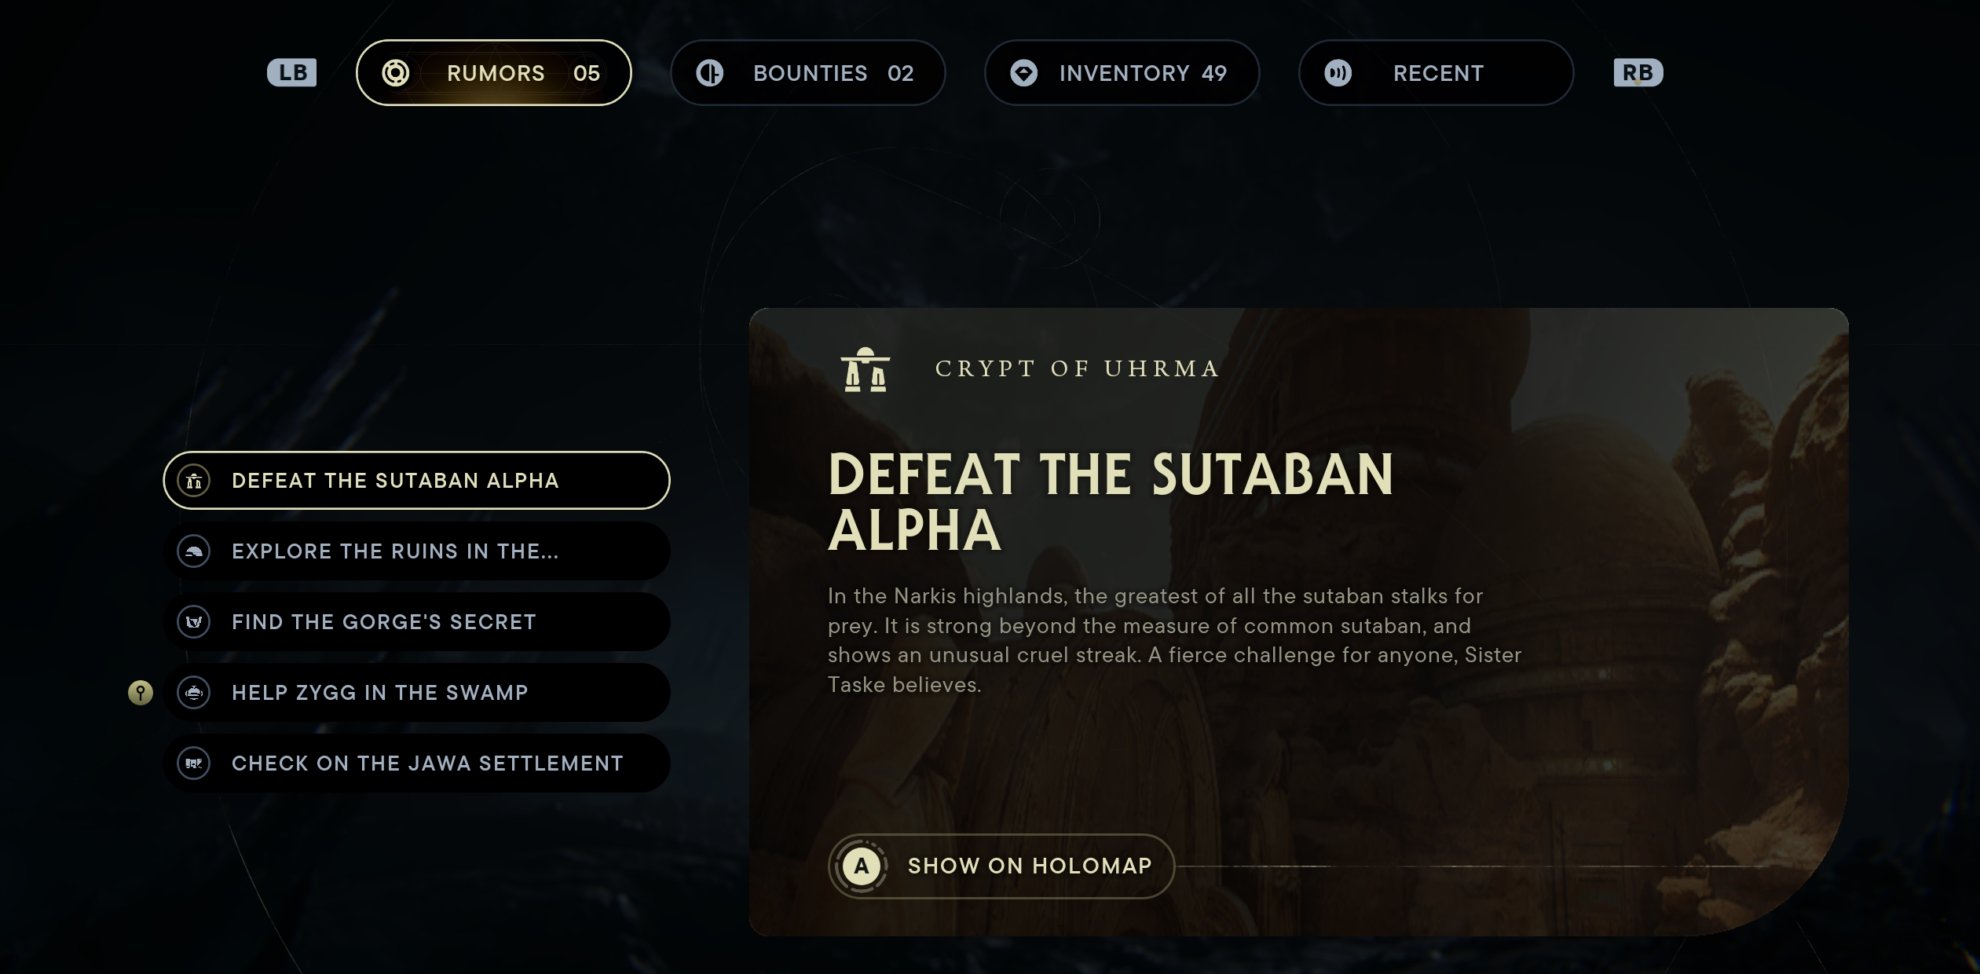
In other words, the Rumors aren’t side-quests in the traditional sense, but rather point you in the direction of goodies and interesting enemies. Speaking to an NPC after completing a Rumor only offers a bit of closure to the thin wrapper story for event at the location in question. You only need to speak to the NPC if the Rumor objective tells you to.
Bounties are also a thing later on, but they’re just one-off fights against the Haxion Brood similar to Jedi Fallen Order.
Other Tips and Tricks
I wanted to mention a few other tips related to Combat, Stealth, and Exploration.
Combat
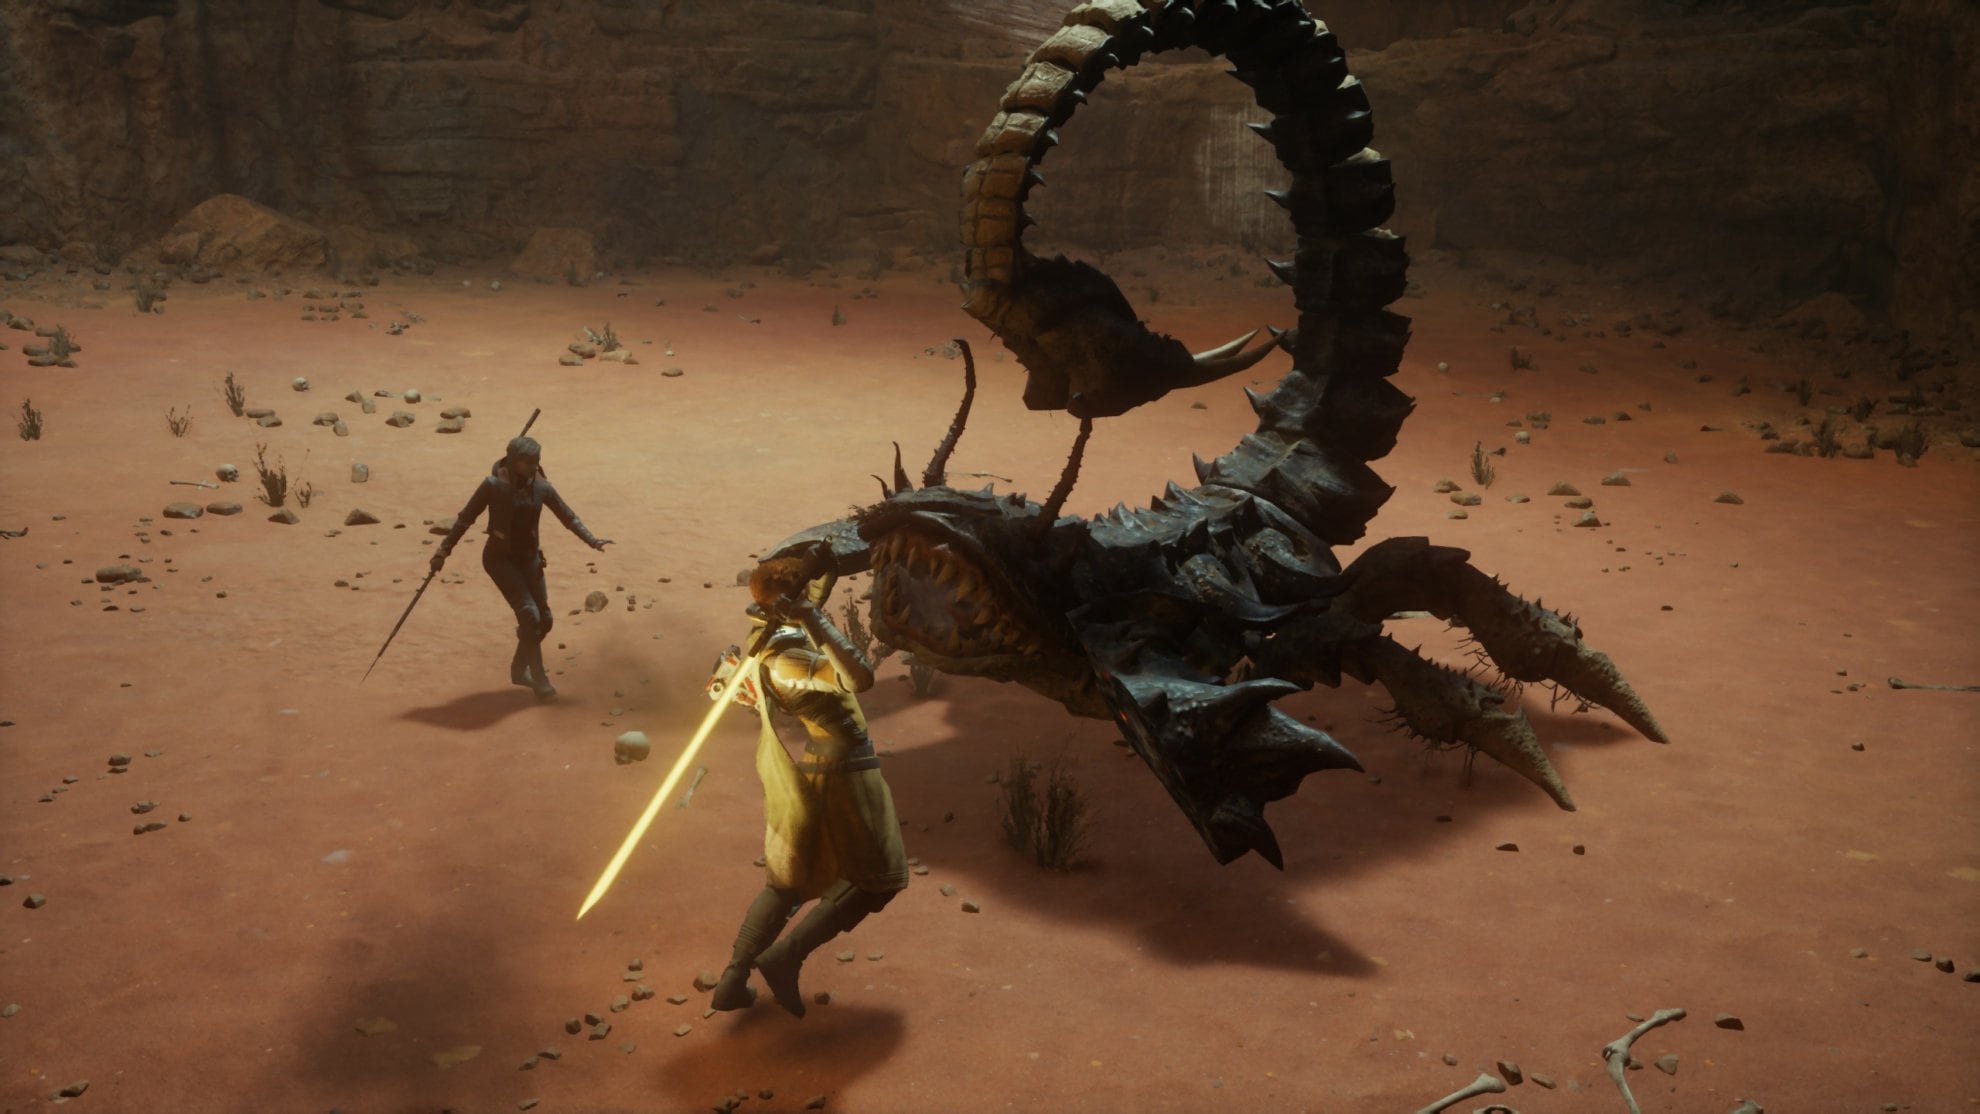
There are many enemies in Jedi Survivor, and learning how to deal with each one is part of the game. If you are having many problems when fighting an enemy (ex: the Rancor) try a different approach like changing stances or using other attacks.
Jedi Survivor is far less forgiving than Fallen Order, some boss fights can be incredibly frustrating especially at the beginning of the game when you are still learning the combat mechanics. If you feel overwhelmed take a walk or do an activity that is relaxing. Having a cool head when fighting a hard boss will always improve your chances of succeeding.
If it is hard to remember the controls, consider re-assigning the buttons/keys in your keyboard or controller to something you are familiar with. For example, in every third-person action game, I always have the “evade” function assigned to my mouse, after re-assigning the function it was a lot easier to perform better in fights because I am already used to it.
Some fighting combos have a slightly bigger learning curve. Attempting to learn them in the middle of a fight is not always a good idea; take advantage of the training area at Meditation Points and practice different combinations repeatedly until you master them.
We’ve got a lot more tips in the Jedi Survivor Combat Guide. Take a look when you are ready to start mastering this aspect of the game.
Stealth
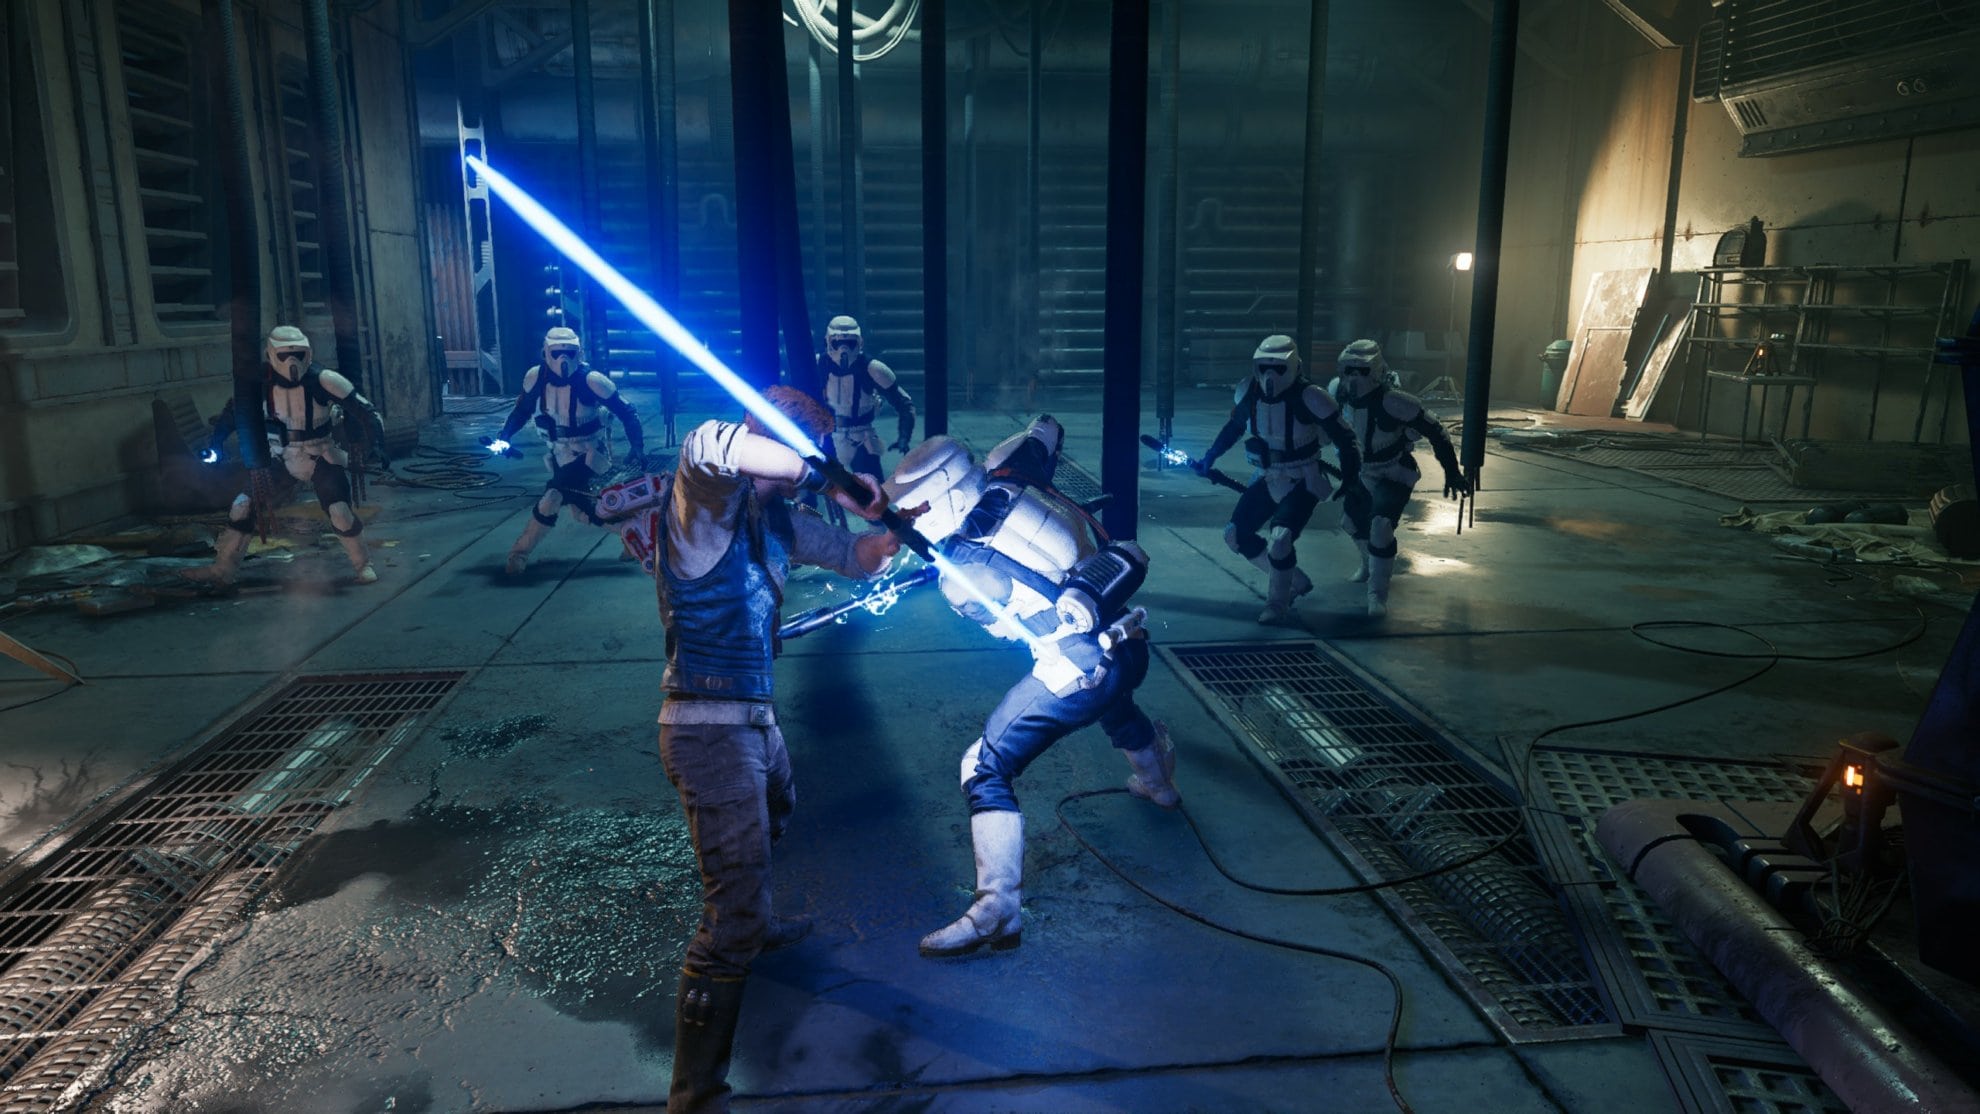
Stealth is underdeveloped in Jedi Survivor, but there are some interesting interactions that result from being sneaky. If you get close enough to an enemy without them noticing you, a button prompt to attack them will appear, often enabling you to take them out in a single hit.
It’s also very amusing to watch NPCs interact with each other. If you try the stealthy approach you will be able to hear fun conversations between enemy droids, raiders, and troopers.
There are many enemies that will do their best to remain undetected until the last second as well. Use your senses to detect odd sounds or changes in lighting caused by your foes.
Exploration
Jedi Survivor is almost triple the size of Fallen Order so take your time to explore. There are a ton of things to find like hidden enemies, customization parts, and even some great easter eggs like the posing Wampa on Koboh.
You will notice that there are some areas you can’t access but this will change later in the game as you obtain new abilities. Just remember to return to previously inaccessible locations.
There are times when you’re going to feel frustrated when doing a puzzle. The game provides you with all the necessary tools but sometimes it is not as obvious as we would like. Check your surroundings, even if it appears like there’s nothing useful, I assure you that it is there. And if you want to speed things up, use our Puzzle Guides readily available to help you.
The amount of information can be overwhelming when playing a new game for the first time, make sure to check the databank every once in a while to learn more about new enemies, allies, locations, and more. And if that isn’t enough…
Our Star Wars Jedi Survivor Guides Master List will provide helpful information and resources on whatever you need for this game!


