
List of all regular and hidden Achievements, also called Trophies, in Star Wars Jedi: Survivor with guides and strategies for how to unlock all of them faster and easier to 100% the game!
Table of contents
How Achievements Work in Jedi Survivor
In Star Wars Jedi Survivor you can unlock achievements by numerous means. Some are gained by making progress in the game’s story or by completing certain challenges. There are a total of 53 achievements available!
While the achievements serve no purpose other than bragging rights, you can get some goodies by fulfilling the requirements for achievements in the form of customizations, Perks and more!
There are a total of 23 Hidden Achievements you can get in Jedi Survivor. These tend to be gained through challenging or inconspicuous means. Fortunately, we’ll be providing information on how to achieve them here!
Tips for completing Achievements in Jedi Survivor
In this section, I will cover some tips on how to complete the more difficult or more esoteric achievements you can get. Many of the achievements in the game are very easy to get and you’ll get without even trying.
You will find a full table containing all Achievements in Star Wars Jedi Survivor further down in this guide.
The following segment contains spoilers for Jedi Survivor. The nature of completing these achievements requires that I provide some spoilers in the tips so you can complete them. If you want to avoid spoilers, please do not read beyond this point.
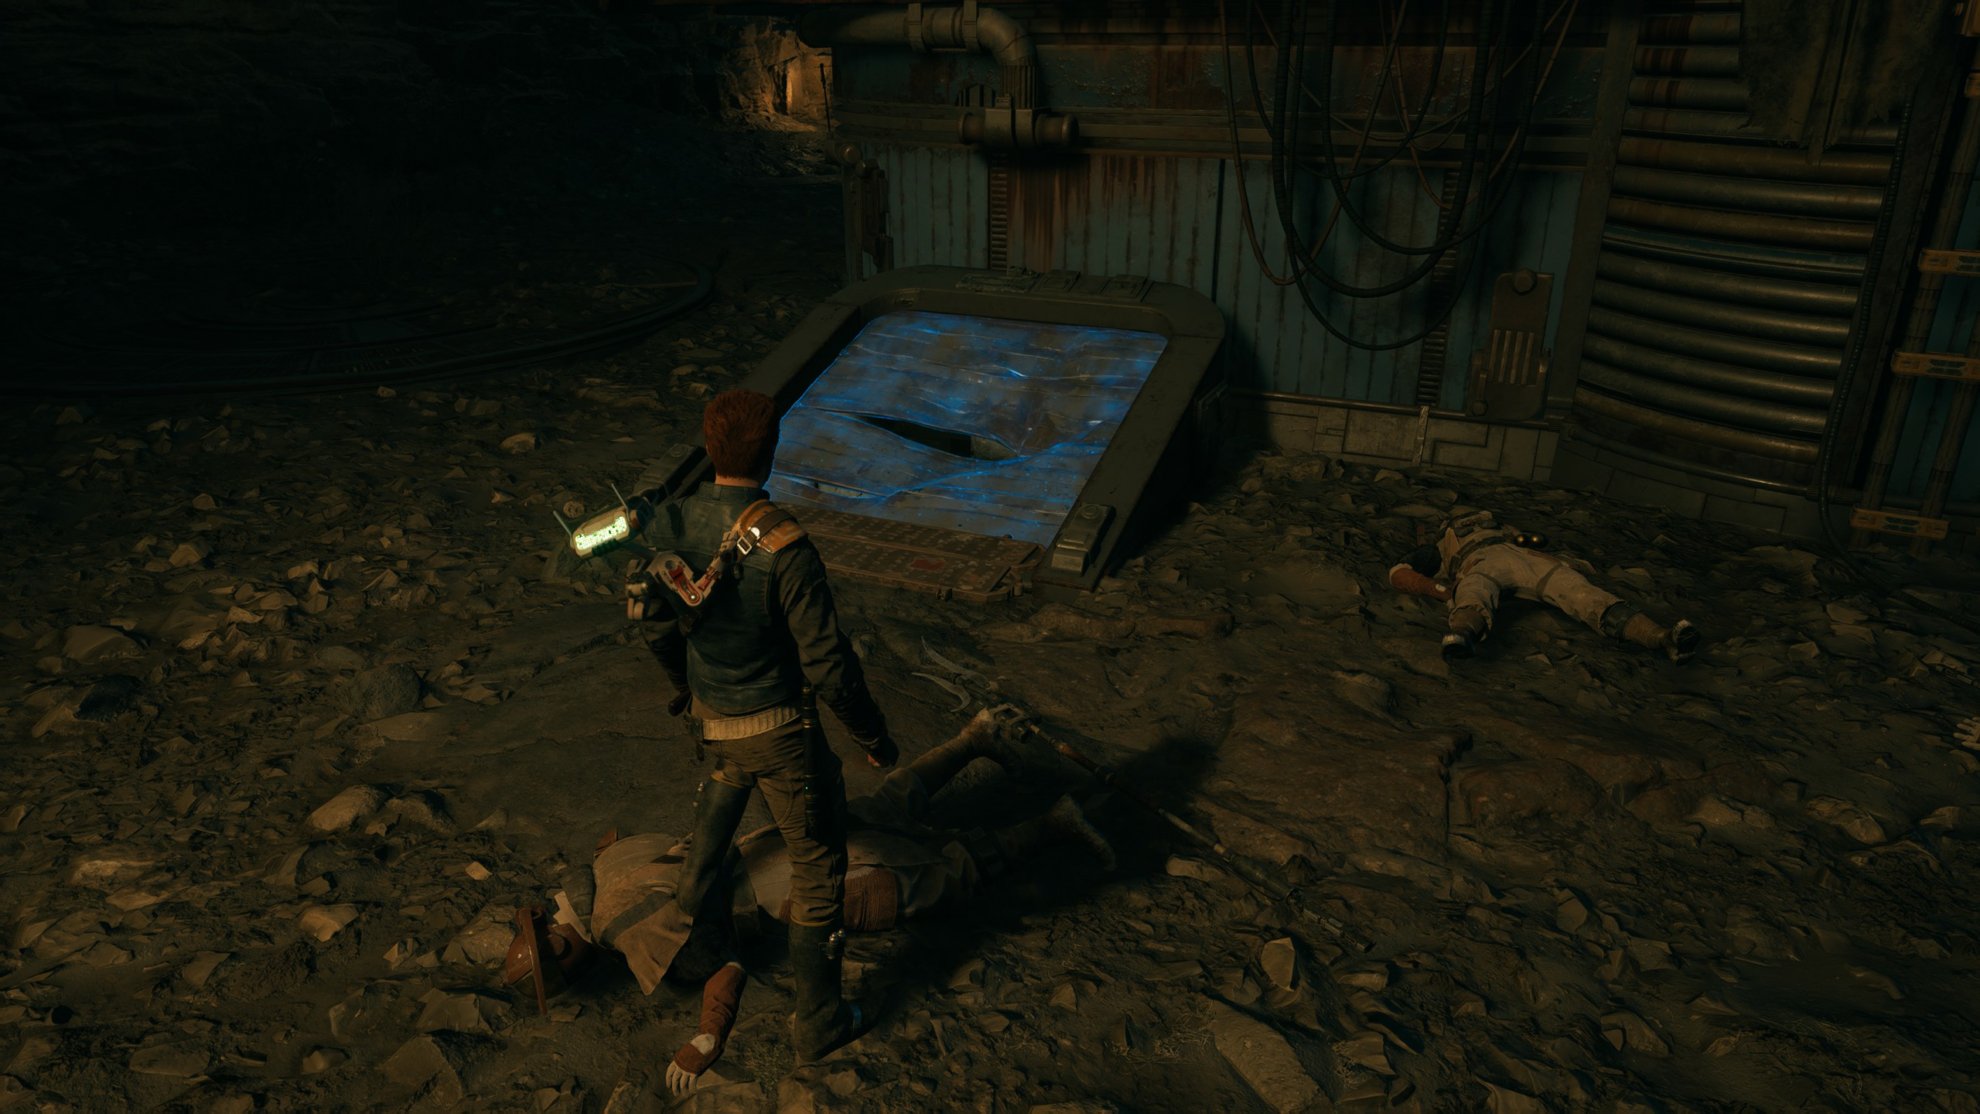
 Rooftop Duel
This is a hidden achievement you will unlock very early in the game as you progress through the story on Coruscant. Near the end of the path, you will have to face and defeat the Ninth Sister. Since she is an Inquisitor, this achievement is related to her. You will unlock it once you beat her.
For Saw Gerrera
This hidden achievement unlocks for you when you complete the first mission on Coruscant and get on board of the Mantis.
Grab Some Seat
This hidden achievement unlocks when you visit the Pyloon’s Saloon cantina at Rambler’s Research Outpost on Koboh and meet Greez, the owner.
The Past Made Present
This one unlocks when you reach the tower at the Forest Array on Koboh and release Dagon Gera from the bacta tank. If you need a guide for Dagan Gera boss fight, we have it!
Survivors, We Adapt
This unlocks when you meet Merrin on Jedha while trying to find Cere.
Among the Masters
This one is awarded to you when you meet Cere and Master Eno Cordova on Jedha.
For the Path
This achievement unlocks after you take down the giant digging machine with the help of Merrin on Jedha. This is during your mission to reach Pilgrim’s Sancruary on Jedha.
Out of Bedlam
This unlocks after you complete the mission at the Lucrehulk on Koboh to save Zee. This is the second time you encounter and battle with Dagan Gera.
Tanalorr Bound
This hidden achievement unlocks when you complete the Mountain Observatory main objective and defeat Dagan Gera at the end.
At the Precipice
You have to complete the mission on Nova Garon to unlock this achievement. This is part of the main story of the game. You get the achievement when you return back to the Mantis.
Into the Abyss
This achievement is unlocked after you complete the objective taking you to the Control Center on Koboh.
A Place You Could Call Home
This is the final story achievement in the game. You unlock it after defeating Bode Akuna on Tanalorr and complete the story. Depending on what difficulty you play and how much you explore in between the main story missions , this may take you anywhere between 15 and 30 hours.
 Catch!
One of the easiest locations to complete this and unlock the achievement is at the earlier locations on Koboh, at the Derelict Dam.
You have a main story puzzle to solve there that involves you breaking a wall and lowering a ramp to allow the Roller Mine Droid to get closer before you pick it up and throw it at the dam.
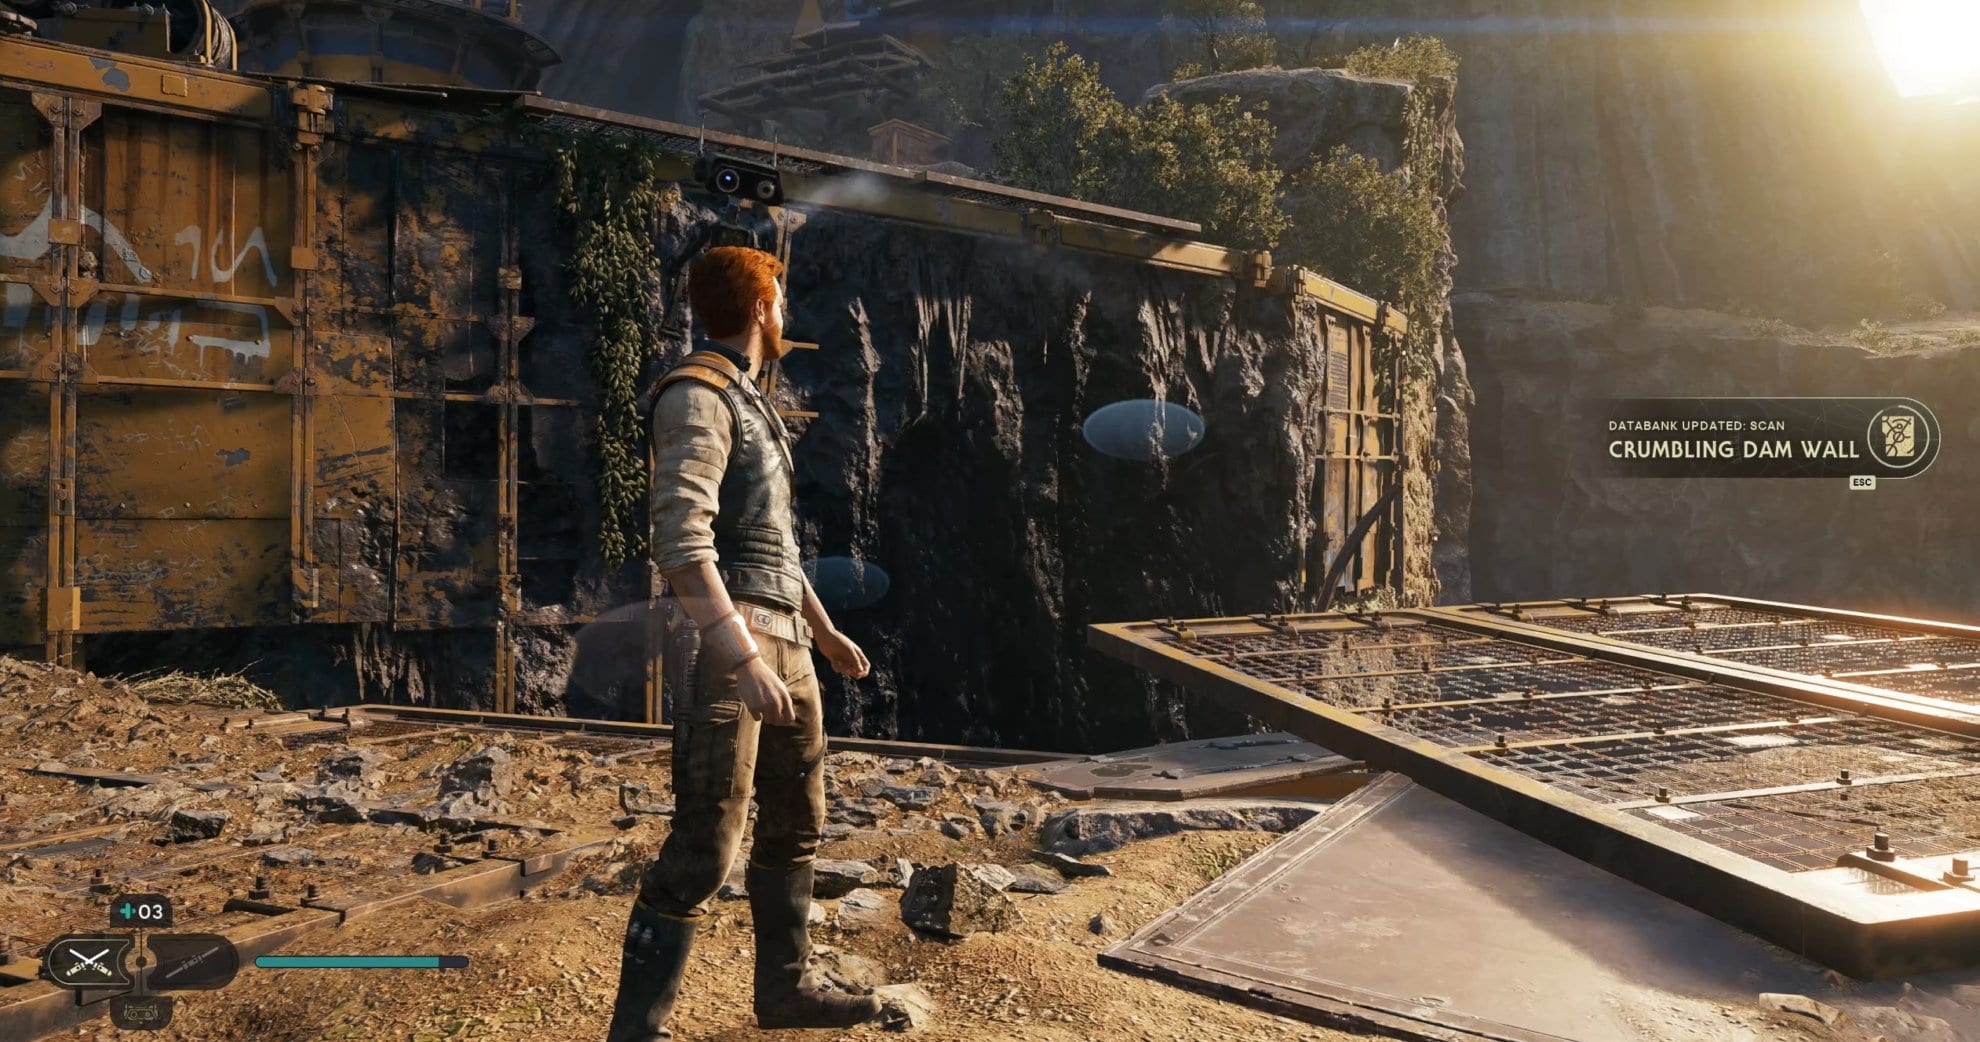
In the area right before the ramp, there are a few Shiverpedes and at least one Bedlam Raider. You can lure them together and throw a Roller Mine from the nearby cave that you just opened earlier for the main story objective.
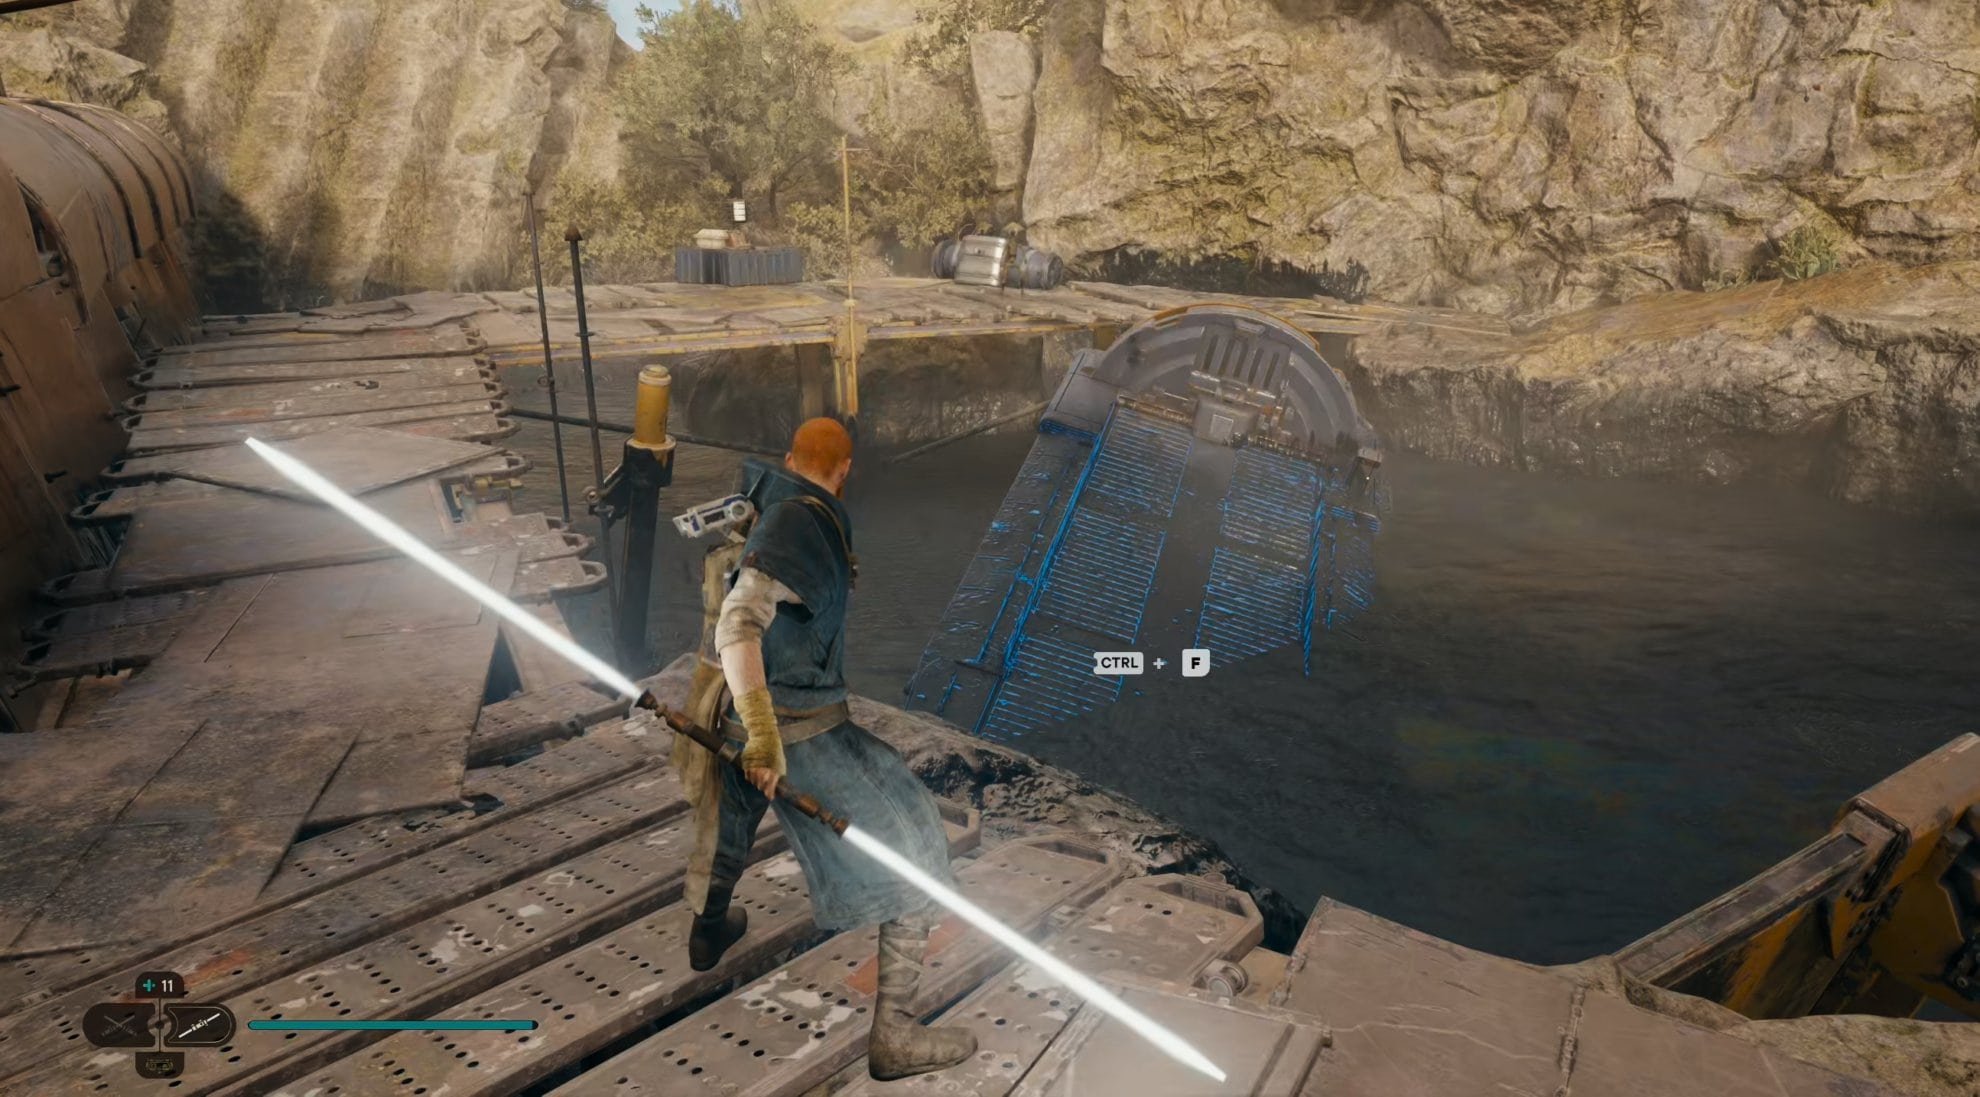
This is Canon
You can complete this on the Shattered Moon when you return to it chasing Rayvis. Find an enemy NPC and throw them into the beam.
I’m a Living Legend
This achievement is granted to you after you defeat all 13 Legendary adversaries in Jedi Survivor. These are unique creatures and boss encounters that you have to find and defeat. Some of them are challenging, some are relatively easy. Use our guide to find and defeat all Legendary adversaries in Jedi Survivor to make this task simpler.
Get Down From There
To be able to defeat 20 Lifted enemies, you will need to have unlocked the Force Lift ability first. This happens on the Lucrehulk where you go to save Zee from the Bedlam Raiders and Dagan Gera. Then you can lift up any enemy that will not resist it.
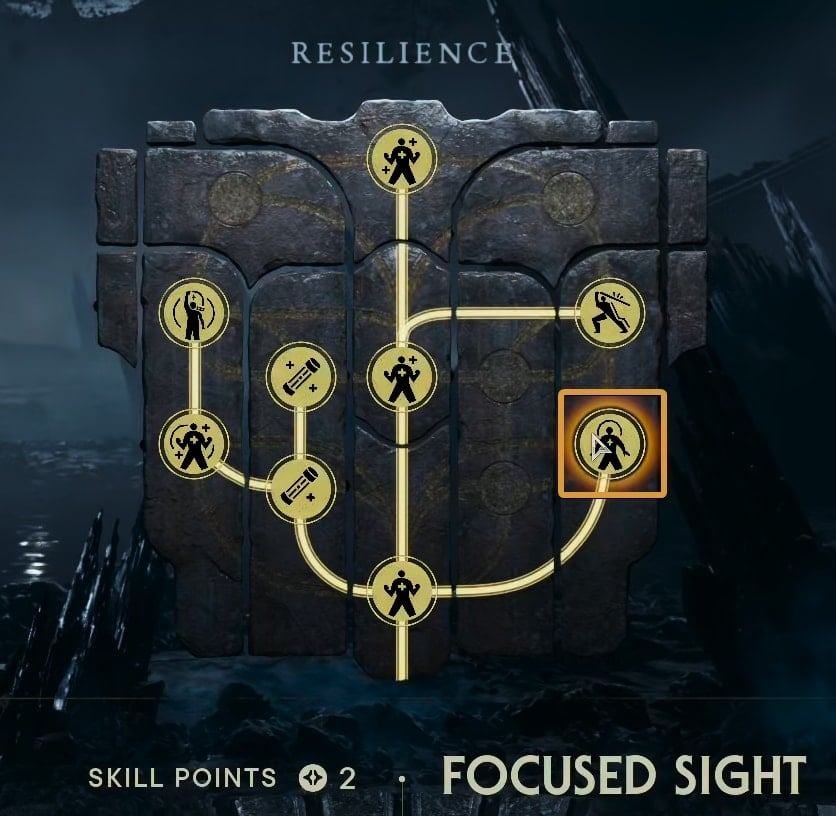
One With the Force
To earn this achievement, you have to spend at least three Skill Points in the Resilience Skill Tree to unlock Focused Sight. With it, you can press the appropriate button when facing a melee enemy and wait for them to miss. Avoid 50 hits to earn the achievement.
Slam Dunk
This achievement is possible after you unlock the Force Lift and Force Slam abilities, which happens during your mission on the Lucrehulk to save Zee. You have to Force Slam 5 enemies with one Force Slam use.
An easy way to achieve this is in one of the Fractured Challenges where you are faced with waves of enemies. You can find large groups of Empire Forces as early as Coruscant. The Lucrehulk also offers a number of large group encounters for you to do this. You don’t have to defeat them all with the Slam, just hit all 5 with one attack.
Pinpoint
For this one, you will need to unlock the Precision Release ability for the Dual Wield Stance. Acquiring this ability will cost a total of four Skill Points. You can easily farm Skill Points or explore the game and find all locations of Skill Point Essences. Pinpoint is granted when you execute 10 perfectly timed Precision Releases. Wait for the enemy to hit you and at the same time with their hit, release the button to hit them back.
Riposte
You have to parry an enemy that is flying toward you right after they resisted your Force Pull. This is easily doable on most Bedlam Raider type of enemies, especially the tougher types.
King of the World
To earn this achievement, you have to climb all the way to the top of the tower at the Barn with the Nekkos at Harvest Ridge. The tower is this metal structure standing tall right at the edge of the barn.
We have a guide on how to complete the Nekkos Barn puzzle and while doing so you can climb to the top to activate the Harvest Ridge Meditation Point and earn this achievement.
There is no Try
On Koboh, right where the first Tar Pit Puzzle is at Gorge Crash Site, there is a droid asking you for help with lifting his sunken ship. When you first encounter it, you will not be able to help and Cal will make a note of that.
Later, after you unlock the Force Lift Ability while rescuing Zee from the Lucrehulk, you will learn the ability and be able to go back to this location on Koboh to lift up the ship and earn the achievement.
We have compiled this and many others in our guide to the Jedi Survivor Easter Eggs, References, Secrets and Little-Known Facts
Star Tours
For this achievement, you need to find, unlock and explore all seven Jedi Chambers on Koboh and complete the puzzles inside.
We have a complete guide to the locations of all Jedi Chambers as well as individual puzzle guides for each chamber:
- Chamber of Duality Location
- Chamber of Reason Location
- Chamber of Clarity Location
- Chamber of Fortitude Location
- Chamber of Connection Location
- Chamber of Detachment Location
- Ambidexterity Perk Location
Cleaning Up
To complete this, go into the restroom in the Pyloon’s Saloon cantina on Koboh and interact with the toilet. This will not only earn you the Cleaning Up achievement but yield you a Priorite Shard.
They’re Probably Fine
To unlock this one, first, learn how to tame a Nekko, then ride one toward a large gap (but not over a cliff) and jump off the Nekko. The goal is for you to manage to land on the other side of the gap, while the Nekko drops down.
It’s a Trap
To get this, you have to explore the Phon’Qi Caverns. The entrance to the Caverns is under the Abandoned Shack in Foothill Falls on Koboh.
We have a complete guide to the Phon’Qi Caverns, including how to defeat the bosses, get all Collectibles and unlock the Map Upgrade to reveal all chests on your map!
Max Capacity
To unlock this achievement, you have to recruit all possible NPCs and bring them to the Pyloon’s Saloon cantina on Koboh. Here is the full list:
- Mosey – Southern Reach on Koboh.
- Turgle – In front of the Cantina, after you rescue him from Rayvis.
- Toa – Near the Chamber of Reason entry in Basalt Rift in Basalt Forest. Toa will give you more Jedi Chamber Rumors later.
- Tulli and Bhima – Find the odd pair at the Boiling Bluff. Recruiting them unlocks the Holotactics mini-game in the Cantina.
- Ashe and DD-EC – The musician and her droid DJ are at Harvest Ridge
- Caij – You will meet her at the Stone Spires where you go to research Tanalorr, she appears right after your first meeting with a Haxion Brood Bounty Hunter.
- Skoova – Recruit him at the Foothill Falls, near the Abandoned Shack. Skoova has another achievement that you can unlock by finding all fish locations with him and filling up the aquarium of Pyloon’s Saloon.
- Pili – You will meet Pili on Jedha, during your second trip while you are trying to reach Pilgrim’s Sanctuary.
- Wini – In a hut in the middle of Viscid Bog, you will find Wini talking to Zygg. You can complete the Rumor after finishing the Lucrehulk mission.
- Pit Droid – At the Derelict Dam, you have to lift the ship from the tar pit, which will unlock the “There is no Try” achievement for you as well.
- T-1N8 – You will find this droid under the Abandoned Shack, next to the entrance to the Phon’Qi Caverns.
- Jawa – To recruit the Jawa, you have to visit and rescue them from the Bedlam Raiders at the Bygone Settlement. This is part of the rumor that sends you to check on the Jawa Settlement on Koboh.
Who Gives a Puck
Unlocked after you encounter the Haxion Brood bounty hunter at the Stone Spires on Koboh where you meet Caij, who will give you a Bounty Puck token. You can later exchange these at the Pyloon’s Saloon for goodies that Caij is offering.
This actually starts an entire chain of objectives where you have to hunt all of the Bounty Hunters to earn Bounty Pucks from Caij. This all ends in an entertaining way which I will not spoil.
Caij Match
After you unlock the Bounty Progression System, you will get Bounty Hunter locations from Caij. Go to each one and defeat all of the opponents. After you finally return to Caij at the cantina, you will meet the mysterious stranger and earn this achievement.
Perk of the Job
To earn this achievement, you have to unlock all seven additional Perk Slots and occupy them all with Perks.
Here is a list of locations and puzzles you have to complete to unlock all of the available additional Perk Slots for a total of ten:
- Interact with the Essence at the Derelict Dam’s Rusted Elevator on Koboh
- Interact with the Essence in the Smuggler’s Tunnels on Koboh
- Interact with the Essence at the Nekko barn, Harvest Ridge on Koboh
- Purchase a Perk Slot from Zee at the Pyloon’s Saloon
- Complete the Path of Persistence Puzzle on Jedha
- Complete the Path of Restoration Puzzle on Jedha
- Complete the Path of Conviction Puzzle on Jedha
Cobra Cal
This is a fun reference to the TV Show Cobra Kai on Netflix. To earn the achievement, you have to use the Headband hairstyle for Cal Kestis while performing attacks on the training dummy at The Archive base on Jedha.
You can purchase the Headband from Doma at Rambler’s Reach Outpost for 7 Priorite Shards. To unlock the Training Stormtrooper dummy, you have to find Cere on Jedha.
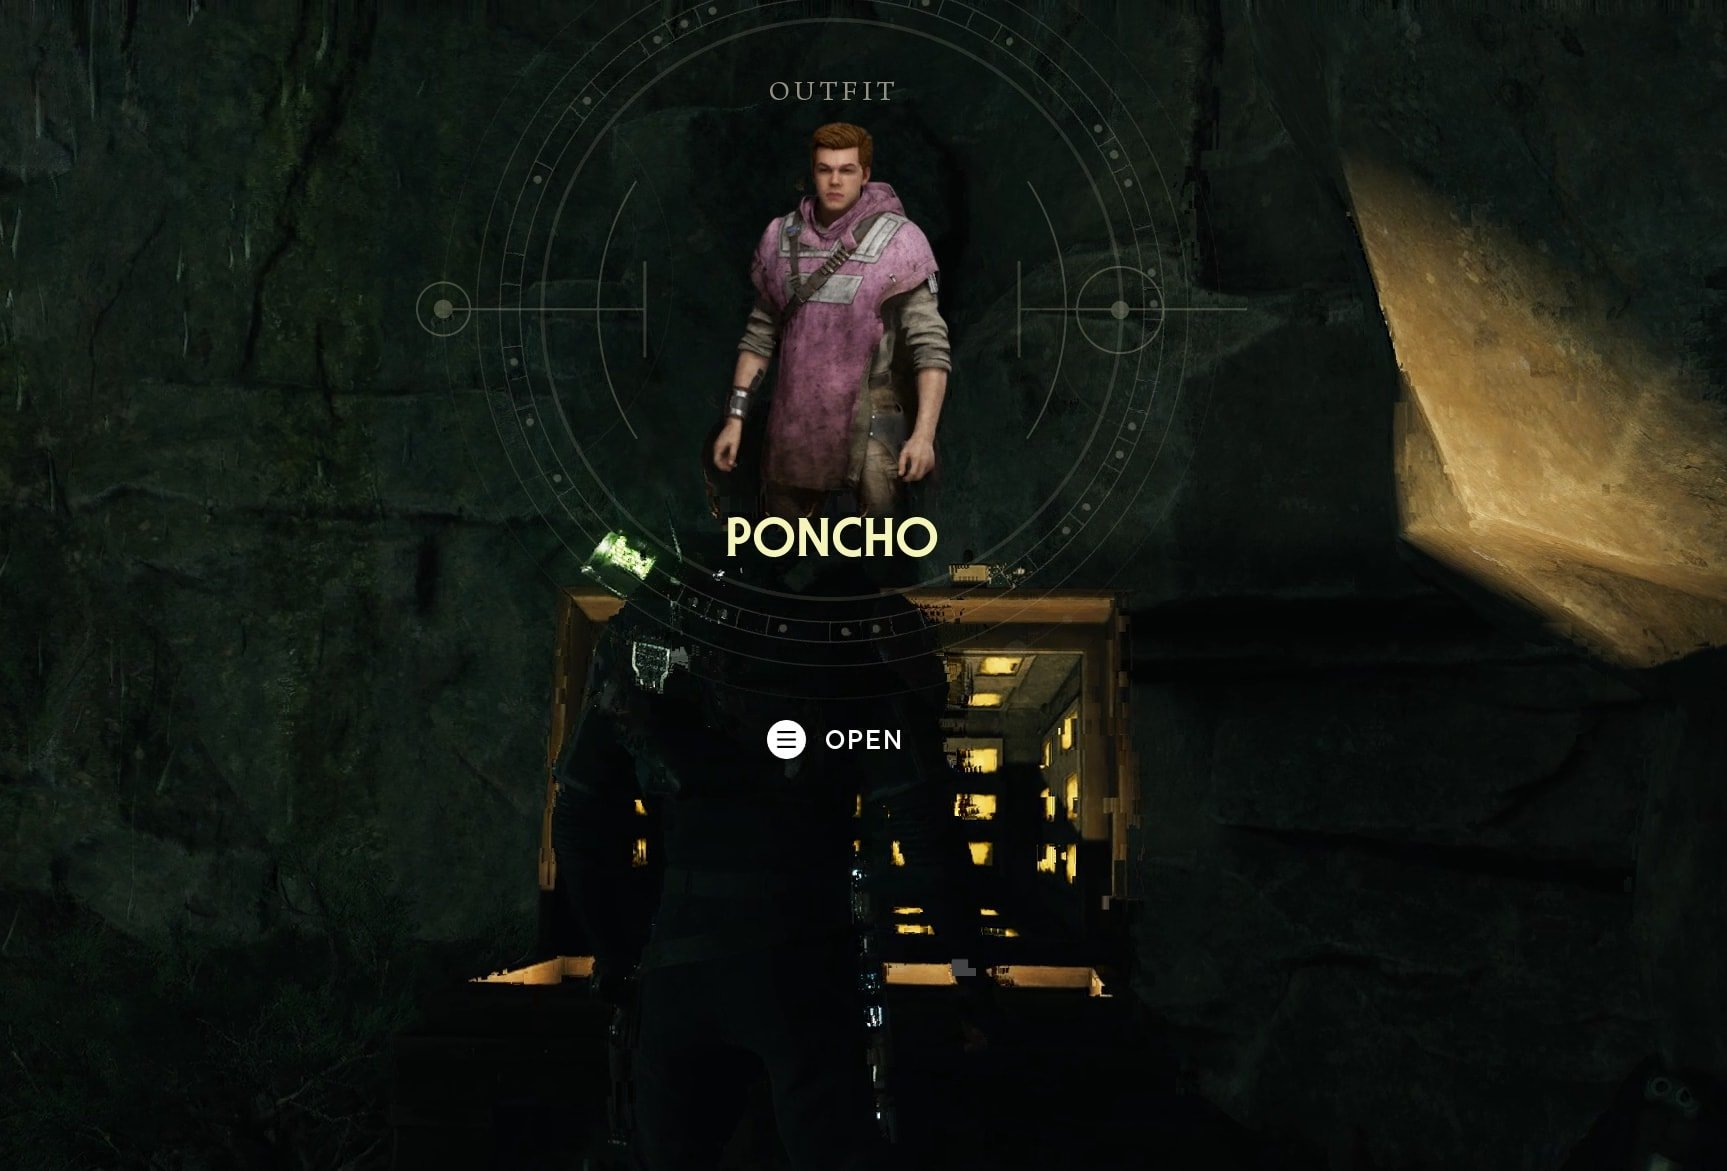
A Presence I’ve Not Felt Since…
To earn this achievement, you have to find and defeat the Spawn of Ogdo at Fort Kah’lin on Koboh to get the Poncho Outfit from the legendary chest.
Road House
To earn the Road House achievement, you need to get the Mullet hairstyle from a chest at the Derelict Dam area on Koboh. You also need to have the Crossguard Lightsaber unlocked. To get the achievement, run toward an enemy (or the training dummy on Jedha) and press attack.
Gambler
To earn the Gambler achievement, first recruit Tulli and Bhima, who will open up the Holotactics mini-game at the Pyloon’s Saloon on Koboh. Then win all matches against all opponents.
We’ve got a comprehensive guide to the Holotactics mini-game in Jedi Survivor, which includes instructions on how to unlock all opponents and detailed tested and working strategies for how to defeat all of them.
Skoova Diving
To earn the Skoova Diving achievement, you have to recruit Skoova at Foothill Falls on Koboh and then find him in various places all around the worlds you visit and explore to help him catch all types of fish for the aquarium.
We have a complete guide to all Fish Locations if you need assistance.
Growth Spurt
The garden is on the roof of the Pyloon’s Saloon at Rambler’s Reach Outpost on Koboh. You get access to a small part of it at first. Recruit Tili on Jedha during the mission to reach Pilgrim’s Sanctuary to be able to expand the garden to its full potential.
To earn this achievement, you have to plant seeds and wait for them to grow up. And you need at least one of each seed to be planted anywhere in the garden. This means you have to find all Seeds in the game. If the next slot of the garden is not unlocking for you, it could be either time-based or you have not collected enough seeds. Talk often to Tili as well.
You will get the achievement when you plant enough different types and kinds of seeds in the first three slots of the garden. When you unlock the fourth one and the Terminal for the Map Upgrade, that’s when you will also get the Growth Spurt achievement.
Intergalactic Geographic
To complete this, you have to scan at least one of each type of enemy. Below is a full list of all of them from the Tactical Guide in the game:
Bode Akuna (2 entries)
- Bode Akuna, slot 1
- Bode Akuna, slot 2
The Galactic Empire (22 entries)
- Scout Trooper
- Scout Trooper Commander
- Stormtrooper
- Stormtrooper Commander
- AT-ST
- Security Droid
- Flametrooper
- Heavy Assault Trooper
- Probe Droid
- Rocket Launcher Trooper
- Electrobaton Purge Trooper
- Electrostaff Purge Trooper
- Purge Trooper Commander
- The Ninth Sister
- Shield Trooper
- Jetpack Trooper
- Imperial Officer
- Viper Probe Droid
- DT Sentry Droid
- Security Droid Enforcer
- ISB Agent
- Darth Vader
Bedlam Raiders (20 entries)
- B1 Battle Droid
- B1 Melee Battle Droid
- B2 Battle Droid
- BX Droid
- BX Droid (Hybrid)
- BX Droid (Rifle)
- Dagan Gera, slot 1
- Dagan Gera, slot 2
- Dagan Gera, slot 3
- Droideka
- E3-VE3
- The Massif
- Bedlam Raider Lieutenant (Single-Blade)
- Bedlam Raider Lieutenant (Double-Blade)
- Magnaguard
- Rayvis
- Raider Veteran
- Raider Grunt
- Bedlam Smasher
- Beetu Deetu
Haxion Brood (8 entries)
- Haxion Brood Commando
- Haxion Brood Brawler Bounty Droid
- Haxion Brood Bount Droid
- Haxion Brood Bounty Hunter
- Caij Vanda
- Haxion Brood Shock Commando
- Haxion Brood Gunslinger
- Haxion Brood Grenadier
Flora and Fauna (17 entries)
- Gorocco
- Gorger
- Vile Bilemaw
- Gorocco Matriarch
- The Mire Terror
- Rancor
- Bilemaw
- Rawka
- Spawn of Oggdo
- Bramlik
- Shiverpede
- Mogu
- Hardshell
- Golden Skriton
- Skriton
- Sutaban
- Sutaban Alpha
Droids (2 entries)
- Roller Mine
- Scavenger Droid
Blood, Sweat, and Tears
To earn this achievement, you have to complete all 15 Force Tear Challenges available in the game. Check our list of Force Tear Walkthroughs for how to find and complete all of them.
Jedi Survivor Achievements List
Below you will see the full list of all 53 achievements available in Jedi Survivor. There is no specific order in which you should be unlocking achievements. You can unlock whichever and whenever you please.
| Icon | Name | Type | Description |
|---|---|---|---|
 | Rooftop Duel | Hidden | Defeat an Inquisitor |
 | For Saw Gerrera | Hidden | Break free from the grasp of the Empire |
 | Grab Some Seat | Hidden | Chat with the owner of the Koboh Cantina |
 | The Past Made Present | Hidden | Release the Jedi from the bacta tank |
 | Survivors, We Adapt | Hidden | Travel together with a Nightsister |
 | Among the Masters | Hidden | Meet the Jedi Masters |
 | For the Path | Hidden | Protect Pilgrim’s Sanctuary |
 | Out of Bedlam | Hidden | Rescue a friend from the Bedlam Raiders |
 | Tanalorr Bound | Hidden | Collect the Abyss Compass |
 | Tragedy | Hidden | Defend the Archive |
 | At the Precipice | Hidden | Survive Nova Garon |
 | Into the Abyss | Hidden | Discover the route to Tanalorr |
 | A Place You Could Call Home | Hidden | Complete the Story |
 | Han Slowlo | Regular | Defeat 50 enemies under the effect of Slow |
 | You’ve Got a Friend | Regular | Direct your companions to assist in combat 10 times each |
 | Catch! | Regular | Hit 3 enemies with a single roller mine |
 | So Uncivilized | Regular | Defeat 10 enemies with shots using the Point Blank Skill |
 | They Never Saw It Coming | Regular | Strike an unaware enemy 20 times |
 | This is Canon | Regular | Push an enemy into the Shattered Moon mining cannon |
 | I’m a Living Legend | Regular | Defeat all Legendary adversaries |
 | Get Down From There | Regular | Defeat 20 Lifted enemies |
 | Mirror Match | Regular | A Confused enemy defeats an enemy of the same type |
 | One With the Force | Regular | Avoid 50 attacks using Force Sight |
 | Slam Dunk | Regular | Slam 5 enemies with a single use of Slam |
 | Pinpoint | Regular | Execute 10 perfectly timed precision releases |
 | Riposte | Regular | Parry a Force Pull resisting enemy |
 | King of the World | Regular | Reach the highest point of Harvest Ridge |
 | There is no Try | Regular | Help lift a ship out of the tar pits |
 | Star Tours | Regular | Discover and complete all Jedi Chambers |
 | Now, This Isn’t Podracing | Regular | Travel 500m of distance while riding creatures |
 | Cleaning Up | Hidden | Refresh the Refresher |
 | They’re Probably Fine | Hidden | Drop your mount into the great unknown |
 | Skywalker | Regular | Keep your feet off the ground and walls for 60 seconds |
 | It’s a Trap | Hidden | Explore the Phon’Qi Caverns |
 | Max Capacity | Hidden | Have a packed cantina |
 | Can You Pet the Bogling? | Hidden | You can pet the bogling |
 | Who Gives a Puck | Hidden | Obtain your first bounty |
 | Caij Match | Hidden | Gain the attention of a mysterious stranger |
 | Perk of the Job | Regular | Equip Perks in all slots |
 | Greezy Money | Regular | Trade 25 collected items |
 | Cobra Cal | Regular | Train with your weapons while wearing a headbanc |
 | A Presence I’ve Not Felt Since… | Hidden | Wear an old wardrobe staple |
 | Hey, Luke At Us | Regular | Equip a new cosmetic in every Cal slot |
 | Kitted Out | Regular | Customize BD-1, the blaster a, and Cal’s lightsaber with new parts |
 | Road House | Regular | Dropkick an enemy while wearing a mullet |
 | Gambler | Regular | Win all Holotactics matches |
 | Reconnaissance | Regular | Use BD-1 to investigate a target in the distance |
 | Skoova Diving | Hidden | Fill the aquarium in the cantina |
 | Growth Spurt | Regular | Find space for a full garden |
 | Intergalactic Geographic | Regular | Scan every type of enemy to fill out the Tactical Guide |
 | The Jedi Path | Regular | Fully upgrade 3 skill trees |
 | Splurge | Hidden | Purchase all of Doma’s merchandise |
 | Blood, Sweat, and Tears | Regular | Complete all Force Tears |
I based this guide on the list of achievements available on Steam, where I and my team play the game. The Achievements are identical for all platforms, no matter where you play the game.


