This guide will help with completing the Fractured Determination Force Tear in Jedi Survivor. Force Tears are additional challenges you can complete while exploring!
Where to find the Fractured Determination Force Tear
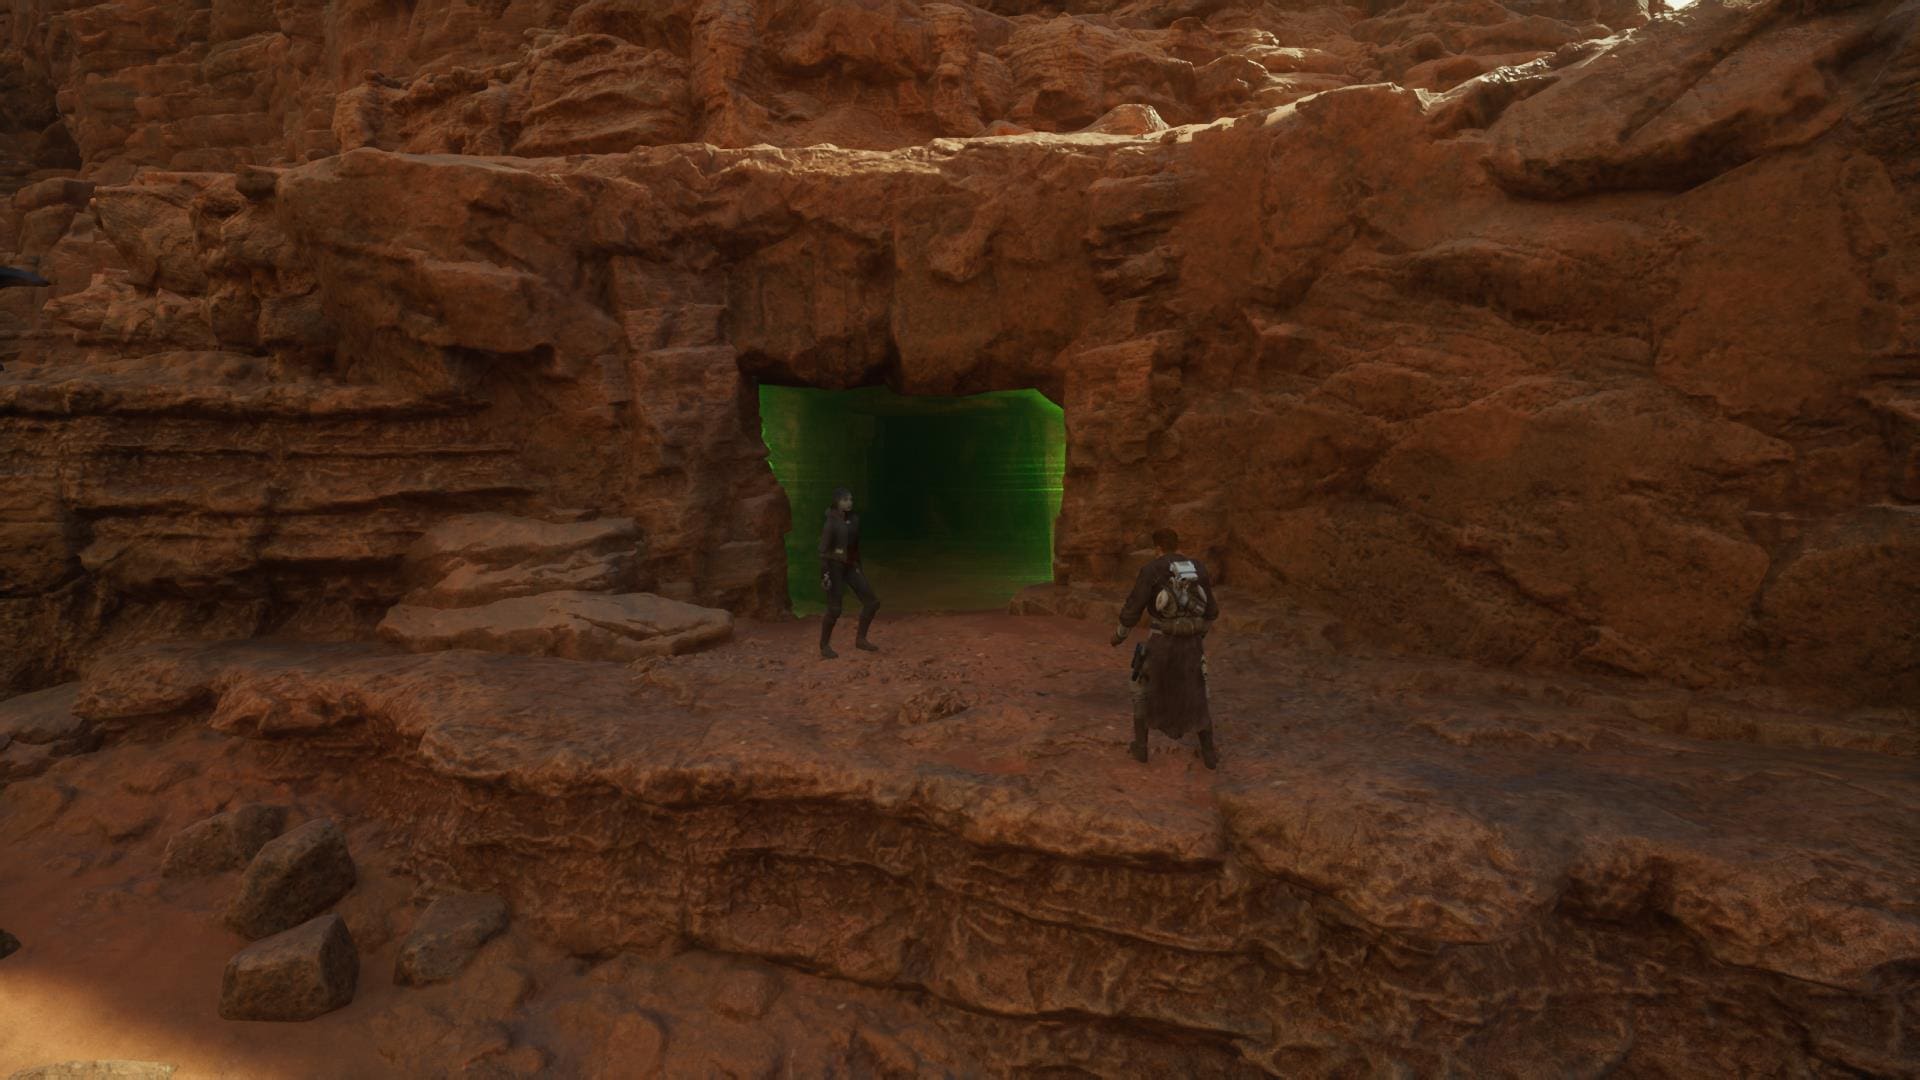
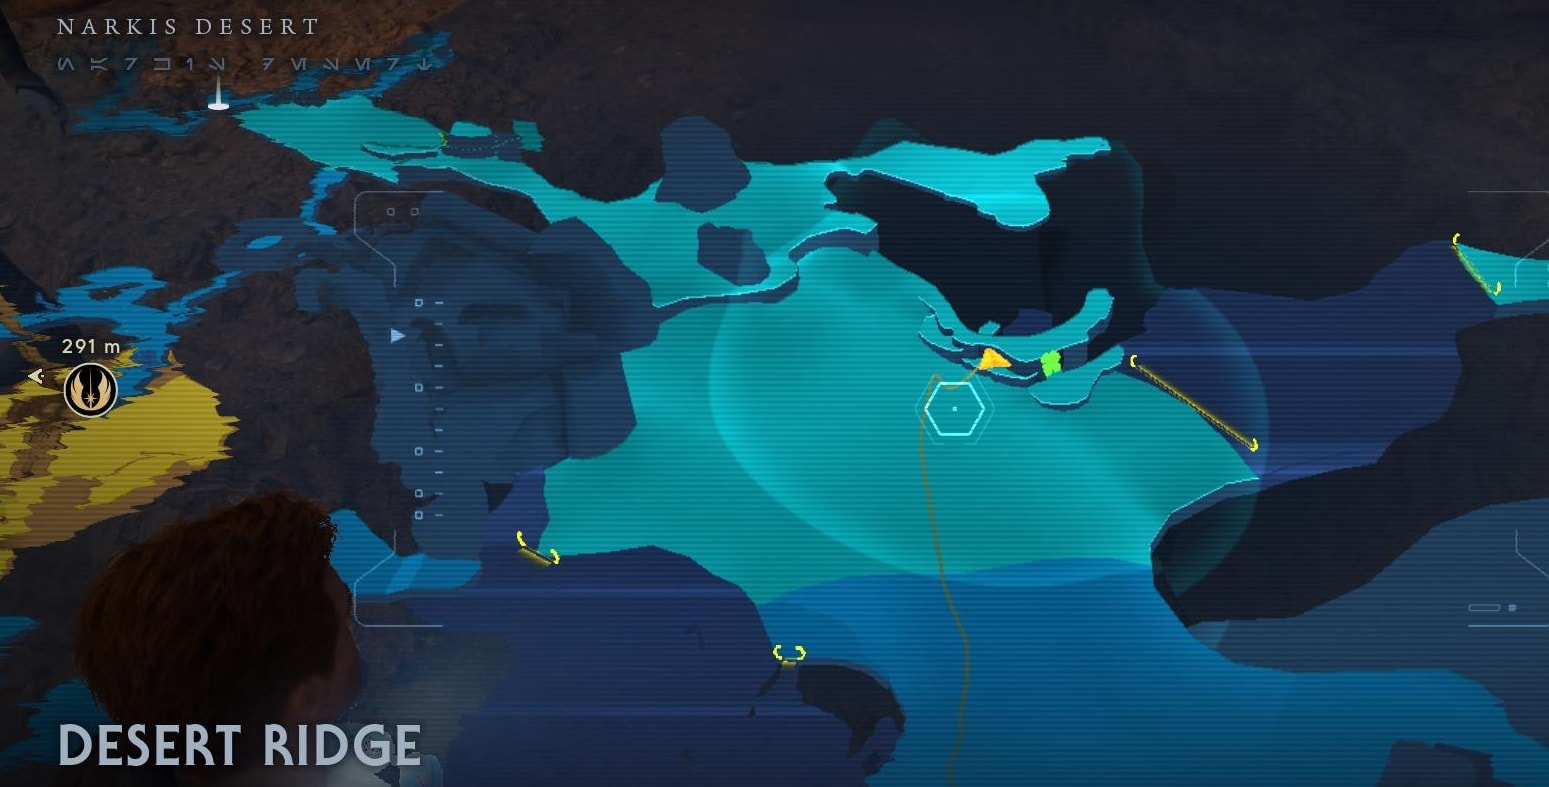
You must head to the Desert Ridge in Narkis Desert. The Meditation Point at Anchorite Base is very close to it. There’s a green barrier in the canyon wall. You’ll be able to see it even from far away.
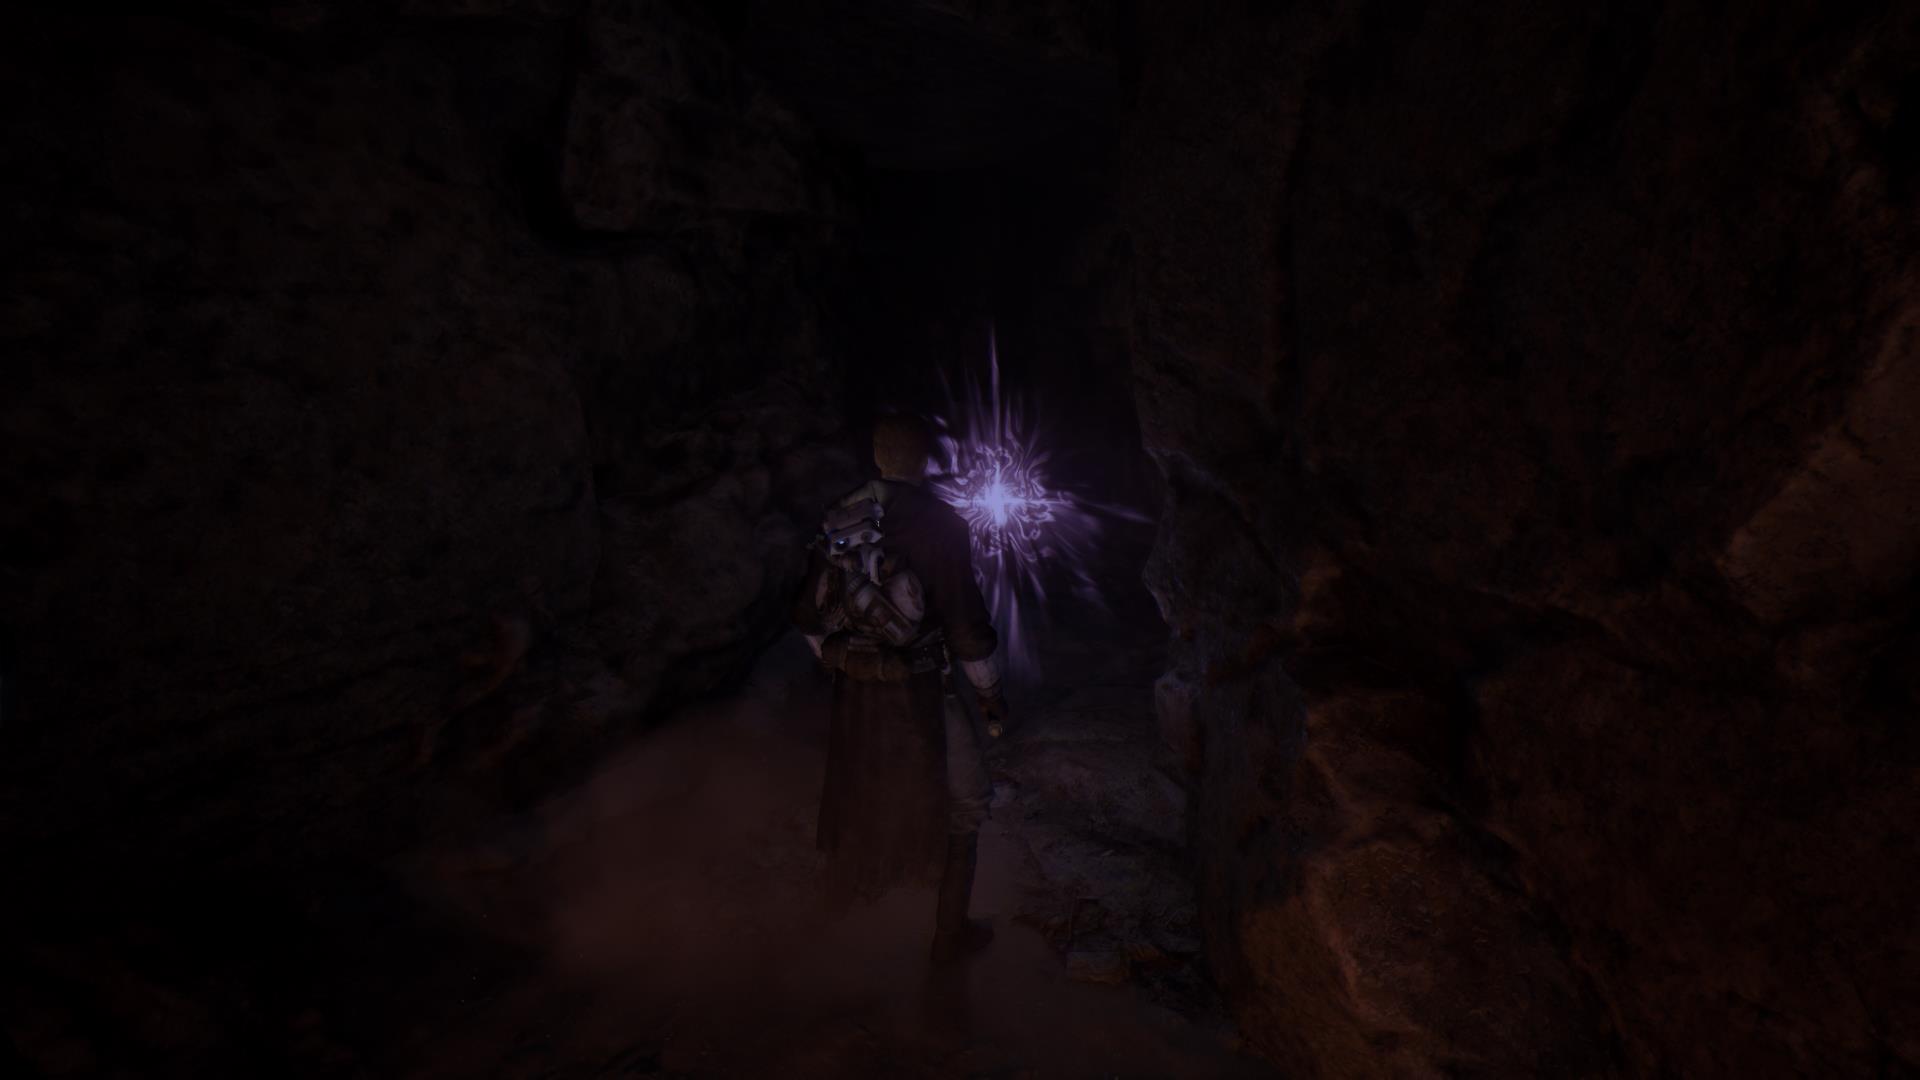
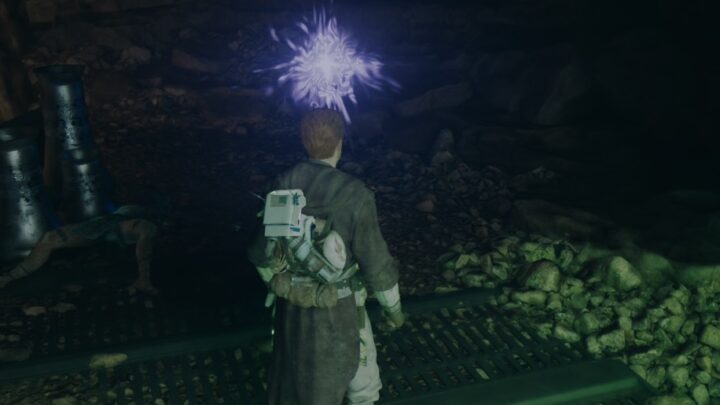
The cave is very dark, just stick to the left wall and you’ll see the Force Tear after a few steps.
Video Walkthrough
Step-by-Step Walkthrough
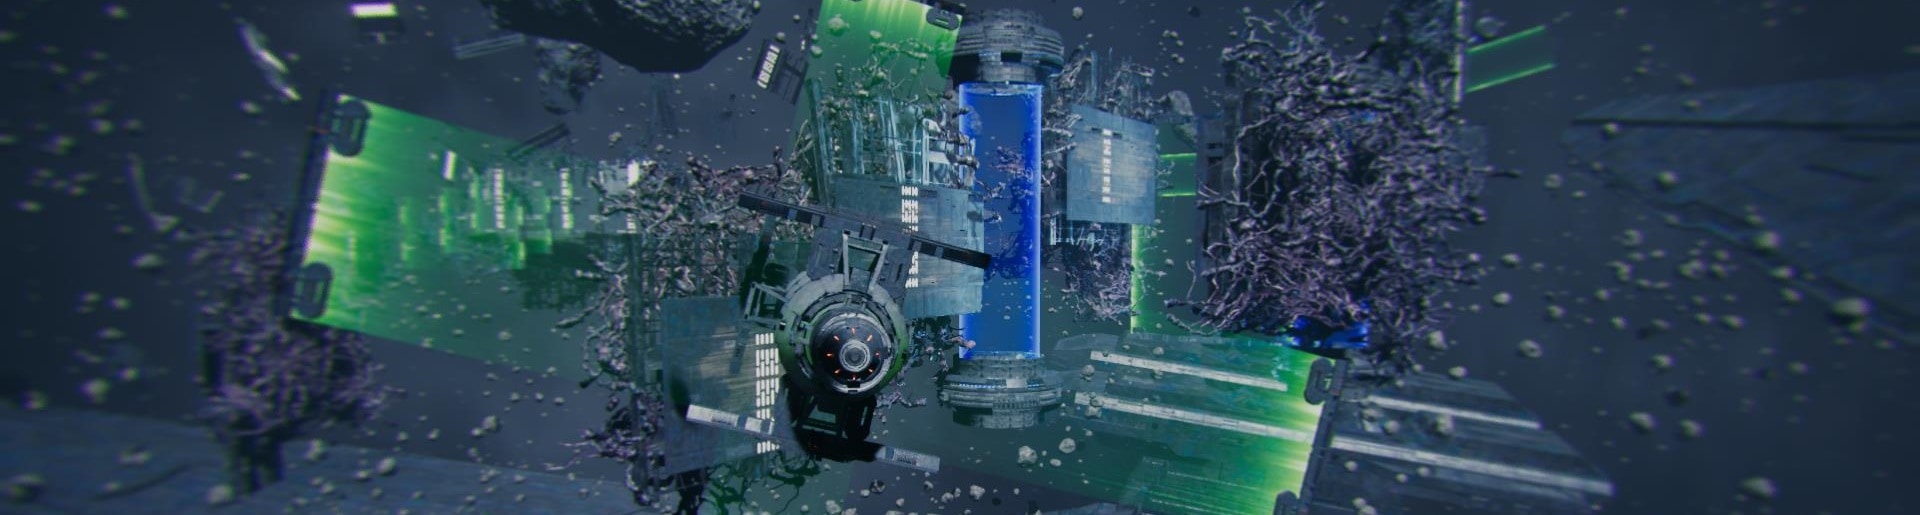
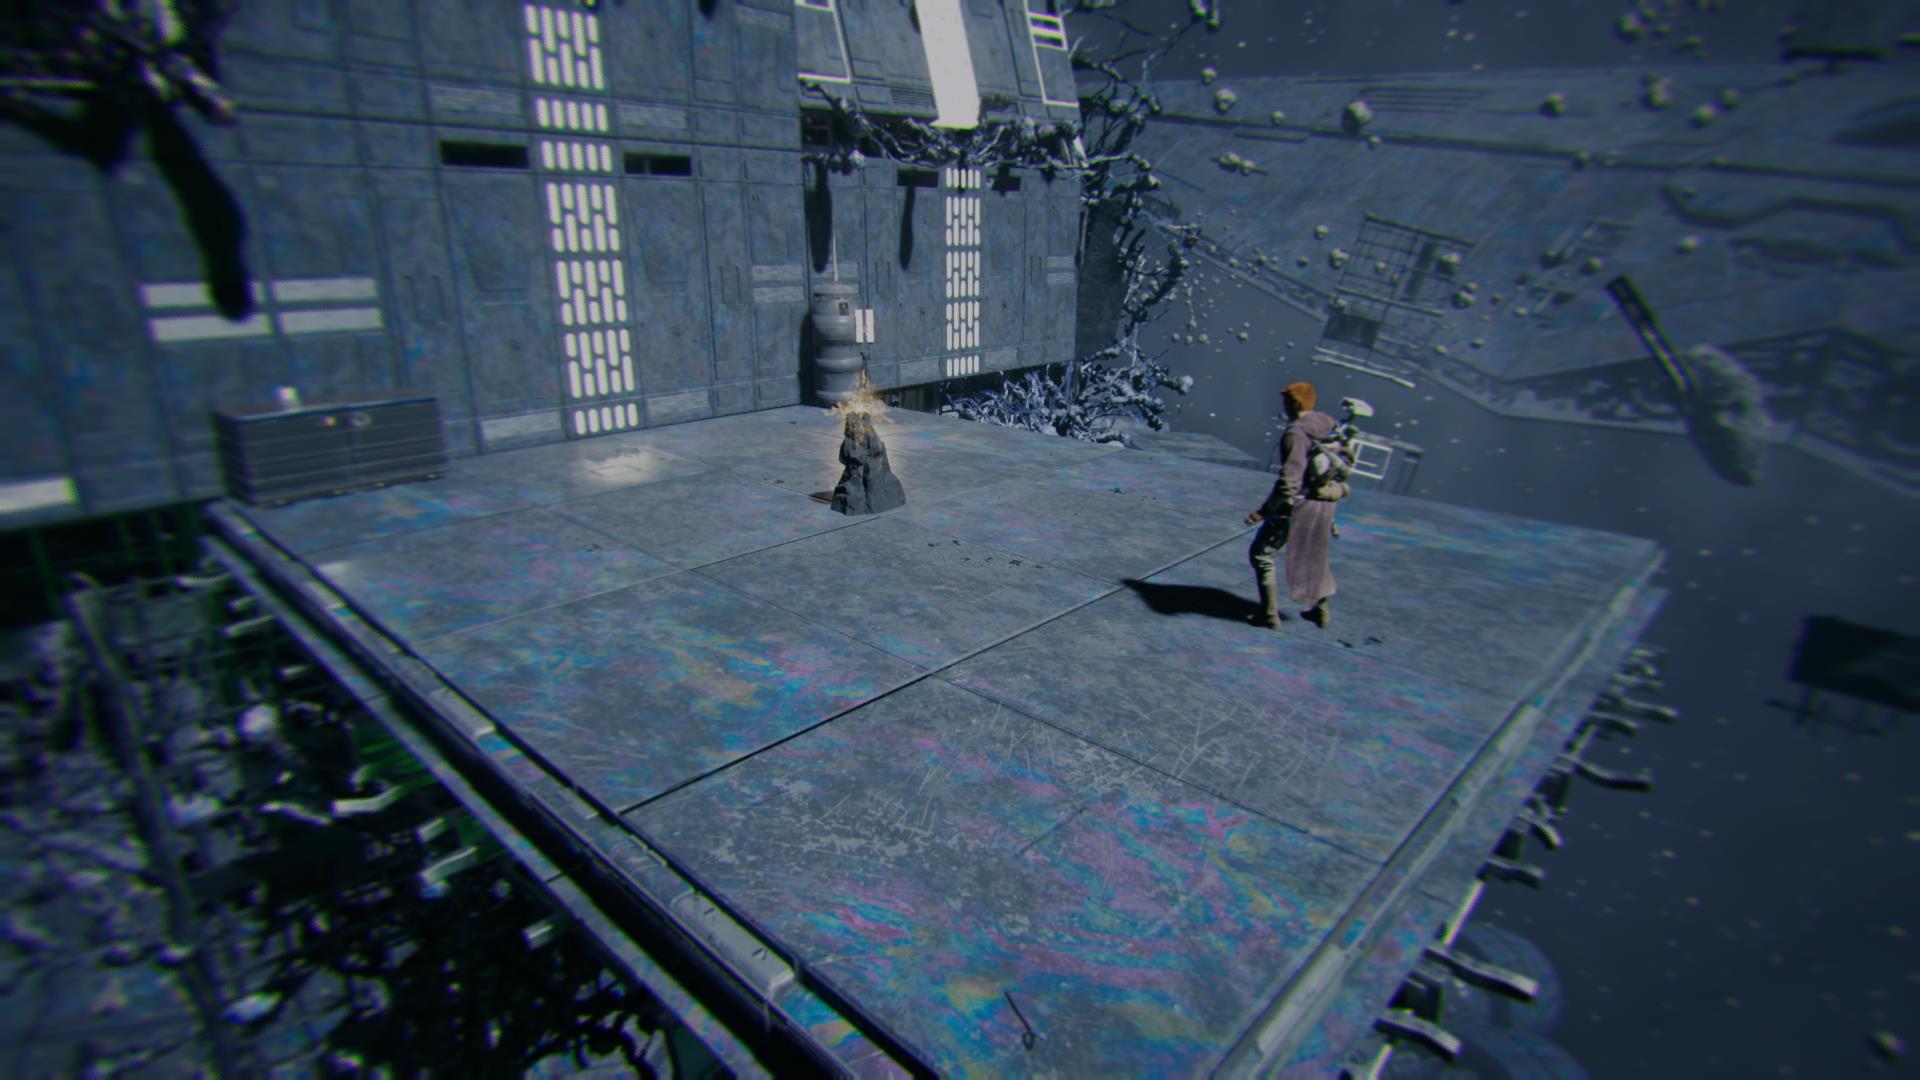
This challenge is pretty fast-paced, once you begin it there will be no moment to stop. Double jumps and mid-air dashes done with precision and determination will make this a lot easier.
The first thing that you will do is a double jump and then dash through the moving barrier. It is important to do the double jump because the next barrier is higher than the first one. If you don’t do this, it will be impossible to reach it.
After going through the second barrier you must get to the wall. Remember that every time you cross a barrier, your second jump and mid-air dash are reset.
Continue for a few steps and jump to the second wall before you reach the blue laser. It’s just as deadly as the red barrier from other fractured challenges.
Repeat the process and get to the next wall. Keep in mind that every wall is higher than the previous one. Using your second jump to reach the required height will prevent you from falling into the abyss.
Your next objective is a static barrier, this shouldn’t be hard to reach. Try to always stay in the center of every barrier.
Use your second jump and mid-air dash to reach a vertical barrier. Remember that gaining height is critical throughout this challenge.
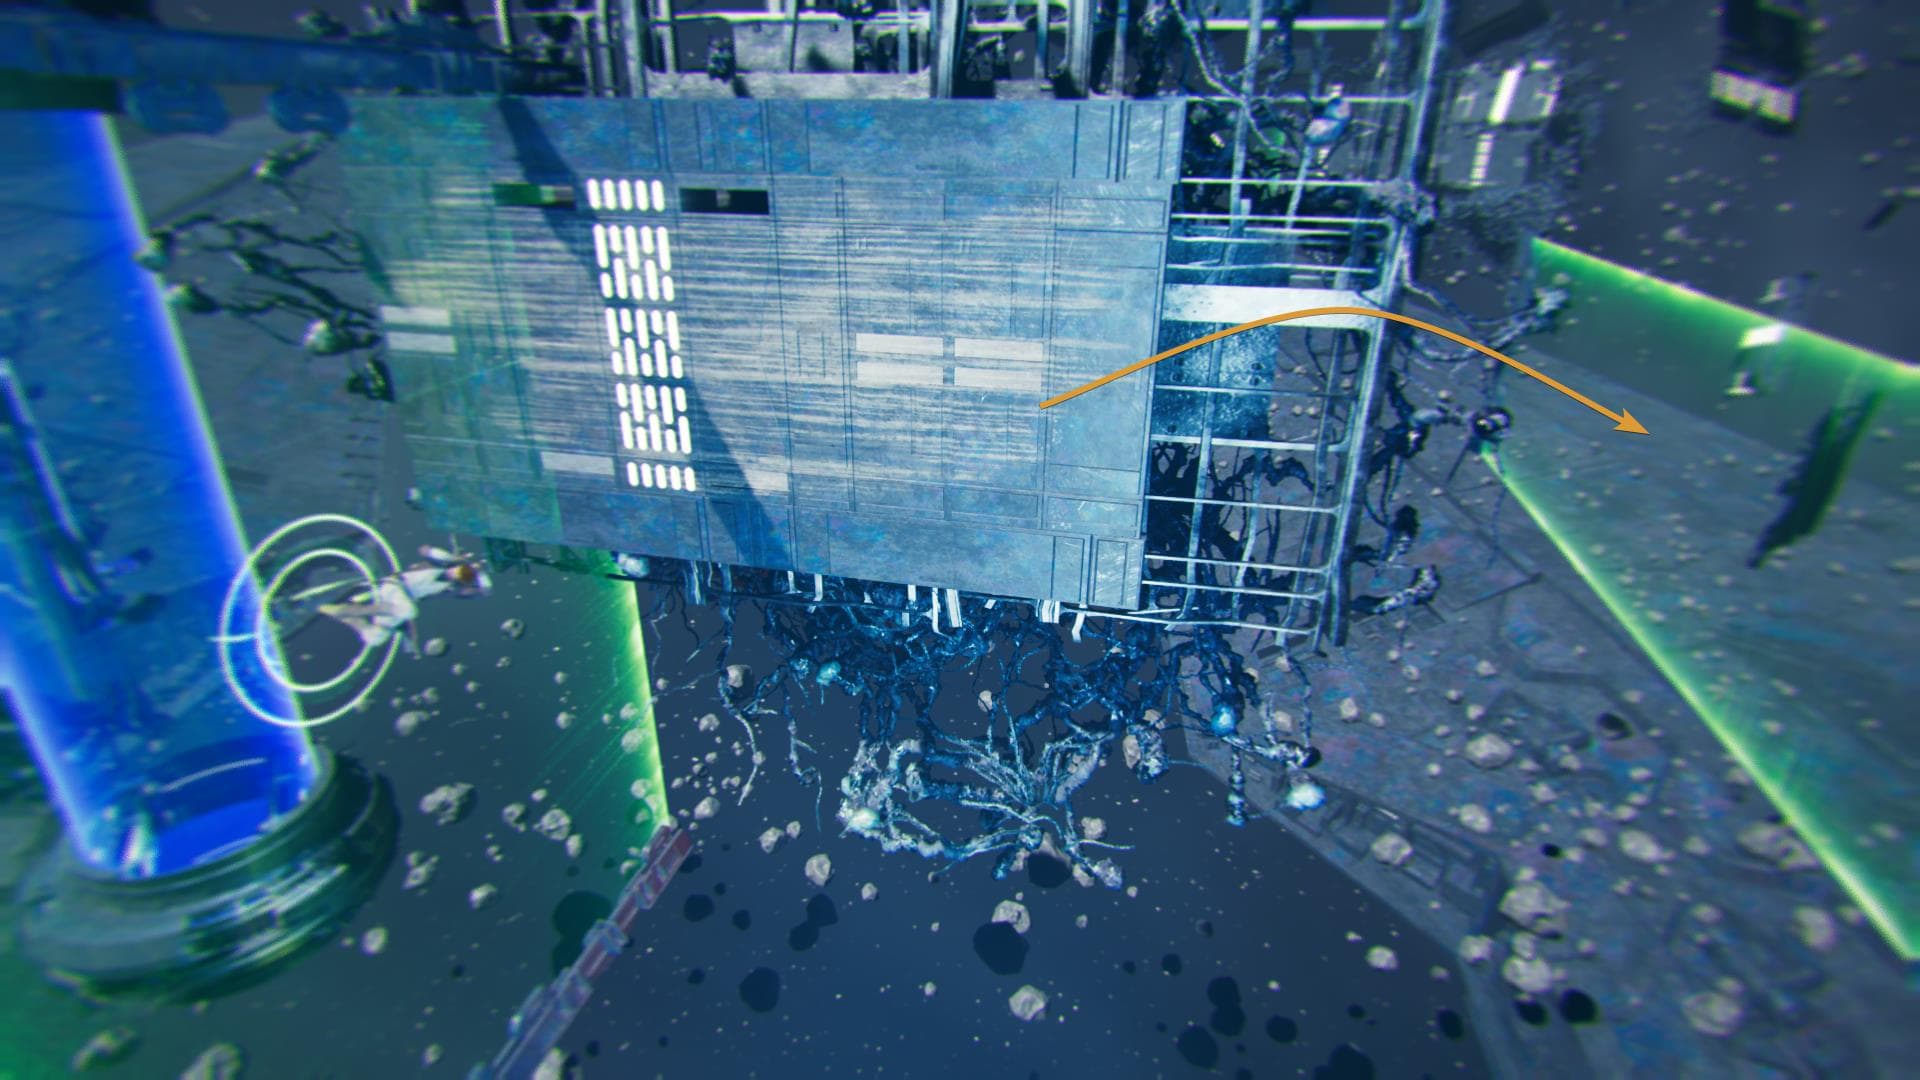
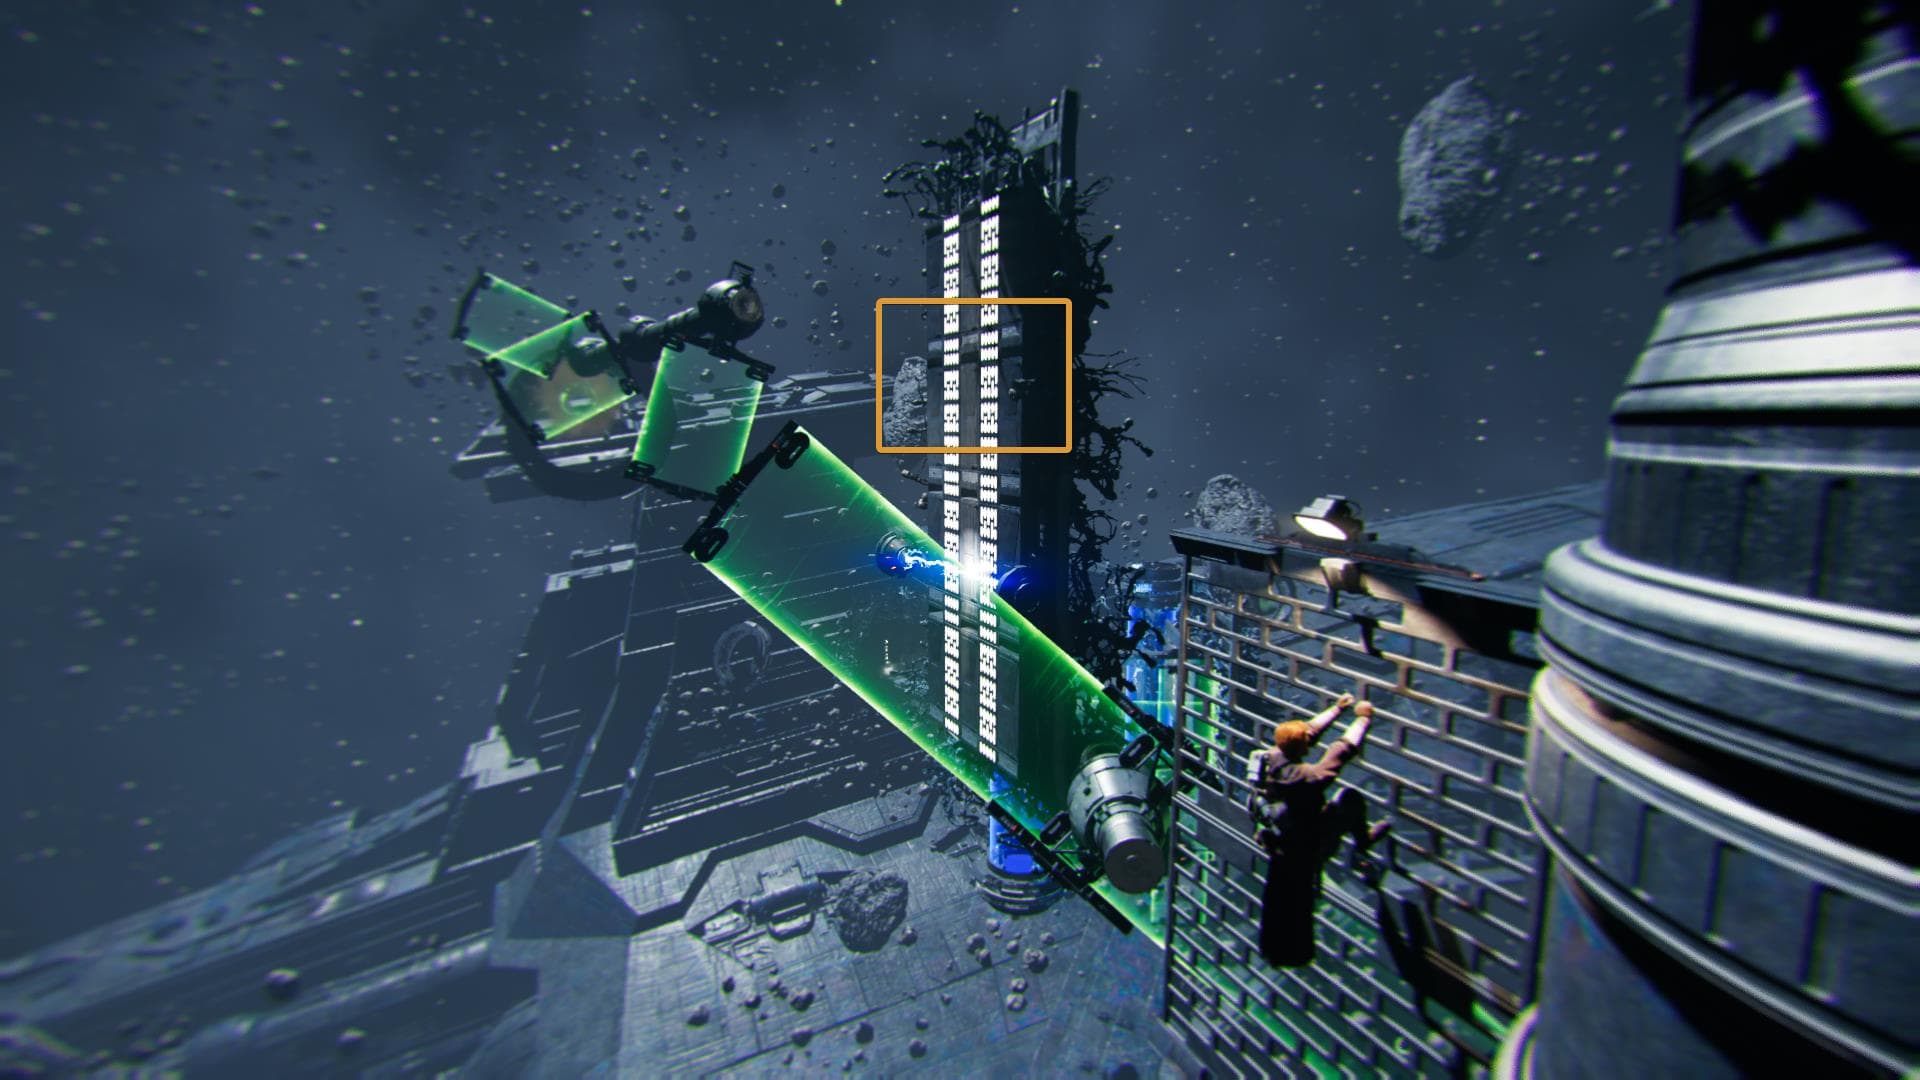
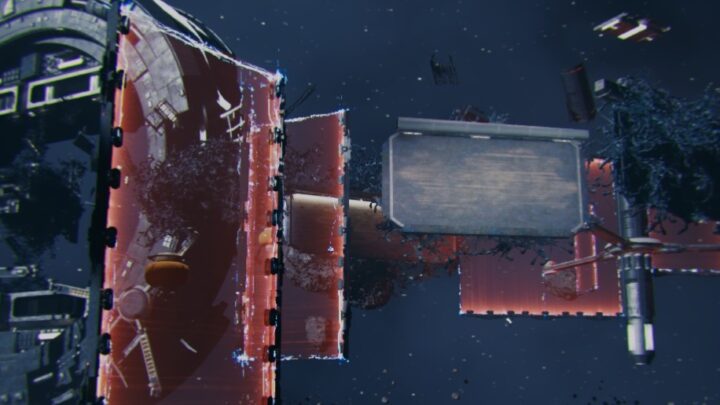
You’ll end up hanging in this tube. Do not jump right away! Wait until the moving barrier is aligned with the marked wall in the image below, as this is where you’re heading next.
As soon as you grab onto the wall, the entire structure will spin clockwise. Do not attempt to do anything while this happens.
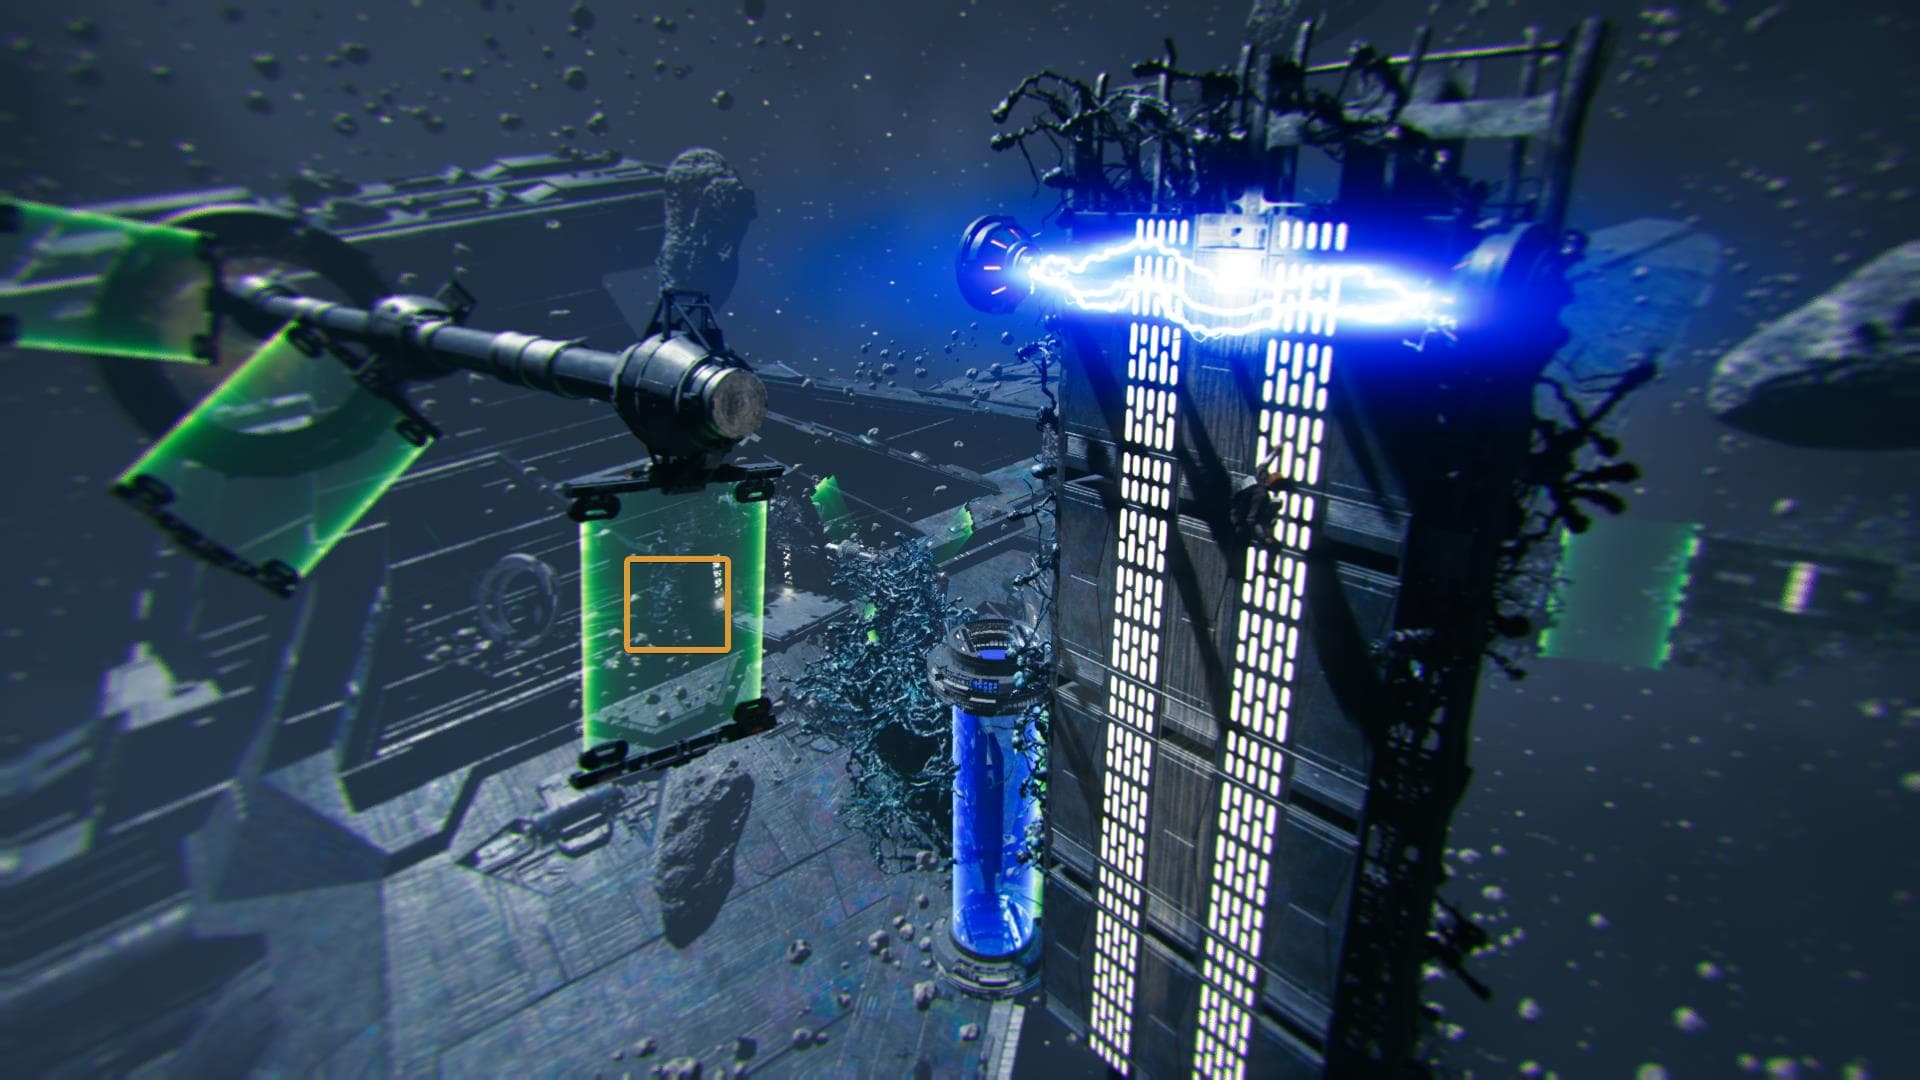
After it’s done spinning, move to the right and prepare to jump. Just like before, you must go through the barrier. The wall where you’ll land has an electric beam that moves up, keep this in mind before jumping. Try to land close to the marked area below.
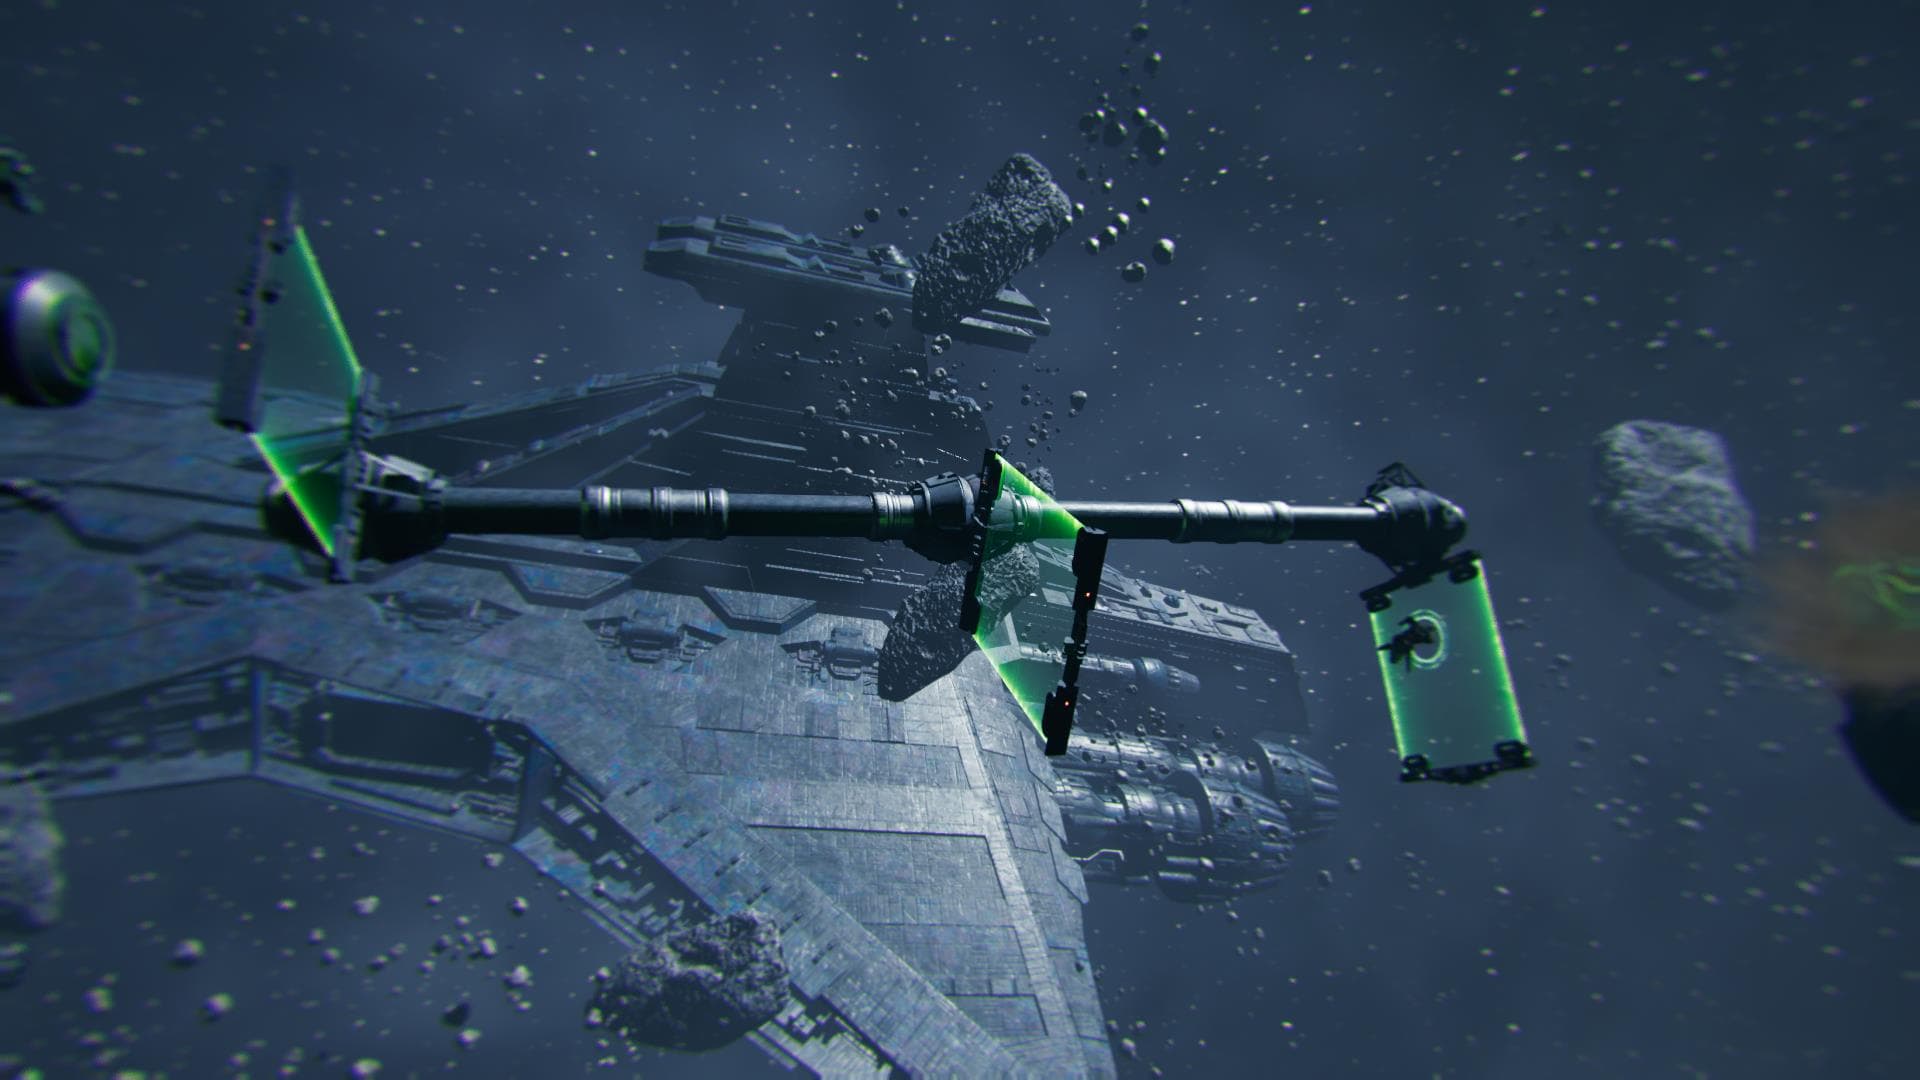
This is by far the hardest part of the challenge. Not only because you have to go through three barriers that are all moving, but because sometimes when jumping from here the camera doesn’t center so the perspective makes it a lot harder to go in the right direction. Aim to the center of each barrier, this will make it easier to correct the mid-air trajectory (if needed).
This part might take you a couple of tries but with patience, good timing, and a little practice you’ll get it.
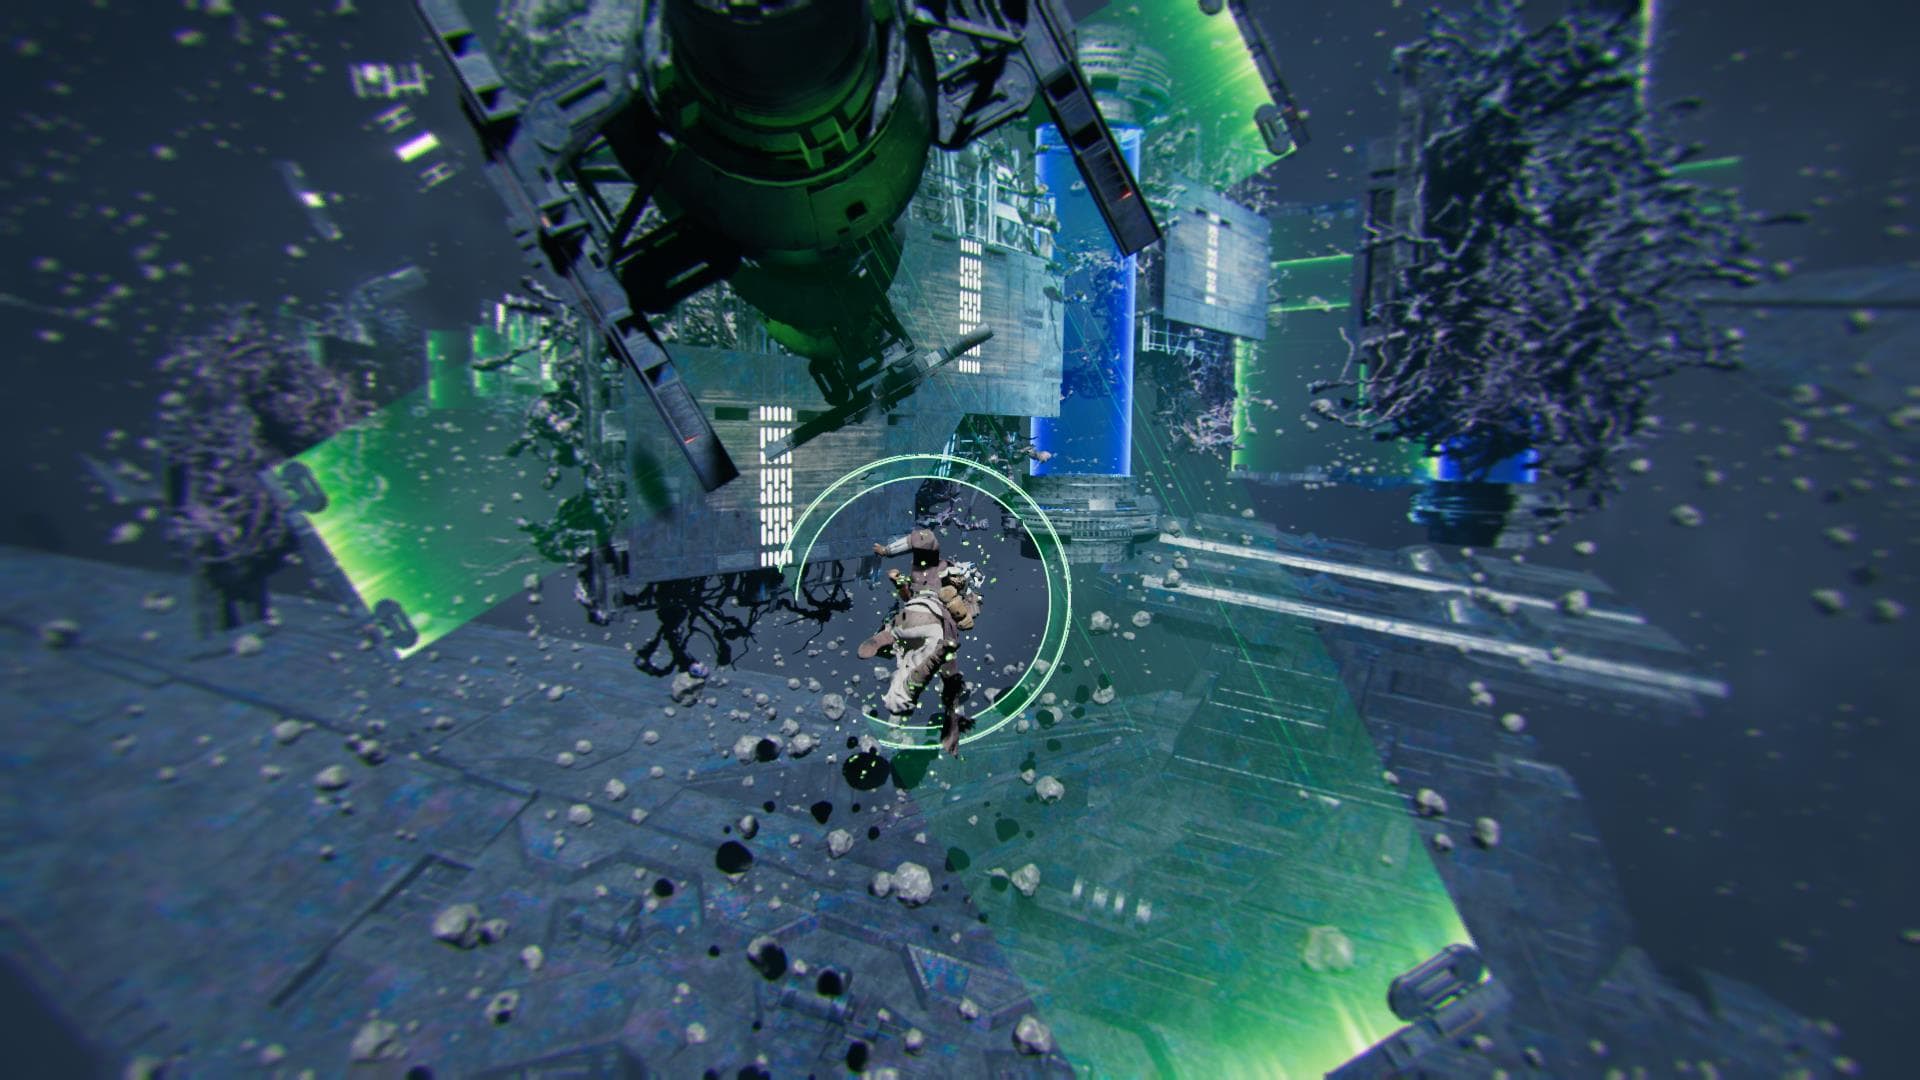
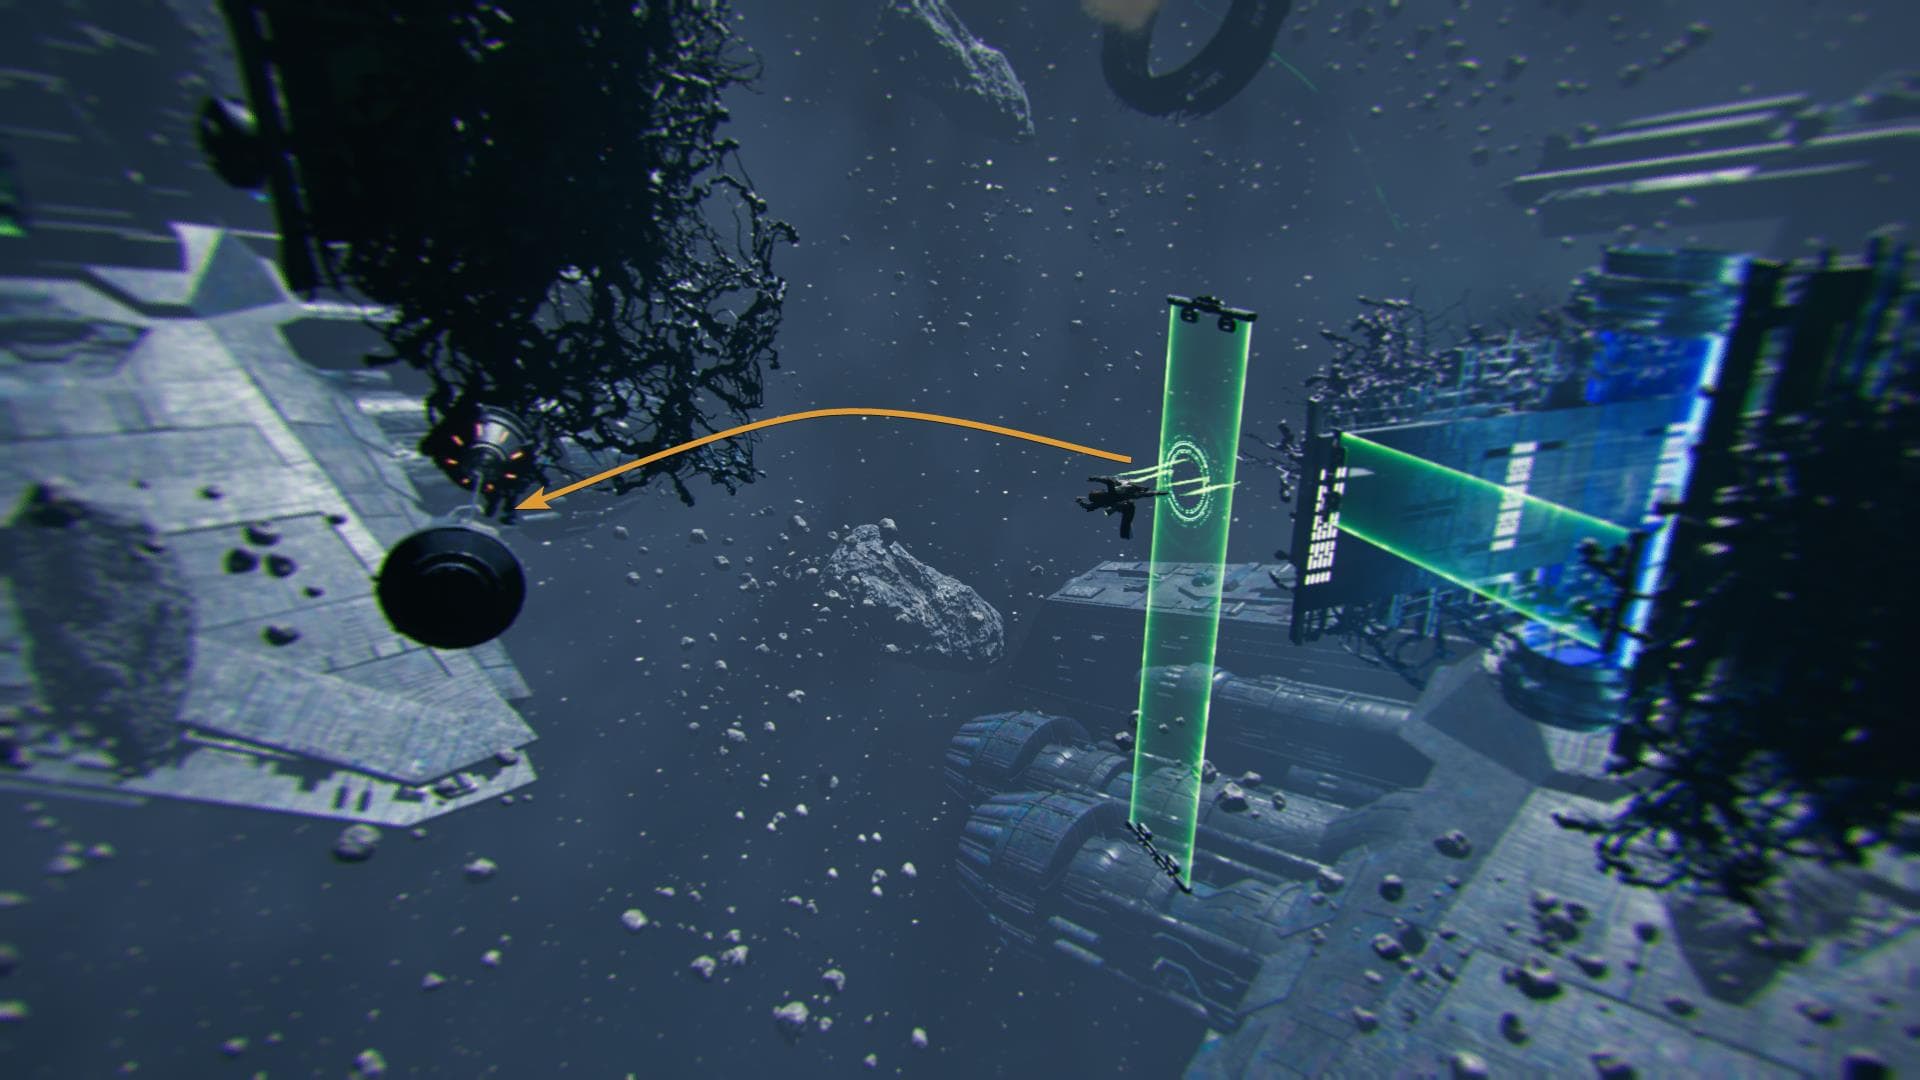
After the third barrier, you’re going to notice that there is no wall or barrier to head. Instead, you must get into this portal. It is just like the one you used during the fight with the giant drill on Jedha.
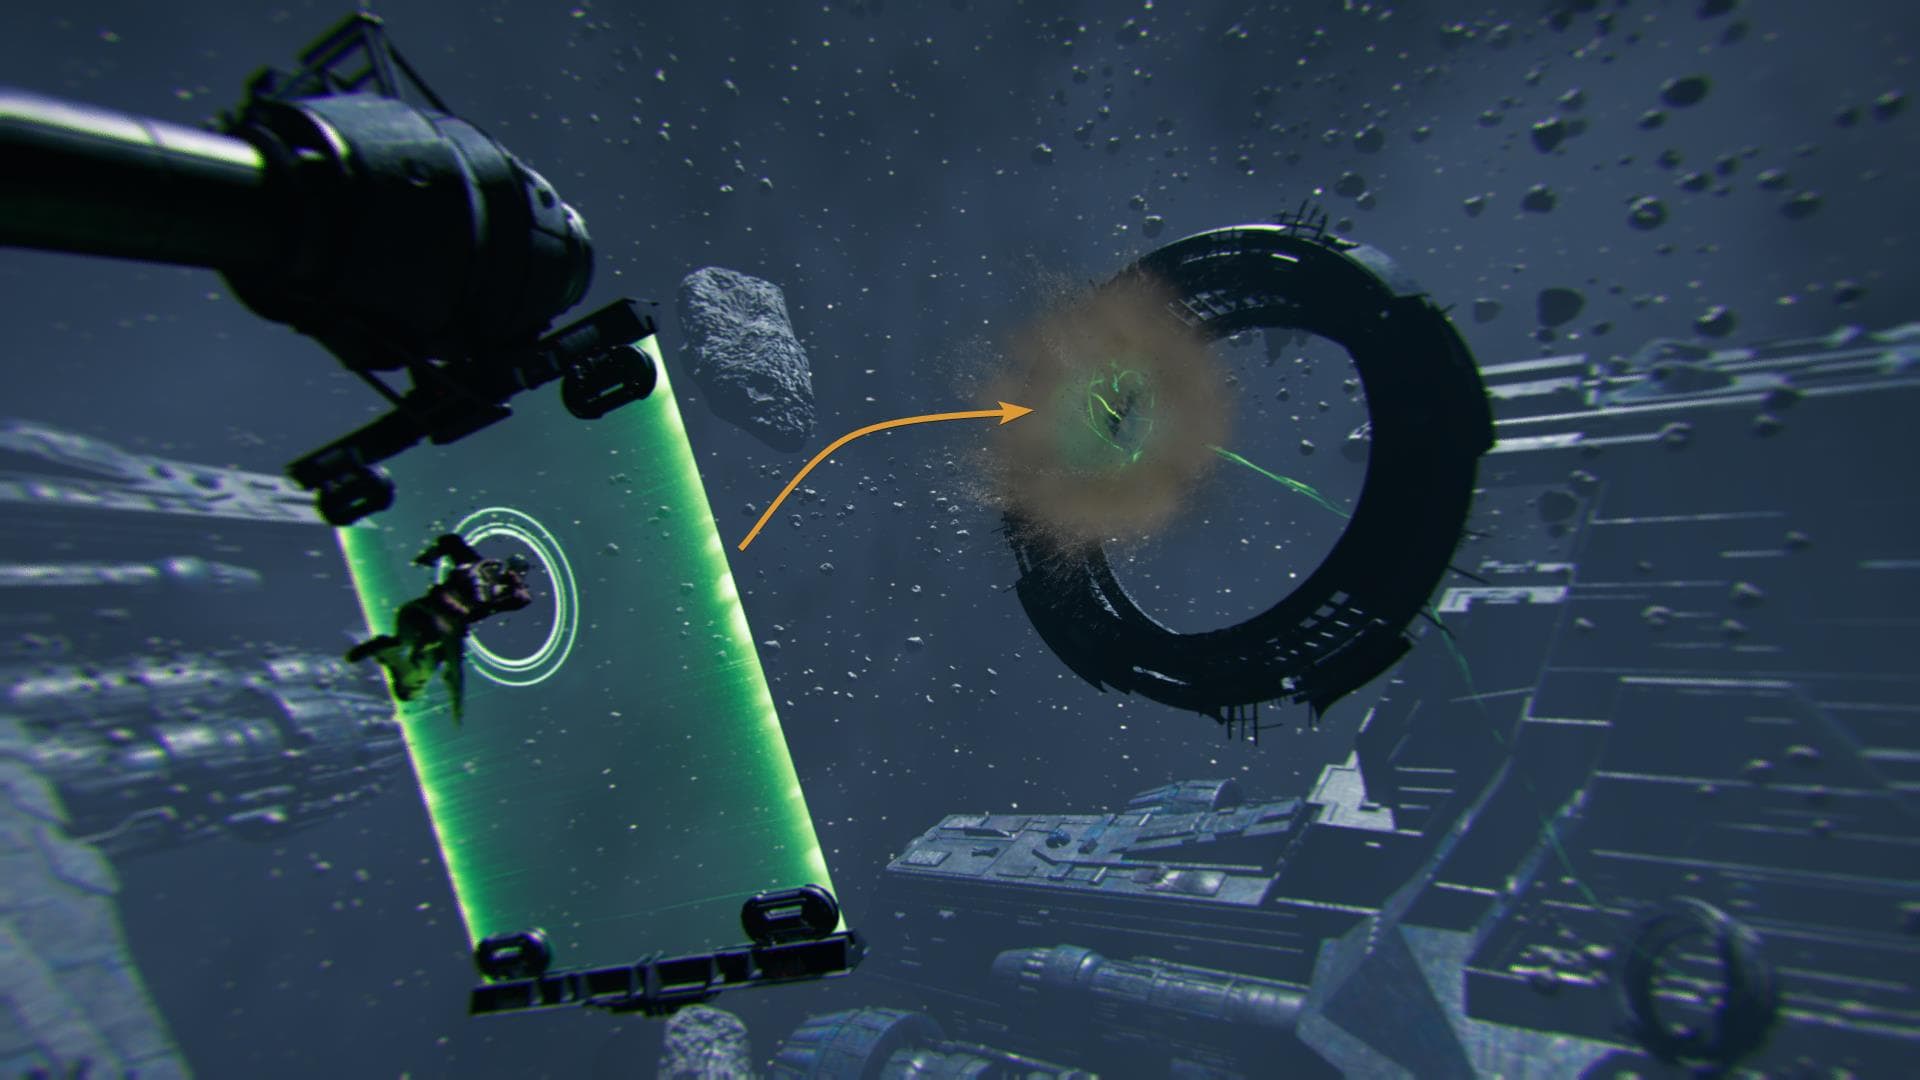
This will last for five seconds only, be ready to continue with the last part of the challenge.
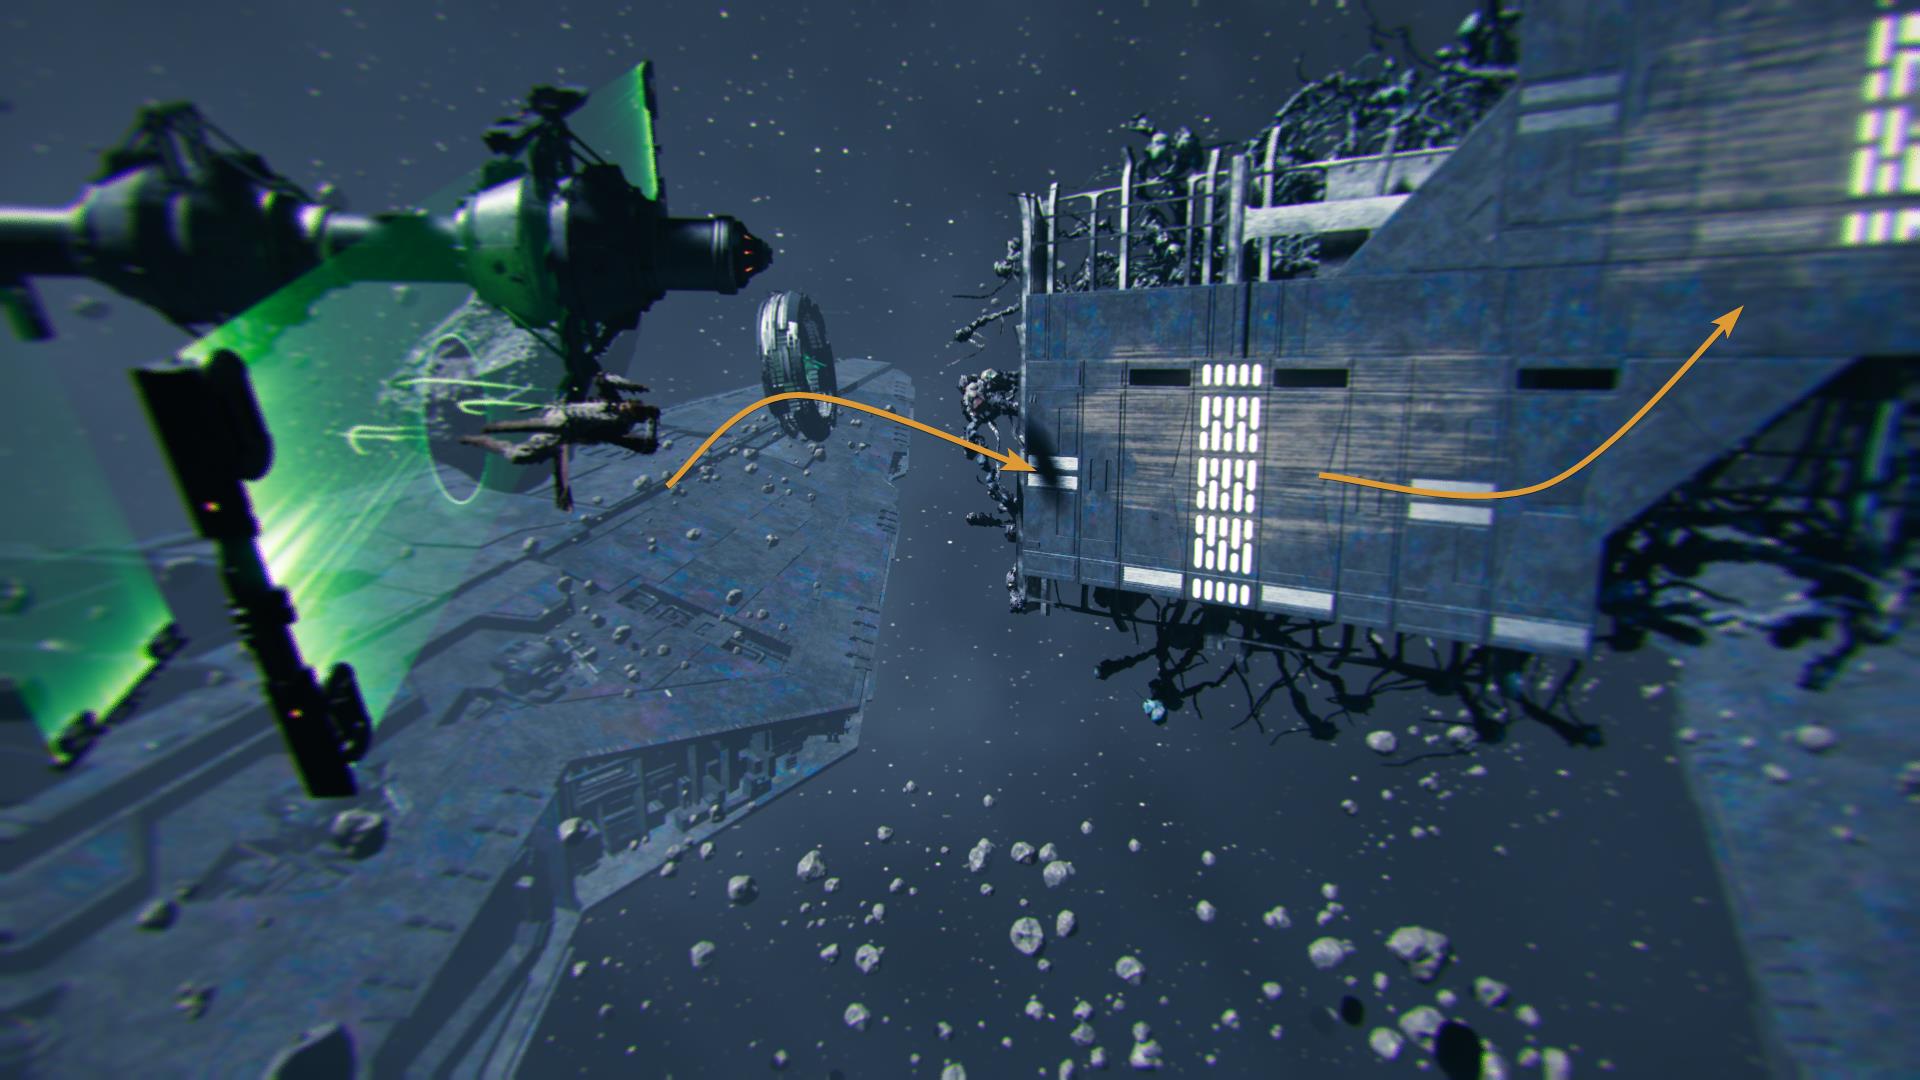
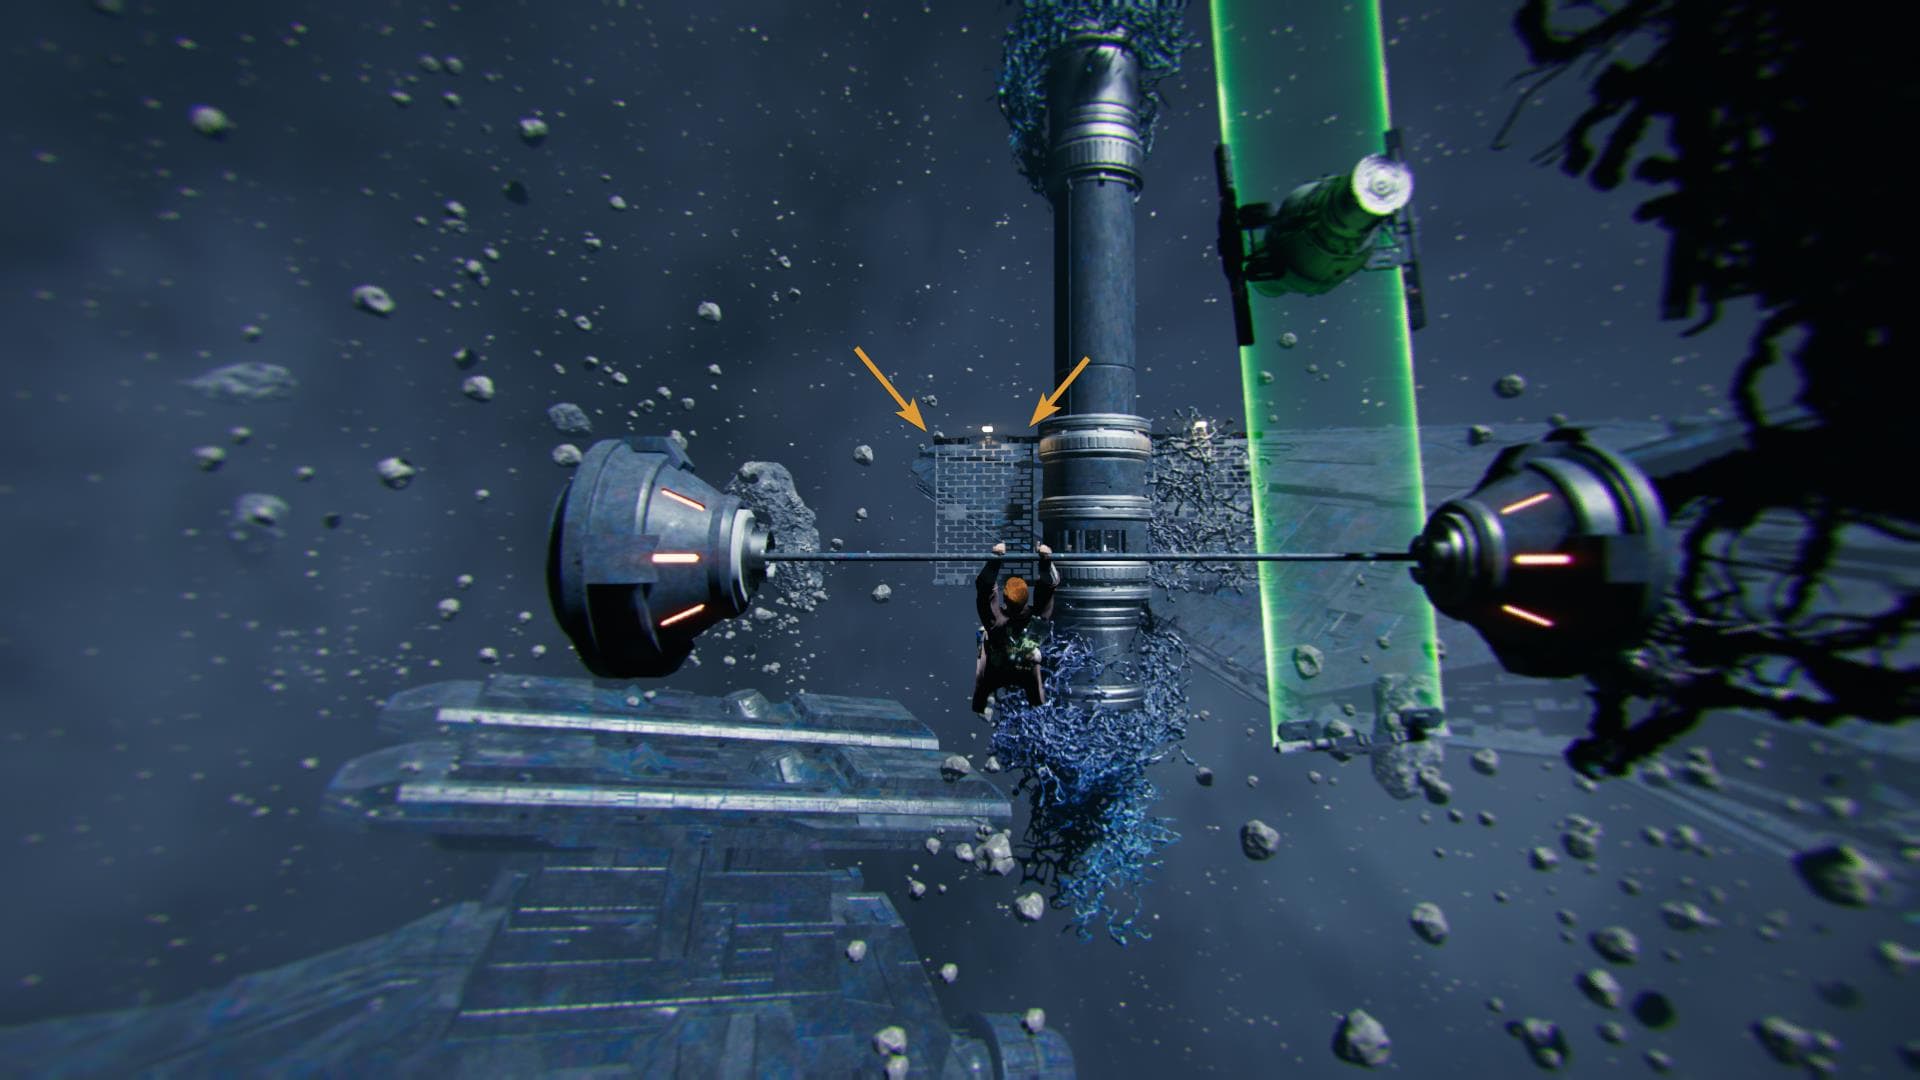
As soon as you come out, dash to the wall on the right. Do a double jump to gain height and then dash through the barrier, do another double jump to reposition yourself and a mid-air dash to land on the wall.
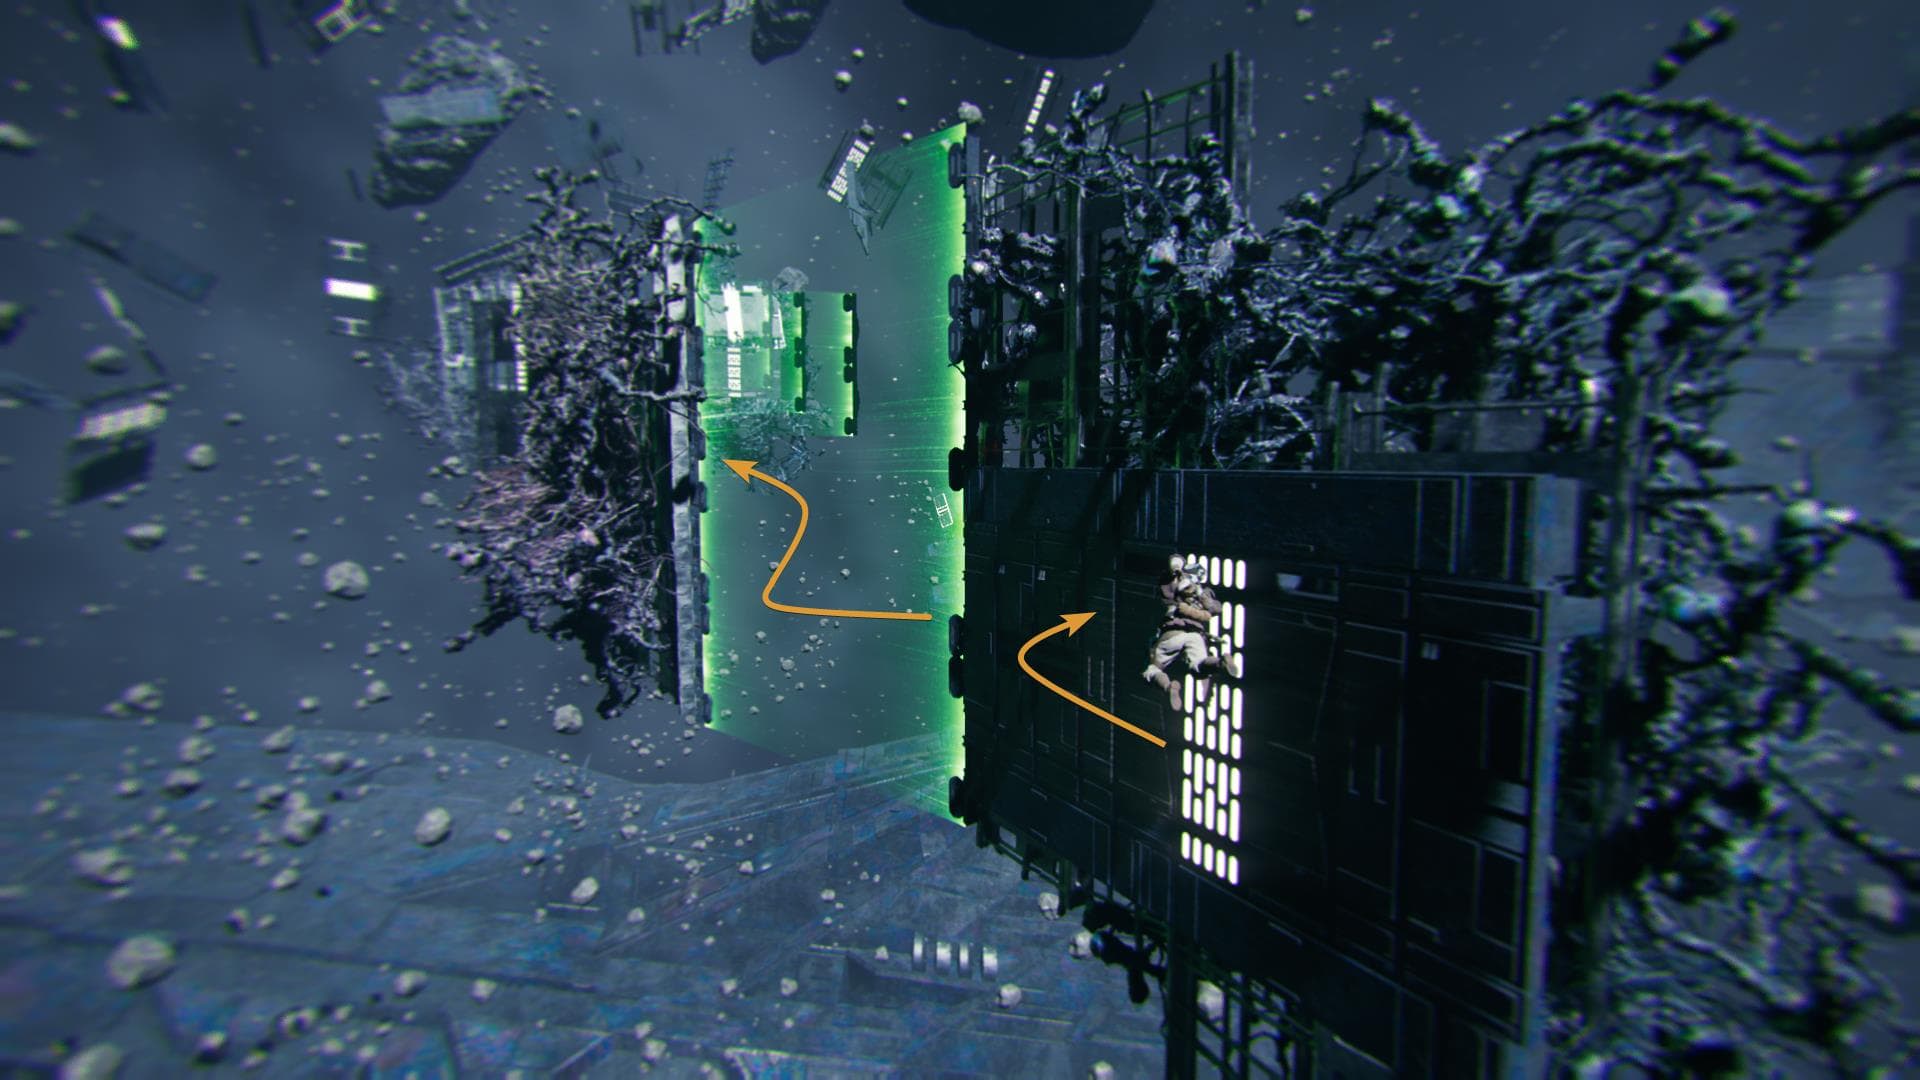
This image with the above perspective makes it easier to understand.

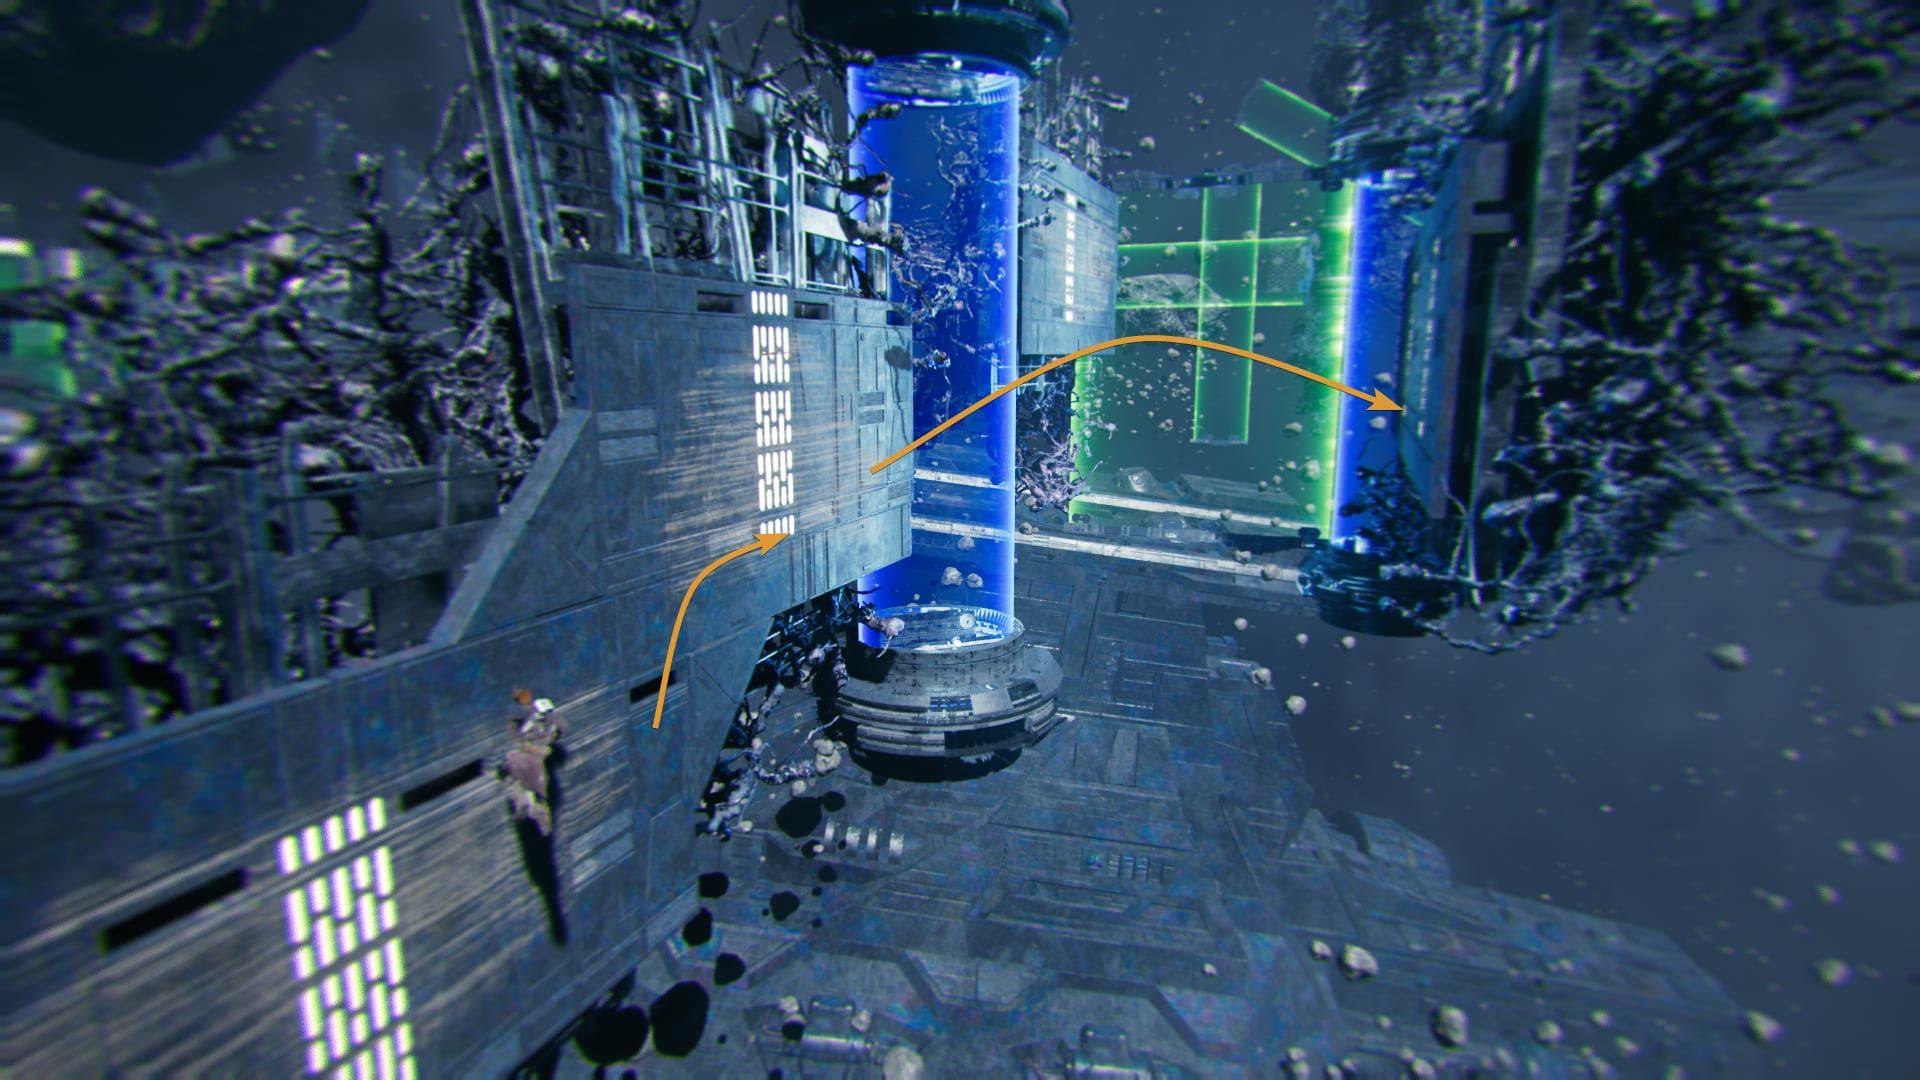
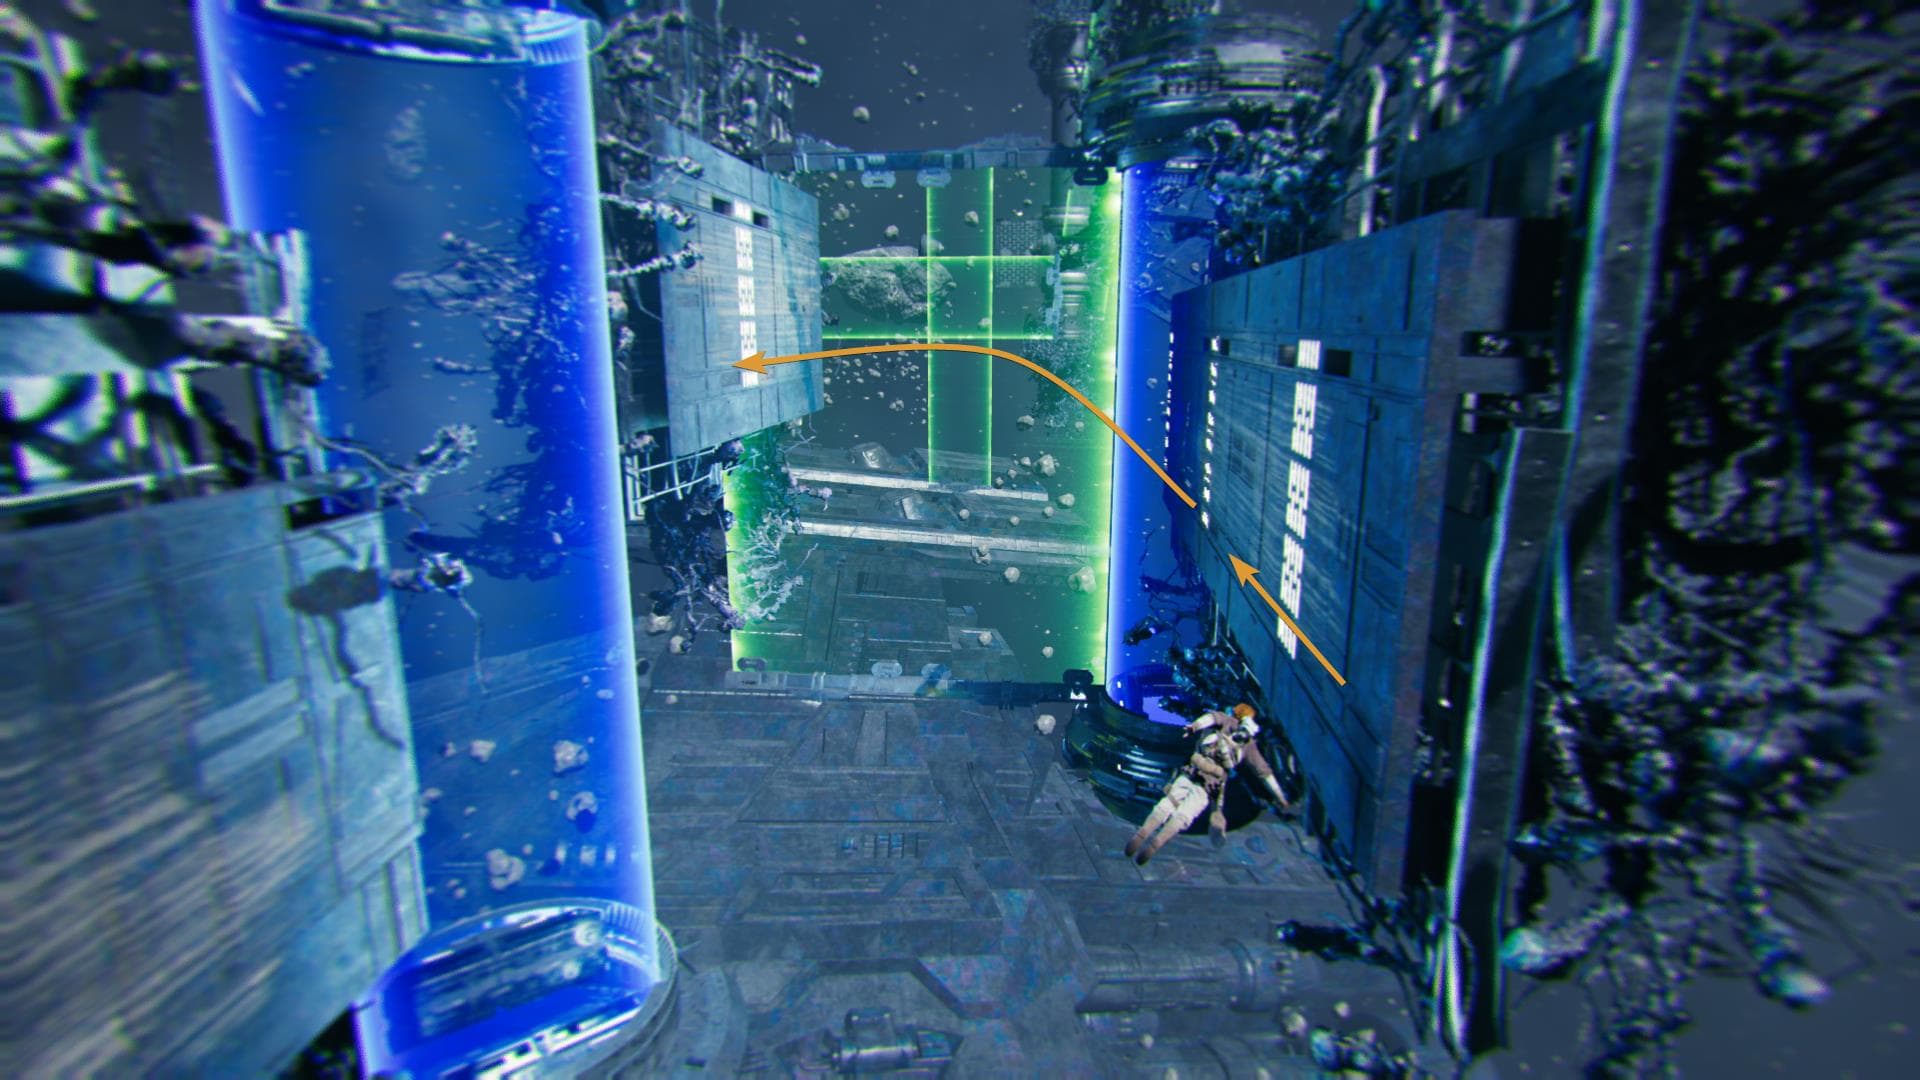
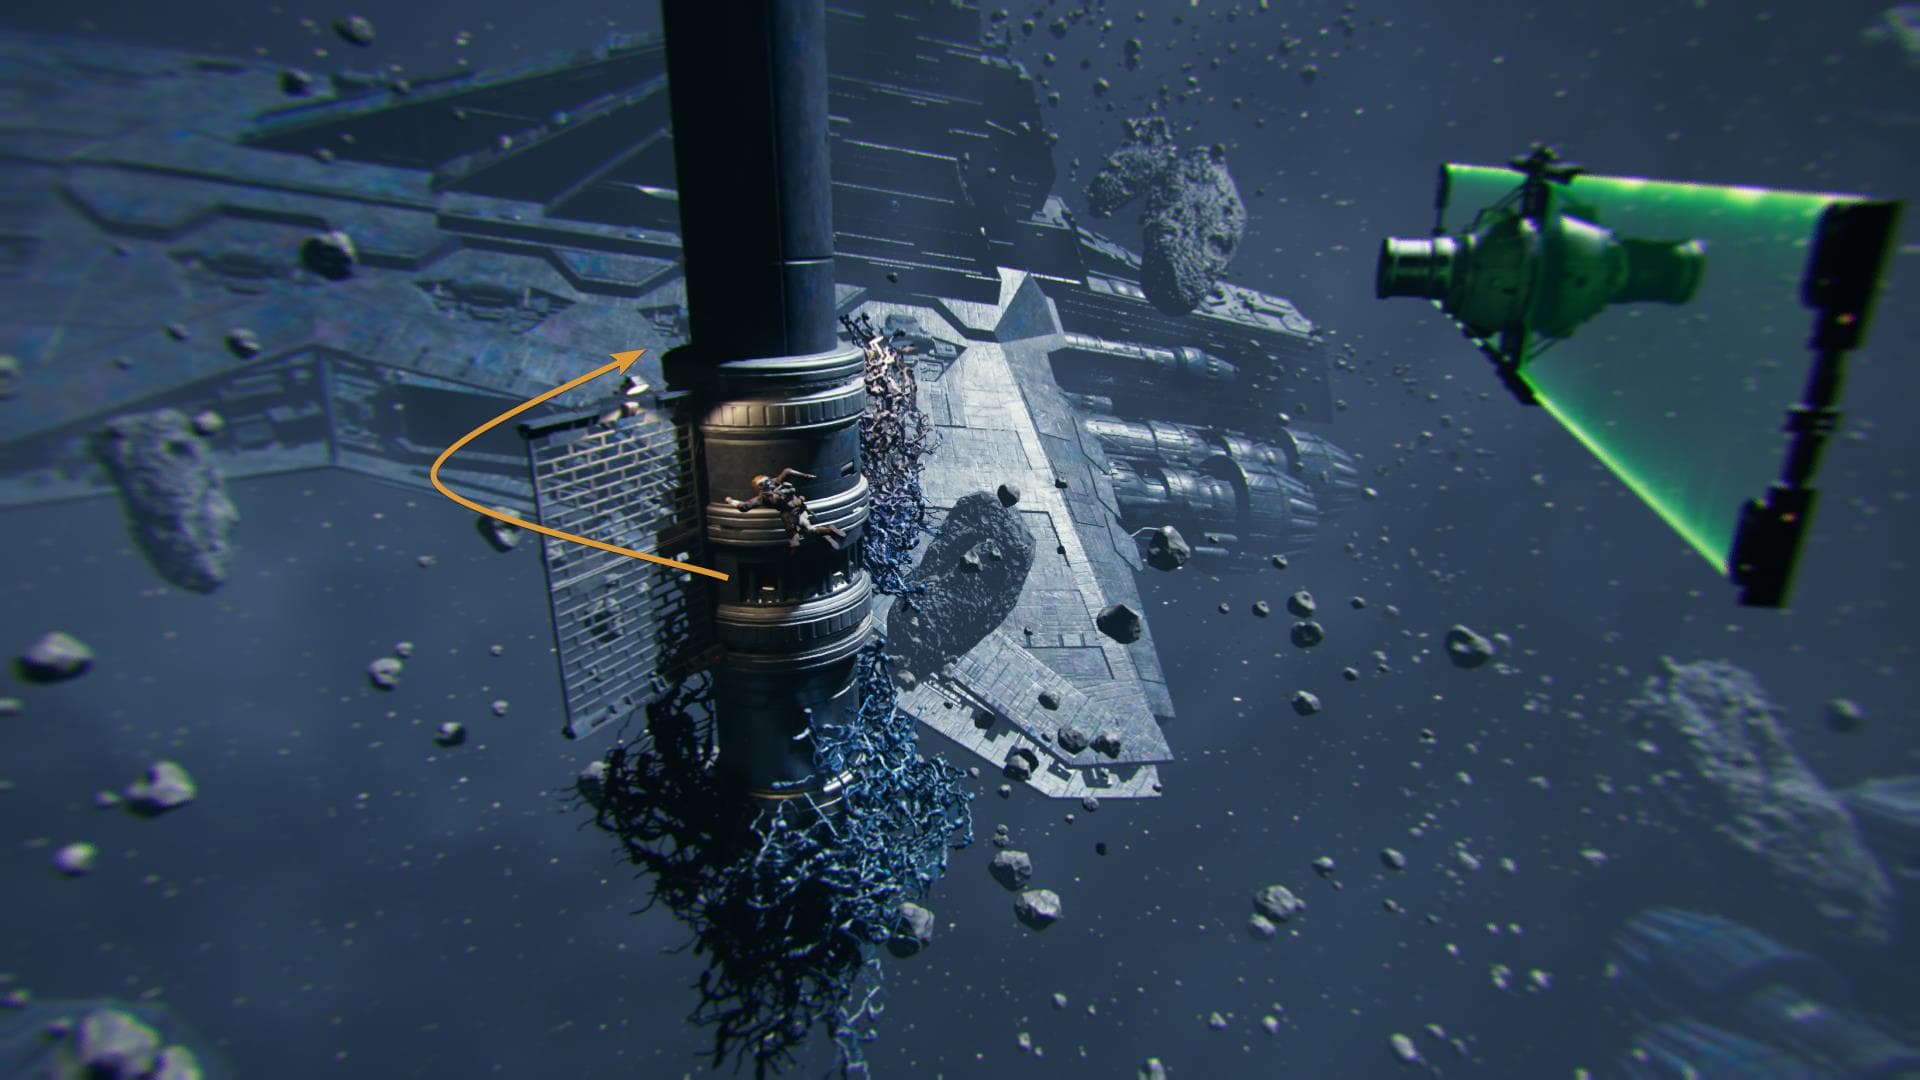
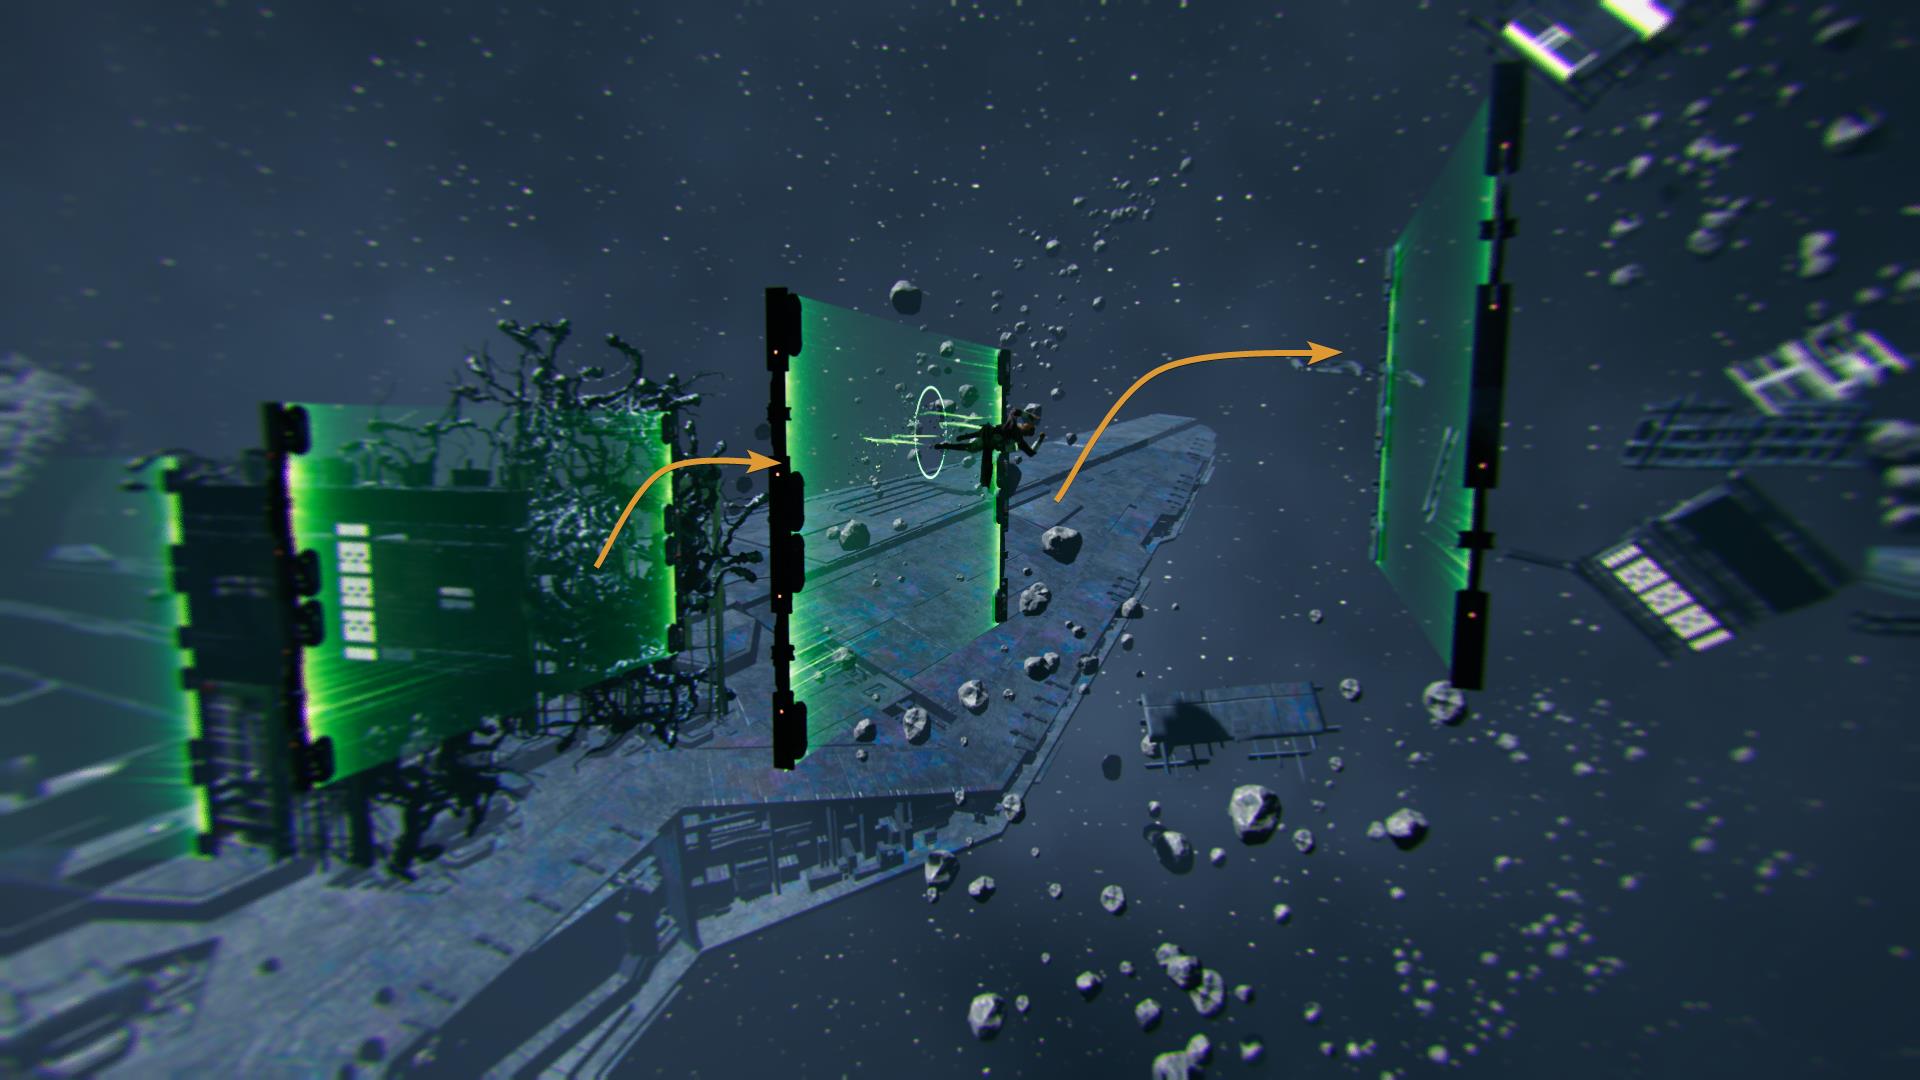
After that last wall, you will have to go through another triple-barrier obstacle. But don’t worry, these are static.
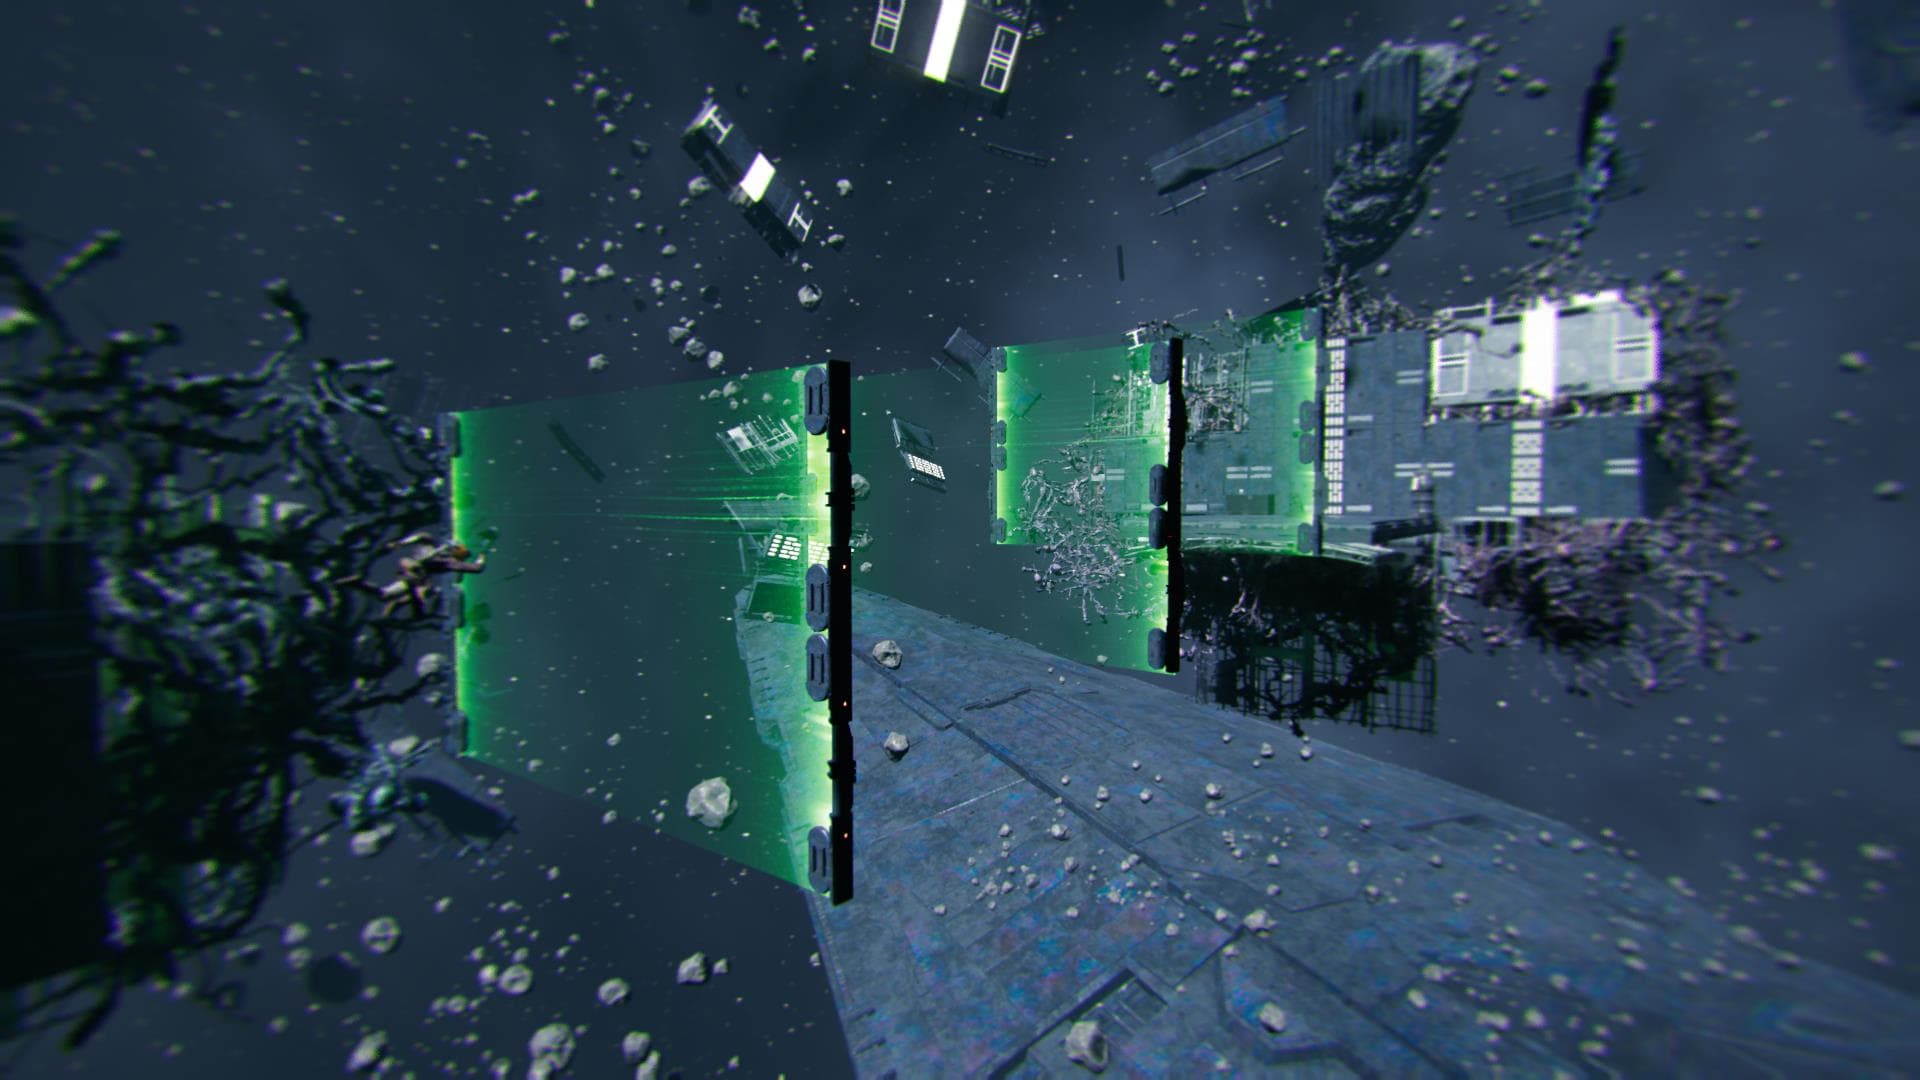
Despite being the last (and arguably easiest) part, you still need to gain height in order to perform the final jump.
You have now completed the Fractured Determination Force Tear challenge! The reward for completing the challenge is a Skill Point. This is one of many Skill Points locations in Jedi Survivor!
This concludes my guide on how to find and complete the Fractured Determination Force Tear in Jedi Survivor.
If you’re looking to acquire additional Skill Points quickly, check out our How to Farm Skill Points Faster in Jedi Survivor guide. This is a brief guide that details a number of early and readily accessible XP farming locations to help you unlock upgrades faster.
All Jedi Survivor Fractured Force Tears Locations Guide
This guide will show you where to find and how to access each one of the Fractured Force Tears in Star Wars Jedi Survivor. We also have full guides to solving the puzzles you must complete. All Fractured Force Tears grant an additional skill point when completed.
Jedi Survivor Fractured Resolve Force Tear Guide
This guide will help with completing the Fractured Resolve Force Tear in Jedi Survivor. Force Tears are additional challenges you can complete while exploring!
Jedi Survivor Fractured Momentum Force Tear Guide
This guide will help with completing the Fractured Momentum Force Tear in Jedi Survivor. Force Tears are additional challenges you can complete while exploring!
Jedi Survivor Fractured Agility Force Tear Guide
This guide will help with completing the Fractured Agility Force Tear in Jedi Survivor. Force Tears are additional challenges you can complete while exploring!


