List and overview of the mods I recommend and personally use while playing Star Wars Jedi Survivor on PC! These mods enhance and spice up the experience while attempting to eliminate some of its frustrating shortcomings.
The mods I use and recommend aim to preserve the gameplay while improving some aspects of the game such as visuals and bringing even more diversity with new unique custom outfits and reskins.
I generally avoid mods that alter the developers’ original intent. Jedi Survivor’s modding scene doesn’t dive much into that segment anyway.
Disclaimer: Please note that my recommendations are based on my own experience with them as a player and user of the mods. I have not developed any of them and I do not know their creators. If you run into any issues while using them, please check the dedicated message boards on Nexus Mods for each mod. You may find your answer there.
How to add Mods to Jedi Survivor
Installing mods for Jedi Survivor is as easy as opening the archive you download and copy-pasting its contents to a sub-folder within your game’s folder. In the list below I have links to each mod’s page on Nexus Mods.
Some mods recommend the manual copy-and-paste approach. Others allow you to use Vortex. I prefer the manual approach for the mods I am using for Star Wars Jedi Survivor.
Depending on which platform you use, the location where the game is installed may slightly differ. Below are two example locations for Steam and EA:
- Steam: \Steam\steamapps\common\Jedi Survivor\SwGame
- EA: \EA Games\Jedi Survivor\SwGame
Inside the SwGame folder, you should have a “Paks” folder. Most of the mods will be placed in it. I have instructions for each mod below so you don’t feel lost.
Unique Outfits and Reskins
Jedi Survivor has a large amount of outfits for Cal and BD-1 as well as lightsaber hilts. For a first playthrough, you may not feel the need to resort to custom and unique outfits outside of what the game has to offer.
We have complete catalogs of all outfits for Cal in Jedi Survivor as well as BD-1’s skins + colors and all Lightsaber Customizations.
One of the main attractions, especially for those of us looking for inspiration to replay the game yet another time, would be the new and unique outfits you can use with a mod called “Outfit Manager”. Alternatively, you can use mods that reskin an existing outfit in the game to offer it a new color scheme or even redesigned visuals.
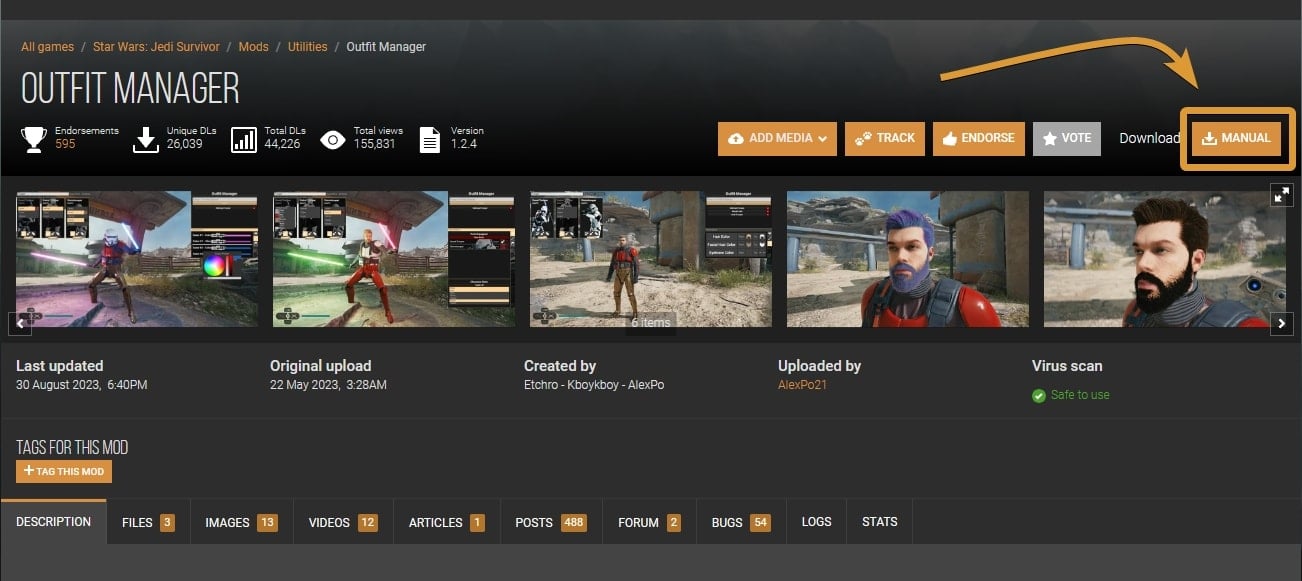
Outfit Manager
The Outfit Manager is an amazing mod that allows you to use a customizable outfit of Cal’s clothes, his hair and beard colors and even change the colors of the lightsaber blades.
To install the Outfit Manager mod, extract the contents of the archive you downloaded into the main installation game folder. The archive you get from Nexus Mods contains a folder called “SwGame”. Inside are two folders called “Binaries” and “Content”. You have the same folders in your game’s installation folder “Jedi Survivor”.

Copy and paste the two folders from the archive into the game’s installation folder. Overwrite if it asks for it. If this is your first mod ever, the system may not ask you to overwrite anything.
The Outfit Manager mod contains something called “UE4SS”. You need it for other mods on my list. UE4SS is packed with Outfit Manager as it also requires it to function.
To use the Outfit Manager, press “K” on your keyboard after you load into the game. The Outfit Manager menu may not be available during some specific moments in-game.
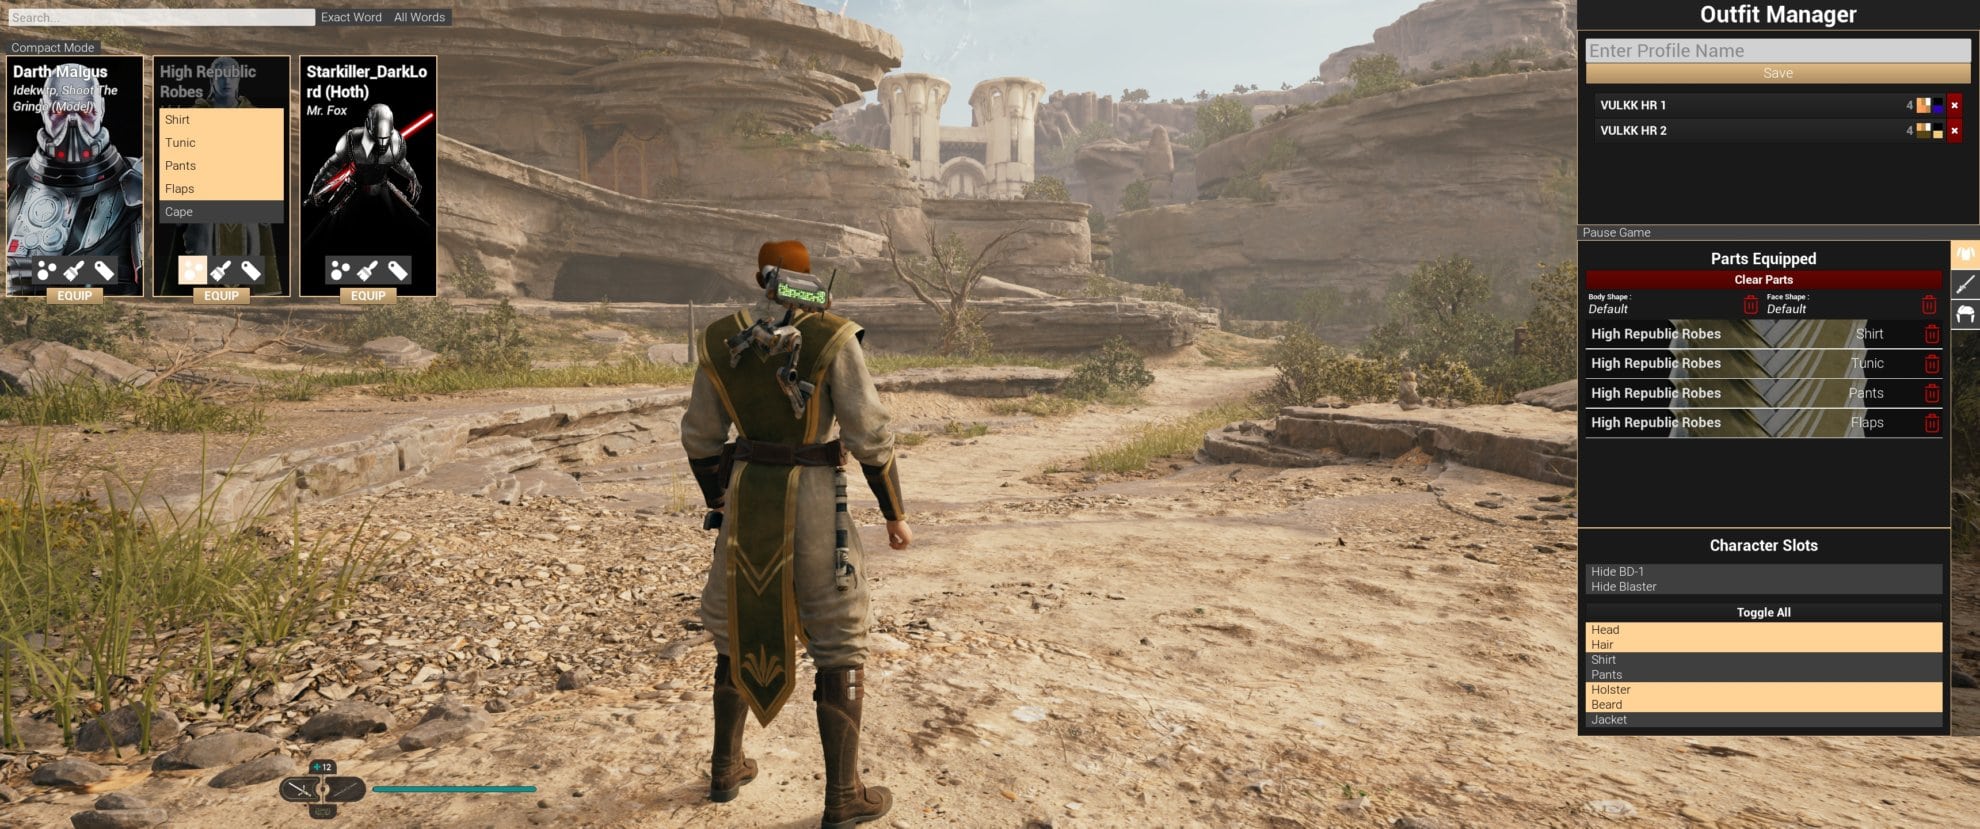
If this is the first mod you install and try, the top left will be empty. That’s where the dedicated custom outfits that are designed for Outfit Manager will show up after you add them.
In the top right, you have a list of Profiles you can create and save. In the example shot I have two outfit profiles. The mod saves these profiles in the same folder where your game saves are: C:\Users\Your-Account-Name\Saved Games\Respawn\JediSurvivor
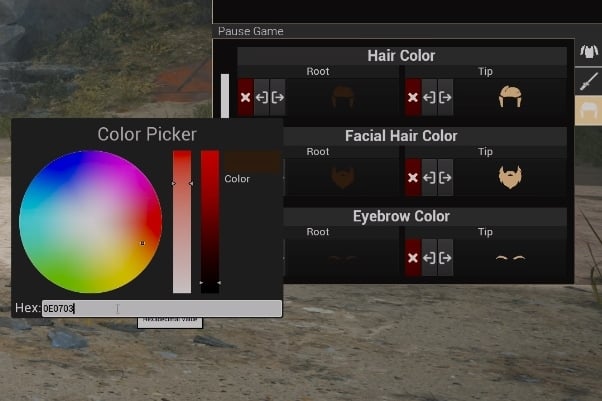
Below, on the right side, you have the option to tweak various elements of your appearance and outfit. You can click on the little “Pause Game” button located below the Profiles segment to force the game to “stand still” while you make changes.
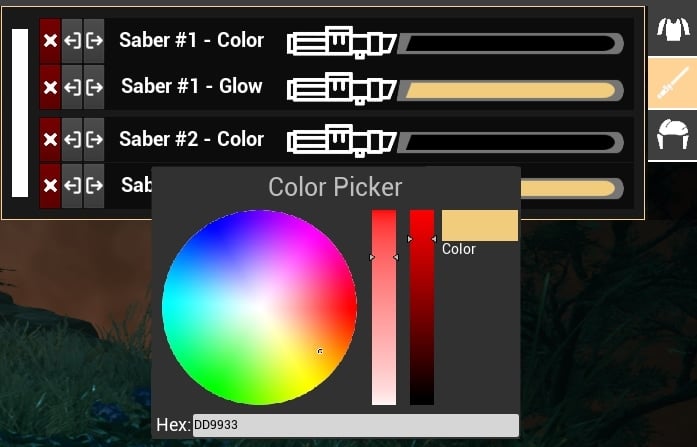
To the right of the Parts Equipped list, you have three buttons. The first one is for your Outfit, the second one is where you can choose custom colors for the Color and Glow effect of your Lightsabers (my favorite part of the entire mod!) and the third button allows you to change Cal’s beard and hair colors.
In the image above, I have the Buzzcut hair, which cannot be modified, sadly. I have changed the Full Beard customization to dark brown, though.
Below that, you have a list with items you can toggle on and off. Based on what outfit you have and the customizations you have done, you may want to turn off some elements like the Holster, for example.
The mod’s page on Nexus Mods has an extensive description of each function and troubleshooting segment you can look into if you get stuck or are having trouble with the mod. The Profiles also persist through different saved games.
Download Outfit Manager ModA large number of outfits for the Outfit Manager are available. You can choose from classic Legends characters like Revan, to modern classics such as Luke Skywalker, to Mandalorians, Imperial Uniforms, and many more.
I am going to list a few below – my personal favorites. Note that because these are fan-made outfits and added forcefully to the game, there may be bugs. Pretty much each cloth piece will tend to bug out from time to time. No outfit is 100% guaranteed top work bug-free.
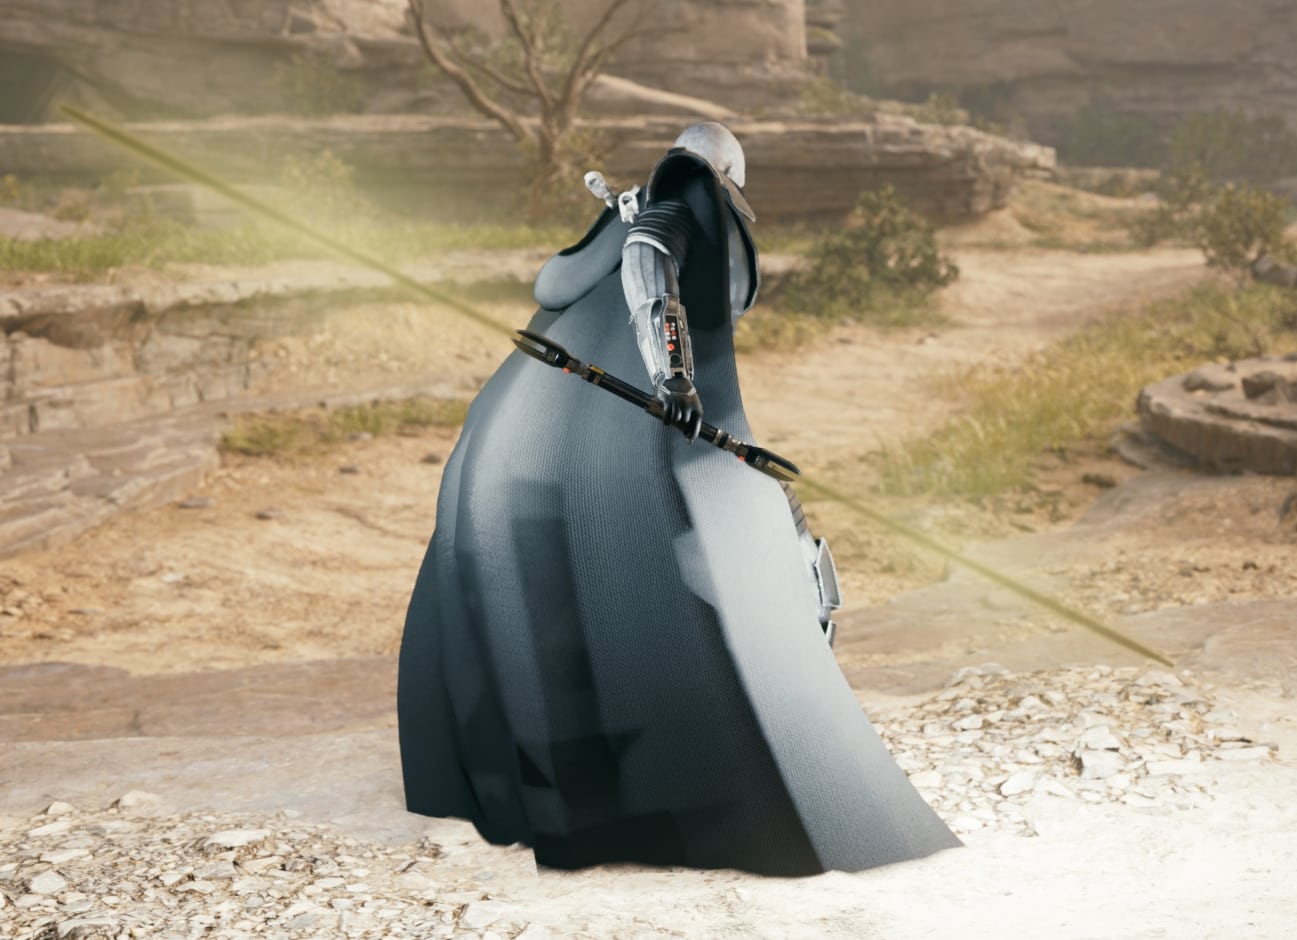
Dagan Gera’s High Republic Outfit
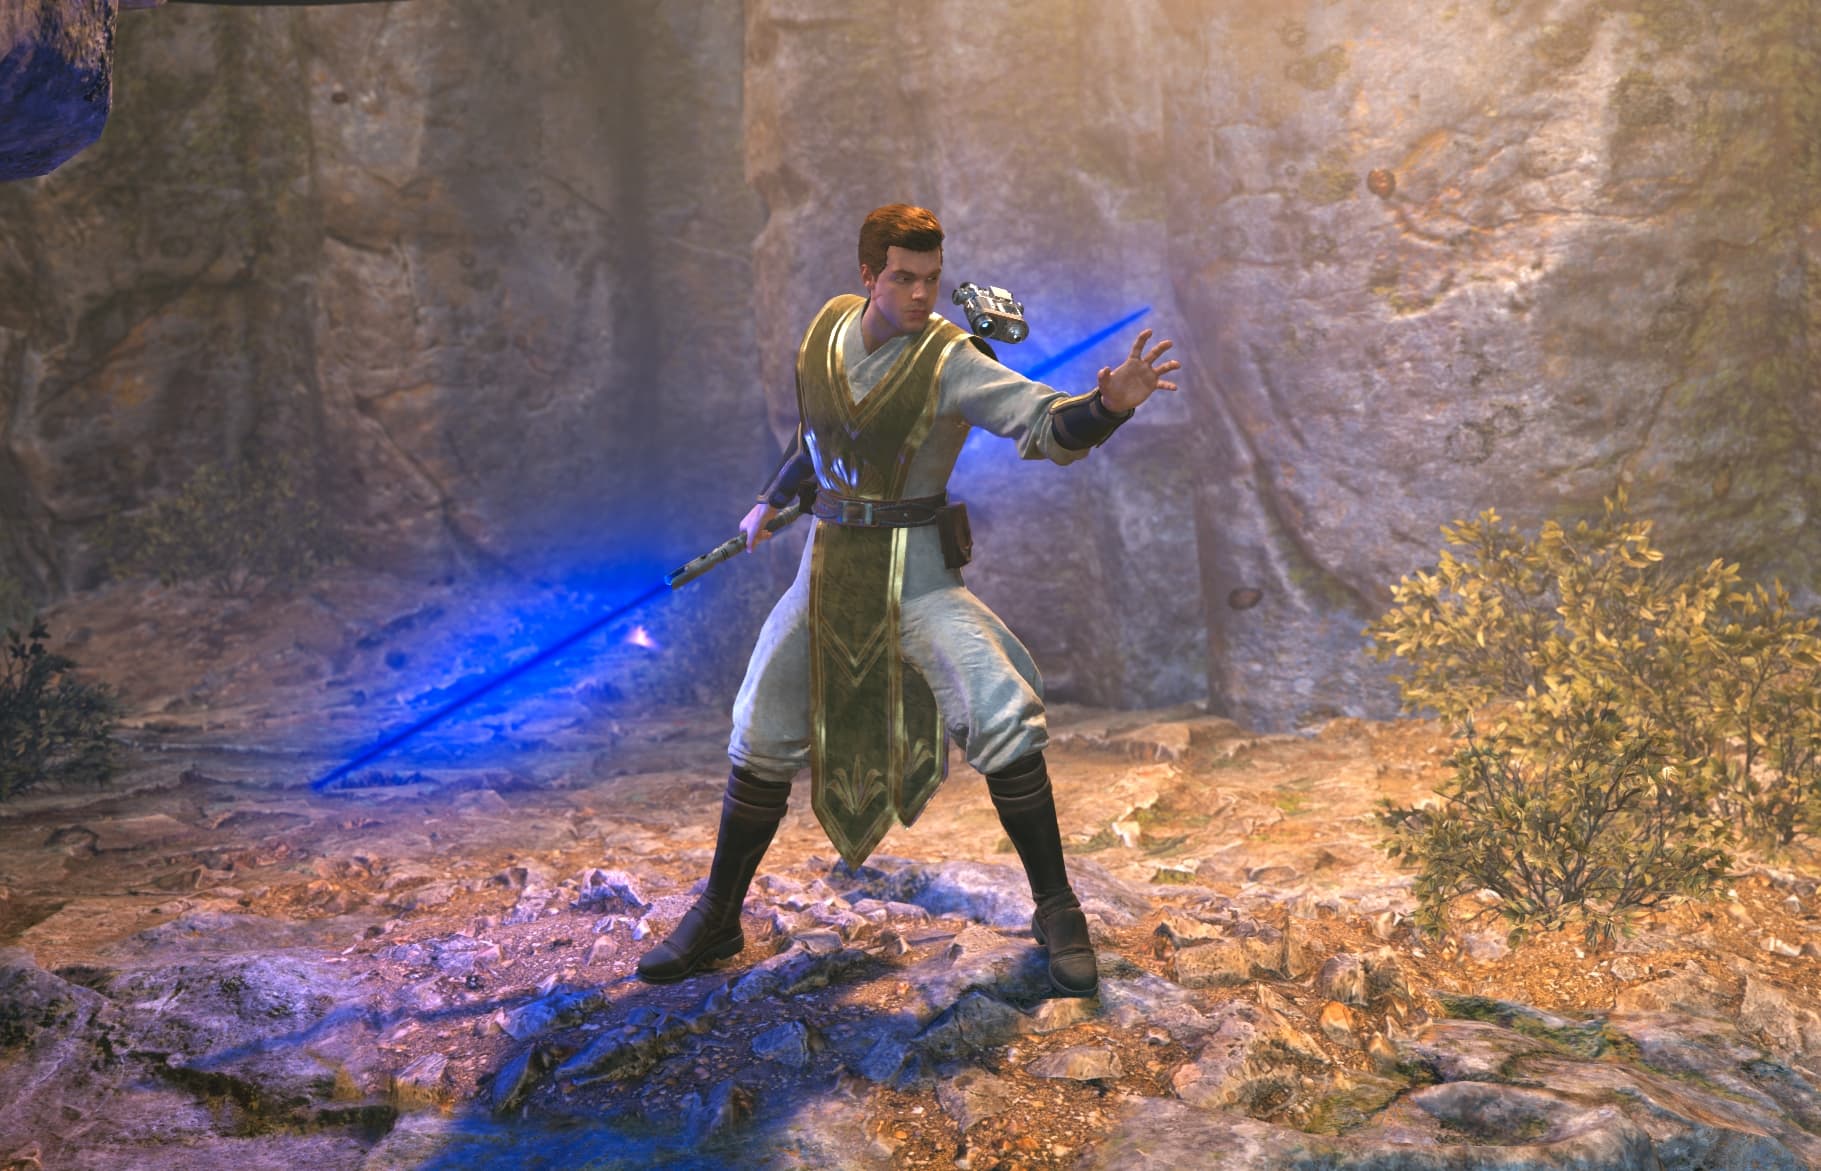
My favorite outfit for the Outfit Manager is Dagan Gera‘s robes. This mod requires Outfit Manager to function as it is a full custom appearance change. It does not replace anything existing in the game. It doesn’t matter what you have equipped.
After you download the archive, extract it into the Paks folder:
/Jedi Survivor/SwGame/Content/Paks
Open Outfit Manager when in-game and choose the outfit from the top left of your screen. Note that there is a bug that prevents you from using the Cape along with the Flaps. You may be able to temporarily make it work, but I find it’s not worth the effort.
My preferred style is just the Flaps, no Cape. The Flaps item is not bugg-less, of course. Images below show some of the glitches that may occur while mounted on a Nekko or Spammel or while jumping and fighting.

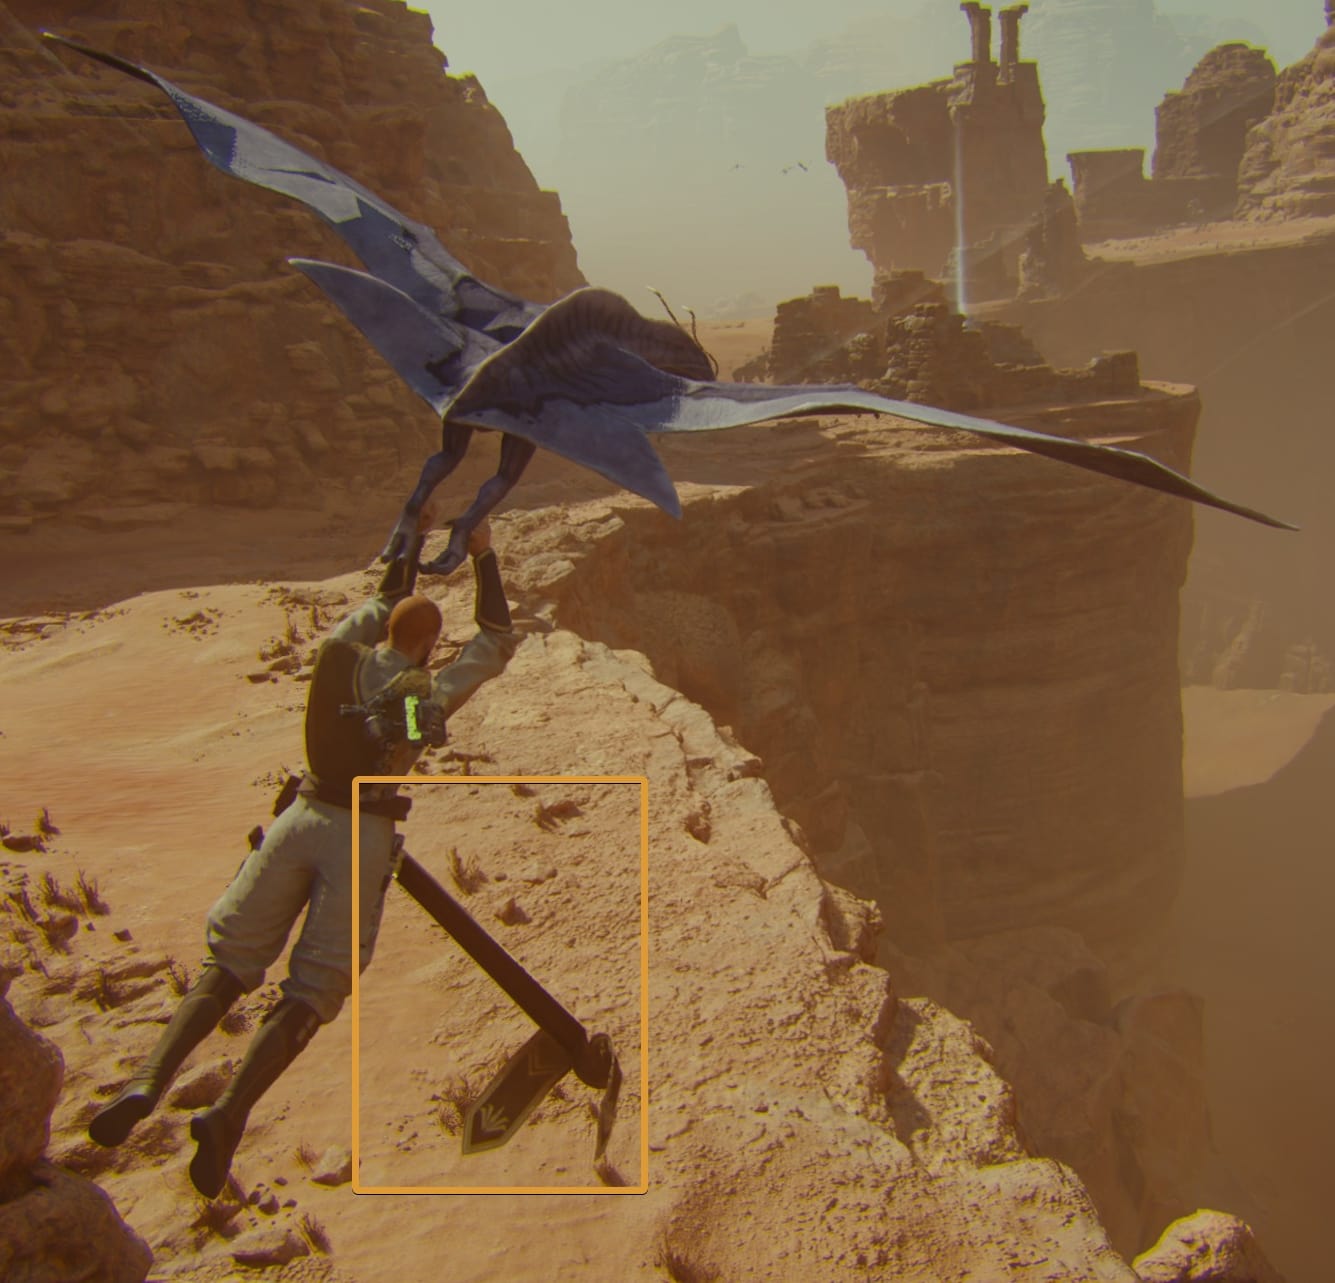

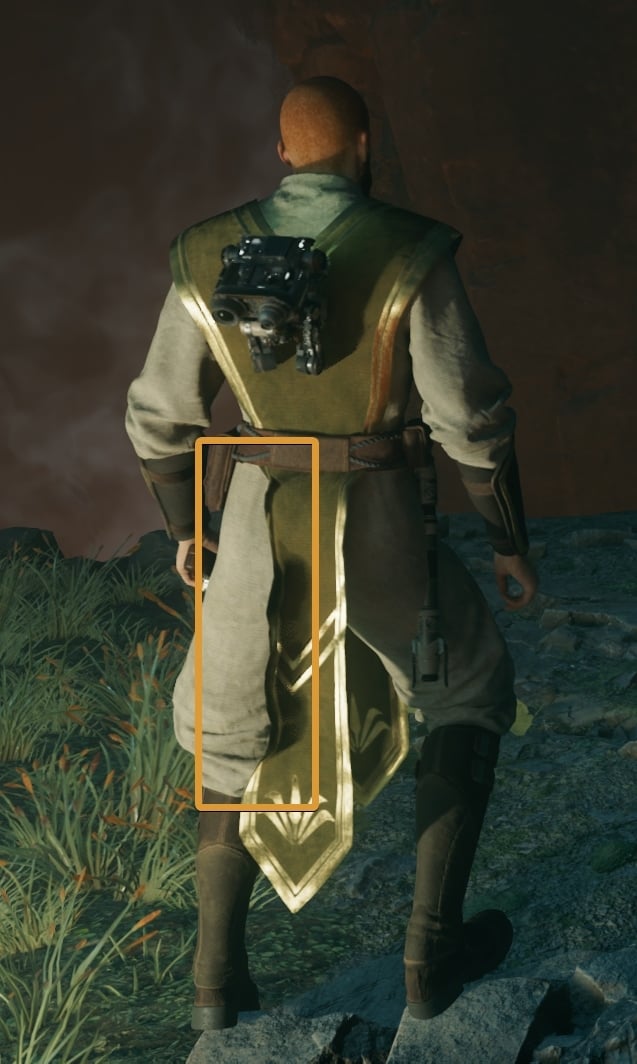
To fix the appearance, open the Outfit Manager and click on the saved profile or re-equip the outfit. The bugs that occur while mounted, cannot be fixed.
While solving the Chamber of Duality puzzle, Zee will still make her usual comment about your outfit not being Jedi-like. She doesn’t know you are using a mod, so forgive her.
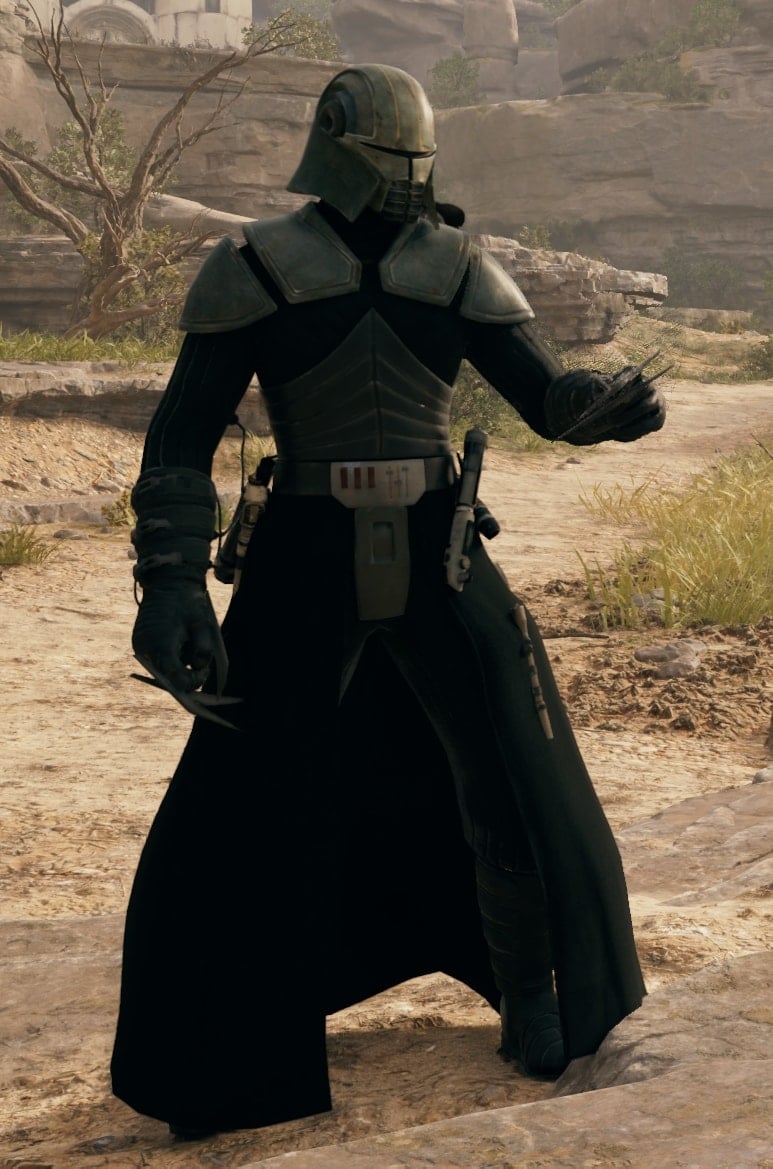
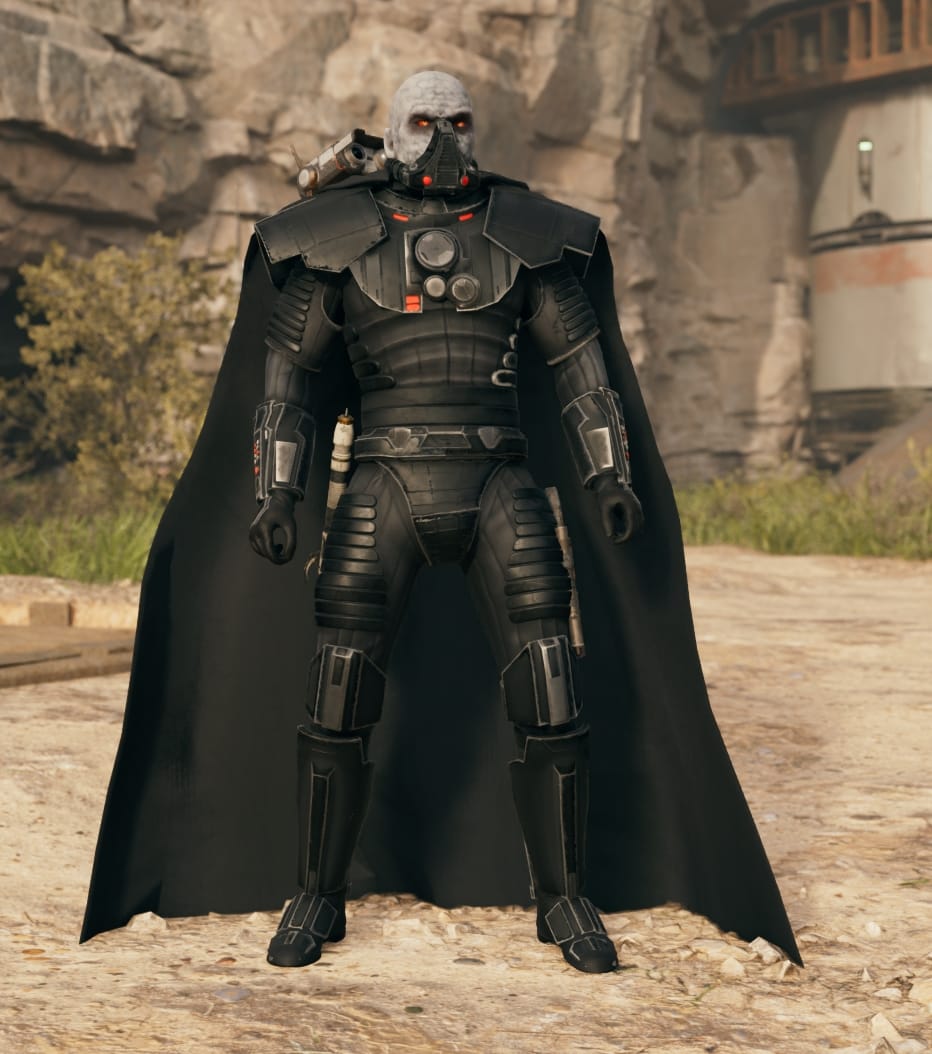
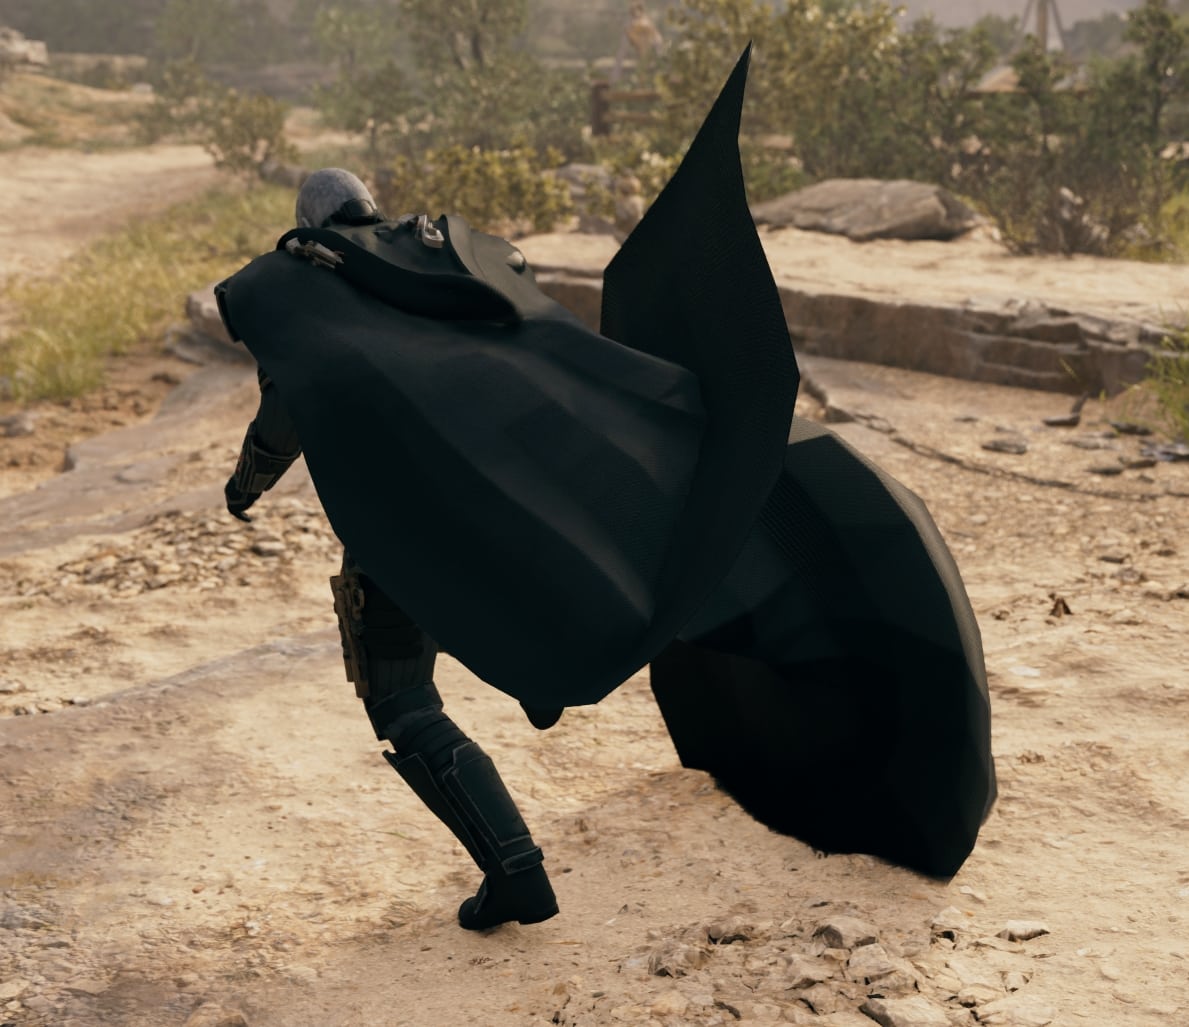
Download Dagan Robes for Outfit ManagerStarkiller Dark Lord Outfit
The Dark Lord armor from The Force Unleashed DLC is my favorite piece of appearance from that game. I simply loved the look. You can make Cal look like he belongs to the Dark Side with this mod.
To add this appearance to the Outfit Manager, copy the contents of the archive you download into the Paks folder.
Reskins and Custom Colors for Existing Outfits
Apart from using the Outfit Manager to insert custom-made outfits, there are a few mods that I want to bring your attention to that alter the appearance of existing outfits in the game.
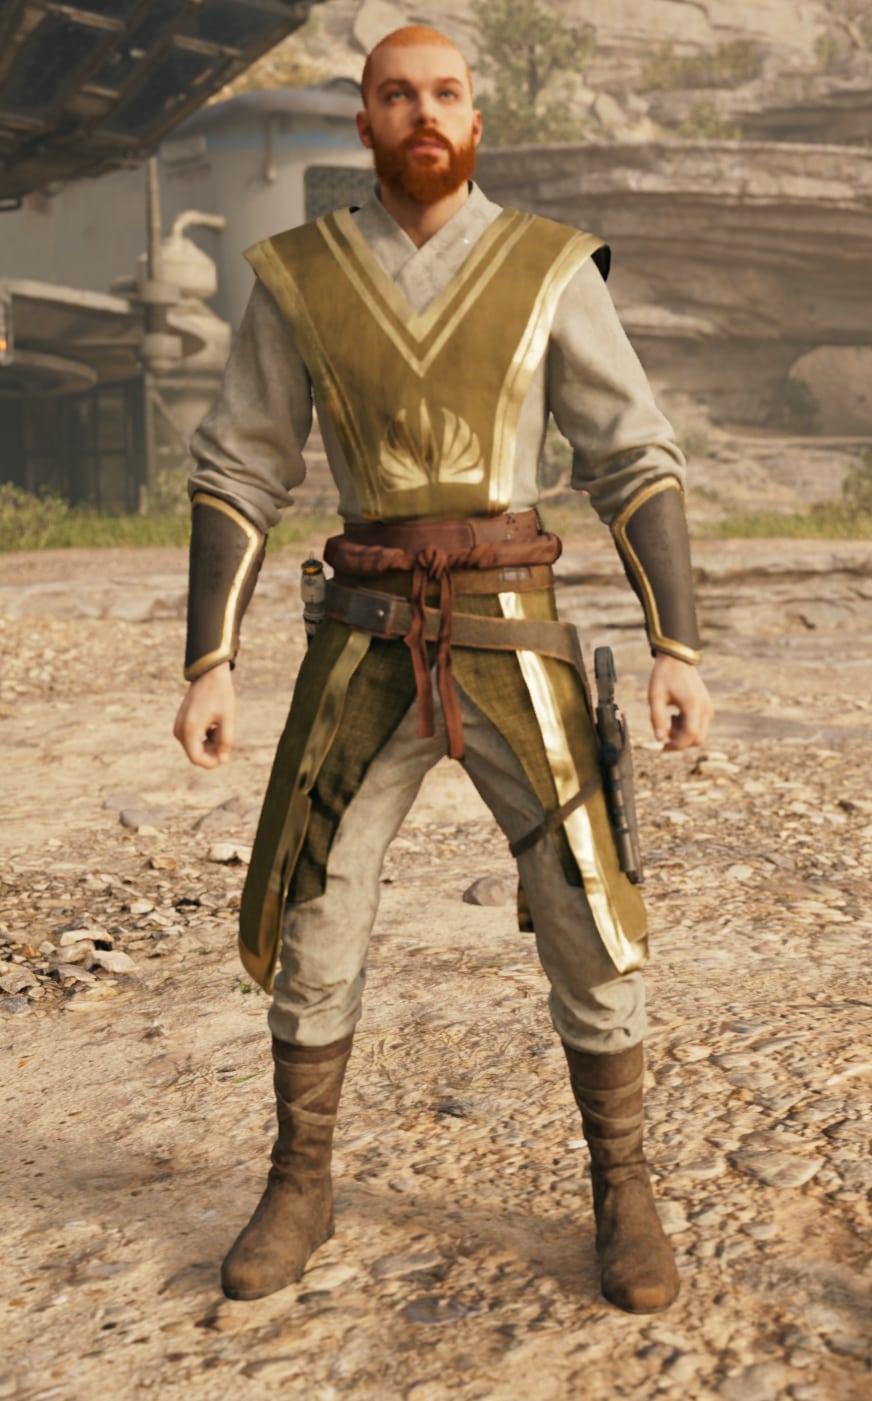
High Republic Robes
If you don’t want to use the Outfit Manager or happen to not like the version of the High Republic outfit I showed you earlier, there is another option. A mod called “High Republic Robes” alters the appearance of the Scrapper Jacket and Shirt and Wanderer Pants with Texture 4.
To add this mod, extract the contents of the archive you download from Nexus into the Paks folder. Not in the “~mods” folder (you may not even have one, so no need to create it for this mod).
Black Commander Outfit
I spent most of the time wearing the Commander Outfit during my first playthrough, my first New Journey + playthrough, and my second normal playthrough. That’s how much I liked this appearance. This mod allows you to color the entire set in all blacks. Perfect!
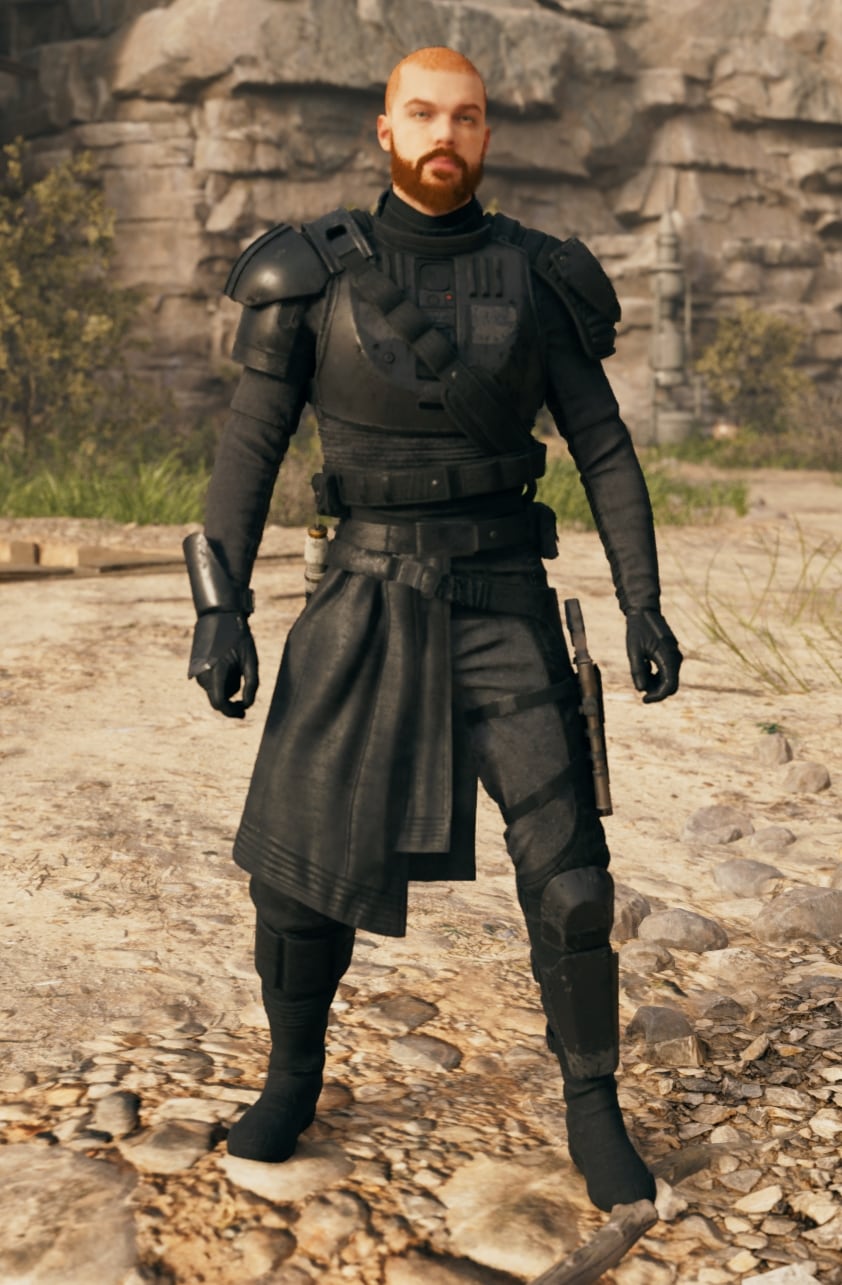
The author has a few more mods that have the same effect on other existing sets. The good news is that the black color is overwriting the default color scheme of the set(s), so you don’t need to hold off until you find the Materials as well.
To add this (and the other mods from the author, if you like them), create a folder called “~mods” inside your Paks folder and paste the files there:
\Jedi Survivor\SwGame\Content\Paks~mods
Add the ability to Walk
If you play with a mouse and keyboard, you will not be able to have Cal walk around at a normal human-like pace. The only two options you will have are jogging and running.
A mod simply called “Walk” adds the ability to walk normally. It is highly customizable too, for such a simple feature.
To install this mod, download it and paste the three files from the archive into the LogicMods folder:
/SwGame/Content/Paks/LogicMods/
This folder is created by UE4SS, which is packed together with the Outfit Manager mod, as I explained earlier. If you have the Outfit Manager, you should have this folder as well.
The default keybind for walking is Left ALT. You can remap it. Press Numpad 1 on your keyboard to open the settings for this mod while in-game. You will see this in the lower right corner of your screen:
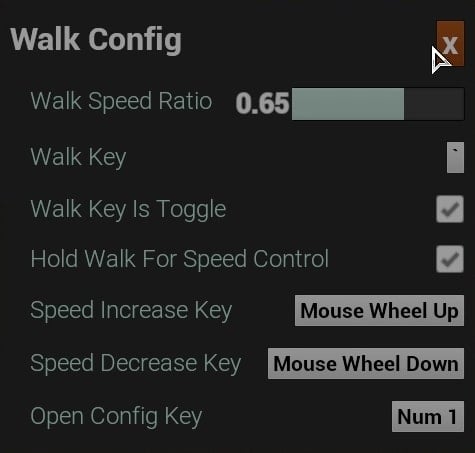
The default keybind is Left ALT. I changed it to ` – this is the key on the left-hand-side of “1”. The default speed is 0.30, which I find too slow. I recommend 0.65. The settings you change are saved in a file located in the same folder where your game saves and Outfit Manager saves live.
Download the Walk ModRemove the Intro when launching
To speed up the starting process, you can use a mod to remove the intro showing the logos of Respanw and EA. I personally don’t know why they insist on showing their logos on every single game launch. One is enough. We will not forget who made the game. D’oh!
To add this mod and its functionality, place the zNoIntro_P.pak file into the “Paks” folder.
Download the No Startup Movies ModFix the Ray Tracing Crashes
For higher-end Desktop machines the Ray Tracing, especially on Jedha, has been a problem since the moment we turned it on. Frequent crashes made it very hard and unpleasant to play with RT on. Jedha was literally unplayable (and still is for many).
I tested a few fixes in the months since it launched and this one seems to be offering the best result so far. Since I added it to my game, I played through the first visit of Jedha when you have to find Cere, the return to Jedha to reach the Pilgrim’s Sanctuary, and did a bit of side content on the desert planet, namely some collectibles and a couple of the Path Puzzles. Not a single crash. The moment I remove this mod, the game goes back to frequent crashing on Jedha.
I cannot promise that this will stop the crashes forever for you, but it certainly has a positive effect on my system (4090, 7950X3D, 64GB, 3440×1440), which was still crashing before this mod with RT on.
To add the mod, place the file from the archive you download into the Paks folder.
Download Fix for Ray Tracing Crashing ModMods I like, but cannot recommend to everyone
This mini collection of mods is separate because some of them I no longer use and don’t know how their latest development has evolved or because the mods are not solid enough to offer identical results on different hardware.
I still use the Ultra Plus mod, for example, but I can’t recommend it as it’s not for everyone. More on that later.
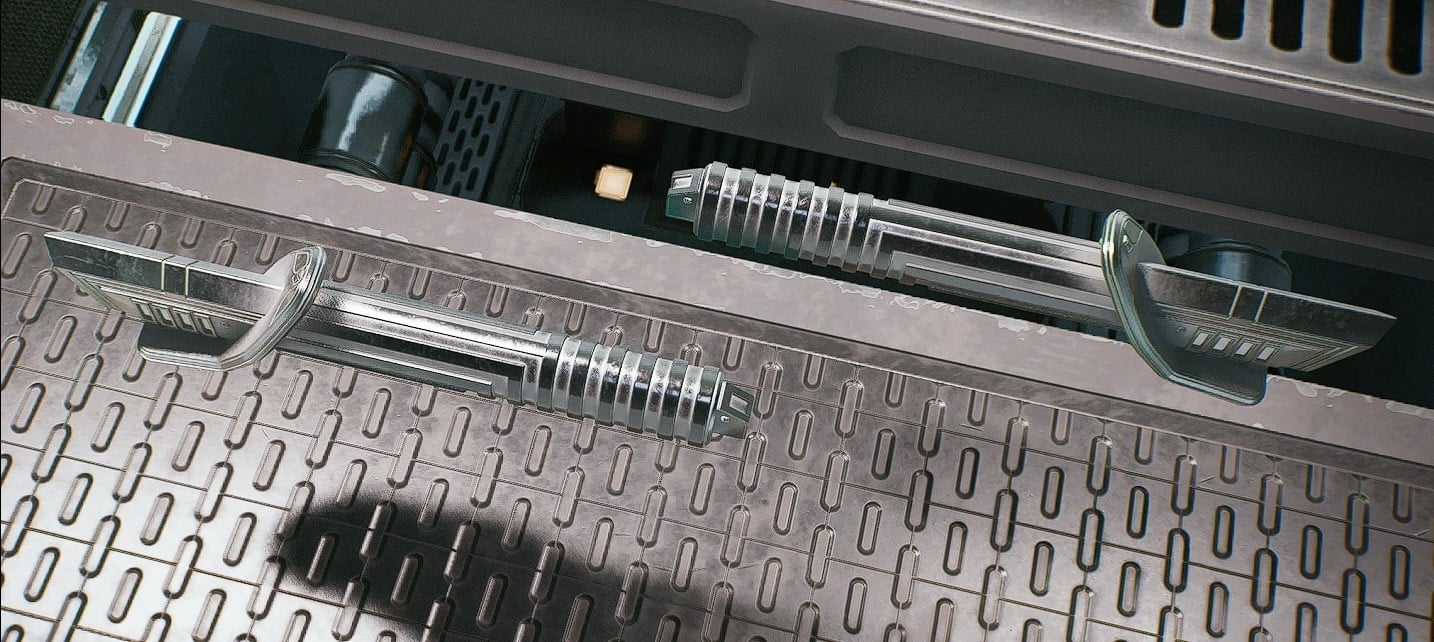
Darth Malgus for Outfit Manager and Lightsaber Hilt
As a SWTOR player, I had to try the Malgus Outfit and Lightsaber, of course. To add the outfit to the Outfit Manager, put the three files from the archive into the Paks folder.
Sadly, it has somewhat low-quality textures. Also, Malgus is quite a bit larger than Cal. The biggest issue I have with this outfit, is the cape. It is crazy (bad).
The Lightsaber hilt mod functions as a replacement of the Patience emitter. This mod also turns the Jaro Tapal parts invisible, so when you decide to go Full Malgus, you will have the perfectly matching hilt design as well (double-bladed as well). To add the saber skin, extract the three files into the Paks folder.
SWJS Fixes and Improvements
This is quite a massive change to a lot of things within the game’s systems and while I liked its effect to my game, I cannot recommend it to everyone because the results may vary too much depending on the specific hardware configuration and other factors.
I first installed this mod in an attempt to resolve the stuttering. While it visibly lowered its presence, it did not completely remove the stuttering effect. My machine is on the very high end and I did not need any other tweaks.
Koboh has been and remained laggy and FPS drops were frequent on the planet with any mod or tweak I have tried in the months since the launch of the game, spanning all of its patches and updates.
Because I am using the Ultra Plus mod (described later in this guide), I opted out of the SWJS FAI mod because they kind of cross paths in several aspects.
Check out the SWJS Fixes and Improvements ModDark Saber
The Dark Saber is a reskin mod for the Detachment Emitter. I tried it along with my favorite colors from SWTOR, the Black and Blue lightsabers (I know, not exactly the true Dark Saber colors), but on my new playthrough I ended up changing my entire outfit to what you have already read above – the Dagan Robes. So, the Dark Saber didn’t fit at all with this outfit.
You could get a Mando-themed Outfit mod and use the Dark Saber with it. There are several Mandalorian outfits for the Outfit Manager on Nexus. This reskin works with the in-game materials for hilts. You can use the Outfit Manager to make the blade as close as possible to the actual Dark Saber.
Check out The Dark Saber ModJedi Survivor Ultra +
On paper, this mod sounds fantastic. It improves the quality of everything you see on the screen. But at a greater cost to your hardware. The author of this guide has put it on hold since September 2023 because of the many issues players are experiencing.
It’s hard for me to tell what the original intention of the author is – to allow low-end PC configurations to play the game smooth(er) or to give the high-end desktops the “ultra plus” experience where everything is bumped to eleven and the engine works extra hard to deliver. Perhaps both, I guess.
I haven’t tested the low-end graphics presets that this mod alters, but I read comments from people who are grateful and confirm that the mod did help them out.
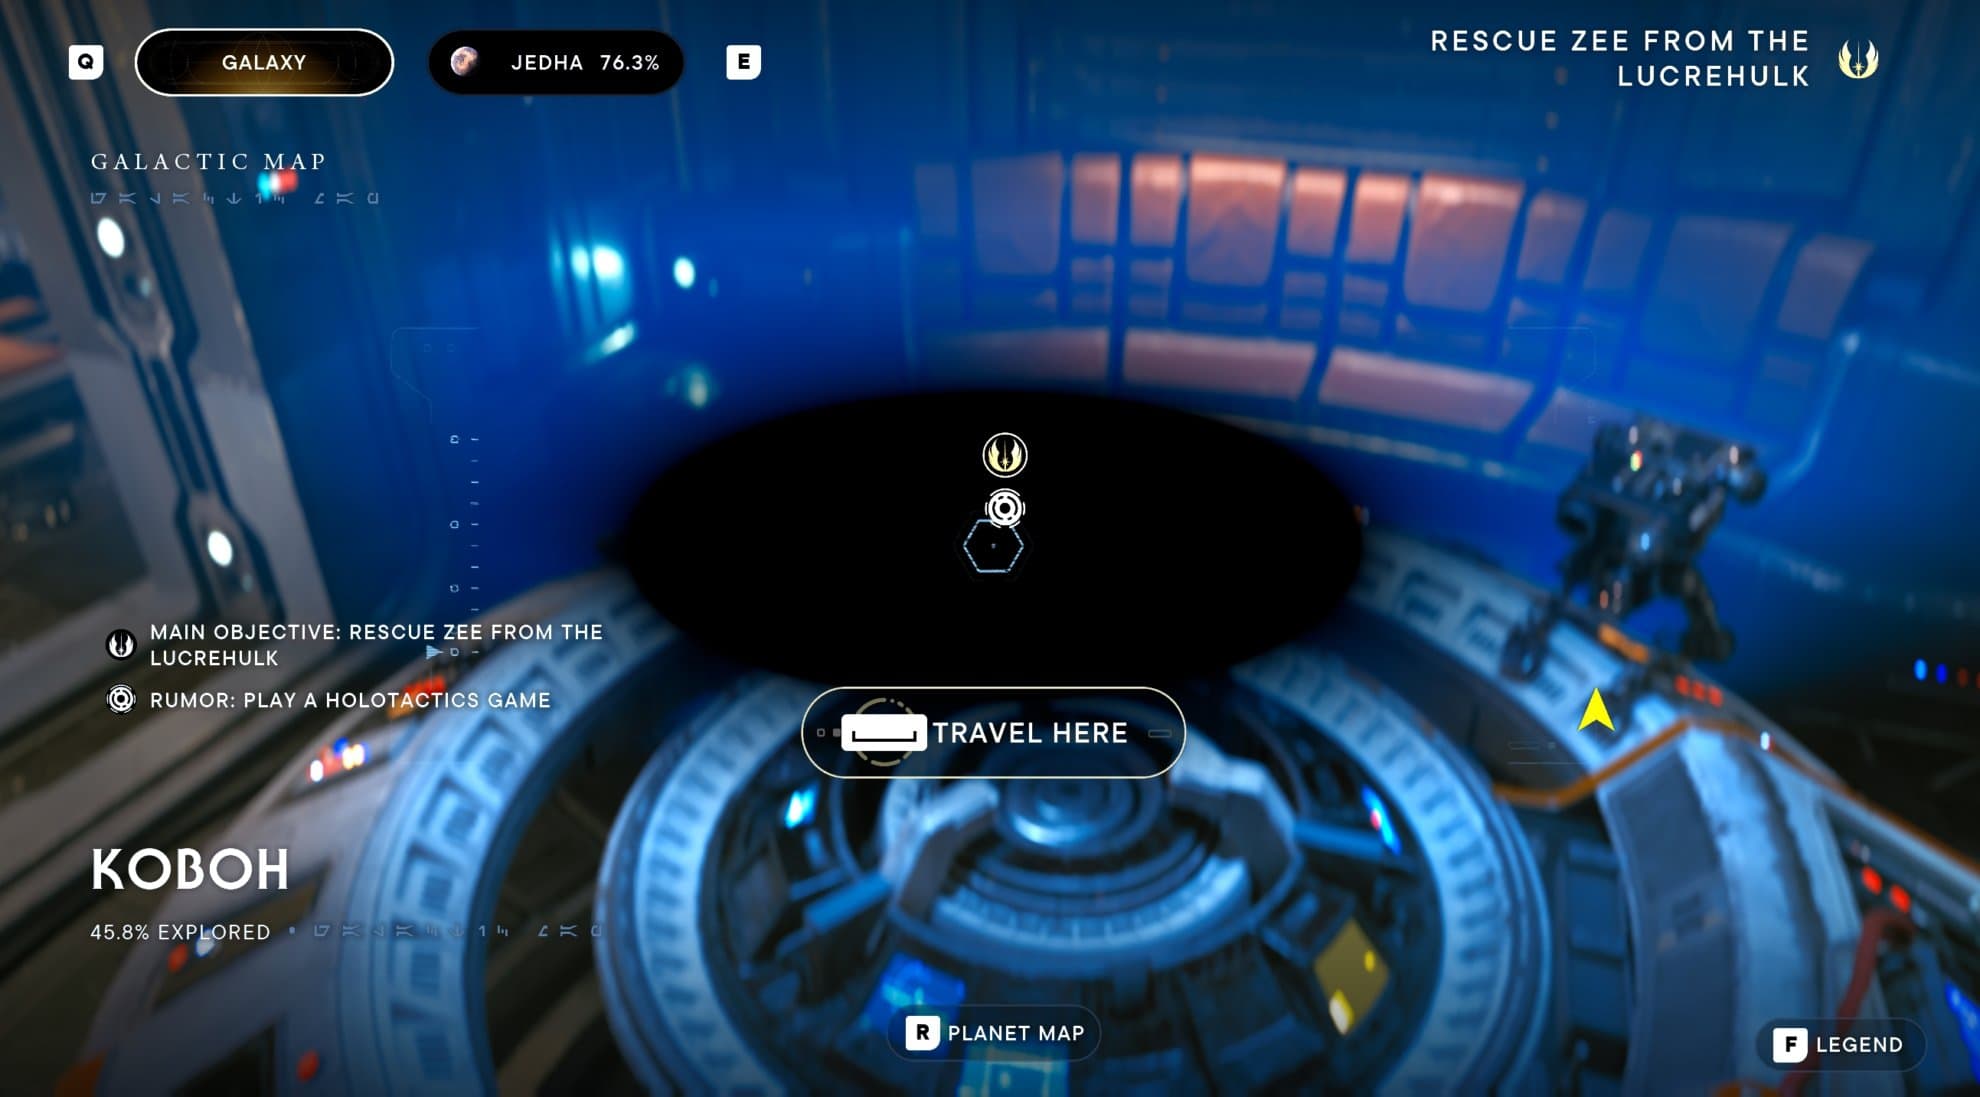
I only tested it on my strongest PC hardware (the 4090 + 79050X3d machine) and the mod improved both the visuals and the FPS for me. But it came at a cost. I started getting frequent heavy stutter moments. Some areas, like the Lucrehulk, are still not perfect, but outside of the major stutter moments, the FPS counter does show up higher values than normal.
The mini stuttering that is present throughout most of Koboh (and other places) usually, went away, but it was replaced by heavy stutter moments where from time to time the game would nearly freeze for a couple of moments.
The mod is said to not work well (or at all) with other similar mods that touch up the game’s engine so aggressively. If you want to use this mod, you may need to remove the “Fix for Ray Tracing Crashing” mod. For me, it seems to be working fine, though I added it back recently and am still testing.
One thing this mod breaks badly is the map. It has been reported by others as well. The map is invisible for some reason except for the small area where Cal is currently.
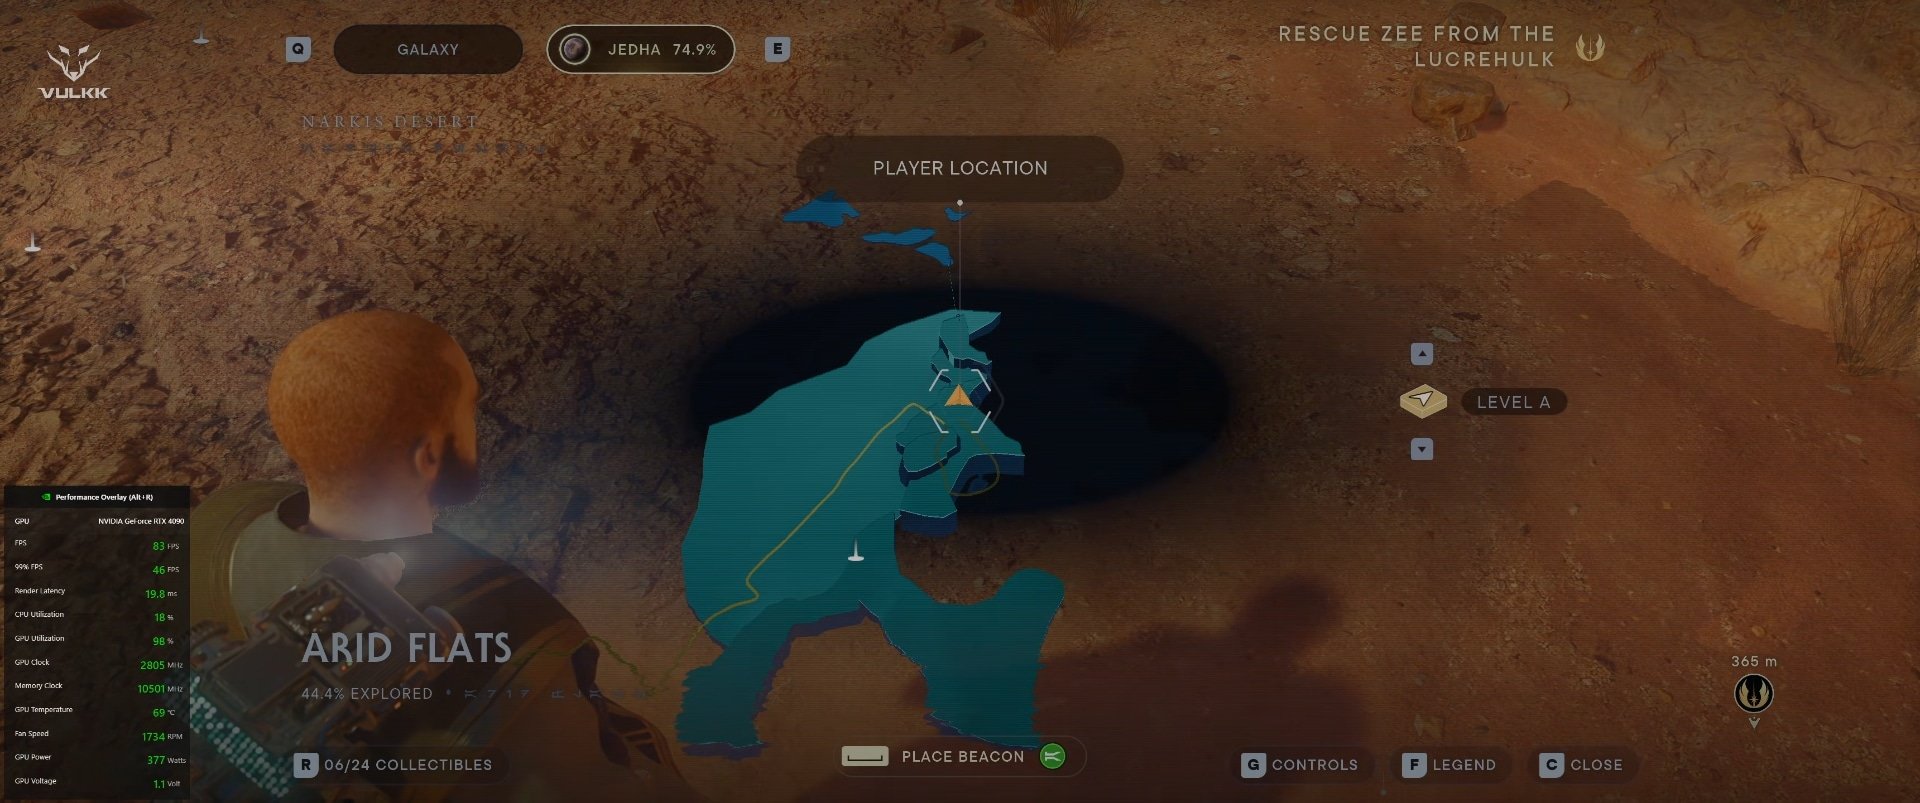
At the time of writing this guide, I am in the middle of my 5th playthrough, so I kind of know the maps and if I have forgotten the location of a collectible or a secret, I can always look up one of our guides.
Overall, in my case, this mod improves the graphics of the game but brings its own issues that I have to either accept and tolerate or remove it. I’ve been playing with it since my fourth playthrough and am enjoying it, but at times its shortcomings do annoy me.
Because of the multiple issues you may encounter, I find it hard to recommend the mod to everyone. I have been using it for a while and enjoy it. Read through the description on the mod’s home page and visit the messages page to read the pinned post as well before you decide if it’s worth giving it a shot.
Check out the Ultra Plus Unnoficial Hotfix and Better GraphicsThat’s it for now. I may expand or update my recommended mods for Jedi Survivor in the future. Until then, you can find tons of helpful guides for absolutely everything in the game. Our Jedi Survivor Guides Master List is a great starting point!