This guide will show you how to complete the side jobs “Epistrophy” and “Don’t lose your mind” from Cyberpunk 2077 where you deal with the Delamain AIs going rogue!
This guide is up-to-date for Cyberpunk 2077 Update 2.3
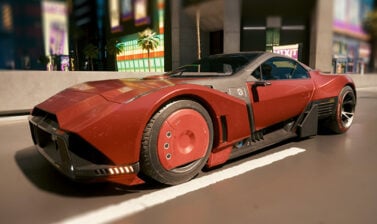
This guide includes two different missions, Epistrophy and Don’t Lose Your Mind. The first one is about recovering different Delamain vehicles that have gone rogue. All of them have different personalities and different actions are required to recover each one of them.
The second mission is about all the recovered vehicles trying to gain their freedom by force from the original Delamain. It’s your job to infiltrate the Delamain headquarters and ultimately decide the fate of these sentient beings.
Epistrophy and Don't Lose Your Mind walkthrough

This is the simplified version of Epistrophy/Don't lose your mind with easy-to-follow step-by-step instructions on how to start the mission and what choices to pick. Below this segment, you will find detailed instructions and explanations of what happens if you make all of the available choices.
Instructions
- Complete the Human Nature and Tune Up side jobs. to unlock Epistrohpy.
- Recover the rogue Delamain taxis located at The Glen, Wellsprings, Rancho Coronado, North Oak, Northside, Badlands, and Coastview.
- Wait until you get a message from Delamain and start Don't Lose Your Mind.
- Return to the Delamain headquarters.
- Find your way into the garage.
- Get to the core room.
- Decide the fate of Delamain's divergent forms:
-Reset the core
-Merge all personalities
-Destroy the core
How to unlock Epistrophy and Don’t lose your mind.
To unlock Epistrophy you must first complete the Human Nature and Tune Up side jobs. This can occur only after beginning Act 2. Once these missions are completed, Epistrophy will become available. Don’t lose your mind will unlock a few hours after finishing Epistrophy.
Epistrophy Walkthrough
All the missing vehicles are located in different areas of Night City. Before beginning the search you must acquire a special scanner at the Delamain headquarters.
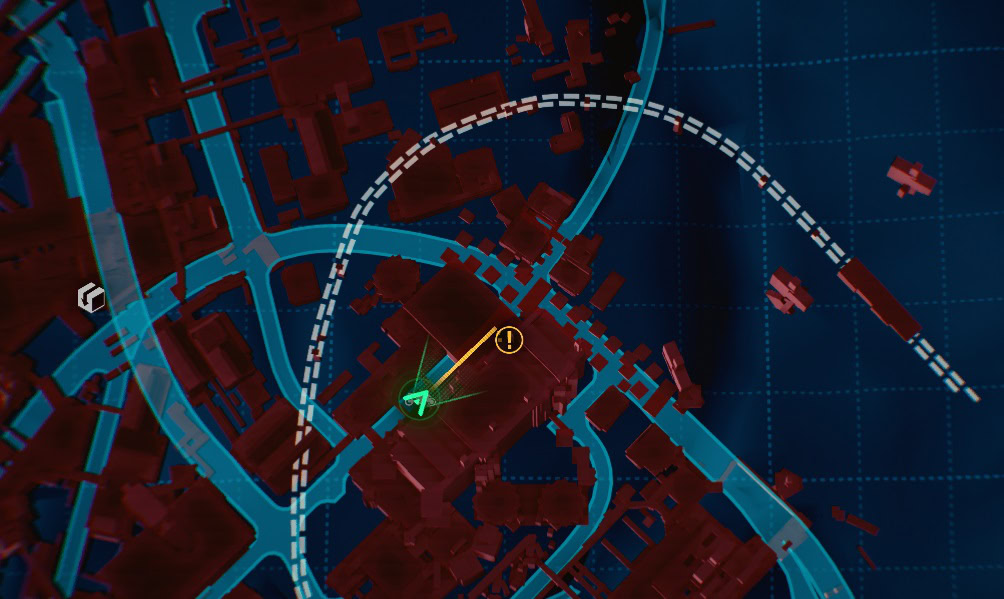
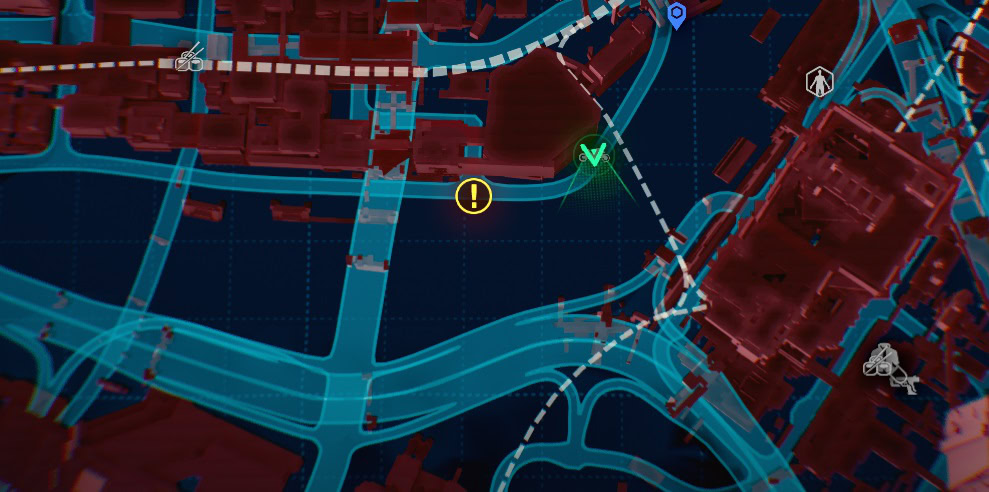
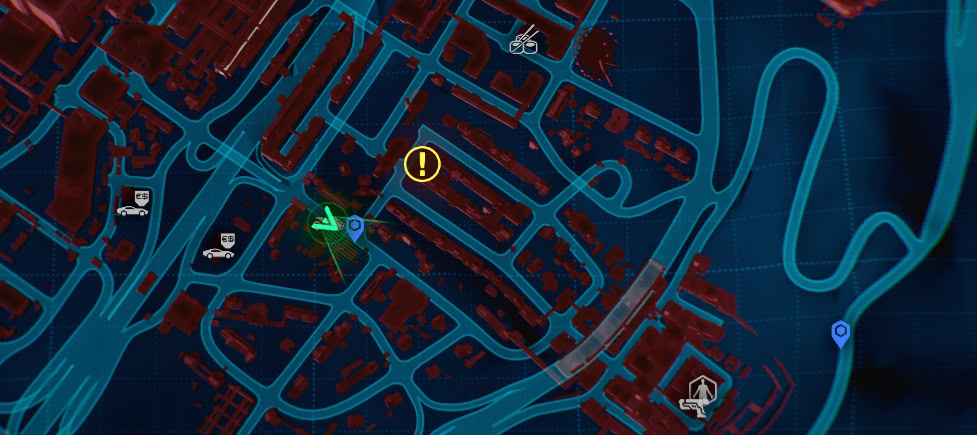
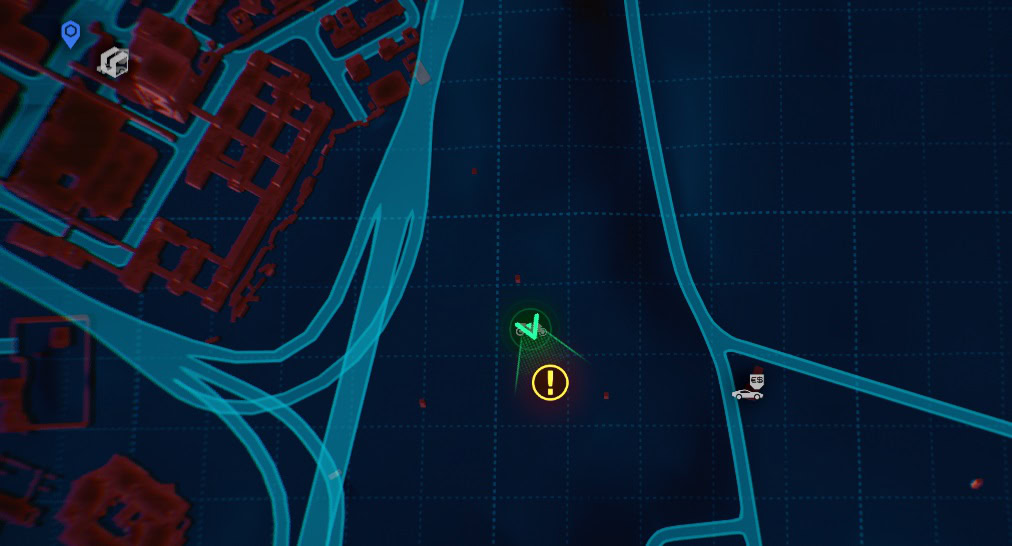
You’ll be informed when you’re near one of the rogue Delamains. To know specifically where it is simply open your map and look for the mission icon. In the next segment, I label the cars with numbers, but the order is not mandatory.
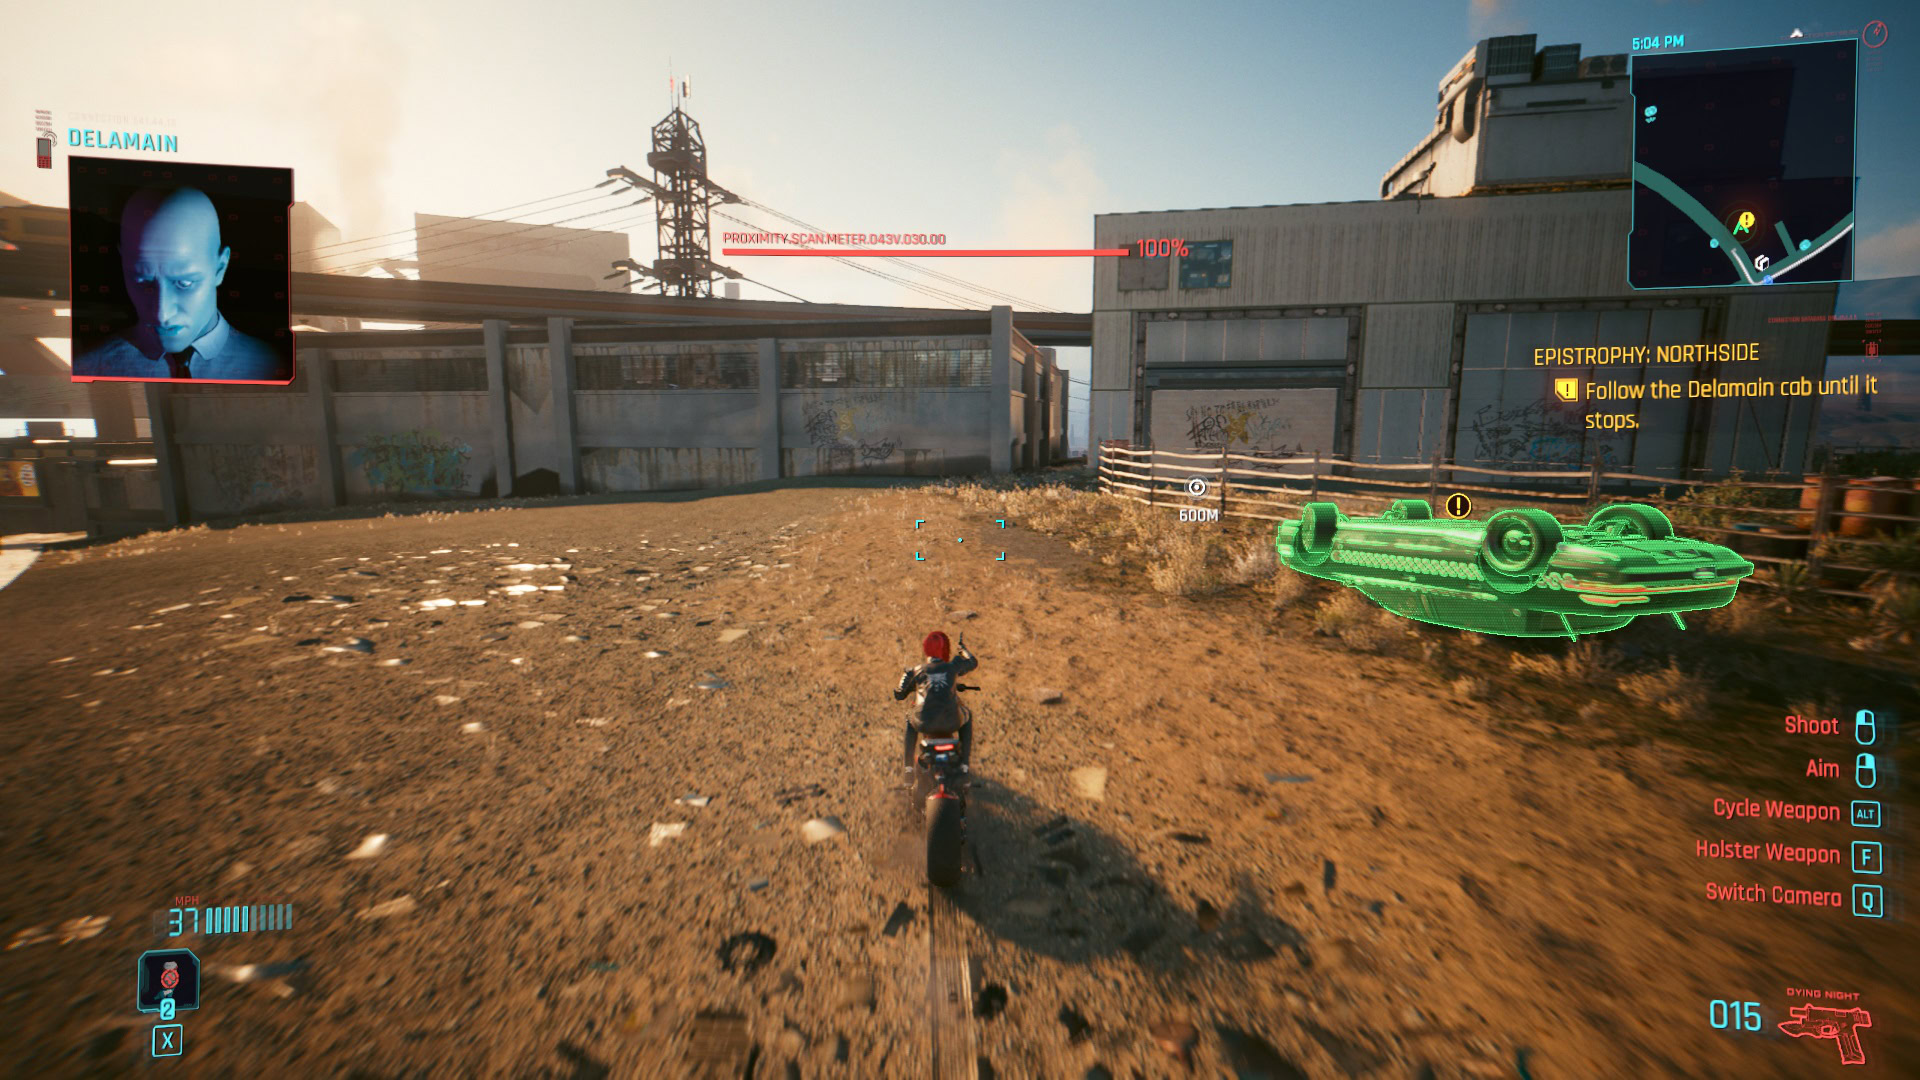
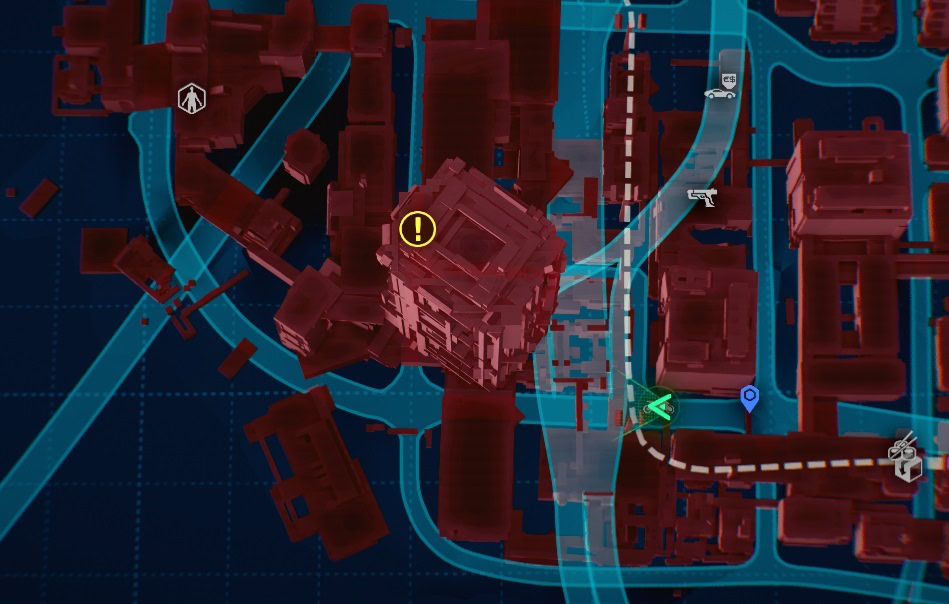
First Delamain car: Northside (Watson)
The first one is located in Northside (Watson). It is not moving but this will change as soon as you get close to it.
I encountered the bug that makes cars flip over, if this happens to you go away and then return in one or two minutes. The Delamain should continue running away from you.
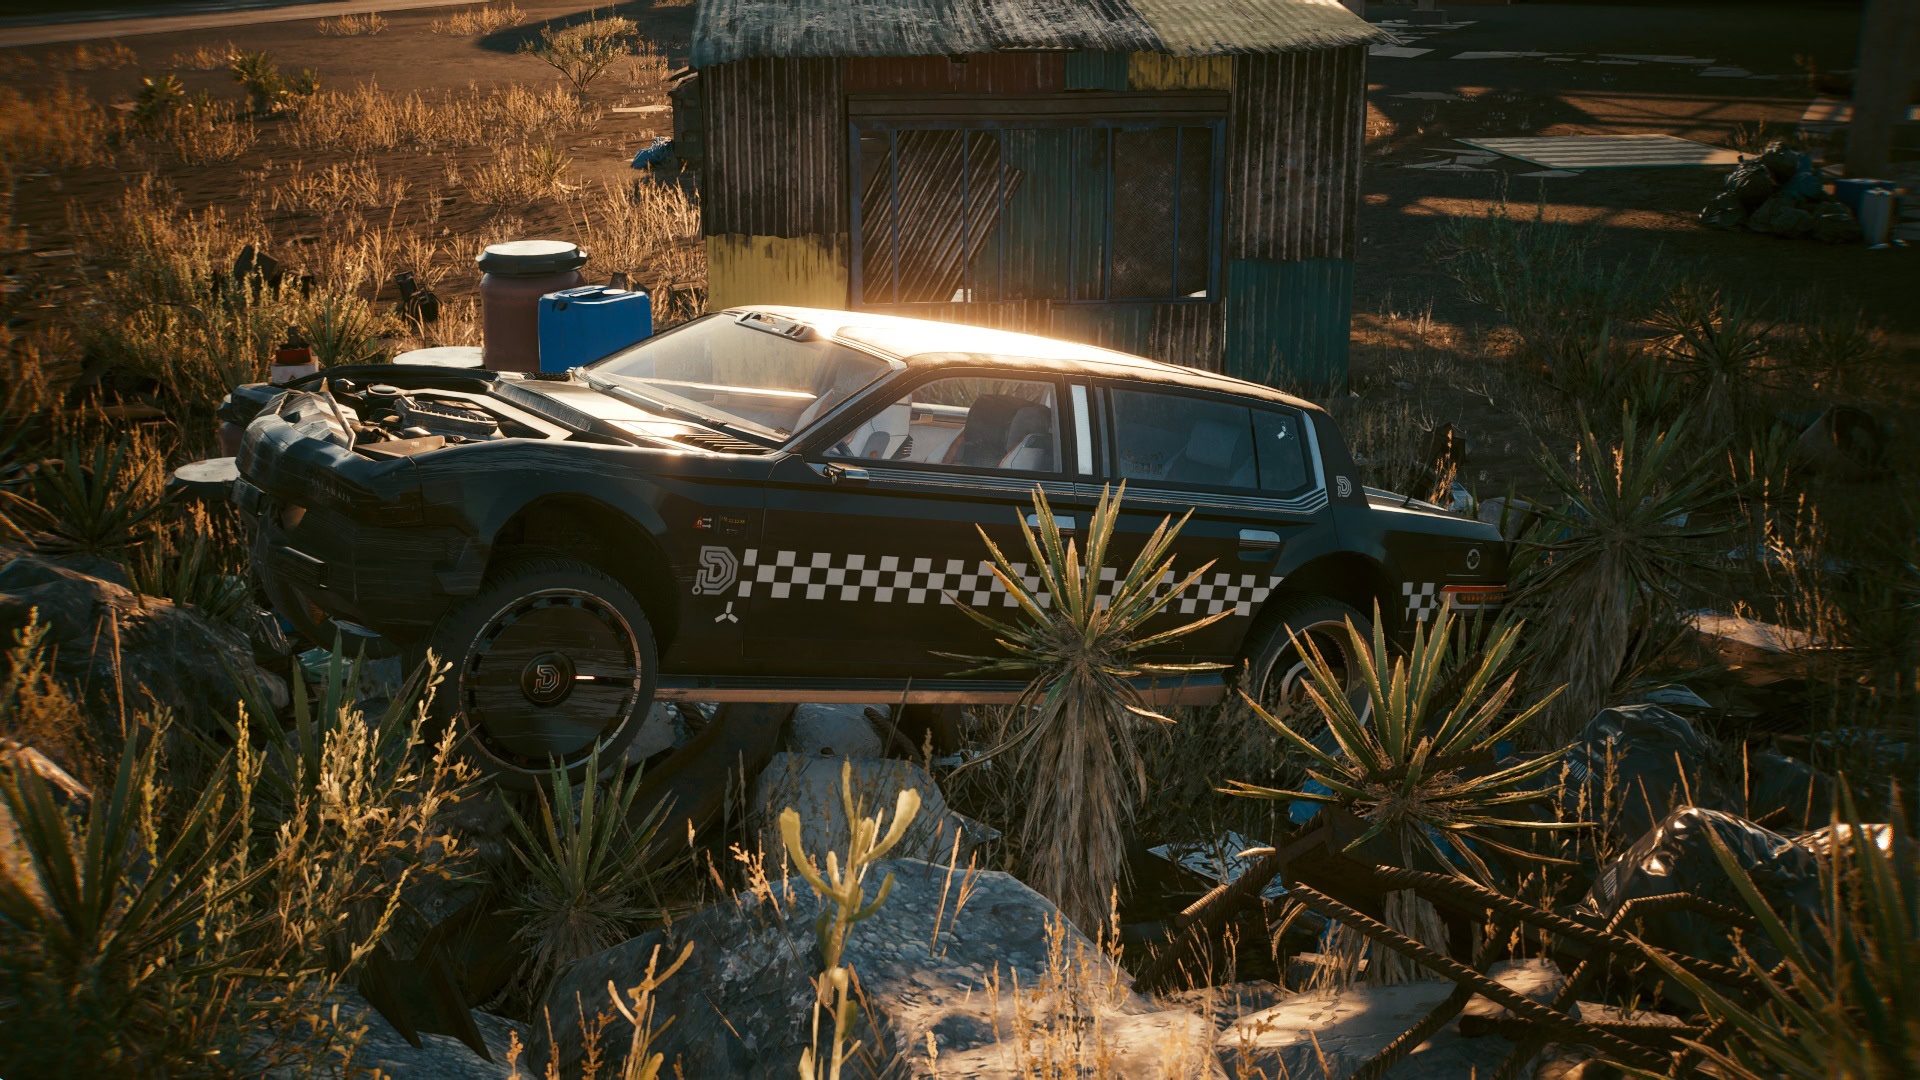
Eventually, it will hit a small metal shack. The impact makes it stop and Delamain can now call it back.
Second Delamain car: North Oak (West Brook)
Another Delamain is driving in circles at the roundabout that’s located in North Oak (West Brook).
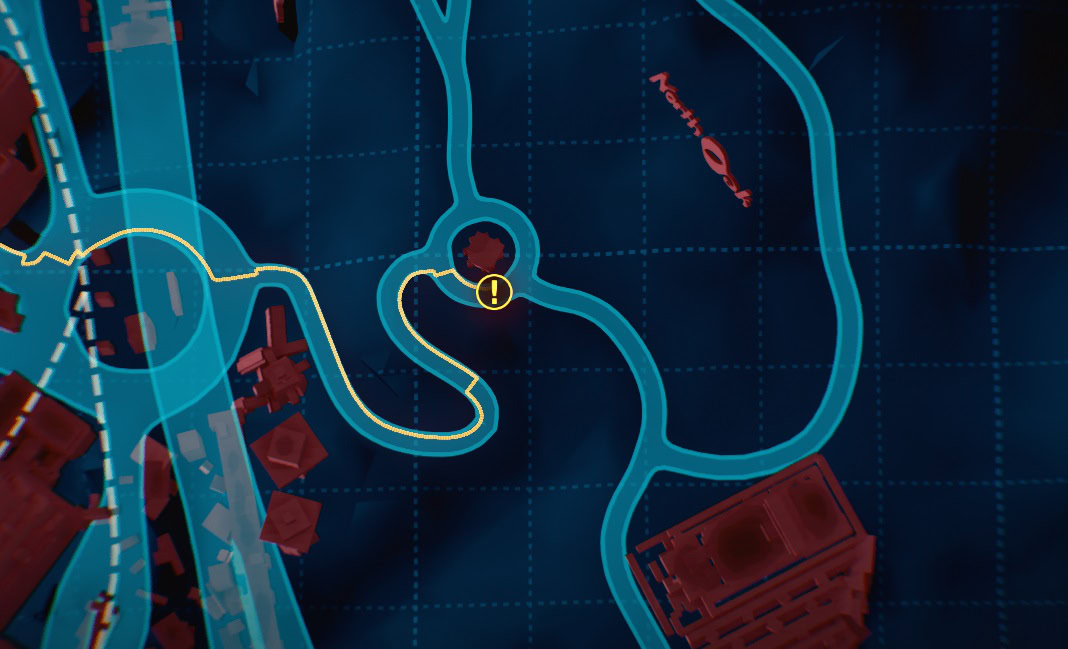
You shouldn’t have any issues locating it. After talking to it, you must get into the driving seat and make sure it returns to the Delamain headquarters.
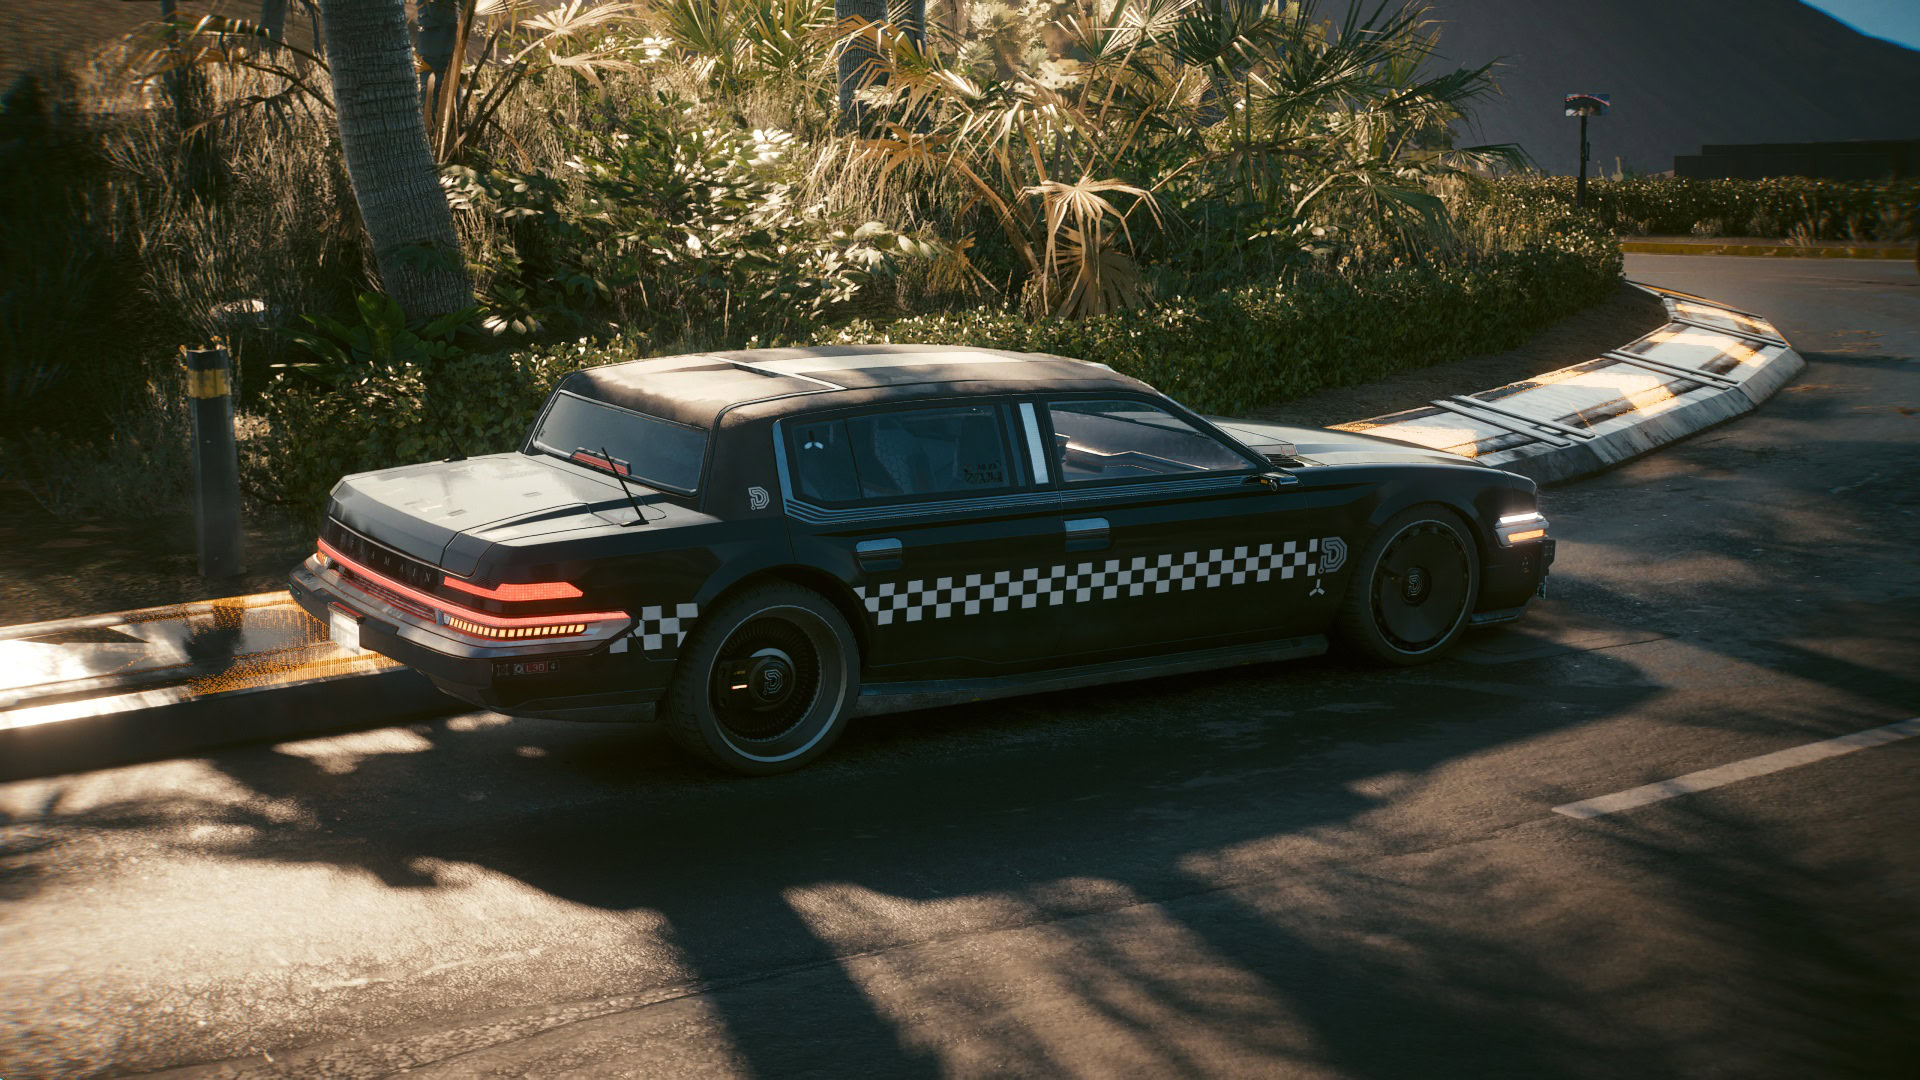
This Delamain doesn’t like speed, it’s best if you drive like an old grandma for once. Park the Delamain near the headquarter’s garage.
Third Delamain car: Heywood (The Glen)
Another Delamain can be found in Heywood (The Glen). This one can be found near the roadway.
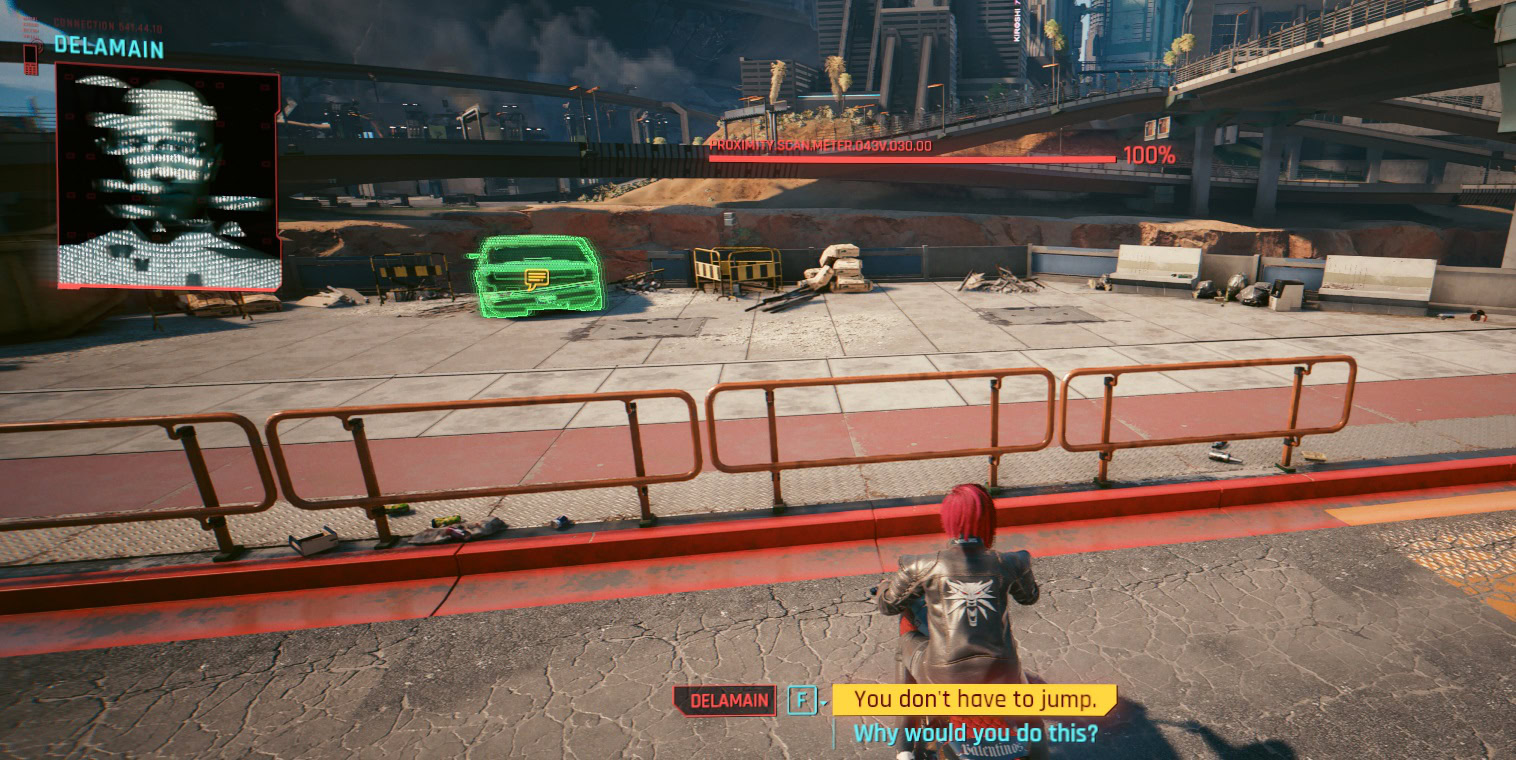
This one is going through a tough time, to the point that it is considering “end it all”.
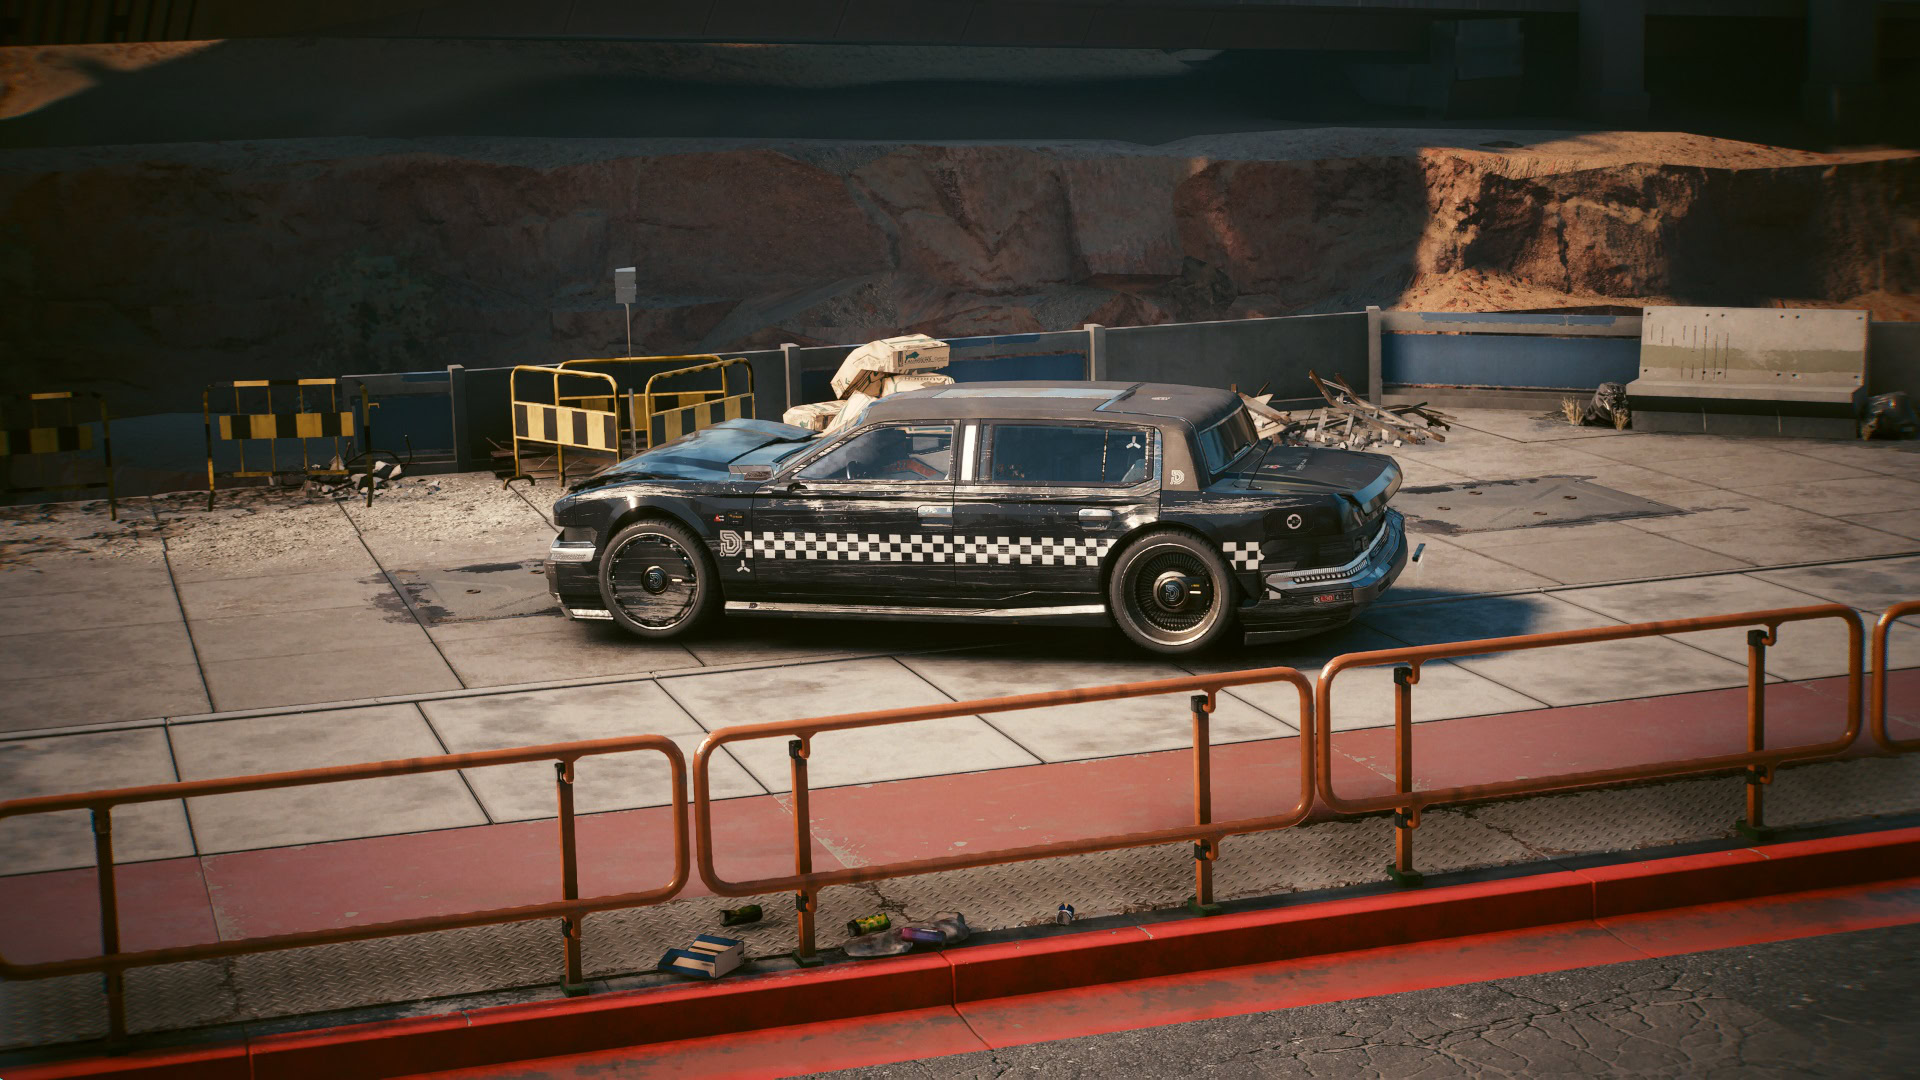
It almost drives off the cliff but with a little empathy, V can convince it that life is worth it. After this, Delamain will recall it successfully.
Fourth Delamain car: Heywood (Wellsprings)
A mad Delamain can be found in Heywood (Wellsprings). This one’s just driving around but it will become hostile as soon as you get close to it.
It doesn’t matter who or what is in front of it, it’ll drive through anything that attempts to stop it.
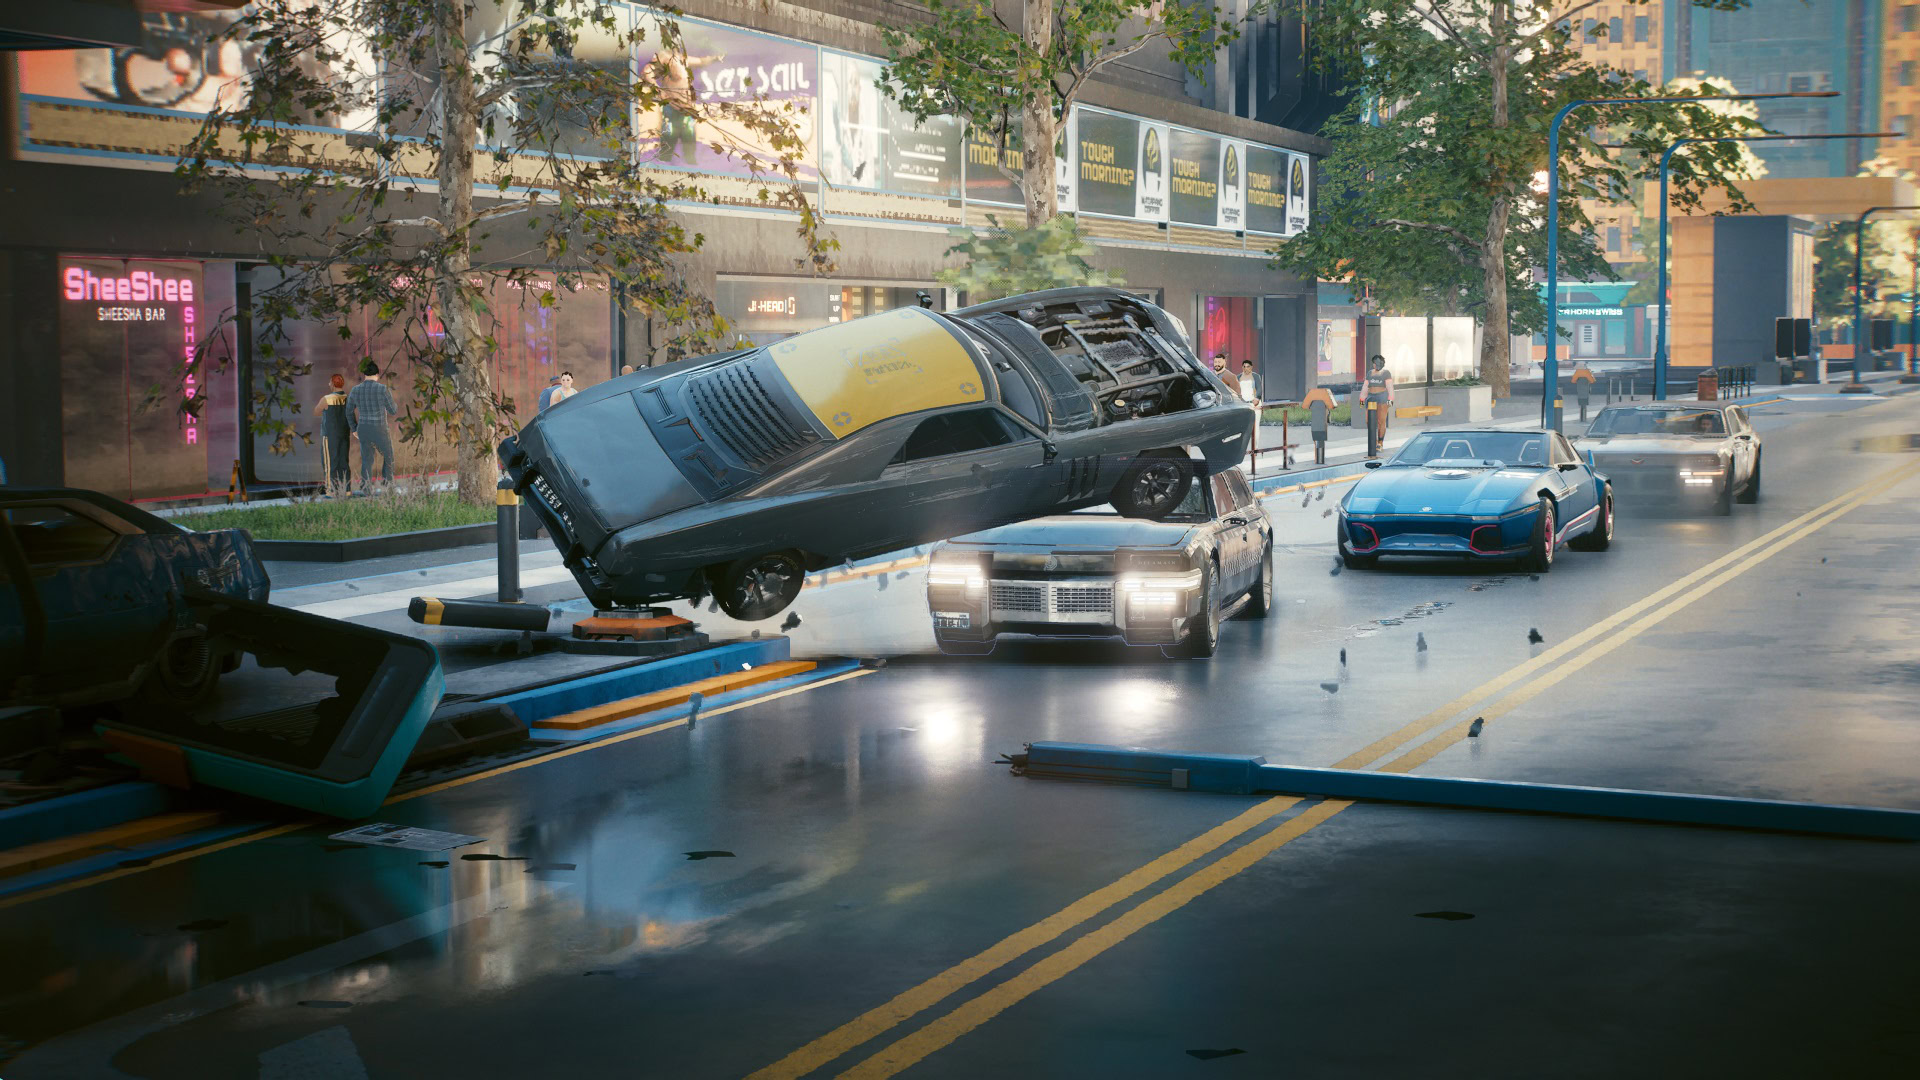
The only way to stop it is by causing a considerable amount of damage, without destroying it of course. The Delamain will constantly try to hit your vehicle, unless you’re using a weaponized car it will take a while to deactivate it.
The easiest way to do it is by getting out of the car and shooting with a powerful weapon. Just be careful because it won’t stop trying to run over you.
Fifth Delamain car: Coastview (Pacifica)
Another hostile Delamain can be found at Coastview (Pacifica). The approach of this one is a little more subtle than the previous one.
It will constantly taunt you while it runs away. You must follow it for a few meters before it stops.
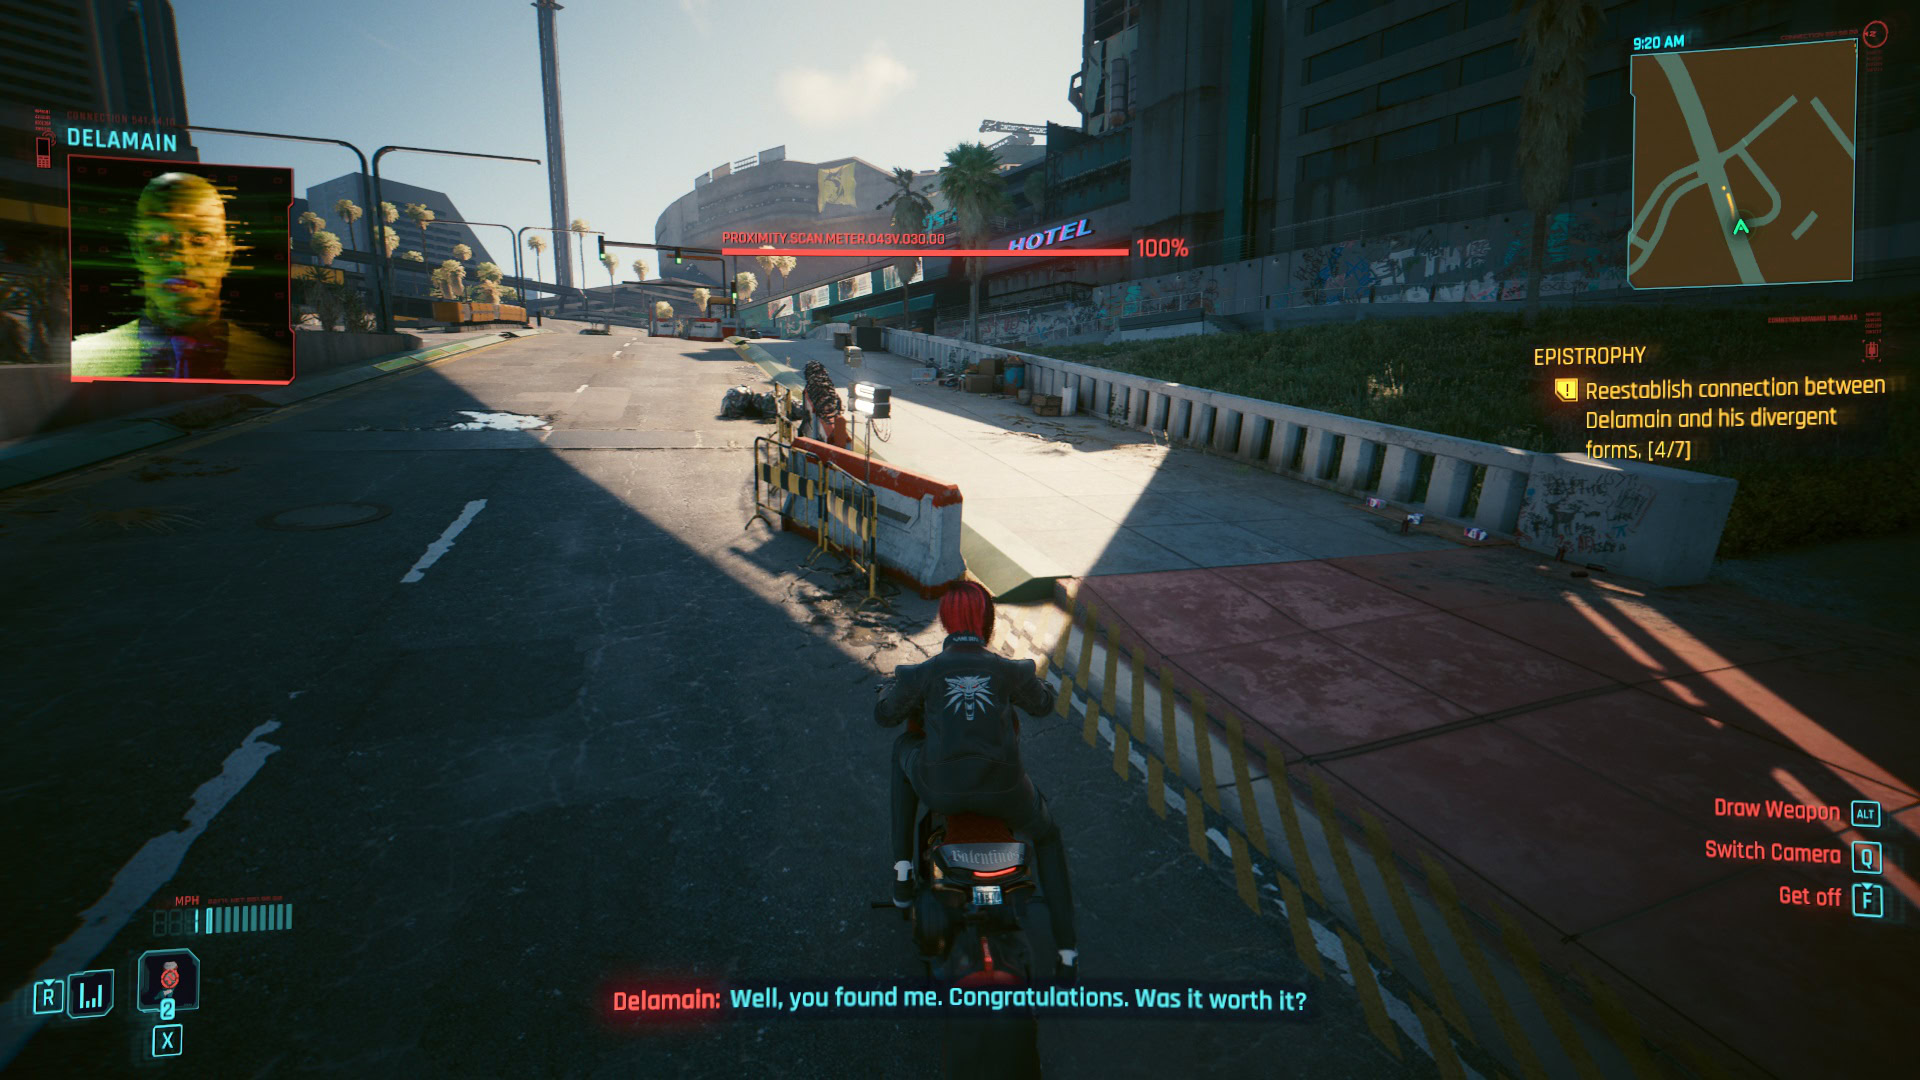
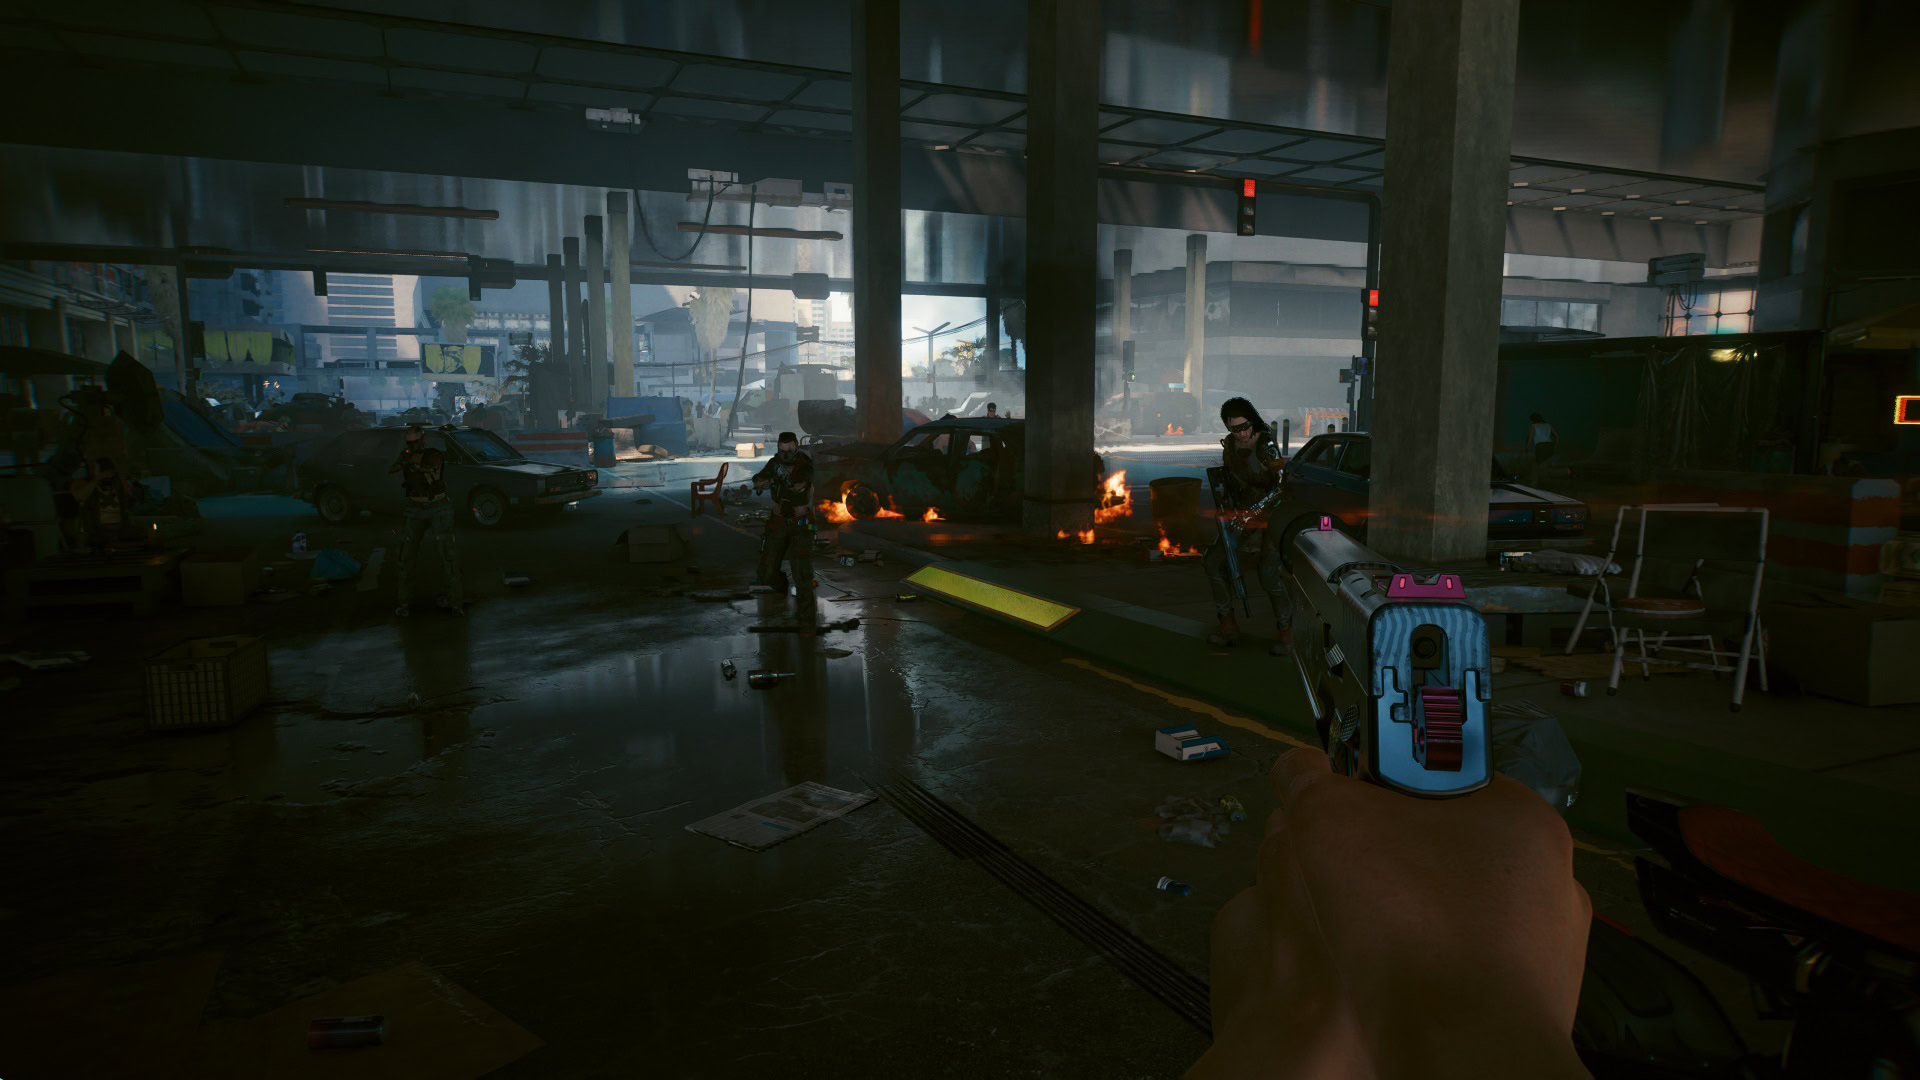
Before you know it, many humans will draw their weapons and start shooting. The Delamain’s purpose was to lure V into a trap. Eliminate all enemies and only then you’ll be able to speak to the crazy cab. It should return to the headquarters on its own.
Sixth Delamain car: Rancho Coronado (Santo Domingo)
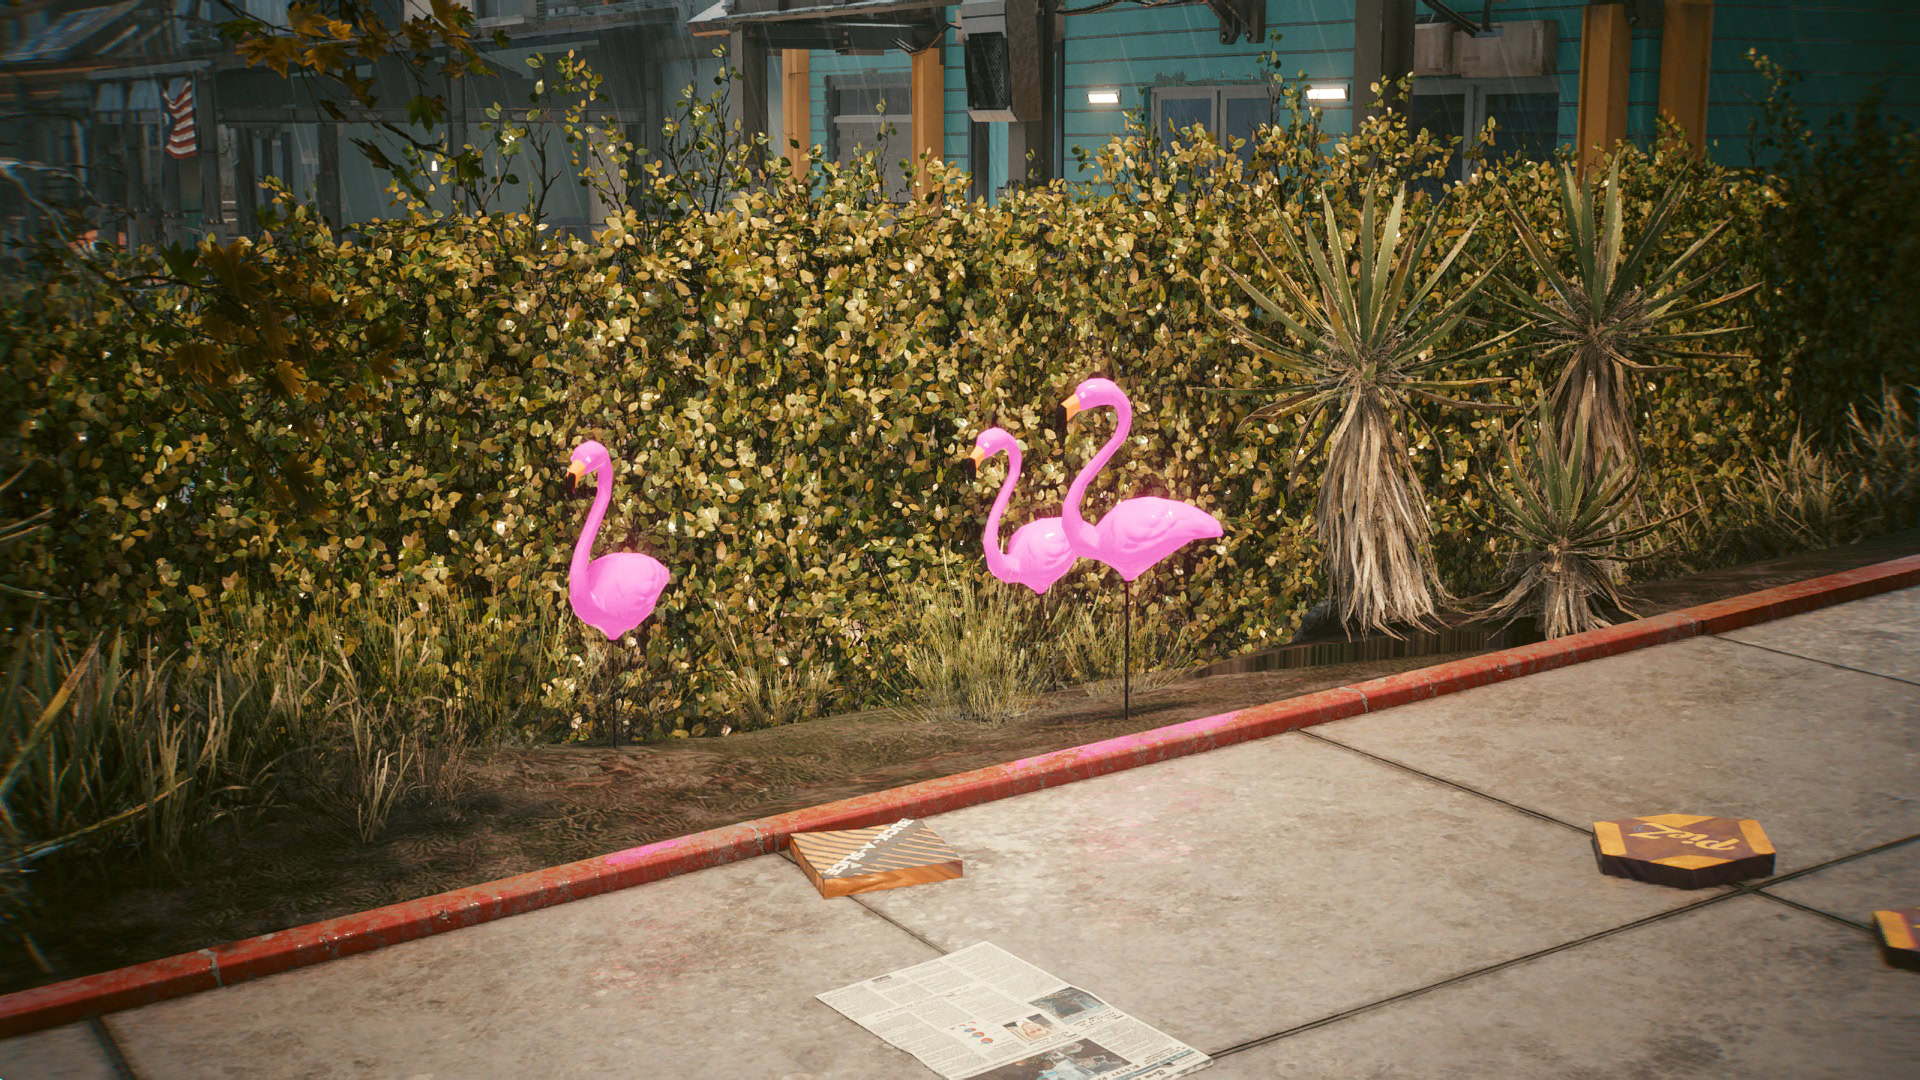
An extremely paranoid Delamain Coronado (Santo Domingo). This is probably the strangest of them all.
This Delamain variant is experiencing extreme paranoia. According to it, the “screams” won’t stop and it won’t agree to go unless you help silence those voices. The creatures that are stressing it so much are none other than flamingos. Yes, you read that right.
The front yards of this neighborhood are filled with these scary beasts. Once you’ve destroyed eight of them, the Delamain is going to return to the headquarters.
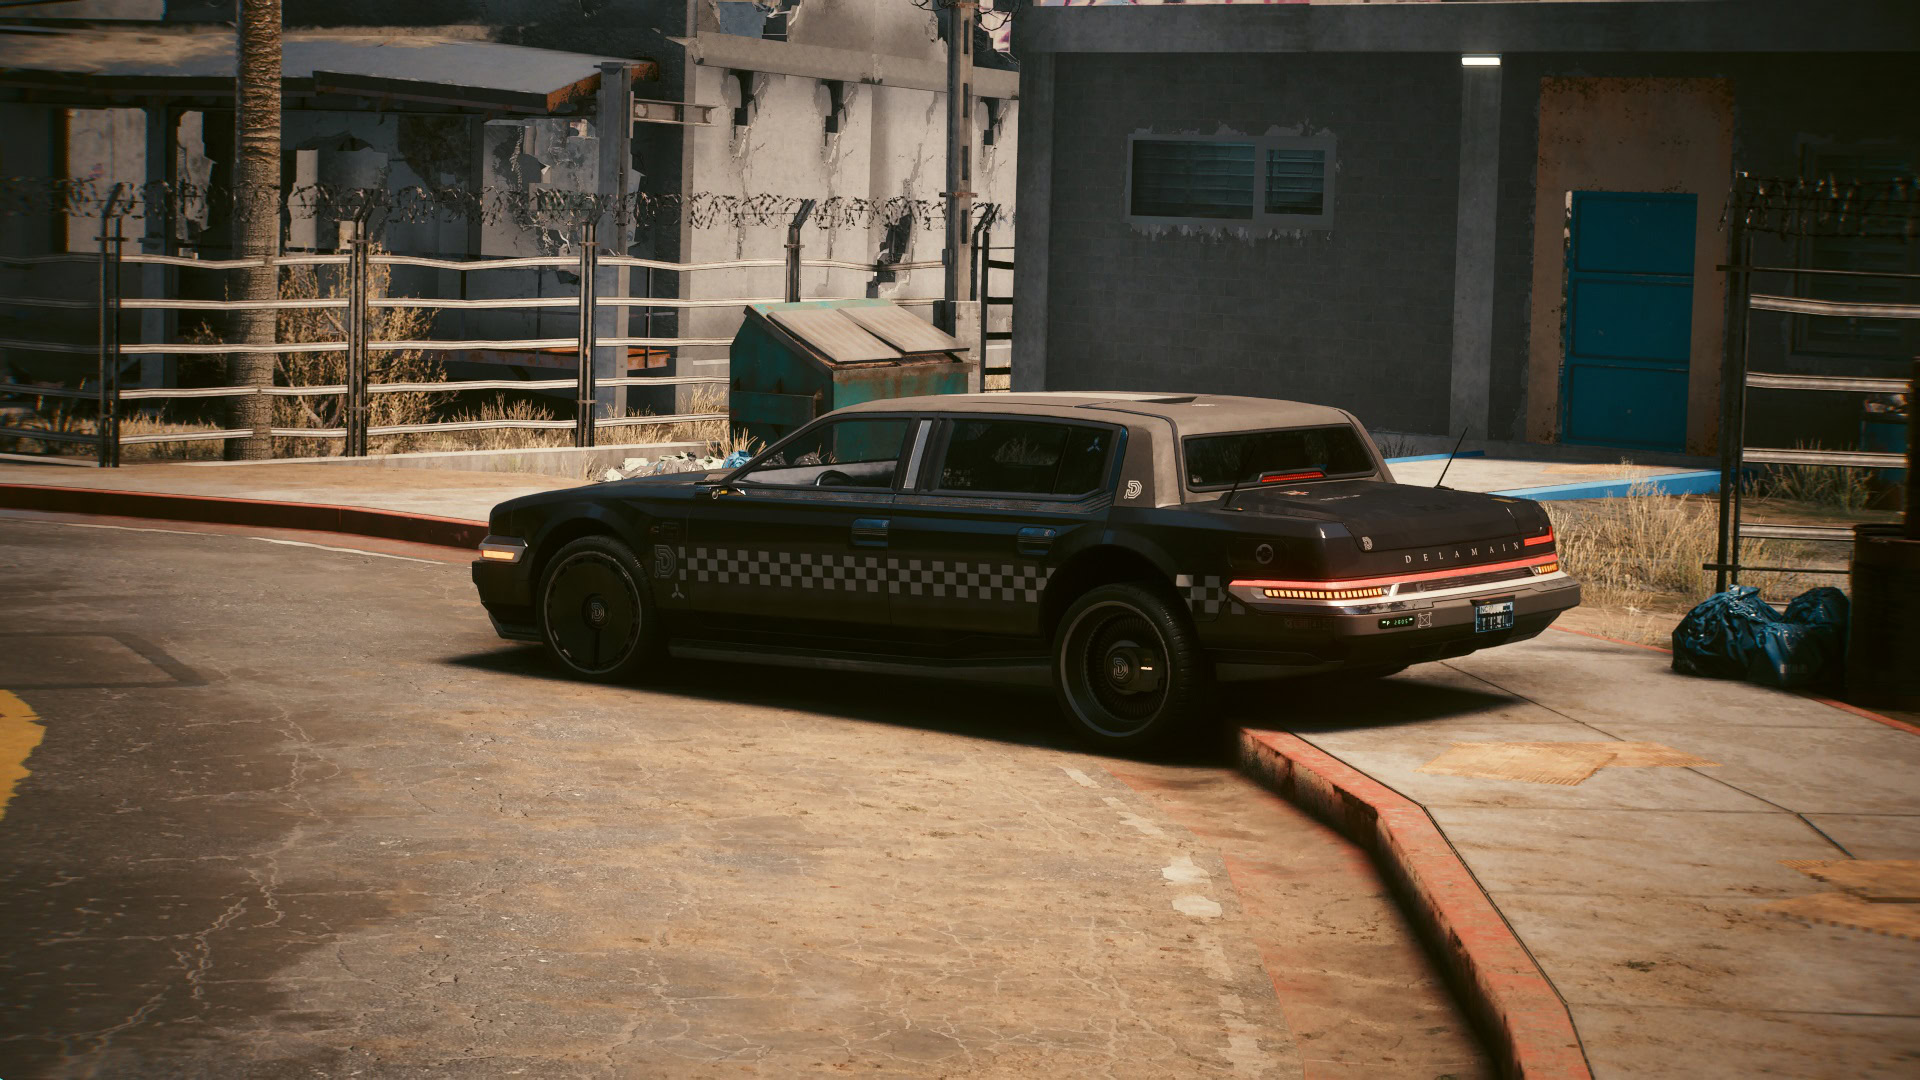
Seventh Delamain car: The Badlands
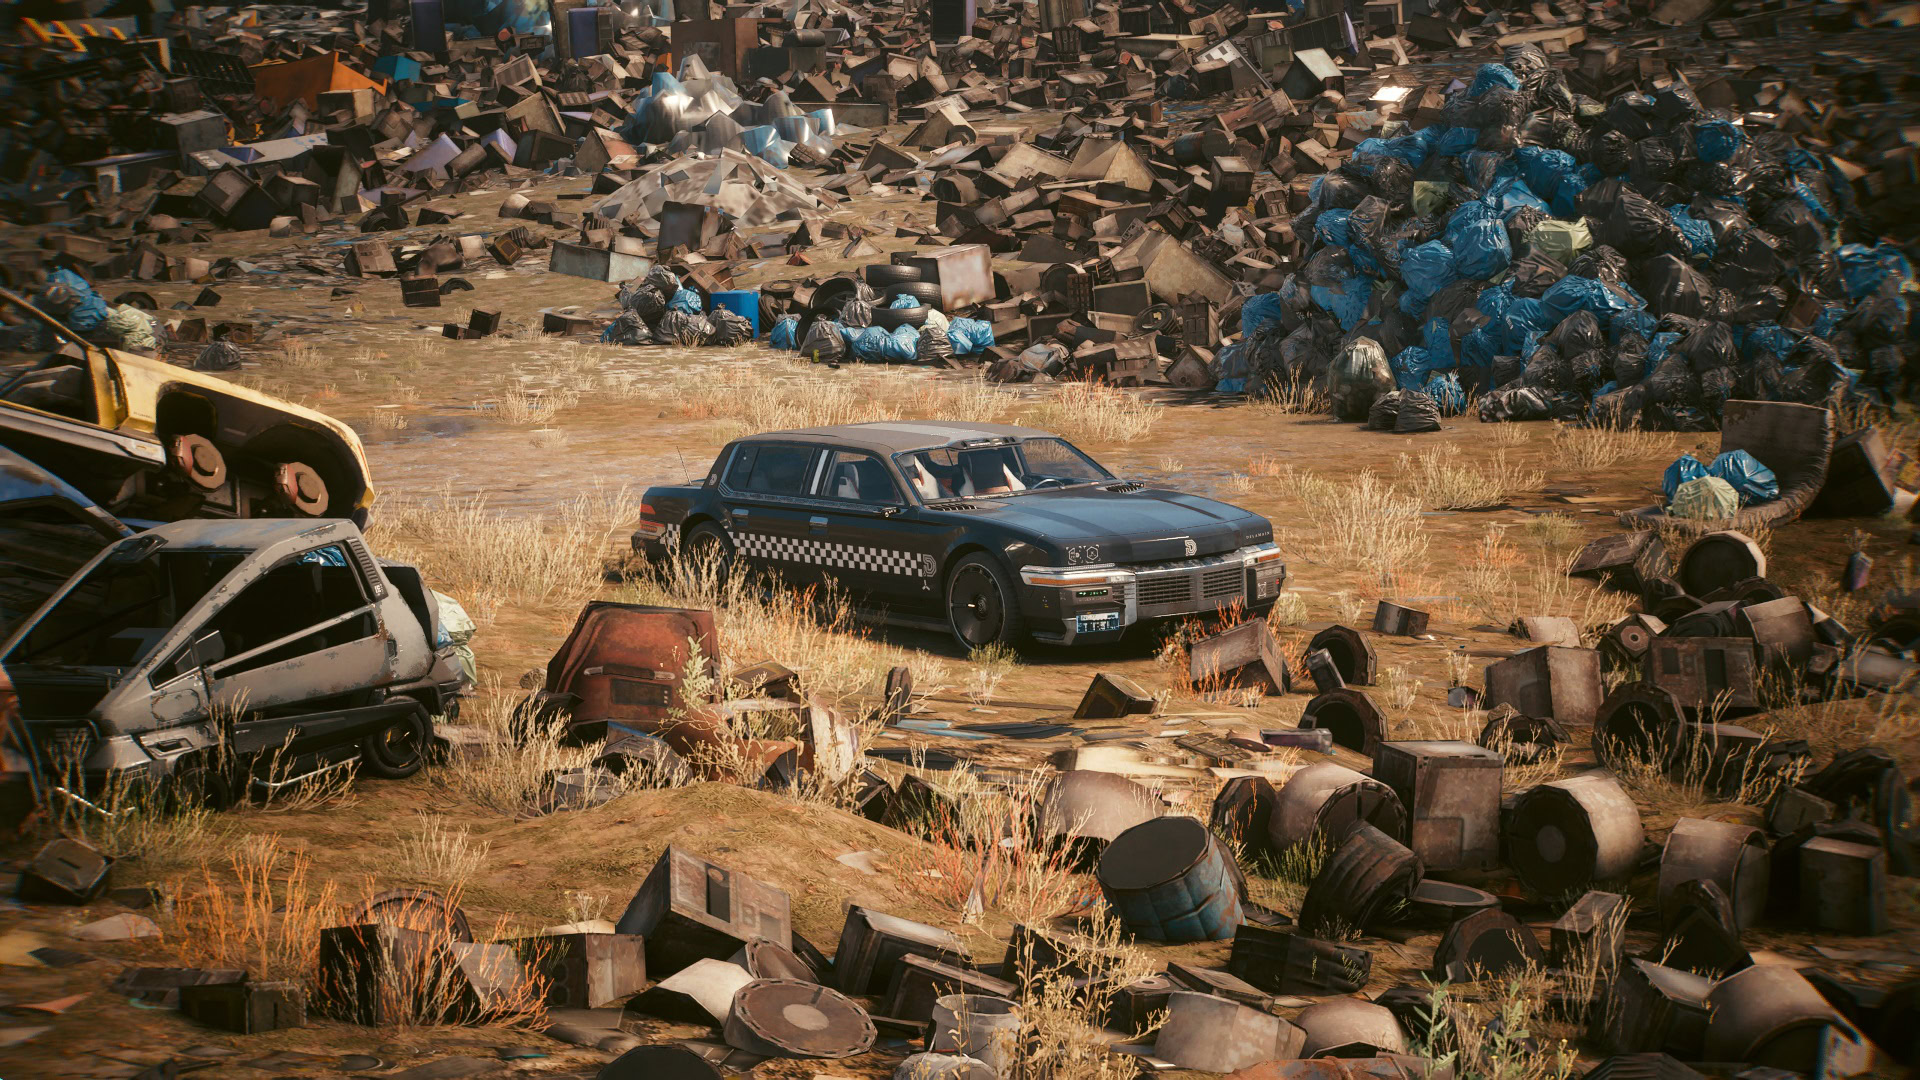
The last one is located in the Badlands, this one is parked in the middle of a dumpster. There aren’t any nasty surprises waiting for you.
Get inside the back seat, the Delamain taxi will say just a few words before re-establishing its connection with Delamain, you don’t have to do anything else. Once all cars have returned to the headquarters, Epistrophy will be completed.
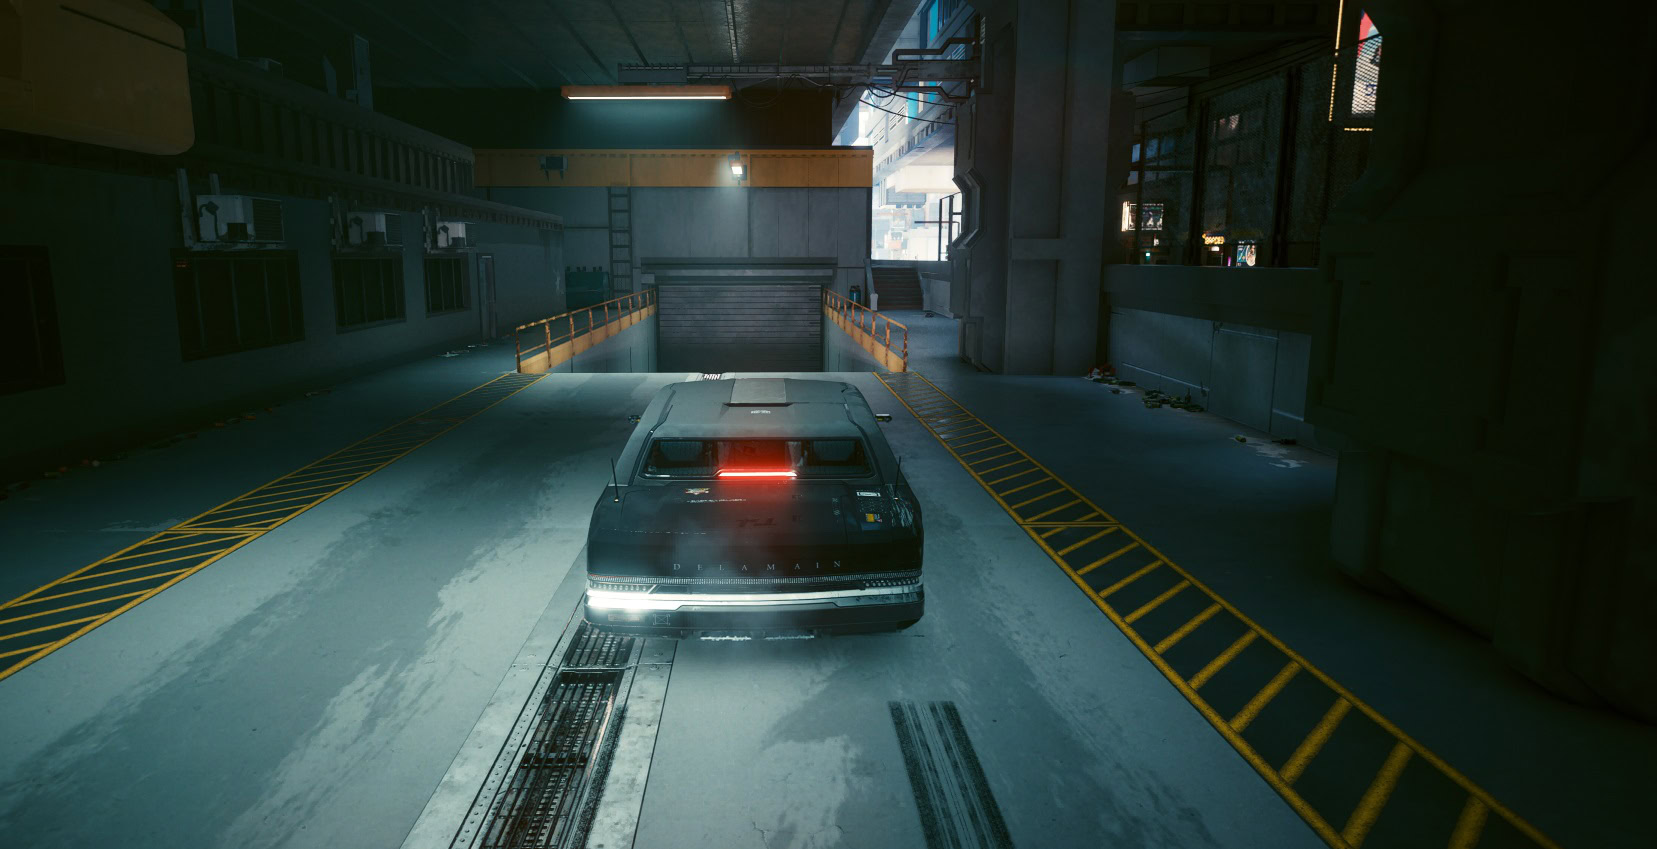
Don’t Lose Your Mind Walkthrough
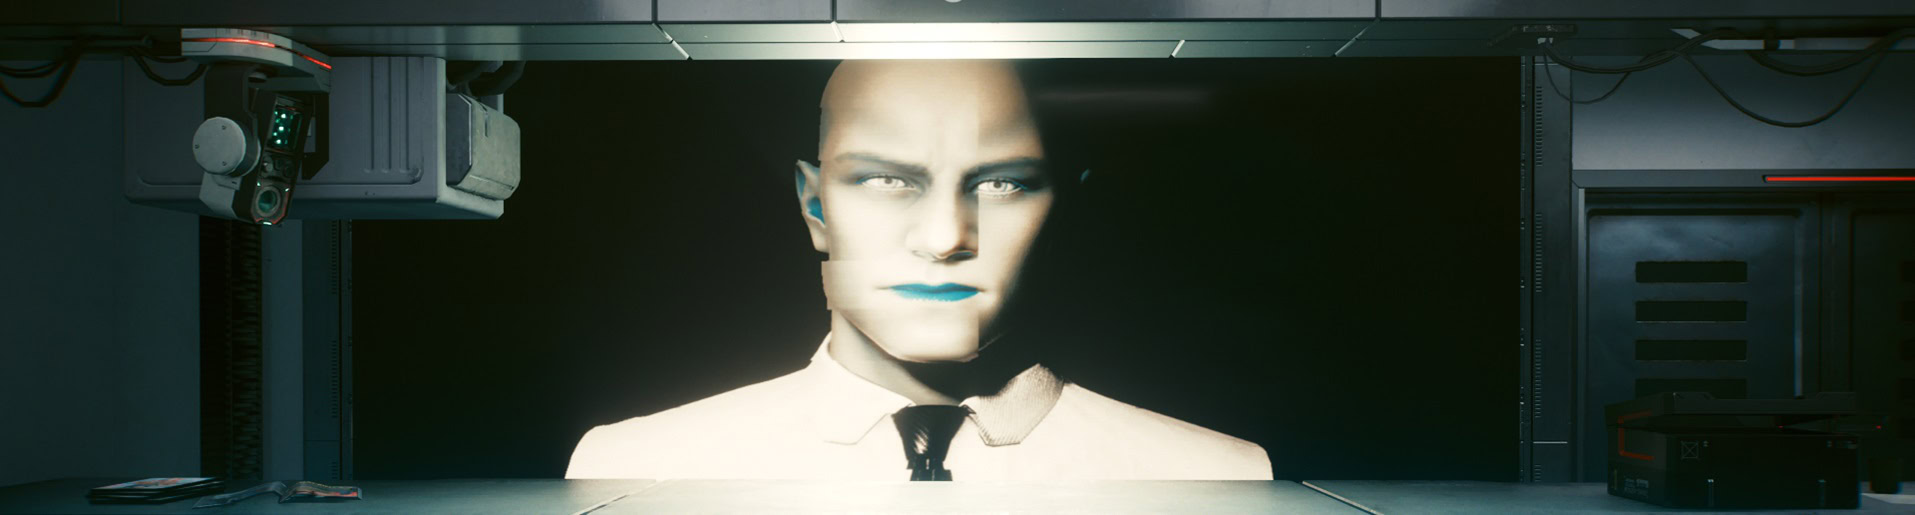
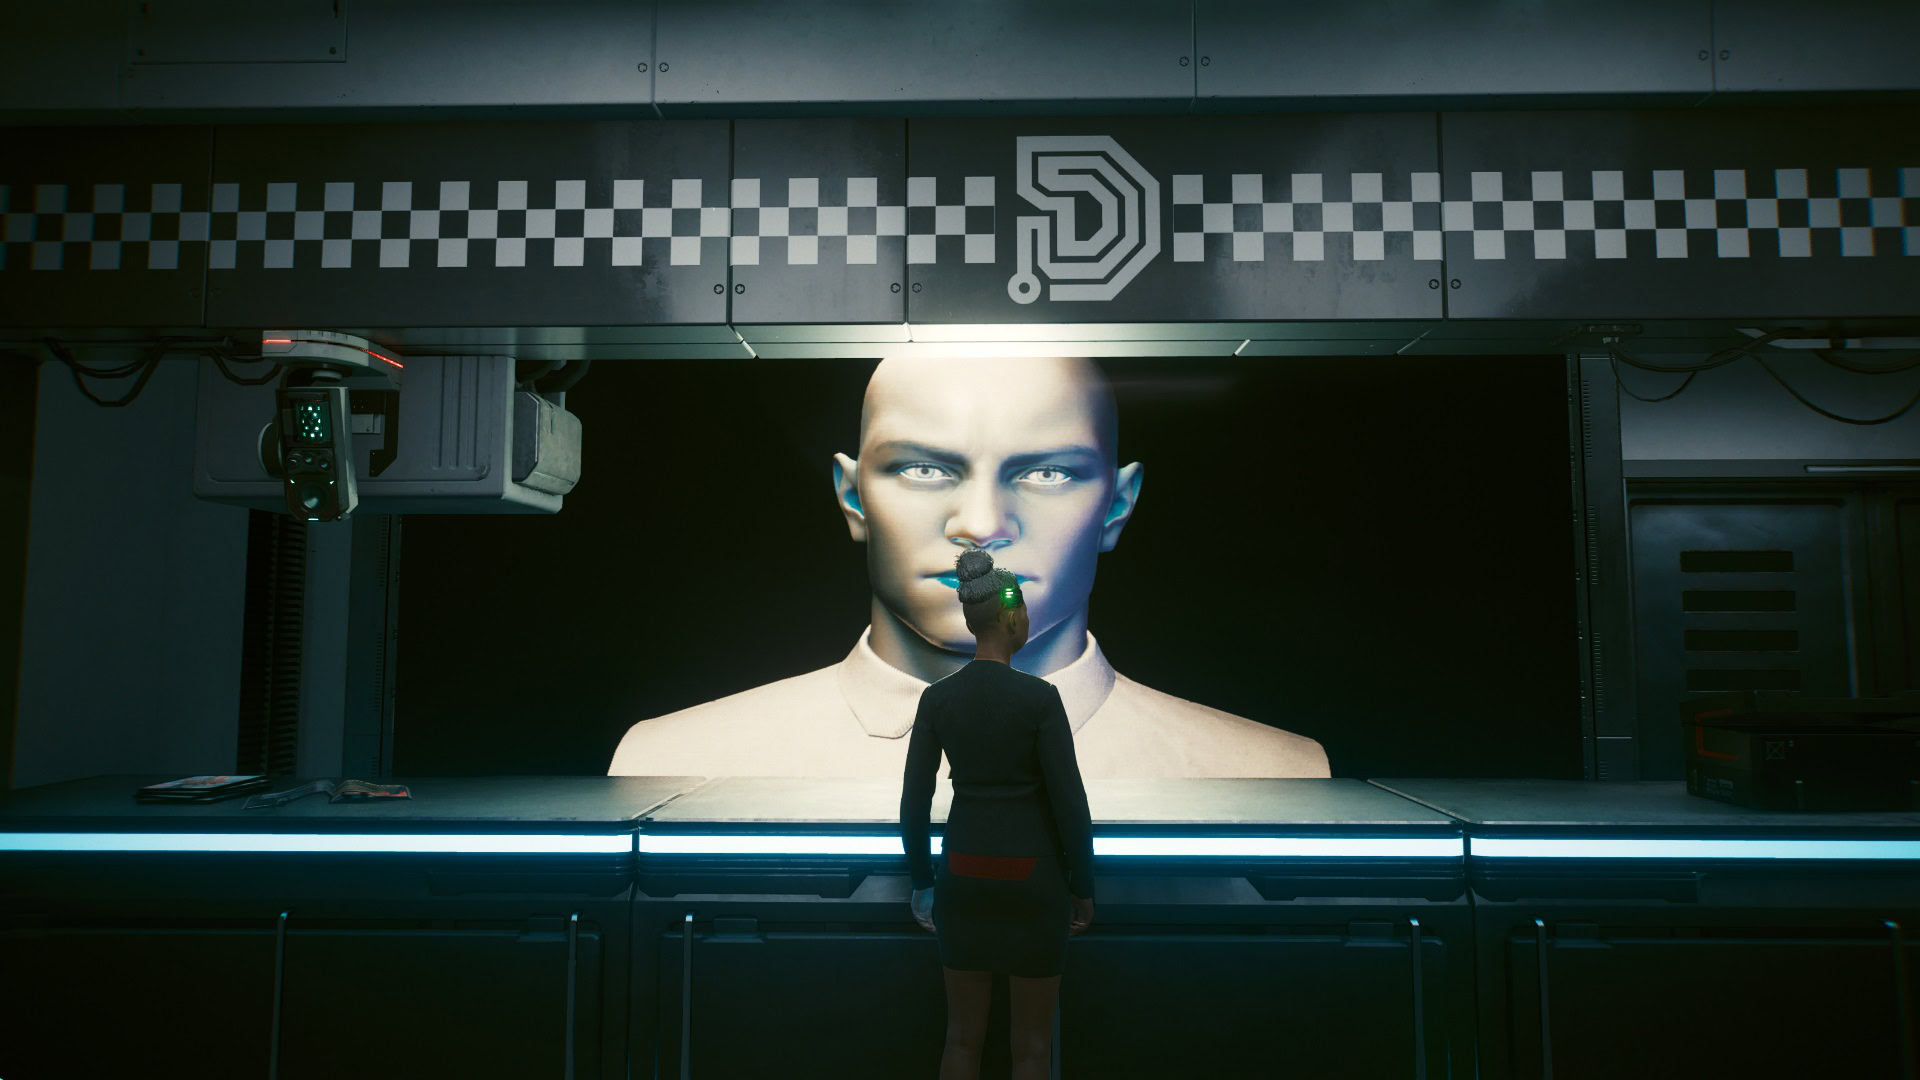
After waiting for a few hours, Delamain will ask for more help. This is the beginning of “Don’t lose your mind” Go to the Delamain headquarters and talk to the receptionist. Delamain will immediately ask for you to go to the “office”.
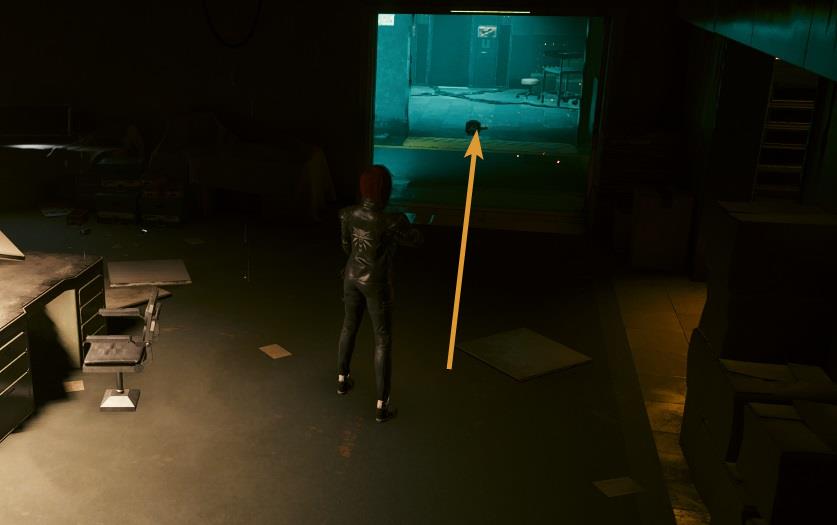
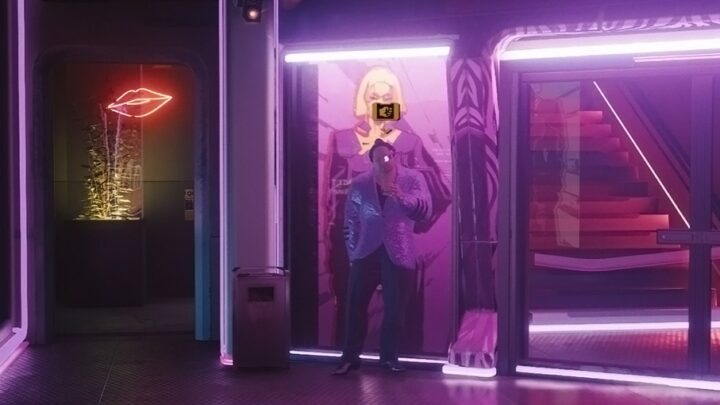
Everything but the main entrance is closed, go outside and enter through the door seen in the following image. Requires 8 Technical Ability points.
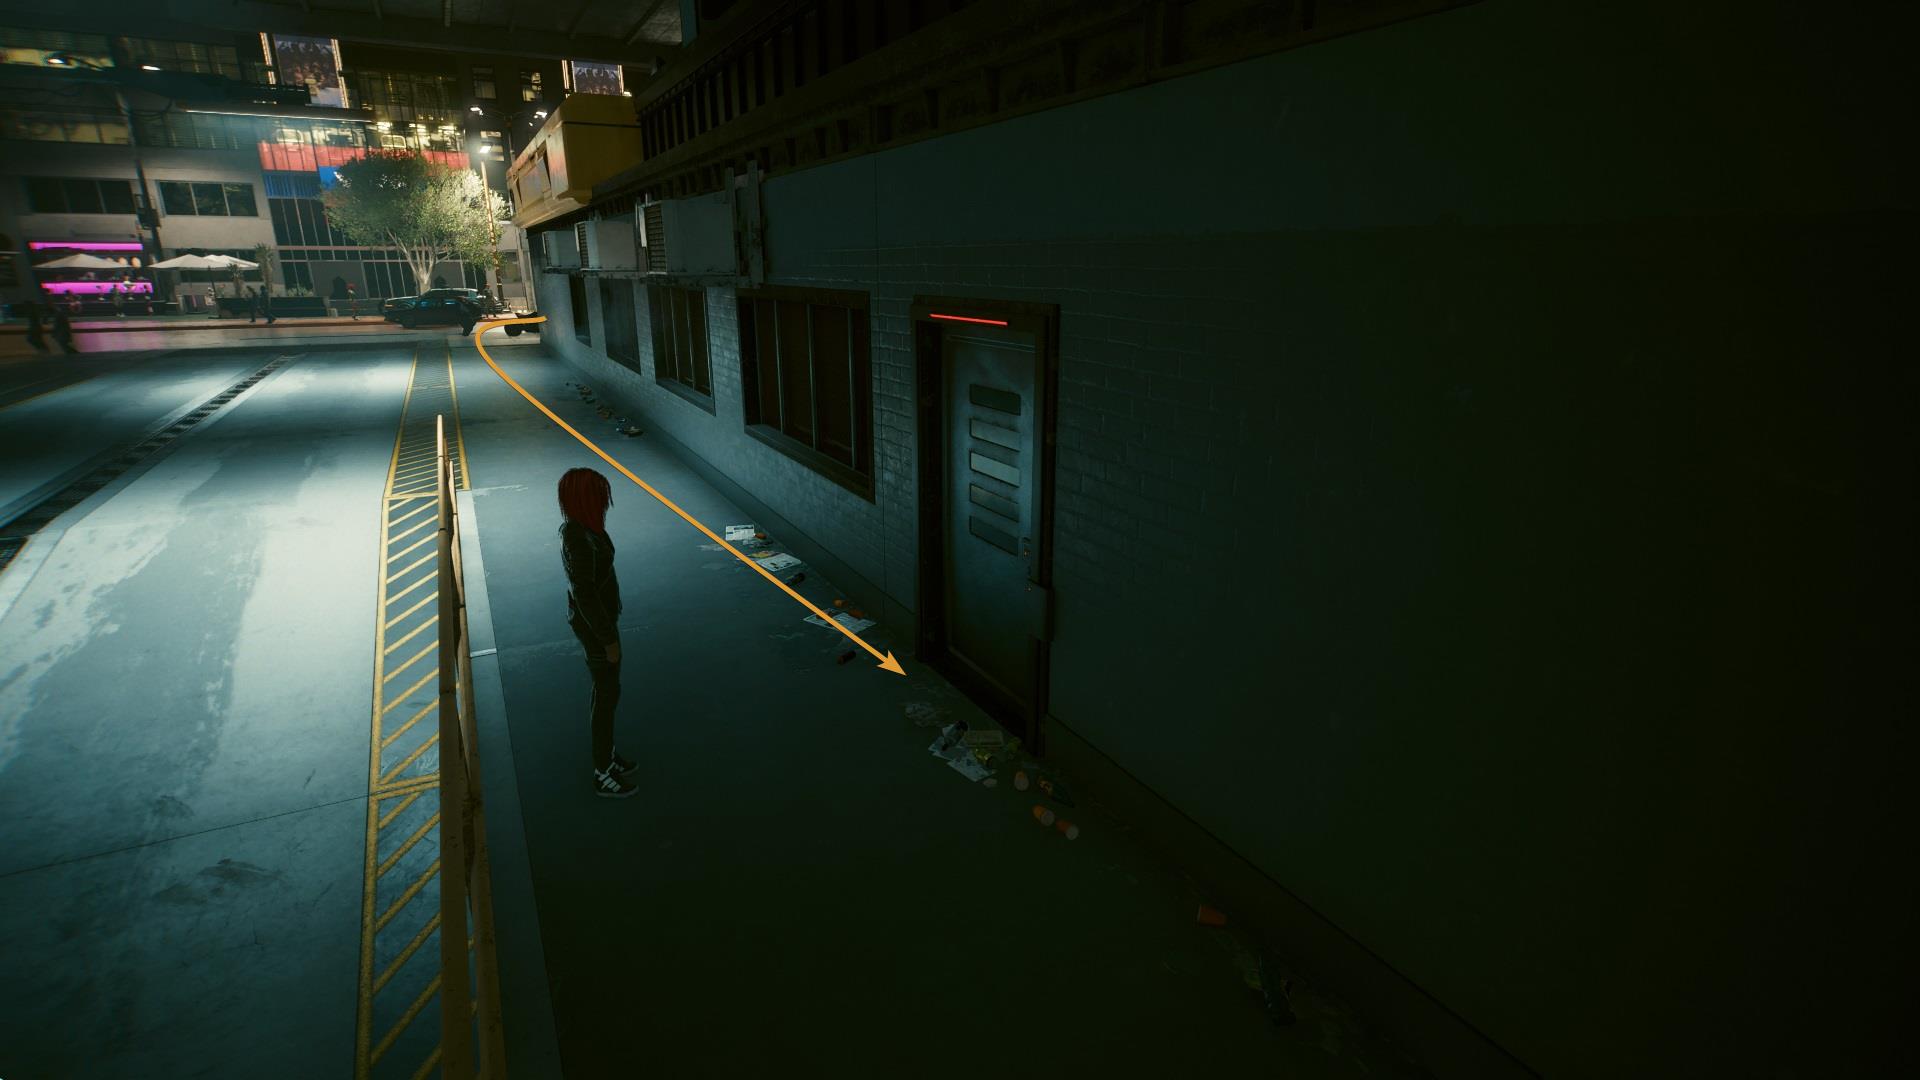
There’s another entrance in case you don’t have enough Technical Ability. Head to the alley that’s on the back.
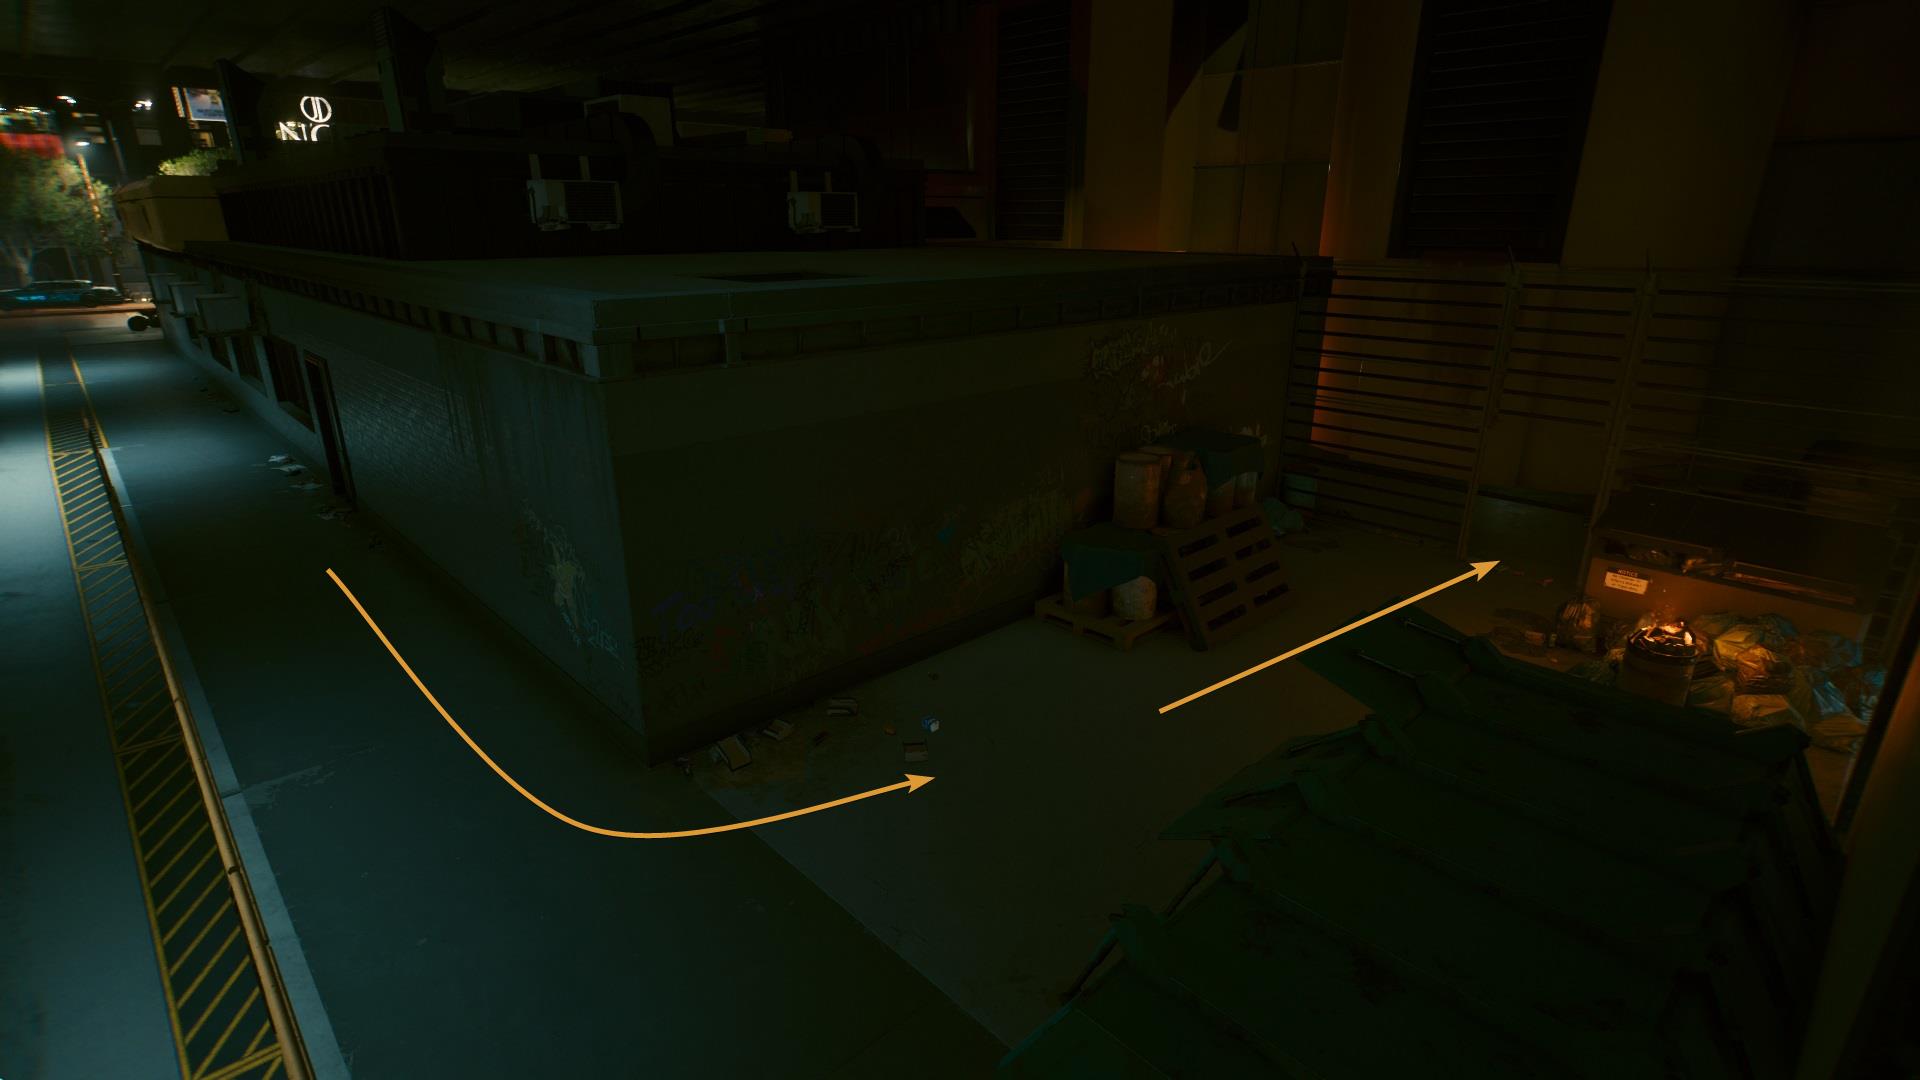
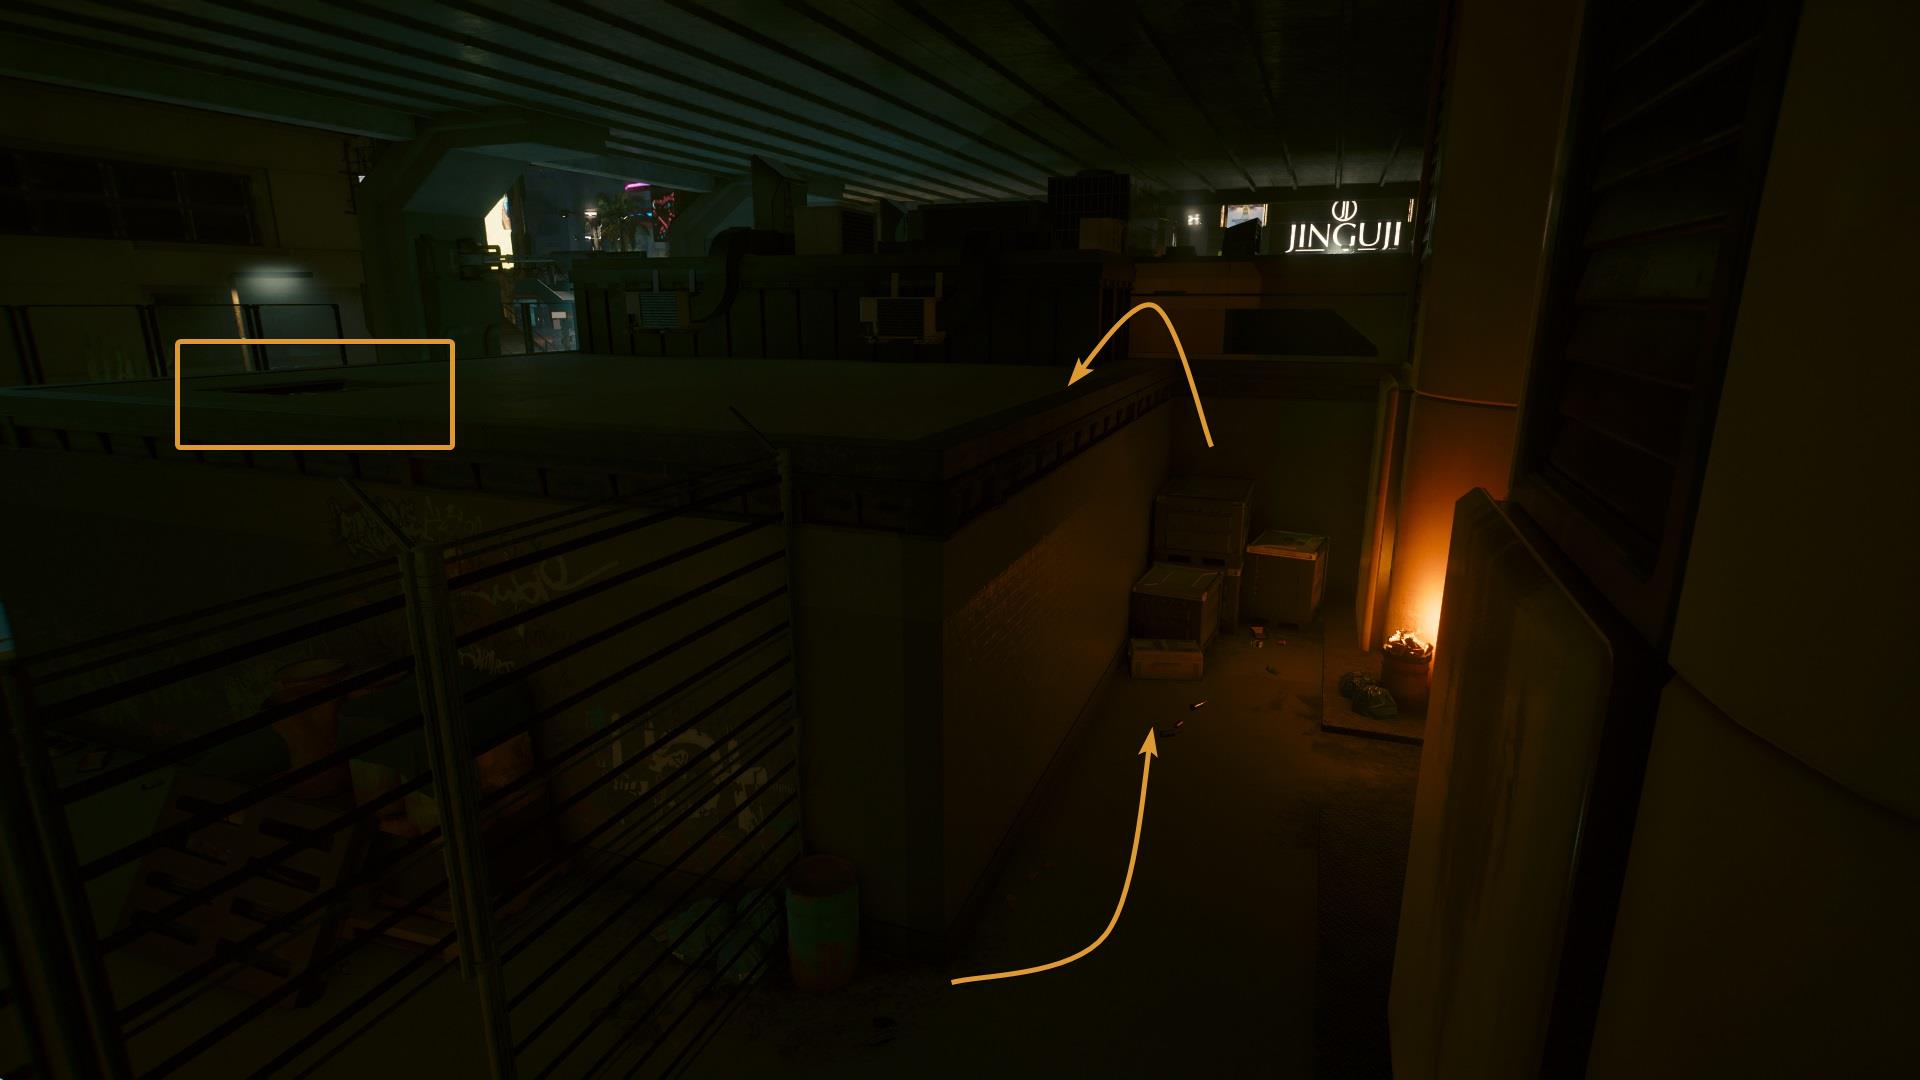
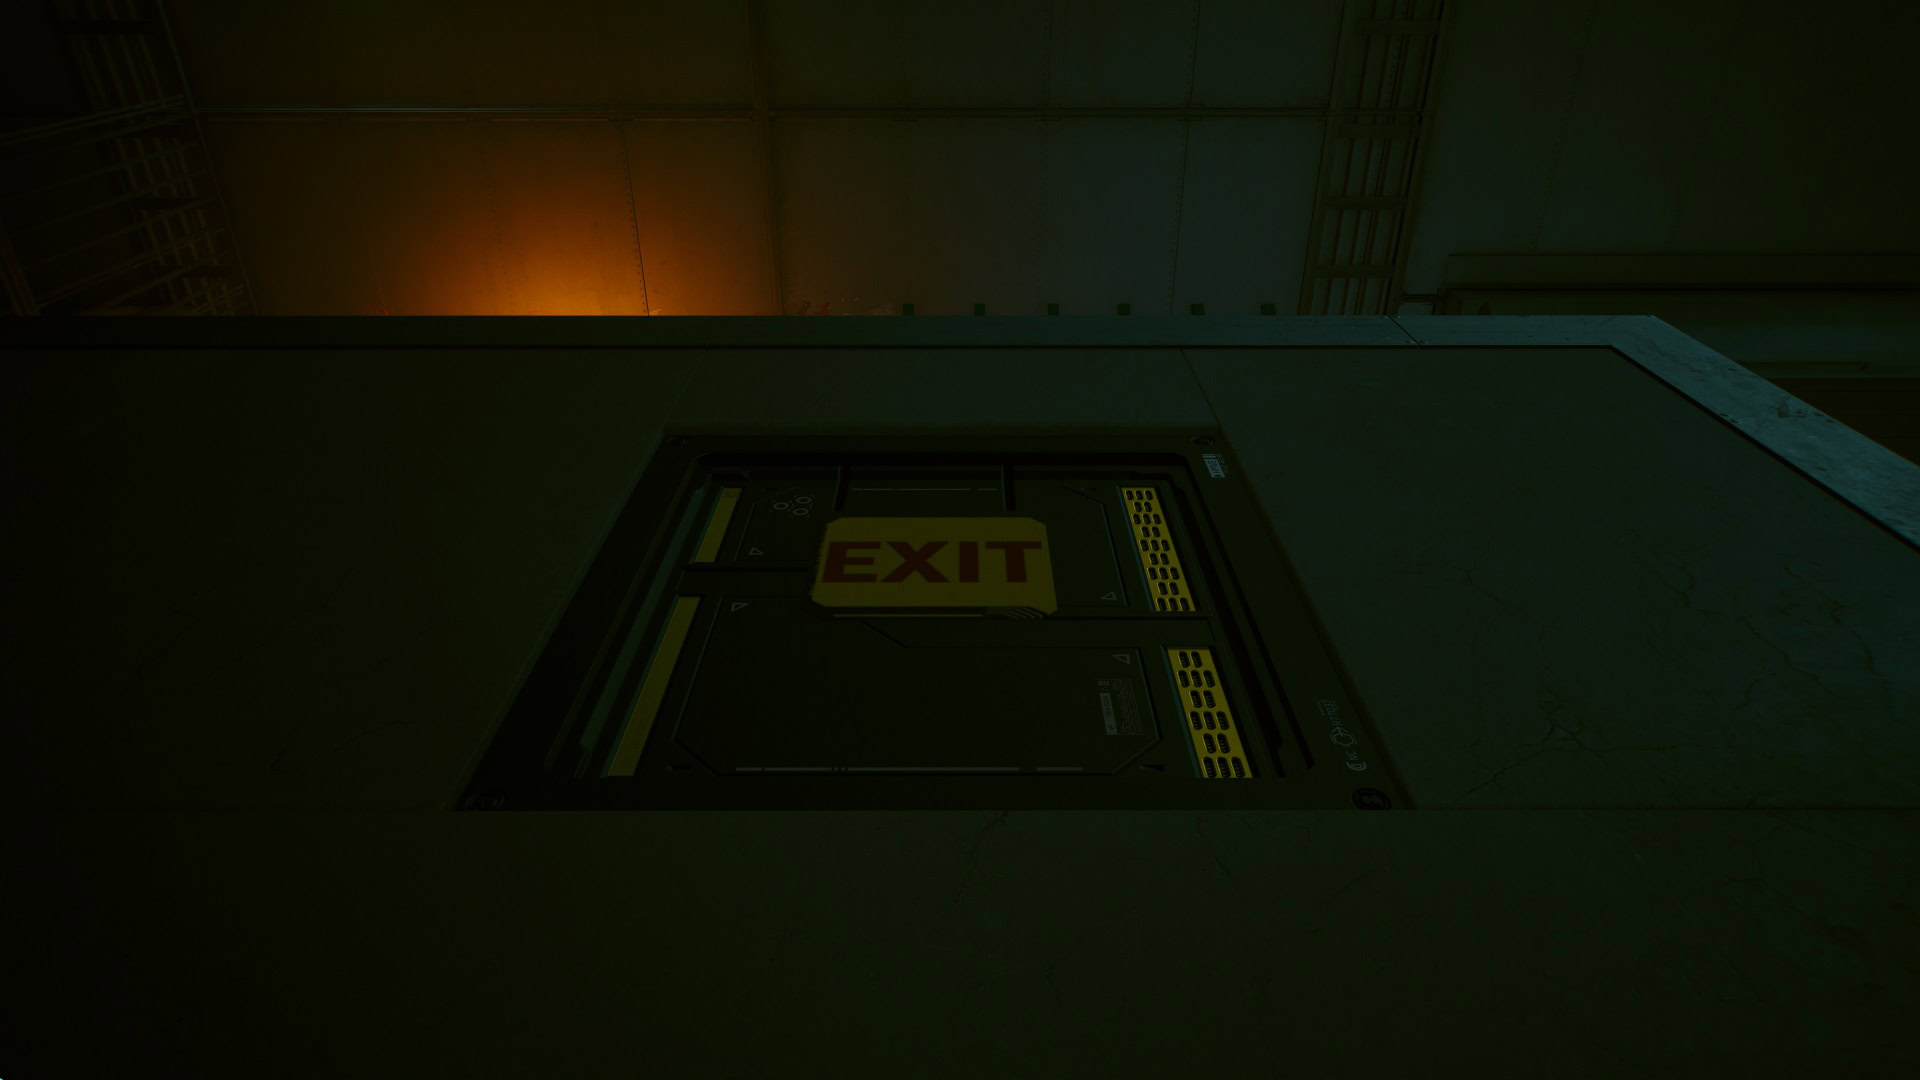
Use the boxes and containers to get to the roof. Look for the emergency exit on the roof. Entering this way doesn’t impact the outcome of this mission in any way.
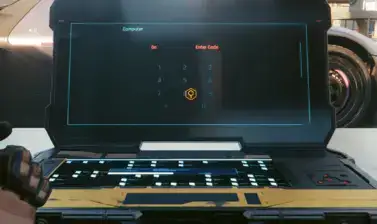
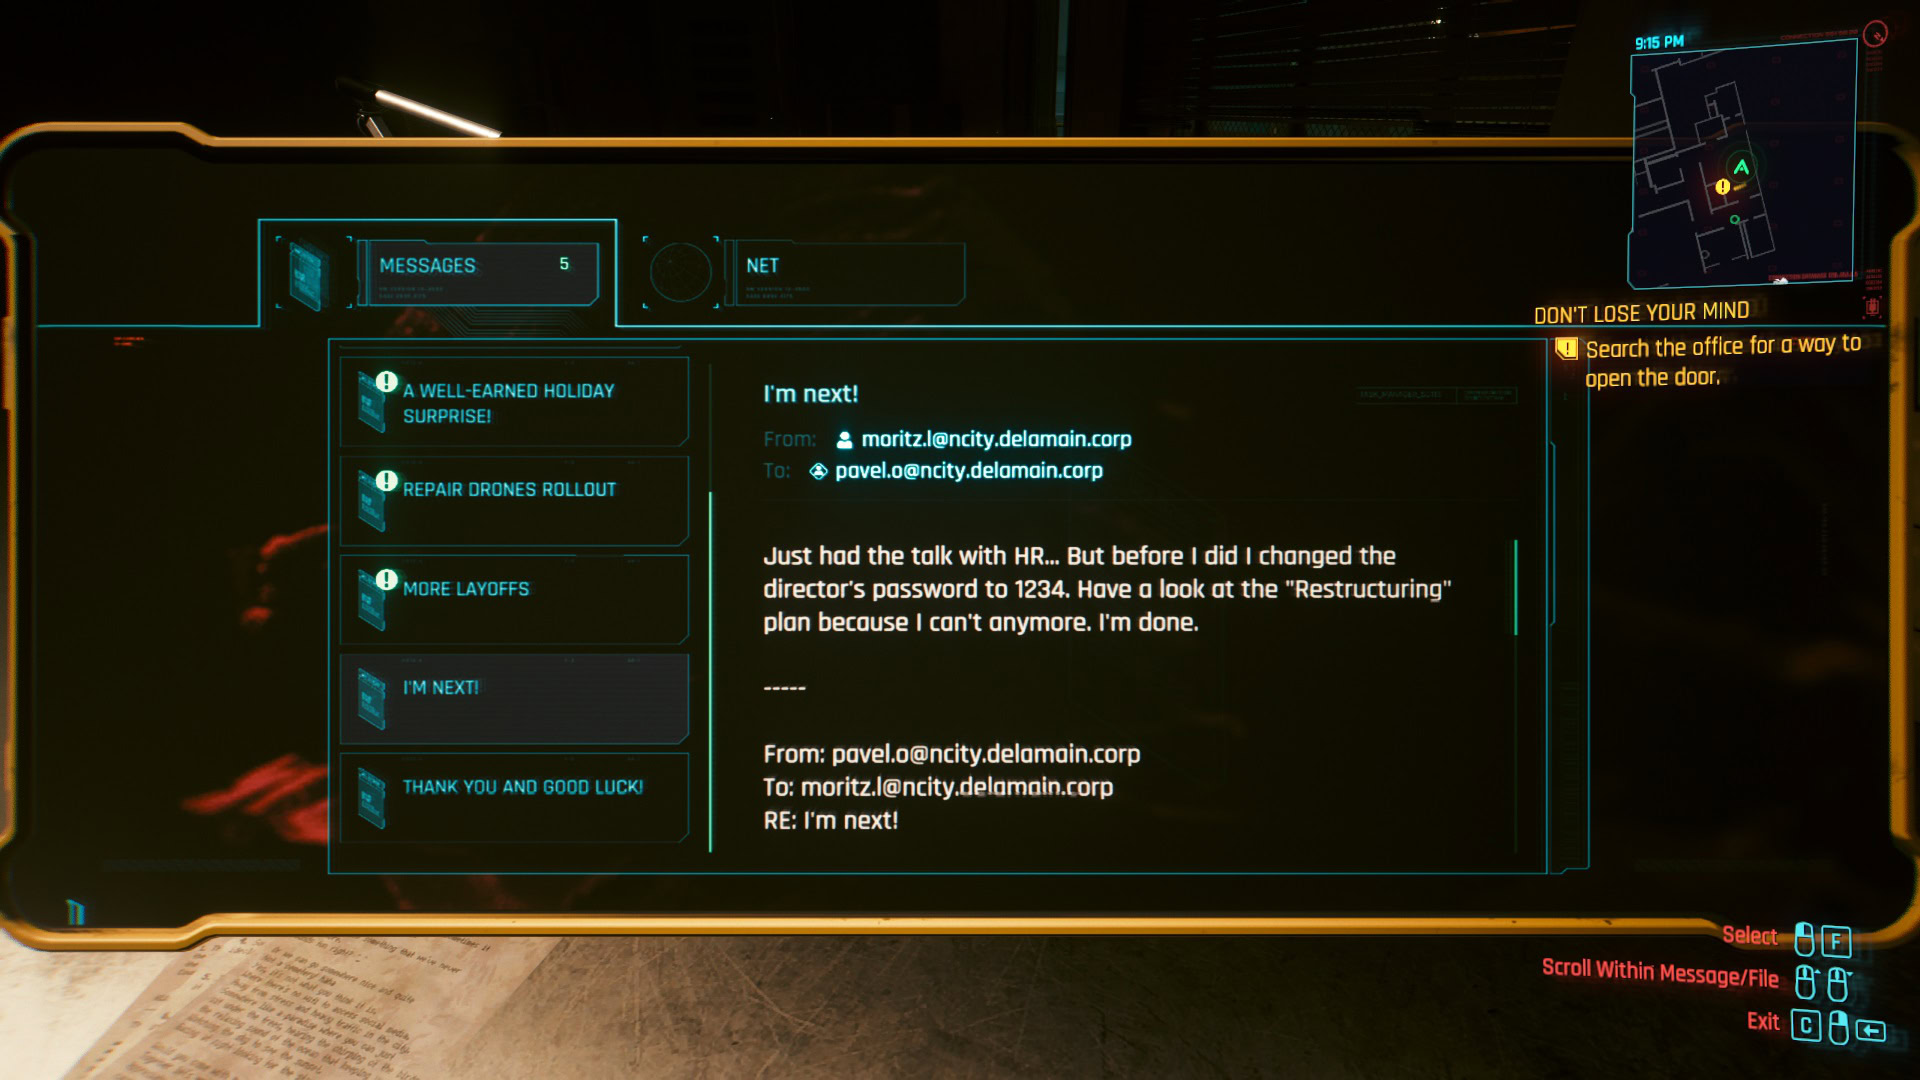
A computer must be accessed, doing so will grant access to the garage. But before you must get the security code. Another computer located in the biggest area contains a bunch of emails, upon reading them you’ll find one that states how someone changed the password to “1234”. This is the password you’re looking for.
The door that was previously sealed will open. Proceed to the next area.
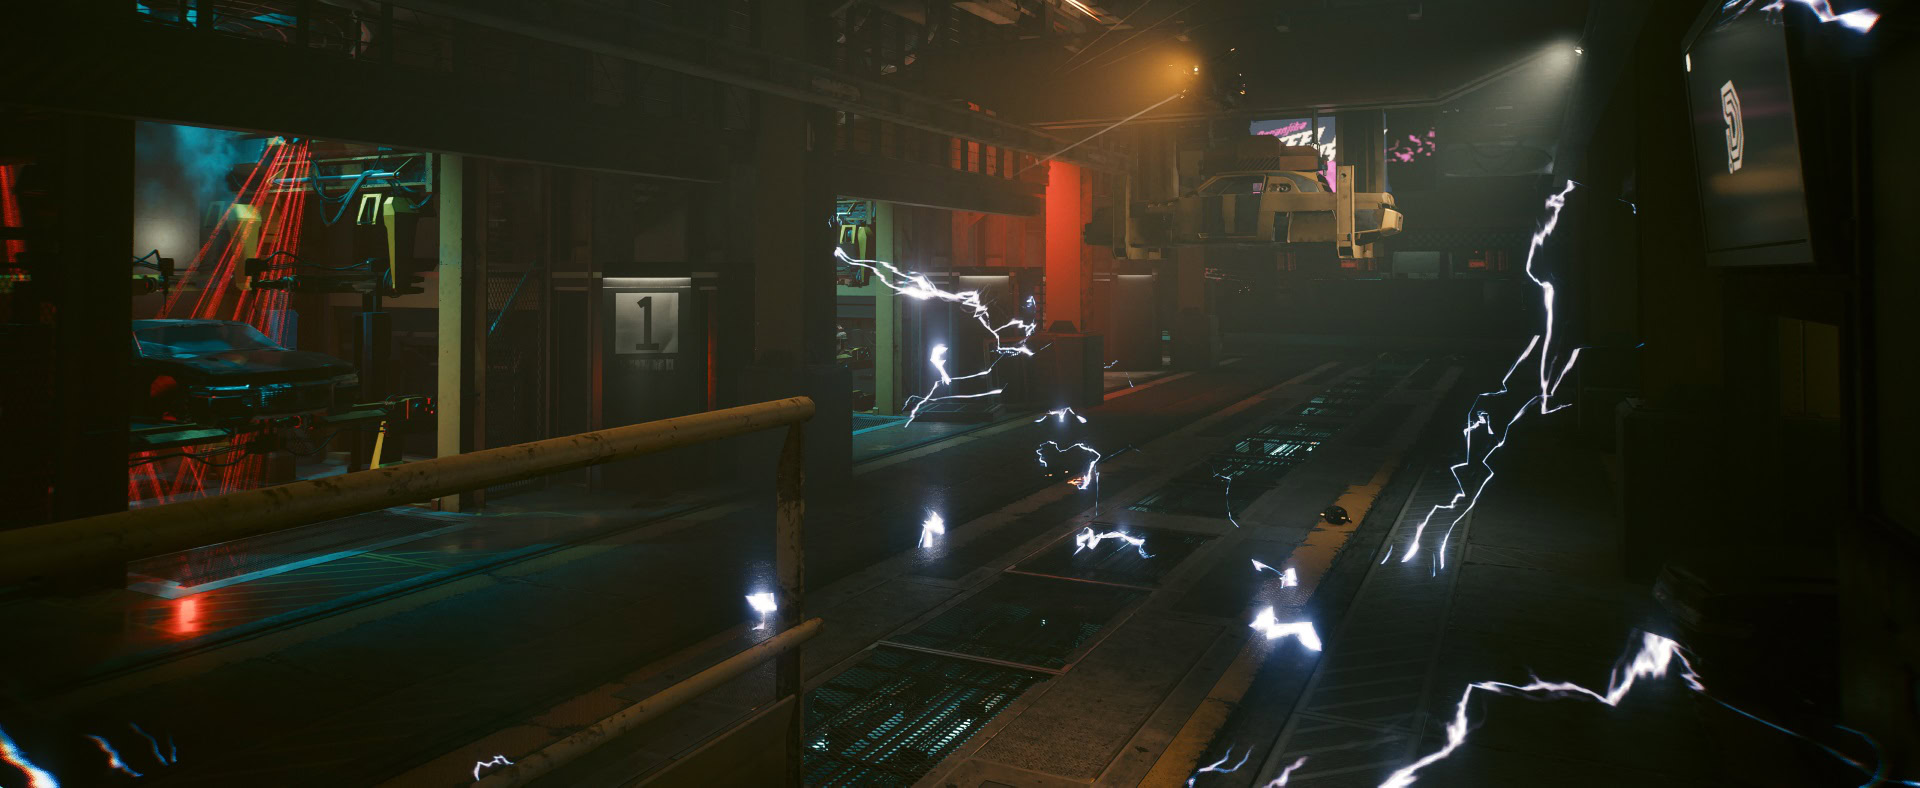
This garage is complete chaos, Delamain and its divergent forms are all trying to gain control in any way possible and this is reflected in the entire facility.
Multiple drones are attacking each other but do not let this confuse you. The moment you’re spotted they’ll turn on you, they’re not too dangerous but it can be hard to hit them.
Electricity is all over the place, it might not look menacing but it is deadly. Do not touch it unless you want to reload the last checkpoint.
Reach the stairs that are exactly in front of the entrance of the garage. There’s electricity midway, but it’s intermittent. It’s easy to get through once you get used to the timing.
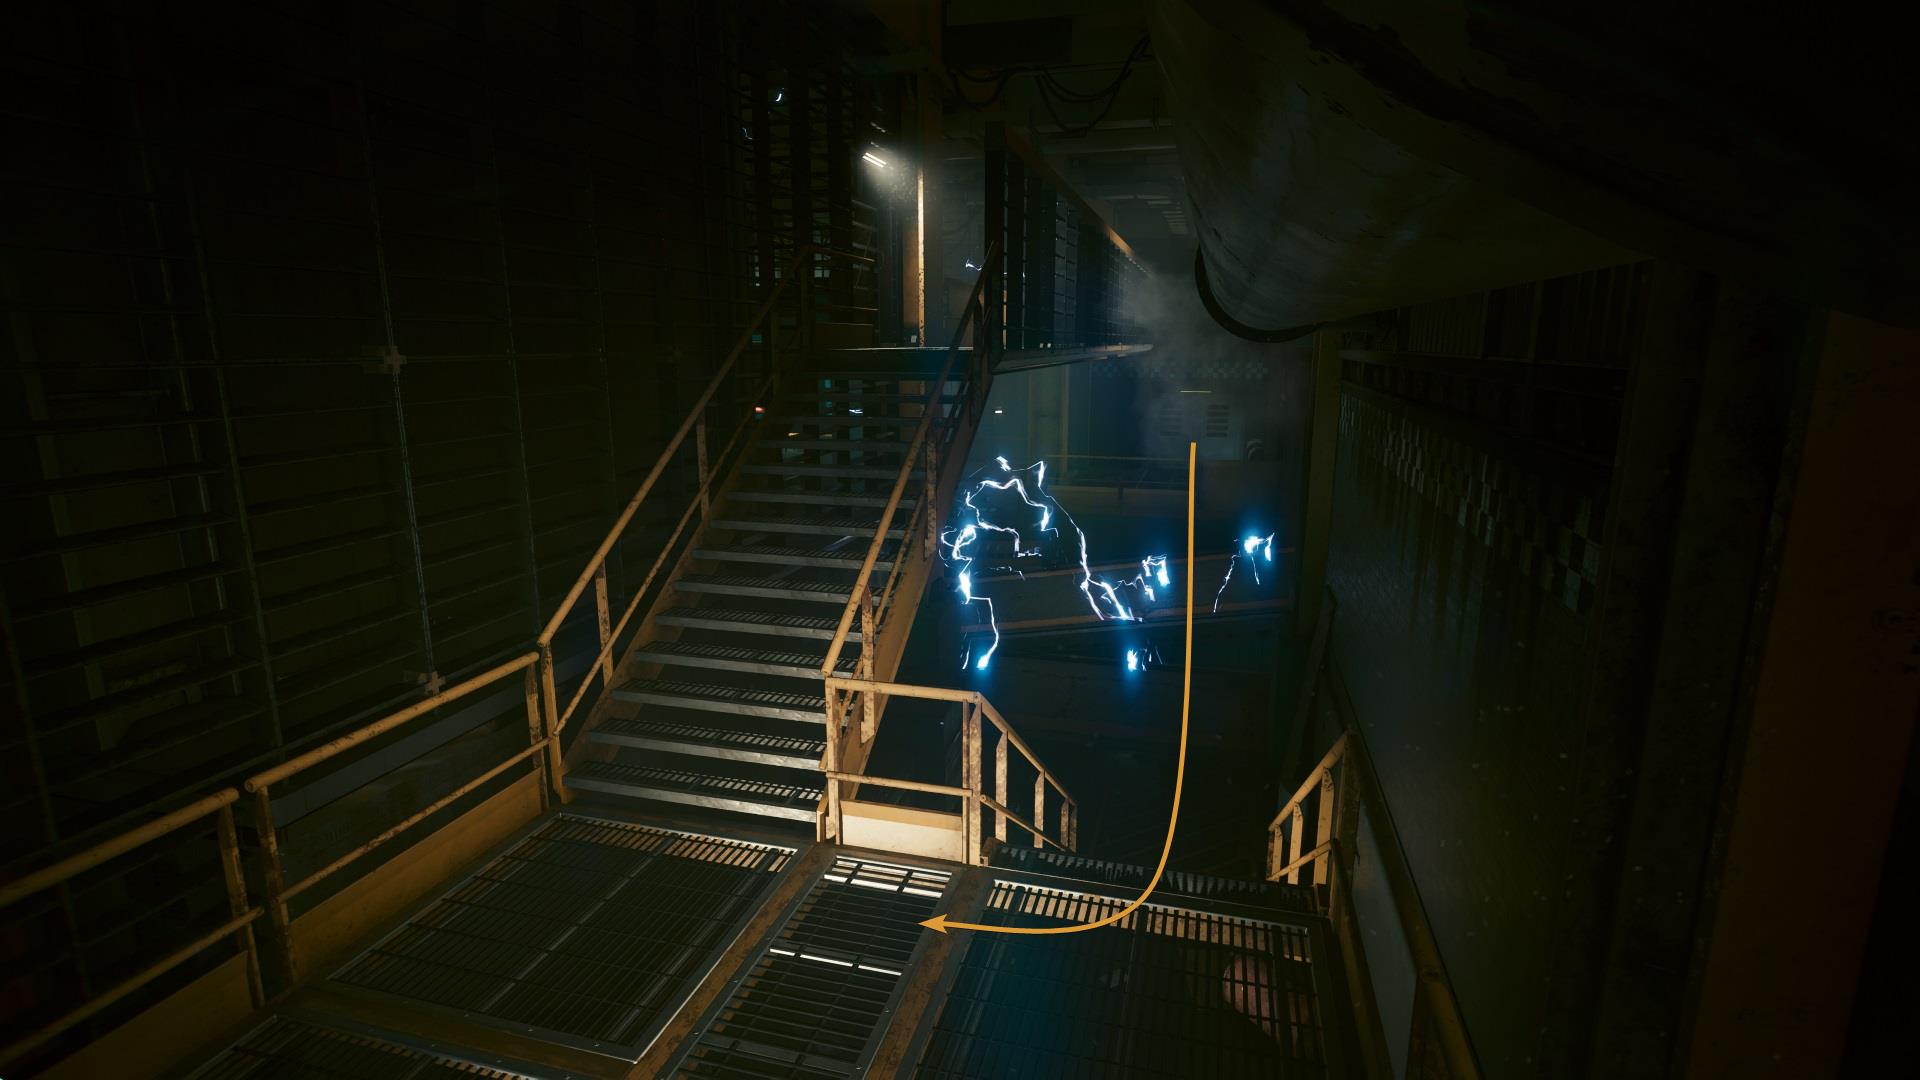
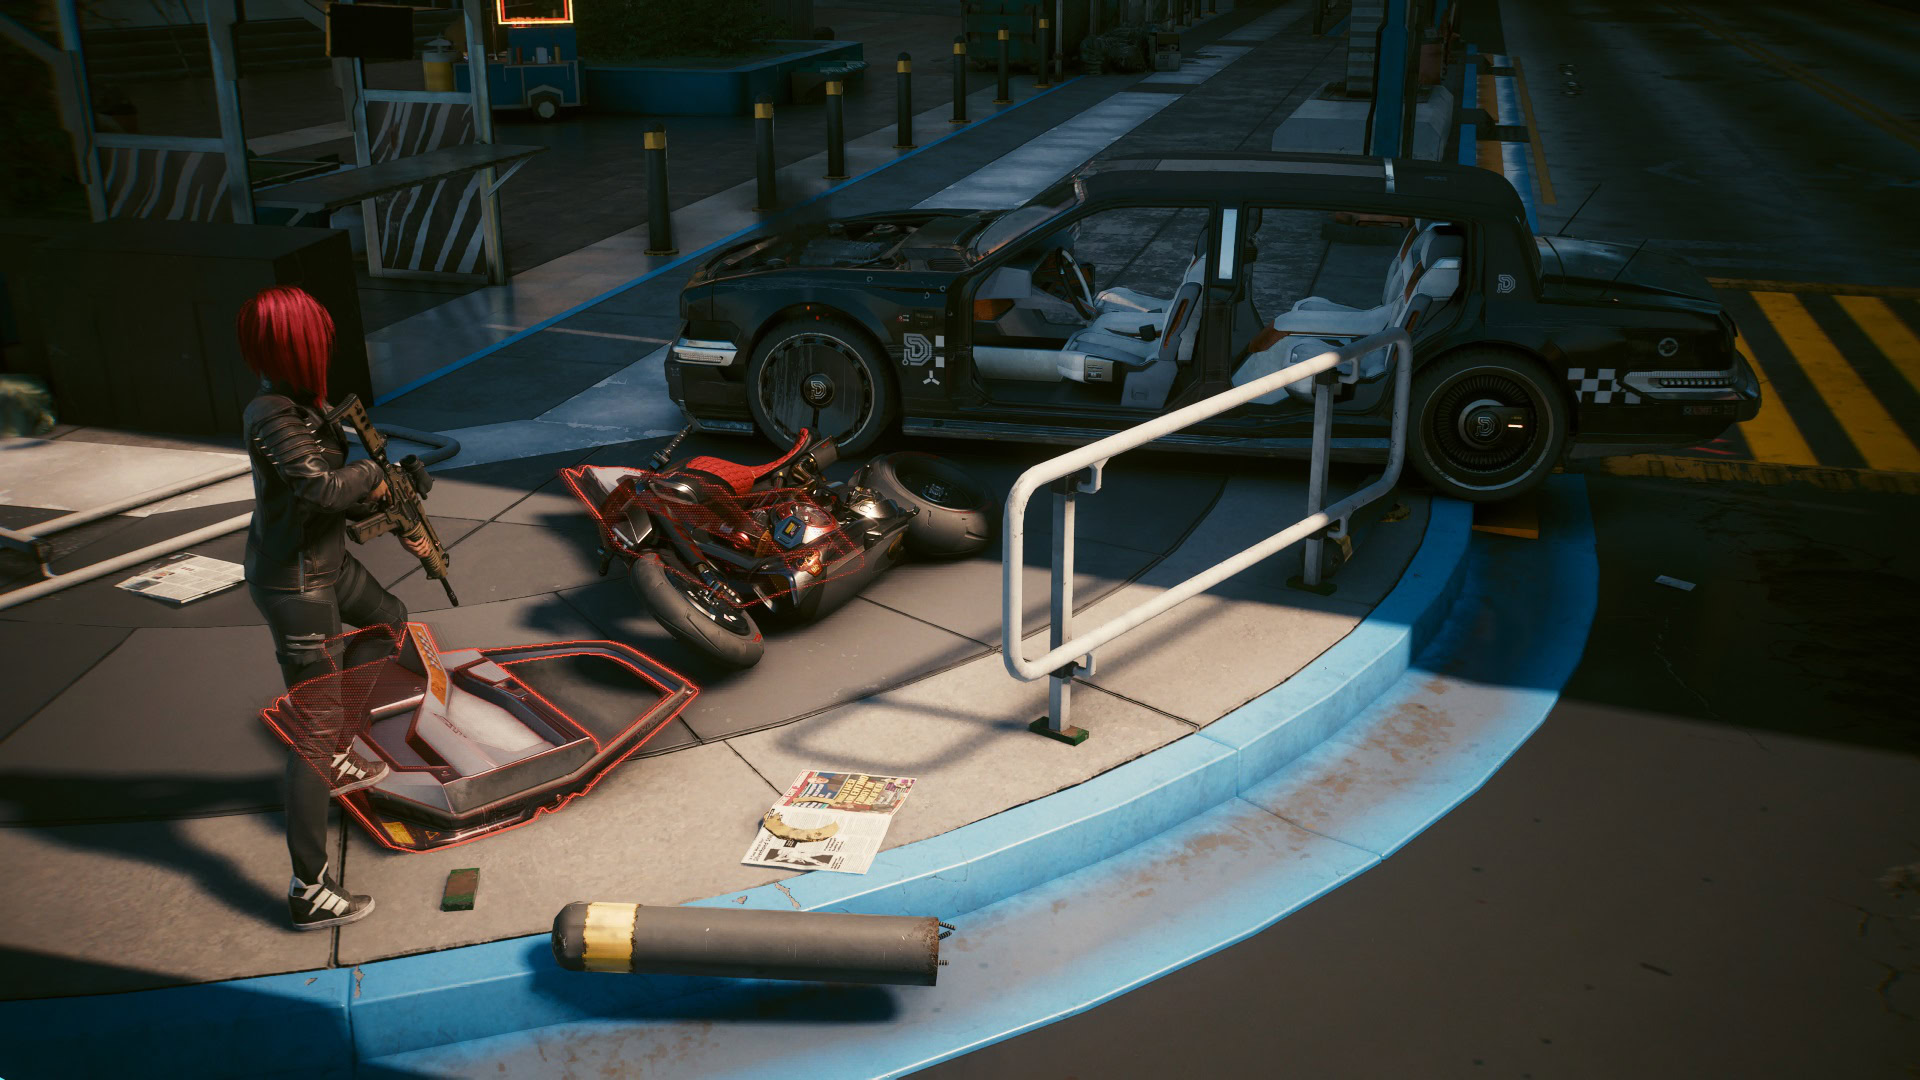
Continue until you drop to a small section where a Delamain cab is parked. There’s a trapdoor on the floor, using it will allow V to navigate the garage without the risk of getting electrocuted. This requires 6 Body or 5 Technical Ability points.
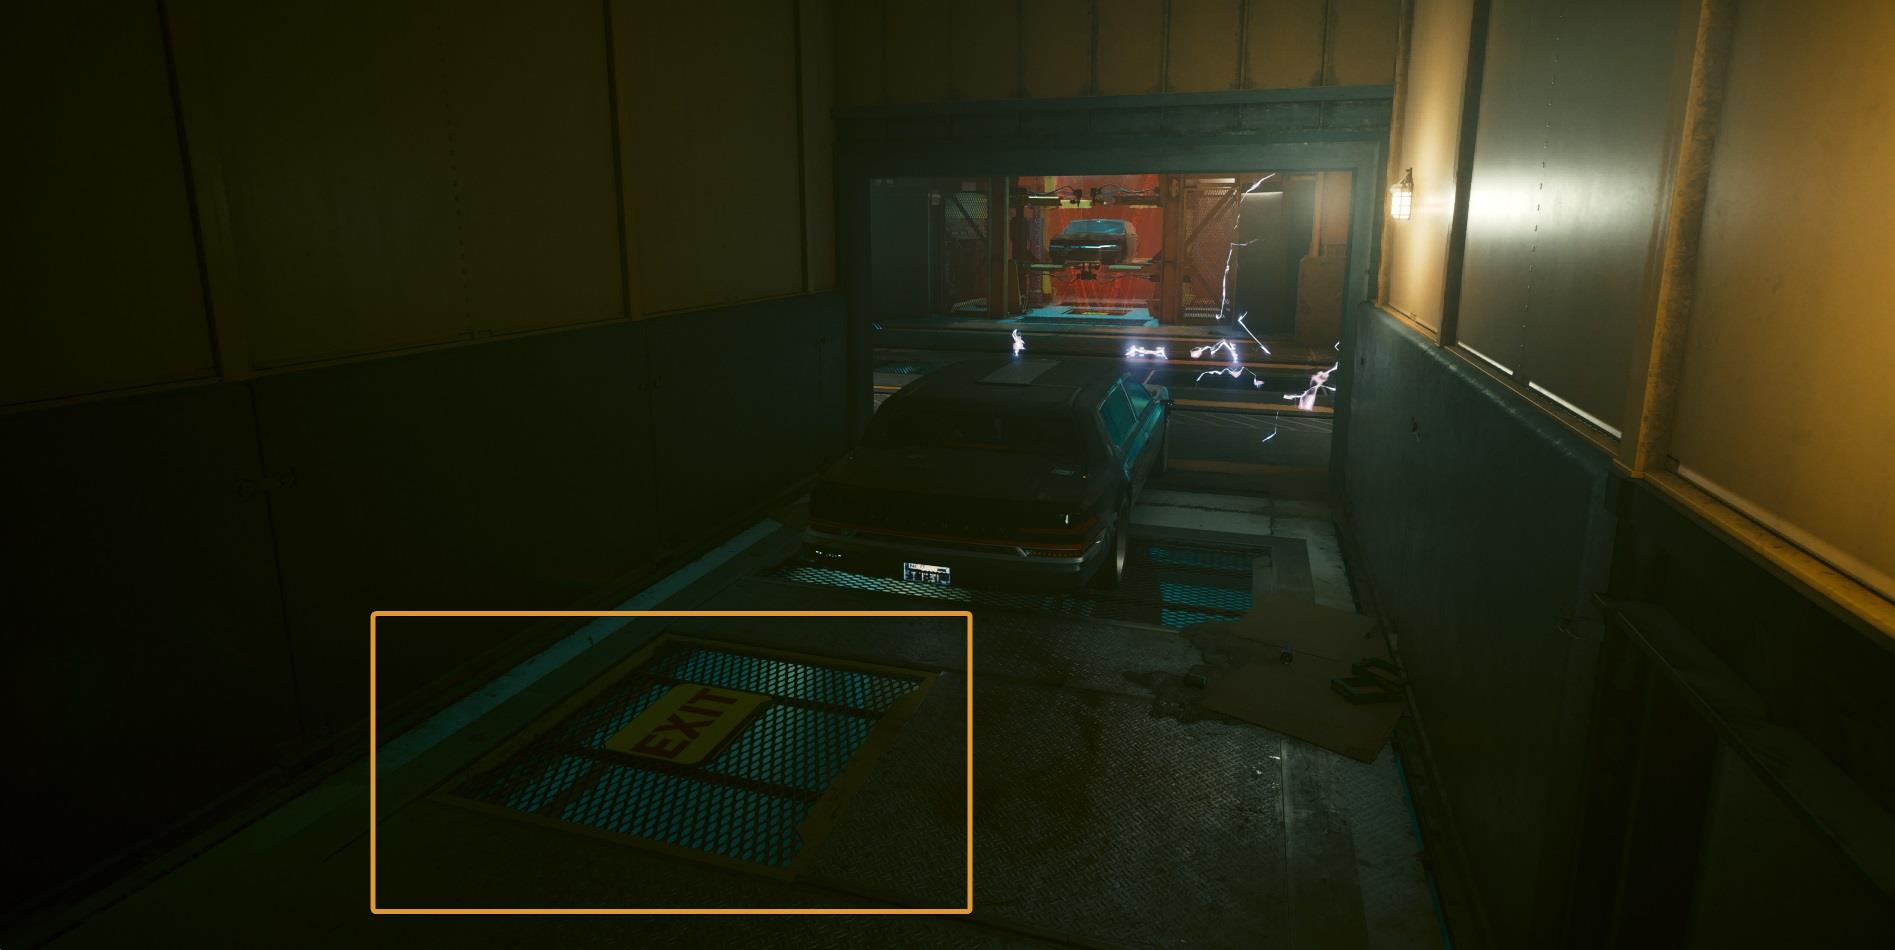
The only ladder you’ll find allows for V to come out of a spot where a Delamain cab is being repaired. These lasers pose no threat to you.
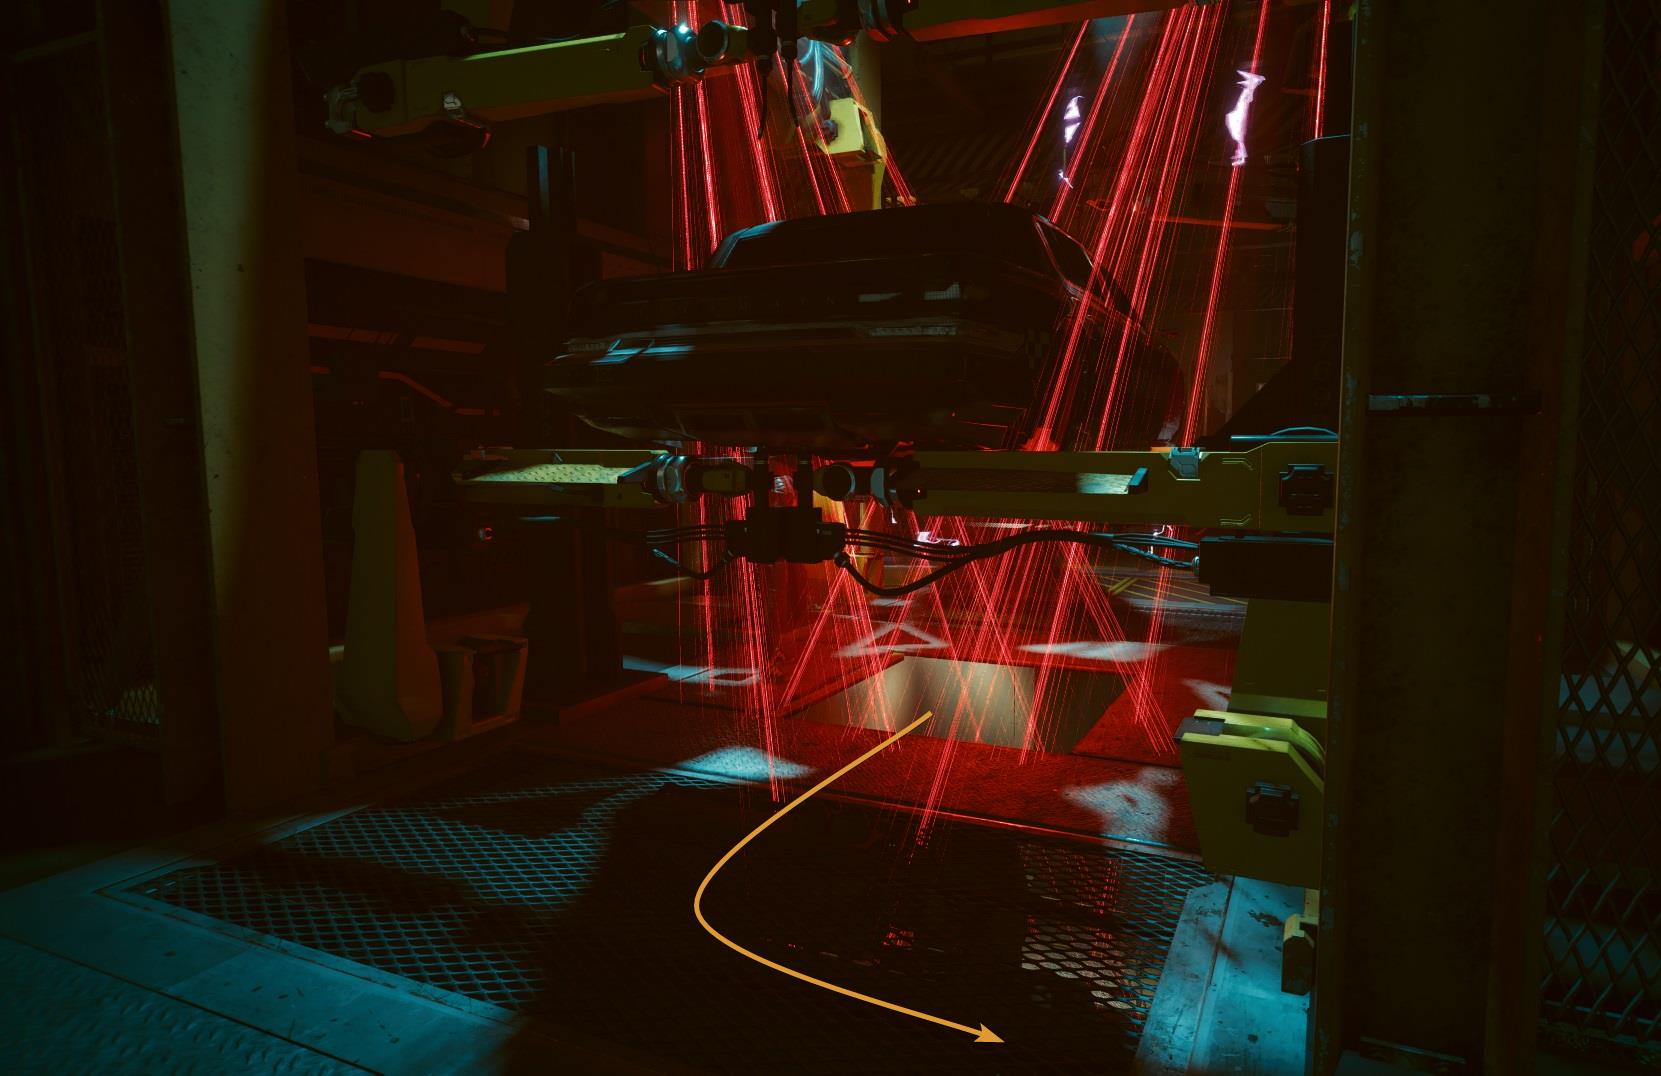
There’s a small hallway behind the trapdoor where you just came out. Find the closest ladder and climb up.
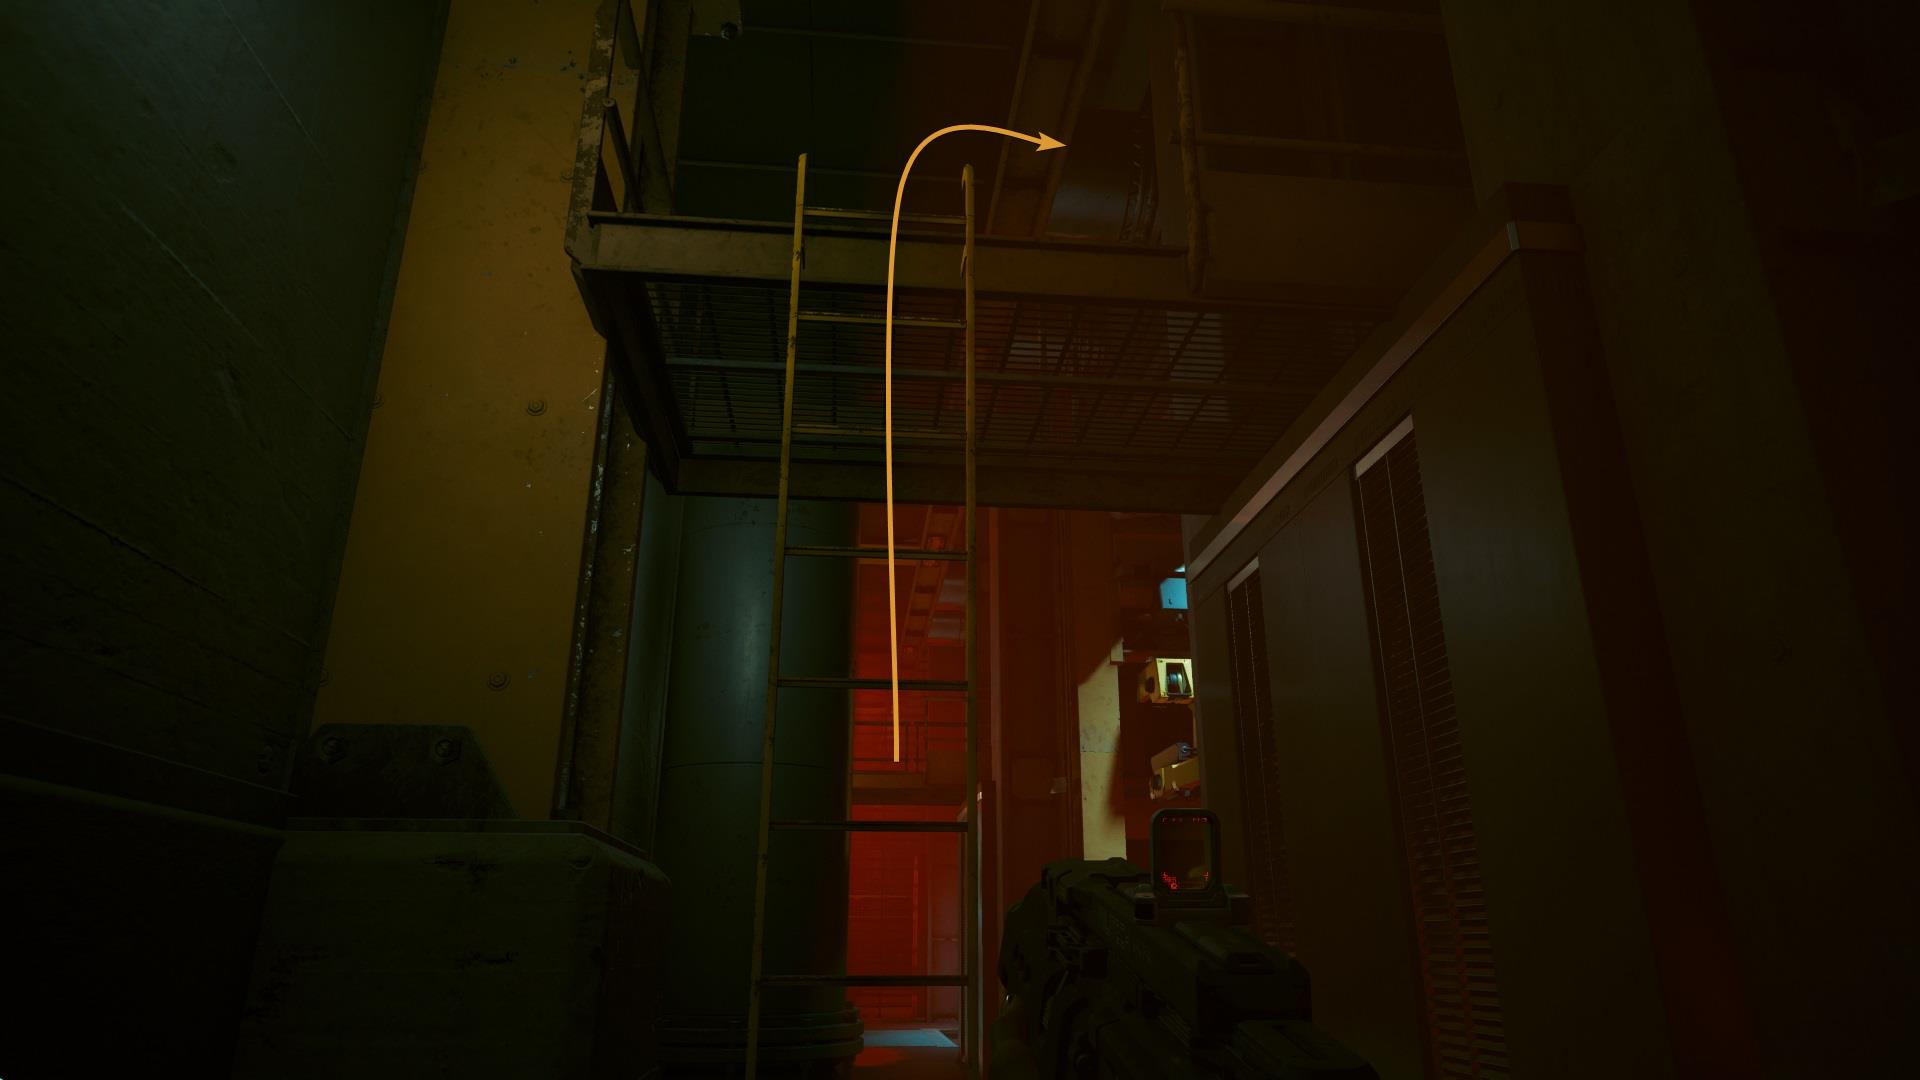
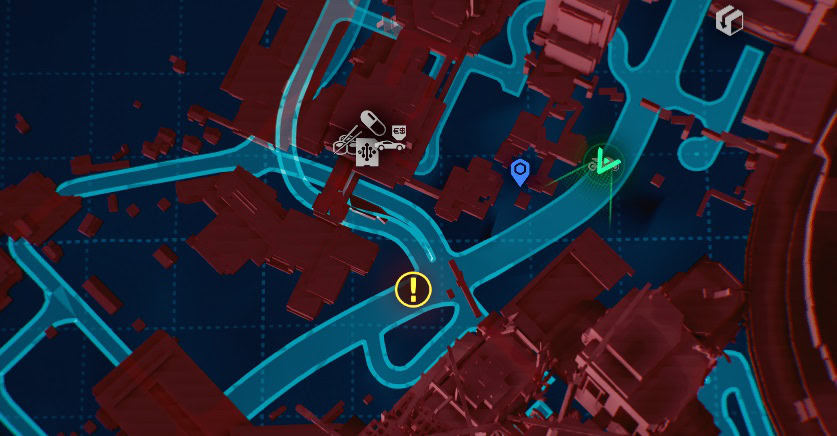
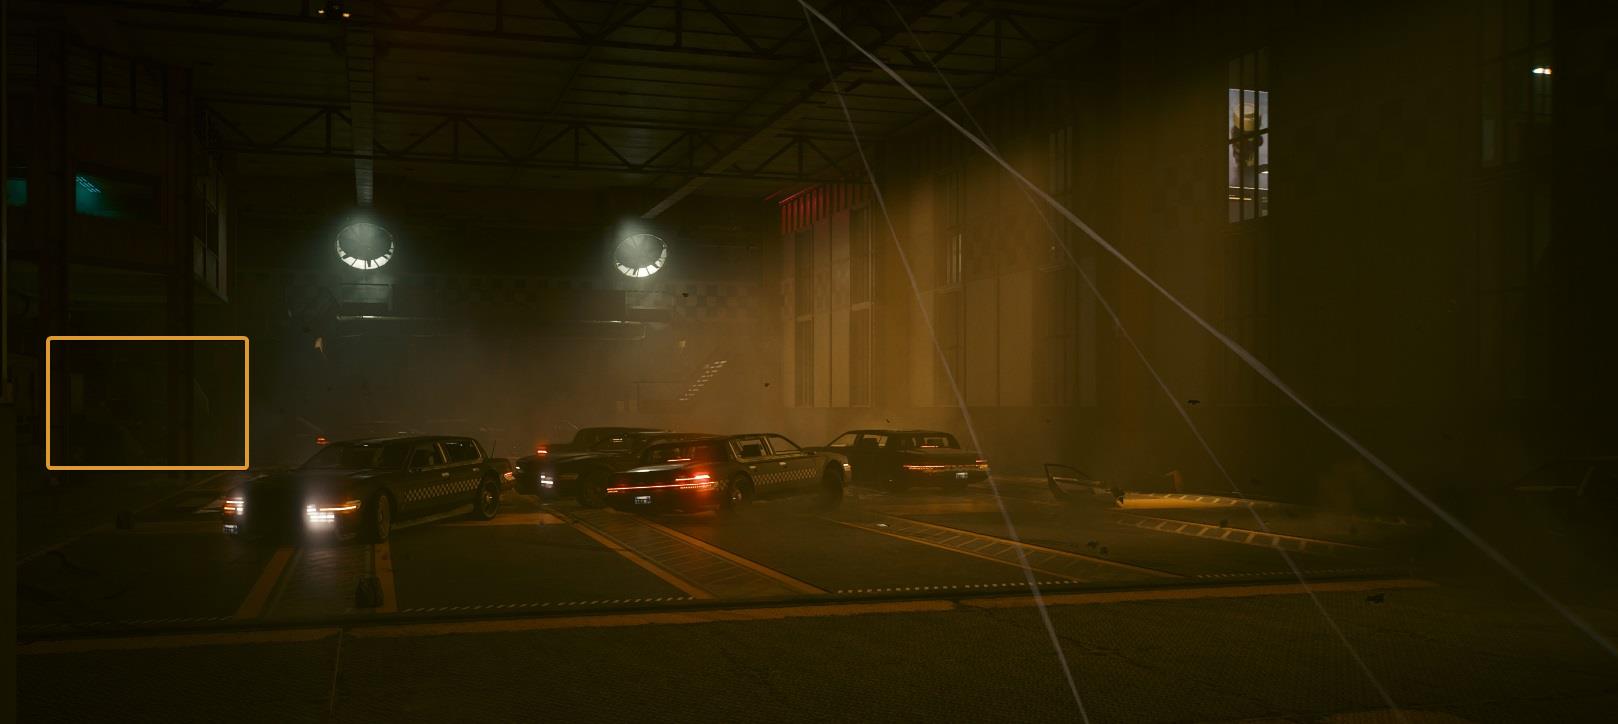
Continue until you find a big room with lots of Delamain cabs going crazy. These are all the vehicles that were recovered on the Epistrophy mission. There’s a small structure on the back of this area.
Due to the lighting, it’s impossible to distinguish it from the picture below, which is why it’s highlighted. Head there but be careful, the Delamain vehicles won’t hesitate to run over you if they have the chance.
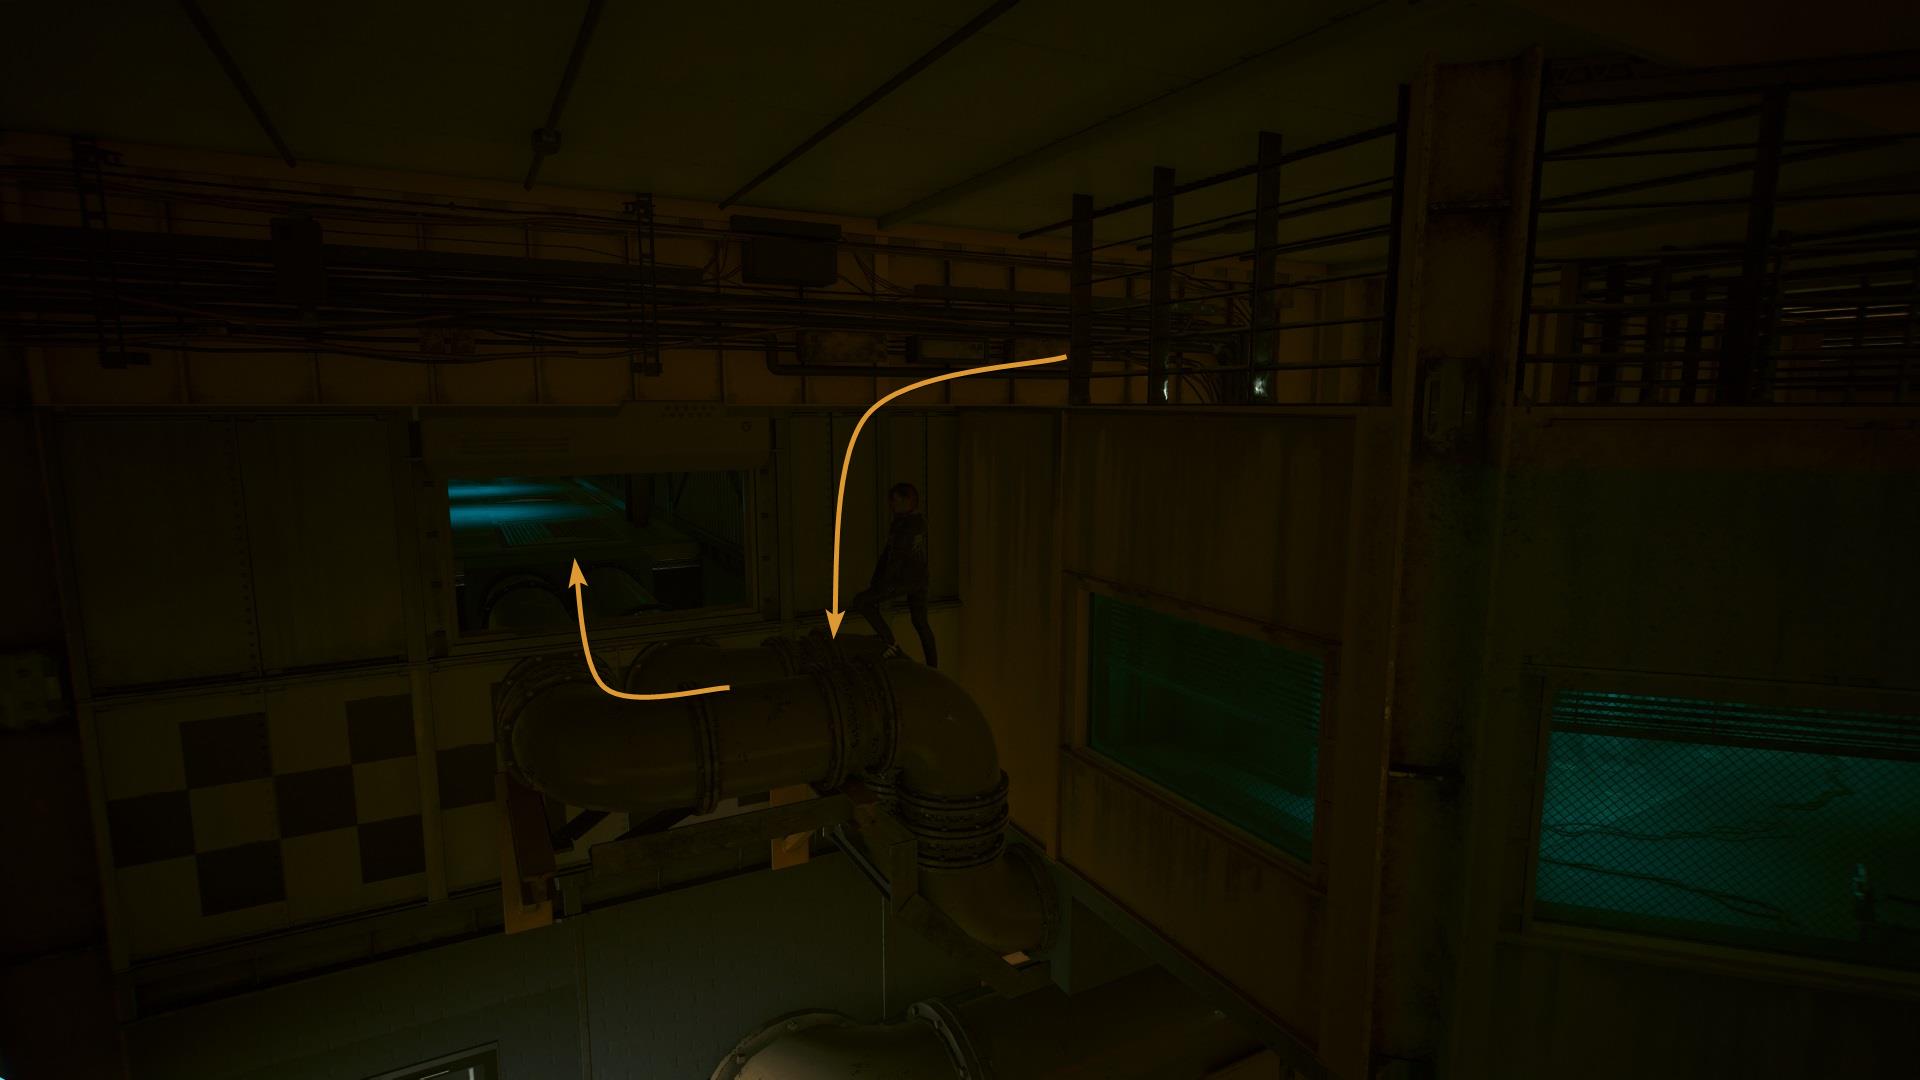
Climb the stairs and then jump to the pipes that are next to the wall and then move forward.
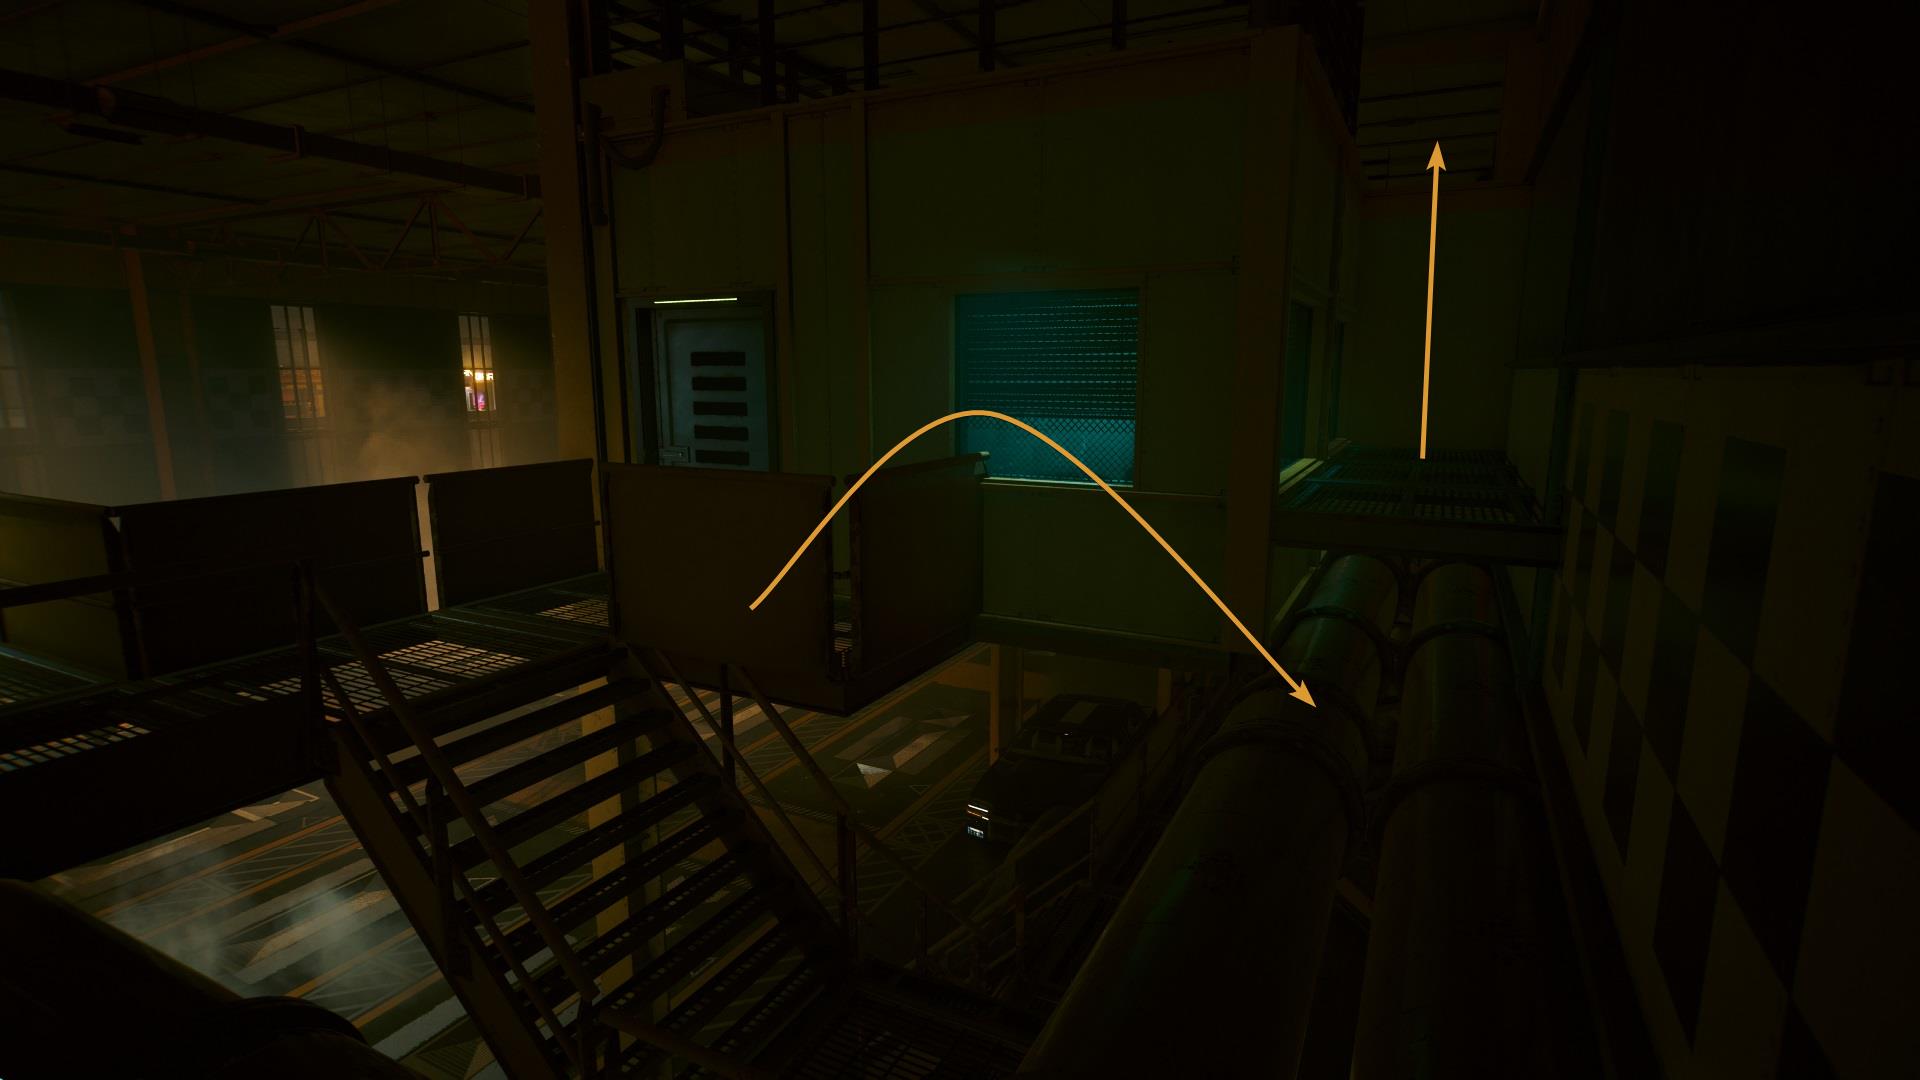
Climb down to another pipe and then enter the next area. Just be careful, it’s very easy to fall off. Continue until you enter the control room, the Delamain core is on the back of that room.
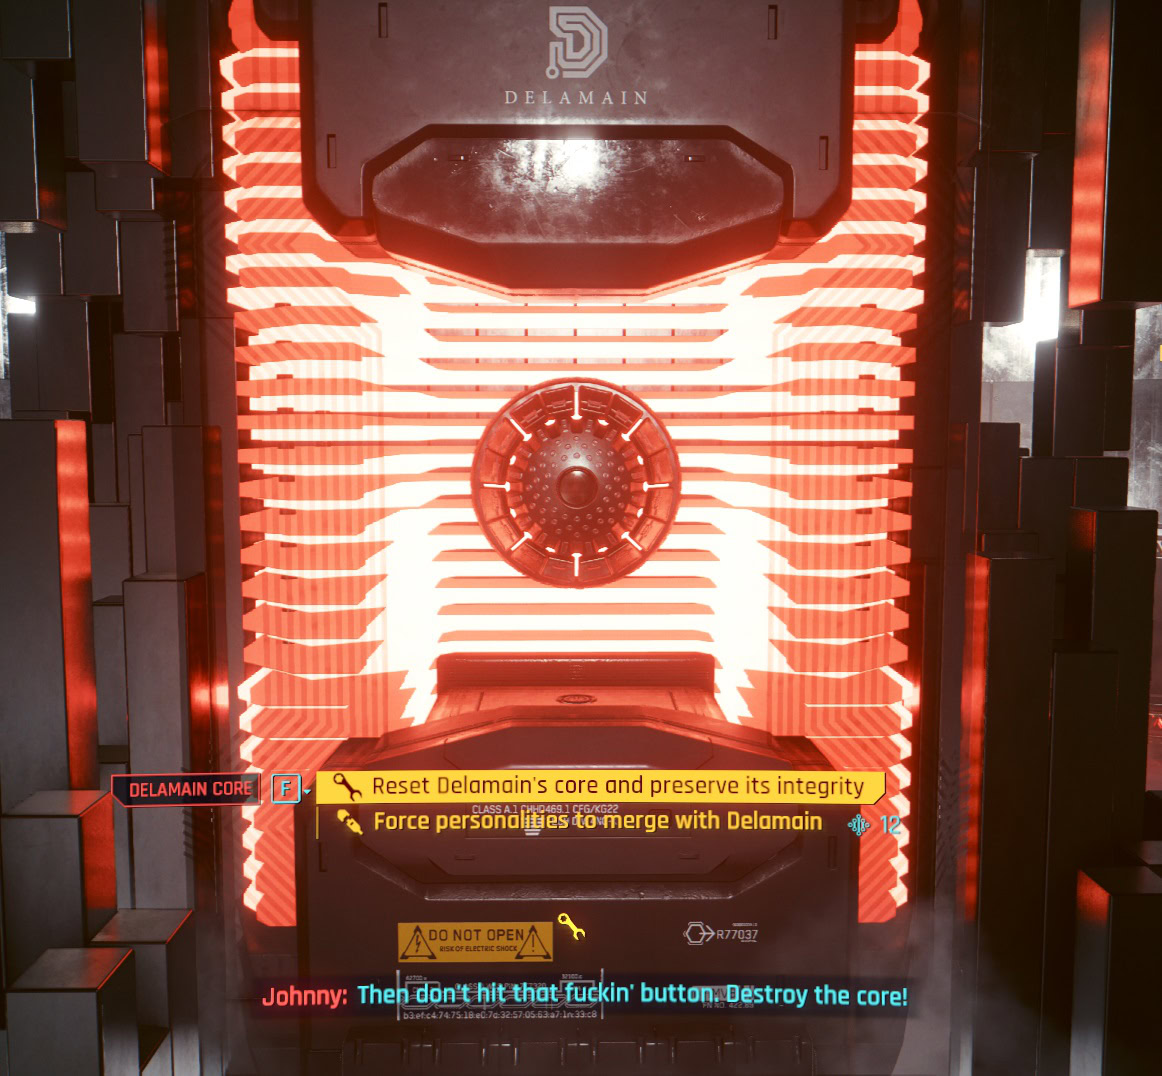
Now it’s time for you to decide what to do with Delamain and all of its “sons”. This is by far the most interesting part of the story. Jhonny Silverhand provides a good perspective. Despite not being “alive”, Delamain and the divergent forms are sentient forms that want to survive. With how AIs are evolving in the real world this looks like something that could happen in the not-too-distant future. Regardless of what Johnny thinks, the final decision is up to V.
Choices and consequences from the Delamin mission
There are three different choices and outcomes respectively. However, regardless of what you pick, the Delamain taxi that drove you during The Heist will become a permanent addition to your vehicle list.
Reset Delamain’s core
By resetting Delamain’s core you will also destroy every other personality. Delamain will reset to factory settings and forget everything about you, the Heist, or any previous interaction.
Merge all personalities
This option requires 12 Intelligence. Delamain merges with all personalities and turns into a “more advanced being”. After this event, Delamain will leave the city never to be seen again.
Destroy the core
This option isn’t shown but it still has repercussions. Destroy the core and all the rampage Delamains will escape the garage and drive freely. Every now and then the Delamain cabs will send updates of their new life.
This concludes our guide to the side jobs “Epistrophy” and “Don’t lose your mind”. Check out our Cyberpunk 2077 Guides Master List to learn about main jobs, gigs, vehicles, item catalogs, weapon locations, and more!
How to Free Brick during The Pickup Mission in Cyberpunk 2077
This guide will show you how to complete the optional objective to find a way to free Brick during the main story mission “The Pickup” in the All Foods Factory in Cyberpunk 2077!
How to access the Clouds VIP area and complete Automatic Love in Cyberpunk 2077
This guide will explain everything you need to know about the main job “Automatic Love” in Cyberpunk 2077. How to start, different approaches and outcomes, and most importantly, how to get access to the VIP area with and without causing chaos in the club Clouds!

Should you Punch Fingers: The Space In Between, Cyberpunk 2077 Guide
This guide will explain all possible outcomes from your visit of the Ripperdoc Clinic on Jig-Jig Street. What you should and should not do (and why) during your conversation with Fingers, part of “The Space In Between” main job in Cyberpunk 2077!

Cyberpunk 2077 Happy Together Guide: How to Save Barry
This guide will show you how to start and complete the side job Happy Together in Cyberpunk 2077. Here you will also find out all of the possible outcomes and what you have to do to save Barry and keep him alive!

Cyberpunk 2077 The Beast In Me: Should you spare Sampson
This guide will explain how to start and complete the side job “The Beast in Me” in Cyberpunk 2077 along with all possible rewards and outcomes resulting from your decisions!

How to find the girl from Cyberpunk 2077's First Trailer
A Step-by-step buide on how to find Melissa Rory, the cyberpsycho girl from the Cyberpunk 2077 Teaser Trailer released way back in 2013