Learn how gear works in Horizon Forbidden West: damage types, how to spend resources to upgrade your character’s armor and weapons and a lot of valuable tips for new players.
Table of contents
Inventory Overview
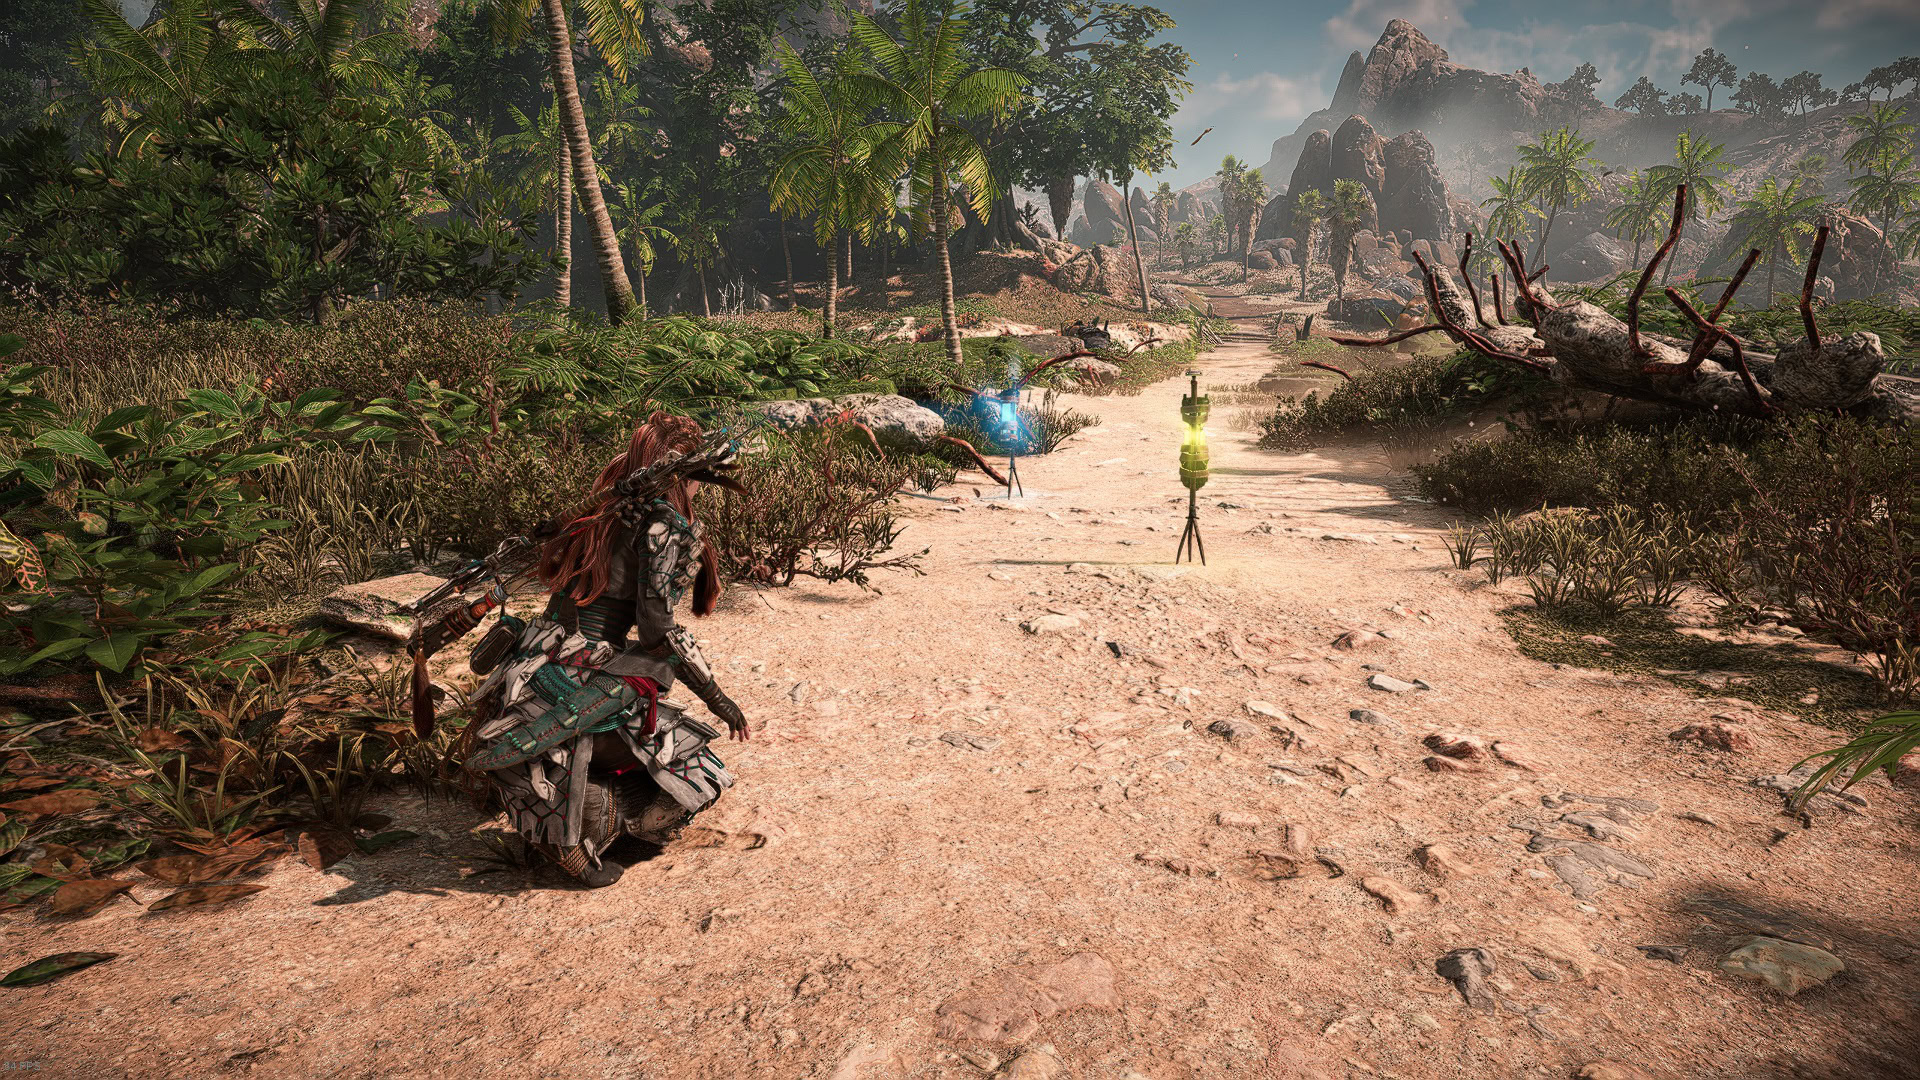
The Inventory screen is your front portal of everything related to gear that Aloy can use and utilize to improve her combat performance.
At the top of the screen you will see five tabs. The first one is called “Inventory” and this is the main topic of this guide.
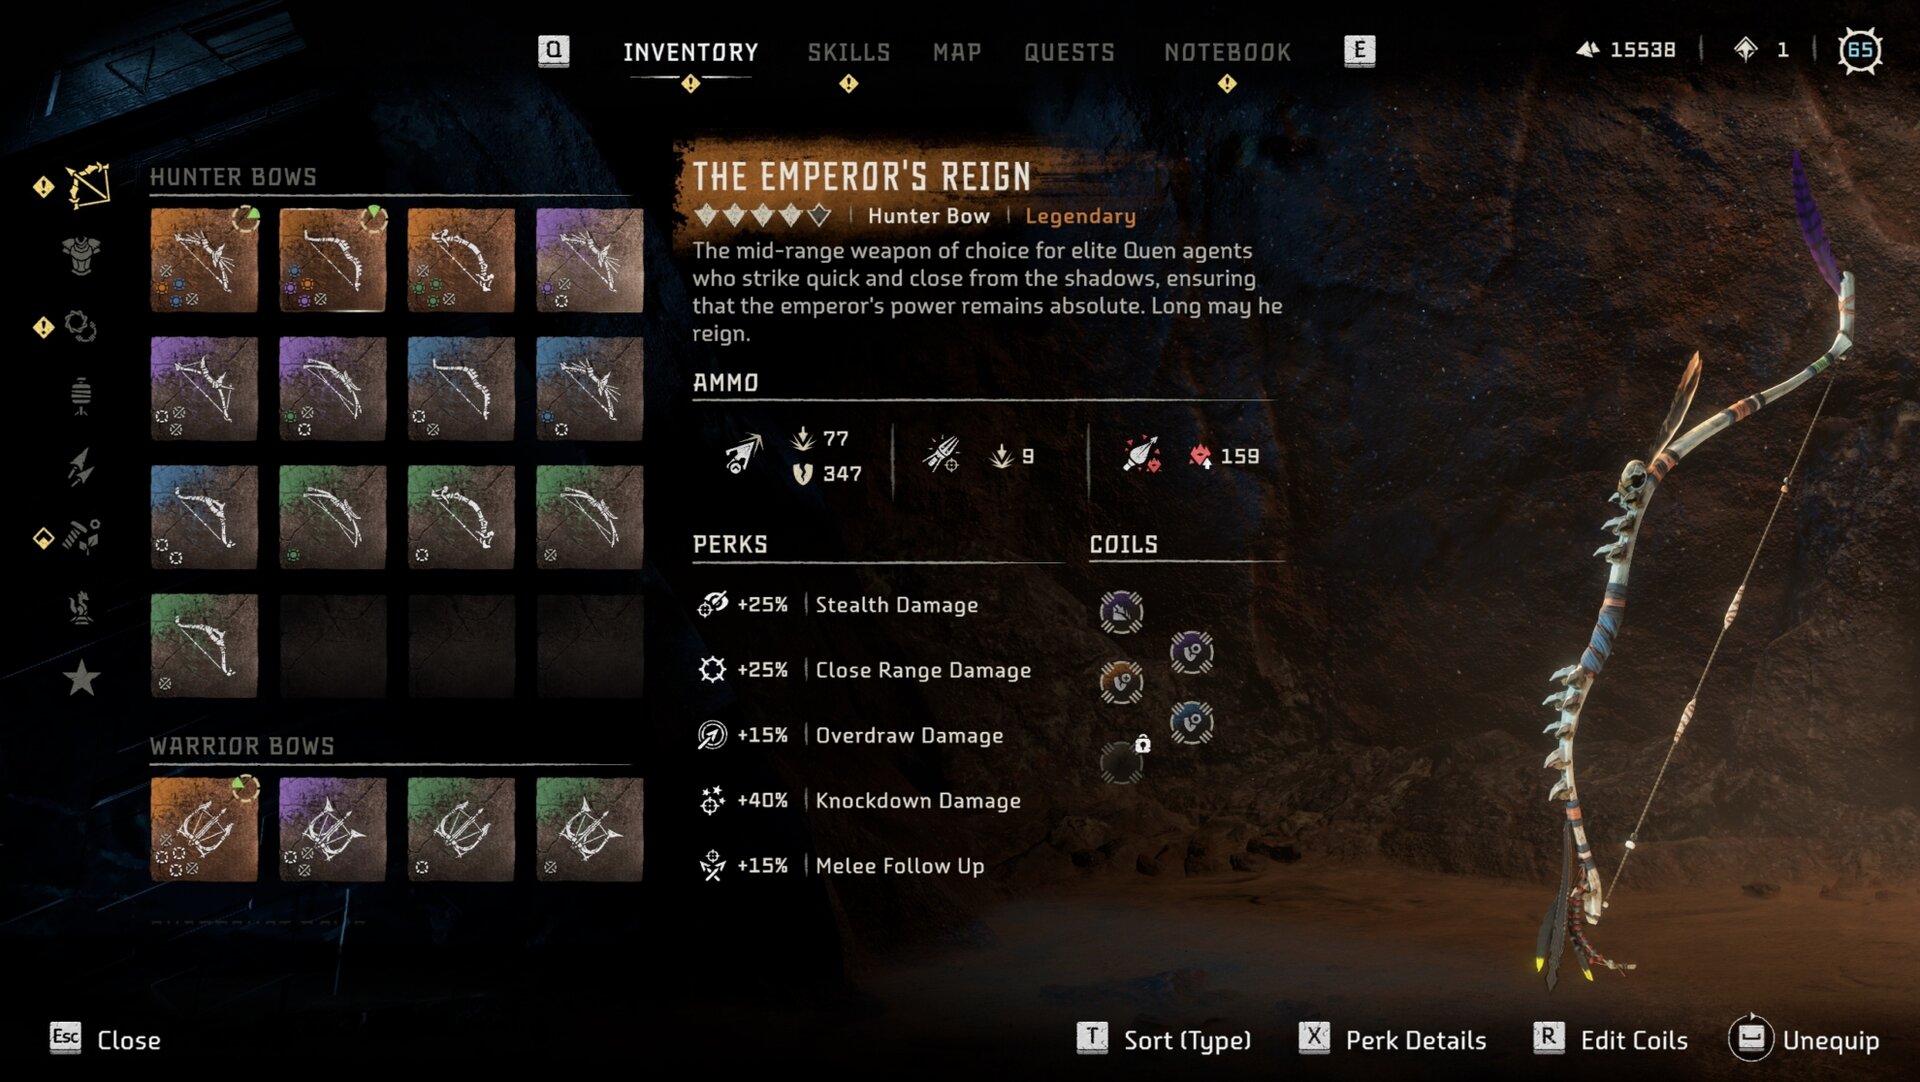
On the left side of the Inventory is a list of sub-categories of items you can equip and use. In the middle is the list of the selected sub-category and on the right side are the details of the individually selected item from the list.
In the bottom right, you have a few buttons to help you sort things in the Inventory and manage the selected item(s).
In the top right you will see your current level, available skill points to spend and the amount of Shards you have. Shards are the main currency in the game, same as with the first game.
Weapons
Spears
The only melee weapon that Aloy will use in the game. Unlike other weapons, you can’t purchase them from Hunter merchants. You can only get a new Spear after completing main story quests.
Hunter Bows
The most well-rounded weapons of the game. You will likely a Hunter Bow as your primary weapon most of the time. Good range, accuracy, and all types of elemental damage available and easy to obtain.
Use our Hunter Bows List and Guide to learn where to find and how to get the best weapon for your build as well as its strengths and useful perks are.
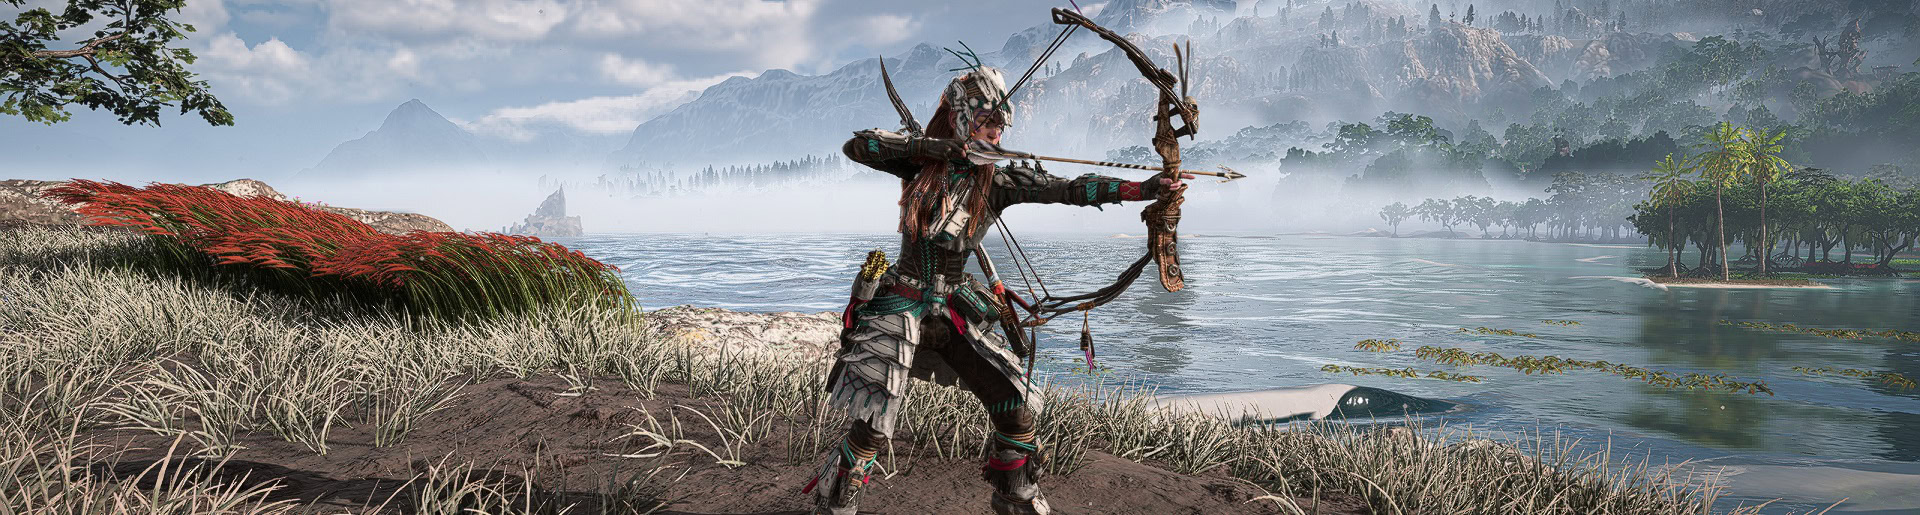
Warrior Bows
This type of bow can shoot in rapid succession in exchange for accuracy and a large range. They are perfect for close combat or when a big enemy is charging at you.
Our Warrior Bows List and Guide will tell you where to find and how to get the best weapon for your build as well as its strengths and useful perks are.
Sharpshot Bows
The strongest and most accurate type of bow. They are perfect for taking down enemies at long distances. The reload times are very slow and can’t be used when sliding or jumping.
Use our Sharpshot Bows List and Guide to learn where to find and how to get the best weapon for your build as well as its strengths and useful perks are.
Shredder Gauntlets
Shredder Gauntlets can launch discs that return after hitting an enemy. If you catch them, the next attack will deal increased damage. This can happen up to three times, the disc will break after that.
Blastslings
Blastlings shoot elemental ammo that explode on impact, they are good at triggering elemental states but you will still need other weapons to be the main source of damage. Blastling shots have an arched trajectory, you will need a little bit of practice before being able to shoot accurately.
Tripcasters
A weapon that deploys tripwires that activate when touched by machines or humans (Including Aloy). Tripcasters can deal elemental damage or deploy shields to create a protective barrier. They are perfect for ambushing enemies that you don’t want to engage directly.
Ropecasters
Most Ropecasters shoot elemental canisters that attach to enemies which can be detonated with ammo of the same elemental type. Other Ropecasters can shoot ropes to lock enemies into the ground.
Boltblasters
They fire a lot of bolts in a few seconds but the reload times are very slow. While they can hit enemies from all ranges I would recommend using them in close to medium-range situations. They are big and very heavy, Aloy won’t be able to move fast while holding one.
Spike Throwers
They are basically javelins. Spike Throwers can knock down enemies and deal huge amounts of damage when hitting weak spots. They are effective at all ranges but just like the Blastlings, they travel in an arch trajectory, making it harder to hit accurately from long distances.
Damage Types
There are many enemies in Horizon Forbidden West, all of them with different strenghts and weaknesses. You will need to pick the right weapon to defeat the strongest ones.
 Impact
 Impact
Lowers the enemy’s health bear. Has no secondary effects. It can be mitigated by enemies’ armor plates. Considered Direct Damage.
Melee
Lowers the enemy’s health bear. Has no secondary effects. It can be mitigated by enemies’ armor plates. Considered Direct Damage.
Buildup and Active Status
 Buildup and
  Active Status
Each elemental ammo has an effect that is triggered after reaching the elemental state of said ammo. This is how you visualize the progress and decay of all elemental states. Please note that the difficulty will affect how fast or slow an elemental state is applied and its duration.
Note: The icon example at the top is for the Fire Buildup and Active Fire Elemental State.
Tear
 Tear
TearTears off components from machines, it can deal fixed amounts of damage depending on what component is removed. When fighting against humans, it can knock them down or send them flying.
Explosive
 Explosive
Deals damage on a wide area. Considered Direct Damage.
Adhesive
 Adhesive
Slows enemies’ movement and disables some attacks. When the build-up is completed it can immobilize even the biggest machines. It also prevents humans from running, dodging, or any type of acrobatic attack.
Fire
 Fire
FireDeals damage over time. Strong against Burrowers, Spikesnouts, Lancehorns, Frost Glinthawks, Snapmaws, Behemoths, Dreadwings, Frostclaws, and Slitherfangs.
Frost
 Frost
FrostSlows the target’s movement and increases the chance of dealing Direct damage by up to 300%, this percentage is only 50% when battling humans. Negates additional defense provided by the enemy’s armor.
Strong against Scroungers, Skydrifters, Fanghorns, Fire Bellowbacks, Rockbreakers, Tiderippers, Scorchers, Slitherfangs, Tremortusks, Fireclaws, and Slaughterspines.
Shock
 Shock
ShockIt paralyzes the enemy and enables Critical Hits. You have to build the elemental status first.
Strong against Grazers, Scrappers, Chargers, Acid/Fire Bristlebacks, Longlegs, Clawstriders, Frost Glinthawks, Stalkers, Rockbreakers, Tiderippers, Frostclawsm, and Scorchers.
Purgewater
 Purgewater
The enemy becomes more susceptible to elemental attacks, it also disables elemental attacks from the affected foe. You have to build the elemental status first.
Strong against Leaplashers, Spikesnouts, Widemaws, Grimhorns, Ravagers, Sunwings, Clamberjaws, Thunderjaws, Fireclaws, and Slaughterspines.
Acid
 Acid
AcidWeakens armor and deals damage over time. You have to build the elemental status first.
Strong against Scroungers, Plowhorns, Shell-Walkers, Grimhorns, Ravagers, Rollerbacks, Behemoths, Shellsnappers, Stormbirds, and Thunderjaws.
Plasma
 Plasma
It causes a time-delayed explosion. The explosion will deal more damage if you inflict direct damage during this delay. You have to build the elemental status first.
Strong against Acid Clawstriders, Stormbirds, and Slitherfangs.
Berserk
 Berserk
This will cause the affected enemy to attack everything near it: humans, machines, or both. You have to build the elemental status first.
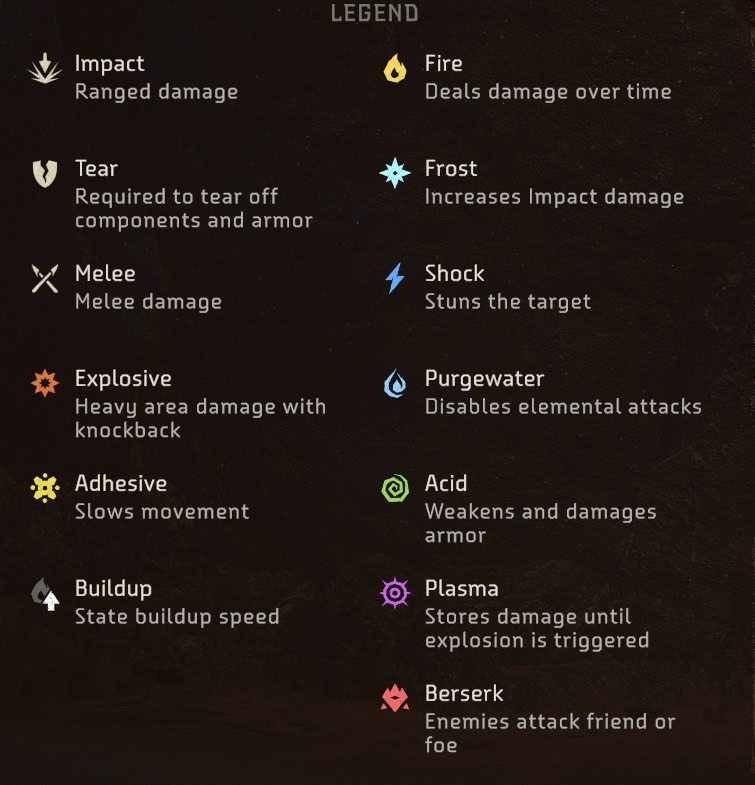
The next in-game image is a summarized version of the information above. You will see it each time you open the Inventory screen and before you select an individual item.
What the damage numbers and icons for each ammo type mean
Many weapons in the game allows you to utilize different types of ammo. Some deal impact damage, others can freeze, shock or burn the target. Some can bypass armor and others are perfect for taring off components from the machines.
For Elemental ammo, the first number is the impact damage and the second one is the elemental buildup it will cause when it hits the target. When your focus is to build up an Elemental Status on a machine, you only care what the second number of the arrow’s stat says.
If a machine is weaker to a specific elemental damage, hitting it with an elemental arrow will also cause it to take slightly more Impact damage than the listed in the weapon’s stat. But the difference is marginal.
If a weapon’s ammo type has two numbers that are not elemental, they are usually again Impact at the top and Tear (shield) or Explosive (blow-up) icons.
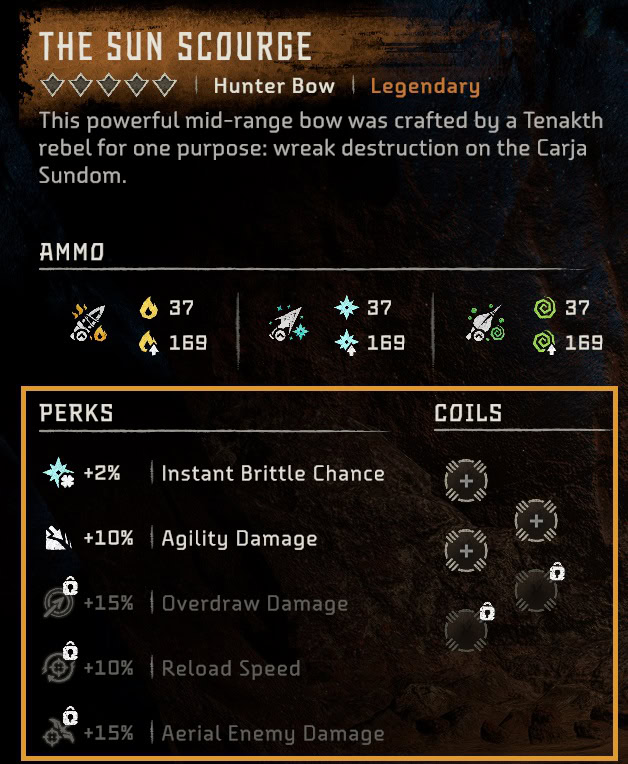
What are Weapon Perks
Perks are additional weapon stats that are useful in specific scenarios. Upgrading your bow increases the weapon’s damage Perks stats and adds new Perks. Some weapons have more than one perk which can be unlocked after upgrading the weapon.
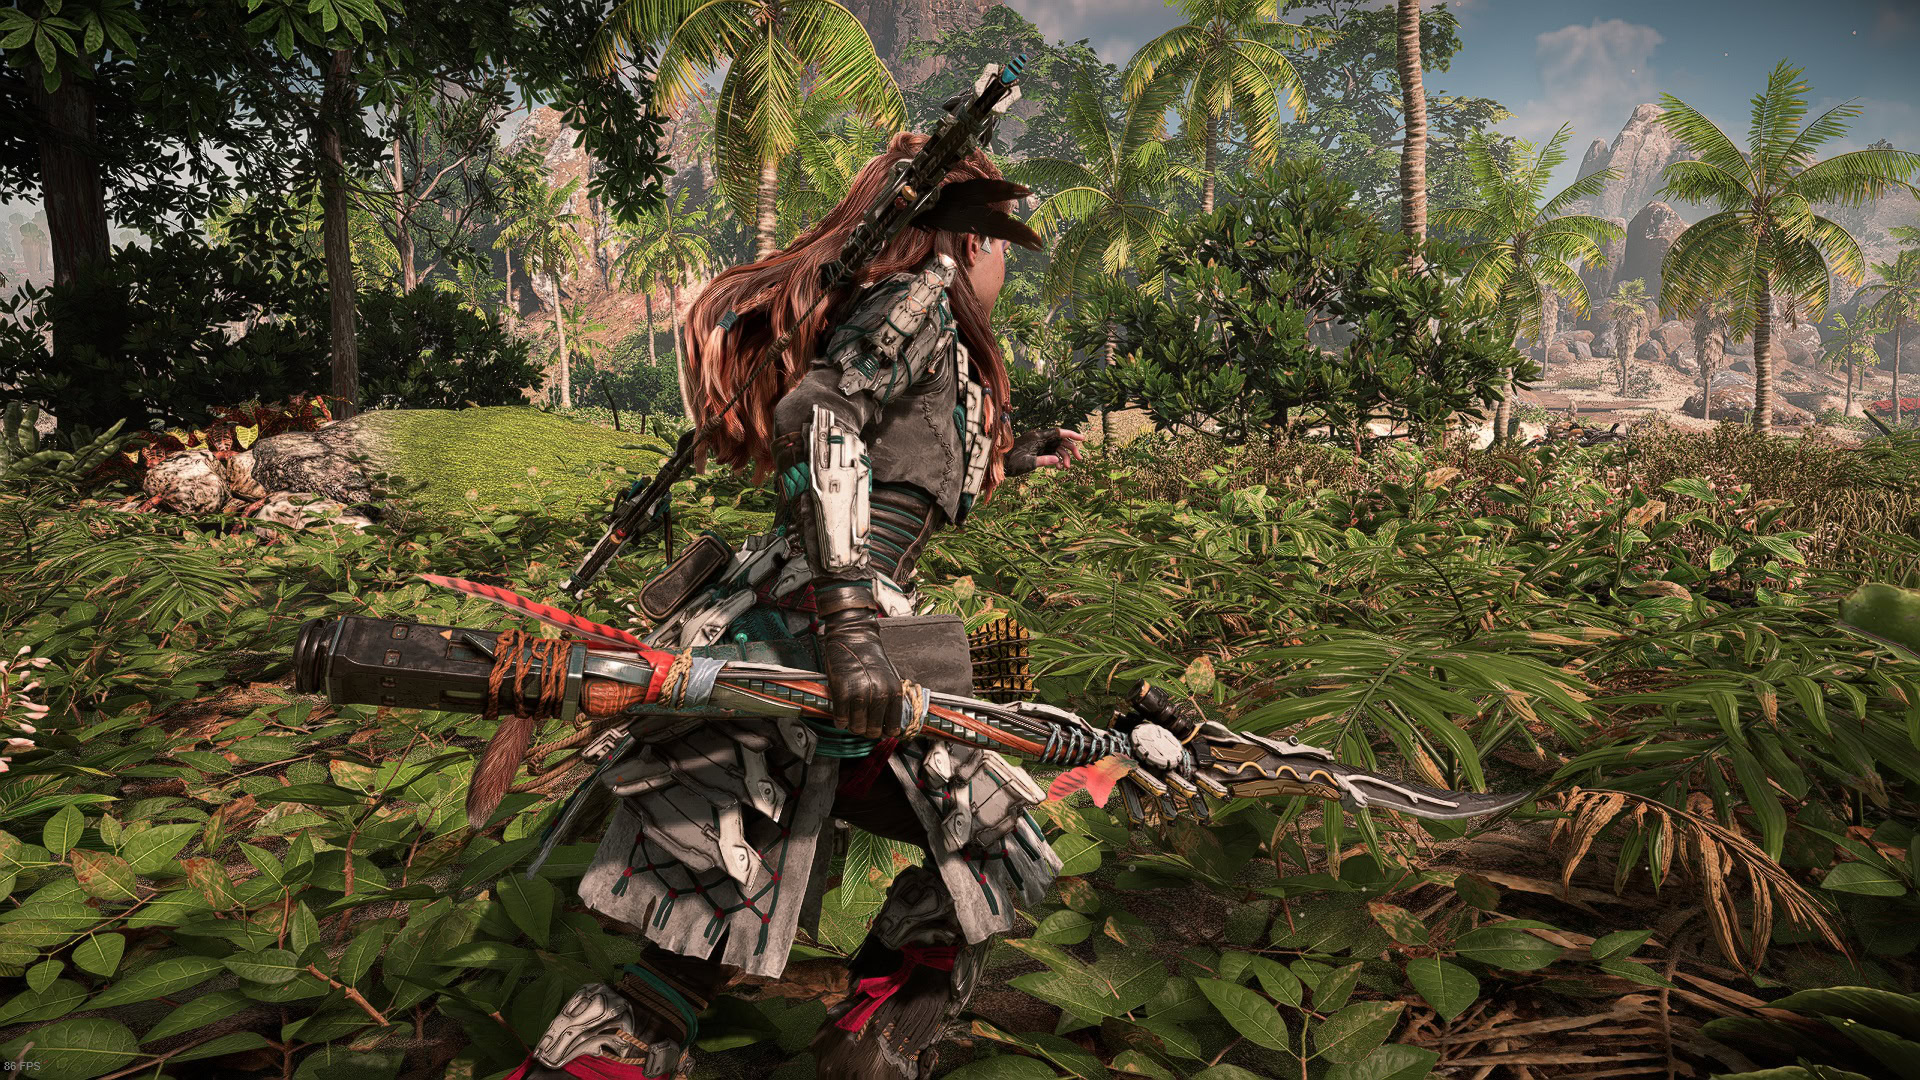
Outfits and Armor
In Horizon Forbidden West Aloy can only wear a full set of armor. There are no individual pieces of armor parts like in many other action games that allow you to upgrade gear.
How to get Outfits
In the game Armor and Outfits are the same thing, but with one caveat. The Outfits are all ranked in a similar way to the weapons in the game:
- Green = Uncommon (low levels)
- Blue = Rare (early to mid-game)
- Purple = Very Rare (mid-game to Endgame)
- Orange = Legendary (Endgame content)
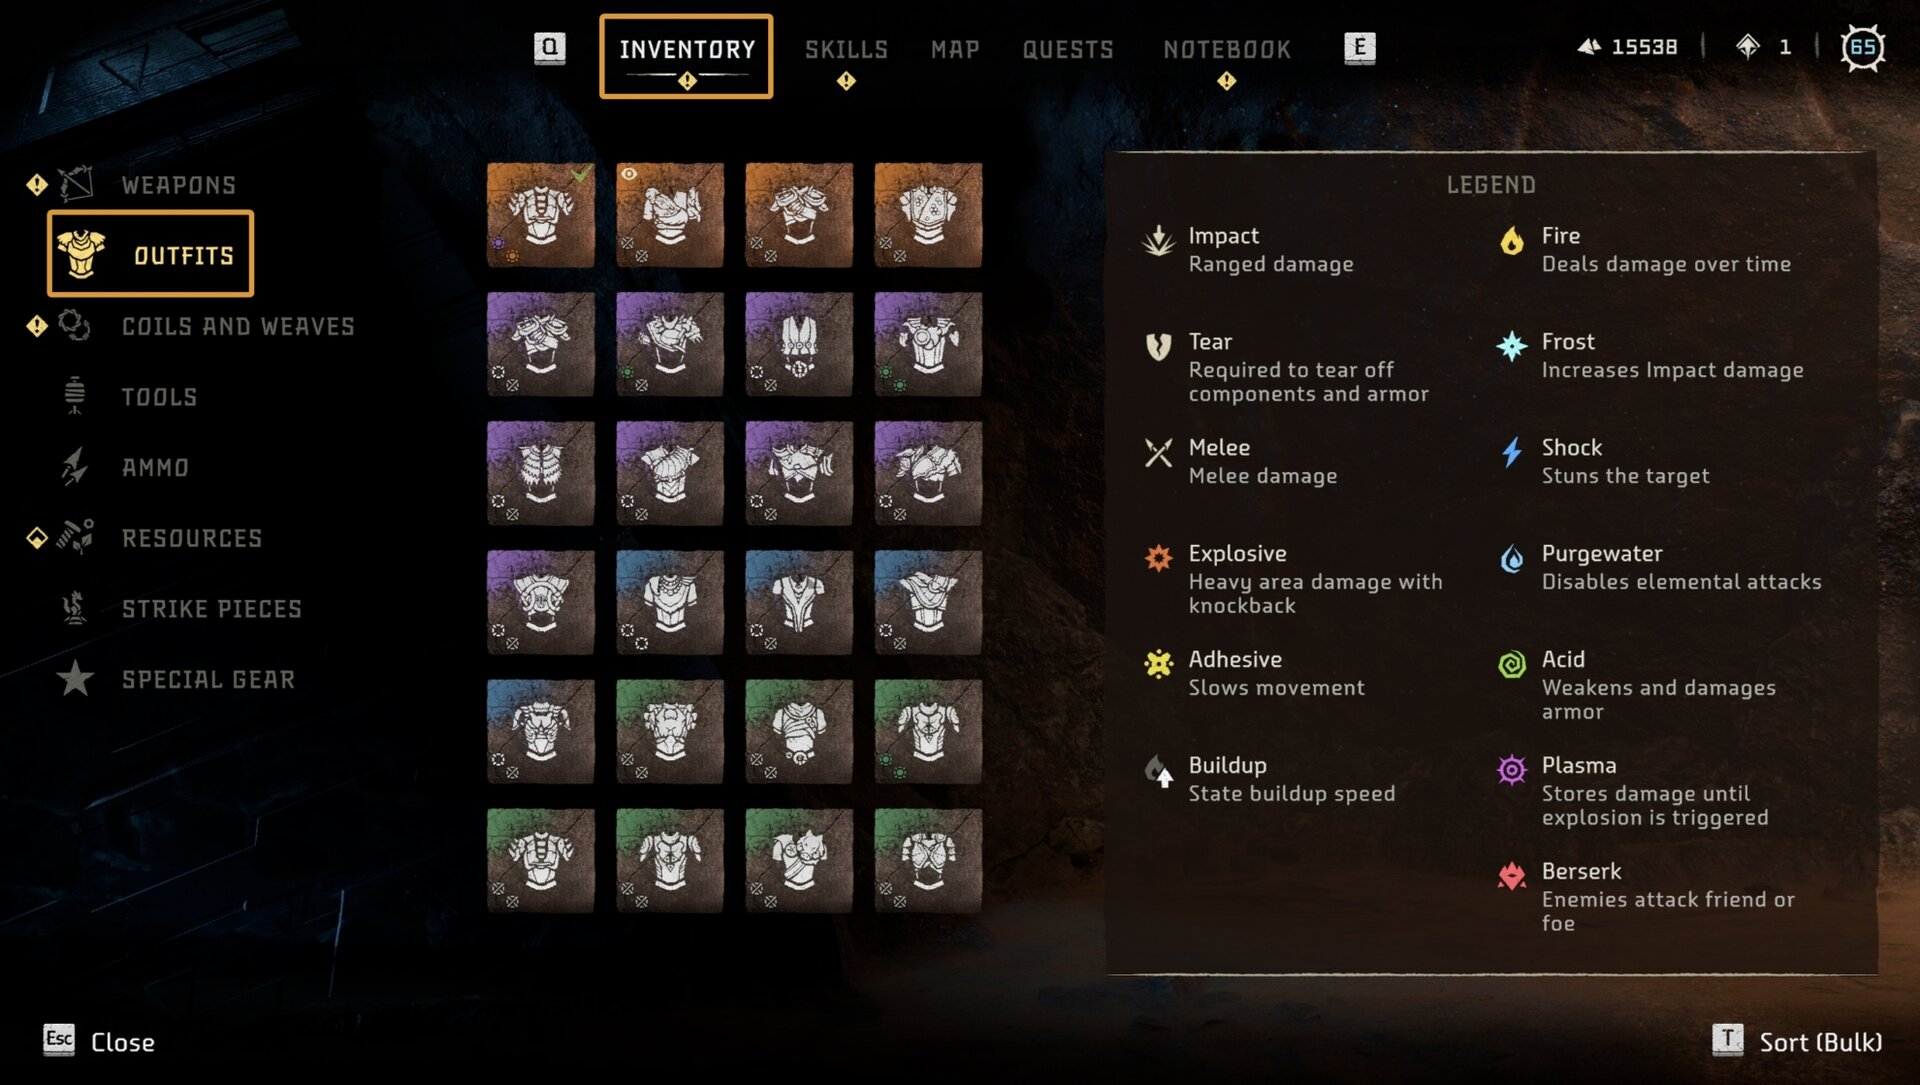
To view the Outfits you currently own and can equip, open the Inventory and click on Outfits at the top left.
You can earn Outfits from completing missions and you will also be able to purchase many of them from vendors in the major social hubs in the Forbidden West.
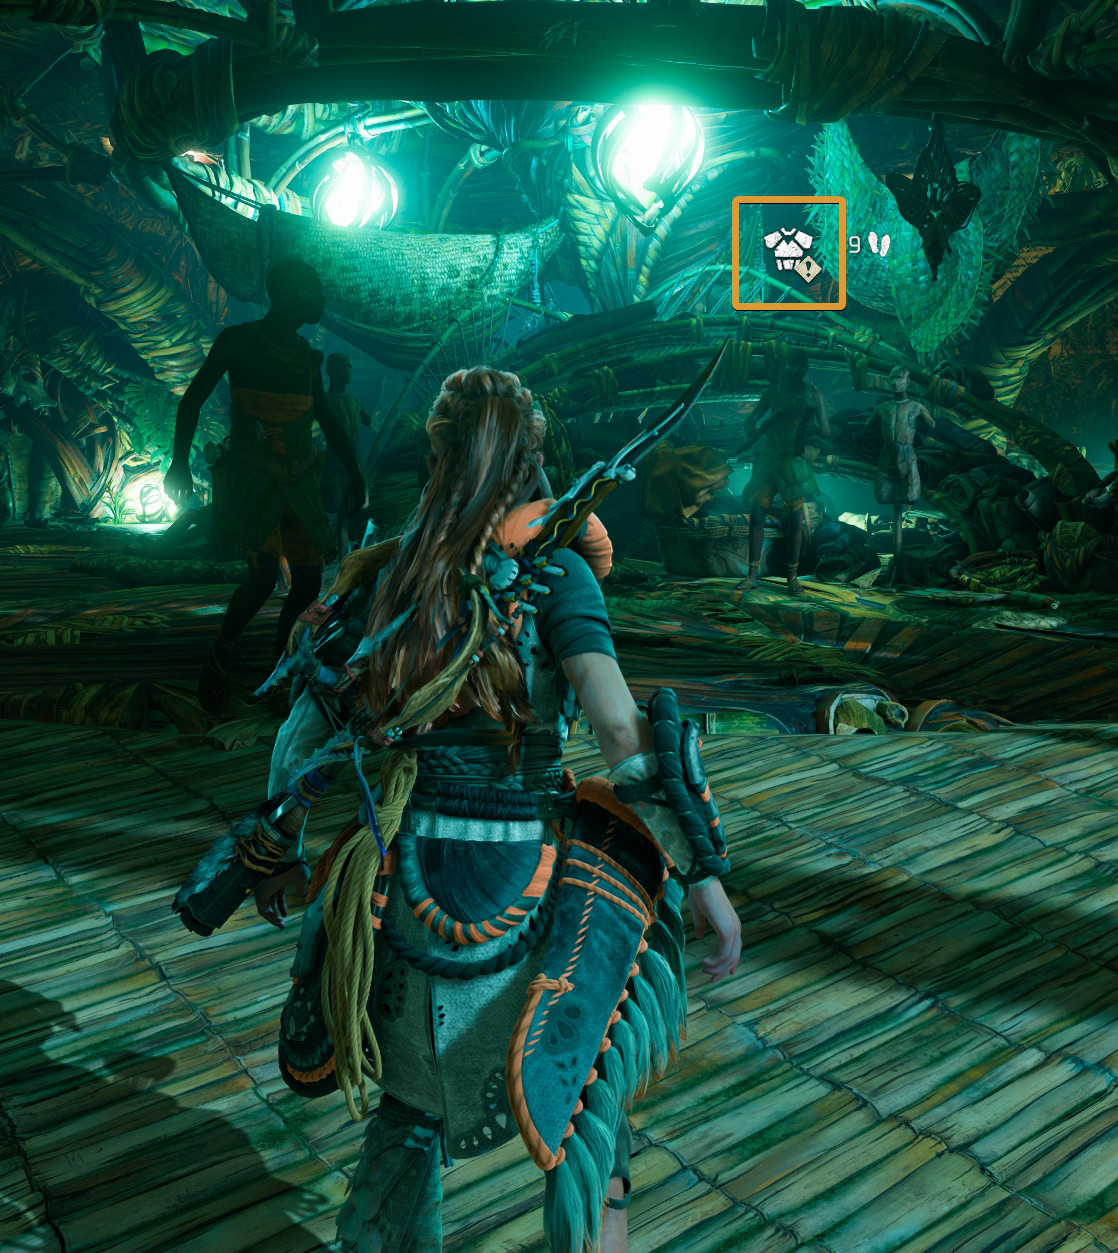
The Outfits are designed according to the tribe that you get it from. Each major hub you visit and talk to a Stitcher, expect to see mostly designs according to the local customs. Stitchers are marked with a chest piece armor icon on the map and radar.
How to use Transmog
The game allows you to use one set for its stats to help aid you in combat and choose a different set for its appearance. This feature is commonly known as “Transmogrification” or “Transmog”.
To use an outfit for its looks, open the Outfits tab in the Inventory, click on the desired look and hit the Apply Look button at the bottom right.
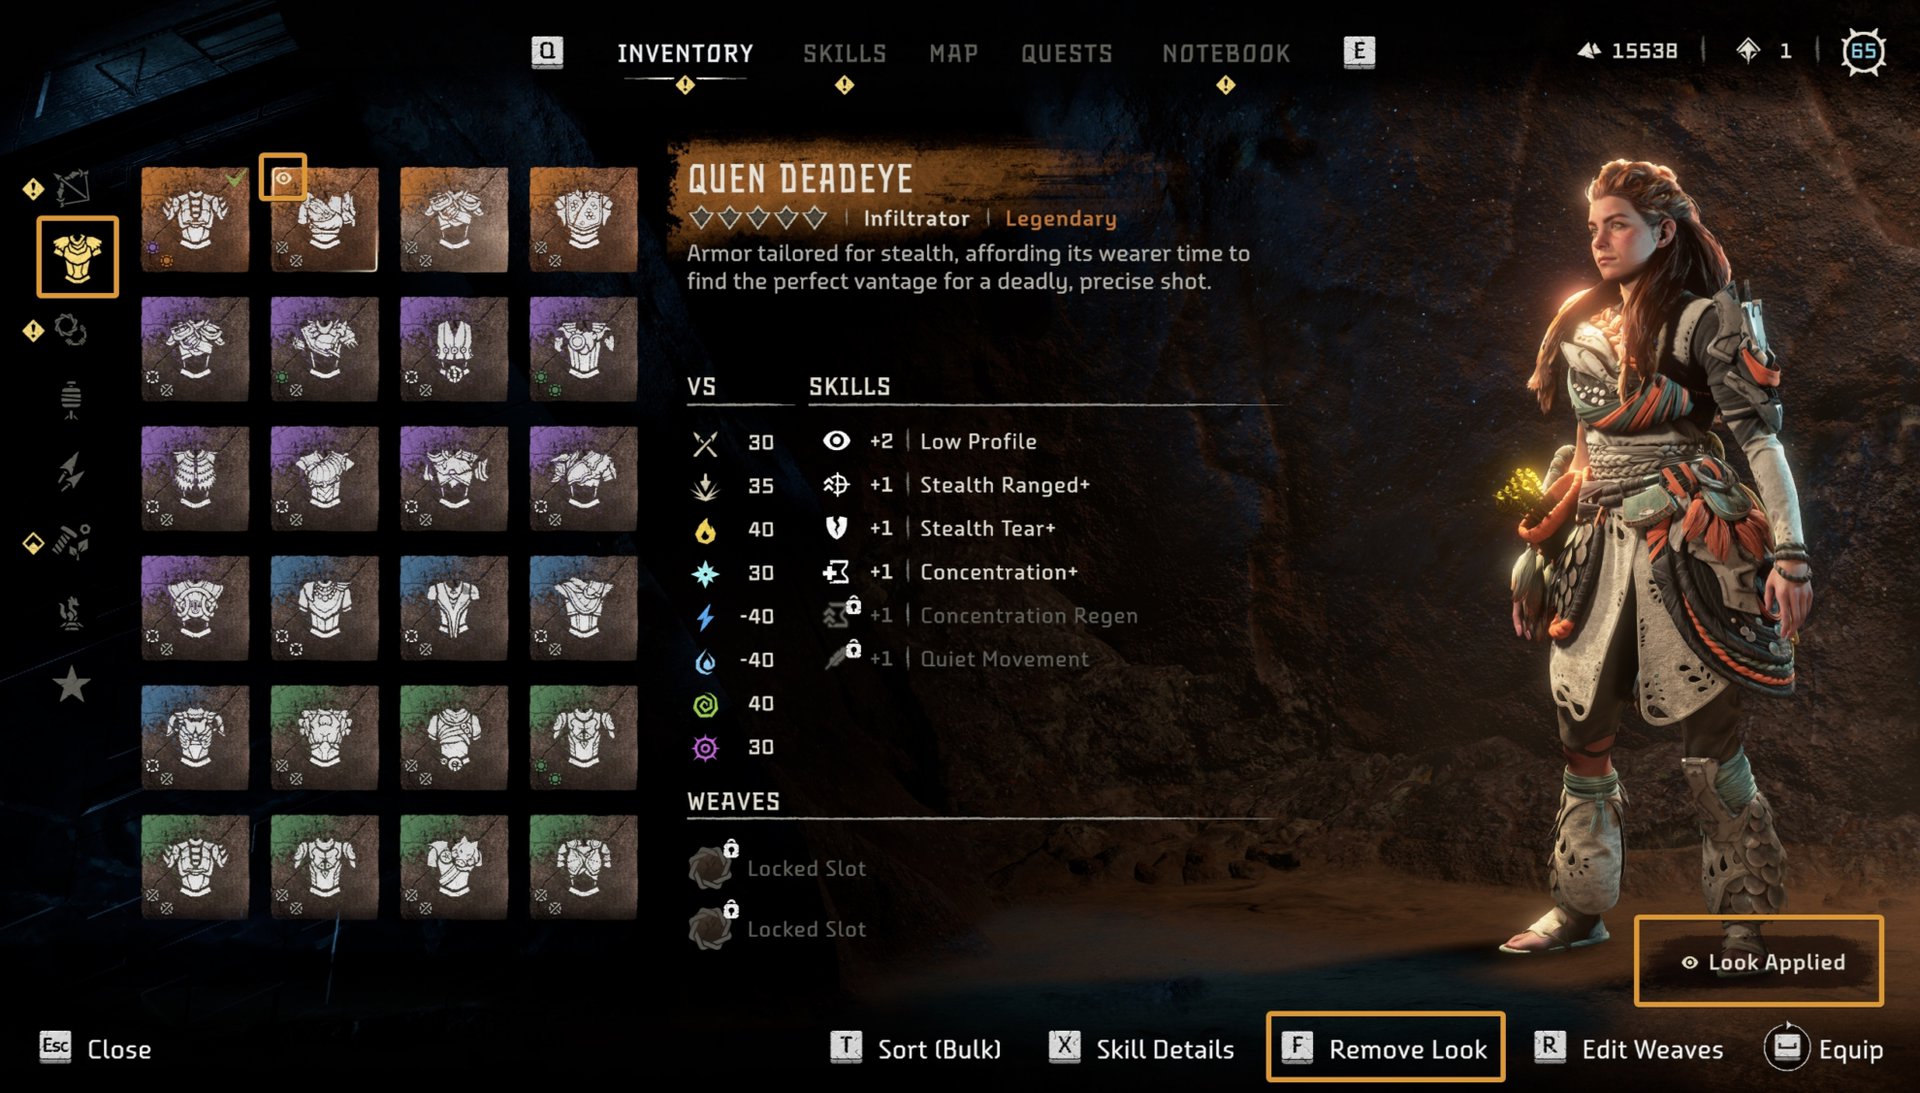
When you use one Outfit for stats and another for Looks, you will see two different icons in the list on the left side.
The Outfit you are currently using for its stats and perks, will have a small green arrow icon in the top right corner.
The Outfit you use for its Looks, will have a small white eye icon in the top left corner of the square.
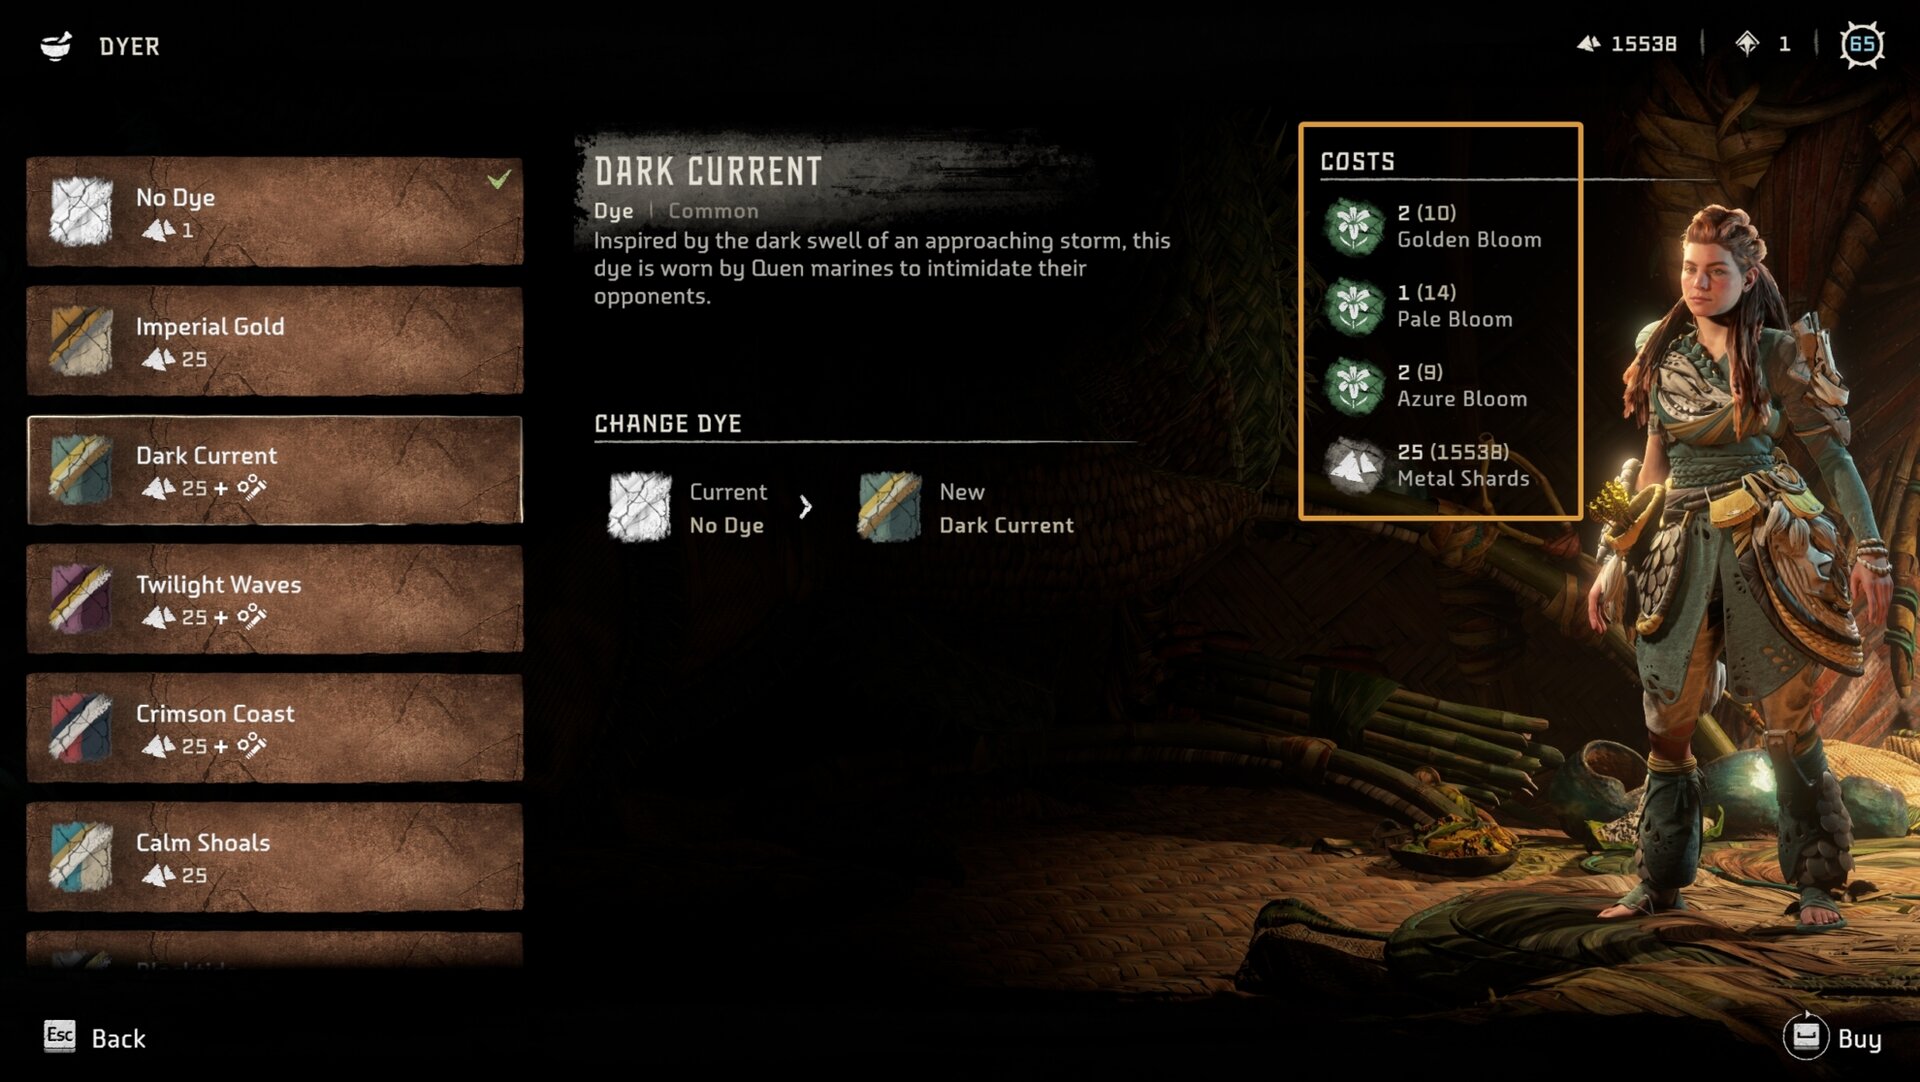
How to Dye an Outfit
You can visit a Dyer NPC to change the colors of an outfit. Dyes are unlocked as you progress through the game, complete missions and collect dye plants required for some of the dyes.
Dyer NPCs are marked with a white mortar and pestle icon on the map. They are available at every major settlement.
You can visit a Dyer NPC to swap between unlocked dyes for 25 Shards per change. To unlock a new dye, you have to trade with the Dyer a certain amount of unique Dye Plants.
What are Coil and Weave Upgrades
Coils are used to increase the damage and perks stats. They can be acquired when looting machines or by purchasing them from Hunter merchants. Unlike the Perks, coils can be switched or removed.
The number of coils each weapon has will vary depending on things like the type of weapon and the rarity. Each weapon will have a short paragraph that specifies how many coils are available and when they can be unlocked.
Weaves can only be equipped on your outfits to boost a specific skill or increase your defense against certain types of damage. Every outfit comes with a pre-equipped with a weave. Upgrade the outfit to unlock it and gain its benefits.
The amount of coils or weaves you can equip to a weapon or outfit will depend on its rarity.
How to Get Gear
There are many ways to get gear in Horizon Forbidden West. Completing the main quest will grant you the most essential outfits and weapons but that’s just a very small amount of items compared to what’s available in the entire game.
Merchants are the easiest way to get gear, they are spread in the different settlements of the Forbidden West and will sell you their inventory in exchange for Metal Shards and machine parts. The higher the rarity of the item, the more expensive it will be.
A few pieces of gear can be found on loot chests located in spots that appear to be random but it’s not something common so don’t choose this as your main method for getting new gear.
Legendary tier items are the best in the entire game, but because of this, they are not easy to get. For most of them, you will have to do a series of quests like completing all four gauntlet runs, solving all the relic ruin puzzles, or earning medals at the Hunting Grounds and Maw Arena.
How to Upgrade Gear
Gear can be upgraded at any Workbench, which can be found in settlements and shelters. Upgrading gear ensures that it continues to be effective against high-level enemies. This is the recommended tier of gear for each level:
- Uncommon (Green) Tier: Levels 1-15
- Rare (Blue): Levels 12-25
- Very Rare (Purple): 22-40+
Uncommon gear can be upgraded up to Level III. Rare gear to Level IV. Very Rare and Legendary gear can be upgraded up to Level V. Each level upgrade requires different items. The higher the weapon’s level, the more rare and expensive the items will be.
You will need a lot of different resources to upgrade each piece of gear. Metal Shards are the most important and easiest resource to get in the game, because of how easy it is to find them, you will need absurd amounts to upgrade weapons to the highest levels, especially if they are of very rare or legendary rarities.
Further down in the guide we have a dedicated segment on all of the resources and how to find and sort them in your Inventory.
Tools
The Tools tab contains the valuable consumables you loot while exploring the Forbidden West. You can also craft all of the items using resources you find around you or purchase from vendors.
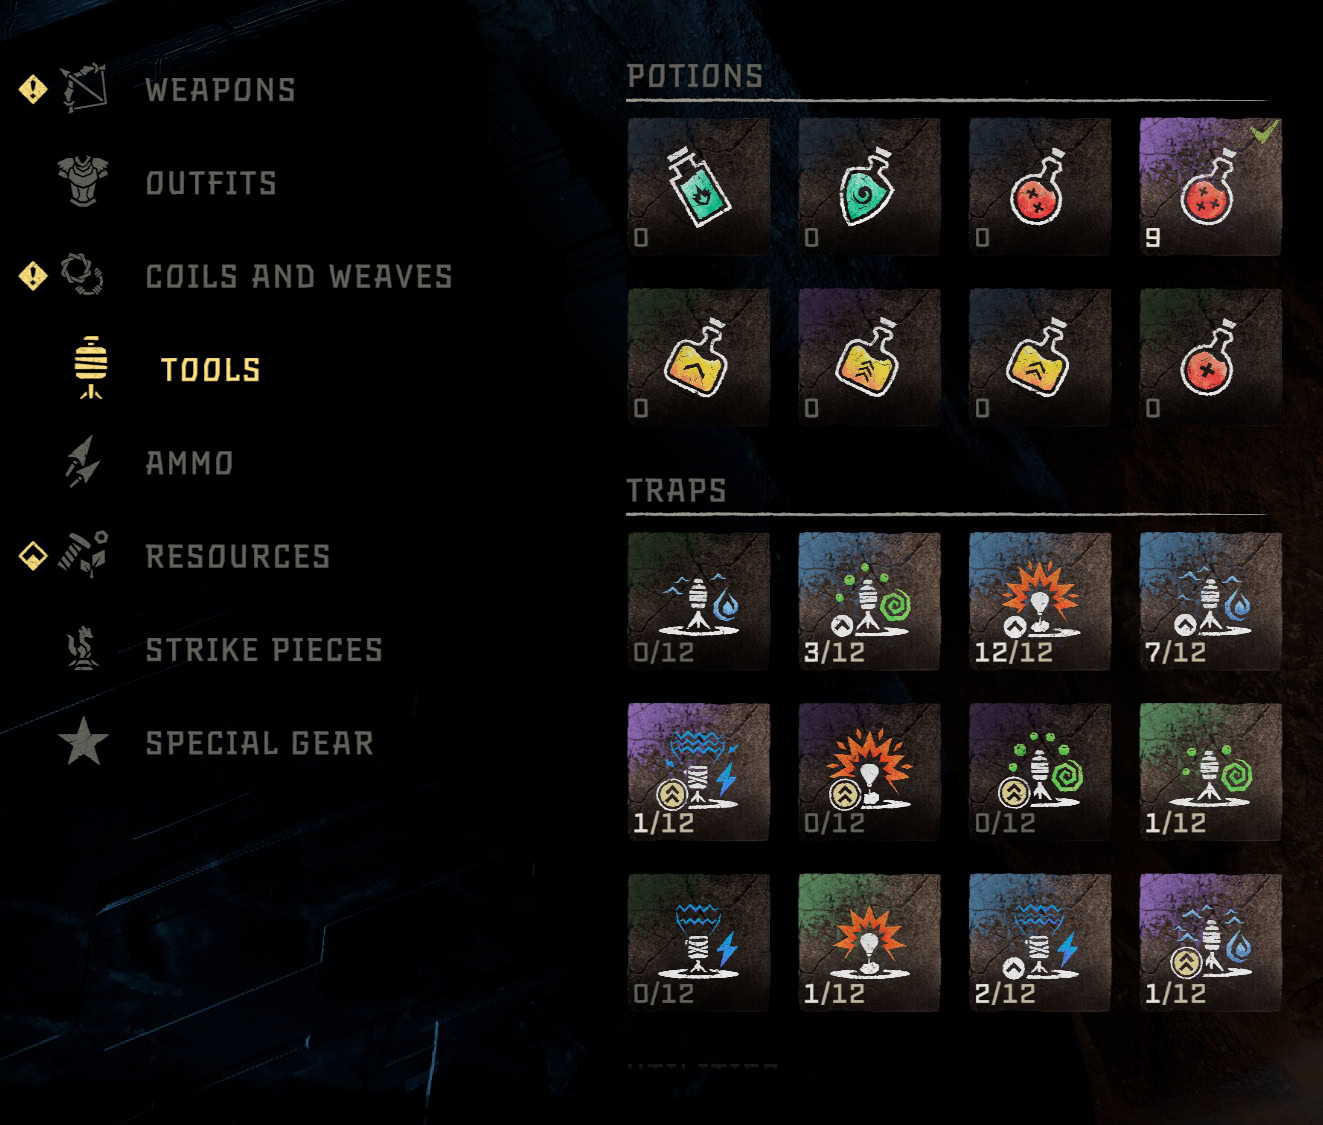
The Tools are split into three categories: Traps, Potions and Utility Items. Out of those, the Healing Potions and Stamina Potions will likely be the most used ones during your journeys. Below you can learn a bit more about each type.
Traps
Traps can be placed in the ground, they will activate as soon as a machine or human walk close enough. There are three tiers of traps: standard, advanced, and elite. Traps can be destroyed by the machine’s elemental attacks.
Potions
Potions can regenerate health, increase stamina, eliminate elemental and/or status defense, and provide temporary defensive stats.
Utility Items
There are other tools that are useful for multiple purposes. These tools are Smoke Bombs, Rocks, Fast Travel Packs, and Mount Calls.
Resources
Resources are used to buy, craft, and upgrade items. Some of them are easy to obtain while others will require you to go to a specific place or defeat one of the stronger machines.
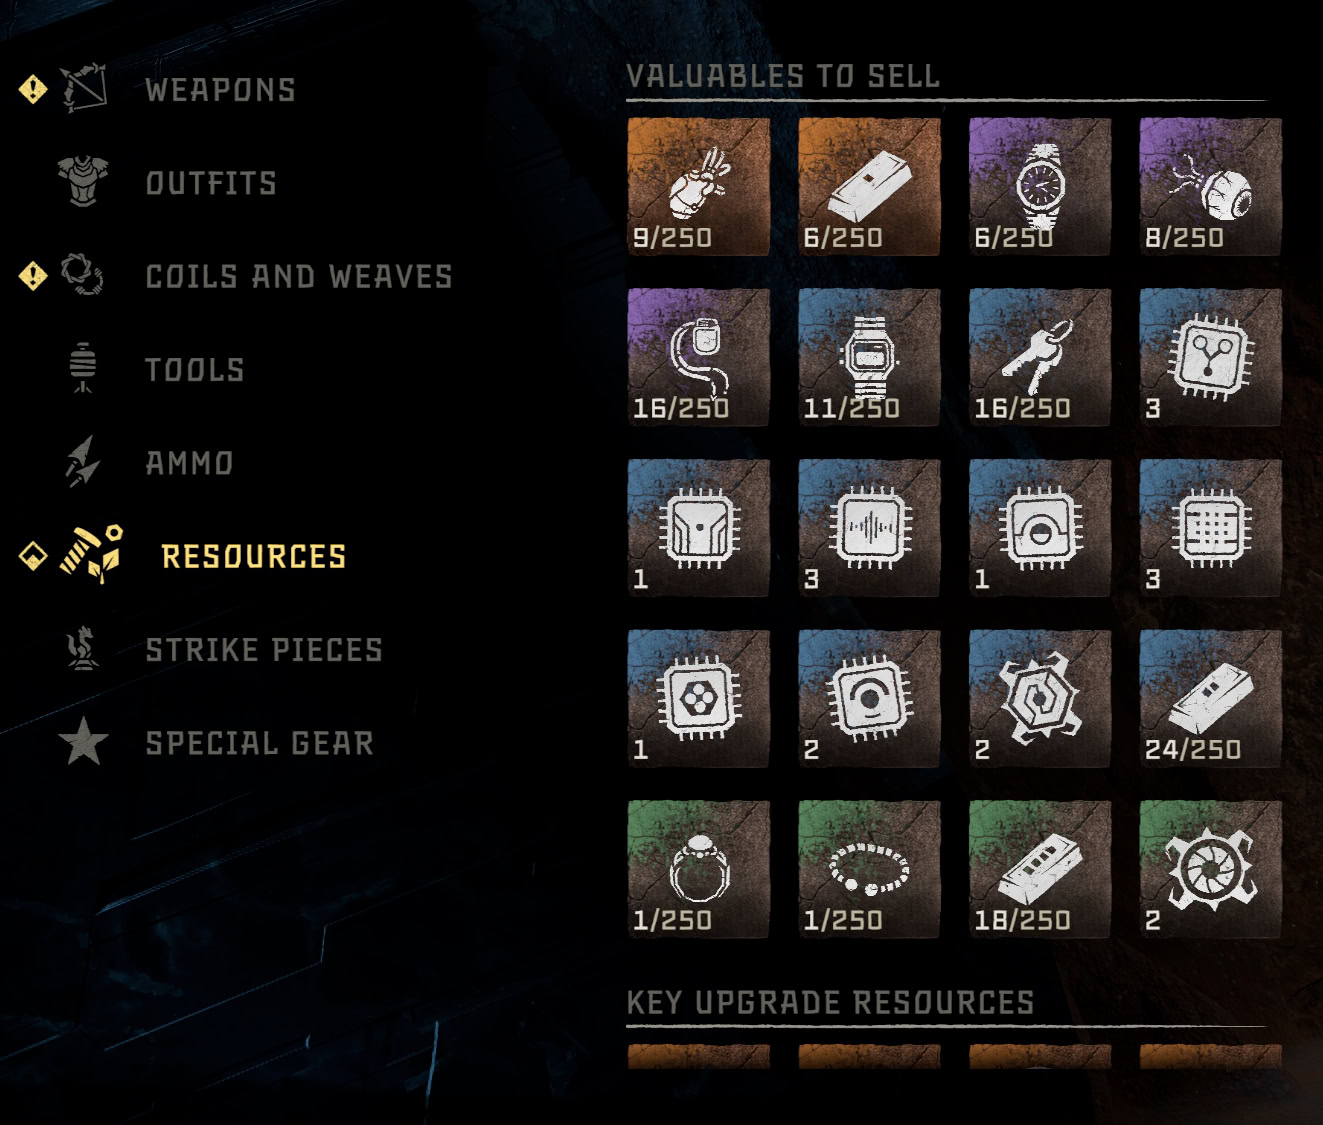
You will loot a ton of items that you may never need in such large quantities. It is worth to check your Resources Tab in the Inventory frequently and stop by a vendor to trade some of them for Shards.
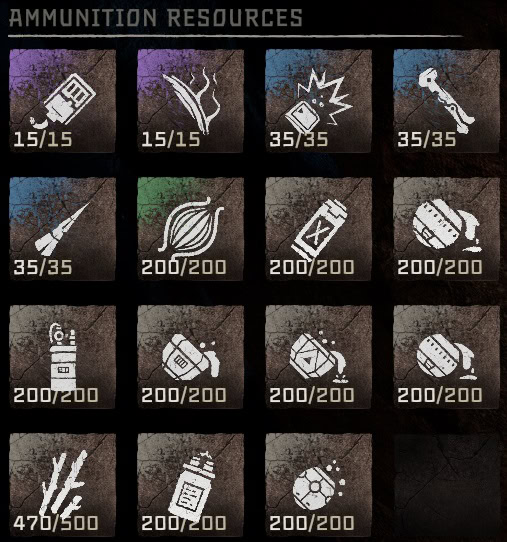
Ammo resources
Used to craft the ammo for all your weapons. You can get these resources from machines or purchase them from merchants.
Healing resources
Medicinal Berries are the easiest to acquire healing resource but you can combine them with food and plants to craft Health, Stamina, Cleans, and Overdraw potions.
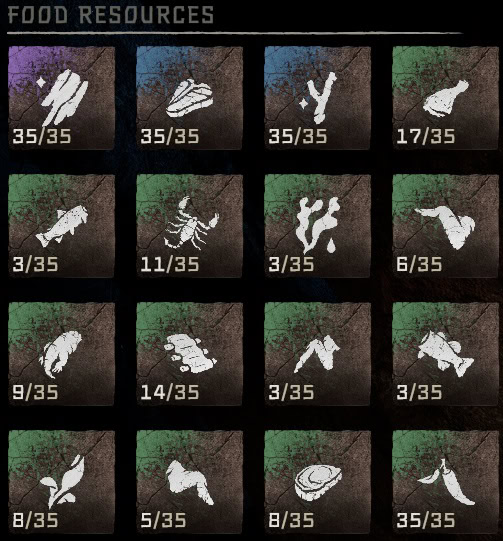
Food resources
You can get food resources from plants and animals. These ingredients can be exchanged with different cooks for dishes that temporarily increase the level of a skill, or recover health or stamina.
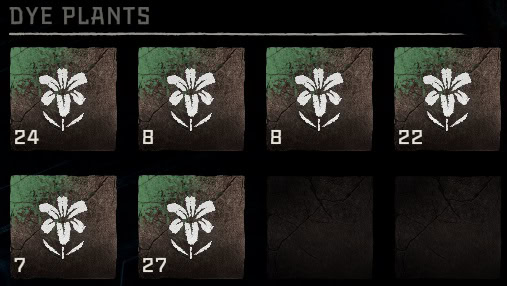
Dye plants
Bloom-type plants can be exchanged for dyes to alter the appearance of your outfit.
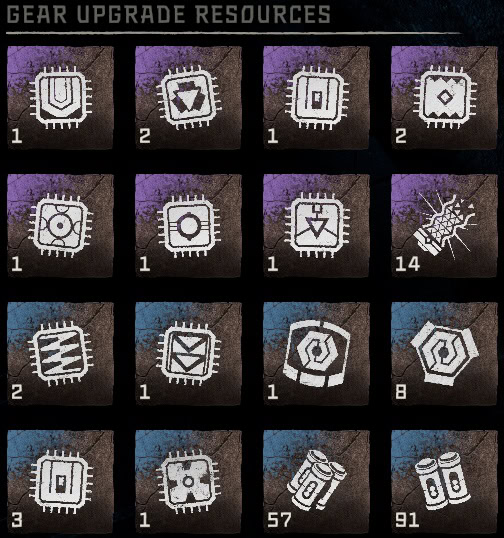
Upgrade resources
These resources are used for pouch, outfit, and weapon upgrades. You can get them from machines, animals, or loot chests. Stronger enemies provide the rarest and most valuable resources.
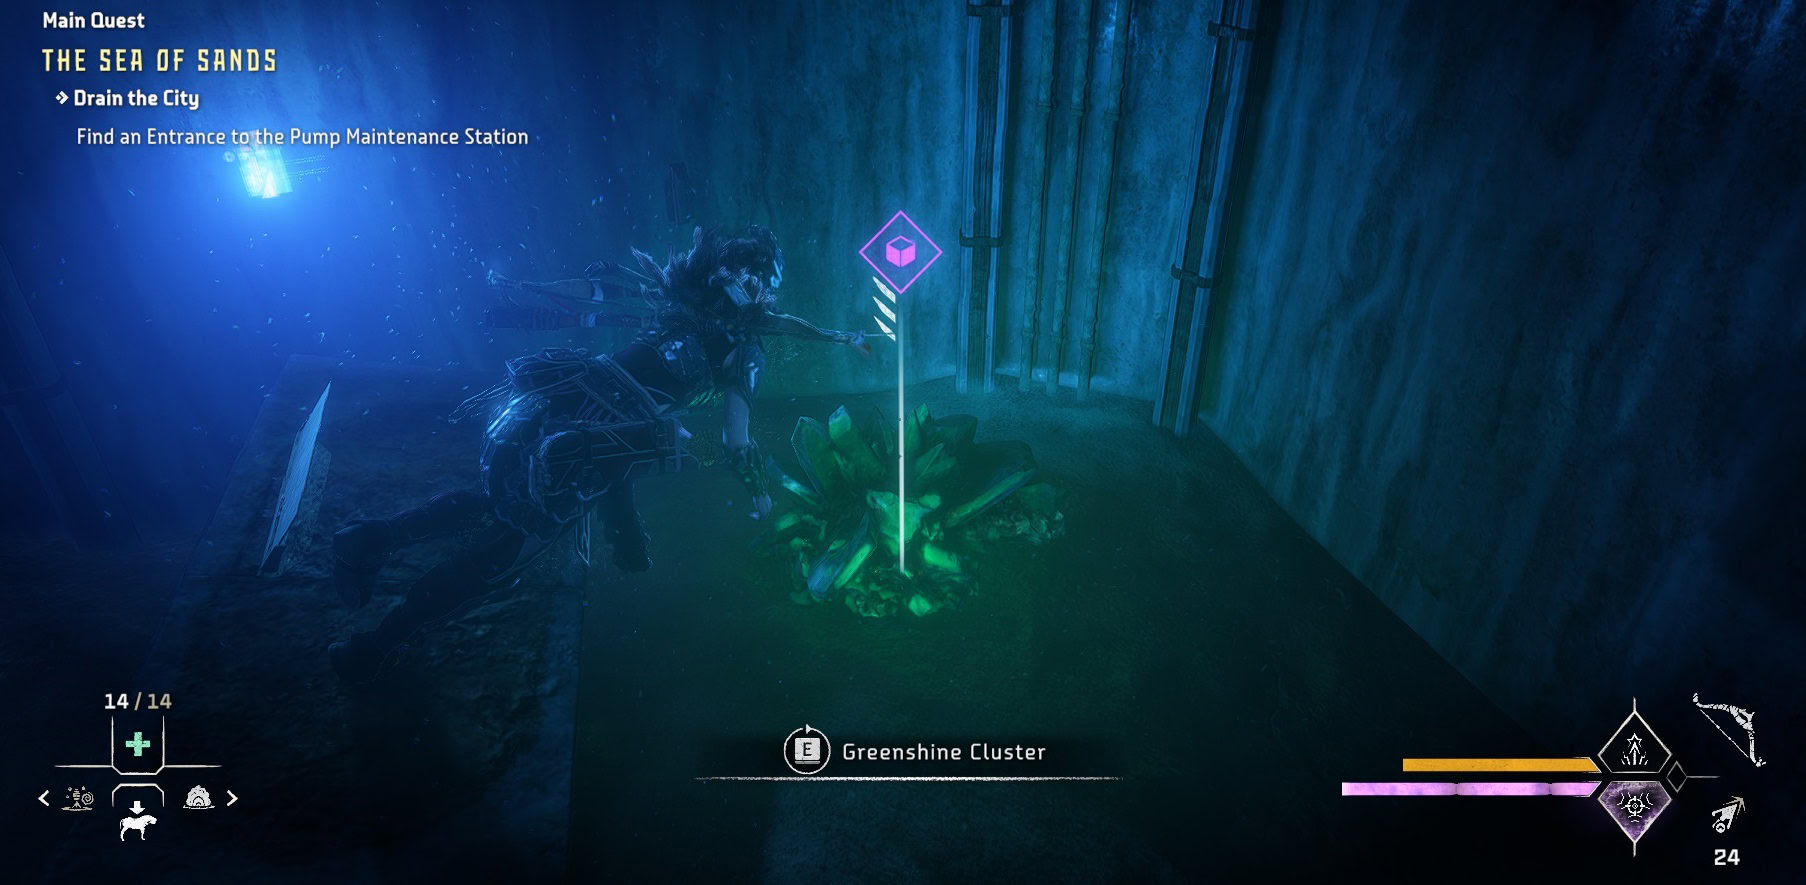
 Greenshine
A very valuable crystal that you can find all over the Forbidden West in the form of Slivers, Fragments, Chunks, Clusters, and Slabs. Greenshine is used to upgrade Outfits and Weapons but think carefully as to which item to upgrade, this resource does not respawn.
Brimshine
The equivalent of Greenshine, available in the Burning Shores expansion. New gear items like weapons and outfits cost Brimshine to purchase and upgrade, instead of Greenshine.
Strike Pieces
The only purpose of these pieces is for you to play Machine Strike. A strategy mini-game that is played with wooden pieces that resemble the machines of Horizon Forbidden West. Just like the real machines, each strike piece has different strengths and weaknesses.
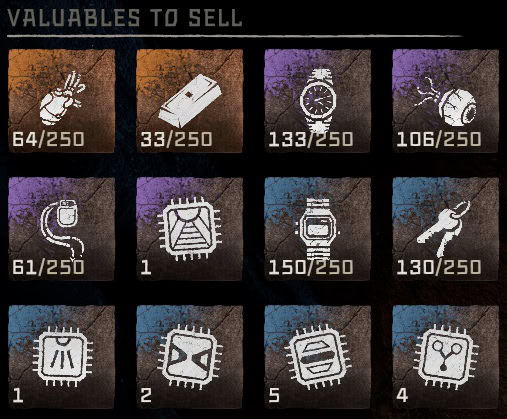
Valuables
You can sell these items to merchants, it’s an easy way to get Metal Shards. Some of these valuable items are also Upgrade resources so make sure to double-check before selling multiple items at once.