Everything you need to know to help Millicent make the journey from the edge of Caelid all the way to Miquella’s Haligtree in the Mountaintops of the Giants. Along the way, you can find a prosthetic arm for her, and then steal it for yourself to use as one of the better talismans in Elden Ring.
Table of contents
- Millicent’s Background Story
- Step 1: Meeting Sage Gowry in Caelid
- Step 2: The Unalloyed Golden Needle
- Step 3: The Secret of Sellia, Town of Sorcery
- Step 4: Millicent Begins Her Journey
- Step 5: The Valkyrie’s Prosthesis
- Step 6: Seeking the Haligtree and Malenia
- Step 7: Deciding Millicent’s Fate
- Step 8: Returning to Sage Gowry
Millicent’s Background Story
Millicent is a red-haired, one-armed woman afflicted by the Scarlet Rot who sets out on a journey to find Malenia as you help each other reach the Haligtree. Despite her quest being as long as those that unlock a new ending, you don’t unlock one by completing Millicent’s quest.
Millicent’s quest is absolutely worth doing because it’s the only way to prevent the Lord of Frenzied Flame ending after you’ve met the Three Fingers. In addition, you can get some pretty valuable items that are essential to certain builds.
Getting the most out of Millicent requires you to make specific choices at different points in her quest, and this guide will tell you precisely what you need to do to get what you want.
Step 1: Meeting Sage Gowry in Caelid
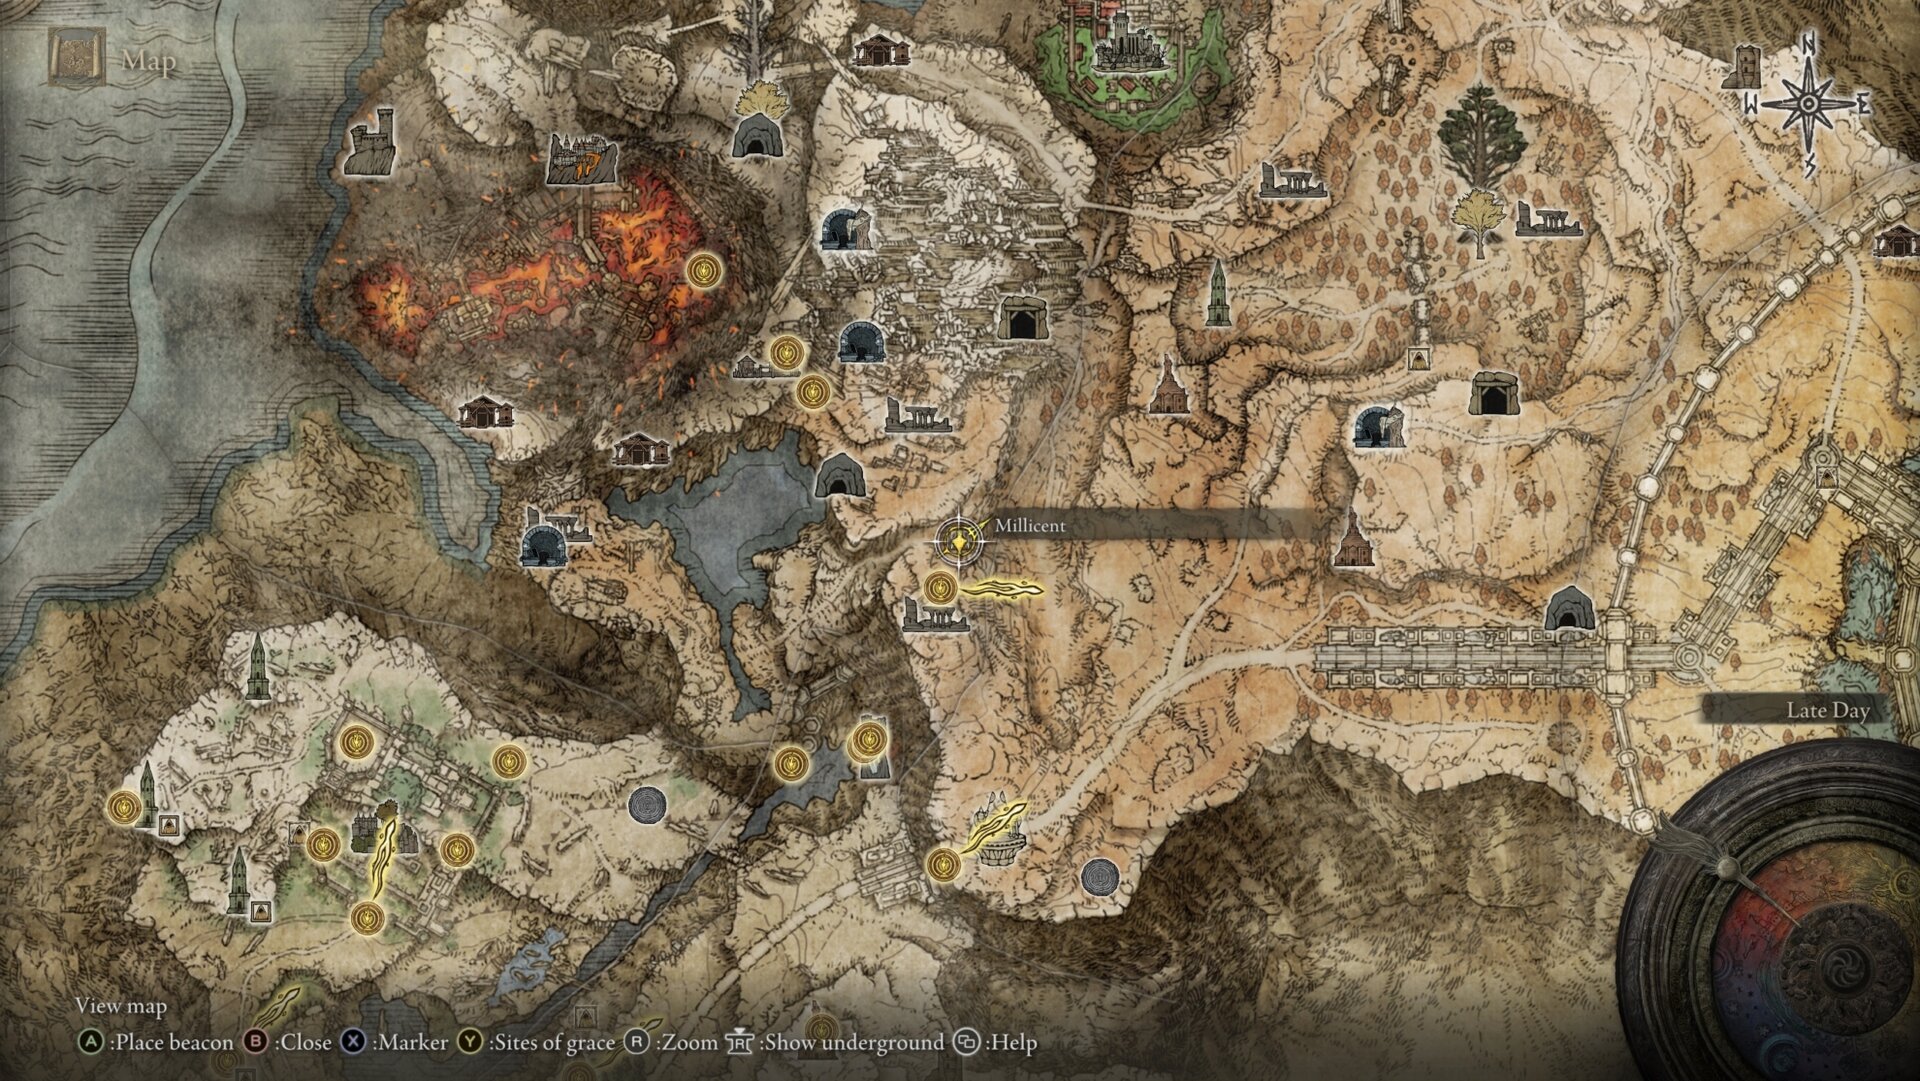
From the beginning of the game, the quickest way to start Millicent’s quest is to use a transporter trap chest at the Dragon-Burnt Ruins at Agheel Lake in Limgrave. You don’t need to travel this way. You can get there on horseback, but it’s much faster.
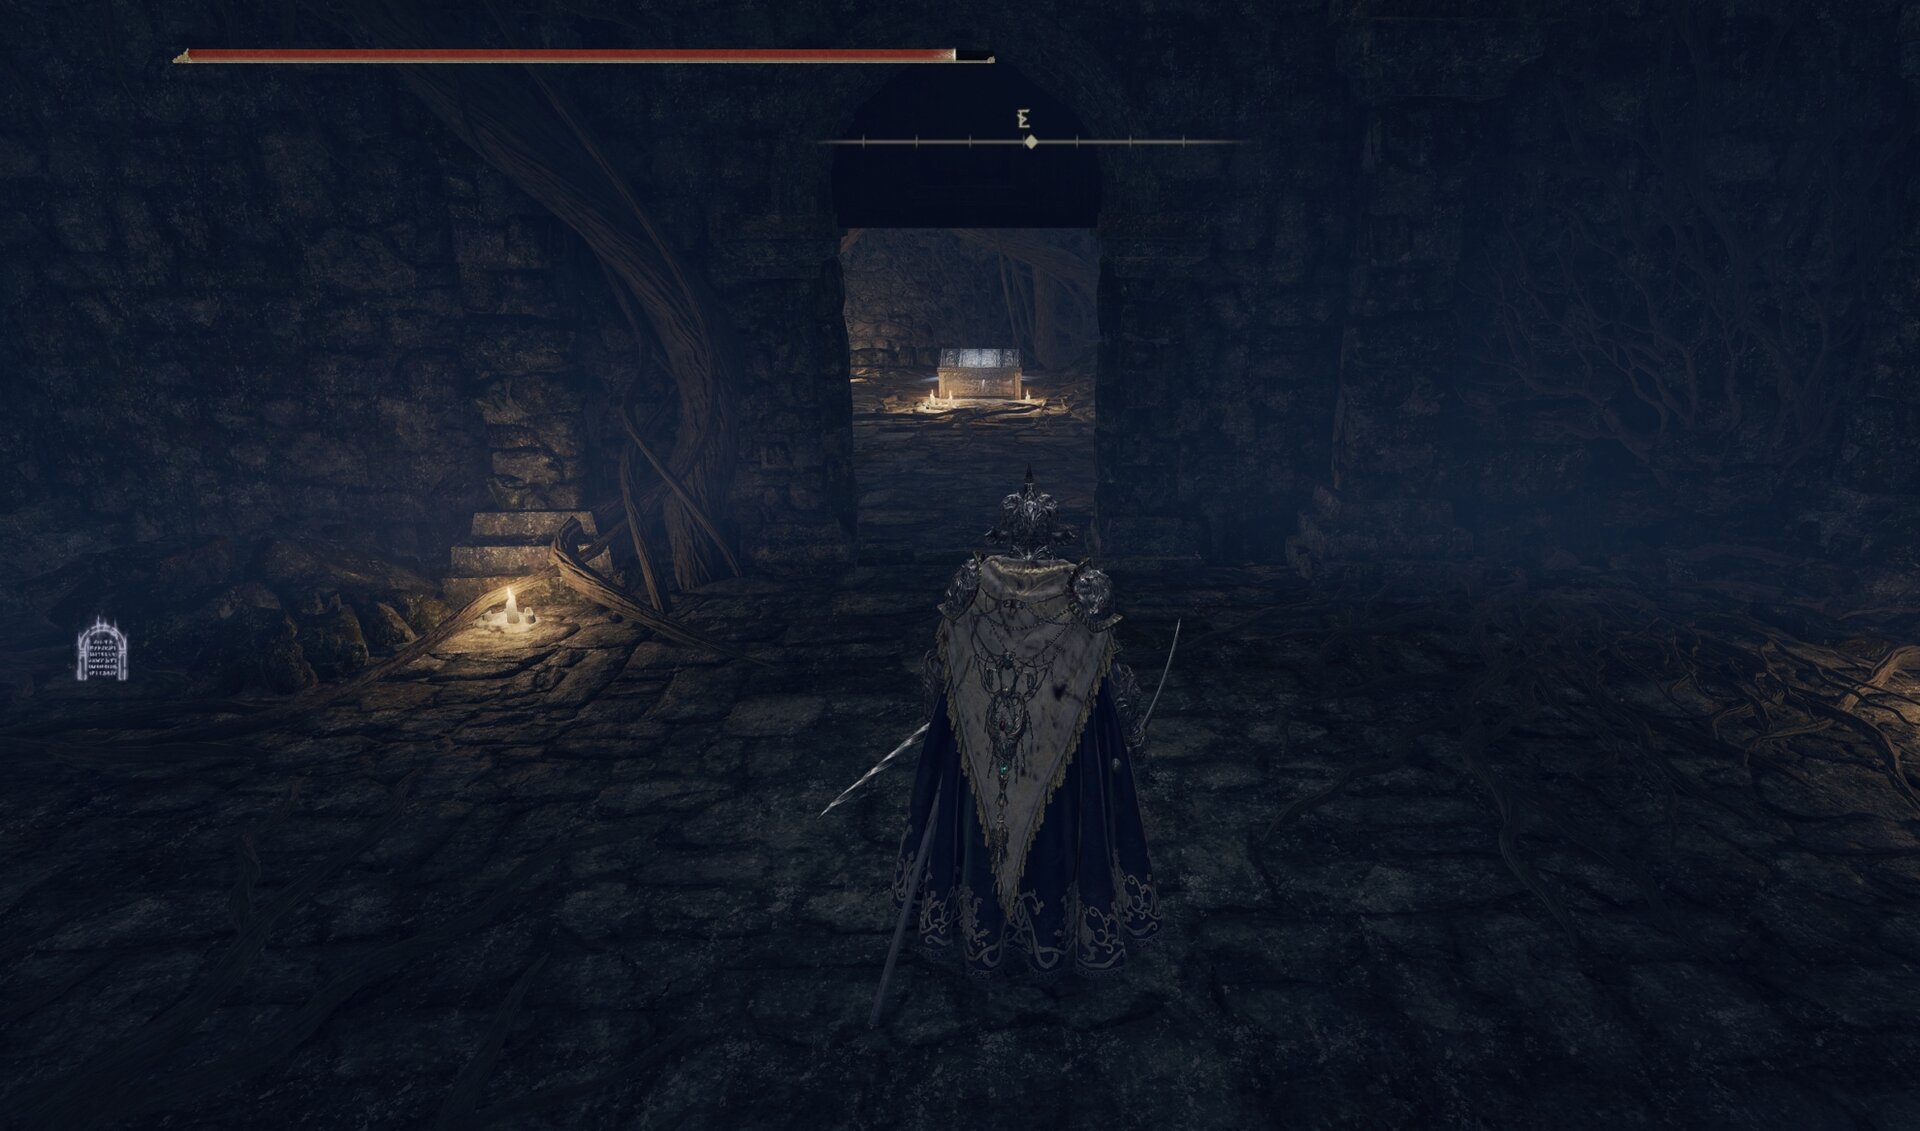

That chest will warp you to Sellia Crystal Tunnel, a higher-level mine near the Swamp of Aeonia. Feel free to explore the mine now or save it for later if you’re under-leveled. Don’t get discouraged. The enemies in Sellia Crystal Tunnel are more challenging than the ones you’ll encounter in Sellia.
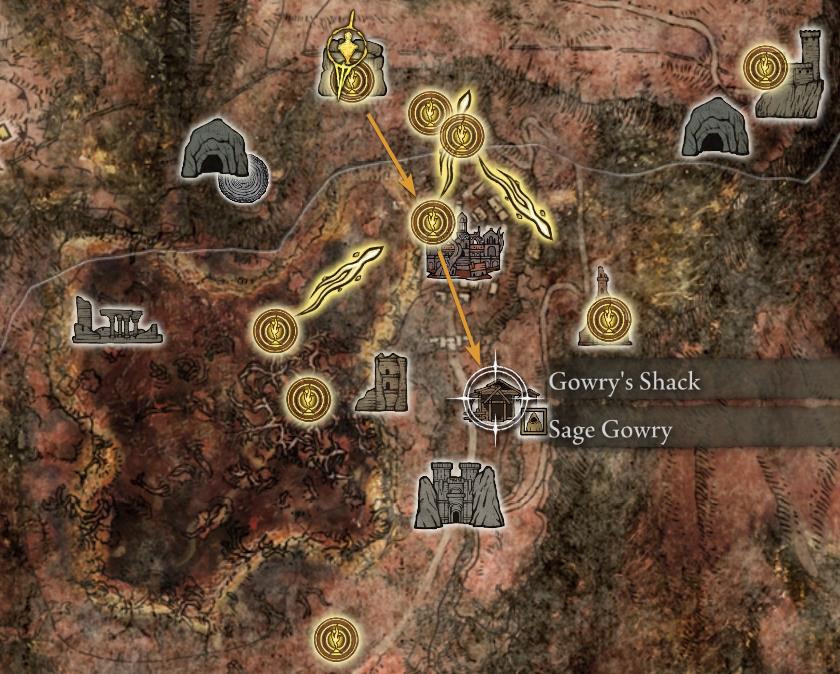
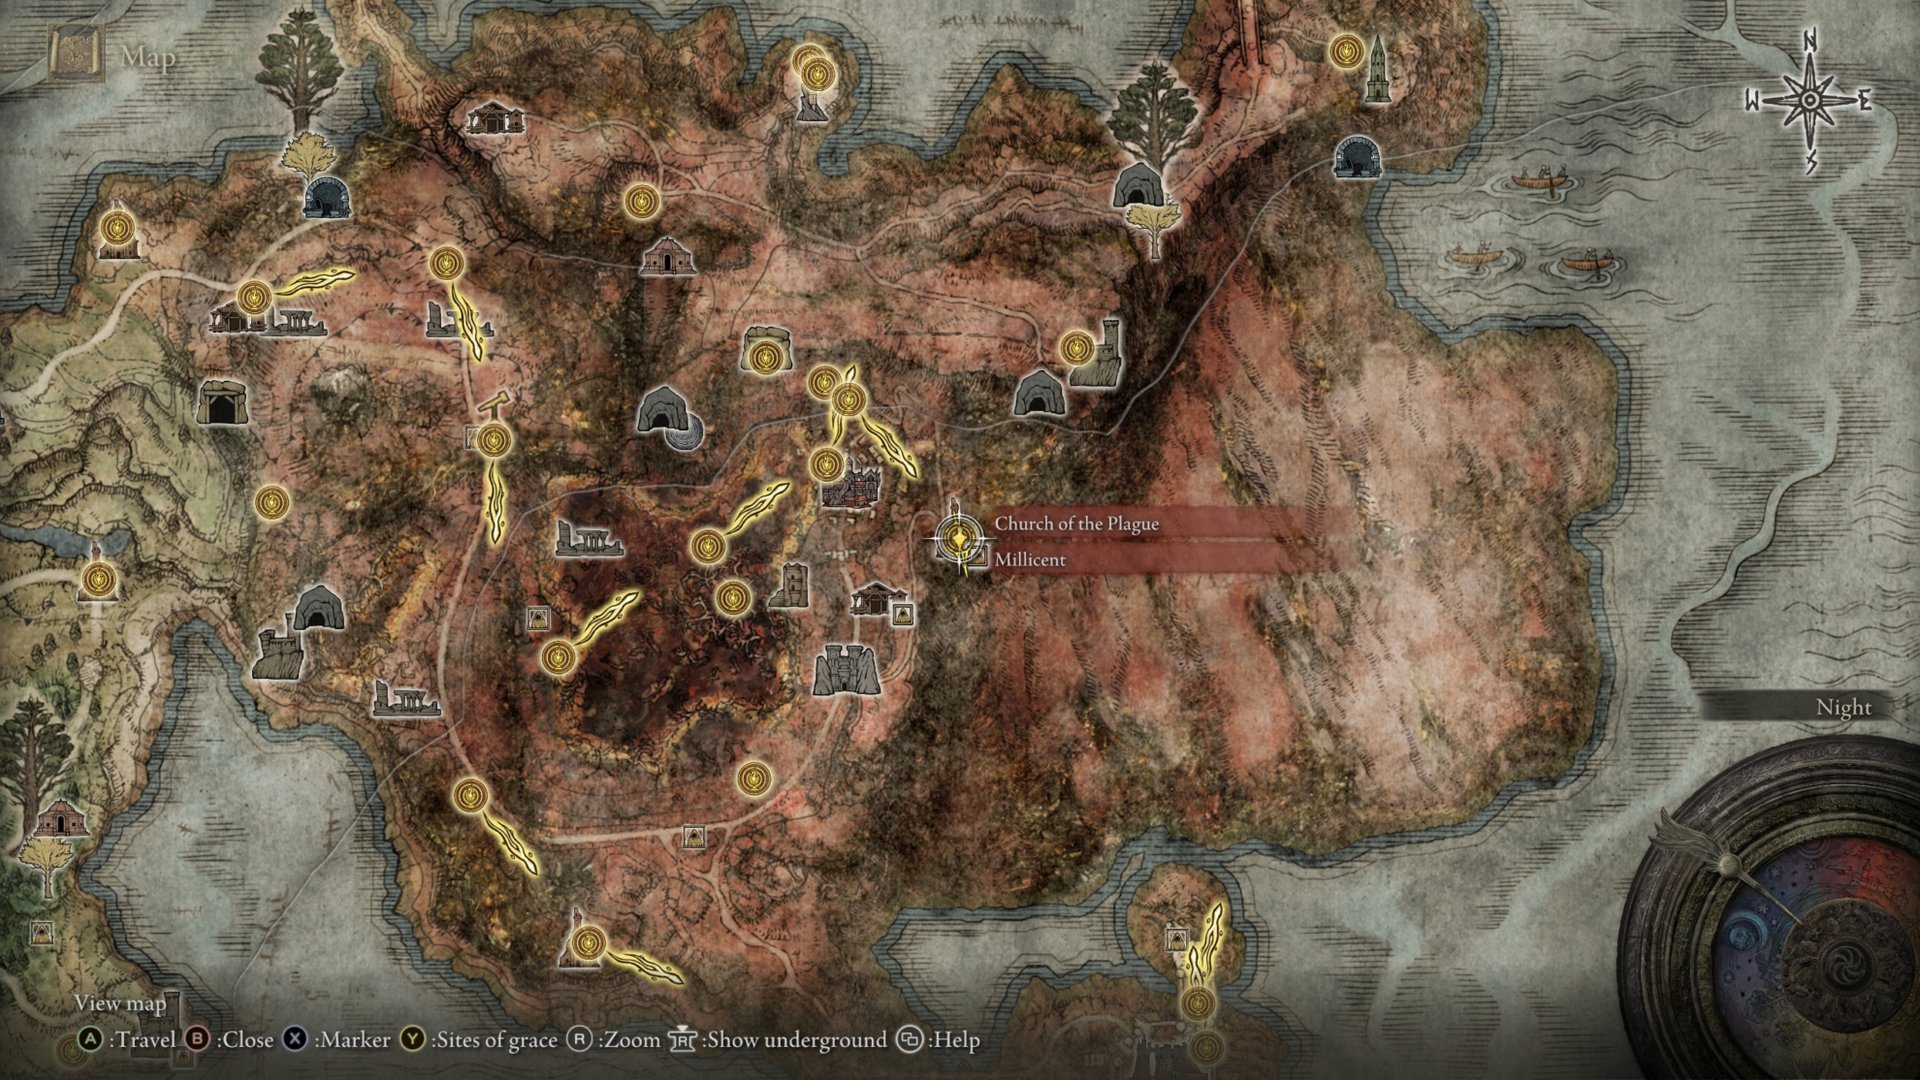
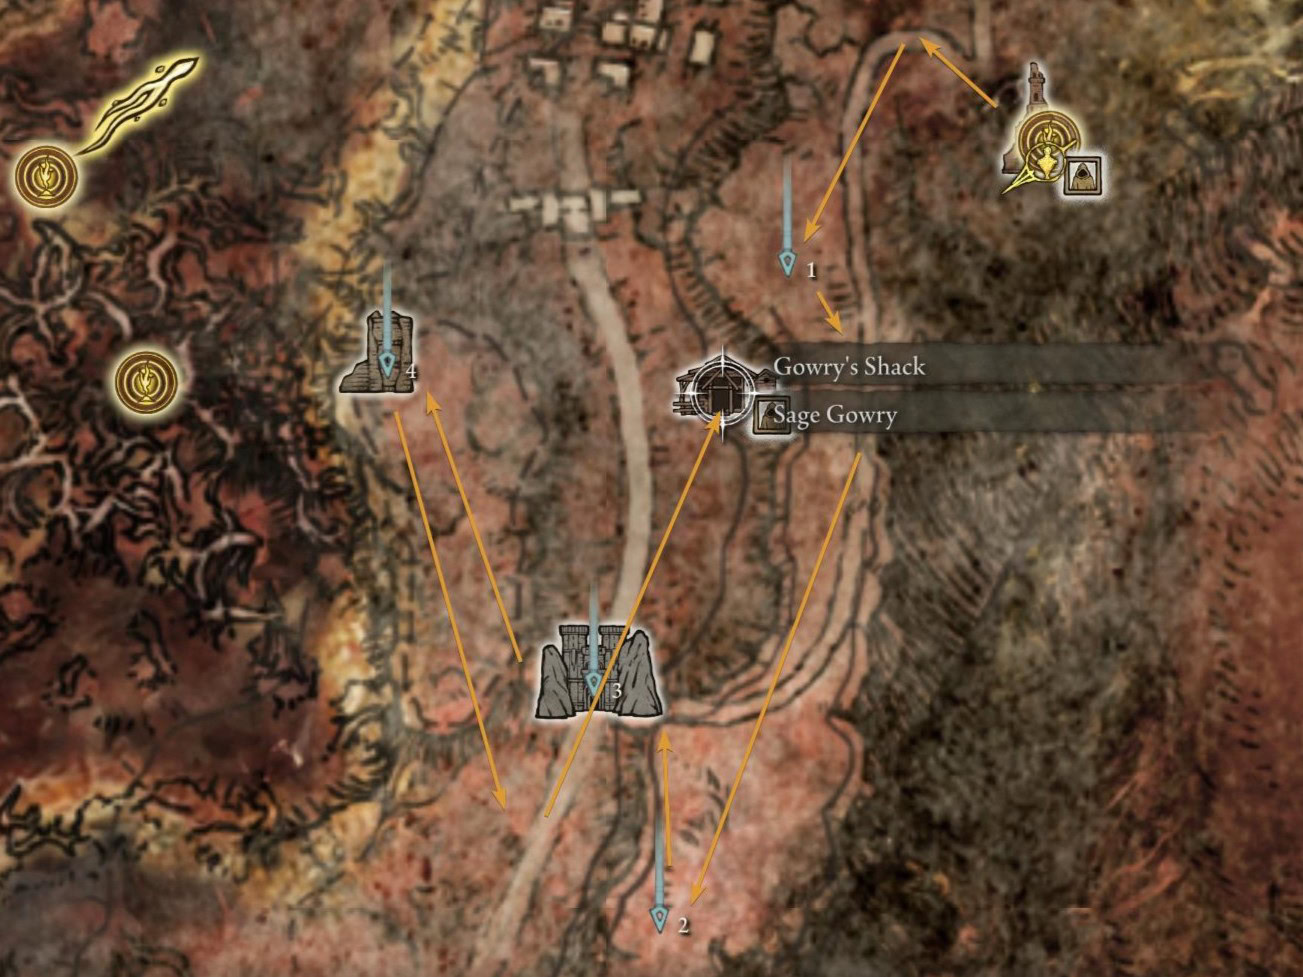
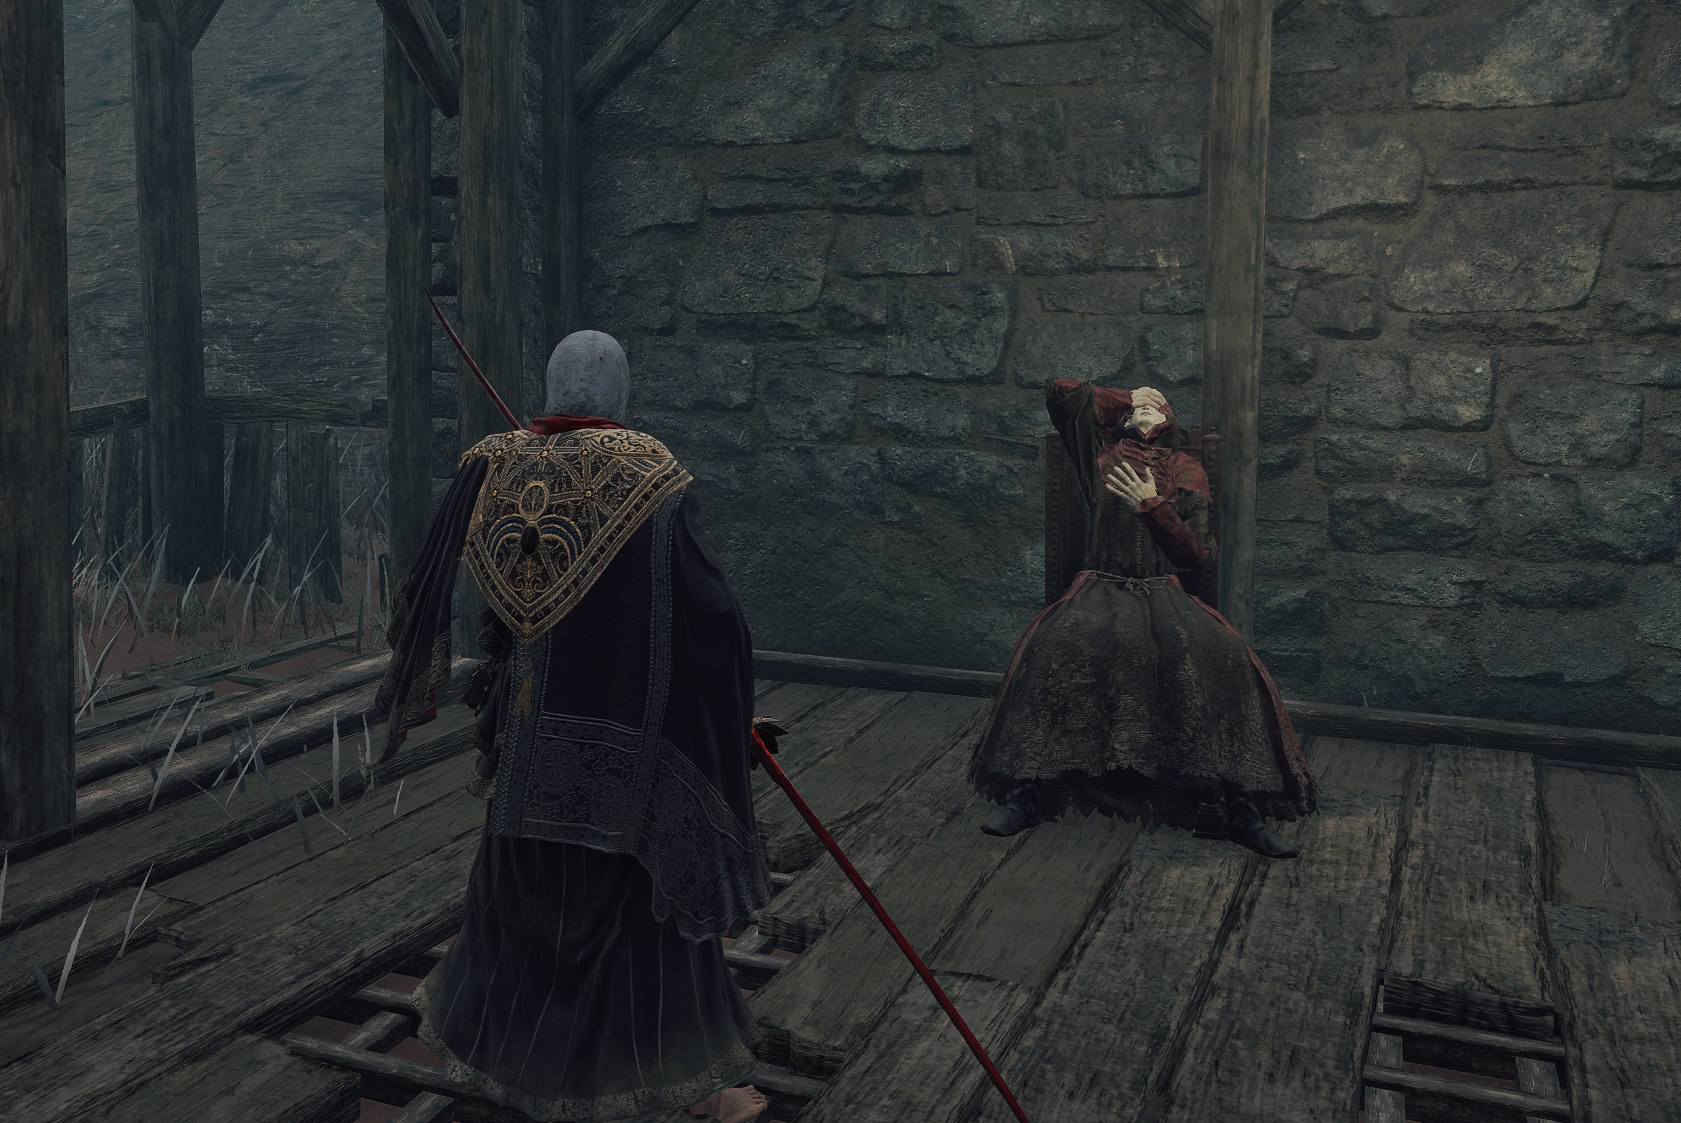
You can initially find Millicent suffering in eastern Caelid at the Church of the Plague, but her quest begins with her adoptive father, a sage named Gowry.
Gowry lives in the most dilapidated shack you’ve ever seen, guarded by one of those freaky T-rex puppers.
Every time you interact with Millicent after she has something new to say or you run into her in a new location, you can and should return to Sage Gowry, as he’ll have something new to say as well. Take stock of his location because you’ll be returning there often.
Unfortunately, there’s no dedicated Site of Grace for Gowry’s Shack. Your closest options are all roughly the same distance from him.
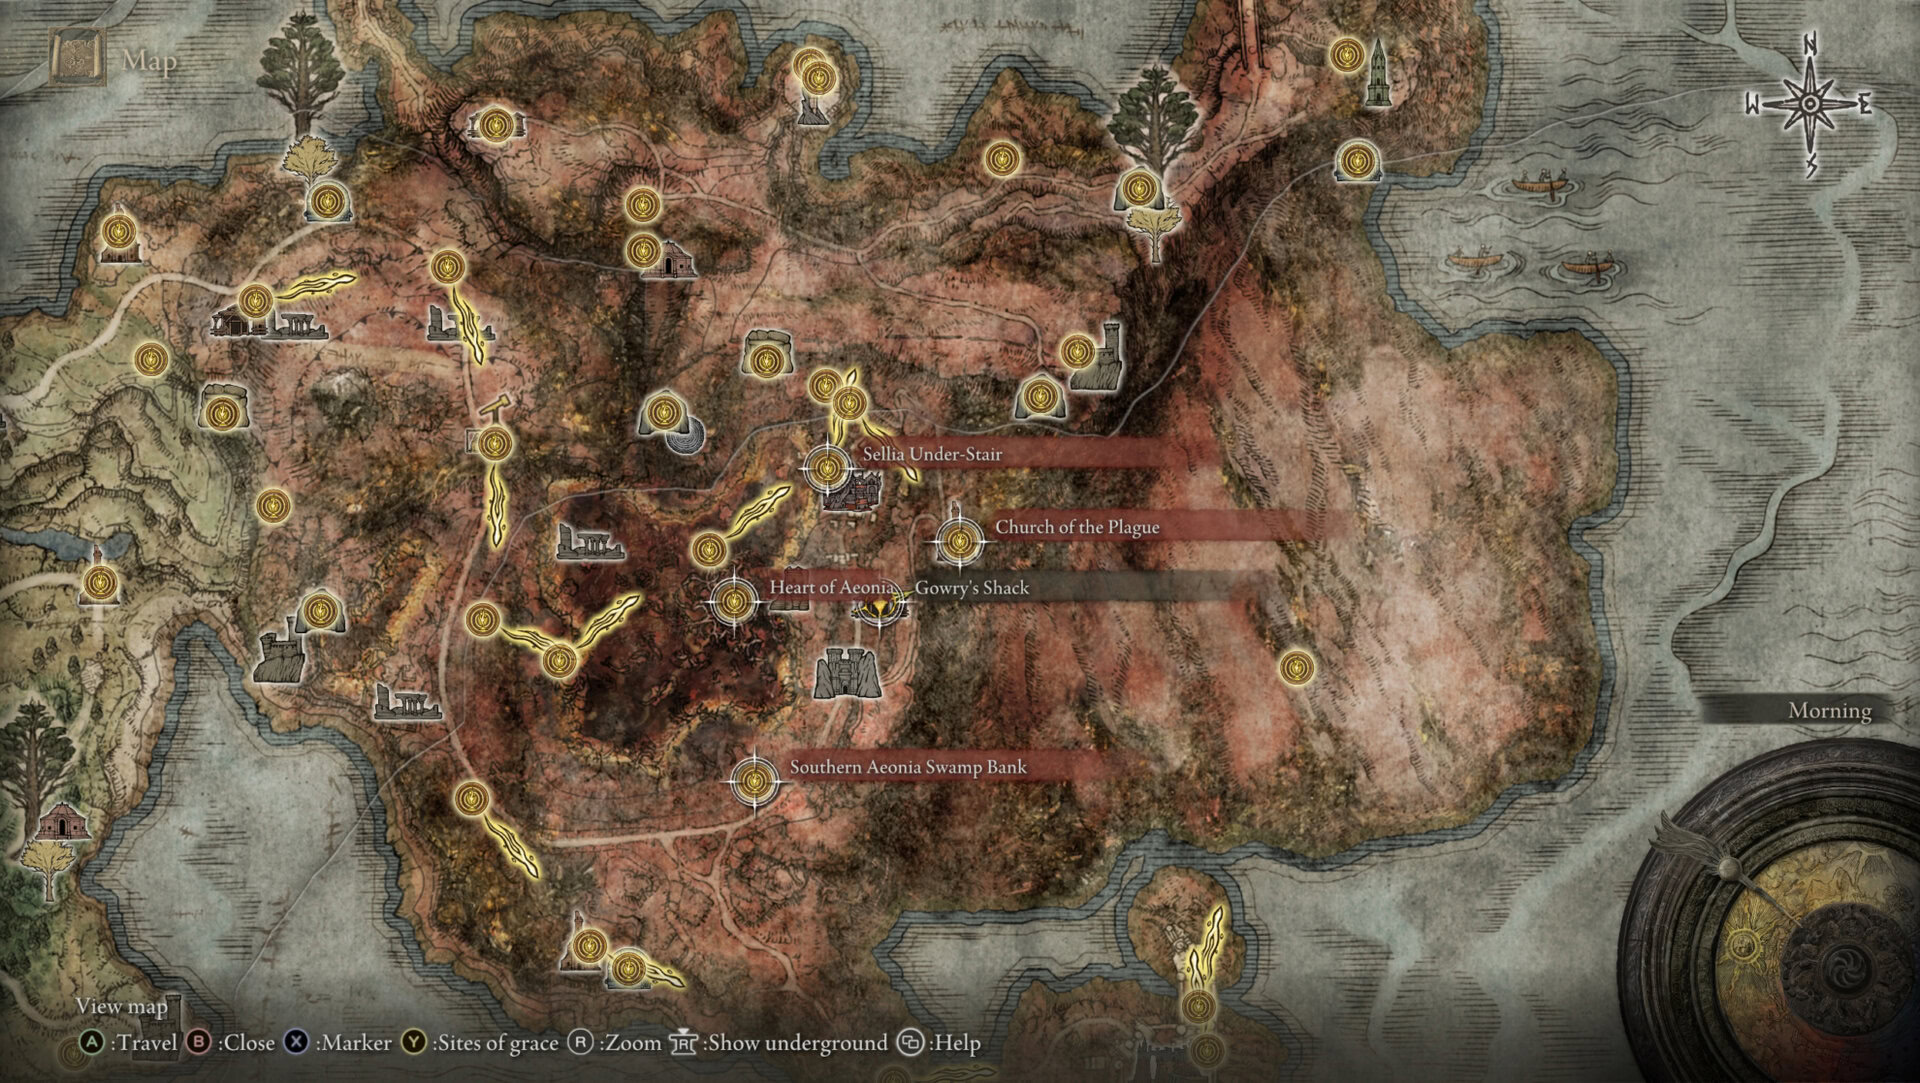
I highly recommend warping to the Southern Aeonia Swamp Bank Site of Grace because it’s a straight shot with minimal enemies, none of which are invisible, but you do you.
Step 2: The Unalloyed Golden Needle
Sage Gowry will tell you that Millicent is ill and that you must retrieve the Unalloyed Golden Needle to help her. In exchange, he’ll tell you the Secret of Sellia, which you need to figure out anyway as a practical requirement to reach Millicent.
The Unalloyed Golden Needle is located at the Heart of Aeonia. Commander O’Neill, one of Malenia’s officers in her battle against General Radahn has the needle, so you’ll have to defeat him to get it.
You can enlist the help of one of Millicent’s sisters, Pollyanna. Her summon sign will appear near the Inner Aeonia Site of Grace.
Optional: Millicent’s Invasion
While you’re out and about, I recommend heading to the center of the Swamp of Aeonia (on horseback). You’ll fight an invader version of Millicent that functions as some visual storytelling, and you’ll get a bunch of runes, which is nice.
Try to defeat as many of the nearby Cleanrot Knights as you can before Millicent finishes teleporting, or you’ll have to contend with them at the same time.
Make sure you head to some solid ground, ideally, one of the roots sticking out of the swamp so you don’t have to fight in the rot.
This is optional, but you lose the opportunity once you give Millicent the Unalloyed Gold Needle. I think it’s meant to represent the rot writhing inside of her.
Step 3: The Secret of Sellia, Town of Sorcery
Oh no! The Unalloyed Golden Needle is broken! Don’t worry. Sage Gowry can fix it, though it’ll take a moment. In the meantime, you get to investigate Sellia’s Secret!
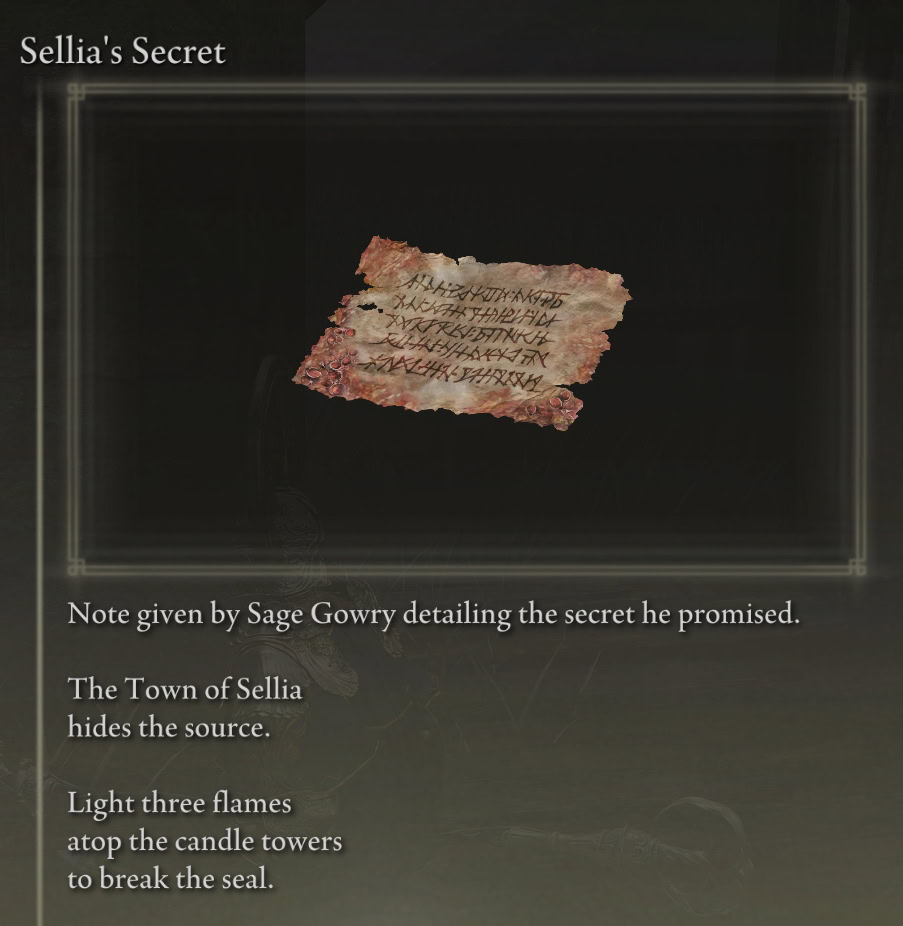
As it turns out, many areas of Sellia are sealed off by some form of Sorcery, and Gowry’s Secret of Sellia tells you what you need to do to break the seals. This is a necessary step, as these seals also block the way to Millicent and the Church of the Plague.
In order to break the seals at Sellia, Town of Sorcery, you must jump onto and around the roofs to light 3 torches atop some of the highrise towers.
You don’t have to interact with Gowry at all to light the torches that break all of the seals. He just gives you the hint because the way to Millicent at the Church of the Plague is sealed off.
That said, there is a far more efficient path that allows you to grab all of the items on the roof as well, and we have a detailed guide on how to light all of the torches and find all of the items in Sellia, Town of Sorcery.
Reaching Millicent
You can head up to Millicent now or rest at a Site of Grace and return to Sage Gowry, as you need to reload the area for Sage Gowry to finish repairing the Unalloyed Gold Needle. I recommend heading up to Millicent now since there’s a natural way back down.
Go through the main doorway up the stairs by the Erdtree sapling, rest at the Site of Grace, and head up the hill. Keep an eye out for some silver bowling balls rolling toward you aggressively, and have some Holy Water Pots ready to douse some skelly bois.
Seeing Millicent at the Church of the Plague
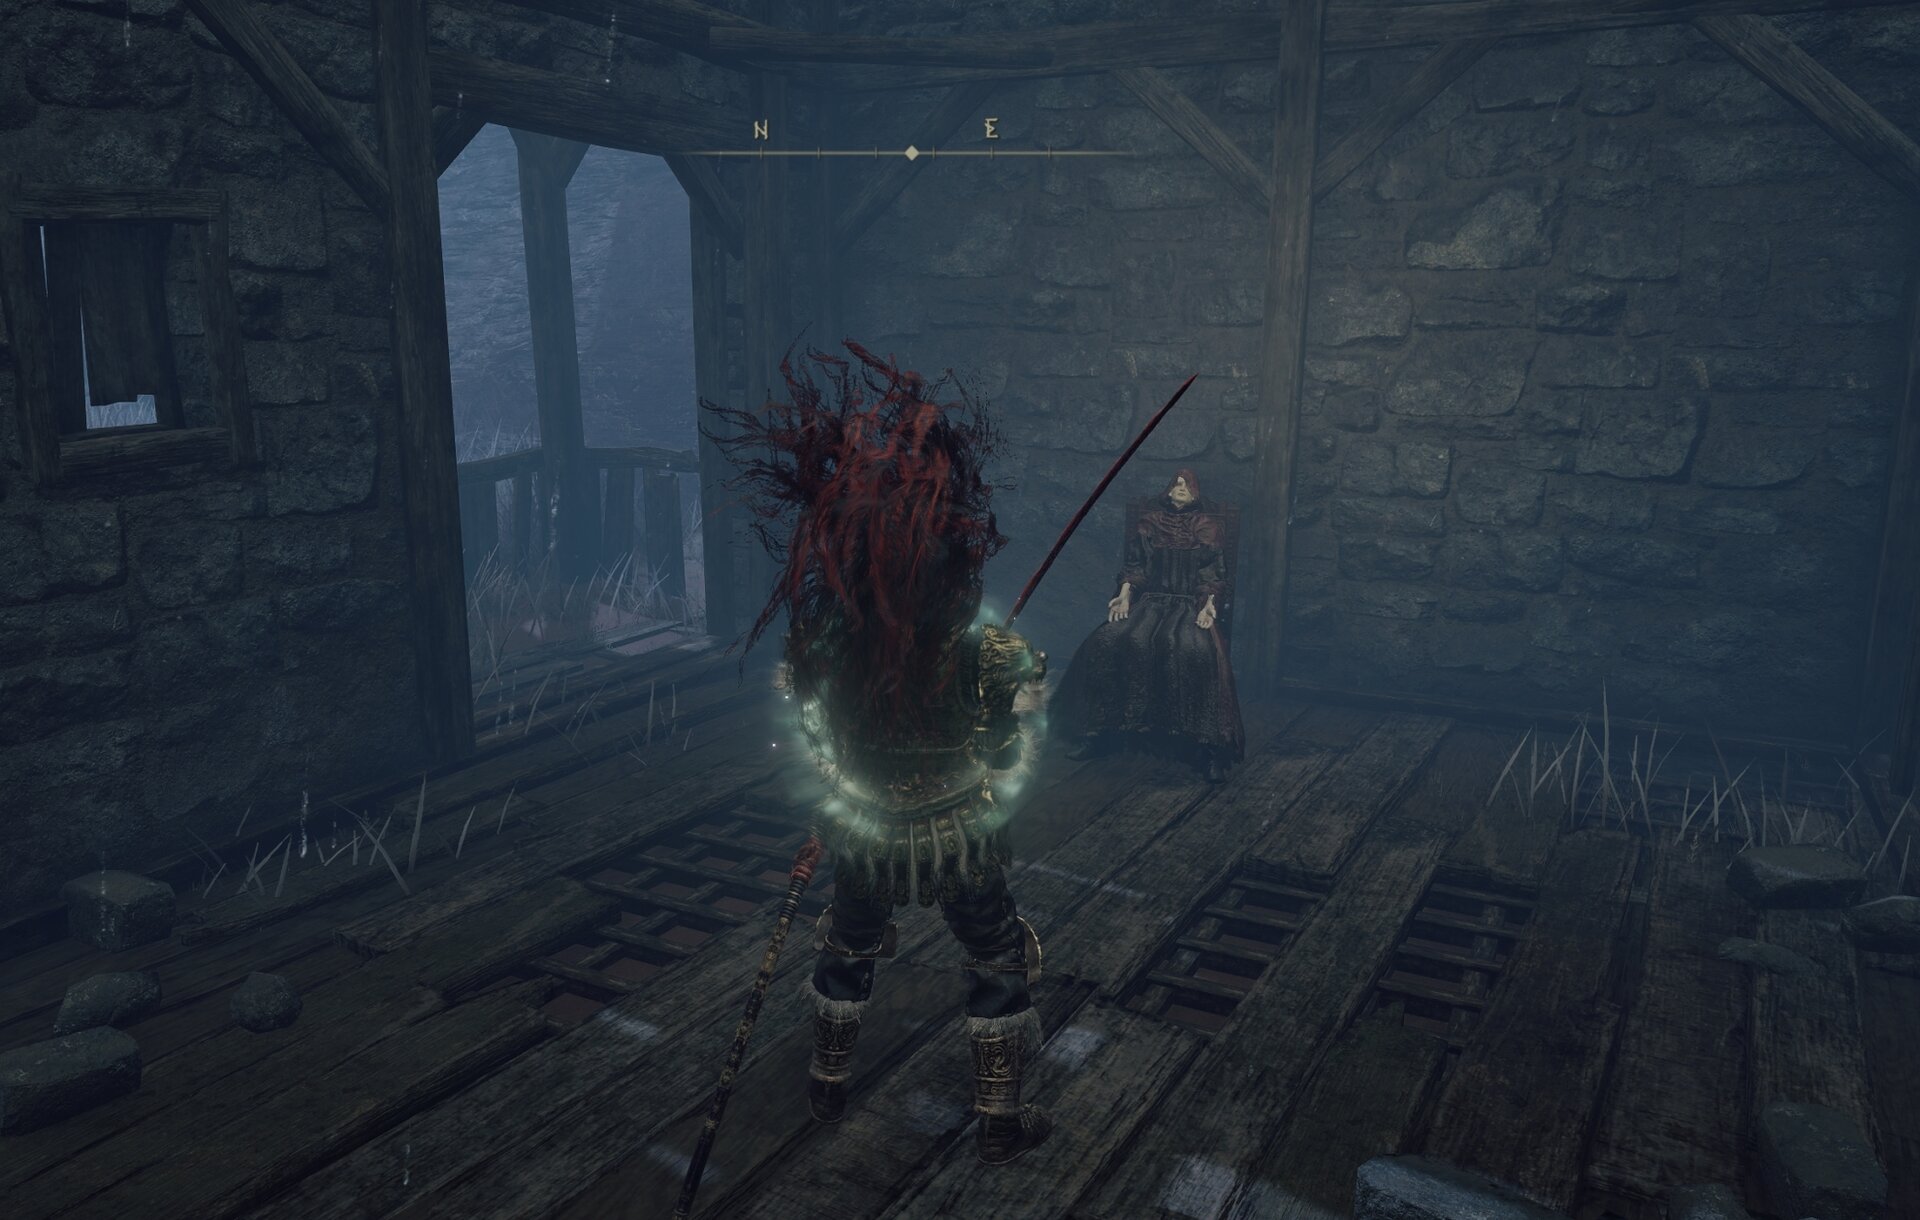
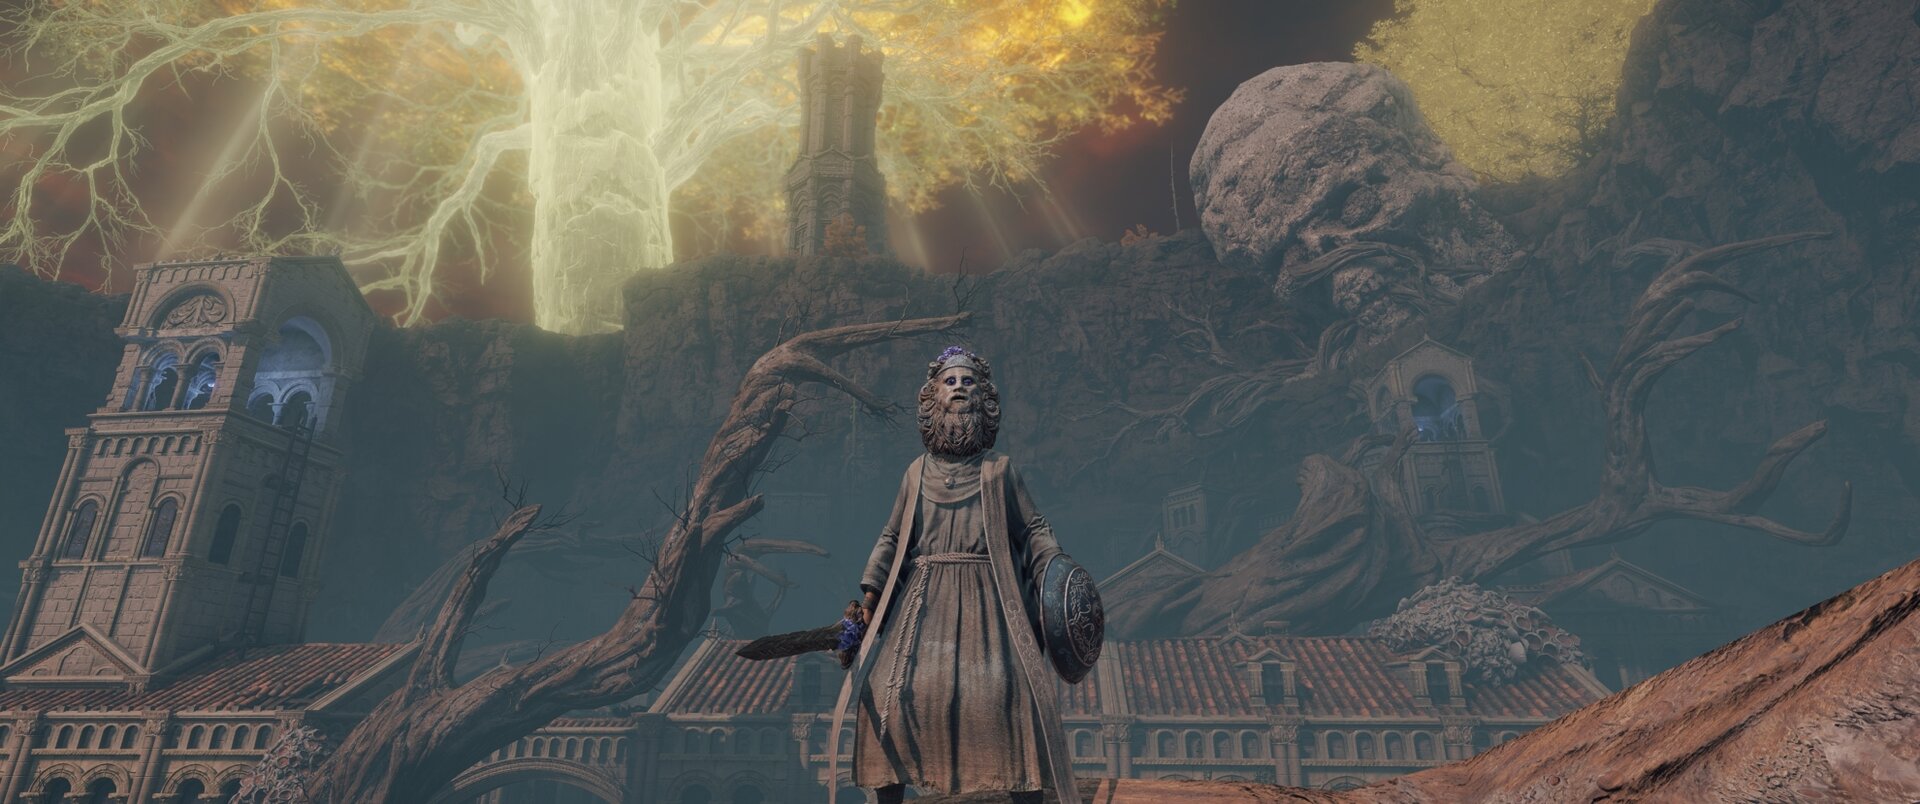
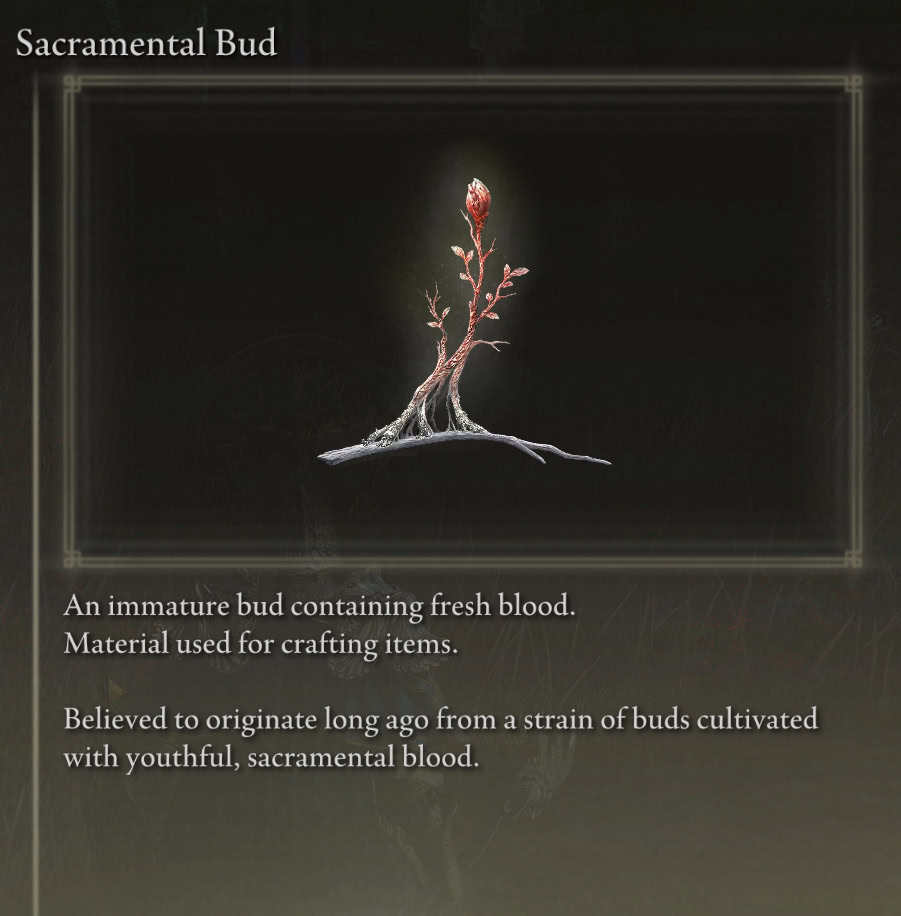
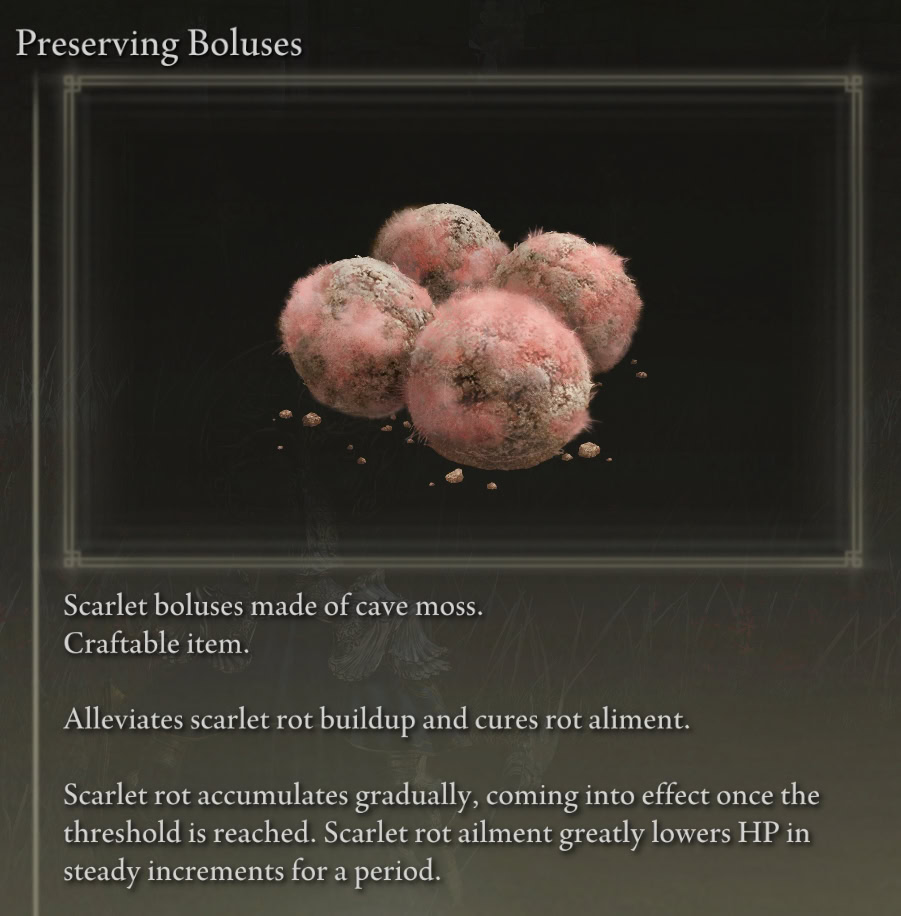
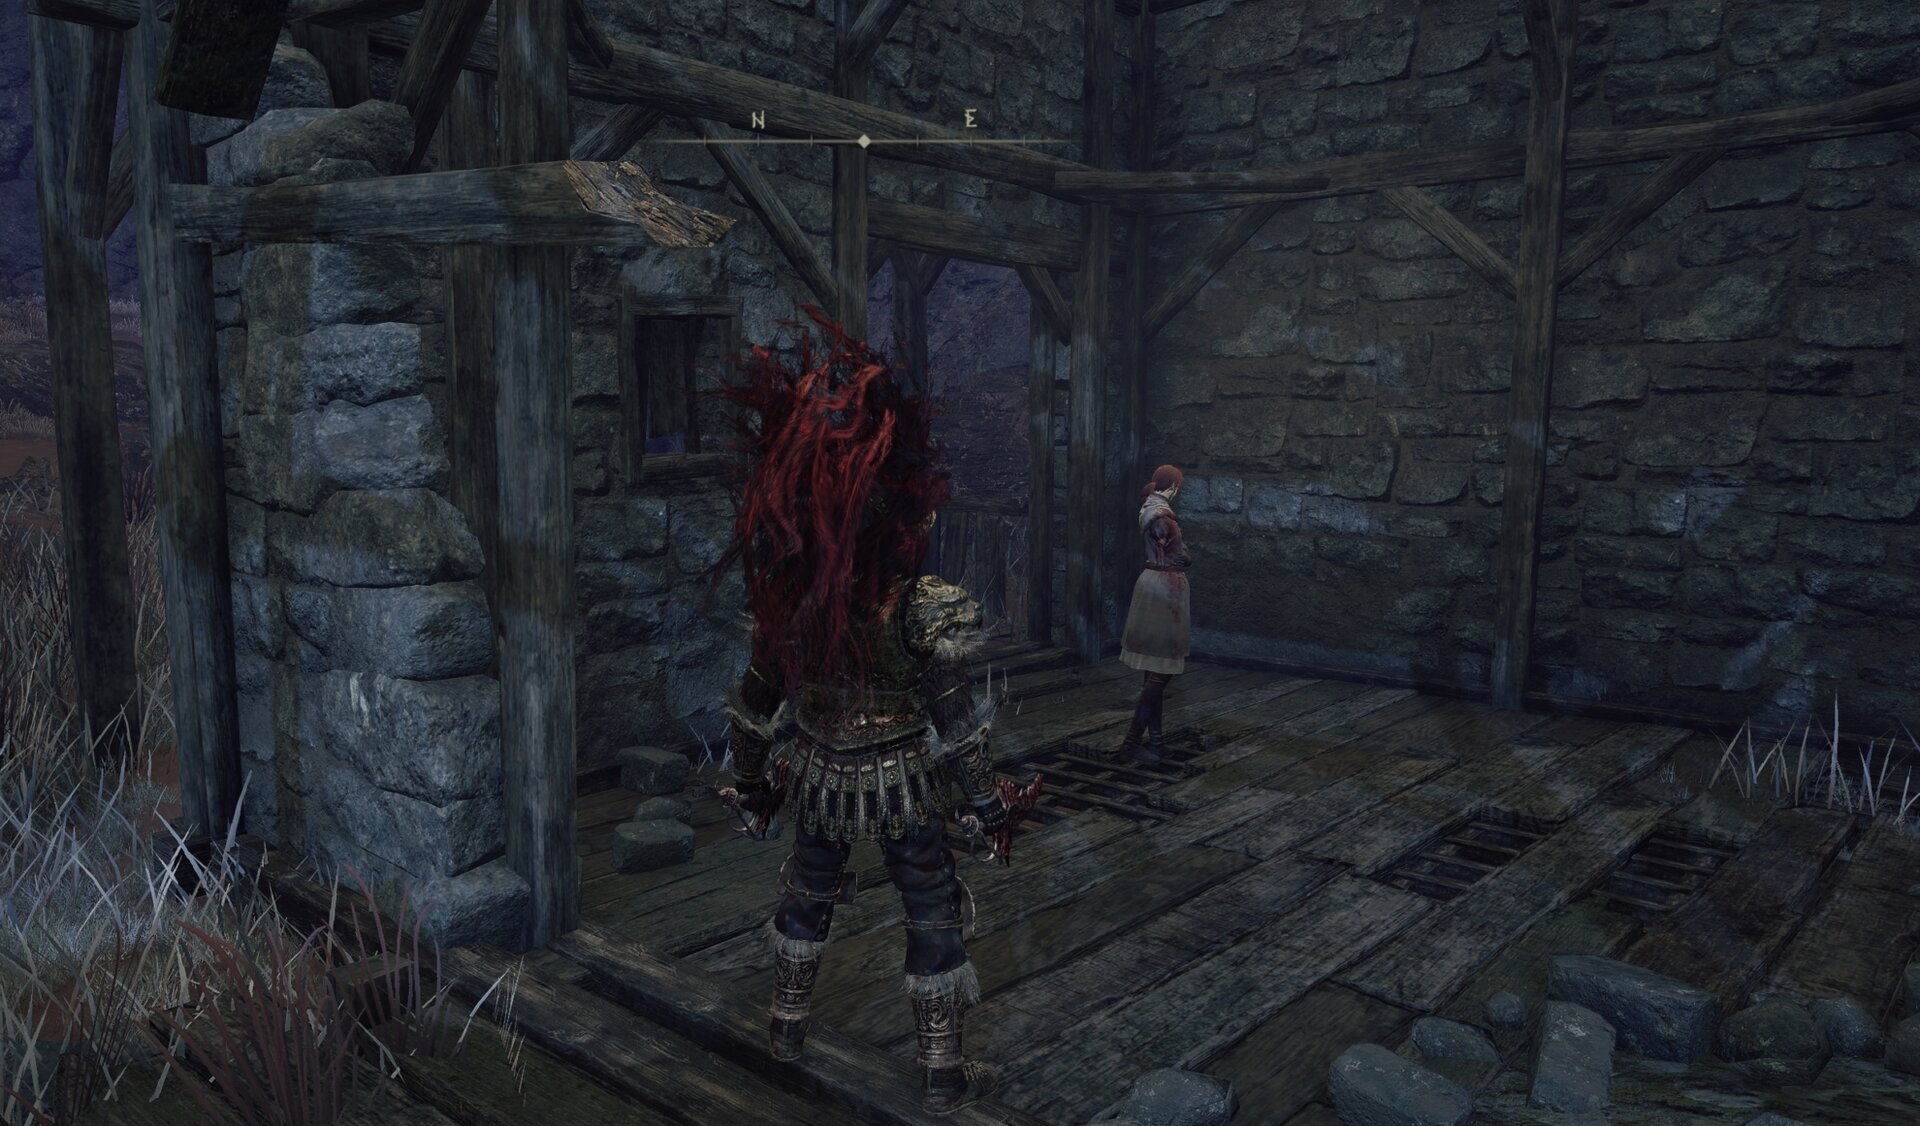
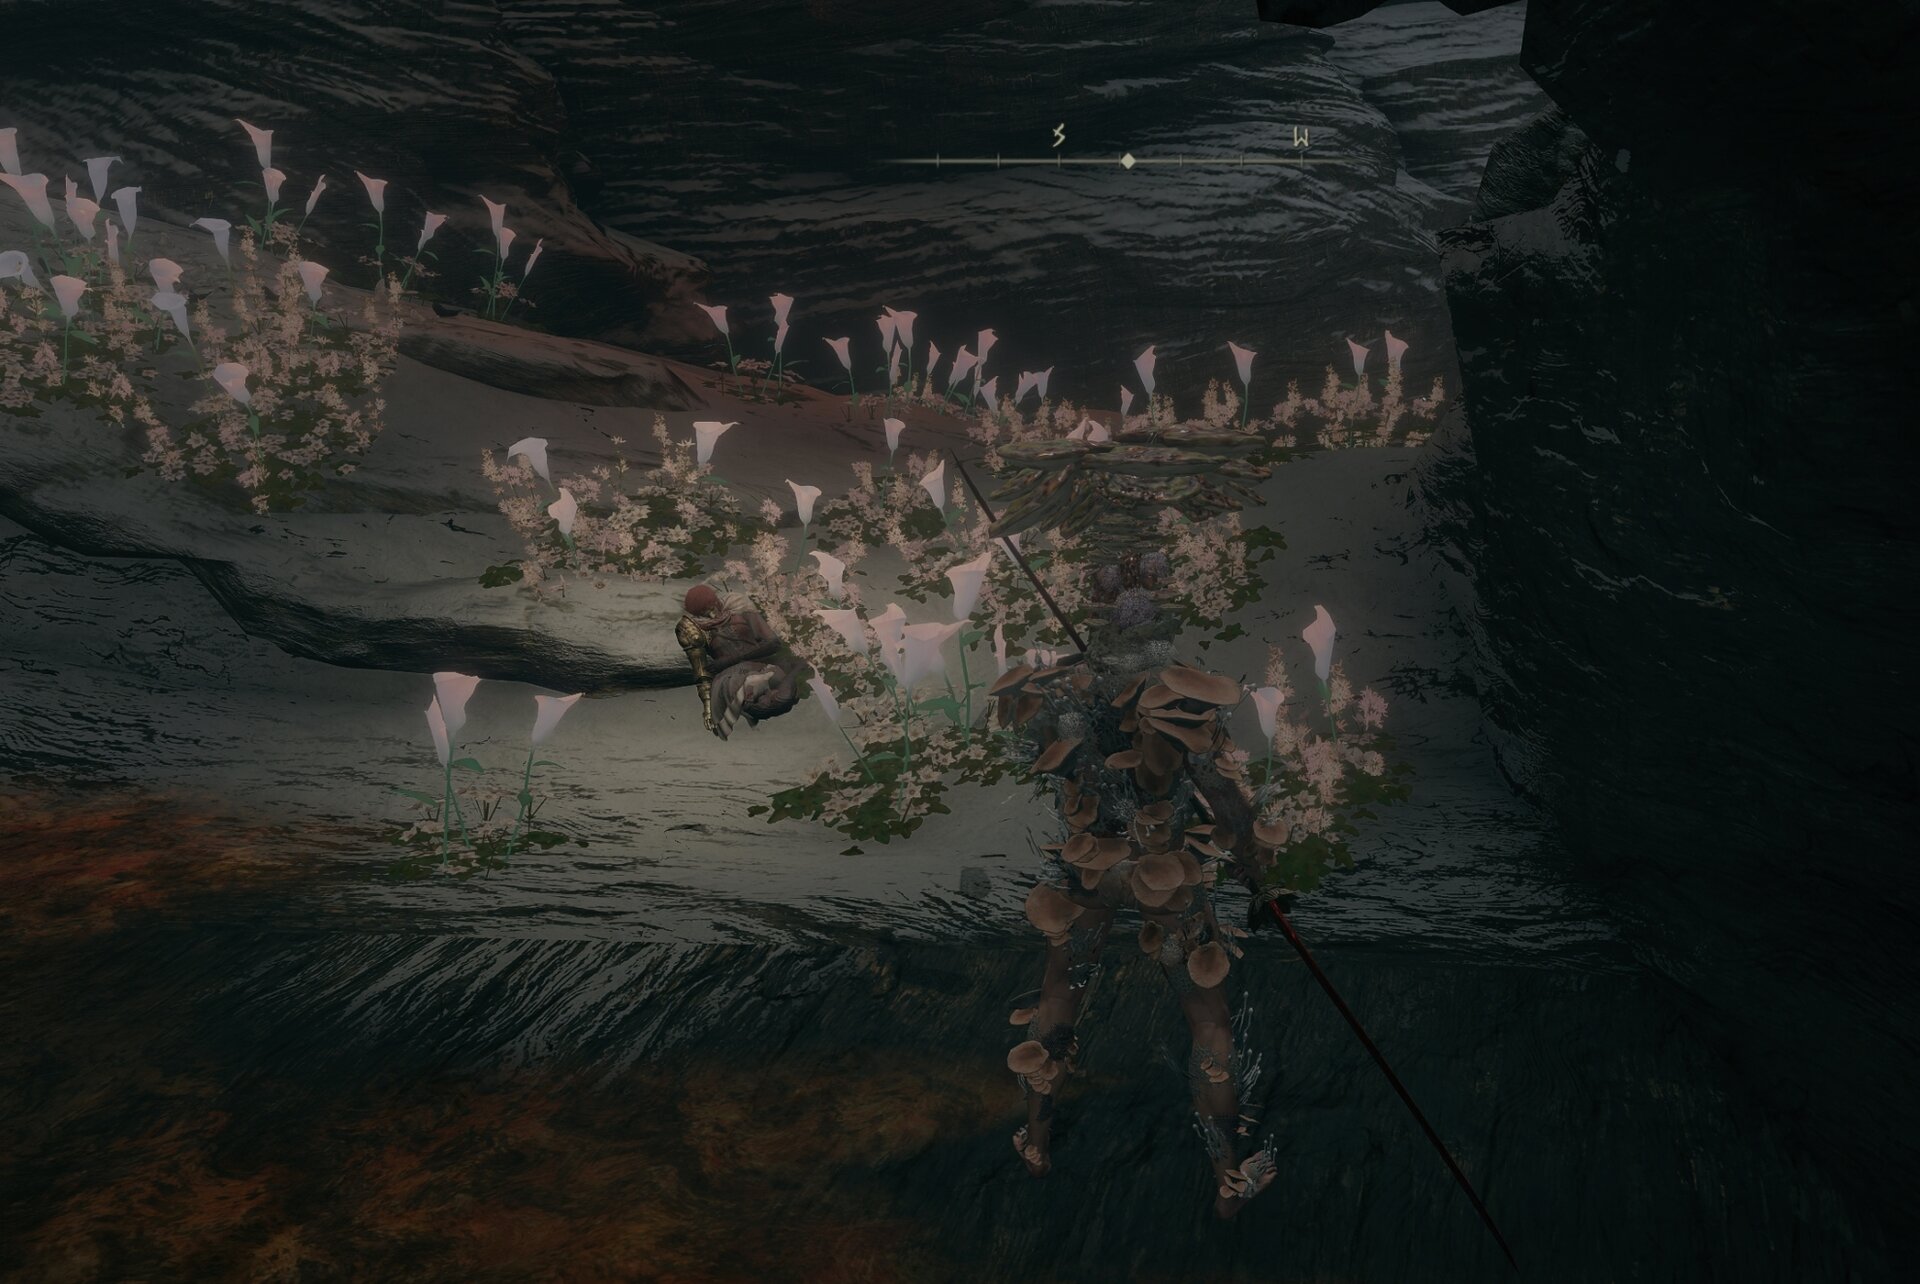
You’ll find Millicent suffering, leaning against a wall at the Church of the Plague, surrounded by more Sacramental Buds than you’ll ever see in the same place anywhere else in the Lands Between.
Keep an eye out for these throughout your journey. They are rare and are the key ingredient required to craft Preserving Boluses, which can cleanse you of the Scarlet Rot.
You’re mainly just here to visit, see her in a rough state without having the cure, activate the Site of Grace, and harvest the Sacramental Buds. There is a little else to do at the Church of the Plague itself, but there are a few things to do up here at a dead end that will lead you back over to Gowry.
Optional: Sellia Gateway Activities
There are a few different notable spots past the Church of the Plague that aren’t really accessible any other way. At the end of your activity pack, on the same plateau as the Swamp Lookout Tower, out in front of Sellia Gateway, there is a series of tombstones you can use to jump down safely.
Your activities include:
- Harvesting some Golden Rune [9]’s from the white bat women. The first time you defeat any of these enemies, you’ll get a Golden Rune [9], worth 3800 Runes.
- Defeat the jar-throwing troll. This one is the most important because jar throwers don’t respawn, so you will be able to reach Sage Gowry at his humble abode more easily.
- Cross to the other side of the chasm using the bridge inside of Sellia Gateway. There are a few invisible Sellian Sorcerers in there, so watch out!
- At the Swamp Lookout Tower, you’ll find Sorcery: Eternal Darkness, which absorbs all magical projectiles that come near it.
After you’ve finished your activities or chosen not to do them, go grab the Unalloyed Gold Needle from Gowry, and then warp back up to the Church of the Plague.
Step 4: Millicent Begins Her Journey
Give the needle you just retrieved from Gowry to Millicent. She will agree to shove an actual needle inside of her that she got from a stranger because she’s in that much agony.
The screen goes dark, and then she’s gotta take a nap. She will awaken after you rest at a Site of Grace or reload the game.

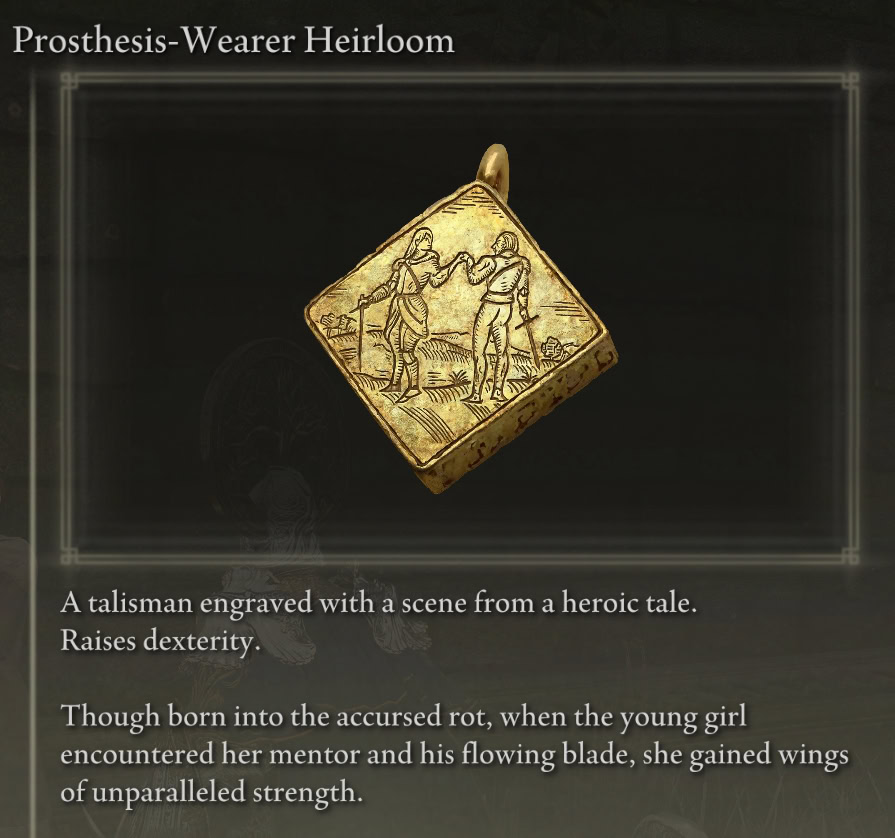
Talk to her. She’ll thank you and give you the Prosthesis-Wearer’s Heirloom talisman, which boosts your Dexterity by 5.
Exhaust her dialogue, then rest at the Site of Grace, and she should be gone. Head down to Gowry’s Shack, and lo and behold, Millicent is there, but not Sage Gowry…
Exhaust Millicent’s dialogue once more, and then reload the game. Millicent will be gone (for a while), but Sage Gowry will return with something to say about the whole situation. You’ll go through the entirety of Liurnia of the Lakes (and Limgrave) without seeing her again.
Step 5: The Valkyrie’s Prosthesis
The next time you meet Millicent will be if you opt to climb up to Altus Plateau instead of taking a ride on the Grand Lift of Dectus. You can summon Millicent to aid you in battle against the Magma Wyrm.
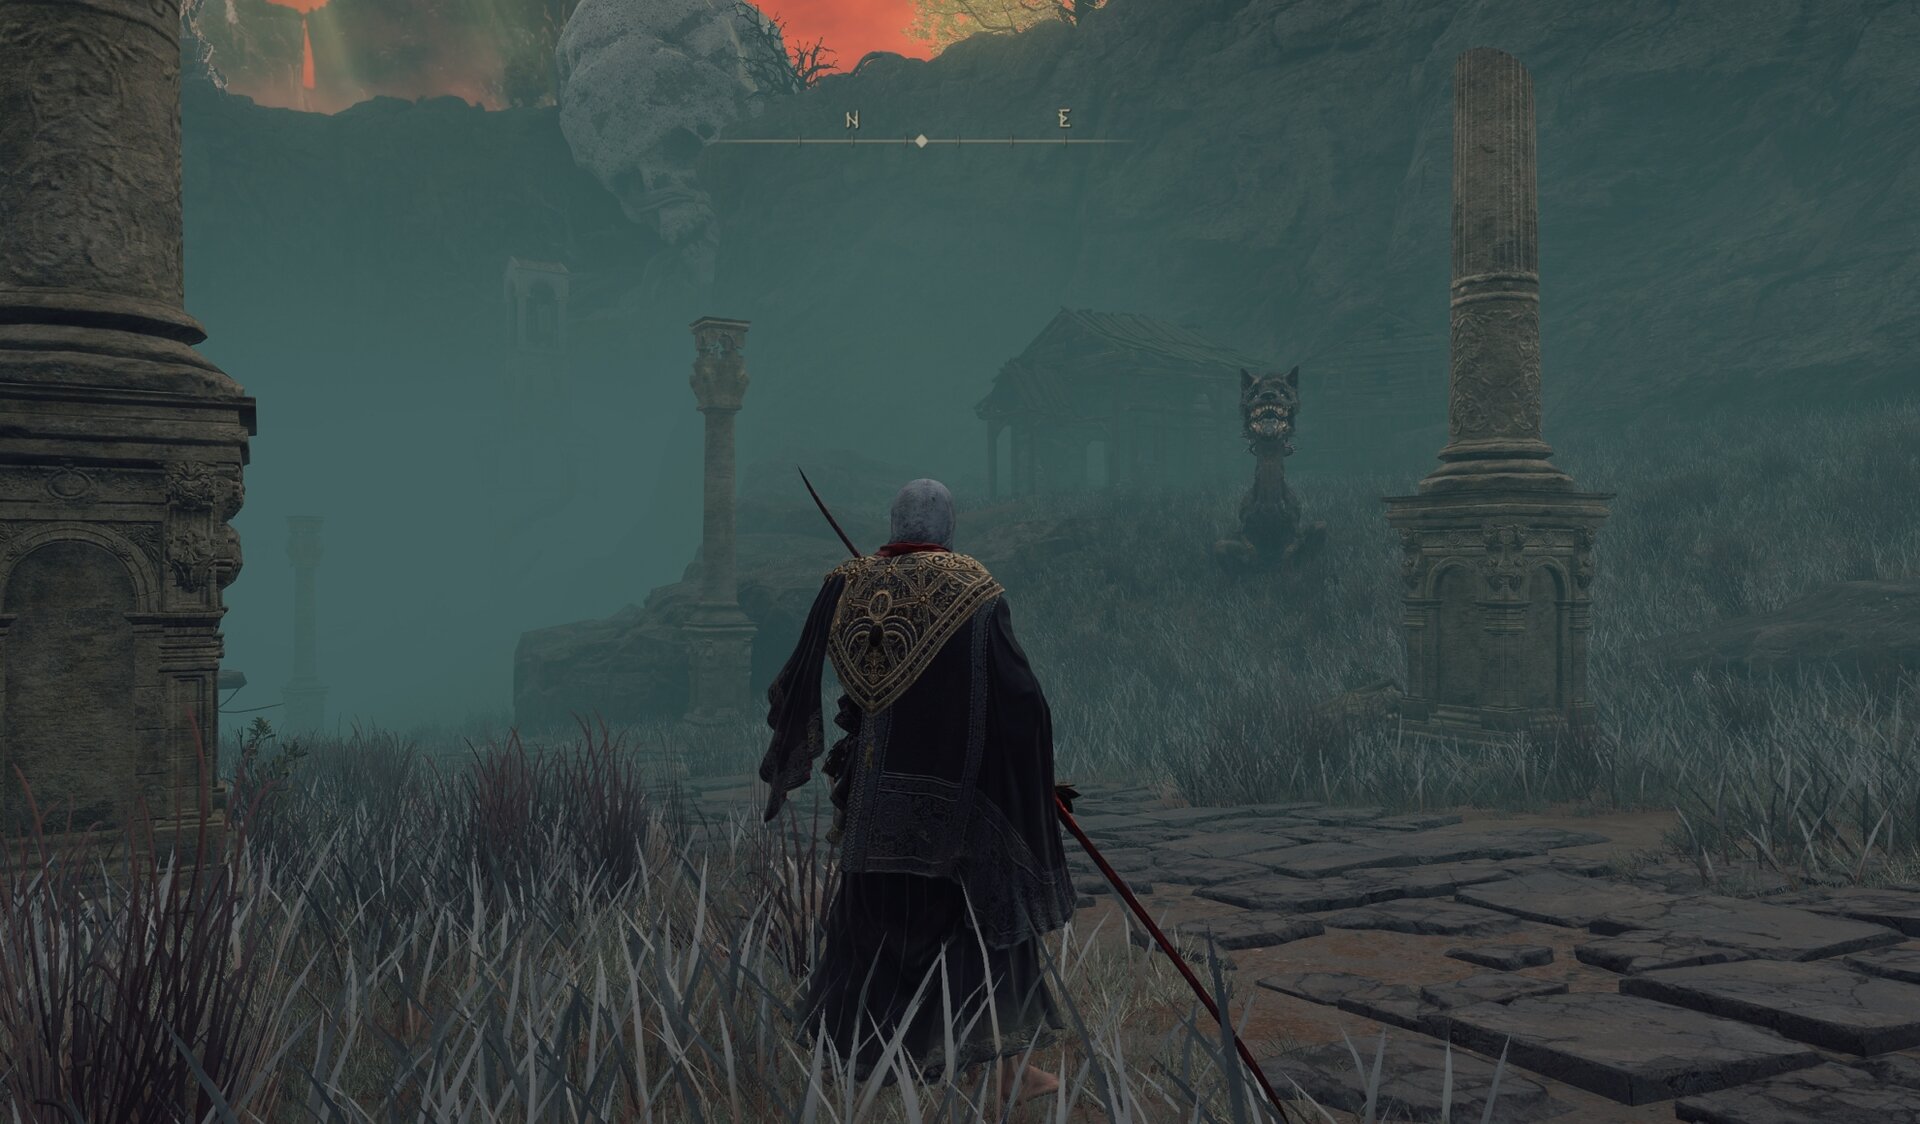
Millicent at Lux Ruins
You’ll find Millicent at Lux Ruins on the Altus Plateau. She can’t continue on without her sword arm, so you’ll need to find her a prosthetic.
You can return to Gowry for a bit of dialogue or head directly to the Shaded Castle at the northern edge of the Altus Plateau.
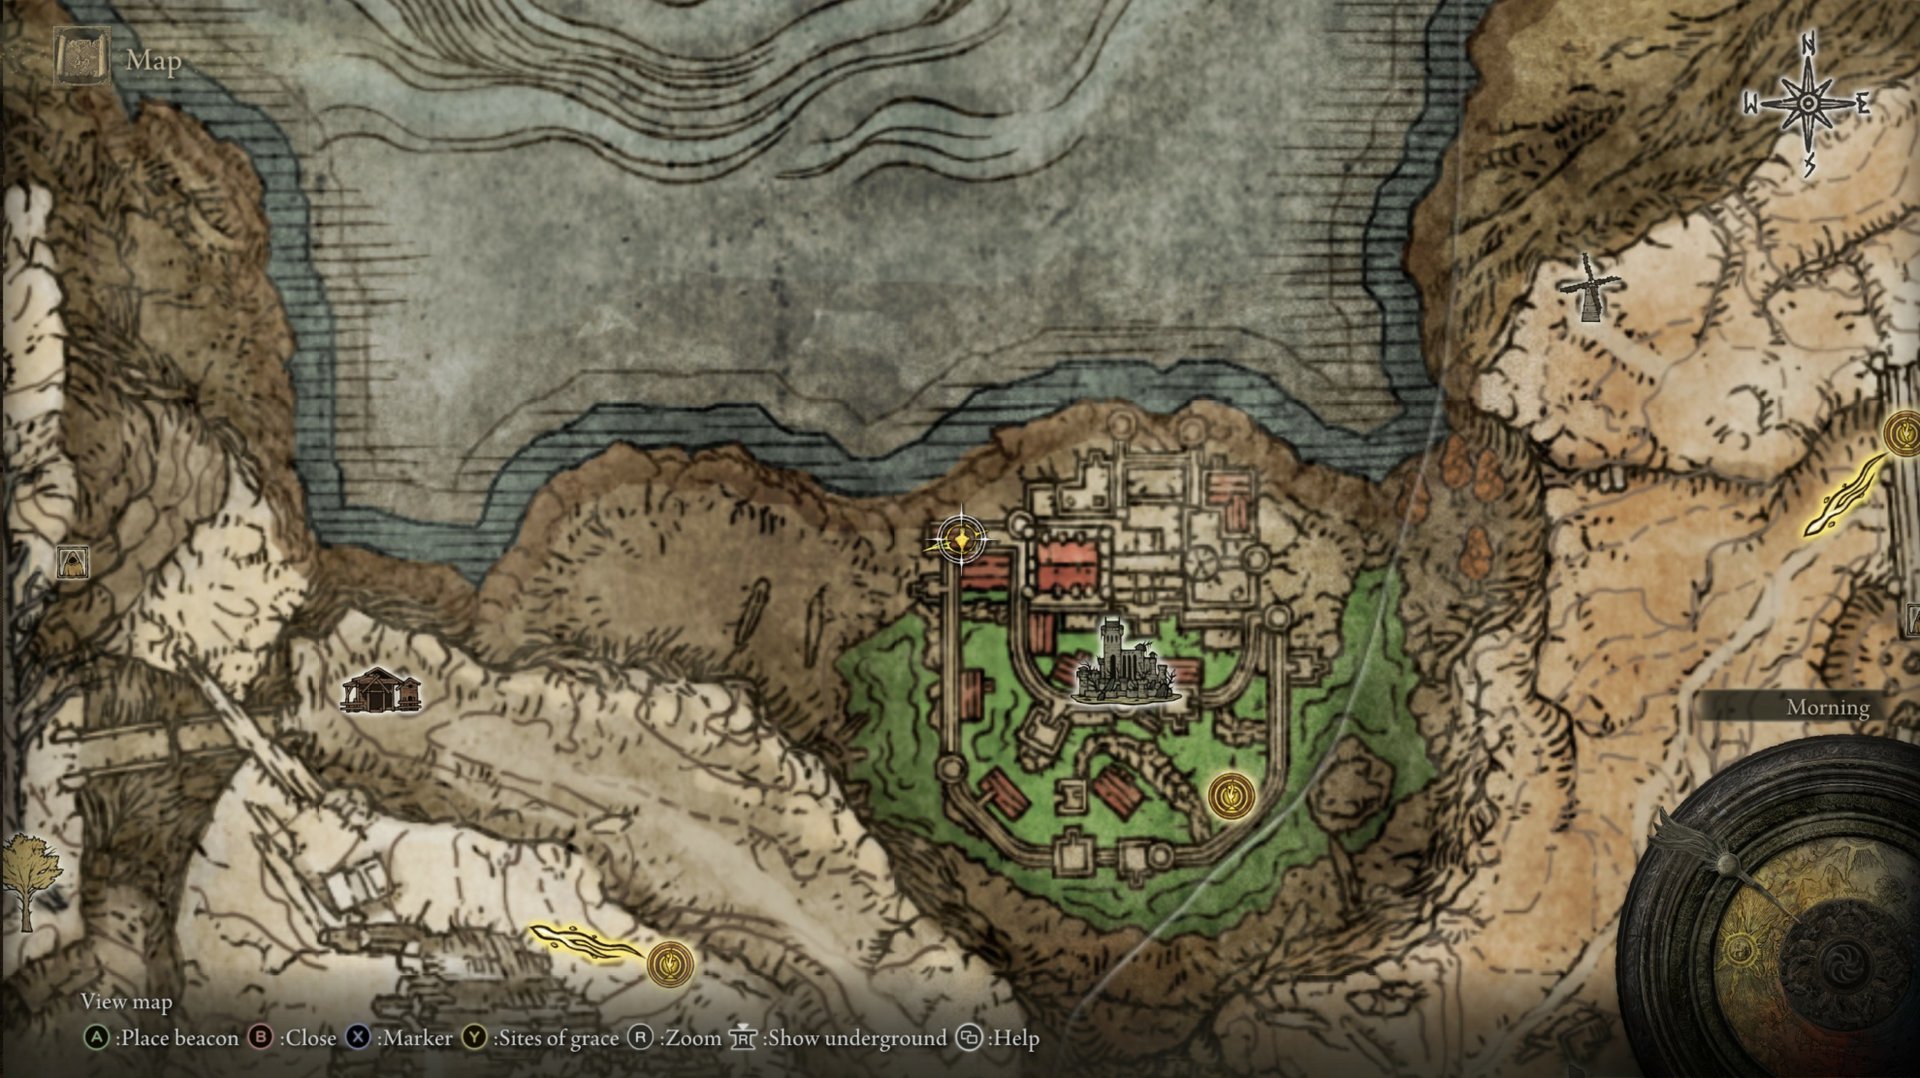
The Shaded Castle
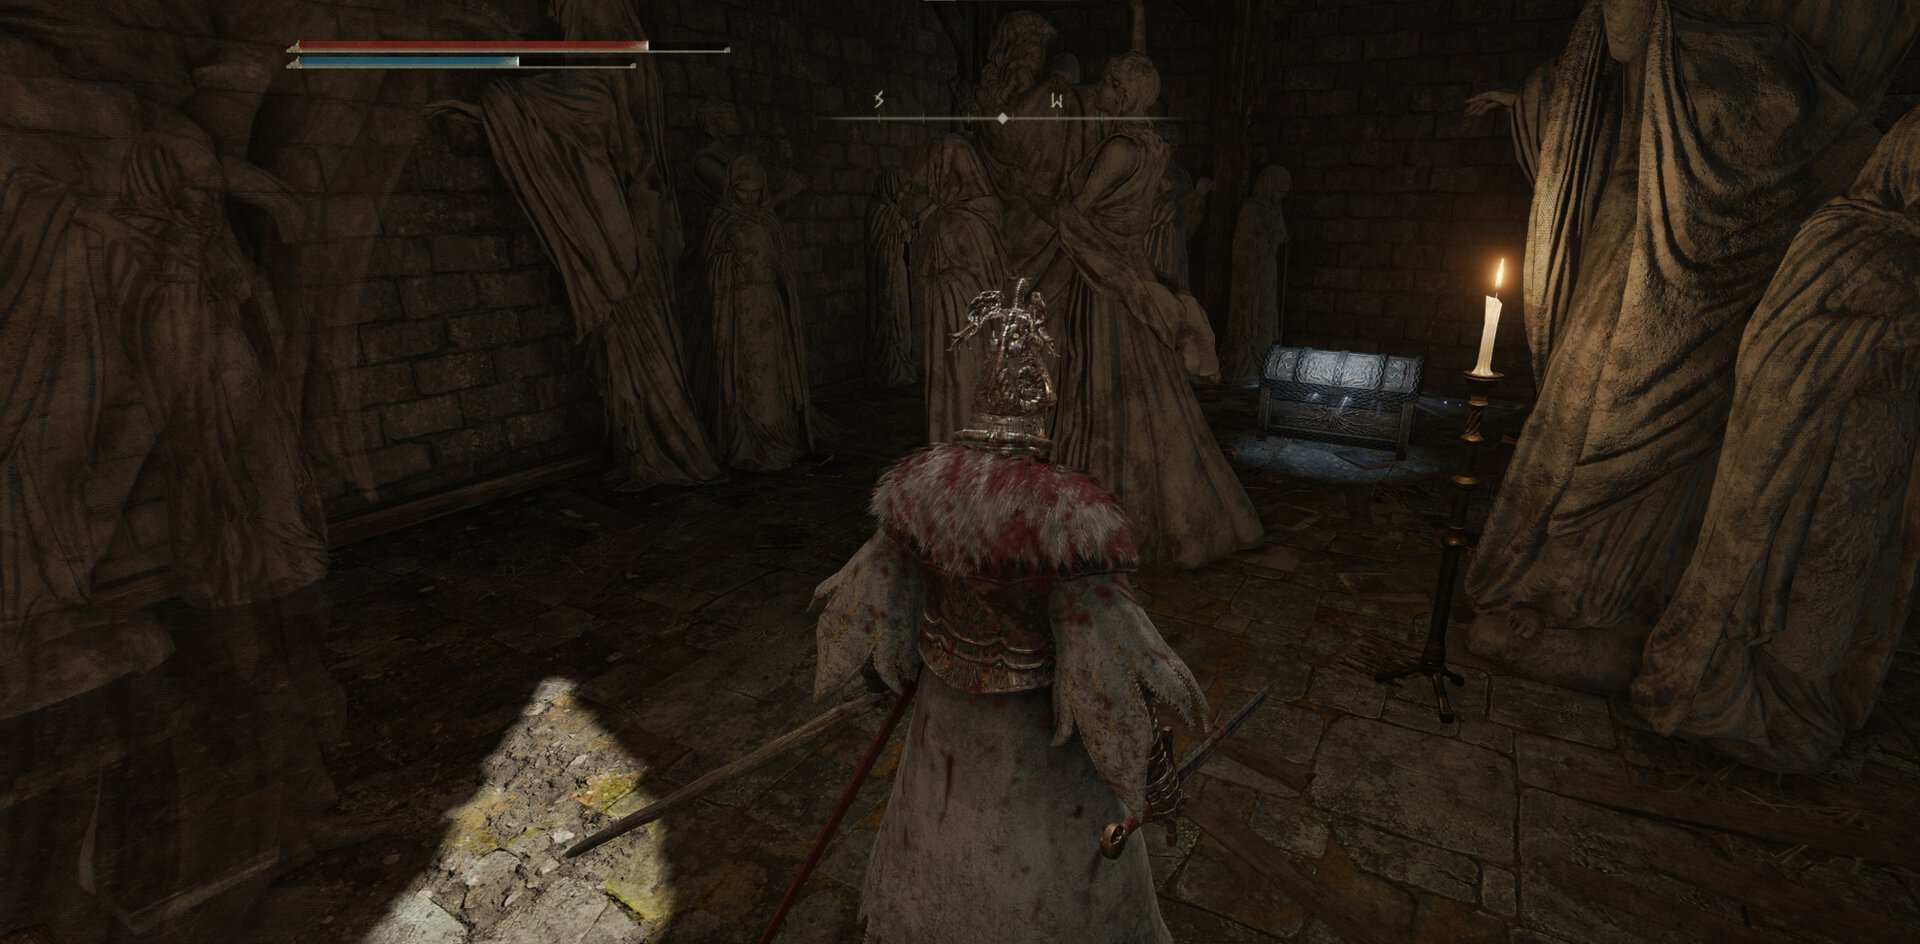
You’ll find the Valkyrie’s Prosthesis in a chest guarded by a Cleanrot Knight on one of the upper levels of the Shaded Castle near the eastern wall.
Return to Millicent at Lux Ruins and hand over her new arm!

Step 6: Seeking the Haligtree and Malenia
After giving Millicent a new arm, she can wield a sword again and continue on her journey to reach Malenia. You’ll encounter her three more times before she reaches her destination. Exhaust her dialogue at each location, and don’t forget to chat with Sage Gowry!
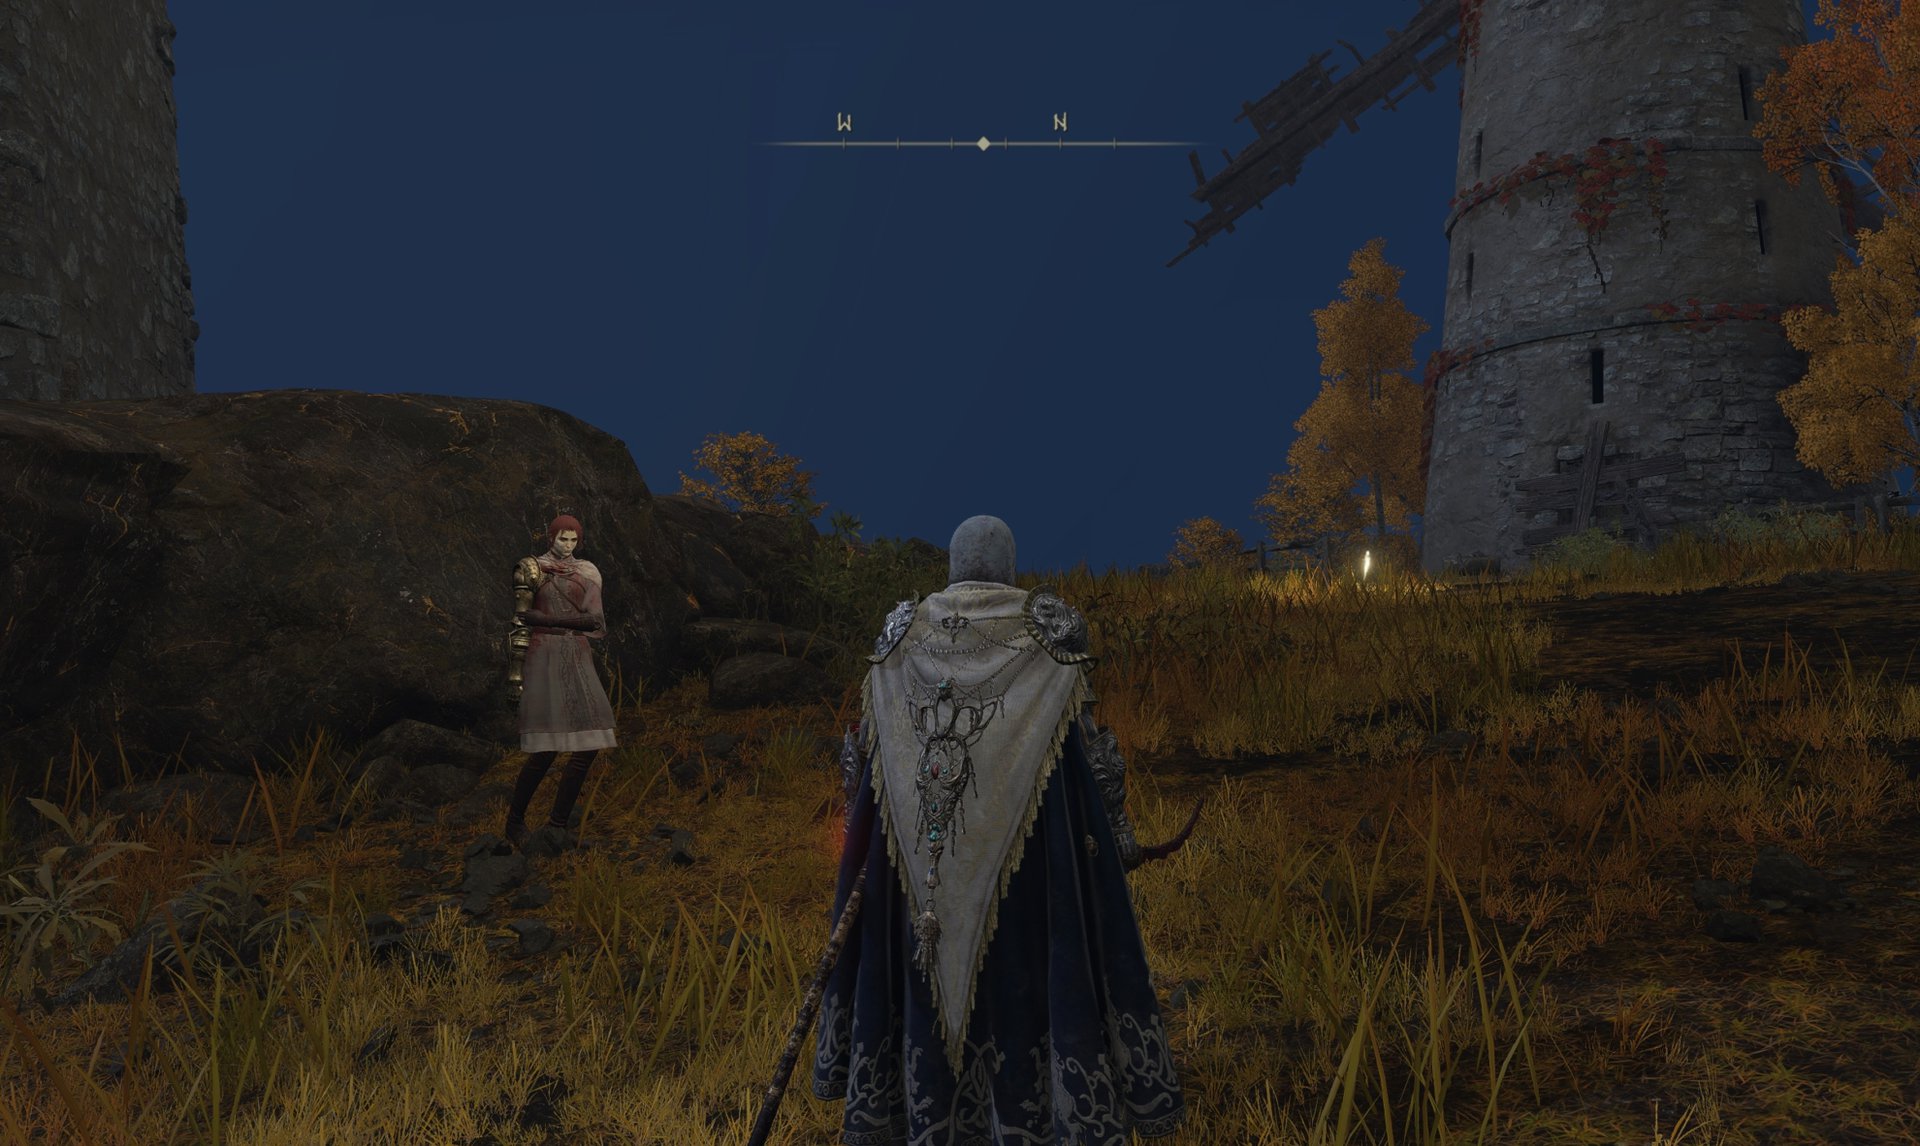
Dominula, Windmill Village
Millicent takes a detour to Dominula, Windmill Village, at the northern edge of the Altus Plateau. You can summon her to help you fight the Godskin Apostle if you like, but it is not necessary to progress her quest. Once you defeat the Godskin Apostle, rest at the Site of Grace or reload the game to make her appear.

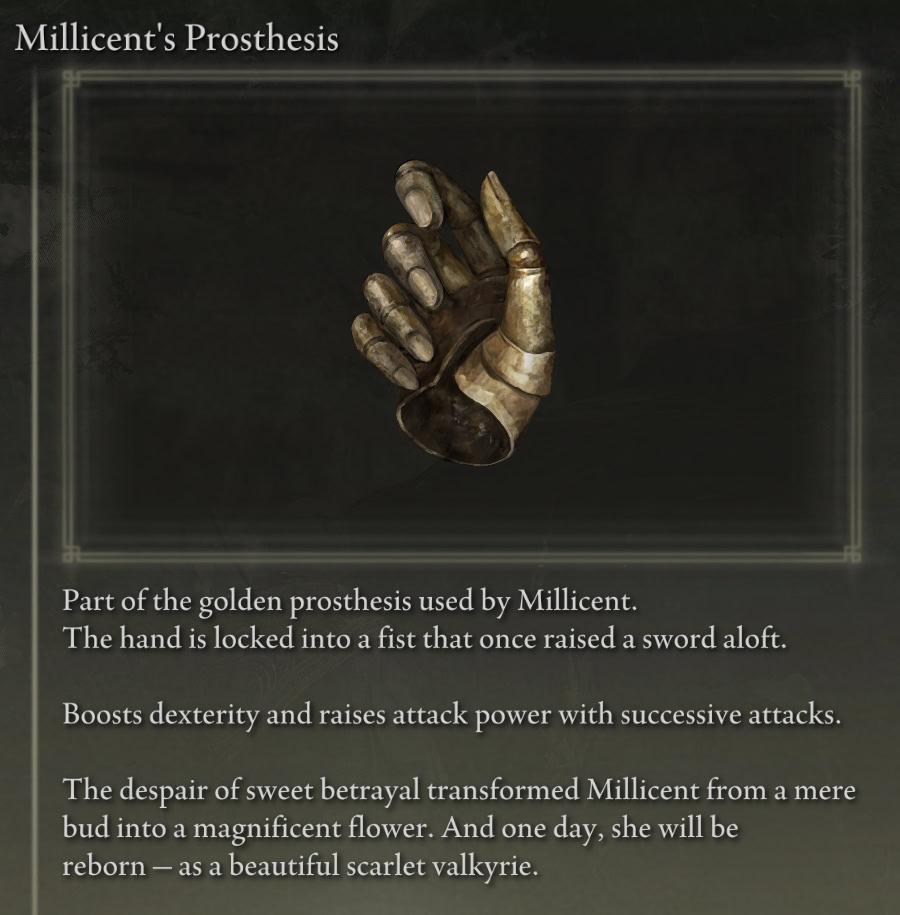
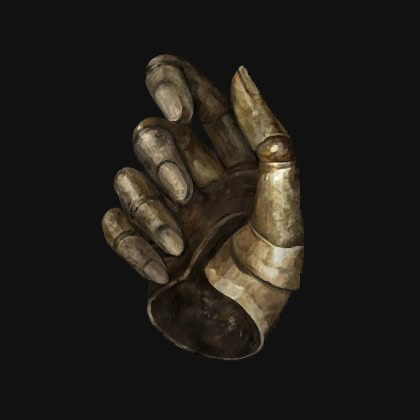
This is also the earliest point where you can defeat her and receive Millicent’s Prosthesis. It’s a particularly good talisman, as it offers the effects of both the Prosthesis-Wearer’s Heirloom and Winged Sword Insignia.
There’s no real point in waiting. If you want Millicent’s Prosthesis (or Flock’s Canvas Talisman), you should fight her here, though keep in mind that her quest will end. If you decide to defeat her here, go to Step 8.
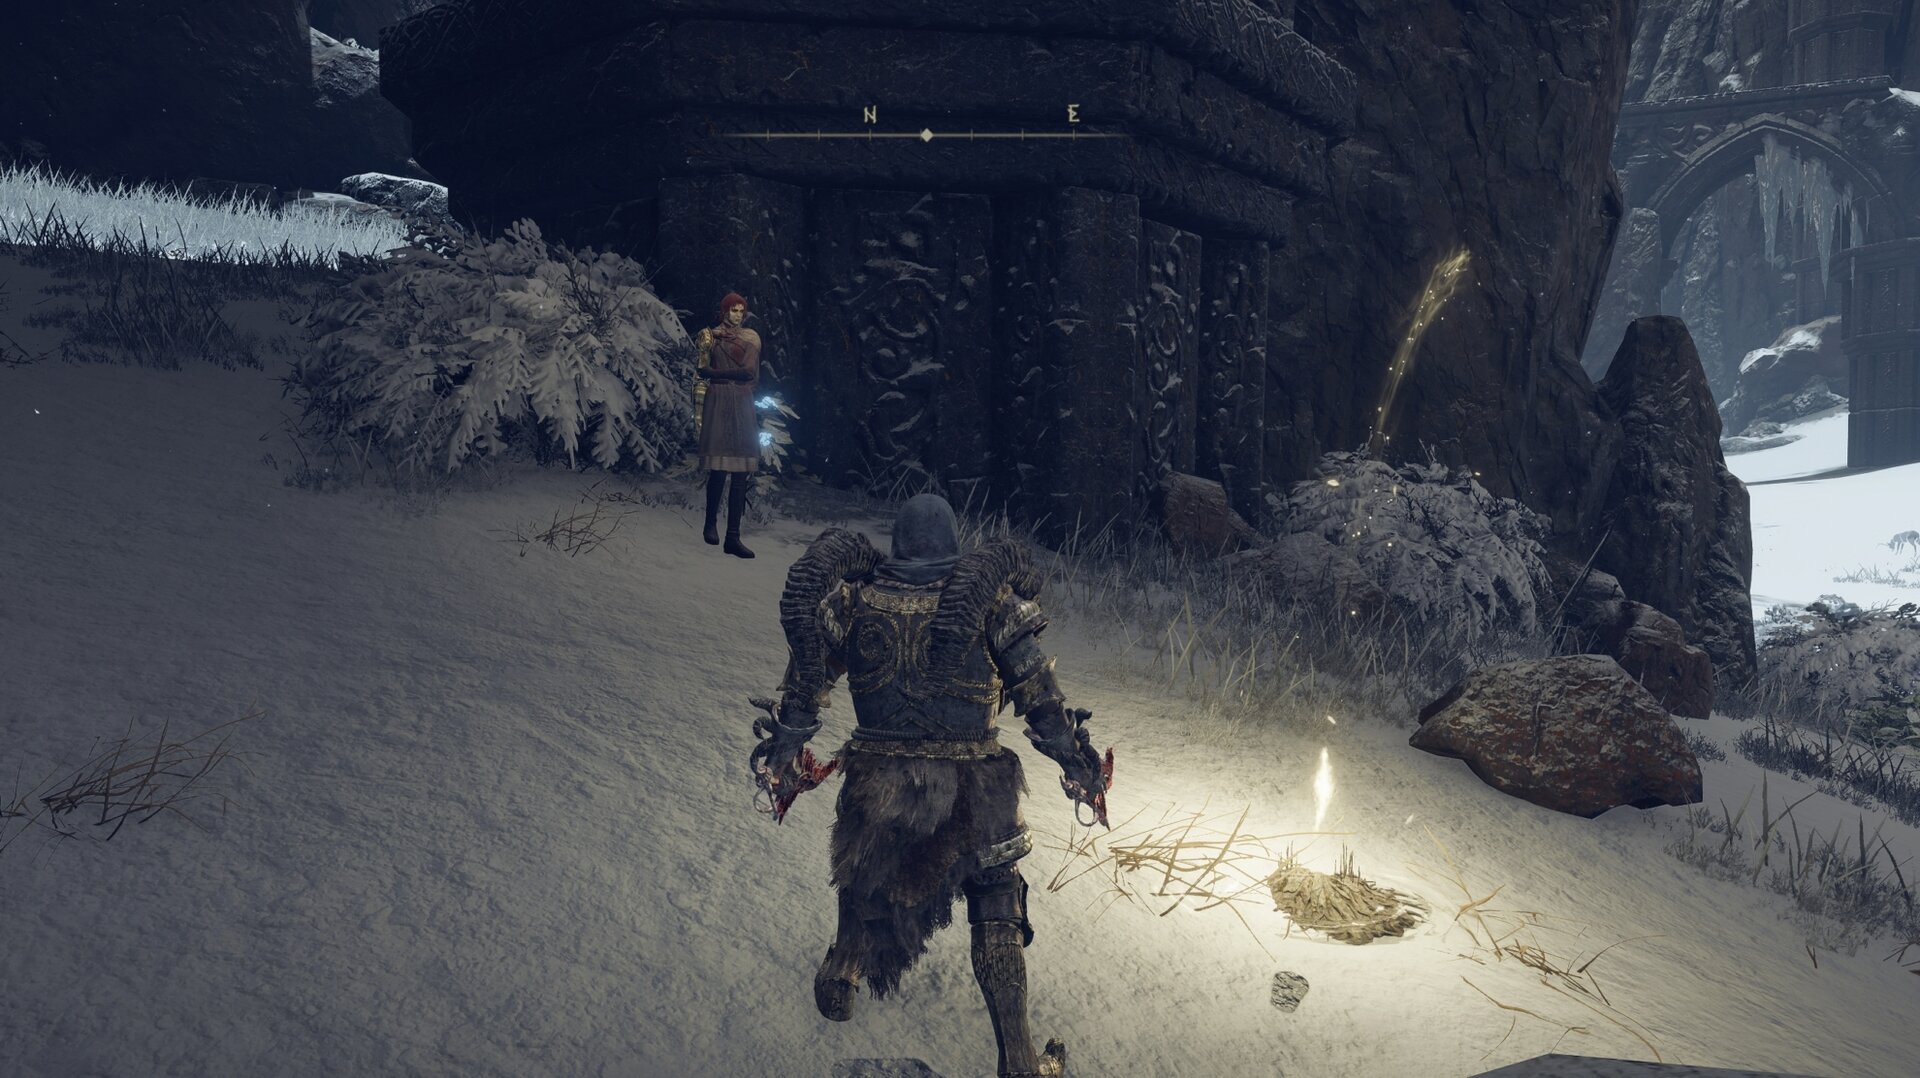
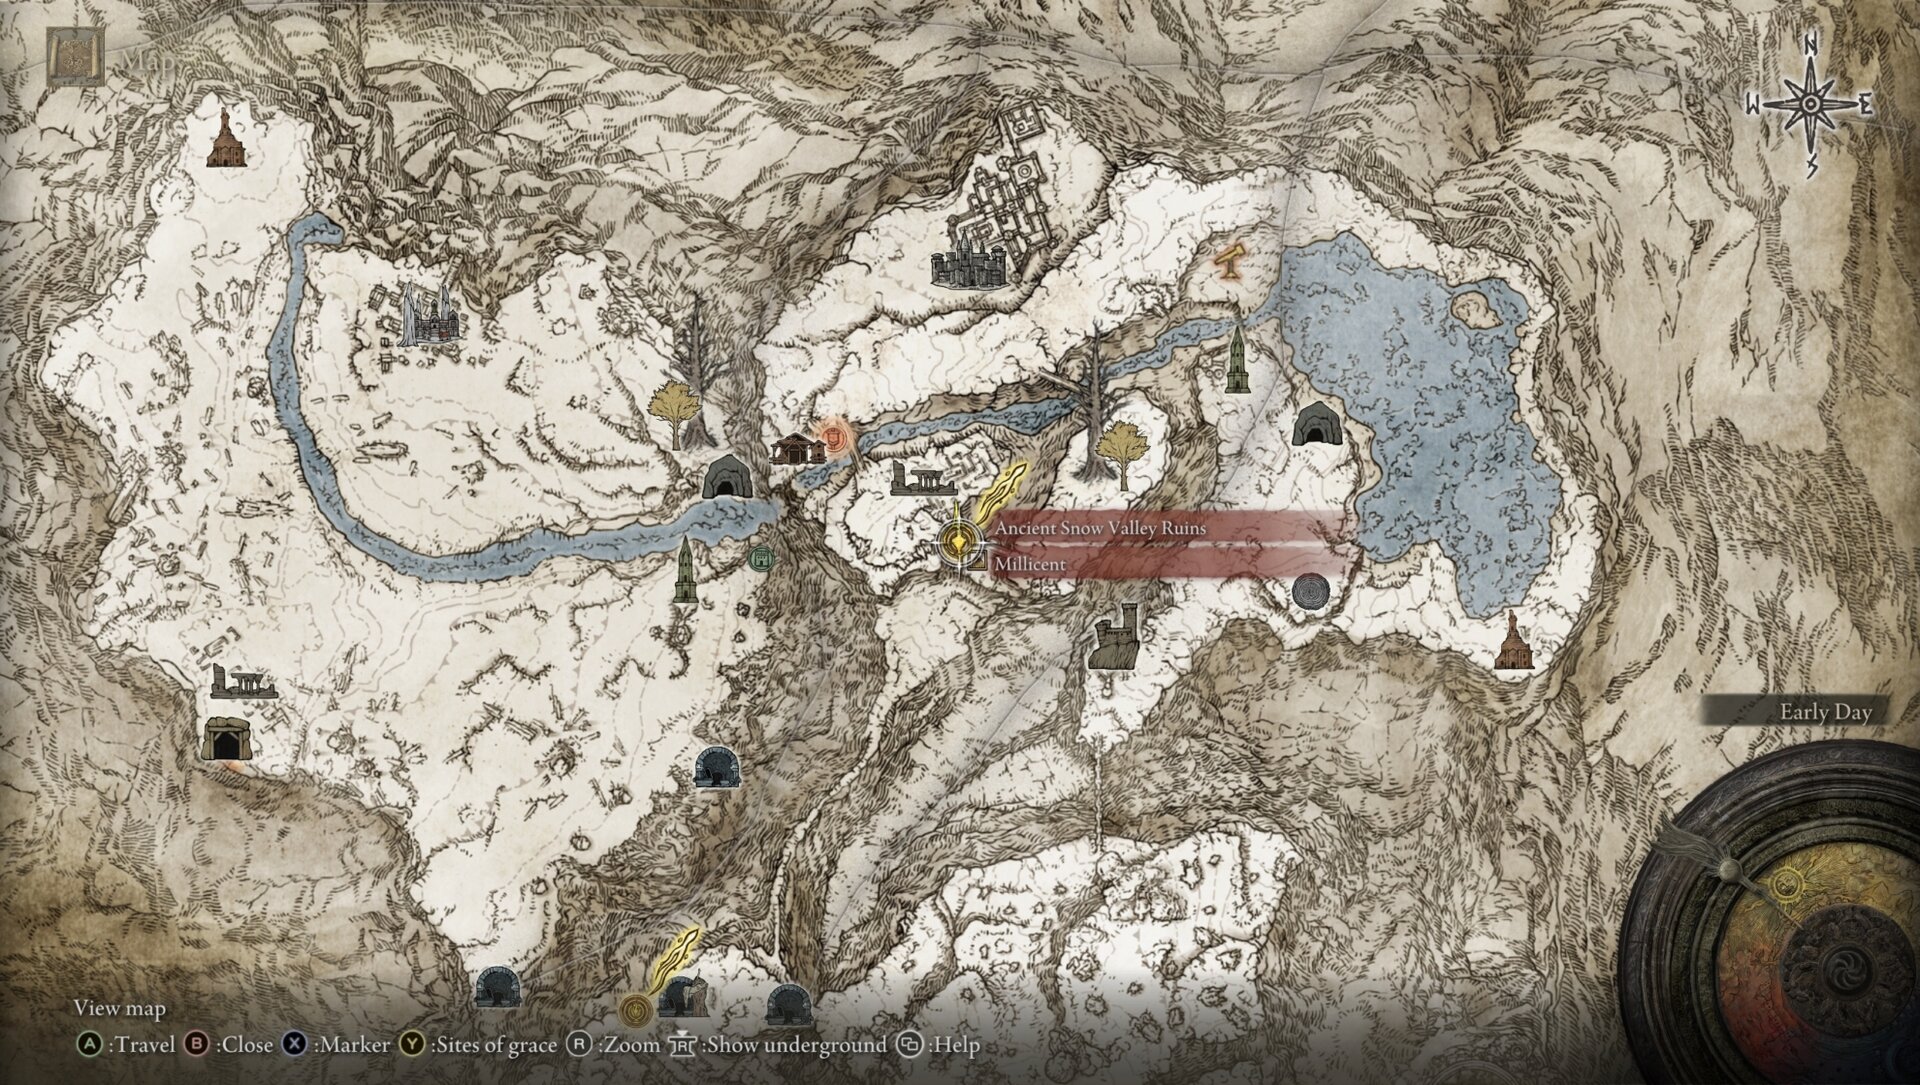
Mountaintops of the Giants
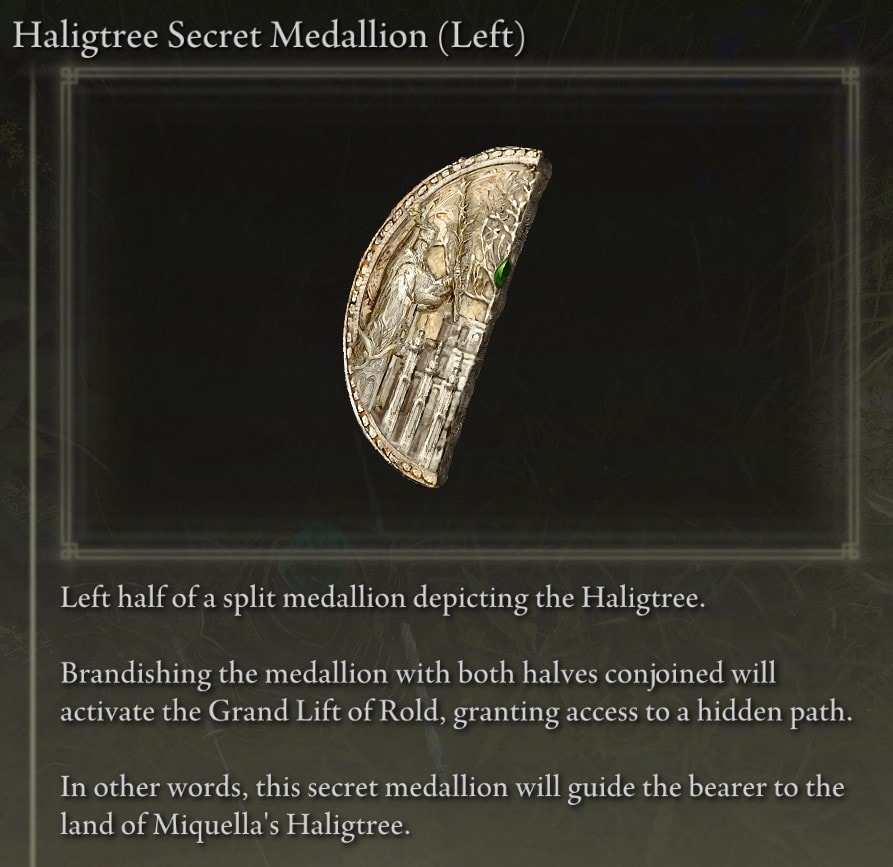
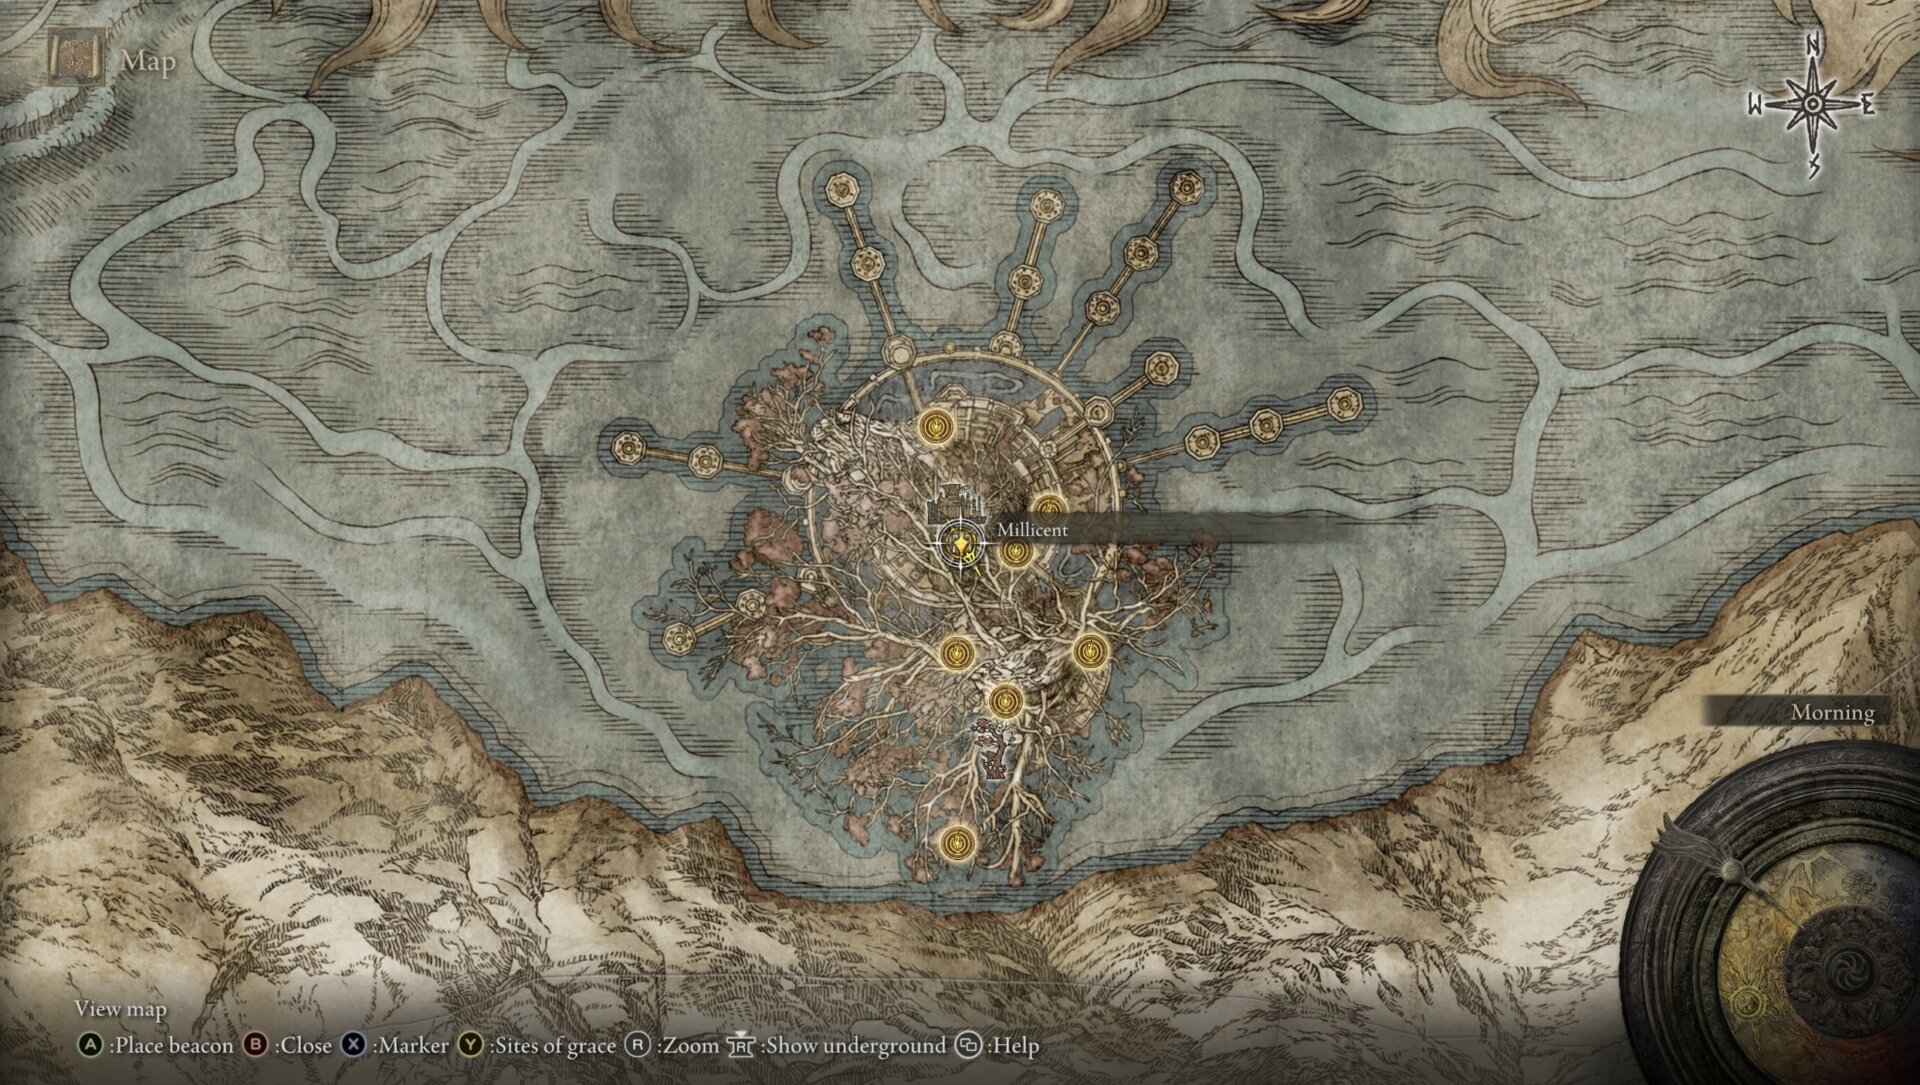
Next, you’ll find Millicent by the Ancient Snow Valley Ruins Site of Grace at the Mountaintops of the Giants. She speaks of Castle Sol, which is where the left half of the Haligtree Secret Medallion is.
It will likely be quite a while before you see her again. You don’t reunite until you make it to Elphael, Brace of the Haligtree.
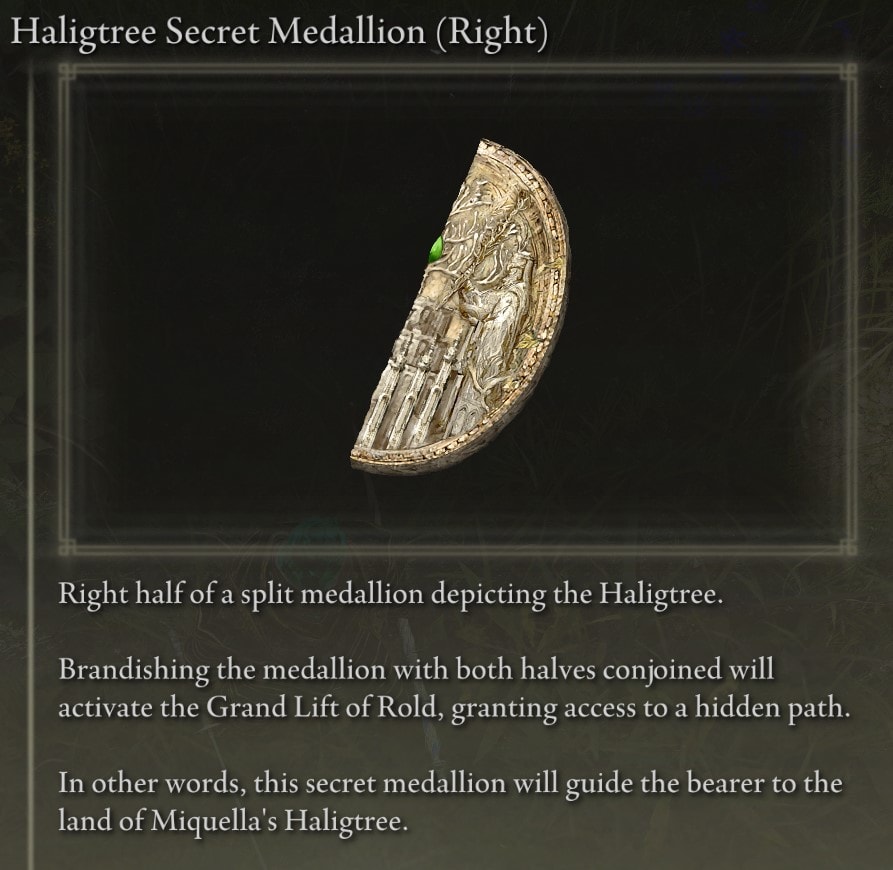
Locate the Haligtree Secret Medallions
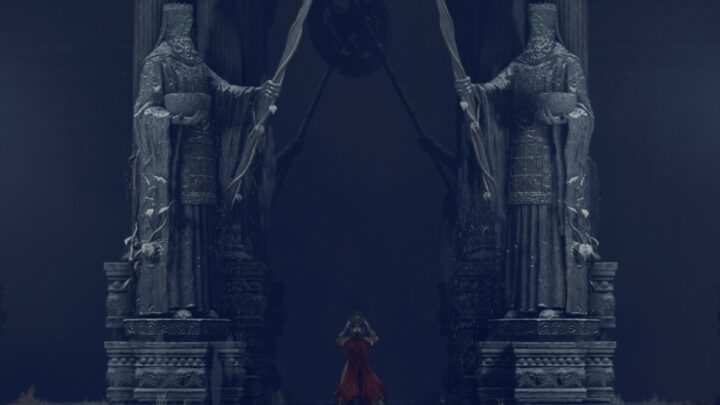
Since we are heading to the Haligtree, you will need to locate both halves of the Haligtree Secret Medallion and use them at the Grand Lift of Rold. Then, you’ll survive the endless blizzard that is the Consecrated Snowfield and break the seals at Ordina, Liturgical Town.
For more information, check out our dedicated guide on reaching the Haligtree and bringing Latenna along for the ride.
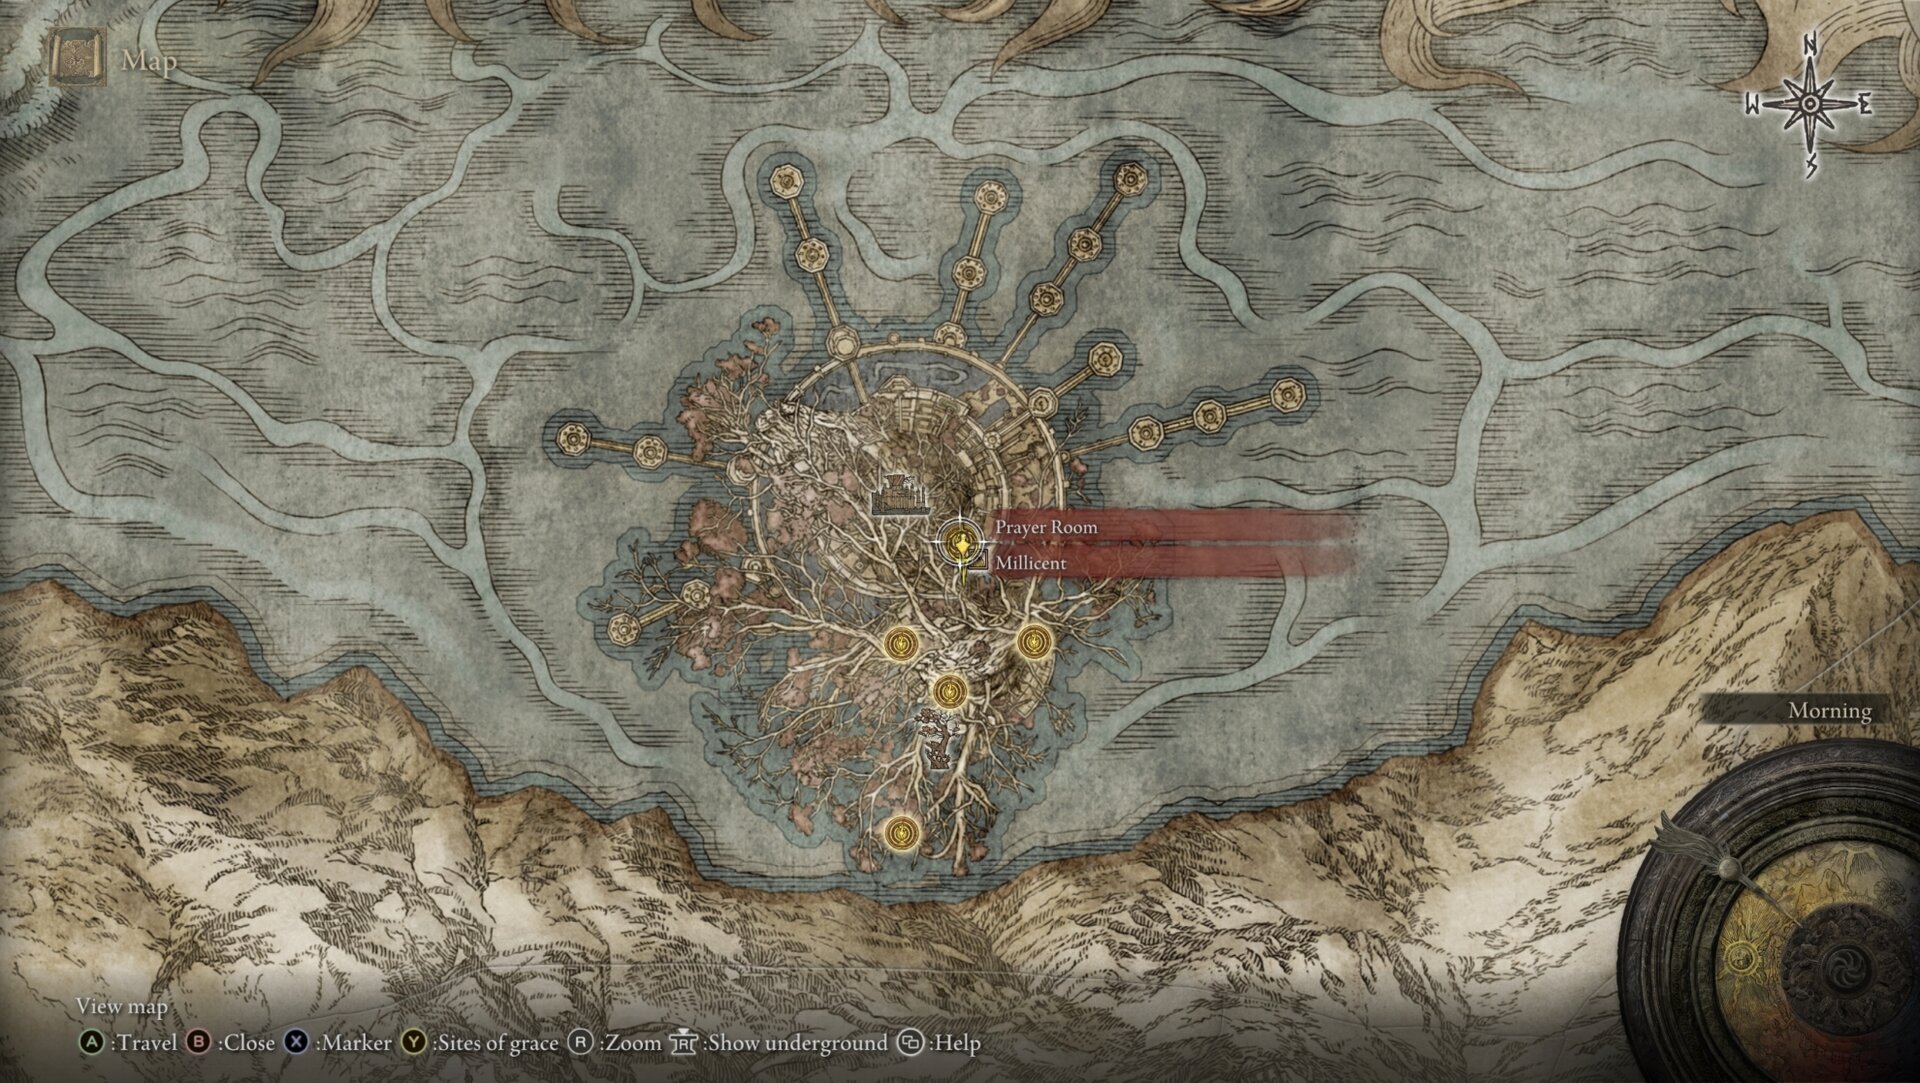
Elphael, Brace of the Haligtree
Hey, Milly! Long time no see! You’ll reunite with Millicent in the Prayer Room at Elphael, Brace of the Haligtree. I suspect that Millicent can still see the Guidance of Grace because every single time we see her after she sets out on her journey, she’s resting near a Site of Grace.
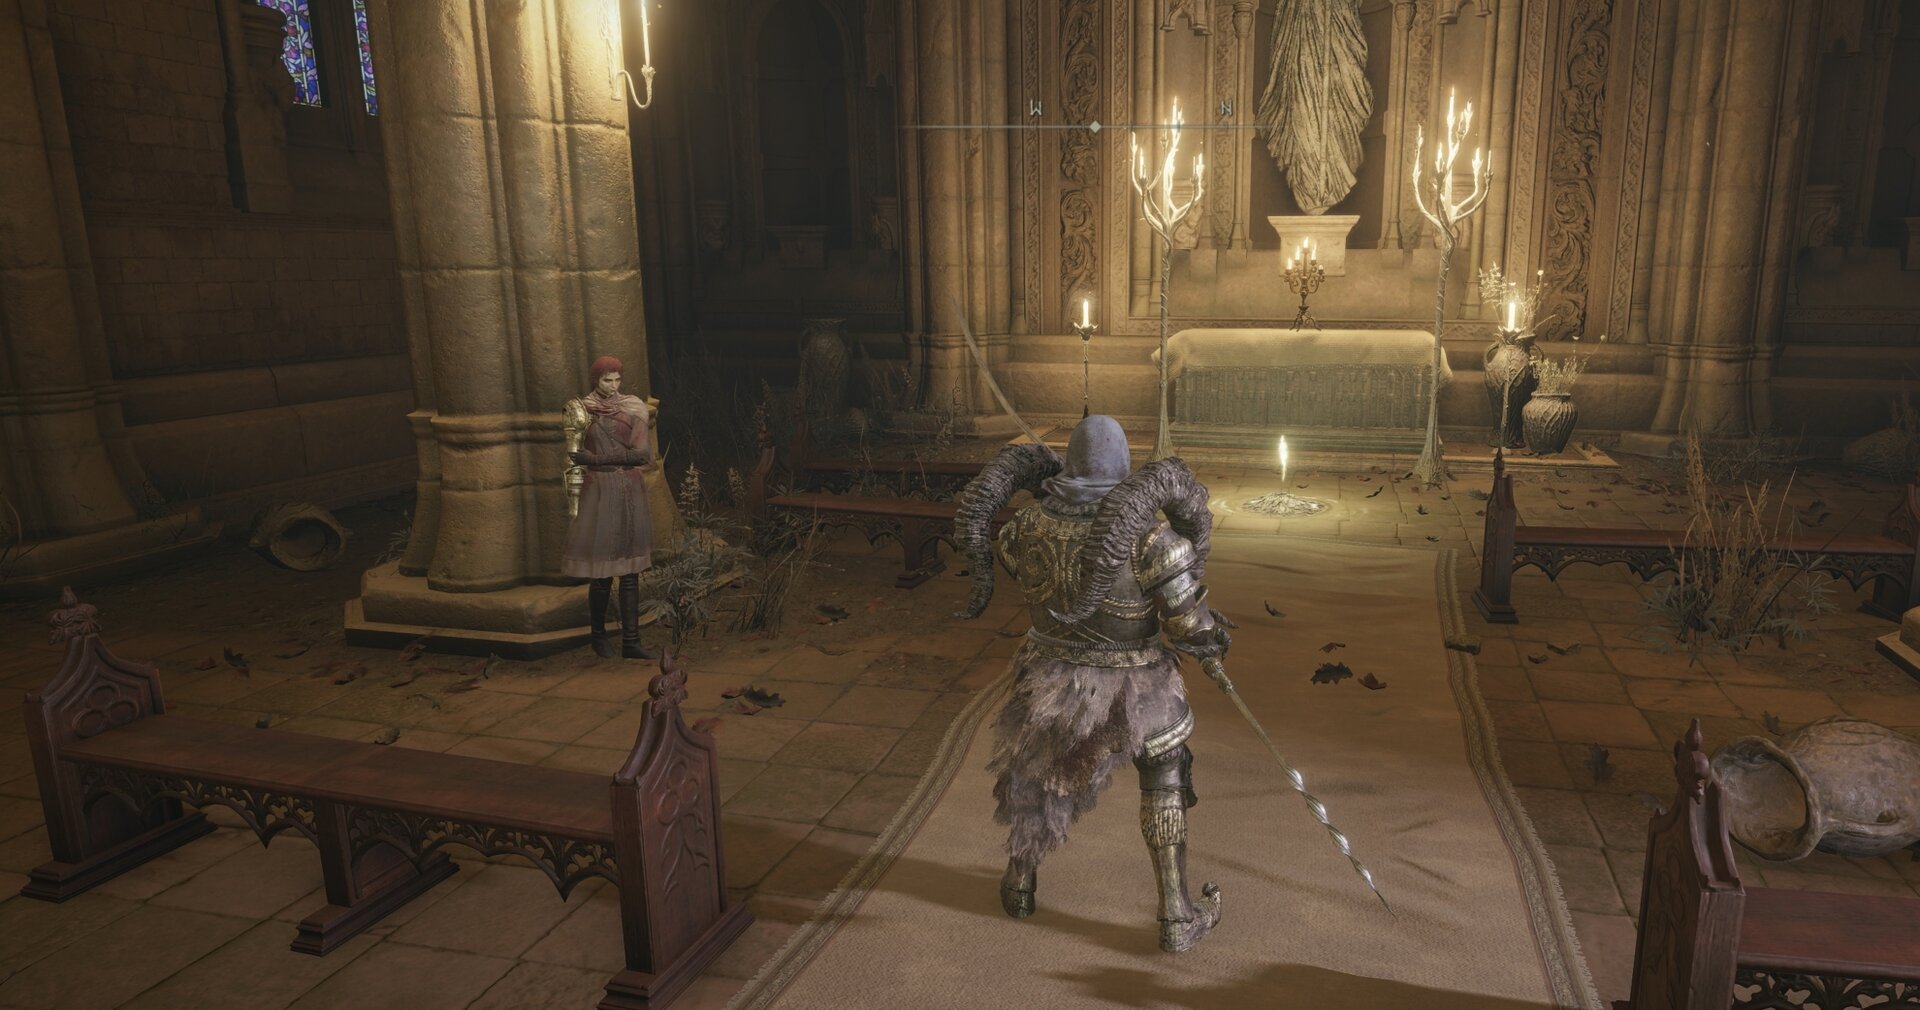
Regardless, exhaust her dialogue here and then forge onward!
Step 7: Deciding Millicent’s Fate
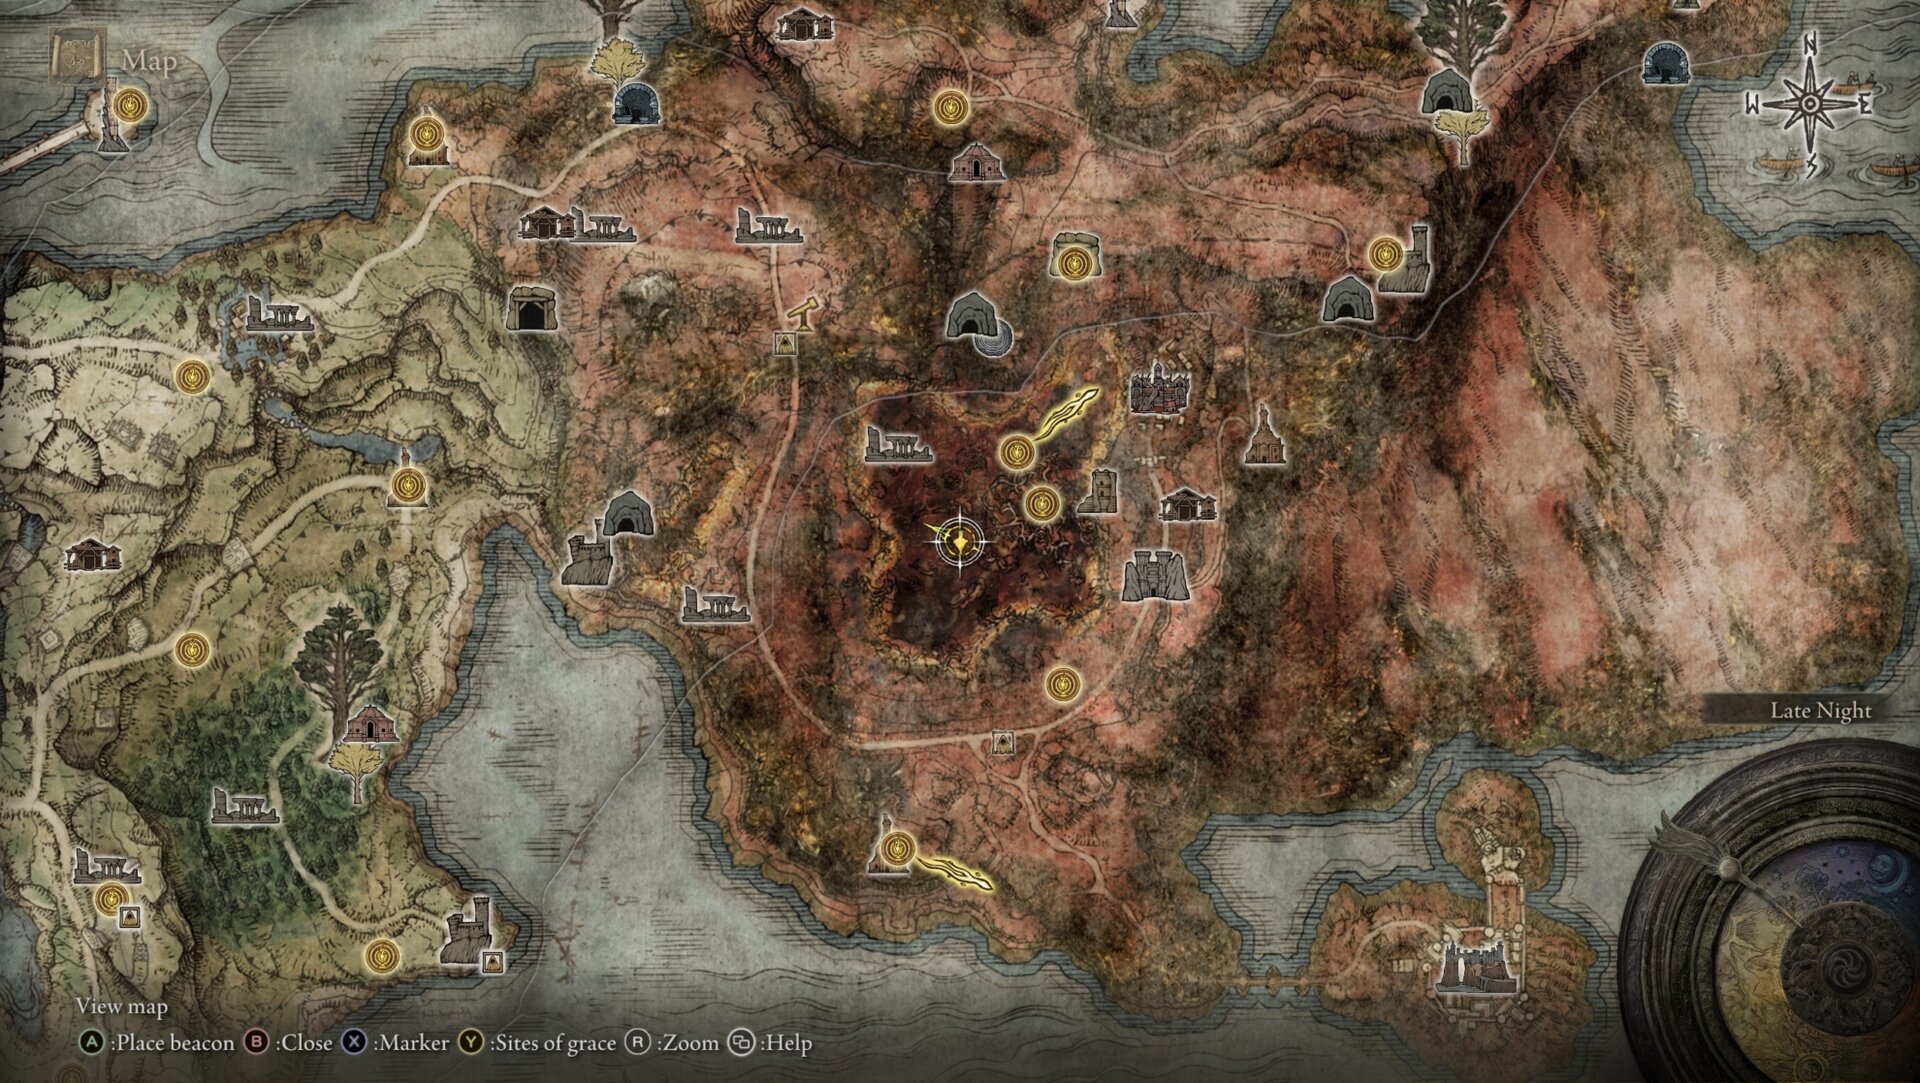
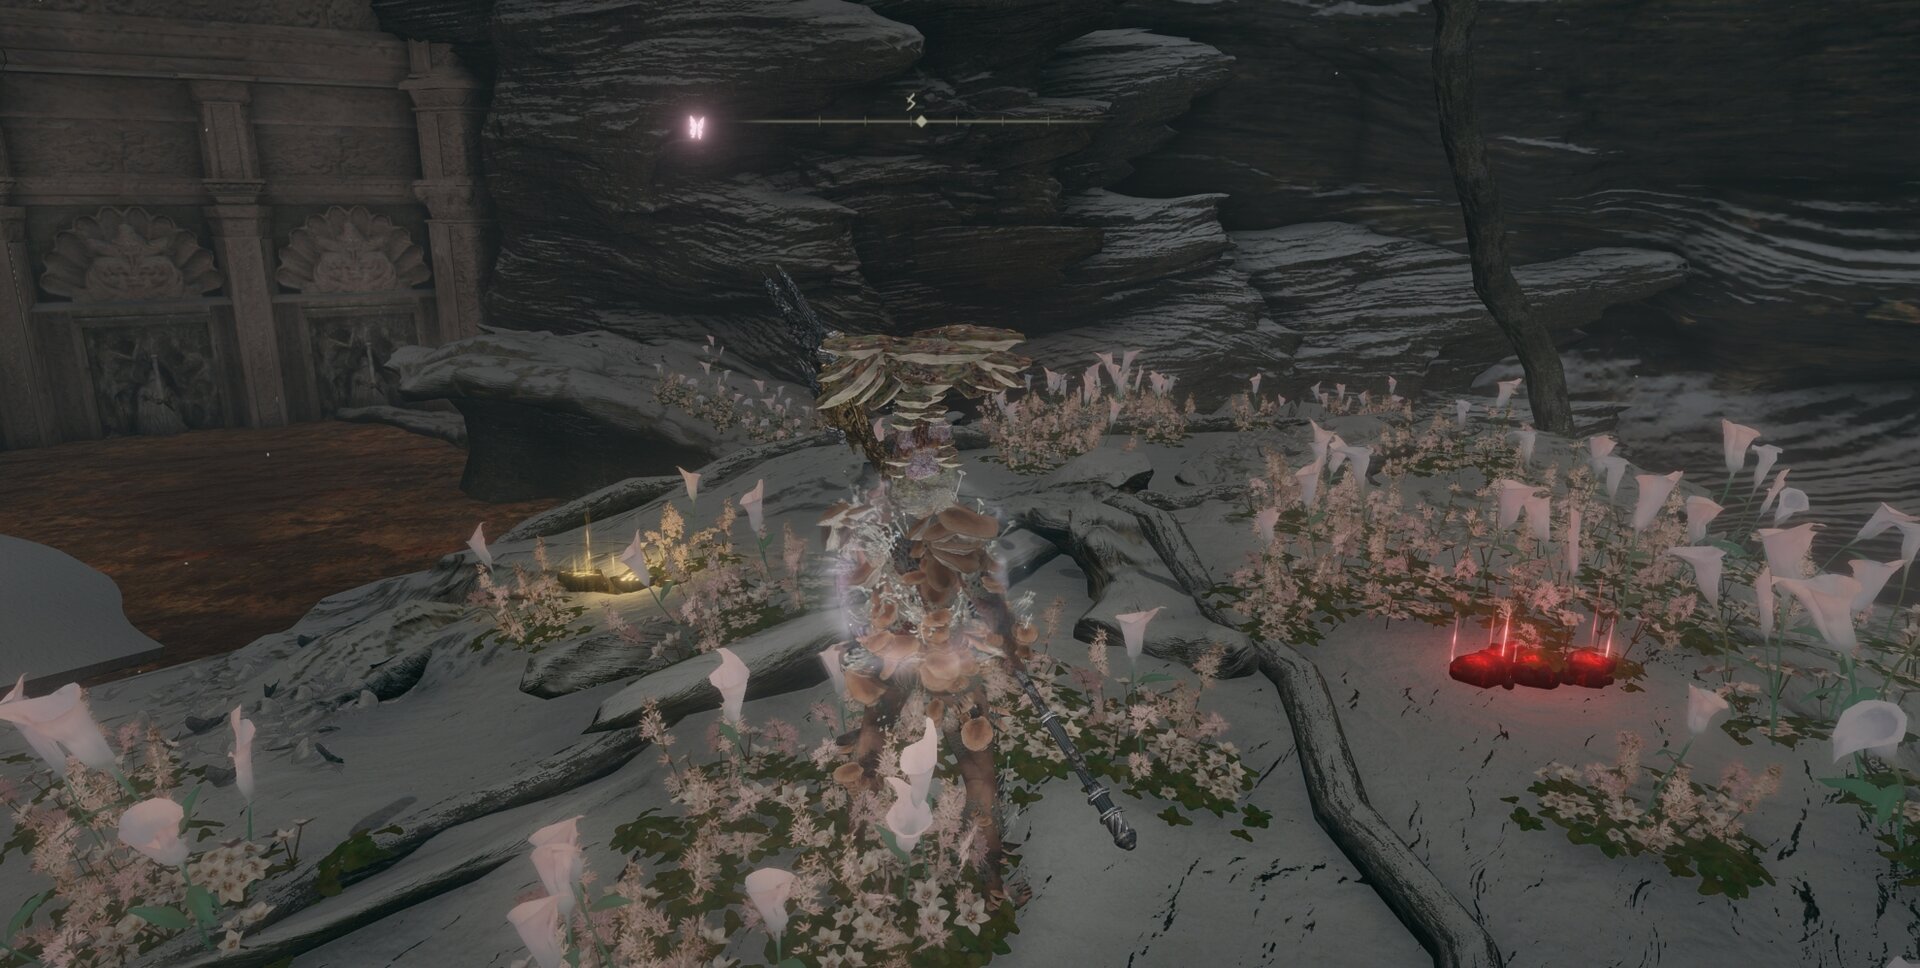
After circumnavigating the brace of the Haligtree, you’ll end up at the rotfalls inside it. At the end of the rotfalls, just a little ways before the Drainage Channel Site of Grace, there’s a pool of rot that you must traverse some uncomfortably narrow branches to reach.
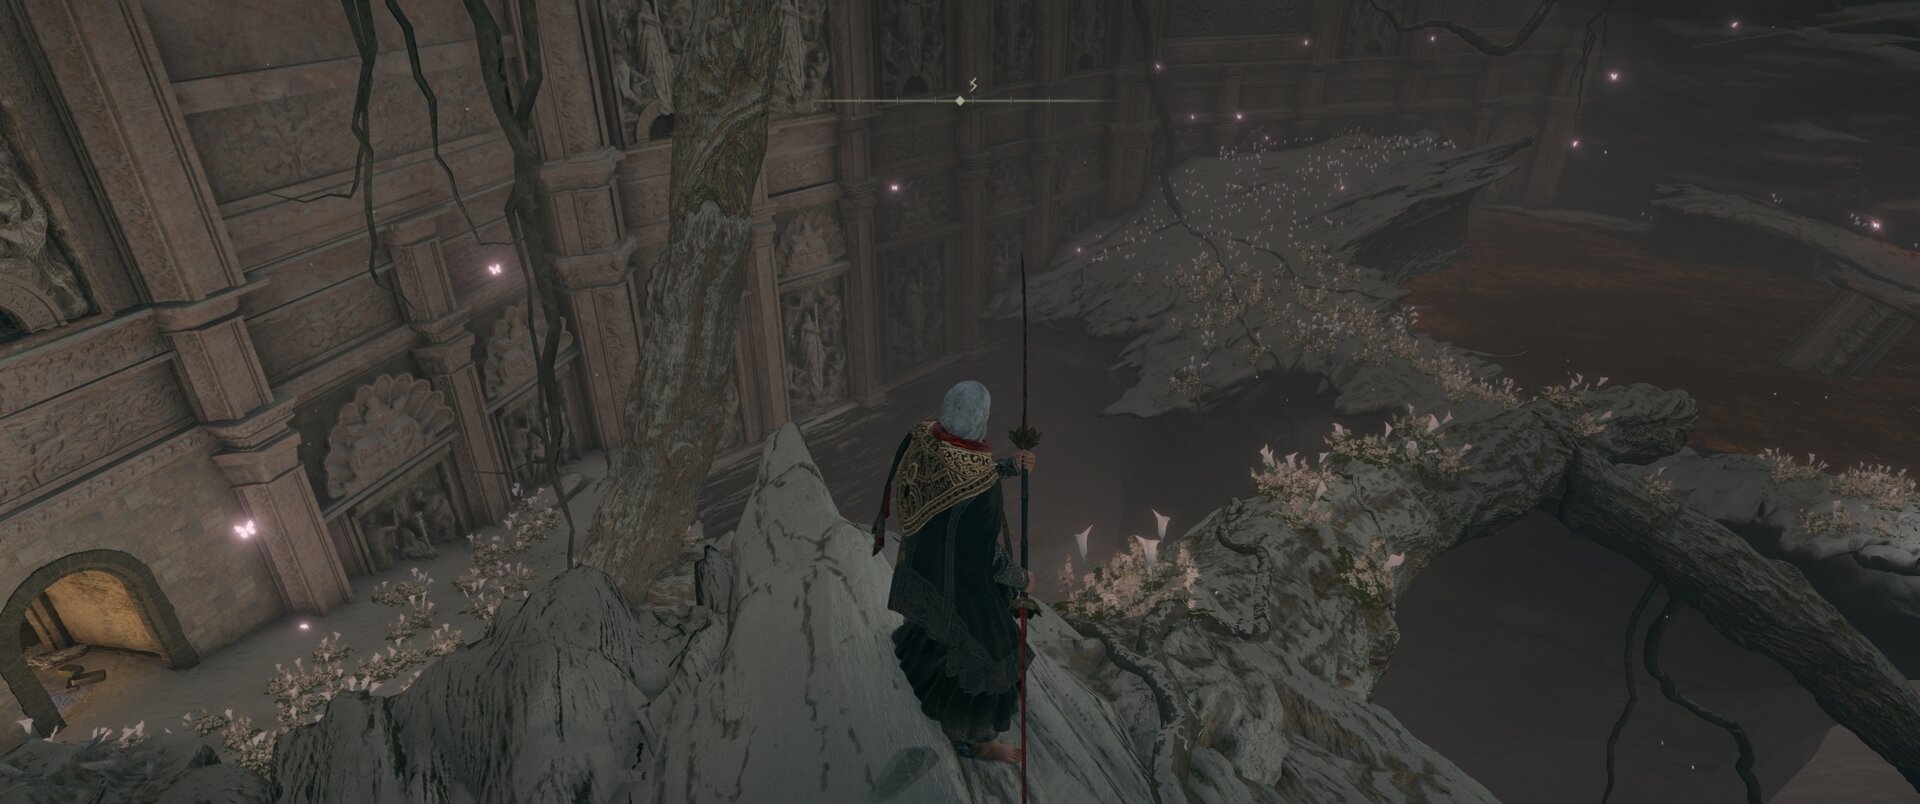
I know you want to go and pick up the pretty gold shiny (not pictured), but don’t step into the pool of rot until you’re ready! There’s a particularly vicious Putrid Tree Spirit waiting to ambush you. You must defeat the Putrid Tree Spirit in order for Millicent’s invasion signs to appear, but don’t use either option yet!

Should You Help Millicent or Fight Her
Before deciding whether to support Millicent (gold sign) or fight her (red sign), unlock the Drainage Channel Site of Grace if you haven’t, and then go speak to Gowry. He will be weeping. If he isn’t, you may need to interact with the summon signs first.
He tells you what he wants you to do, but there are significant consequences to your decision.
| Help Millicent | Fight Millicent |
|---|---|
 Millicent’s Prosthesis Millicent’s Prosthesis | |
If you’ve made it this far, I recommend helping Millicent fend off her sisters because the story doesn’t change that much either way, and you get more stuff for helping her.
You can obtain the other items by defeating Millicent much earlier in the game. If you’re after those items, namely Millicent’s Prosthesis and Flock’s Canvas Talisman, you only need to wait to attack her until she reaches Dominula, Windmill Village.
That being said, helping Millicent is more challenging than fighting her. You need to fend off 4 other enemies together, and she can only survive against 2 of them, meaning you’ll need to quickly aggro and defeat 2 of her sisters.
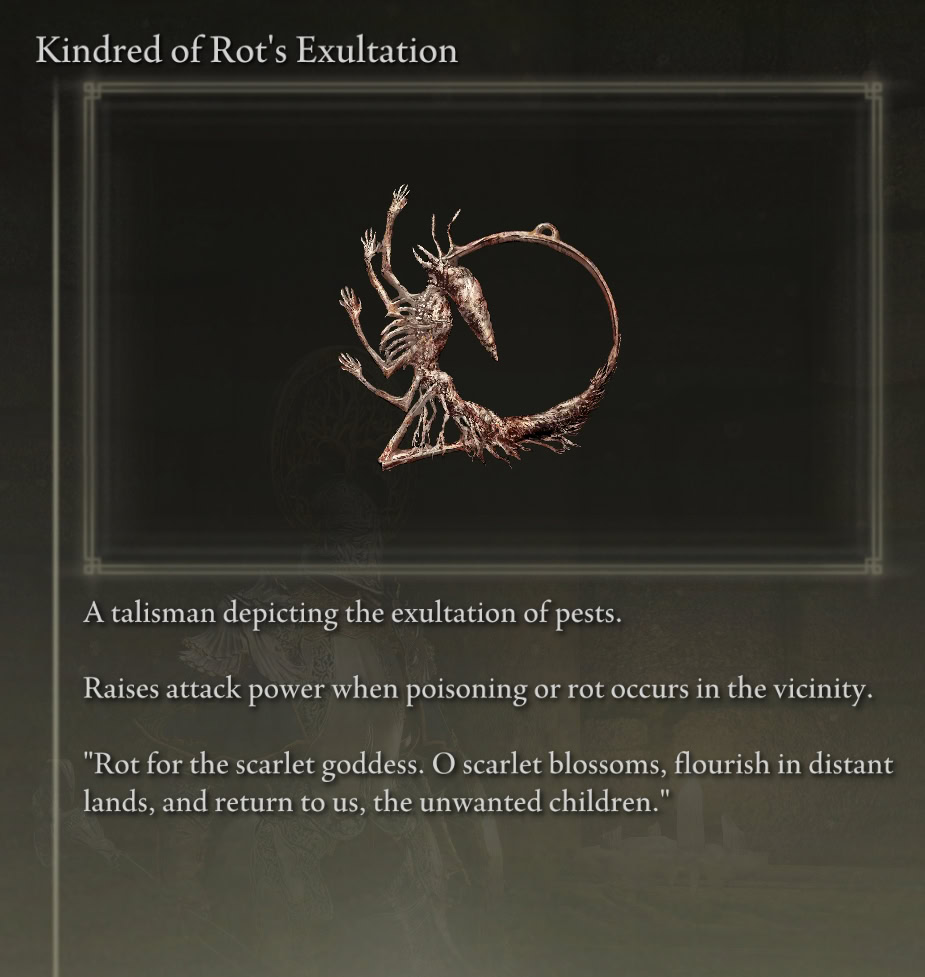
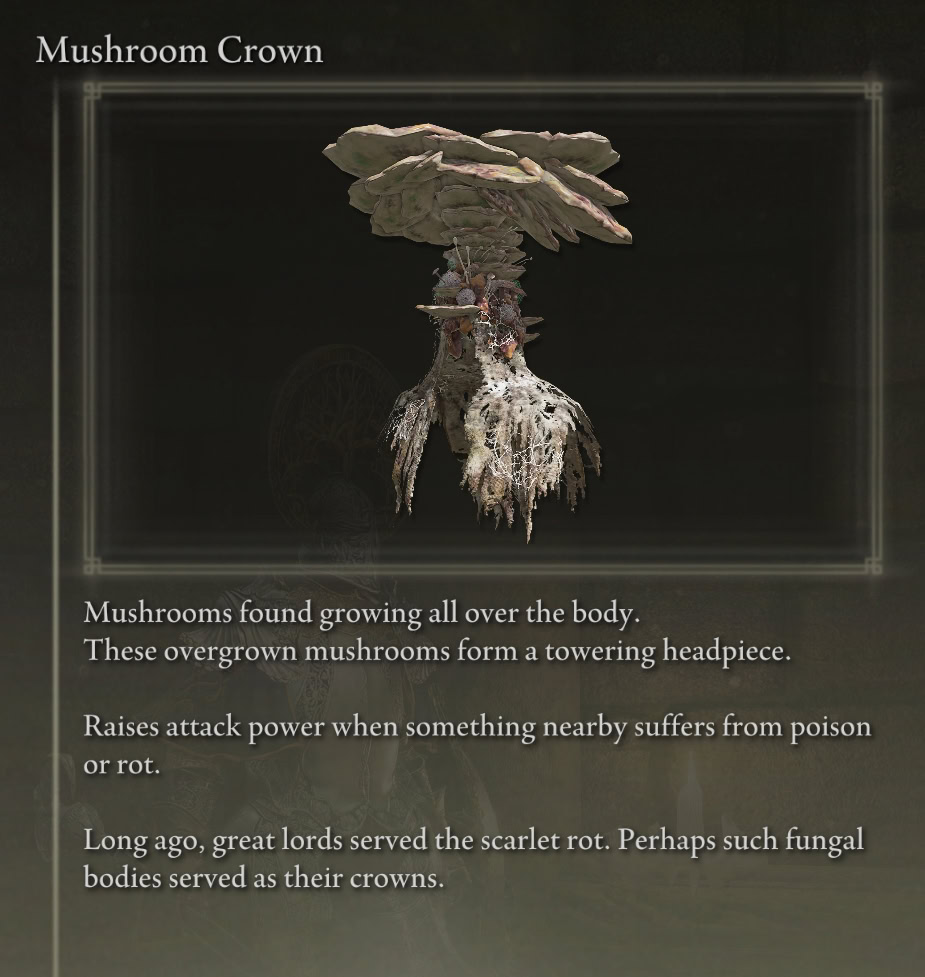
If you’re having trouble, I recommend equipping Shabriri’s Woe, Kindred of Rot’s Exultation, or the Mushroom Crown. The latter two will increase your damage dealt after being afflicted by the scarlet rot, while the former will attract nearby enemies to you.
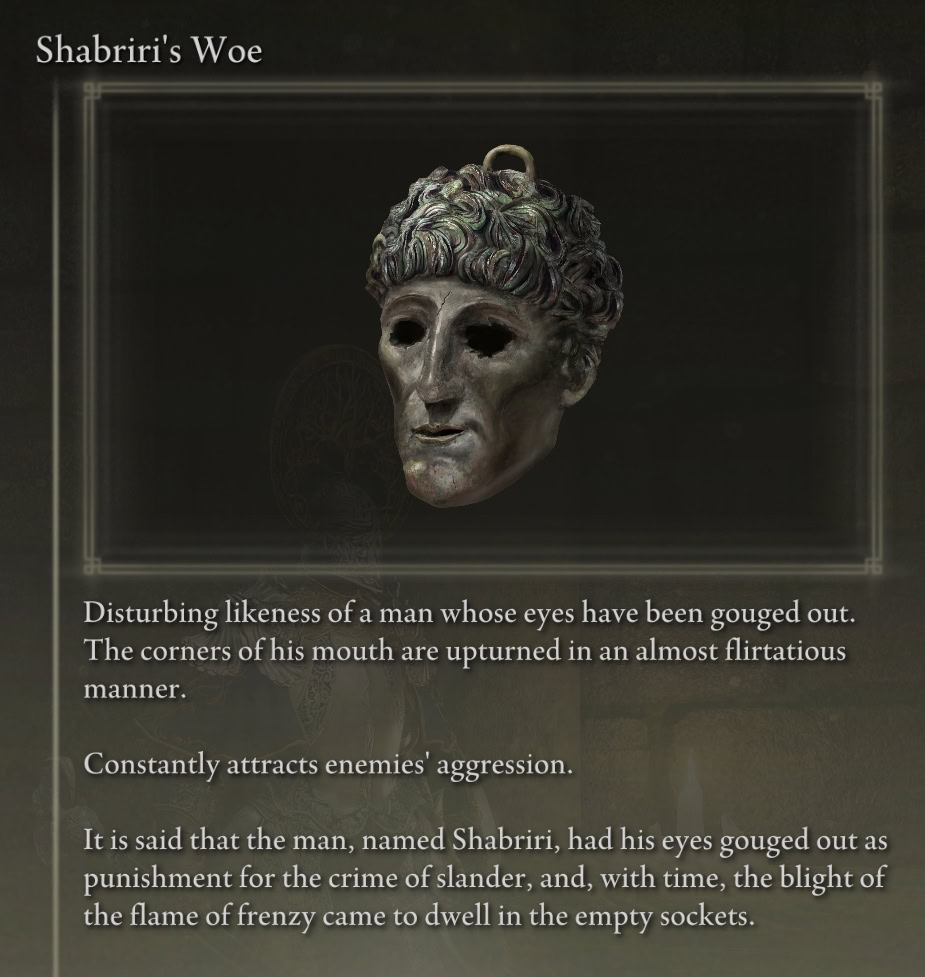
Shabriri’s Woe will make it easier for you to pull the extra sisters off of Millicent, though you might get more than you want.
Aftermath
Once you defeat Millicent or her sisters, it’s time for loot and the end of Millicent’s story. If you chose to defeat Millicent, you’ll be rewarded the Millicent’s Prostheses Talisman, and that’s it, time to return to Gowry.
If you chose to defeat her sisters, you’ll find Millicent resting by the side of the pool of rot. She informs you that she’s taken out the needle because she understands what Gowry was trying to do and that she would rather rot as herself than turn into something else.
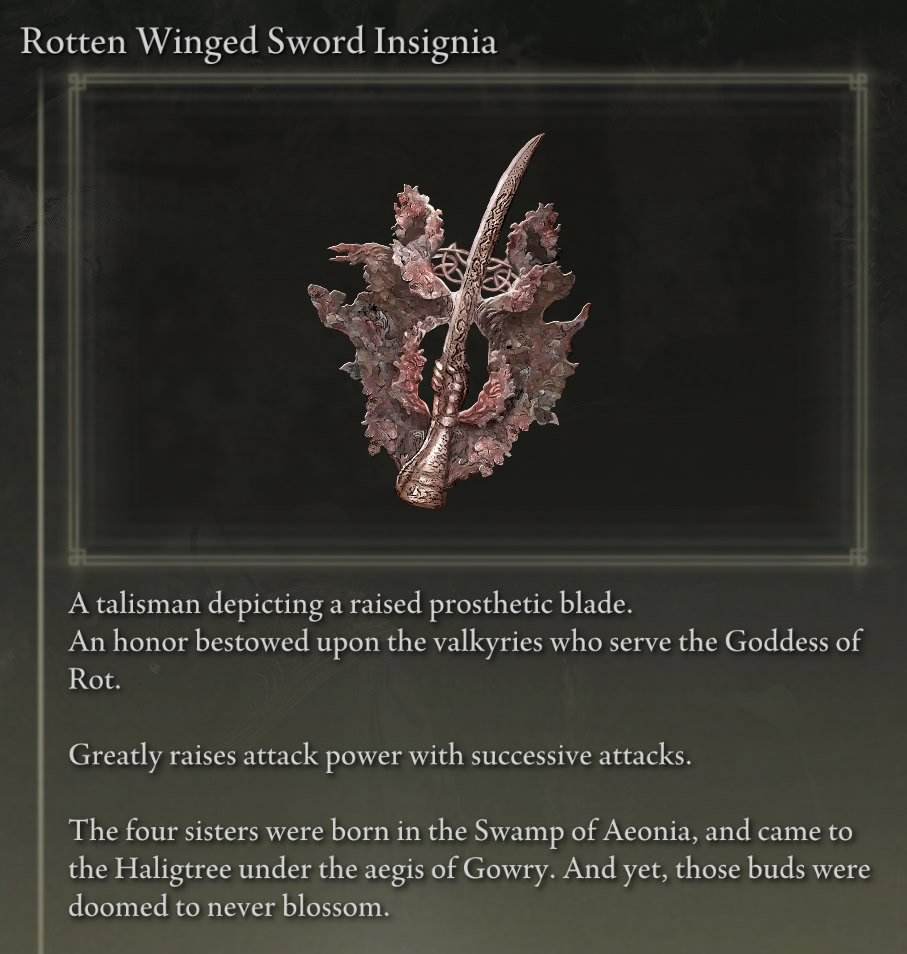
Millicent doesn’t want you to watch this happening, so she asks you to leave. Reload the area, and you’ll be able to loot Rotted Winged Sword Insignia and the Unalloyed Golden Needle.
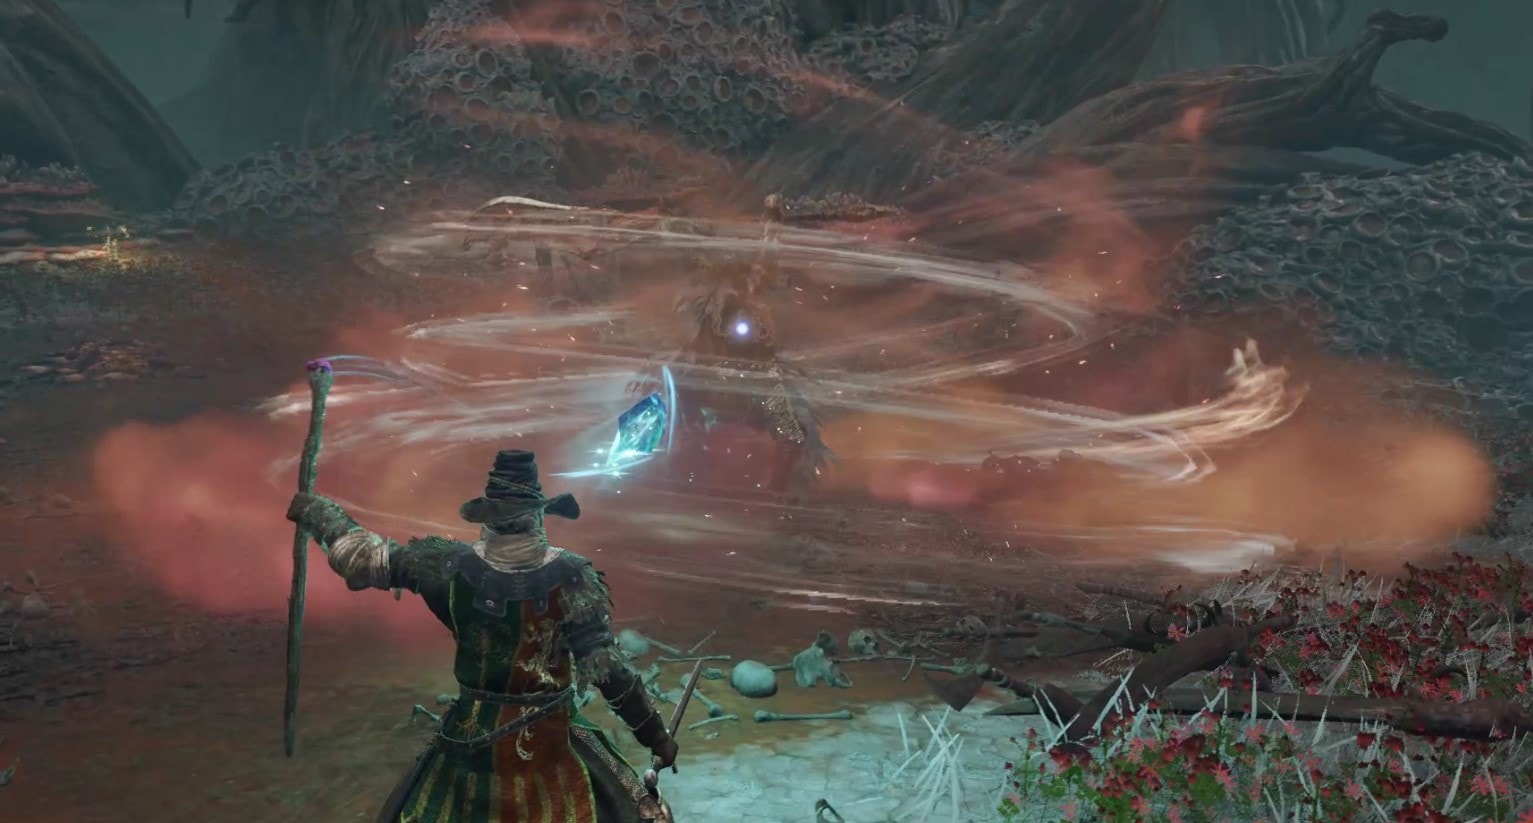
Head onward to reach the roots of the Haligtree and defeat Malenia. Rest or reload the arena where you fought her, and you’ll find Malenia’s Scarlet Aeonia from your fight. It seems this was what Gowry had intended to happen to Millicent, perhaps on a smaller scale.
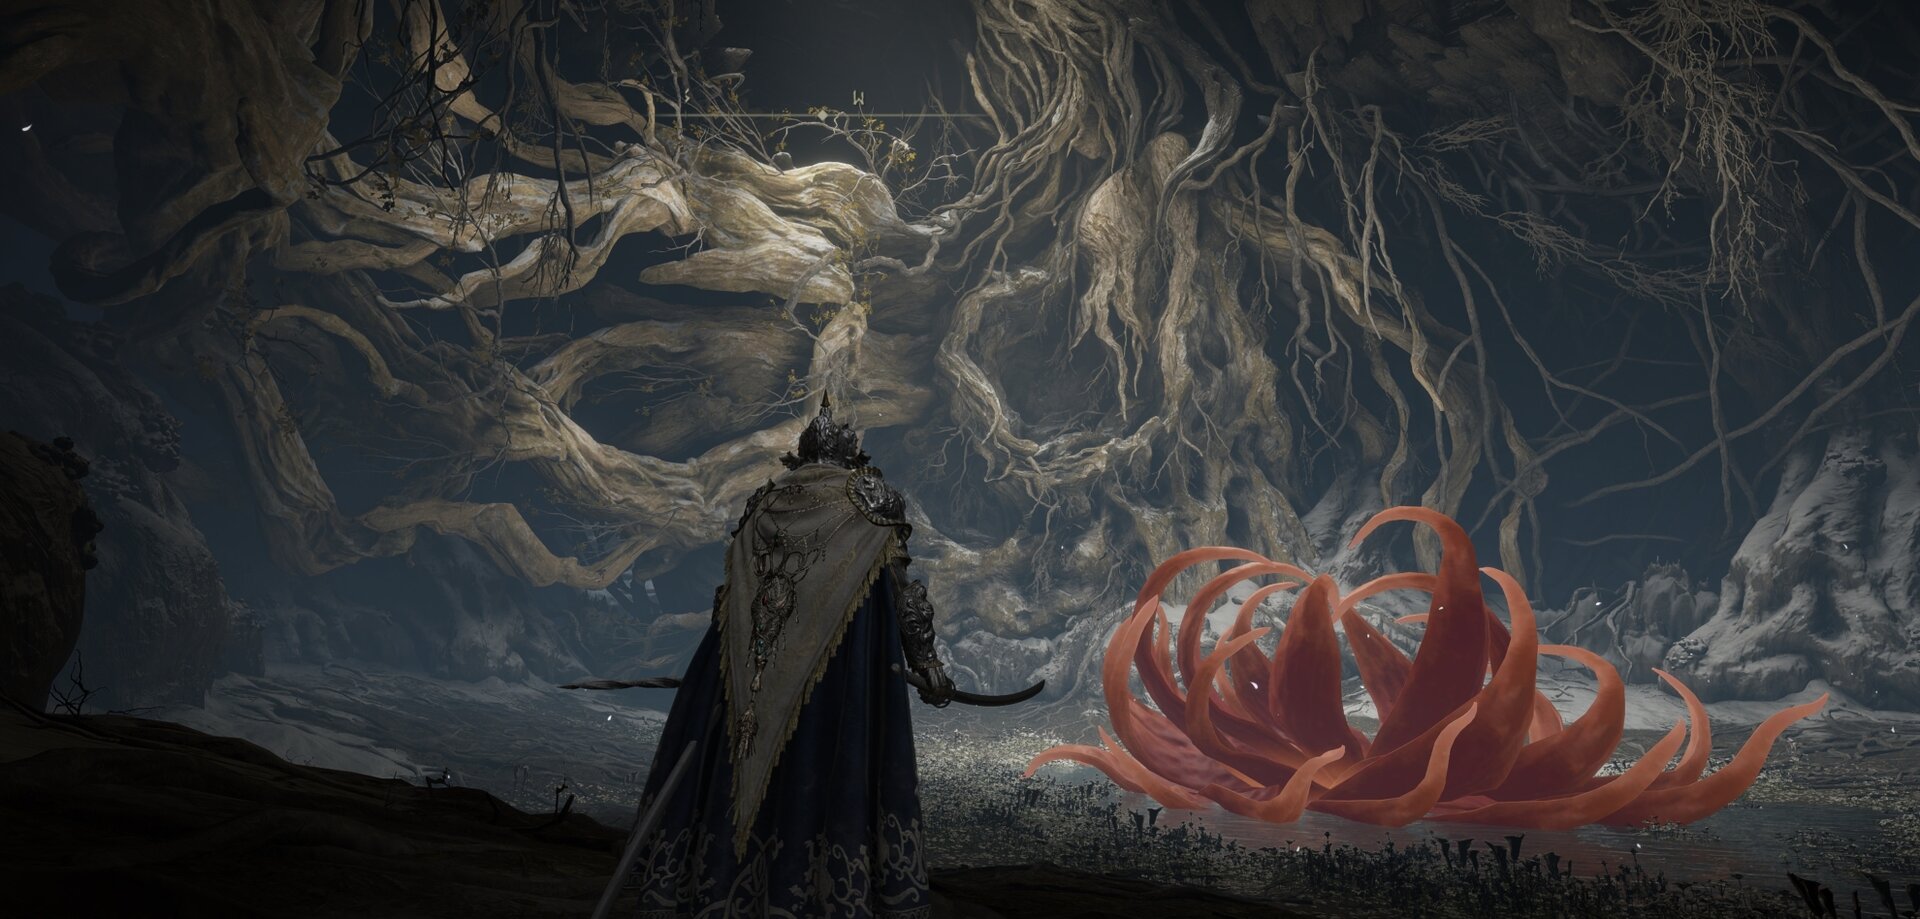
It’s time to do what Millicent could not. Return that sense of dignity, the sense of self, that allowed her to resist the call of the scarlet rot. The pride she abandoned to meet Radahn’s measure. Place the Unalloyed Golden Needle inside the Scarlet Aeonia.
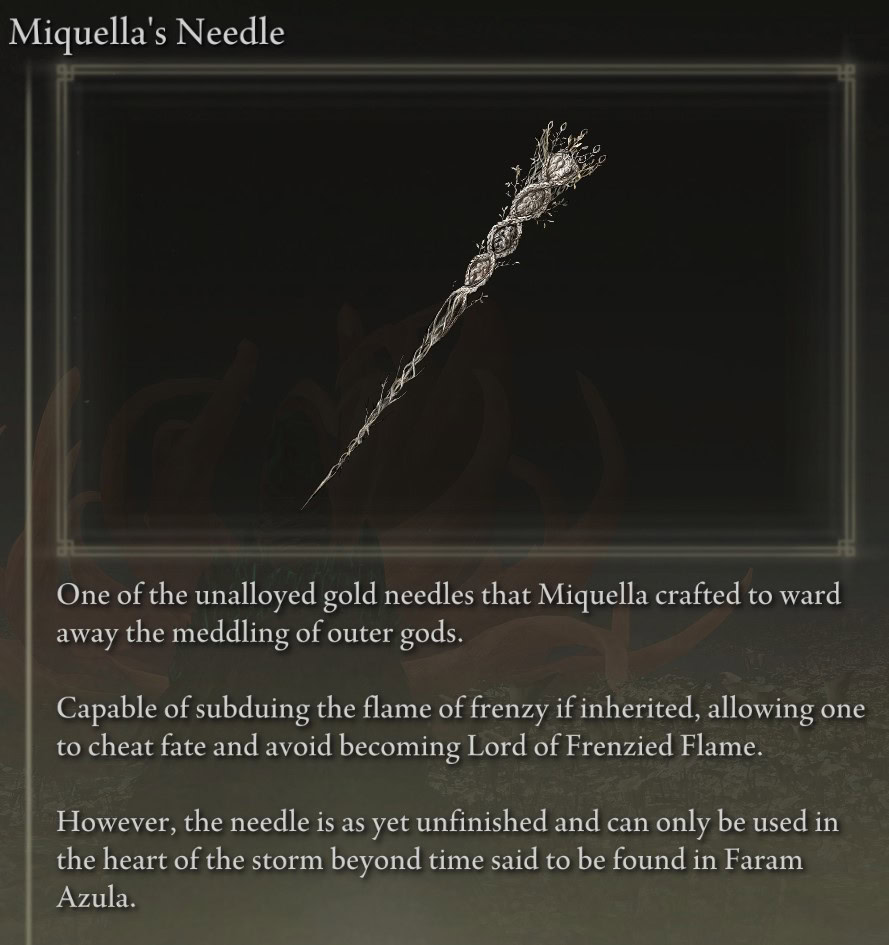
Now, you can follow in their footsteps to resist the call of the Frenzied Flame by inserting Miquella’s Needle at the heart of the storm beyond time. The needle serves no other purpose, so that’s why you get a Somber Ancient Dragon Smithing Stone too!
Step 8: Returning to Sage Gowry
After Millicent has perished, regardless of when, or whether it was by your hand or her own, return to Sage Gowry at his Shack at the entrance to Sellia, Town of Sorcery, in Caelid.
You’ll either find some loot or Gowry under duress. Speak to him and exhaust his dialogue if he’s still alive, and then change that. You’ll get the same loot either way. The big one is Flock’s Canvas Talisman.
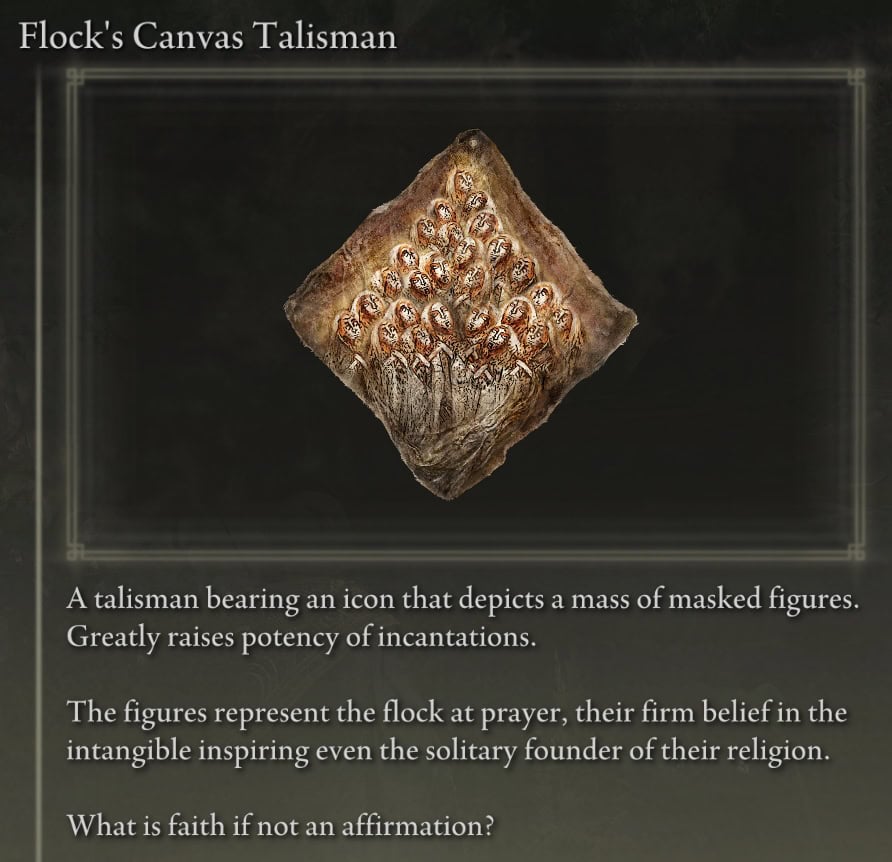
Flock’s Canvas Talisman is arguably the most important Talisman you can equip for Faith-based caster builds because it’s just a flat buff to all of your Incantations, giving you another potential incentive to take out Millicent at Dominula.
Millicent’s Quest Ending Explained
Ultimately, Gowry wanted Millicent to be defeated in battle in order for the Scarlet Aeonia to resurrect her like it does for Malenia, but it does not happen, regardless of your decision to fight her or help her.
Yes, this is anticlimactic. Gowry was just wrong, and we aren’t really told why. He says it has to do with the Unalloyed Gold Needle being taken out, but that doesn’t make much sense unless she took it out before the fight, as that’s what’s keeping the Scarlet Rot at bay.
Some have theorized that the needle had to remain inside her so that pressure from the rot would build and she’d burst into bloom rather than seep out at a controlled rate. Others suggest it could have to do with her not reacting with anger but sorrow after learning of your betrayal.
I believe this anticlimactic ending has to do with Hidetaka Miyazaki reconciling his vision with George R.R. Martin’s worldbuilding after the latter finished his consultation and handed over his lore. Check out my in-depth exploration of this theory if you want to learn more.

Millicent Quest Walkthrough

This is a step-by-step summary of how to start and complete Millicent's Quest in Elden Ring. The complete walkthrough presented here will give you all of the extra details and optional steps you may want to learn and make to get the full experience of this story arc.
Instructions
- Meet Sage Gowry at his Shack in western Caelid.
- Obtain the Unalloyed Golden Needle from Commander O'Neill.
- Break the seals of Sellia. Town of Sorcery and reach Millicent at the Church of the Plague.
- Talk to Millicent and agree to help her so she can begin her journey.
- Climb up to the Altus Plateau and talk to Millicent at Lux Ruins. Go to the Shaded Castle to get Valkyrie's Prosthesis for her.
- Find and talk to Millicent at Domunula, Windmill Village, at the Mountaintops of the Giants and at Elphael, Brace of the Haligtree.
- Unlock the Drainage Channel Site of Grace and speak to Gowry. Then decide Millicent's fate and if you want to help her or not. This is the turning point for her quest.
- After Mellicent has perished, return to Gowry at his shack. Exhaust his dialogue

Elden Ring Ranni quest Guide and Age of the Stars ending
This guide covers all the necessary steps to complete Ranni the Witch’s questline and allow you to achieve the Age of the Stars secret ending!

Elden Ring Dung Eater Quest and Blessing of Despair Ending Guide
A step-by-step guide on how to complete the Dung Eater quest line in Elden Ring and unlock the Blessing of Despair Ending.

Elden Ring Three Fingers Quest, Lord of Chaos Ending and Lord of Frenzied Flame Achievement Guide
Step-by-step guide to the entire Three Fingers Quest in Elden Ring. Learn how to unlock the Lord of Chaos Ending and earn the Lord of Frenzied Flame achievement!
Elden Ring Haligtree Secret Medallion, Ordina Puzzle, and Latenna Quest Guide
This guide will tell you everything you need to know about how to reach Miquella’s Haligtree in Elden Ring and bring Latenna the Albinauric along for the ride, including procuring the Haligtree Secret Medallion and breaking the seals at Ordina Liturgical Town.