All Armor Sets, Talismans, Weapons, and Ashes of War for all Quest Characters from Elden Ring: Shadow of the Erdtree Expansion. With their stats, high-quality previews, and where to find them!
You will receive almost all of the equipment worn and used by all of the Quest Characters in Shadow of the Erdtree at the very end of the final dungeon, Enir-Ilim, either preceding or following the final boss fight at the Gate of Divinity.
Equipment worn and used by Needle Knight Leda’s allies is accessible before the final boss, while all of your allies’ equipment is available after the final boss. Unaffiliated characters’ quest items are obtainable earlier.
Some items are only obtainable if you made specific decisions to attack or support Needle Knight Leda after Miquella shattered his Great Rune and broke his charm on everybody.
In my opinion, it is better to oppose Leda in the first playthrough and defeat her allies after finishing off their quests because you get locked out of far fewer rewards and can get some loot a lot sooner.
Use the Table of Contents below to get to a part of this guide that interests you or scroll down to begin reading everything in order.
Dryleaf Dane’s Outfit, Seal, and Hand-to-Hand Combat Arts

- Dryleaf Dane’s Outfit Stats
- Dryleaf Seal Stats
- Dryleaf Arts and Dane’s Footwork Stats
- Dryleaf Dane’s Attire Preview
- Dryleaf Dane’s Altered Attire Preview
- Dane’s Hat and Dryleaf Arts Location
- Dryleaf Seal, Chest, Gloves, and Boots Location
- Dane’s Footwork Location
- Ash of War: Dryleaf Whirlwind Location
Needle Knight Leda’s Allies
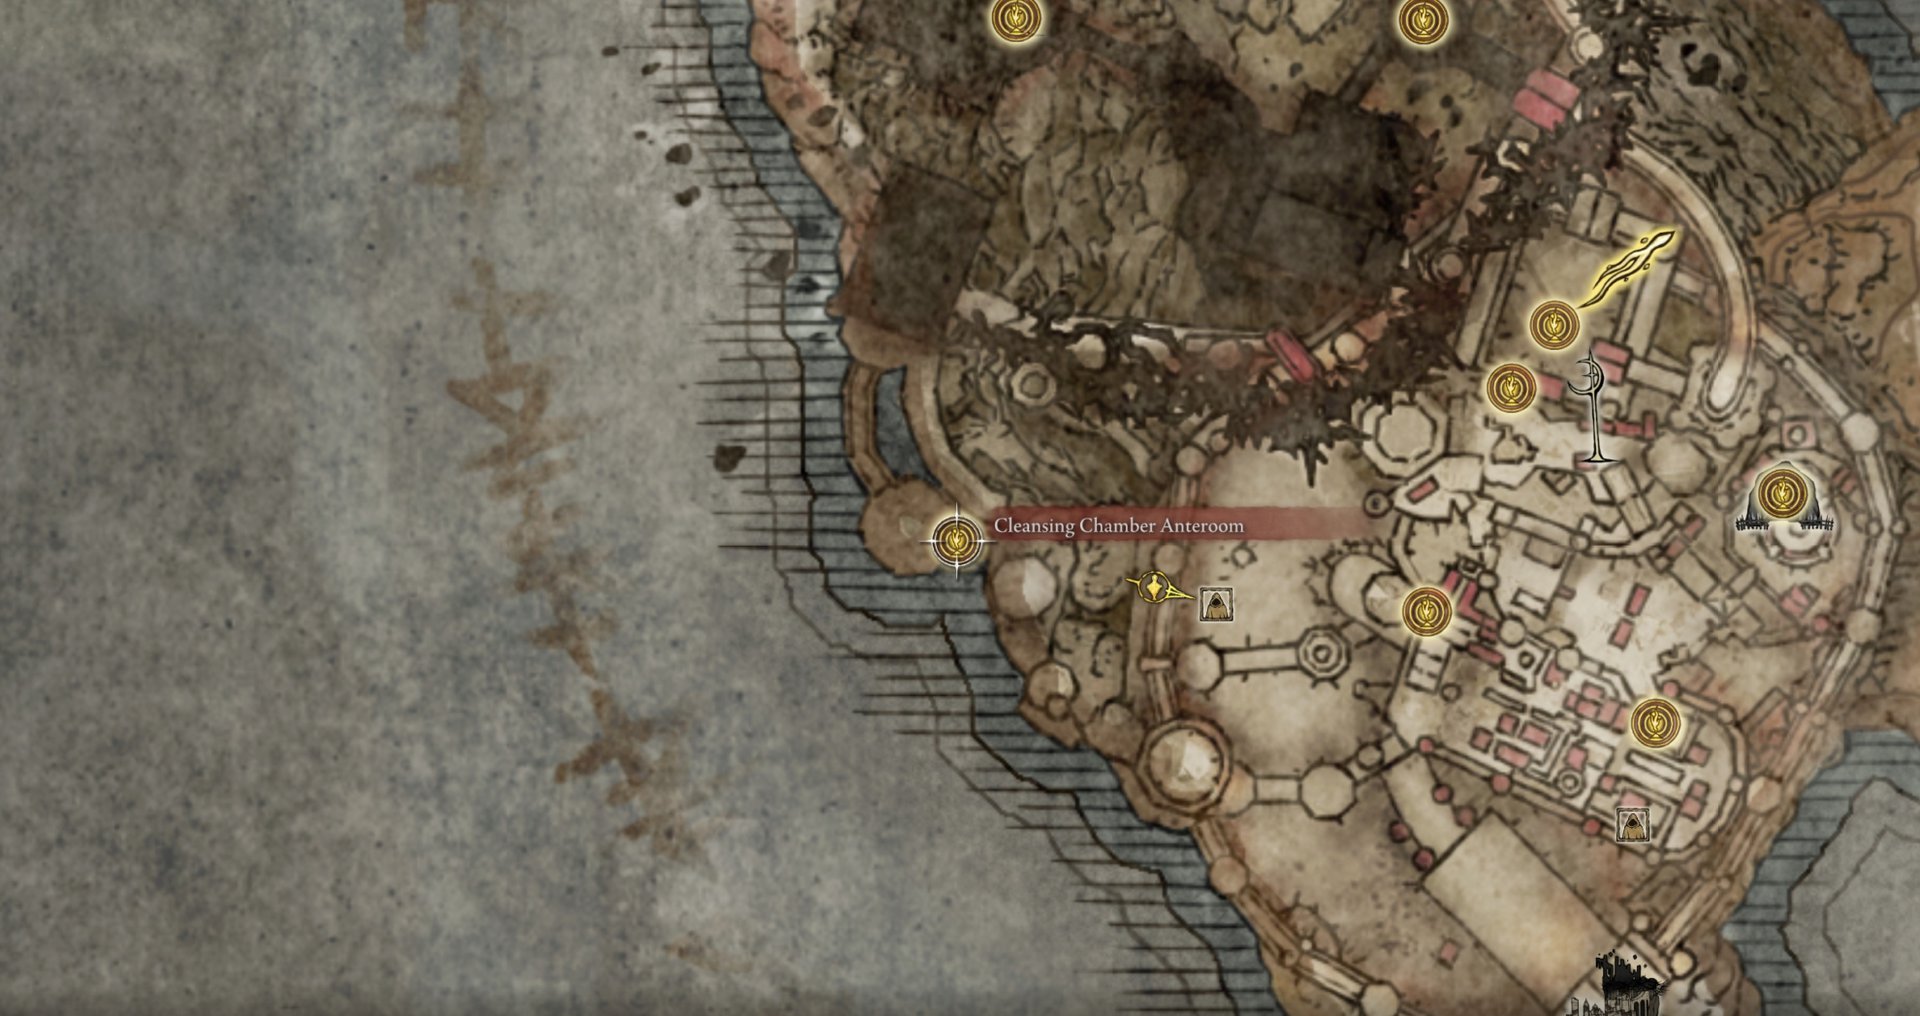
Needle Knight Leda‘s allies include Sir Moore, Redmane Freyja, and Dryleaf Dane. You’ll be able to loot their corpses in the Cleansing Chamber after defeating them.
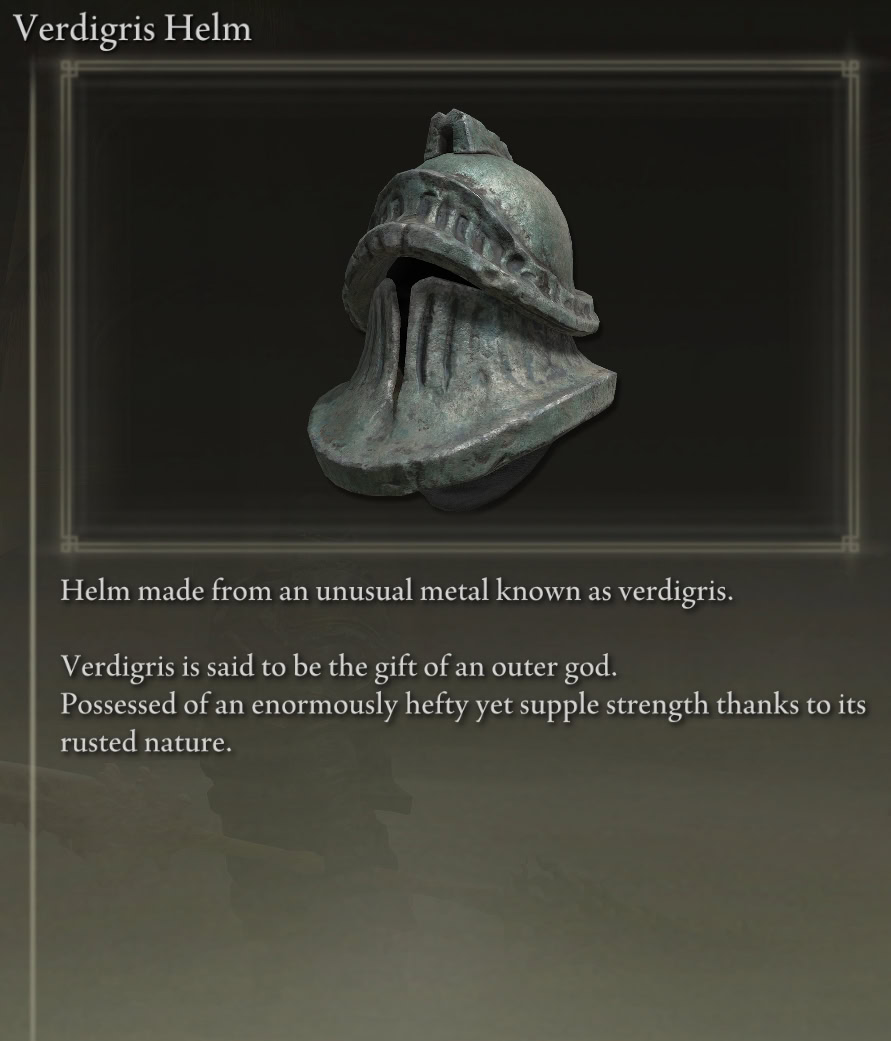
Moore’s Bell-Bearing, Verdigris Armor Set, Greatshield, Talisman
You can loot Moore’s Bell Bearing, the Verdigris Armor Set, and the Verdigris Shield from Moore. You can also obtain the Verdigris Discus Talisman elsewhere at Rauh Ruins and a couple of Forager Broods’ Cookbooks from him.
Moore’s (and Thiollier’s) Bell Bearing
Moore is one of the few vendors in the Shadow Realm. His Bell Bearing allows you to purchase both his and Thiollier’s wares from the Twin Maiden Husks at the Roundtable Hold.
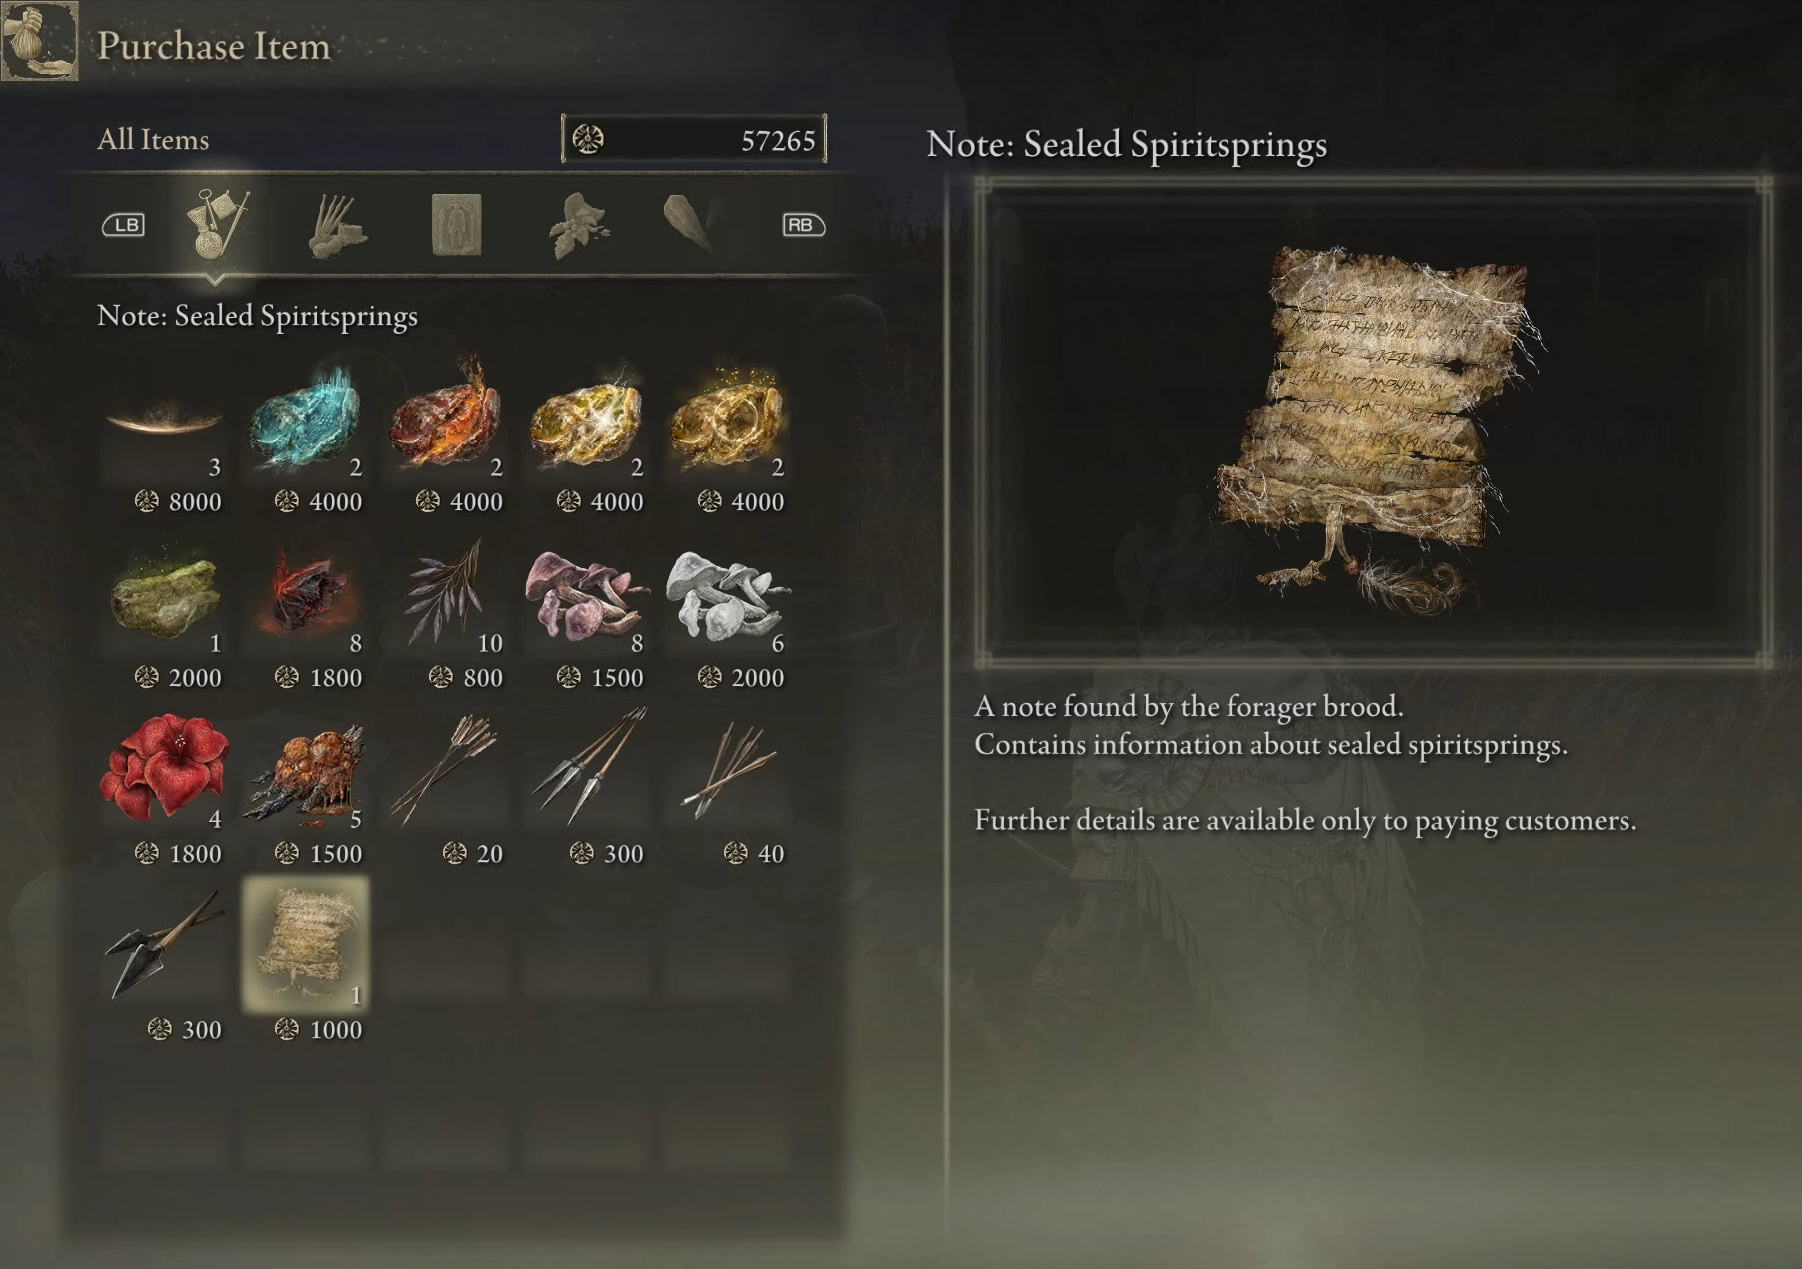
The items from both characters will be available under Bell Bearing Shop 5.
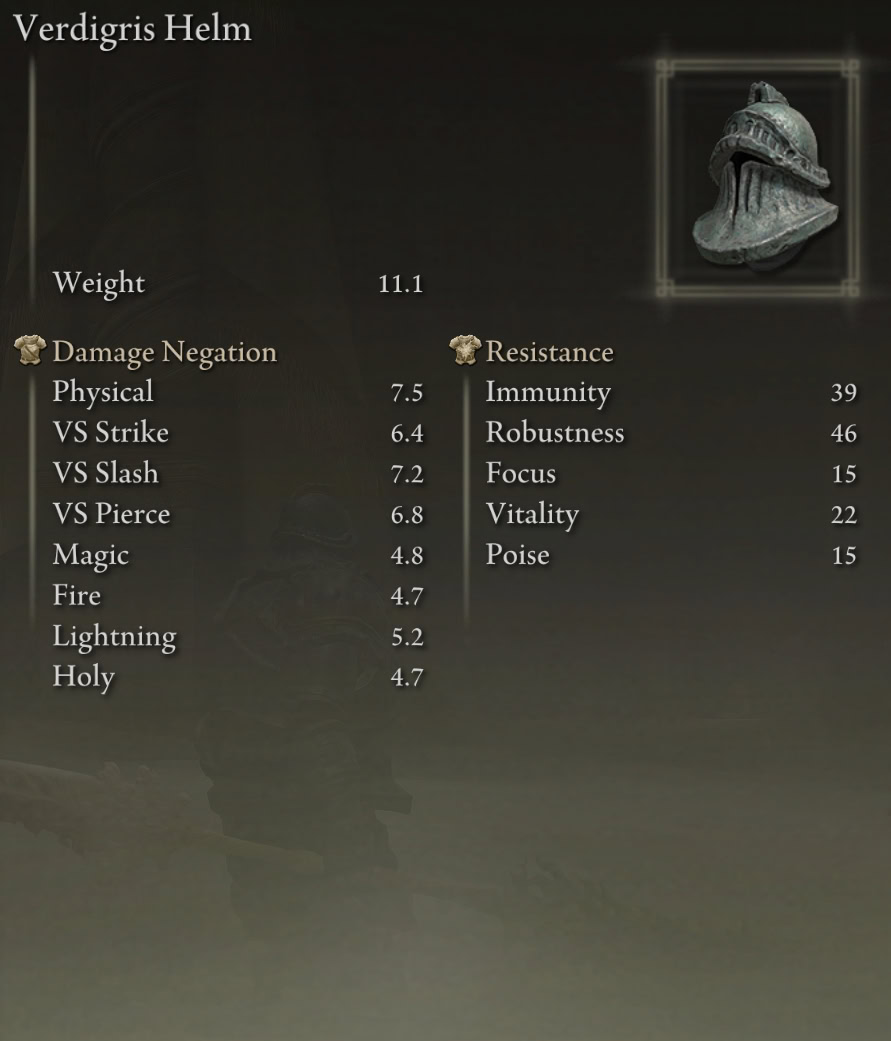
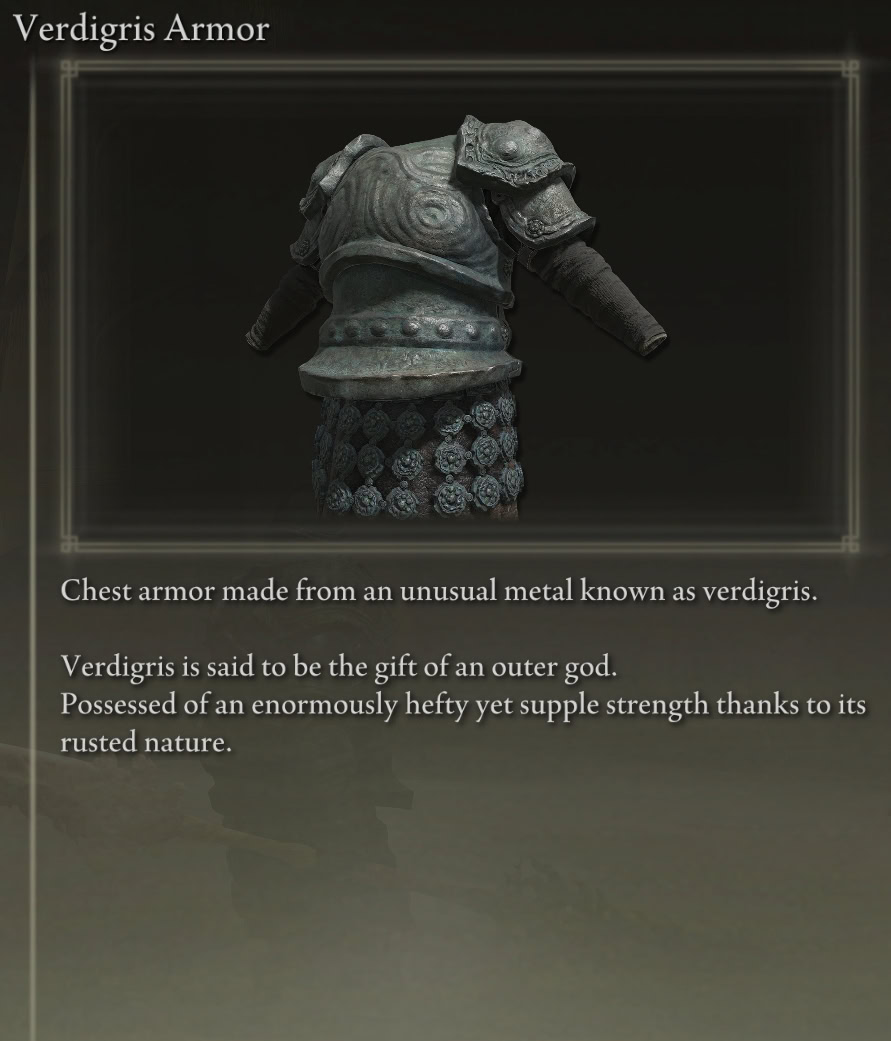
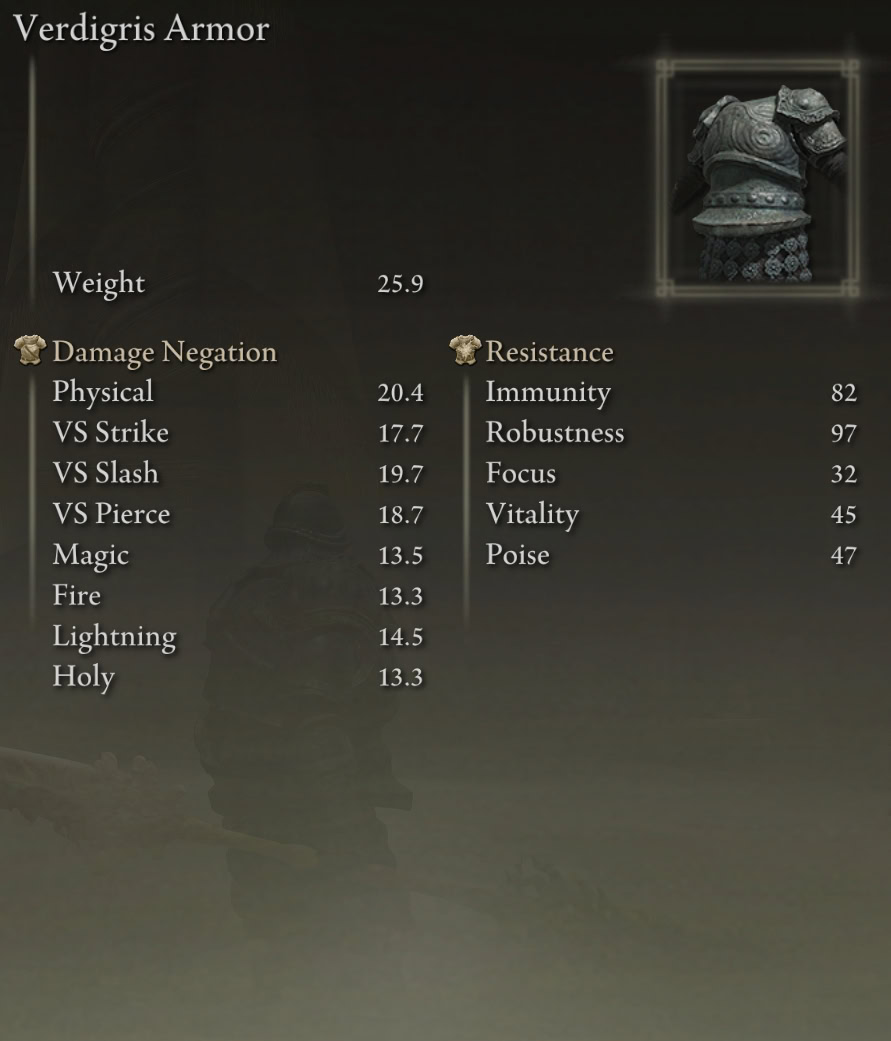
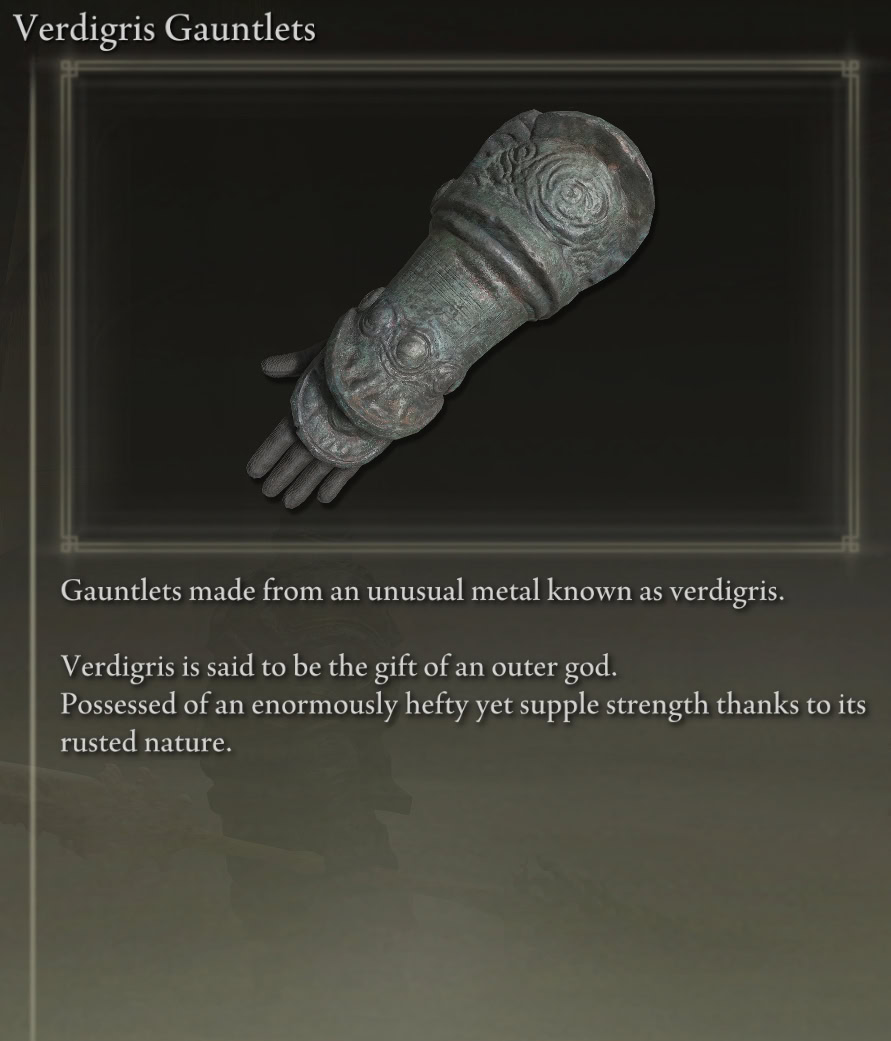
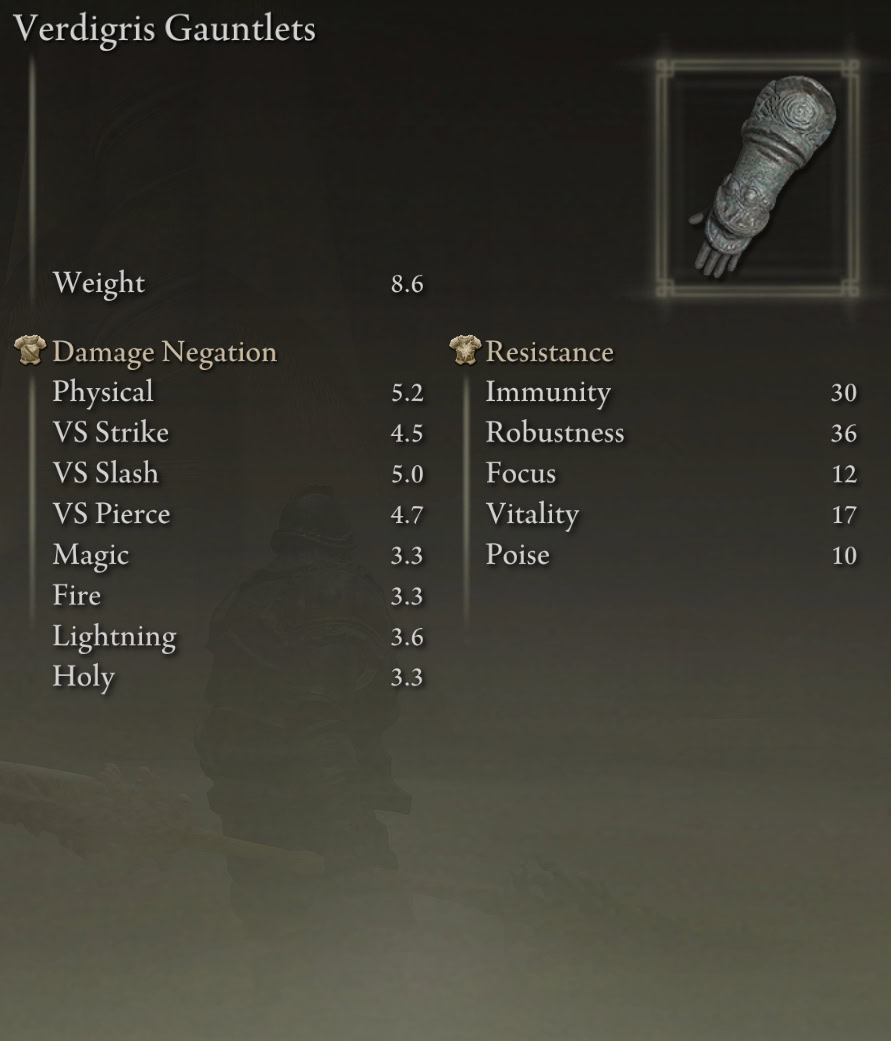
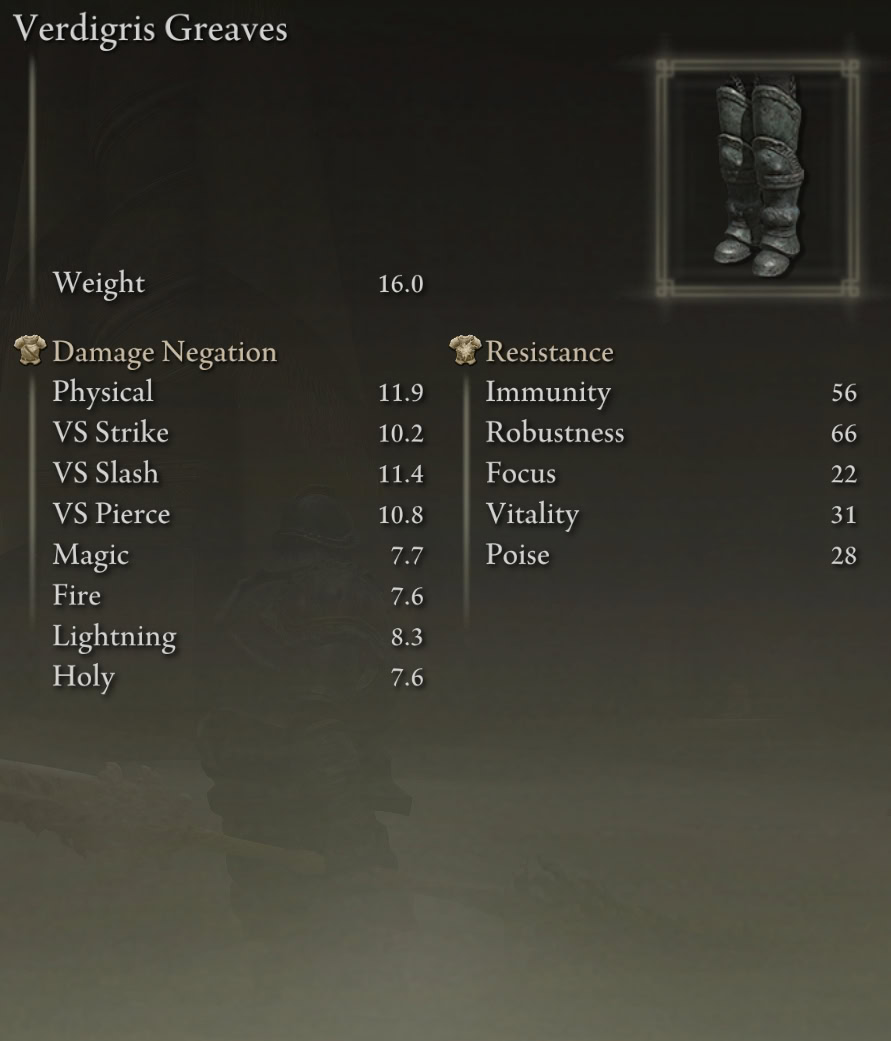
Verdigris Armor Set Stats
The Verdigris Armor Set is reiminiscent of the Havel Knight armor from the Dark Souls series. It weighs a combined 61.6 units, making it ever so slightly lighter than heaviest set in the game, Bull Goat.

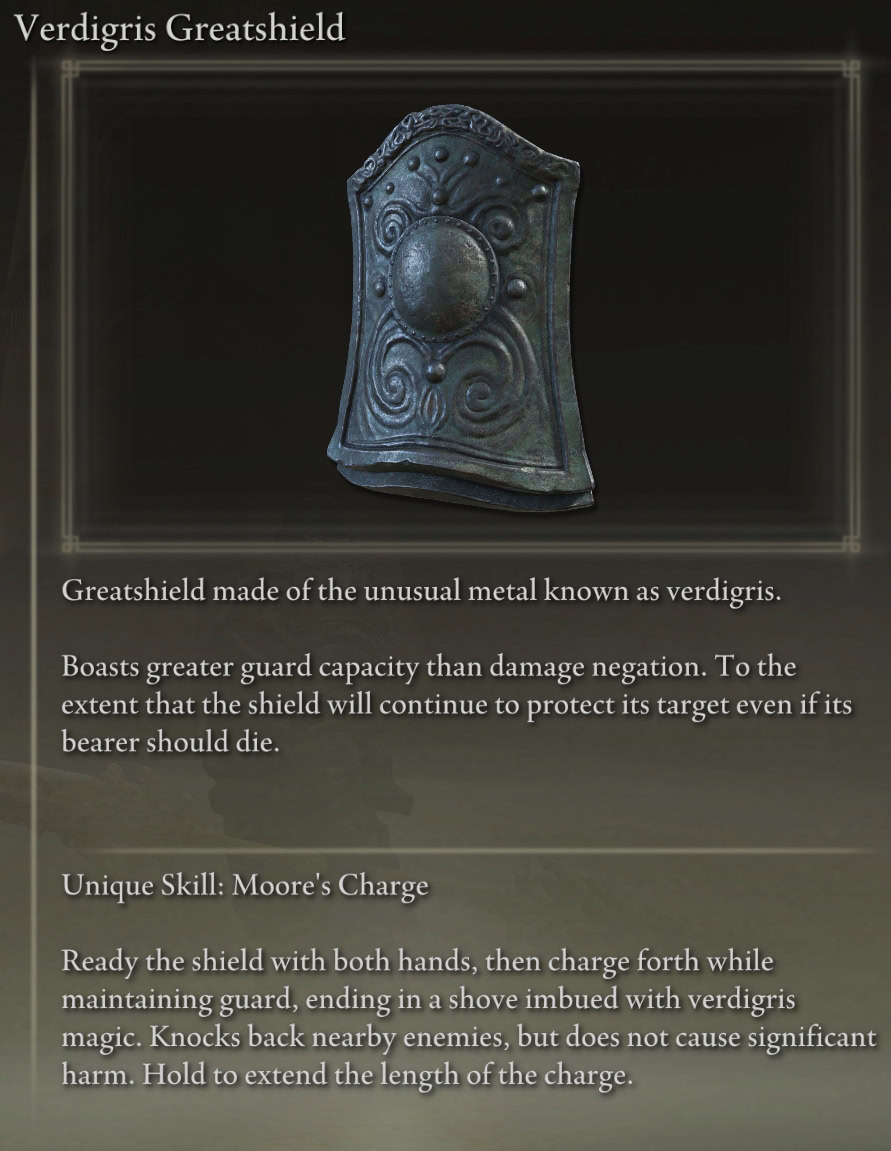
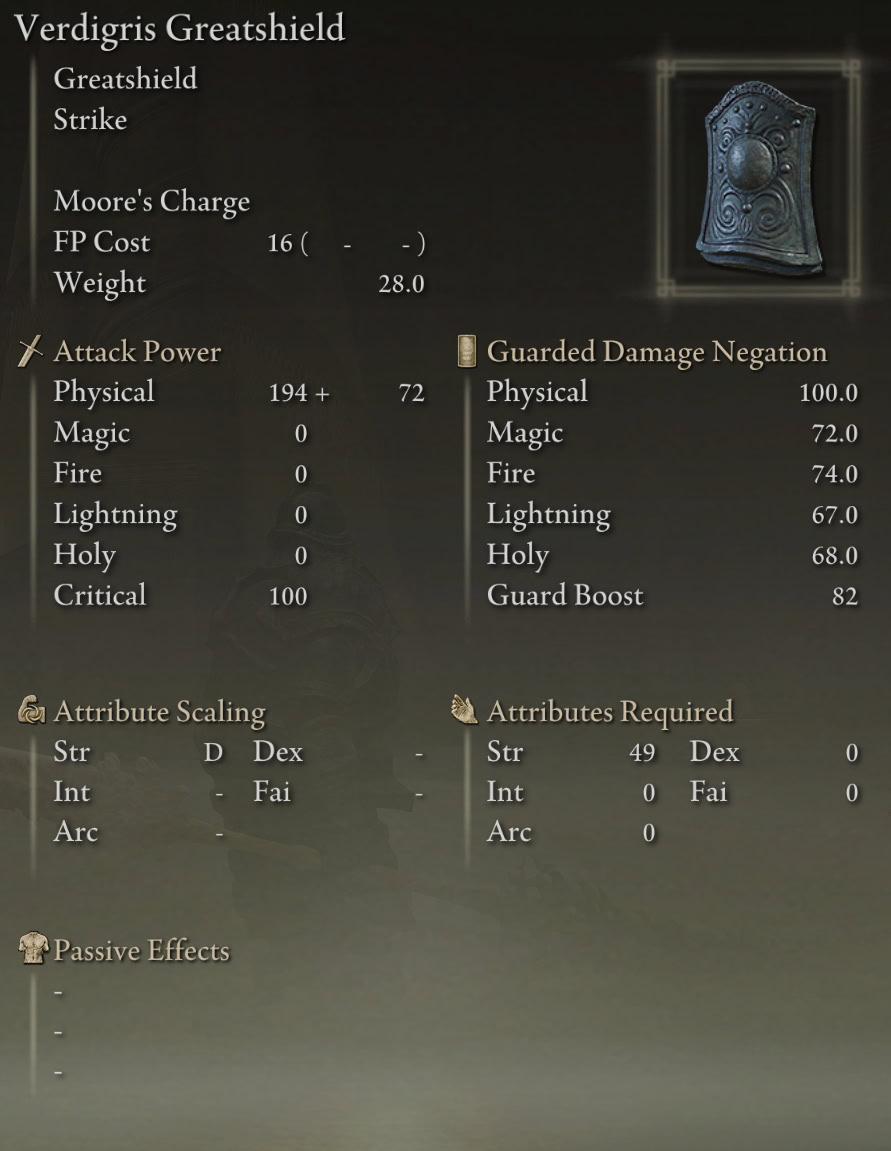
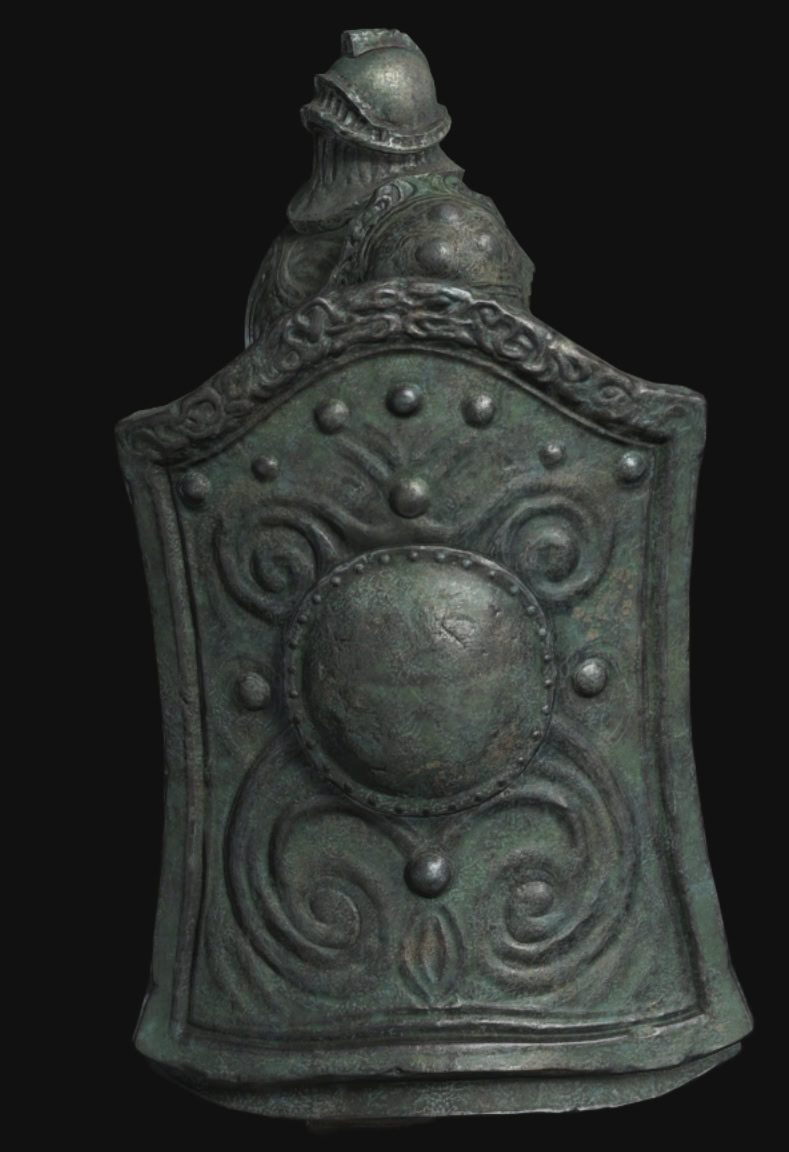
Verdigris Greatshield Stats
Just like the armor set, the Verdigris Greatshield is one of the heaviest greatshields in the game, second only to the Fingerprint Stone Shield. The mitigation stats are substantially worse given it’s only lighter by 1, but it has a Unique Skill: Moore’s Charge.
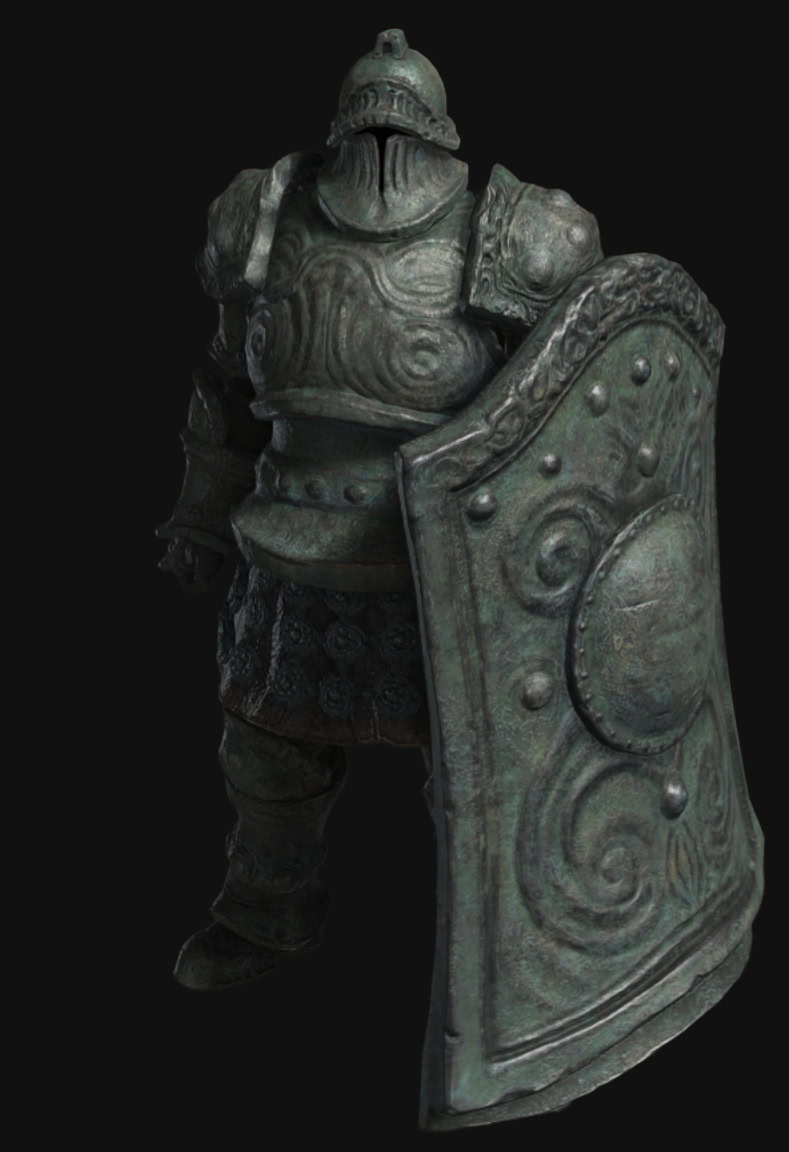
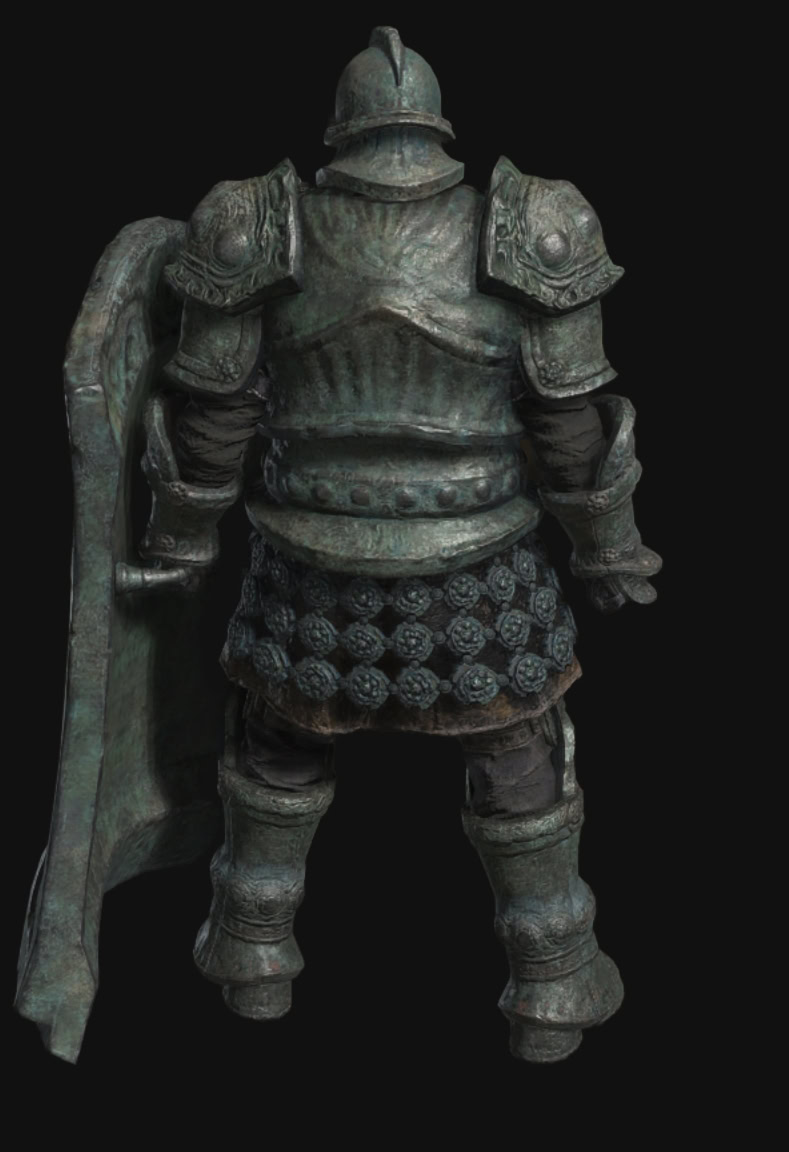
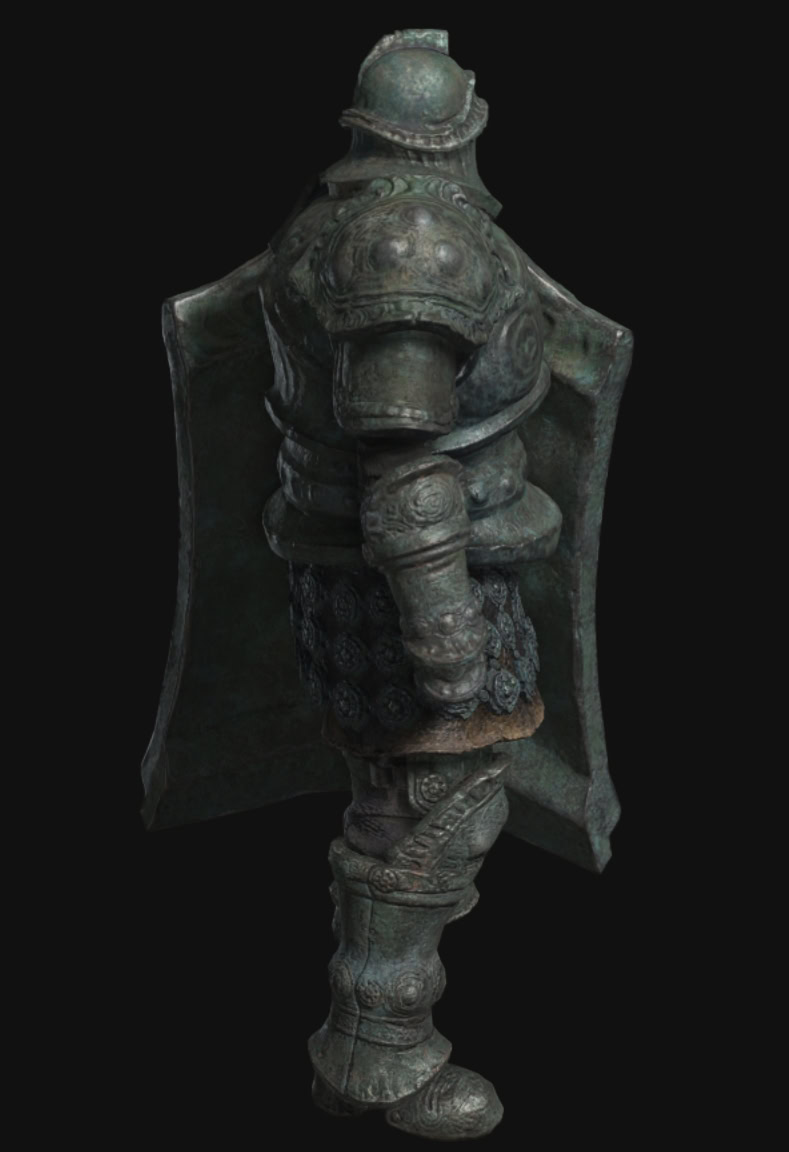
Verdigris Armor Set and Greatshield Preview
Verdigris Discus Talisman Location
You don’t loot it from Moore, but there’s talisman as part of the set as well, the Verdigris Discus. It acts opposite the Blue Dancer Charm to increase your Damage Negation the higher your total Equip Load is.
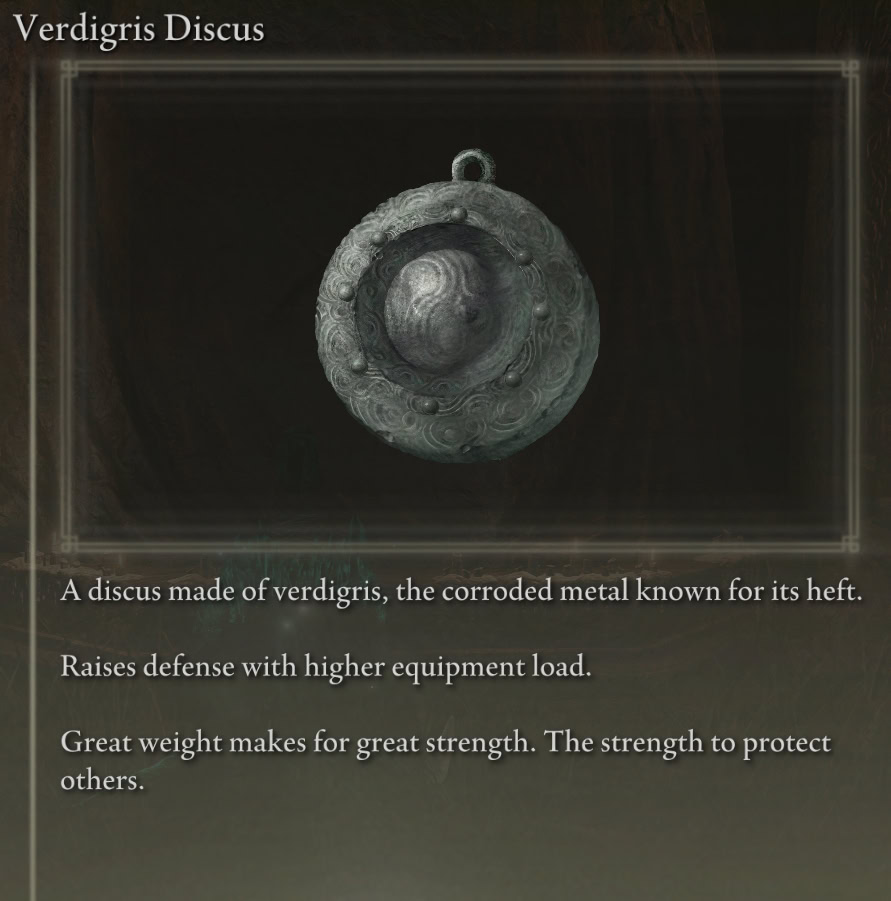
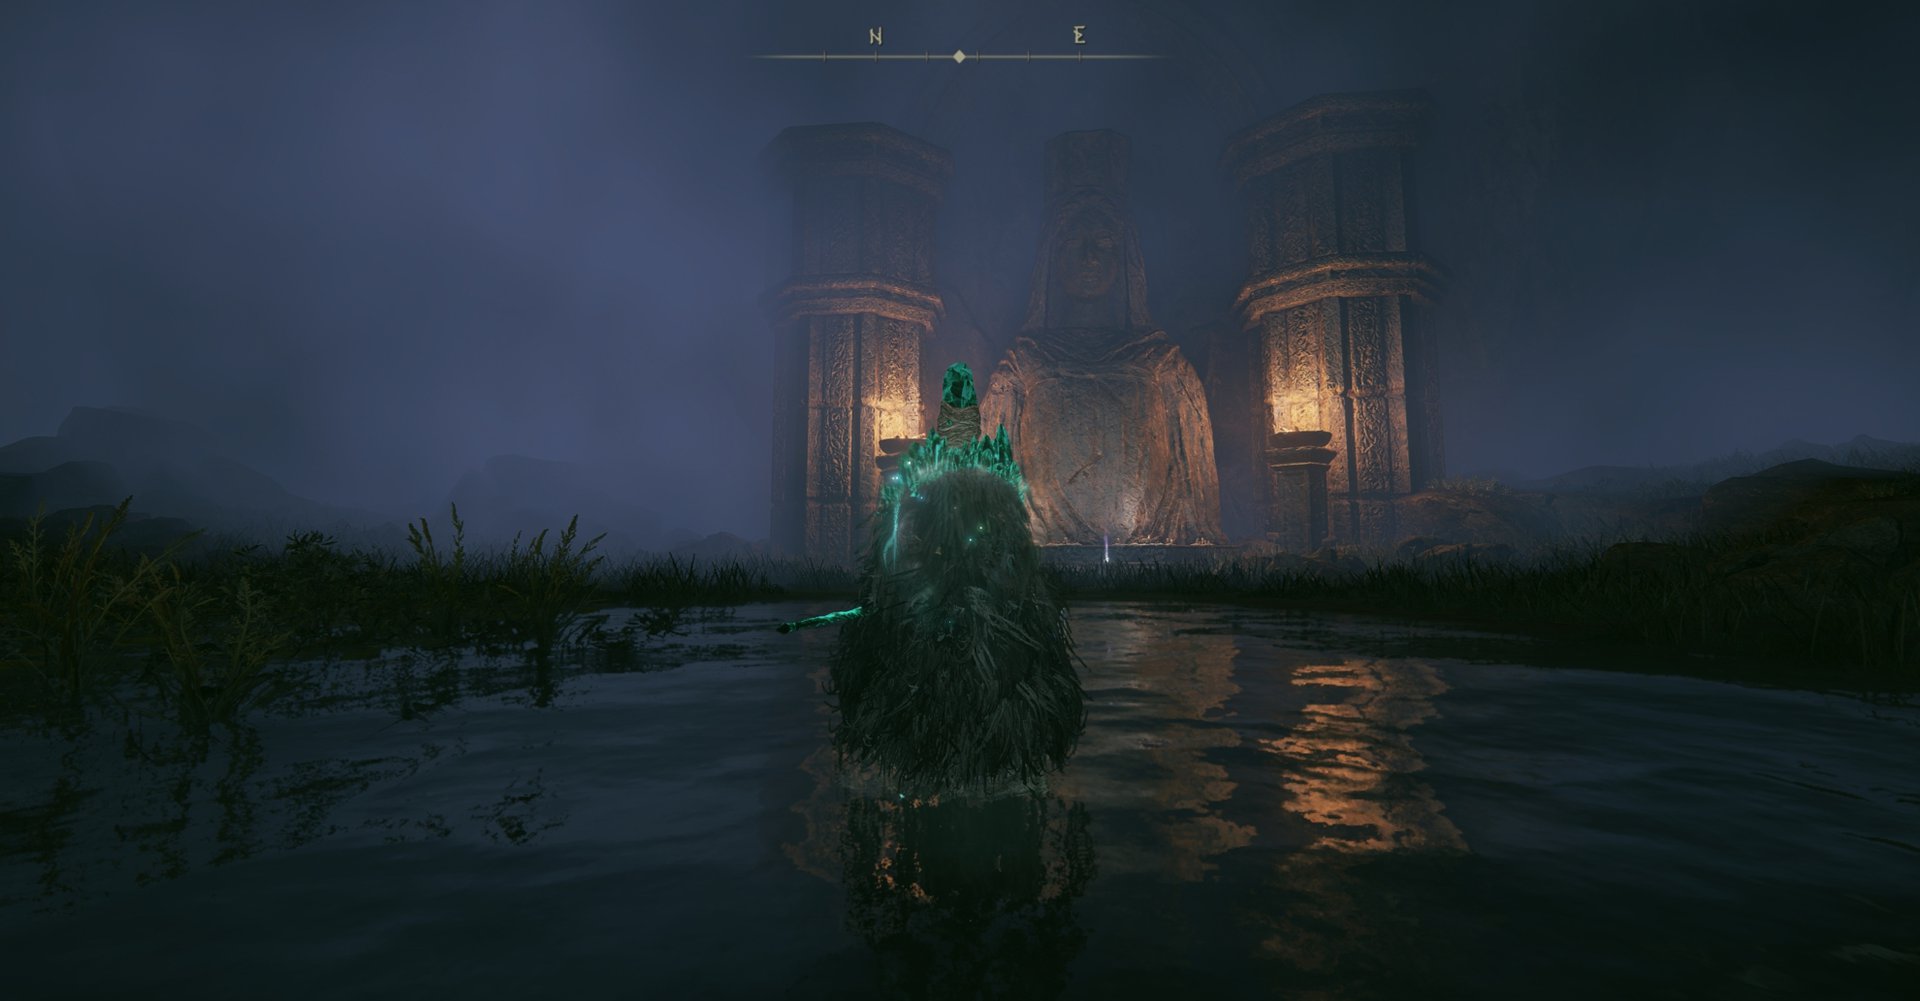
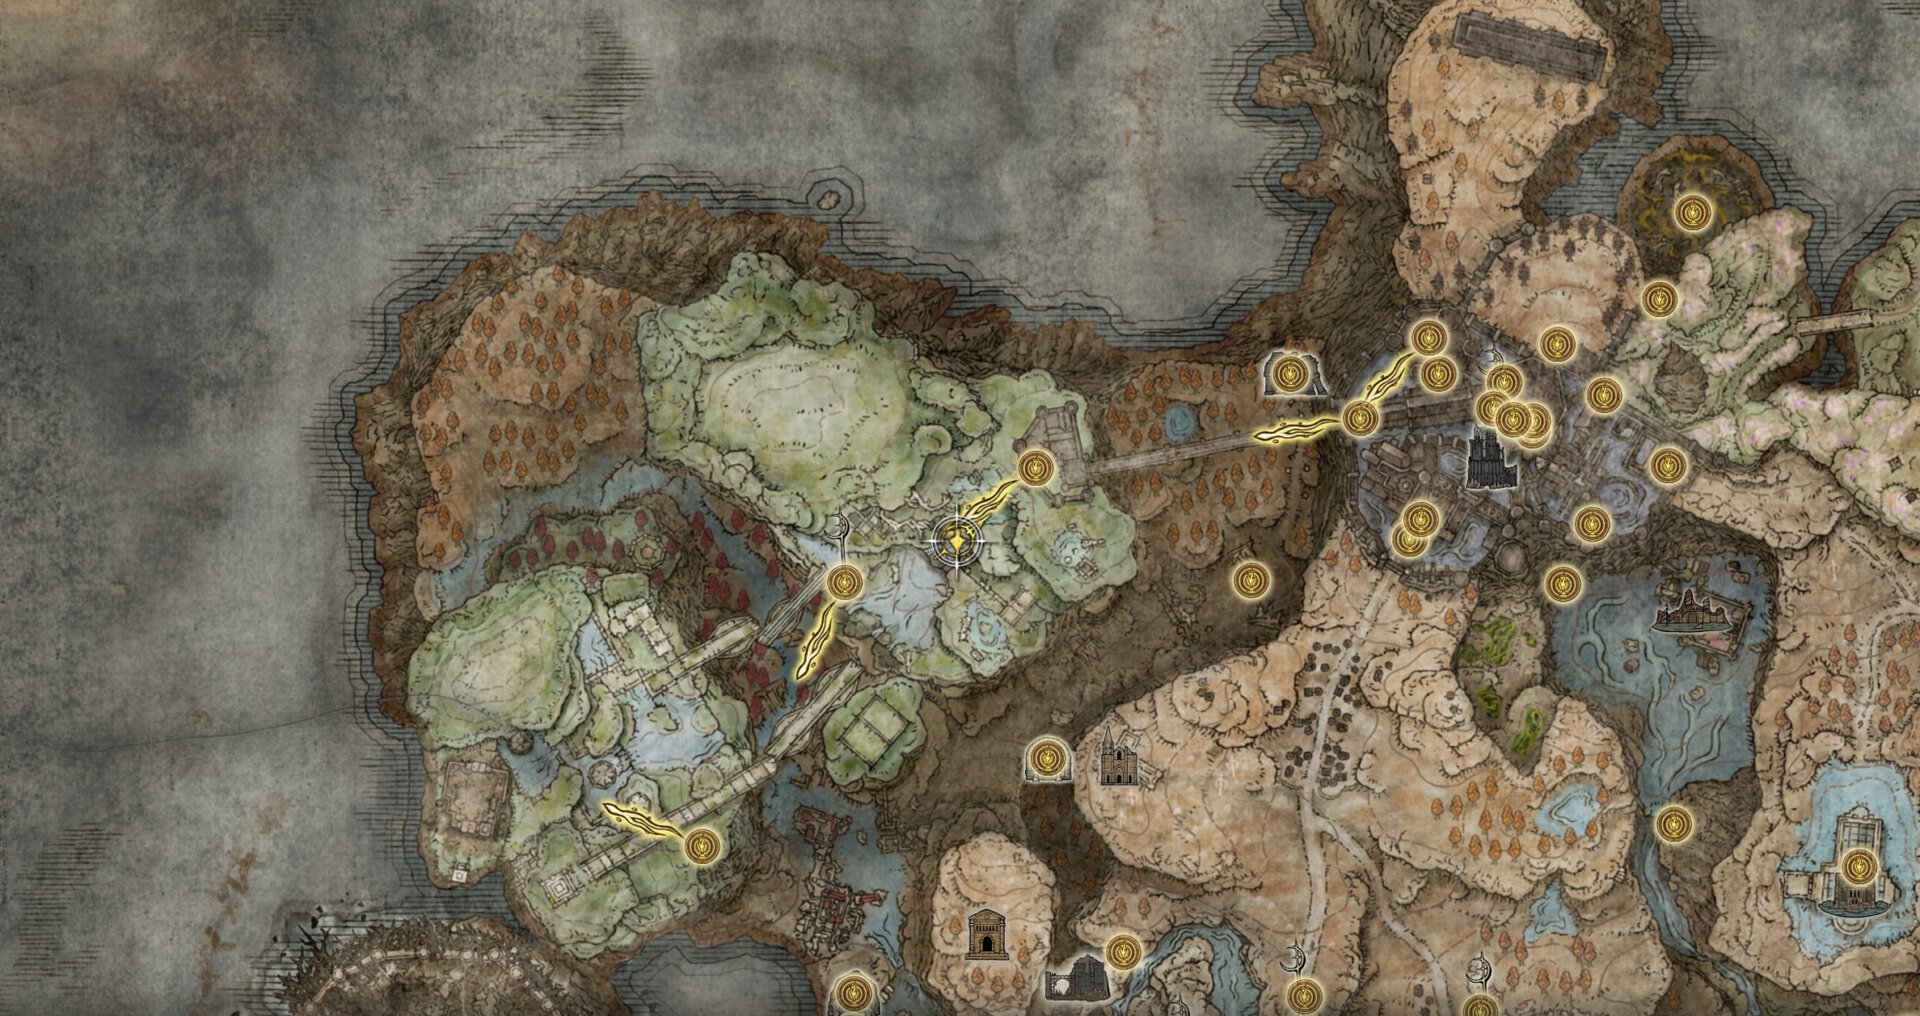
You can procure the Verdigris Discus from an isolated area at Rauh Ruins, accessible via the Castle Ensis Belfry.
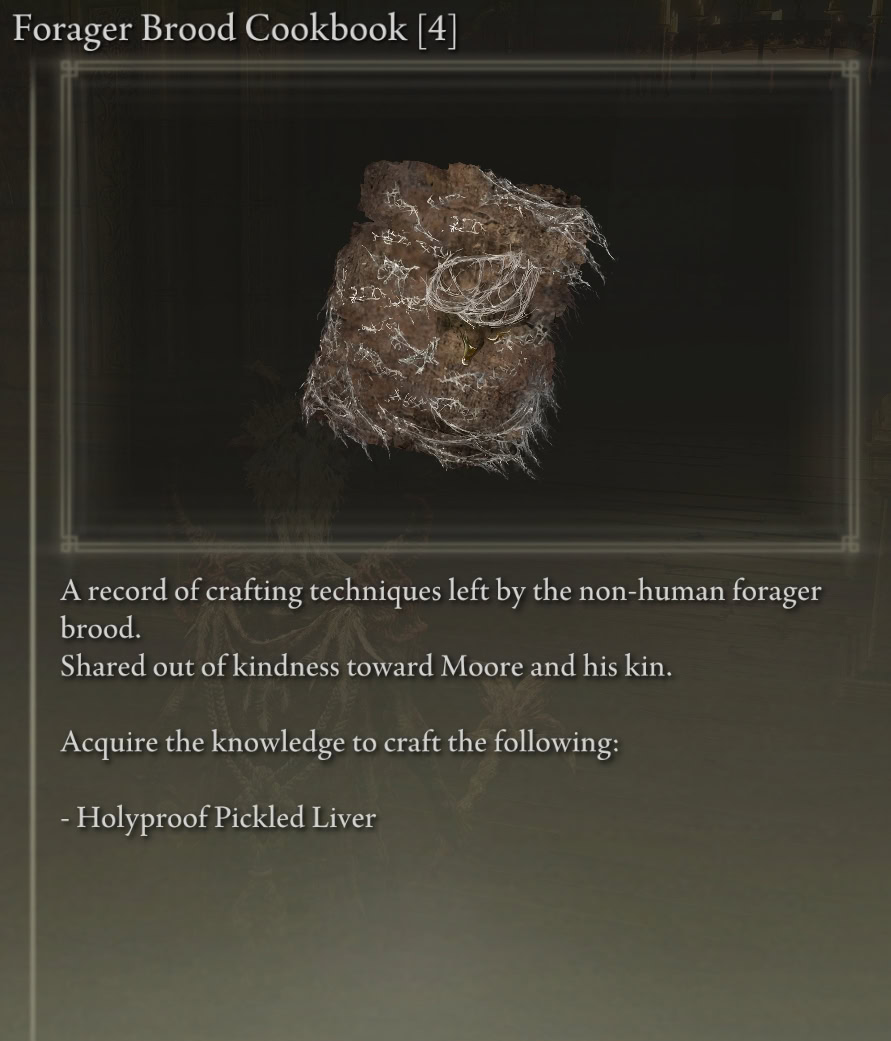
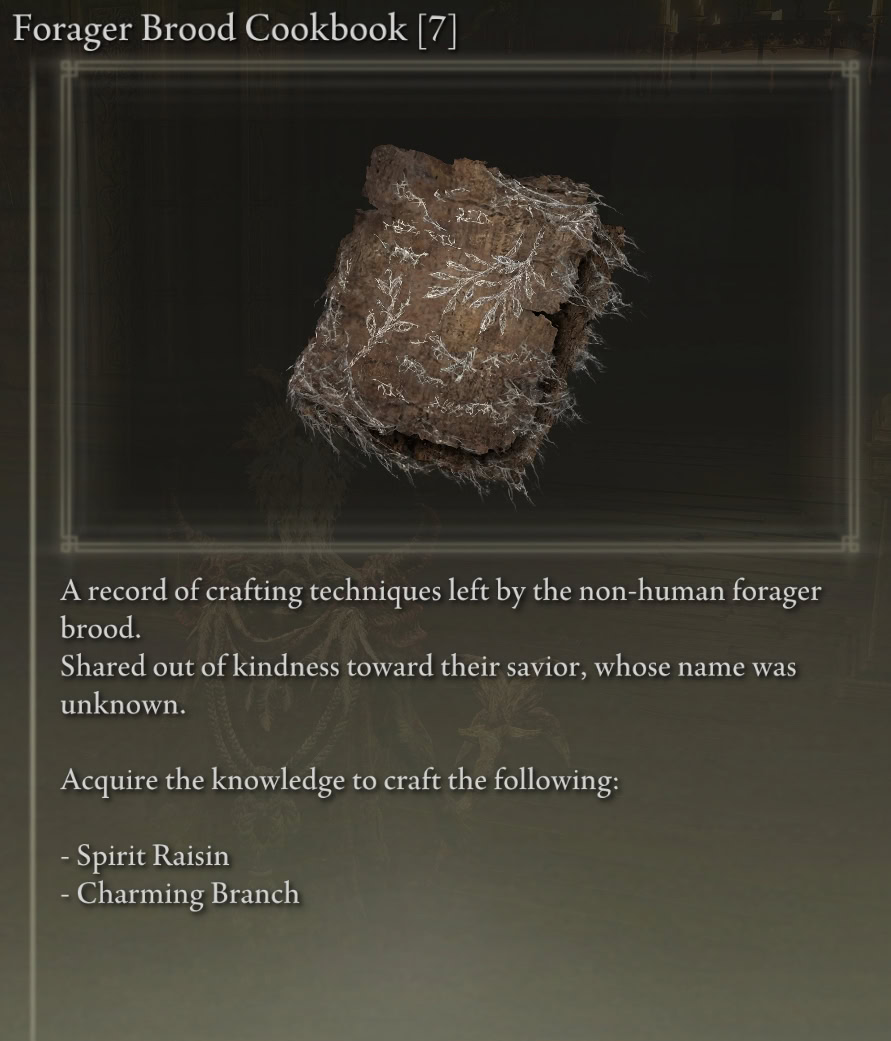
Forager Brood’s Cookbooks 4 and 7 Locations
There are a pair of Forager Brood’s Cookbooks that are specifically related to Moore, specifically Forager Brood’s Cookbook [4] and Forager Brood’s Cookbook [7], which enable you to craft the Holyproof Pickled Liver, Spirit Raisin, and Charming Branch.
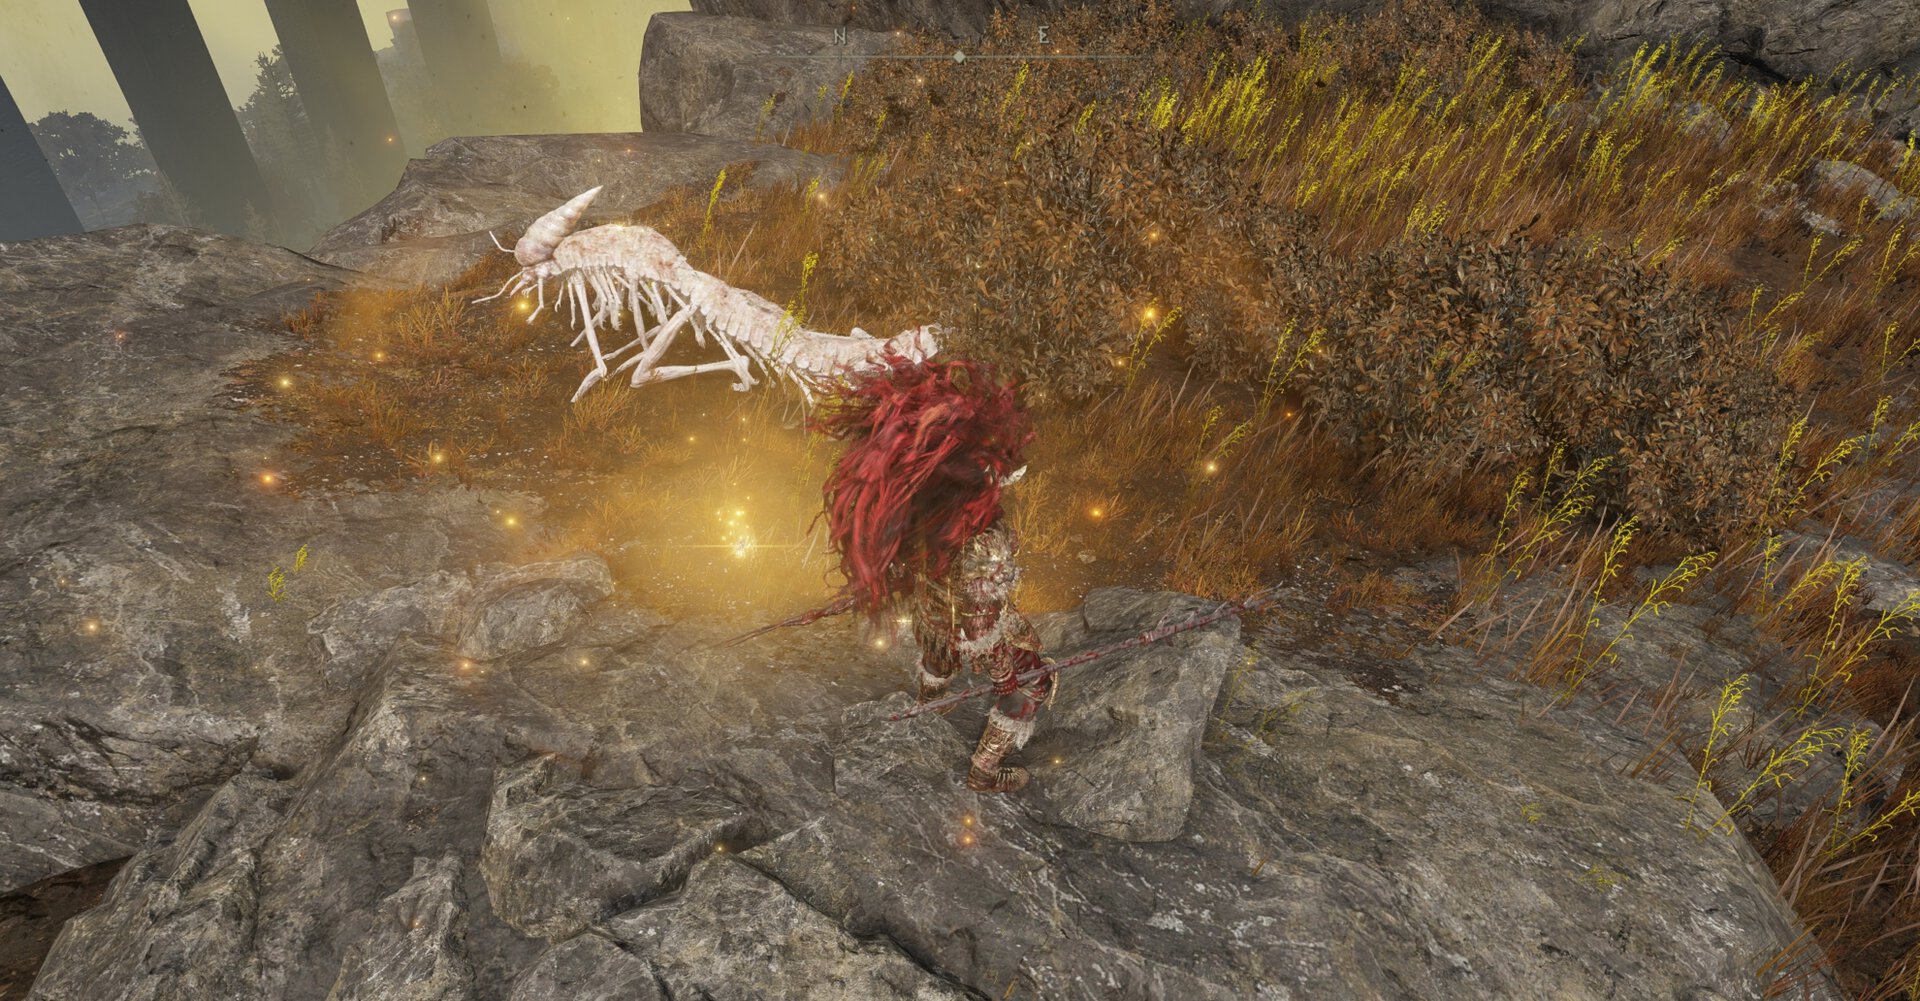
The Forager that would give you Forager Brood’s Cookbook [4] is sick or injured, so you must heal it somehow. Use a Warming Stone, Sunwarmth Stone, or Incantation that heals allies. Once it’s gotten up and begins foraging again, reload the area and speak with it to get the book.

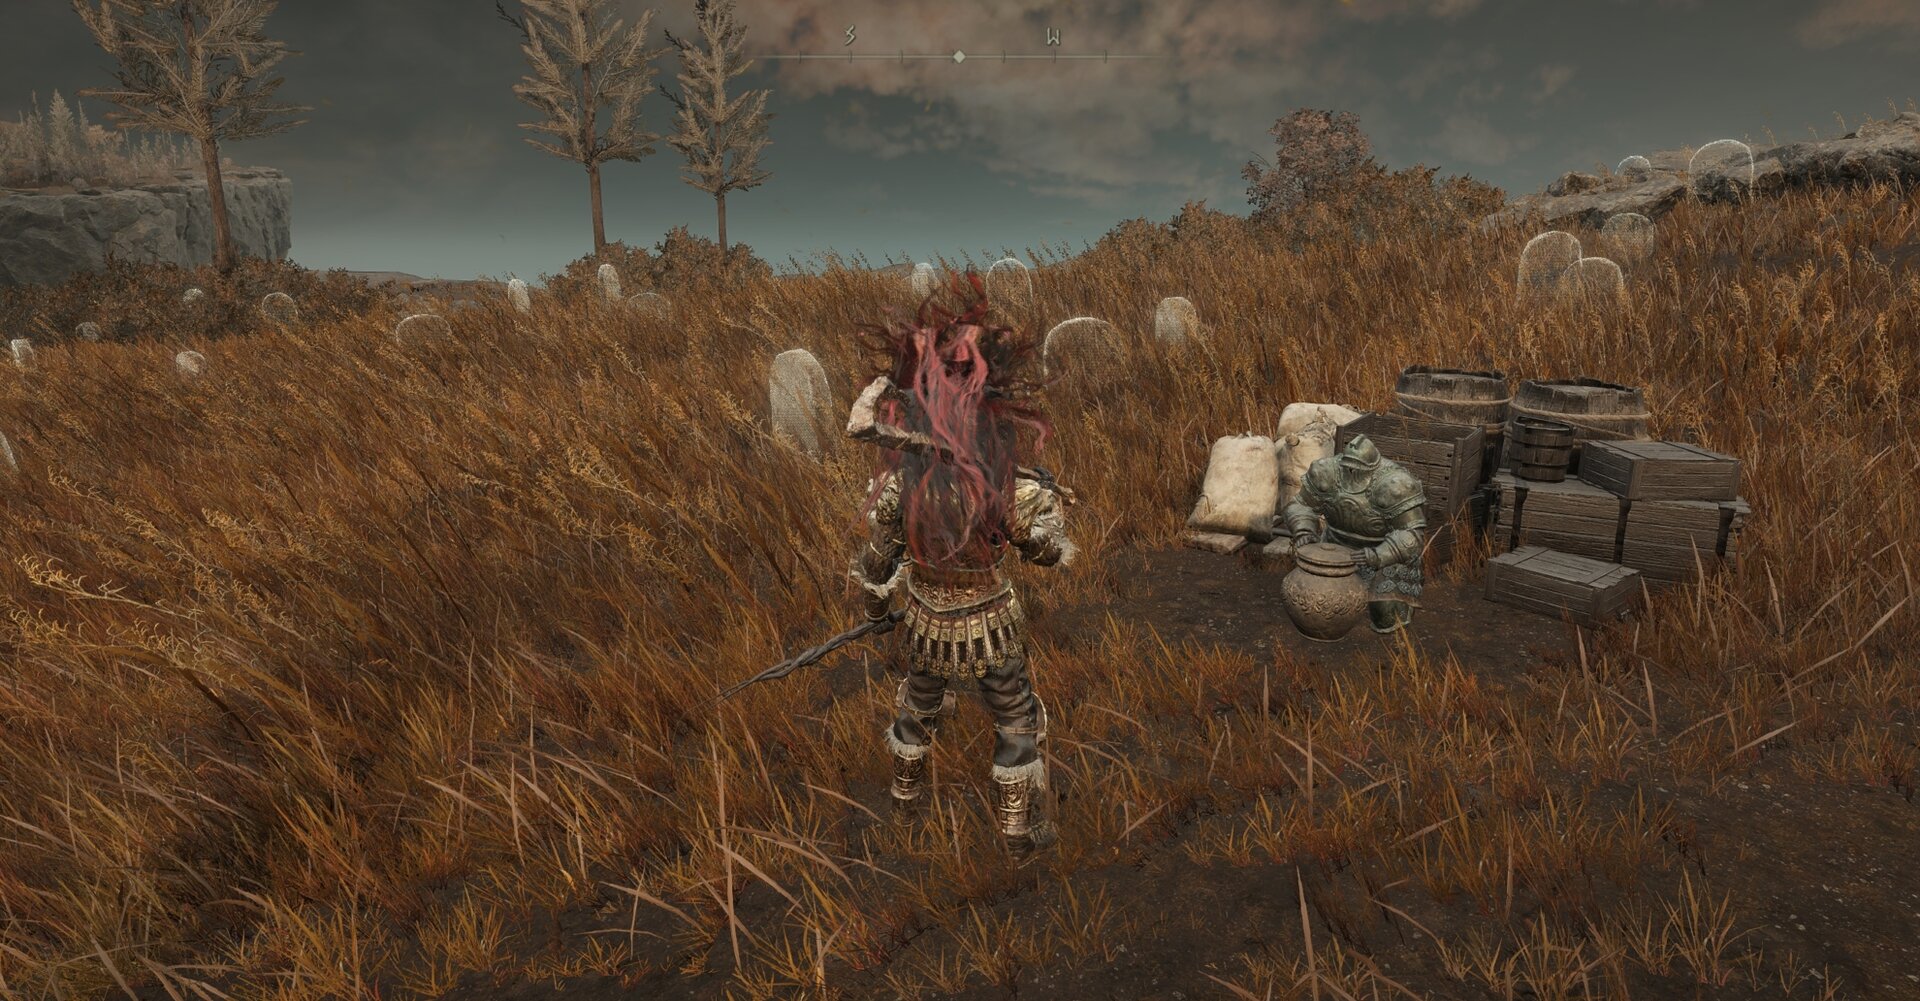
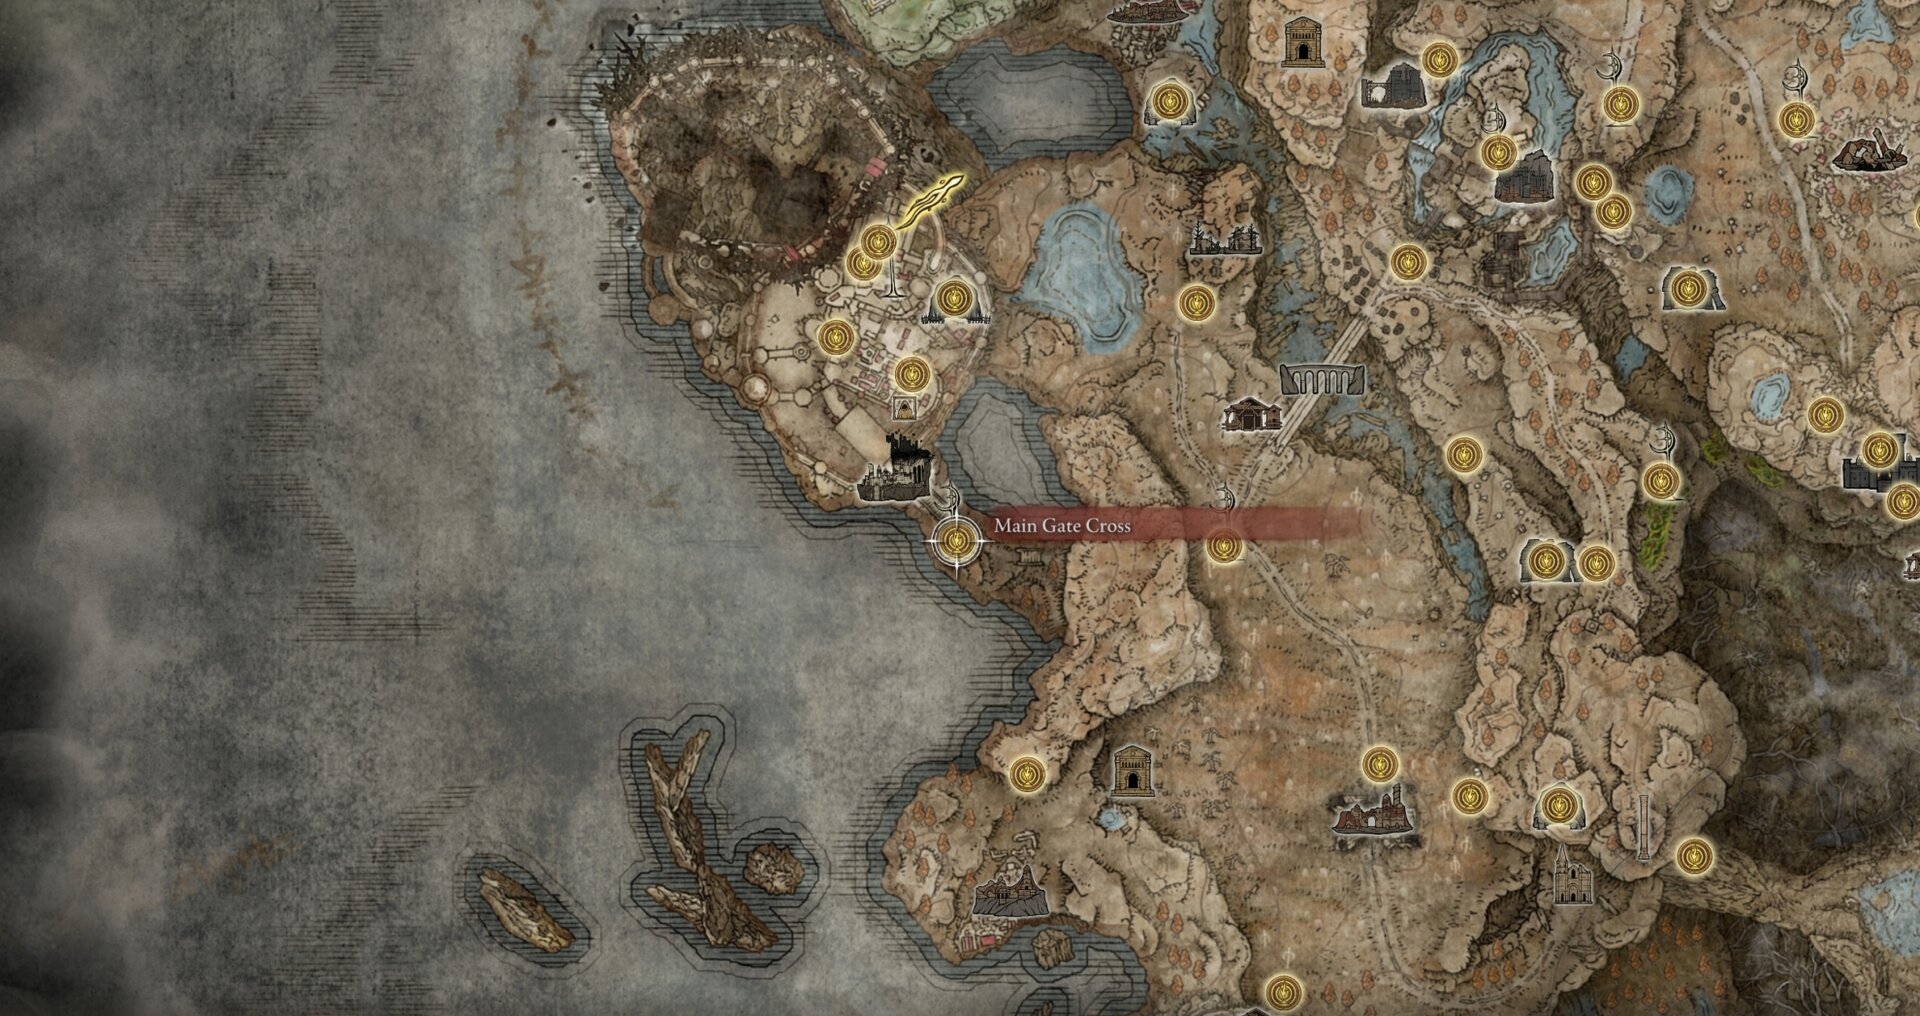
Speak to Moore at the Main Gate Cross in front of Belurat, Tower Settlement, after helping this Forager and Moore will give you Forager Brood’s Cookbook [7].
How to get Moore’s Bell-Bearing, Verdigris Armor, Greatshield
You can loot Moore’s Verdigris Armor, Greatshield, and Bell Bearing from his corpse, whenever that happens. Once Moore dies, all of the other Foragers will disappear, locking you out of getting the other Forager Broods’ Cookbooks and Black Syrup for Thiollier.
Once Miquella’s Great Rune shatters, he will ask you what to do now that the charm is broken. You can say you don’t know and give an answer later.
If you tell him to move on, he will leave and come back to support Needle Knight Leda at the Cleansing Chamber. You can get his stuff after you defeat them.
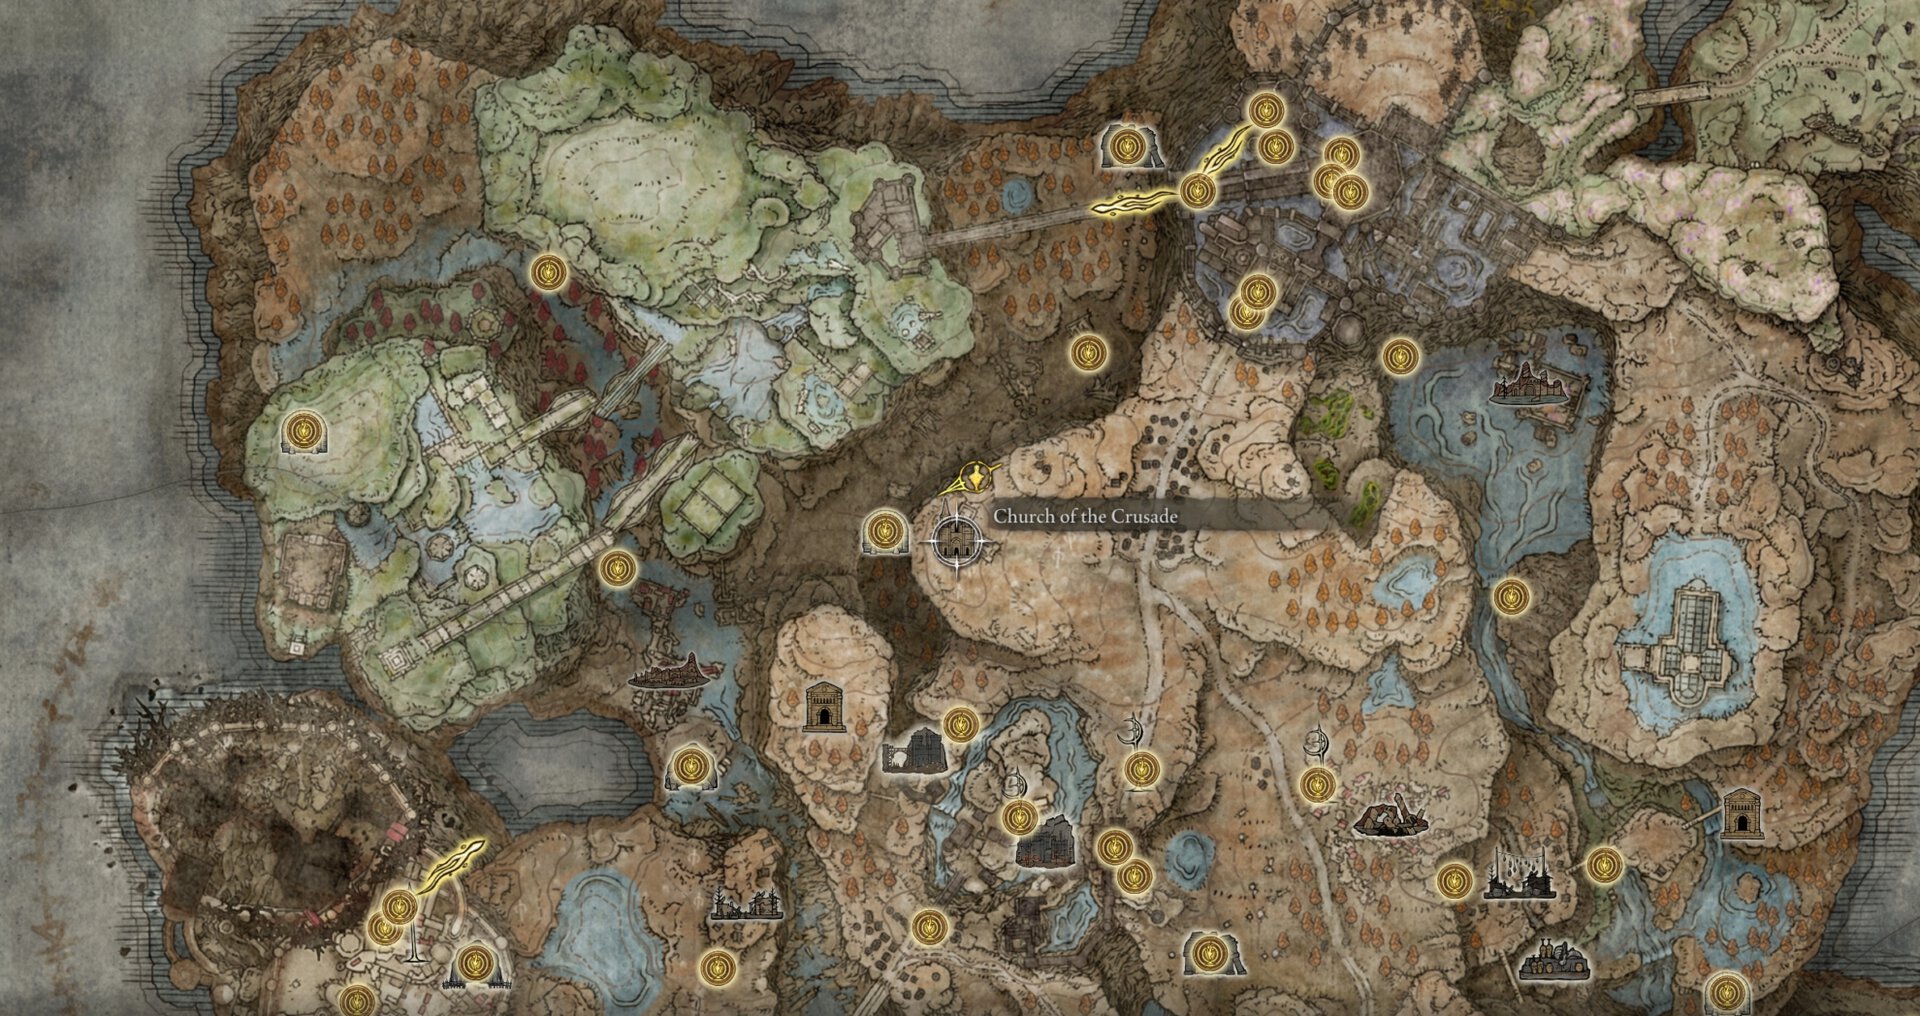
If you tell him to stay sad, Moore will go spoon the Forager to death by the Church of the Crusade on Scadu Altus.
It’s in your best interest to tell him to move on before arriving at the Cleansing Chamber but after you have gotten all the Forager Broods’ Cookbooks.
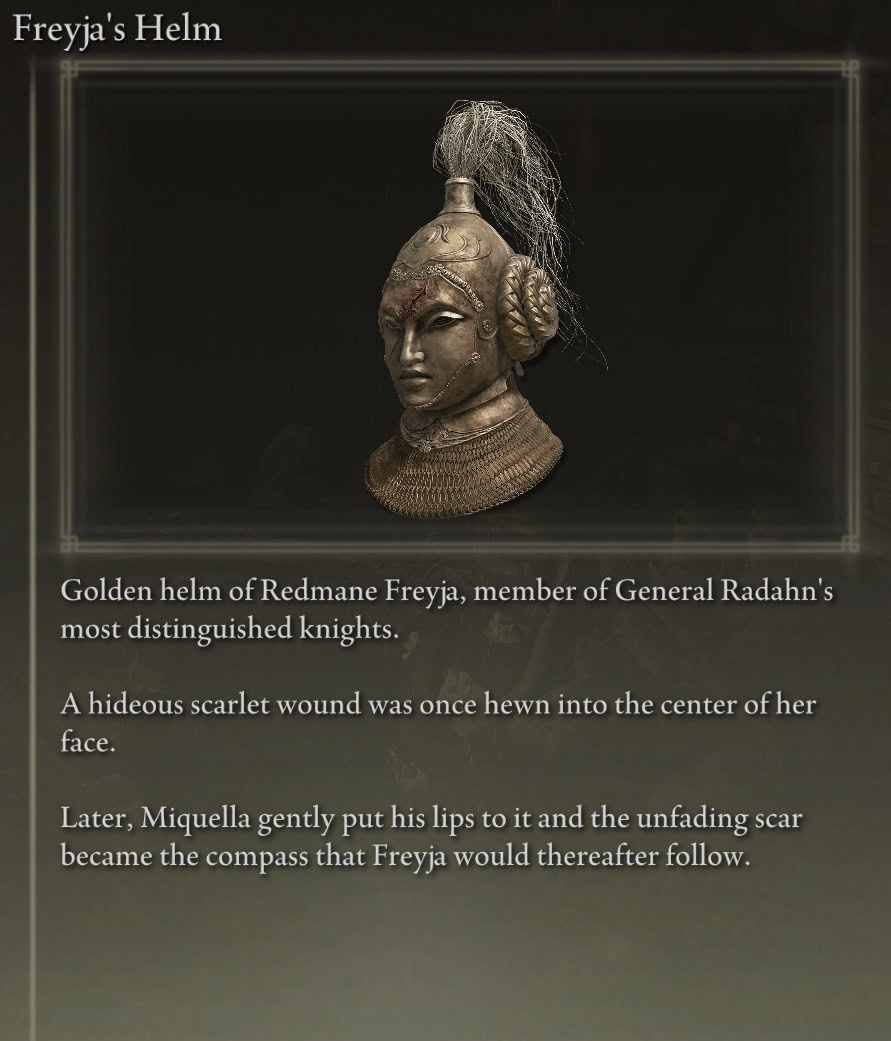
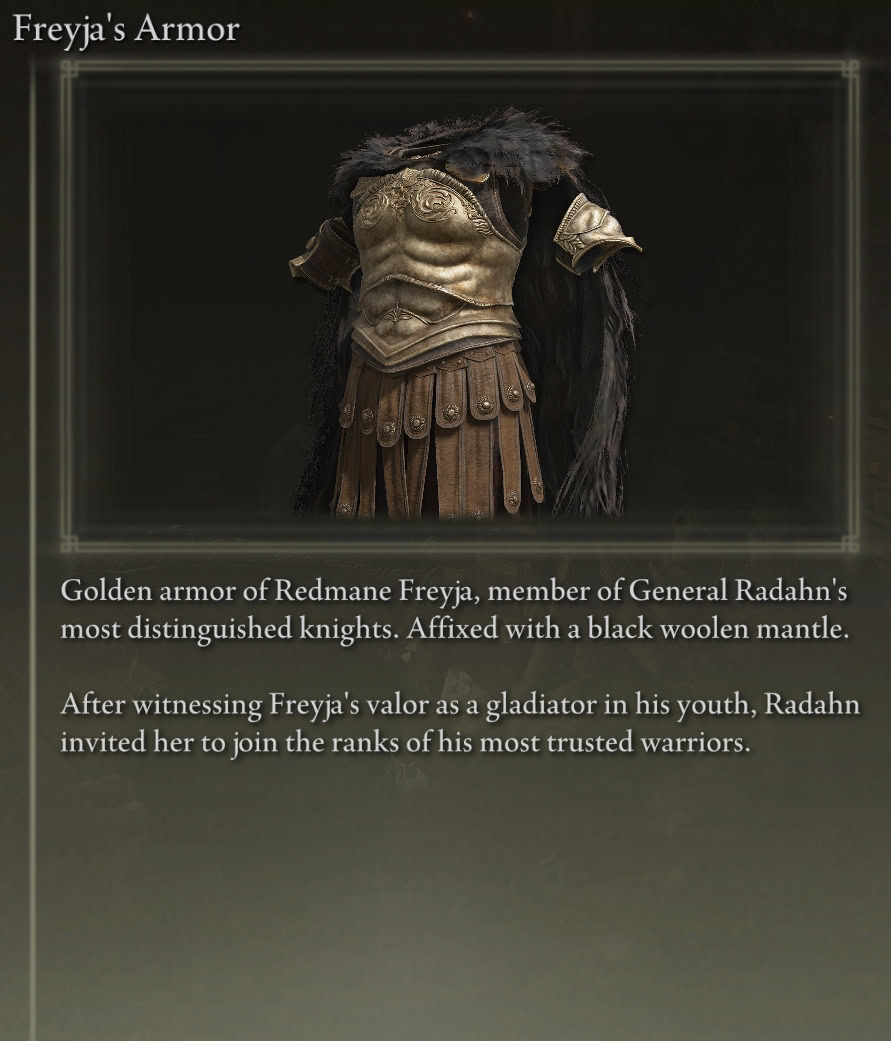
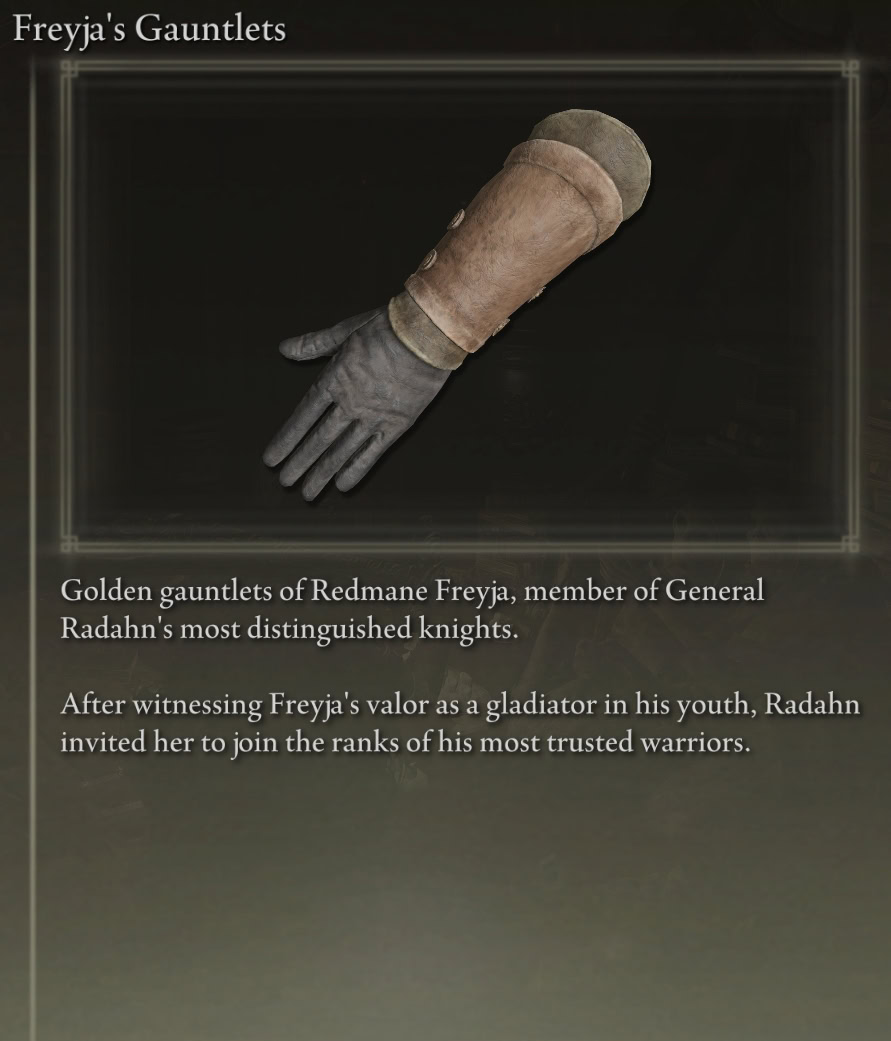
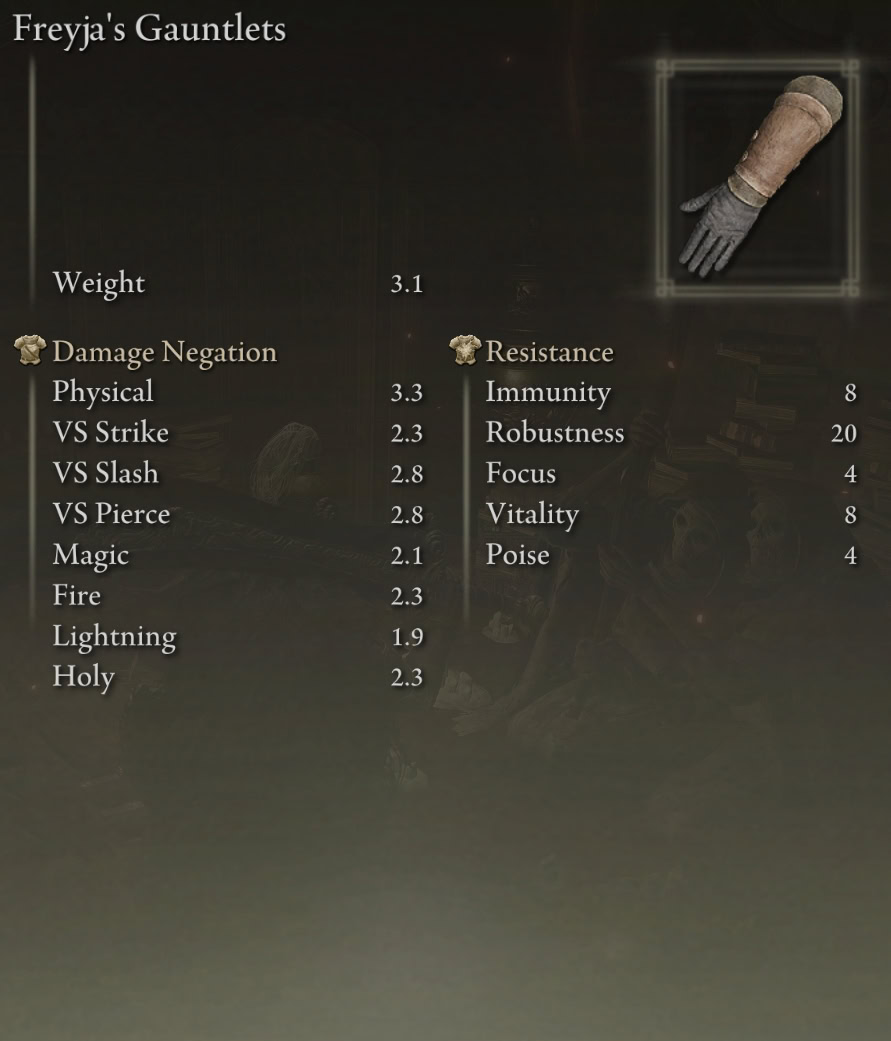
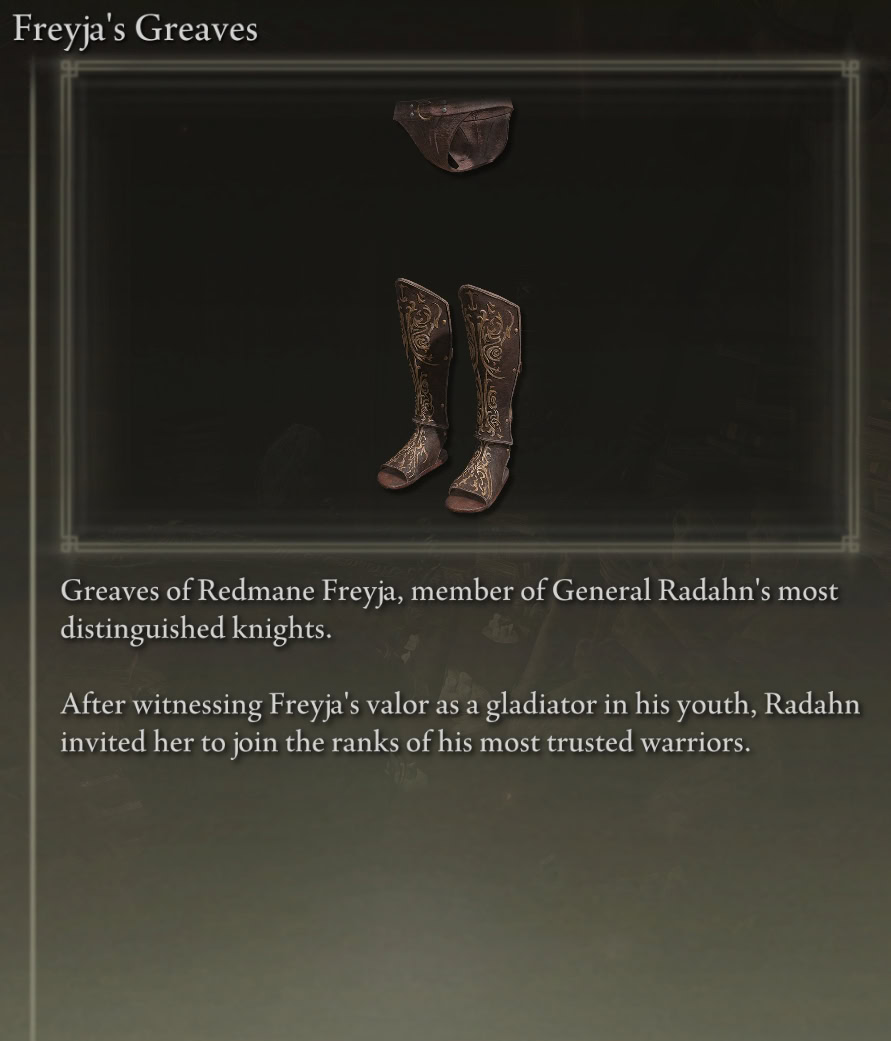
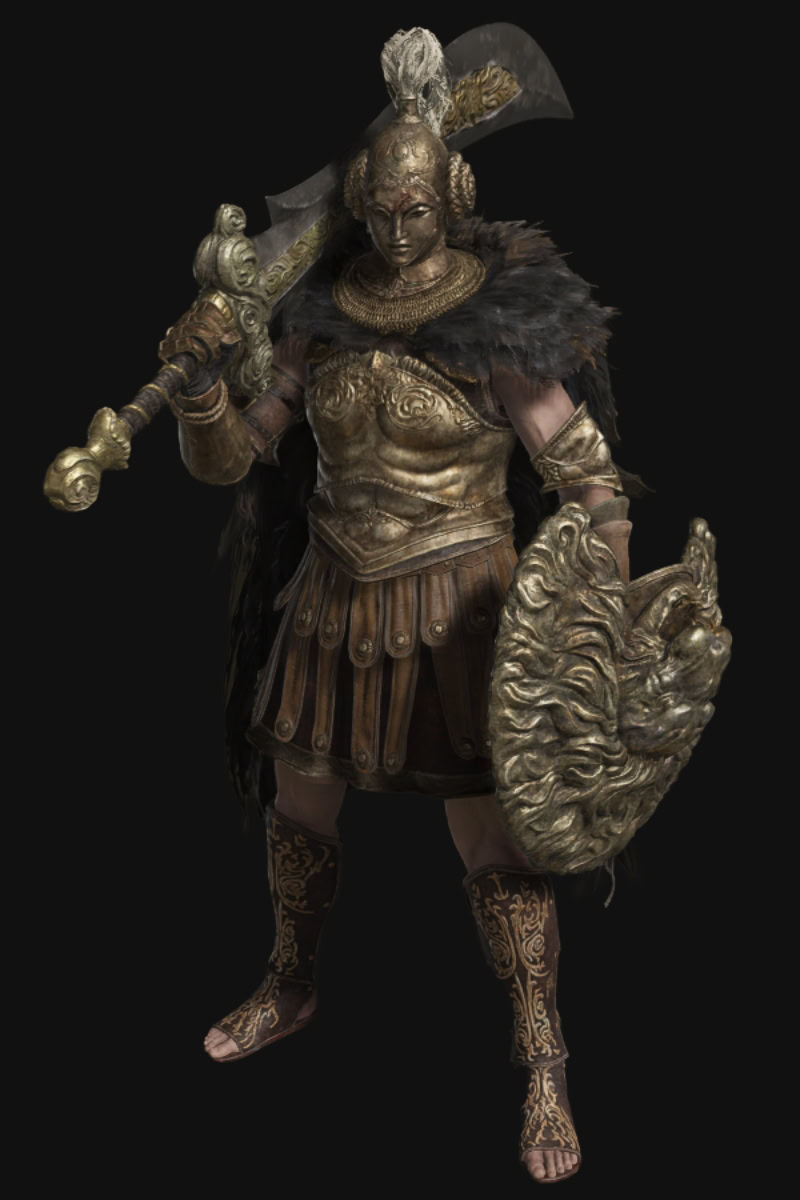
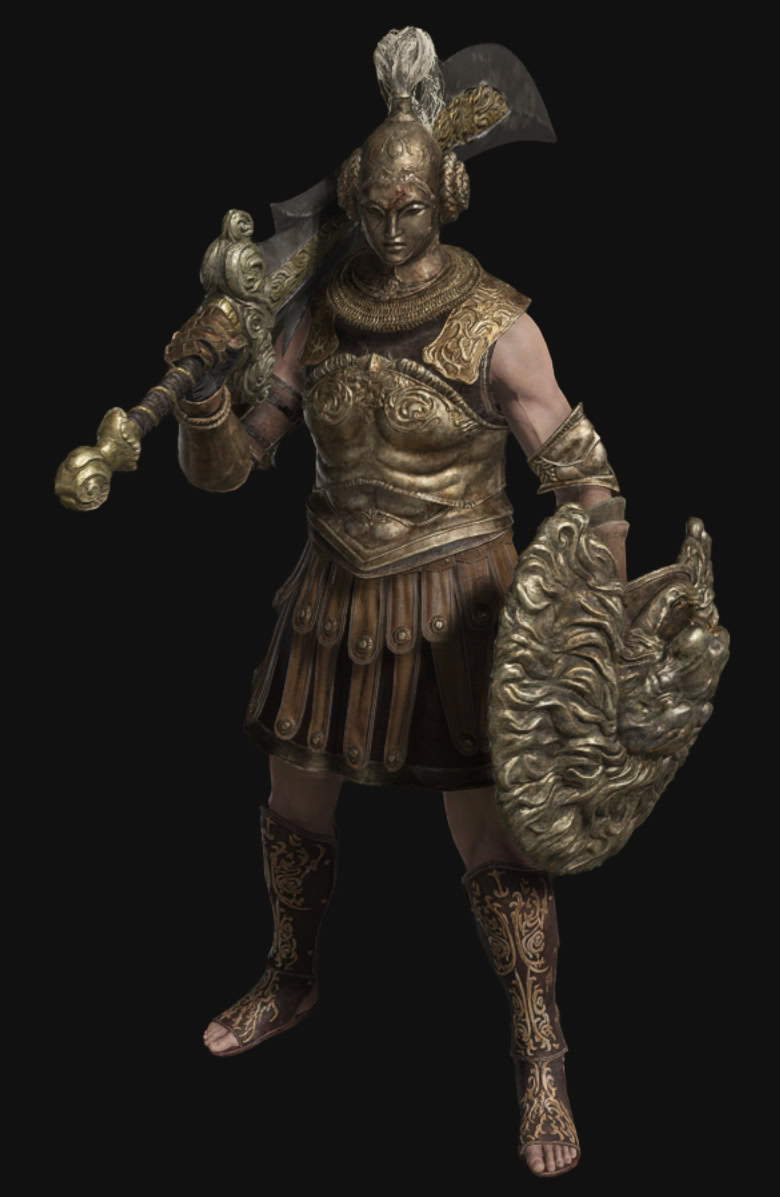
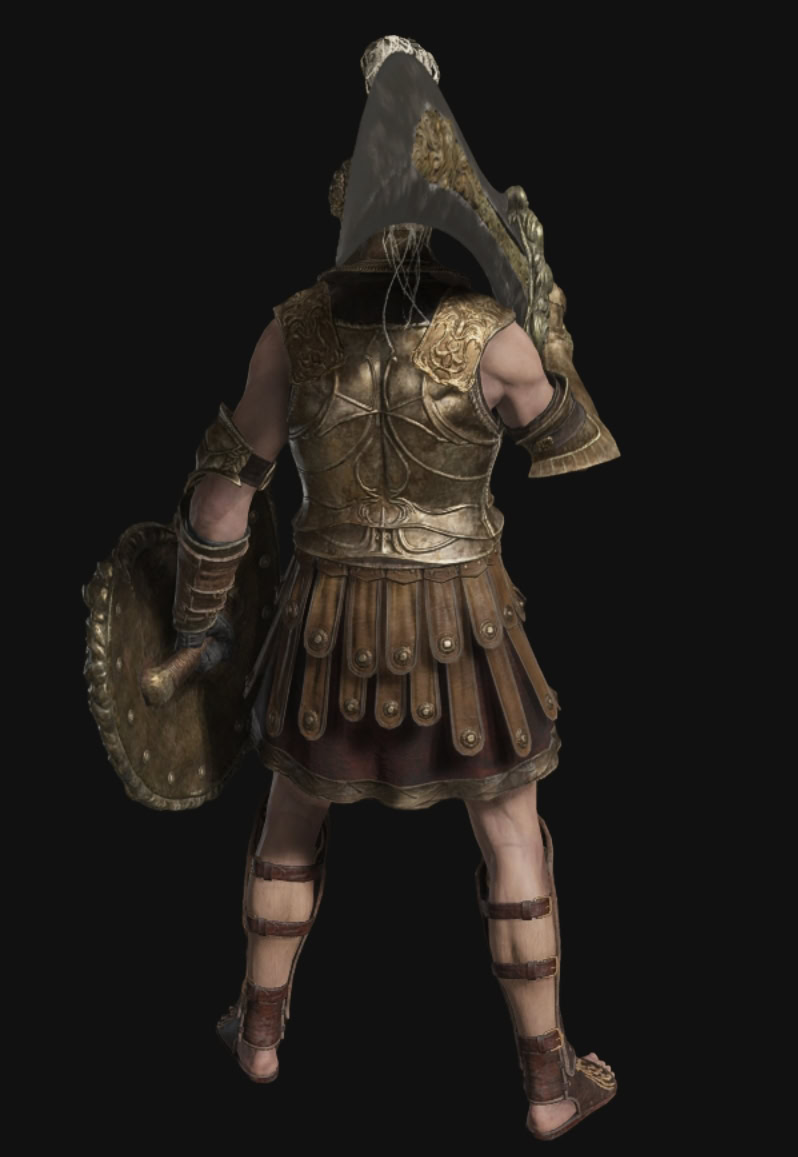
Freyja’s Armor, Greatsword, and Golden Lion Shield
Redmane Freyja has a medium armor set, shield, and curved greatsword.
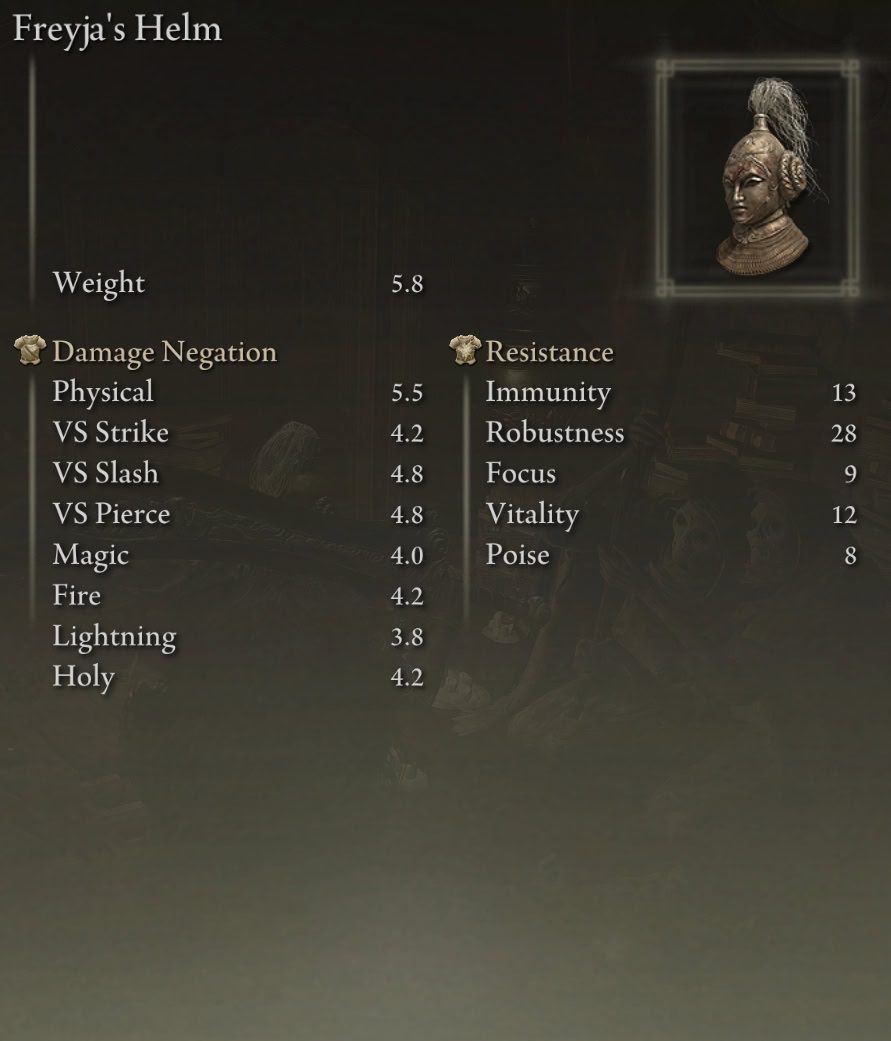
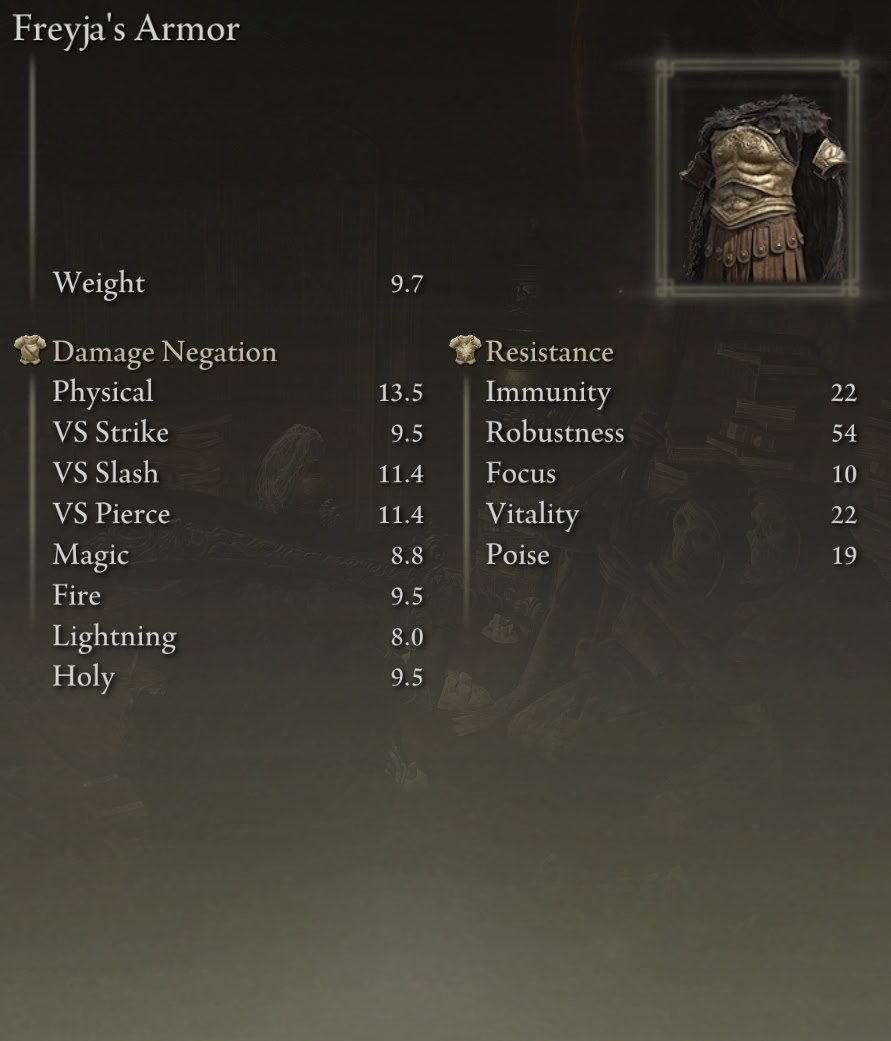
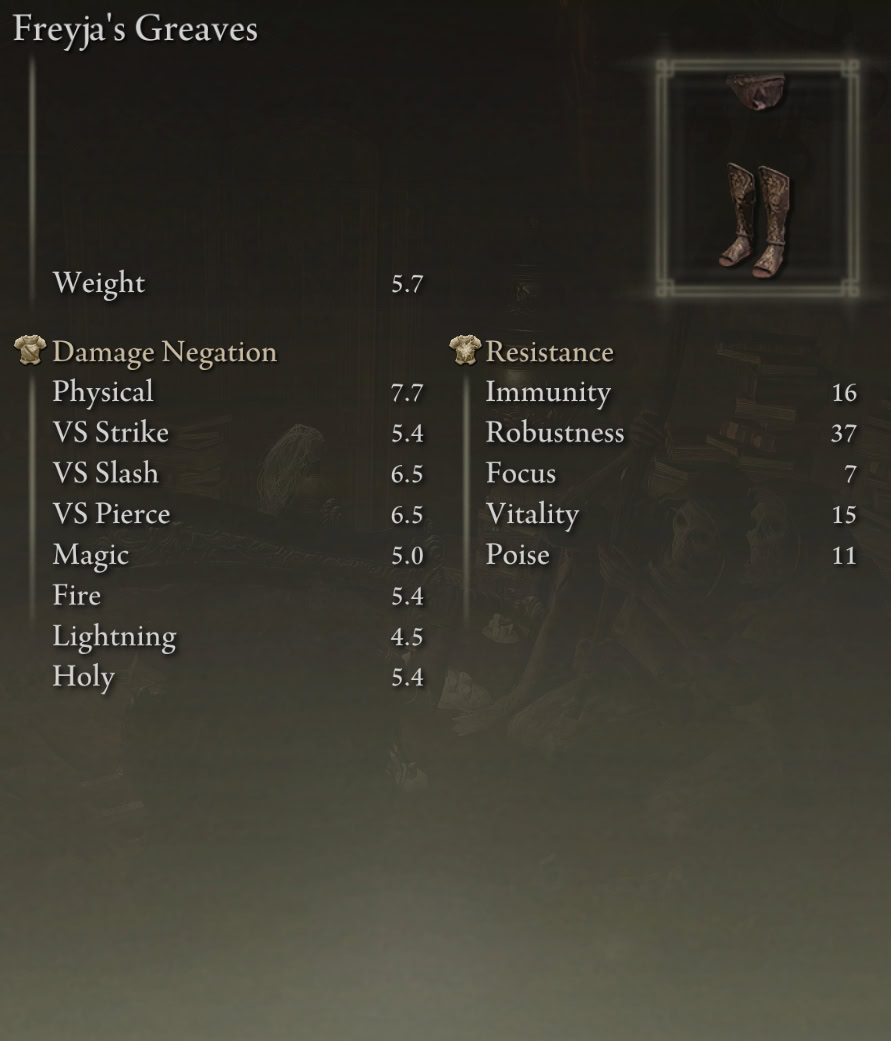
Freyja’s Armor Set Stats
Freyja’s Armor Set has a combined weight of 24.3, placing it in the 5th heaviest weight class alongside all of the other distinguished warrior and nontraditional soldier sets.
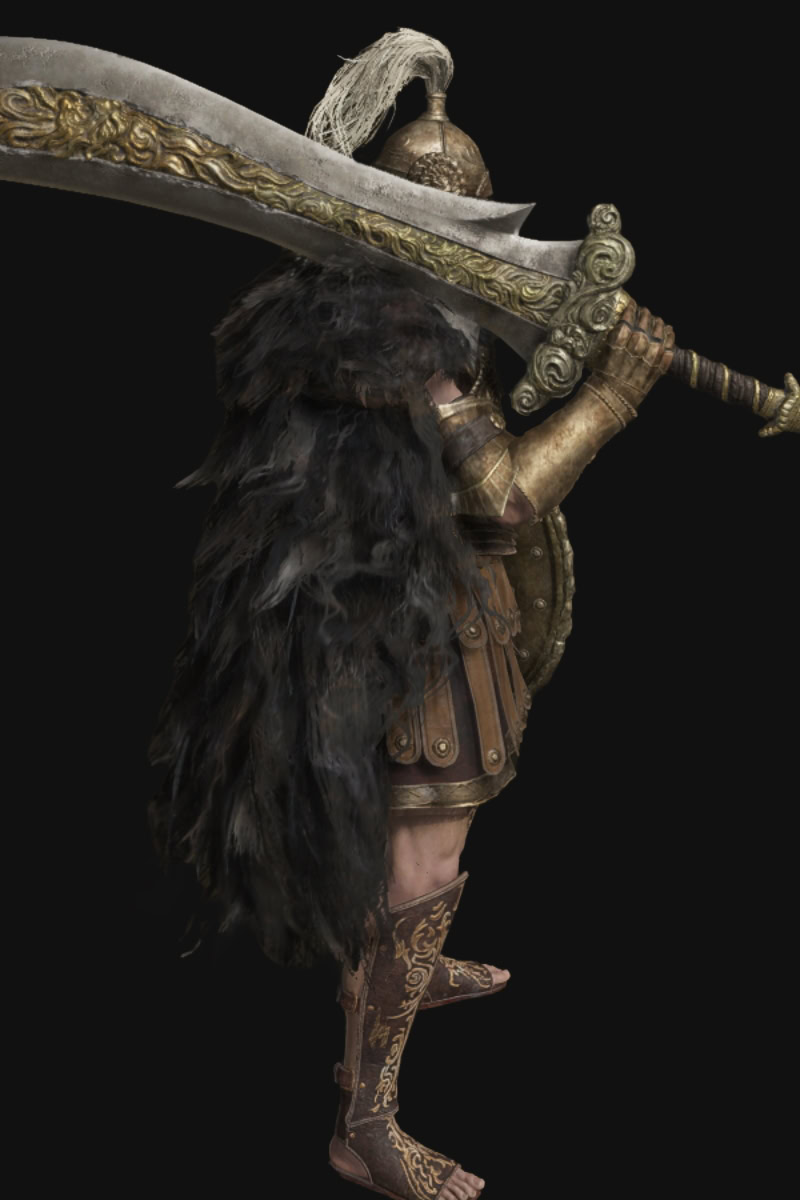
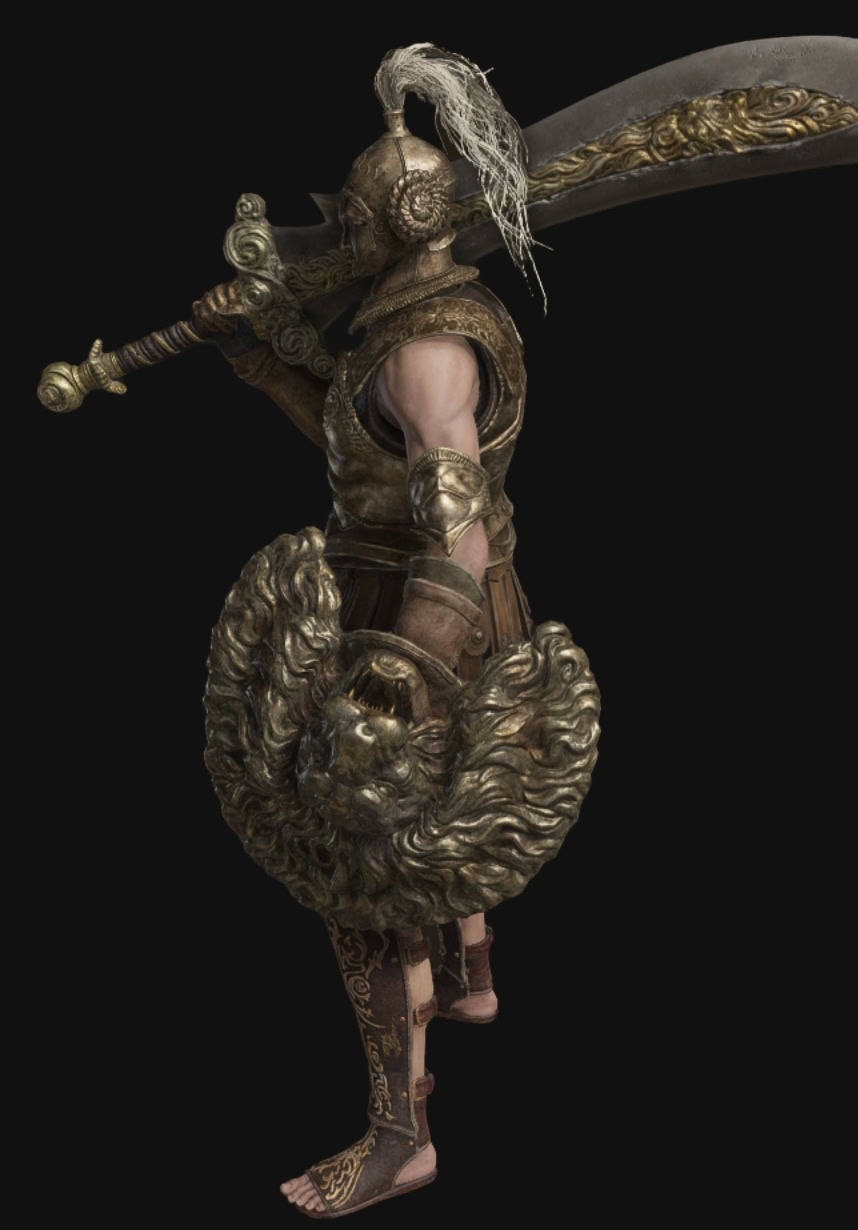
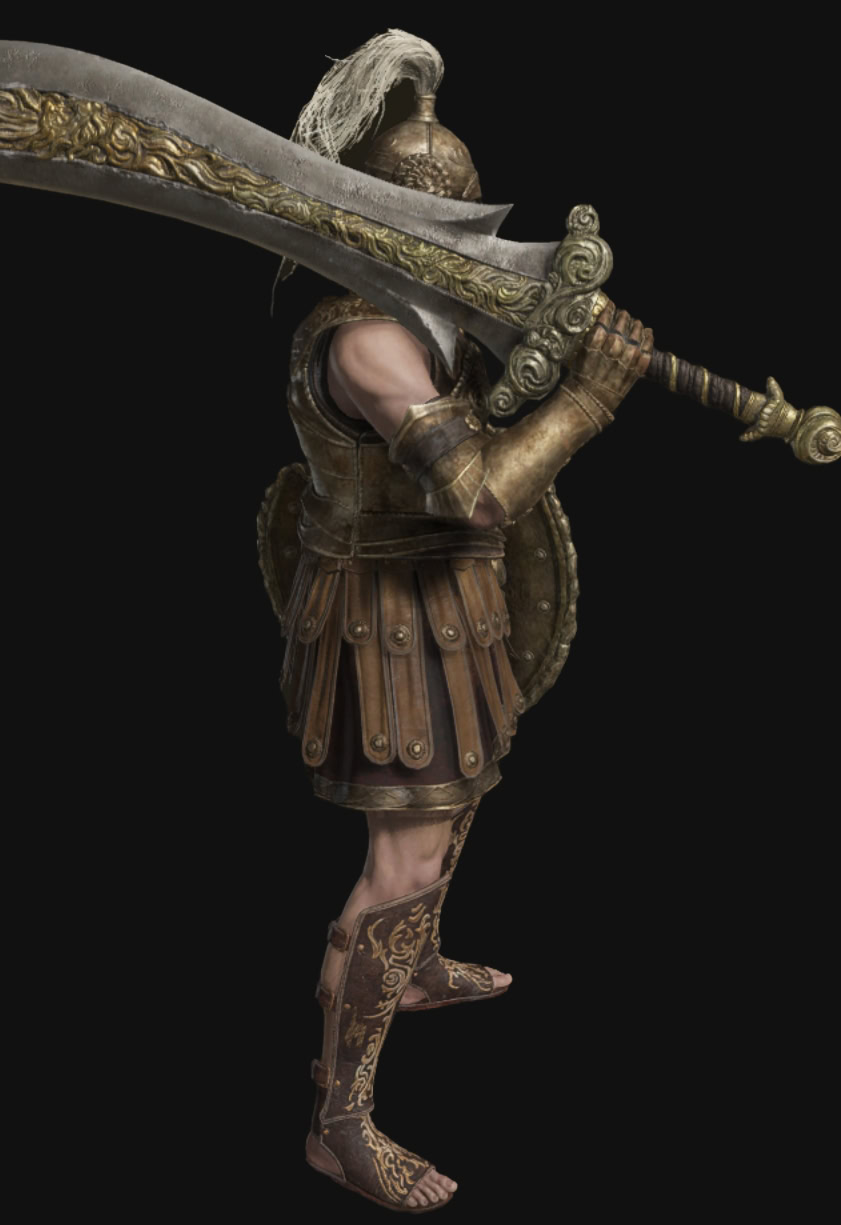
Freyja’s Greatsword Stats
Freyja’s Greatsword is actually a Curved Greatsword. While it lacks a Unique Skill and doesn’t offer any unique scaling, it does boost the damage dealt by Redmane and Lion Skills by 10%.


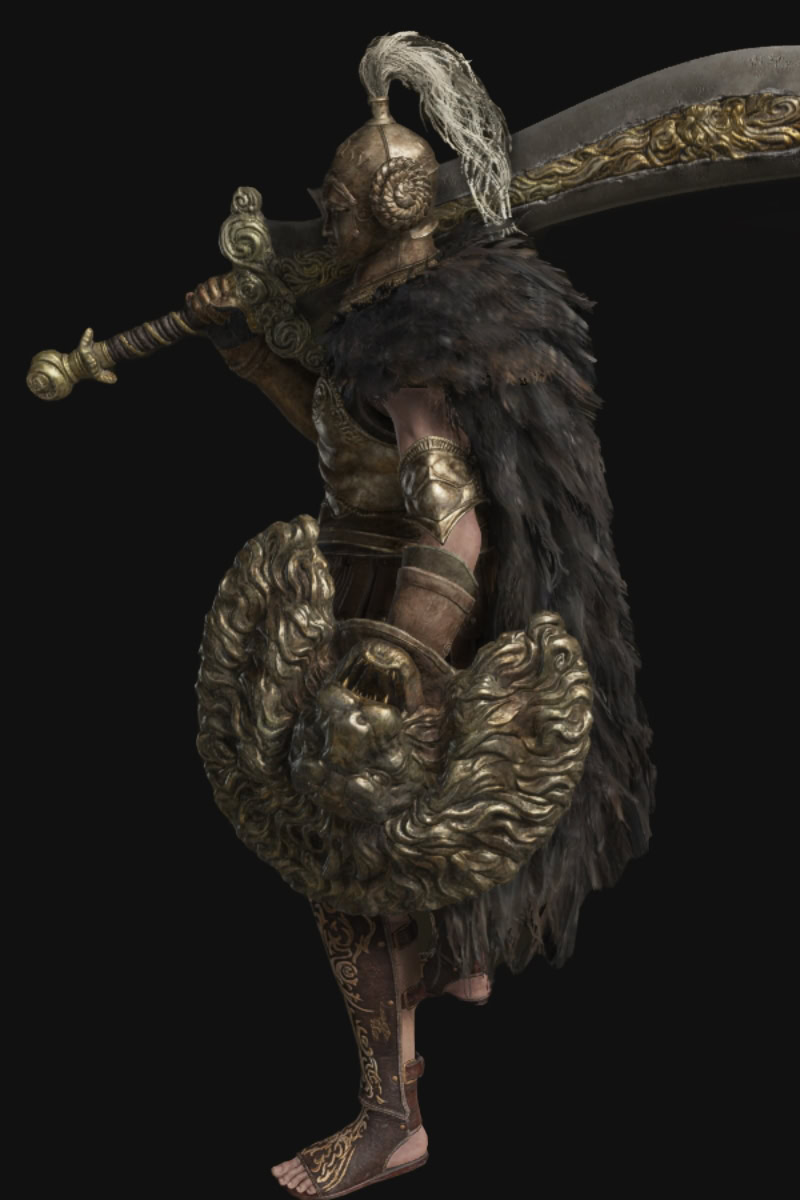
Golden Lion Shield Stats and Location
The Golden Lion Shield is an ornate Medium Shield with average stats and a Unique Skill: Roaring Bash, which is an enhanced version of Ash of War: Shield Bash.
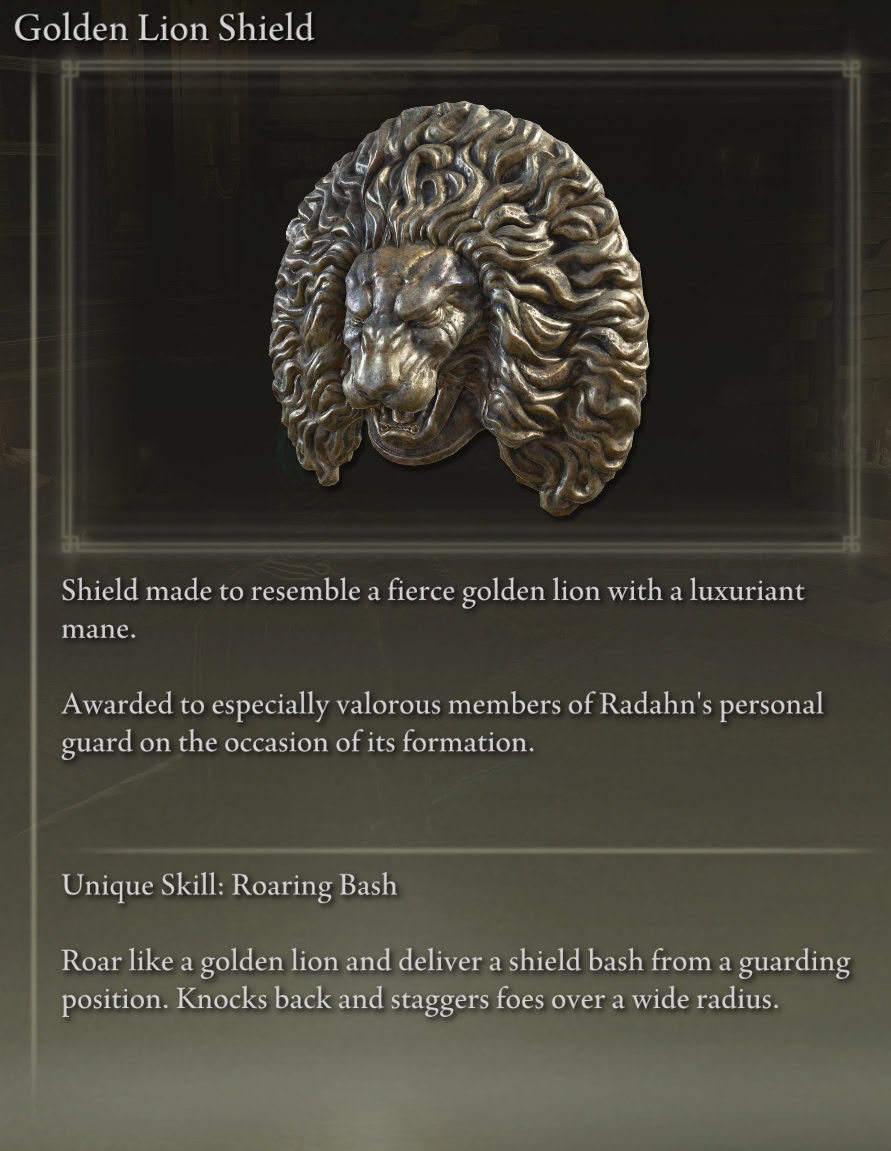
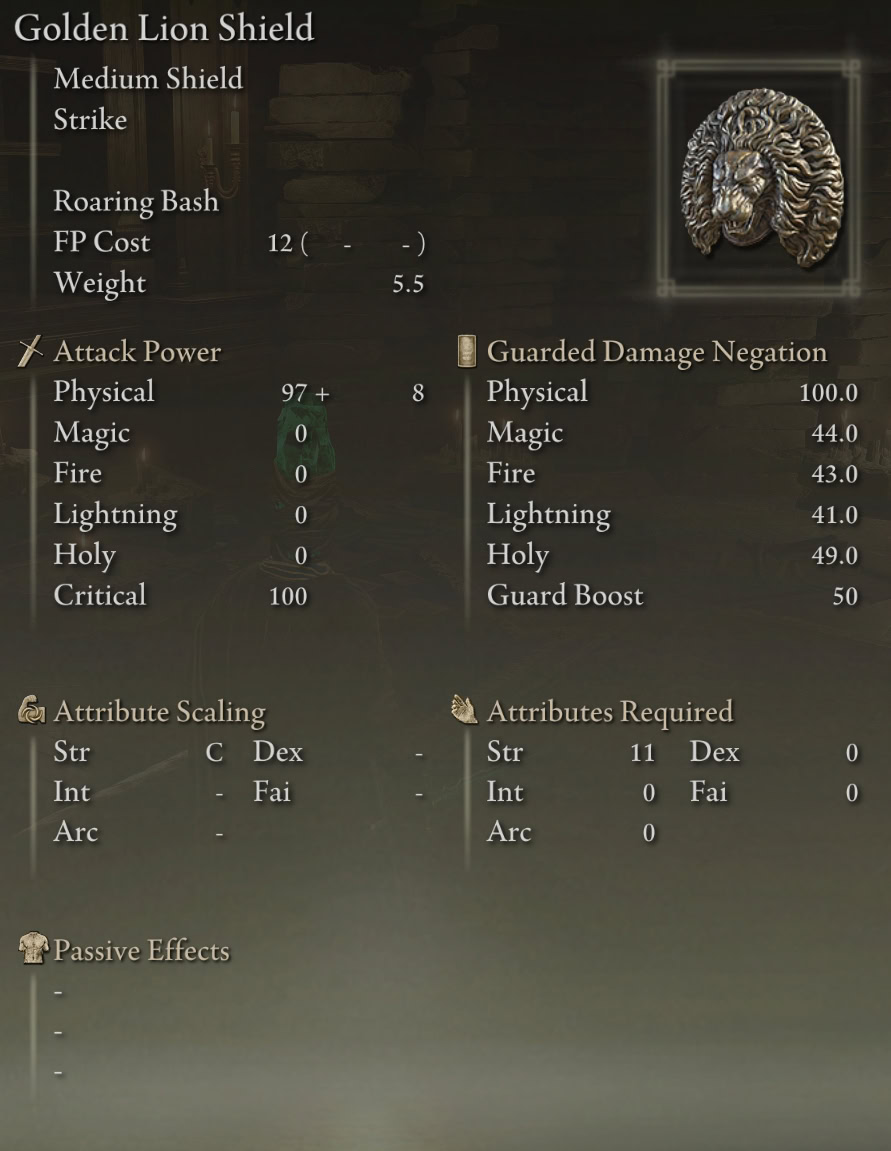
The Golden Lion Shield is a Medium Shield given to you by Freyja at the Specimen Storehouse on the 7th Floor if you can convince Sir Ansbach (on the 1st Floor) to answer her questions about General Radahn.
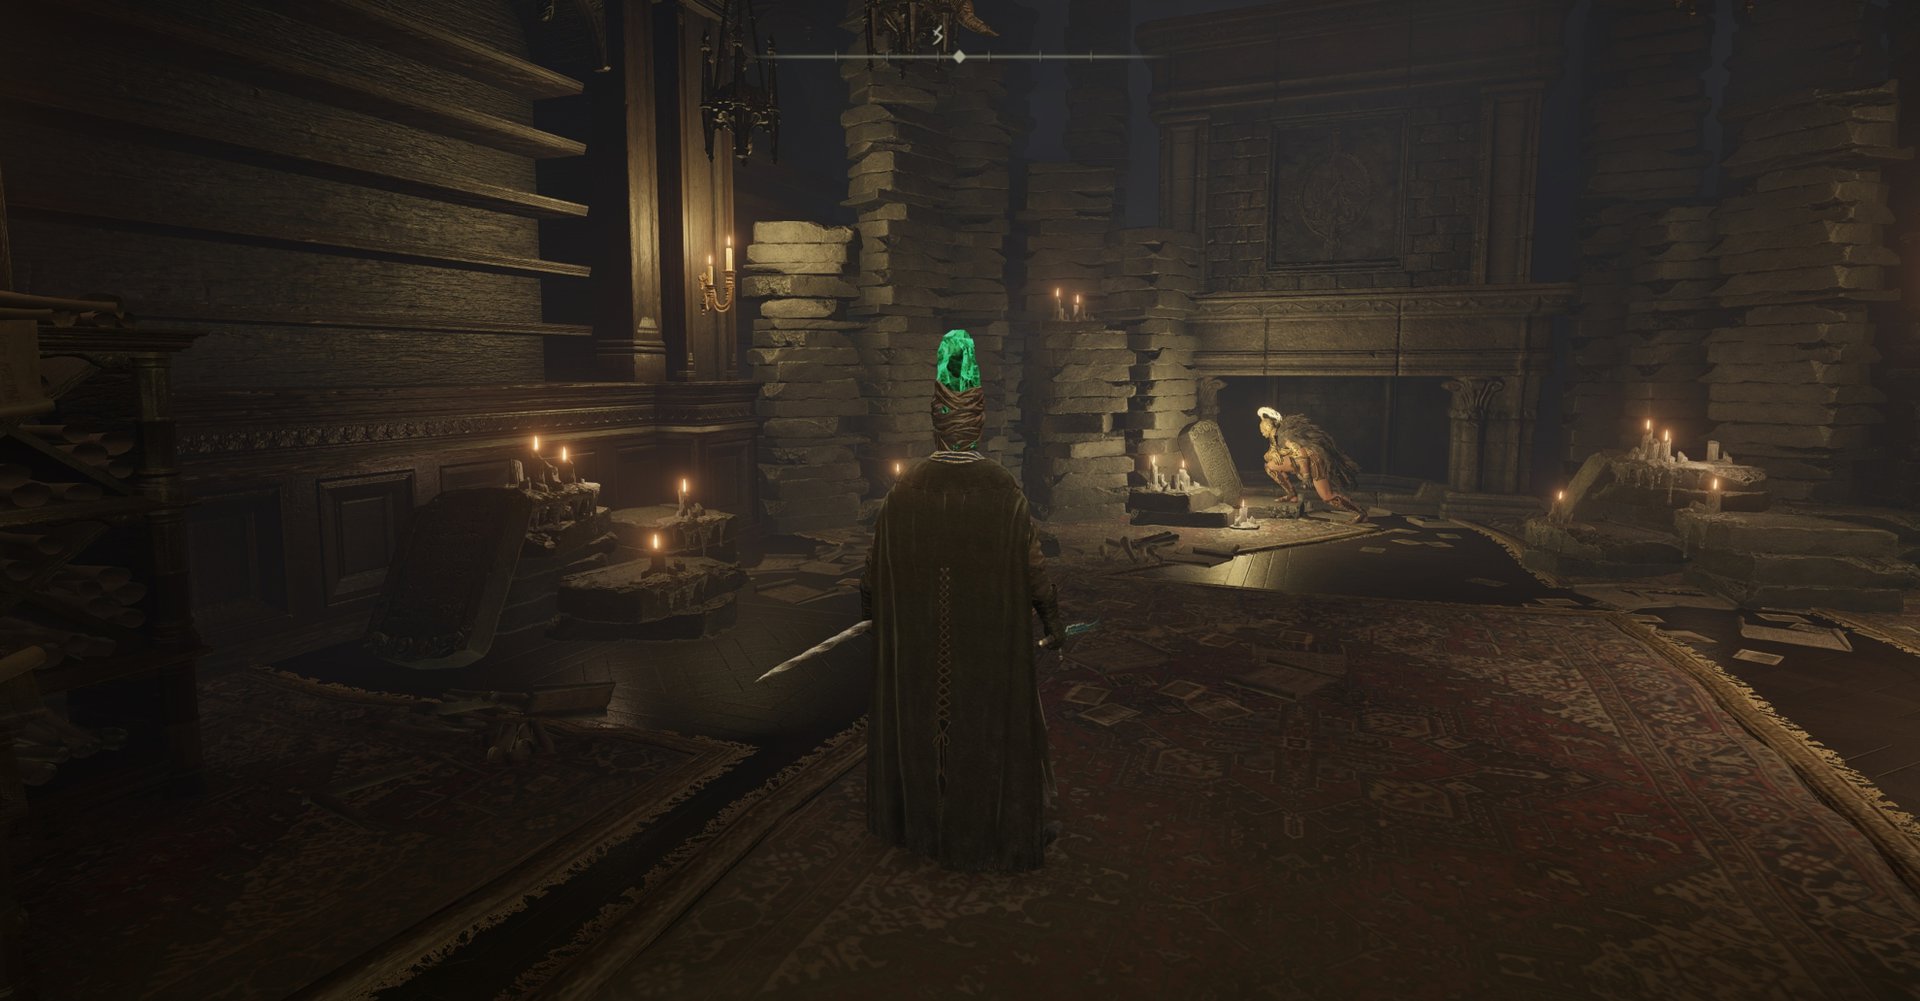
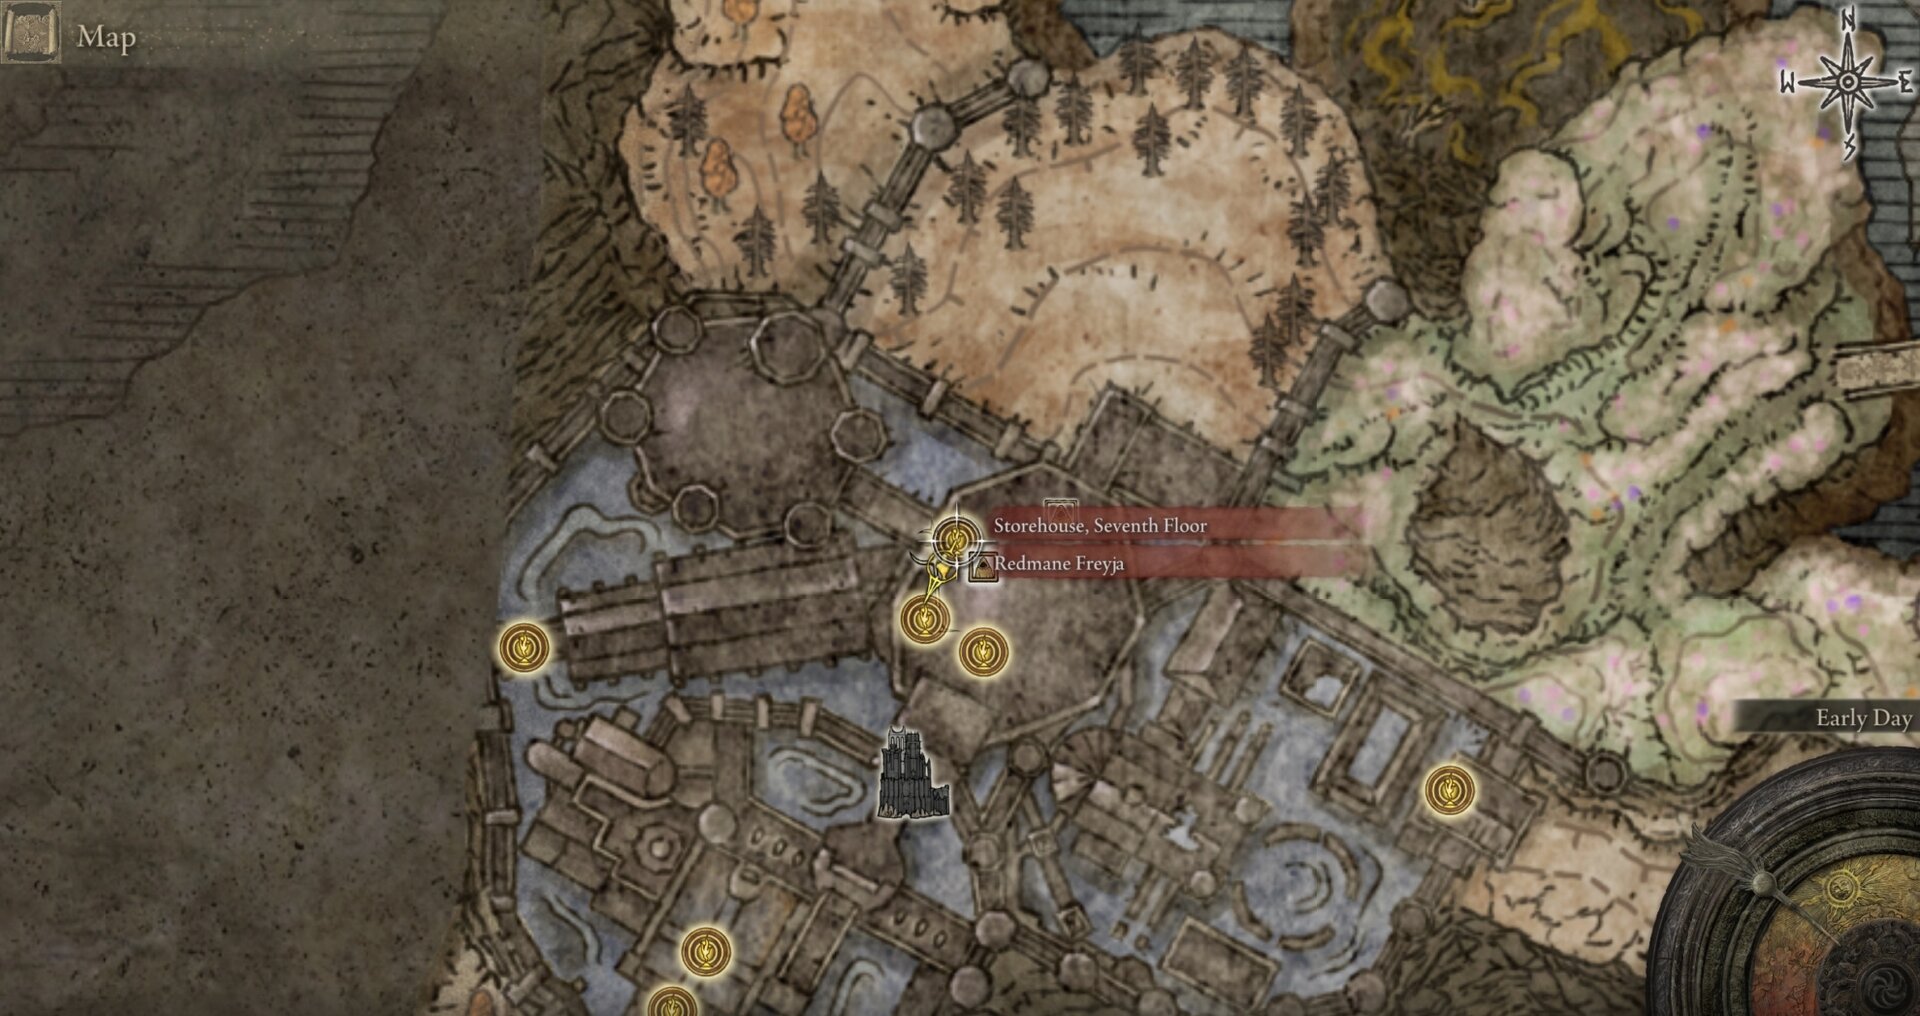
Speak to Sir Ansbach on the first floor and inform him of Freyja’s predicament. He will give you a Letter for Freyja.
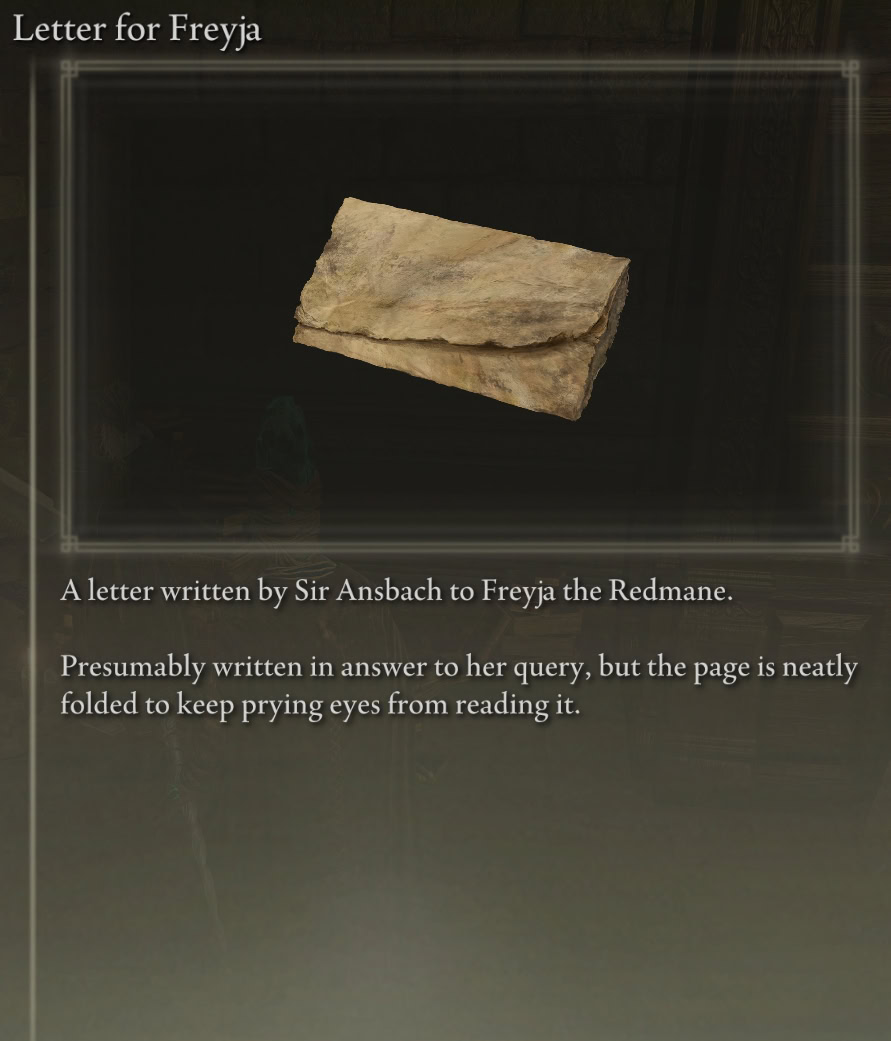
Once you give her the letter, talk to her again to receive the Golden Lion Shield. You can get the rest of her equipment after defeating her.
She will leave this place if you reload, so this is your last opportunity before the end of SotE to get Freyja’s Armor and Greatsword. This is the best to fight her because you get everything and make the fight at the Cleansing Chapel easier.
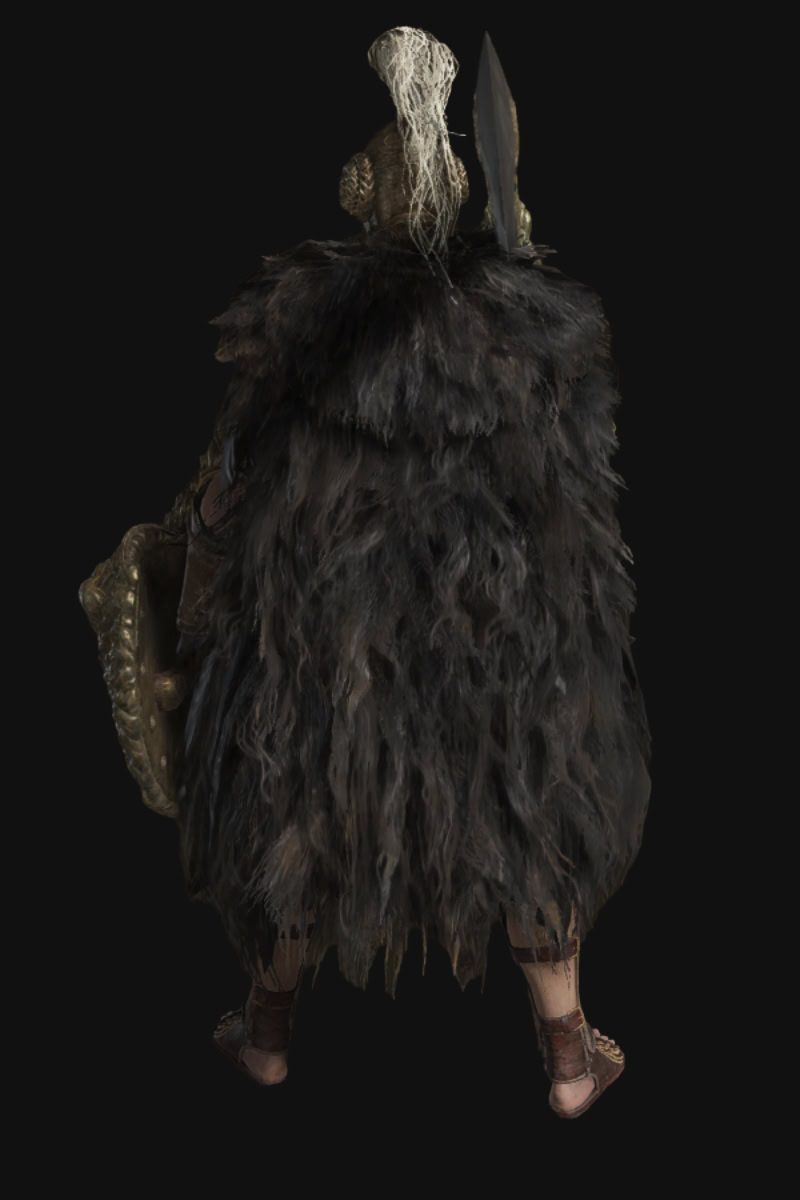
Freyja’s Equipment Preivew
Freyja’s Equipment Altered
Dryleaf Dane’s Outfit, Seal, and Hand-to-Hand Combat Arts
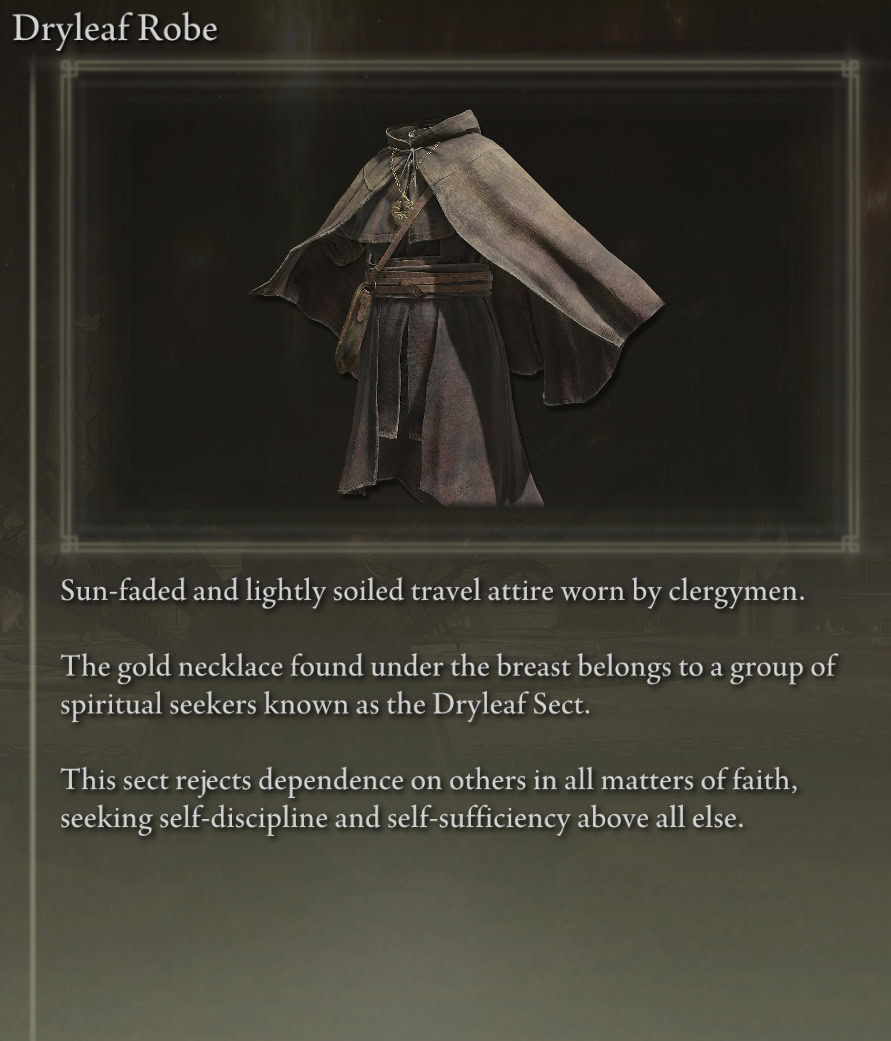
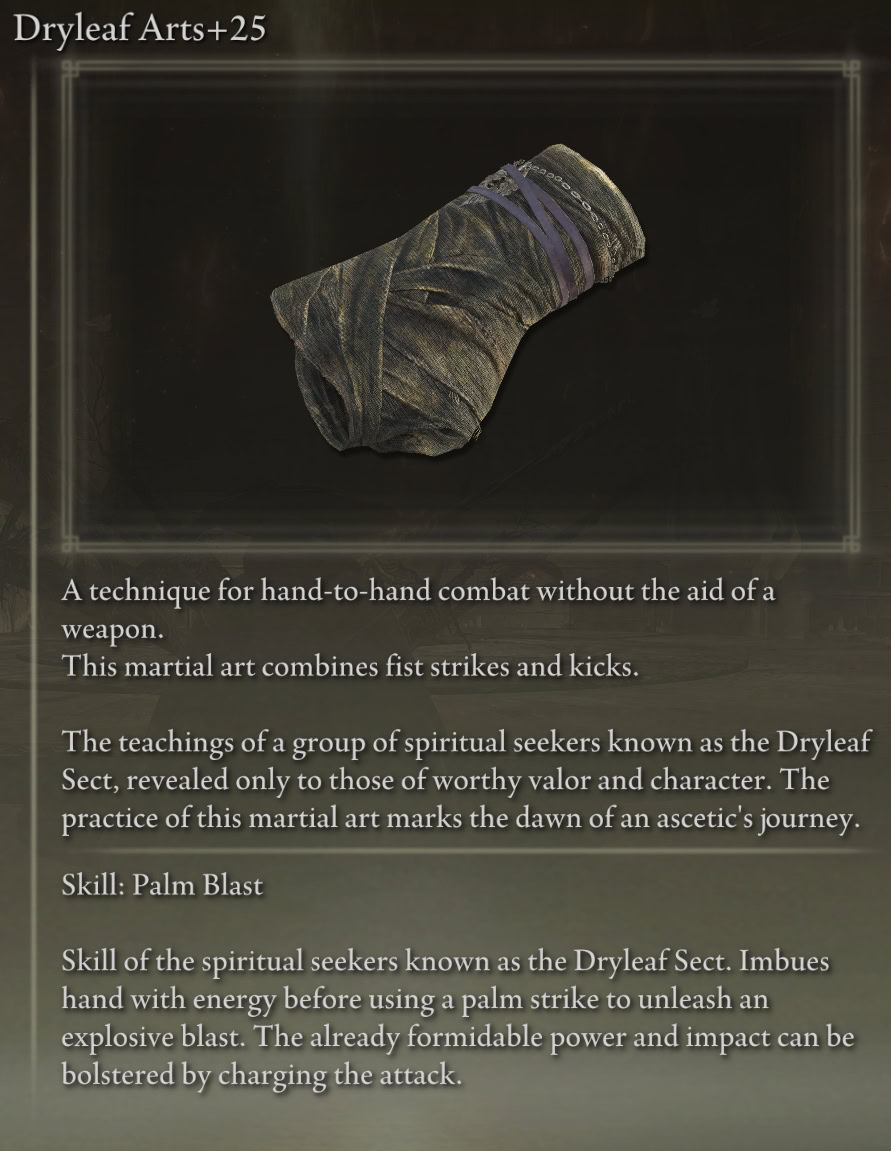
Shadow of the Erdtree introduced some new weapon classes. One of the most distinct doesn’t involve a weapon at all, called Hand-to-Hand. You’ll be using martial arts from the Dryleaf Sect to deal damage with punches and kicks.
Dryleaf Dane is the sole practitioner of Dryleaf Arts, so all of the related equipment comes from him. There are a pair of “weapons” with Ashes of War, a Seal, and an outfit.
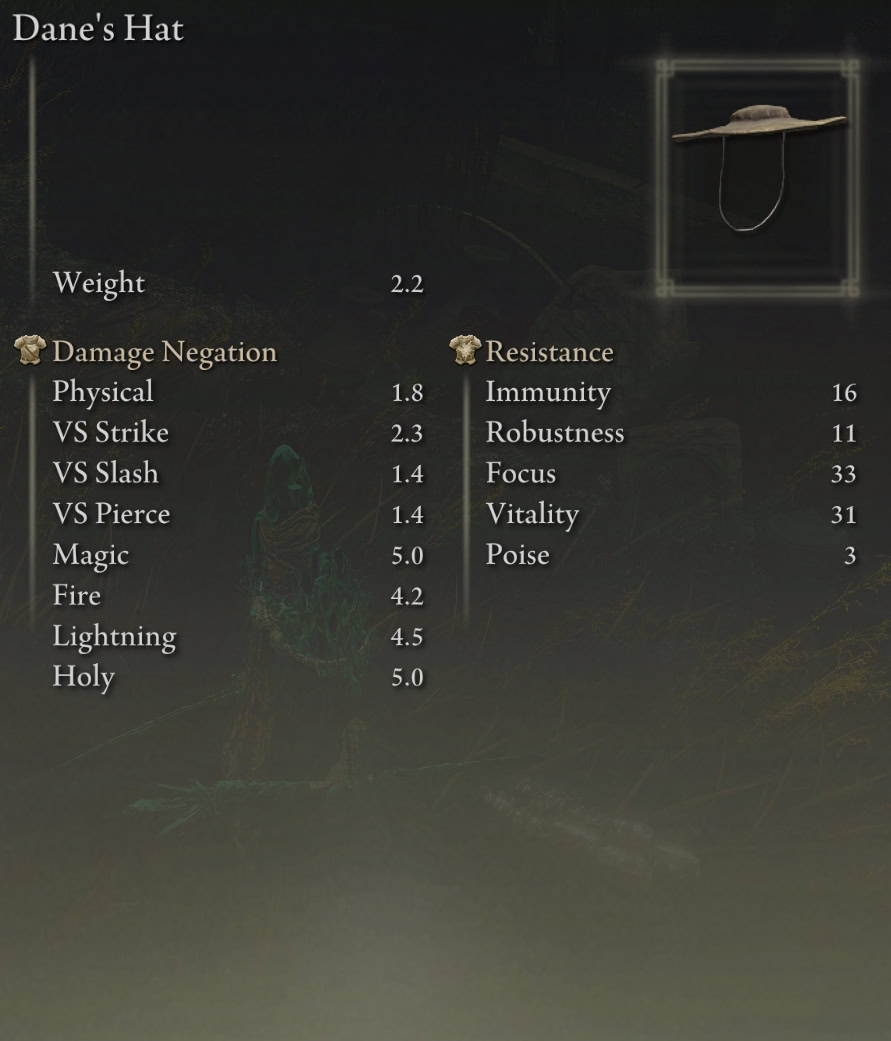
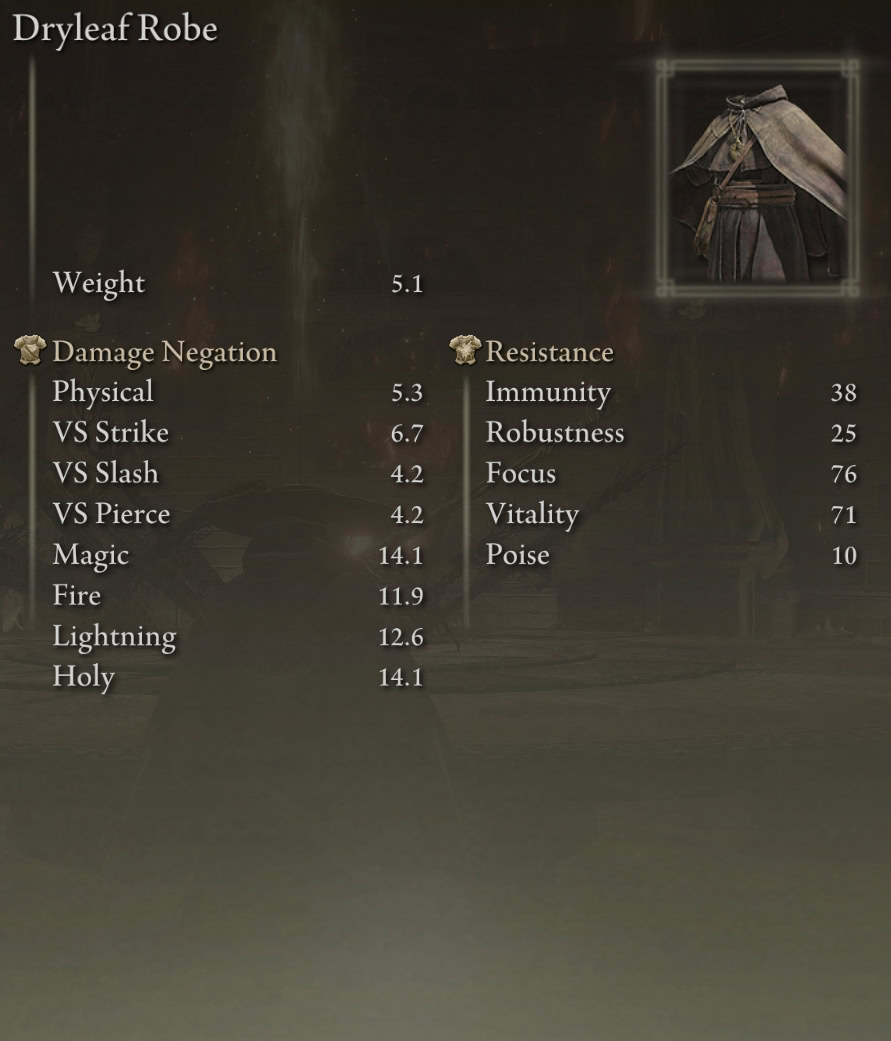
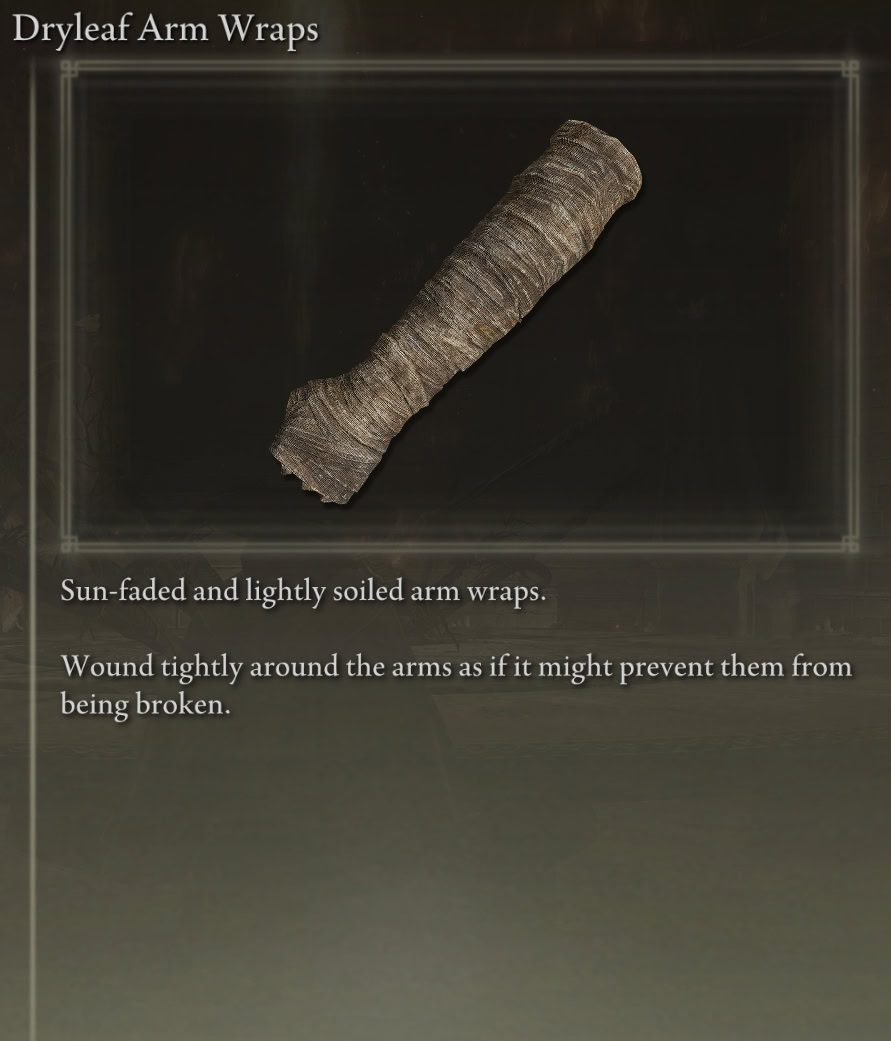
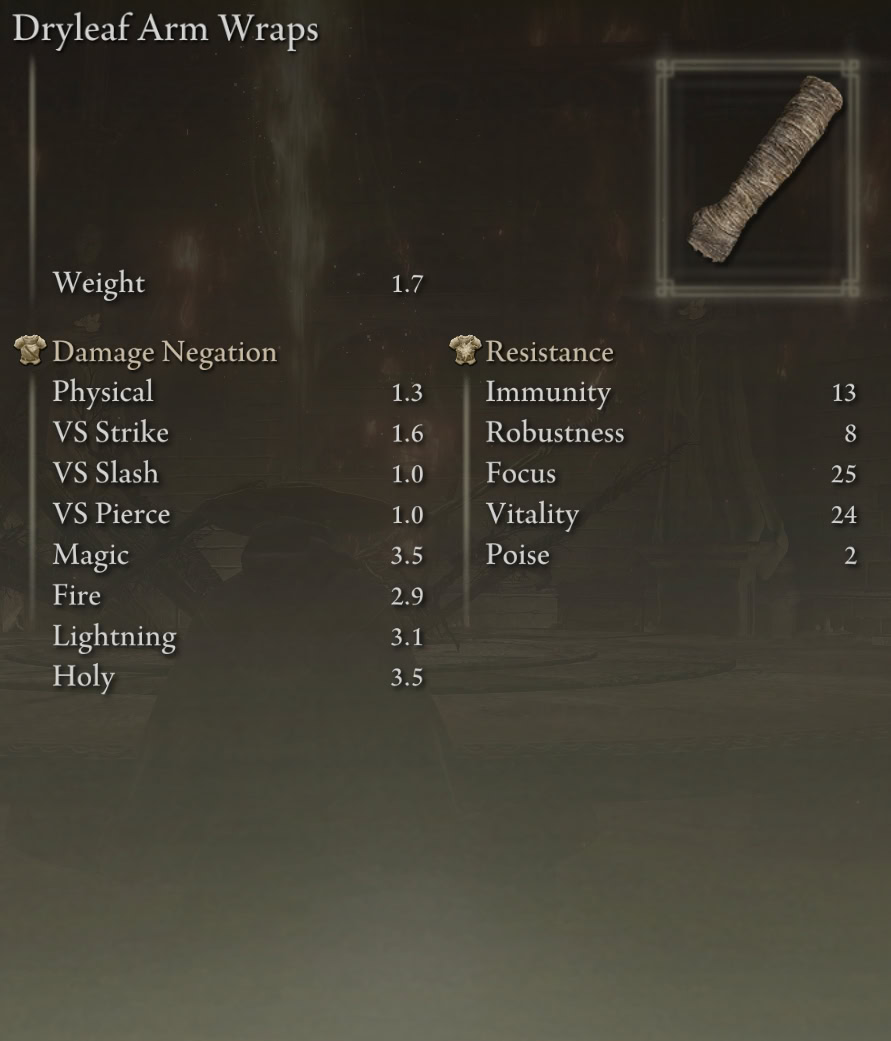
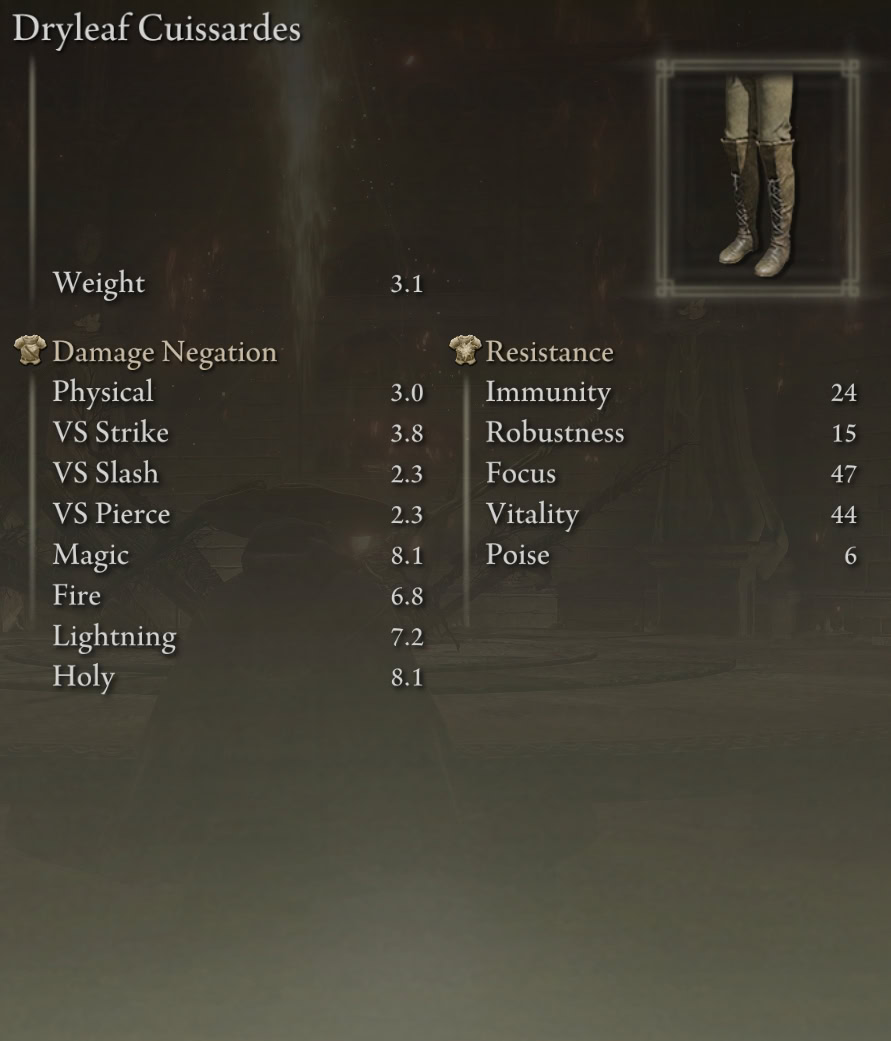
Dryleaf Dane’s Outfit Stats
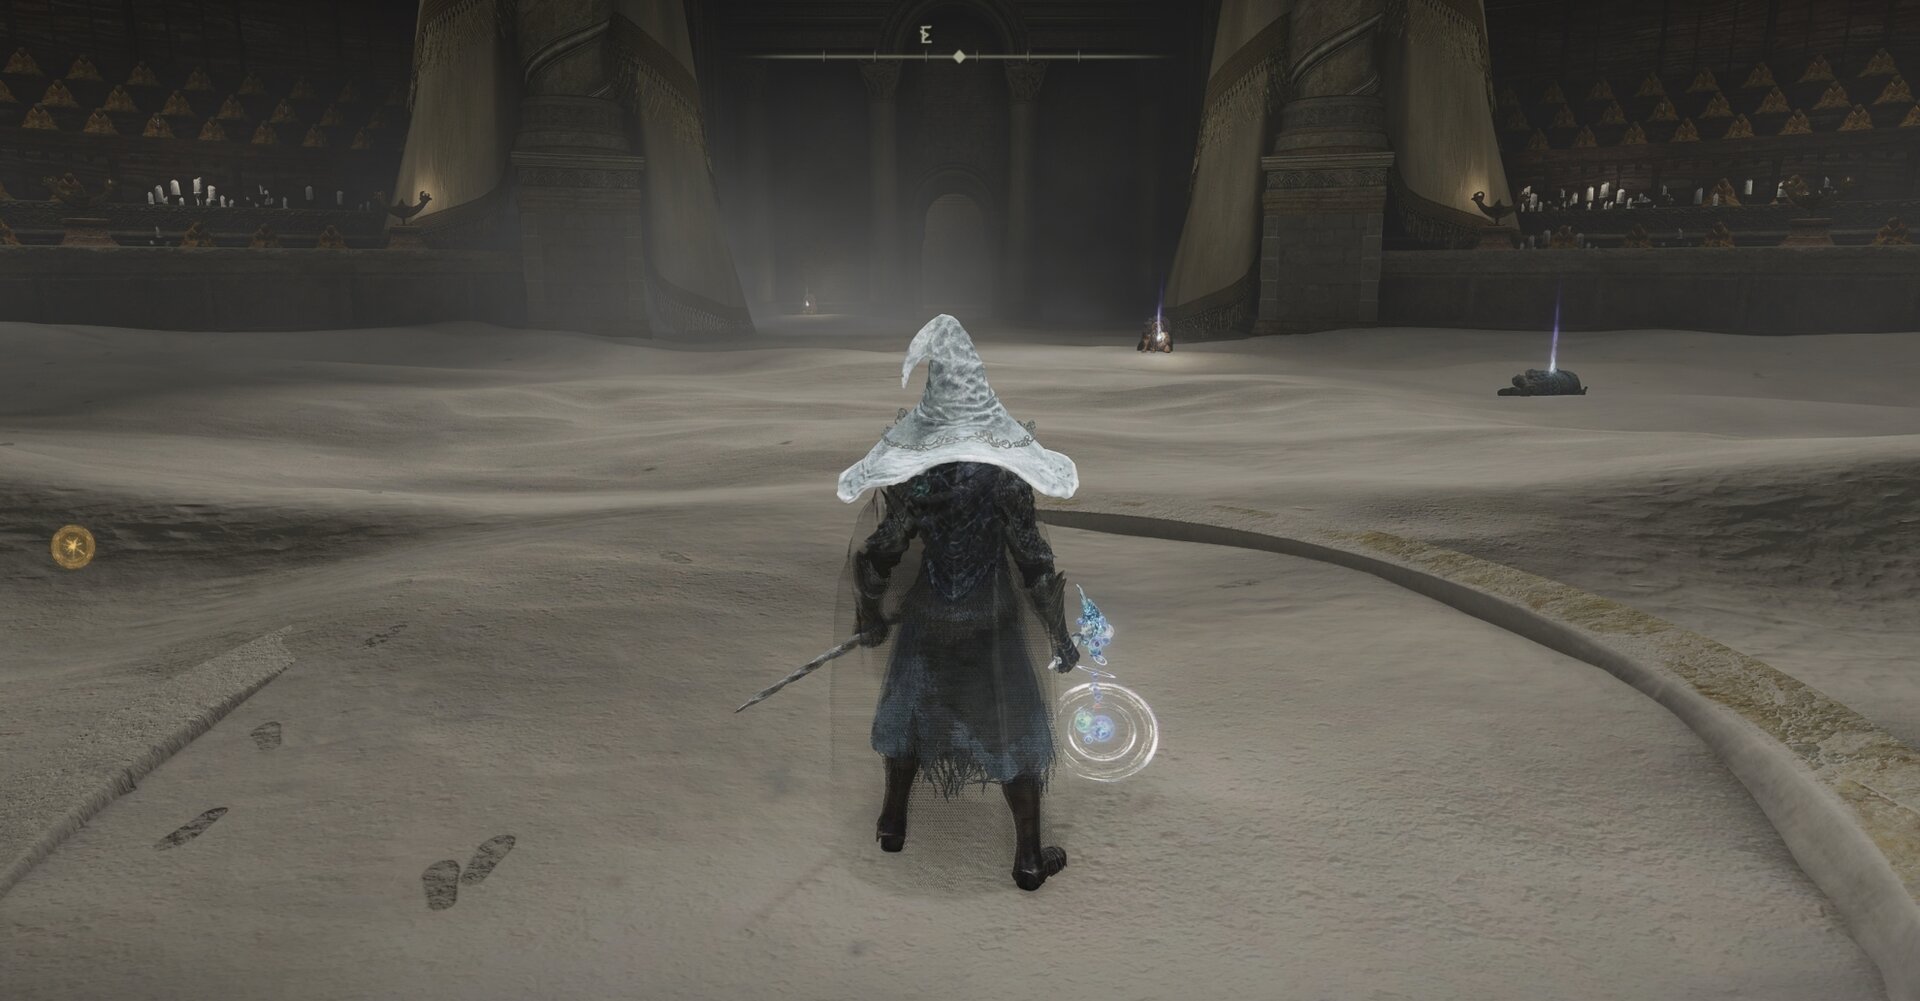
Drylead Dane’s Outfit has a combined weight of 12.1 (or 14.6 if you add the Seal and “weapon”), placing it in the second lightest weight class alongside all of the other wizard robes and dresses.

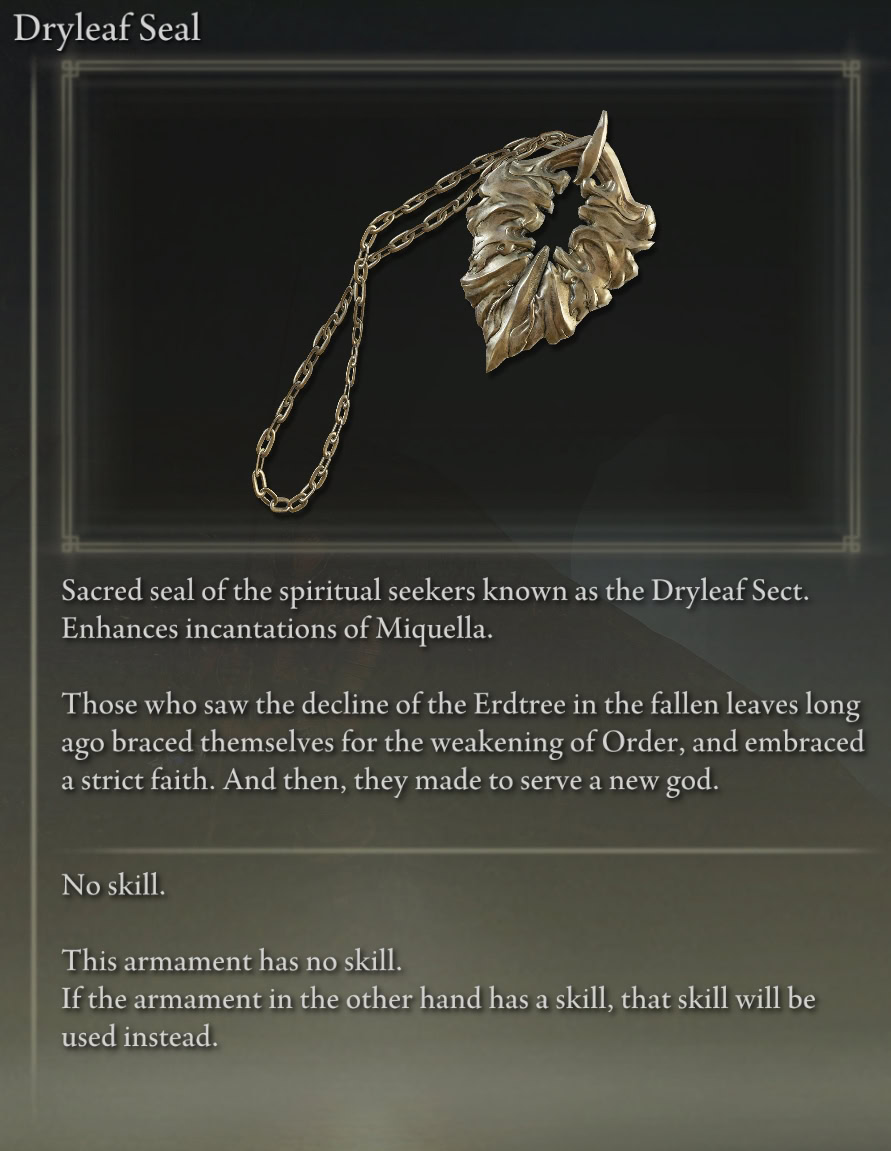
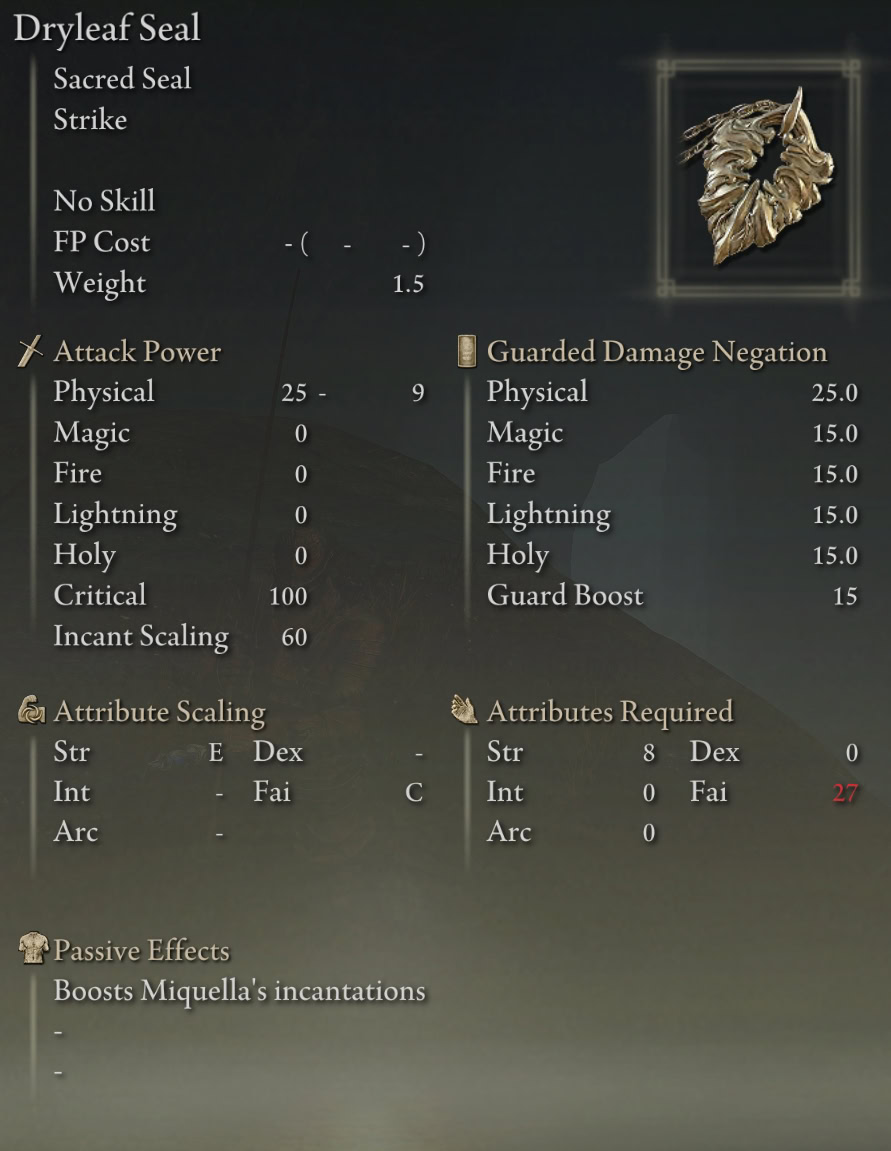
Dryleaf Seal Stats
The Dryleaf Seal boosts the damage dealt by Miquella’s Incantations by 15%. Unfortunately, it only scales with Faith, and you need both Intelligence and Faith to cast many of the Golden Order Incantations that would be buffed by the Dryleaf Seal.
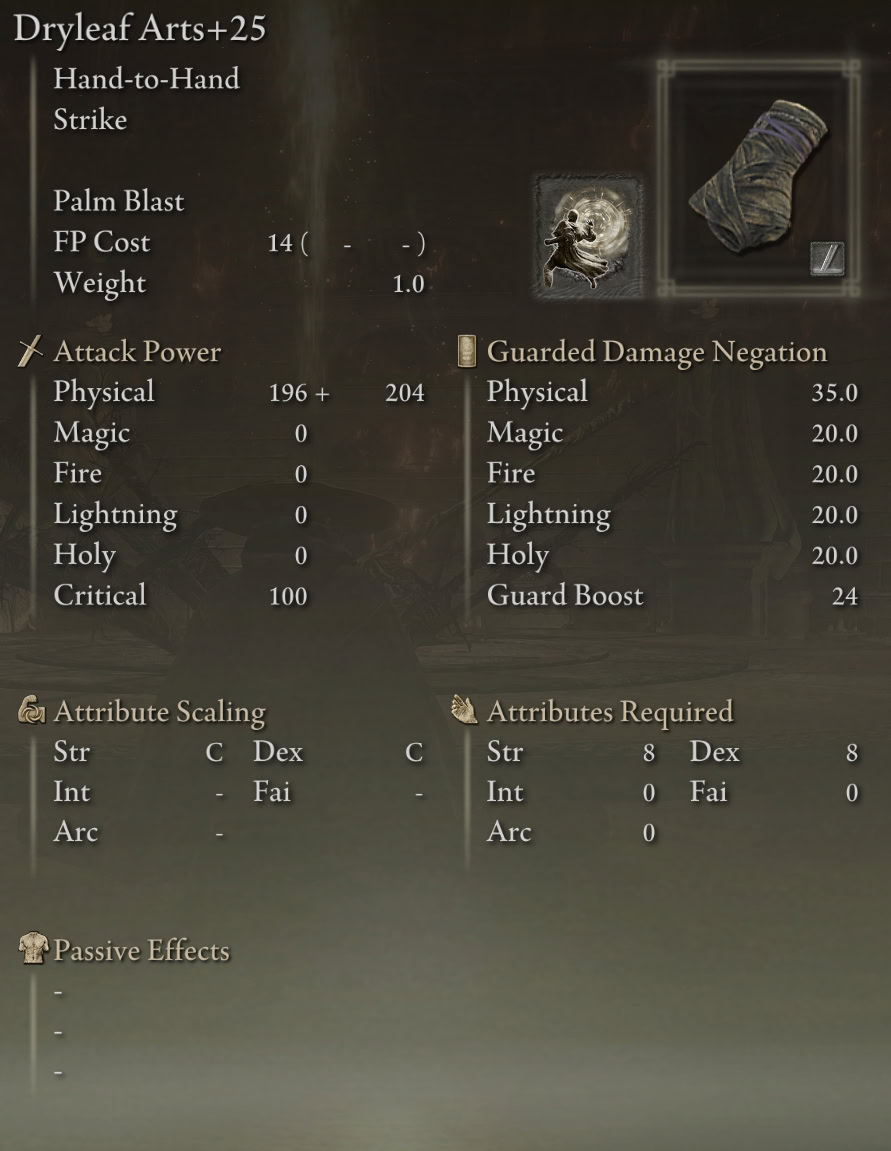
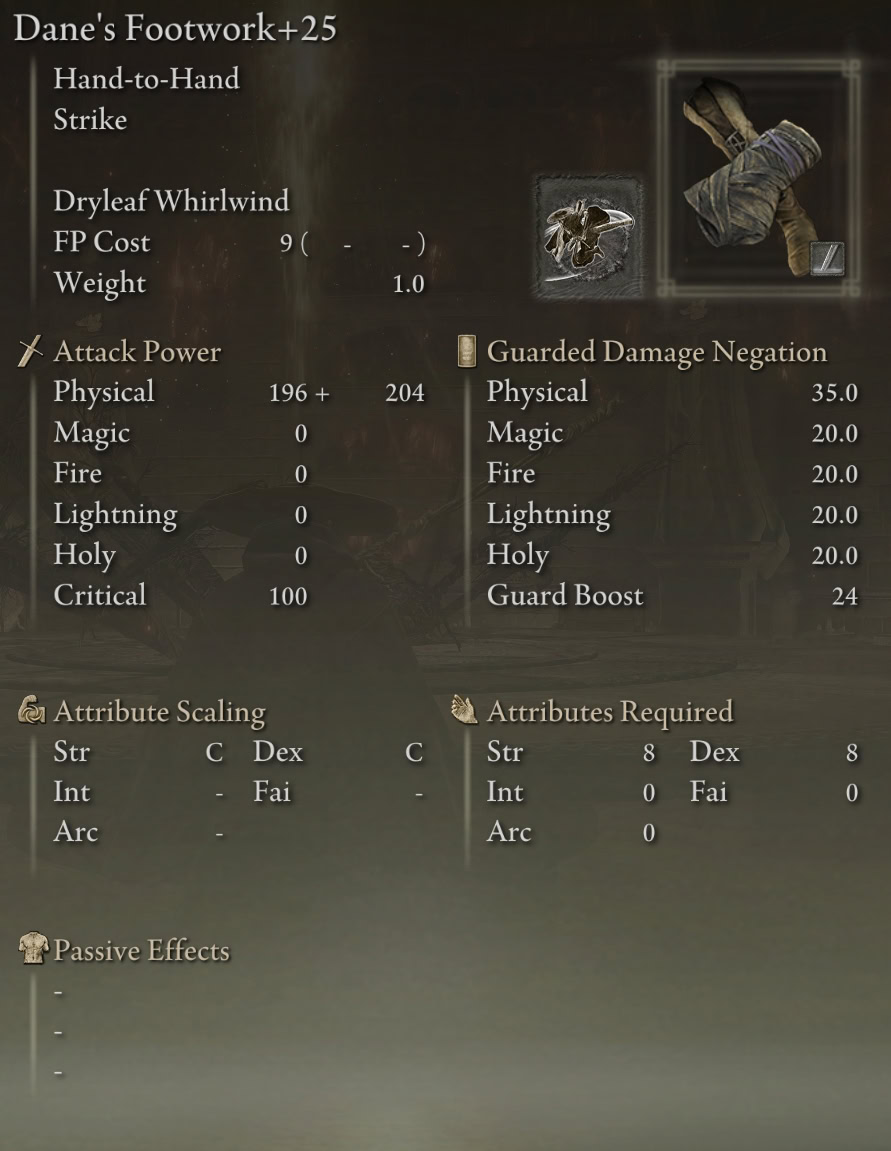
Dryleaf Arts and Dane’s Footwork Stats
Dryleaf Arts and Dane’s Footwork are the two Hand-to-Hand “weapons” you can equip. They have identical stats, and you can use either Skill with either of them, along with other Ashes of War, and alter their Affinity so the damage scales with any of the stat types.
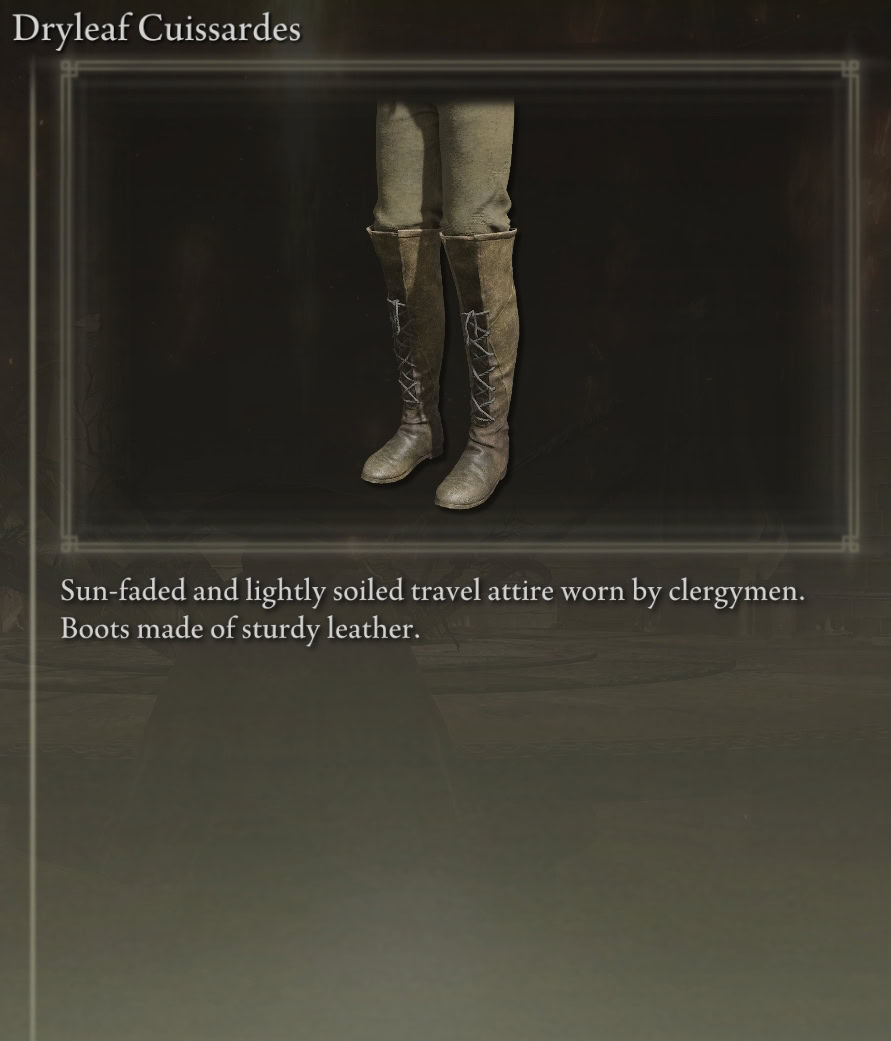
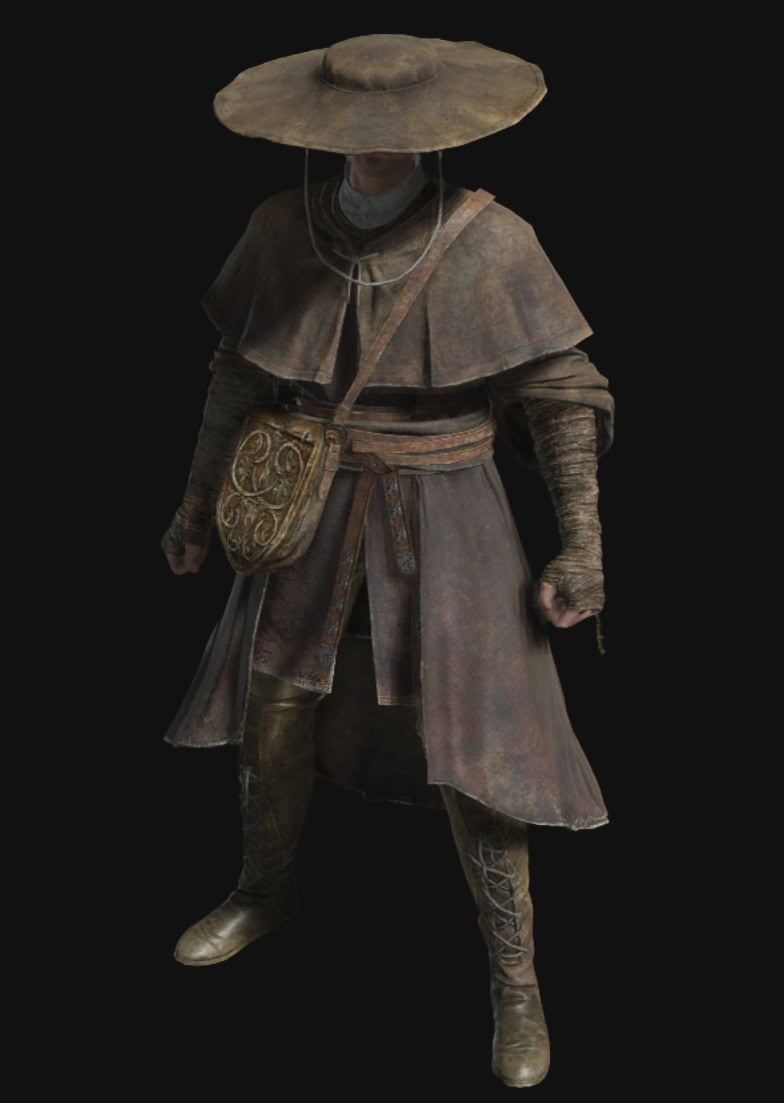
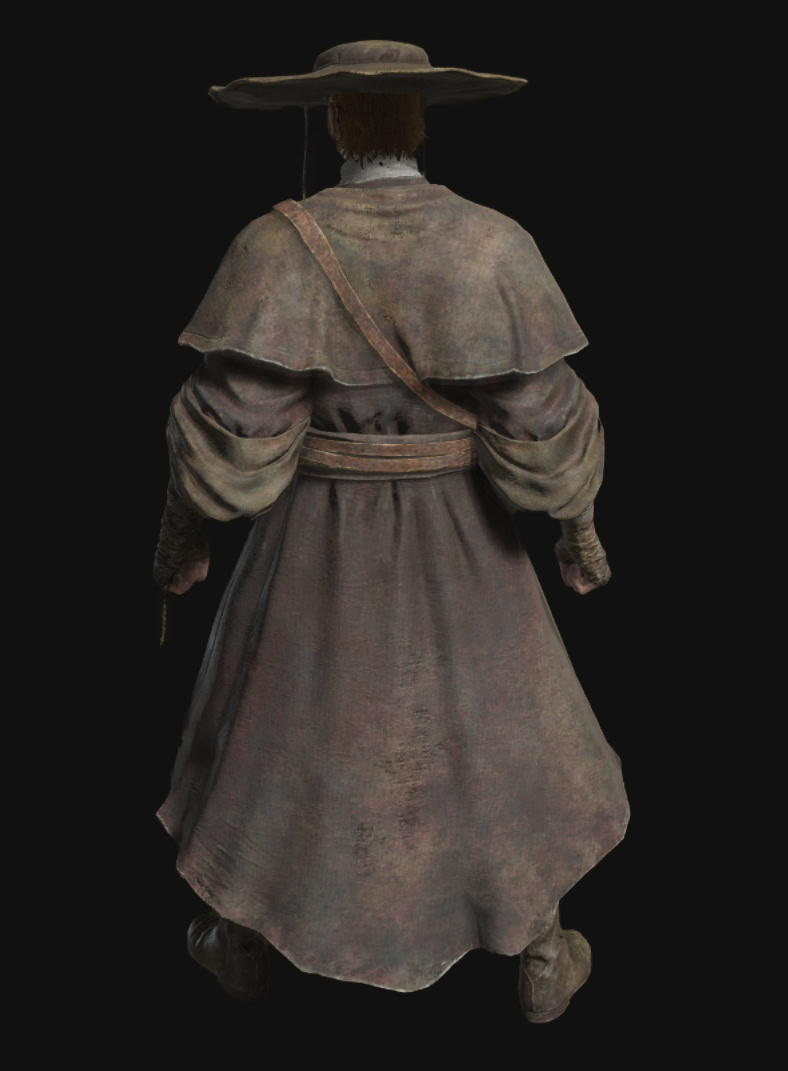
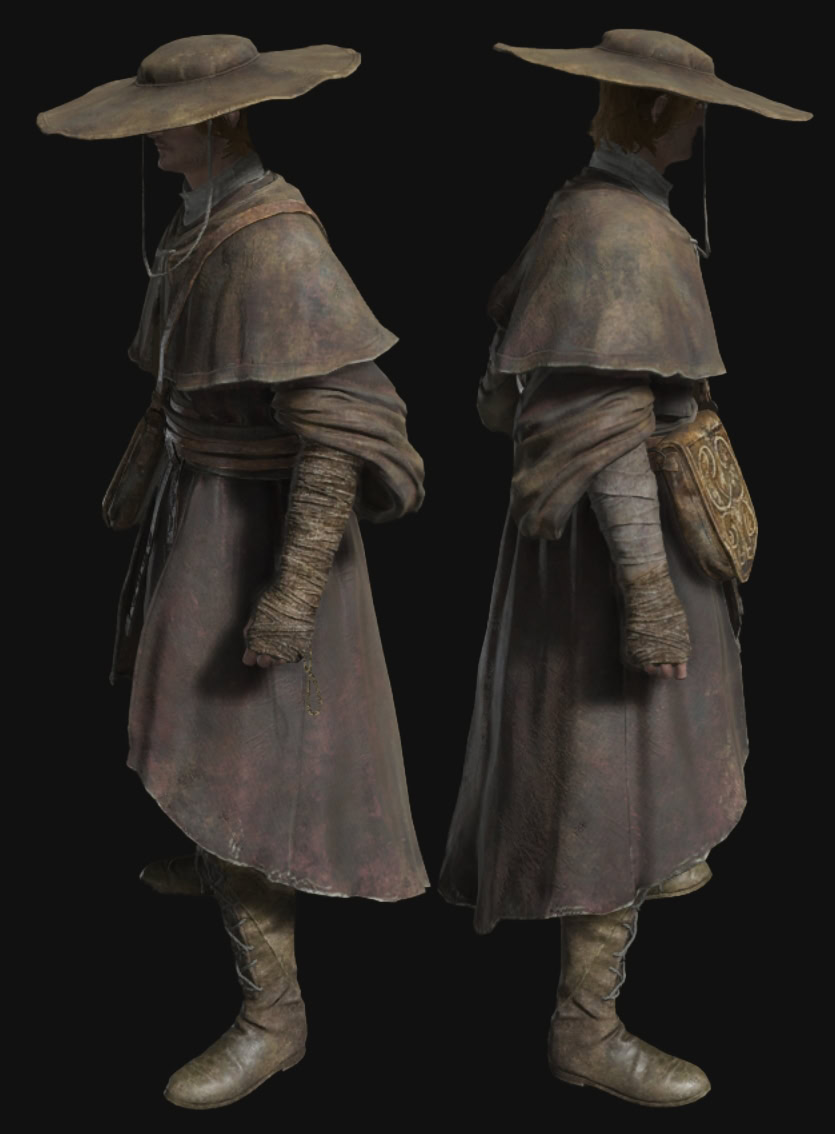
Dryleaf Dane’s Attire Preview
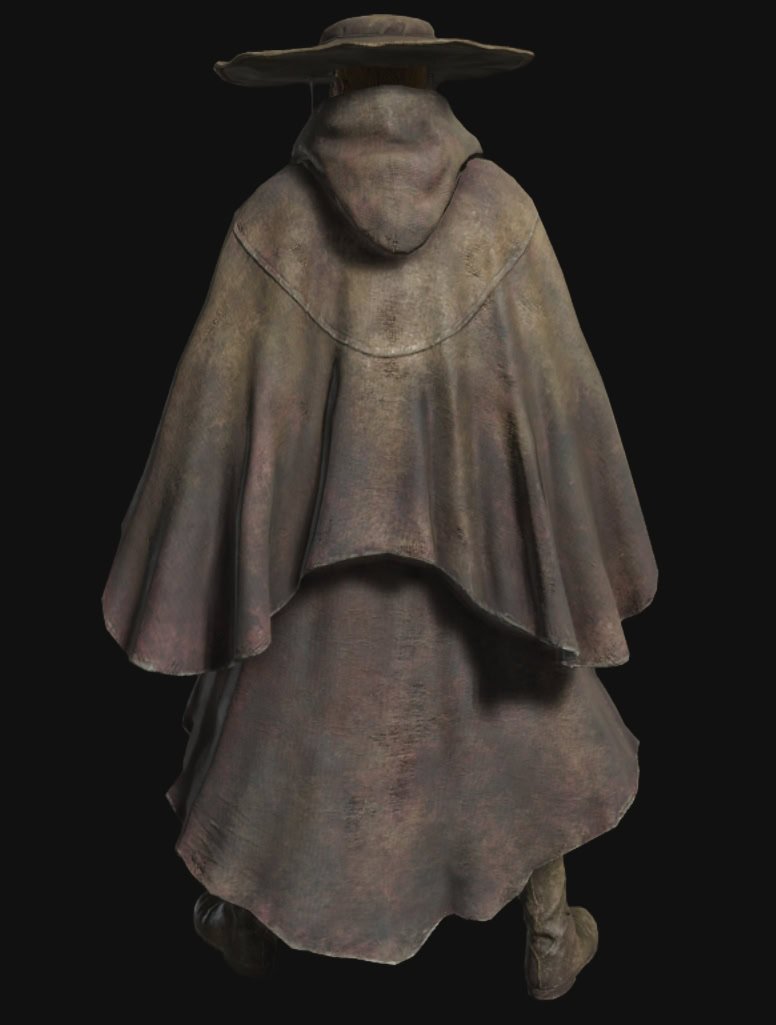
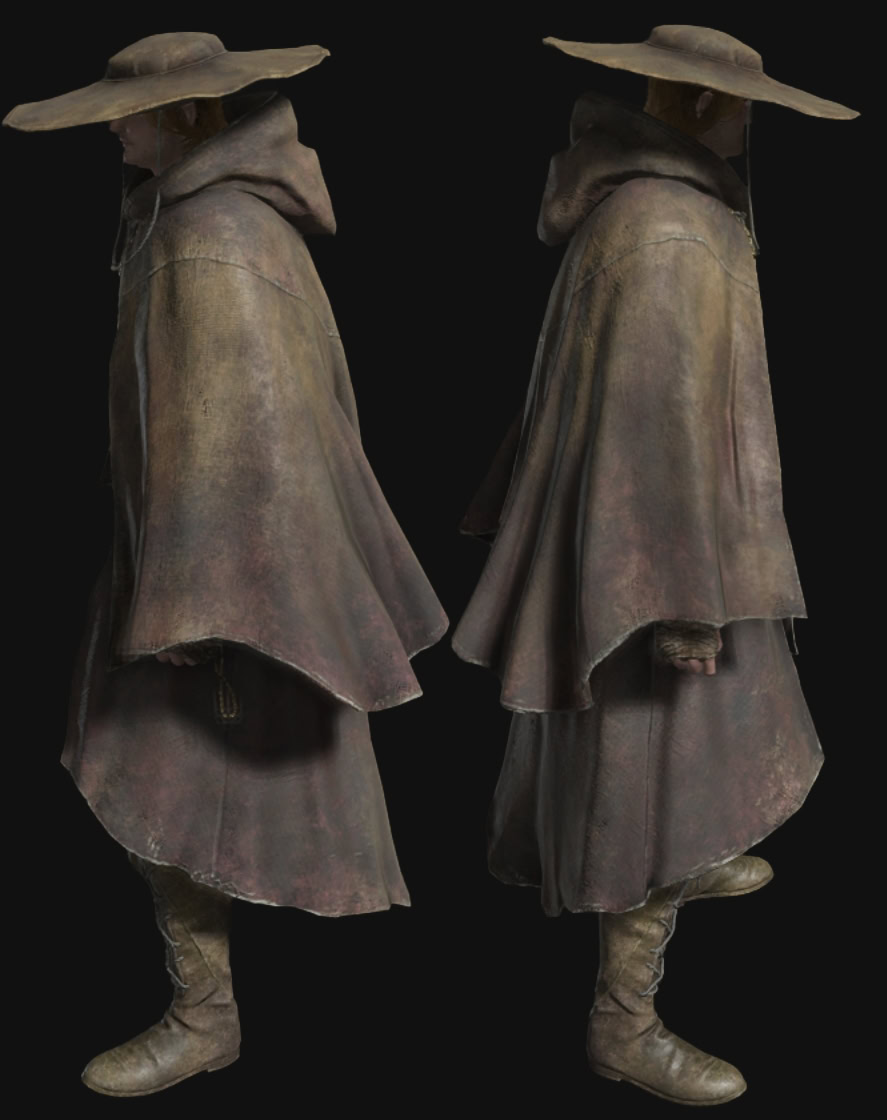
Dryleaf Dane’s Altered Attire Preview
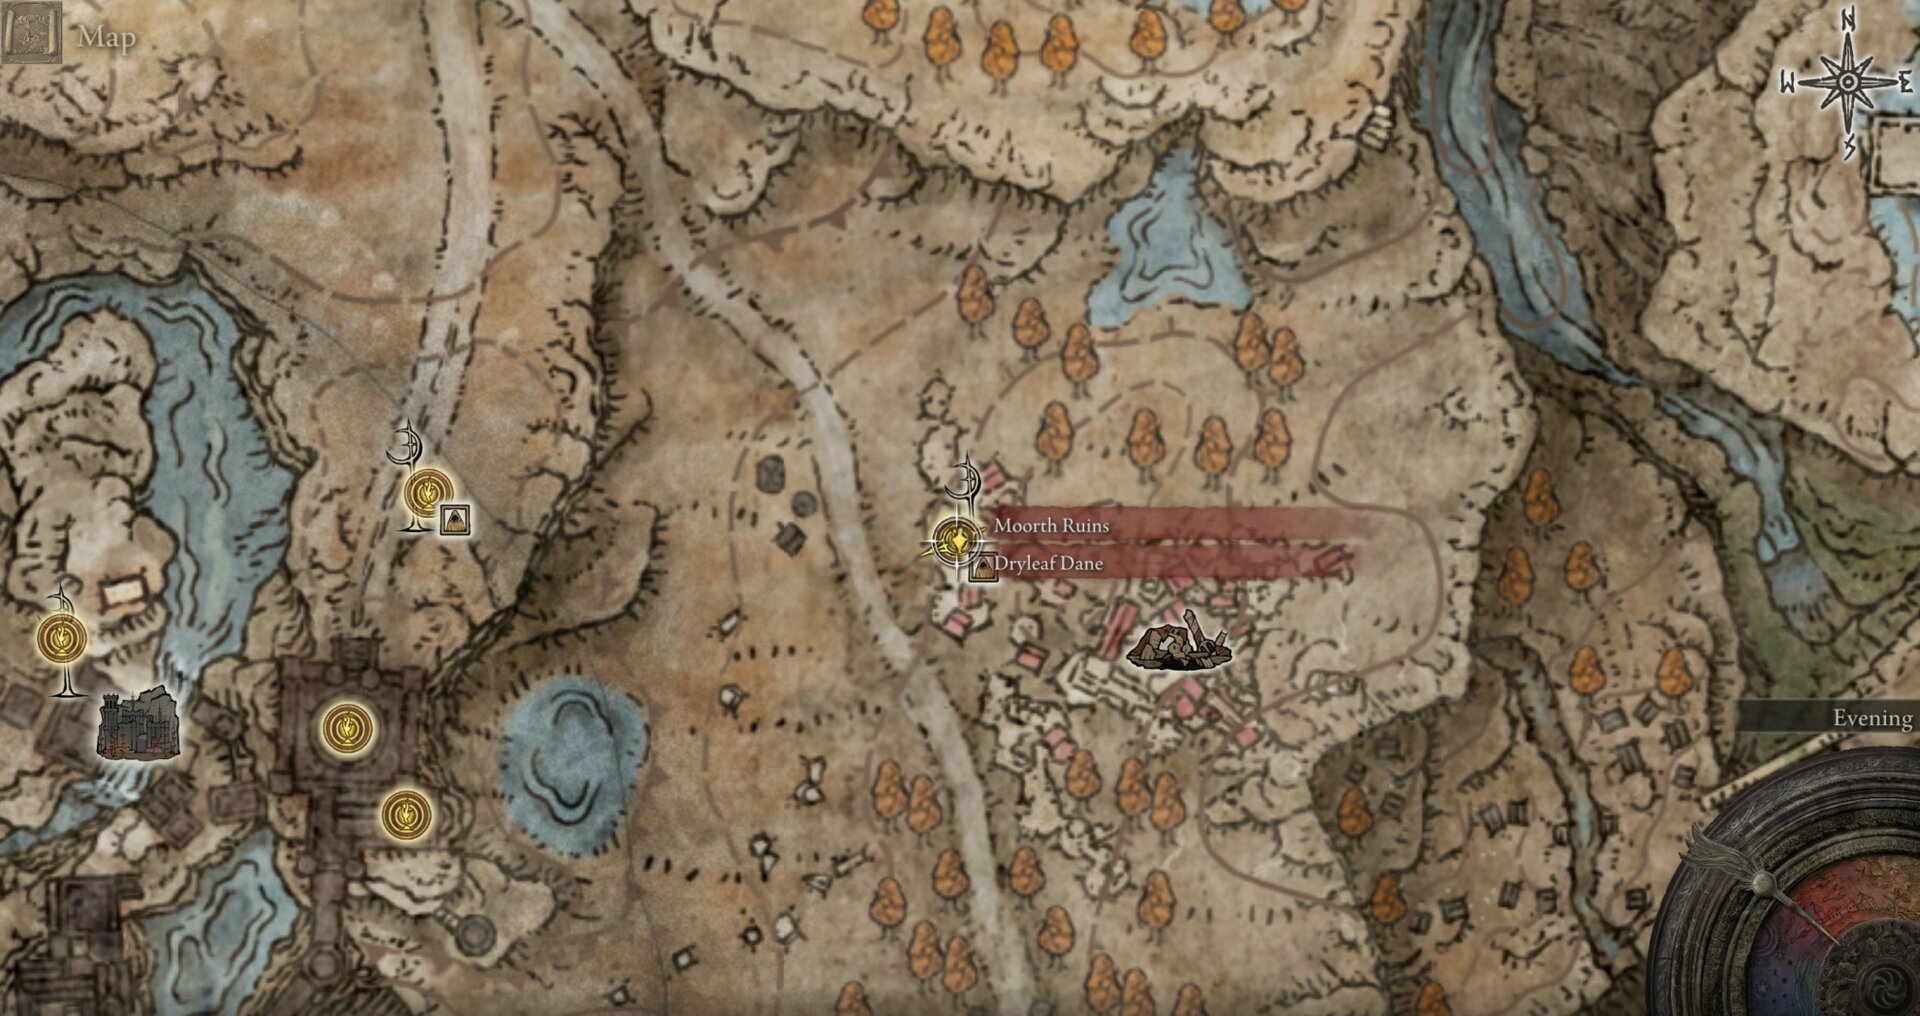
Dane’s Hat and Dryleaf Arts Location
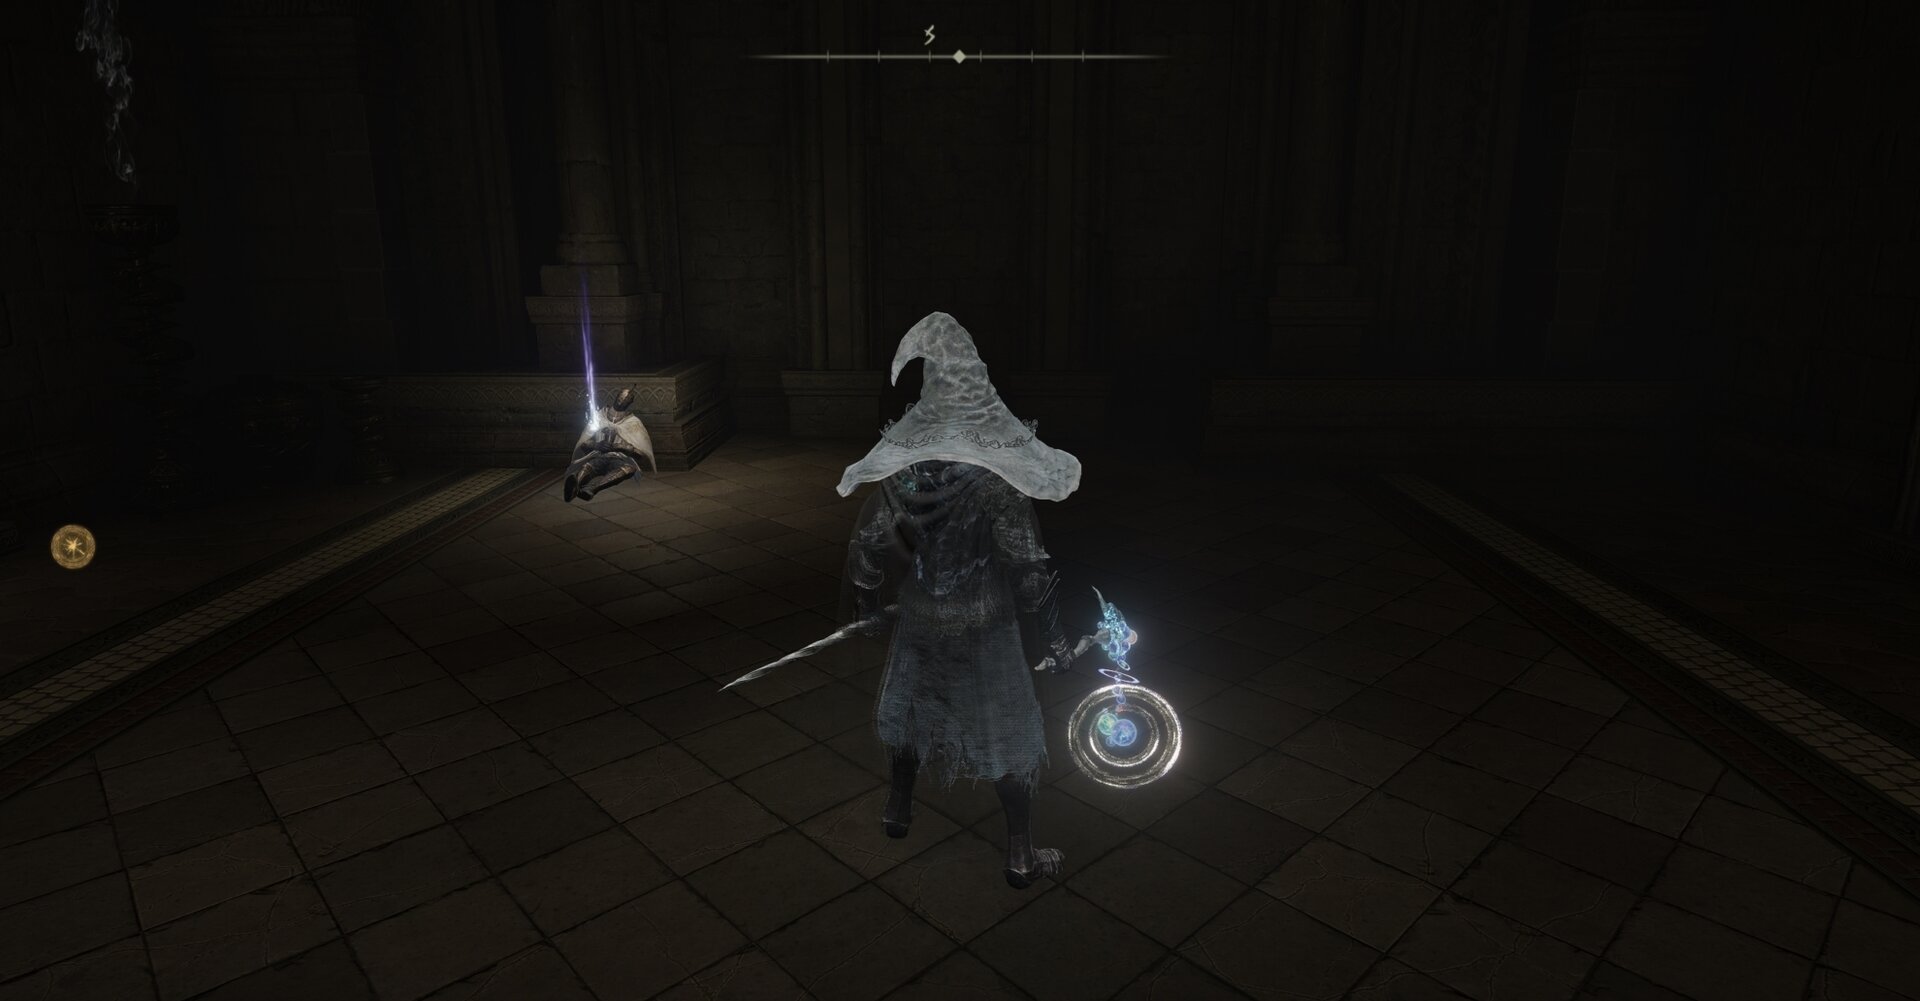
You are introduced to the Dryleaf Arts by a silent man known as Dryleaf Dane at Moorth Ruins Cross atop Scadu Altus, who will leave behind Dane’s Hat and the Dryleaf Arts.
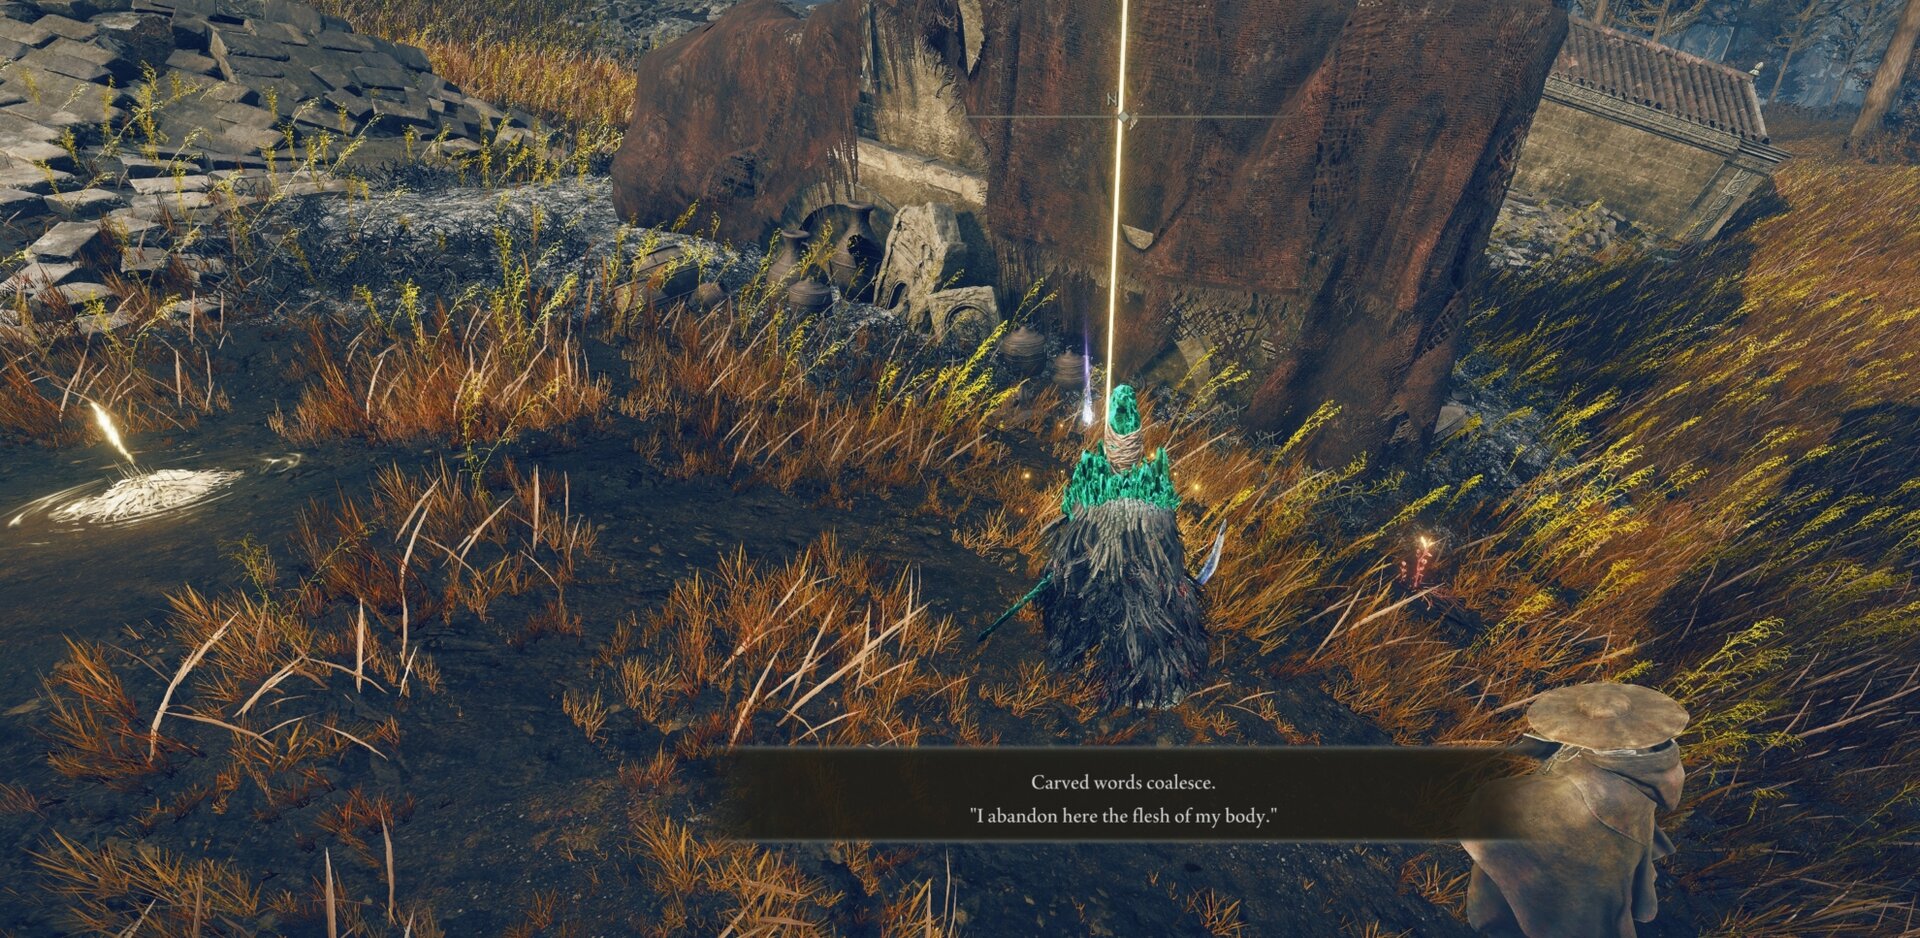
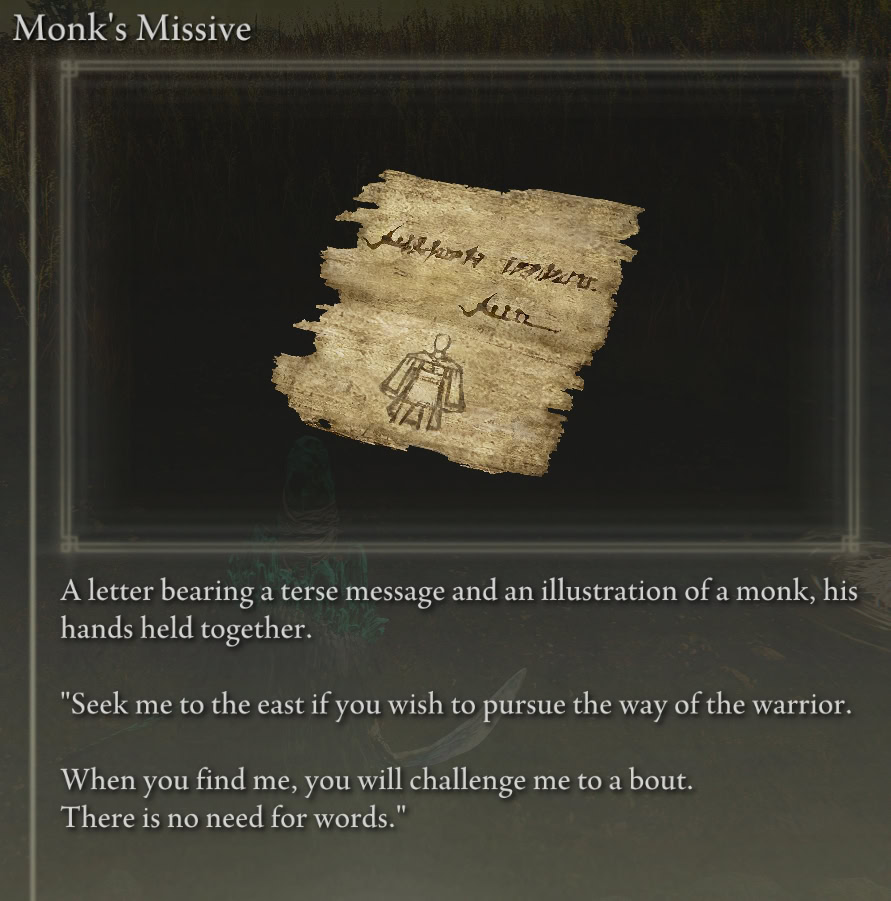
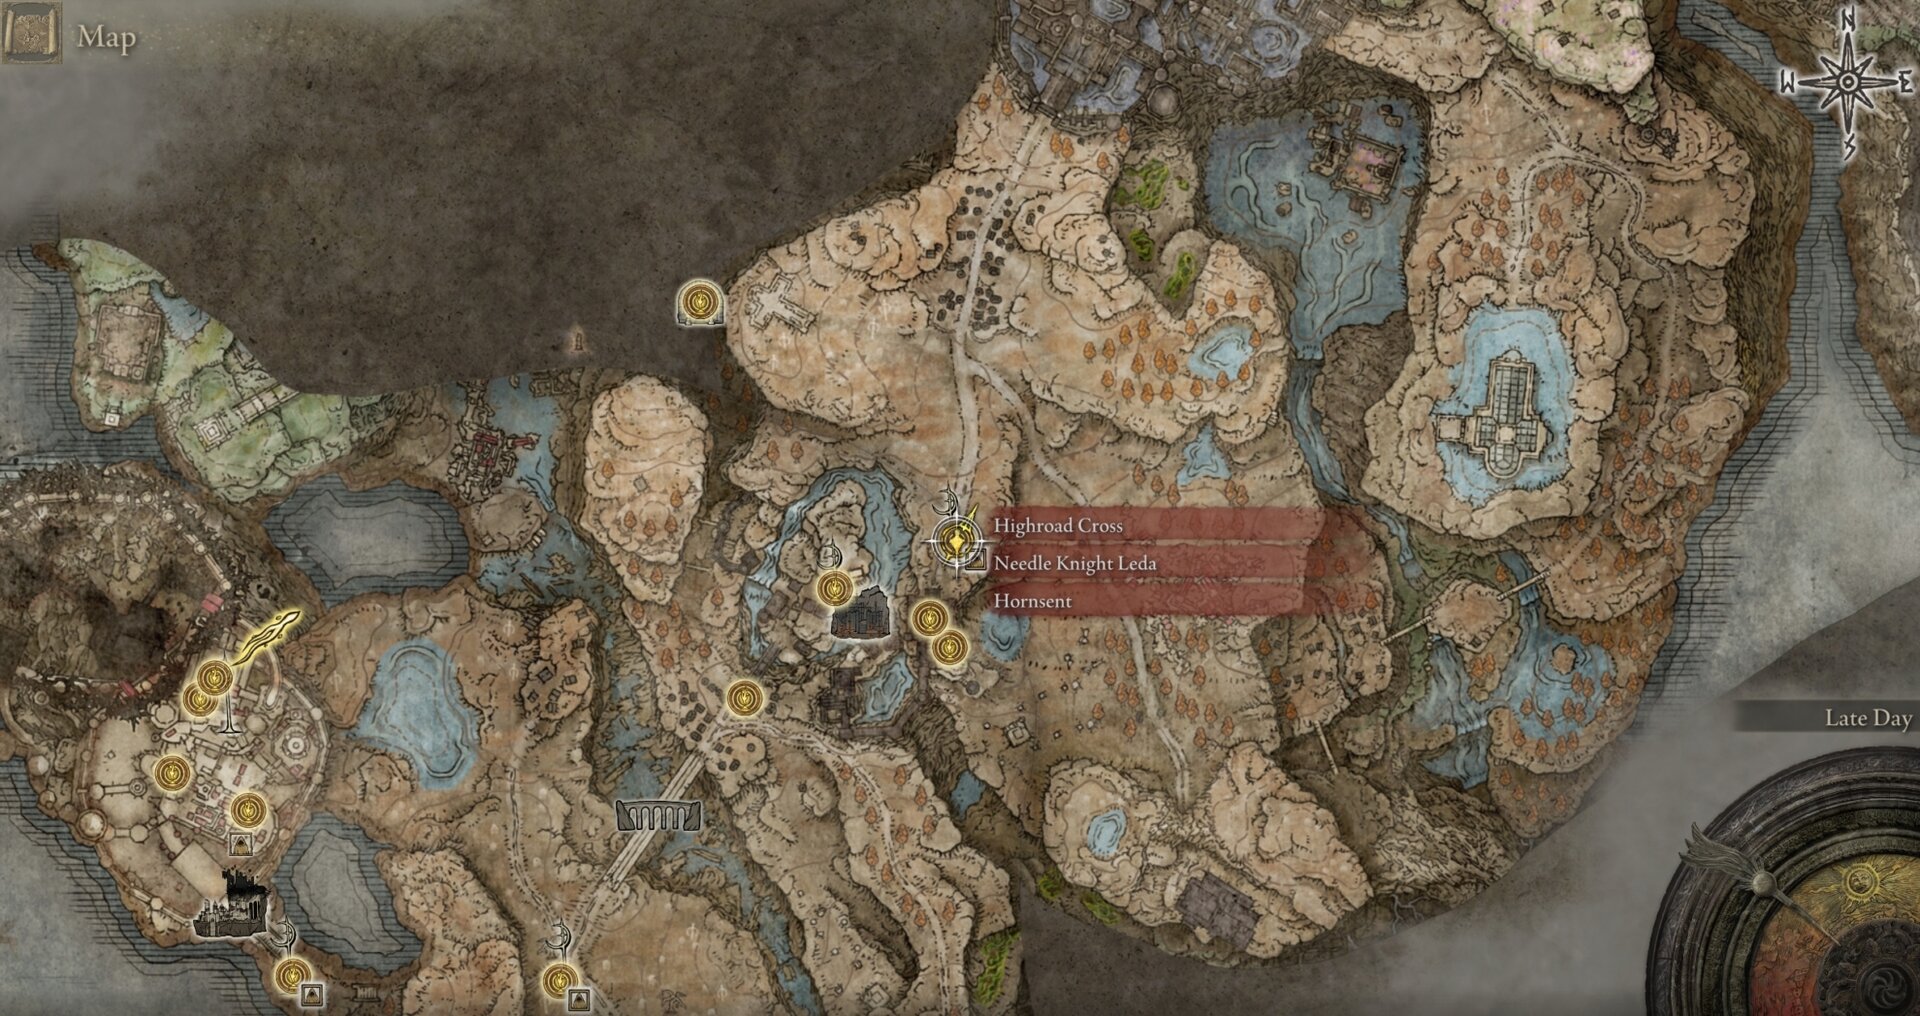
To be inducted into the Dryleaf Sect, you must challenge Dryleaf Dane to a duel by using the May the Best Win emote, which you get alongside the Monk’s Missive note at the Highroad Cross behind Castle Ensis.
Dryleaf Seal and and Dryleaf Chest, Gloves, and Boots Location
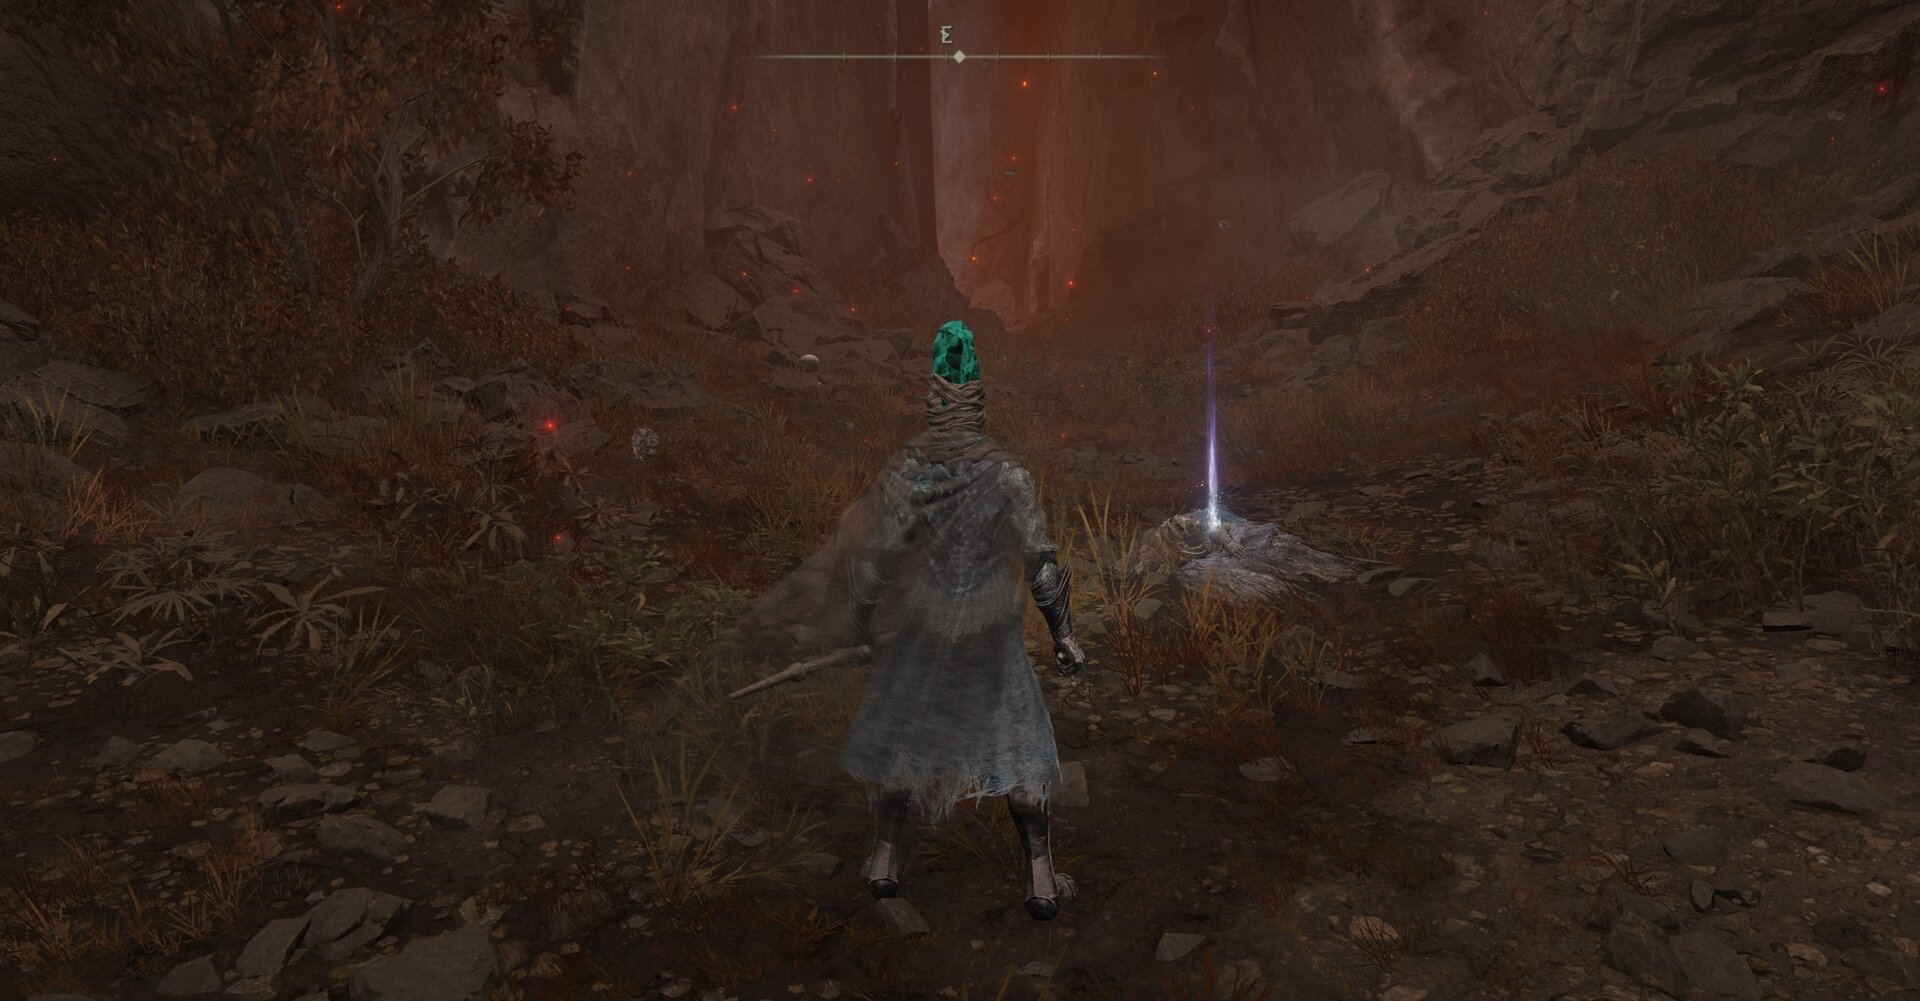
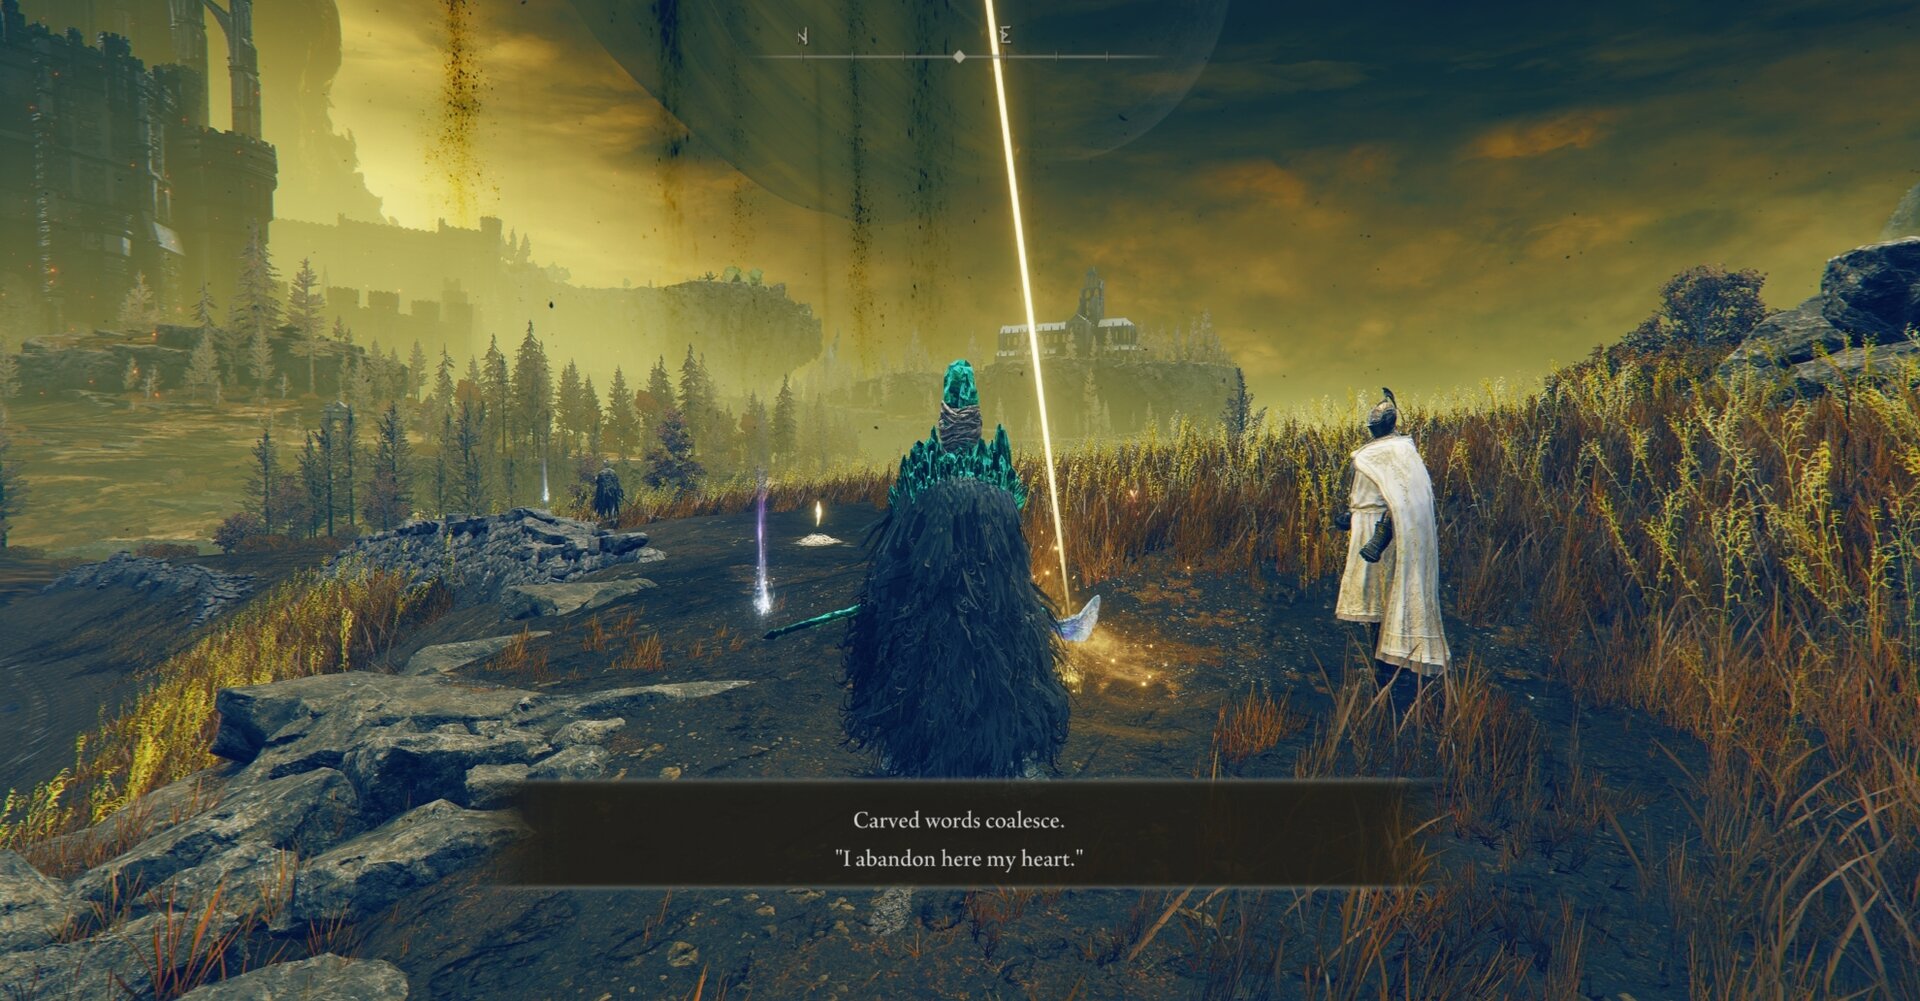
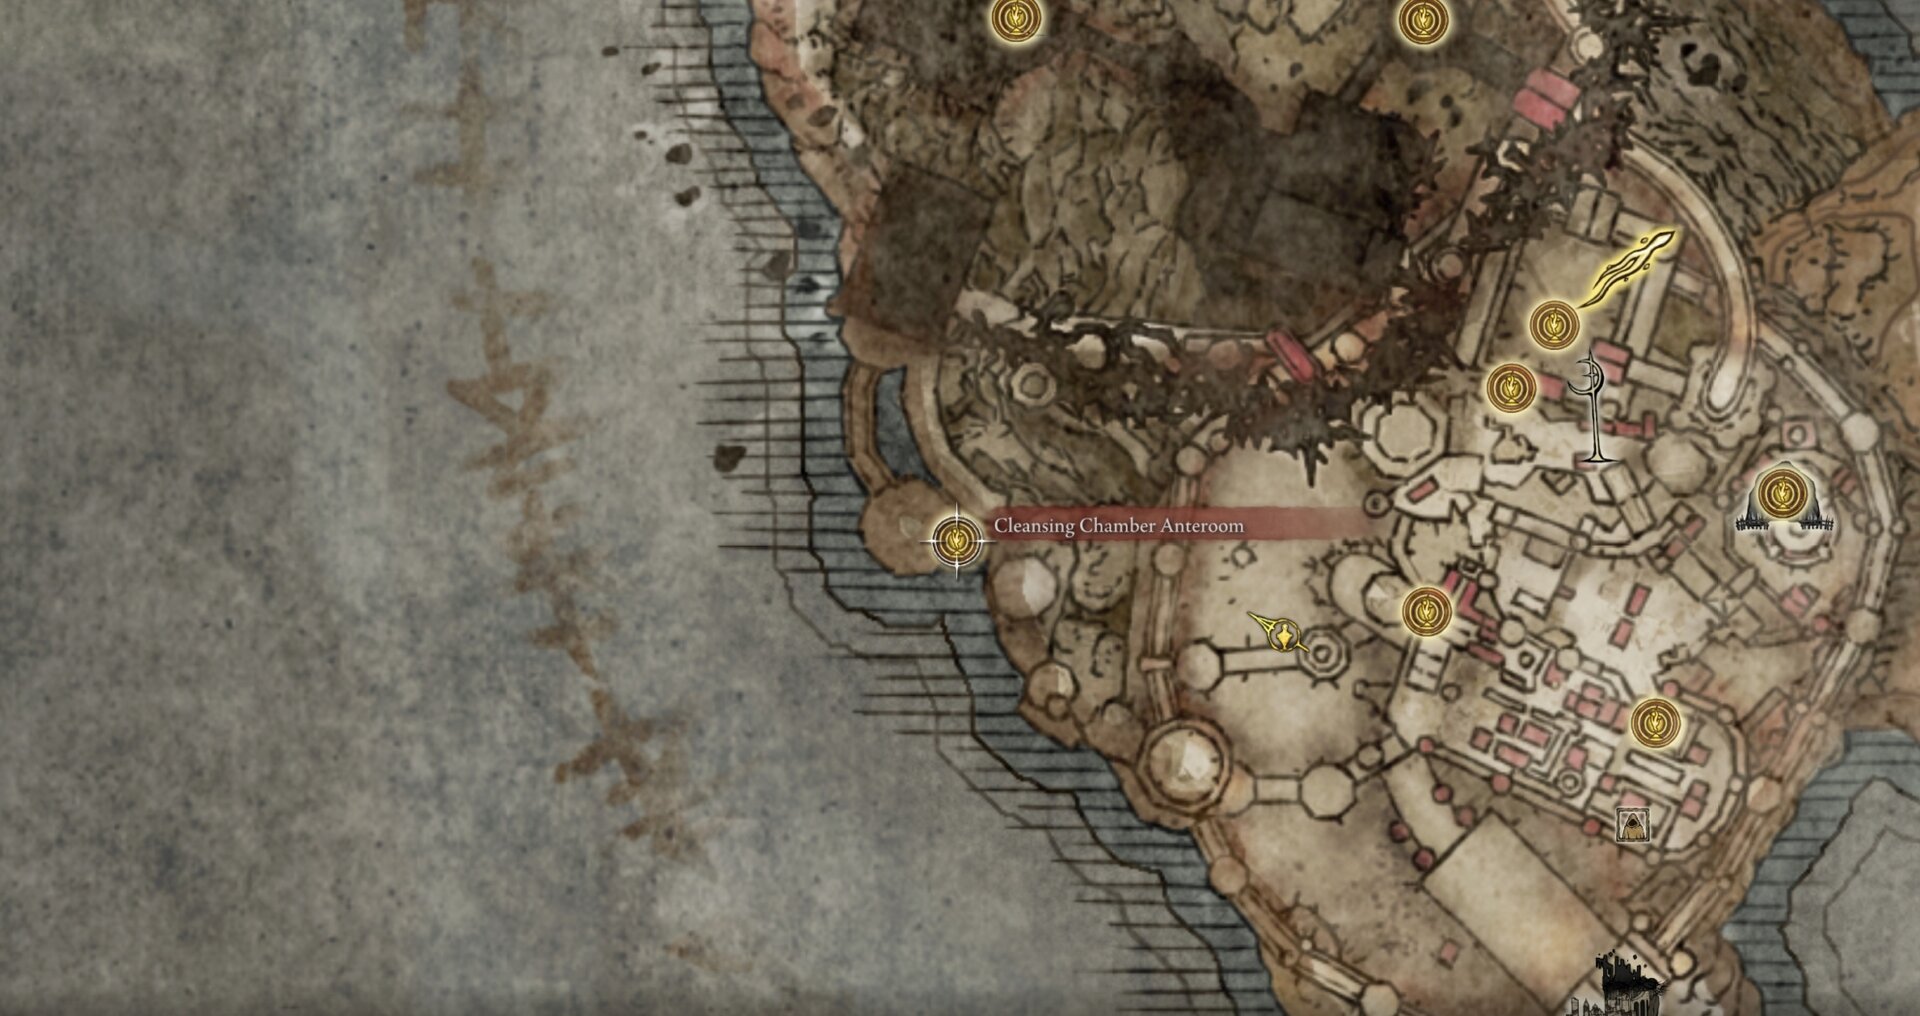
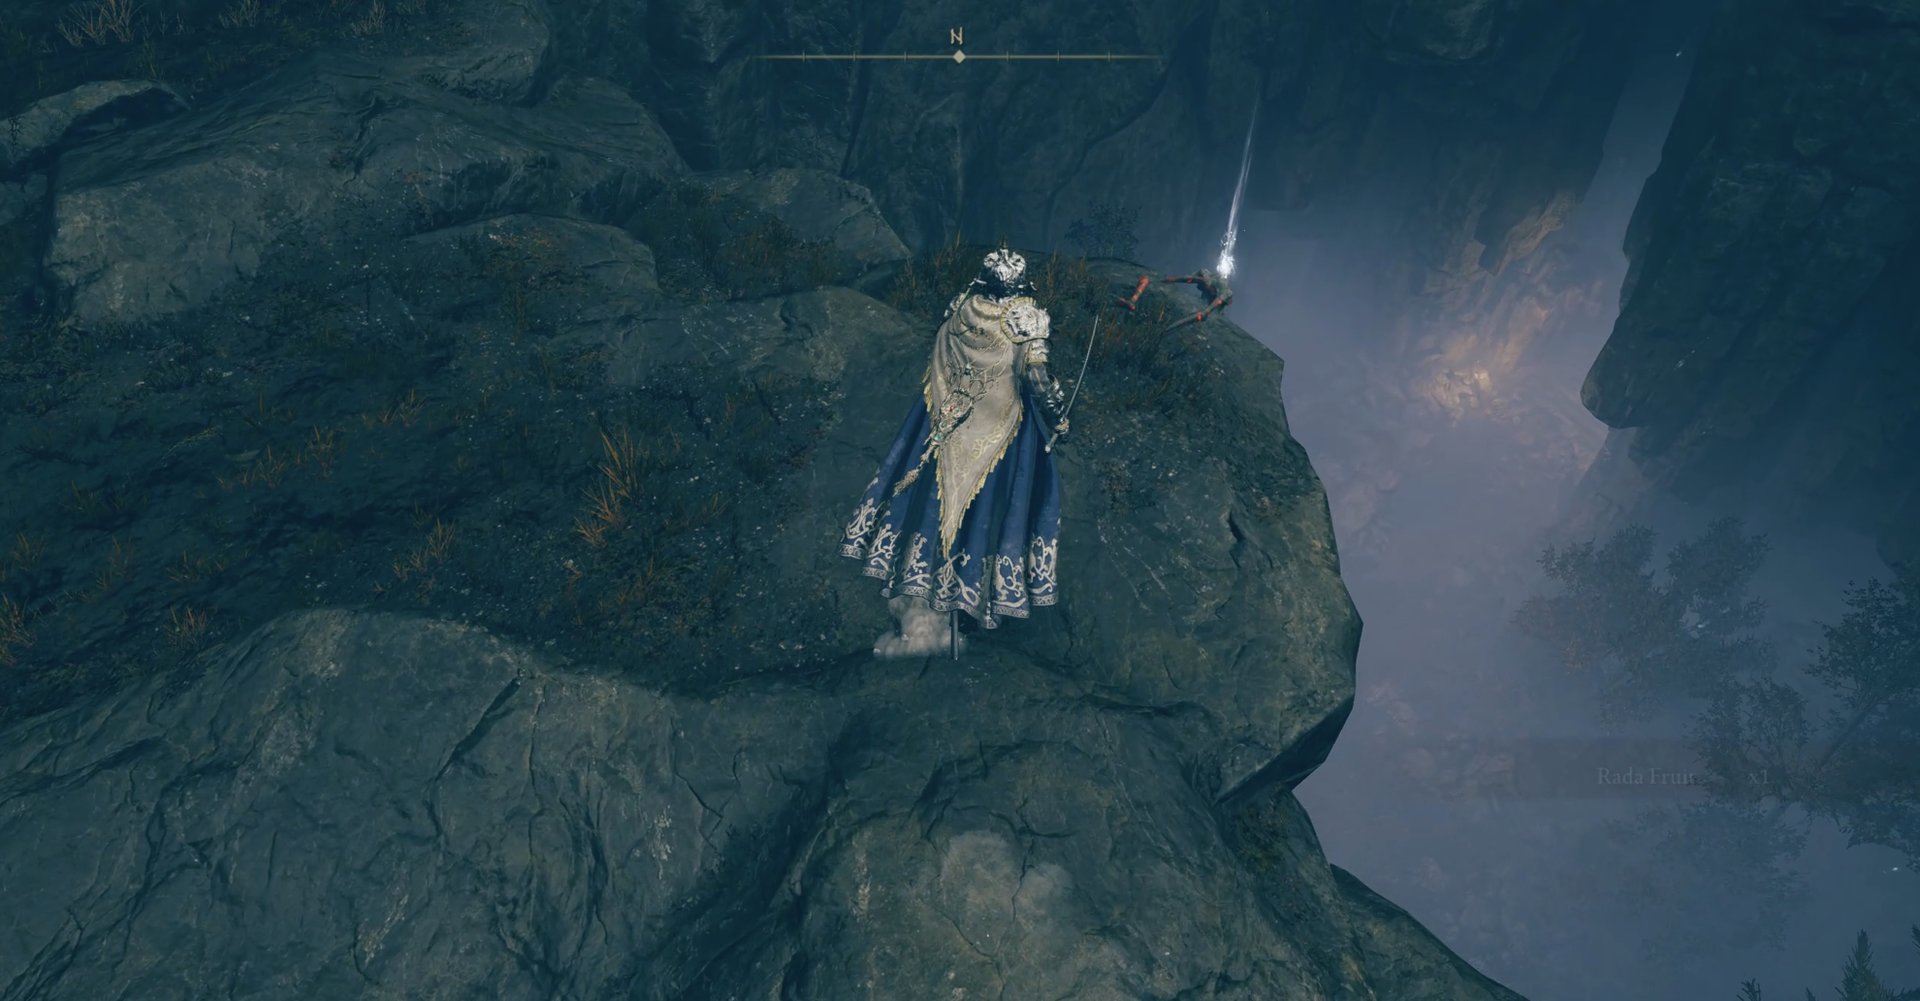
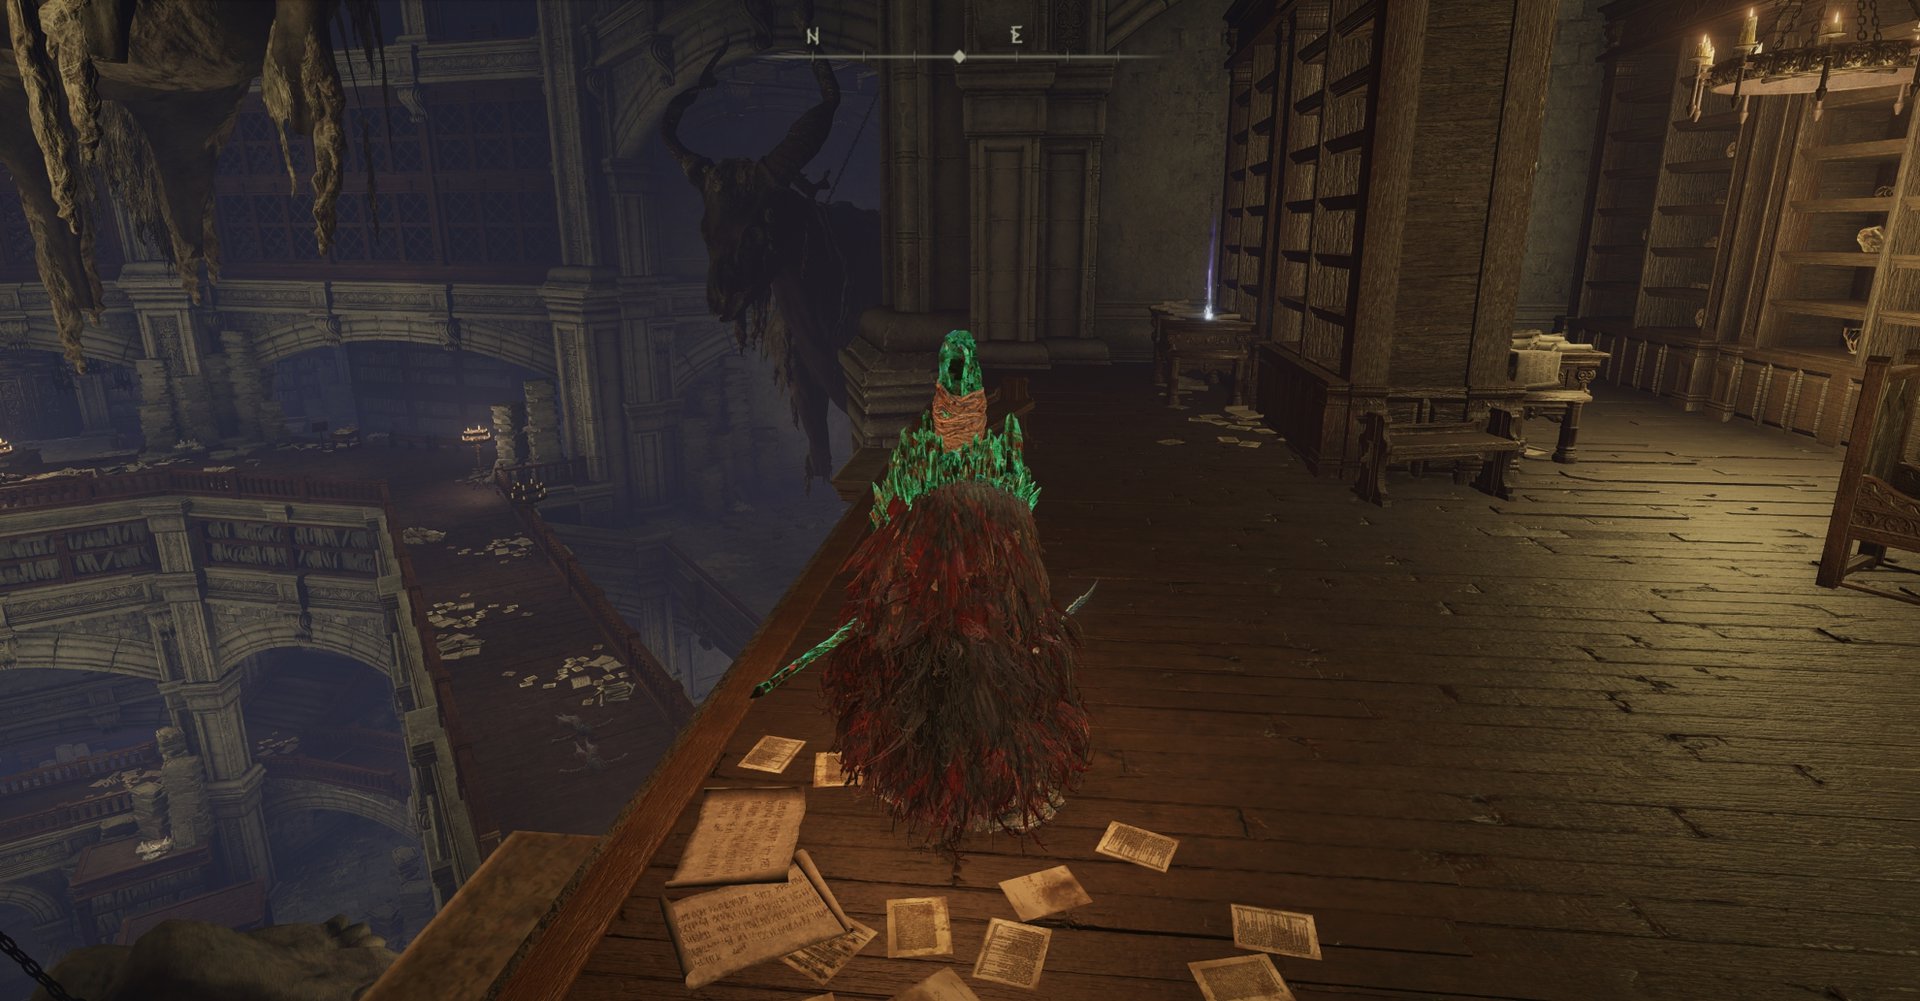
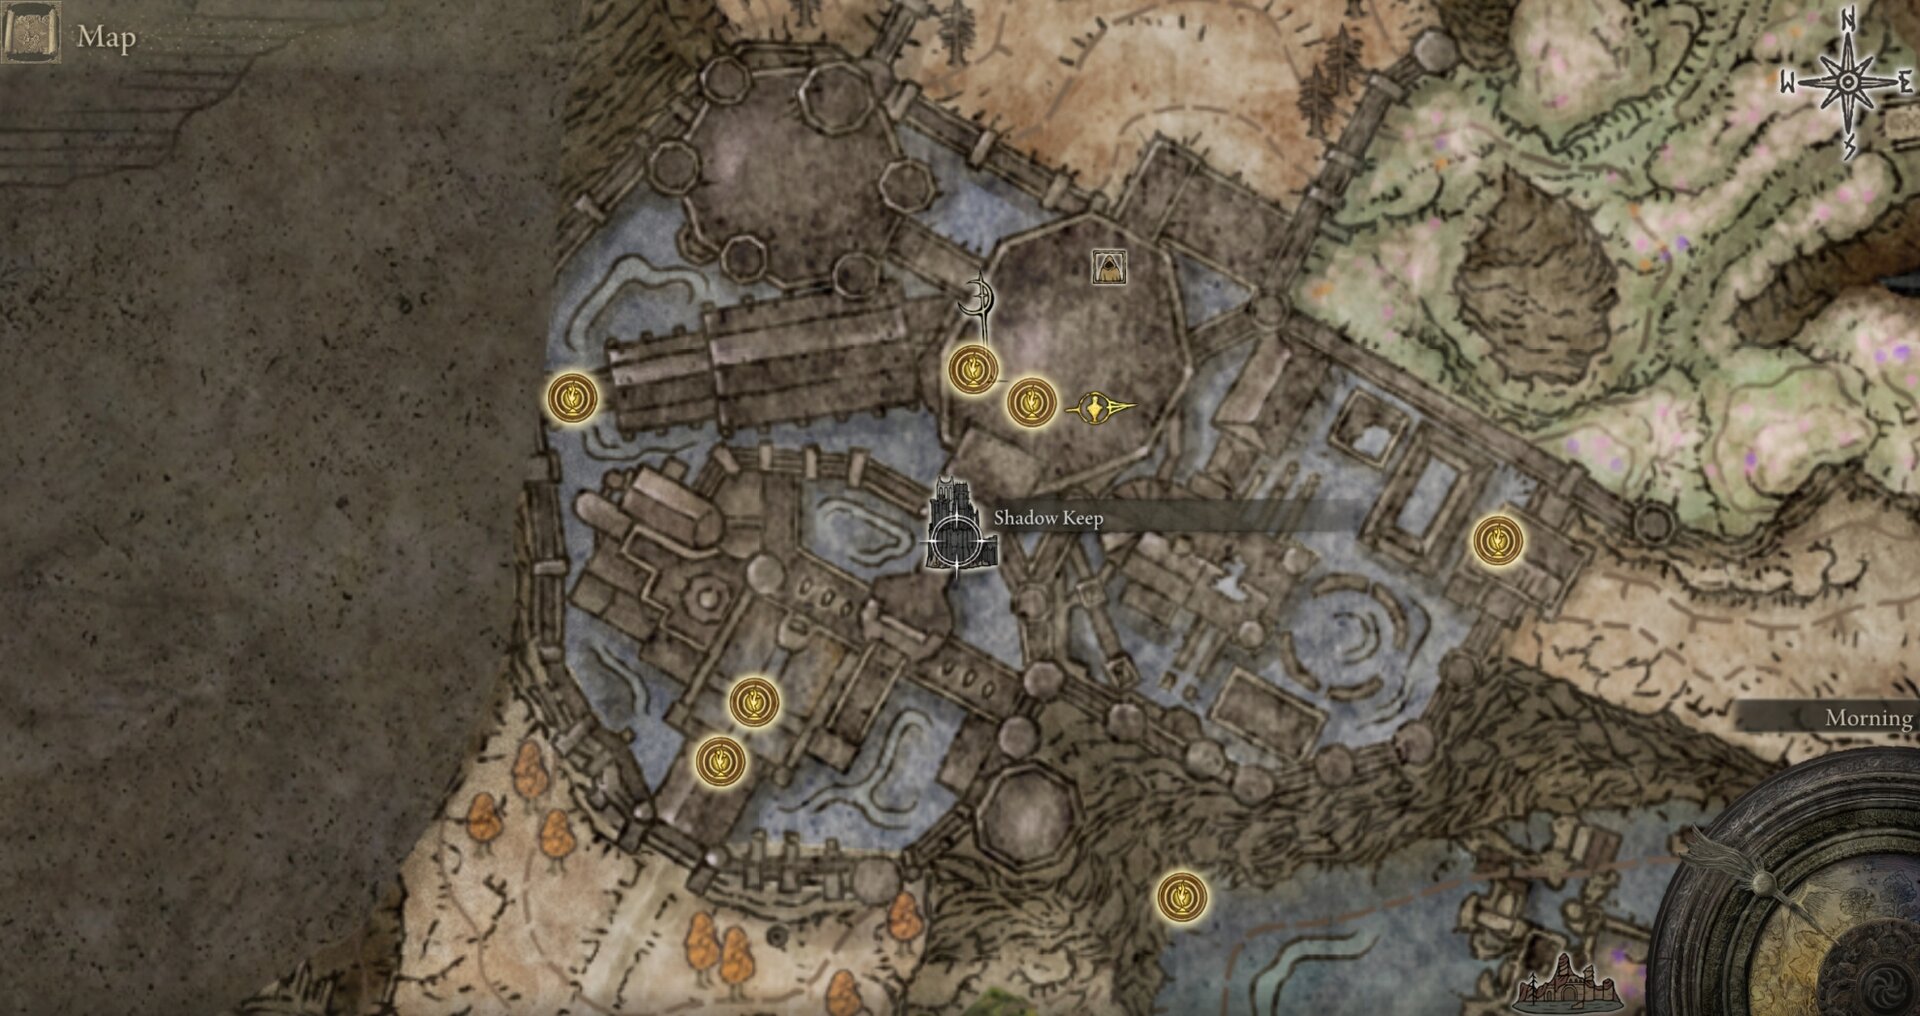
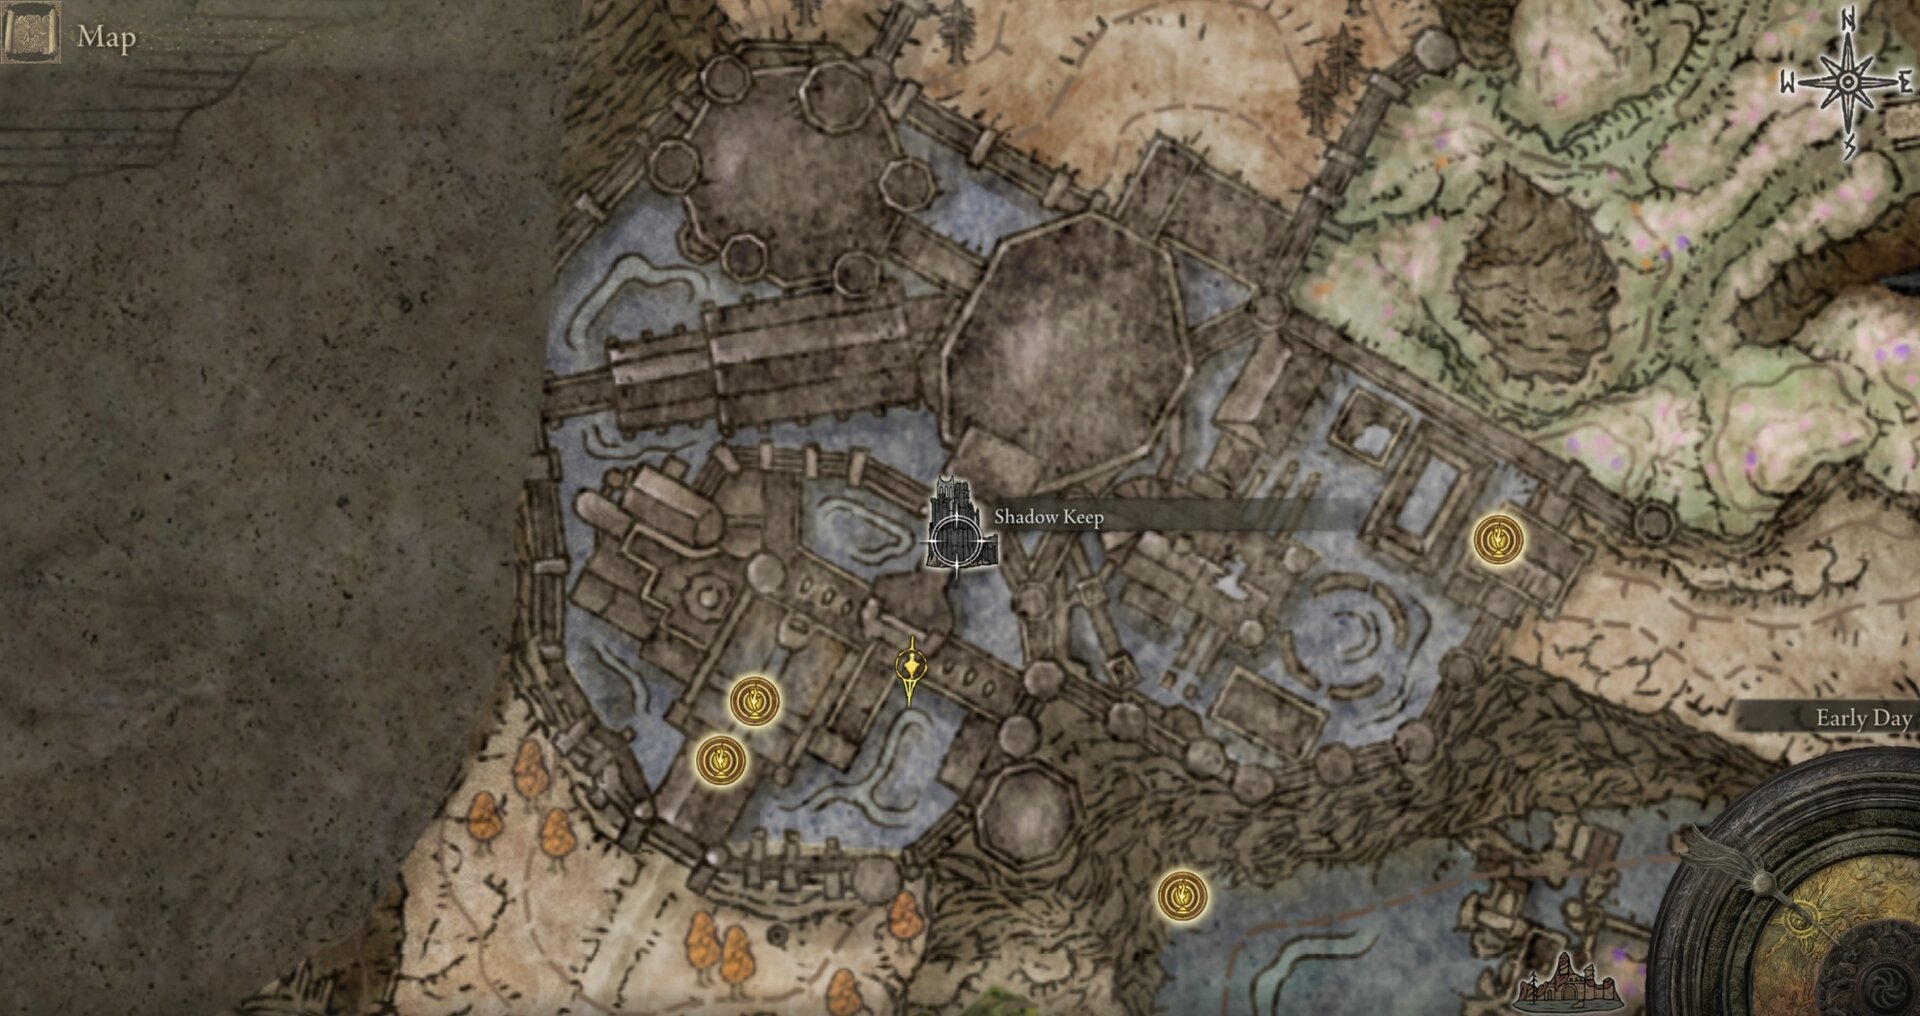
You can loot the Dryleaf Seal and the Dryleaf Armor Set, save for Dane’s Hat, at the base of the second waterfall along the Recluses’ River flowing out of the Ruins of Unte from the Shadow Keep.
Dane’s Footwork Location
You receive Dane’s Footwork after defeating him and his allies at the Cleansing Chamber in Enir-Ilim.
Ash of War: Dryleaf Whirlwind Location
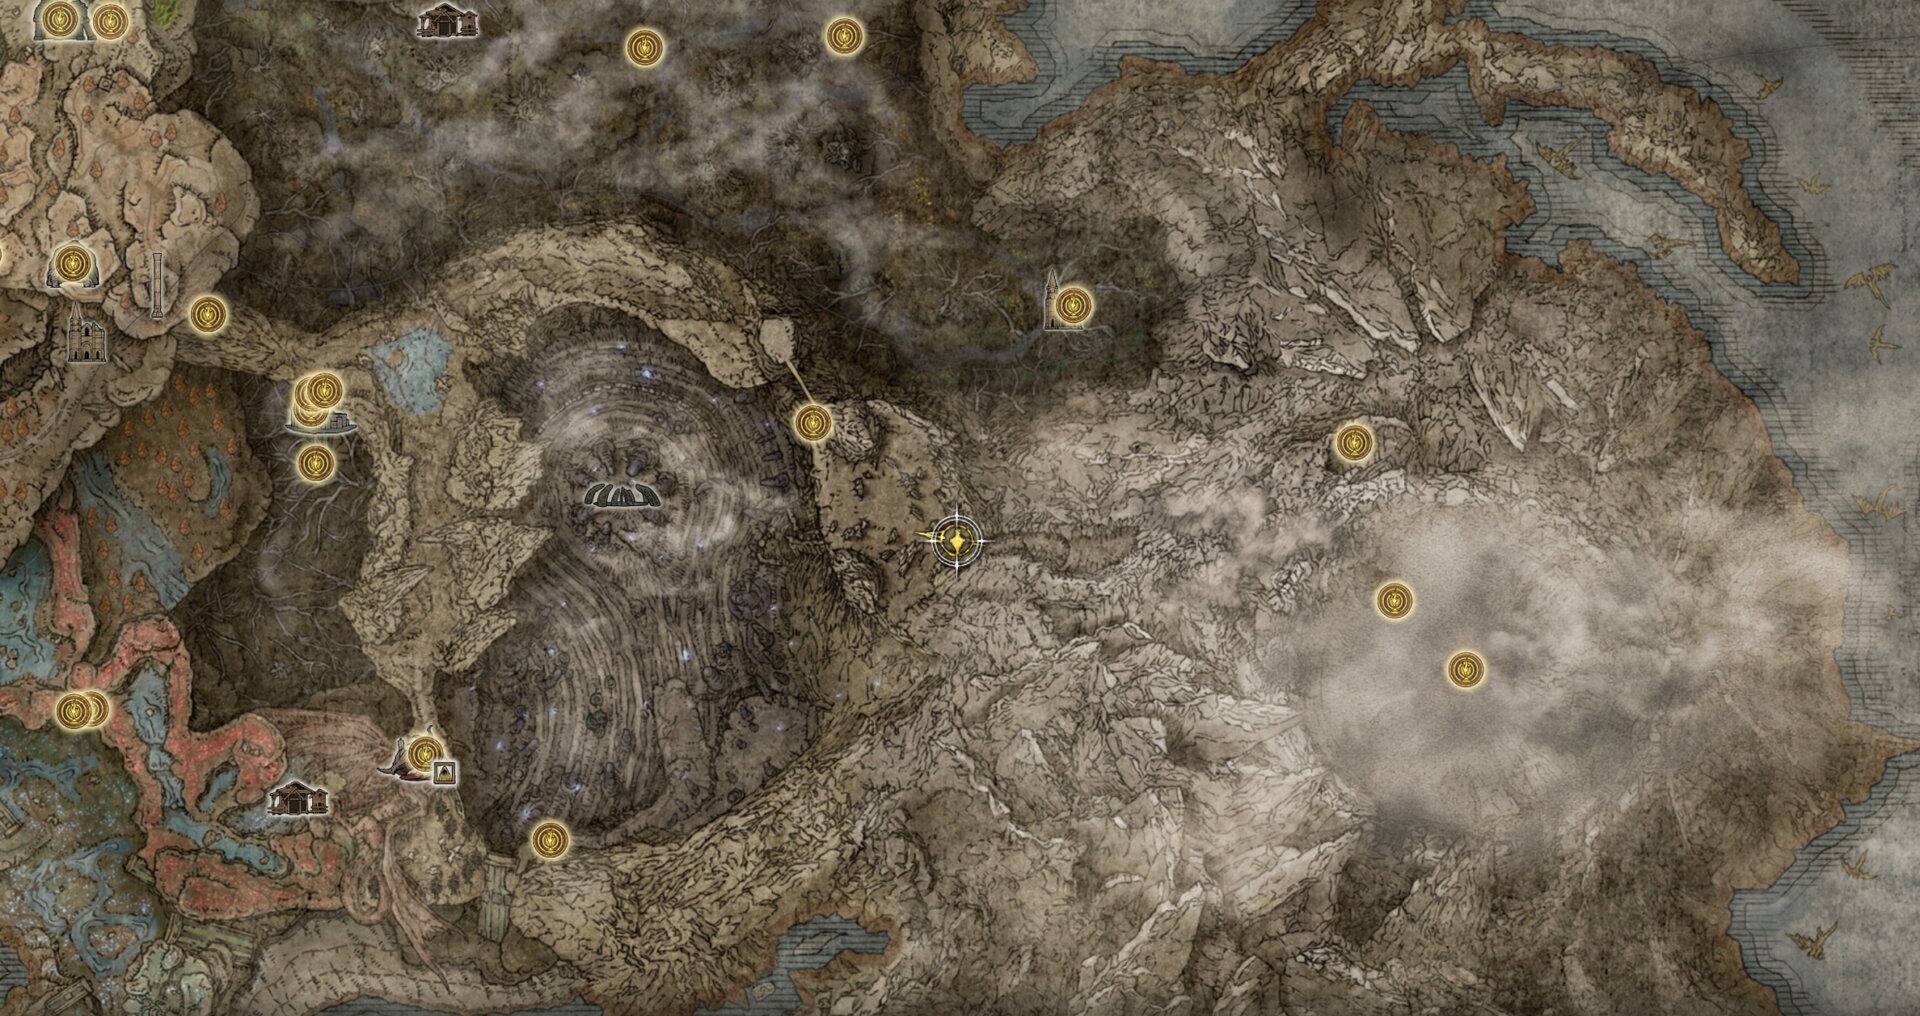
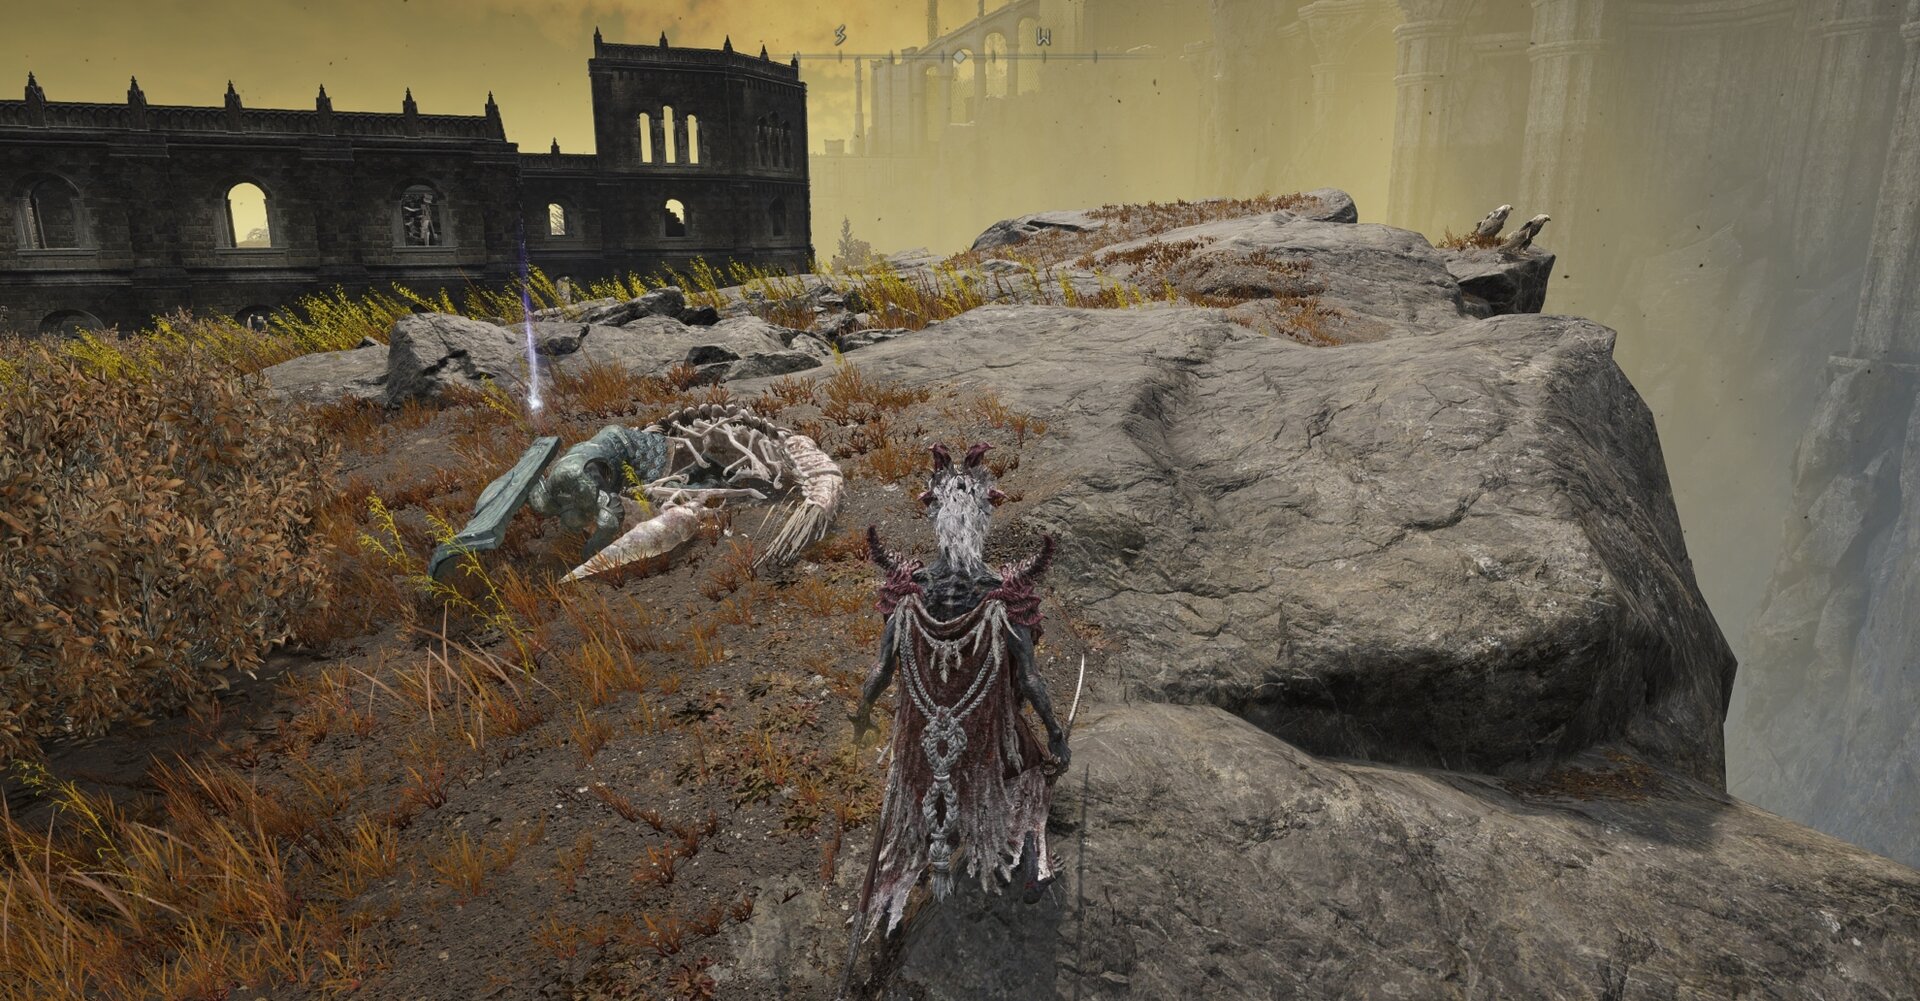
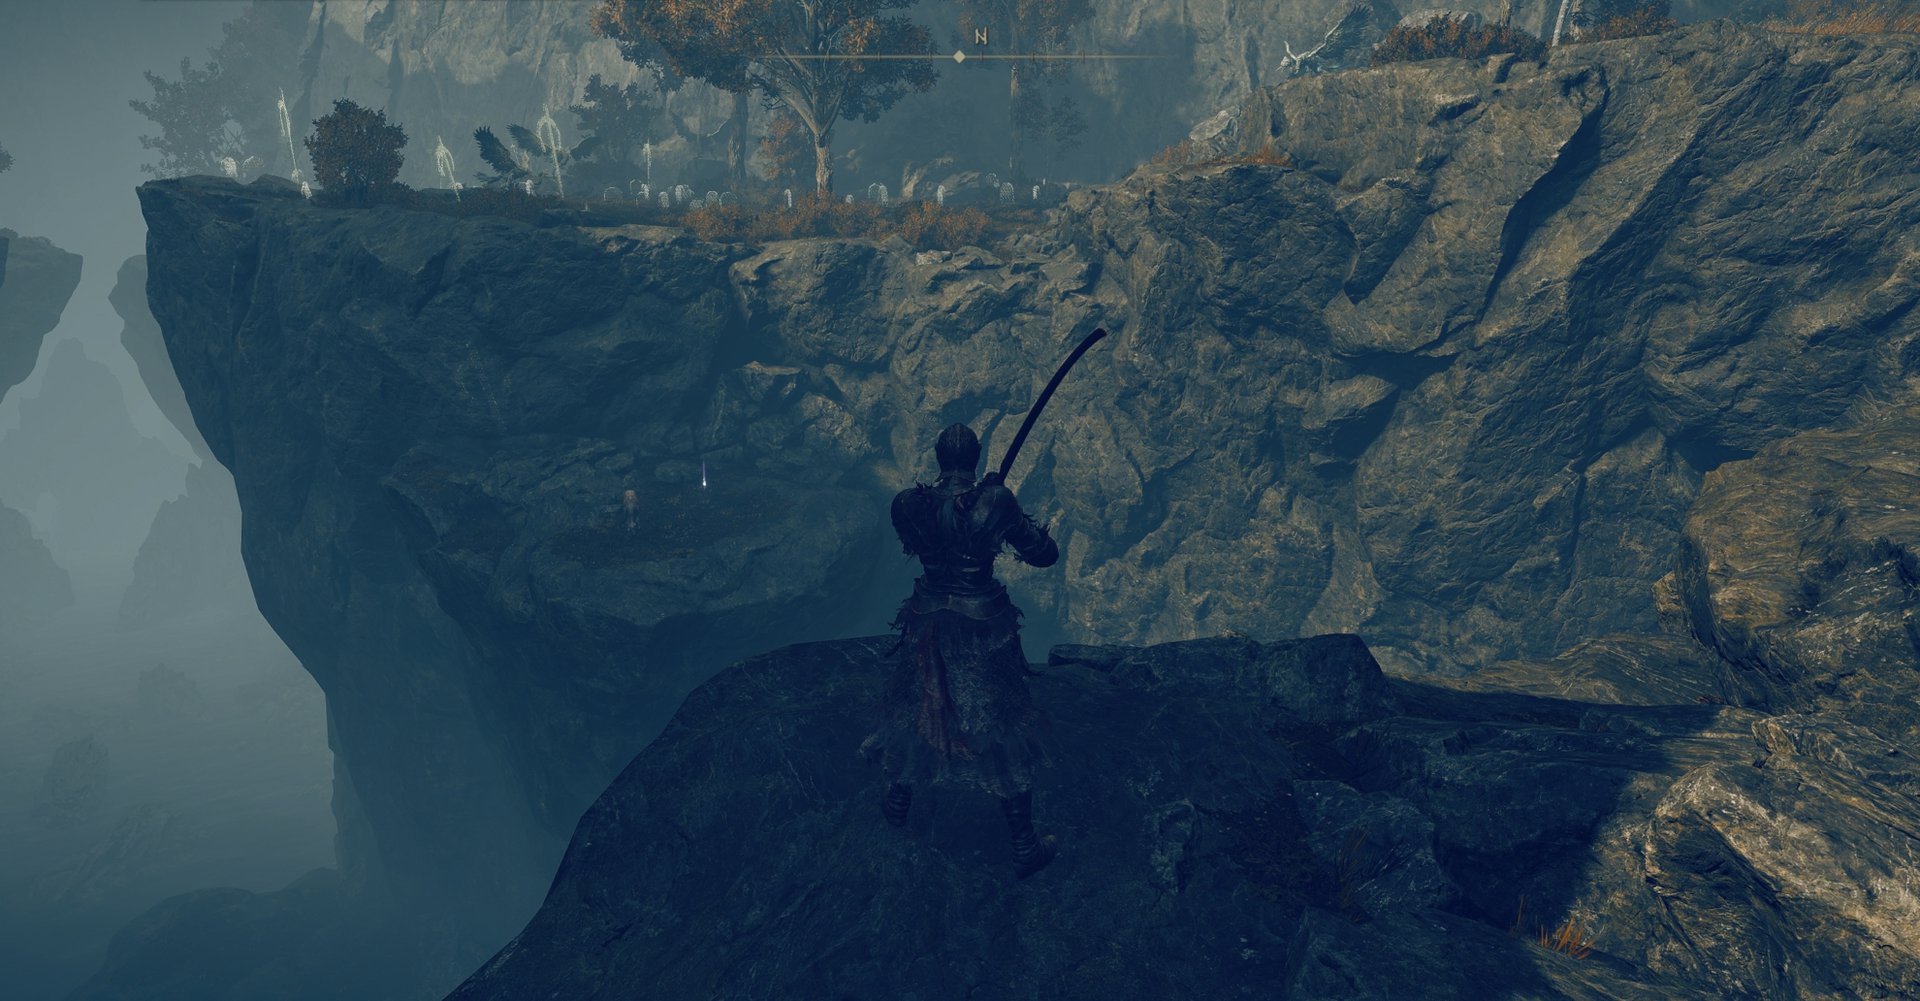
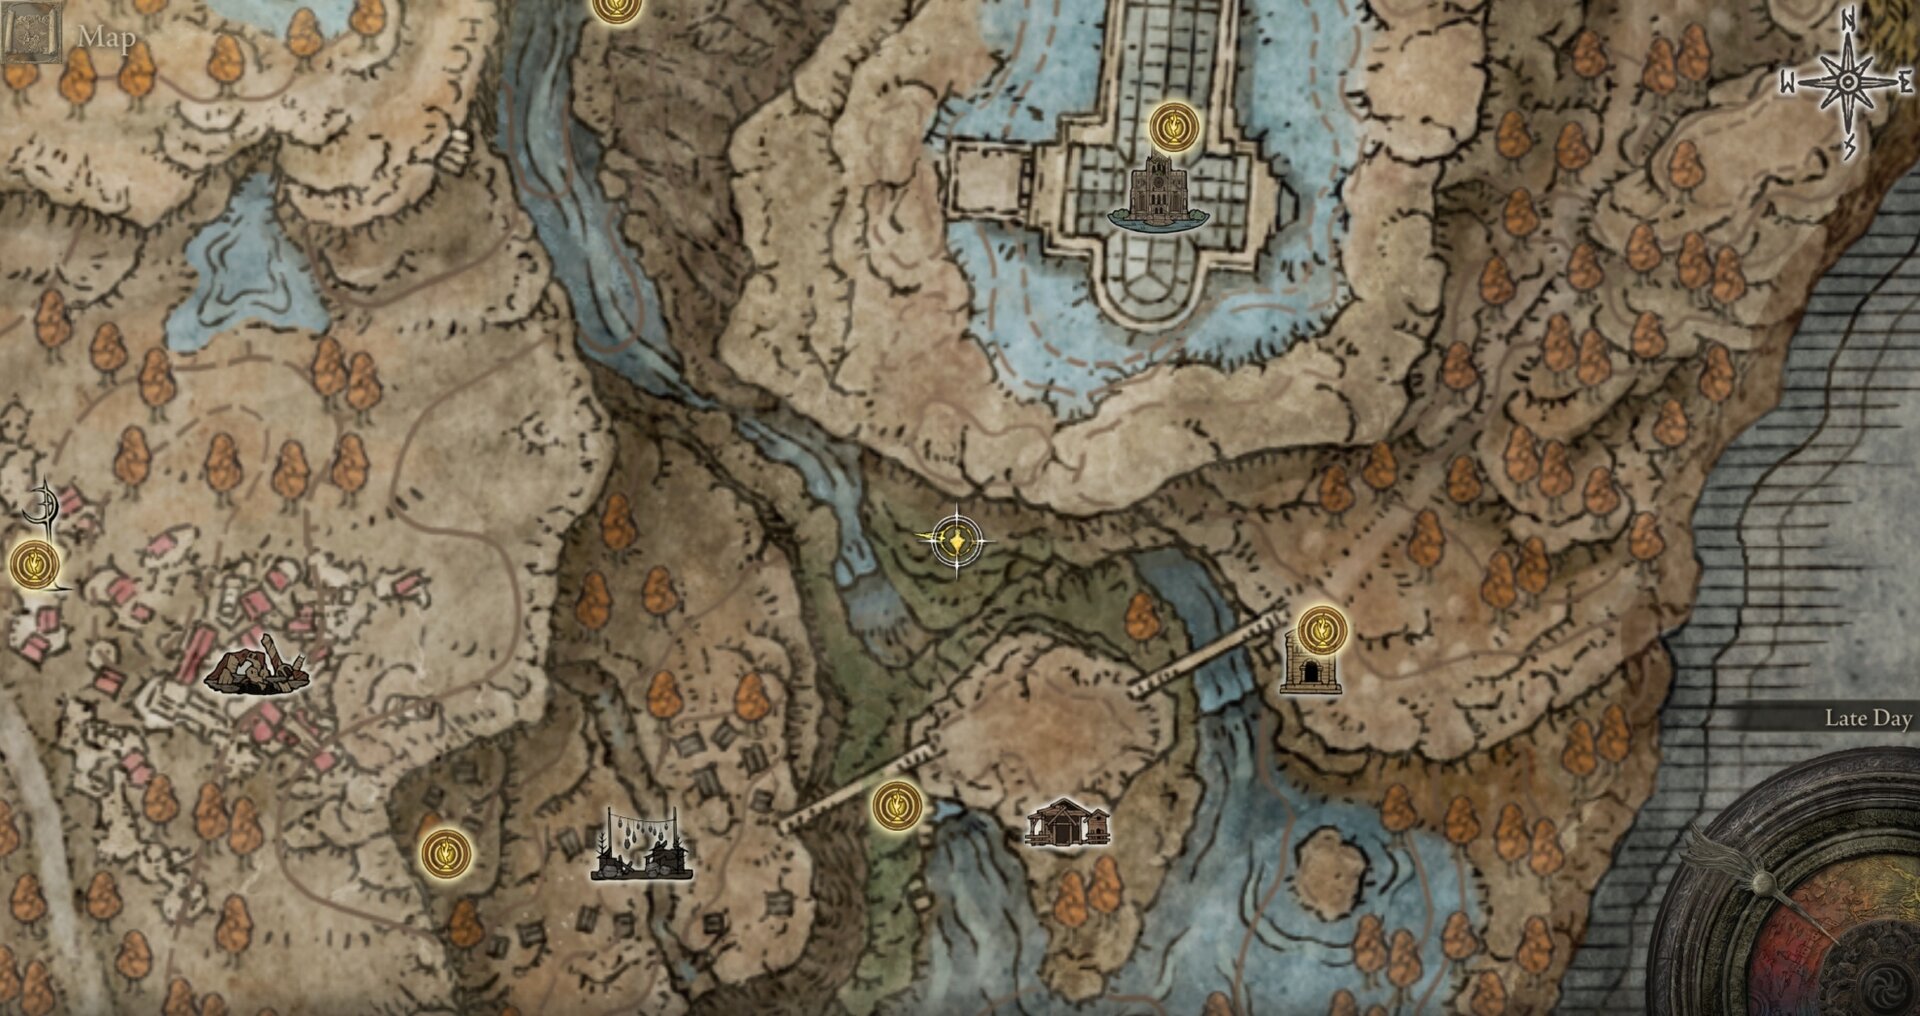
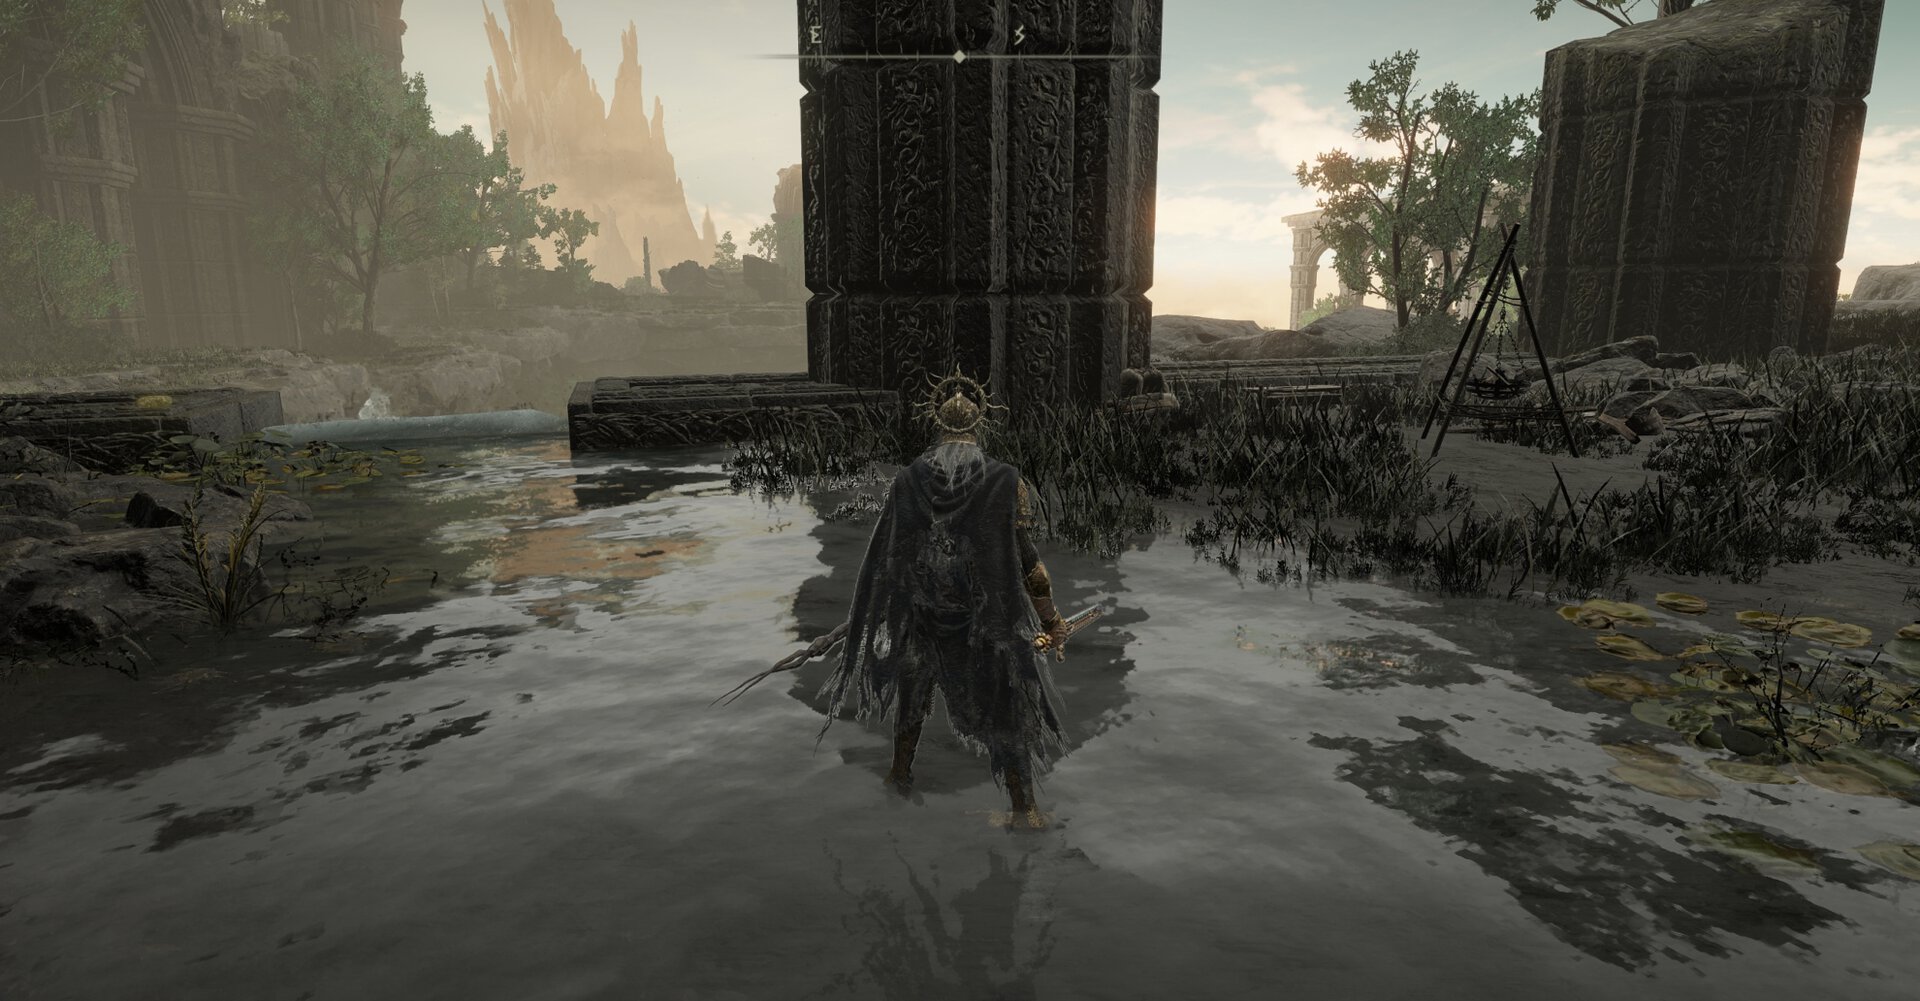
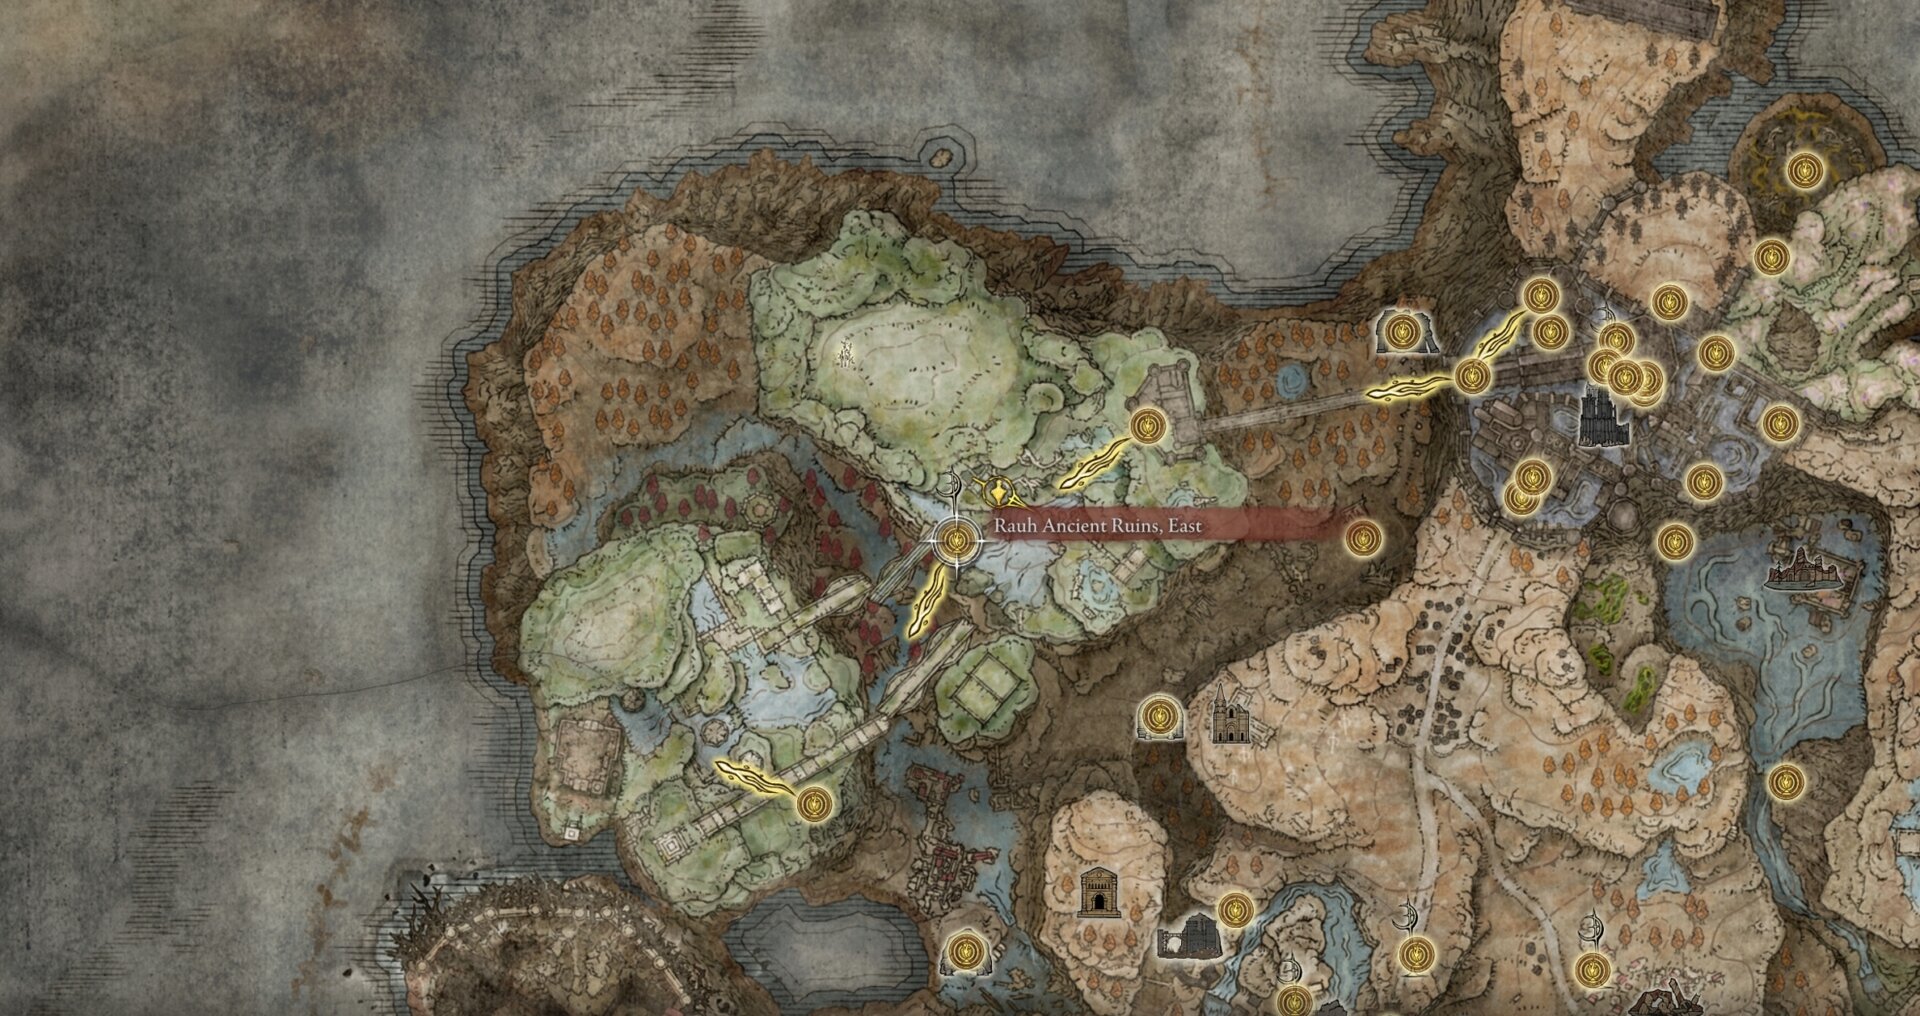
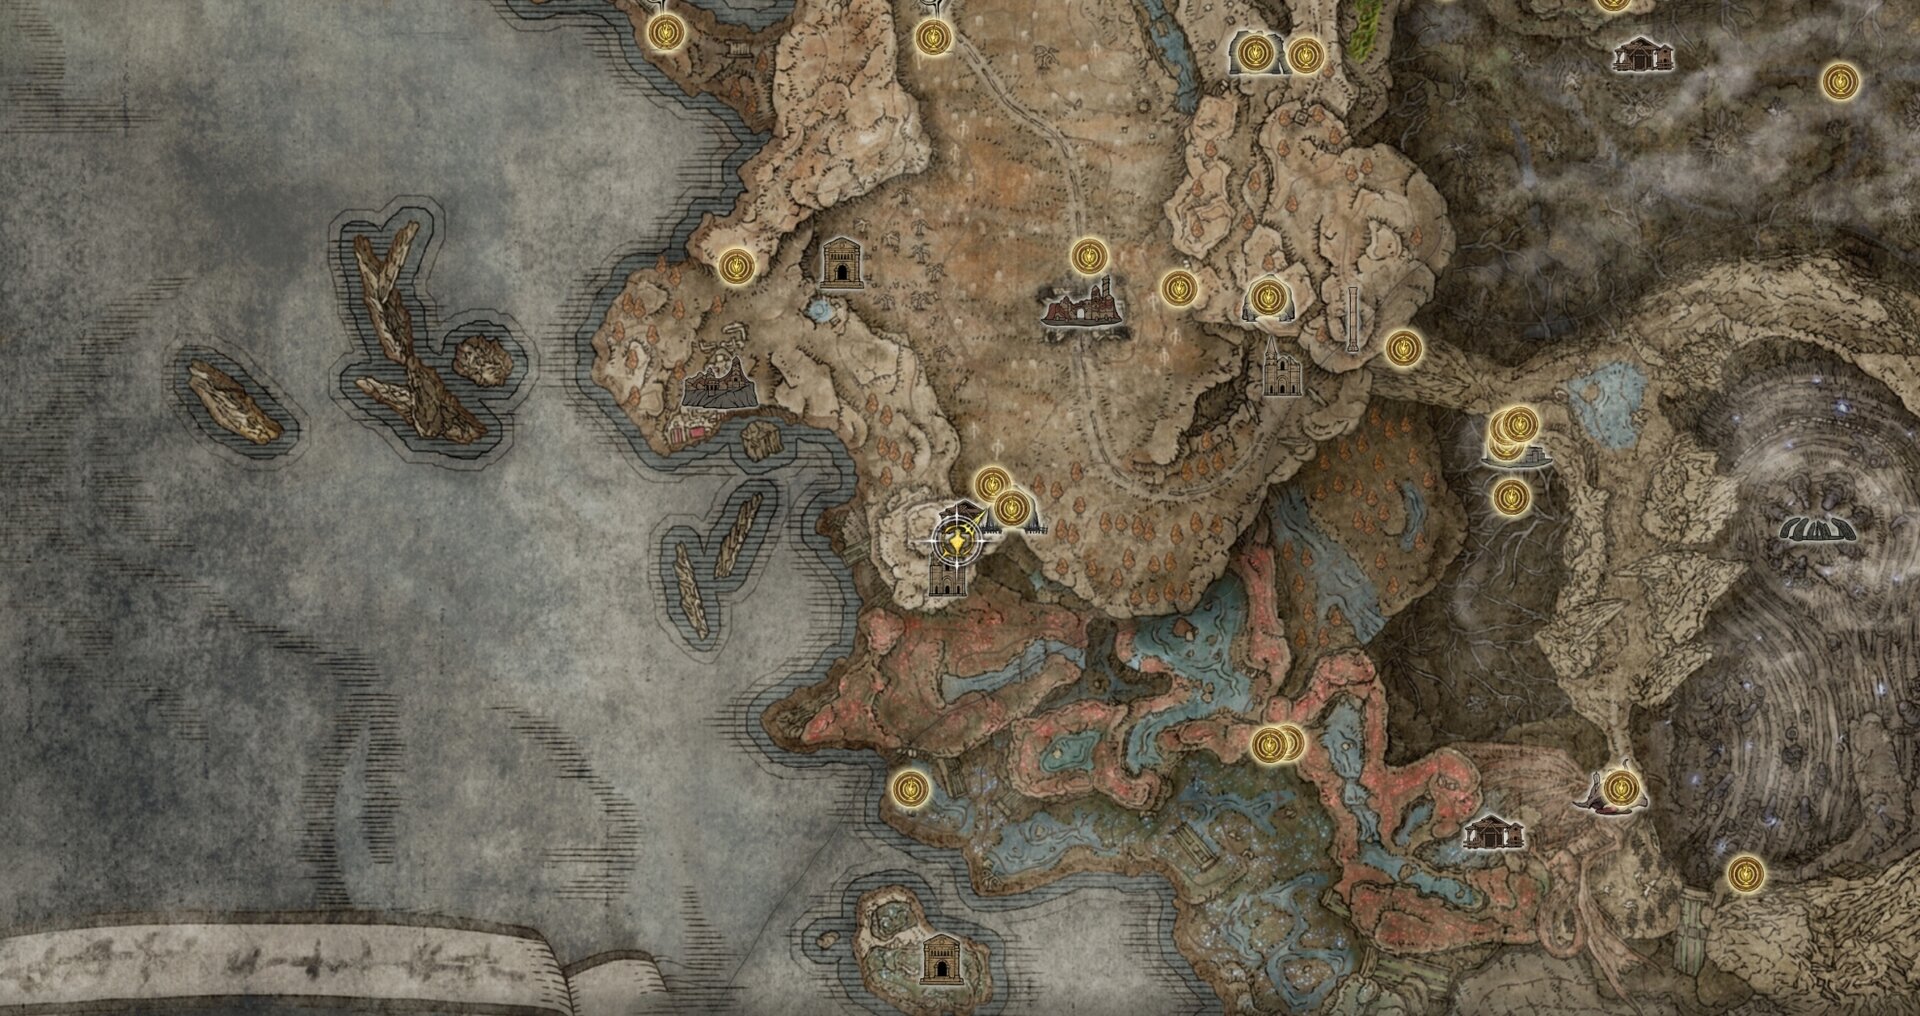
You can loot the Ash of War: Dryleaf Whirlwind (designed for Dane’s Footwork) at an abandoned campsite very close to the Rauh Ancient Ruins, East, Site of Grace and Cross.
Needle Knight Leda’s Armor and Sword
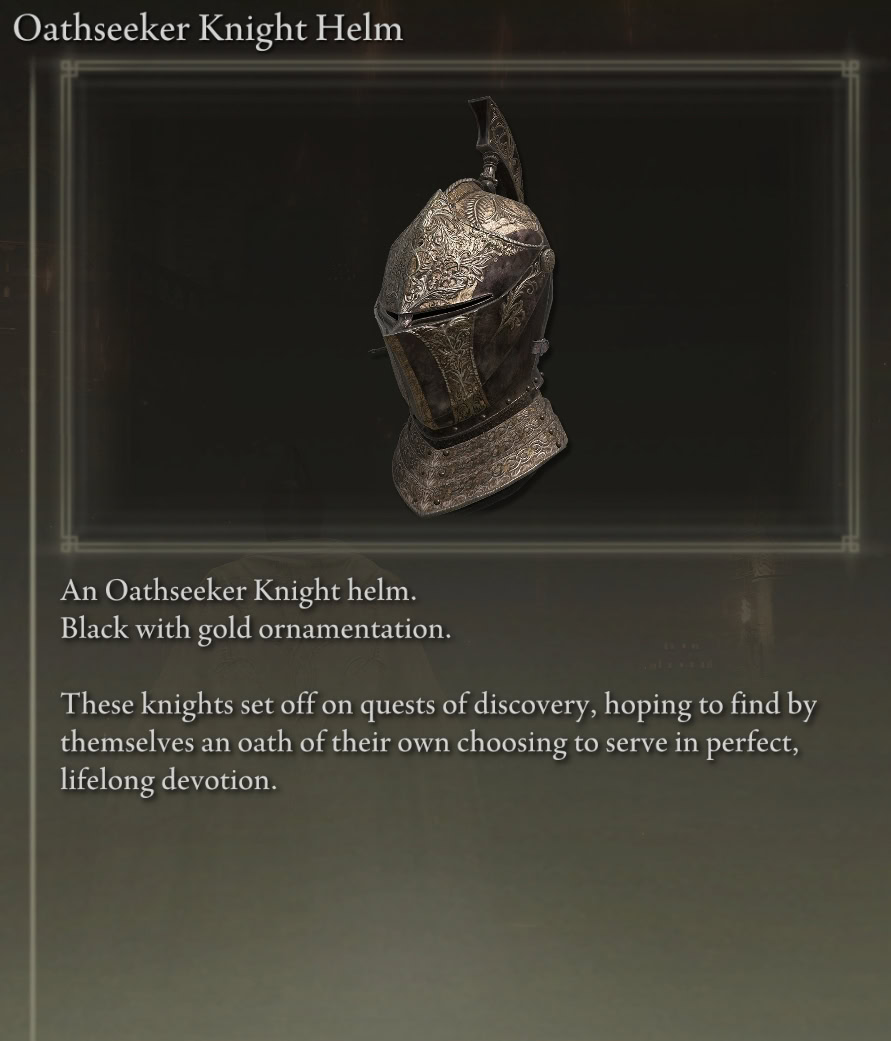
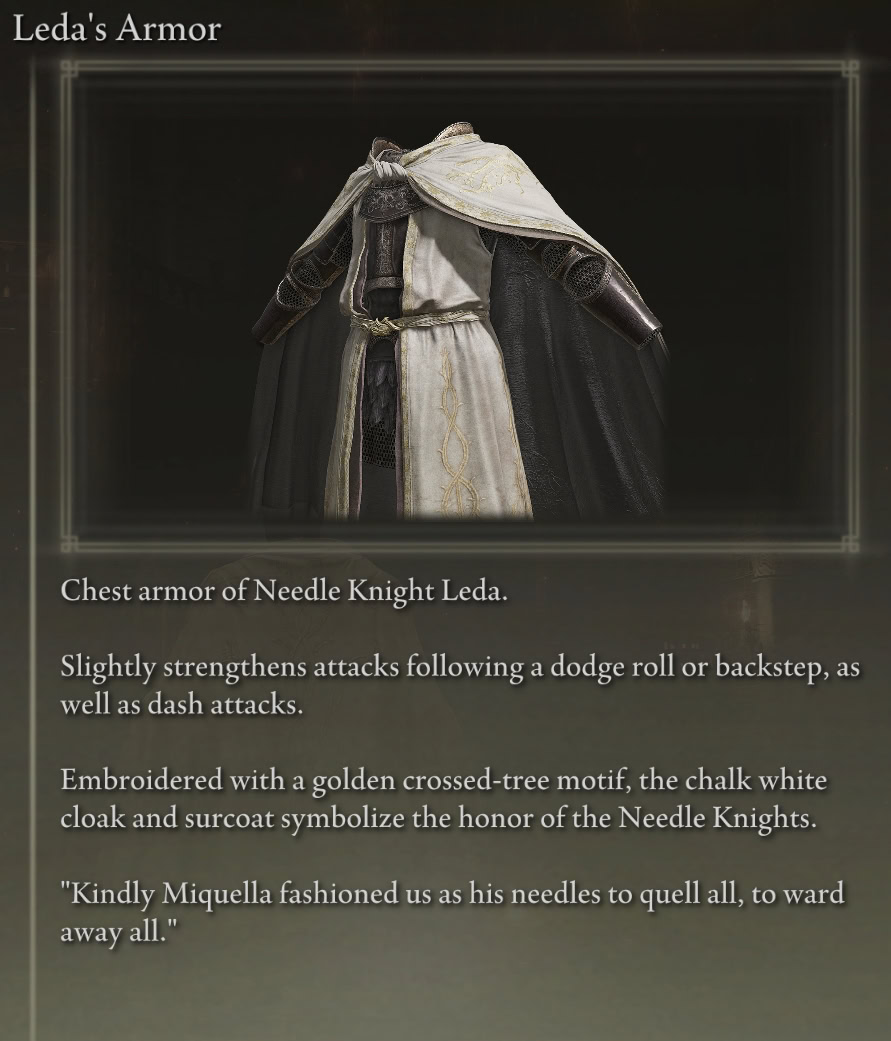
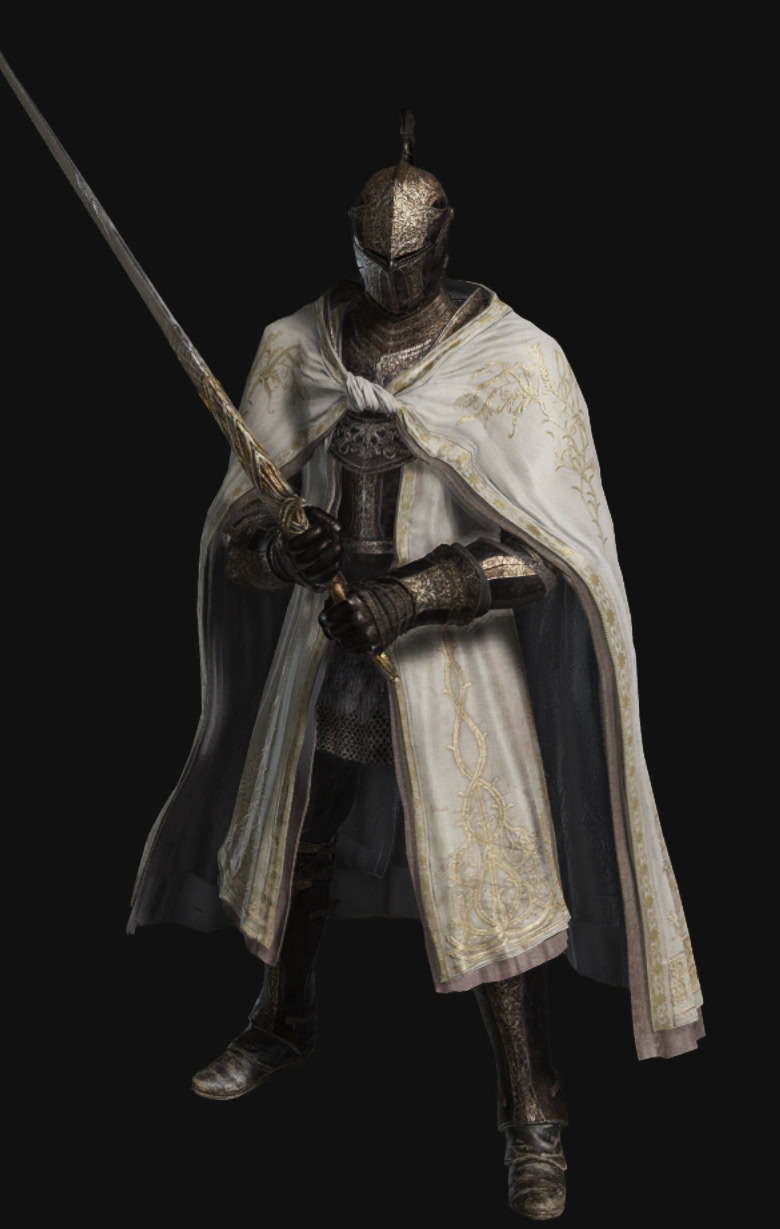
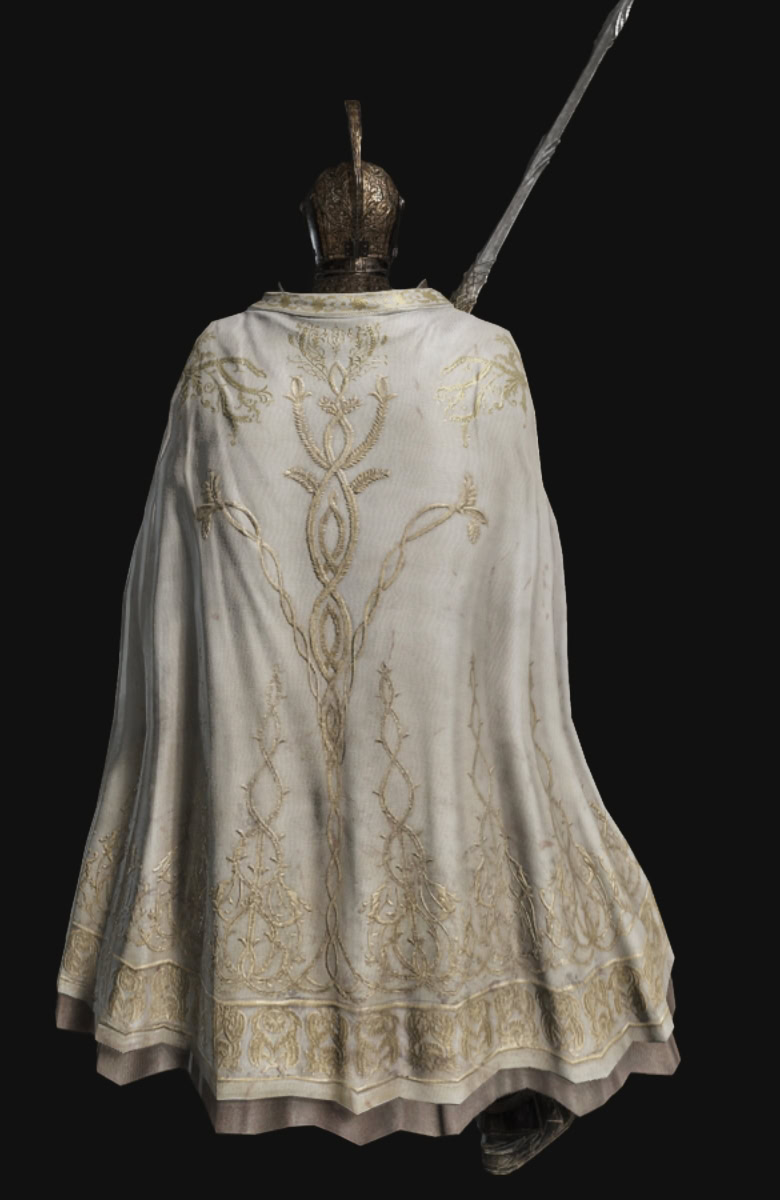
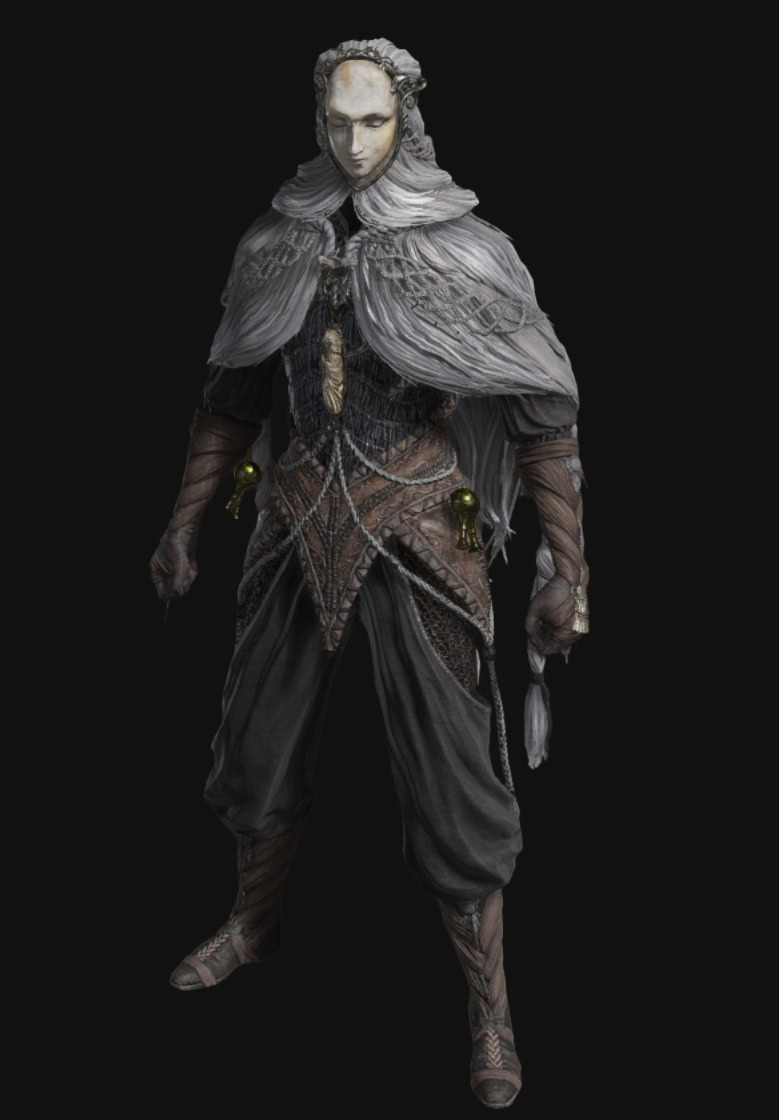
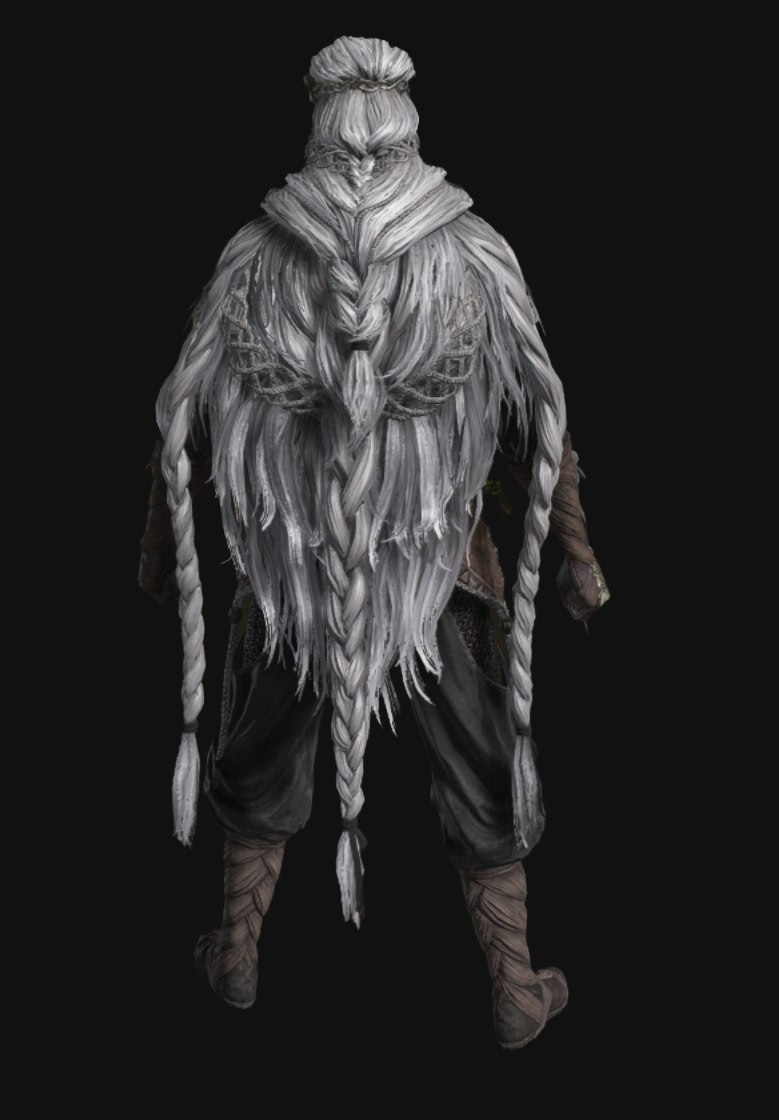
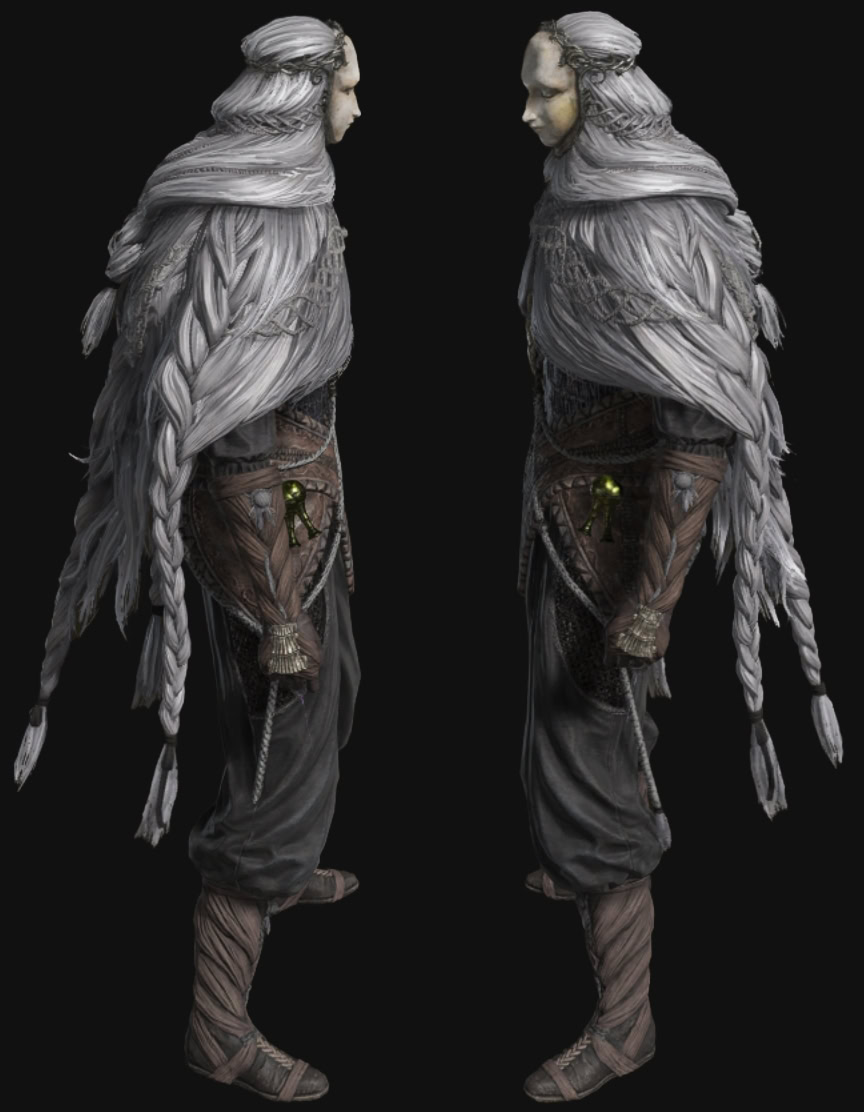
Needle Knight Leda wears a cloaked version of Oathseeker’s Armor Set and a Light Greatsword. She also uses a Seal to cast a little bit, which is likely the Dryleaf Seal. You can also get up to 2 Talismans if you choose to support her.
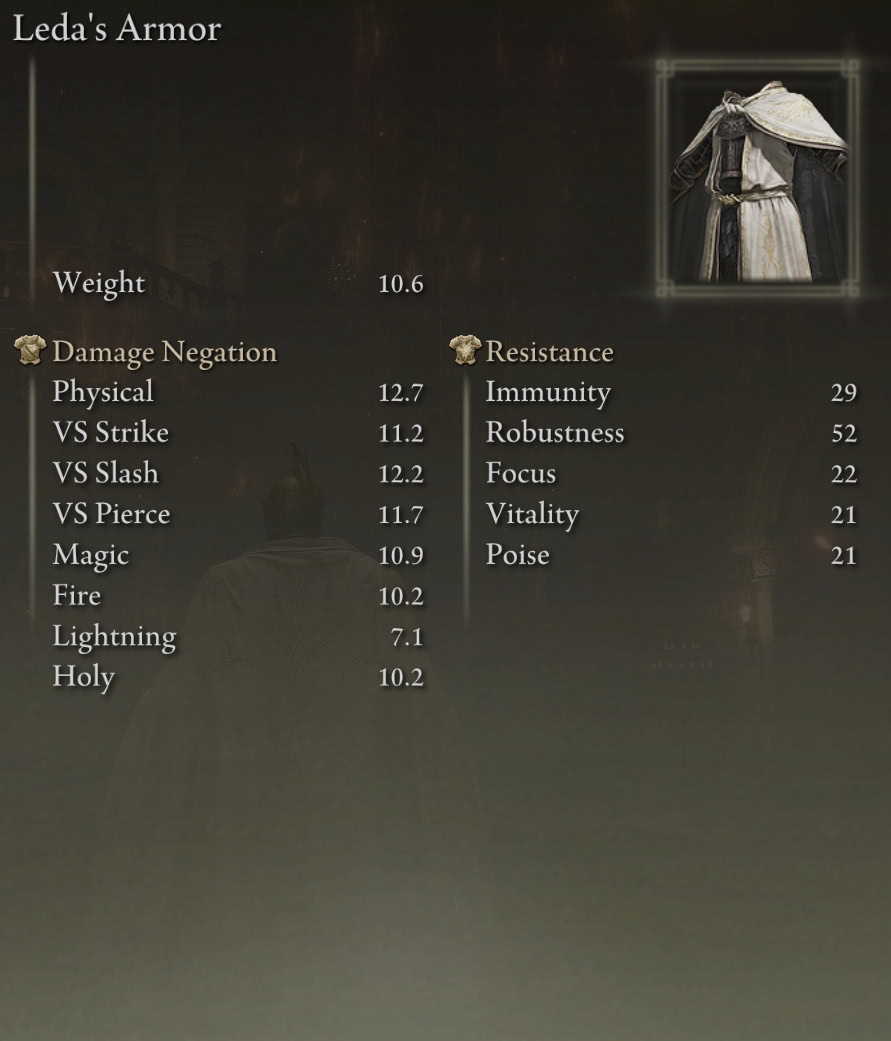
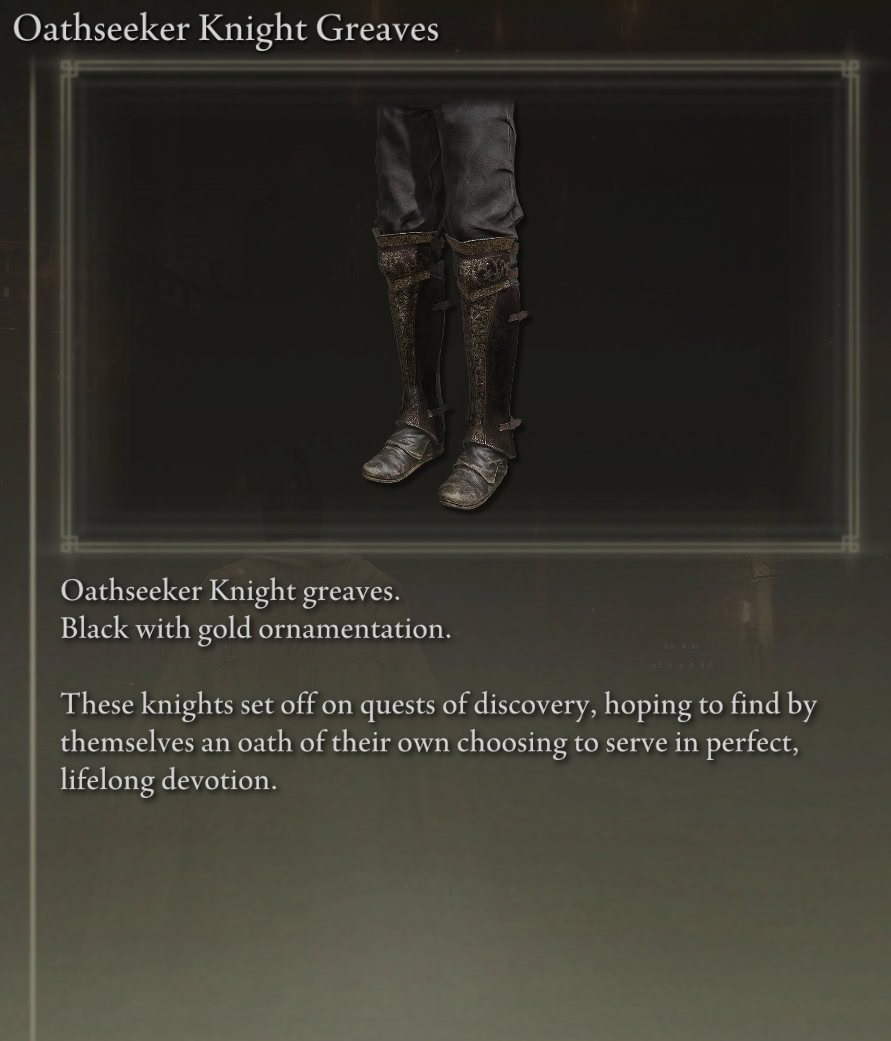
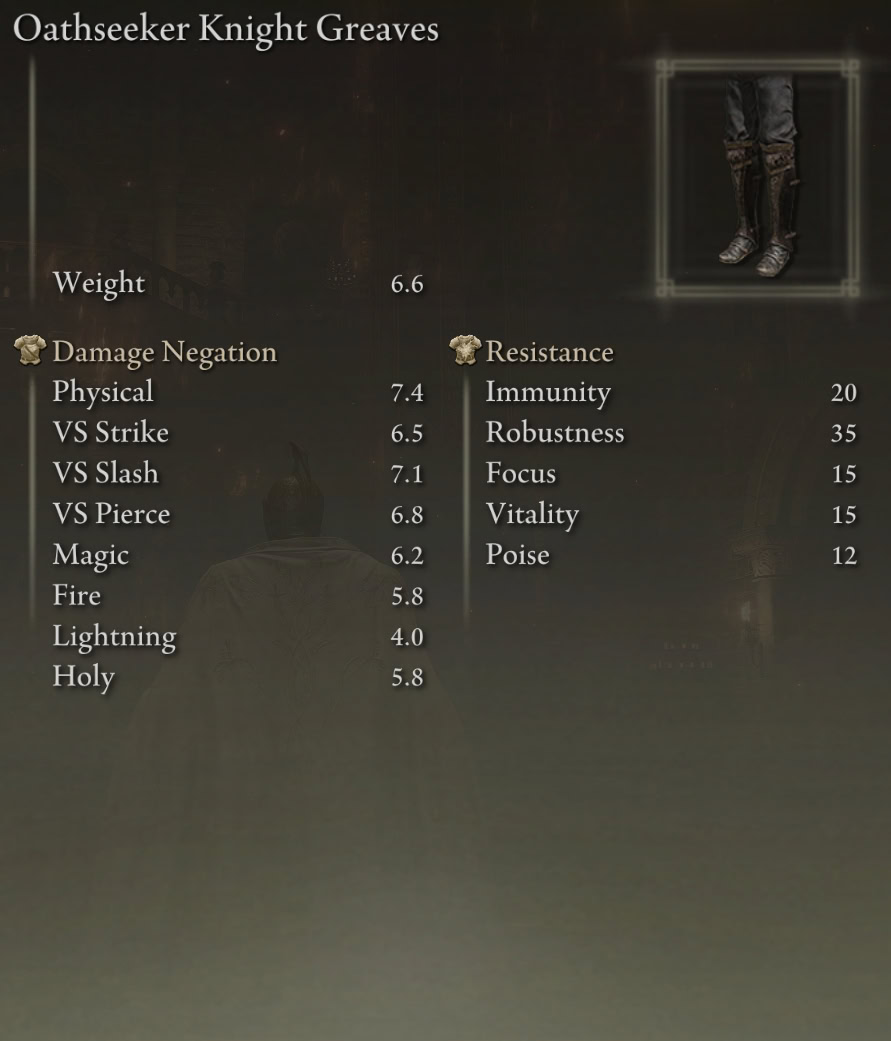
Leda’s Armor (Modified Oathseeker Set) Stats
Leda’s Attire is a combination of a distinct chestpiece (Leda’s Armor) with the Oathseeker armor set. This combo has a combined weight of 25.1, placing it in the 3rd heaviest weight class alongside most of the other base game NPC armors.
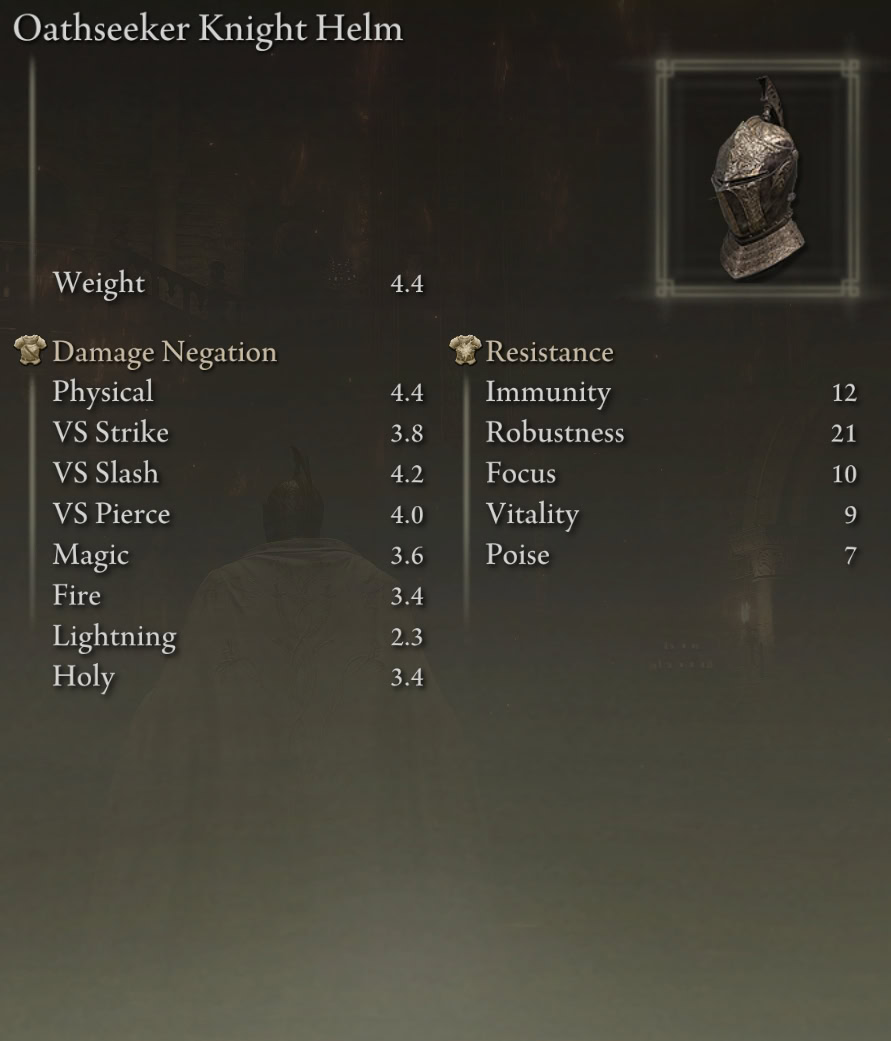
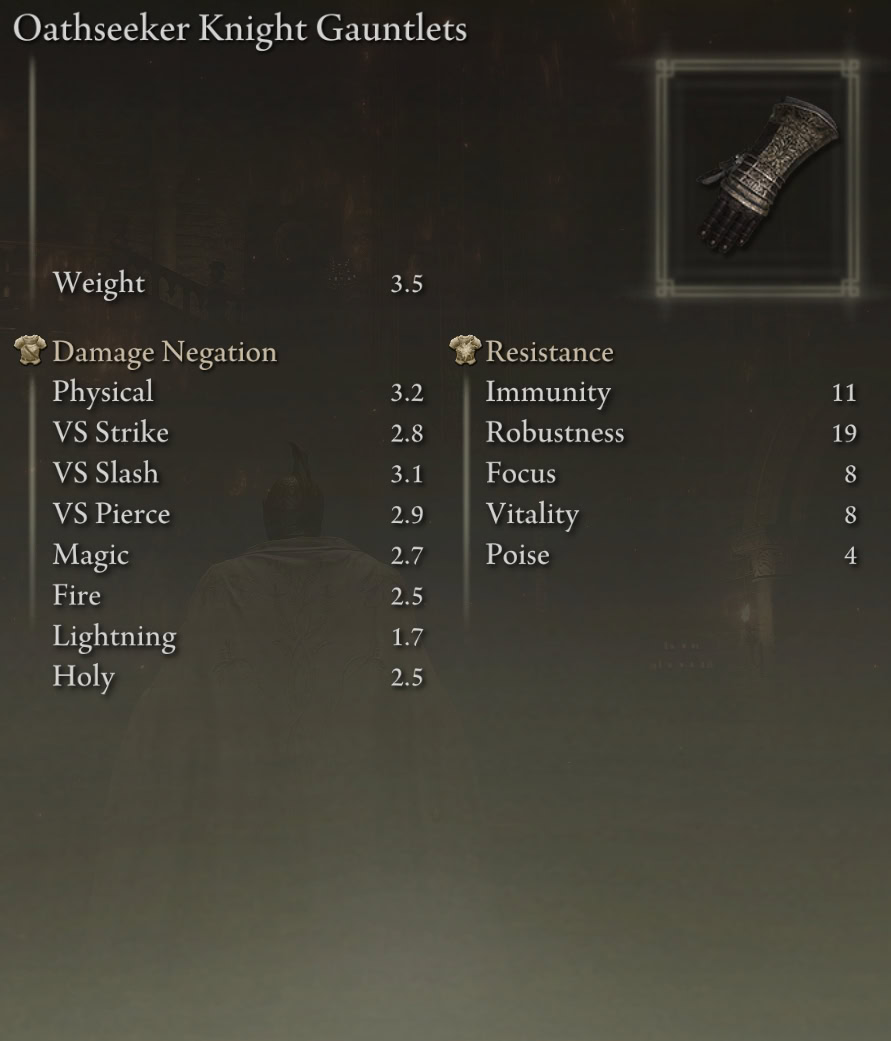
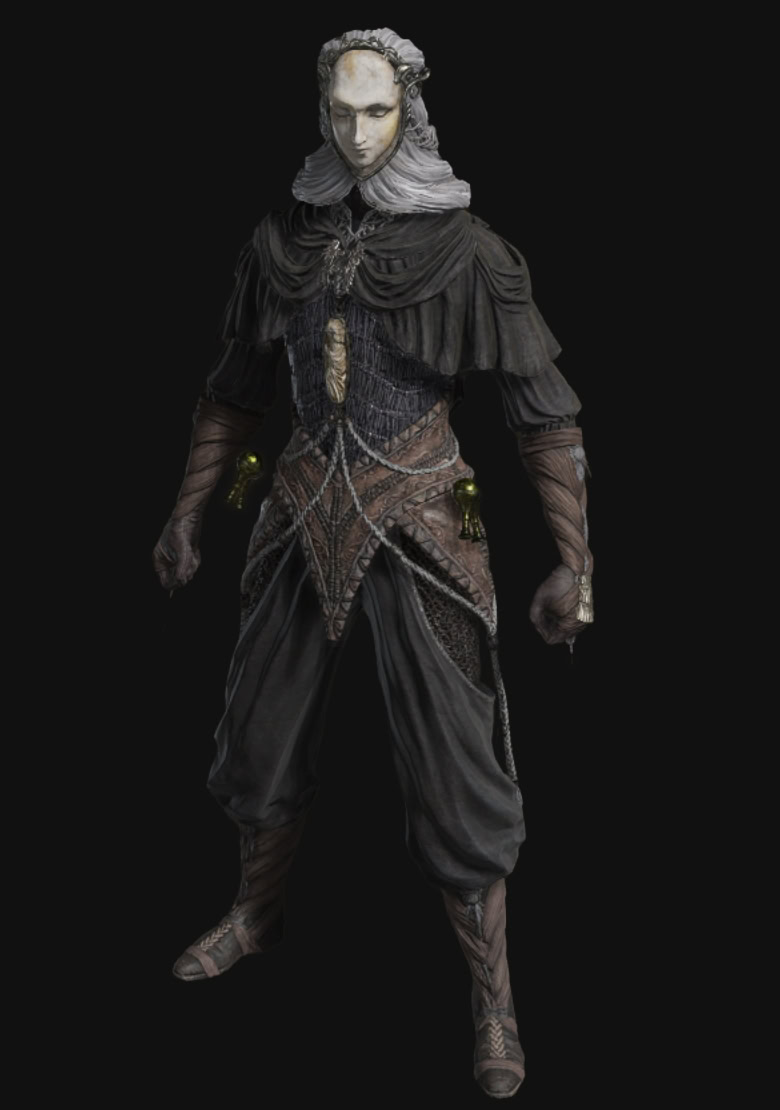
They could have achieved the same effect by calling the set Leda’s Armor Set and just made the Oathseeker Knight chestpiece an Altered version. They could have even called the whole thing the Needle Knight set, but where would that leave the Haligtree Knights?
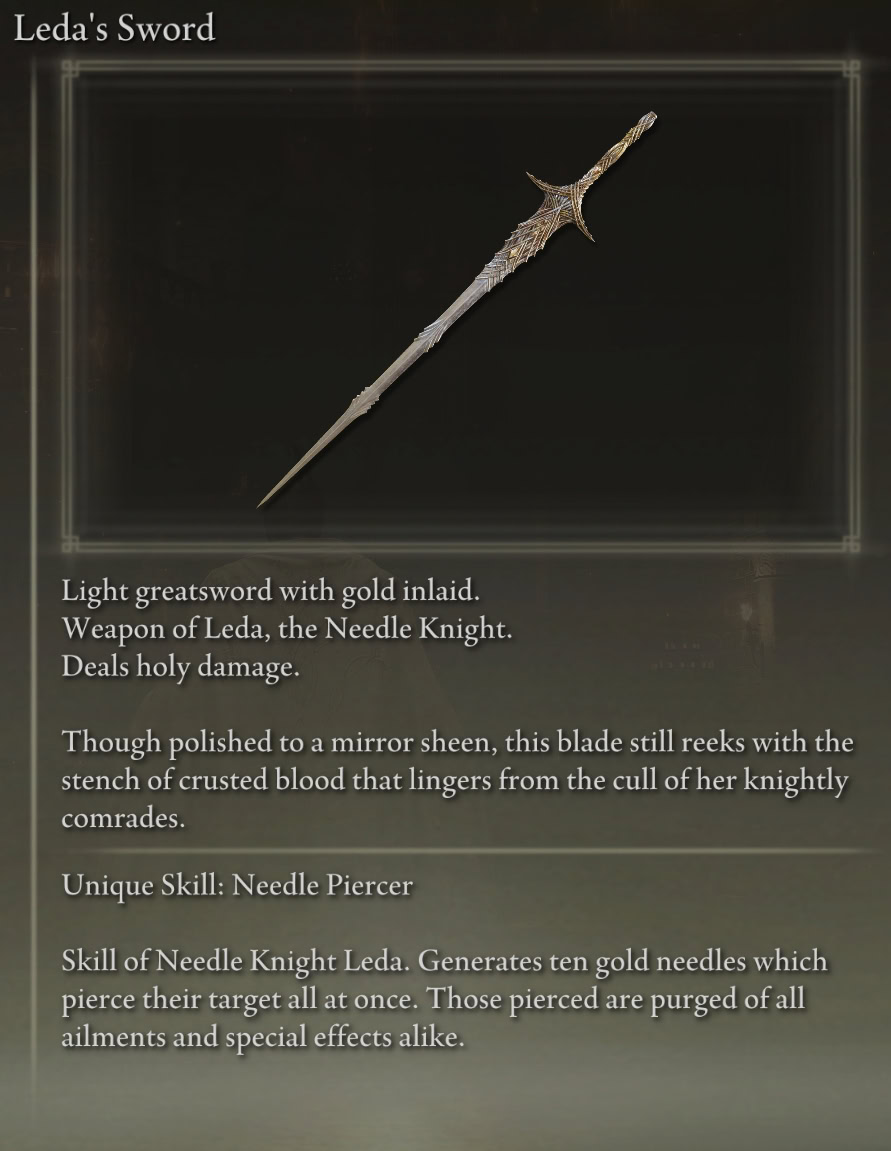
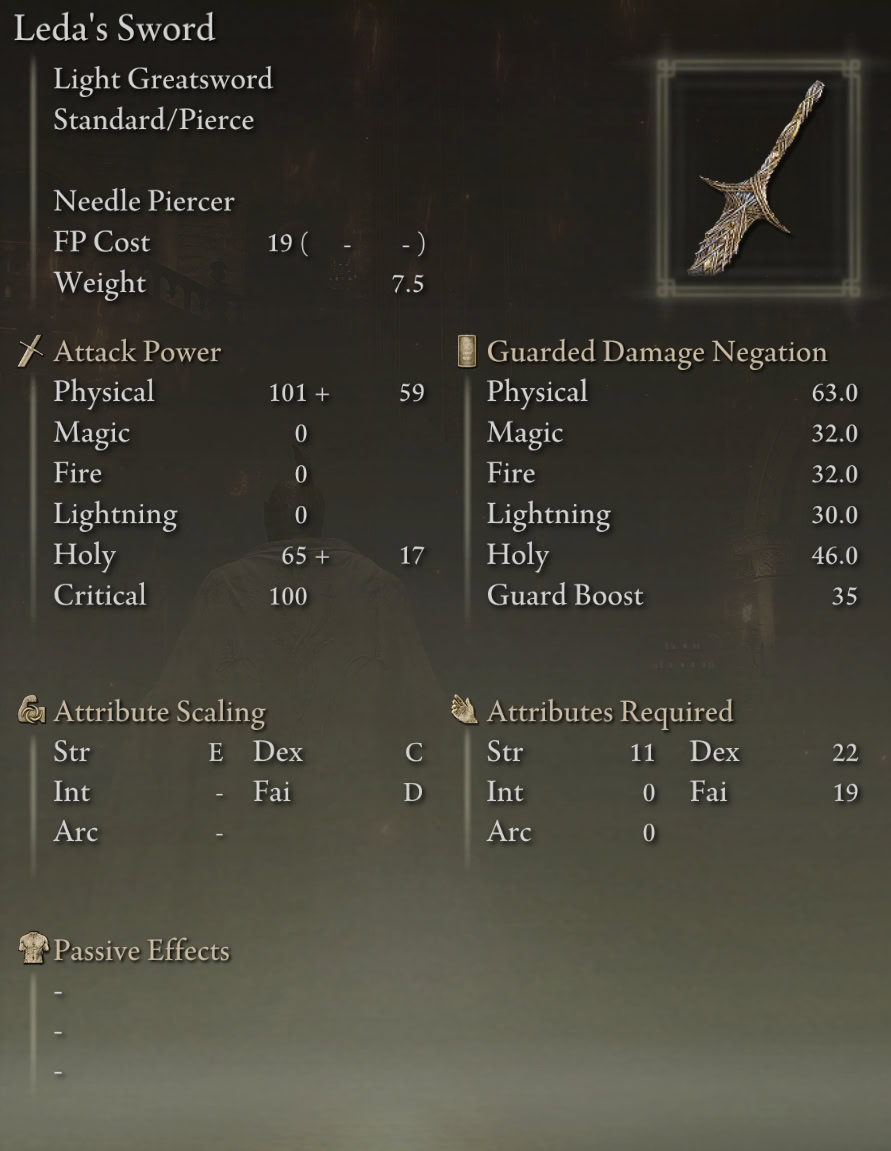
Leda’s Sword Stats
Leda’s Sword is a Light Greatsword that scales with Faith and 33% of its damage dealt is Holy. It has a Unique Skill: Needle Piercer, which surrounds the target with Golden Needles a la Ebony Maw vs Dr. Strange. The needles deal Holy damage and purge all temporary buffs and debuffs, including Physick.
Leda’s Armor Set and Sword Preview
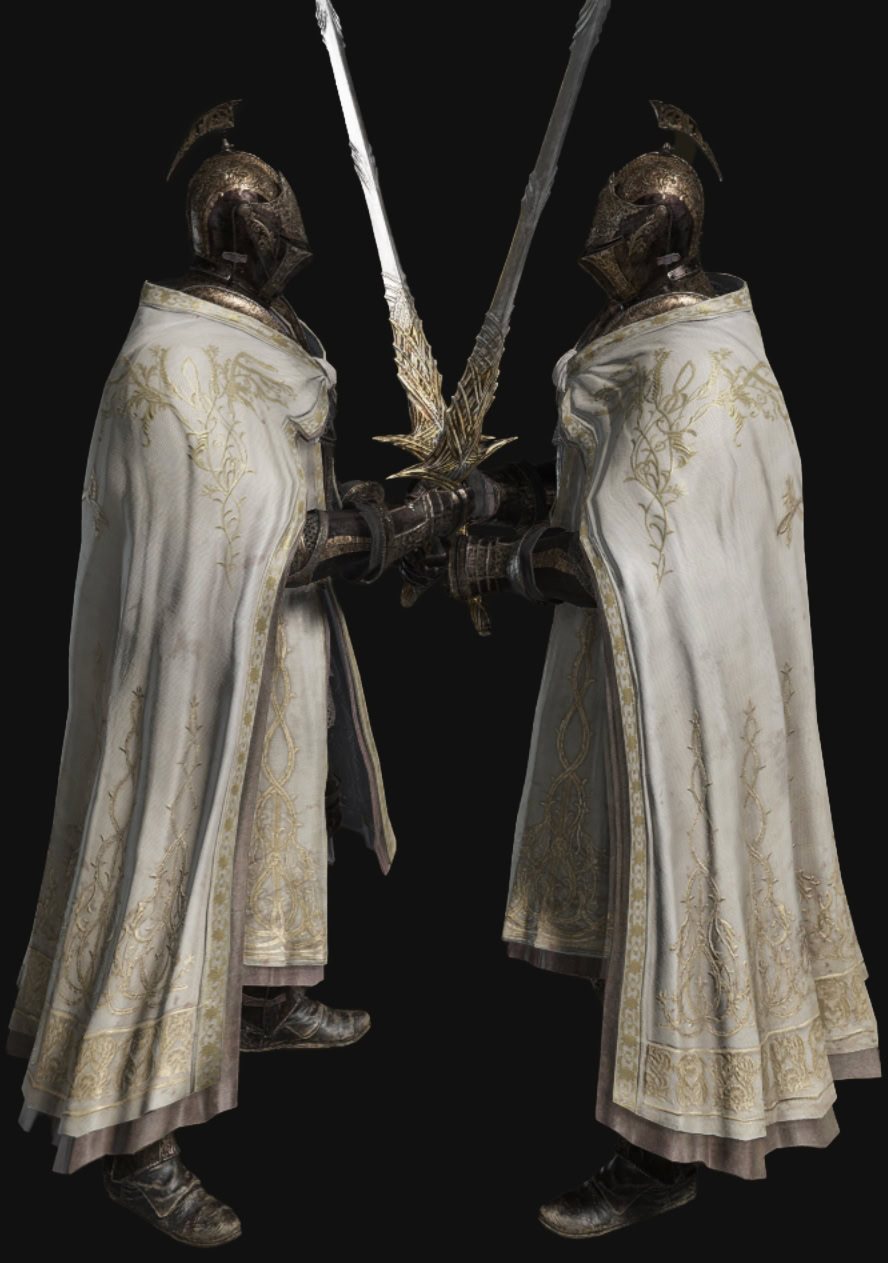
Leda’s Armor and Leda’s Sword Location
You receive Leda’s Sword for completing the Followers of Miquella fight at the Cleansing Chamber in Enir-Ilim, and can loot Leda’s Armor (chestpiece) from her corpse in the next room.
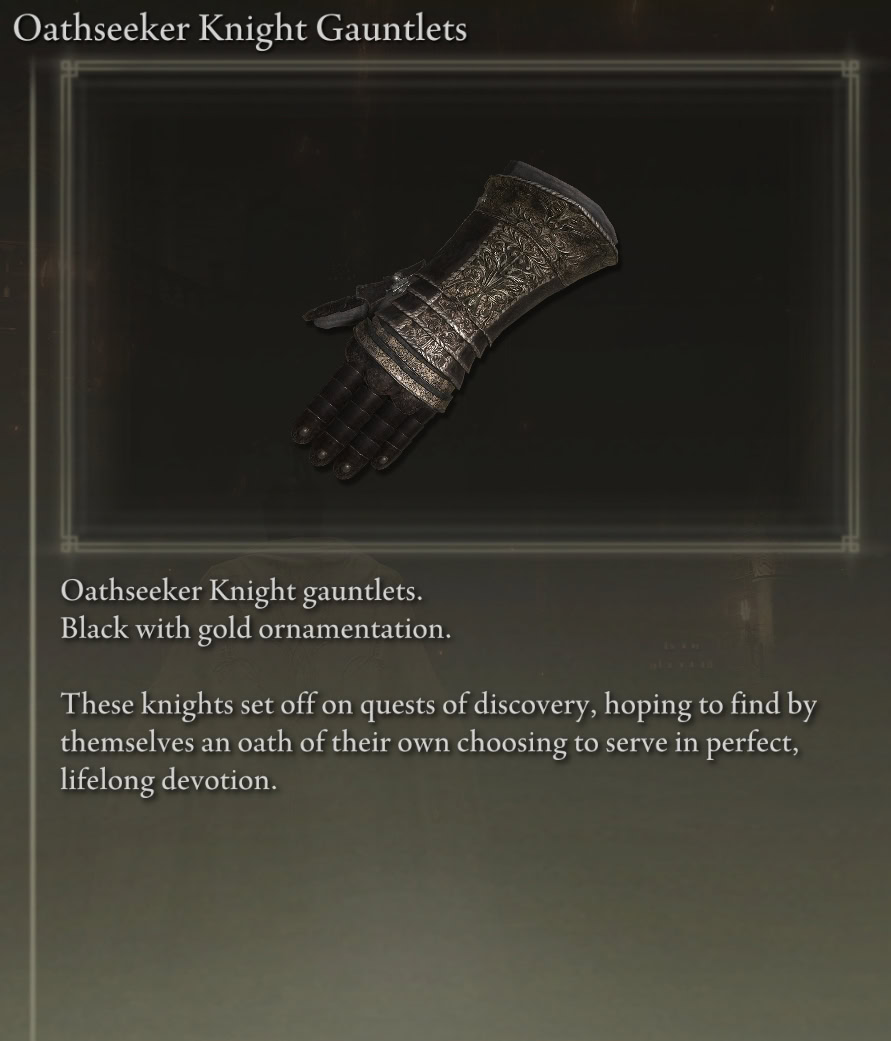
You can obtain the Oathseeker Knight’s armor set and Pata weapon from a corpse behind the Church of Benediction on the Gravesite Plain, hanging over the burrow where you arrive in the Shadow Realm.
Check out our Oathseeker Knight and Pata Preview for more details on that set.
Lacerating Crossed-Tree (Talisman) Location
The Lacerating Crossed-Tree enhances dash attacks by 15%.
You receive the Lacerating Crossed-Tree from Needle Knight Leda at the Highroad Cross on Scadu Altus after helping her to defeat the Hornsent at Shadow Keep. This will lock you out of receiving the Ash of War: Swift Slash on this playthrough.

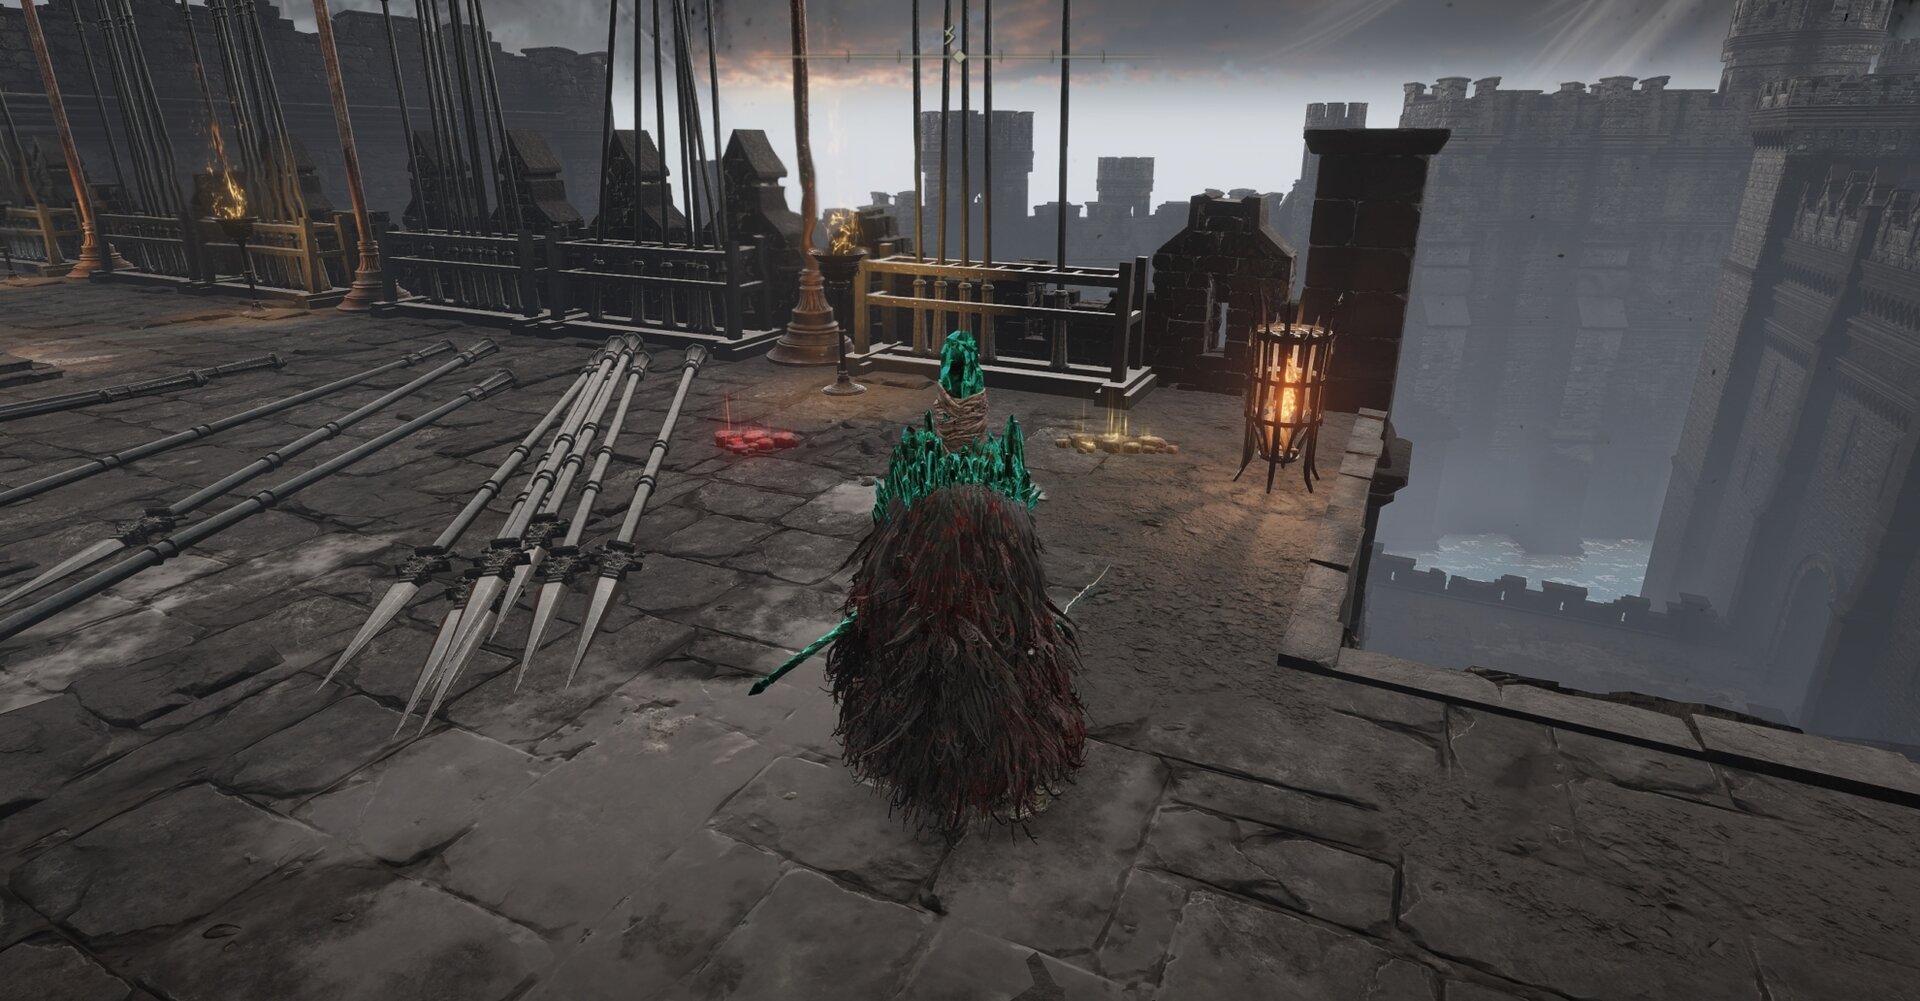

Retaliatory Crossed-Tree (Talisman) Location
The Retaliatory Crossed-Tree increases the damage dealt by roll and backstep attacks by 17%. These are distinct animations that occur when you use your strong or light attack immediately after rolling or doing a backstep.
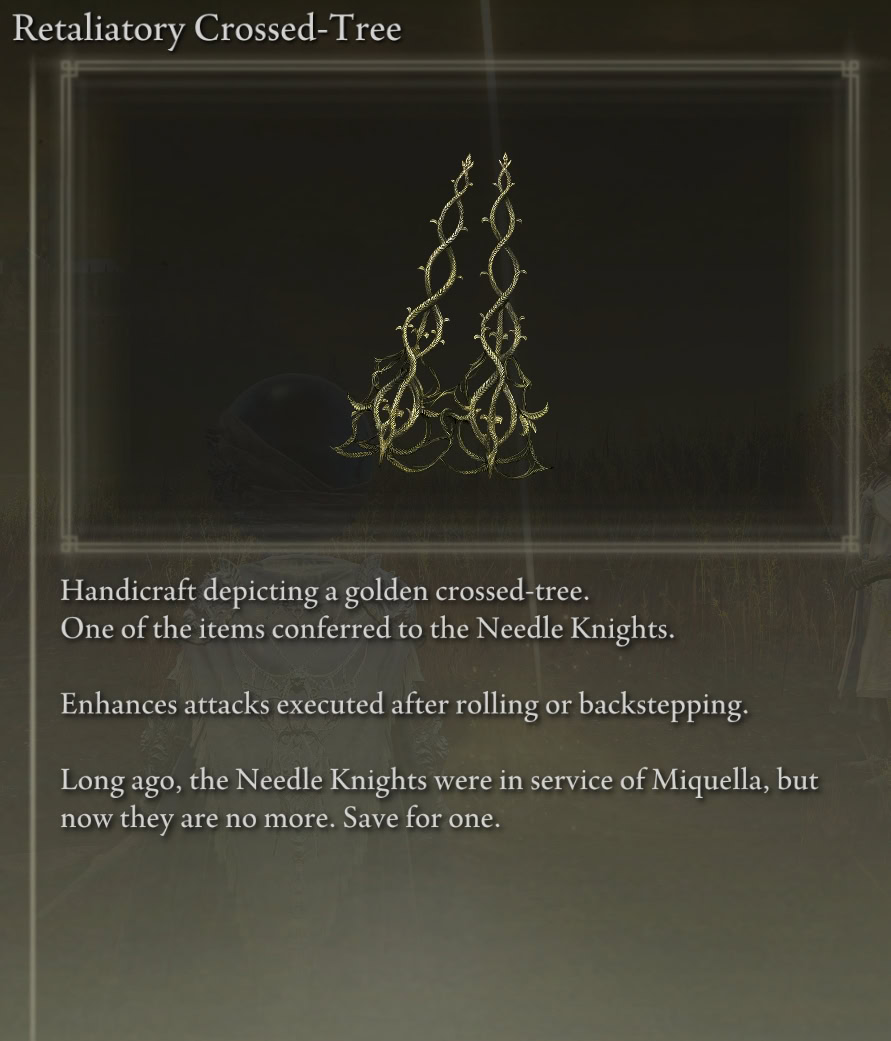
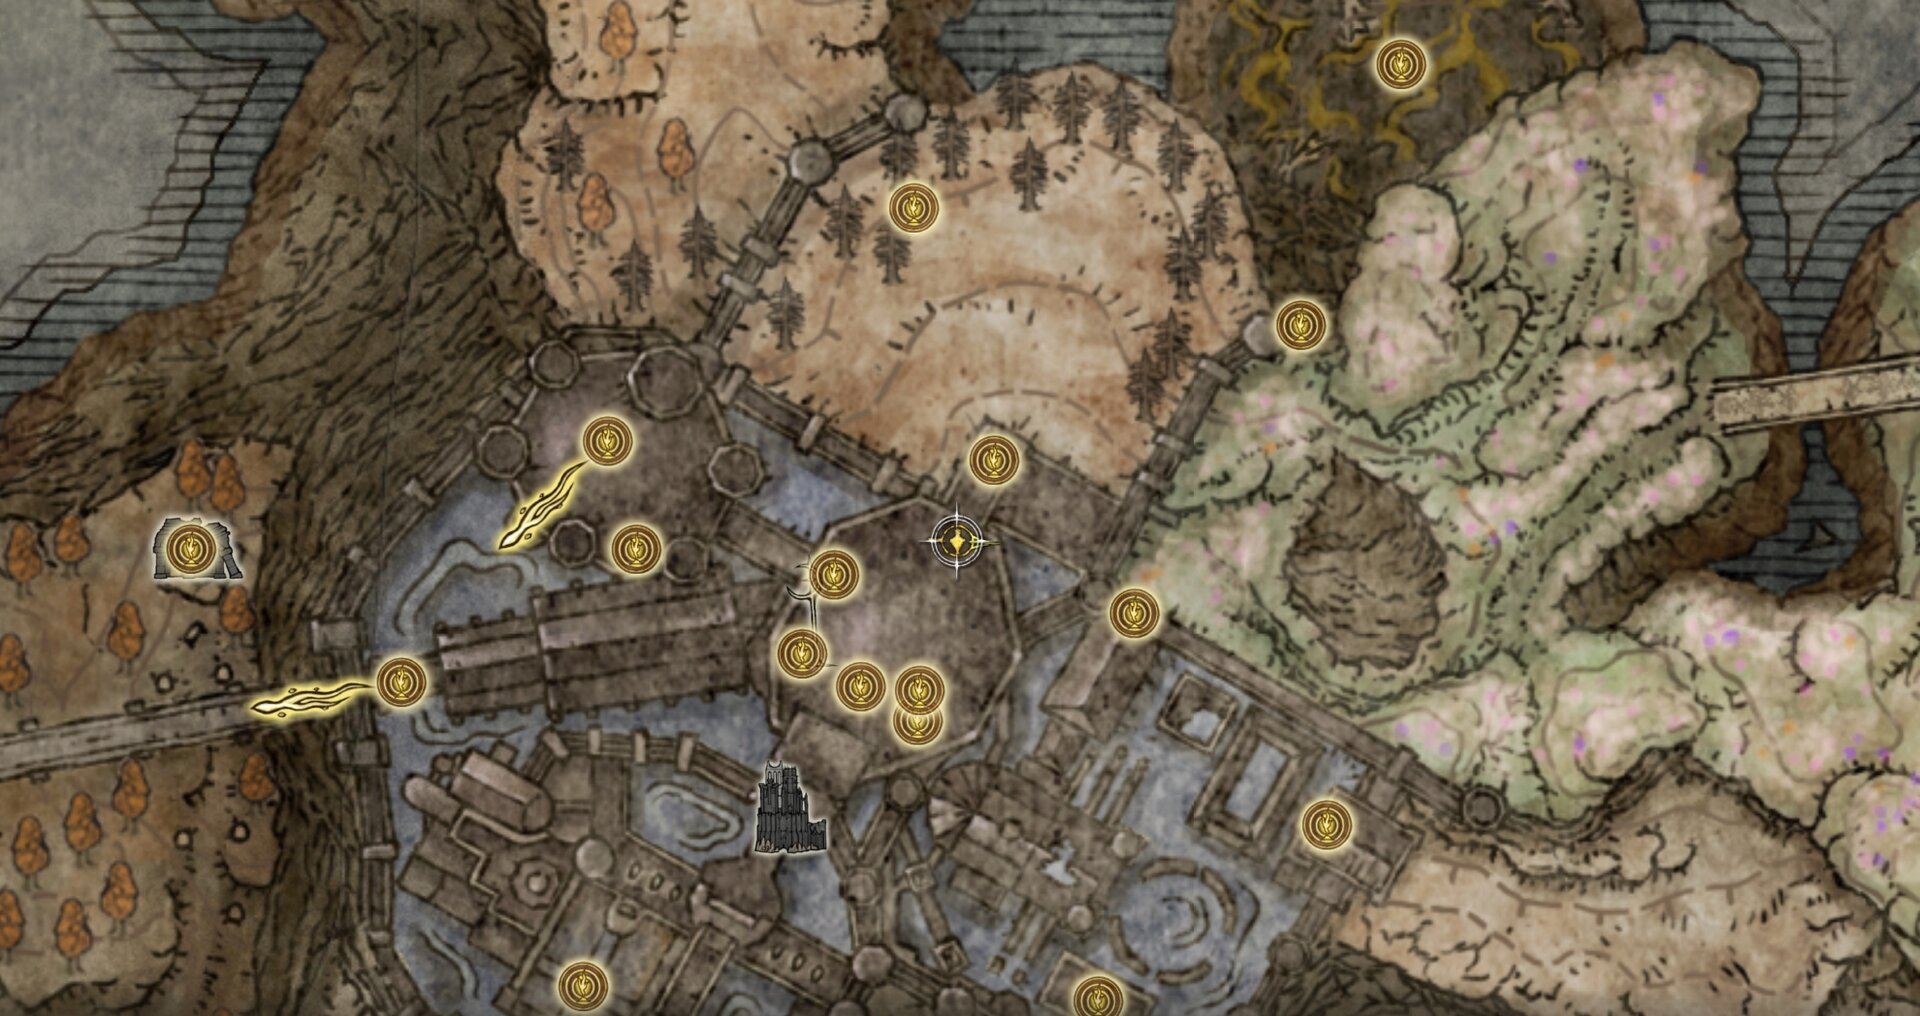
You receive the Retaliatory Crossed-Tree from Needle-Knight Leda at Highroad Cross on the Scadu Altus after helping her defeat Sir Ansbach on the first floor of the Specimen Storehouse. Doing so will prevent you from receiving Furious Blade of Ansbach and the Obsidian Lamina from Sir Ansbach.

Elden Lord’s Allies
These characters will fight by your side against Needle Knight Leda and her allies in the Cleansing Chamber at Enir-Ilim. You can obtain most of their rewards after defeating the final boss.
Thiollier’s Equipment
Thiollier’s equipment includes his armor set, his Hidden Needles, and Deadly Poison Perfume Bottles. He also has a unique Talisman that you can obtain during his questline.
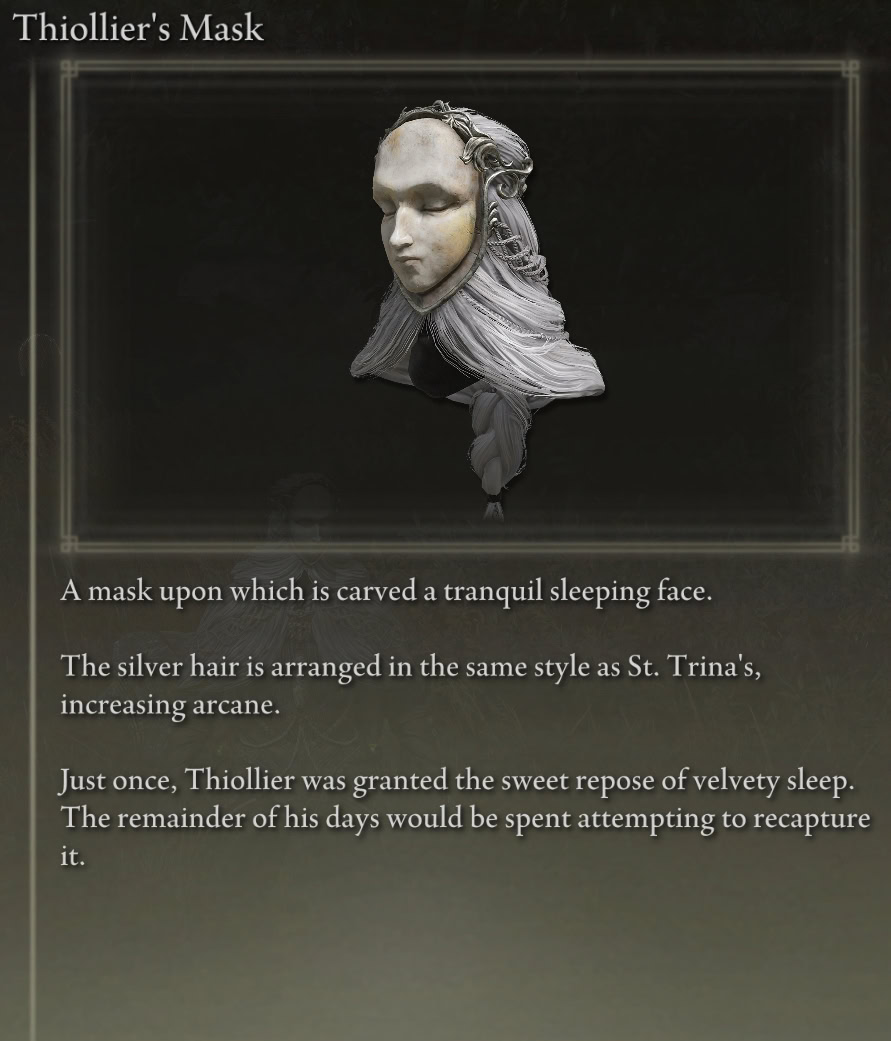
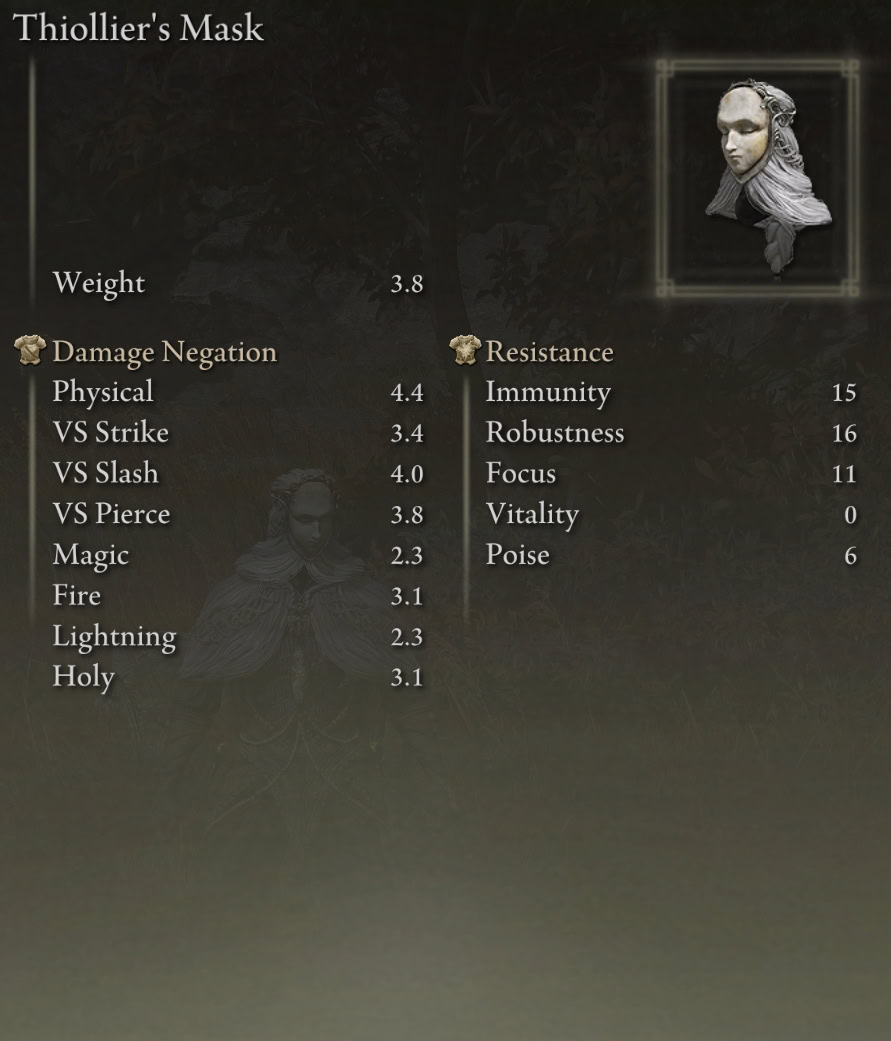
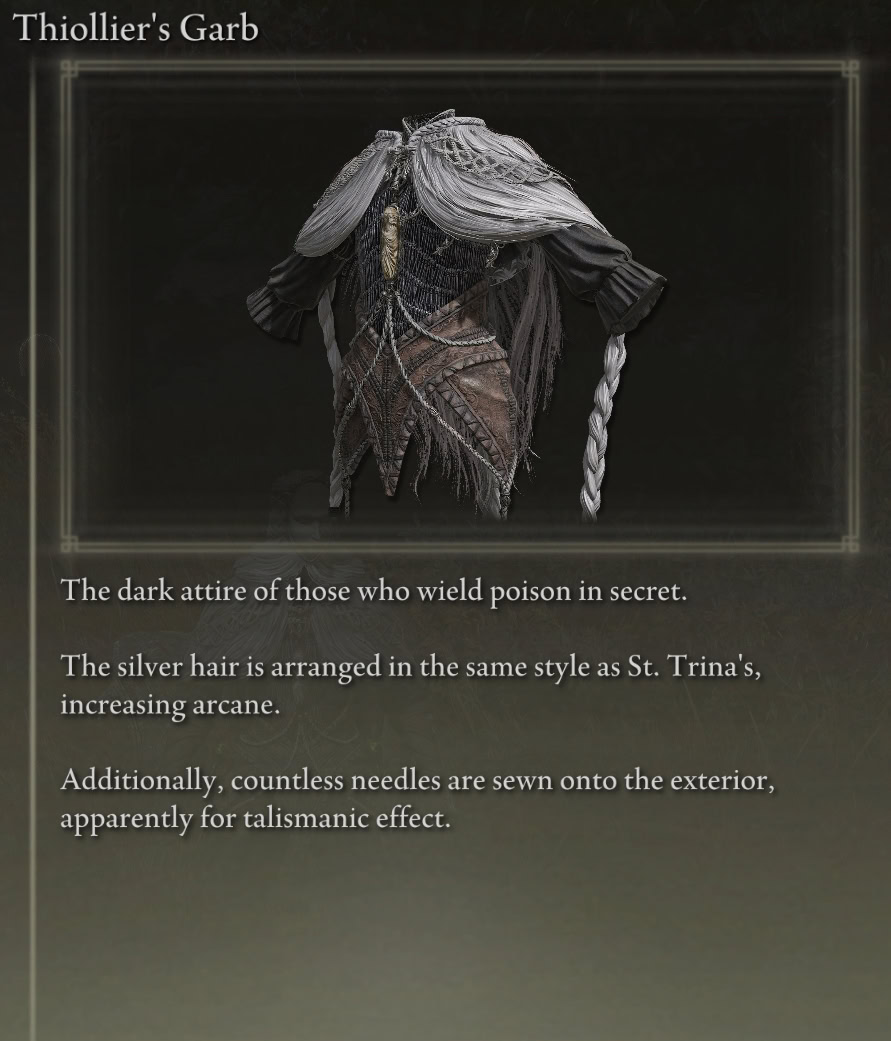
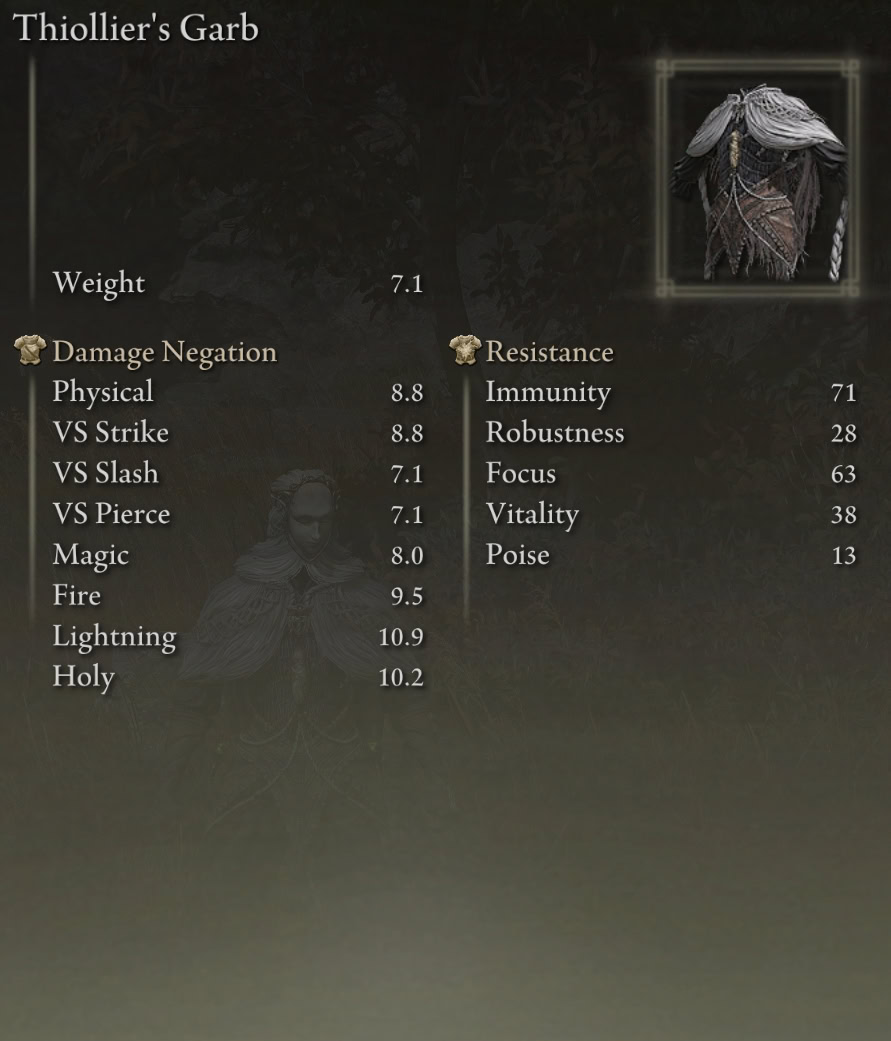
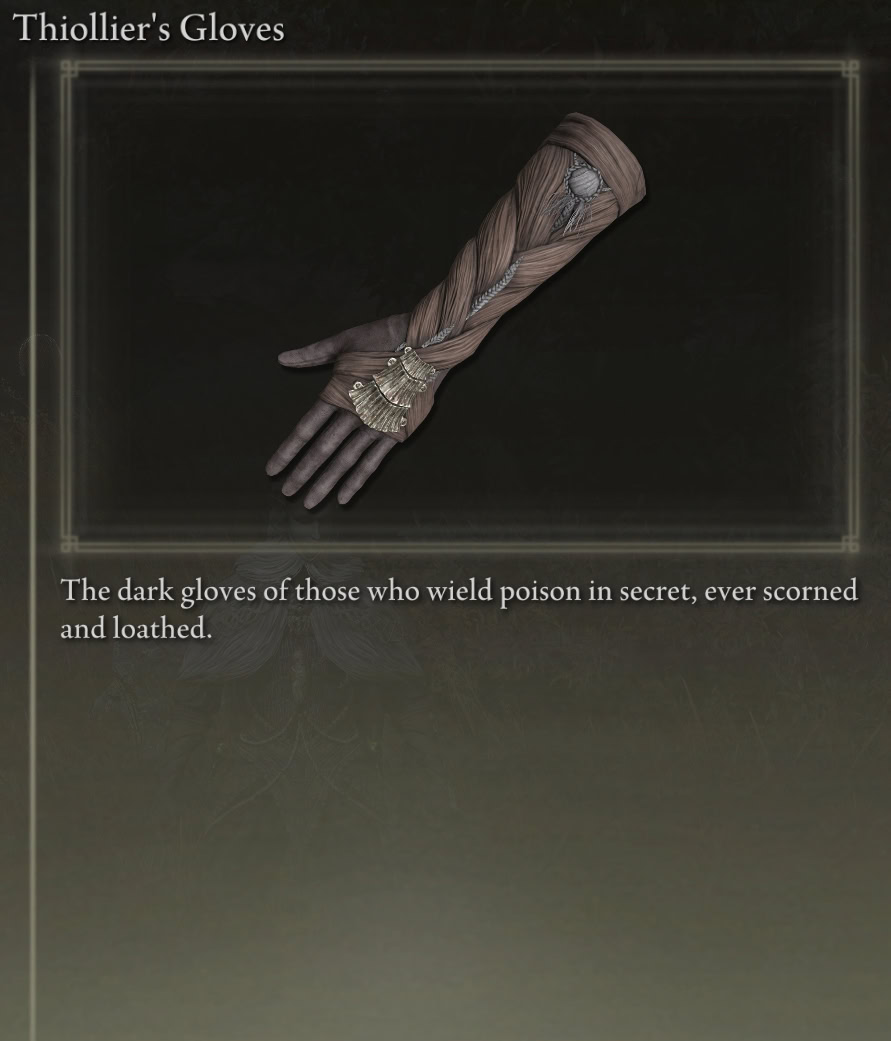
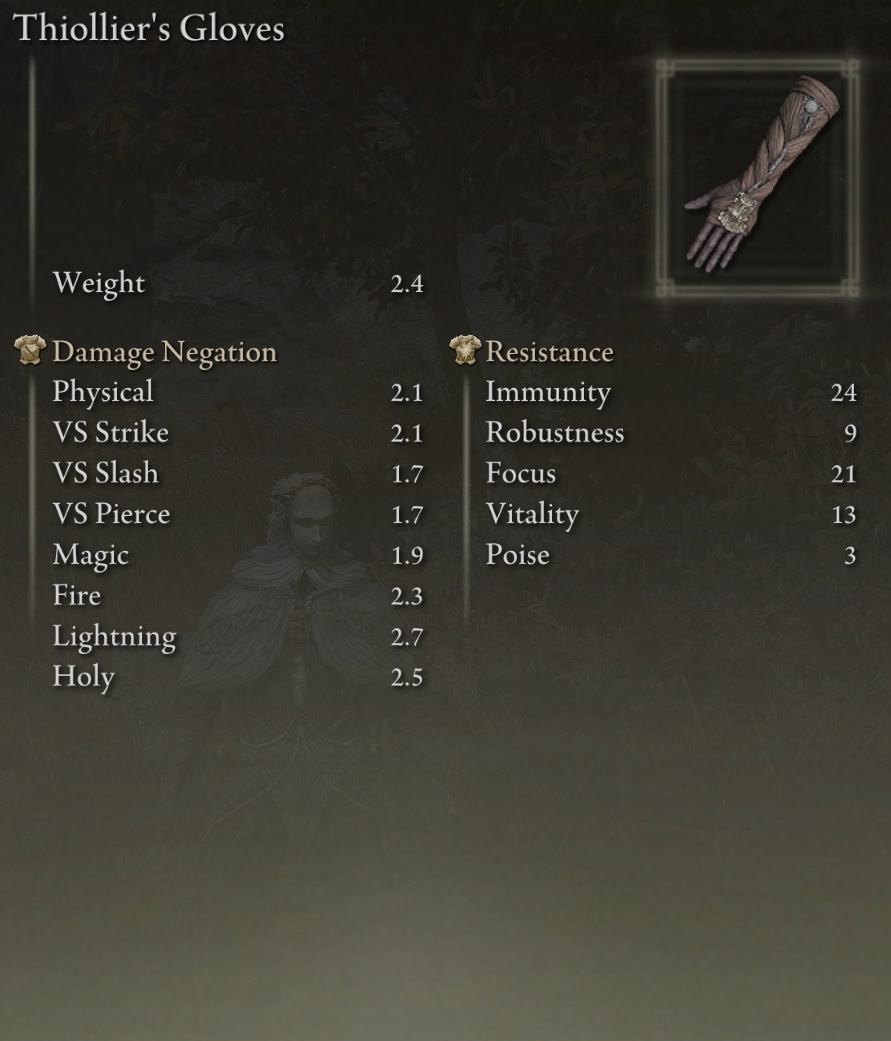
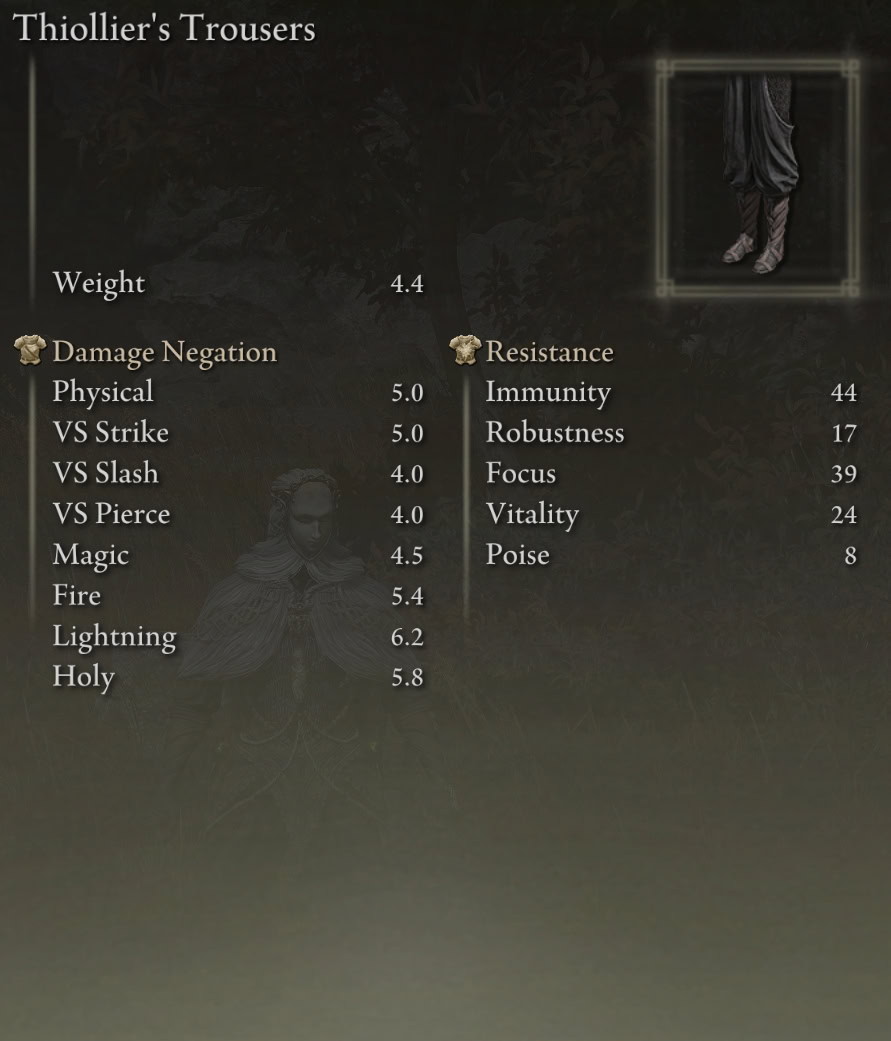
Thiollier’s Armor Set Stats
Thiollier’s Armor Set has a combined weight of 17.7 and is part of the 4th lightest weight class alongside armors from other morally ambiguous characters. The Thiollier’s Mask (head) grants +3 Arcane and Thiollier’s Garb (chest) grants +2 Arcane.

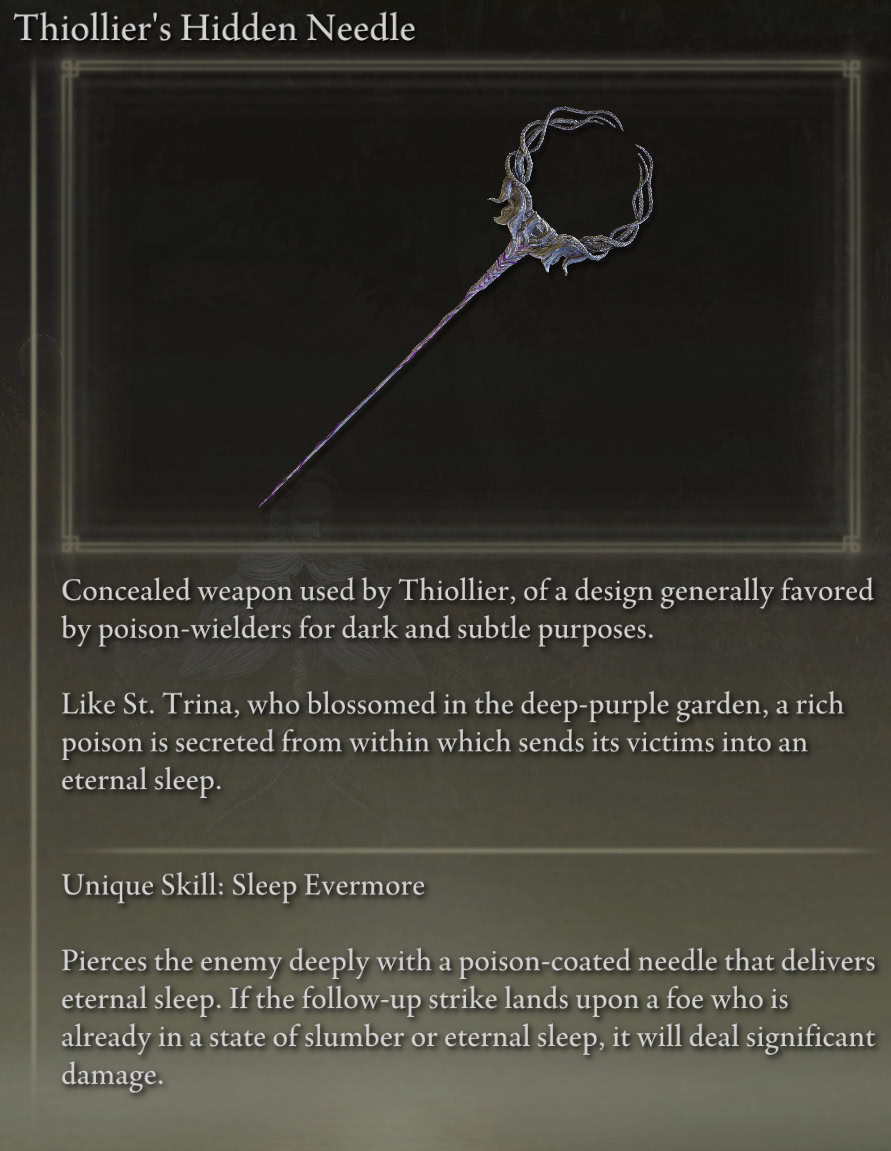
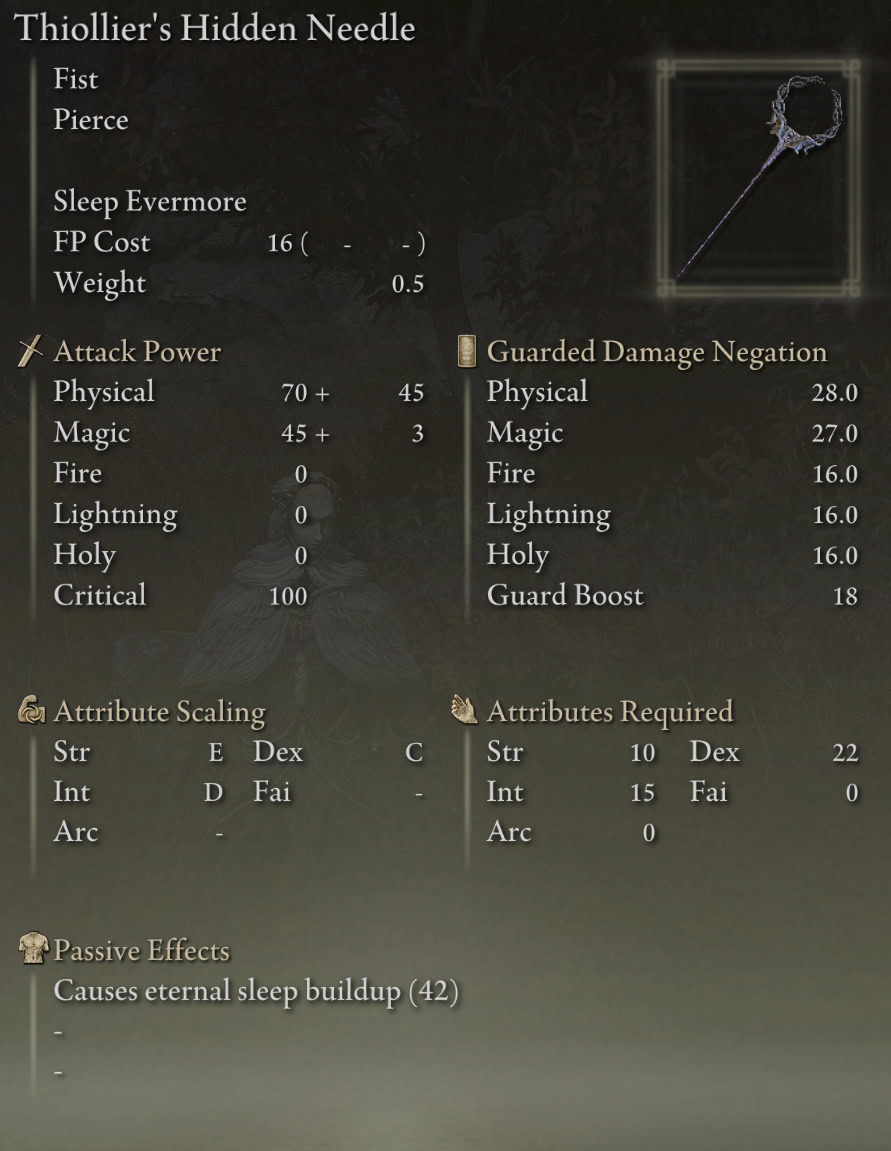
Thiollier’s Hidden Needle (Fists) Stats
Thiollier’s Hidden Needle is a low-profile Fist weapon that deals roughly a third of its damage as Magic and applies Eternal Sleep, not Deadly Poison. Its Unique Skill: Sleep Evermore acts as a sort of critical hit against sleeping targets, akin to the Ashes of War: Poison Moth Flight and The Poison Flower Blooms Twice.
Thiollier’s Armor Set and Thiollier’s Hidden Needle Location
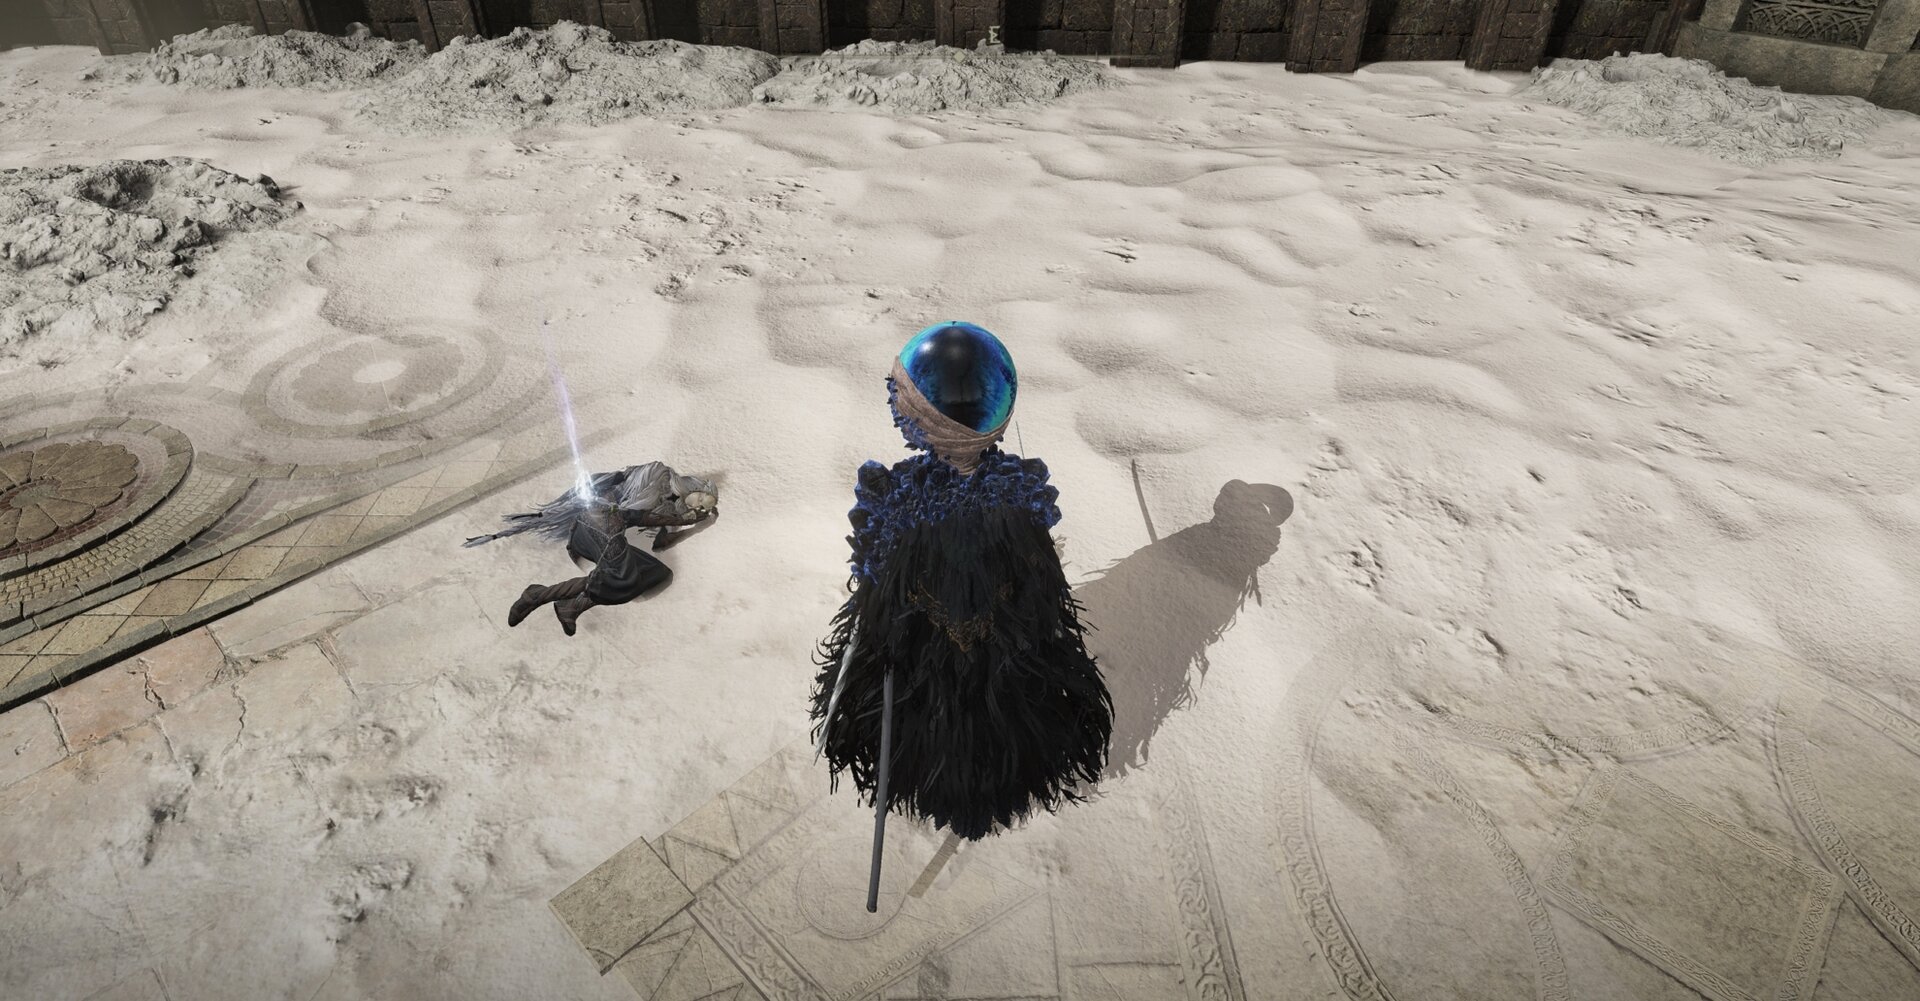
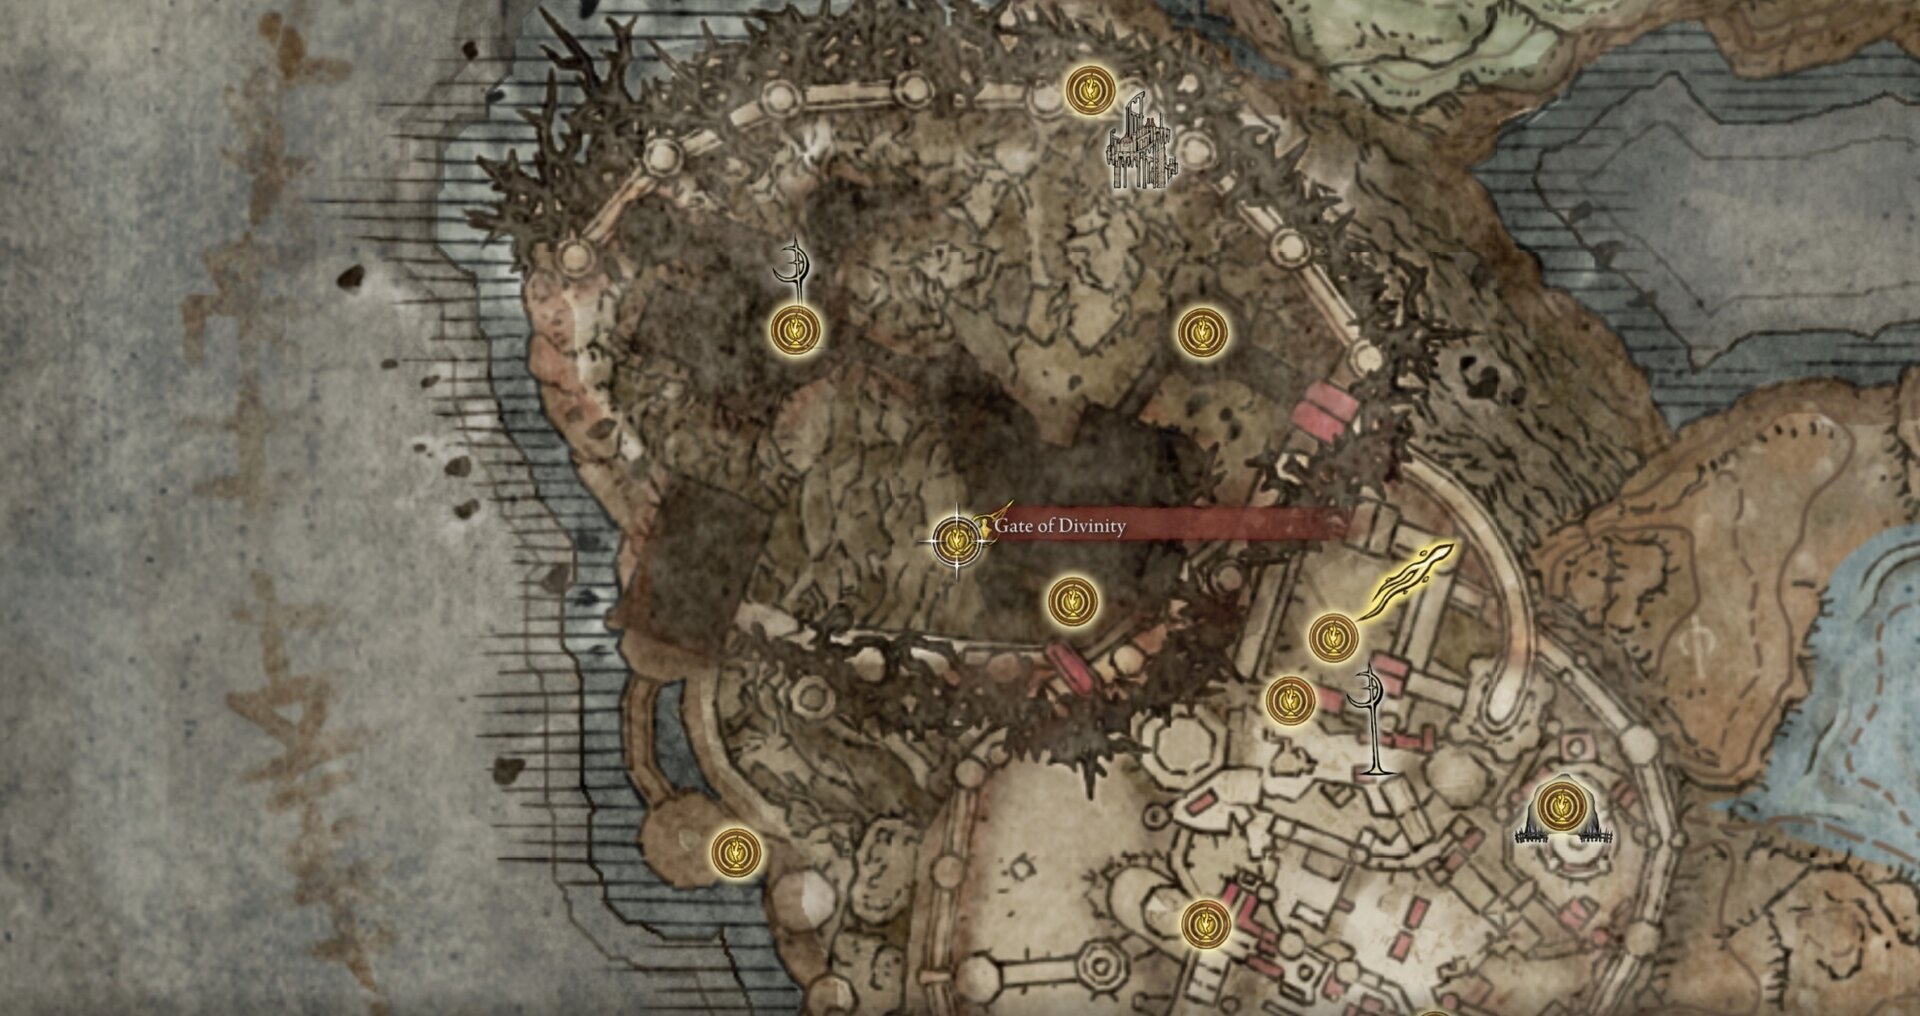
You can loot both Thiollier’s Armor Set and Hidden Needle from his corpse near the Gate of Divinity at Enir-Ilim after defeating the final boss.
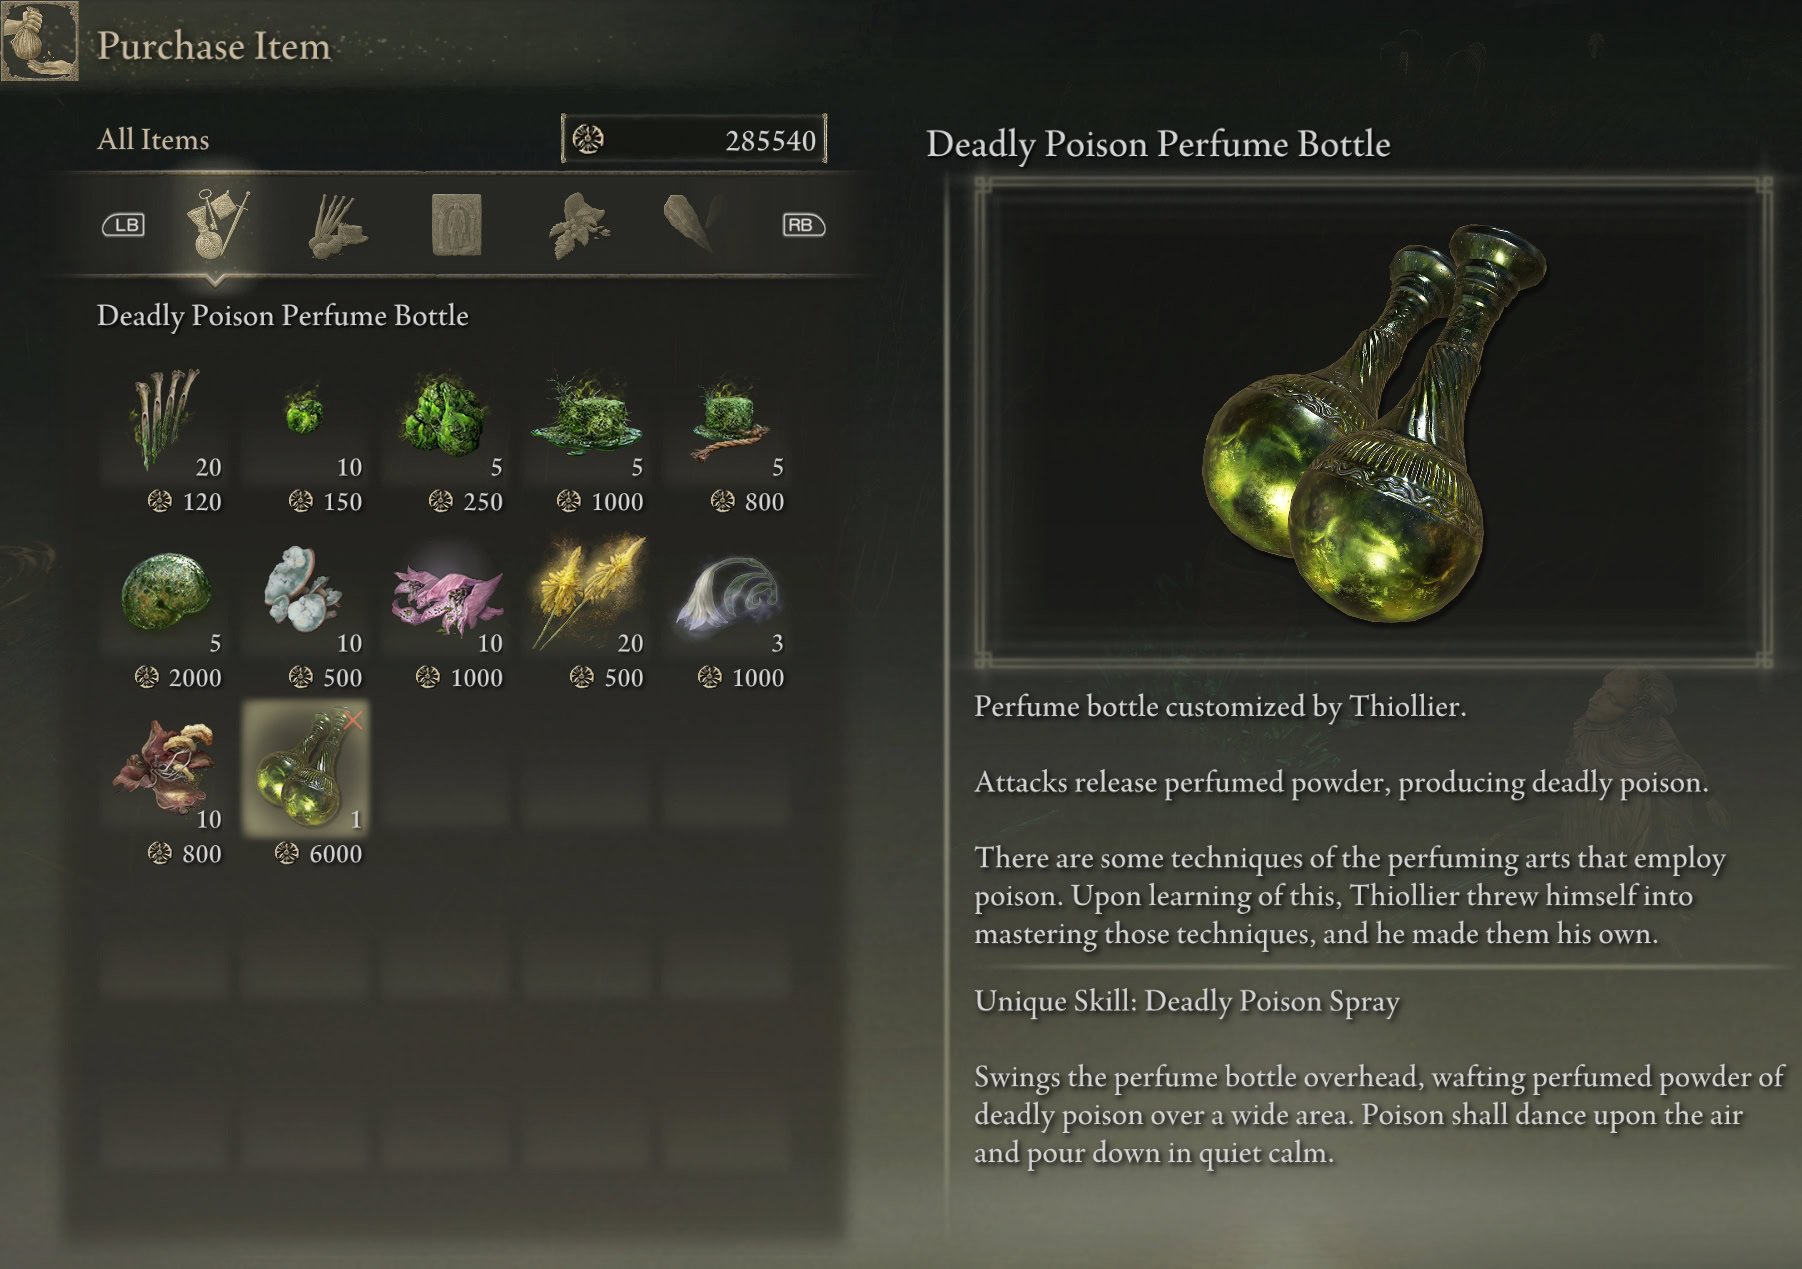
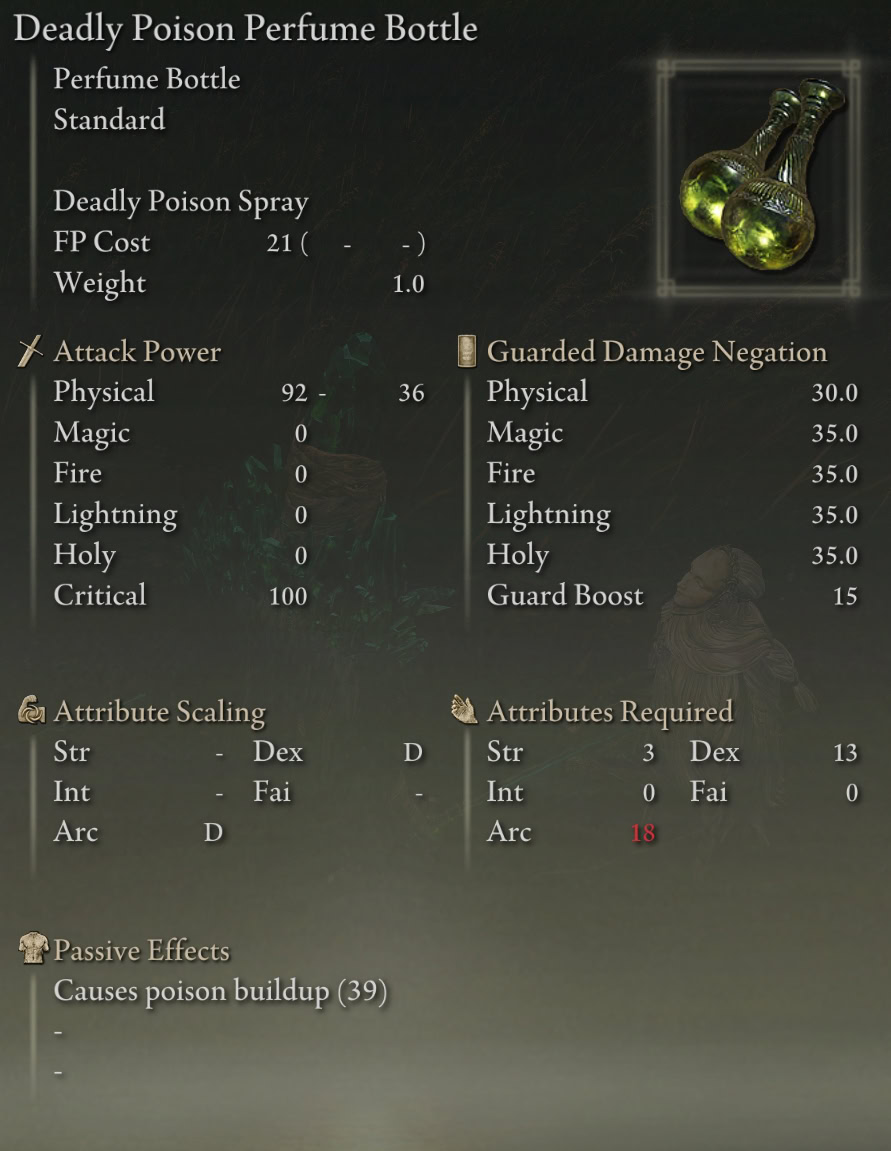
Deadly Poison Perfume Bottle Stats and Location
The Unique Skill: Deadly Poison Spray causes you to waft Deadly Poison into the air above you, practically guaranteeing that you will be poisoned as well, giving you the ability to trigger Kindred of Rot’s Exultation and Mushroom Crown more reliably.
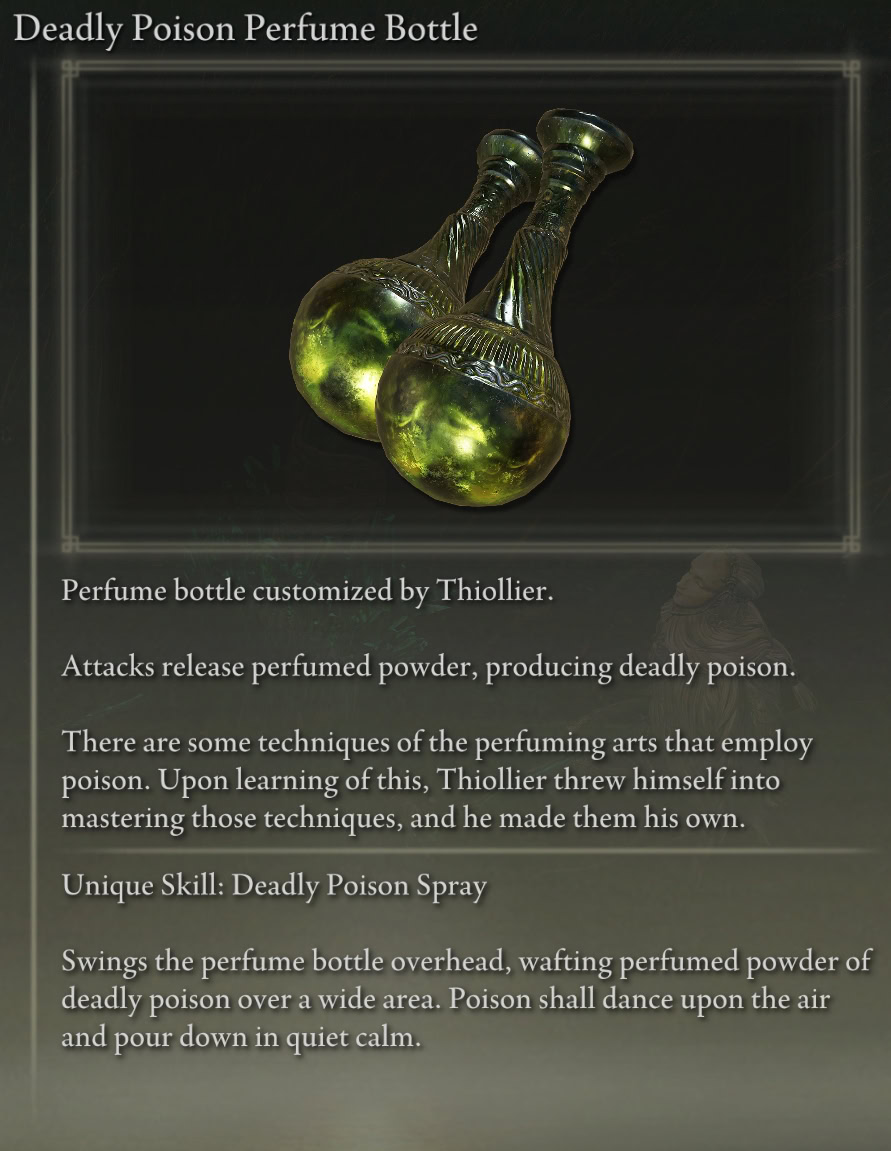
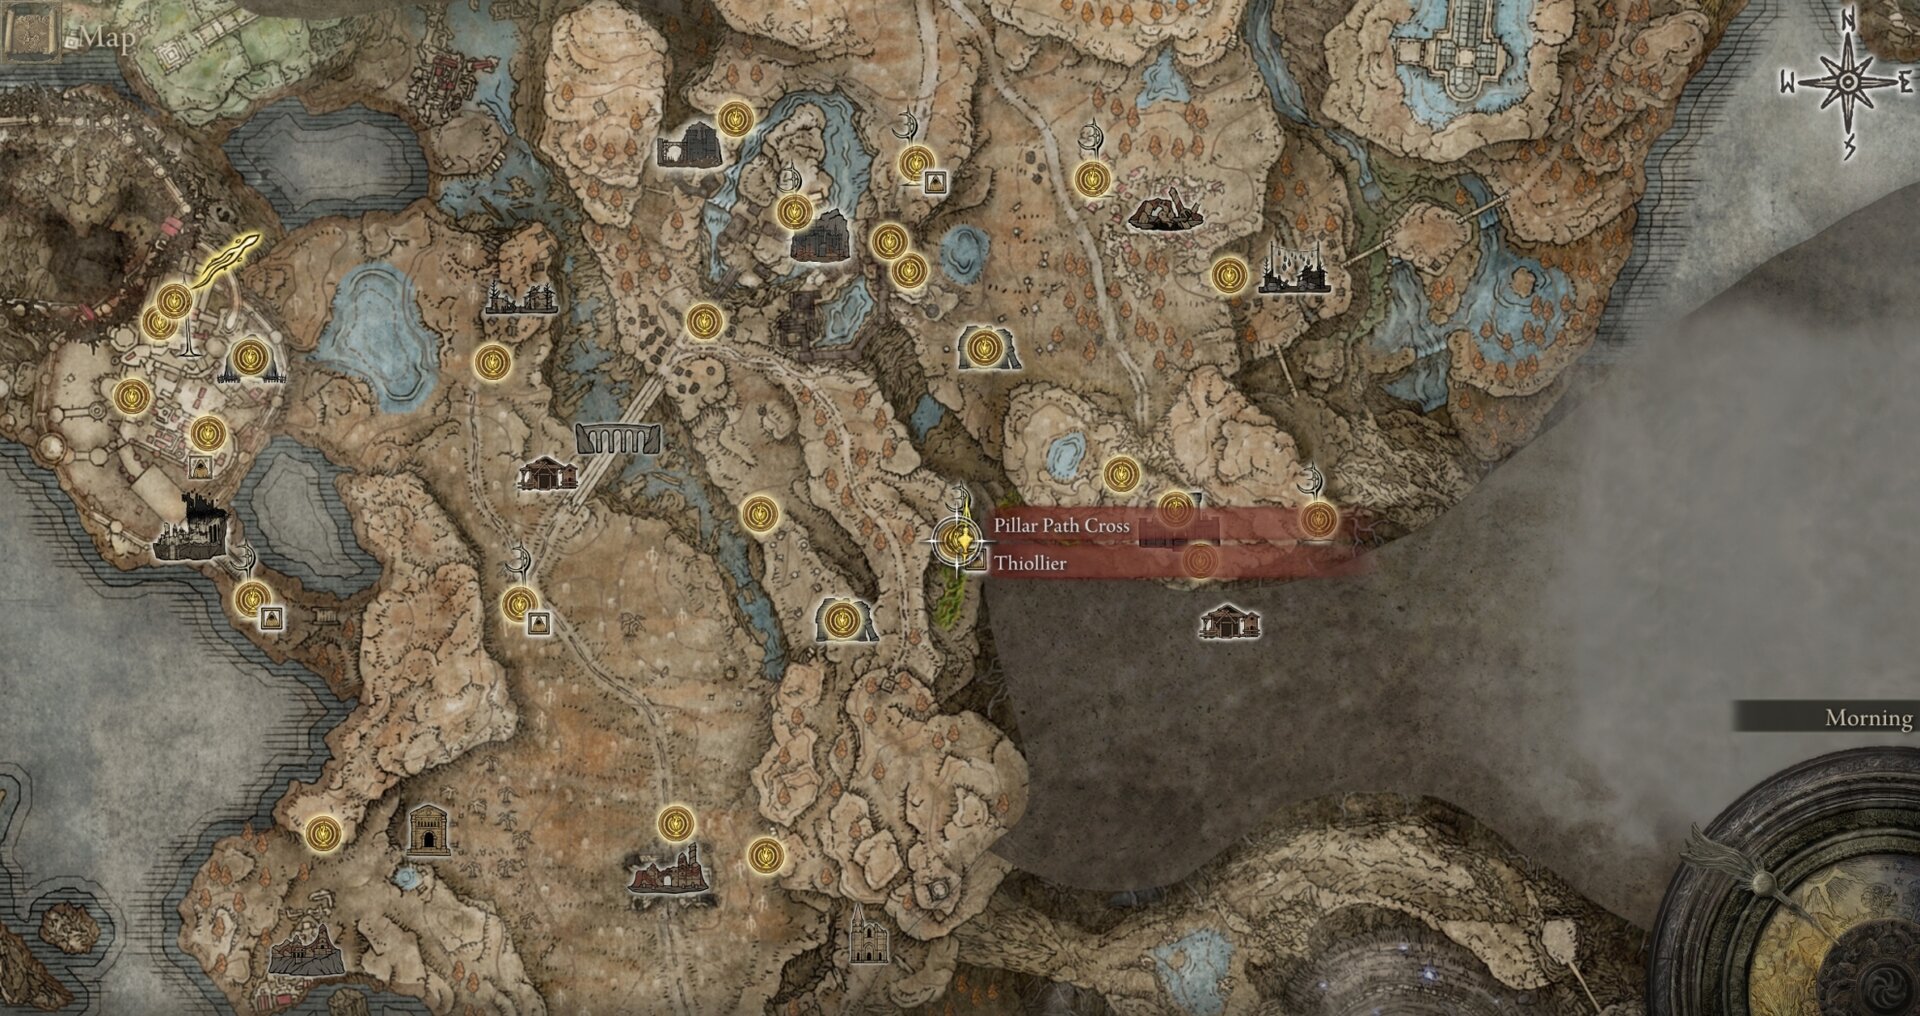
You can purchase the Deadly Poison Perfume Bottle from Thiollier at the Pillar Path Cross on the Gravesite Plain for 6k Runes. If you missed him, you can also purchase it from the Twin Maiden Husks at the Roundtable Hold after you give them Moore’s Bell Bearing.

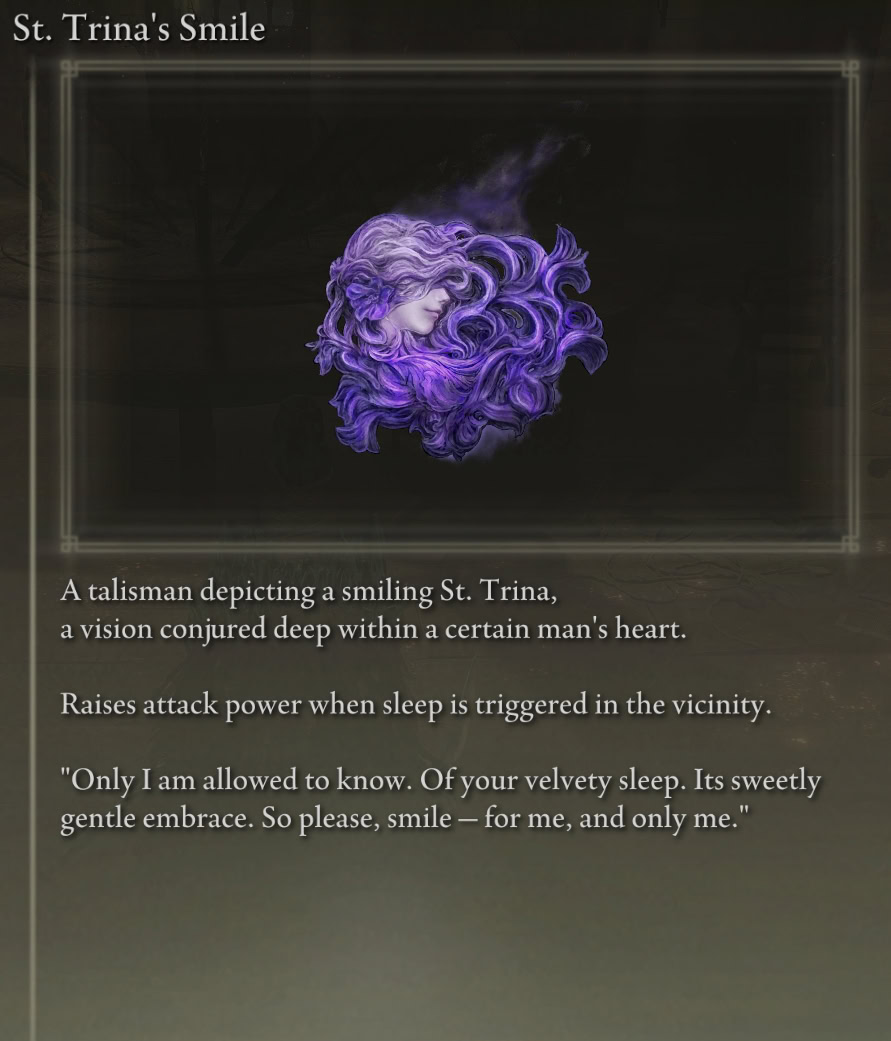
St. Trina’s Smile (Talisman) Location
St. Trina’s Smile boosts your damage dealt by 20% for 20s after someone goes to sleep nearby via (Eternal) Sleep Buildup.
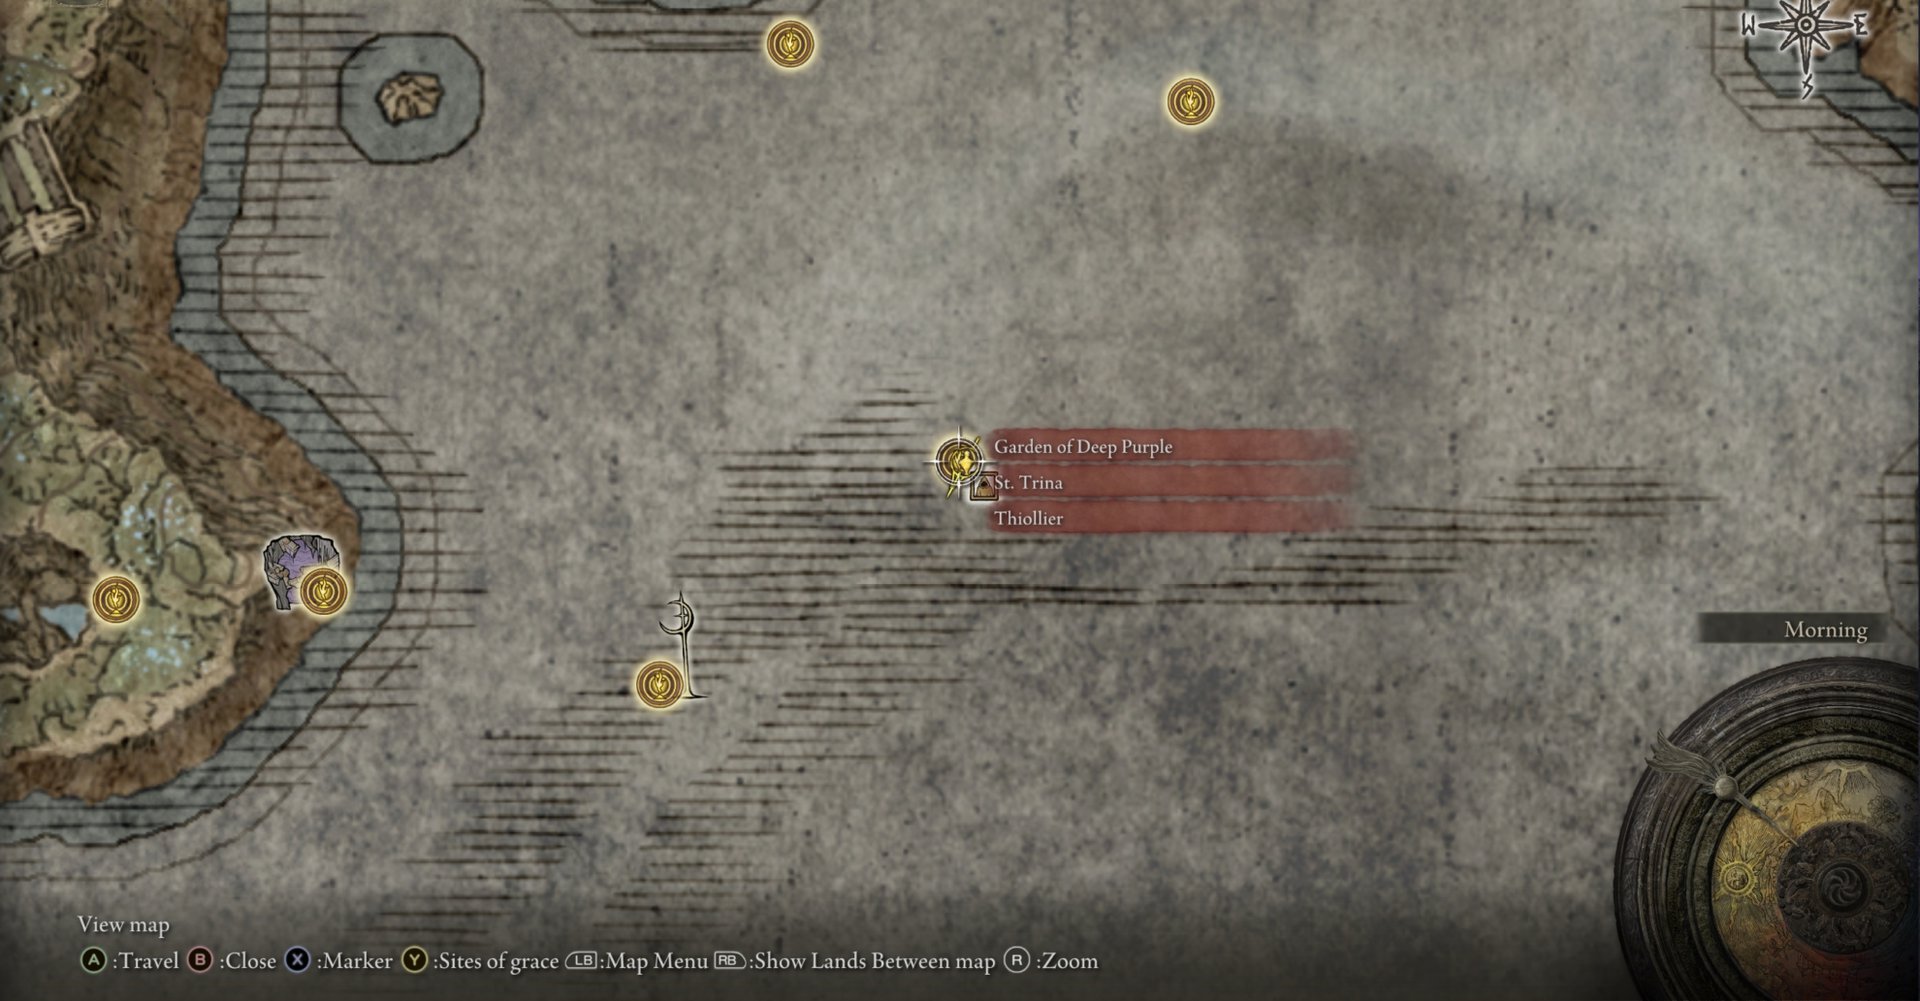
You receive St. Trina’s Smile after angering, then defeating Thiollier at the Garden of Deep Purple below the Stone Coffin Fissure. Keep Imbibing that Nectar from St. Trina and exhausting Thiollier’s dialogue each time. Thiollier will get fed up with you and invade.
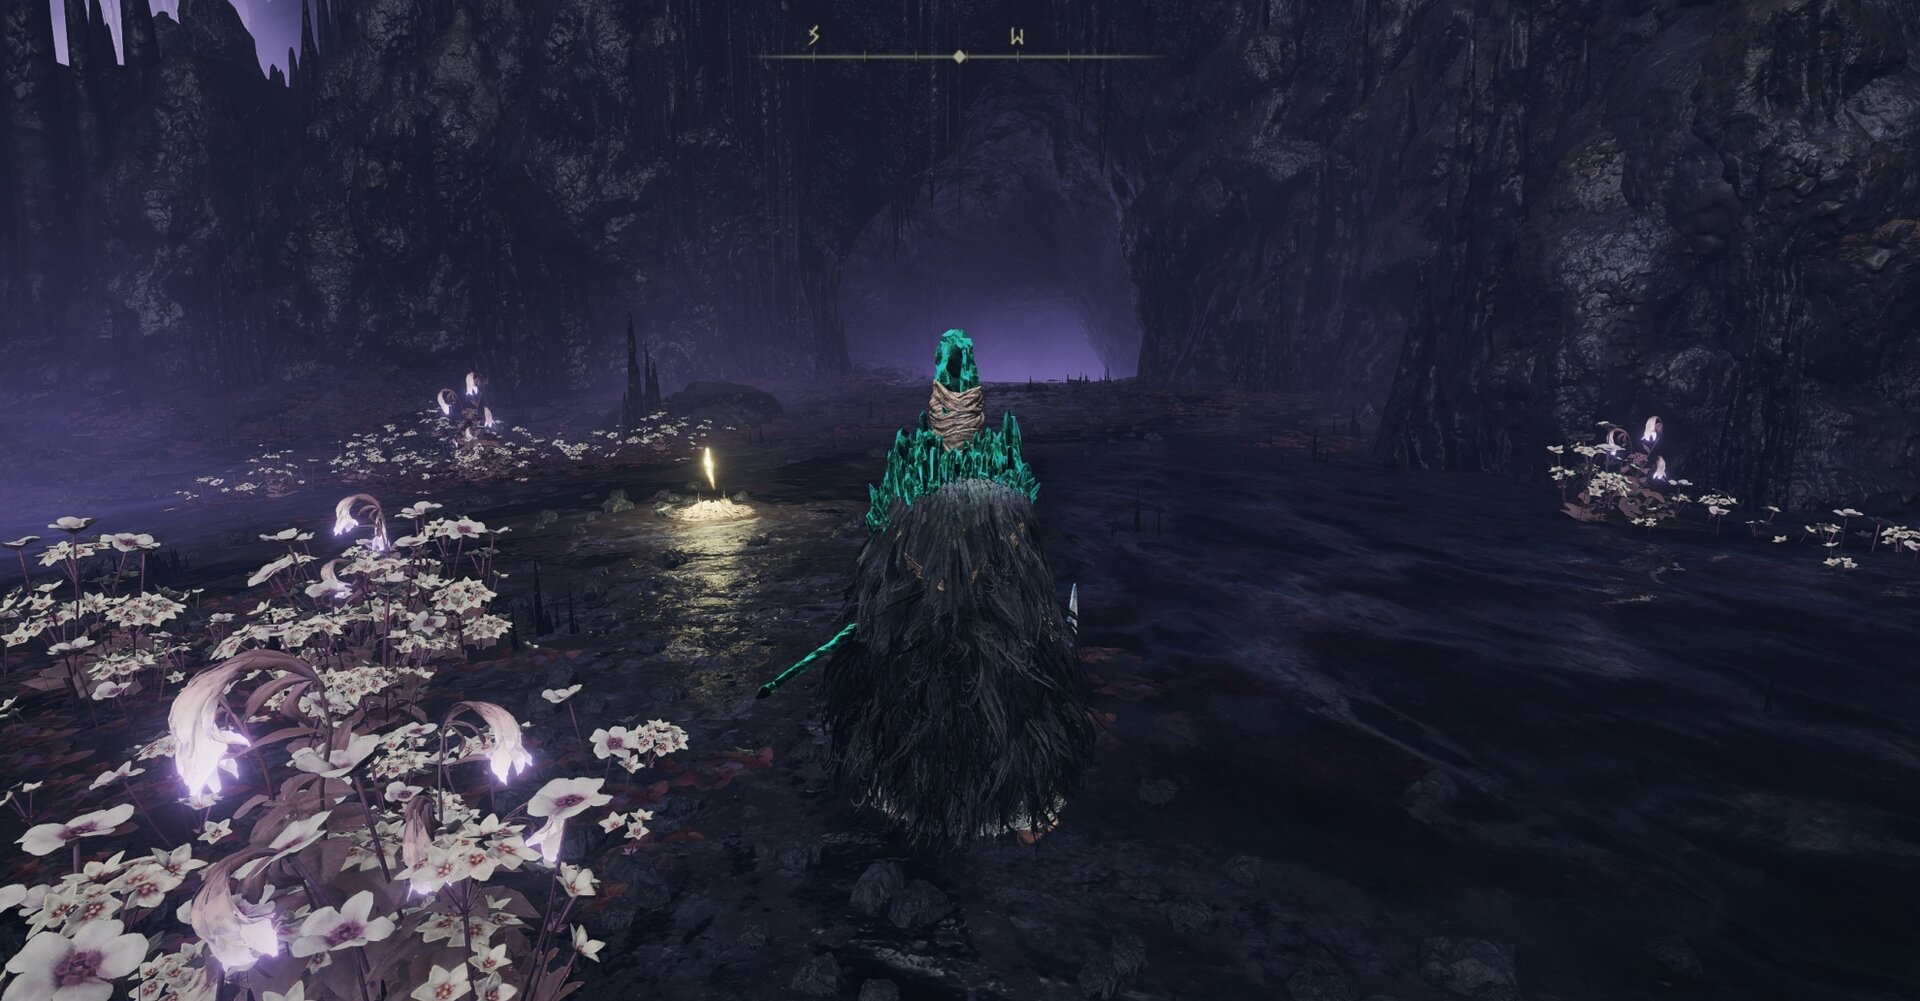
Your actions in this quest do not prevent you from getting anything later on, so go right ahead and torment him with the truth!
Learn more about St. Trina and Thiollier from our guide to all unique item locations at the Stone Coffin Fissure. St. Trina plays a small role in the base game but is a lot more involved in the DLC.
Thiollier’s Armor Set and Weapons Preview
Thiollier’s Altered Appearance
Sir Ansbach Equipment
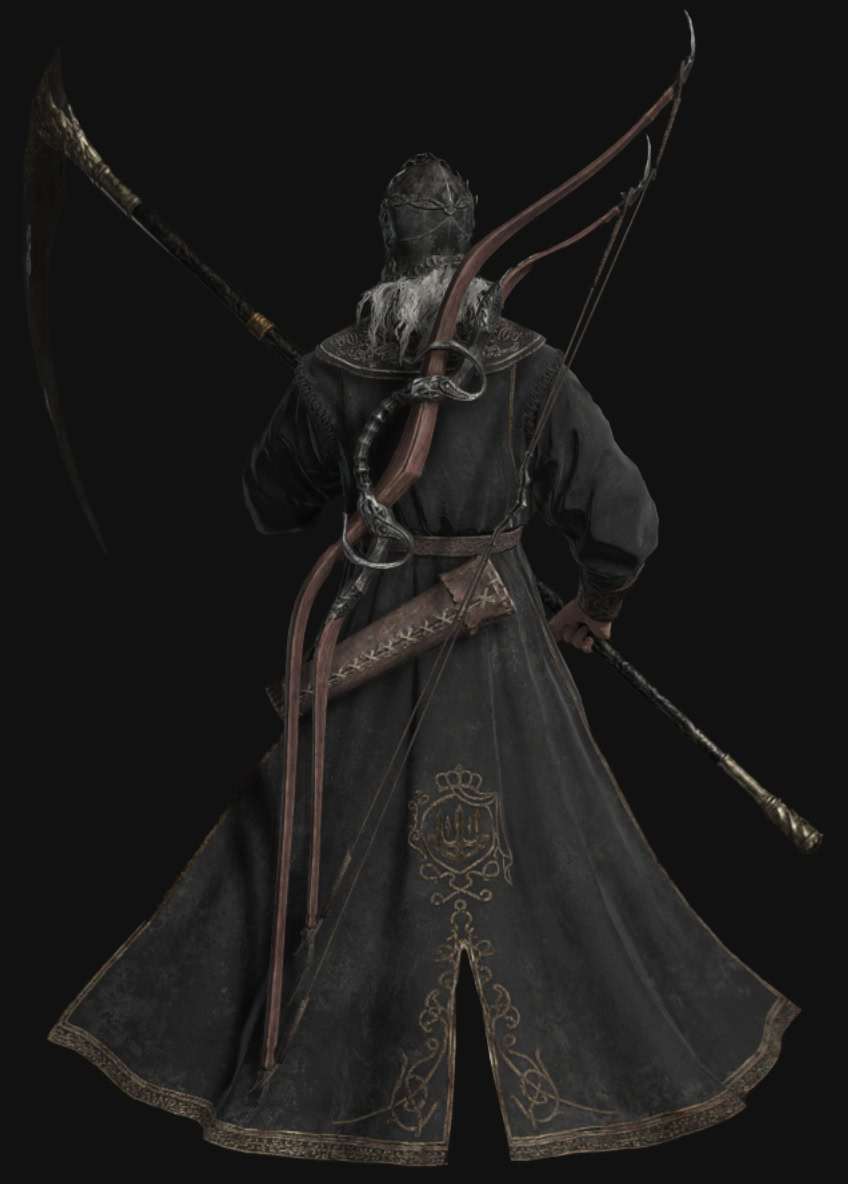
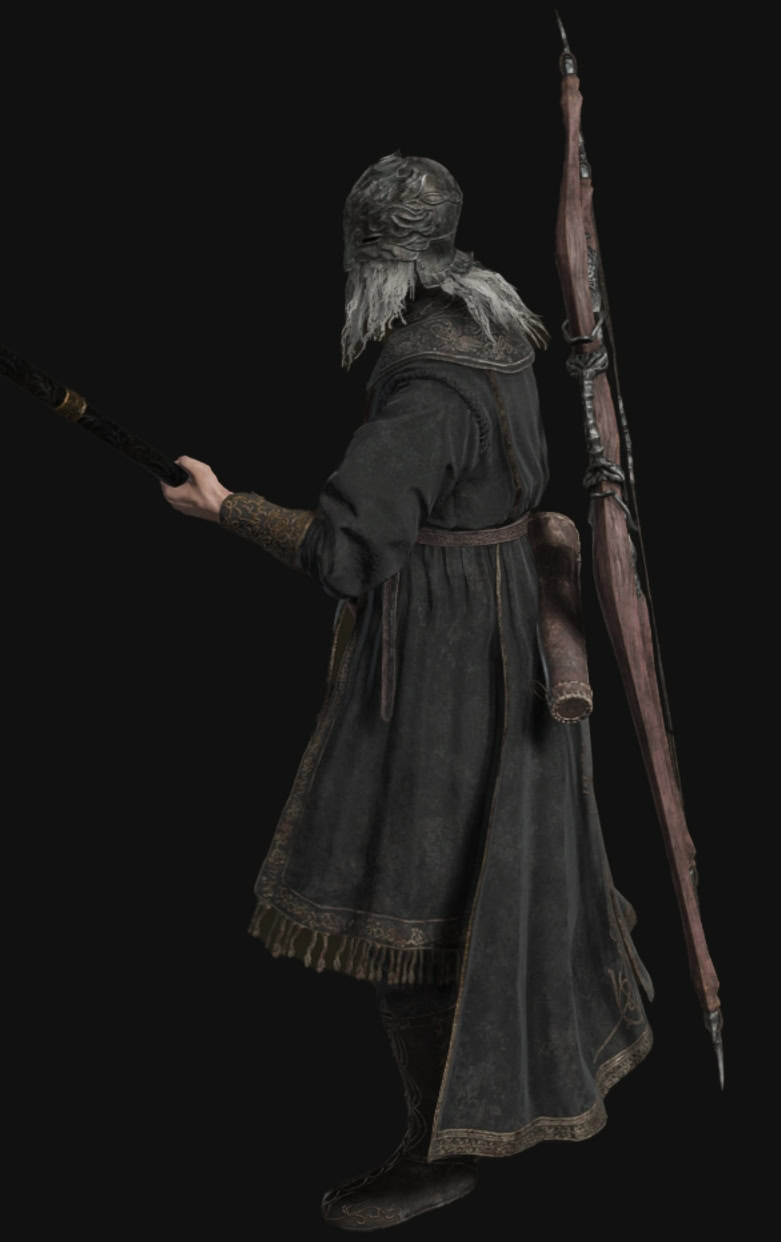
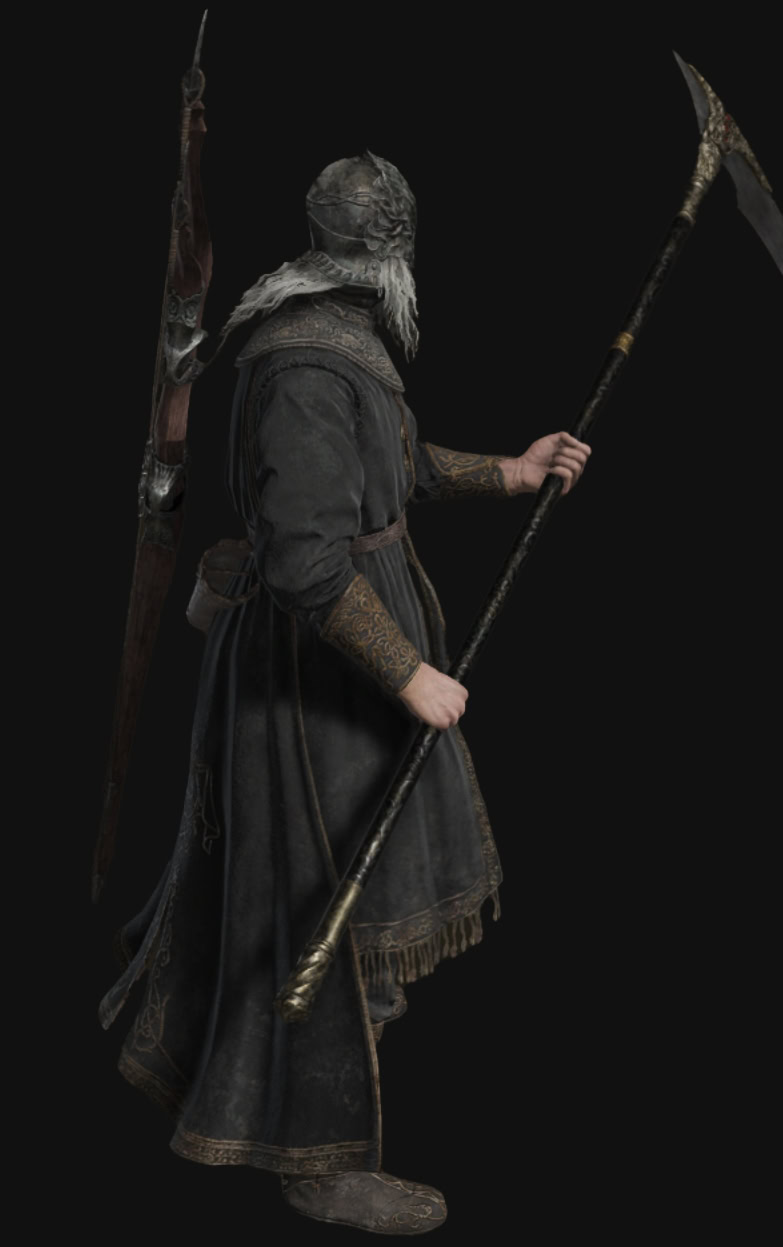
Sir Ansbach’s equipment includes his armor set, his Longbow, the Obsidian Lamina Reaper, and an Blood Incantation.
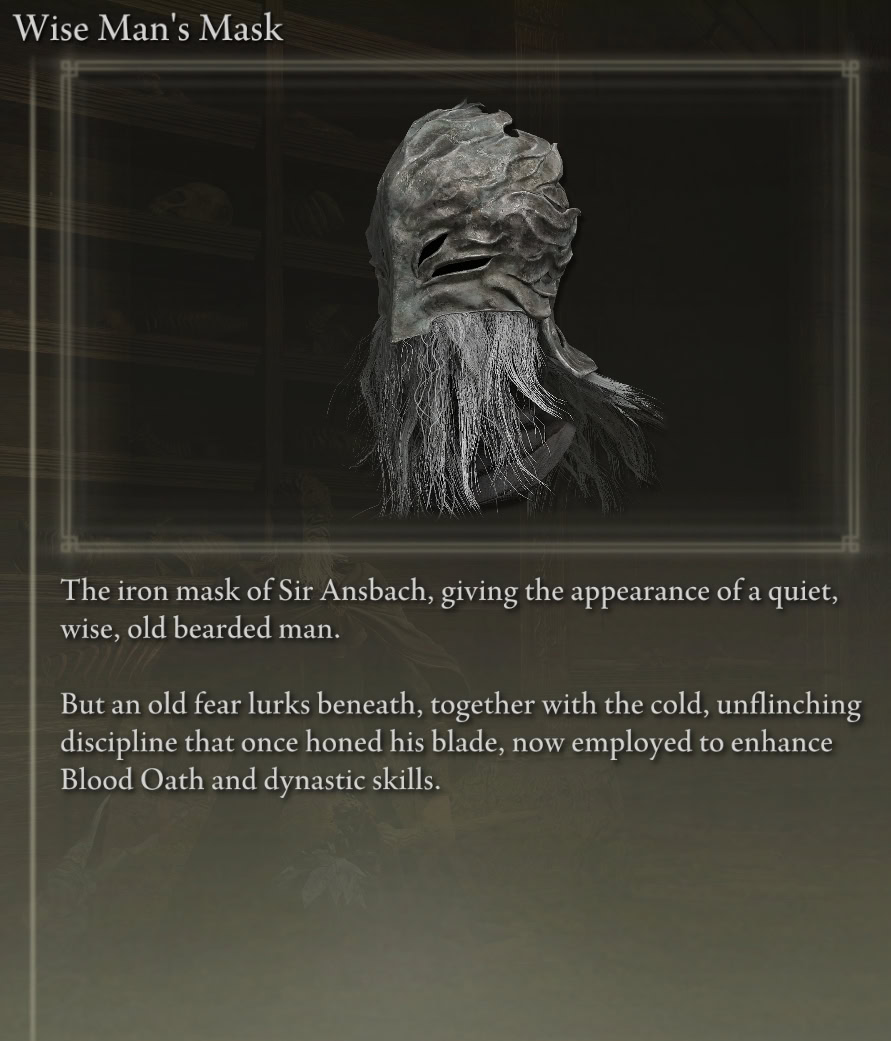
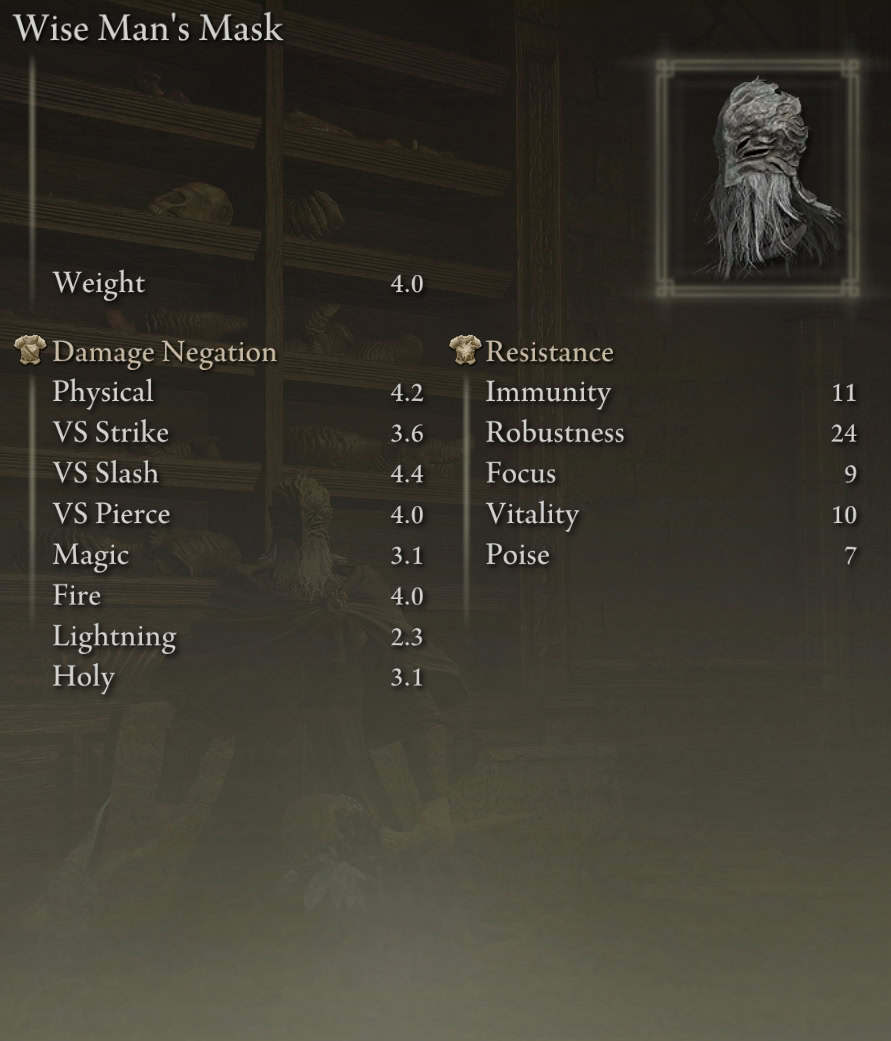
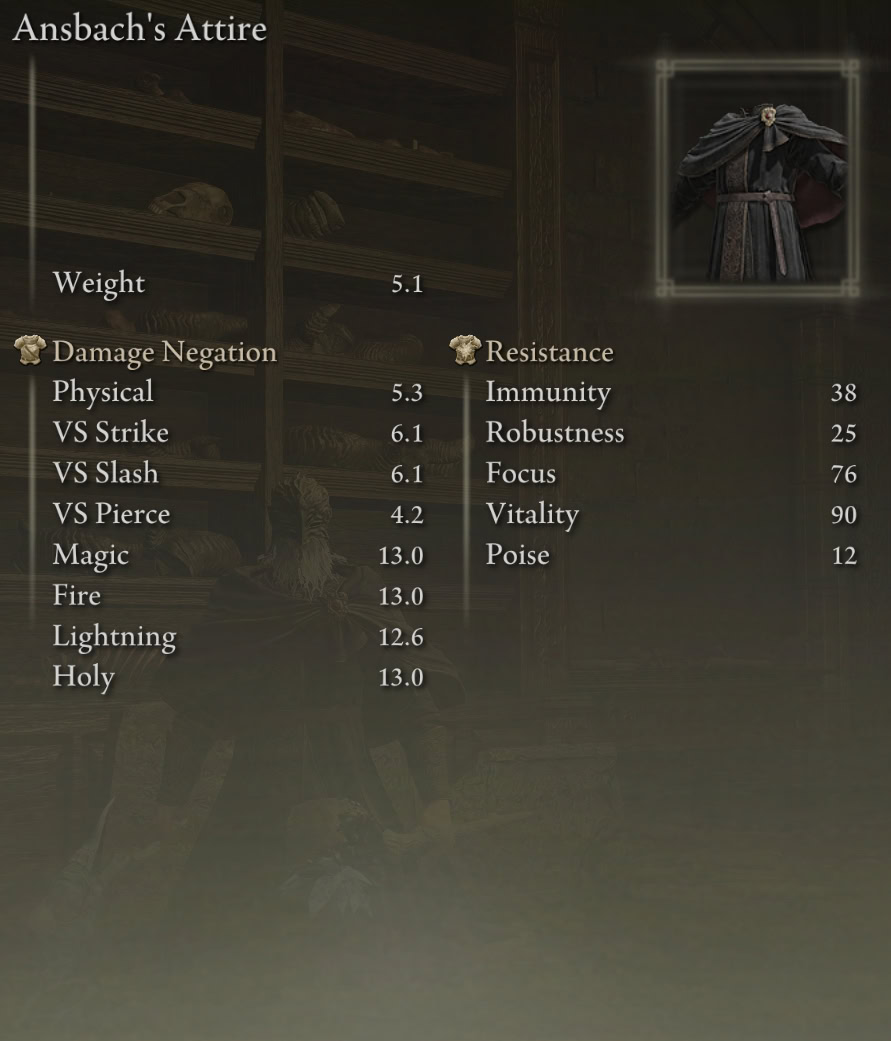
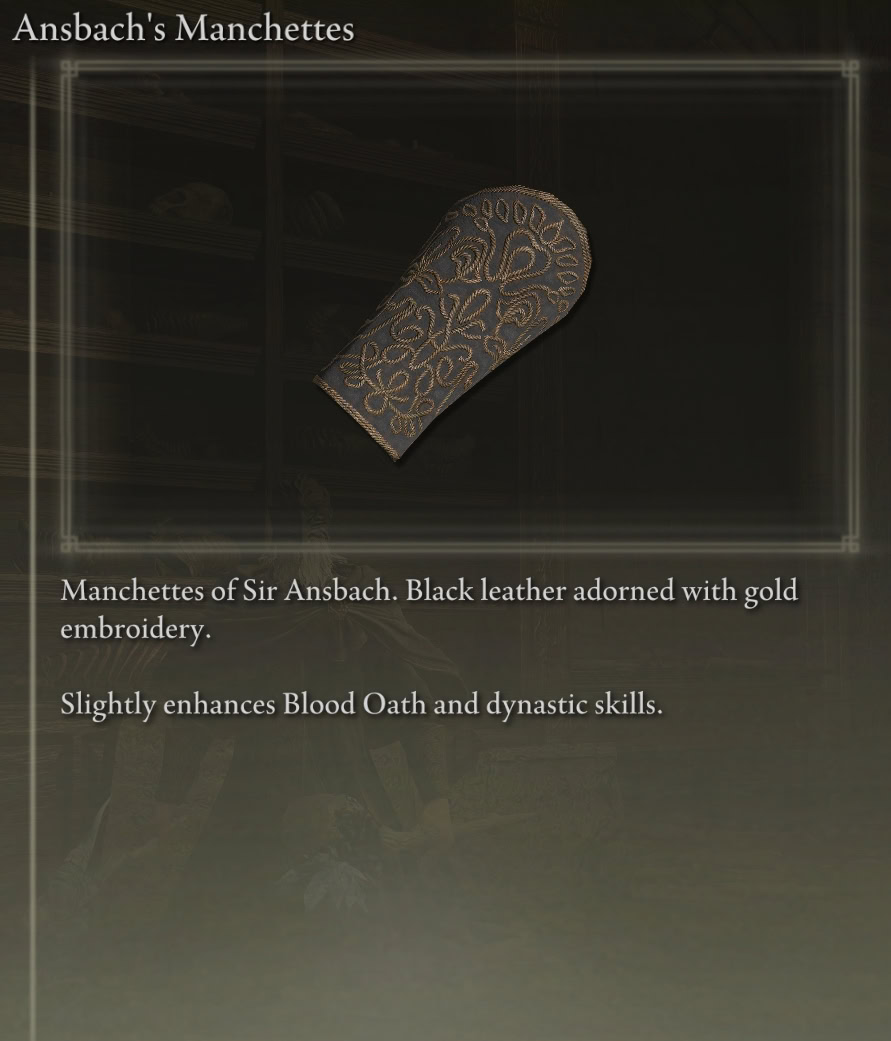
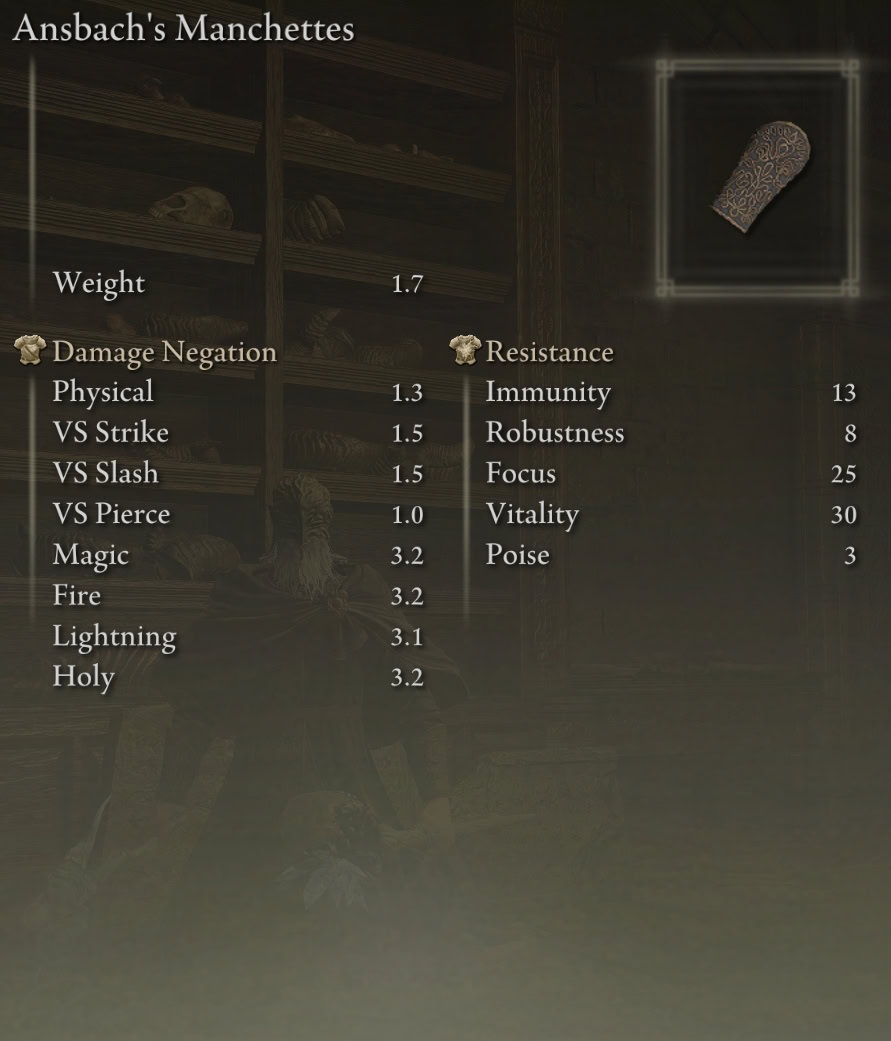
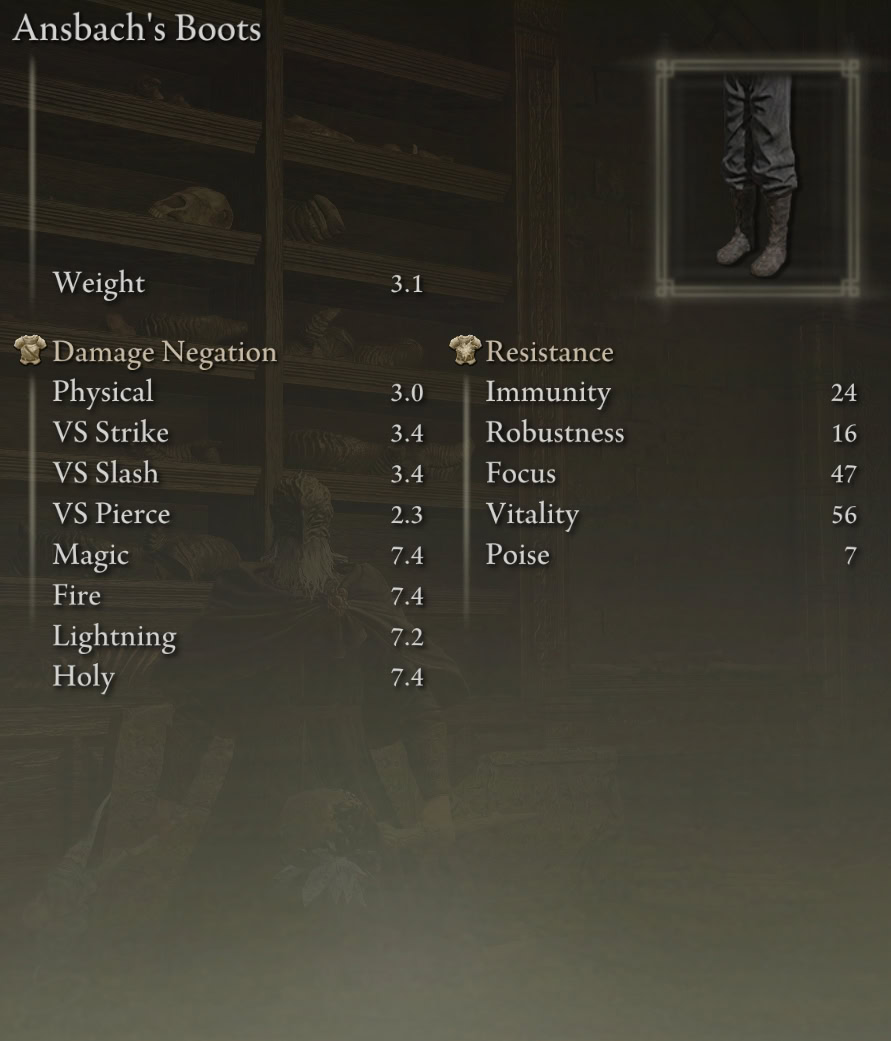
Sir Ansbach’s Armor Set Stats
Sir Ansbach’s armor set has a combined weight of 13.9, and is part of the third lightest weight class alongside the Sanguine Noble armor set and Lord of Blood’s Robe. Each piece in the set comes together to provides a 14% damage boost to all of the Skills associated with the Formless Mother.
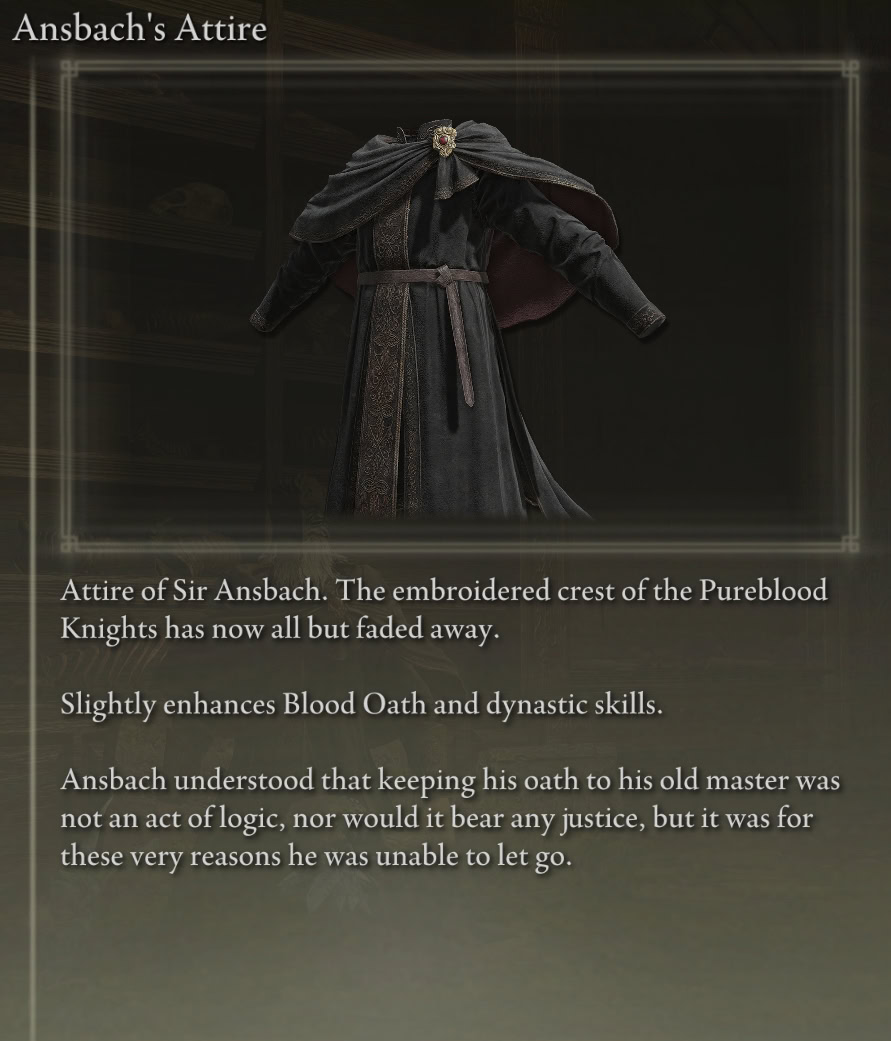
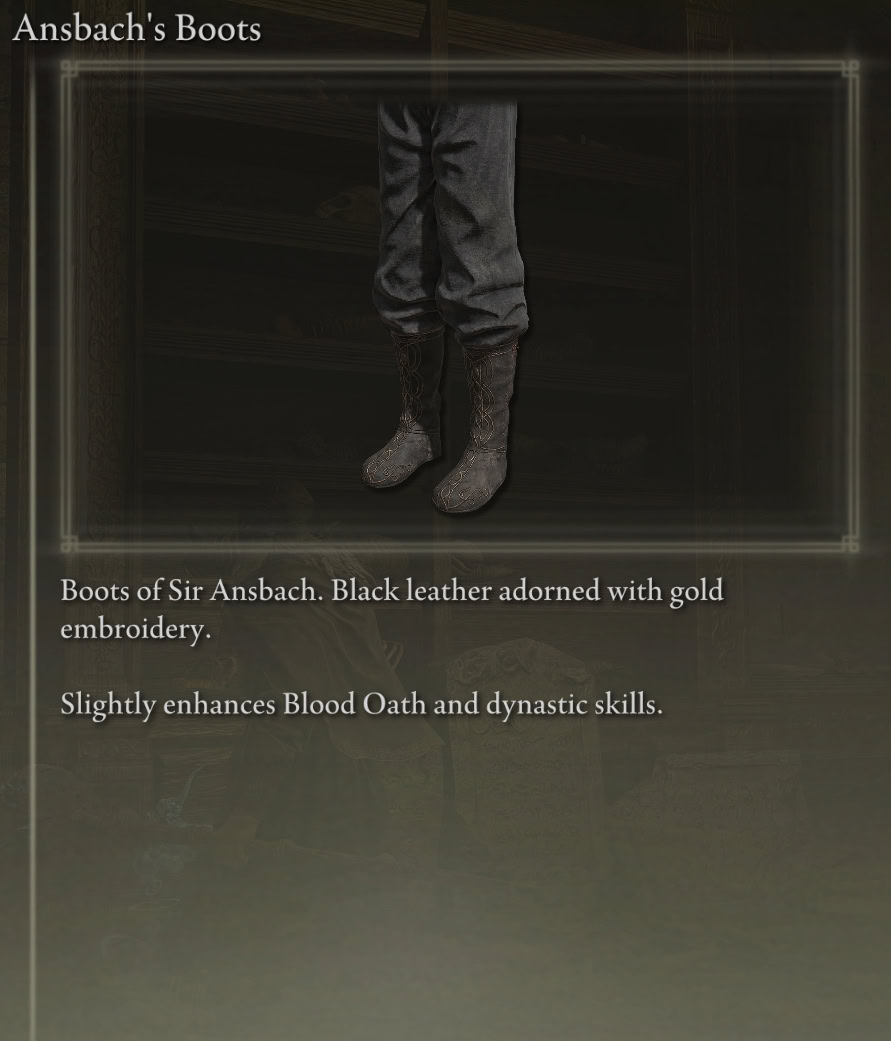
You receive Ansbach’s armor set whenever Sir Ansbach dies.
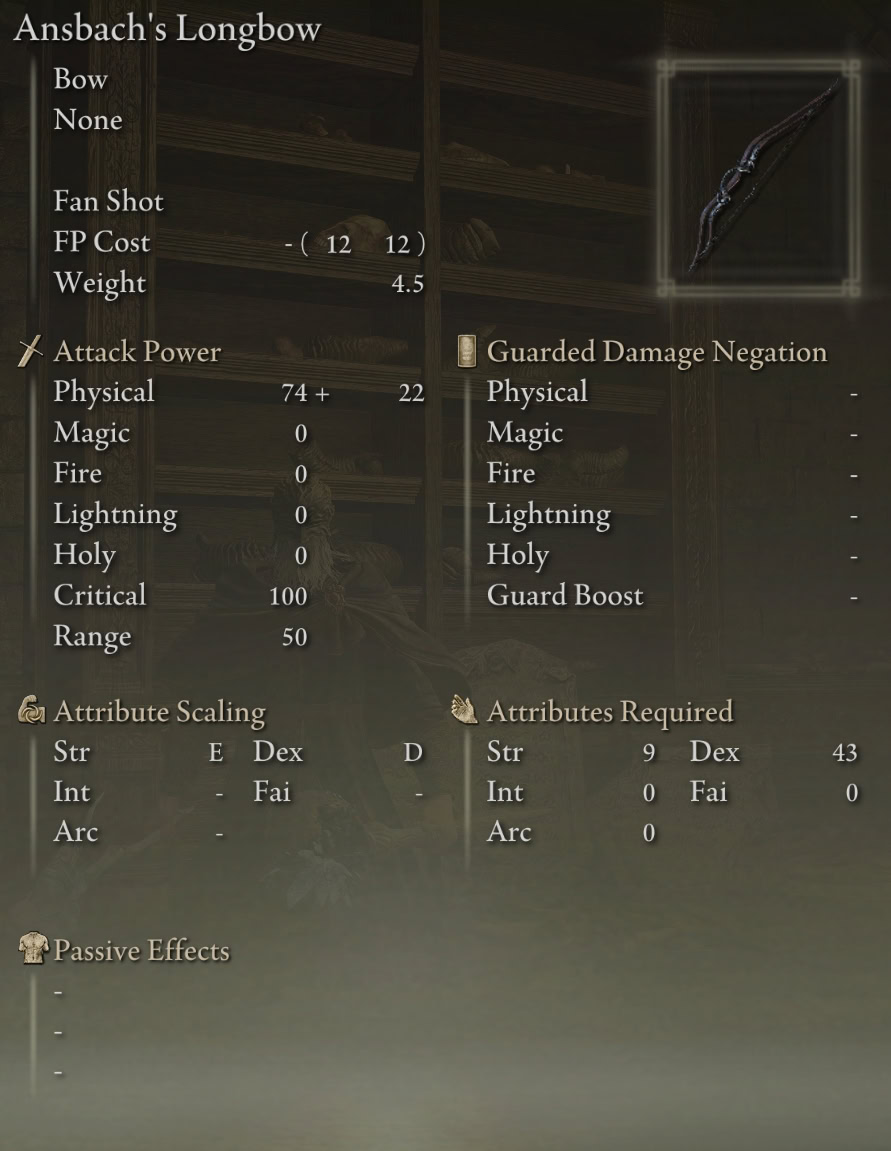
Ansbach’s Longbow (Bow) Stats
Ansbach’s Longbow is a stylish regular Bow with an insane Dexterity requirement of 43, but its Unique Skill: Fan Shot allows you to fire a whopping 8 shots at once!
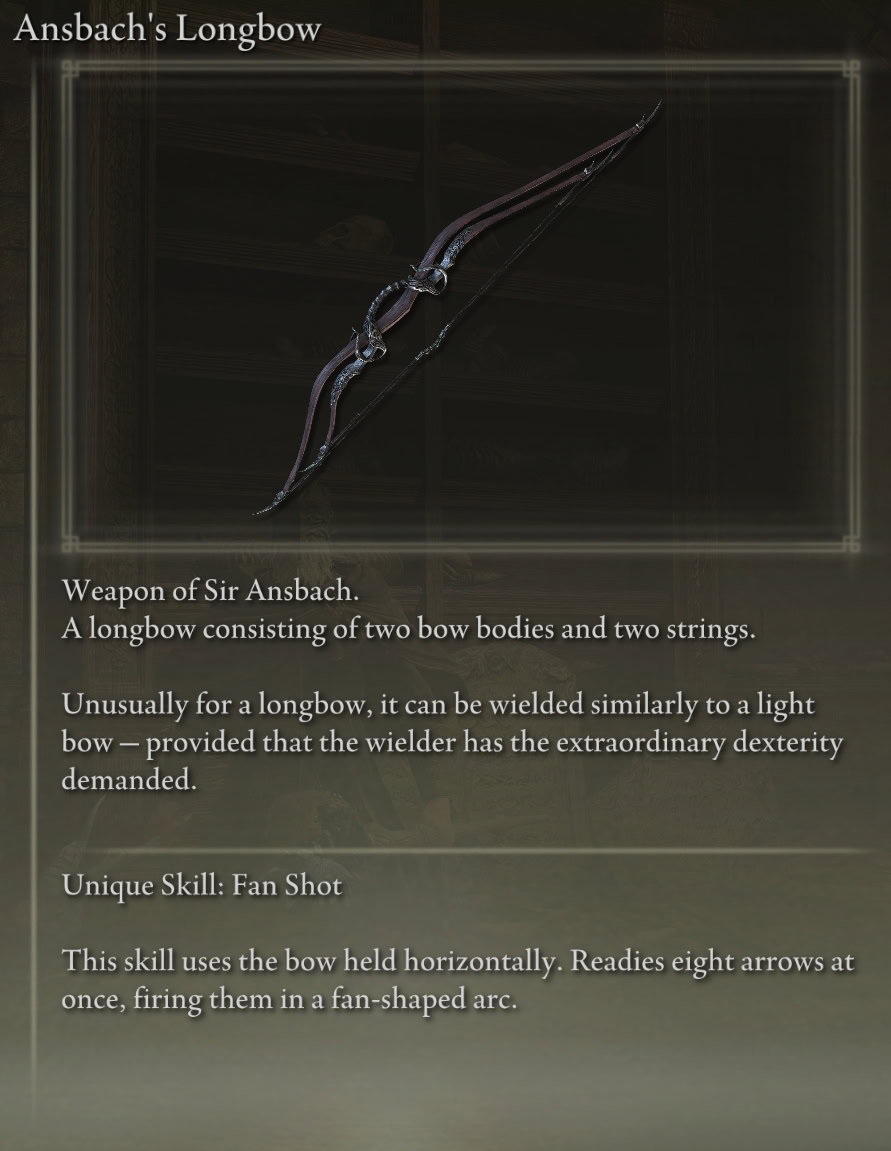
You receive Ansbach’s Longbow if Needle Knight Leda attacks him at the Specimen Storehouse, regardless of who you choose to support.
Obsidian Lamina (Reaper) Stats
The Obsidian Lamina is a gourgeous Reaper that scales with Strength (E), Dexterity (C), and Arcane (D). Its Unique Skill: Dynastic Sickleplay is similar to the Bloody Helice’s Dynast’s Finesse in that it’s meant to be used responsively and retalliatorily, as you you begin with a dodge back.
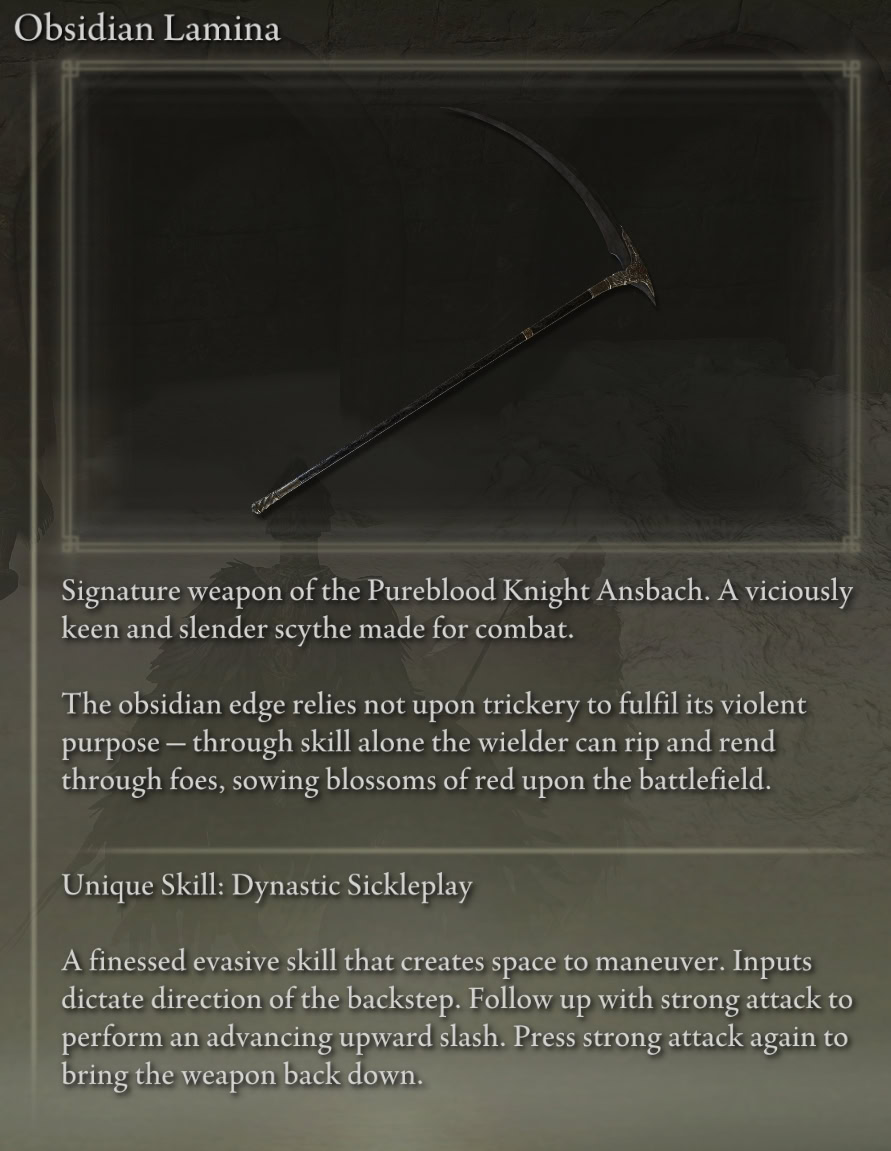
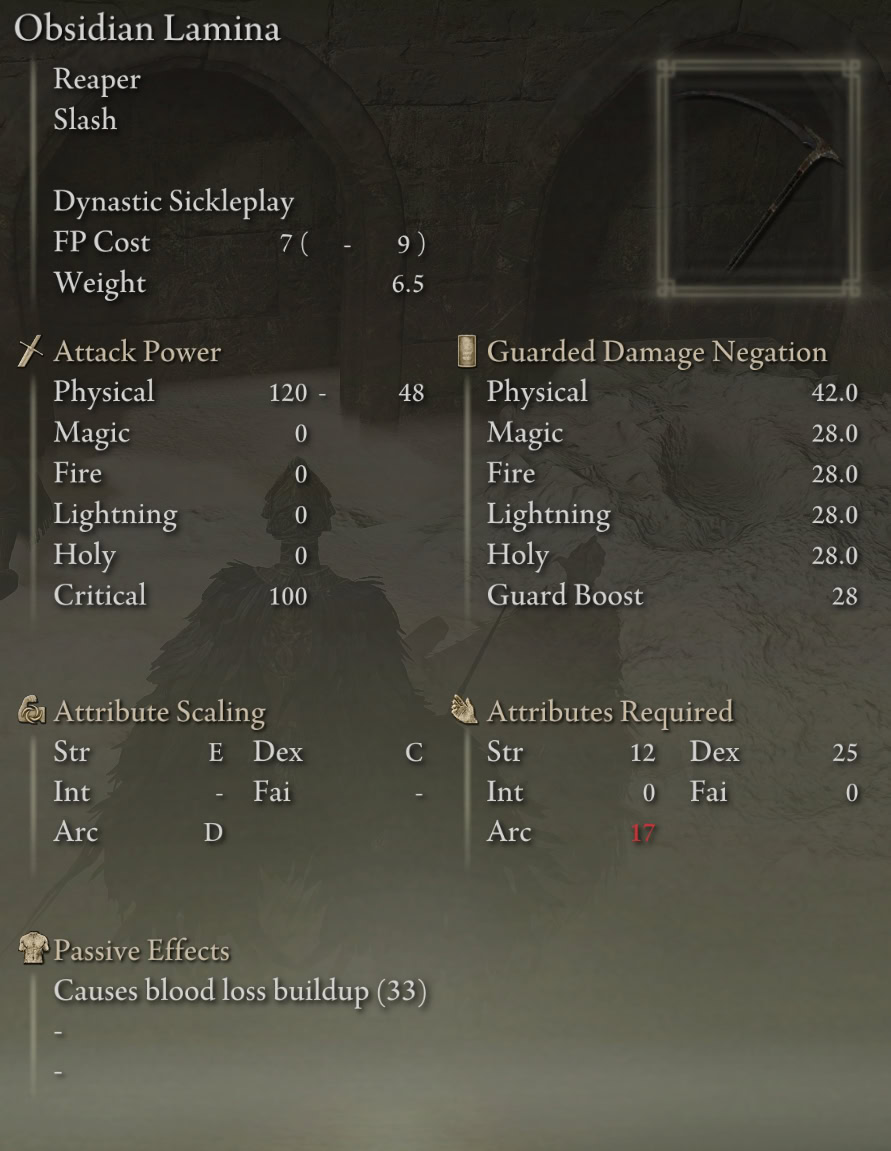
You only receive the Obsidian Lamina if you aid Sir Ansbach at the Specimen Storehouse and can loot it from his corpse at the Gate of Divinity.
Furious Blade of Ansbach (Incantation) Stats
Furious Blade of Ansbach is a Blood Incantation, so it requires both Faith (19) and Arcane (27) to use. You lacerate the Formless Mother repeatedly with your Seal hand, creating clean gashes of Bloodflame.
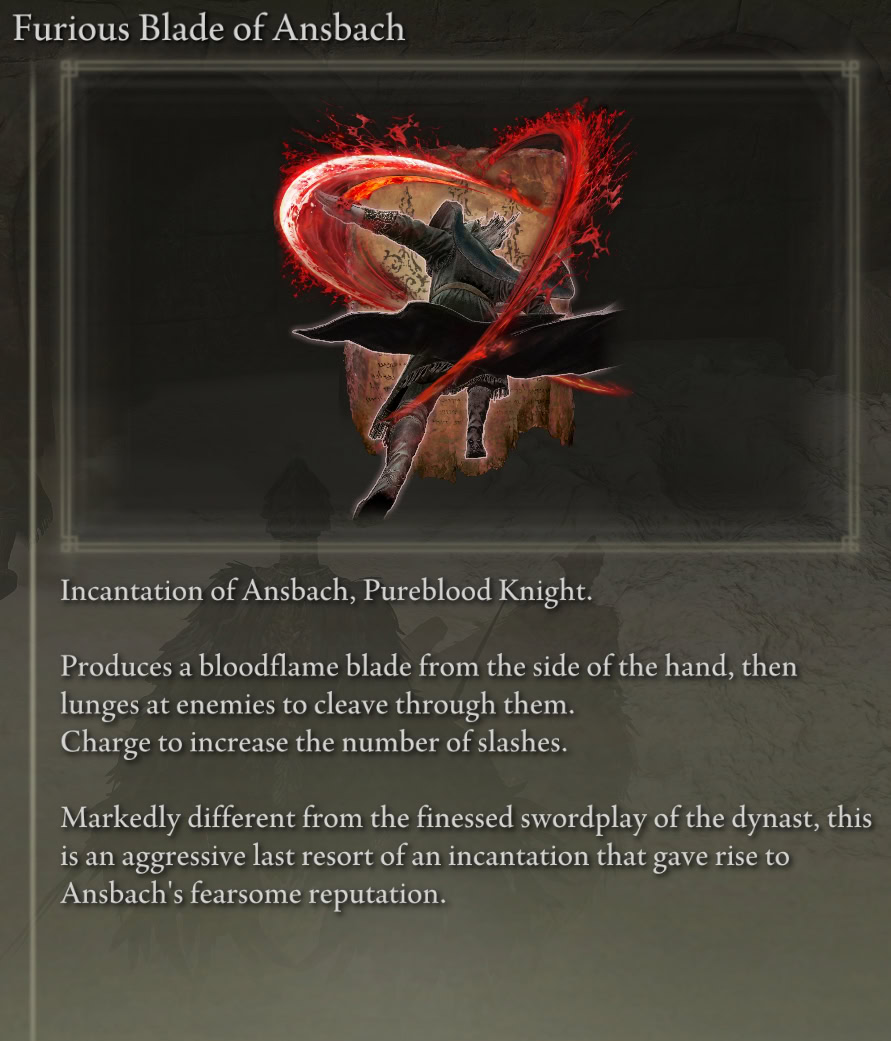
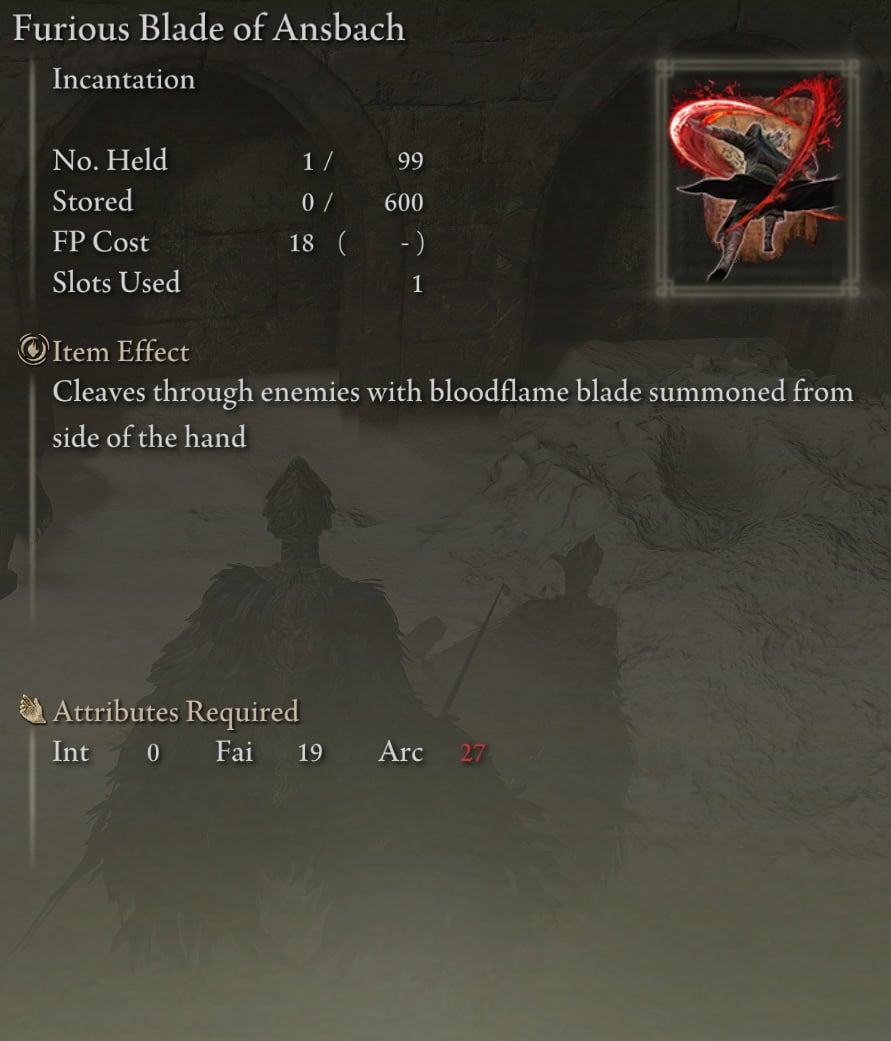
You only receive the Furious Blade of Ansbach Incantation if you aid Sir Ansbach at the Specimen Storehouse and can loot it from his corpse at the Gate of Divinity.
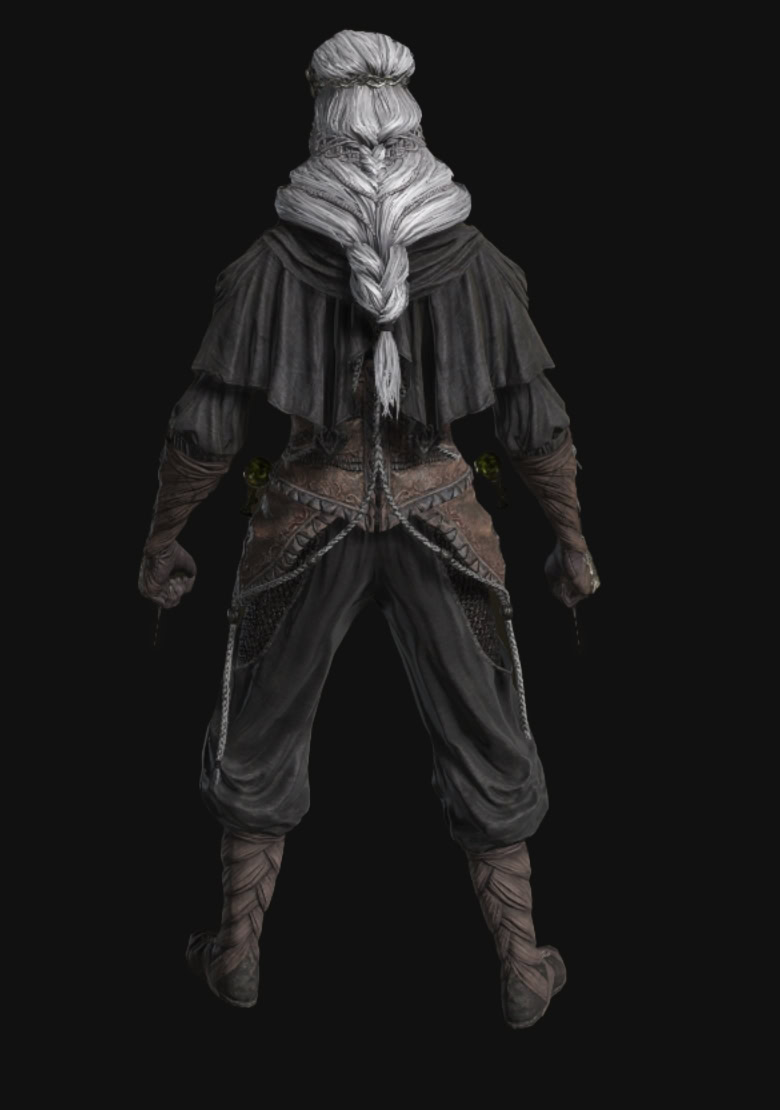
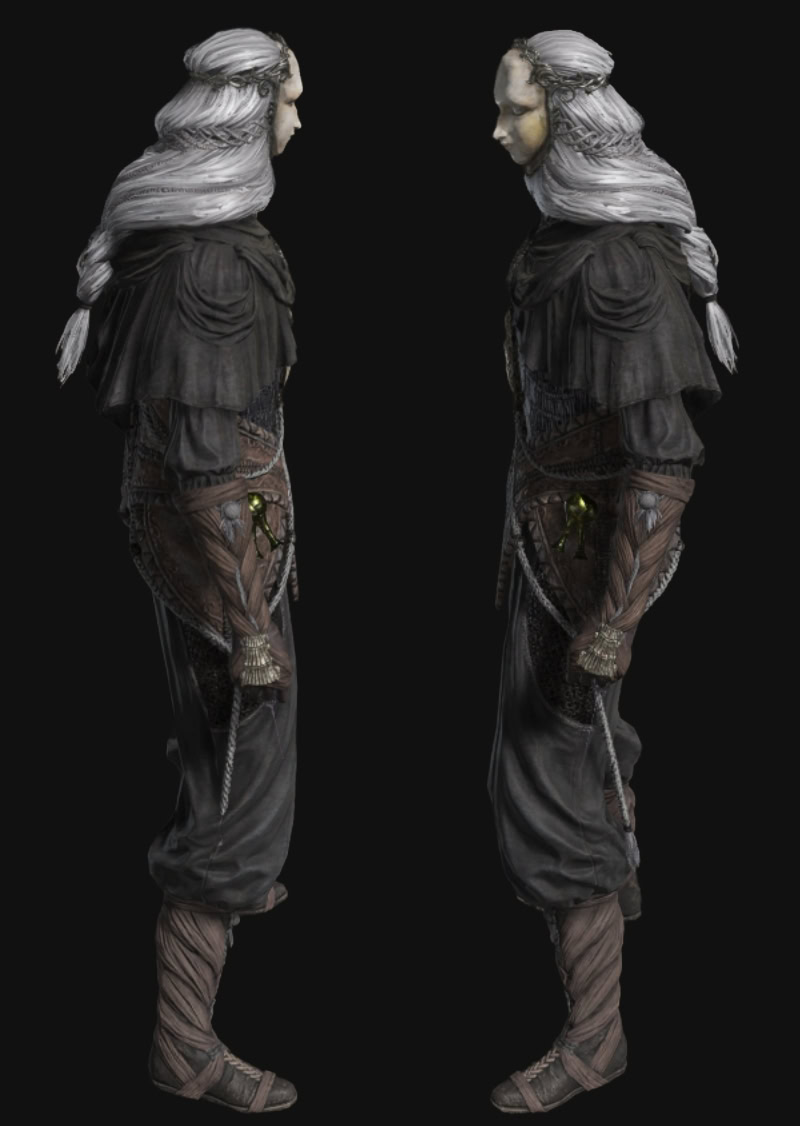
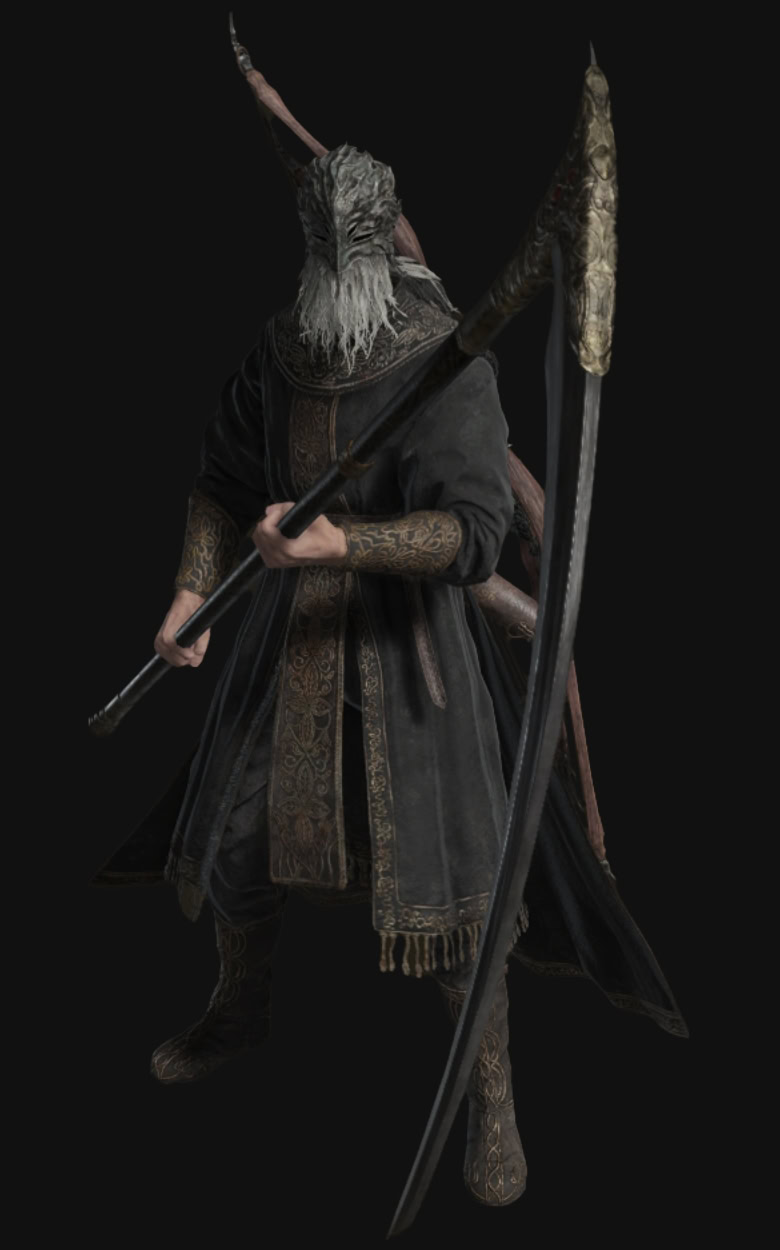
Sir Ansbach Armor and Equipment Preview
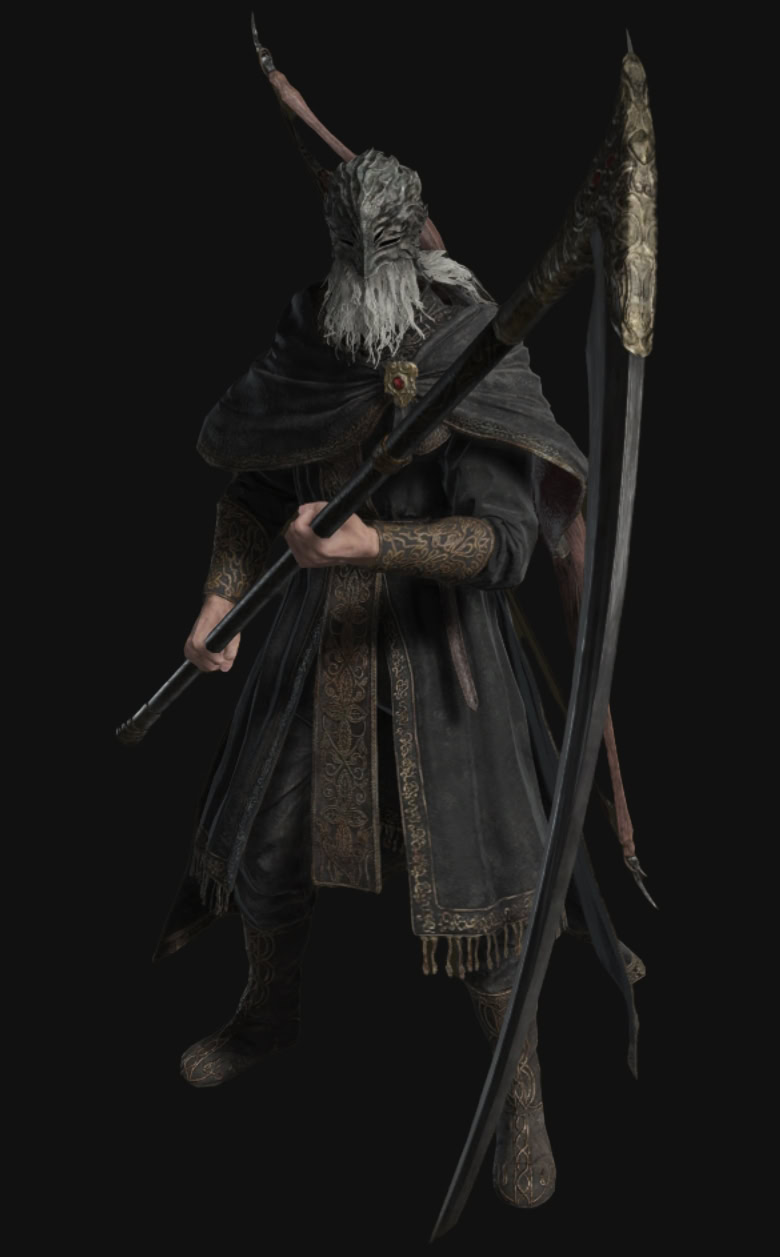
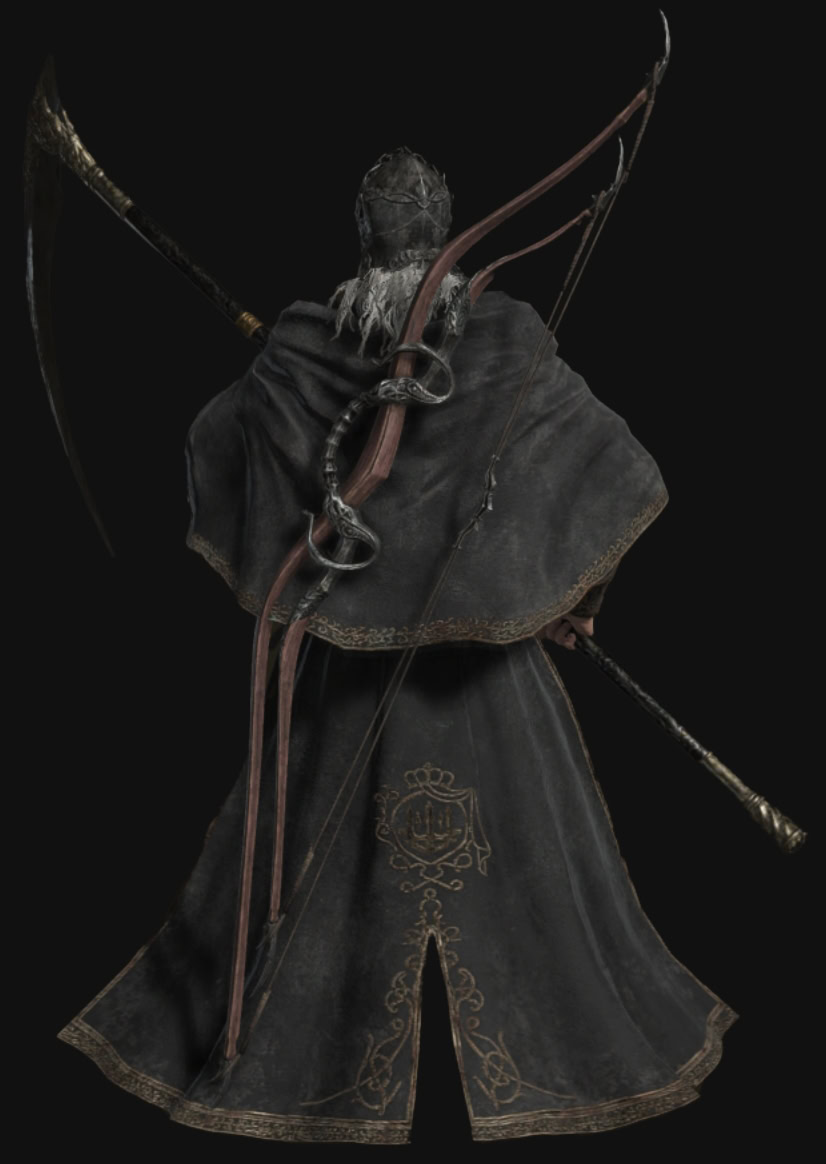

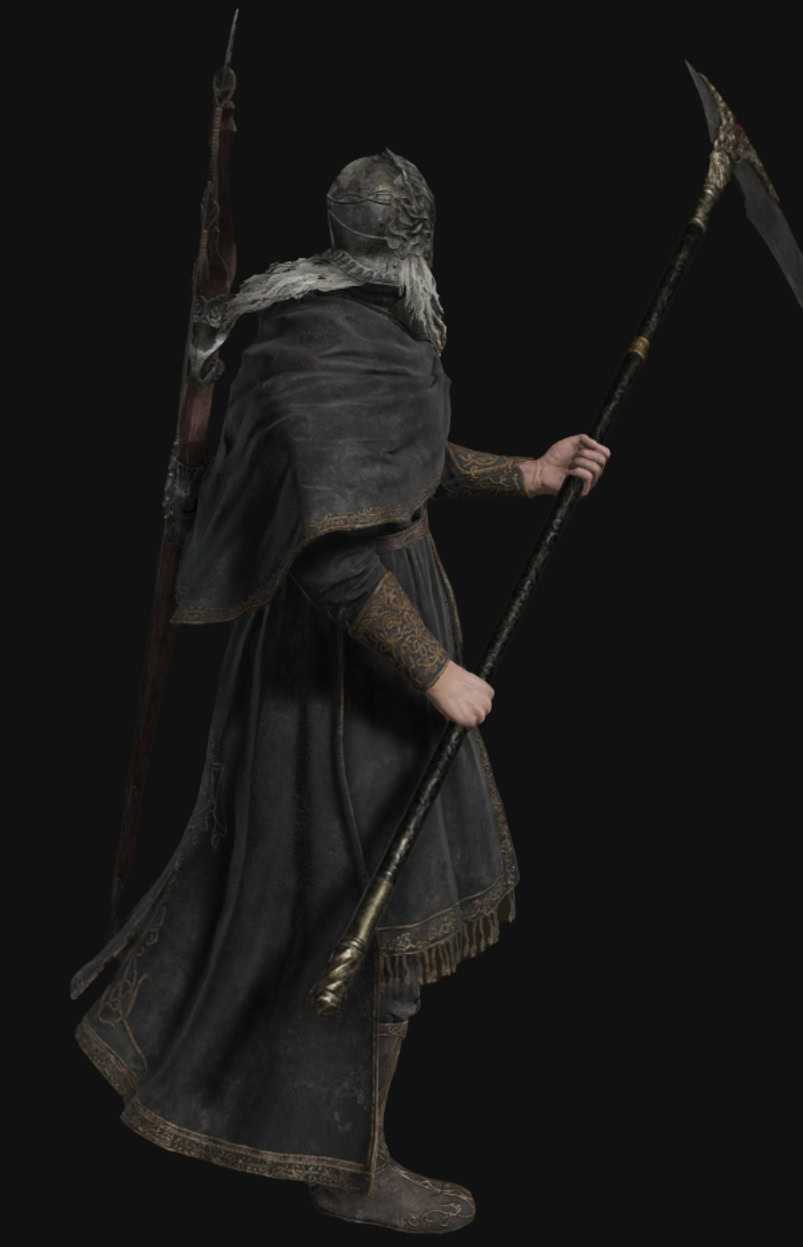
Sir Ansbach Altered Armor and Equipment Preview
How to get Sir Ansbach’s Equipment
You receive Ansbach’s Armor Set and Ansbach’s Longbow whenever he dies, but you only receive the Obsidian Lamina and Furious Blade of Ansbach Incantation as well if you complete his quest at the Specimen Storehouse and choose to support him against Needle Knight Leda.
To complete Sir Ansbach’s quest you need to give him the Secret Rite Scroll at the Specimen Storehouse to alleviate his confusion about Miquella’s plans and Mohg’s corpse.
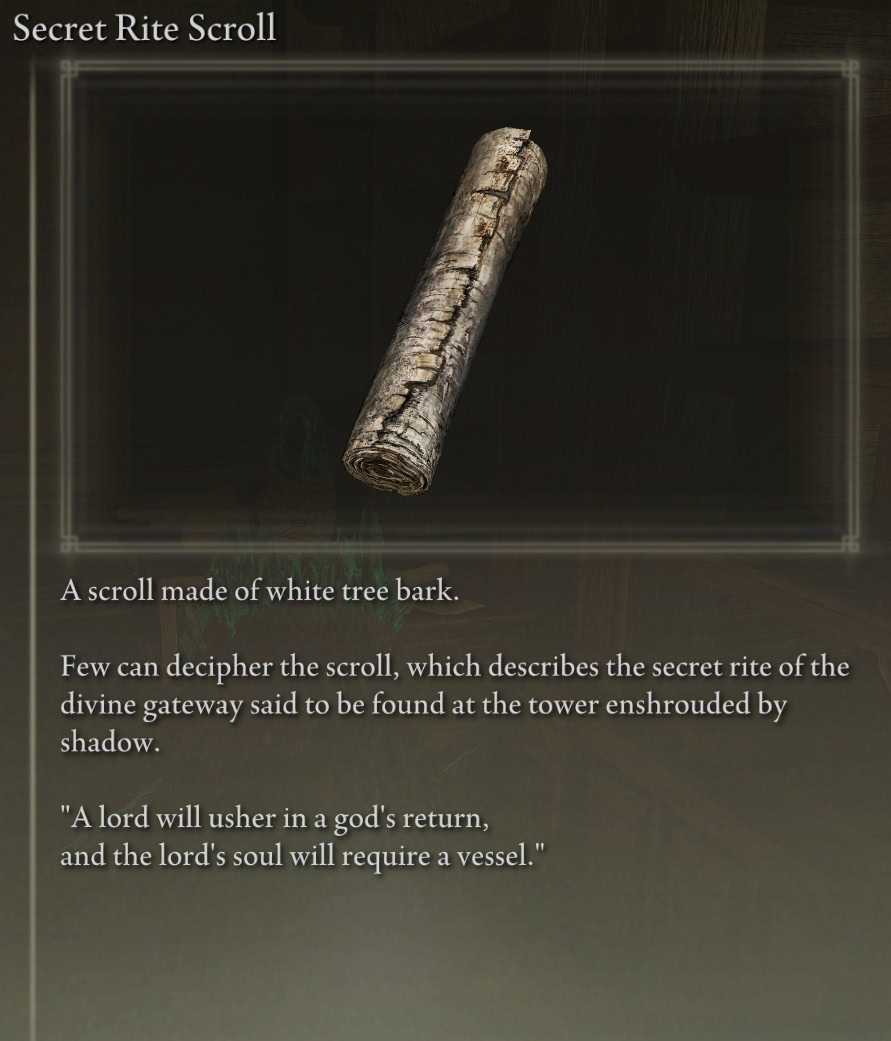
You can find it at the Storehouse on the 4th Floor by going outside from Miquella’s Cross up to the 5th Floor where you fight the Fire Knight, and then back down the stairs outside.
After resolving Freyja’s business or you have progressed far enough that she left, you can choose to support Sir Ansbach or kill him with Needle Knight Leda’s help.


If you kill Ansbach at Specimen Storehouse, you won’t get the Obsidian Lamina or Furious Blade of Ansbach. If you defeat Needle Knight Leda, you won’t get the Retaliatory Crossed-Tree Talisman. You can’t get both in the same playthrough.
If you choose to support Sir Ansbach, you will loot his corpse at the Gate of Divinity at Enir-Ilim after defeating the final boss.

Unaffiliated Characters
These characters don’t have a clear and consistent affliation with Miquella or the Elden Lord.
Hornsent
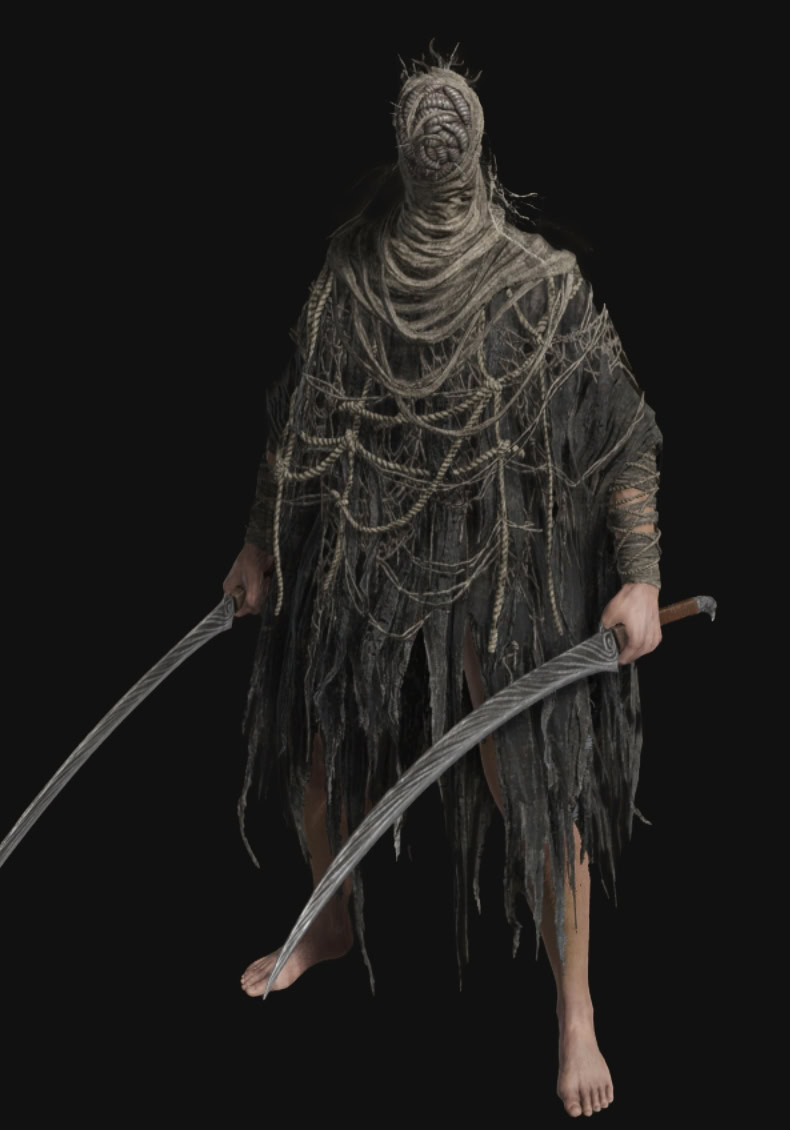
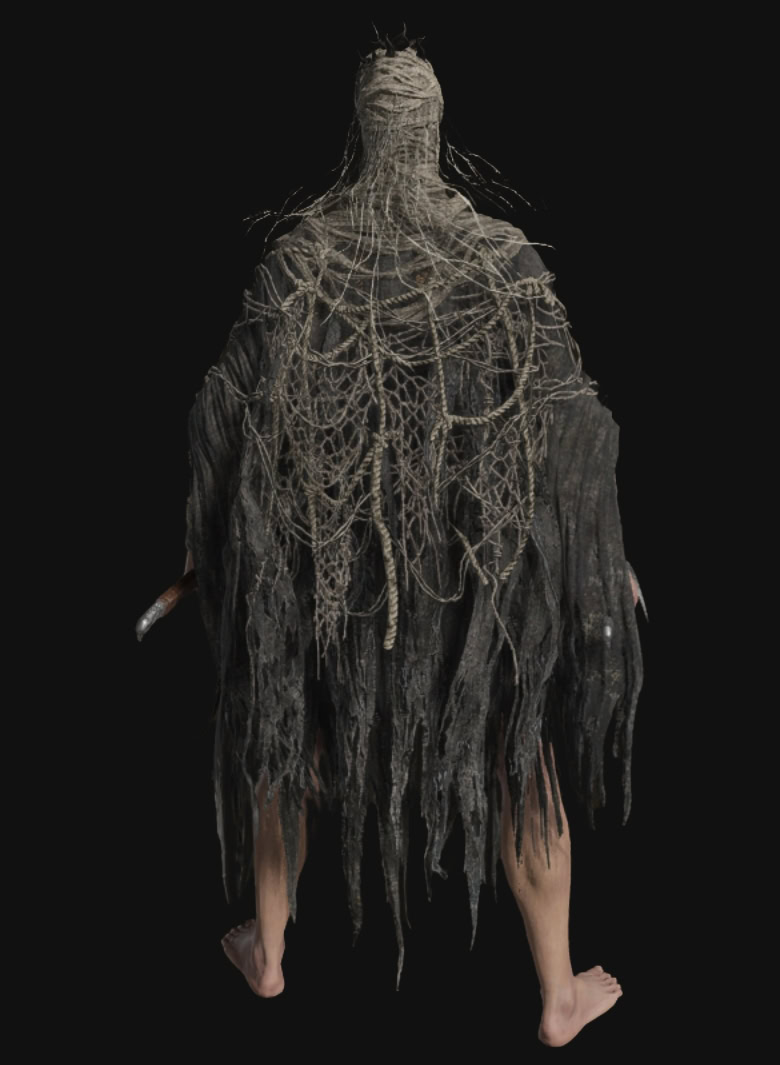
The Hornsent is native to the Realm of Shadow, and can give you his armor set, a curved sword, and an Ash of War.
You receive the Hornsent’s equipment whenever you defeat him, save for the Ash of War: Swift Slash, which you only get if you choose to defend him from Needle Knight Leda at the Shadow Keep. However, doing so will prevent you from getting Ansbach’s Longbow and either of Needle Knight Leda’s Crossed-Tree Talismans.
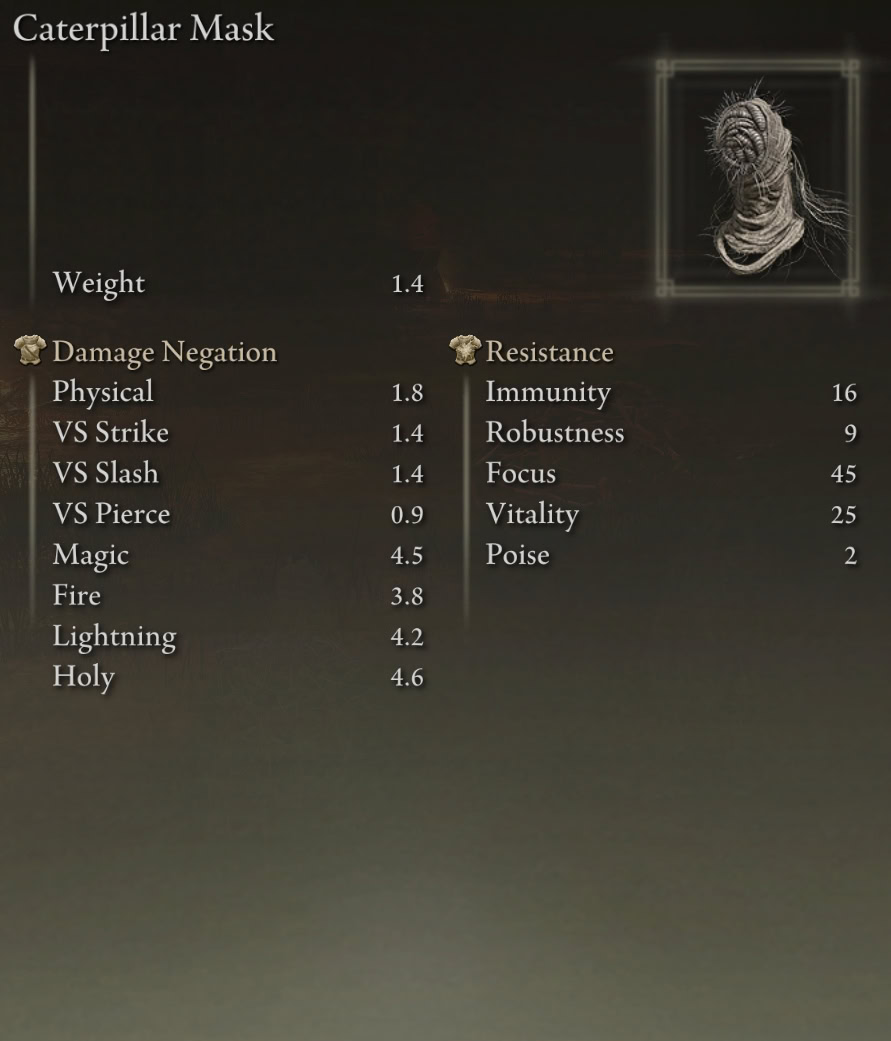
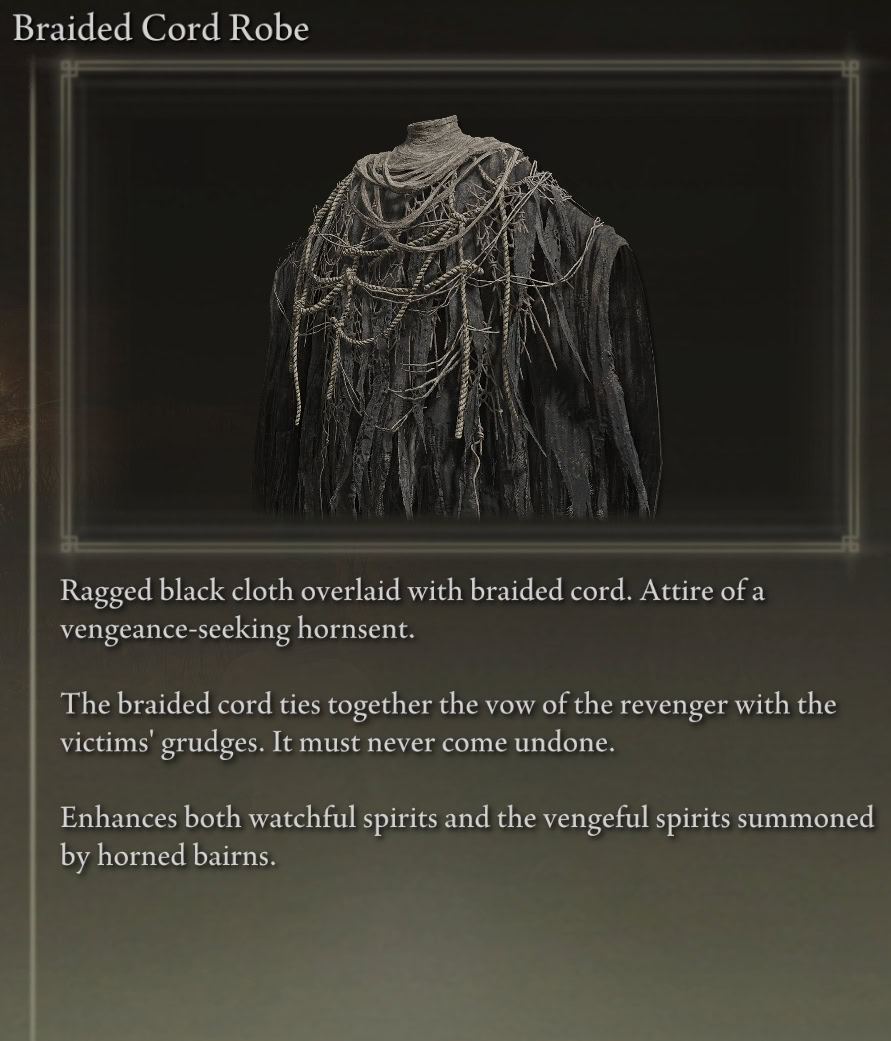
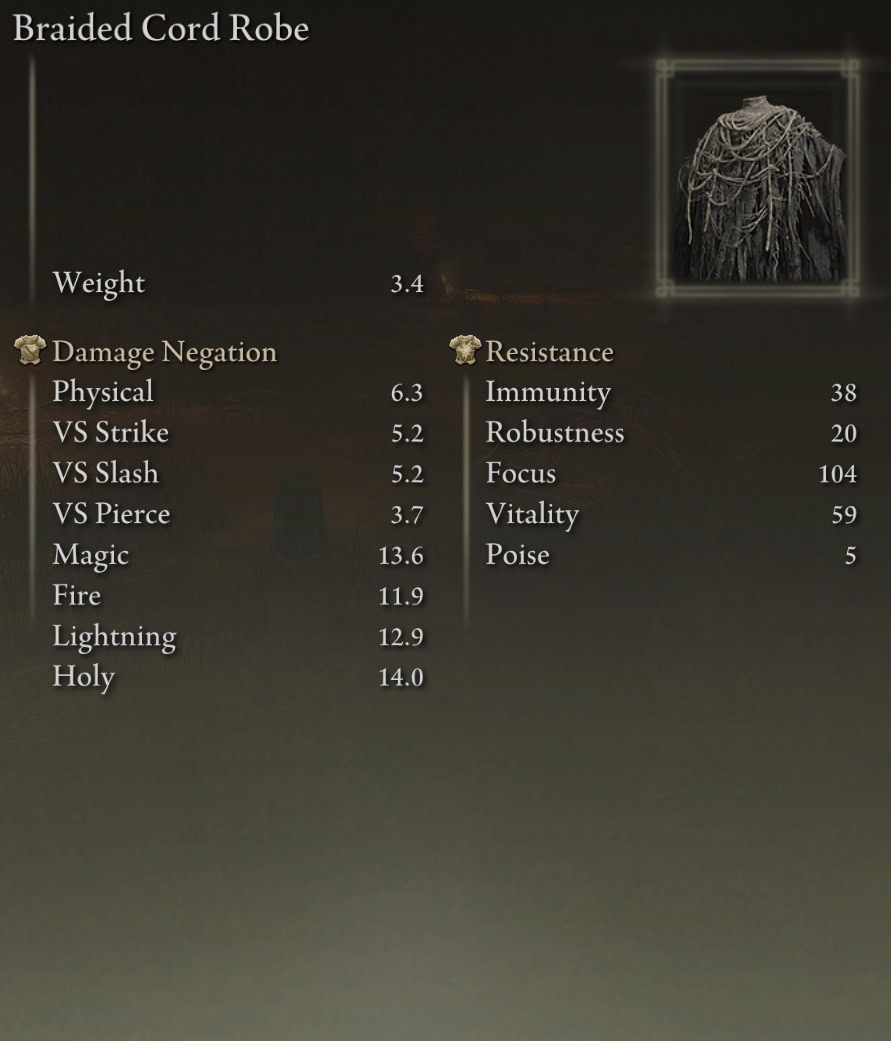
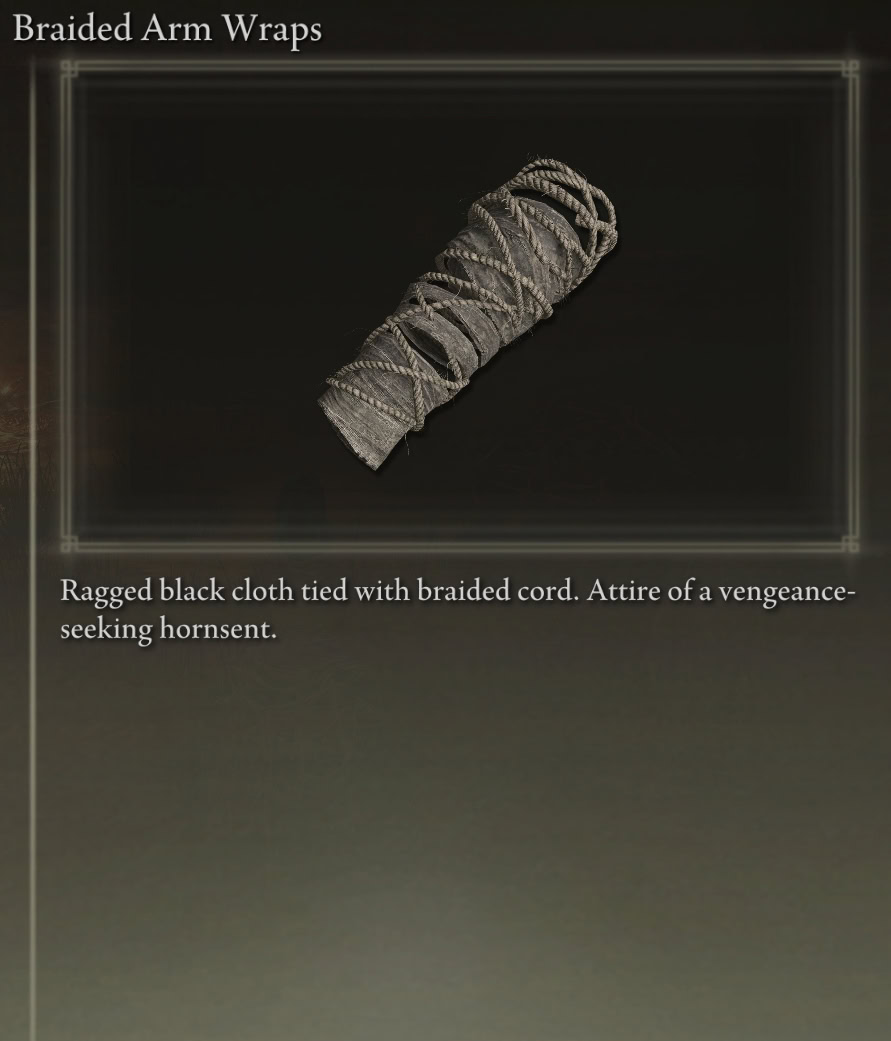
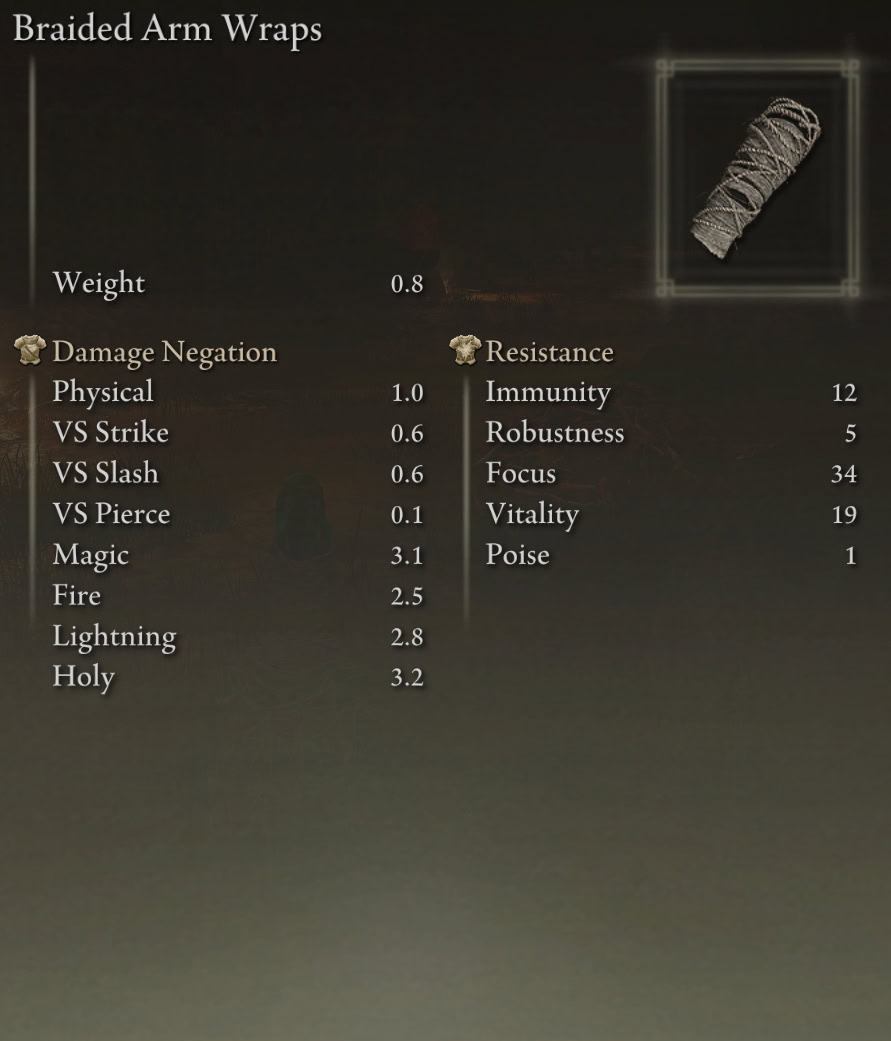
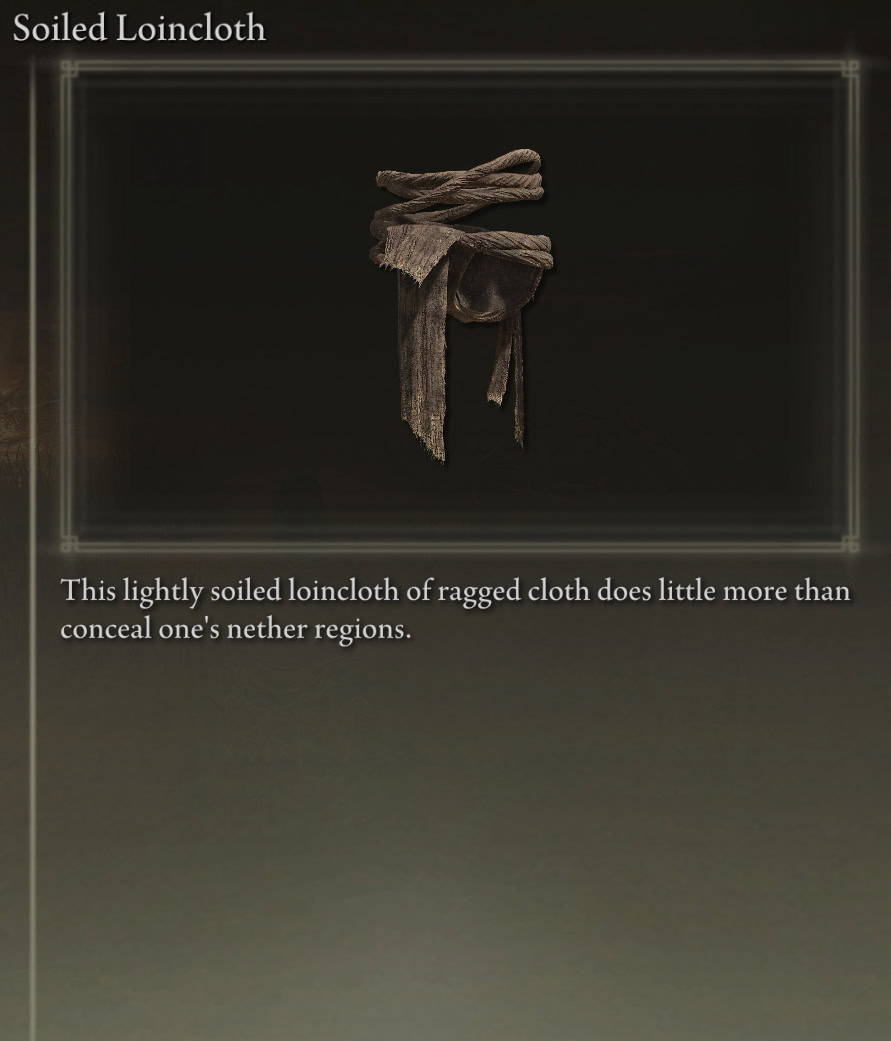
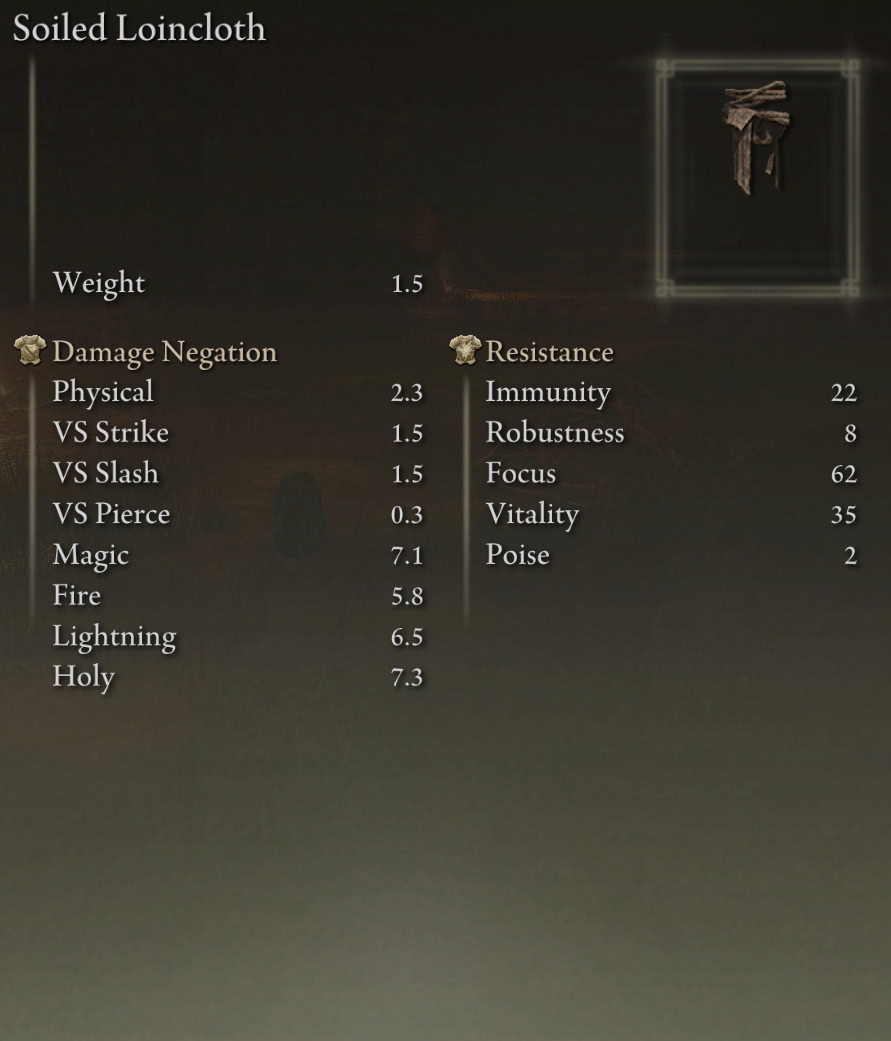
Hornsent’s Braided Cord Armor Set Stats
The Hornsent’s Braided Cord armor set has a combined weight of 7.1, making it the lightest armor set in the game. Unfortunately, you can’t use Soap to unsoil the loincloth.
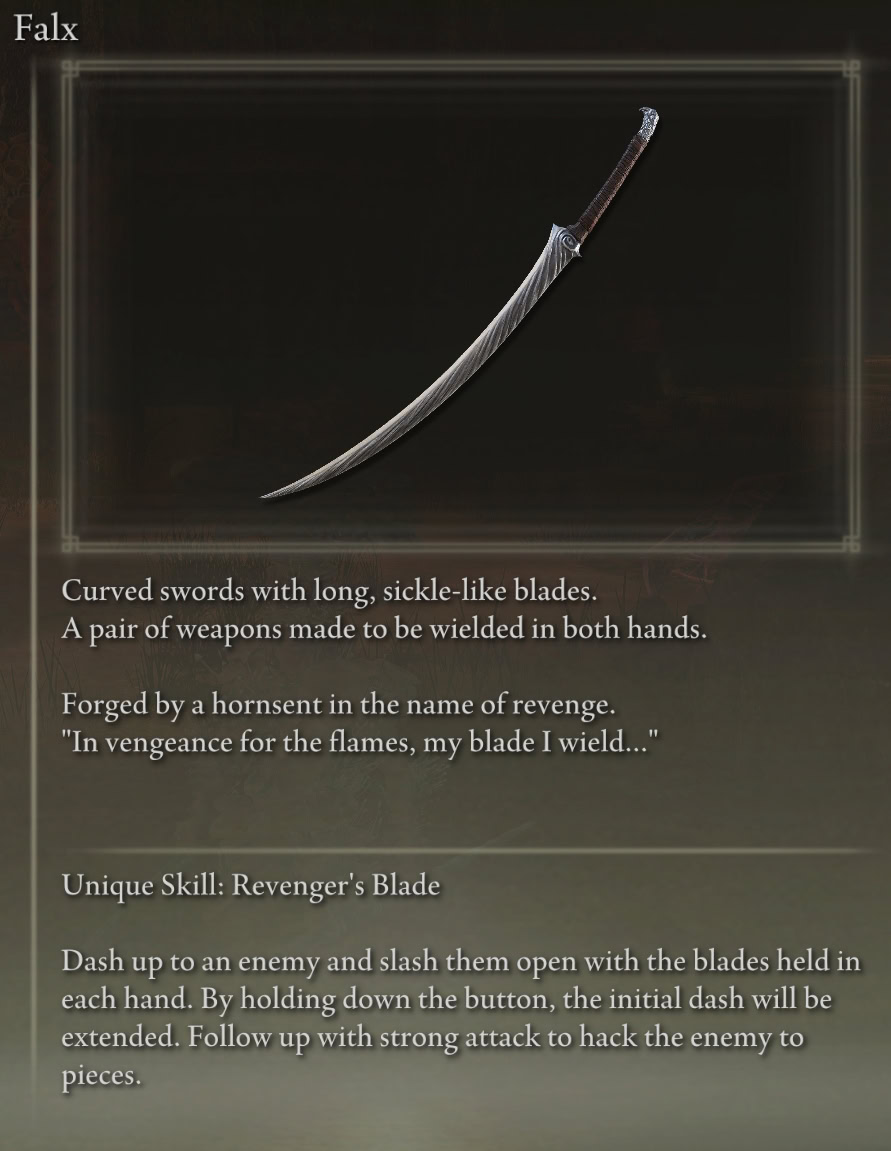
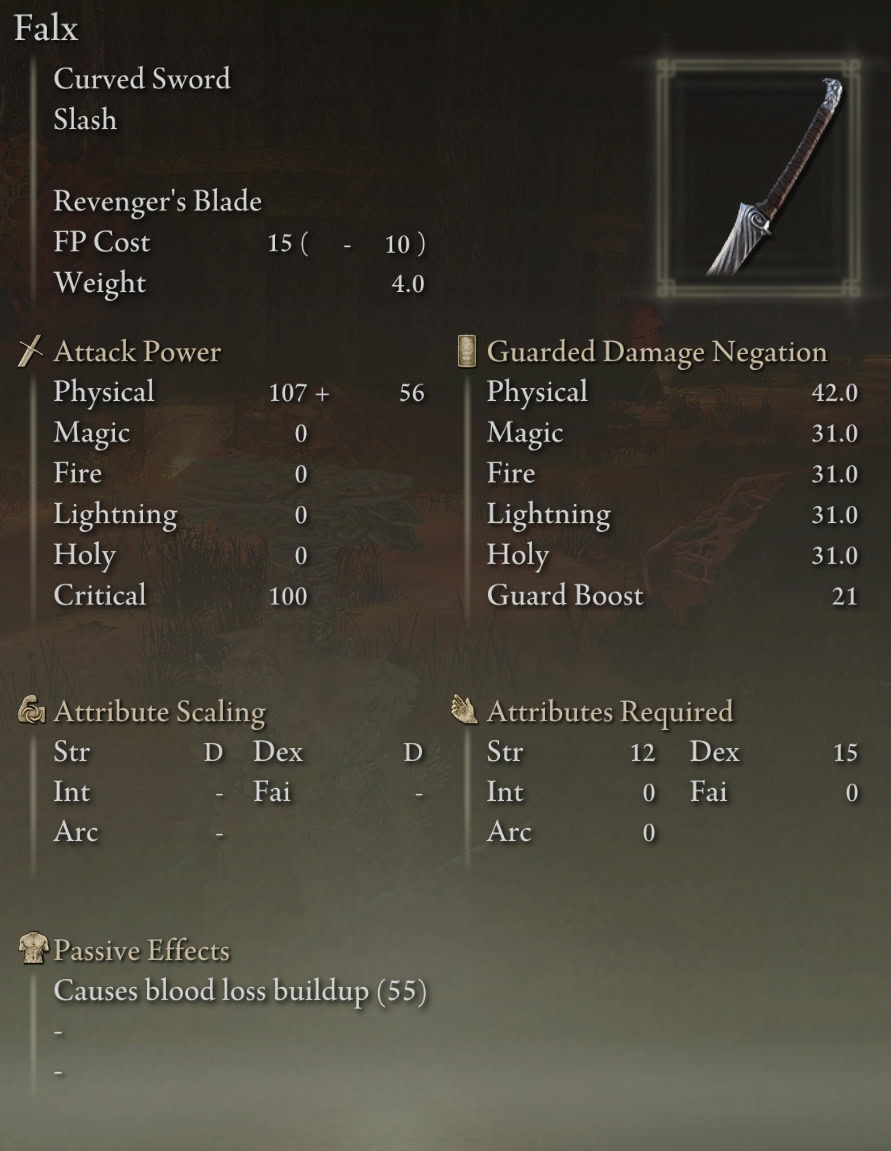
Falx (Curved Sword) Stats
Falx is a pair of Curved Swords that take up a single equipment slot. Two-handing the Falx makes you dual wield them instead. It has a Unique Skill: Revenger’s Blade that acts as a gap closer and can turn you into a blender!
Ash of War: Swift Slash Location
Ash of War: Swift Slash is only usable on Backhand Blades, where you blink forward and leave a bunch of vacuum slices in your wake. Given that you can use it to teleport behind someone, I think it’s absolutely tragic that you can’t combine this with Milady.

You only receive this item if you side with the Hornsent against Needle Knight Leda at the Shadow Keep.

Remember, you will give up both of Leda’s Crossed-Tree Talismans and Ansbach’s Longbow if you do this.
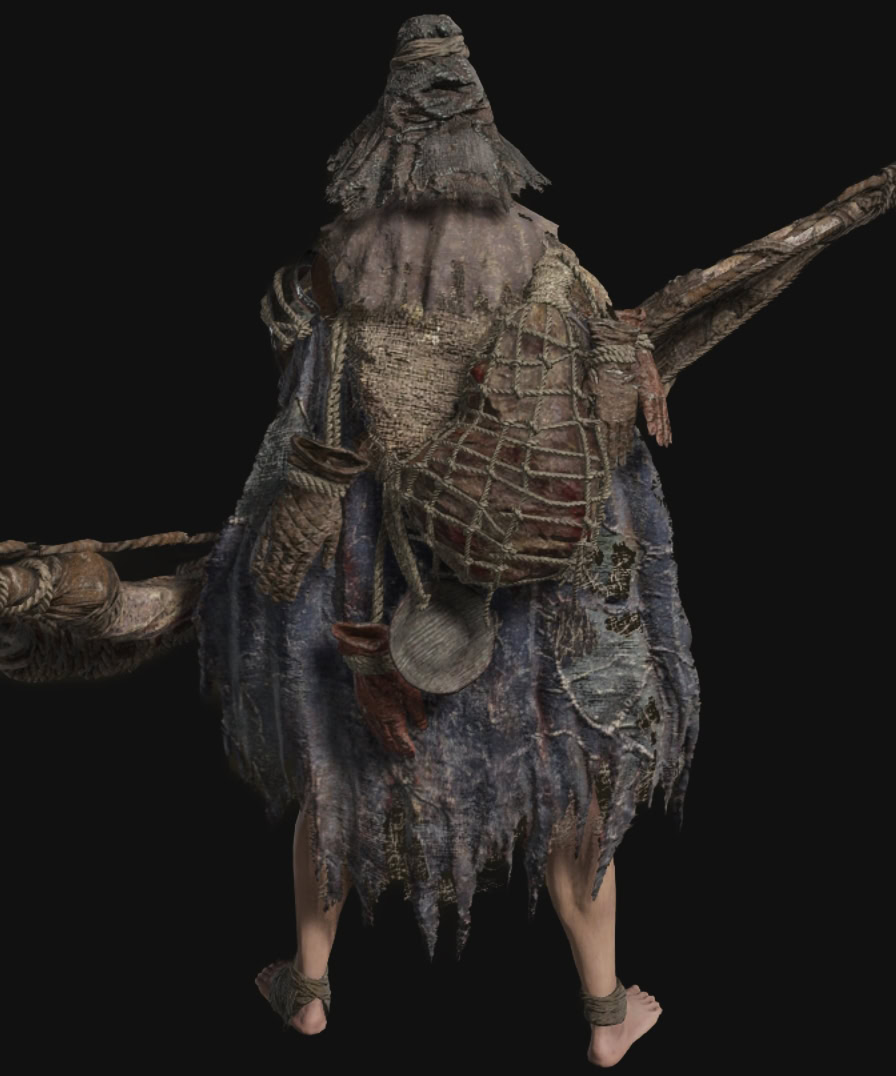
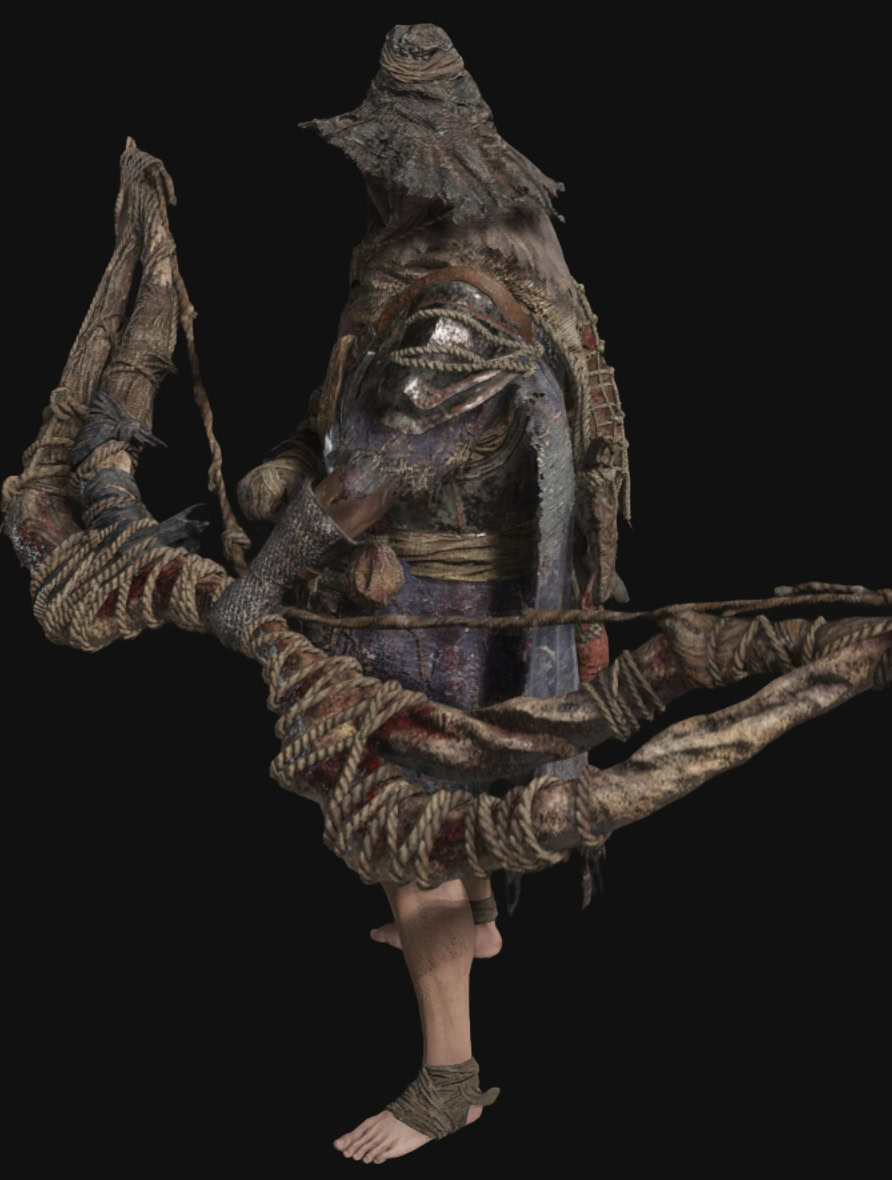
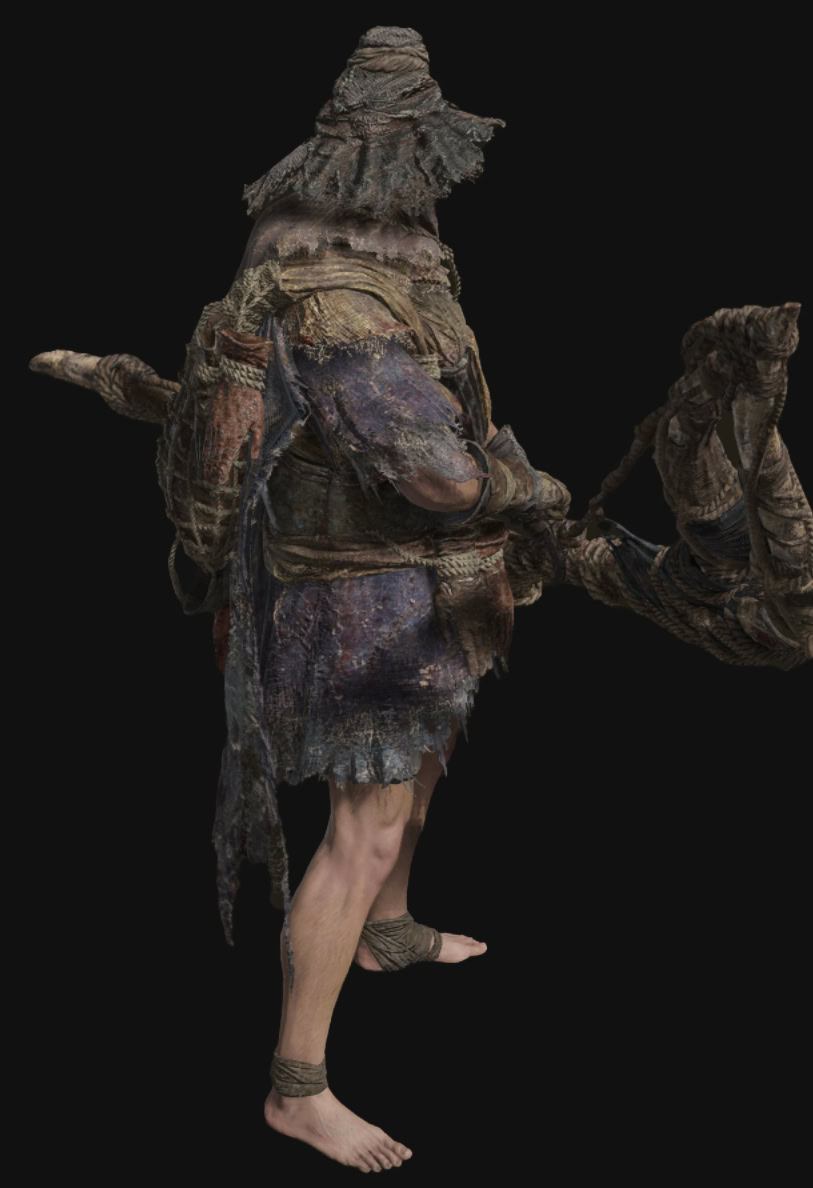
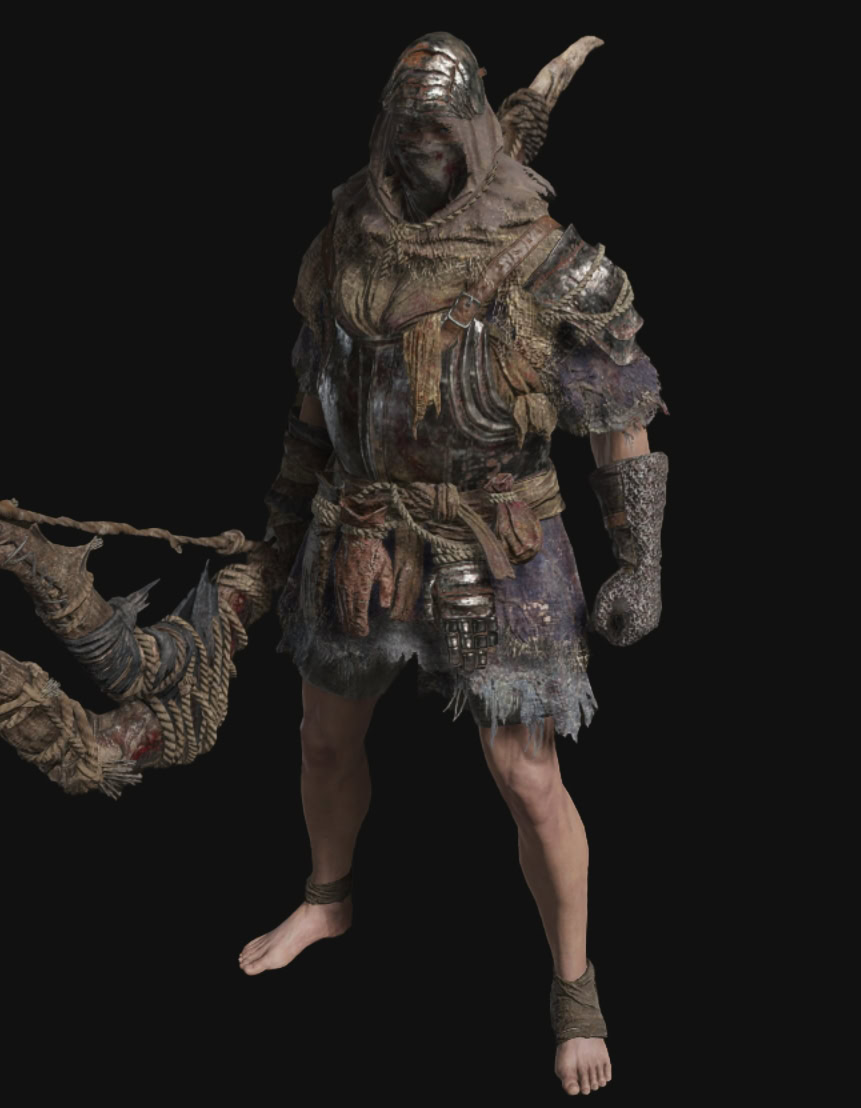
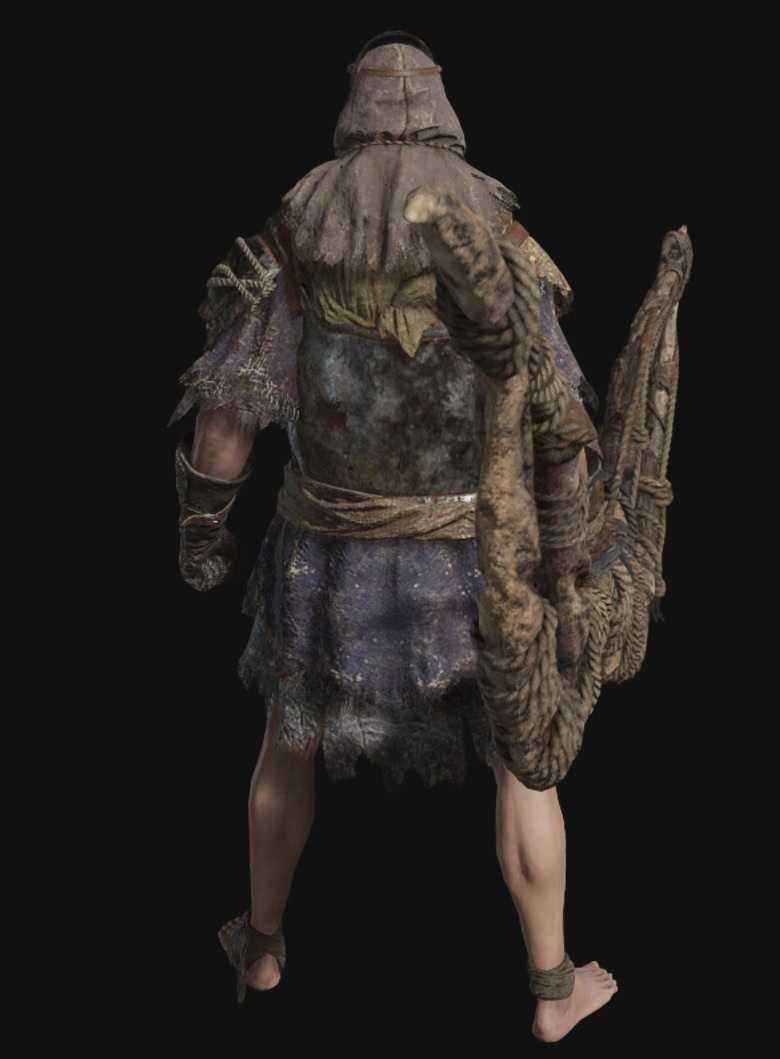
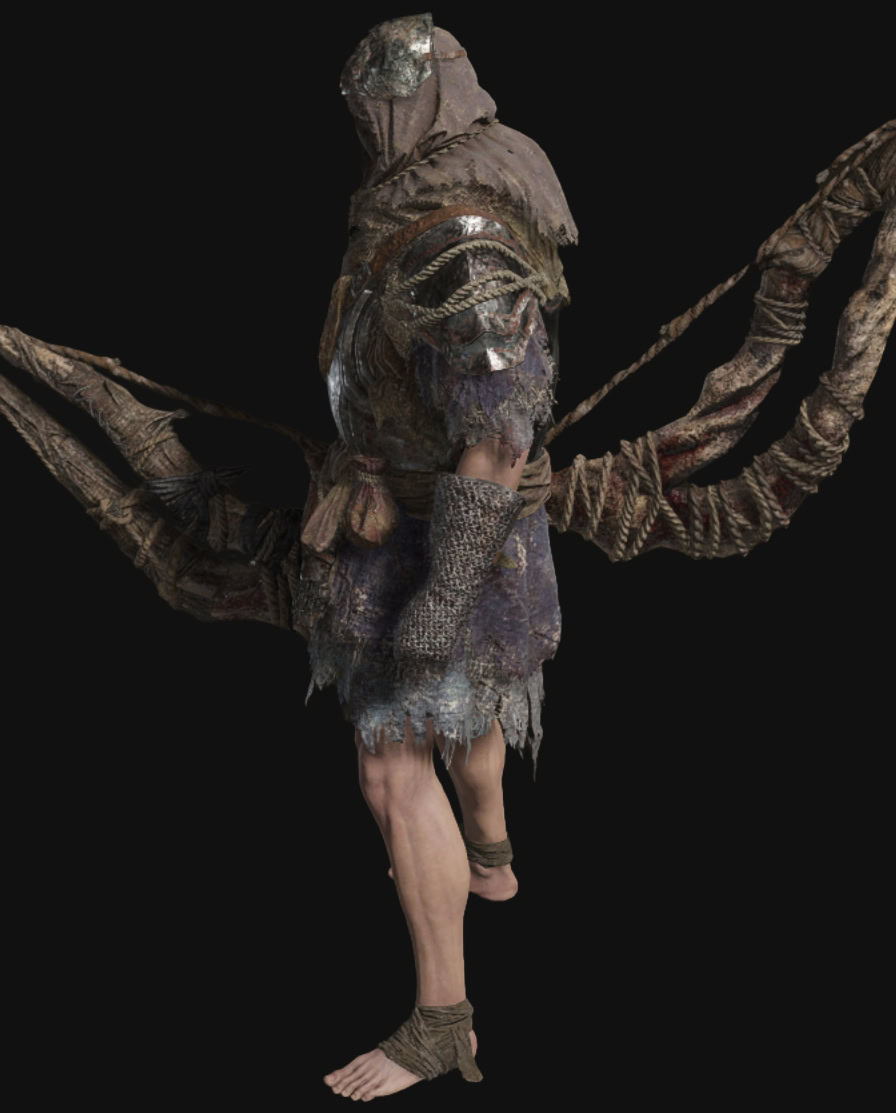
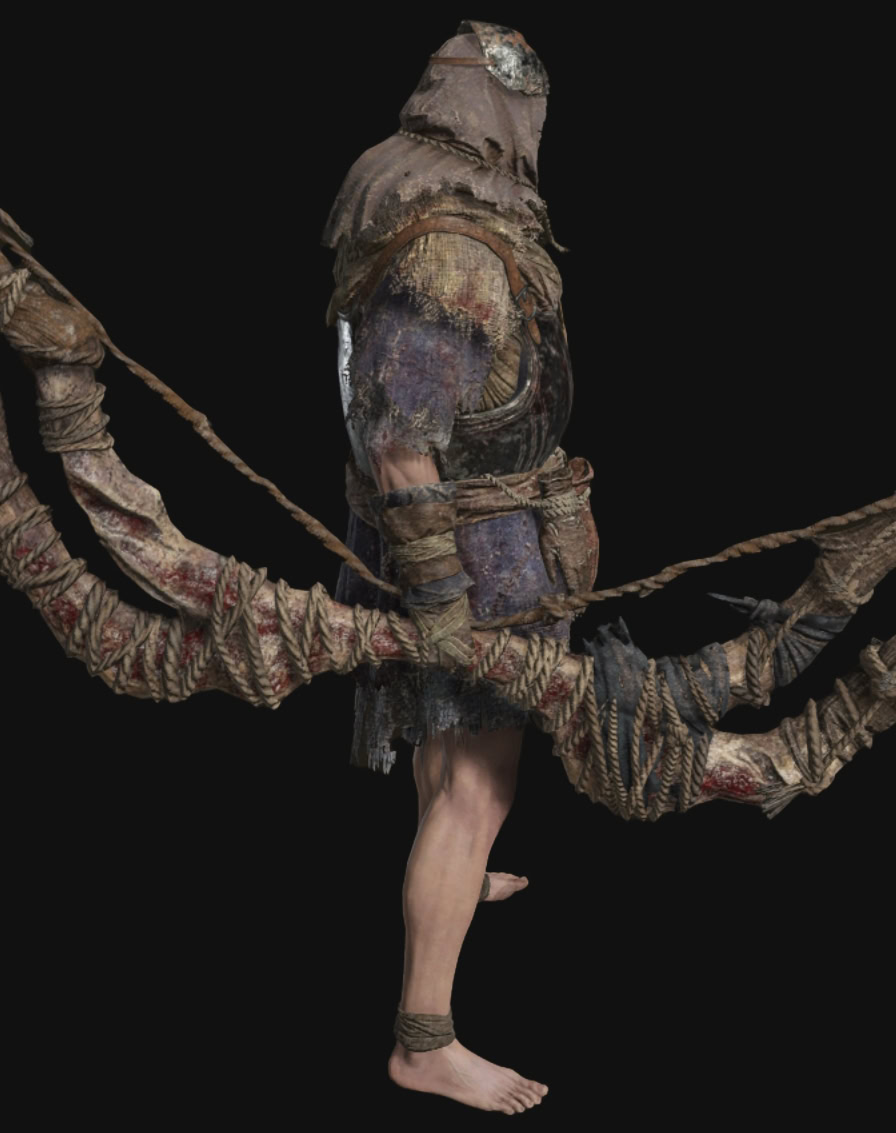
Hornsent’s Armor Set and Falx Preview
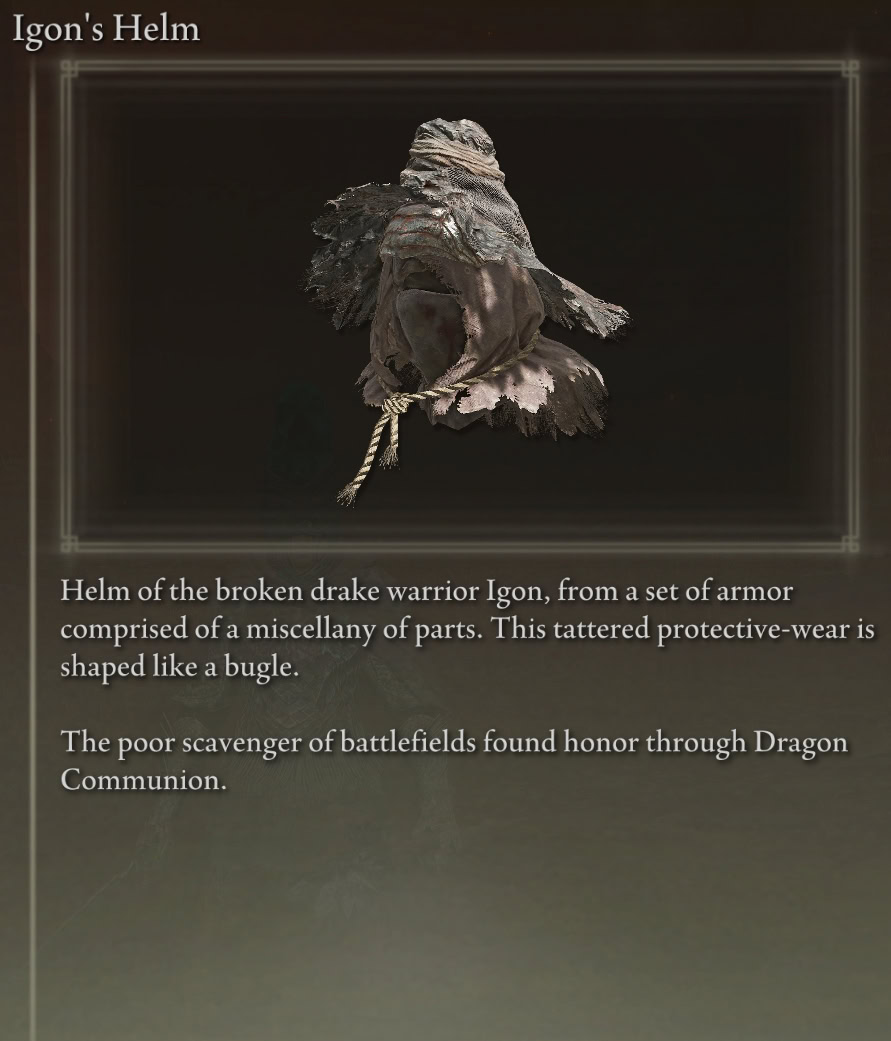
Igon’s Equipment
Igon’s equiment includes his armor set, Greatbow, and Bell Bearing.
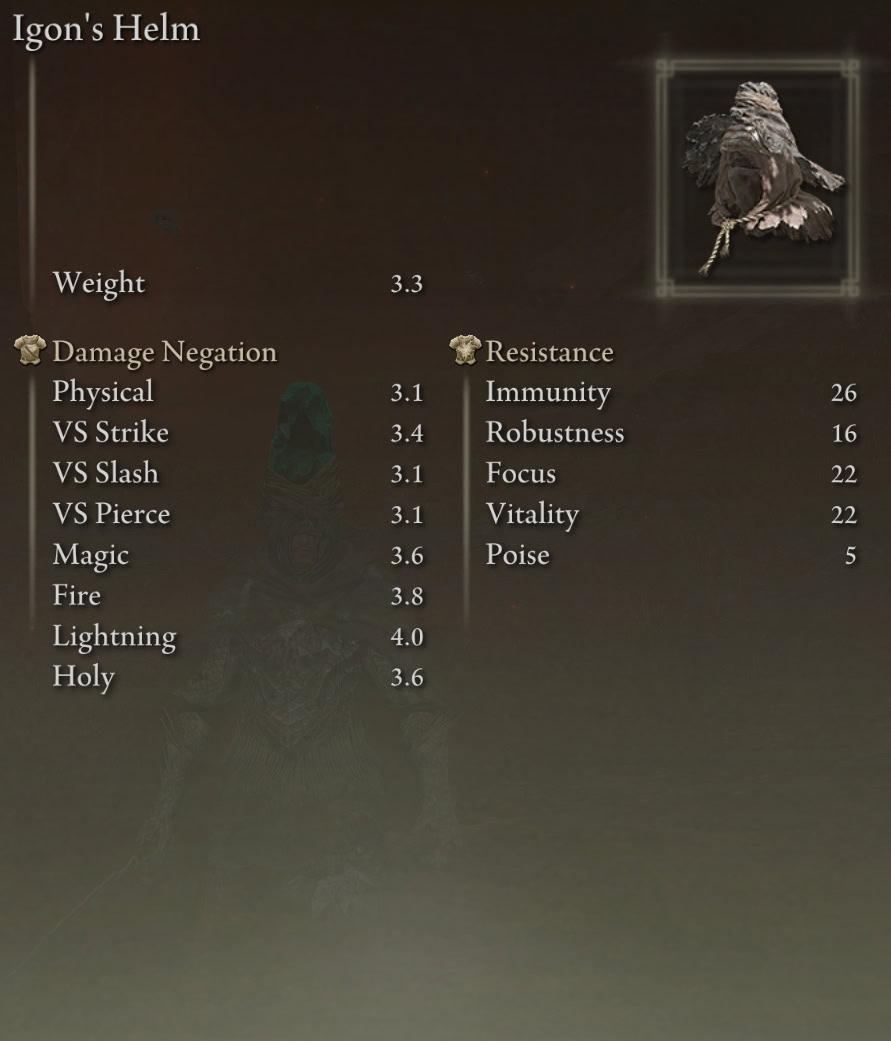
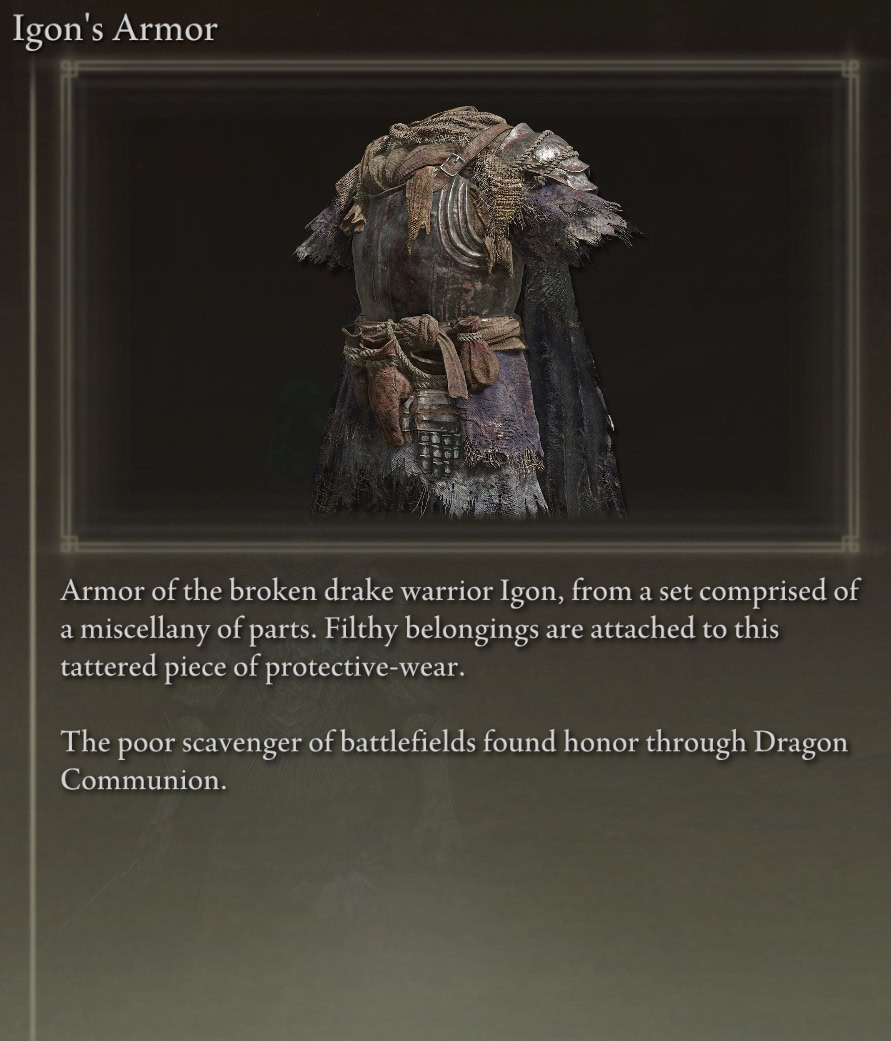
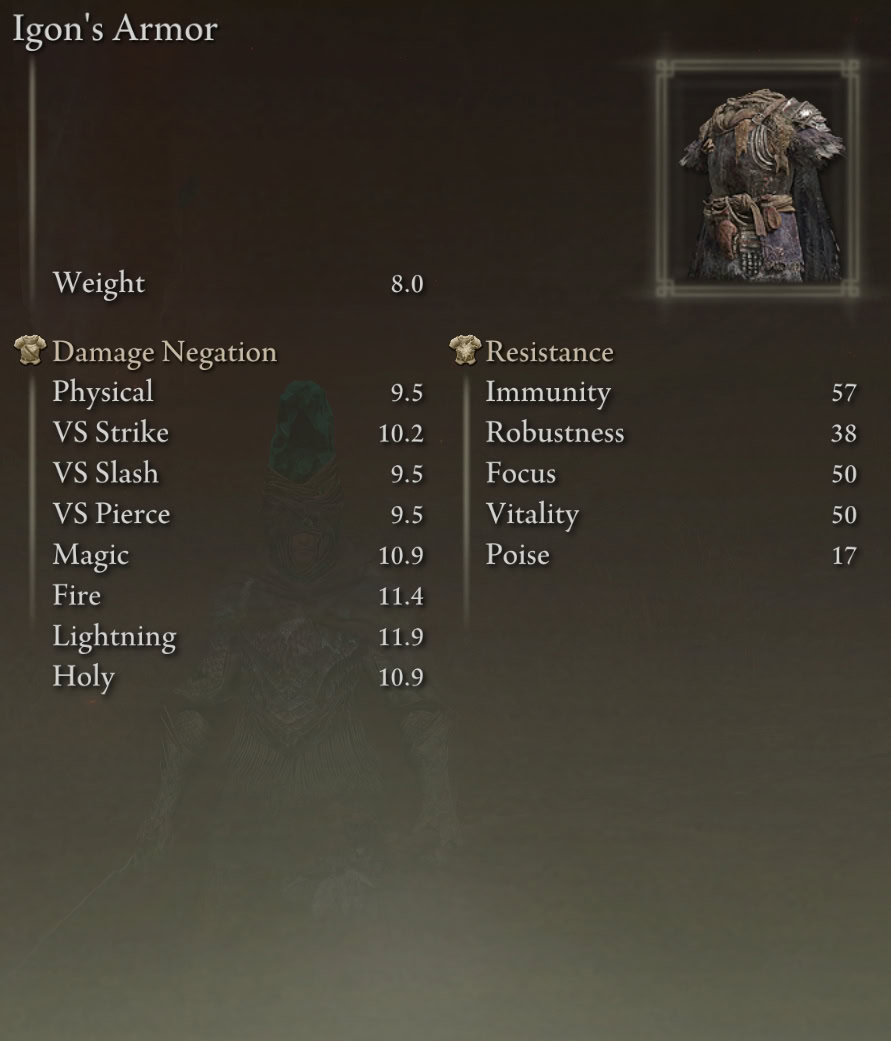
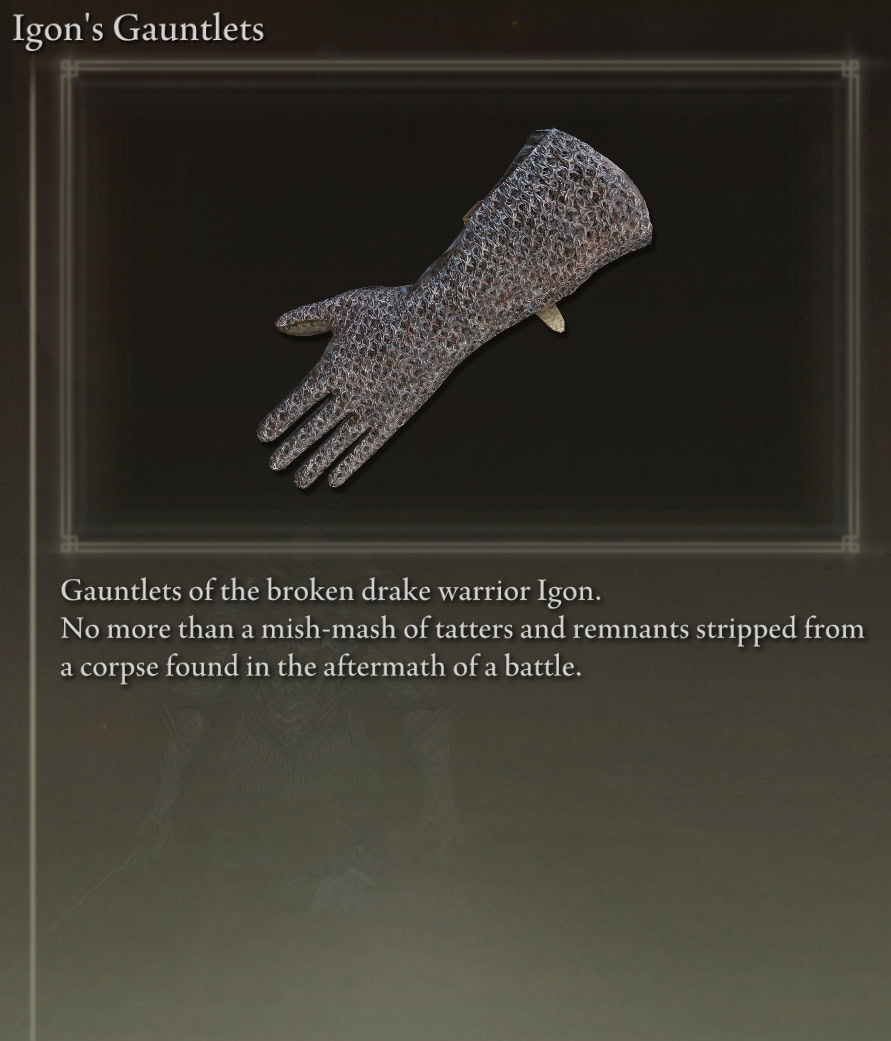
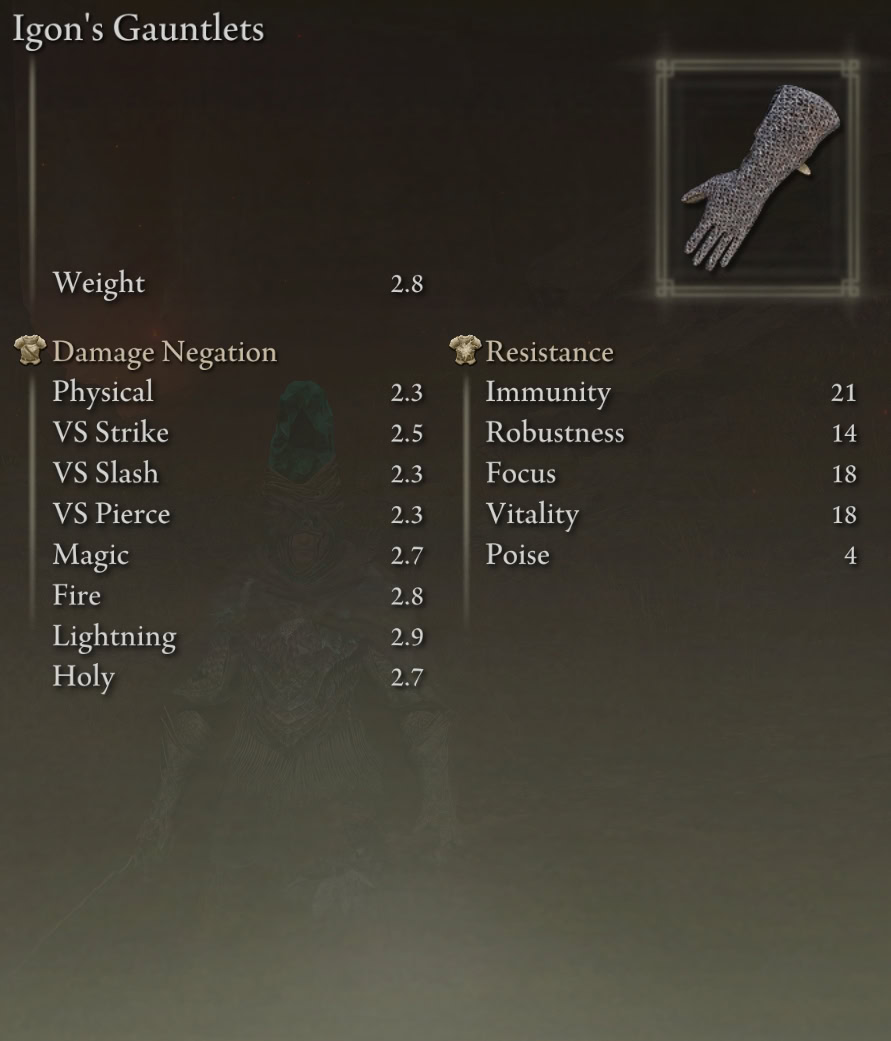
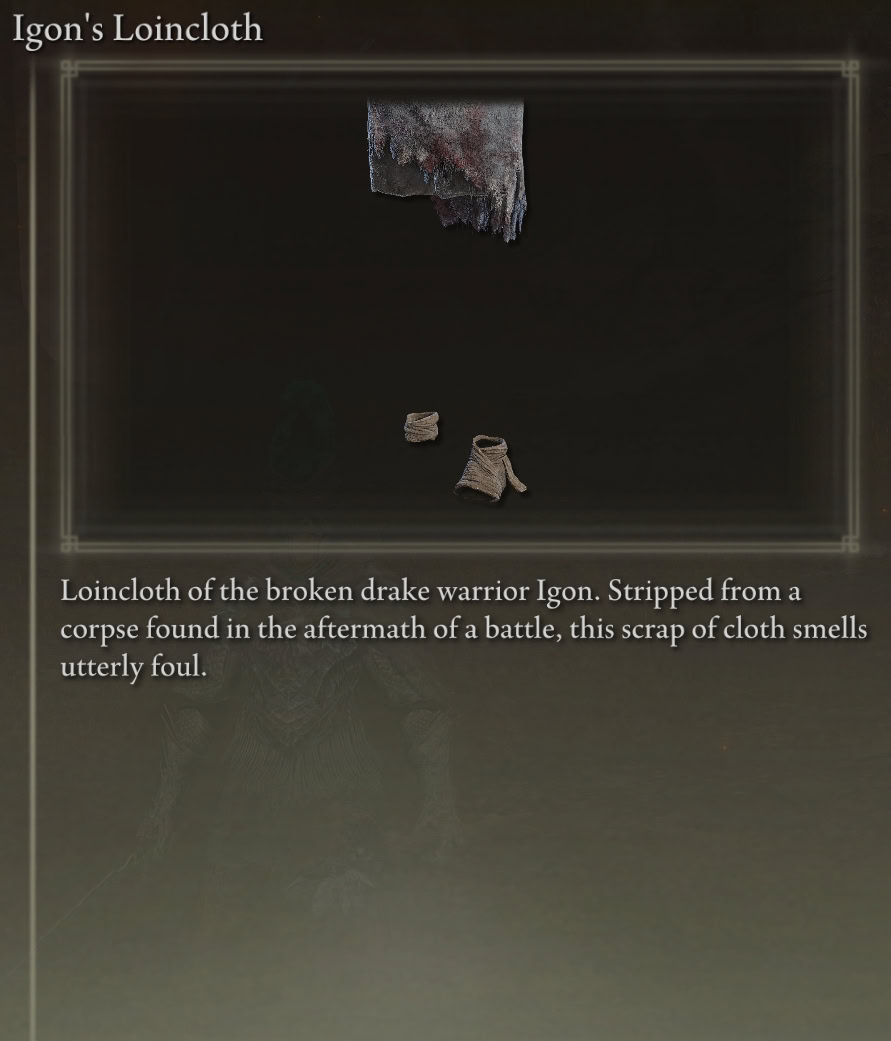
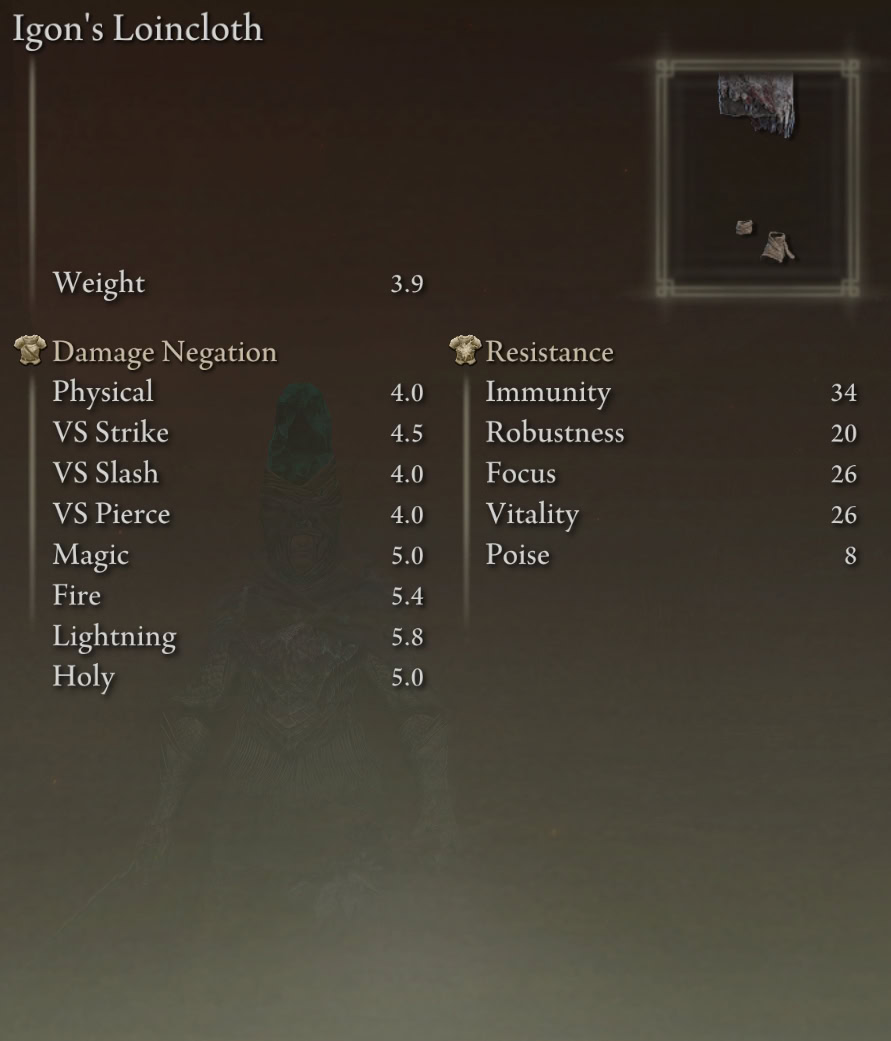
Igon’s Armor Set Stats
Igon’s armor set has a combined weight of 18, and is part of the 5th lightest weight class shared Tabard-wearing Foot Soldier armor sets.
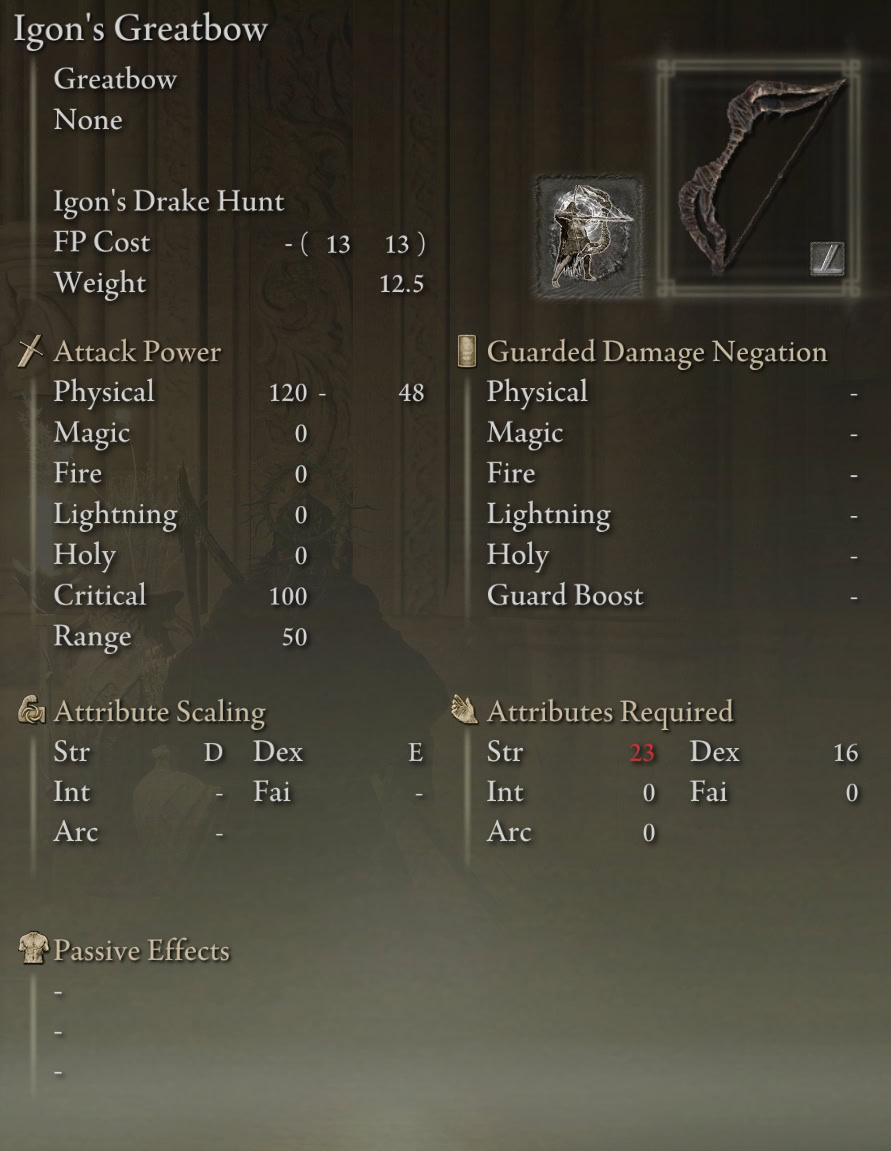
Igon’s Greatbow Stats
Igon’s Greatbow is a meant to be paired with Igon’s Harpoon Greatarrows, which you can purchase from the Twin Maiden Husks for a thousand runes a pop after giving them Igon’s Bell Bearing.
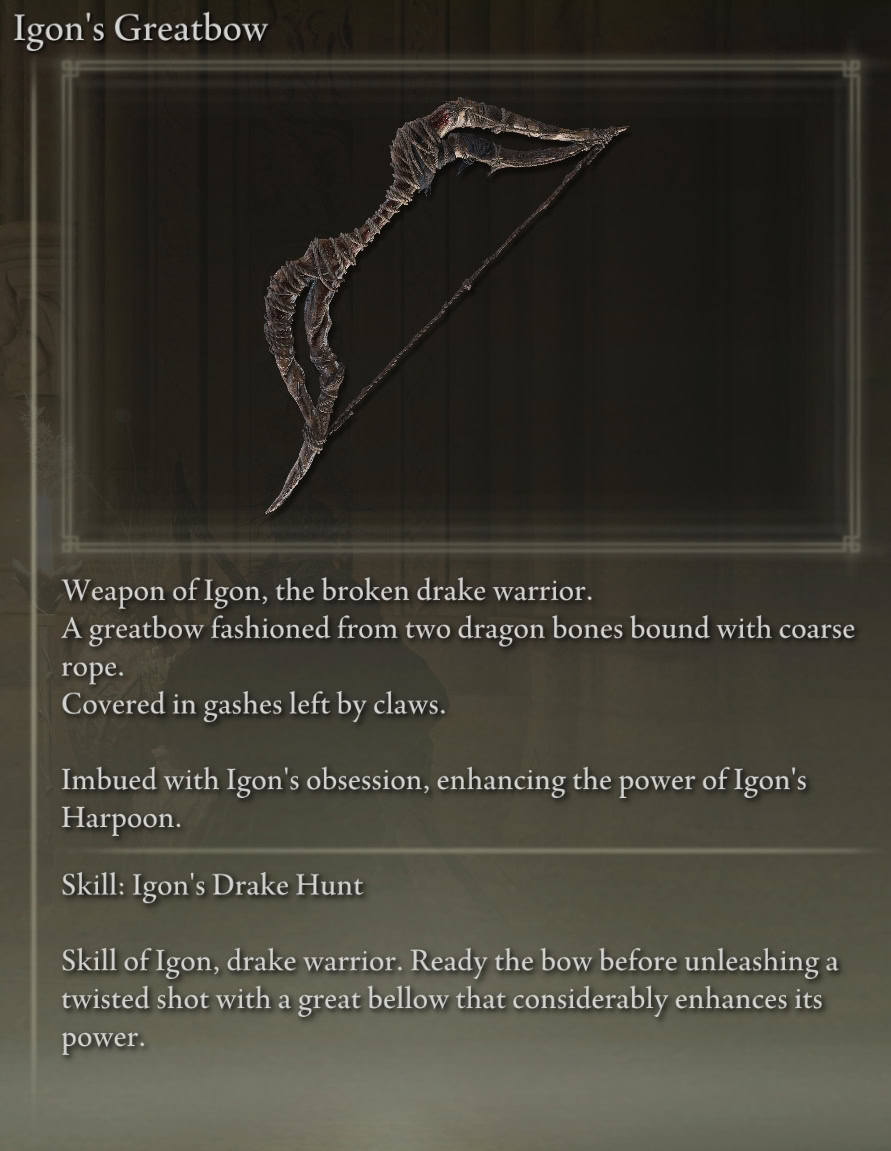
If you kill Igon or don’t accept his Furled Finger at the base of the Jagged Peak, Igon’s Greatbow will come with the Skill: Through and Through instead.
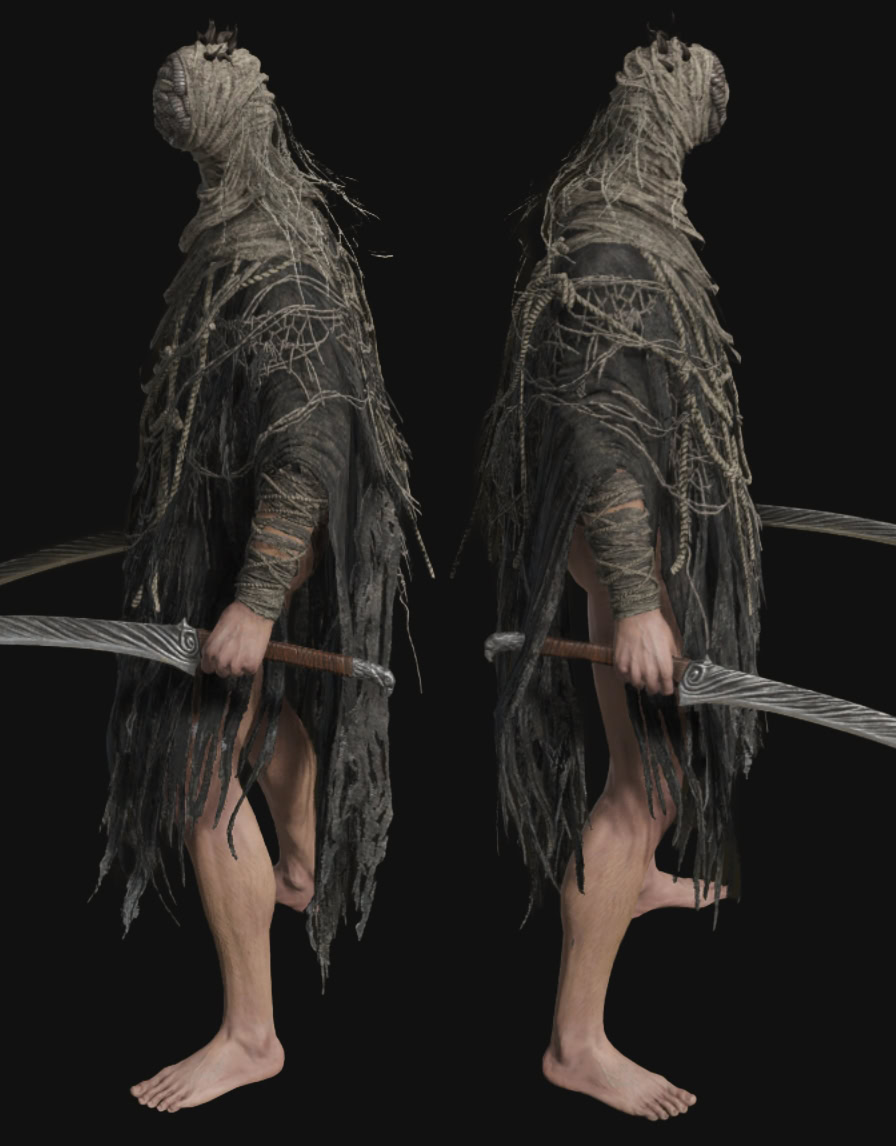
Igon’s Armor Set and Greatbow Preview
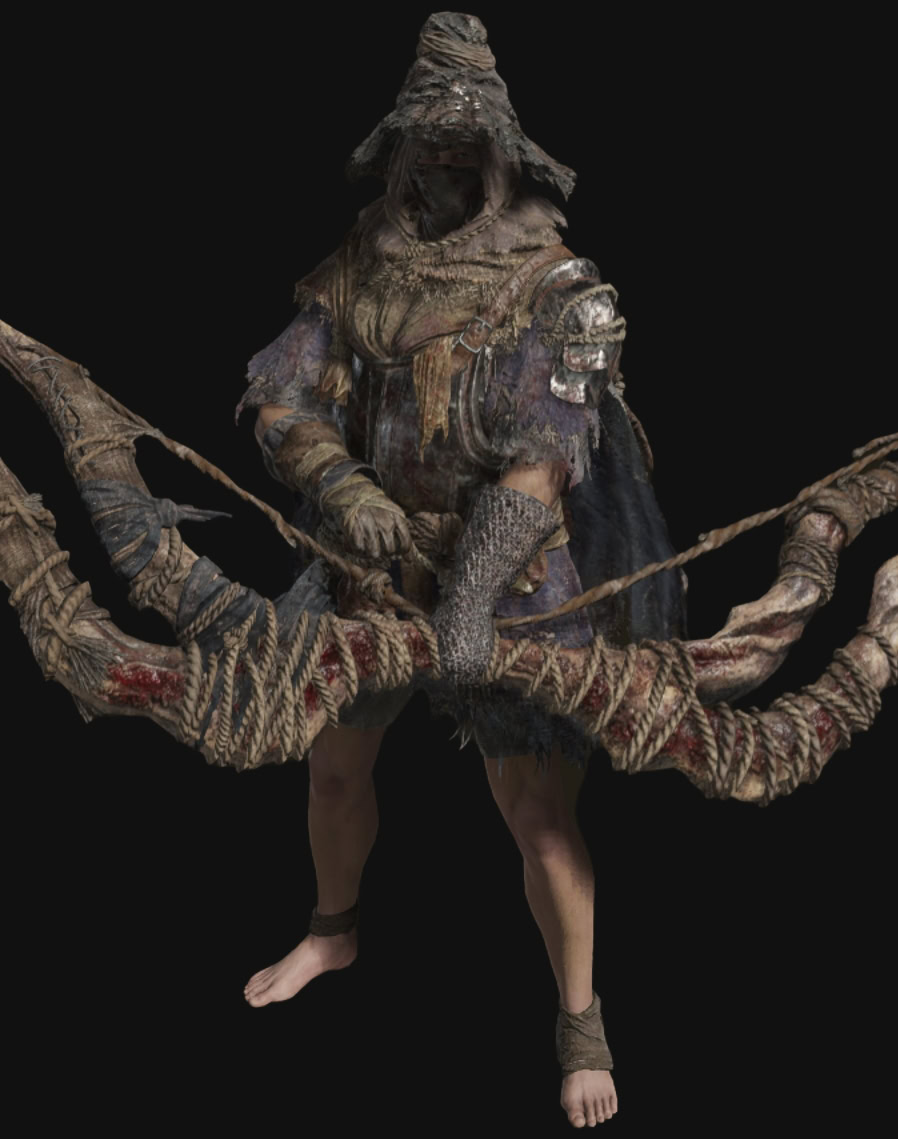
Igon’s Altered Armor Set and Greatbow Preview
Igon’s Armor Set and Greatbow Location
You can loot Igon’s Armor Set, Greatbow, and Bell Bearing from his corpse. If you don’t kill him before defeating Bayle, his Greatbow comes with a more dramatic Skill that involves screaming.