Guide to all Item Locations the Abyssal Woods and Midra’s Manse in Elden Ring: Shadow of the Erdtree: weapons, talismans, spells, rare items, and how to reach tricky areas!
Table of contents
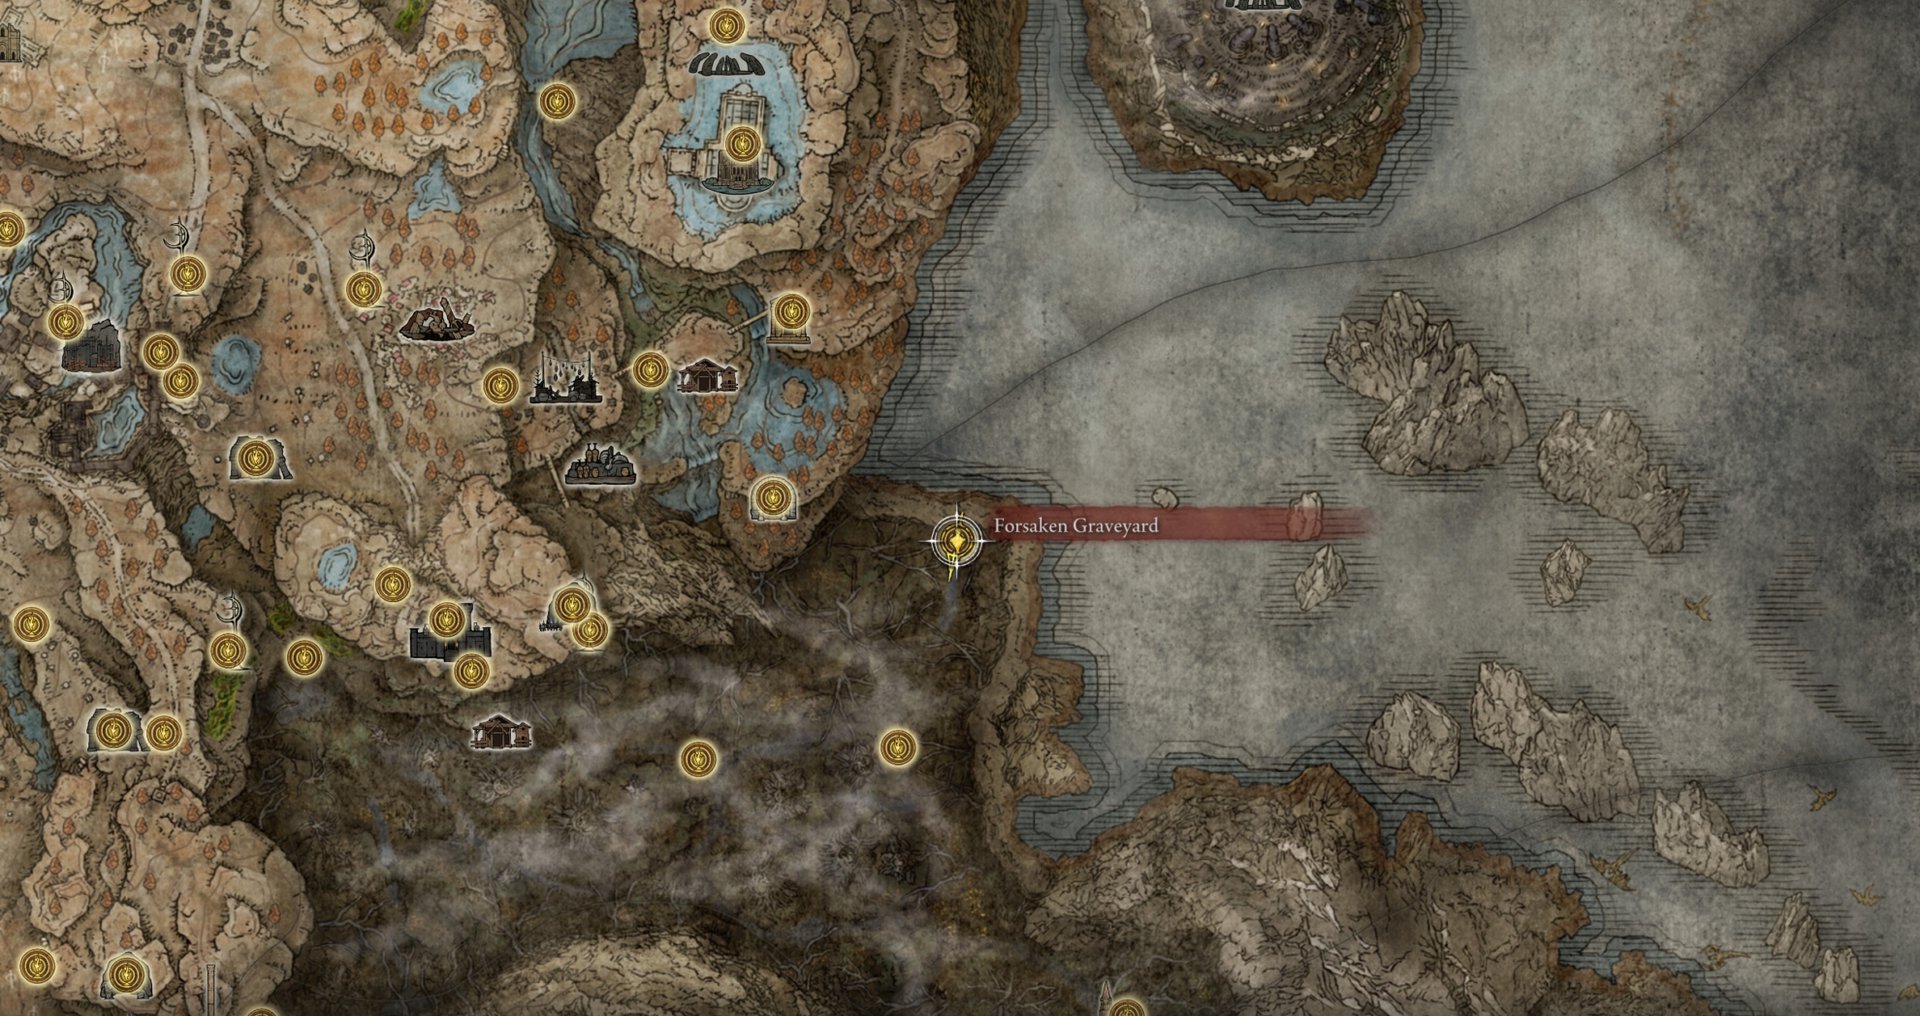
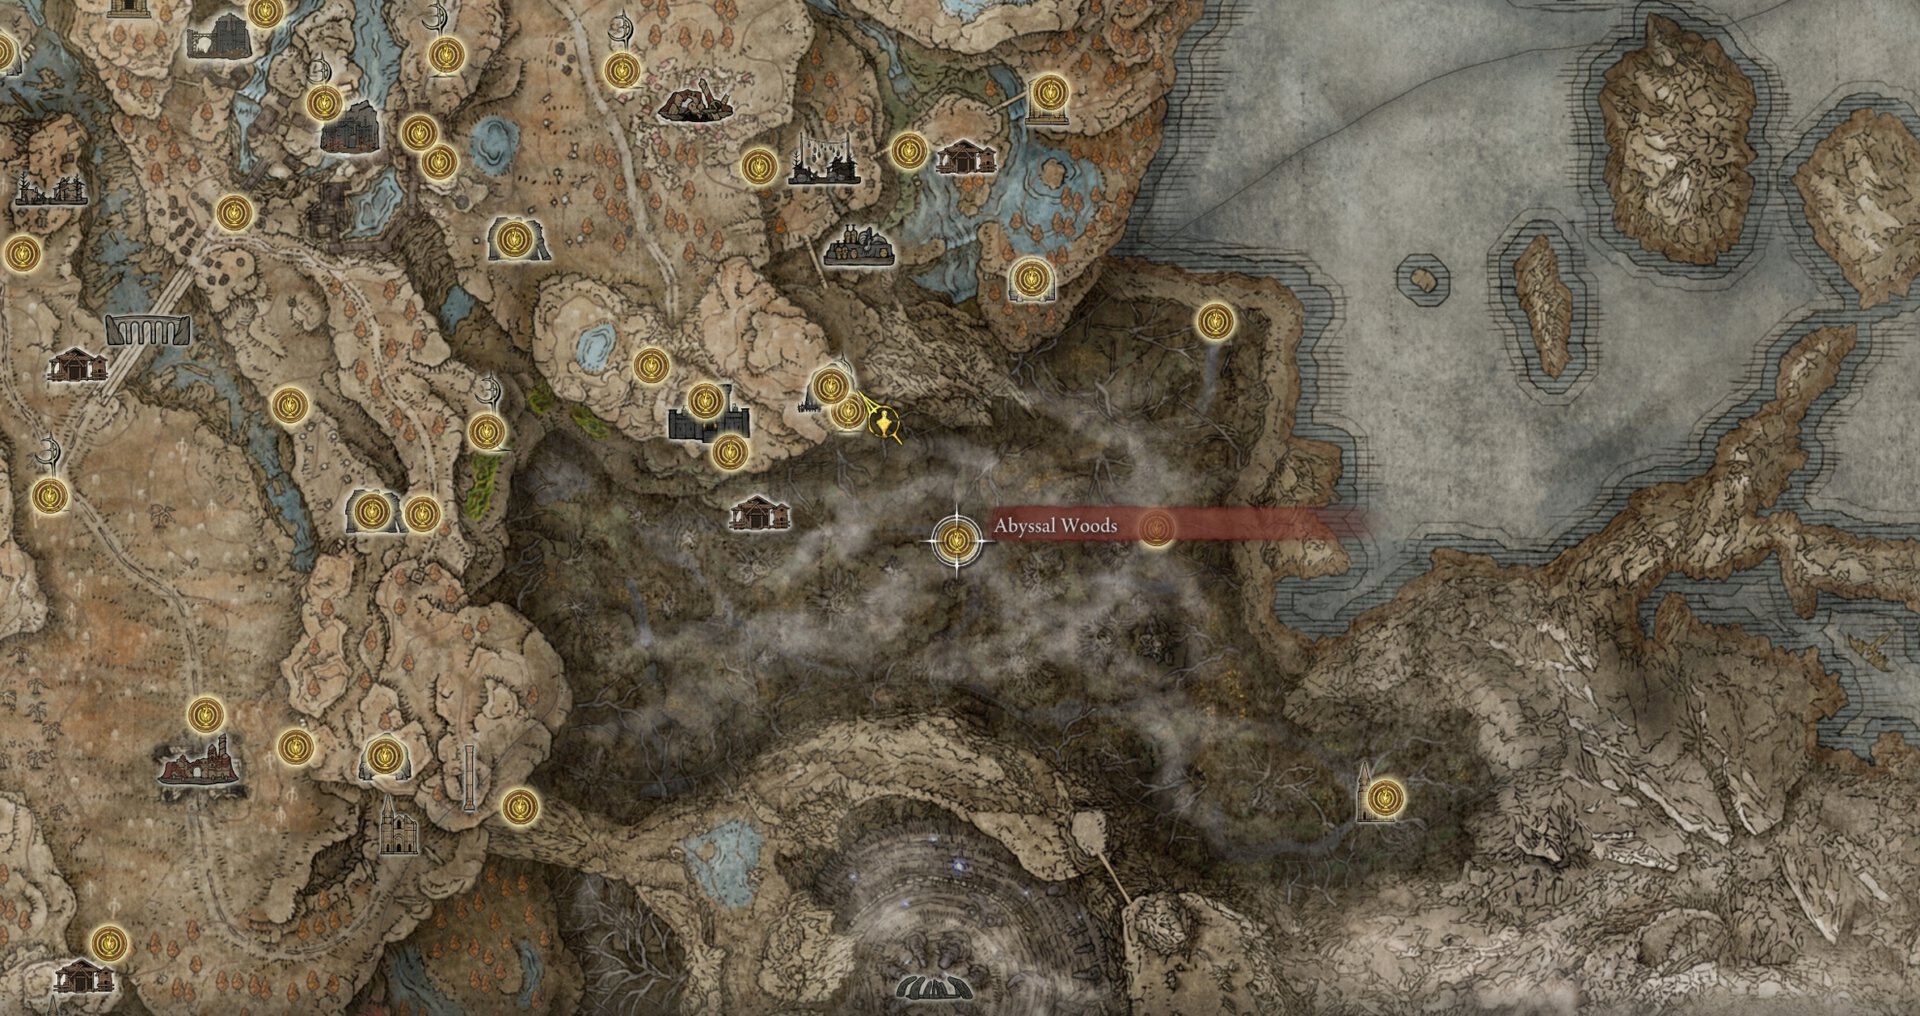
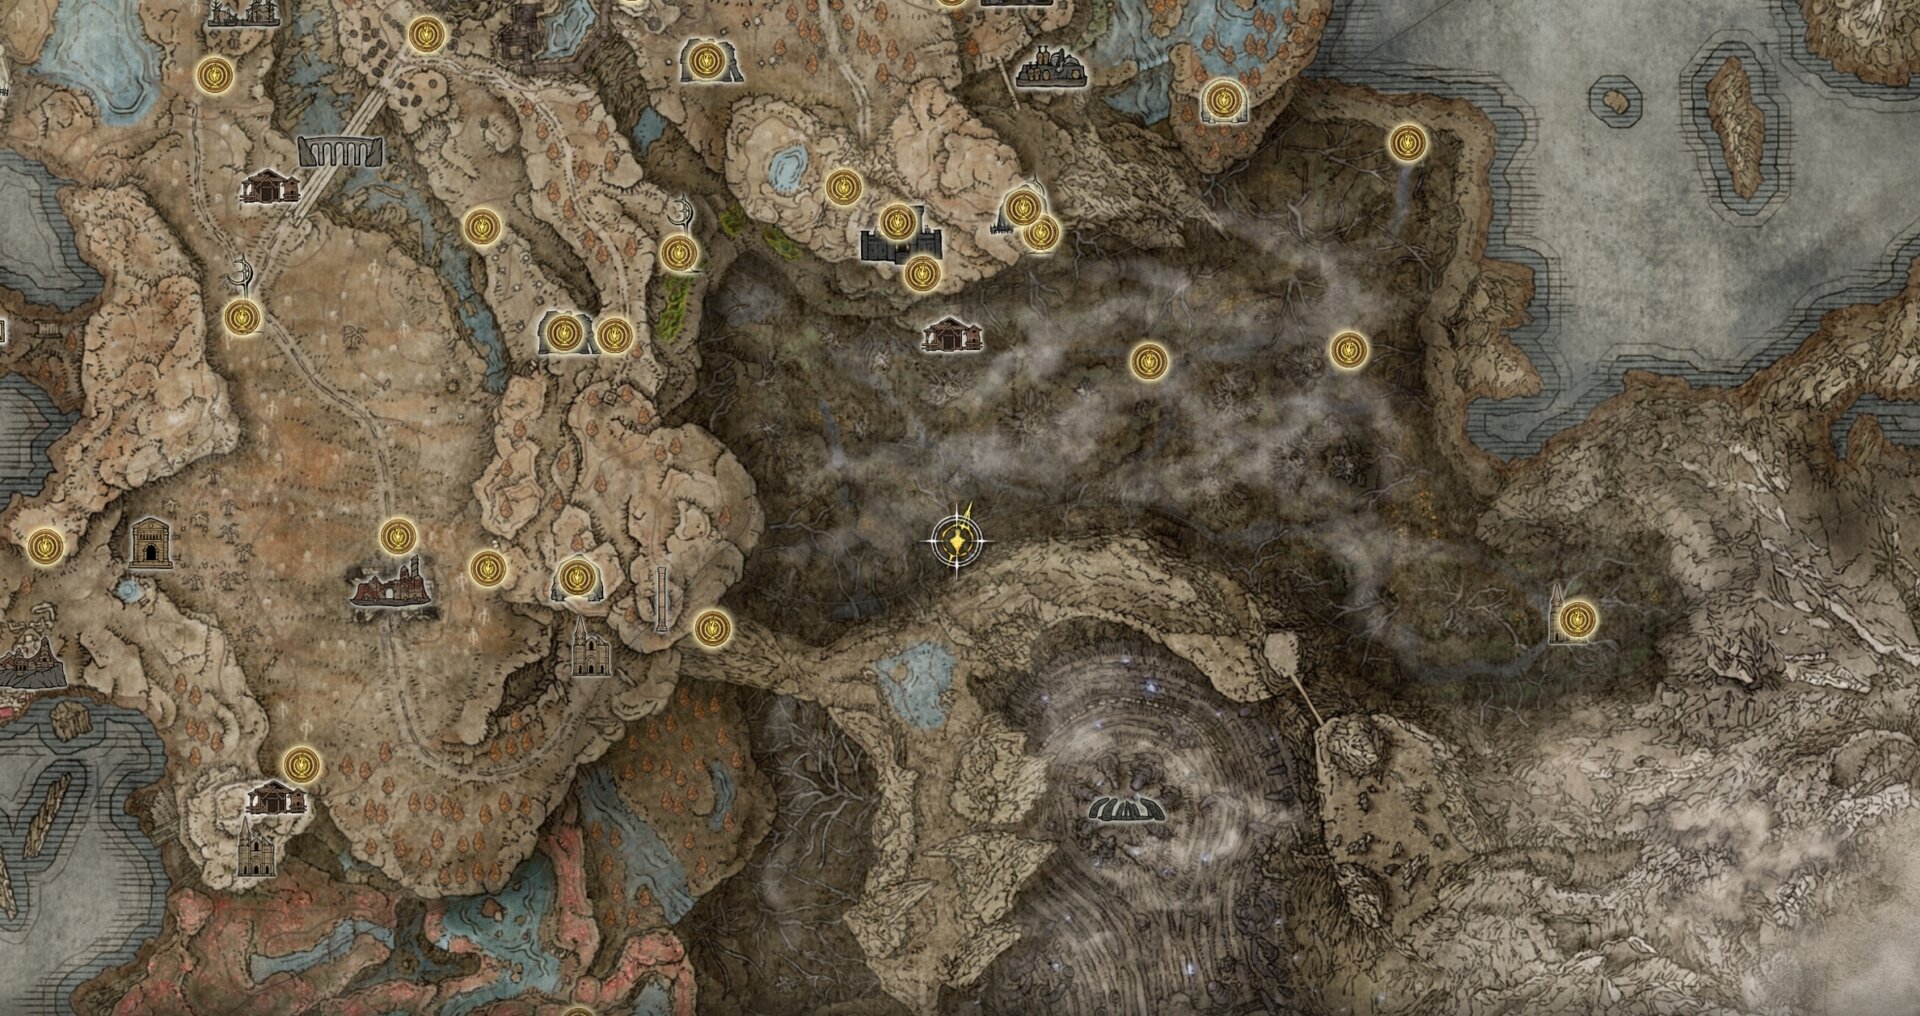
How to reach the Abyssal Woods and Midra’s Manse
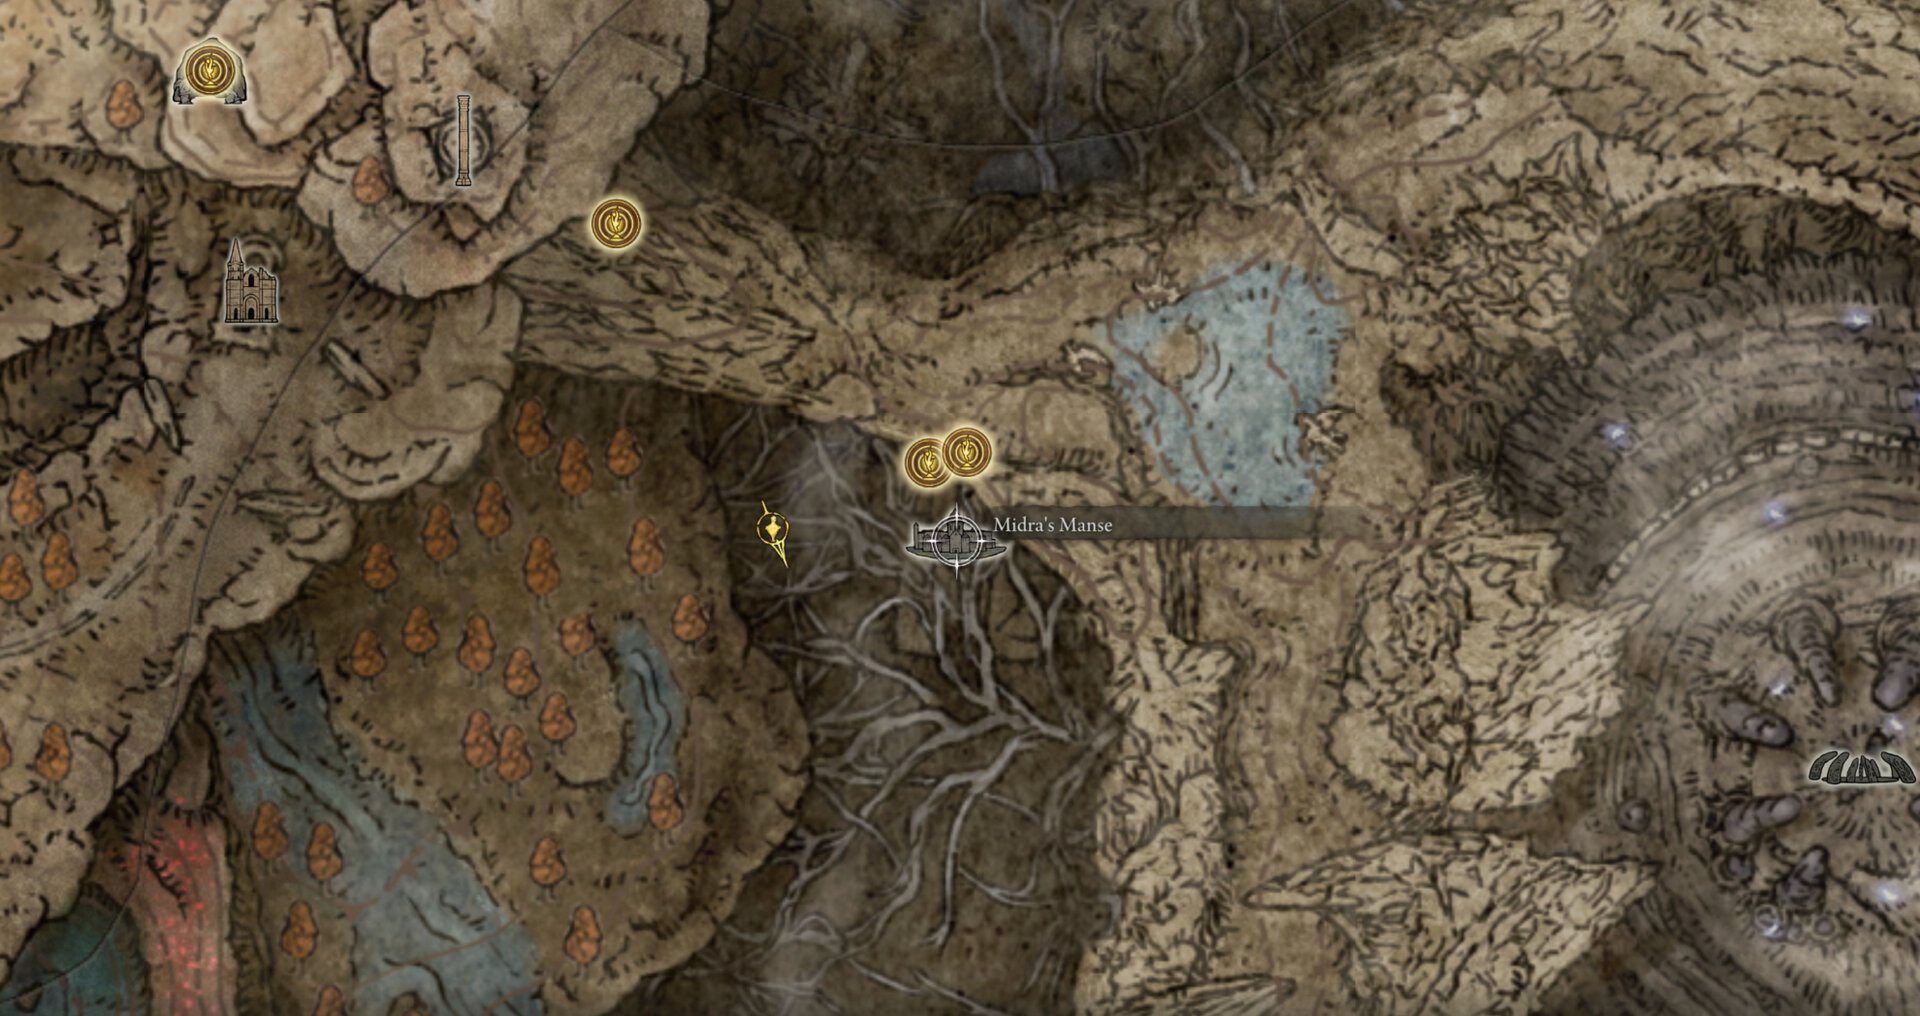
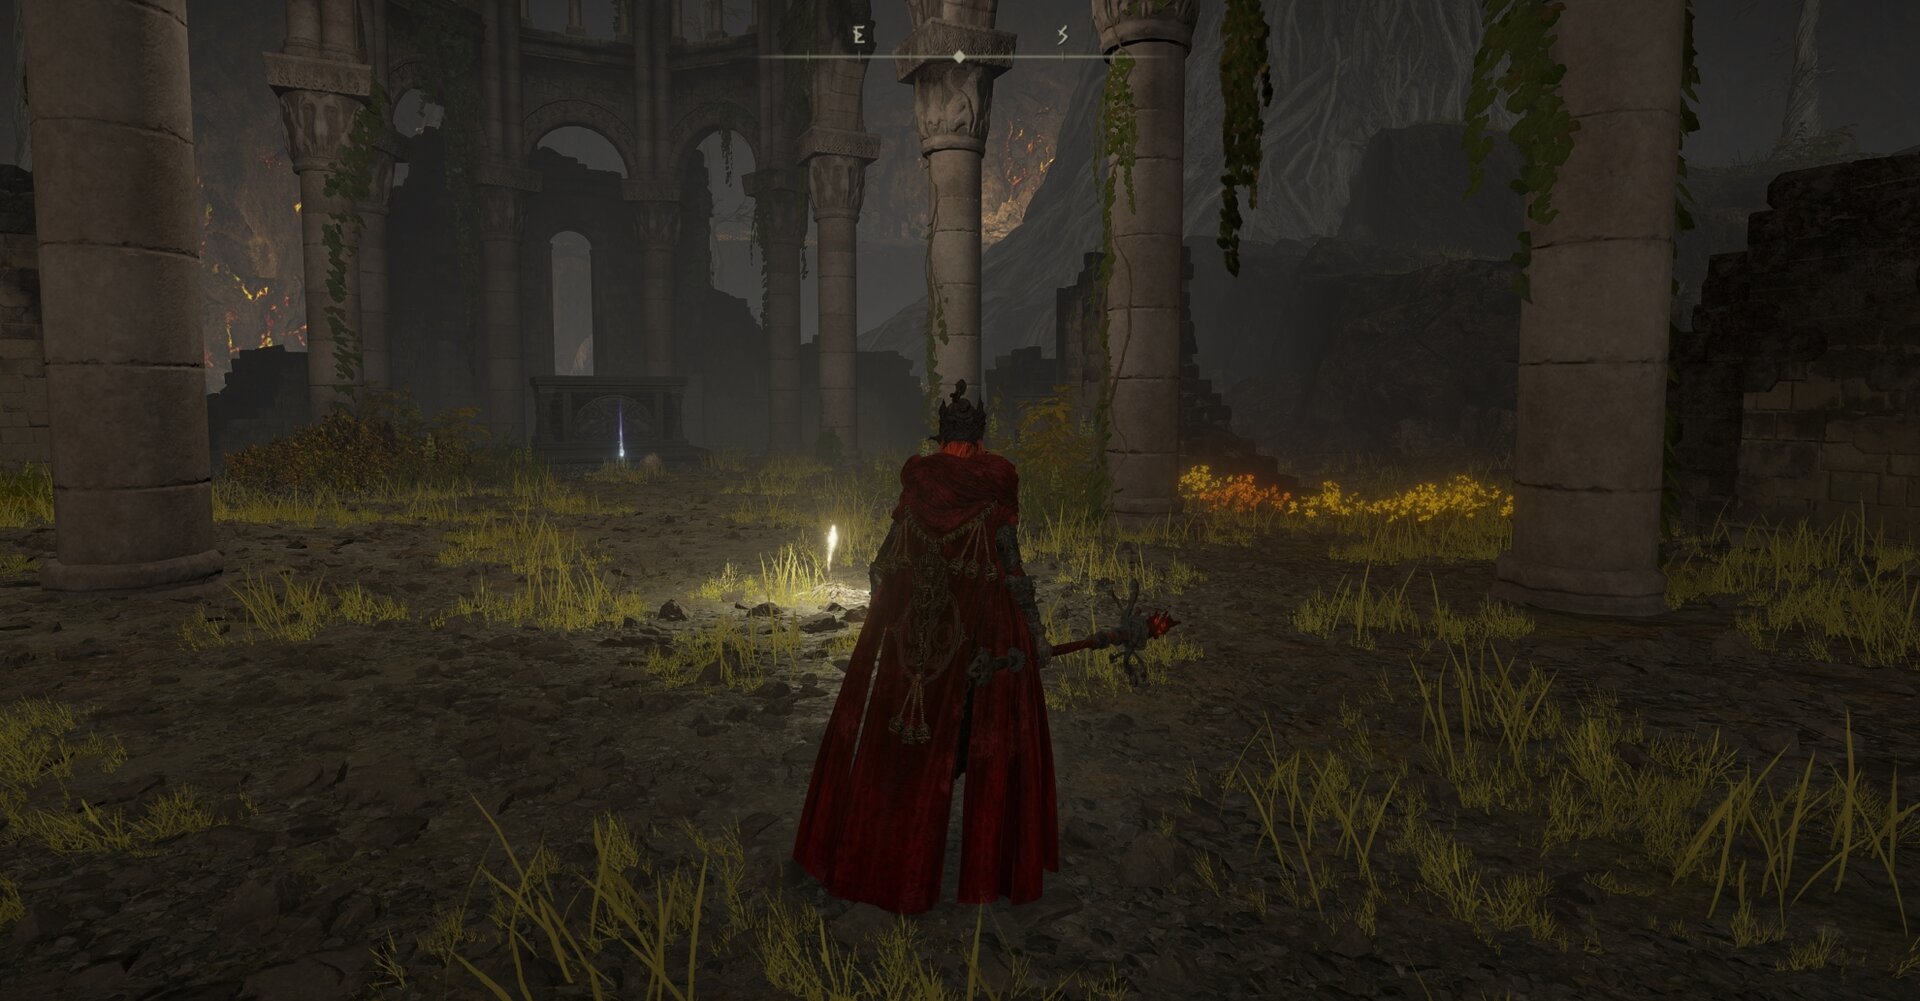
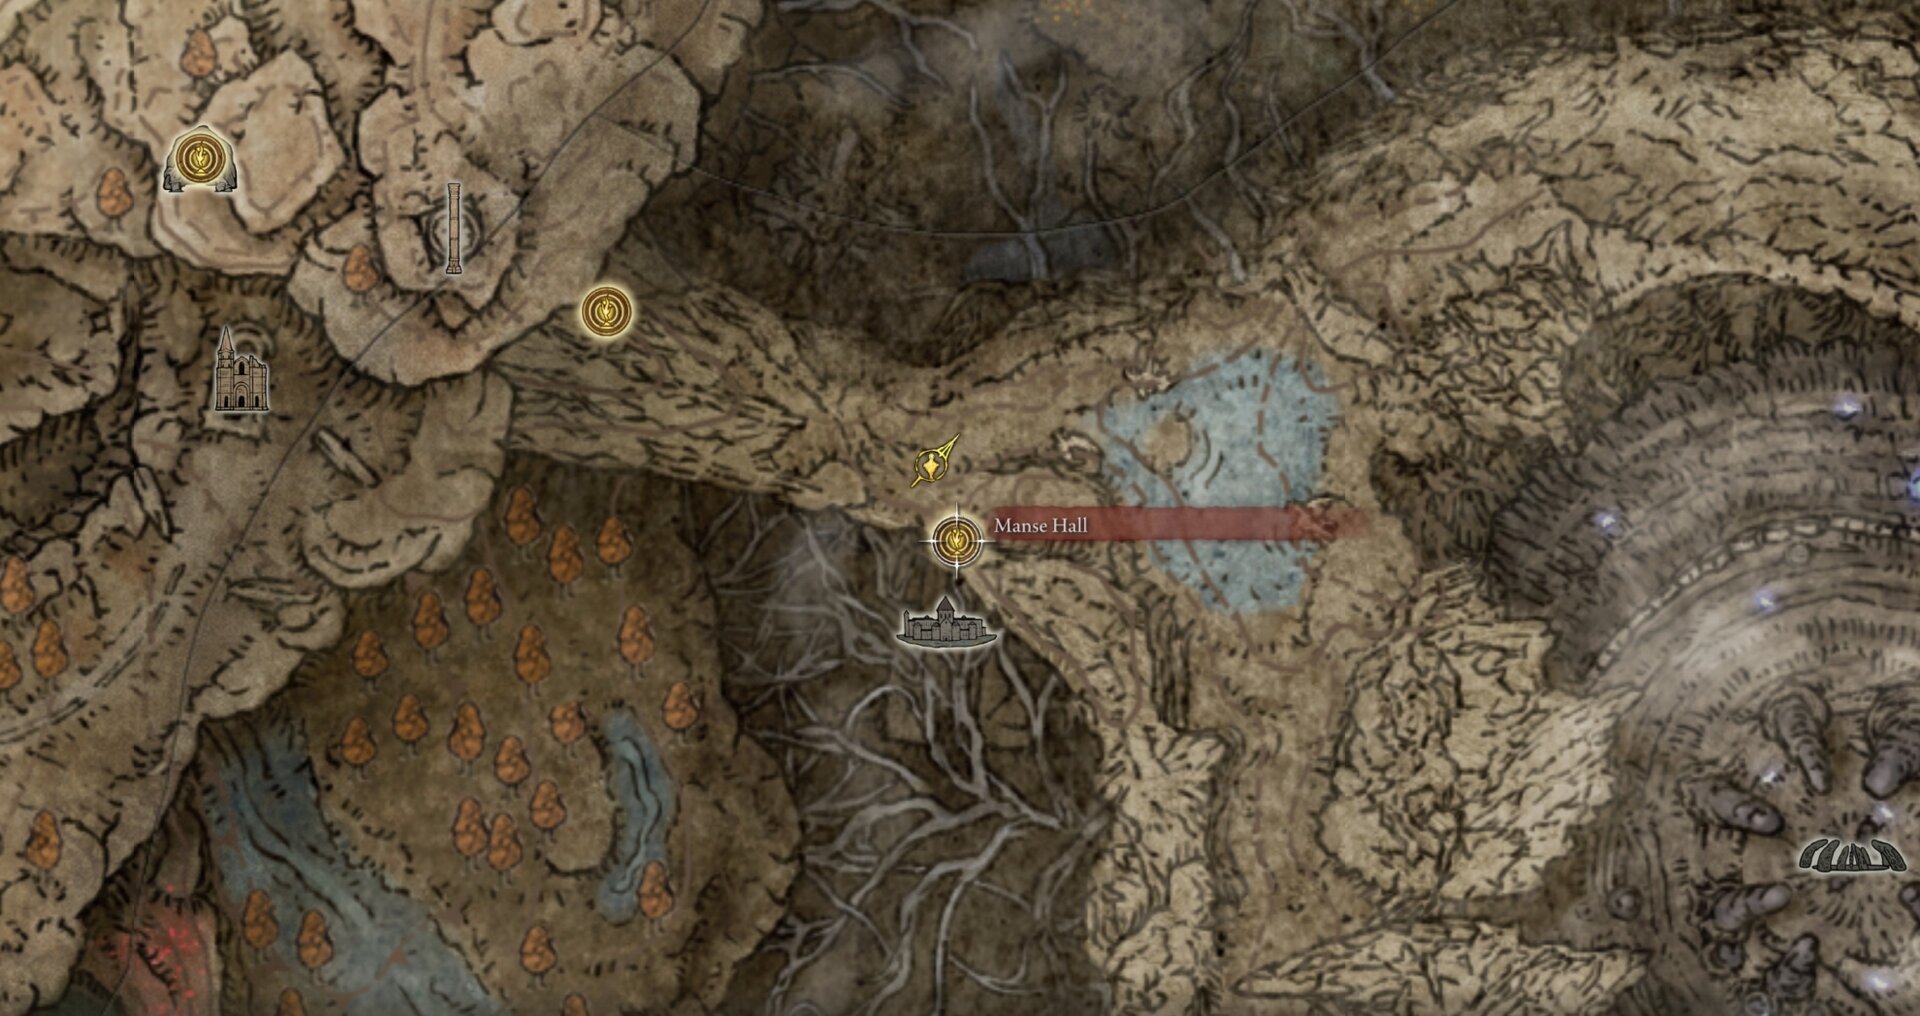
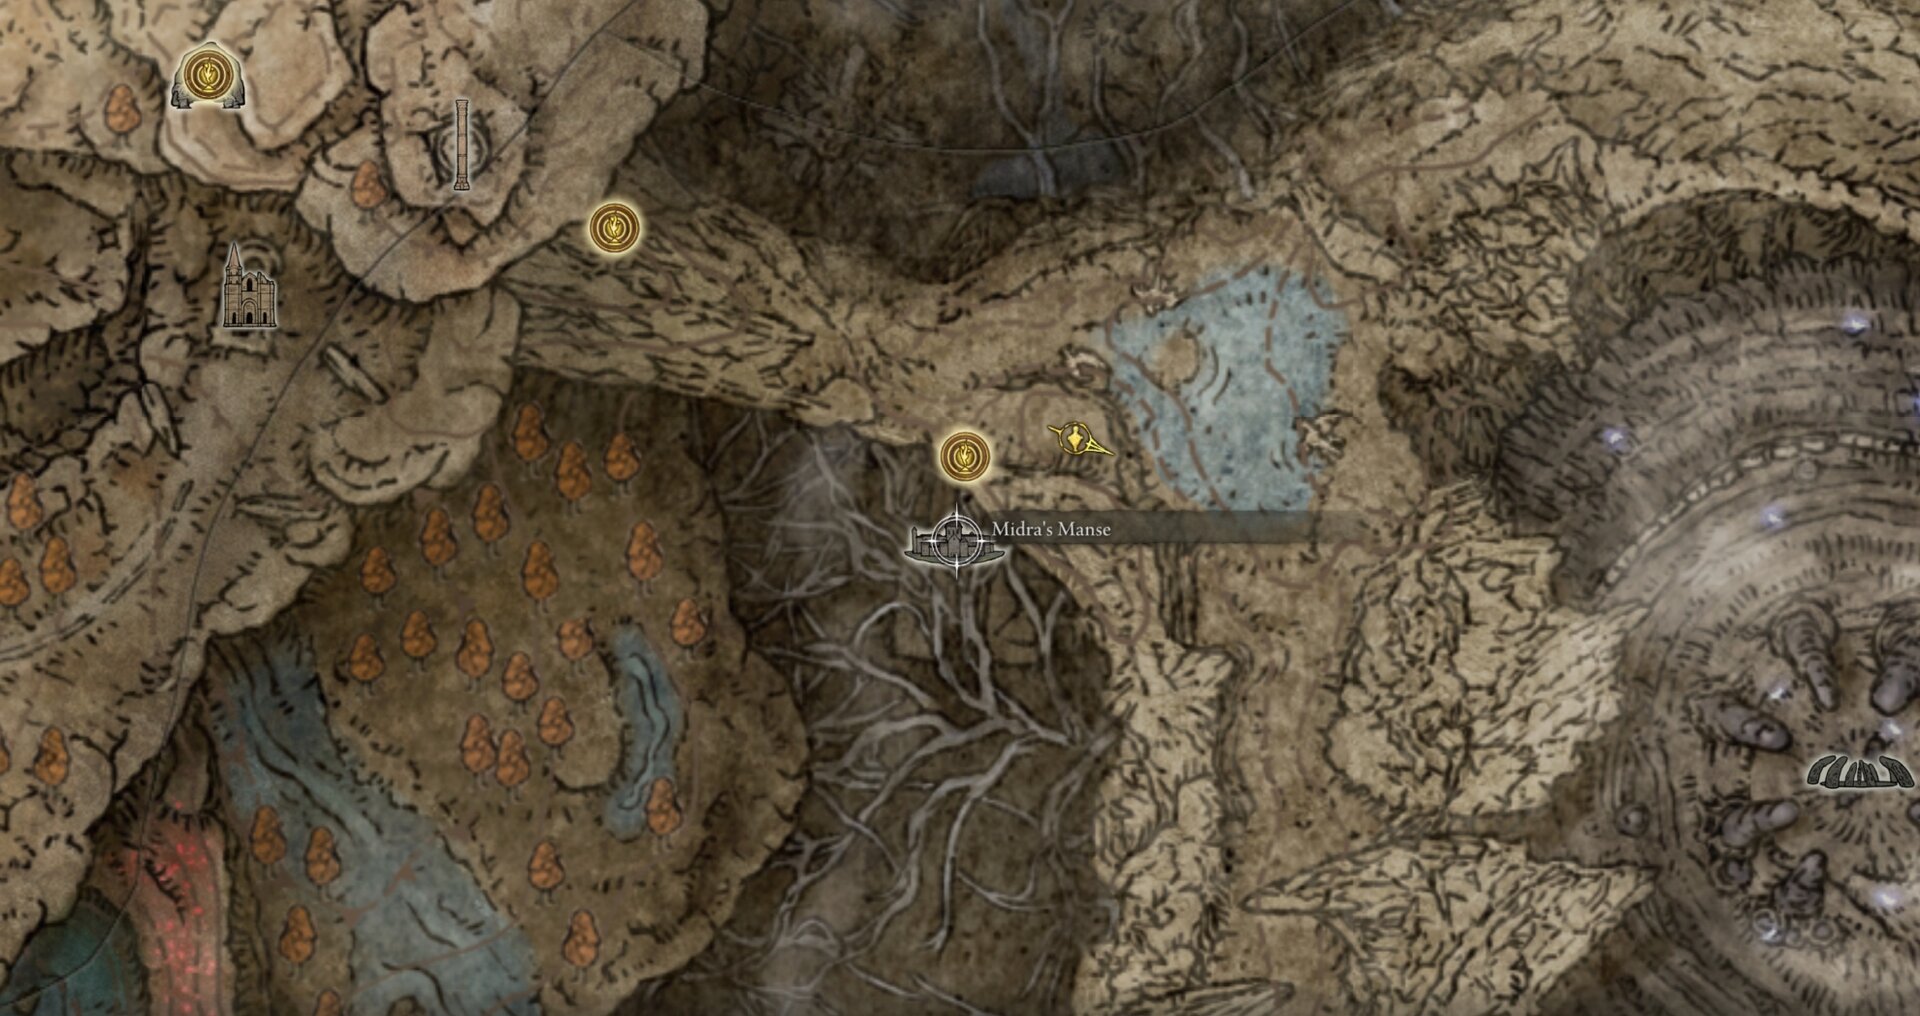
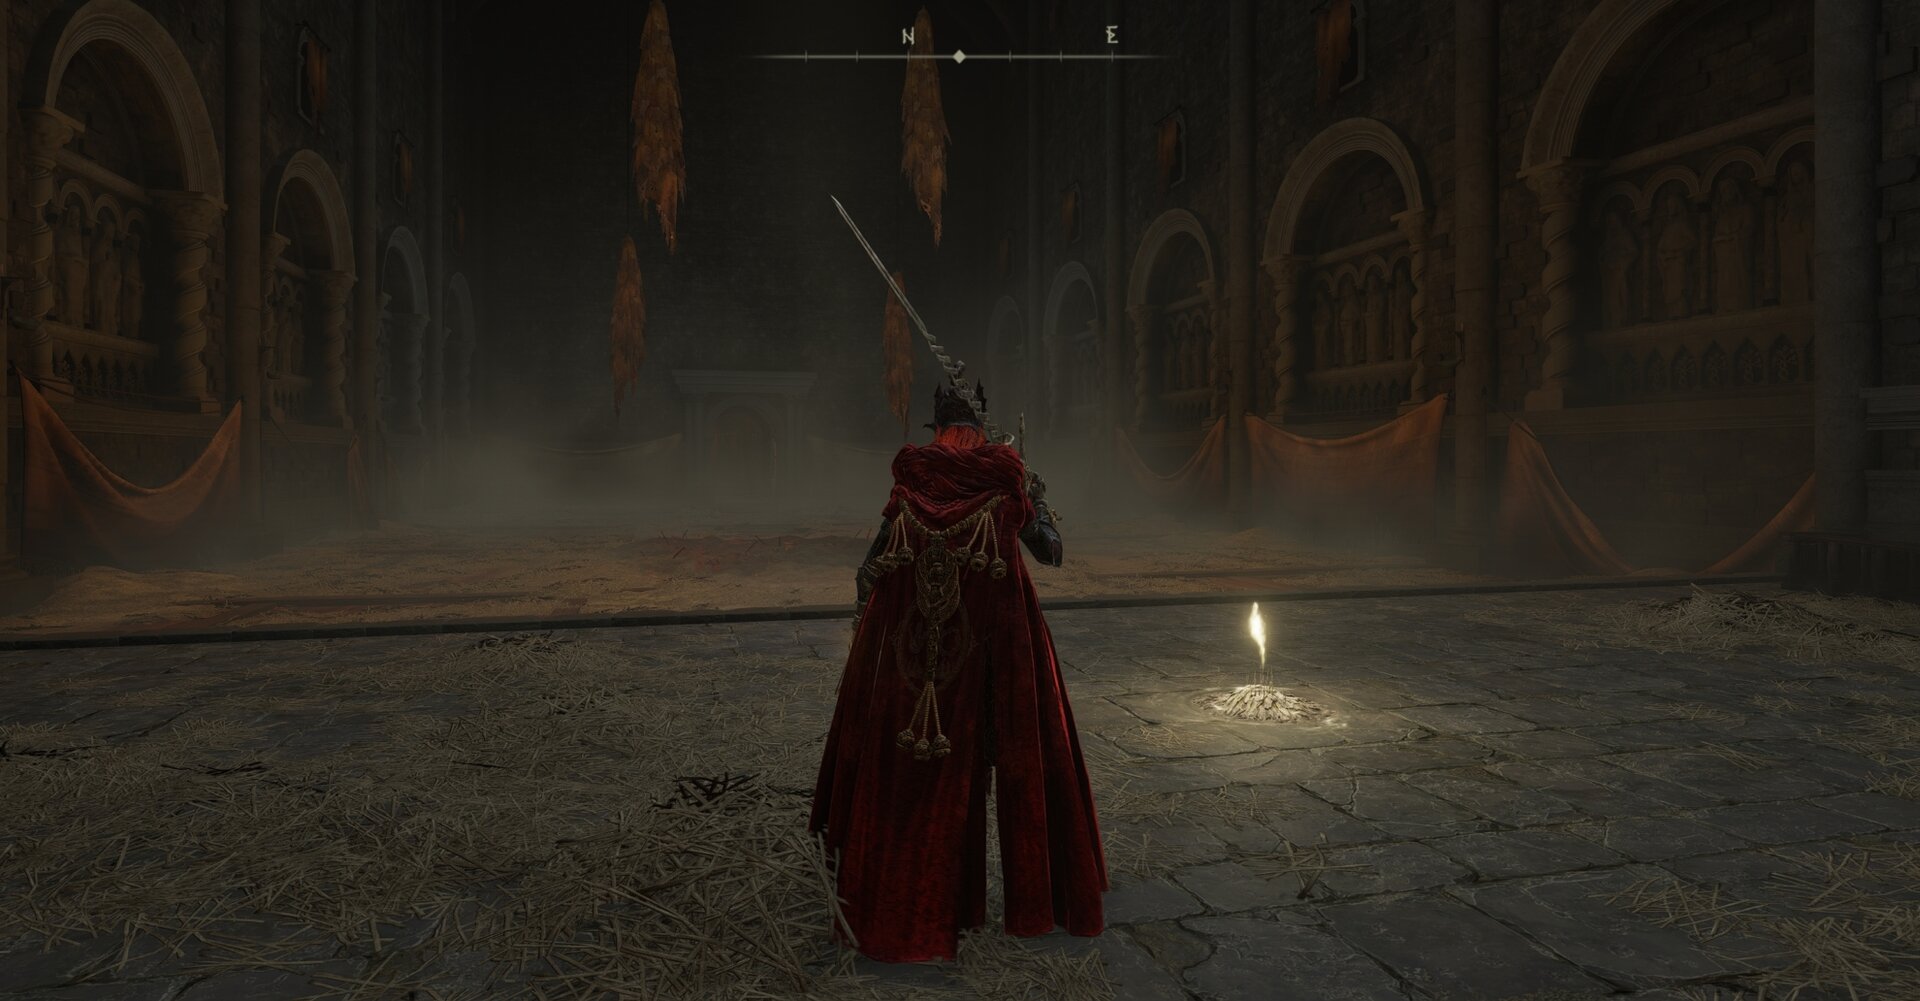
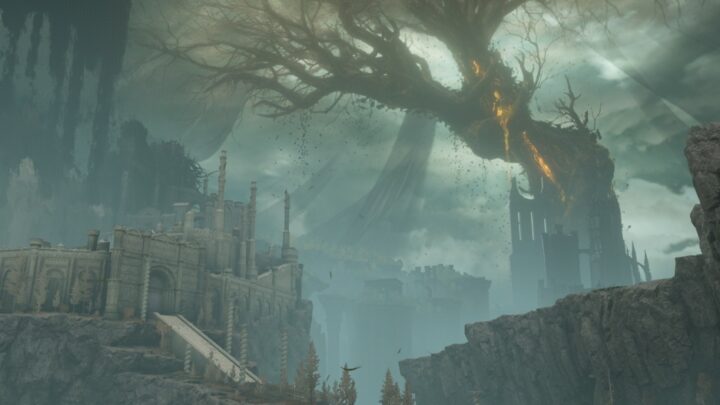
Midra’s Manse is the home of Midra, a little man who harbors the Flame of Frenzy within him. The Manse is located in the southwestern corner of the Abyssal Woods.
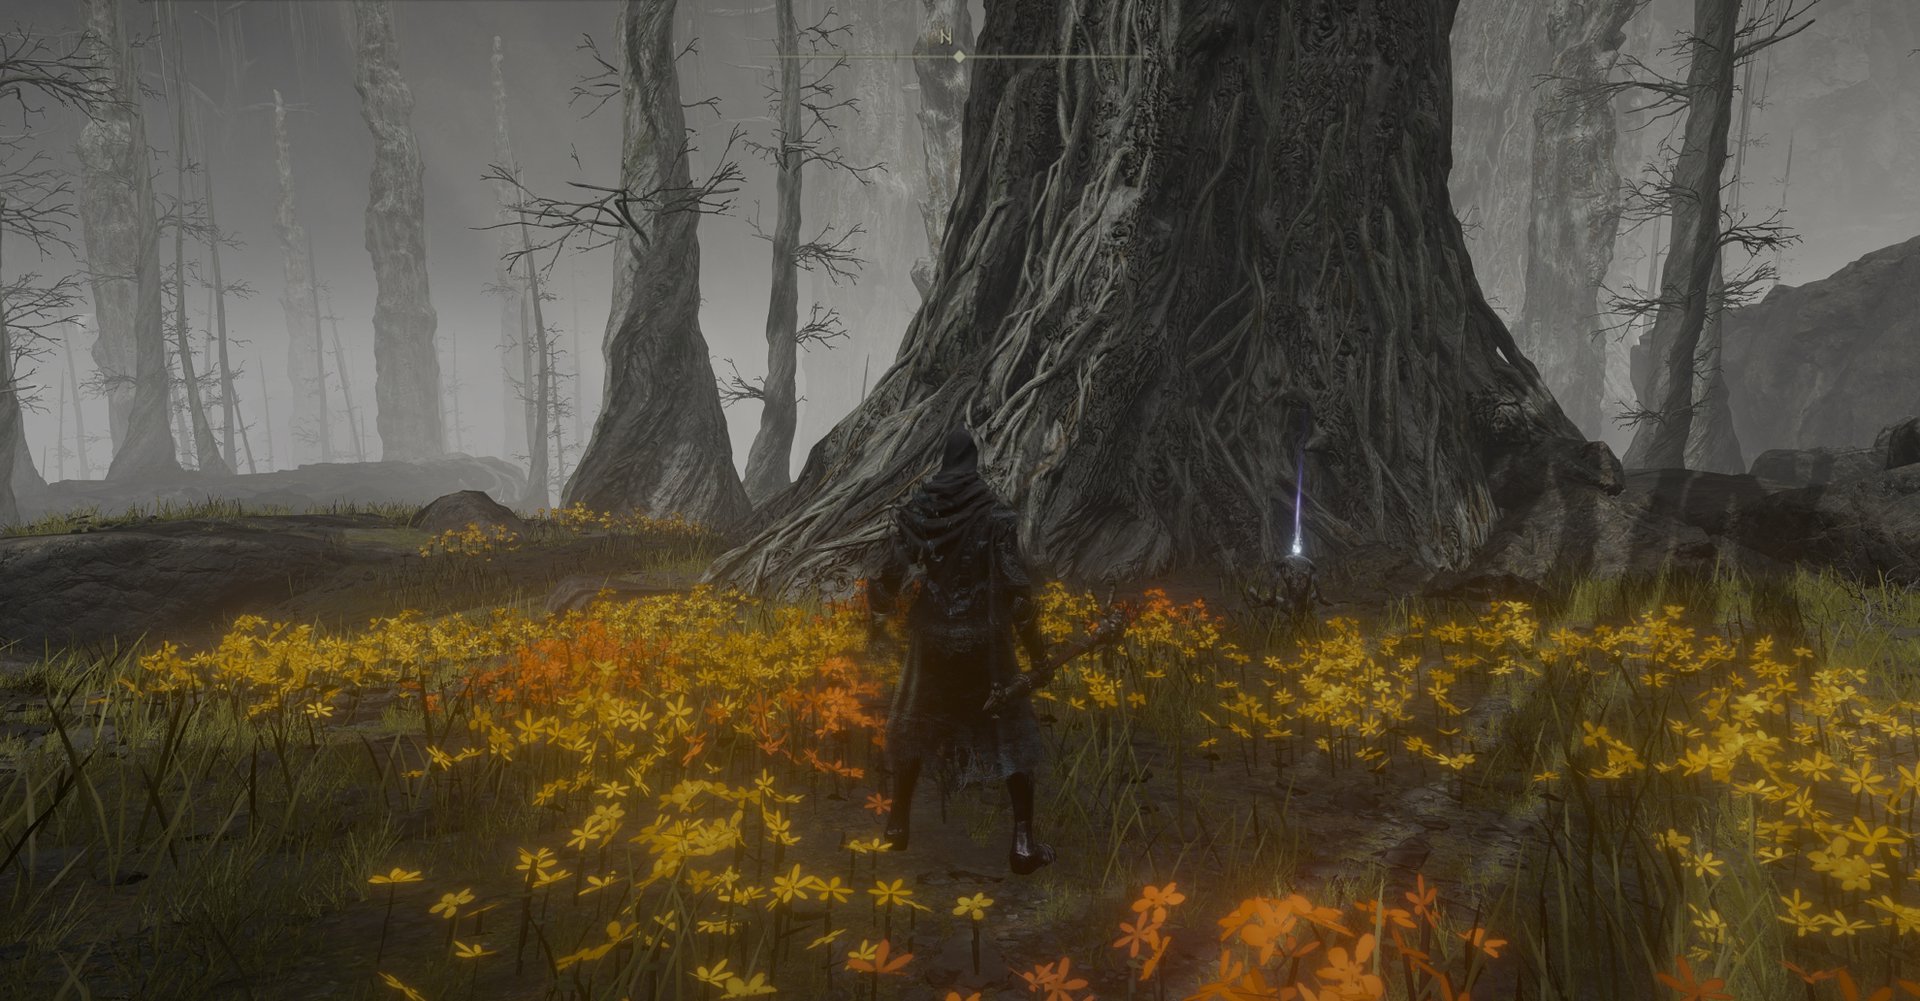
Reaching Midra’s Manse is a bit of a pilgrimage. There’s only one way to reach the Abyssal Woods, and the trek through them to get to Midra’s Manse is fraught with danger and peril.
How to reach the Abyssal Woods
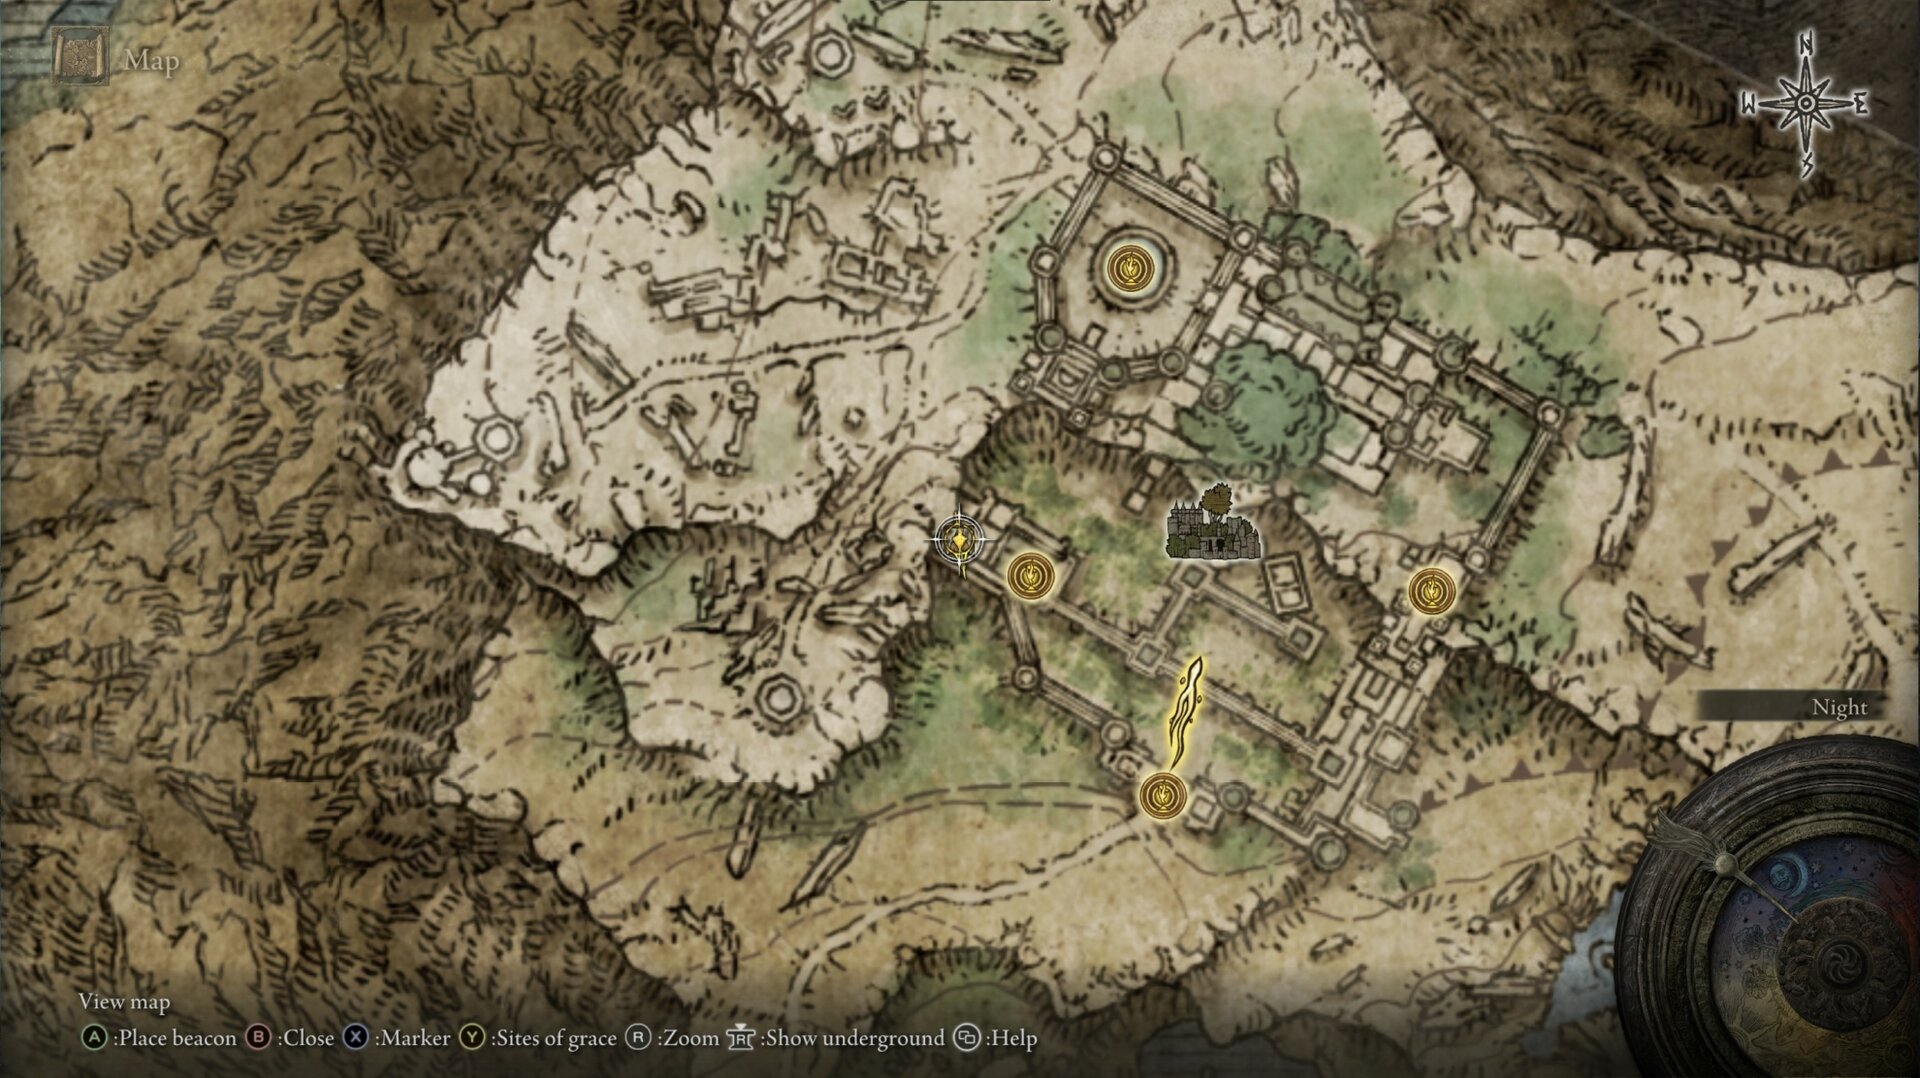
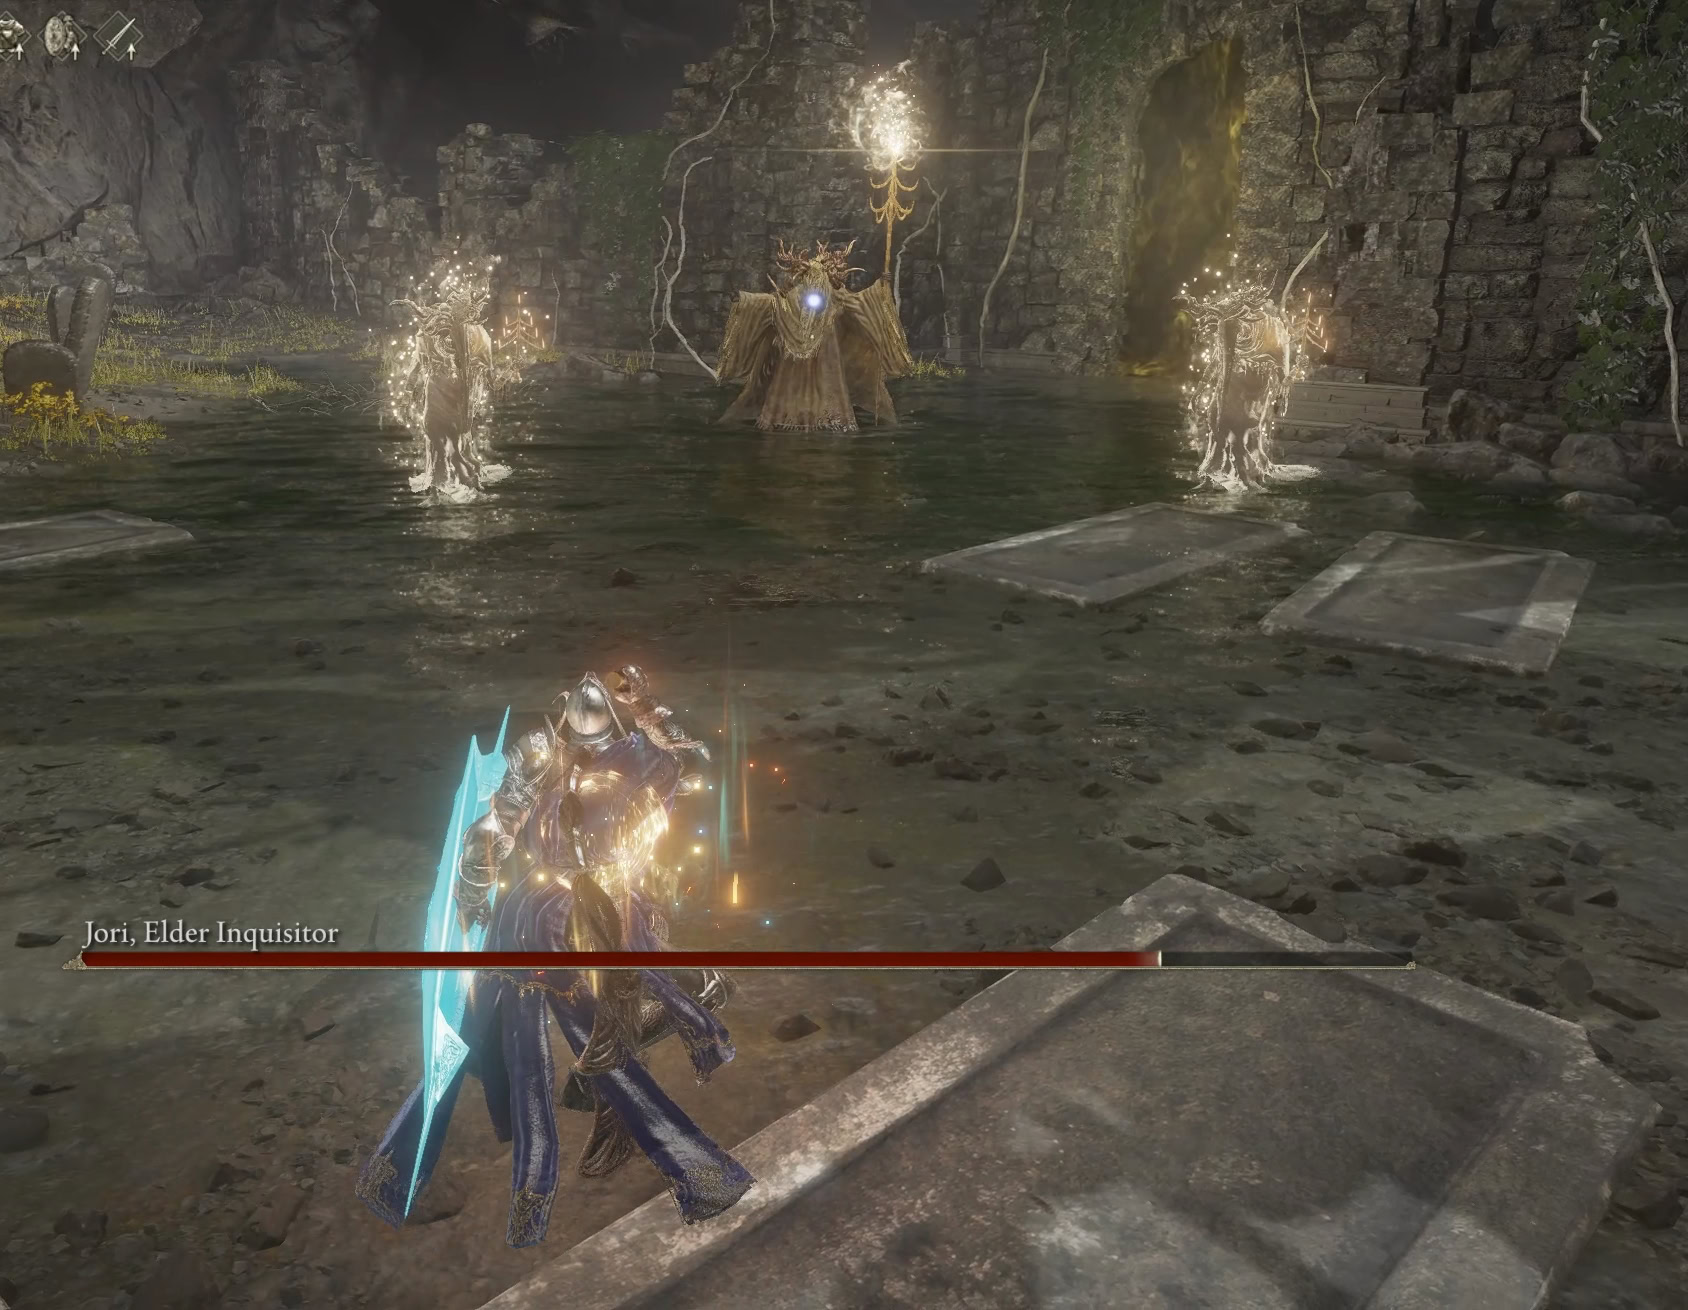
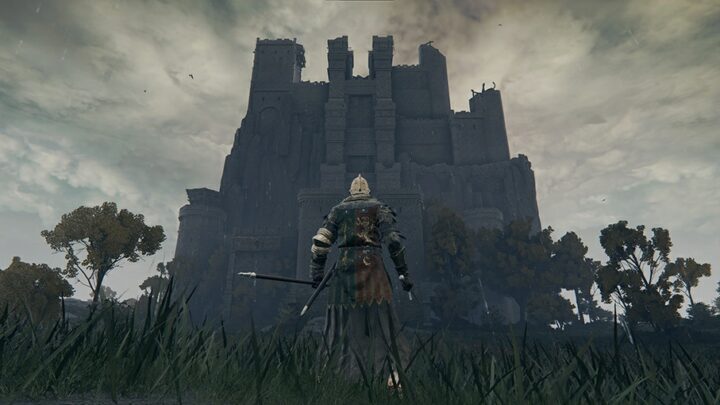
The only way to reach the Abyssal Woods is through the Darklight Catacombs, located at the end of the Recluses’ River on Scadu Altus.
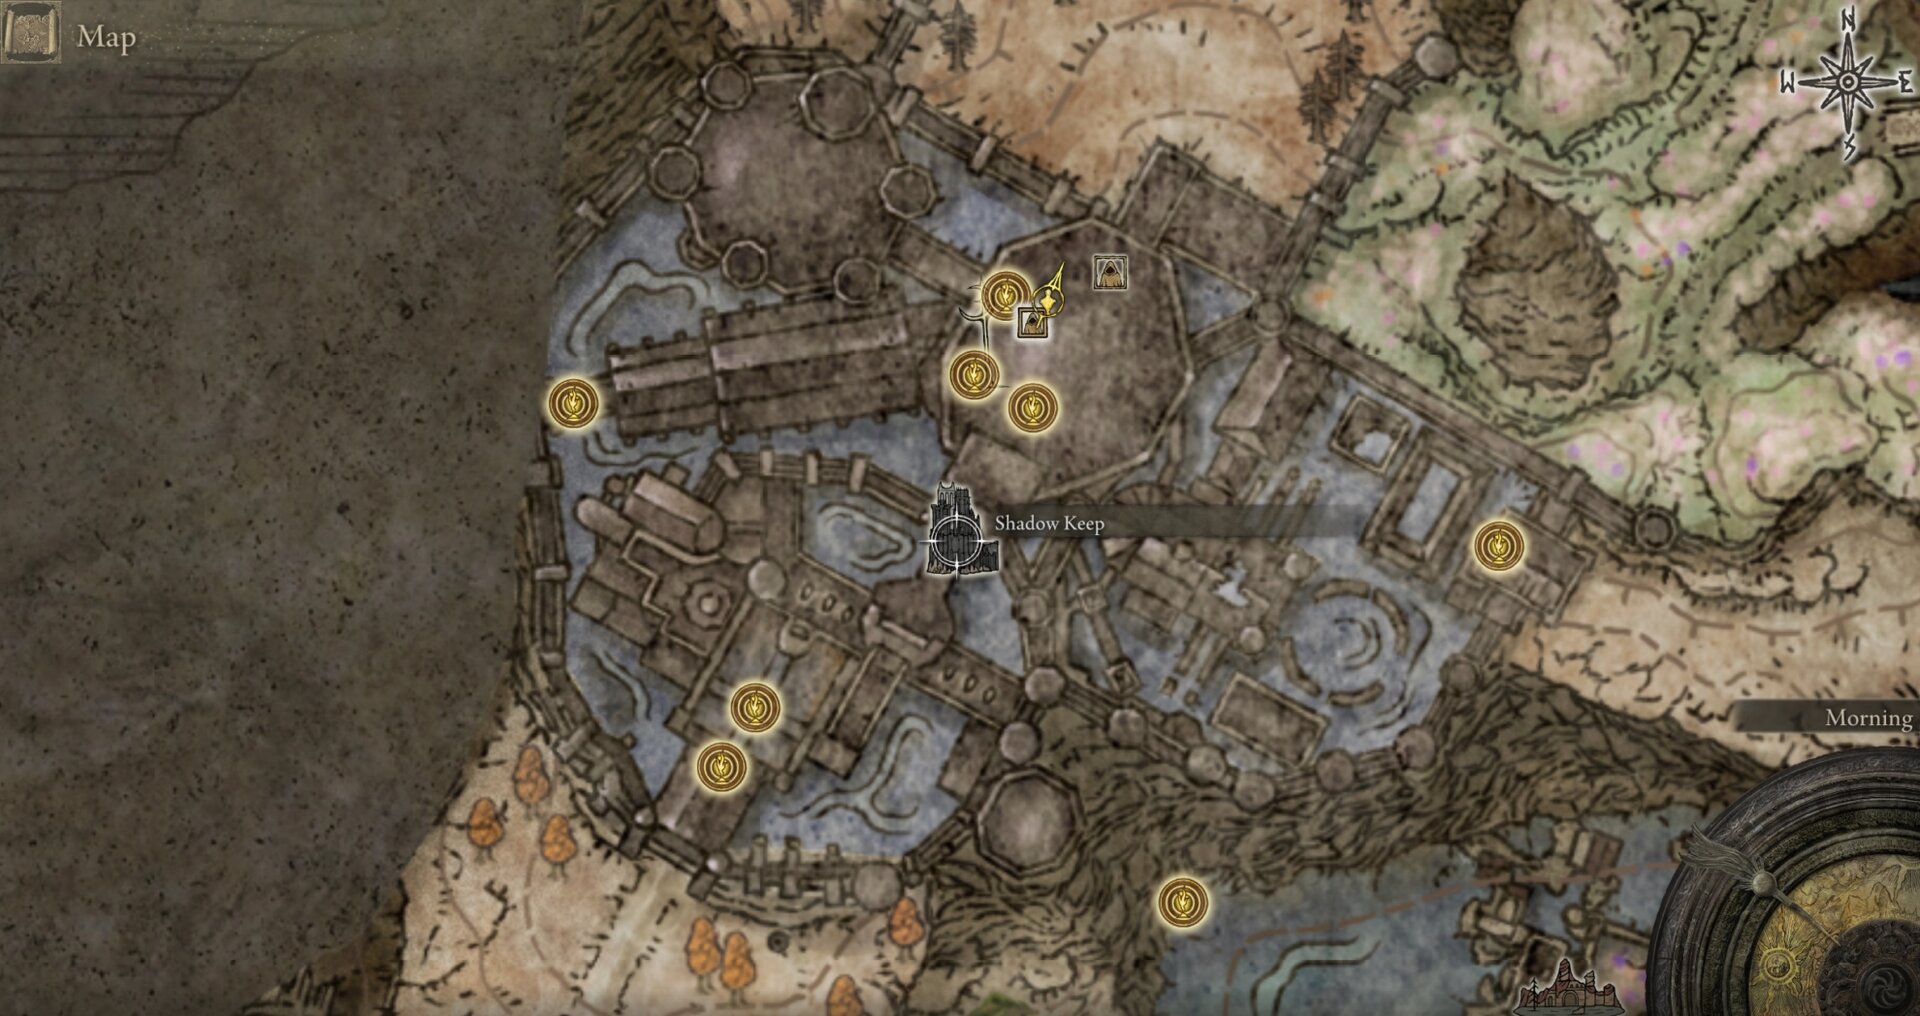
You’ll need to reach the Ruins of Unte through a secret passage in the Shadow Keep and follow the Recluses’ River down past the Village of the Flies.
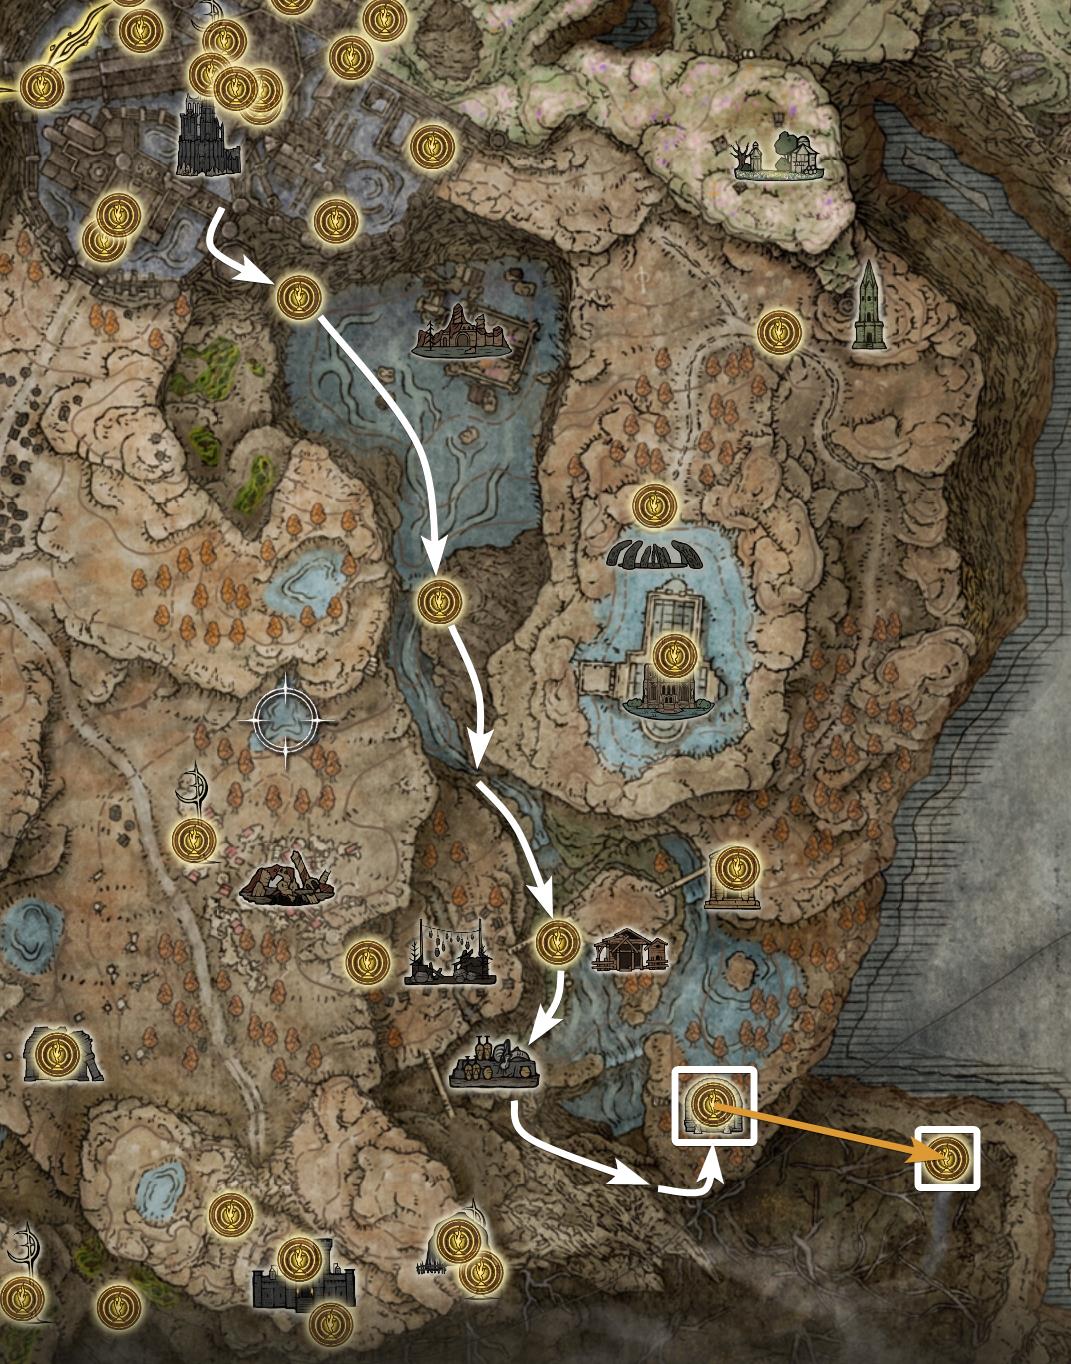
Unlike normal Catacombs, the Darklight Catacombs exit into the Abyssal Woods and terminate their gatekeeper, Jori, Elder Inquisitor.
How to reach Midra’s Manse
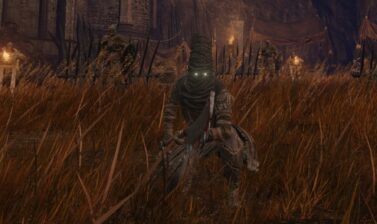
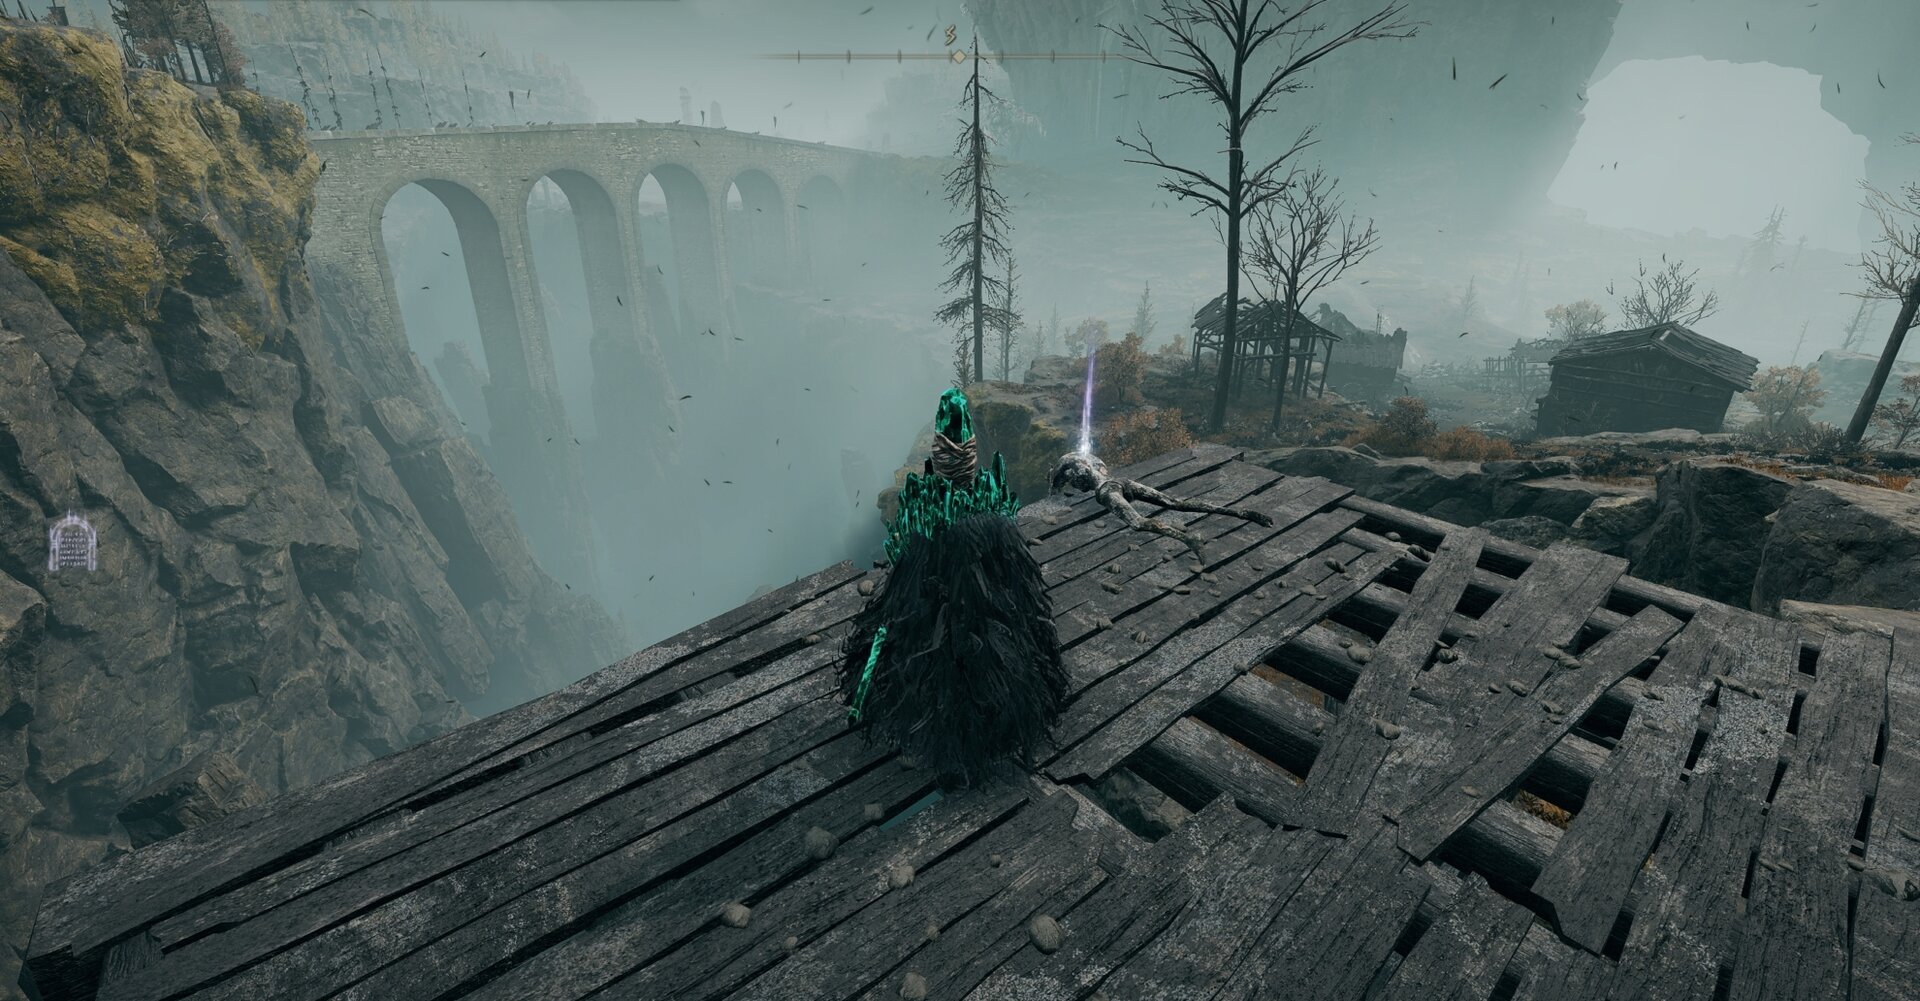
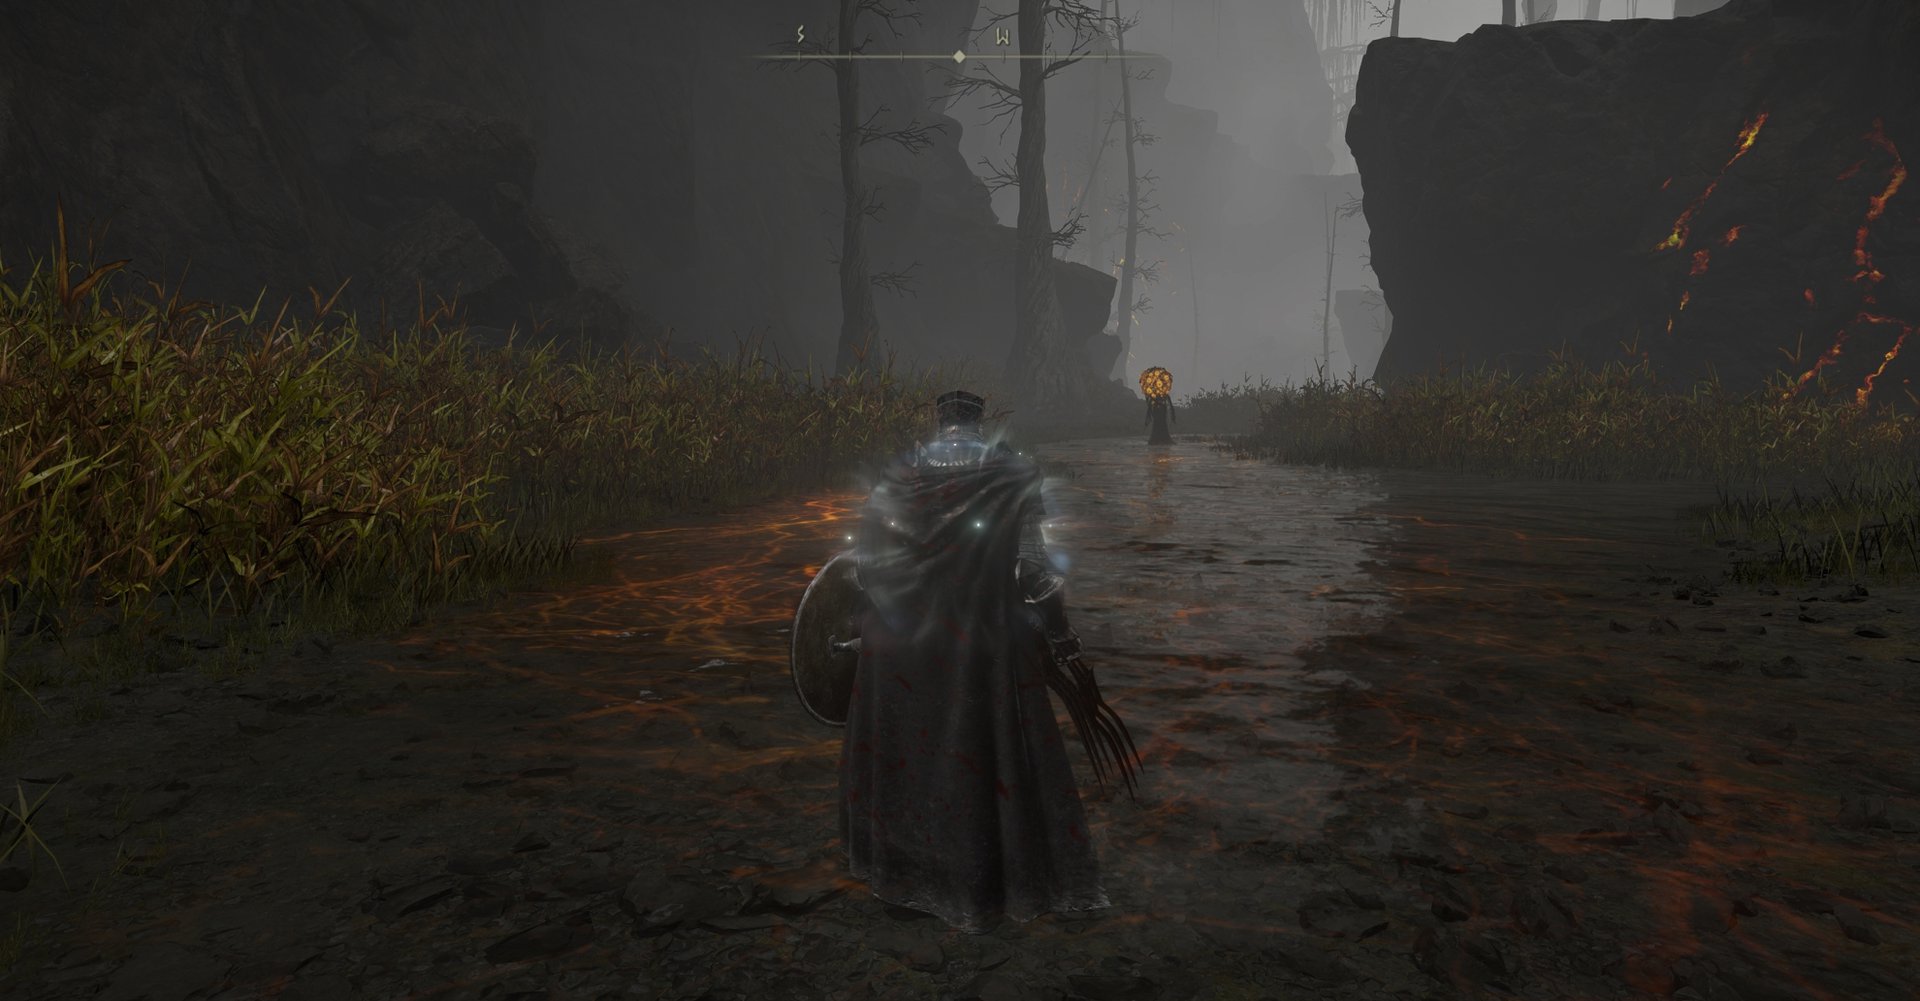
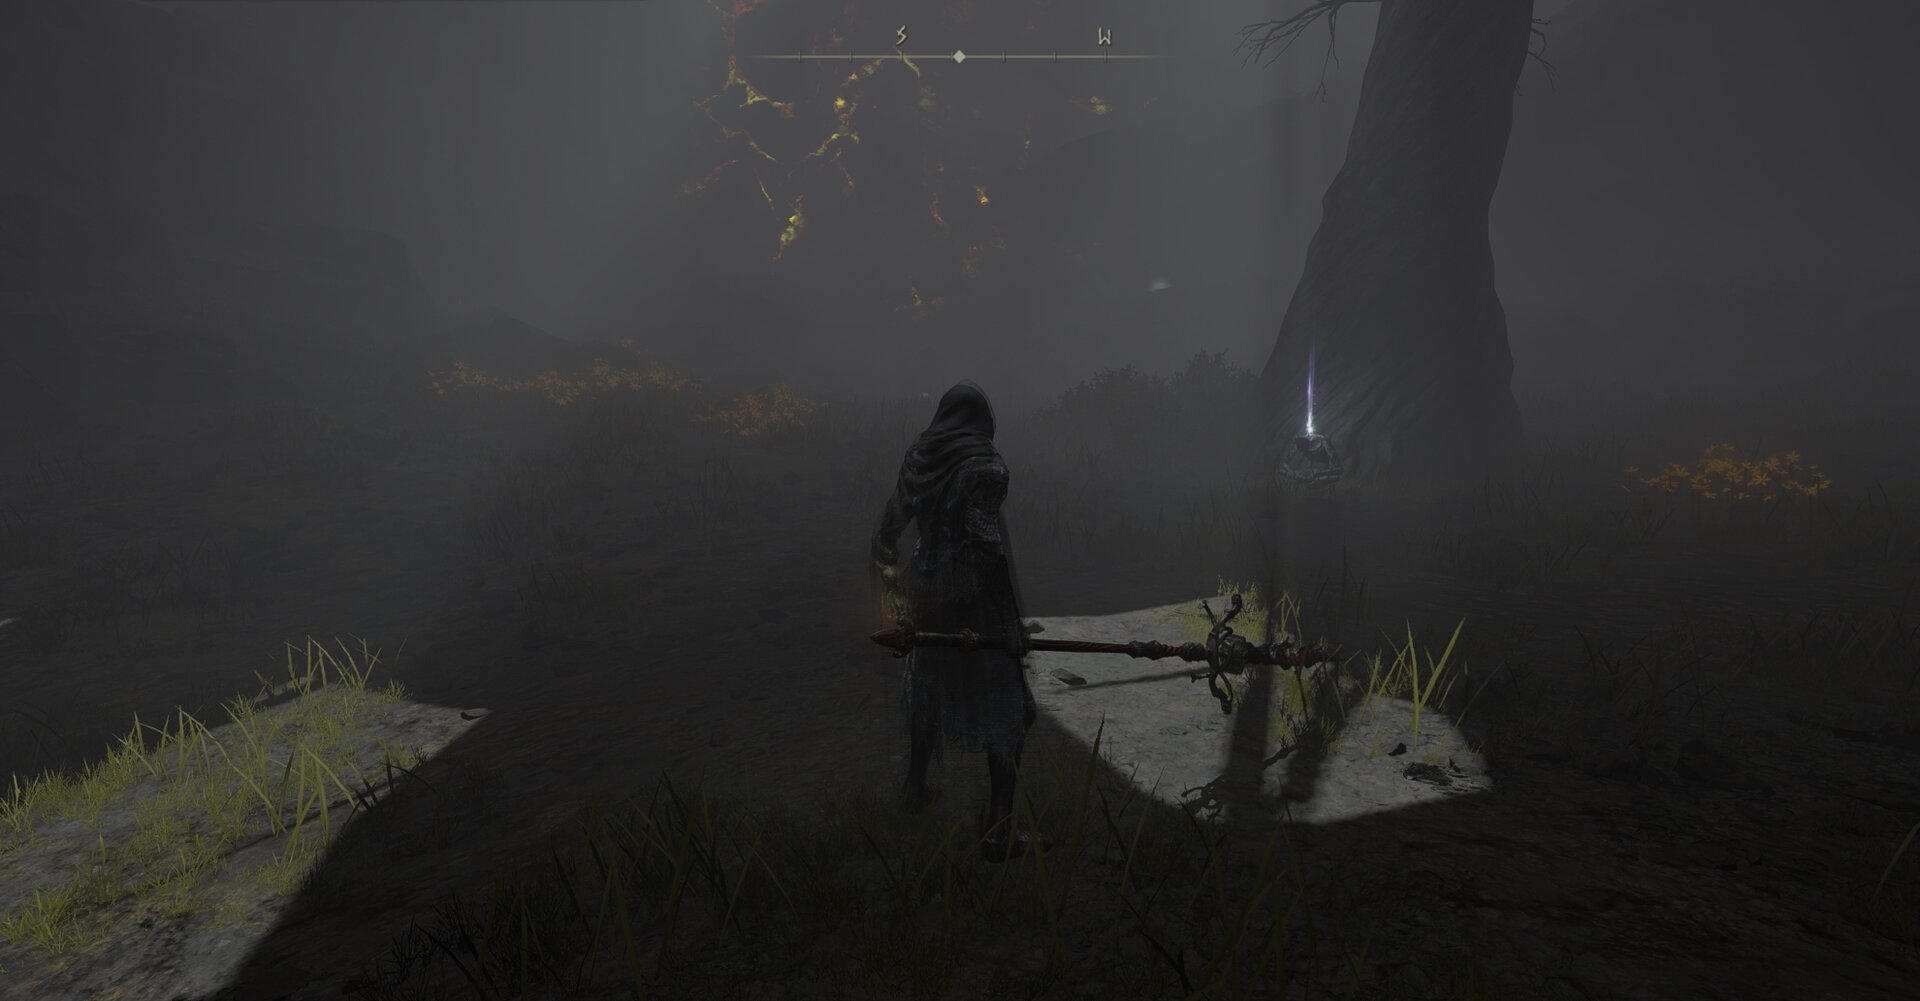
Once you’ve defeated Jori, you can begin your excursion into the Abyssal Woods. Unfortunately, your Spectral Steed is too spooked, so you’ll have to make the trek on foot.
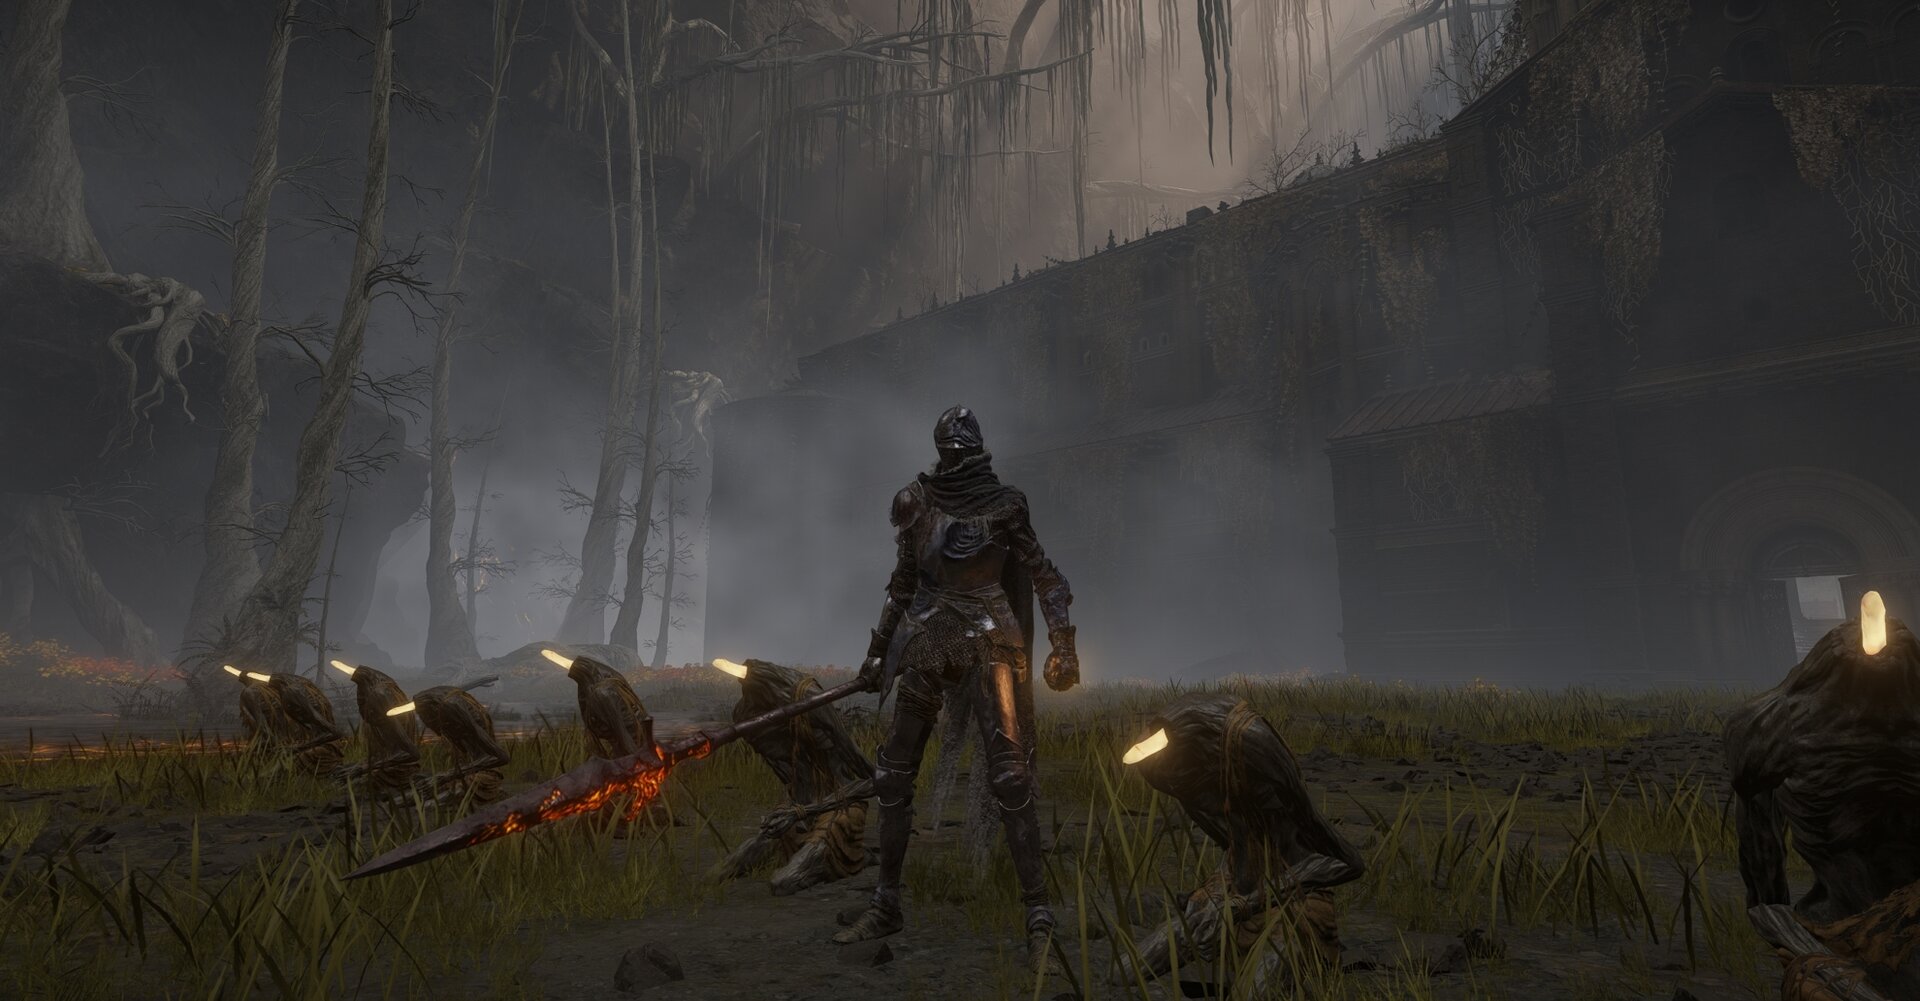
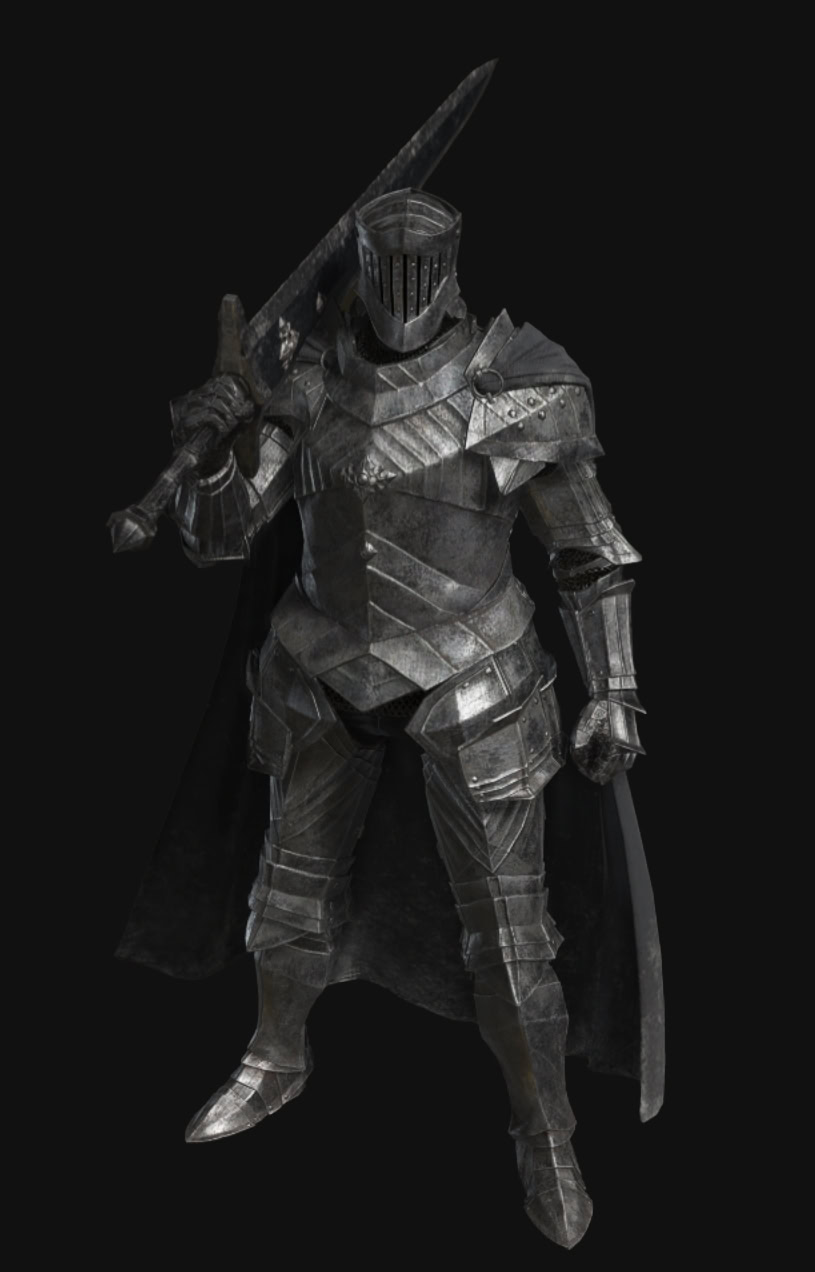
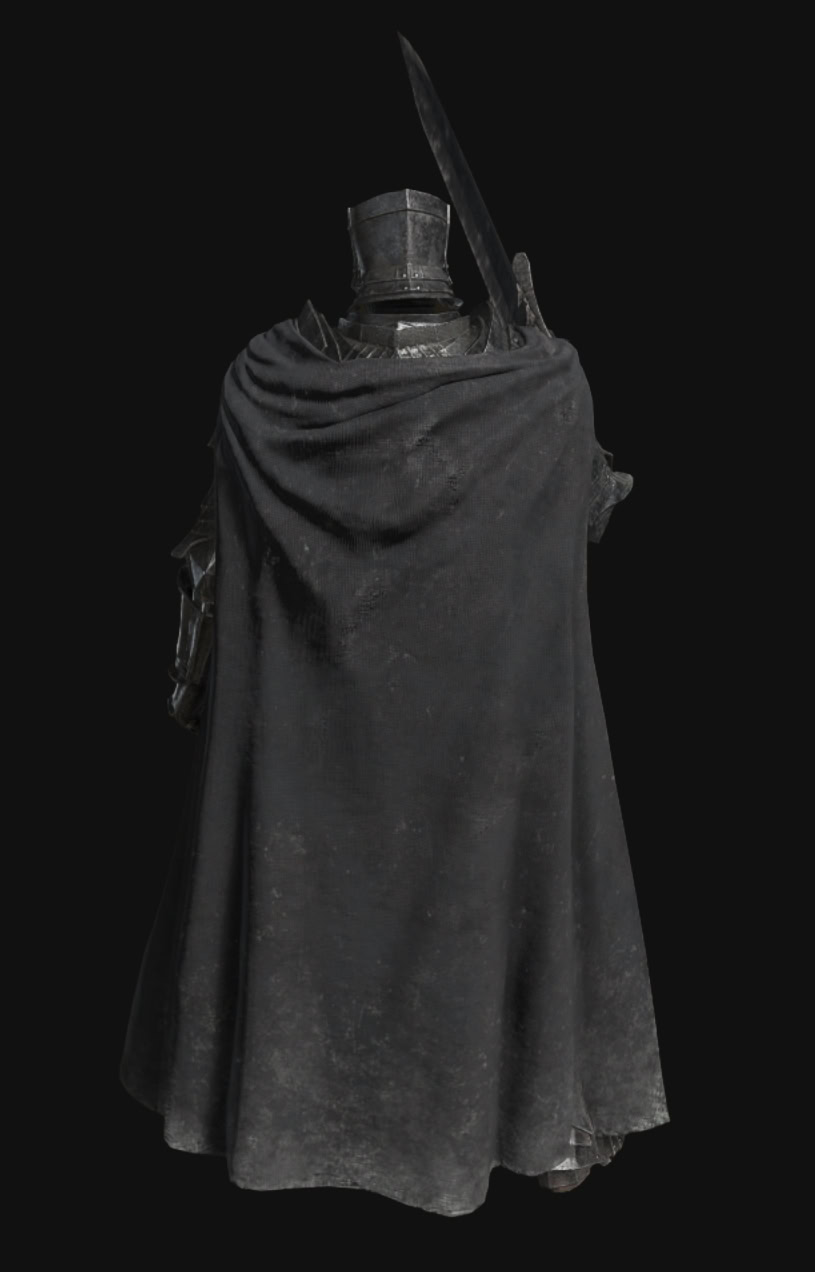
There are a few items to pick up and enemies to put down in the forest. The most formidable things you’ll contend with are the Aging Untouchables, and by “contend with”, I mean Parry or hide from them.

The Aging Untouchables are invincible patrol enemies that will suck the life out of you. They can only be found in the Abyssal Woods, and there are 6 of them. The only way to defeat them is by successfully Parrying their grab attack and then landing a critical hit.
Each Aging Untouchable drops a Swollen Grape upon being defeated, and they don’t respawn after you rest at a Site of Grace like other enemies do. One particular Aging Untouchable drops the Aged One’s Exultation, a talisman that boosts your damage dealt after someone has succumbed to Madness in the area.
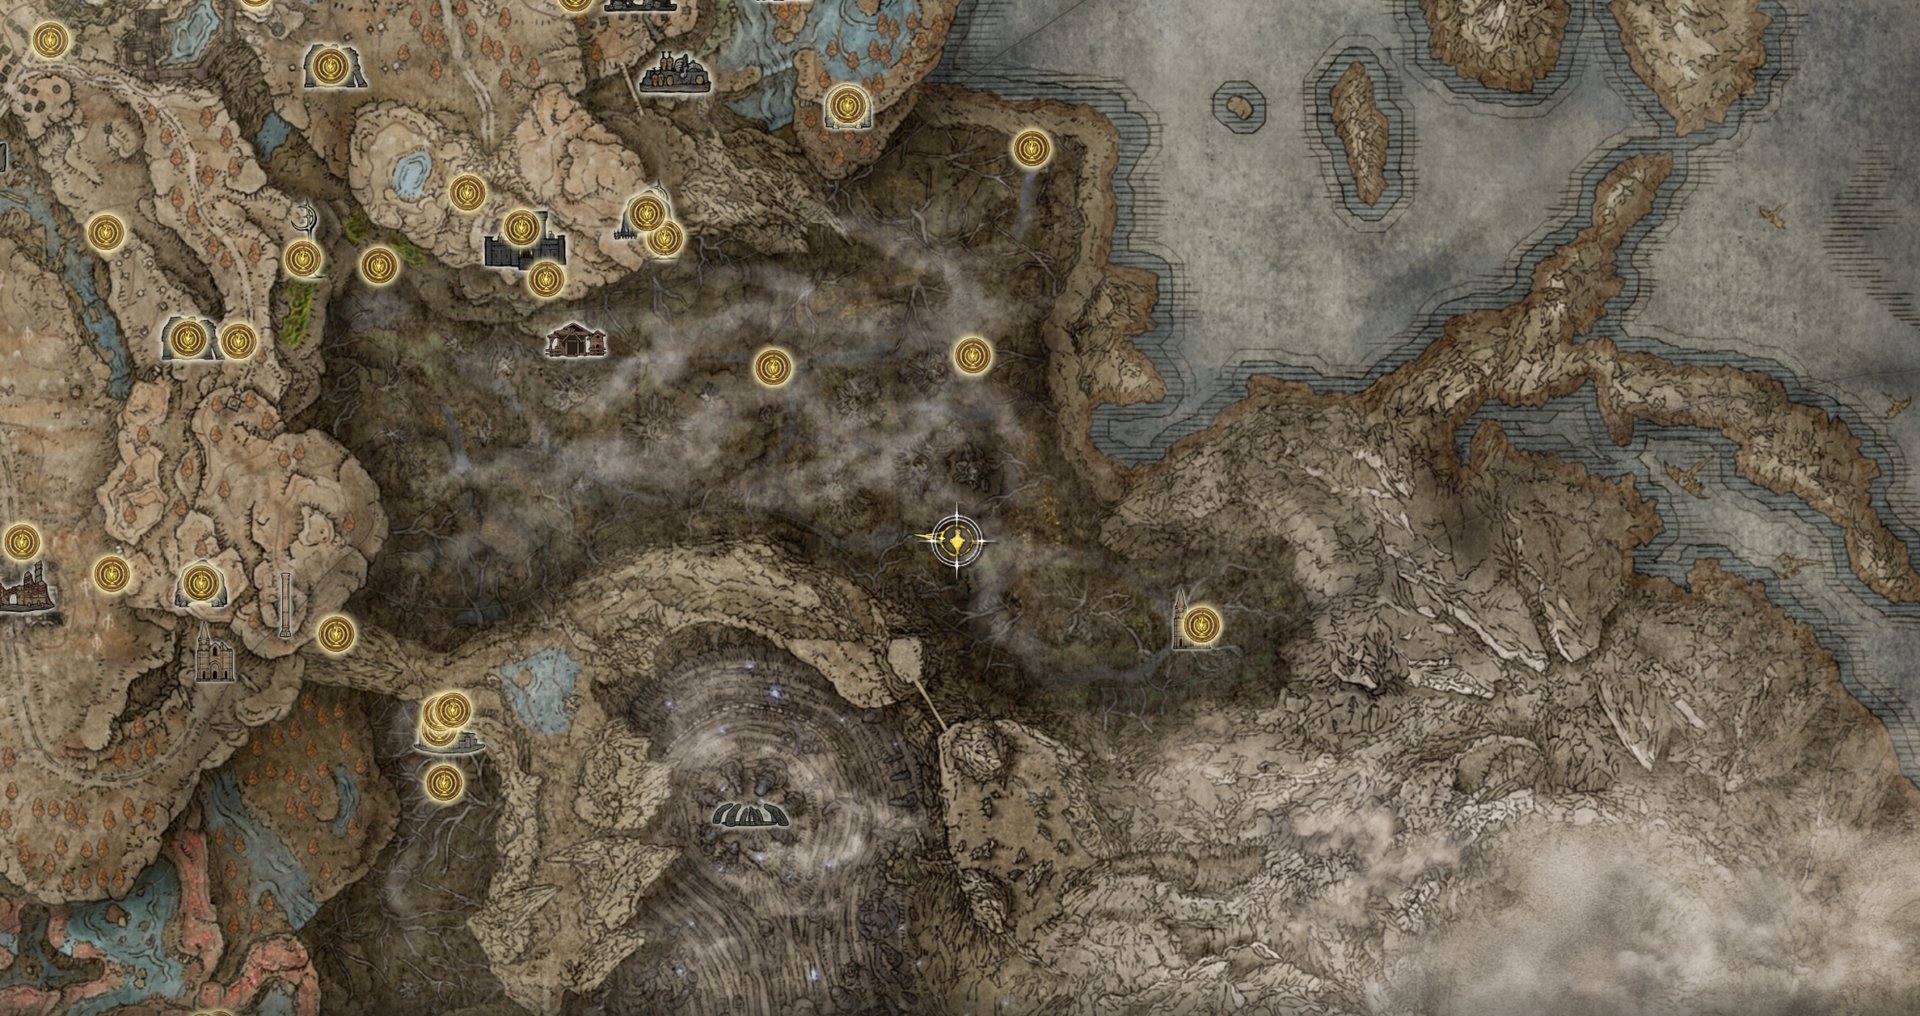
I recommend taking this path through the Abyssal Woods, as you’ll run into each of the Aging Untouchables and activate all Sites of Grace as you make your way to Midra’s Manse.
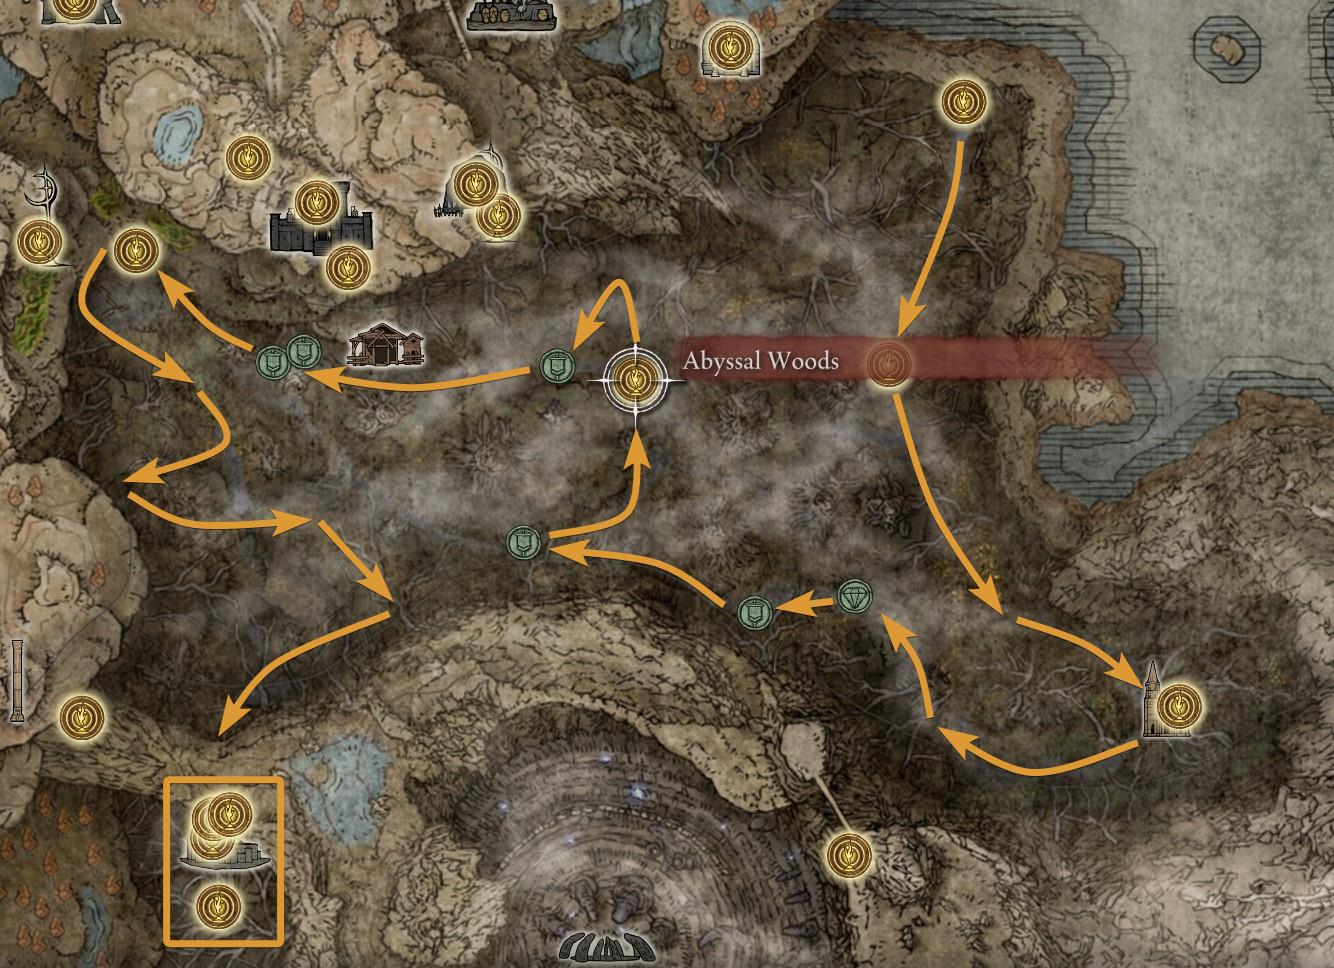
Defeating all of them doesn’t give any special reward, but it will allow you to traverse the woods without needed to be cautious. Frustratingly, your Spectral Steed remains spooked and unusable in this area even after you defeat Midra and all 6 of the Aging Untouchables.
How to defeat the Aging Untouchables
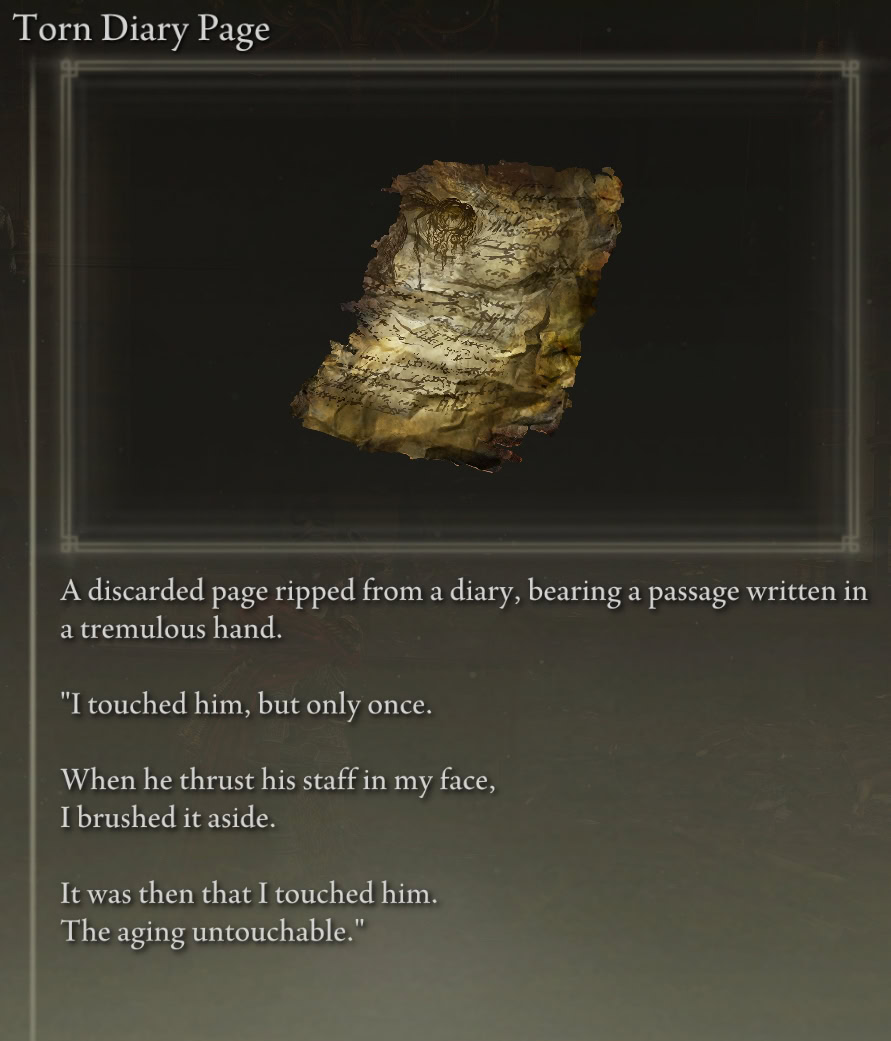
The only way to defeat Aging Untouchables is by Parrying them, which is hinted at in the Torn Diary Page you pick up at Midra’s Manse.
Temporarily swapping out some of your equipment will make it significantly easier to defeat them; namely, your Armor, Talismans, Shield, and Physick.
Armor
It’s helpful to wear armor that boosts your Focus, which is the Resistance stat that increases the amount of Madness and Sleep buildup you can endure before you go mad or fall asleep.
Heavier armor is also beneficial because it protects you from the damage the Aging Untouchables deal as they attempt to spook you. It is possible to survive their attacks.
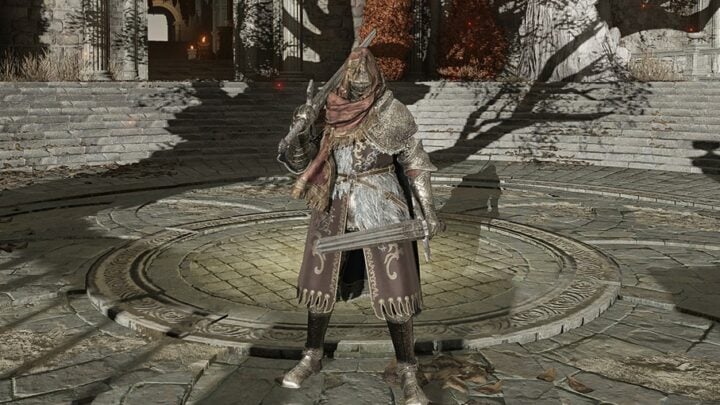
You can sort your armor by Resistance, start with the chest piece, and look for the one that offers the highest Focus. The rest of that set will typically also offer the highest Focus. If you have it, the best set to use is the Armor of Solitude.
Talismans
I recommend using the Clarifying Horn Charm +2, Ailment Talisman, and the Pearldrake Talisman +3 to protect yourself from the Aging Untouchables. These Talismans will effectively give you more tries to Parry
Clarifying Horn Charm
The Clarifying Horn Charm +2 boosts your Focus (Resistance to Madness and Sleep) by 230, which can easily be enough to double your current Focus stat.
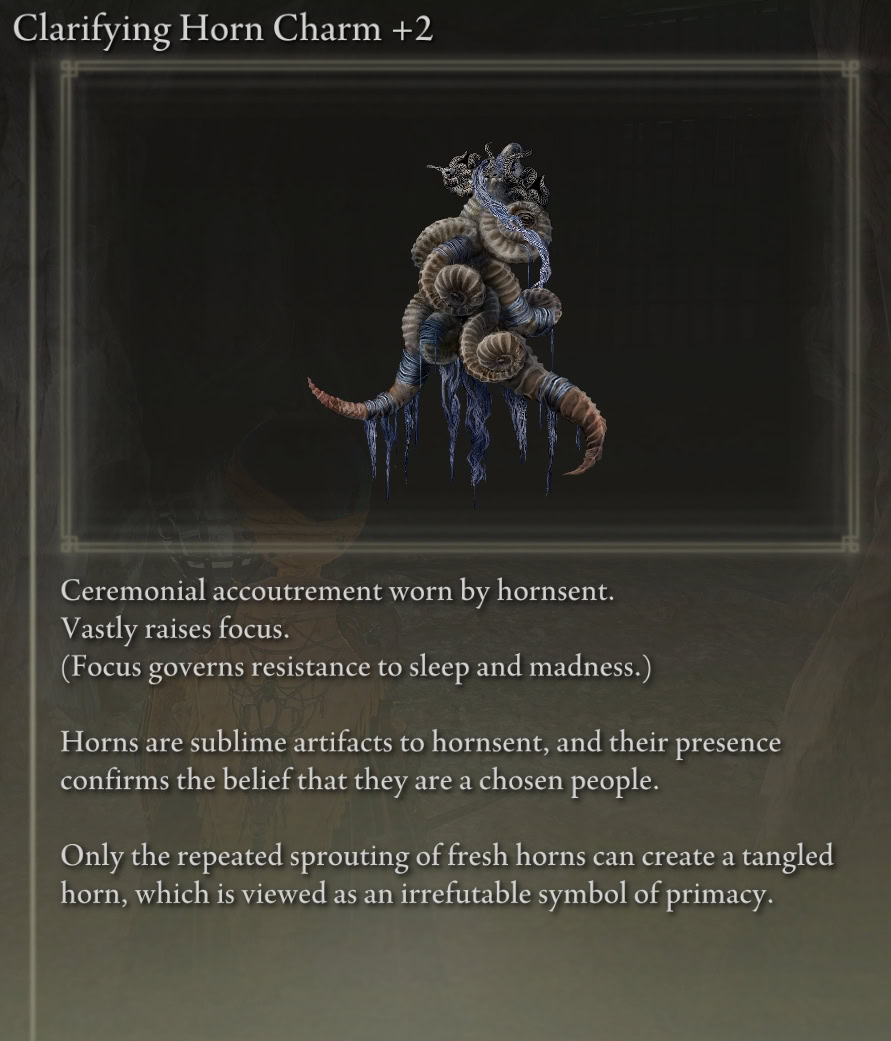
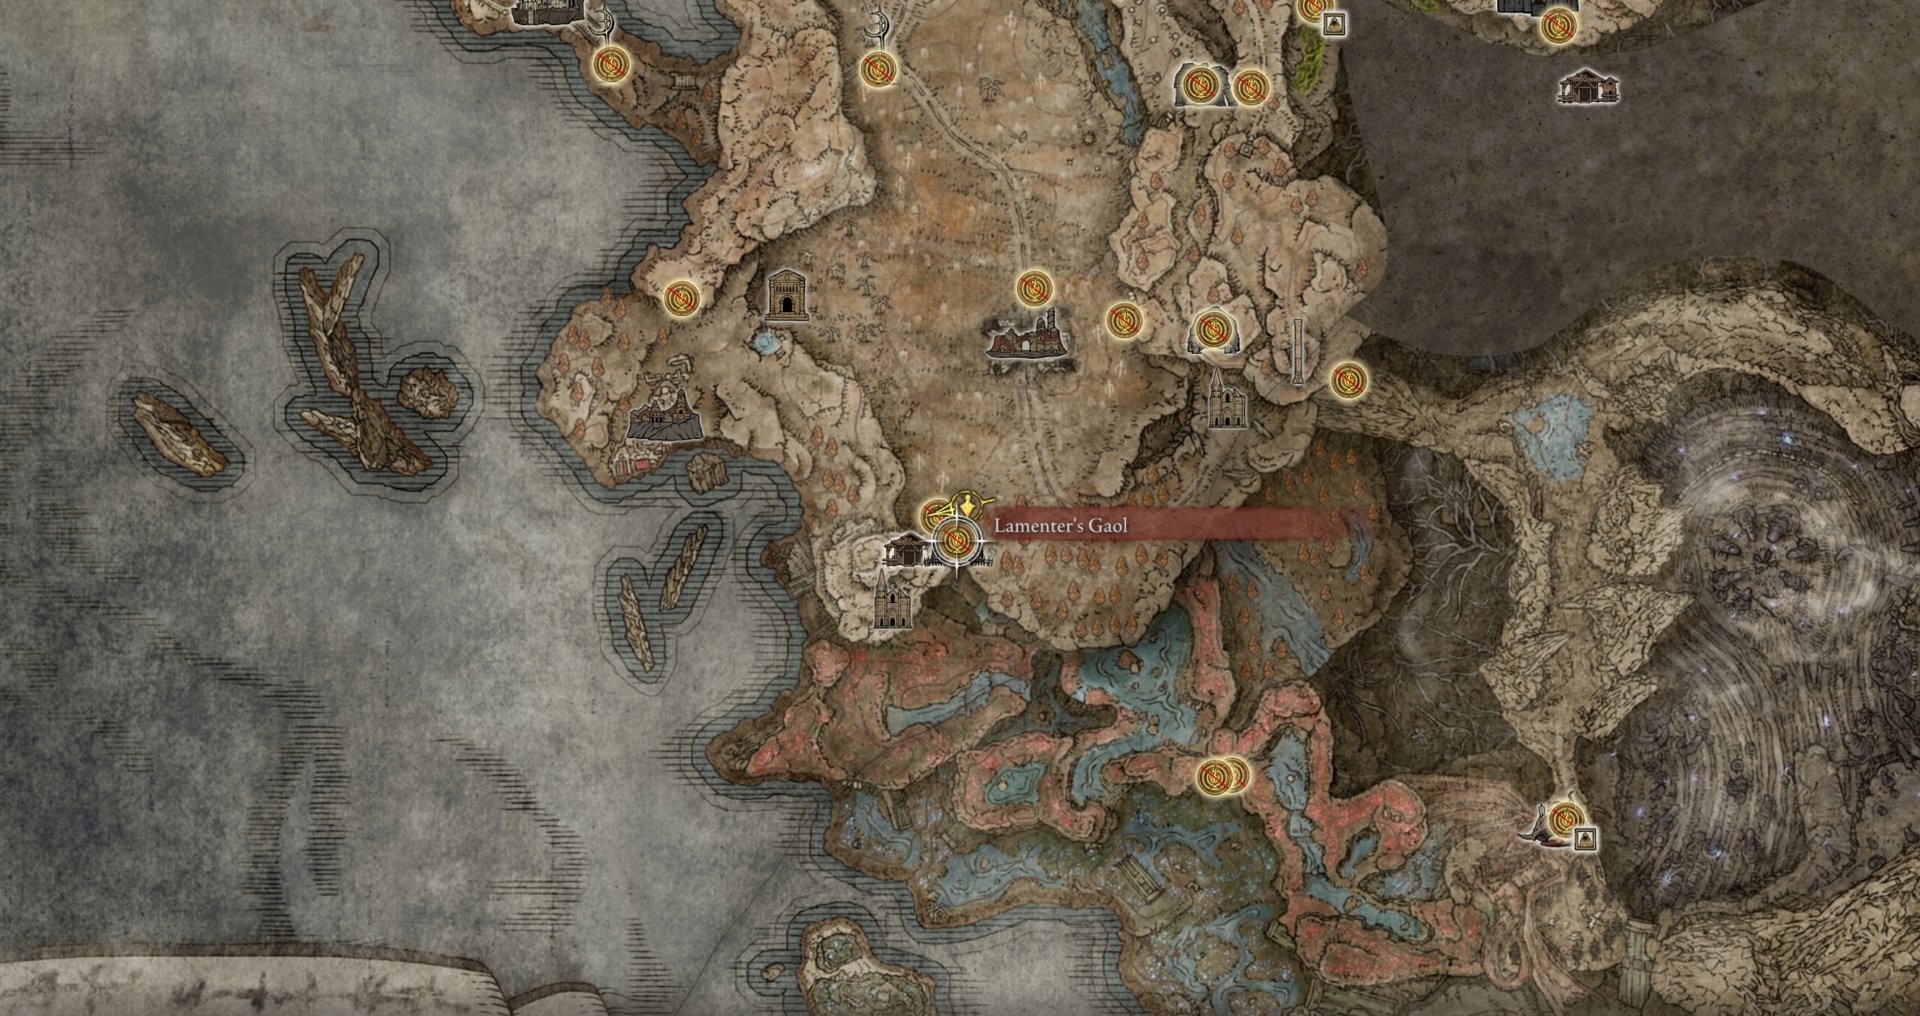
You can loot the Clarifying Horn Charm +2 from a corpse in the sewer at the Lamenter’s Gaol at Charo’s Hidden Grave.
Ailment Talisman
The Ailment Talisman temporarily boosts the associated Resistance stat and immediately lowers current status effect buildup after a status effect is triggered on you.
For example, if your Madness bar fills up completely, you’ll get a boost to Focus for a little while and your remaining Madness will get reduced. In essence, the Ailment Talisman makes you more resilient against repeated status effect buildup.
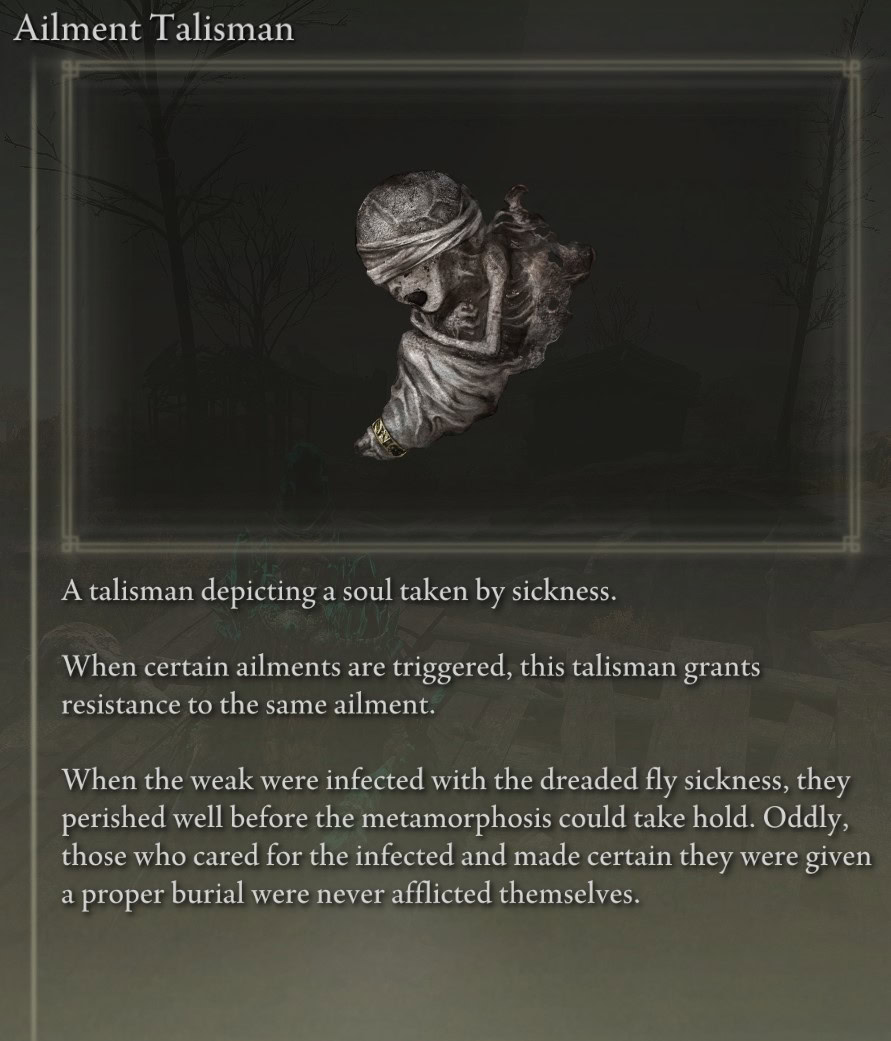
You can loot the Ailment Talisman from a corpse on a wooden overhang at the back of the Abandoned Ailing Village on the Gravesite Plain.

Pearldrake Talisman
The Pearldrake Talisman boosts your non-Physical Damage Negation (Magic, Fire, Lightning, and Holy) by half of what you’d get for a single stat from one of the other +3 Drake Talismans. It follows the same variable behavior as the other Drake Talismans.
In other words, Pearldrake Talisman +3 boosts your non-Physical Damage Negation by multiplicative 18-25% boost or an additive 8-10%.
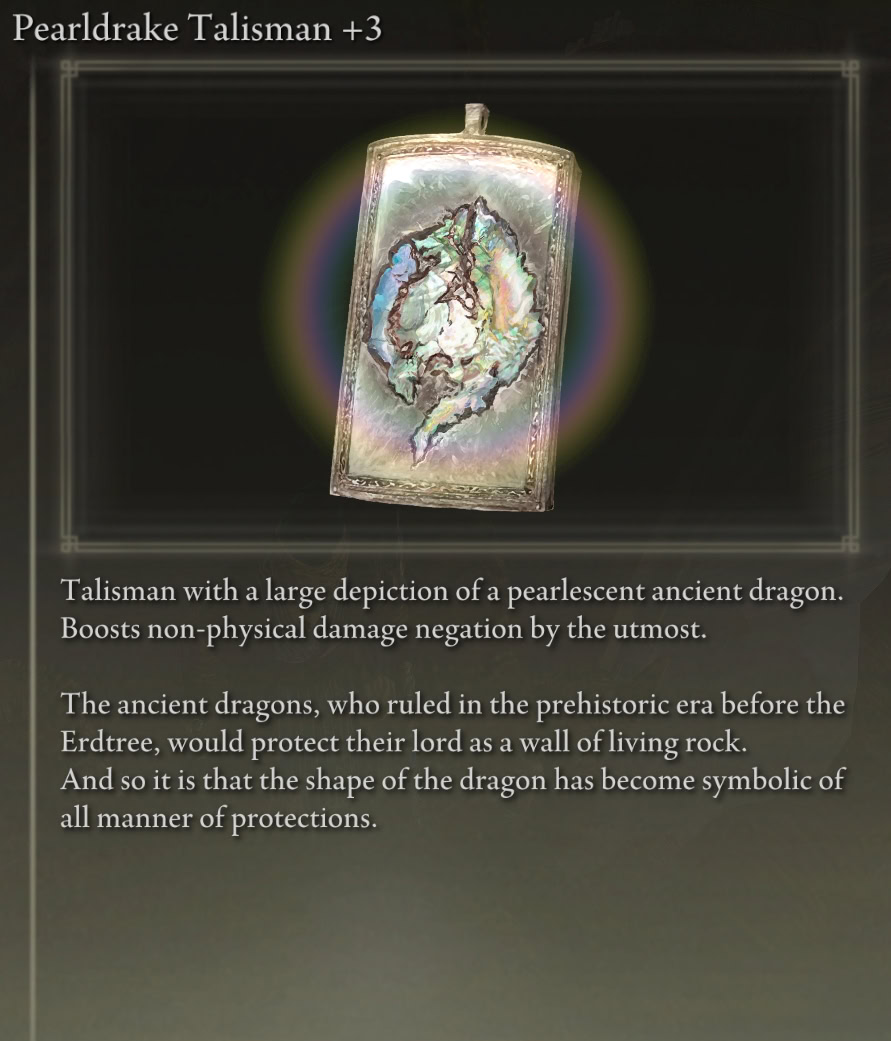
You can loot the Pearldrake Talisman +3 from the head of one of the humanoid specimens at the Specimen Storehouse within the Shadow Keep after lowering the central structure. Check out our Shadow Keep Items Locations Guide for more information.
Additional Talisman Options
There are a bunch of nifty options you can equip in the fourth Talisman slot, but none are quite as valuable as the other three I’ve listed. Here are some of the best options:
- Pearl Shield Talisman
- Dagger Talisman
- Mottled Necklace
- Aged One’s Exultation (after you defeat the first one)
Flask of Wondrous Physick
While attempting to take down the Ageless Untouchables, the best Crystal Tears to mix into your Flask of Wondrous Physick are the Opaline Hardtear and Speckled Hardtear, which increase all Damage Negation and Resistances respectively.
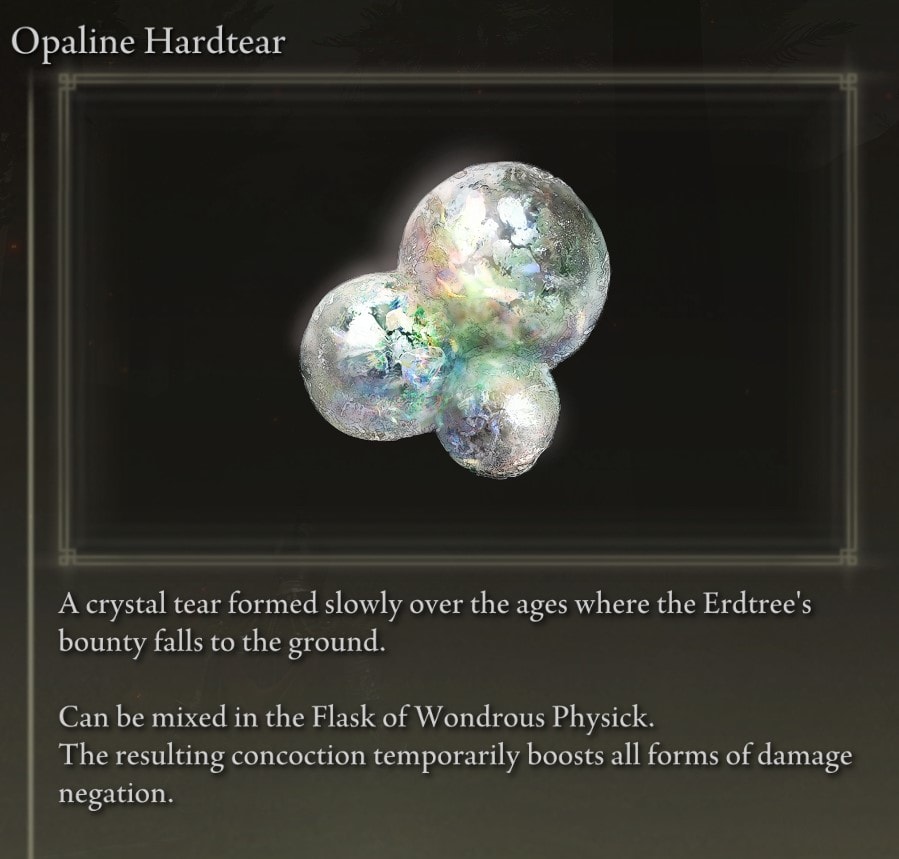
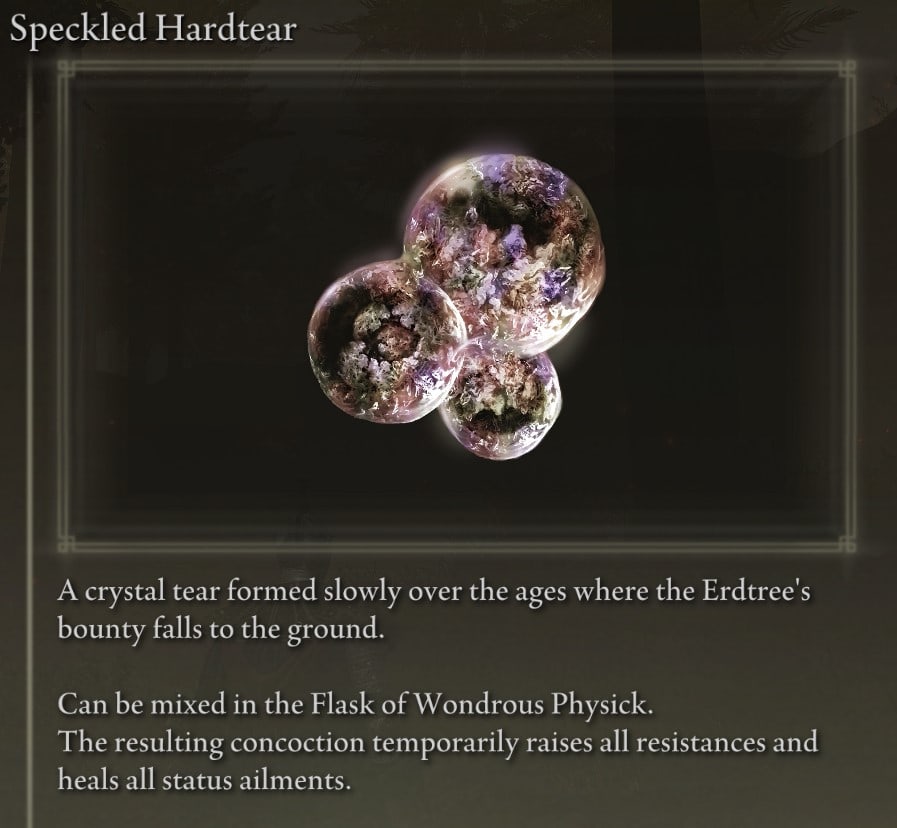
You can find out where to get both of them in our Flask of Wondrous Physick and Crystal Tears Guide.
Parrying
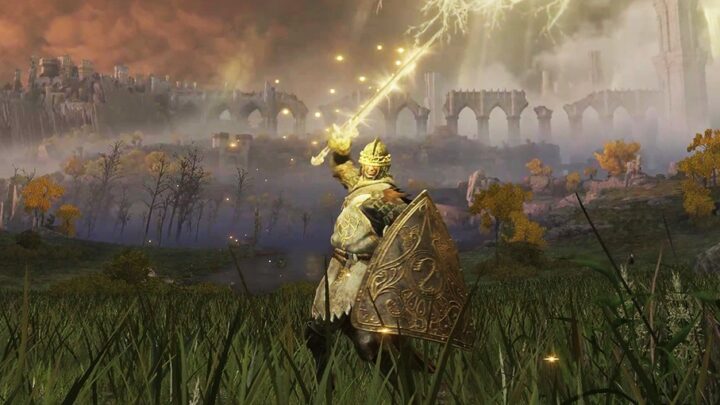
A parry is a type of Skill in Elden Ring that allows you to completely avoid the damage from an incoming attack and break (or severely weaken) the posture of the parried enemy, leaving them open to a critical hit and giving you a massive opening for a follow-up while they get back up.
That sounds great, so what’s the catch? You have an extremely small window of time to parry an attack, and some attacks aren’t parriable. If you get into the details, Parry times are measured and balanced in terms of number of frames, as in FPS.
You can equip parry Skills as Ashes of War to Small and Medium Shields, as well as some Daggers and other small weapons. There are a few variants that offer additional benefits like being able to absorb or deflect spells, have shorter start-up times, or longer active durations.
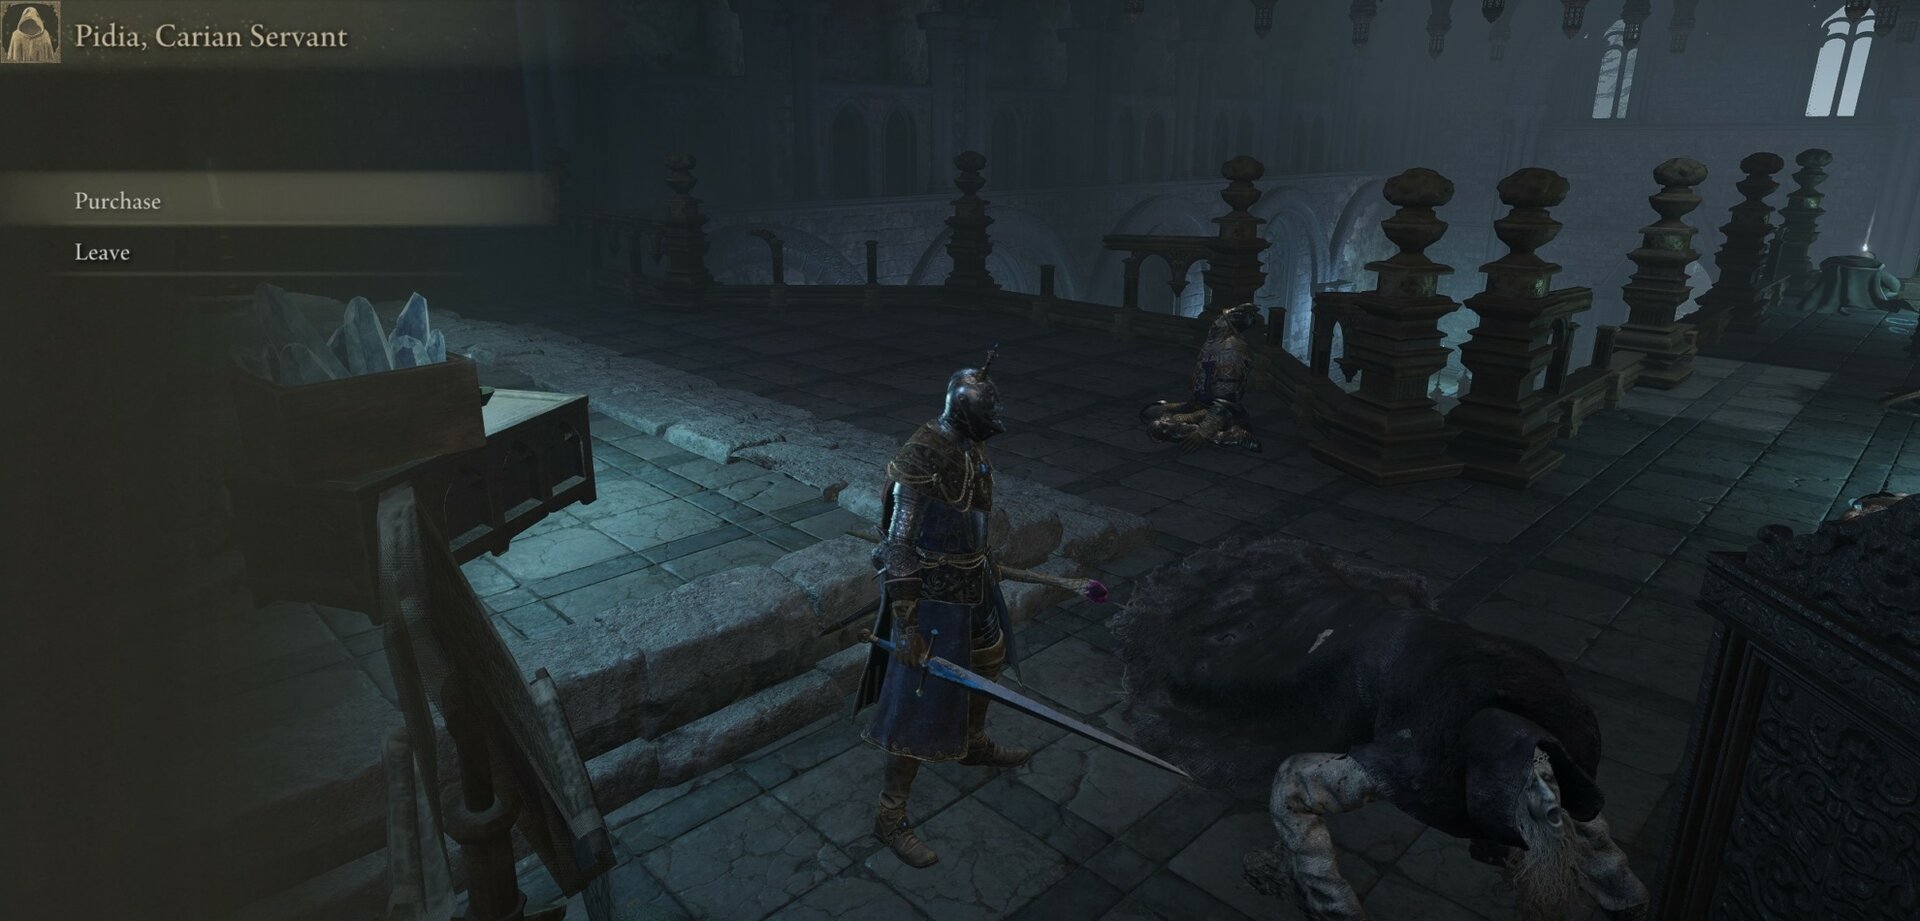
The stats of a parry varies based on the type of armament you equip it to, with Small Shields being the best. I’m not an expert on parrying at the time of writing, but as I understand it, Carian Retaliation is the best parry Skill.
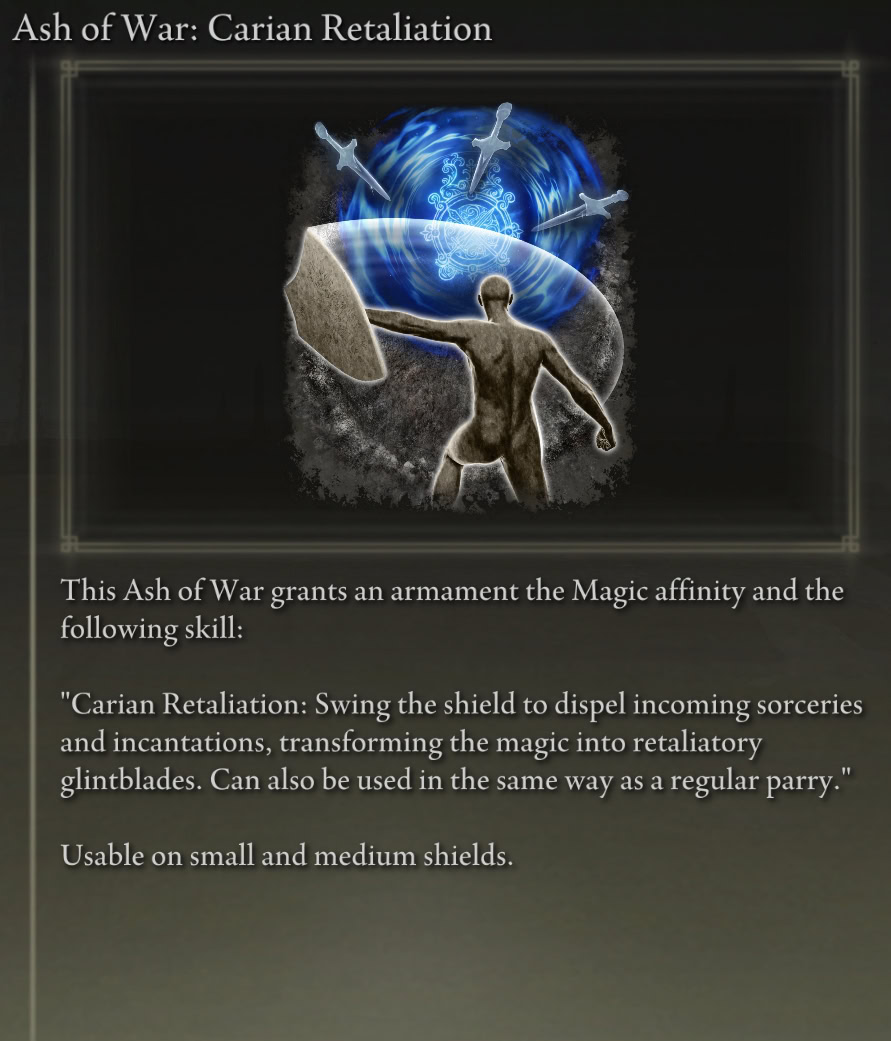
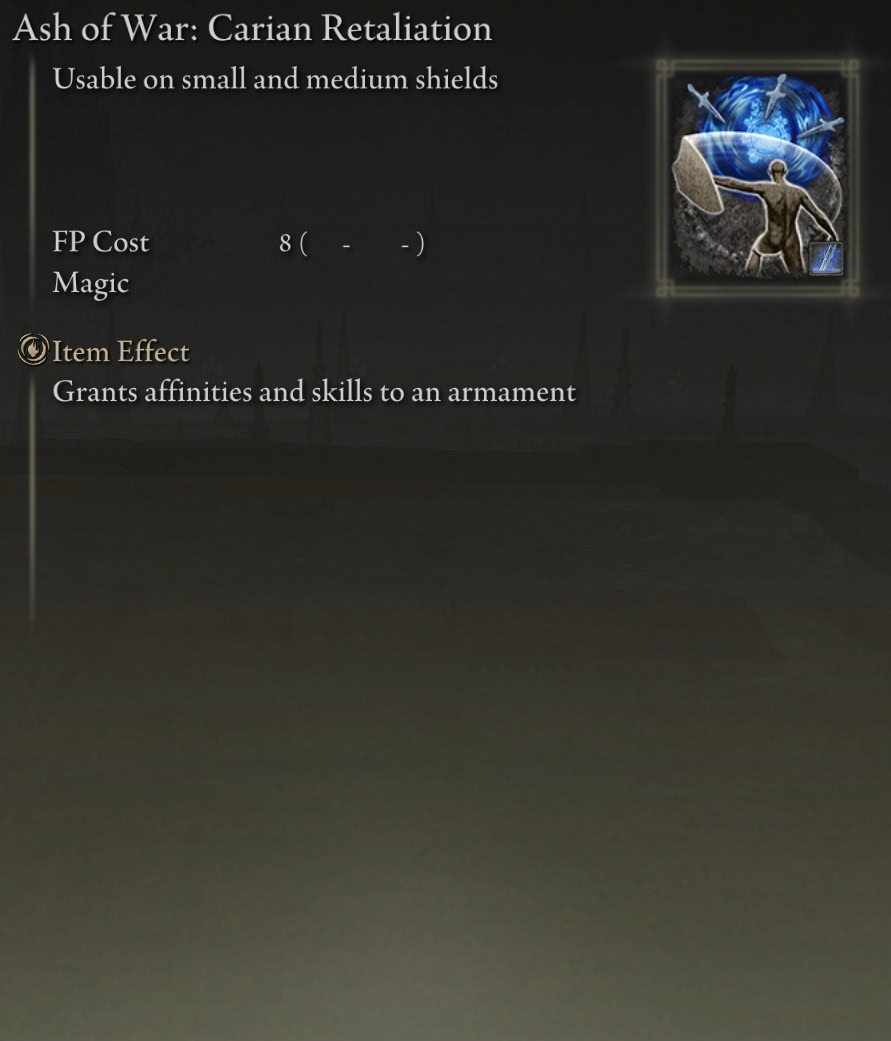
You can purchase from Pidia, Carian Servant, for 3,000 Runes at Caria Manor at Liurnia of the Lakes. Check out our Caria Manor Item Locations Guide for more information.
The Rift Shield is probably the best one to equip Carian Retaliation to because it boosts your Focus by 40, but take this particular recommendation with a grain of salt.
As far as timing goes, you’ll want to parry as soon as you see them pull their arm back to wind up for their grab. I suggest not doing this when you’re sleepy as your reaction time will be slower.
Weapons
There are 4 weapons scattered across the Abyssal Forest and Midra’s Manse.
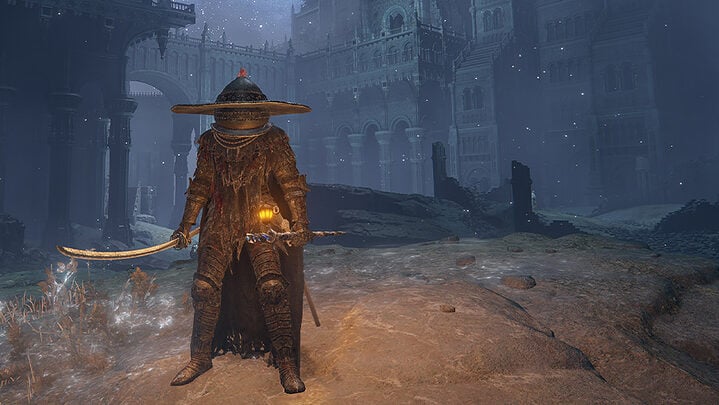
Nanaya’s Torch
Nanaya’s Torch is a disgusting implement that allows you to cast an eerie yellow light and deal a decent chunk of damage with each hit. The Unique Skill: Feeble Lord’s Frenzied Flame allows you to precisely control your Madness buildup.

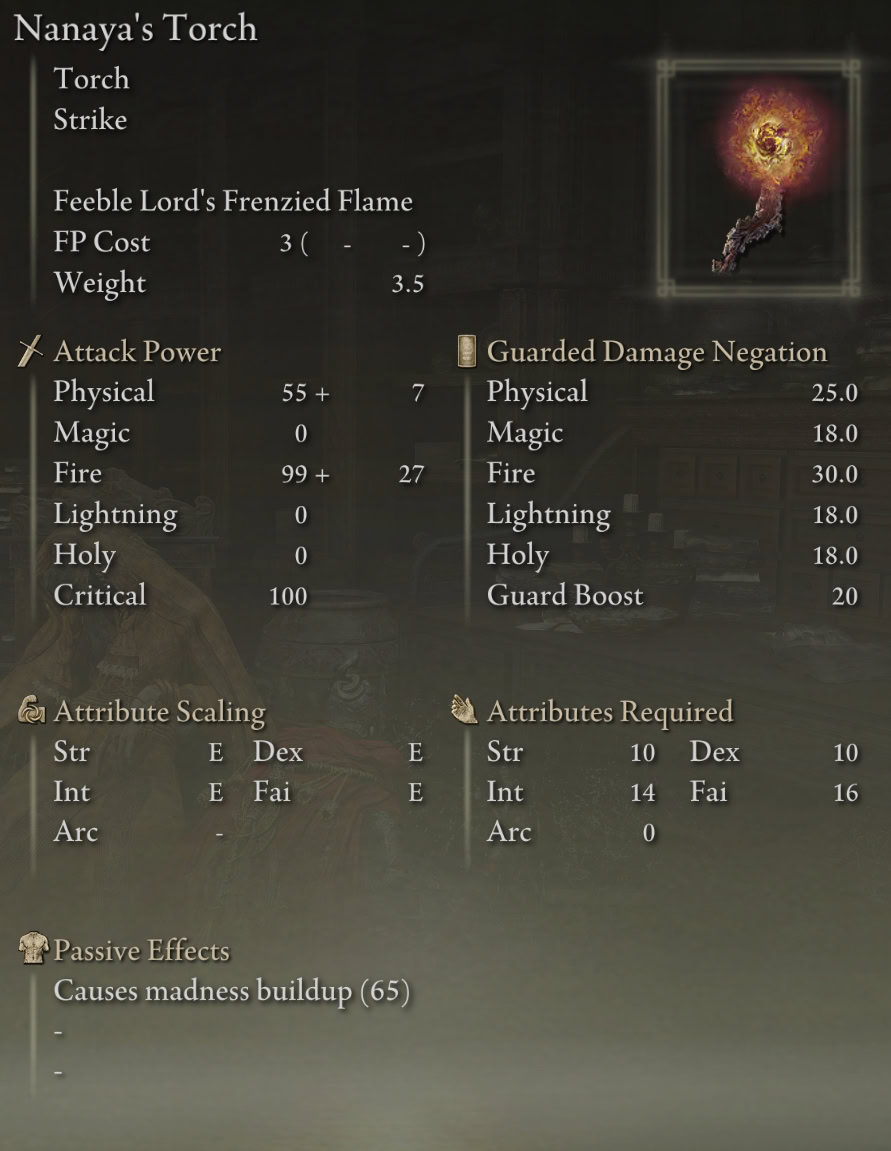
The location of Nanaya’s Torch is Nanaya business. You’ll only get that information if you can pry it from her cold, dead hands.

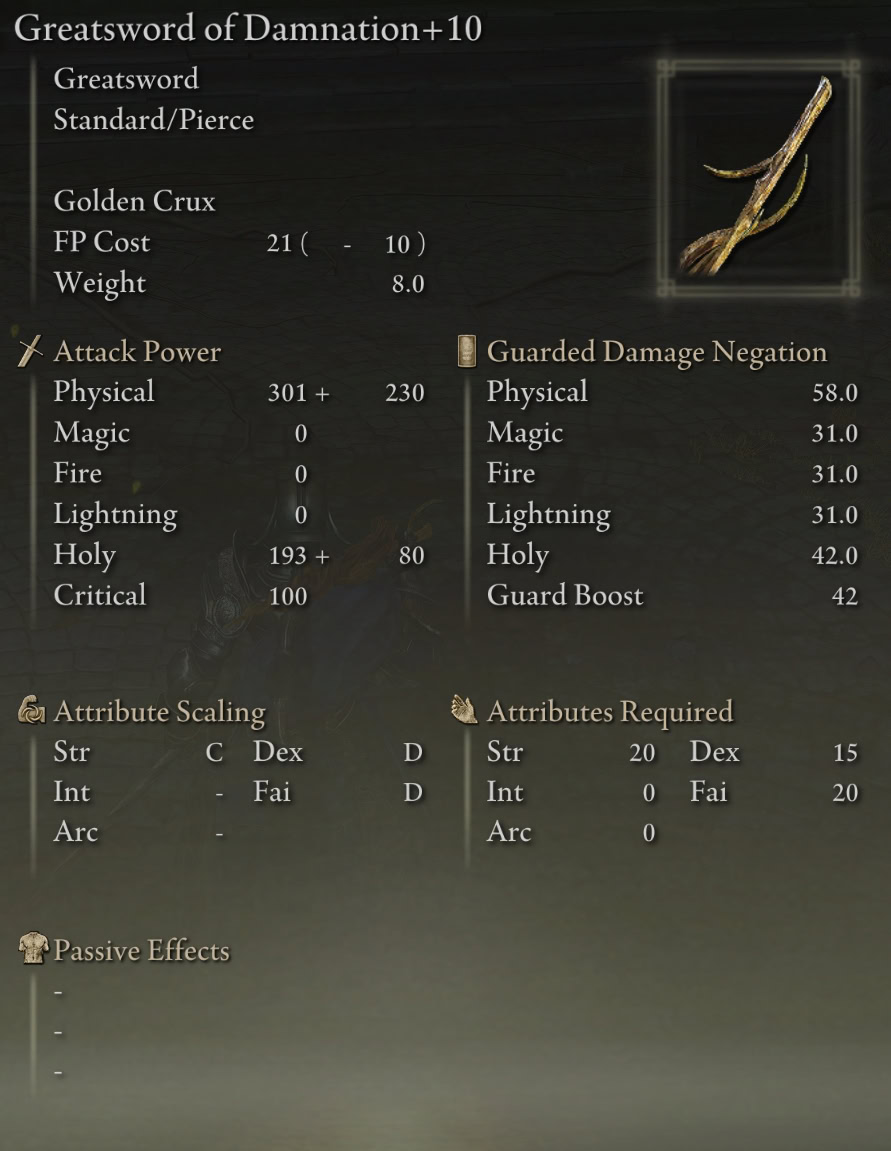
Greatsword of Damnation
The Greatsword of Damnation is a spectacular weapon that’s both powerful and fun to use. It scales with Faith in addition to Dexterity and Strength. Its Unique Skill: Golden Crux allows you to use the leaping stab that releases golden barbs outwards.
Unfortunately, it doesn’t seem to catch enemies like it says it can in the description and as Midra will do to you. The lunge version of the attack is also not present on this weapon, though you can get the same effect on the Ancient Meteoric Ore Blade with different visuals.
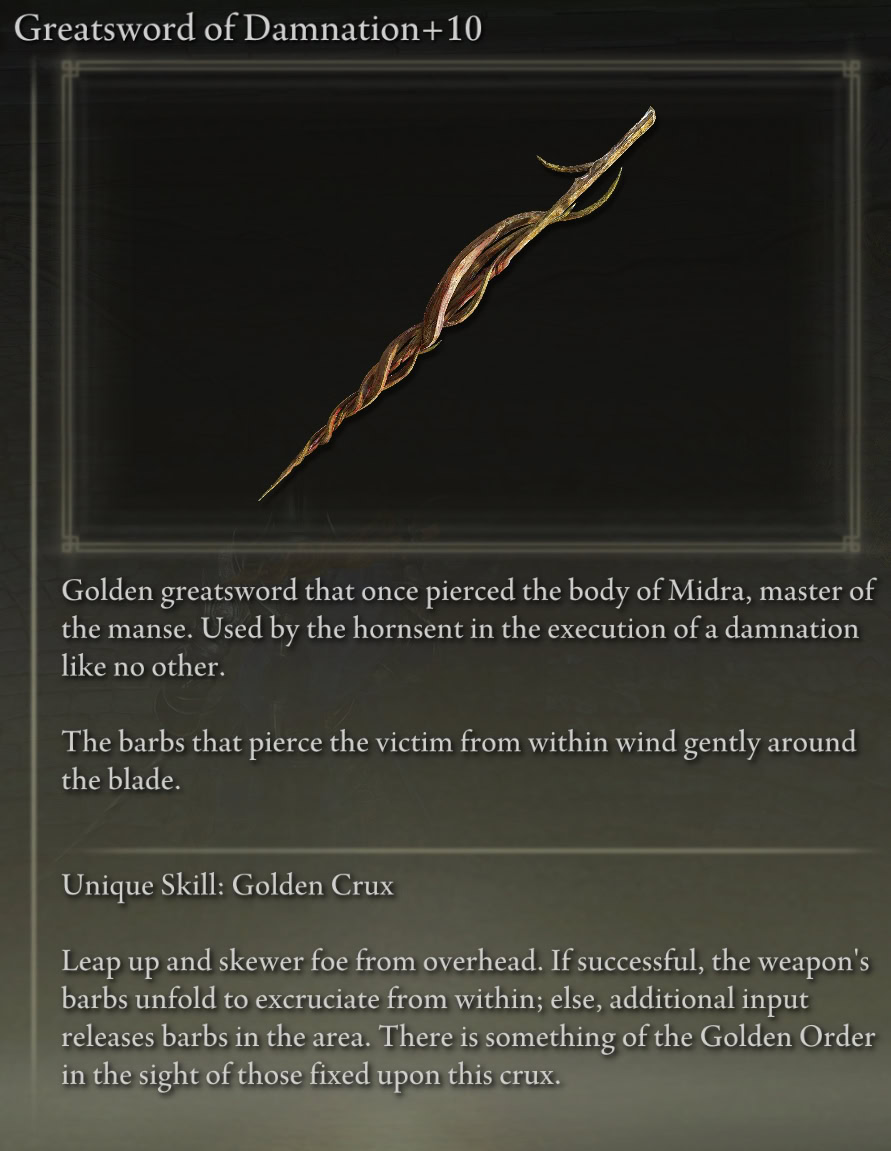
You can exchange the Remembrance of the Lord of Frenzied Flame for the Greatsword of Damnation with Finger Reader Enia at the Roundtable Hold.
Barbed Staff-Spear
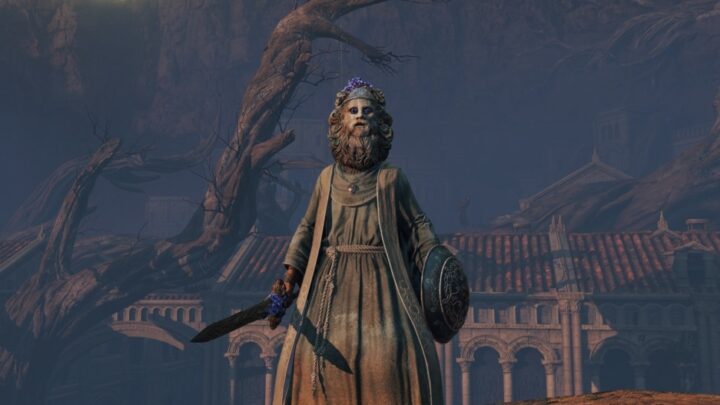
The Barbed Staff-Spear is another powerful implement of the Hornsent Inquisition.
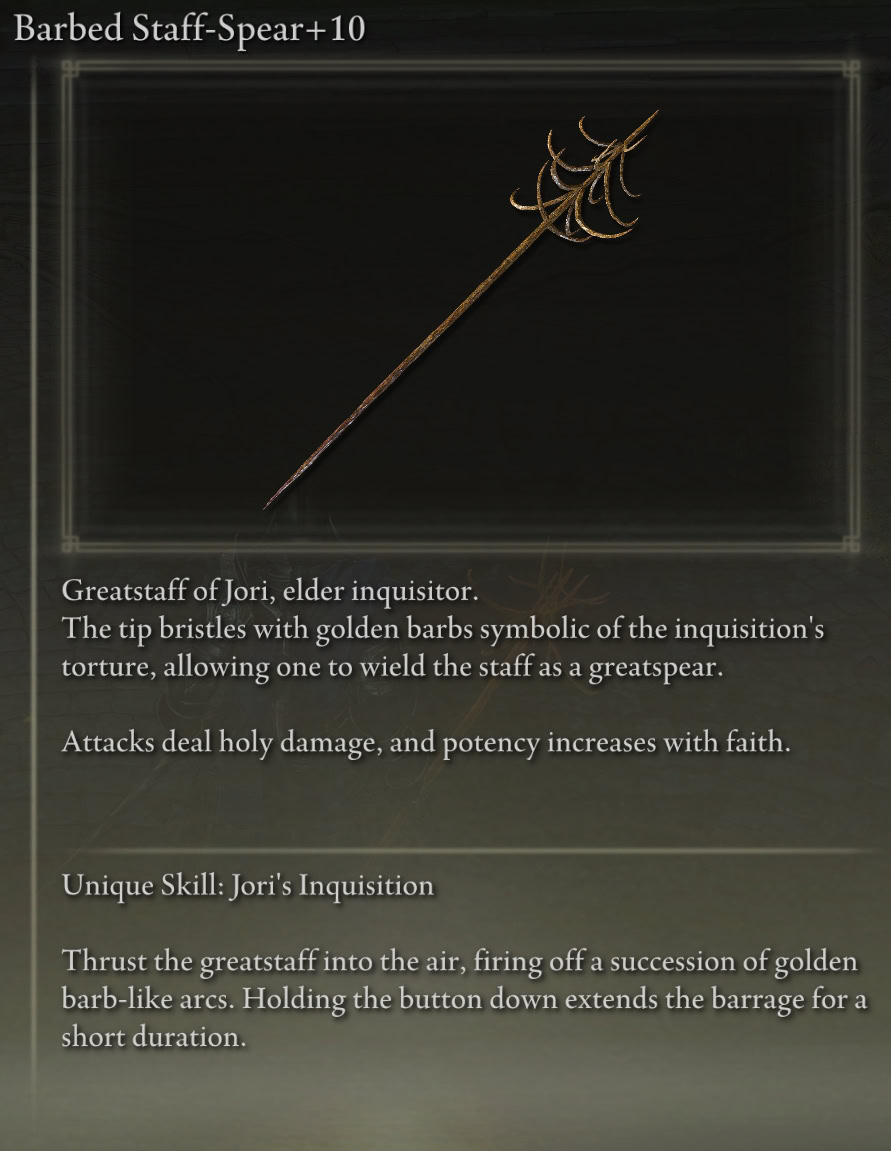
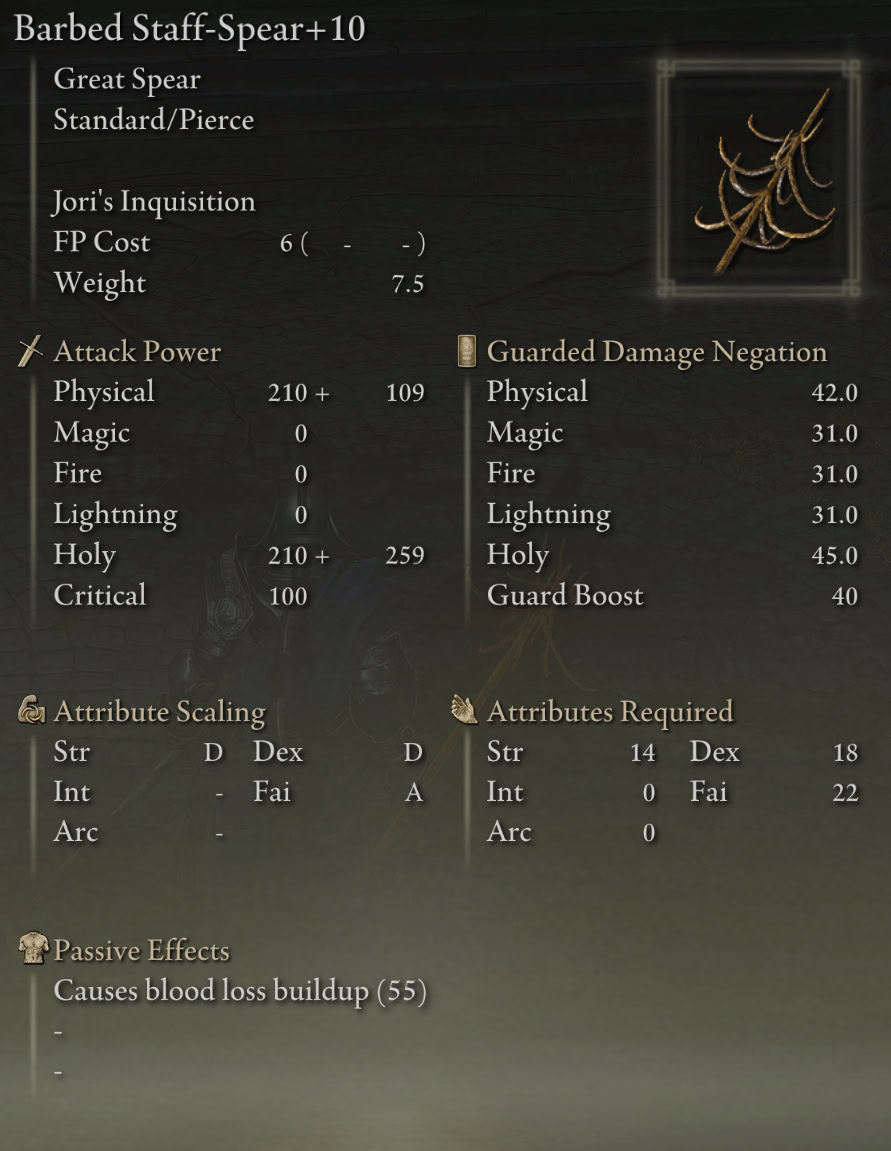
You receive the Barbed Staff-Spear for defeating Jori, Elder Inquisitor, guarding the entrance to the Abyssal Forest.
Frenzyflame Perfume Bottle
Somehow, they managed to turn the Flame of Frenzy into a powder. It has similar scaling as the Frenzied Flame Seal, though with an emphasis on Dexterity rather than Faith.
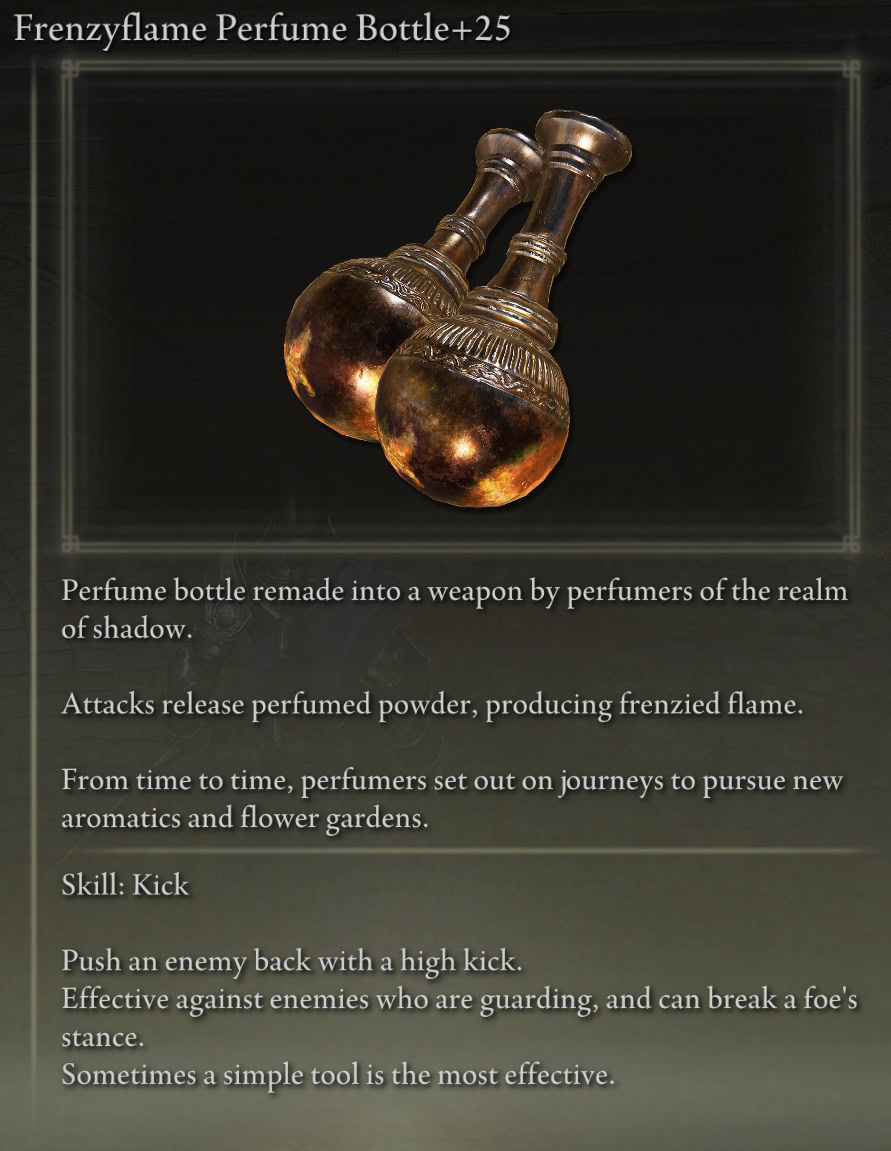
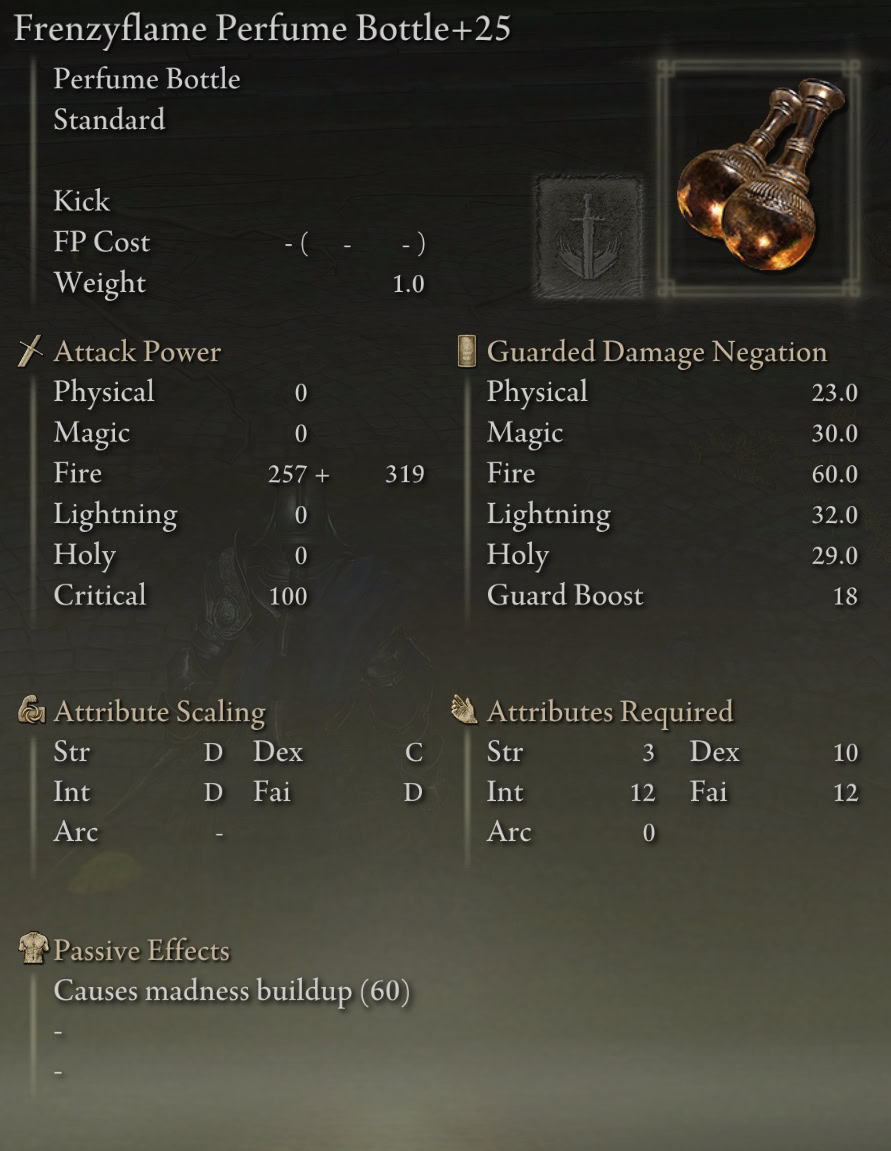
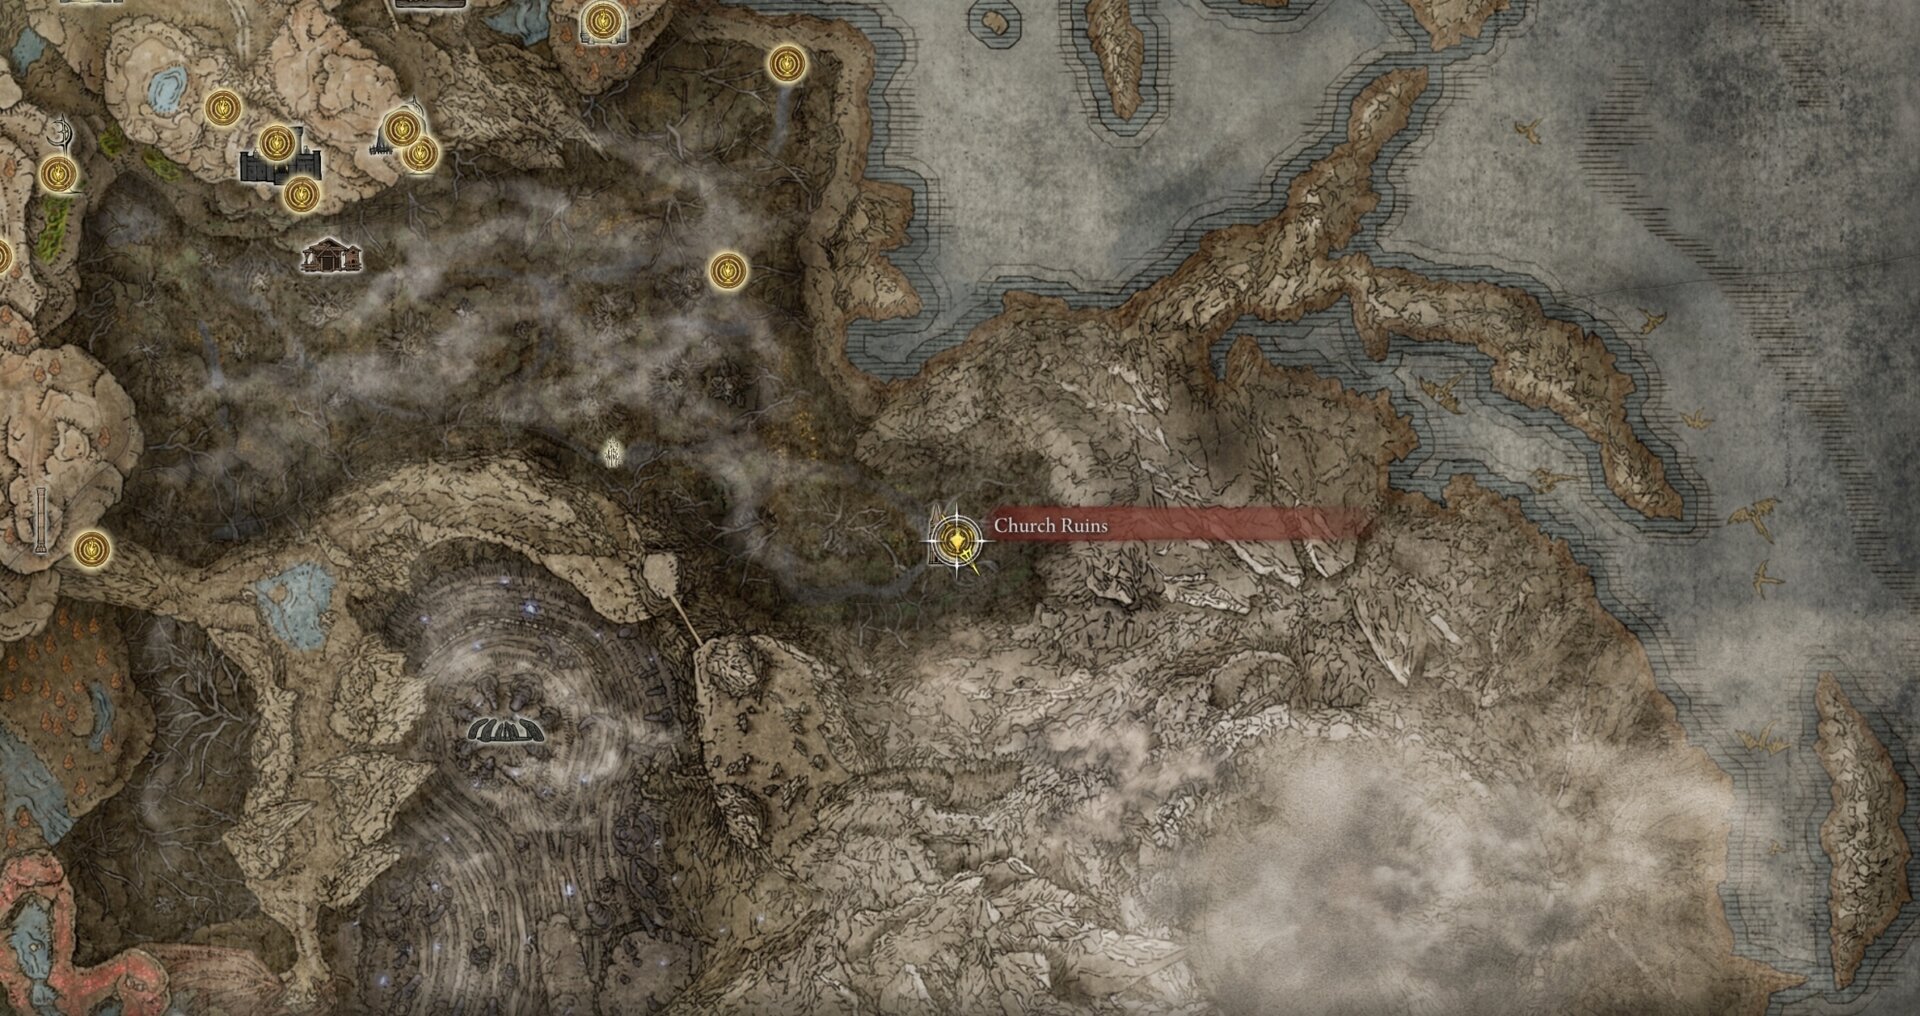
You can loot the Frenzyflame Perfume Bottle in one of the corners of the Abandoned Church, along with a couple of Scadutree Fragments at the empty altar.
Talismans
There’s a single powerful Talisman in the Abyssal Forest.
Aged One’s Exultation
The Aged One’s Exultation boosts all damage dealt by 20% for 30s whenever Madness is triggered nearby.
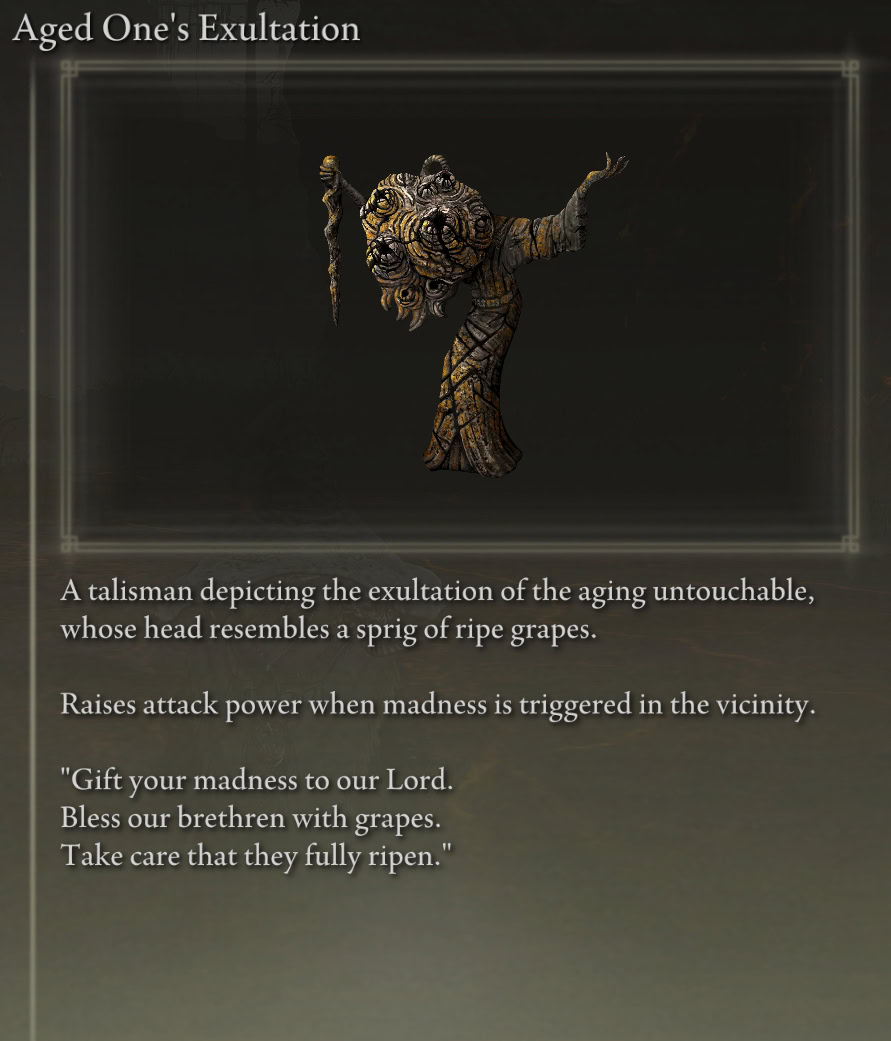
You receive the Aged One’s Exultation for defeating this specific Aging Untouchable in the Abyssal Forest. It’s the closest one to the Abandoned Church.
Incantations
There’s only 1 Incantation, and no Sorceries, located within the Abyssal Forest and Midra’s Manse.
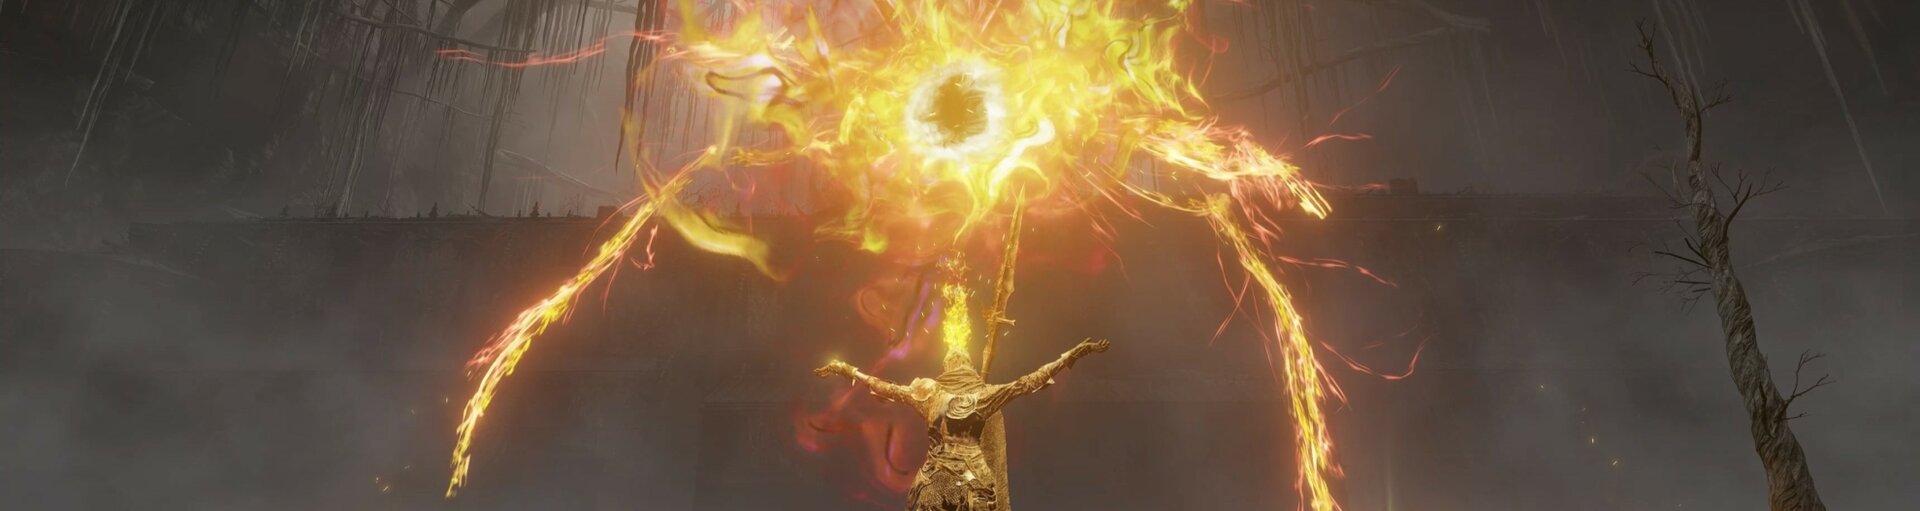
Midra’s Flame of Frenzy
Midra’s Flame of Frenzy is more of a spectacle than anything else. It doesn’t deal as much damage as Unendurable Frenzy, but causes a lot more Madness buildup, so it’s useful against other Tarnished in that regard and to trigger Aged One’s Exultation.
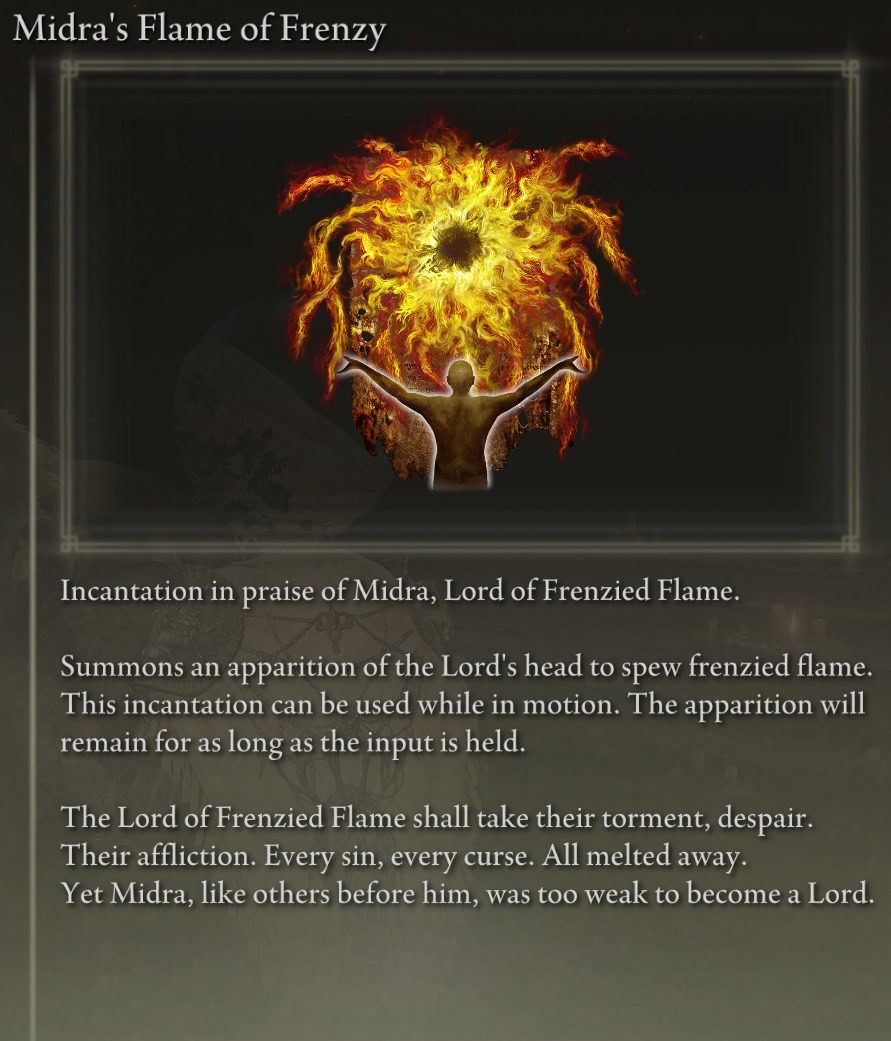
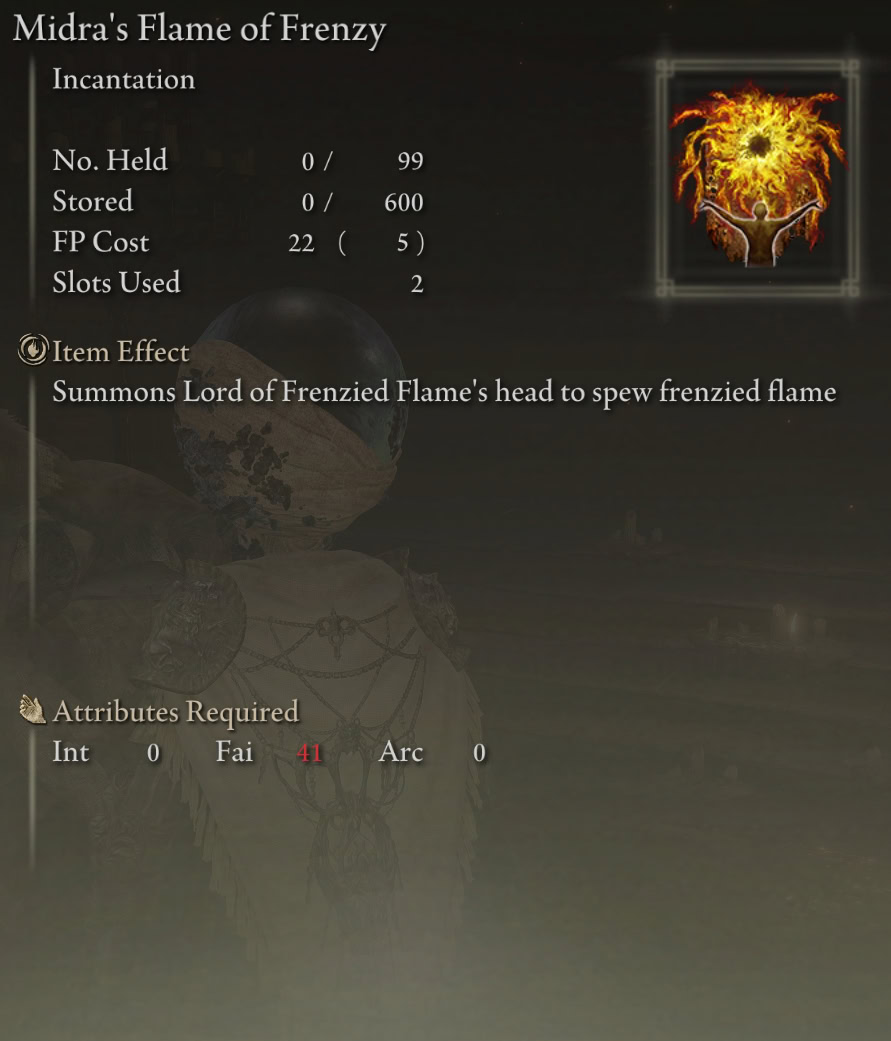
You can exchange the Remembrance of the Lord of Frenzied Flame for Midra’s Flame of Frenzy with Finger Reader Enia at the Roundtable Hold.
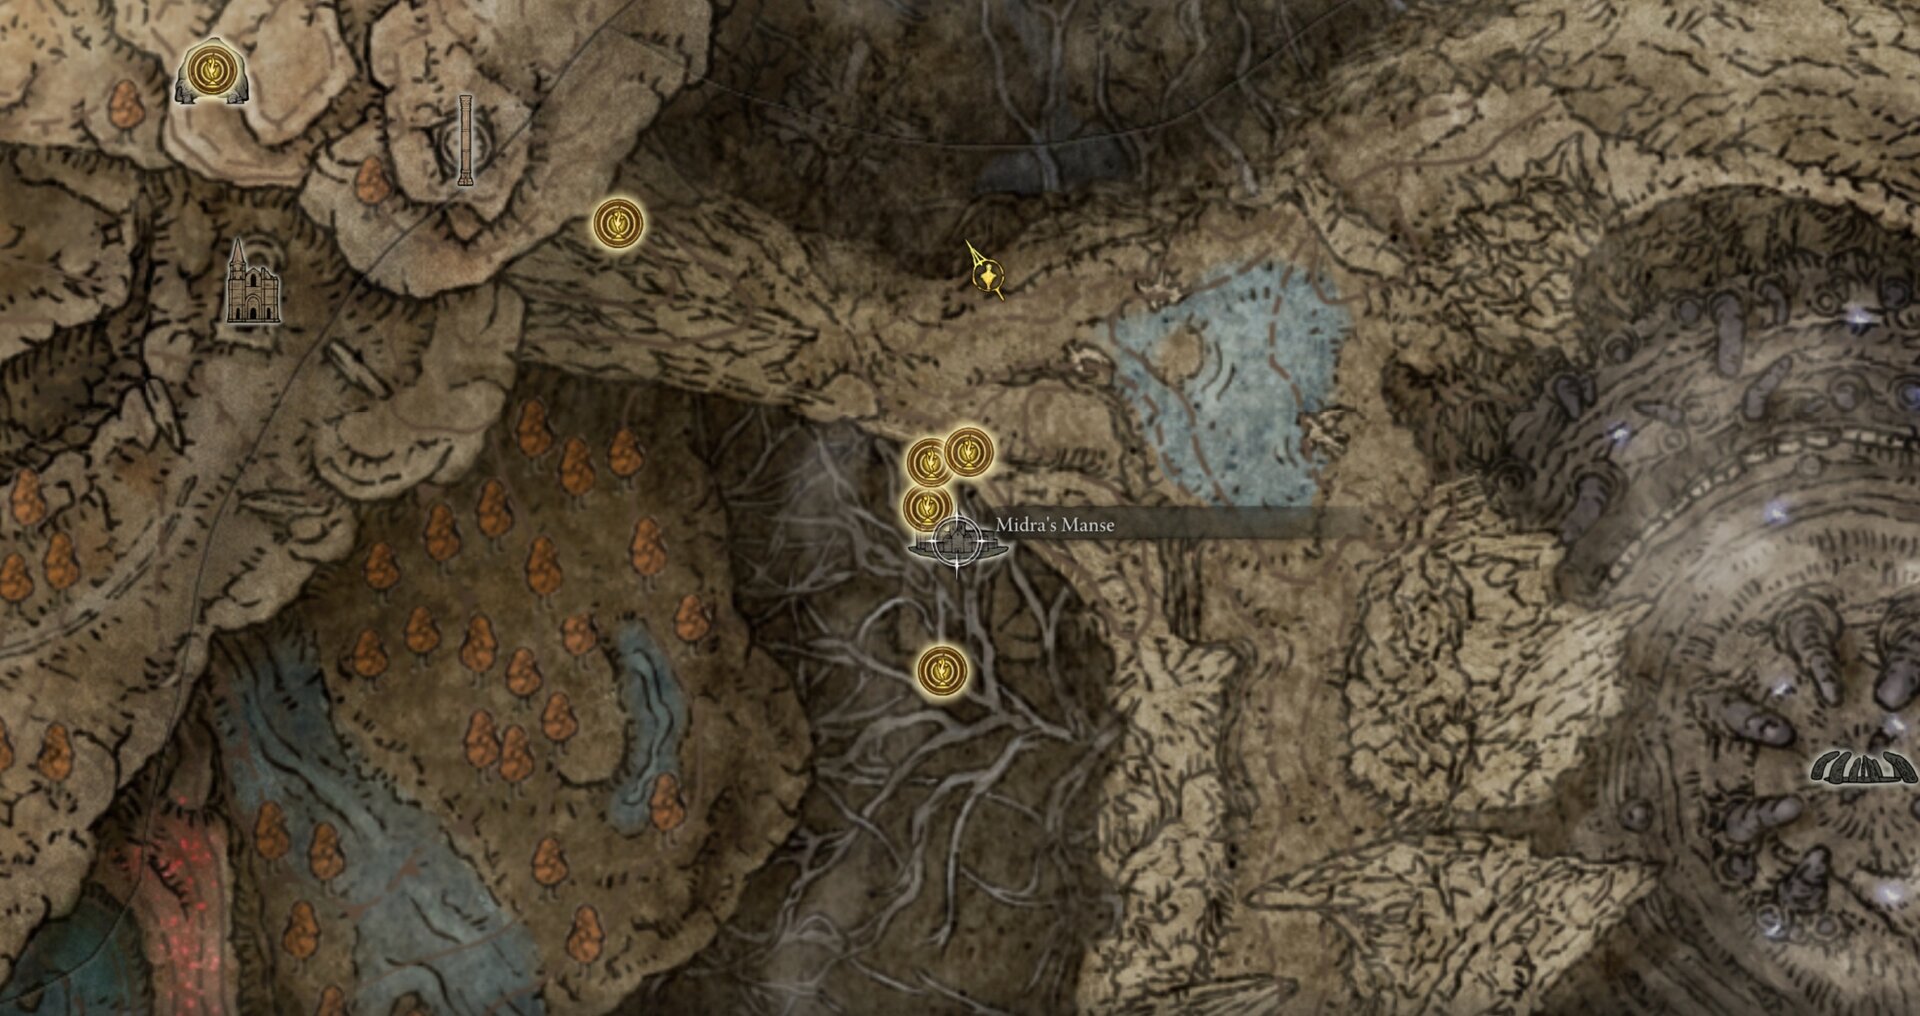
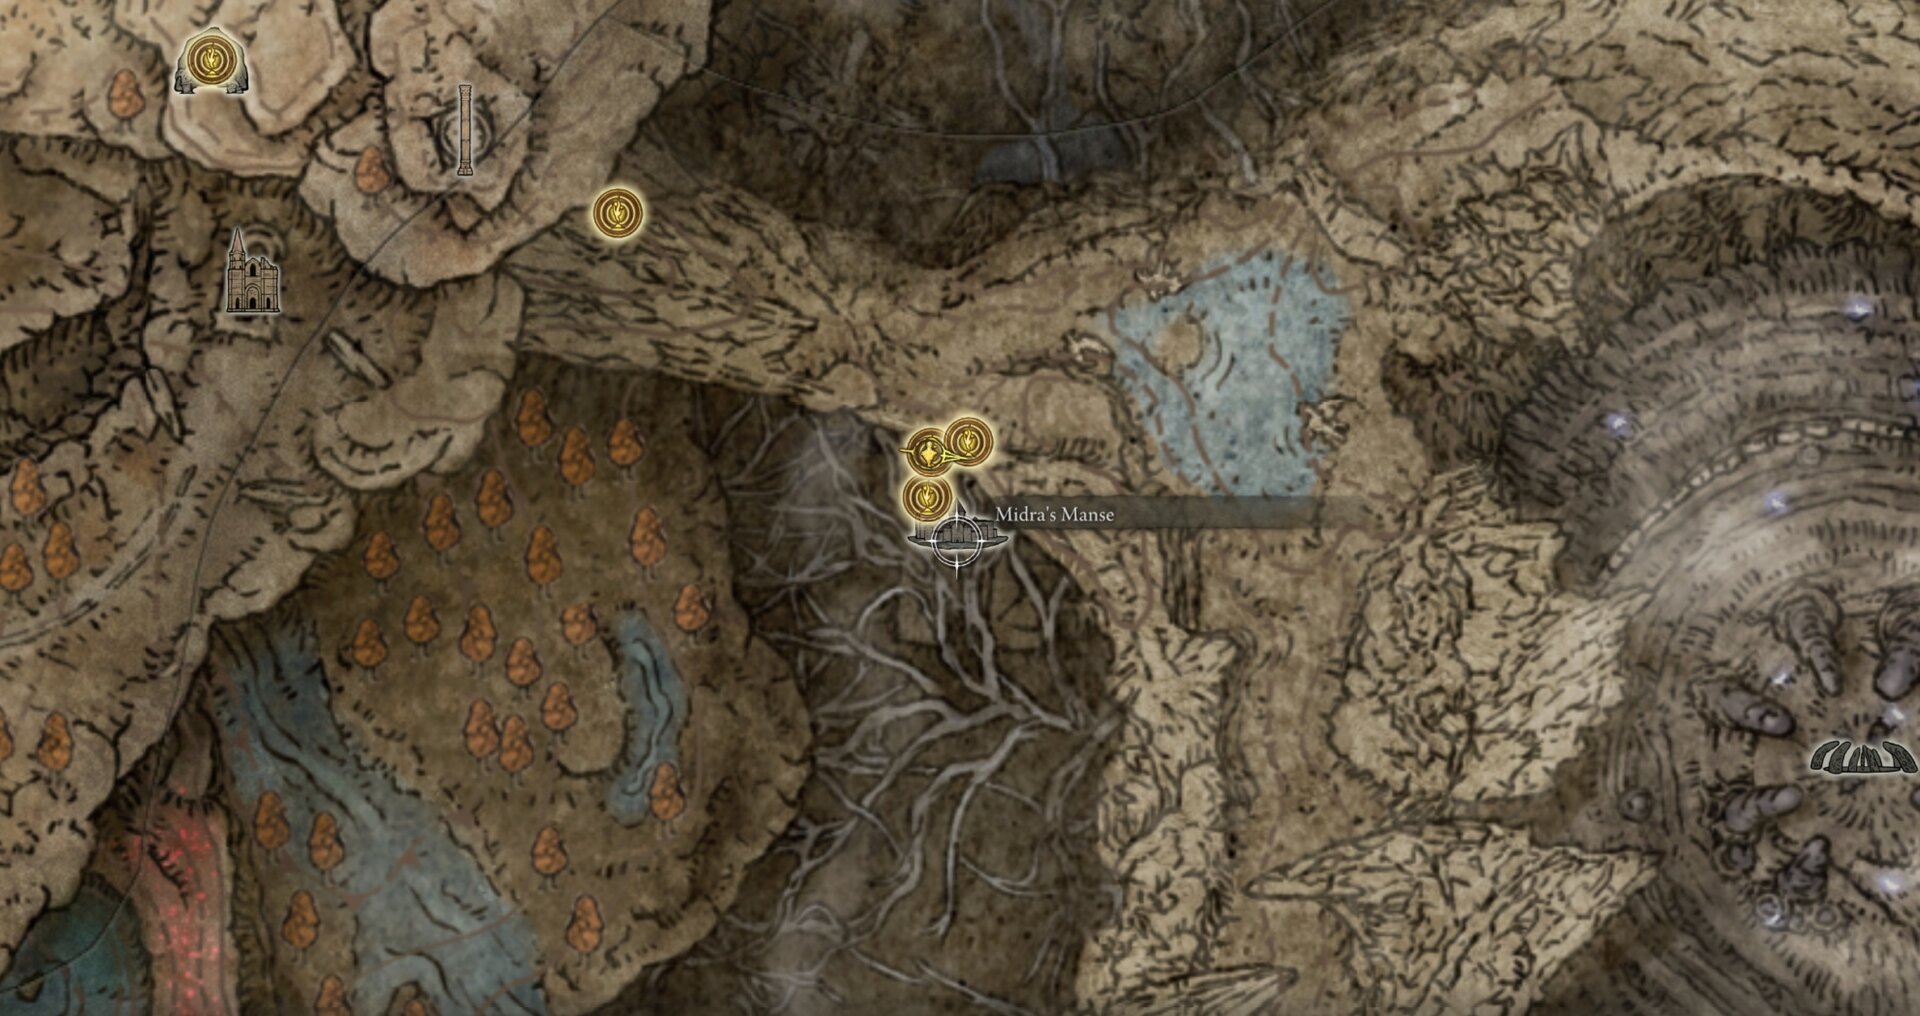
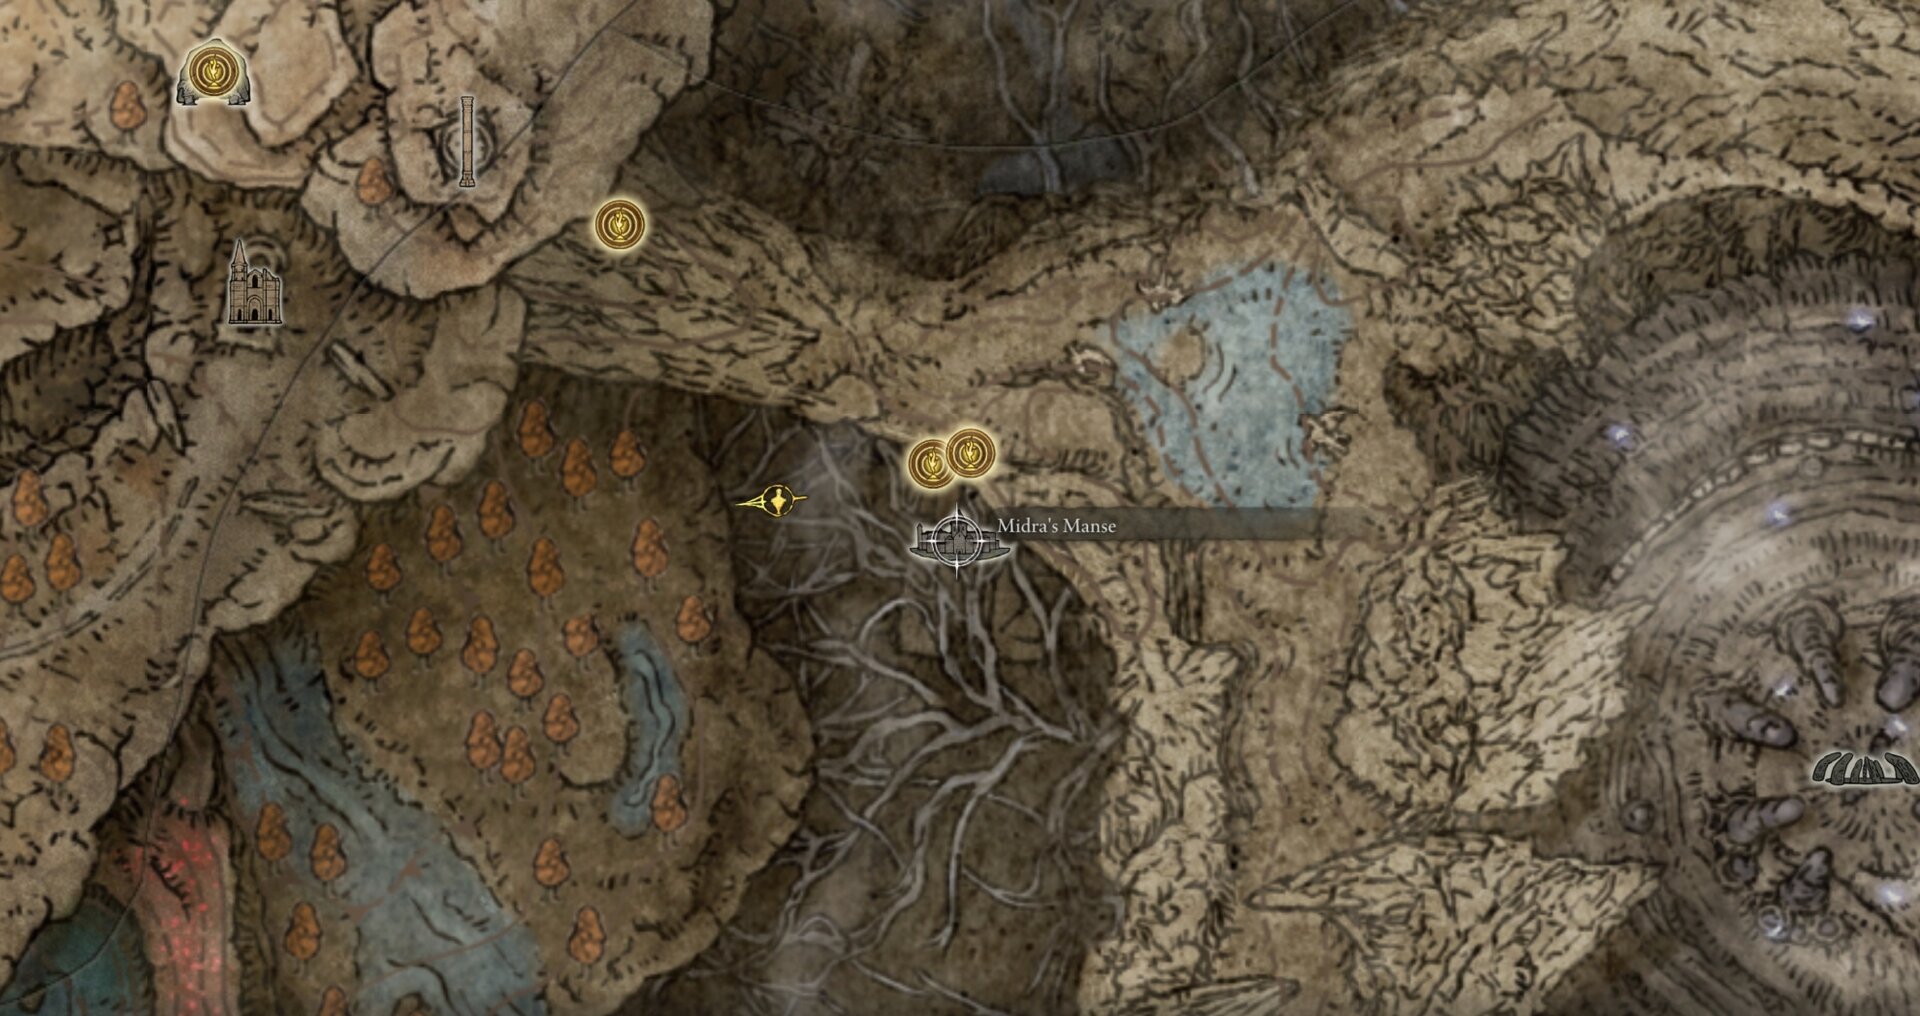
Scadutree Fragments
You can find 3 Scadutree Fragments at 2 locations in the Abyssal Woods.
Abandoned Church in the Abyssal Woods (x2)
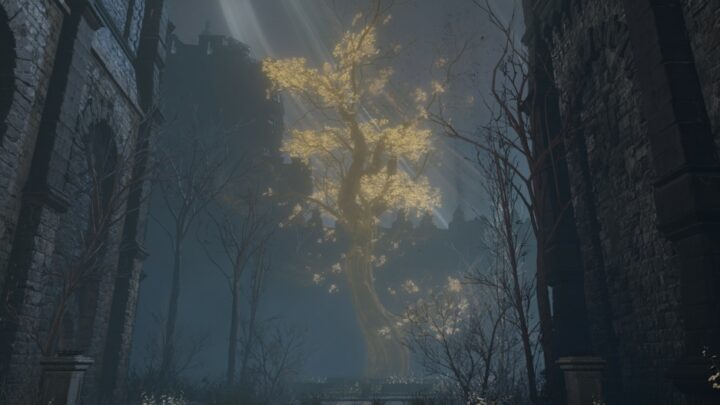
At the eastern edge of the Abyssal Ruins, there is an Abandoned Church. You’ll find 2 Scadutree Fragments at the base of the stolen (or disintegrated) Marika statue.
Northern Woods
At the northern edge of the Abyssal Woods, north of the Site of Grace of the same name, you’ll find a Scadutree Fragment at the base of a tree near a gaggle of Hornsent Inquisitors.
Revered Spirit Ashes
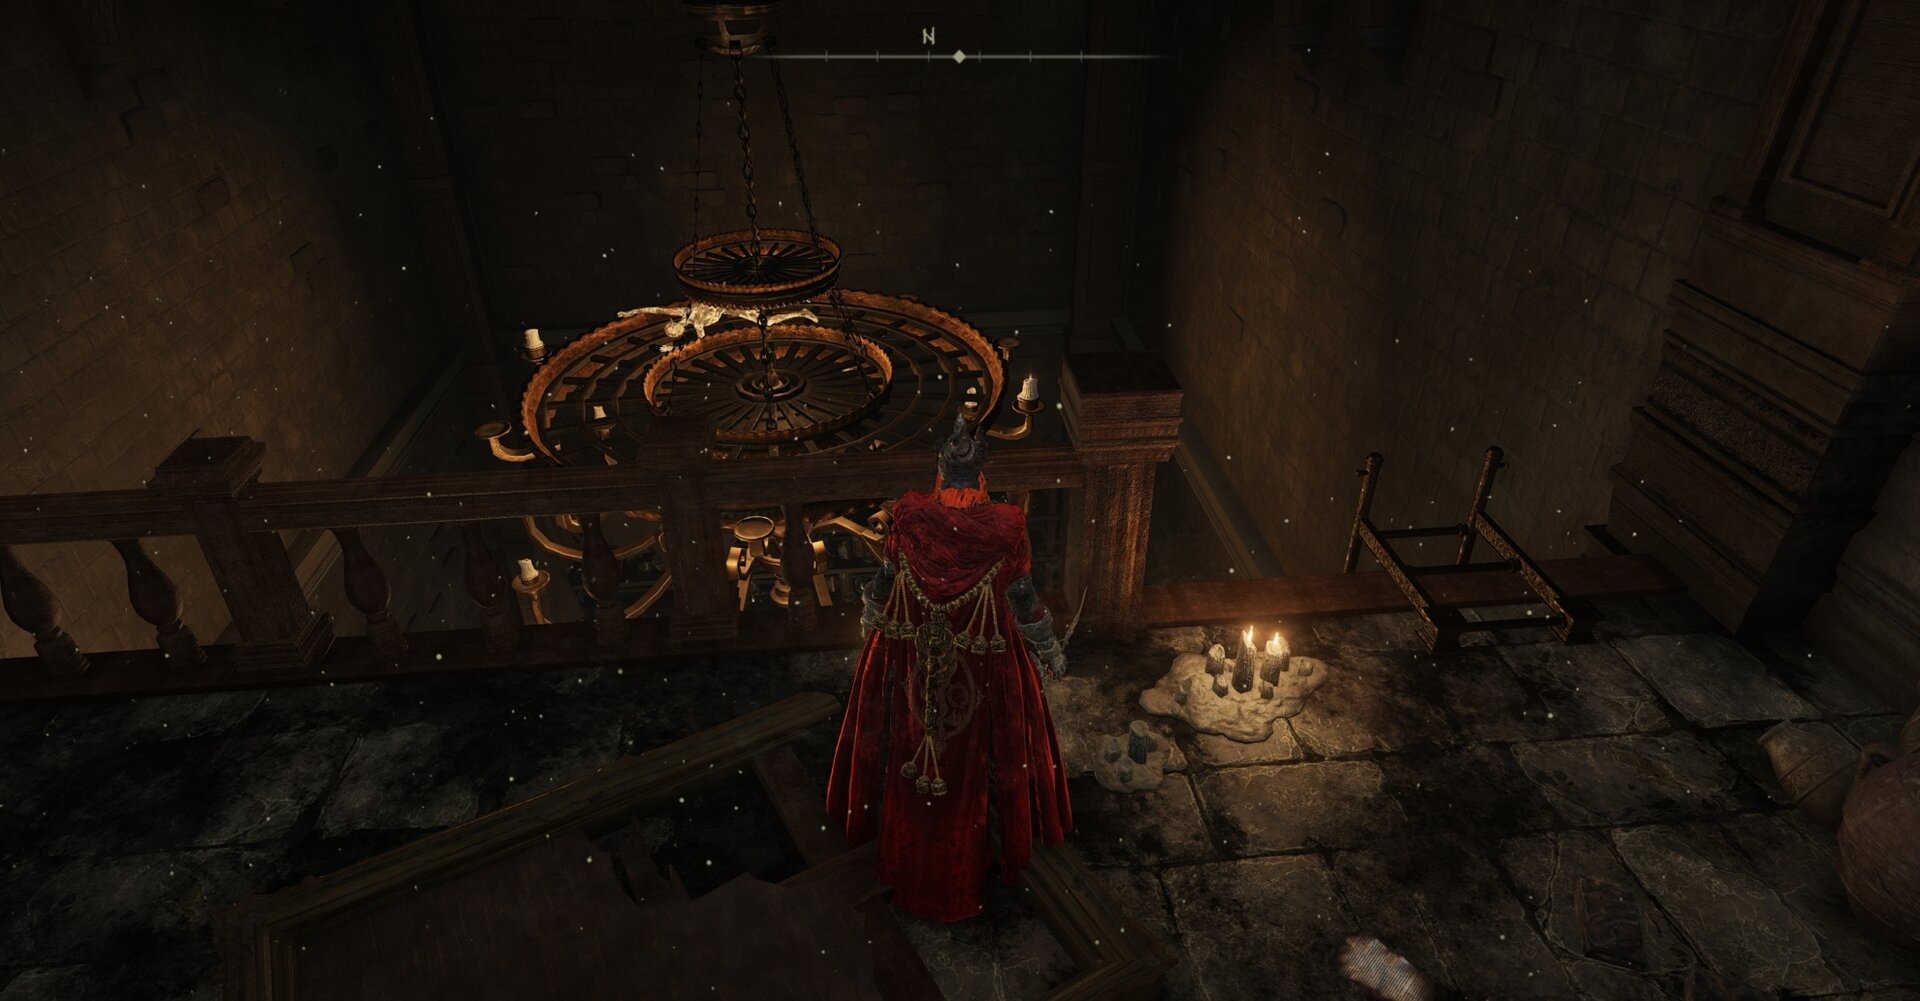
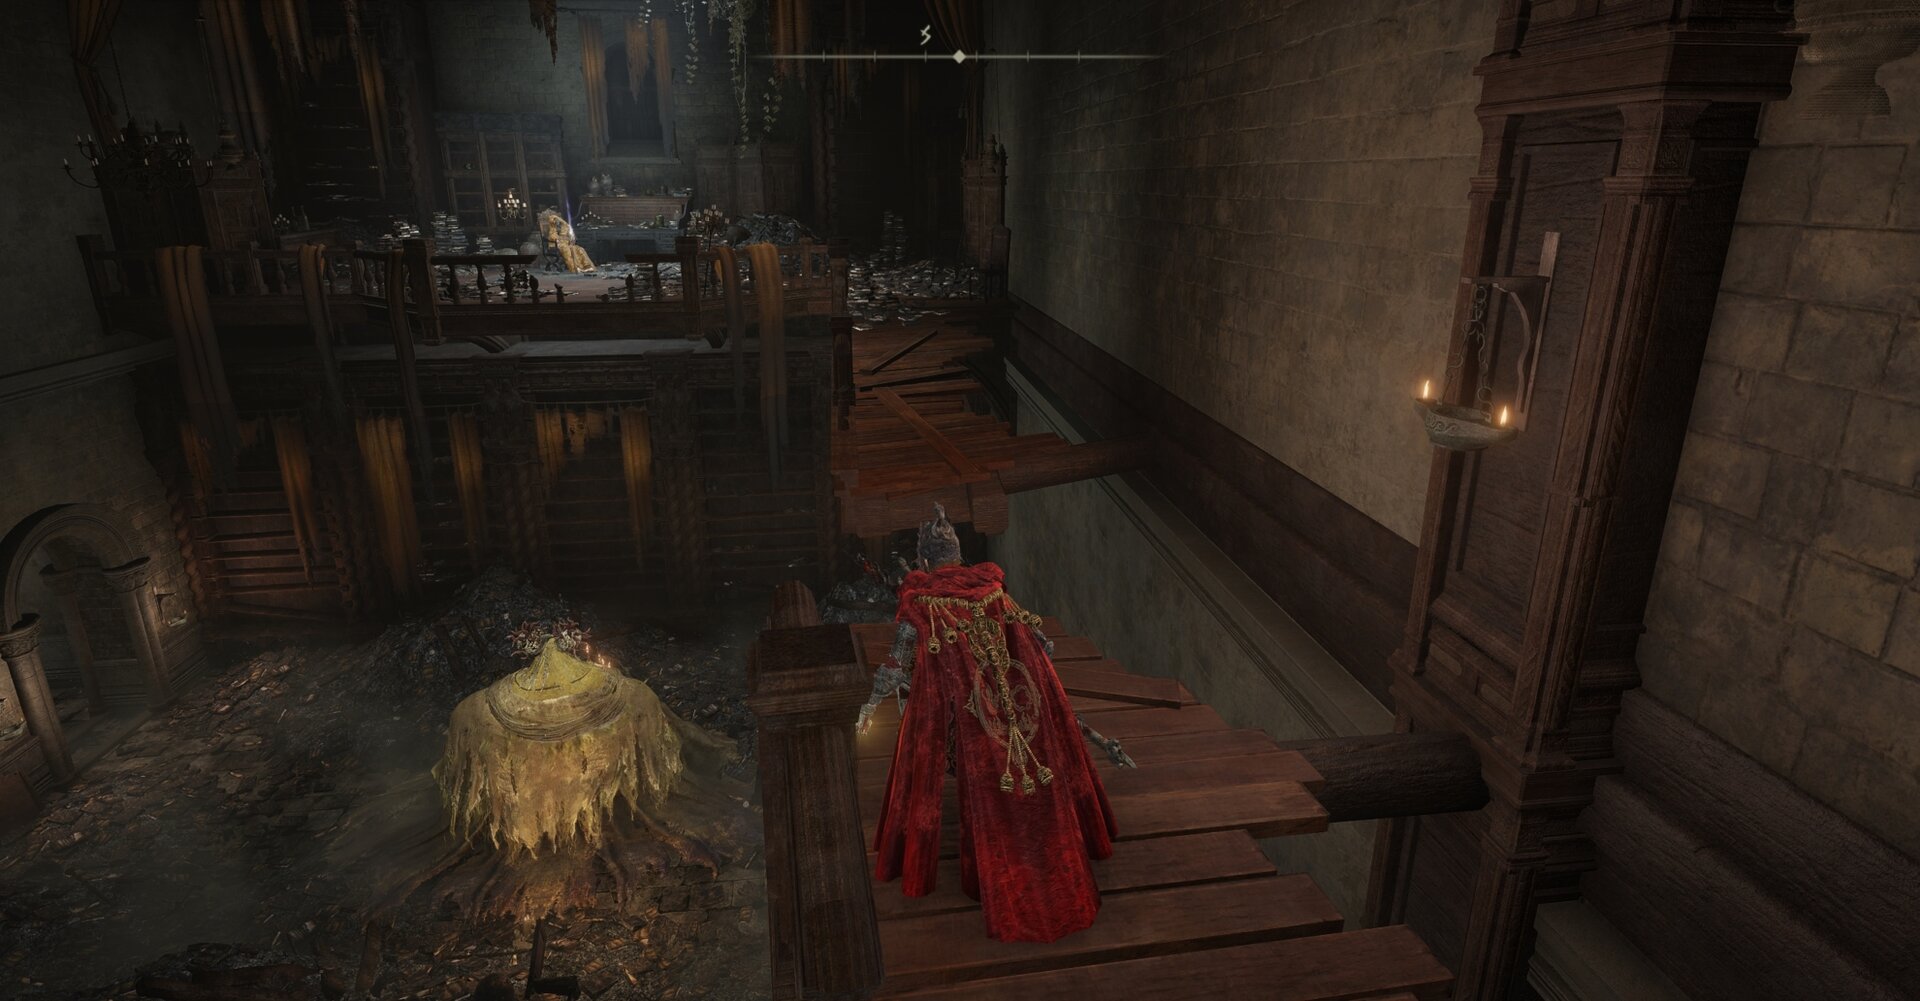
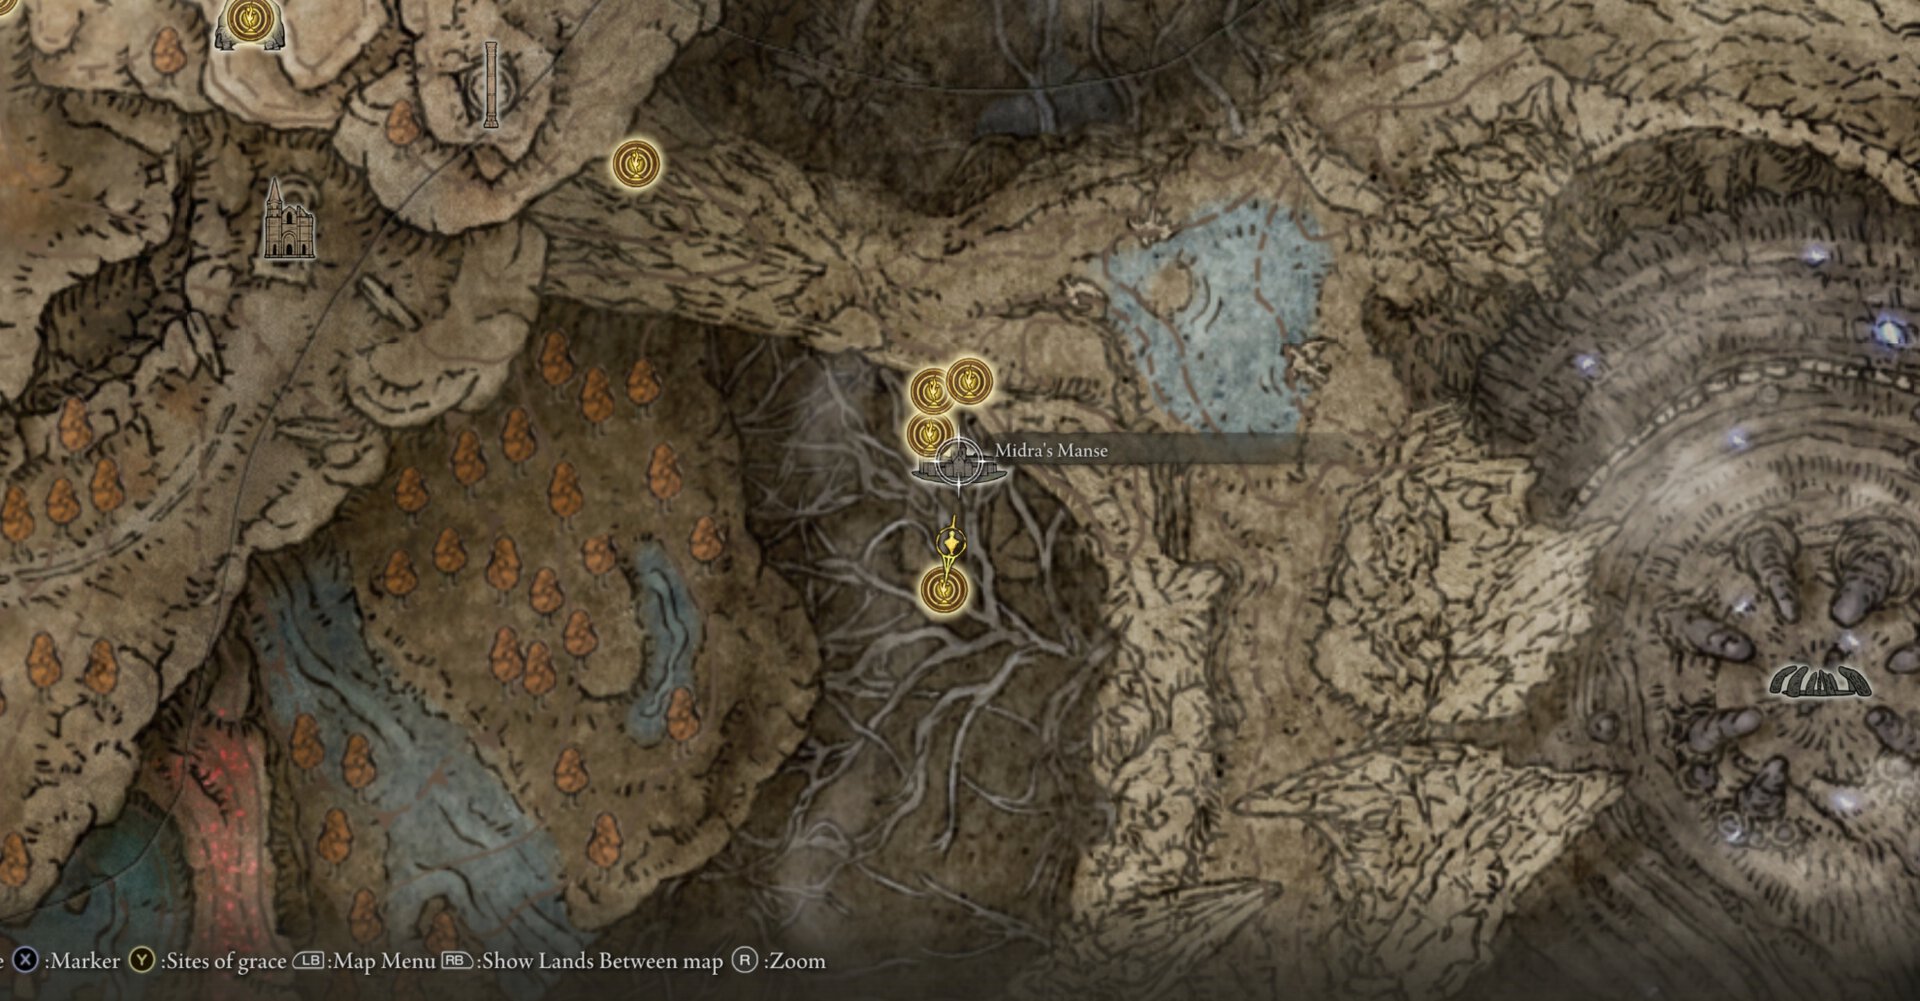
You can find 2 Revered Spirit Ashes inside Midra’s Manse.
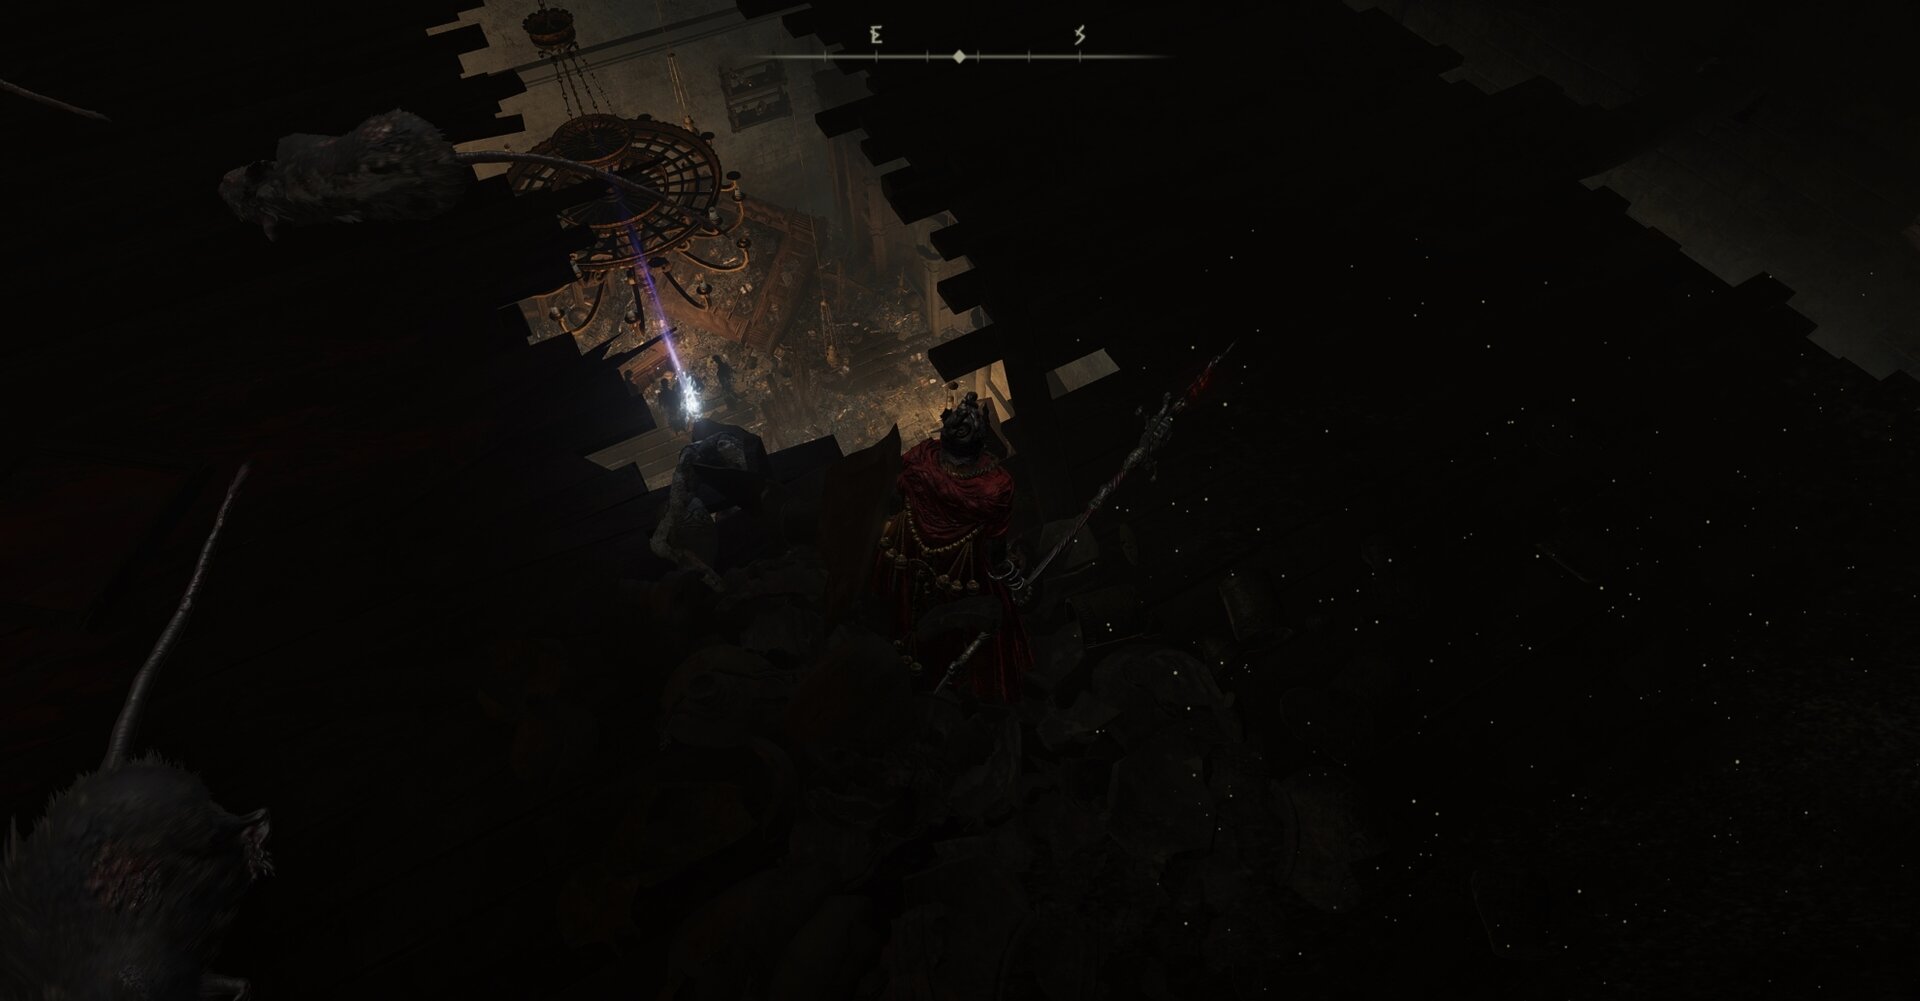
Chandelier in Portrait Room
There’s a corpse on a chandelier with a “Revered” Spirit Ash trying to get a better view of the beautiful portrait of Midra and Nanaya.
Fatty Inquisitor
Defeating the morbidly obese Inquisitor performing his duties near Nanaya will reward you with a Revered Spirit Ash.
Cookbooks
There are 3 Cookbooks located throughout the Abyssal Woods and Midra’s Manse. They’re all written by the Mad Craftsman and contain recipes to craft items related to the Flame of Frenzy.
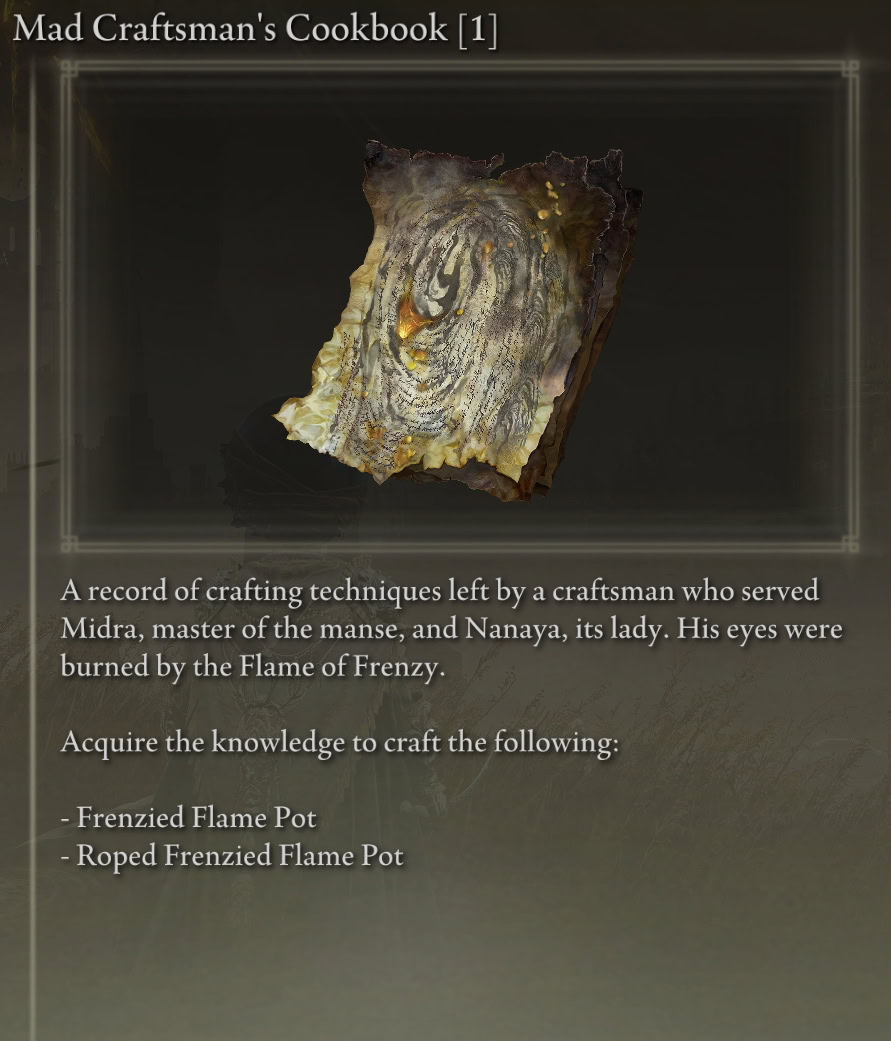
Mad Craftsman’s Cookbook 1
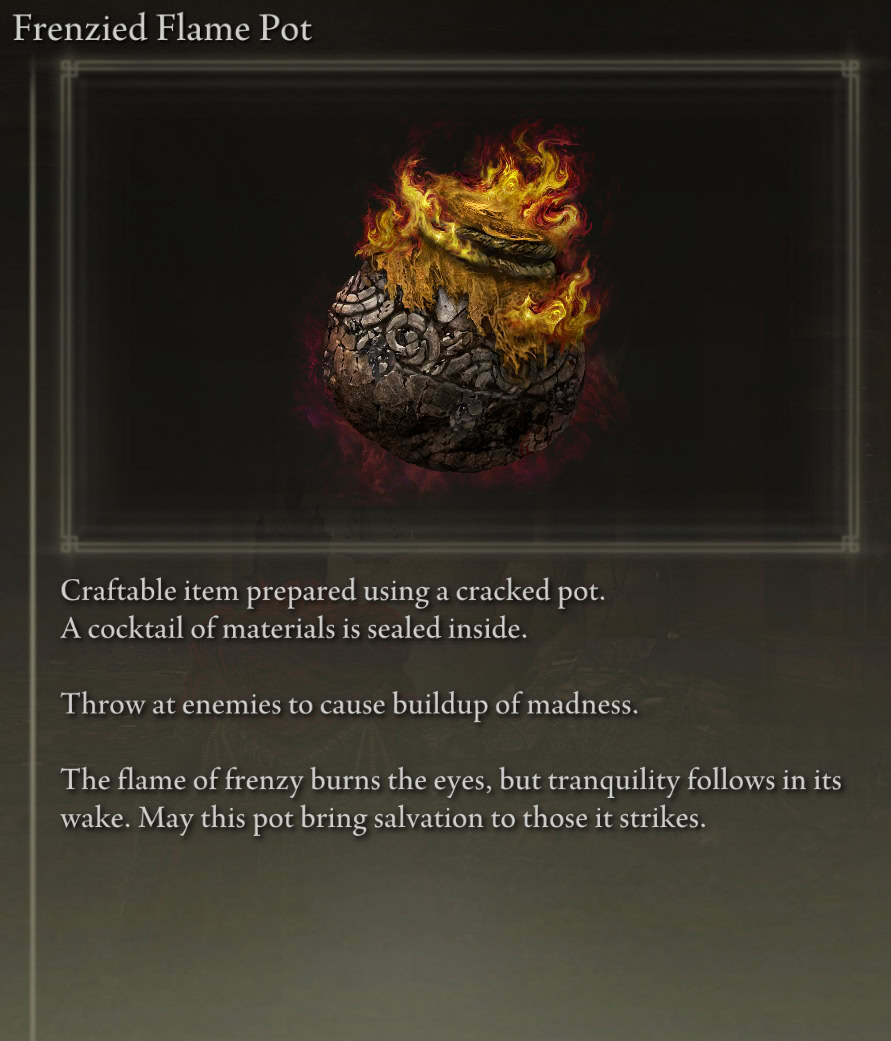
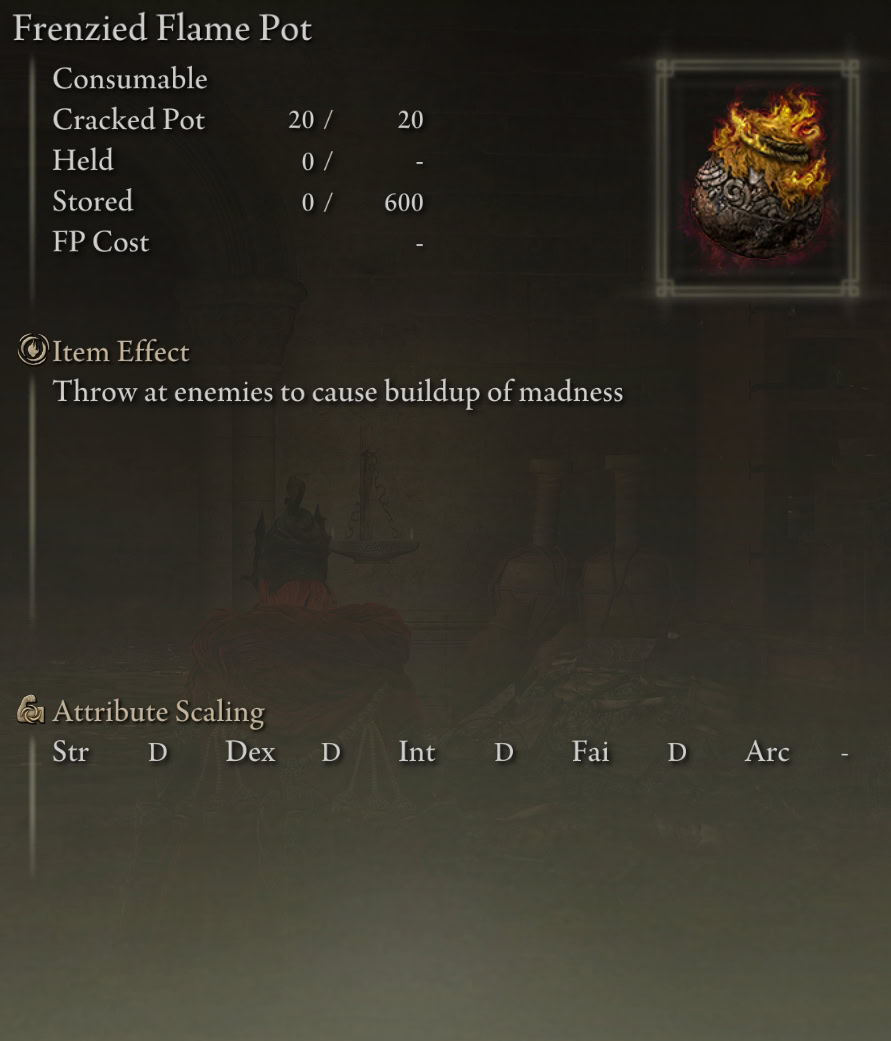
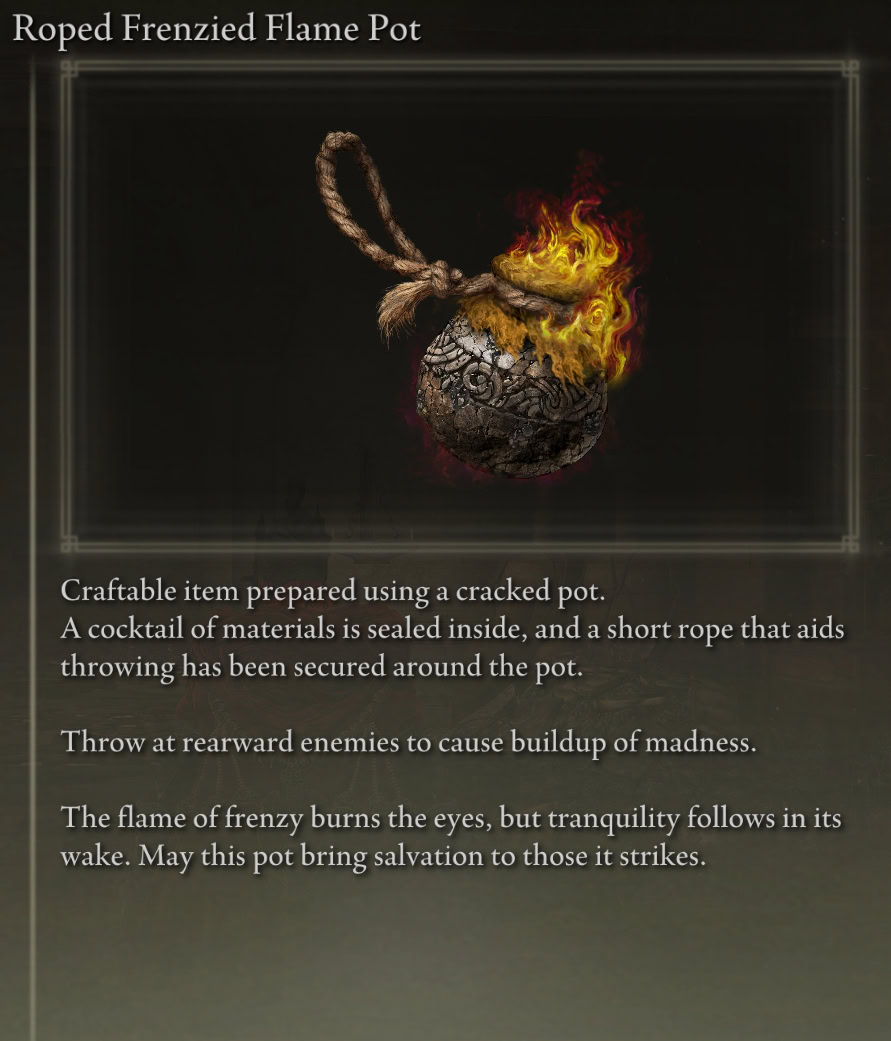
The Mad Craftsman’s Cookbook [1] contains the recipes for (Roped) Frenzied Flame Pots.

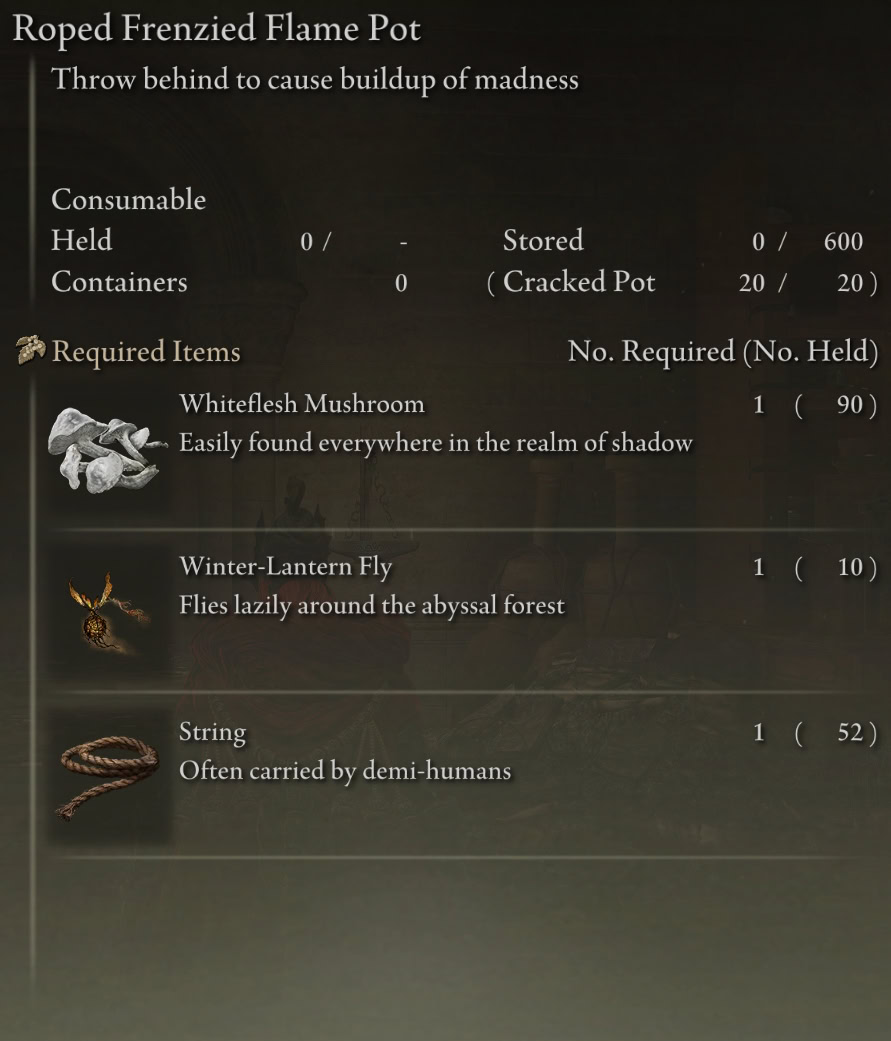
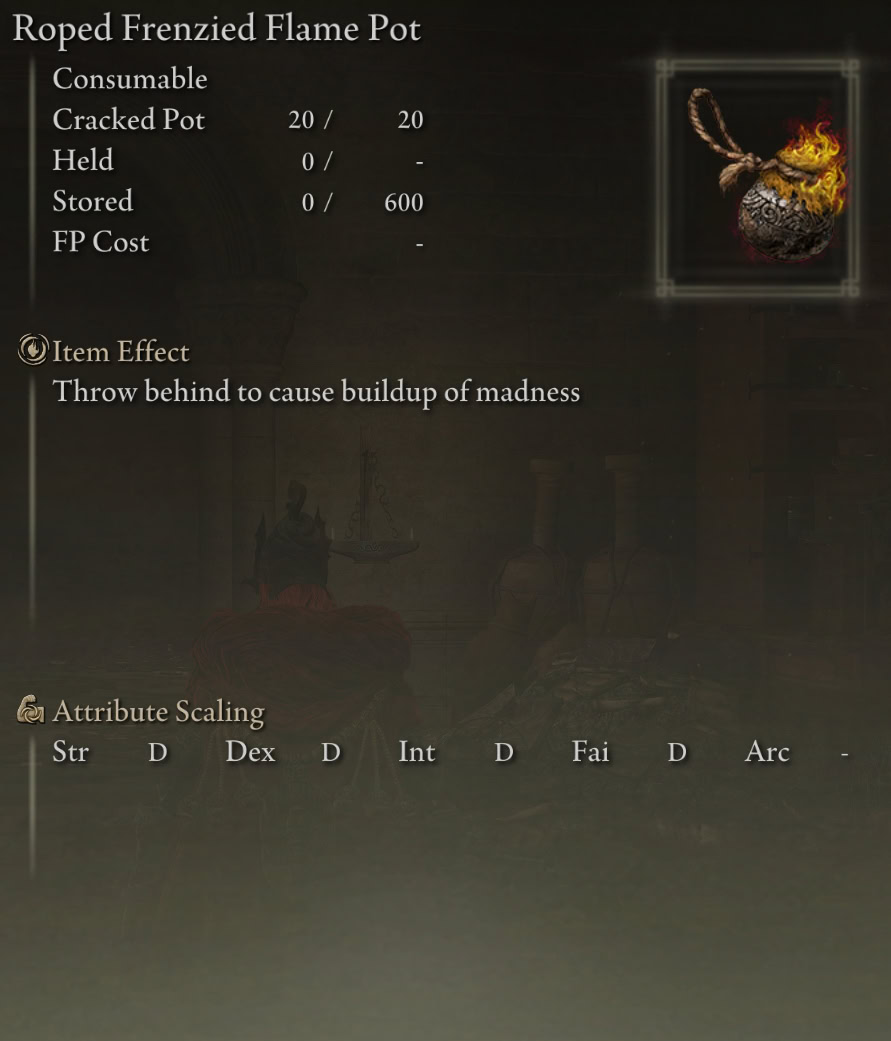
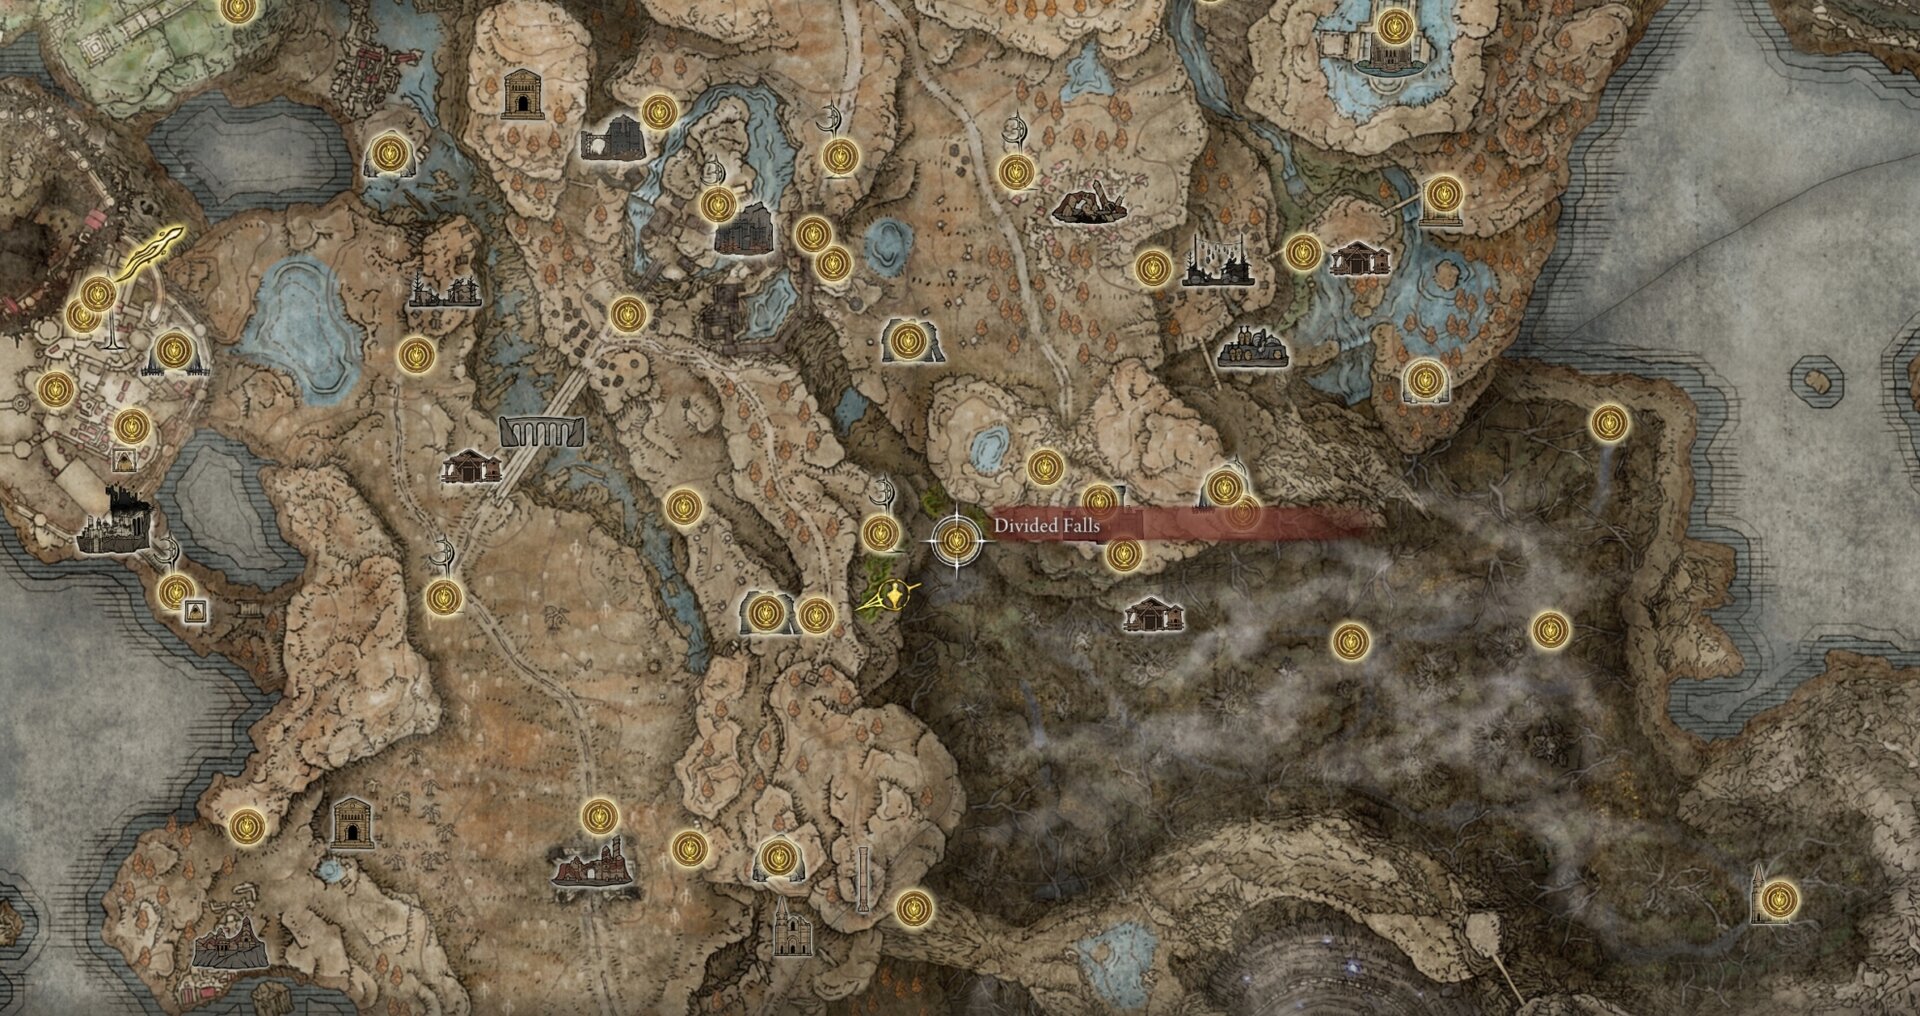
You can loot the Mad Craftsman’s Cookbook [1] from a corpse overlooking the Divided Falls in the northwestern corner of the Abyssal Woods. Follow the rats near the Falls.

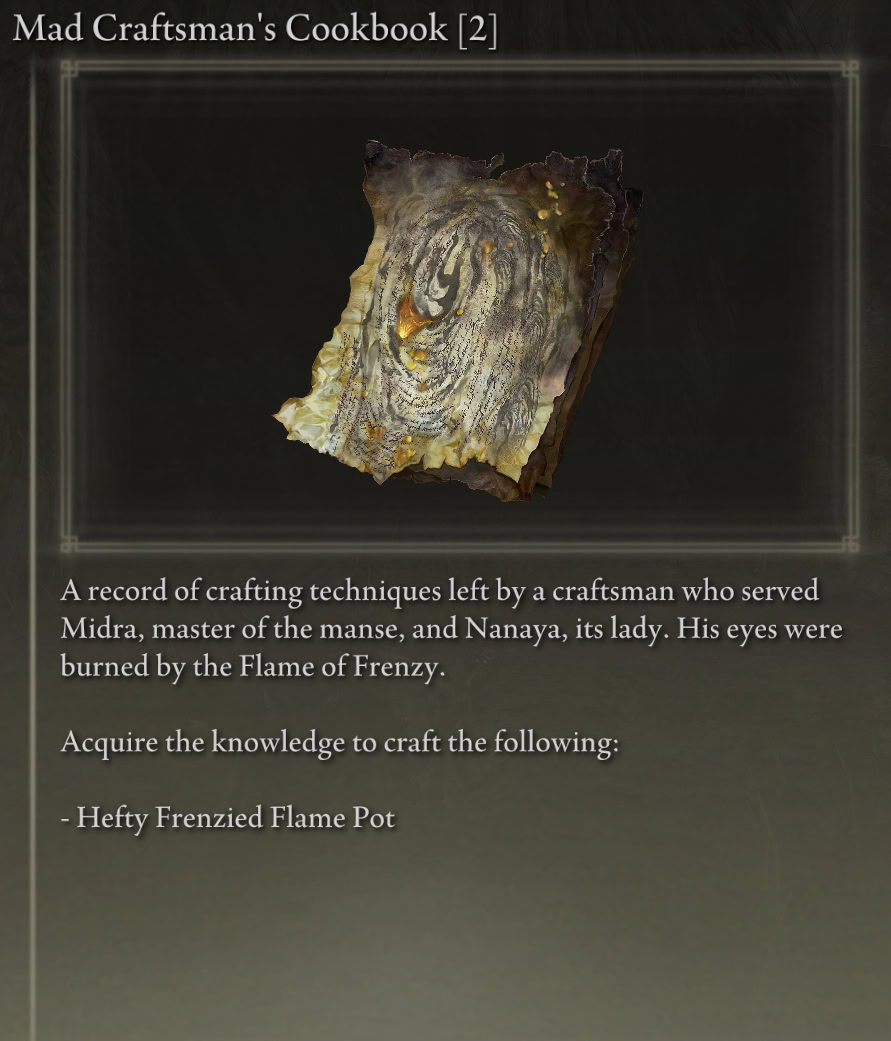
Mad Craftsman’s Cookbook 2
The Mad Craftsman’s Cookbook [2] contains the recipe for the Hefty Frenzied Flame Pot.
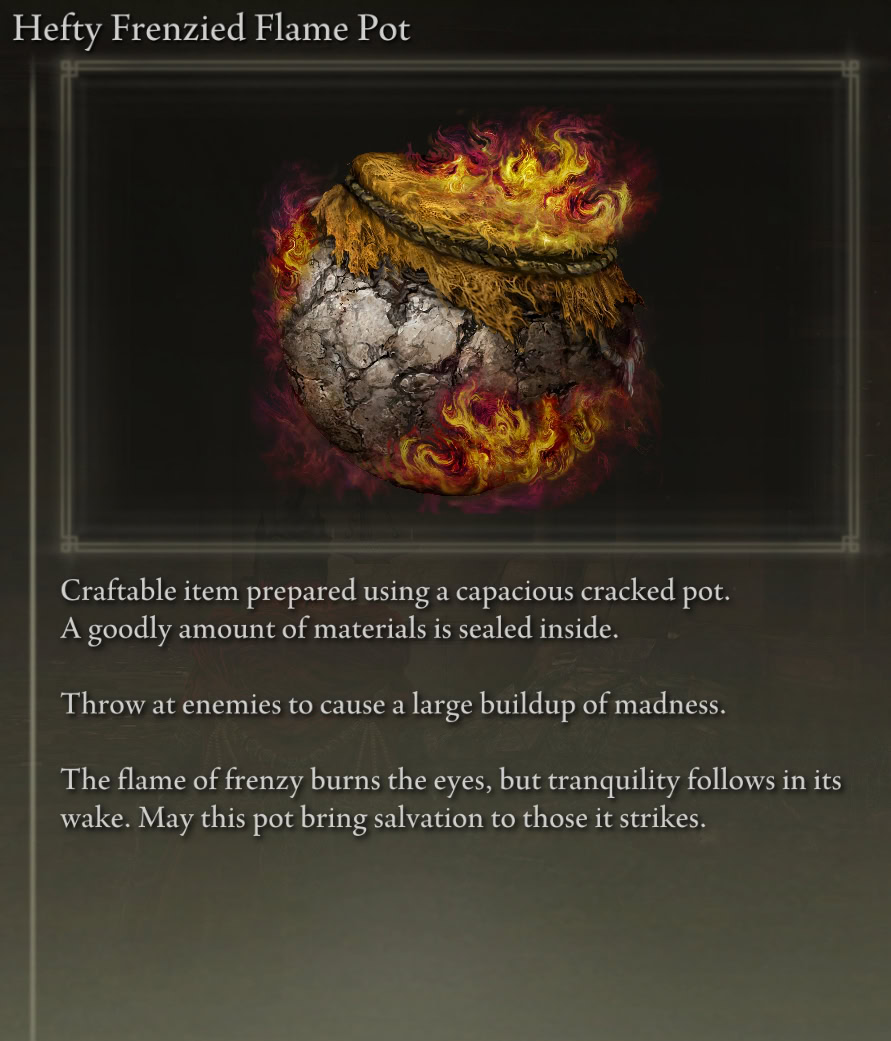
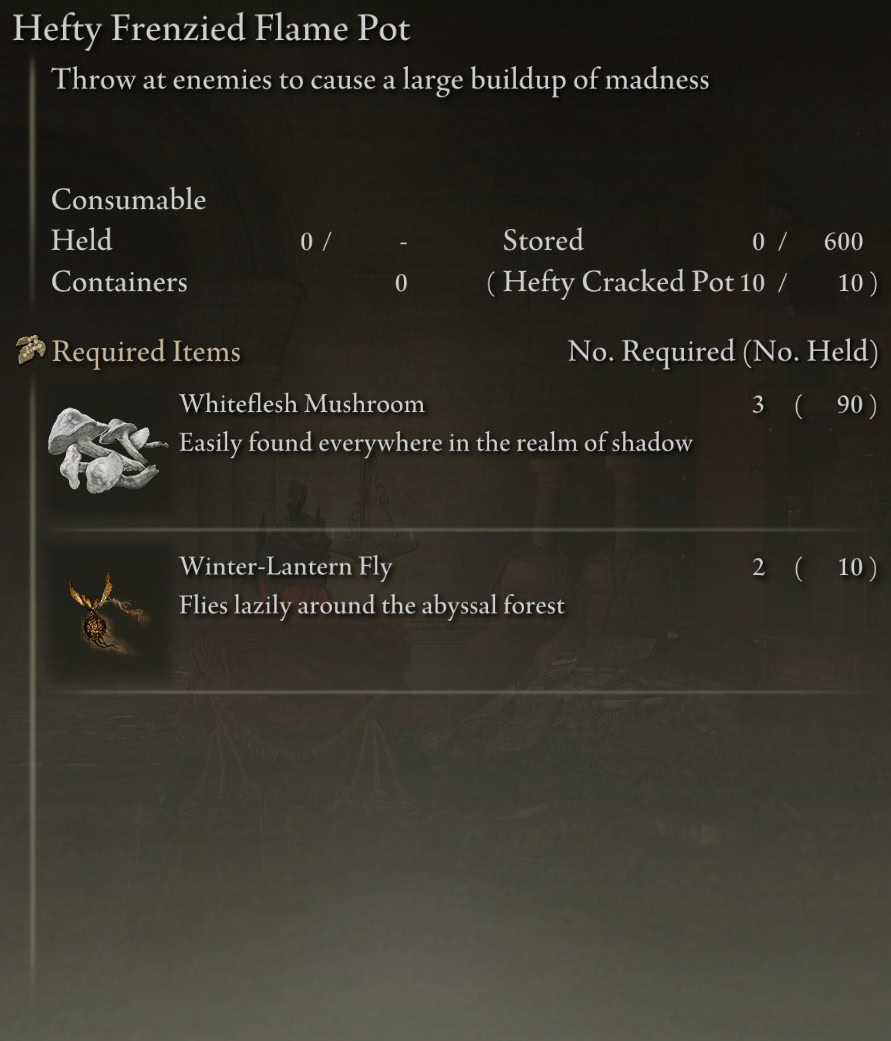
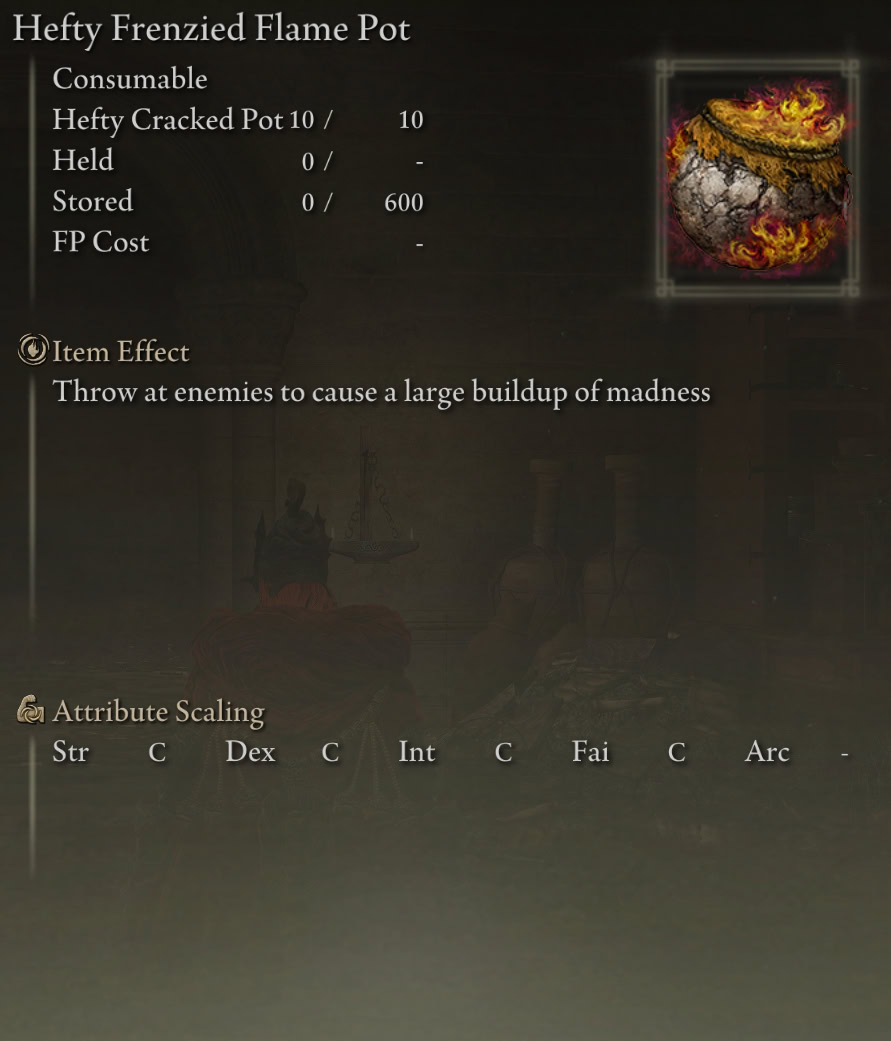
You can loot the Mad Craftsman’s Cookbook [2] from a corpse at the base of a large tree on the “bridge” made of stone, past the Inquisitors near the entrance to Midra’s Manse in the Abyssal Woods.
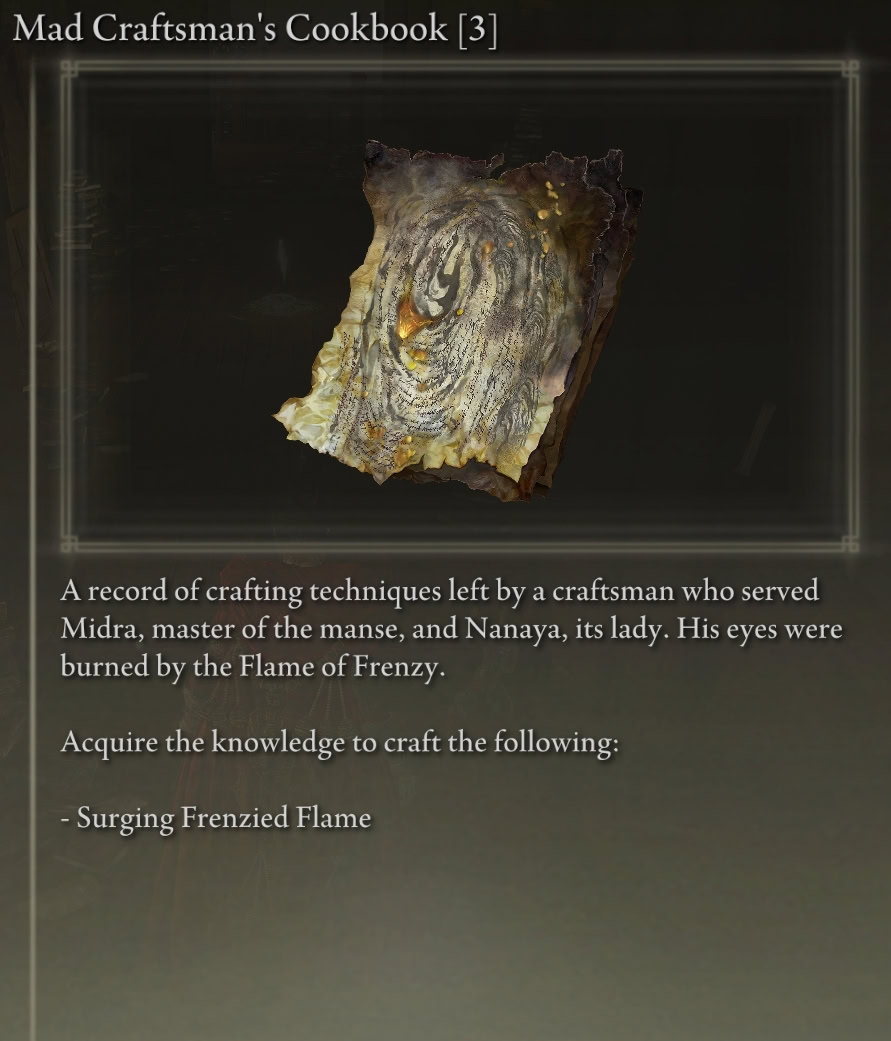
Mad Craftsman’s Cookbook 3
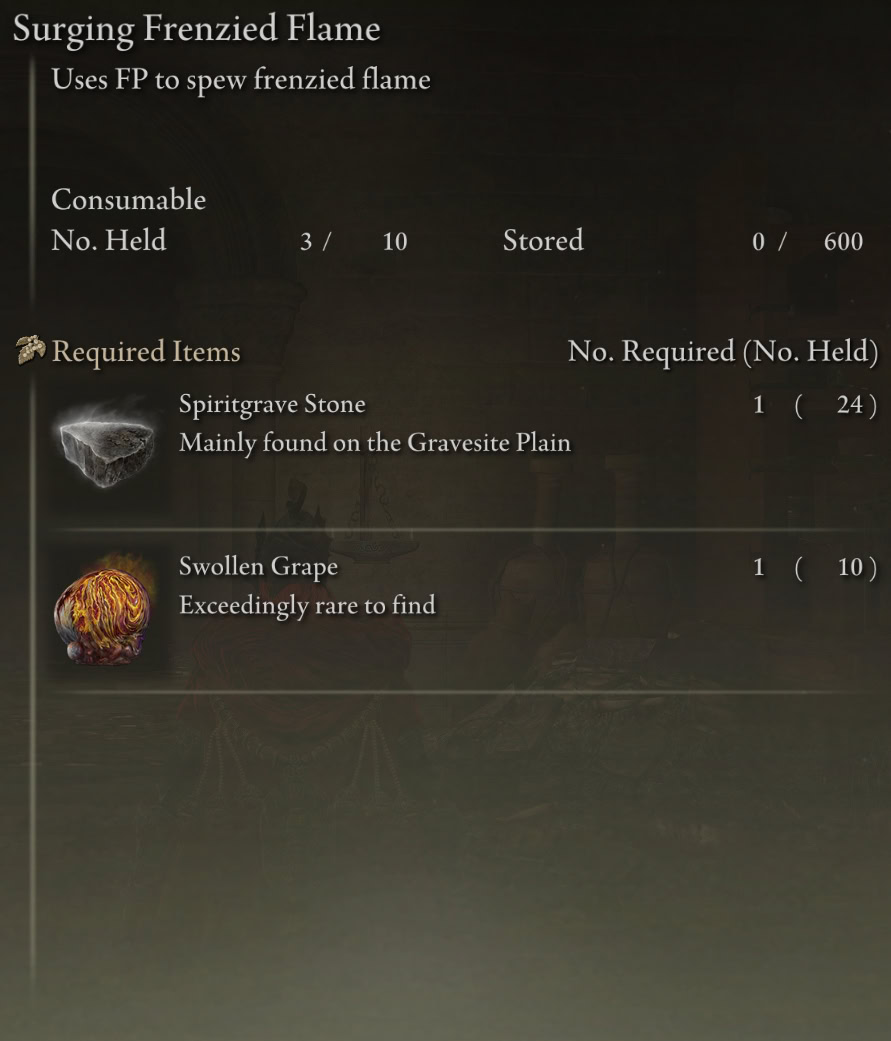
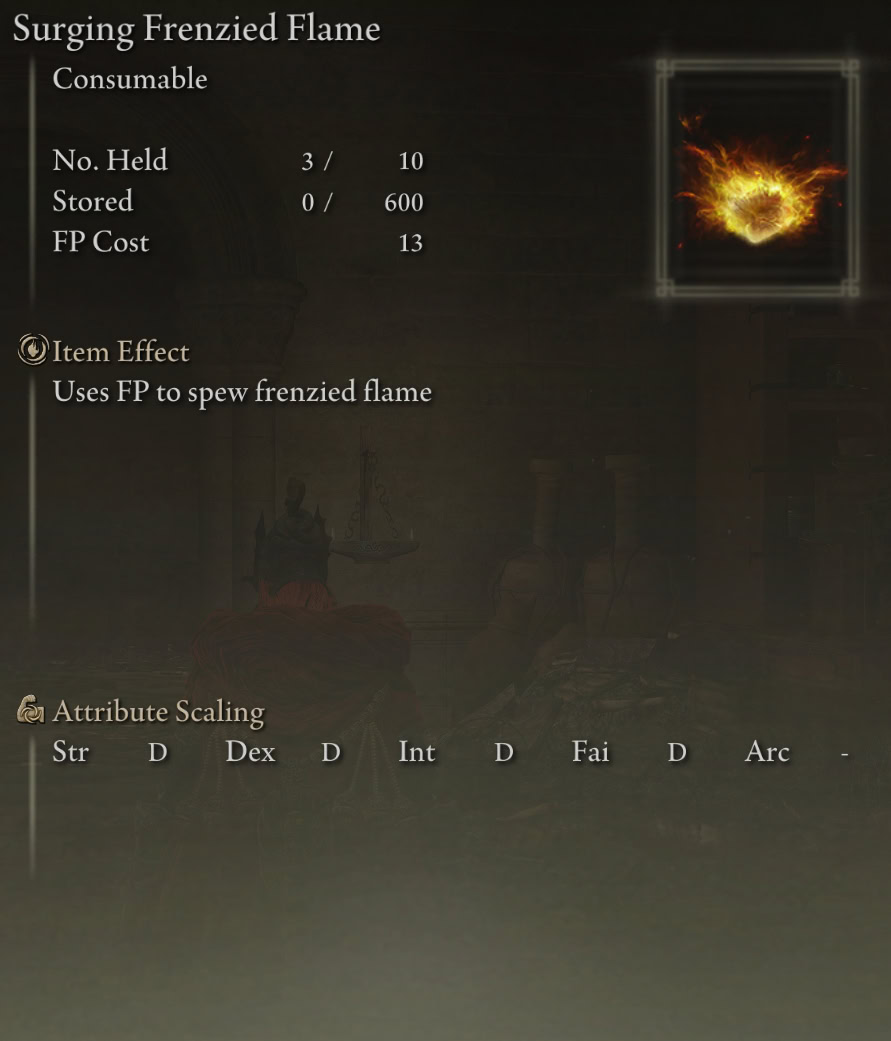
The Mad Craftsman’s Cookbook [3] contains the recipe for the Surging Frenzied Flame Consumable.
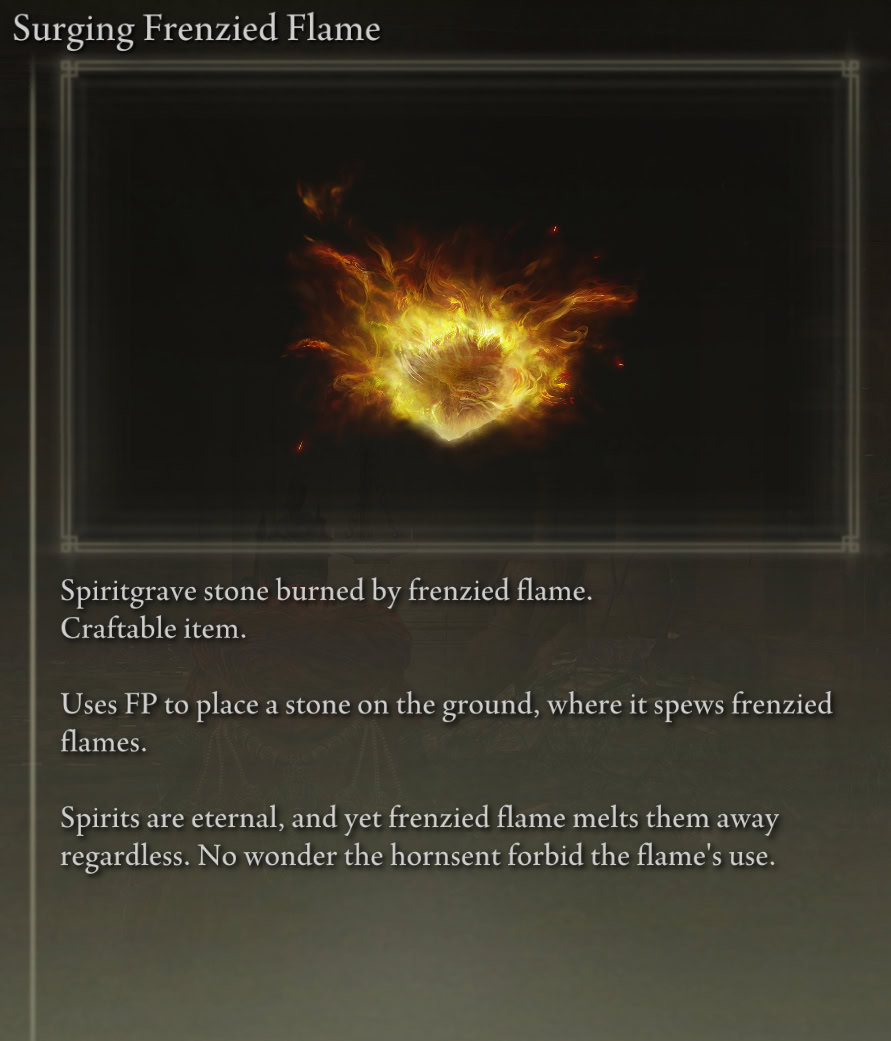
You can loot the Mad Craftsman’s Cookbook [3] from a corpse in the room infested with Mad Rats on the second floor of the Manse.

Swollen Grapes
Swollen Grapes are required to craft the Surging Frenzied Flame consumable item. That is their only purpose; you can’t even feed them to Hyetta.
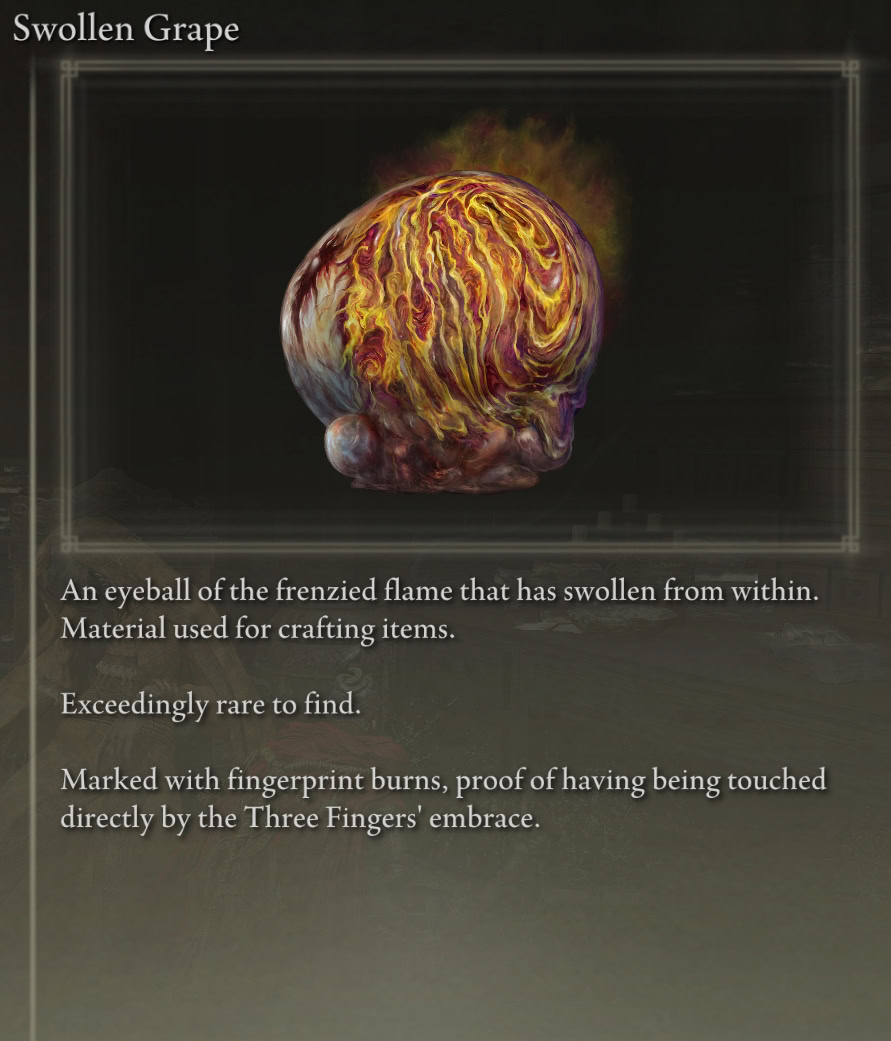
You can only get 10 Swollen Grapes per playthrough. Interestingly, there are also 10 decapitated bodies out in front of the Manse, and you get one for defeating each of the Aging Untouchables.

However, there are no Aging Untouchables inside Midra’s Manse, yet that is where you’ll find half of the Swollen Grapes.
Swollen Grape Location A
You can find 1 Swollen Grape on a corpse in the room to the right of the Manse Hall, right as you enter the building.
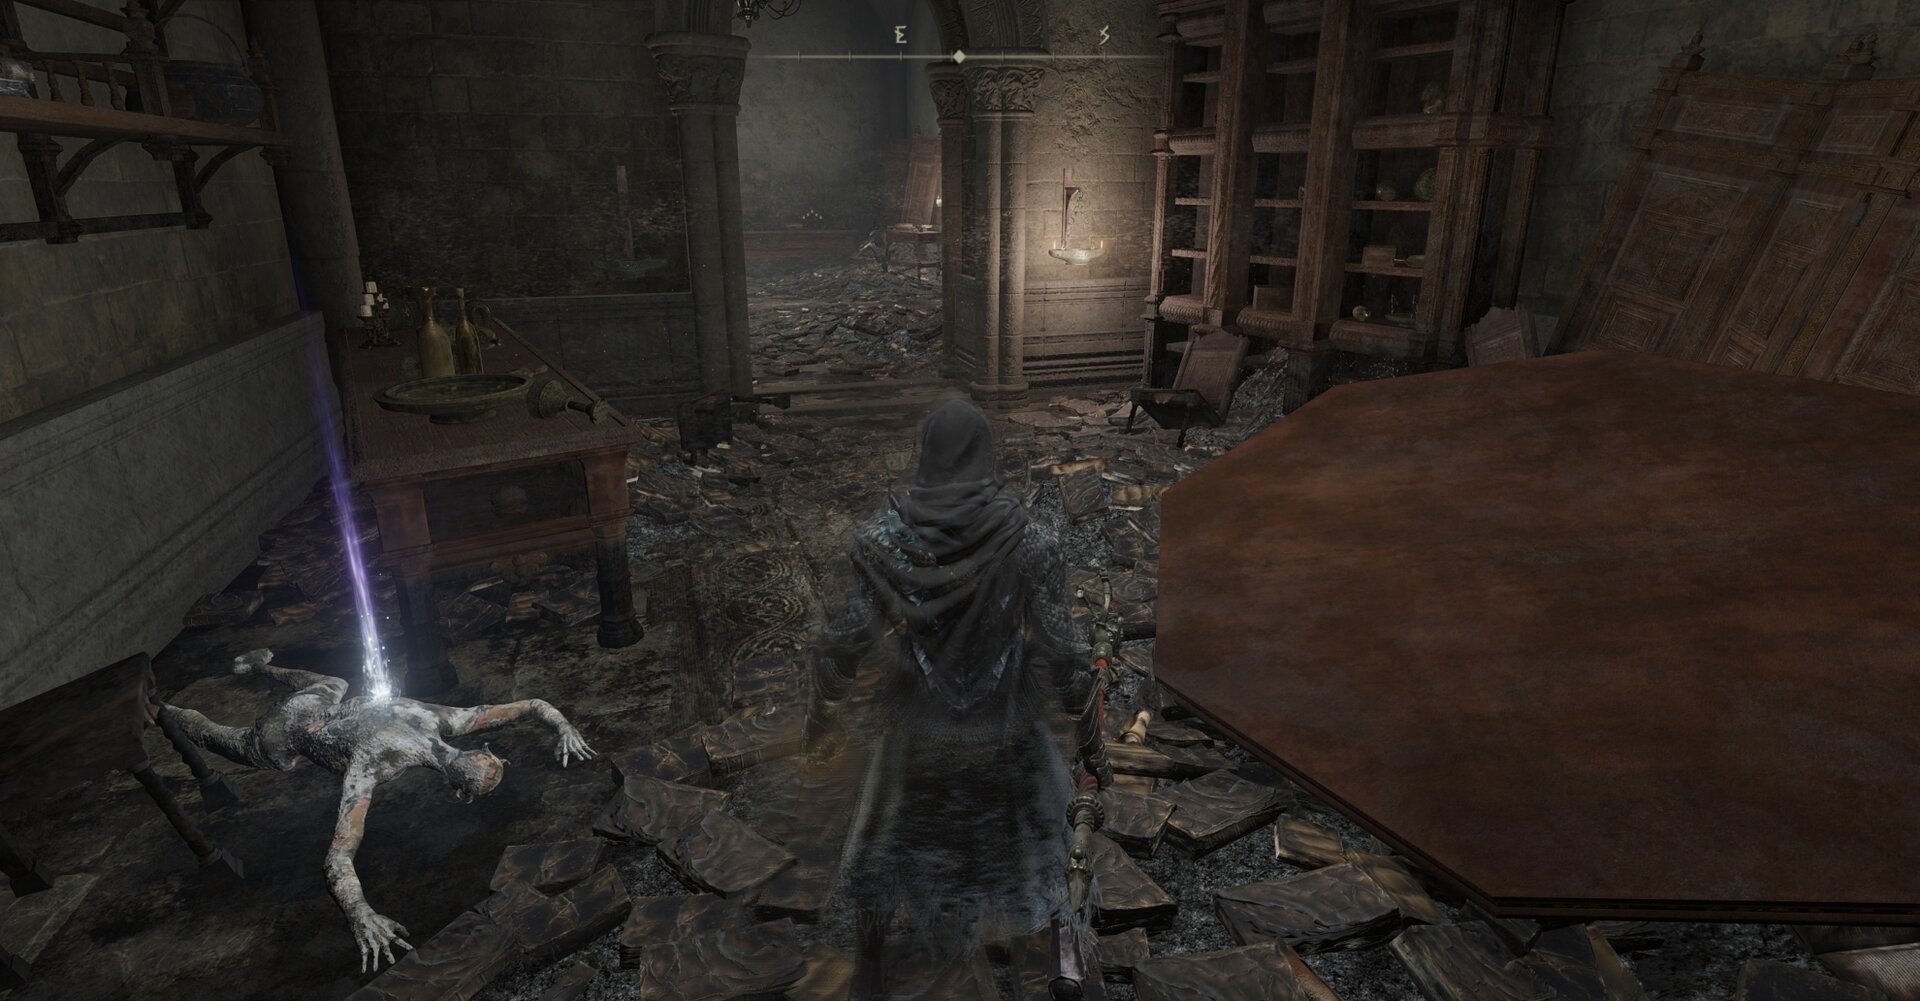
Swollen Grape Location B (x2)
You can find 2 Swollen Grapes on a corpse dangling from a bookshelf in the first room you enter with enemies, a bunch of Shadow Men.
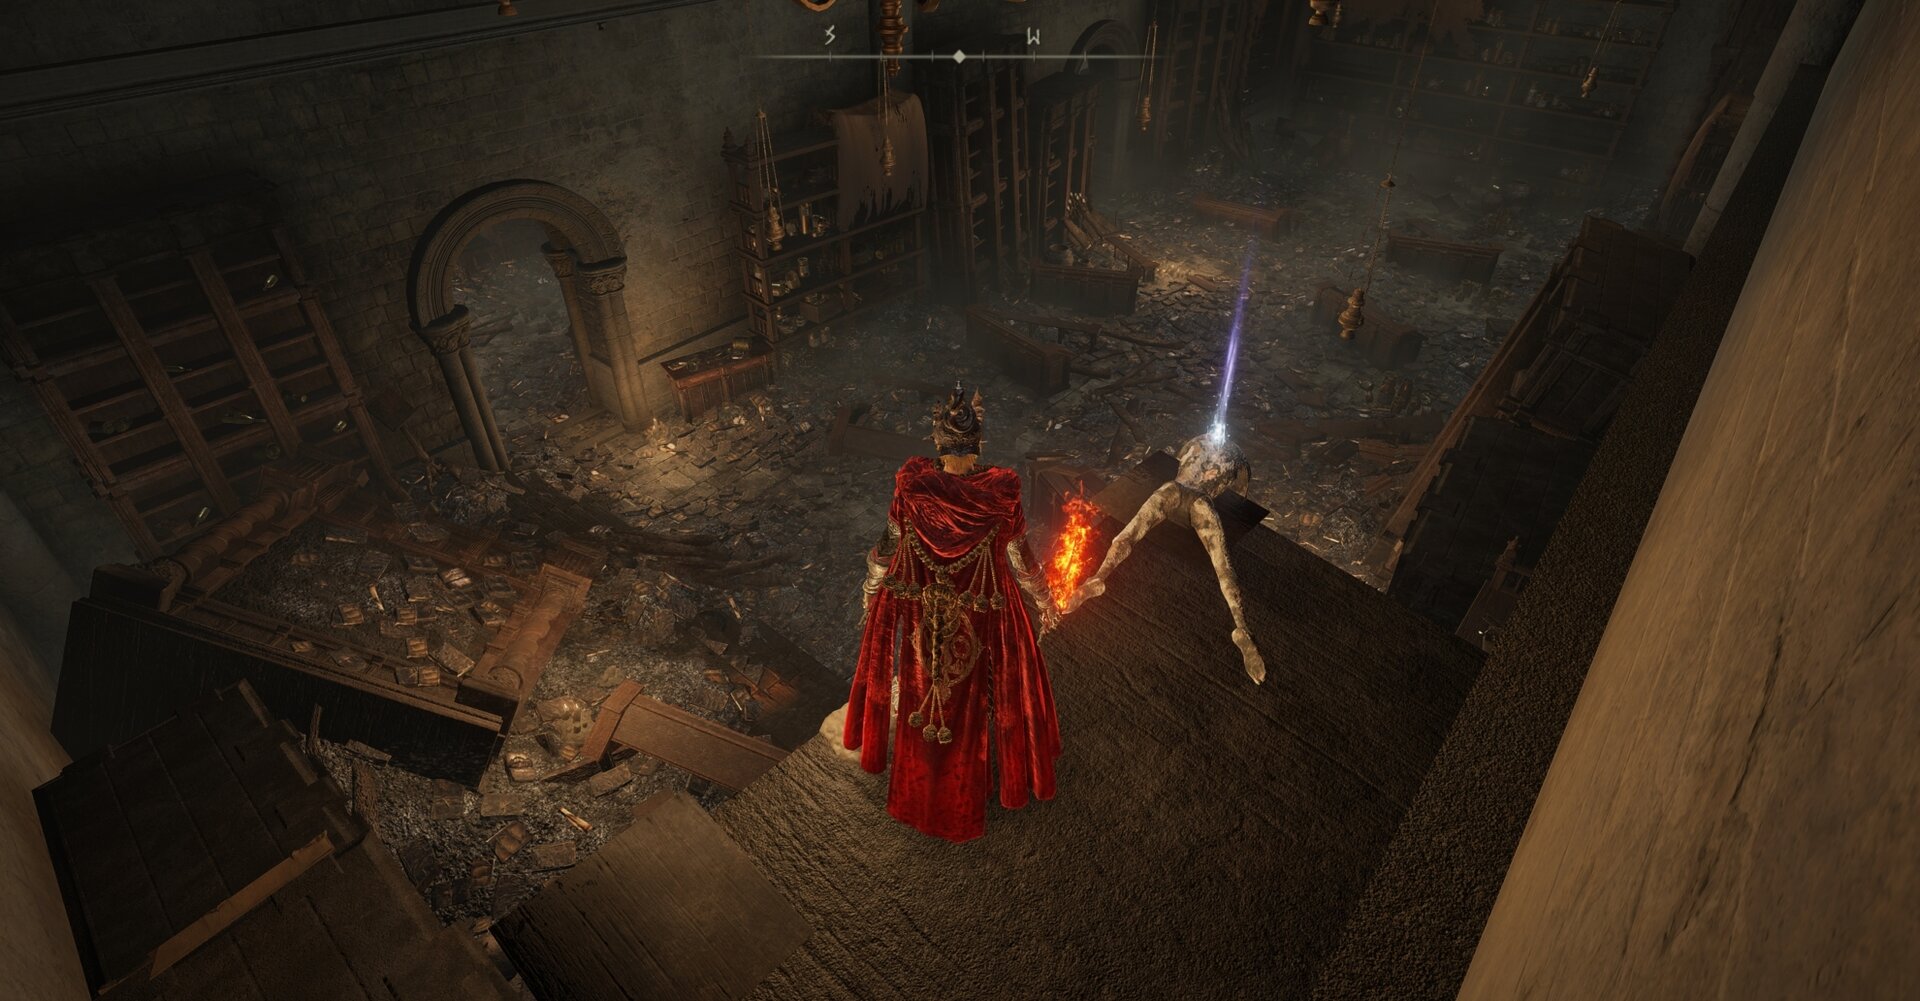
Swollen Grape Location C (x2)
You can find a pair of Swollen Grapes on a lower, isolated bookshelf in the room patrolled by many Inquisitors.
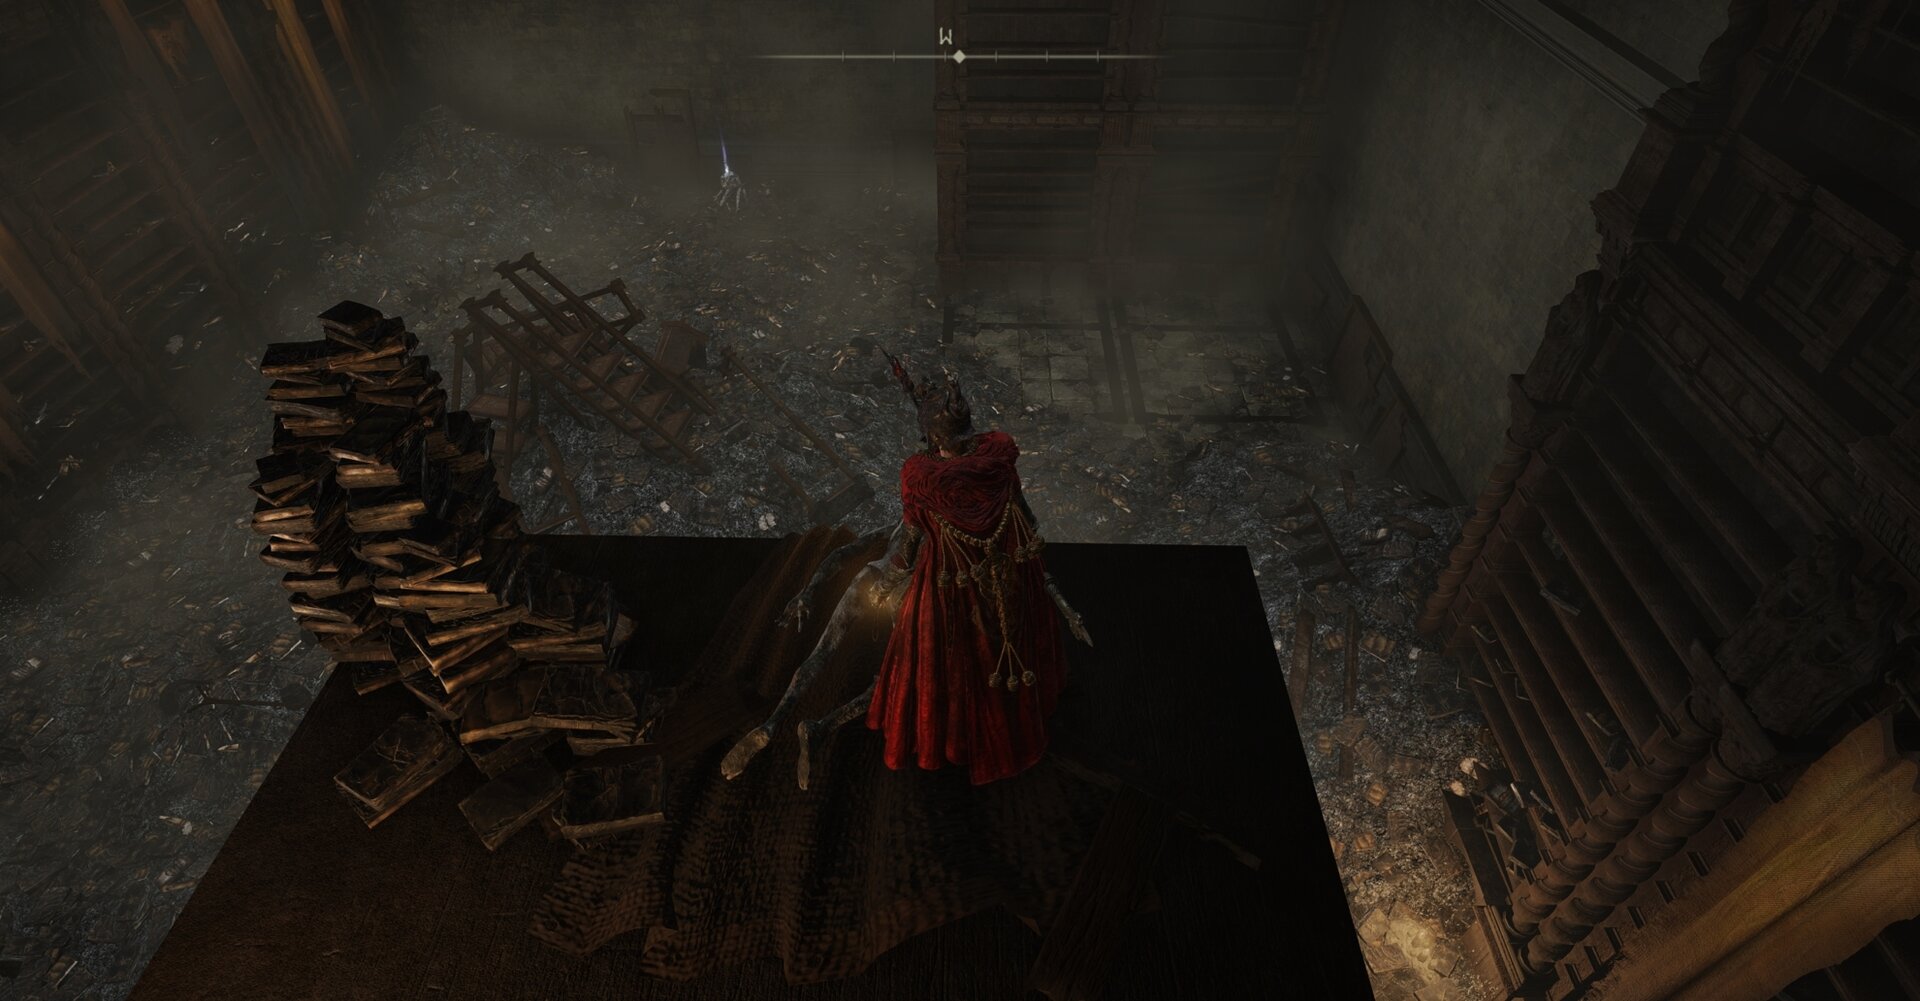

Midra’s Manse Boss Rewards
You receive the Remembrance of the Lord of Frenzied Flame for defeating Midra in the Discussion Chamber at Midra’s Manse.
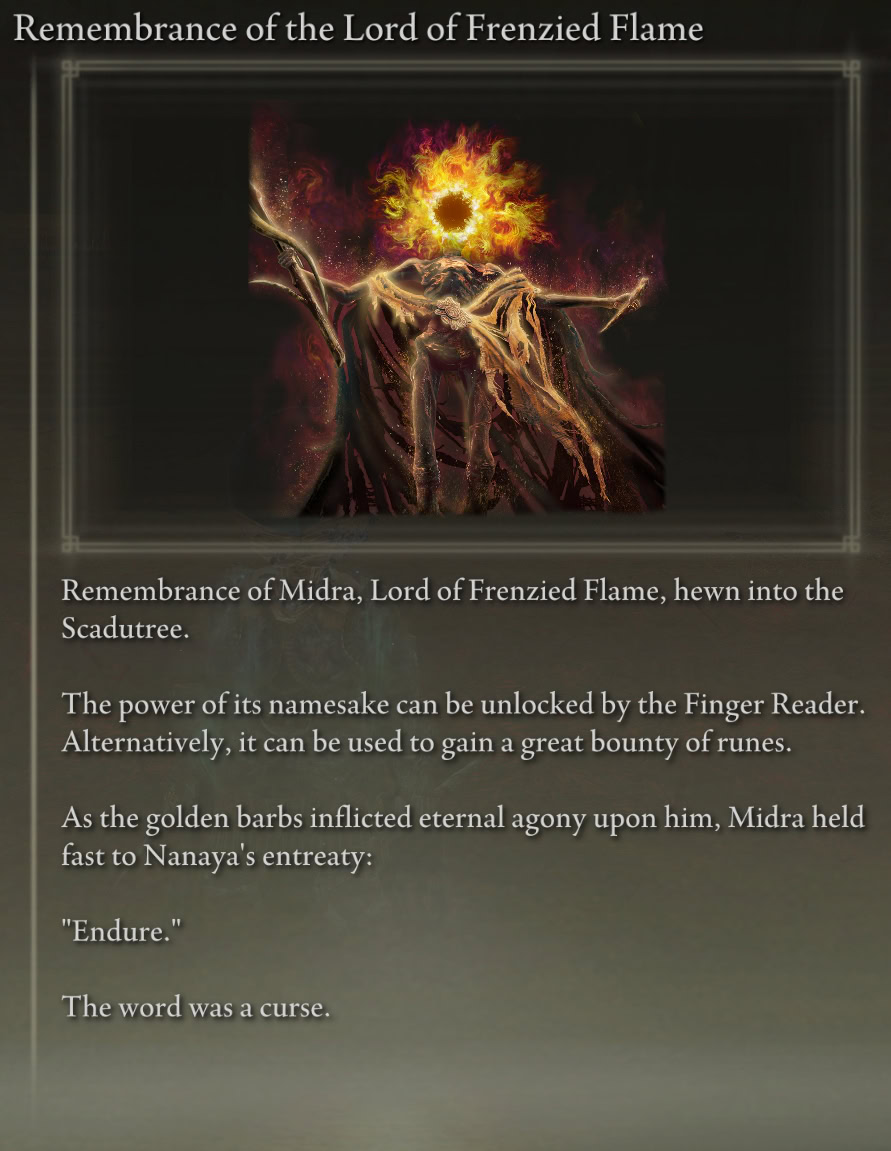
You can exchange the Remembrance of the Lord of Frenzied Flame for either the Greatsword of Damnation or Midra’s Flame of Frenzy (Incantation) with Finger Reader Enia at the Roundtable Hold.
All Major Item Locations in Castle Morne in Elden Ring
This guide shows you how to find all major Item Locations in Castle Morne in Elden Ring. Don’t miss out on good weapons and gear!

All Item Locations at Academy of Raya Lucaria in Elden Ring
Guide to all Item Locations at Academy of Raya Lucaria in Elden Ring – weapons, armor, talismans, spells and consumables and tons of secrets!

Elden Ring Caria Manor: All Item Locations Guide
Guide to all item locations at Caria Manor in Elden Ring - detailed directions to all gear pieces, ashes, sorceries and everything of value!

Elden Ring Nokron, Eternal City: All Item Locations Guide
This guide will show you how to get to Nokron, Eternal City in Elden Ring and fully explore the area to find and loot all valuable items!
Elden Ring Sellia, Town of Sorcery, Torch Puzzle, and Item Locations Guide
Everything you need to know about Elden Ring’s Sellia, Town of Sorcery, including torch puzzle and item locations, as well as how to reach them.

Full Elden Ring Daggers Catalog and Locations Guide
This Elden Ring Daggers catalog will show you all 14 of them, their stats and descriptions and the exact location where you can find them!
Full Elden Ring Straight Swords Catalog and Locations Guide
Elden Ring Straight Swords catalog showing all 19 items with their stats and descriptions, and the exact location where you can find them!
Full Elden Ring Greatswords Catalog and Locations Guide
There are 21 Greatswords scattered throughout the Lands Between, this Elden Ring Greatsword catalog will show you how to get them all!

All Elden Ring Painting Locations and Rewards Guide
A guide showing all Paintings locations in Elden Ring and where to go to discover the location depicted on the painting and get the rewards!
All Elden Ring Larval Tear Locations Guide
This guide explains what Larval Tears are in Elden Ring as well as step-by-step walkthroughs to get to the locations of each one!
Shadow of the Erdtree Belurat, Tower Settlement: All Unique Item Locations
Guide to all Item Locations at Belurat, Tower Settlement in Elden Ring: Shadow of the Erdtree: weapons, talismans, spells, rare items, keys, and how to reach tricky areas!

Shadow of the Erdtree Castle Ensis and Fog Rift Fort: All Unique Item Locations
Guide to all Item Locations at Castle Ensis and Fog Rift Fort in Shadow of the Erdtree – weapons, talismans, spells, rare items, and how to reach tricky areas!
Shadow of the Erdtree Shadow Keep: All Unique Item Locations
Guide to all Item Locations at Shadow Keep in Shadow of the Erdtree, including its sub-areas like Specimen Storage and Church District. weapons, talismans, spells, rare items, and how to reach tricky areas!

Shadow of the Erdtree Enir-Ilim: All Unique Item Locations
Guide to all Item Locations at Enir-Ilim in Elden Ring: Shadow of the Erdtree: weapons, talismans, spells, rare items, and how to reach tricky areas!

Shadow of the Erdtree Stone Coffin Fissure and St. Trina Guide: All Unique Item Locations
Guide to all Unique Item Locations related to St. Trina in Elden Ring and everything at the Stone Coffin Fissure in Elden Ring: Shadow of the Erdtree: weapons, talismans, spells, rare items, how to reach tricky areas, and everything about the enigmatic St. Trina!

Shadow of the Erdtree All Unique Quest Rewards: Locations, Stats, HD Previews
All Armor Sets, Talismans, Weapons, and Ashes of War for all Quest Characters from Elden Ring: Shadow of the Erdtree Expansion. With their stats, high-quality previews, and where to find them!