This guide will explain how the Slicing mini-game in Star Wars Outlaws works and how to beat it. Through the power of the process of elimination, no computer will be safe from you!
Table of contents
How Slicing Works in Star Wars Outlaws
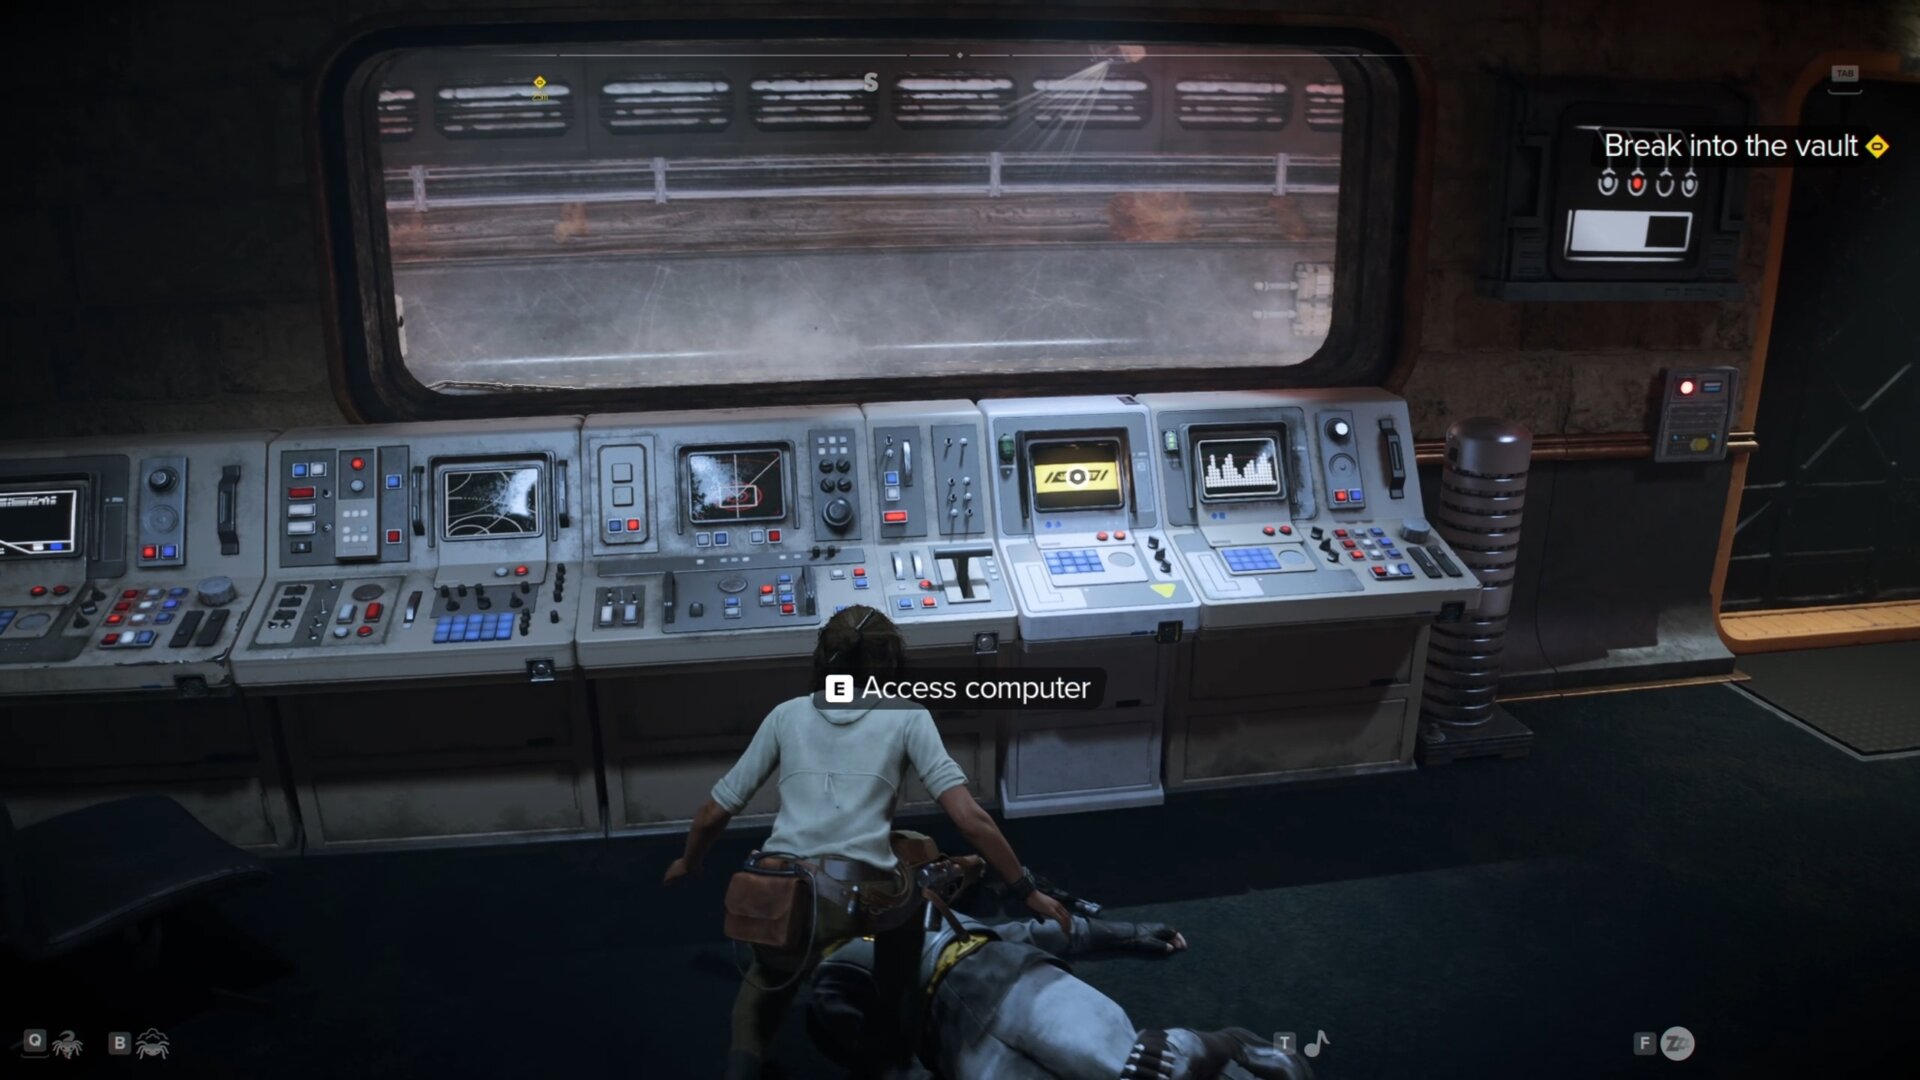
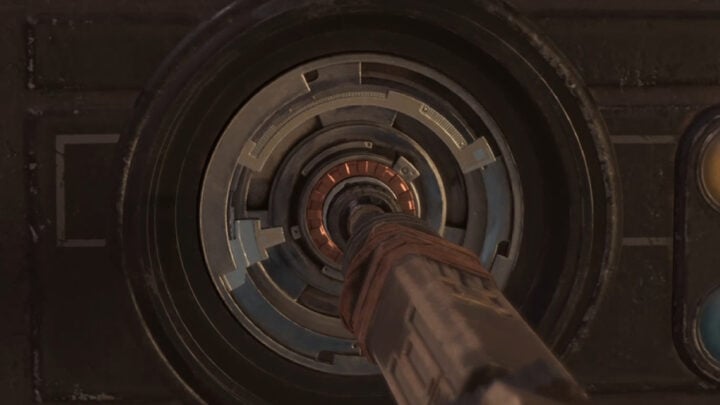
When you need to get past advanced security systems, you’ll have to play the Slicing mini-game. When you’re breaking into the Zerek Besh vault early in the game, you’ll encounter a security terminal.
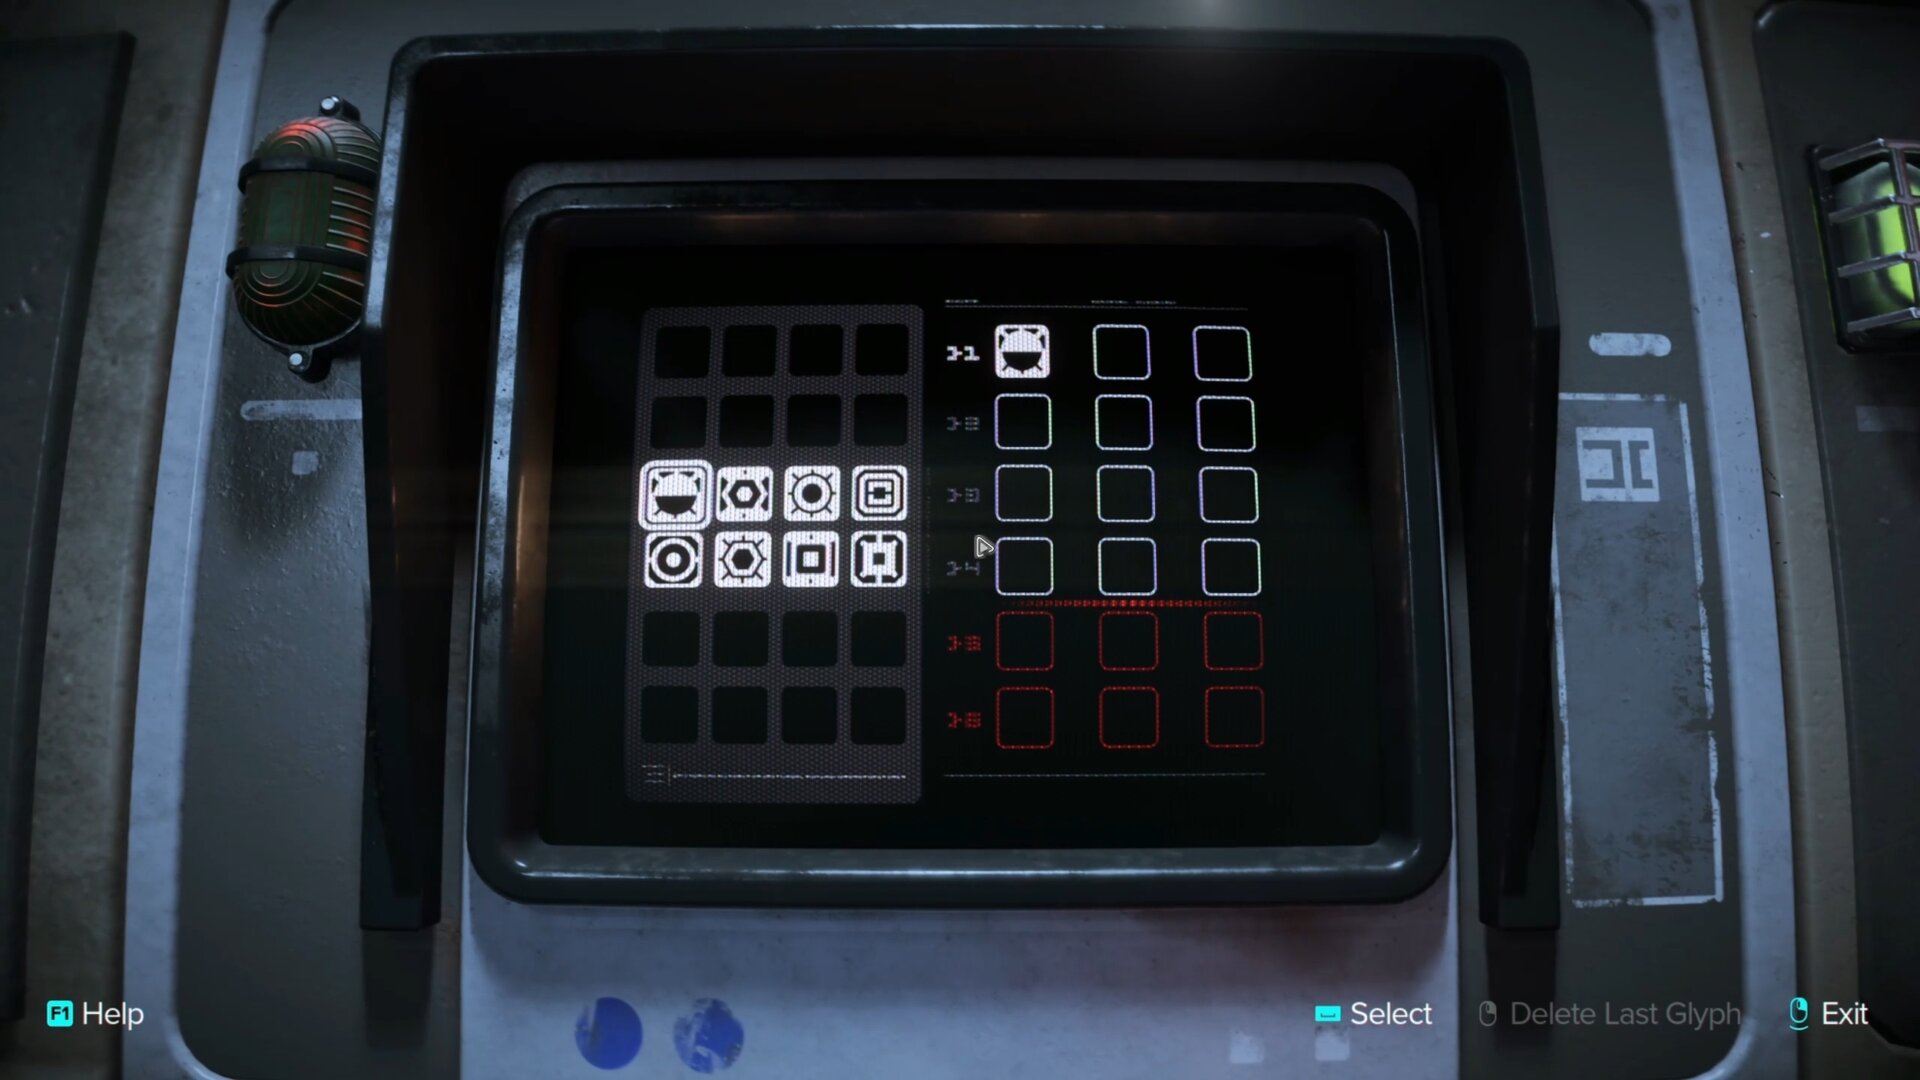
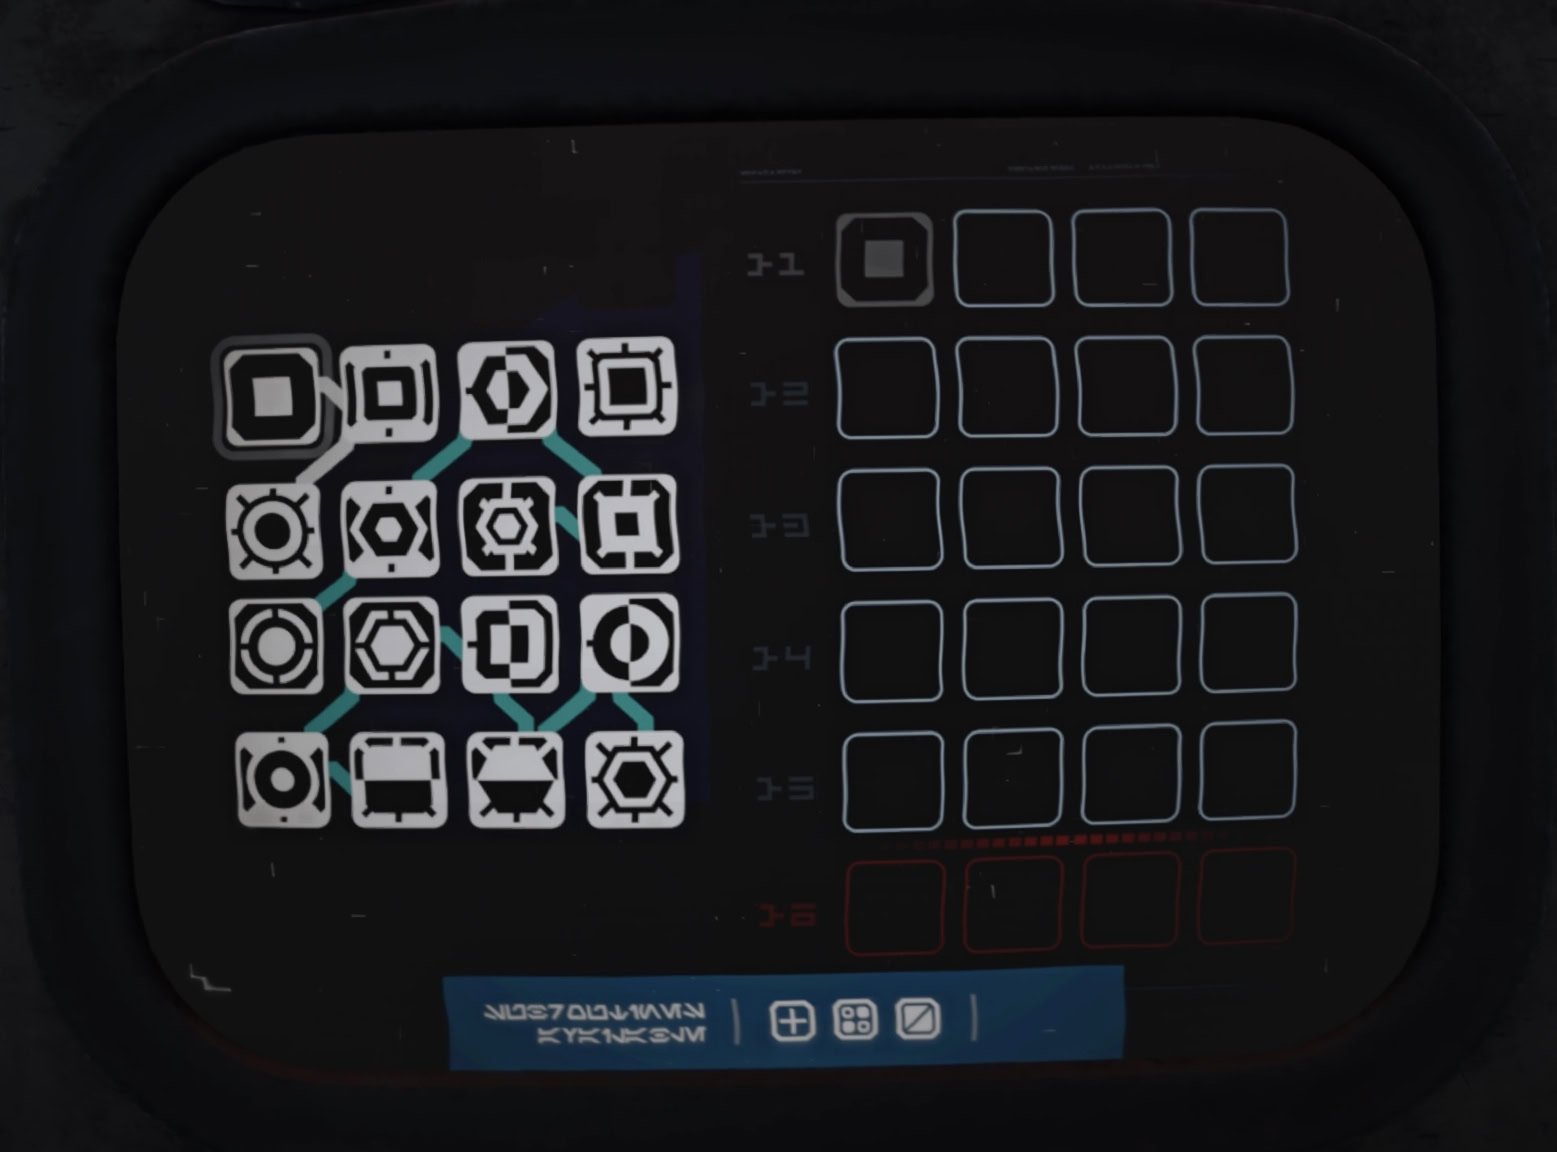
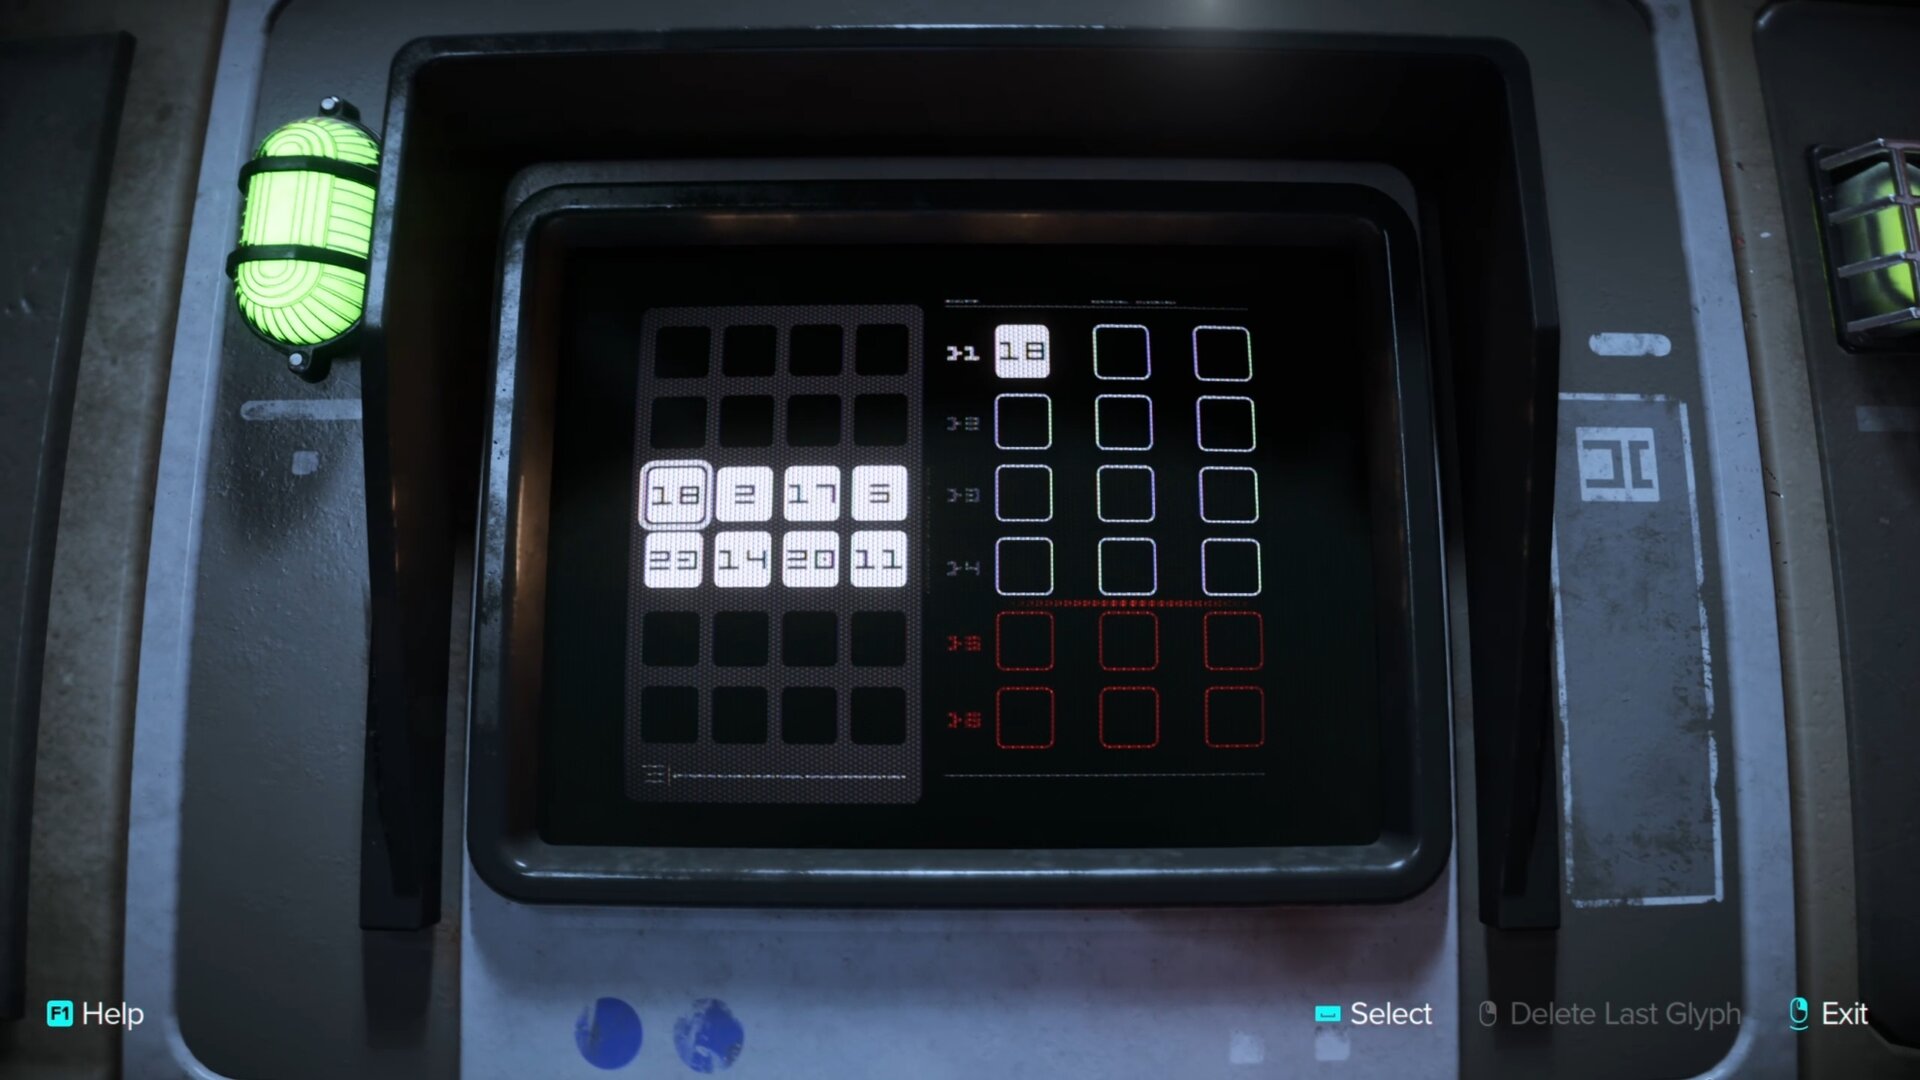
When you use the terminal, you’ll see an array of glyphs to the left, and empty columns to the right. When you select one of these glyphs, you’ll place that symbol into one of the cells in the right columns.
The goal here is to find the correct sequence of glyphs before you run out of attempts. The amount of attempts you have is shown by the amount of blank cell rows. In the case of the image below, you’d have four chances to get it right.
If you fail on your final attempt and get into the red zone, you will have reduced rewards for solving the puzzle and alert nearby enemies. Do be sure to dispatch any enemies in the area before you start slicing.
You can always exit the slicing mini-game to try completing it without reduced rewards. Simply exit the mini-game, slice the device again, and hope you have better luck this time.
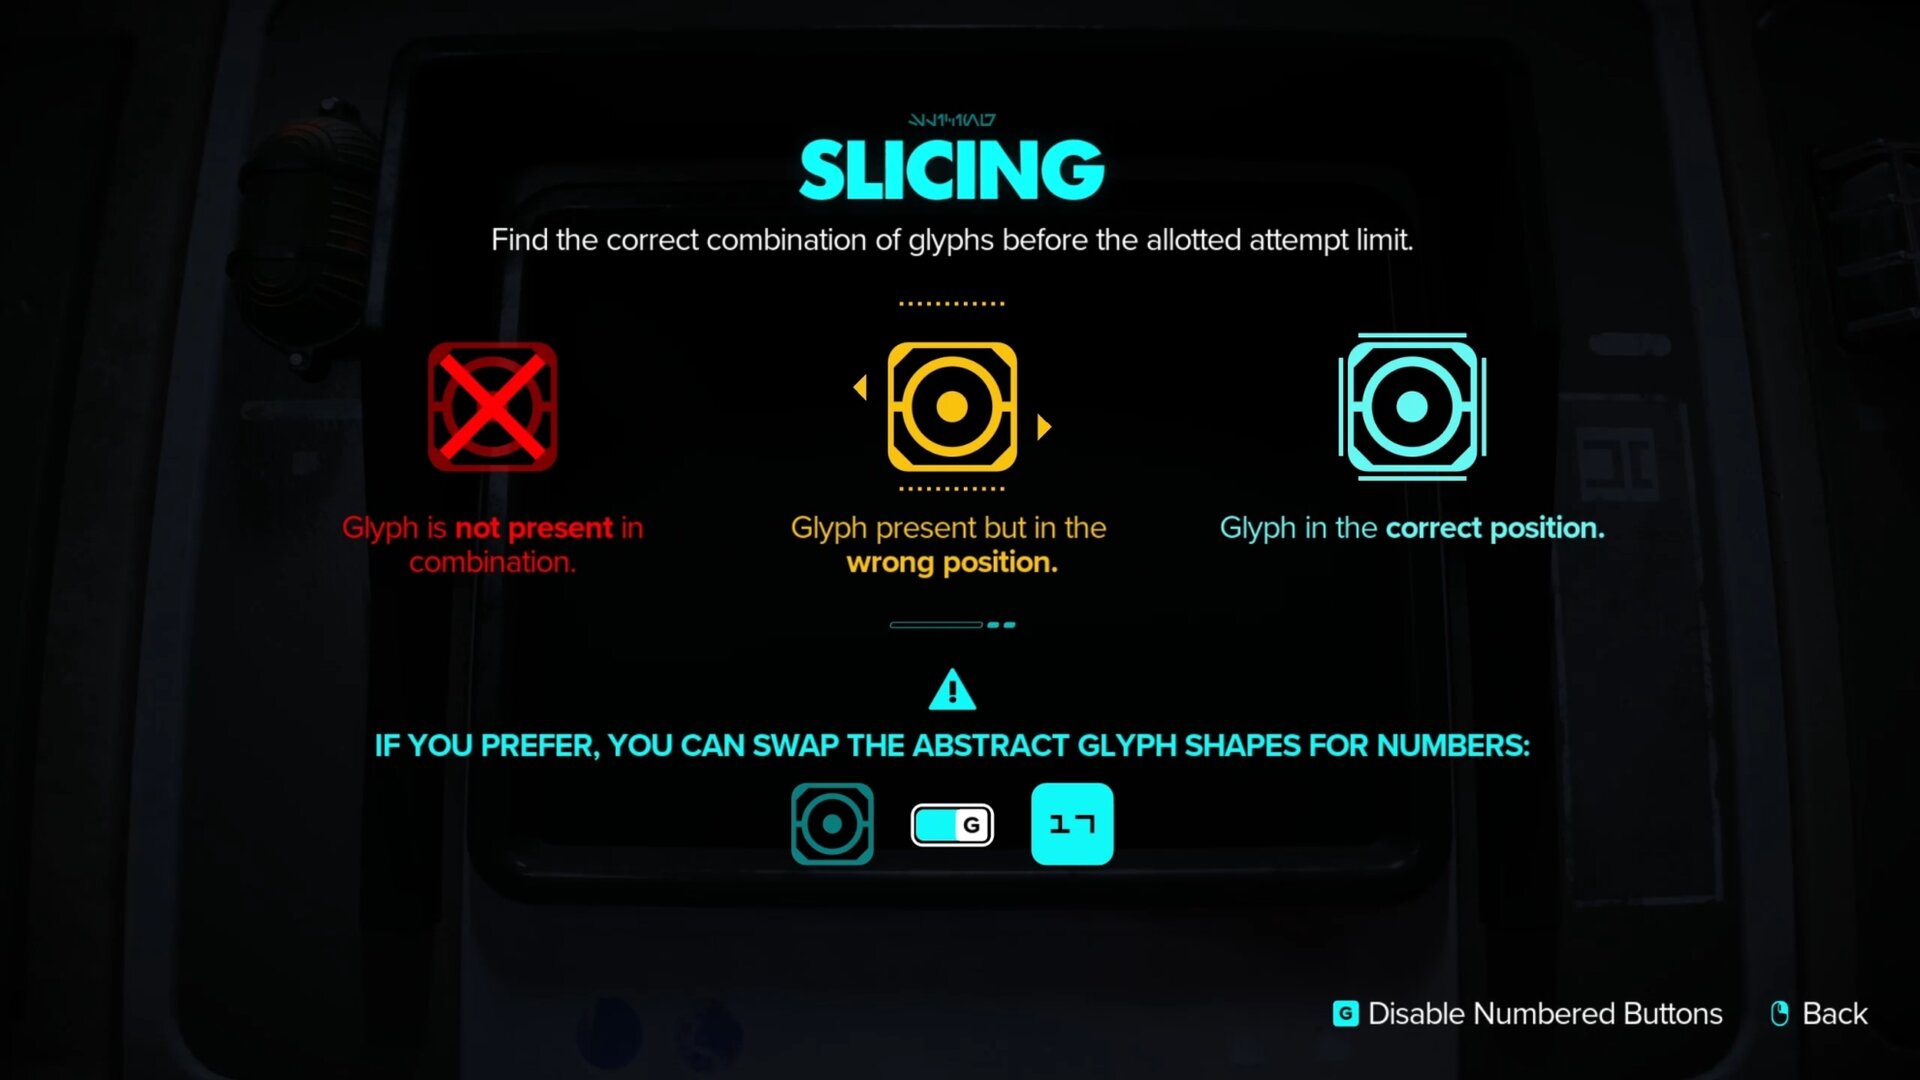
A glyph that’s in the wrong position will appear red. If a glyph is used in the sequence but is in the wrong spot, it’ll appear yellow. You’ll need to use trial and error to figure out where any yellow glyphs belong in the sequence.
In the sequence below, you’ll notice the sun-like glyph in the top row is in the wrong position. On the second attempt seen in the second row, the first cell is still wrong. During this attempt, all the glyphs needed for the sequence were found.
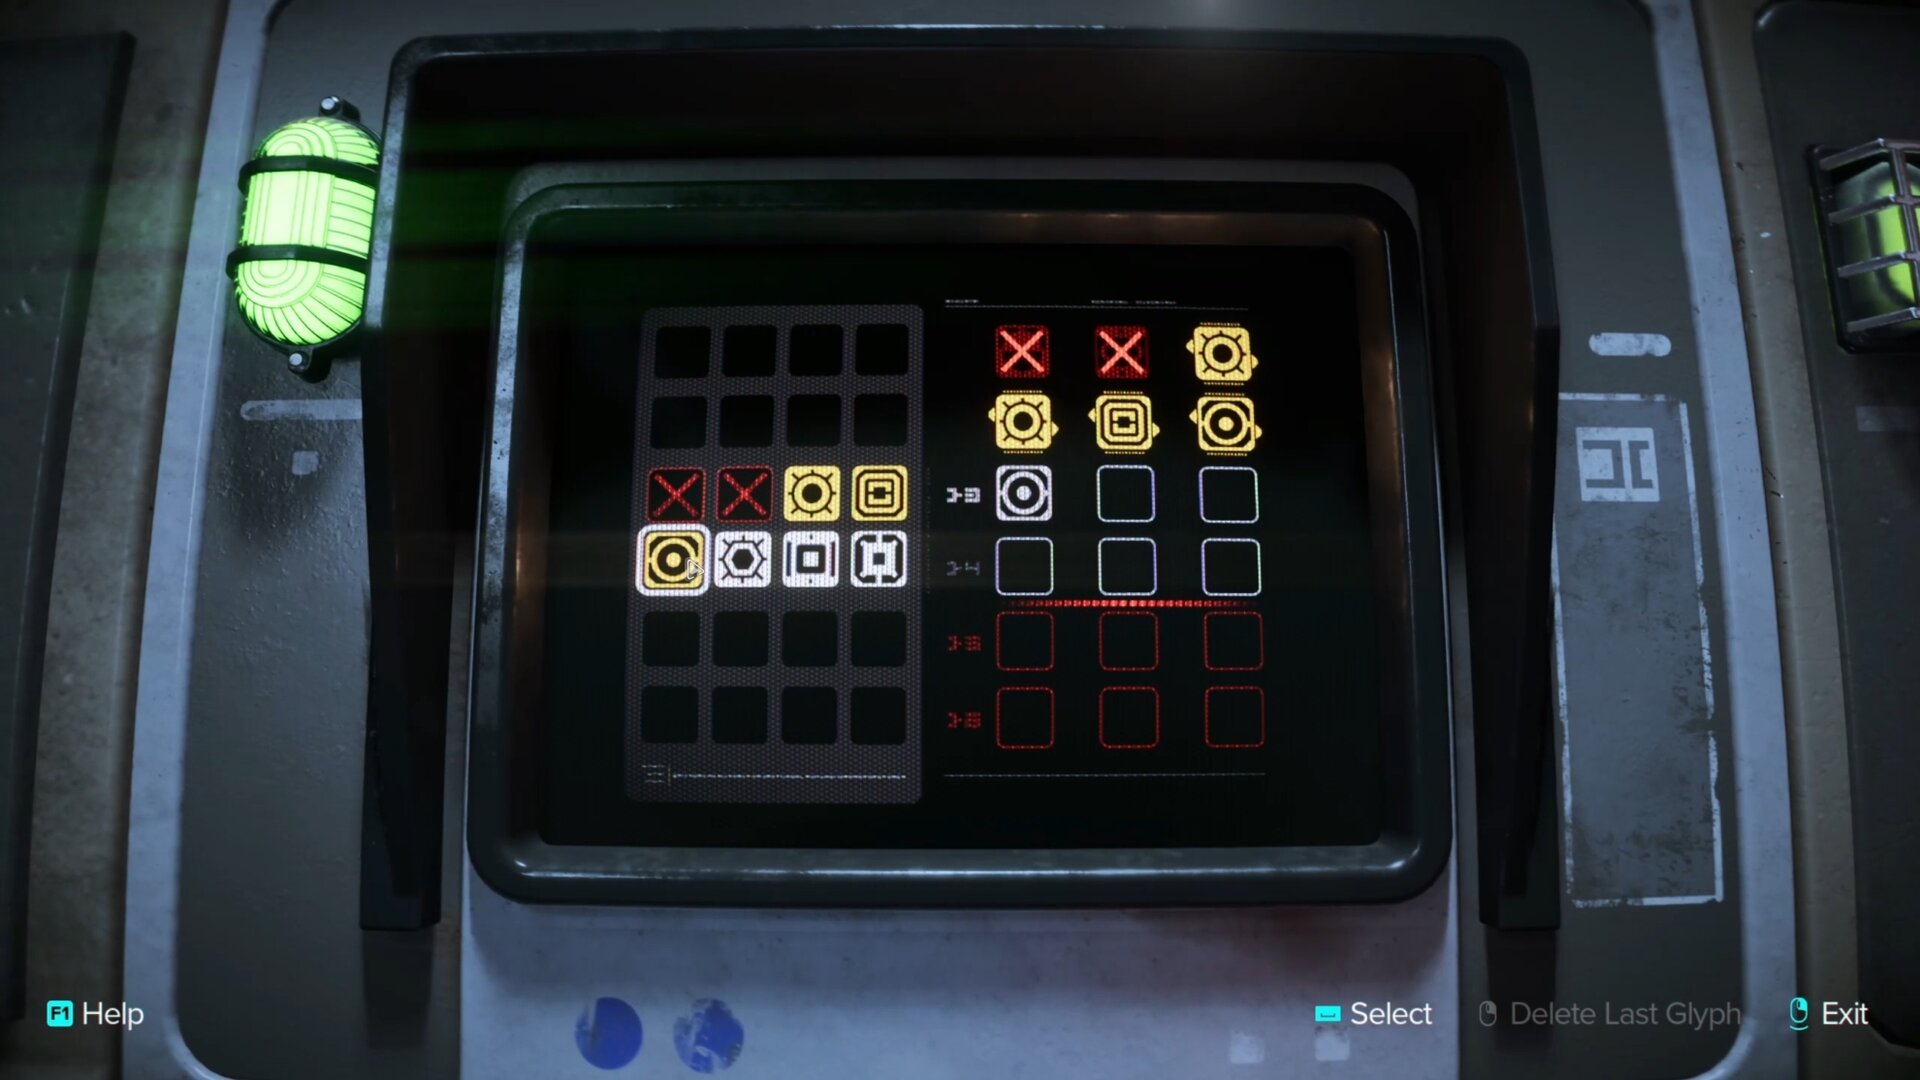
The middle cell is the only place the sun-like glyph can go, leaving a 50/50 chance as to where the circle and square glyphs go. I made a lucky guess here and got the right sequence.

If you get the glyph in its correct position before solving the puzzle, it’ll turn blue and lock in. Any further attempts at the puzzle will have the blue glyph remain, meaning you only have to solve for the remaining cells.

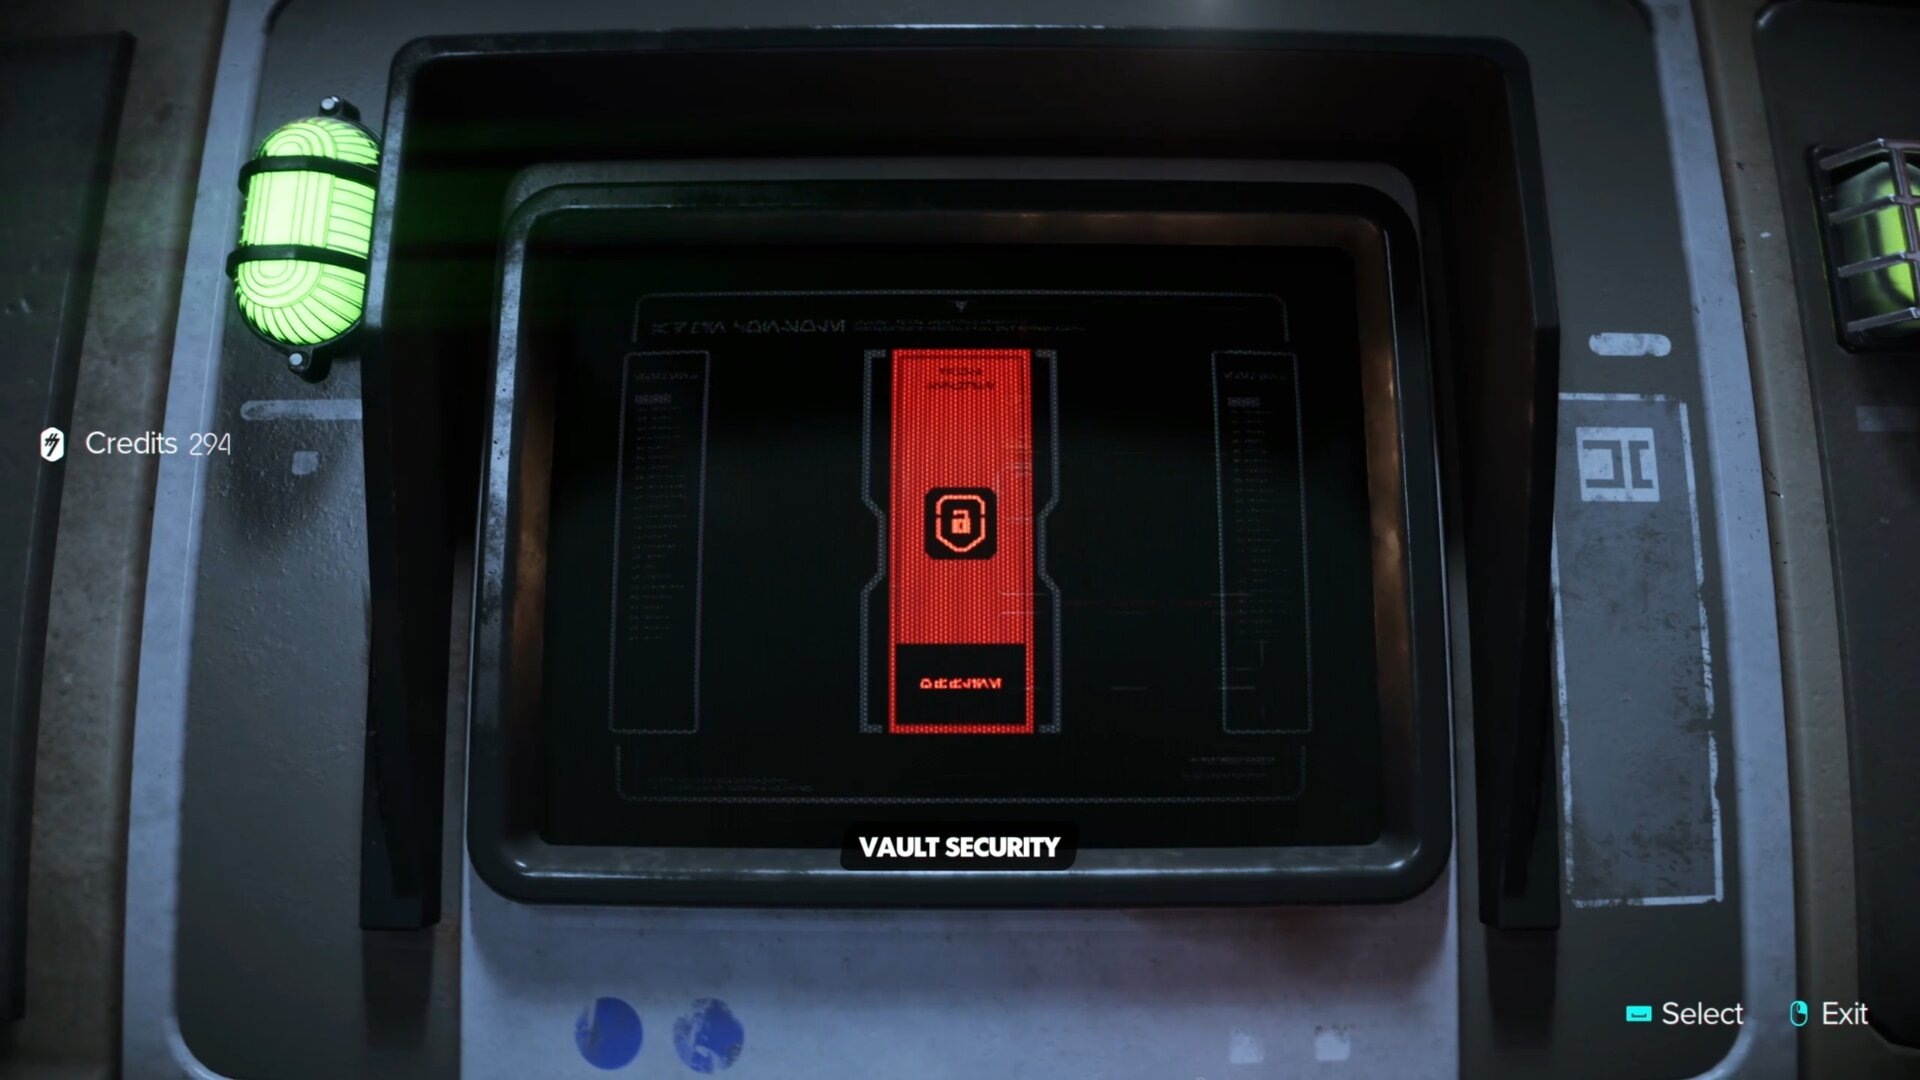
Once you have solved your puzzle, select what you wish to unlock and you’ll exit the terminal. You’ll even get some credits for successfully slicing the terminal.
You’ll often find Slicing Terminals inside major areas with a lot of potential enemy activity. This includes Syndicate-Controlled Zones, Imperial Substations, and Vaults.
How Advanced Slicing Works
As you make progress with the main story, you’ll be able to get into Advanced Slicing. You’ll get a Slicing Kit for rescuing Expert Aila Bren at the Imperial Forward Base on Toshara.
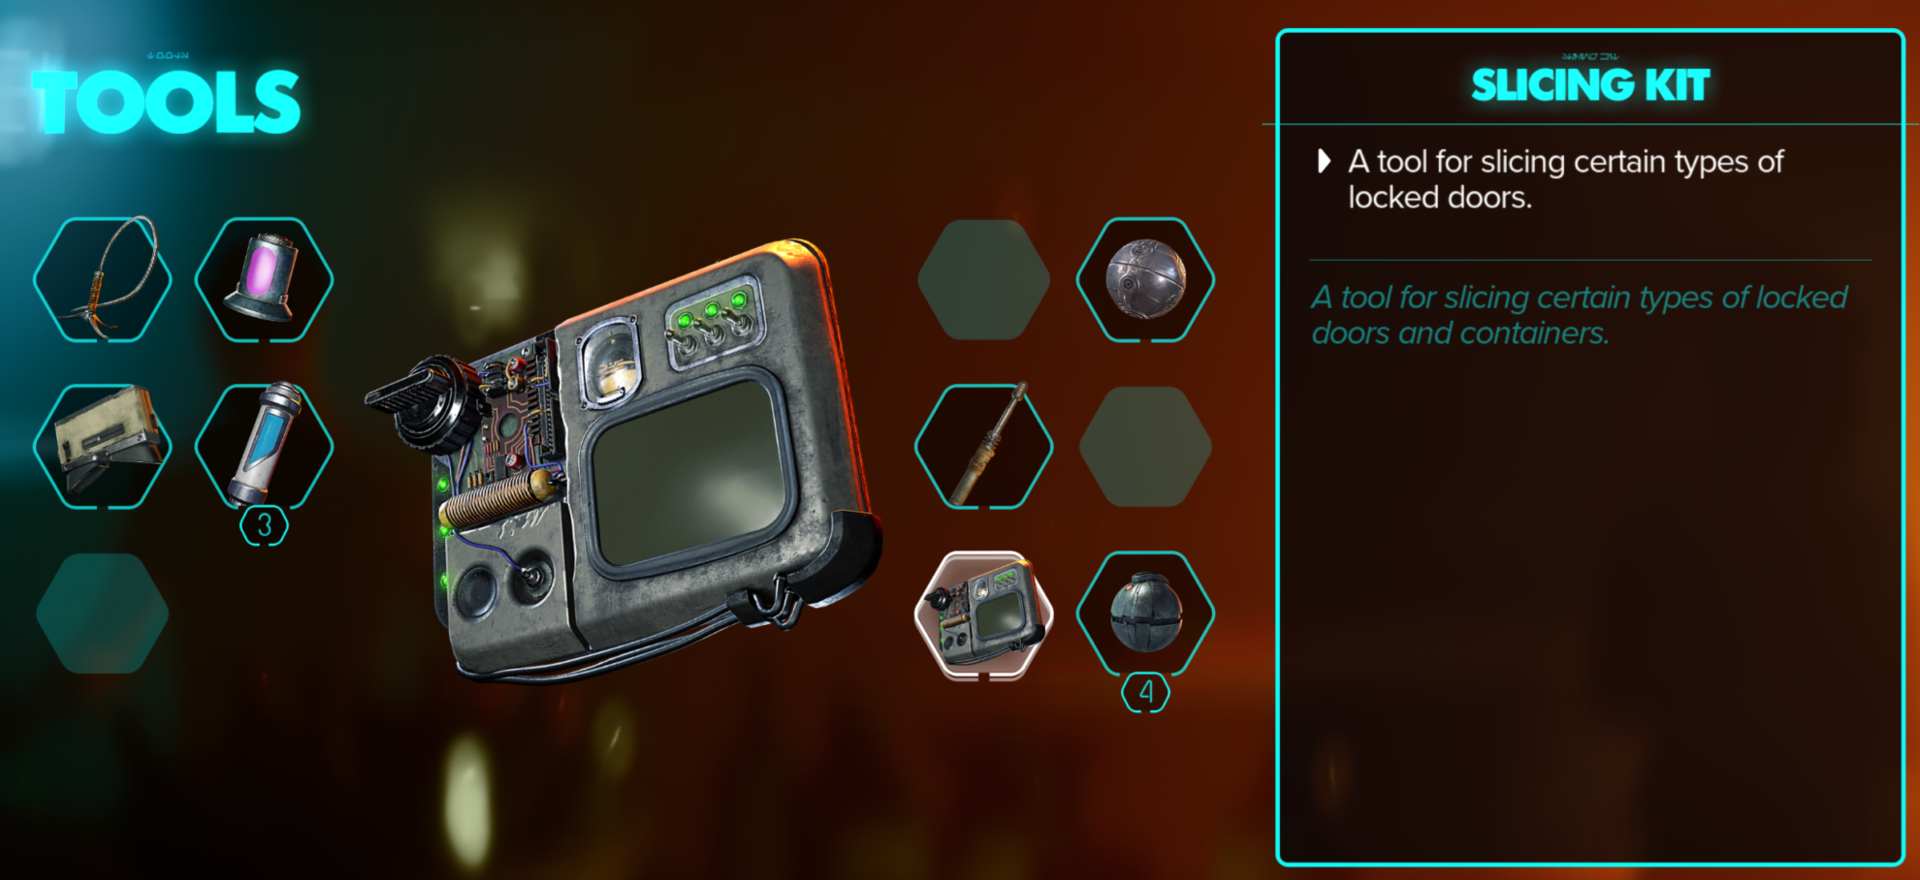
When you get the Slicing Kit, you can slice into a wider assortment of technology through the Slicing Kit. This includes any terminals you would slice basically, they’ll become easier to figure out the proper sequence of glyphs.
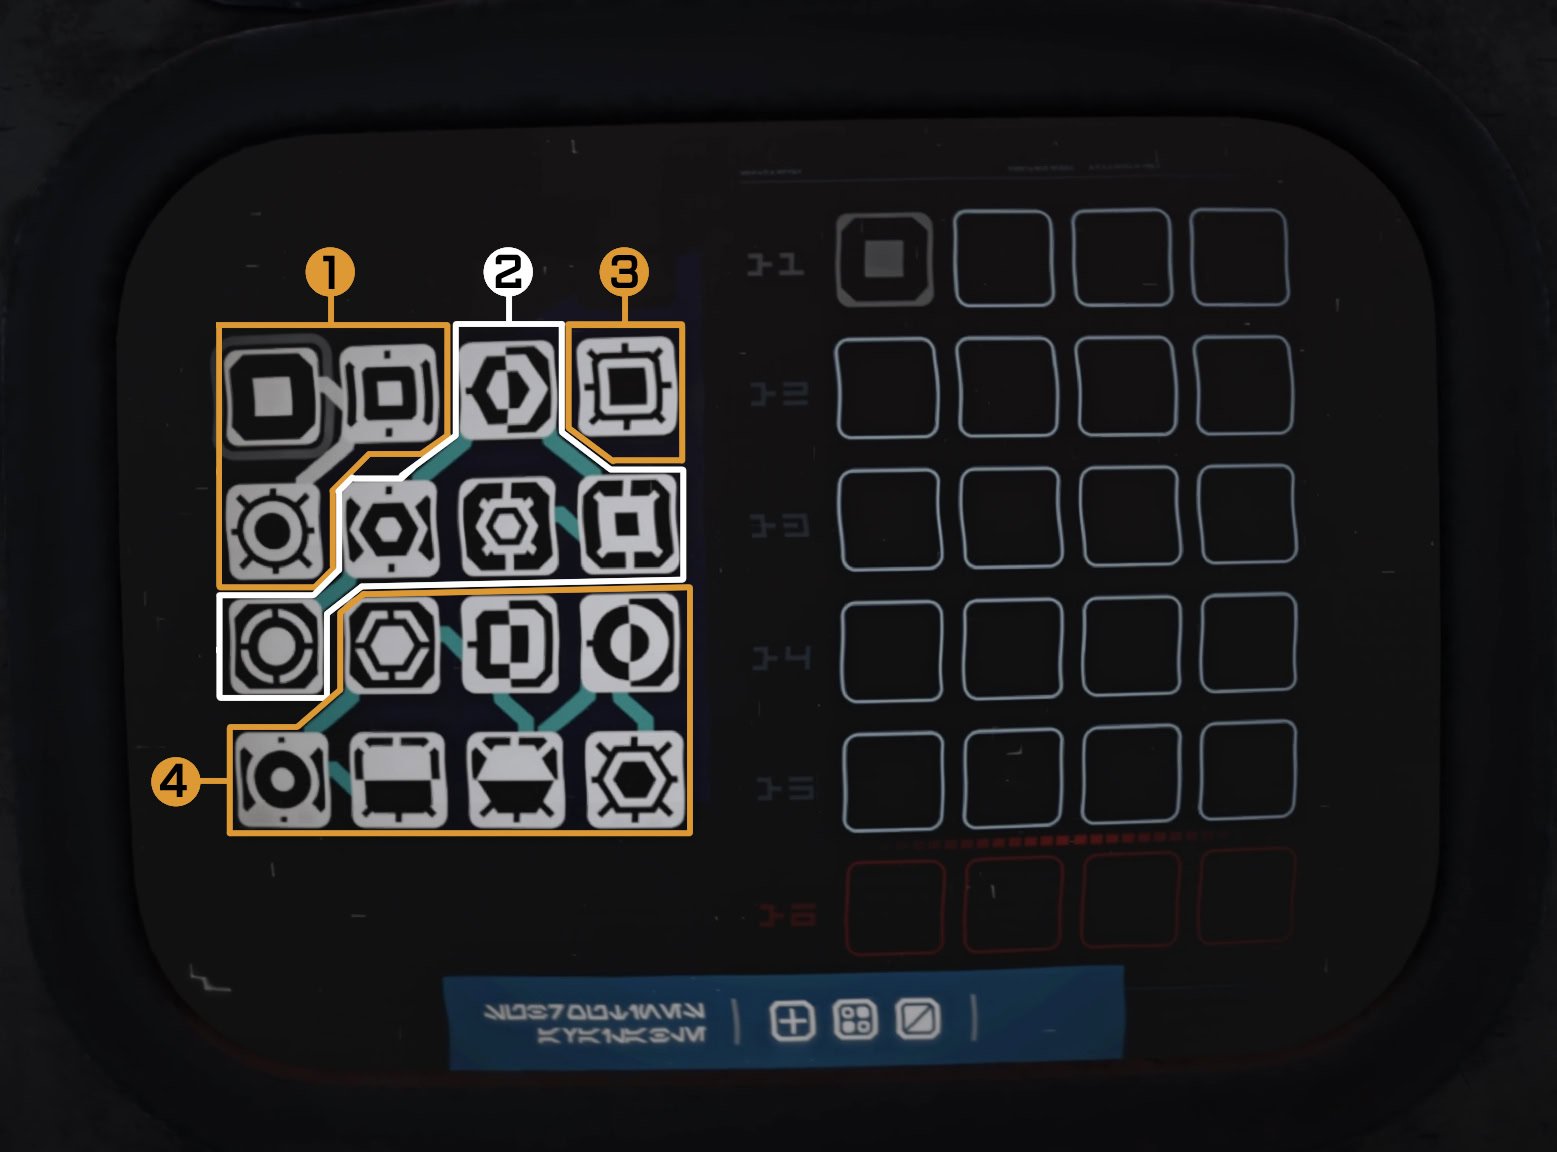
Slicing through the kit is a bit different than basic slicing. Glyphs will be placed into groups as seen by their connecting blue lines. Each group has at least 1 correct glyph, but in some situations, there may be more.
In the following image, I’ve outlined the four groups of glyphs in this advanced slicing puzzle. Since there are four groups, each group has at least one correct glyph.
If there were only three groups available, then there would be one group with at least two valid glyphs. Group 3 only has one glyph, so that’s a guaranteed glyph that’ll work.
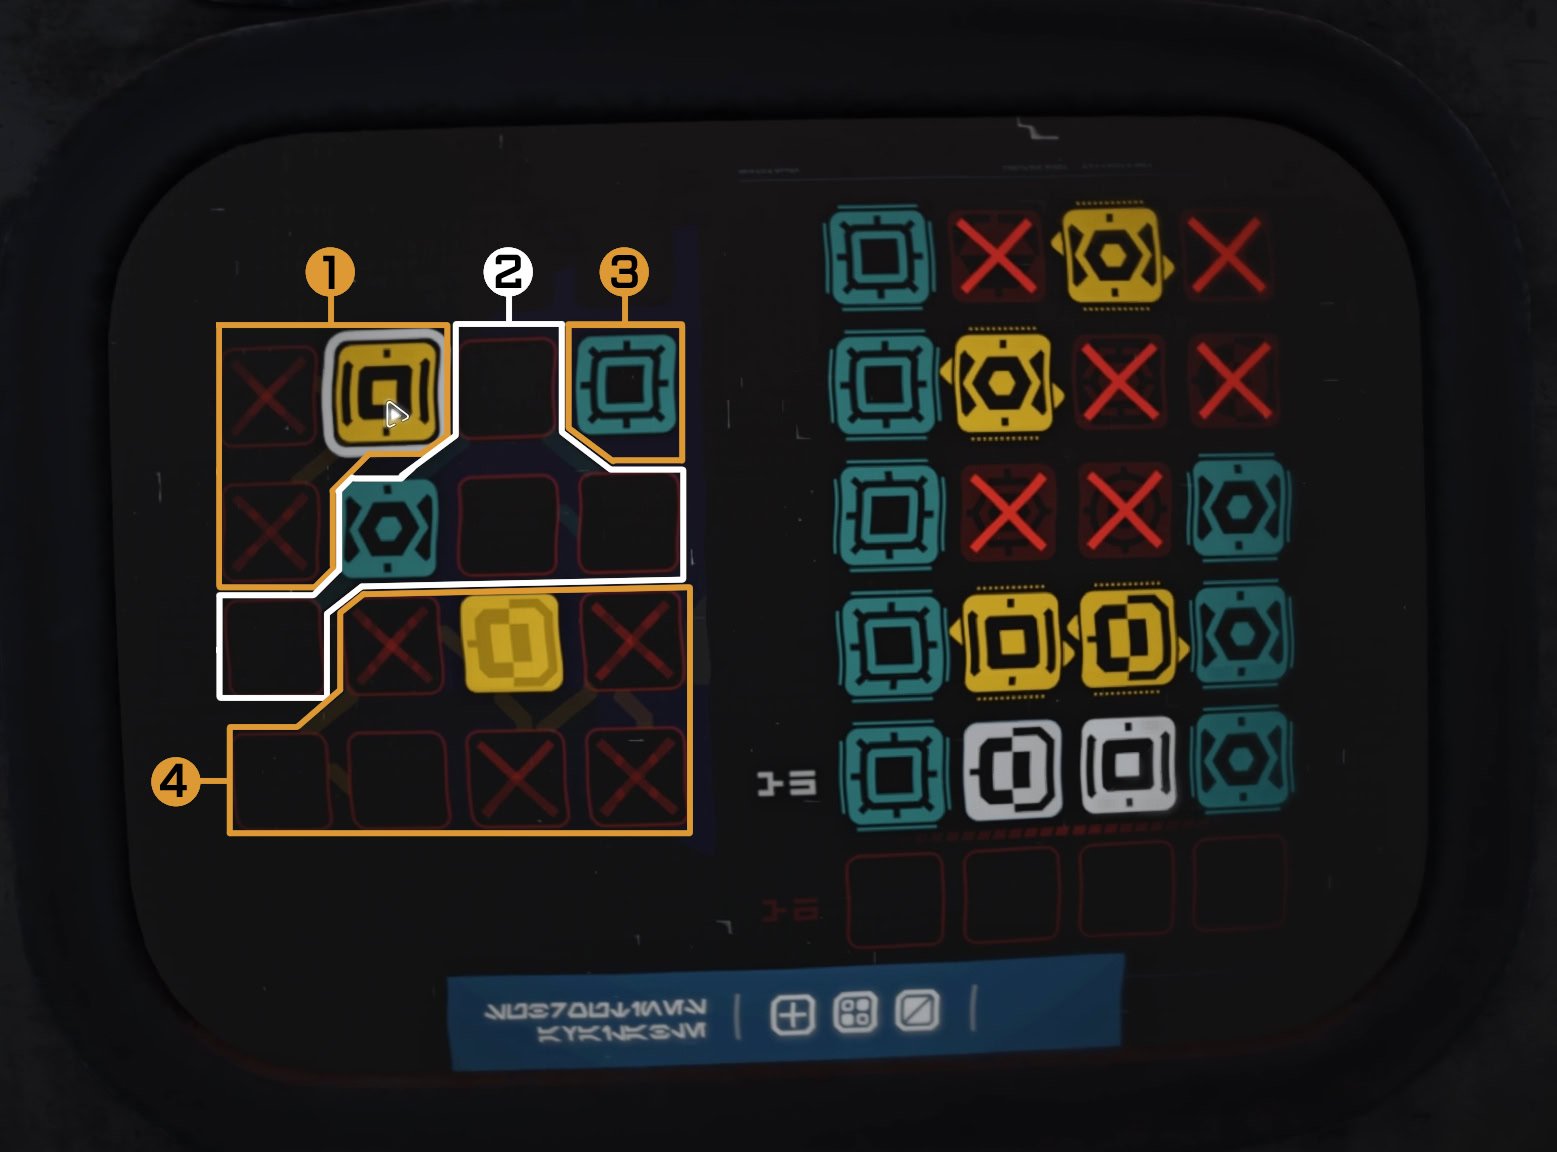
When you find a glyph that’s used in the sequence, all other invalid glyphs in the group will be erased and unusable. If any white glyphs remain, you’ll have to figure out which one is the correct glyph to use.
In the following image, I guessed incorrectly in Group 1, got the right glyph in the wrong sequence in Group 2, and failed in Group 4. Group 3 was guaranteed to work somewhere as we established earlier.
At this point, you’ll have to guess which glyph is the correct answer in each group. If you find the correct glyphs but they’re out of order, refer to your previous tries to figure out where each glyph goes.
You can later unlock the use of Energy in your Slicing Kit. This allows you to use Jokers, functions that can help ease the process of slicing.
You’ll have three Jokers available, they are:

- Memory Expansion (2 Energy) – Adds an extra attempt, up to a maximum of 6 attempts.
You’ll want to use this Joker to get the full slicing reward. It’s better used later on in an attempt if you have the right symbols or know which one to choose next.
- Syntax Sorting (2 Energy) – Automatically place found glyphs that are in the wrong position.
This is useful for times when you have several yellow glyphs and want to put them in their proper location. This narrows down the glyphs you can use and increases your odds of succeeding sooner.

- Error Filtering (3 Energy) – Removes a quarter of unused glyphs from the glyph pool.
A simple yet effective tool to narrow down the amount of useless glyphs on the board.
Jokers run off Energy, you’ll unlock this by obtaining a Code Breaker Chip, 10 Chalcopyrite, and 3 Direct-Energy Circuits. You’ll start with 2 pips of energy when you unlock this upgrade.

Once you use a Joker and consume the energy, you won’t regain any energy unless you exit and reattempt the slice.
Slicing Difficulty and Accessibility
If you require more tries for Slicing or want fewer tries for a challenge, you can adjust the difficulty of the Slicing mini-game. Go to Settings > Gameplay > Slicing and you can adjust the amount of Slicing attempts you have.
You can select the default, fewer attempts if you want it harder, or more attempts if you want it to be easier. You can also toggle off Slicing entirely to automatically slice computers.
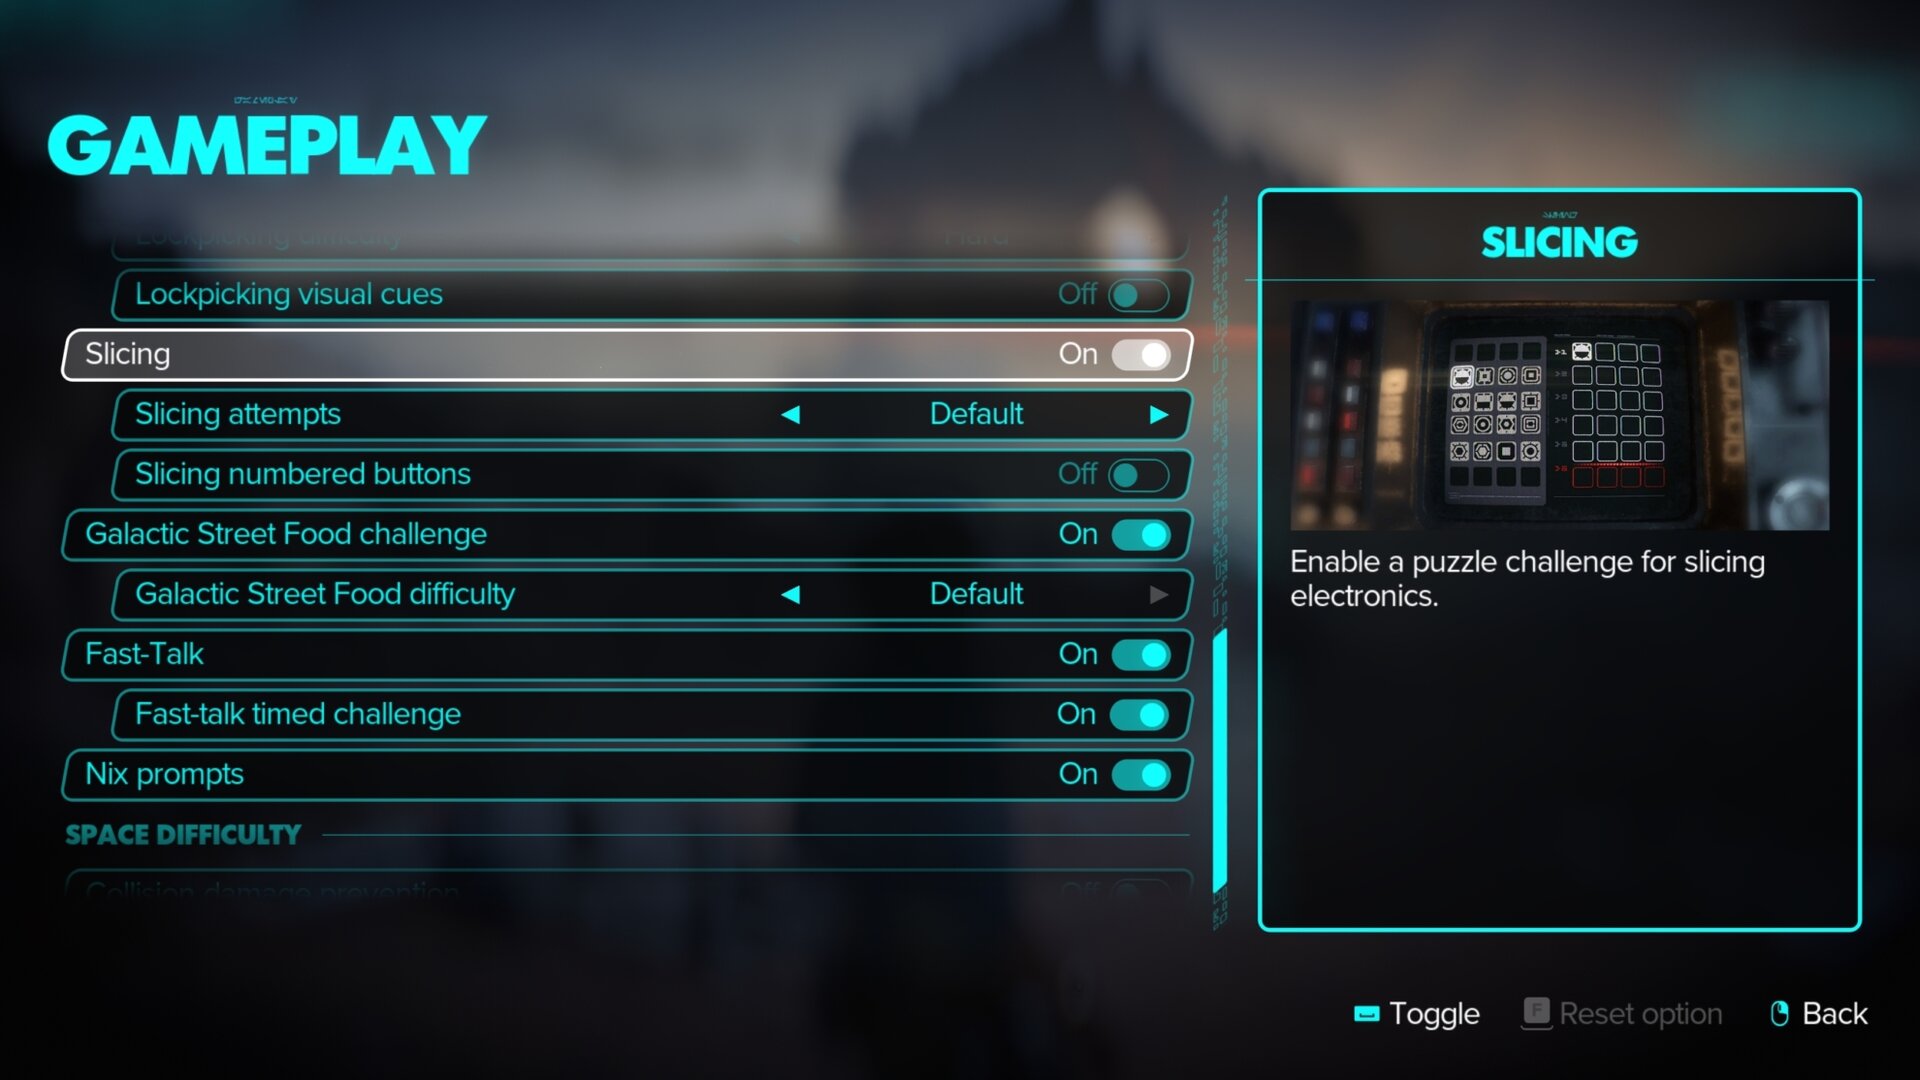
If you’re not fond of the abstract glyphs, you can toggle the Slicing numbered buttons option to replace the symbols with numbers. This can make it a bit easier to recognize which slot goes in what cell.
You can adjust the number settings from within the mini-game as well. Use the Help function and you can input the button or key to toggle the number feature.
This concludes our mini guide on slicing in Star Wars Outlaws. Next up, take a look at our Lockpicking guide for Star Wars Outlaws if you are having trouble with picking locks for doors and containers. Check VULKK.com regularly as we keep posting new guides for the game on a daily and even hourly basis.
Star Wars Outlaws Review
Our spoiler-free review of Star Wars Outlaws. Written after completing the game and gathering everything possible from it.

Star Wars Outlaws DOs and DONTs: Tips for Beginners
A collection of Star Wars Outlaws beginner tips for new players. Learn the DOs and DONTs for Star Wars Outlaws early game and discover how to improve your experience.
Star Wars Outlaws PC and Console Controls Guide
Star Wars Outlaws has its controls laid out quite well, but with a bit of tweaking, you can make them even better. This guide lists all of the default controls for PC and Consoles alongside the changes we recommend you to make for more comfort.
Star Wars Outlaws Settings and UI Guide: What should you change
This guide covers the Visual and Gameplay Settings for Star Wars Outlaws and how best to adjust them for a better experience.

Star Wars Outlaws Nix Guide: All Controls and Abilities
Learn what your fuzzy little sidekick Nix can do for you in Star Wars Outlaws. I hope you're ready to get your sick kicks with Nix!
Star Wars Outlaws Syndicates Reputation System: Everything You Need to Know
This guide explains how the Syndicates Reputation System works in Star Wars Outlaws – the effects of Positive and Negative reputation, what rewards you get for increasing reputation with each syndicate and recommend Reputation Building Strategies!

Star Wars Outlaws Loadouts and Gearing Guide
The Loadout system in Star Wars Outlaws plays an important role in its gameplay, allowing you access to various perks and benefits. This guide goes into this system in-depth.
How to unlock all Experts and Abilities in Star Wars Outlaws
This guide will help you unlock all Experts in Star Wars Outlaws and show you what abilities each one of them can teach Kay as well as everything you need to learn each one of them!
Blaster Modules and Key Parts: Star Wars Outlaws Guide
This guide will show you when you unlock each of the main Blaster Modes and their sub-variants in Star Wars Outlaws. We will also explain where and how to get the Blaster Key Parts and other rare materials required for the upgrades.
Trailblazer Upgrades and Builds: Star Wars Outlaws Guide
You’ll learn how to unlock the various Trailblazer Upgrades and Systems in Star Wars Outlaws, including the more elusive components. We’ll also provide you with several builds for your Trailblazer.
All Star Wars Outlaws Outfits: Full Catalog
This catalog lists absolutely all Outfits available in Star Wars Outlaws. It also explains how outfits work if you are a new player. We will keep it updated when DLCs start coming out.
Star Wars Outlaws Lockpicking Guide: How to Override Locks
This guide will help you learn the basics of lockpicking in Star Wars Outlaws. This simple yet fun mini-game will test your timing and ability to keep pace with the door's rhythm.

How to use Photo Mode in Star Wars Outlaws
This guide explains how to use Photo Mode in Star Wars: Outlaws and what tools it offers for taking the most perfect and tuned-up screenshots!
Related Star Wars Outlaws Collections of Guides

Our Guides Master List for Star Wars Outlaws is a great starting point. In it you will find all of our guides and walkthroughs ordered in categories.