Star Wars Outlaws has its controls laid out quite well, but with a bit of tweaking, you can make them even better. This guide lists all of the default controls for PC and Consoles alongside the changes we recommend you to make for more comfort.
How to change Keybindings
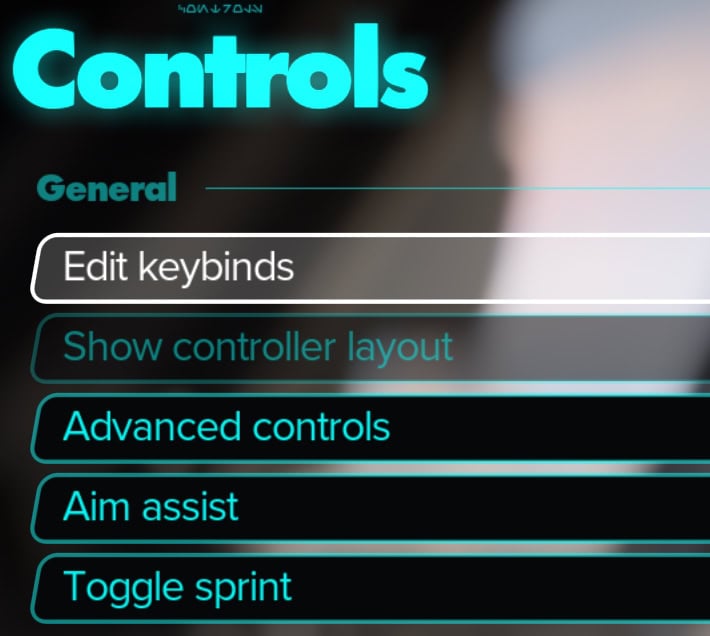
On PC, while using Keyboard and Mouse controls, we can change keybindings as we see fit. We can do this by pausing the game, selecting the Settings Menu, then Controls.
Under the first section, select Edit Keybinds to bring up the menu to adjust the Keybinds.
You can use Space or LMB to select the control you wish to Edit, then press the key you wish to assign to that action and it will be saved.
Should you ever need to return to default Keybinds, you can select a Keybind and press T to revert only that Keybind to default, or Hold G to reset all keybinds.
How to Change Controller’s Layout
Unlike Keyboard and Mouse, you can’t freely rebind your Controller buttons. Star Wars Outlaws does however offer four different Control Schemes to make use of:
- Right-handed (Default)
- Left-handed
- Southpaw
- Left-handed Southpaw.
Thankfully these controls are situated pretty comfortably, so there’s little need to go out of the way to adjust them beyond these basic layouts.
We change this by pausing the game, selecting the Settings Menu, then Controls. Under the first section, select Controller Layout to bring up the Controller Layout screen.

From here, we can cycle through the layout using L1 and R1 for Playstation Controllers, and LB and RB for Xbox Controllers. Once you’ve found the option you want to swap to, confirm the swap with X (Cross) on Playstation or the A Button on Xbox.
On Foot Controls
The next are lists of default controls when playin with Kay on foot for PC, Playstation 5 and Xbox Series X|S.
PC
Below are the default controls while controlling Kay with Keyboard and Mouse. We found these controls to work well without any adjustments.
| Control Name | Default |
|---|---|
| Move Forward | W |
| Move Backward | S |
| Move Left | A |
| Move Right | D |
| Interact | E |
| Sprint | Shift |
| Jump | Space |
| Crouch | CTRL |
| Force Walk | H |
| Auto Walk | N |
| Dodge | CTRL |
| Slide | C (While Sprinting) |
| Call Speeder | Y |
| Electrobinoculars | 5 |
| Melee | V |
| Use Bacta Vial | G |
| Throw Grenade | LMB (while equipped) |
| Equip Grenade | 4 |
| Smoke Bomb | Z |
| Holoreader | 6 |
| Fast-Talk | E |
| Whistle | T |
| Lockpicking Lock-in | LMB |
| Equipment | U |
| Zoom In | Scroll Wheel Up |
| Zoom Out | Scroll Wheel Down |
| Plasma Blaster | 1 |
| Ion Blaster | 2 |
| Power Blaster | 3 |
| Stun Blaster | F |
| Holster/Unholster | MMB |
| Reload | R |
| Fire | LMB |
| Aim | RMB |
| Next Blaster | Scroll Wheel Up |
| Previous Blaster | Scroll Wheel Down |
| Nix Mode | Q |
| Adrenaline Rush | X |
| Mark Enemy | E |
| Remove Mark | R |
| Fire Adrenaline Rush | LMB |
| Nix Order 1 | LMB |
| Nix Order 2 | RMB |
| Nix Order 3 | F |
| Nix Order 4 | 3 |
| Cancel Order | R |
| Nix Sense | B |
| Nix Aggressive Switch | Space |
| Binoculars – Zoom In | Scroll Wheel Up |
| Binoculars – Zoom Out | Scroll Wheel Down |
| Binoculars – Mark | C |
| Binoculars – Place Marker | F |
| Binoculars – Annotate | G |
| Release Grapple | C |
| Shorten Grapple | E |
| Extend Grapple | Q |
| Hologram Left | Q |
| Hologram Right | E |
Playstation
Below are the default controls while controlling Kay using a Playstation Controller. We found these to also be comfortable with no changes, which is good because they cannot be changed beyond swapping layouts.
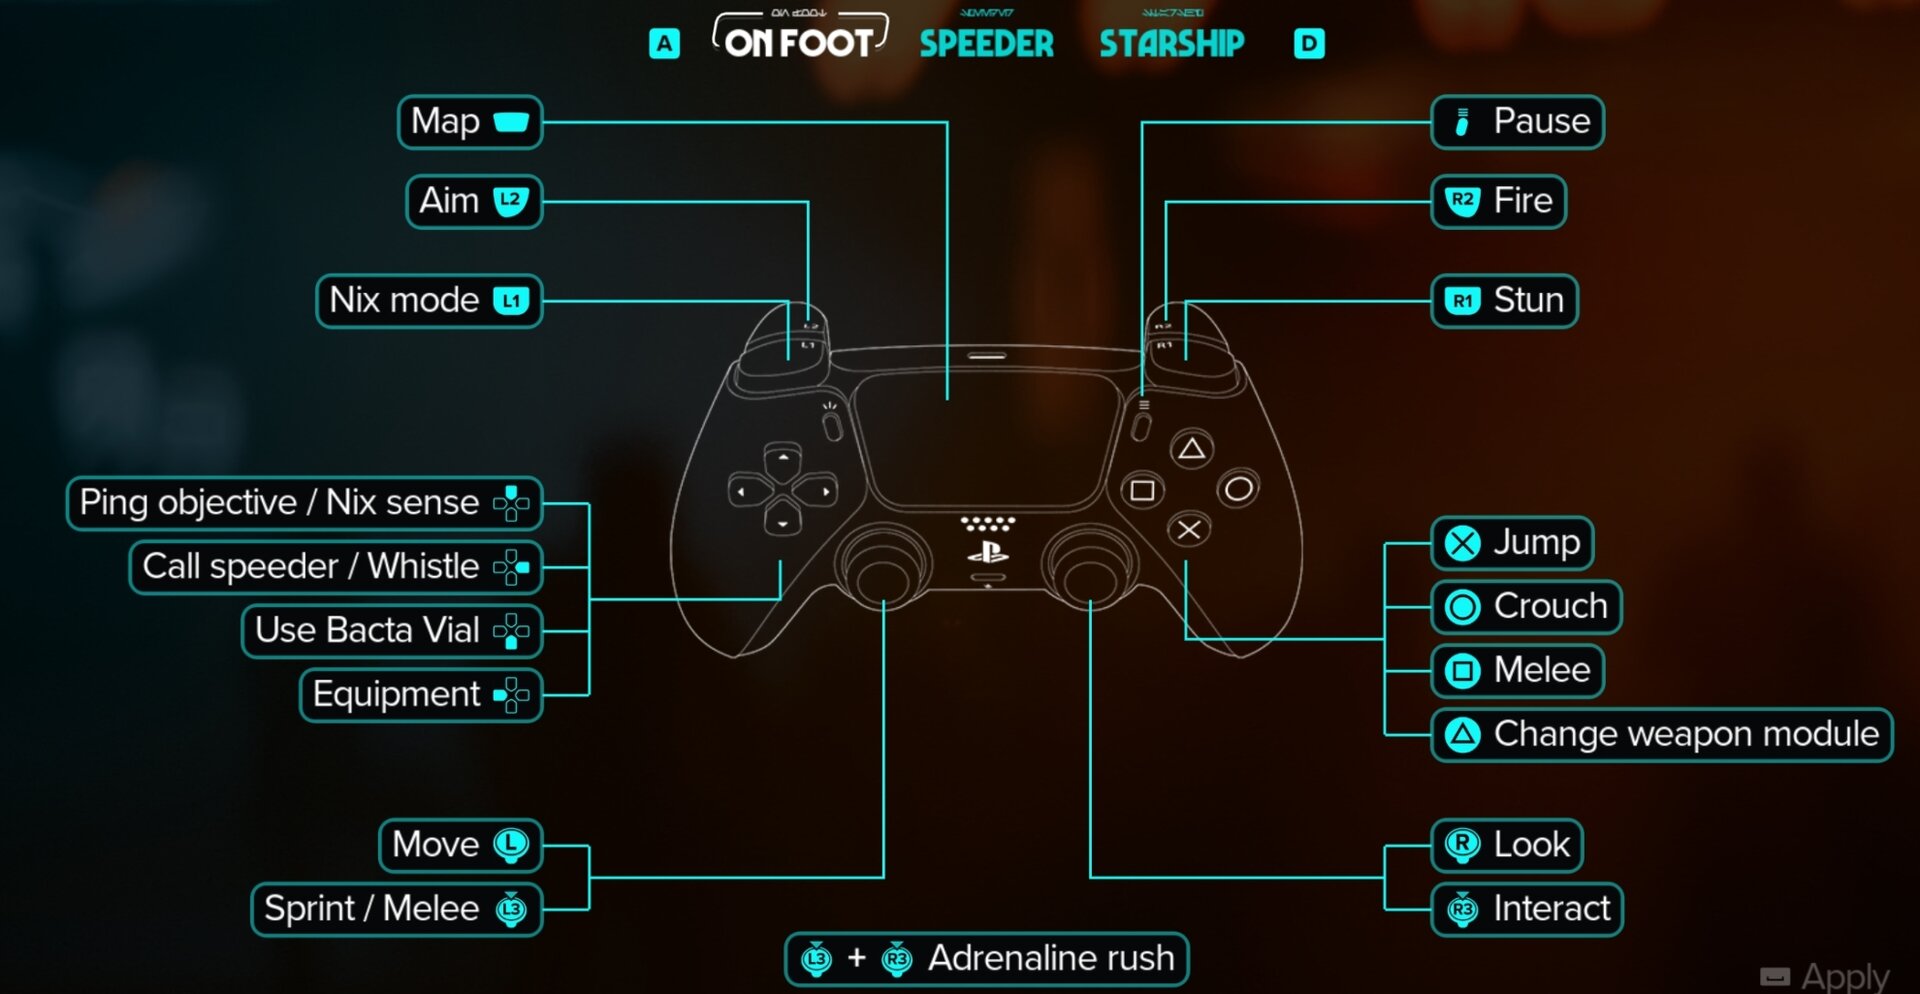
If you are using a Playstation DualSense controller, we highly recommend enabling the Motion Sensor Function in the Advanced Control Settings. This can help a ton when it comes to aiming, especially with making finer adjustments in aim.
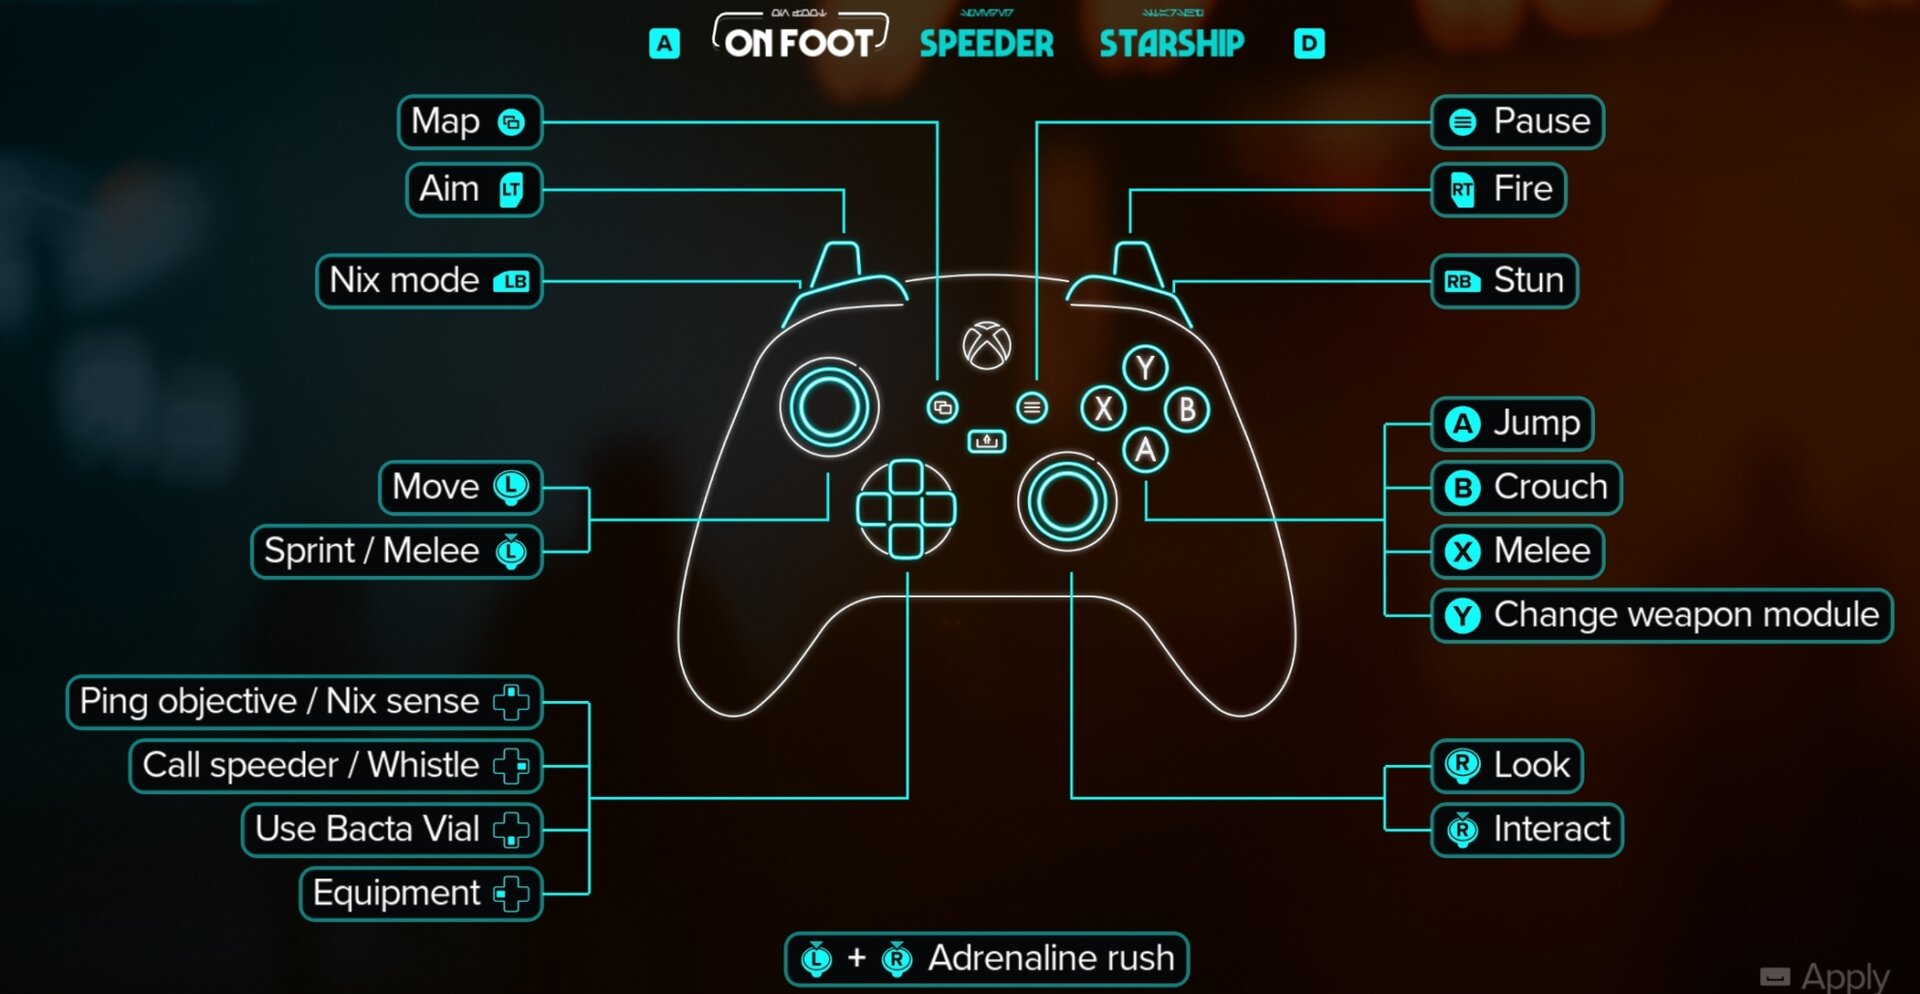
Xbox
Below are the default controls while controlling Kay with an Xbox Controller. Much like the Playstation Controls, these are comfortable but also cannot be altered beyond the same Left-handed and Southpaw presets.
Speeder Controls
The next are lists for the controls for controlling Kay’s speeder on PC, Playstation 5 and Xbox Series X|S. We do recommend you to consider changing a few of them to custom keybinds for a better and more consistent gameplay experience.
Note that for Keyboard and Mouse you can have up to two keybinds per action. This allows even more flexibility.
PC
Below are the default controls while controlling the Speeder with Keyboard and Mouse. We’ve included a few recommended changes here based on our experience.
| Control | Default | Recommendation |
|---|---|---|
| Dismount | R | Y |
| Accelerate | W | |
| Brake | CTRL/ S | CTRL Only |
| Steer Left | A | |
| Steer Right | D | |
| Boost | Shift | |
| Jump | Space | |
| Dodge Left | Q | |
| Dodge Right | E | |
| Look Back | C | V |
Keeping with our recommendations from our Settings Guide, we recommend using the keyboard to Steer. The Mouse Steering Setting is particularly uncomfortable to use, even after messing with sensitivity.
As far as changes go, we recommend changing Dismount to Y, as it moves it a bit further away from the main controls to avoid any accidental use. This also allows you to use the same button for both calling the speeder when on foot and dismounting from it.
Removing S from the Brake control is also very helpful, as it tends to delay initial movement if you accidentally press it as you mount your Speeder.
Moving Look Back to V is more of a personal choice, both C and V serve the same purpose of being accessible by our thumb or Index finger.
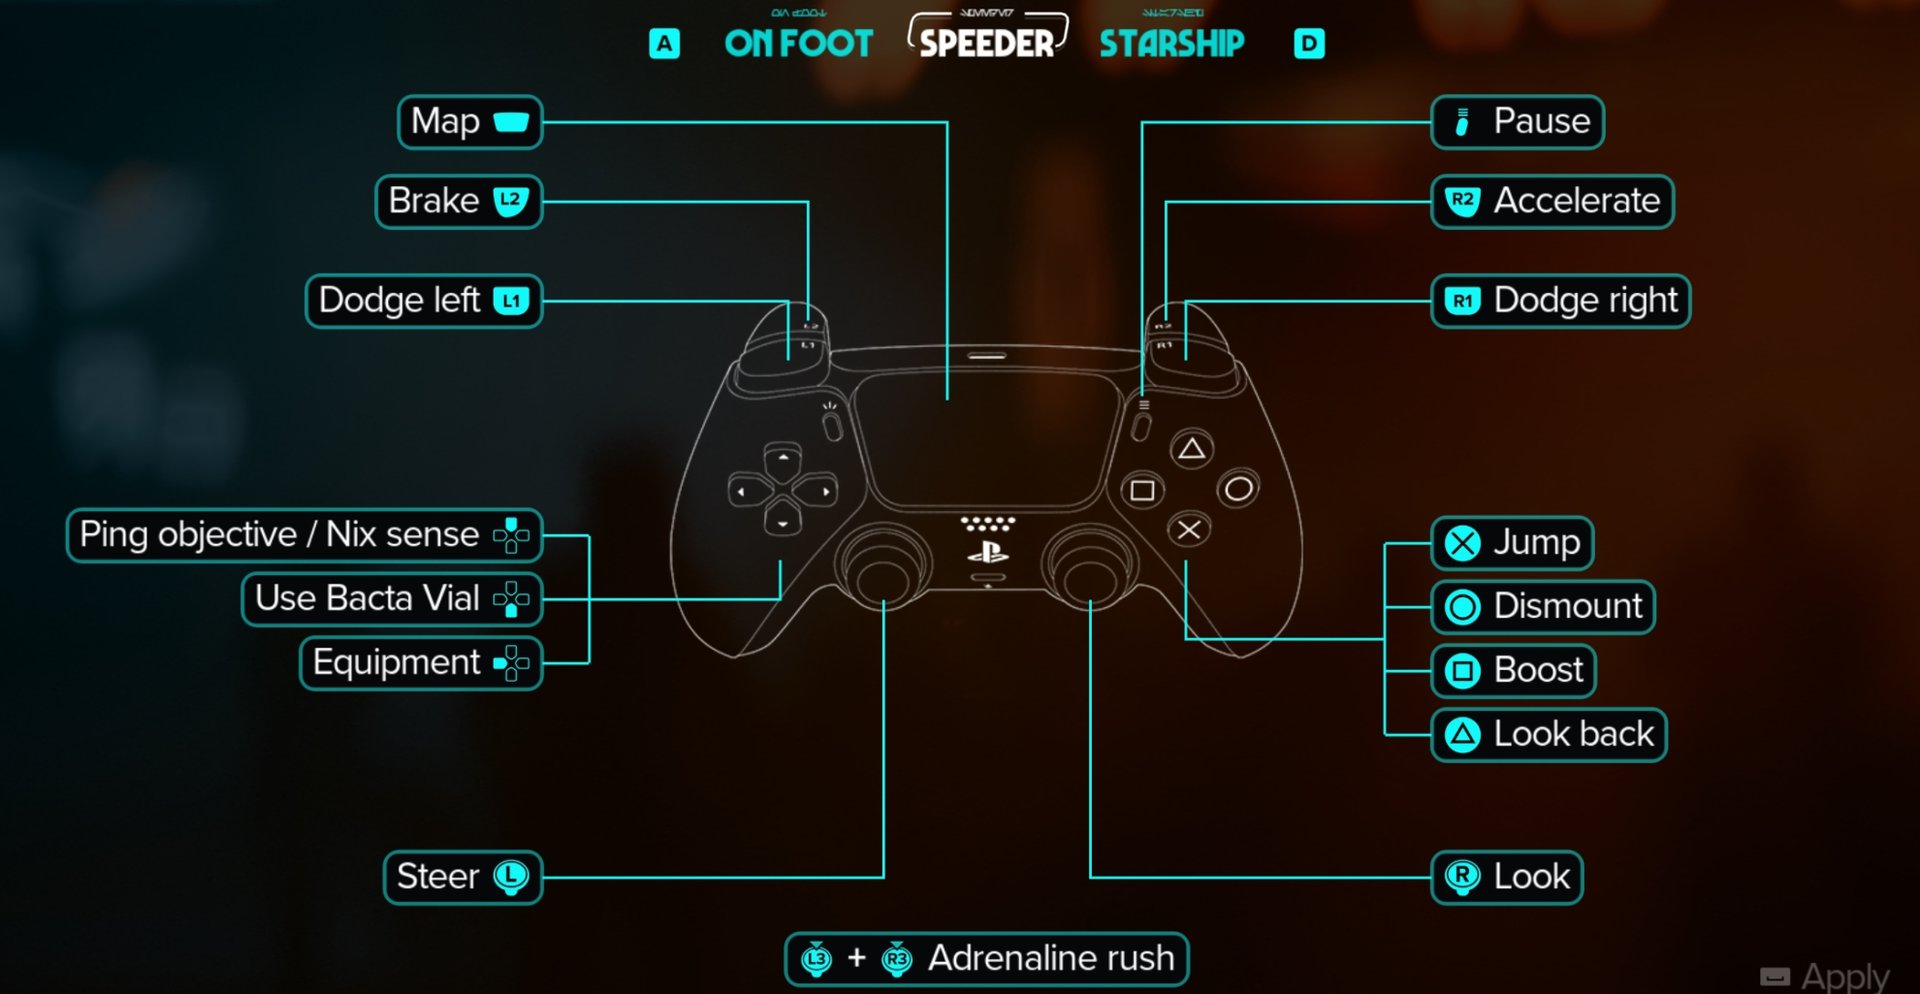
Playstation
Below is the default layout for Speeder controls with a Playstation Controller. Much like the other Console Controls, these cannot be altered beyond switching to a Left-handed or Southpaw control scheme.
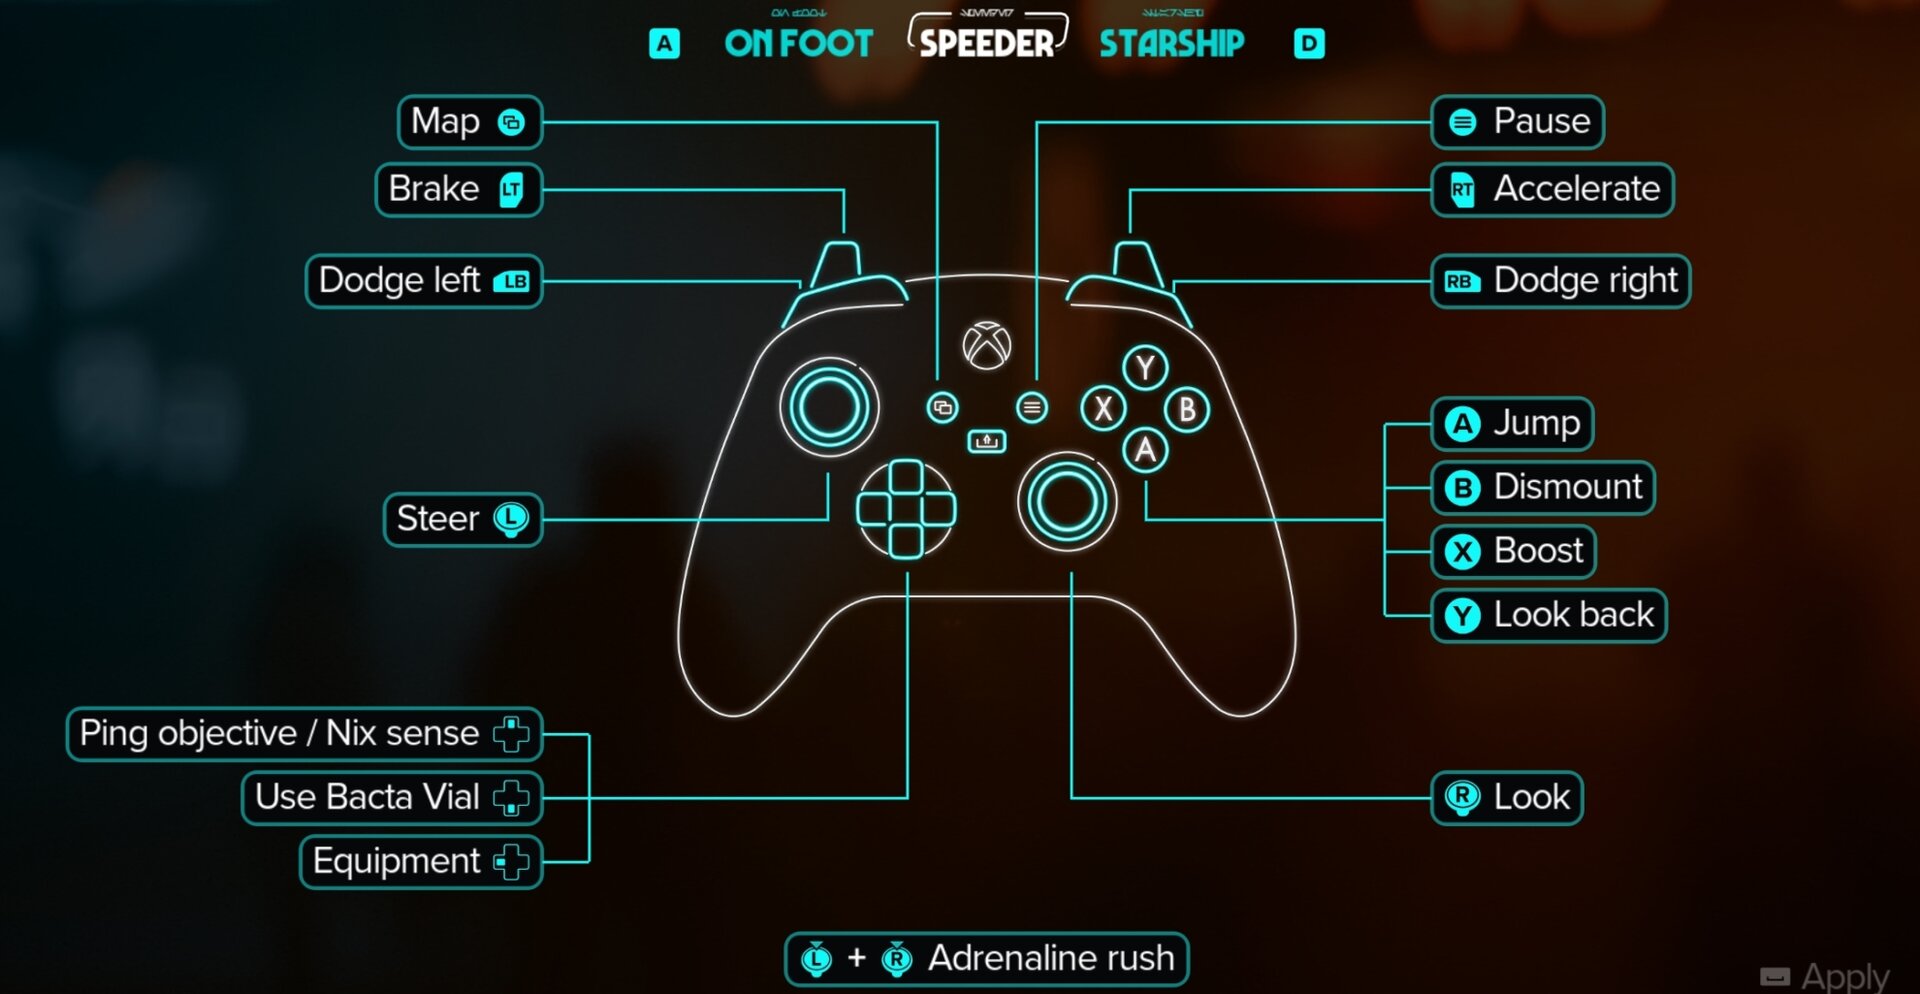
Xbox
Below is the default layout for Speeder controls with an Xbox Controller. Much like the other Console Controls, these cannot be altered beyond switching to a Left-handed or Southpaw control scheme.
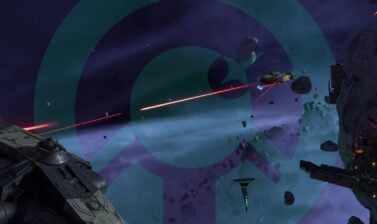
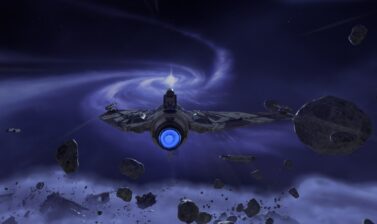
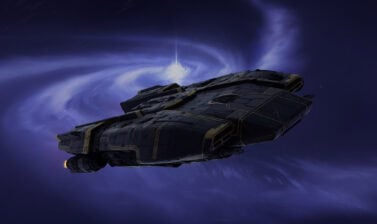
Starship Controls
The next are lists for the controls for controlling the Starthip on PC, Playstation 5 and Xbox Series X|S. We do recommend you to consider changing a number of them to custom buttons for keyboard and mouse to get better and more comfortable experience.
PC
Below are the default controls for controlling the Starship with Keyboard and Mouse. We found these to be fairly comfortable with some minor changes.
| Control | Default | Recommendation |
|---|---|---|
| Accelerate | W | |
| Brake | S | |
| Boost | Shift | |
| Dodge Left | A | |
| Dodge Right | D | |
| Roll Left | Z | Q |
| Roll Right | C | E |
| Fire Cannons | LMB | |
| Fire Missile | Q | RMB |
| Toggle Turret | R | |
| Toggle Pursuit Mode | RMB | C |
| Repair | F | |
| Use Auxiliar Device | G | |
| Scan | V | |
| 180/360 Maneuver | Space | |
| Next Target | Scroll Wheel Down | Scroll Wheel Up |
| Previous Target | Scroll Wheel Up | Scroll Wheel Down |
| Free Look / Look Back | T |
The Default controls are okay, but we found moving Roll Left/Roll Right to Q and E respectively felt better as it keeps all of the main controls in a smaller cluster.
We chose to move Missiles to RMB so that both weapons are on the main mouse buttons. This means we have to move Toggle Pursuit Mode, which can now be on a more comfortable C after moving the Roll Controls.
Finally, we swap the Target Selection controls, moving Next Target to Scroll Wheel Up, and Previous Target to Scroll Wheel Down. This isn’t necessary, but it keeps it consistent across the other controls to swap them.
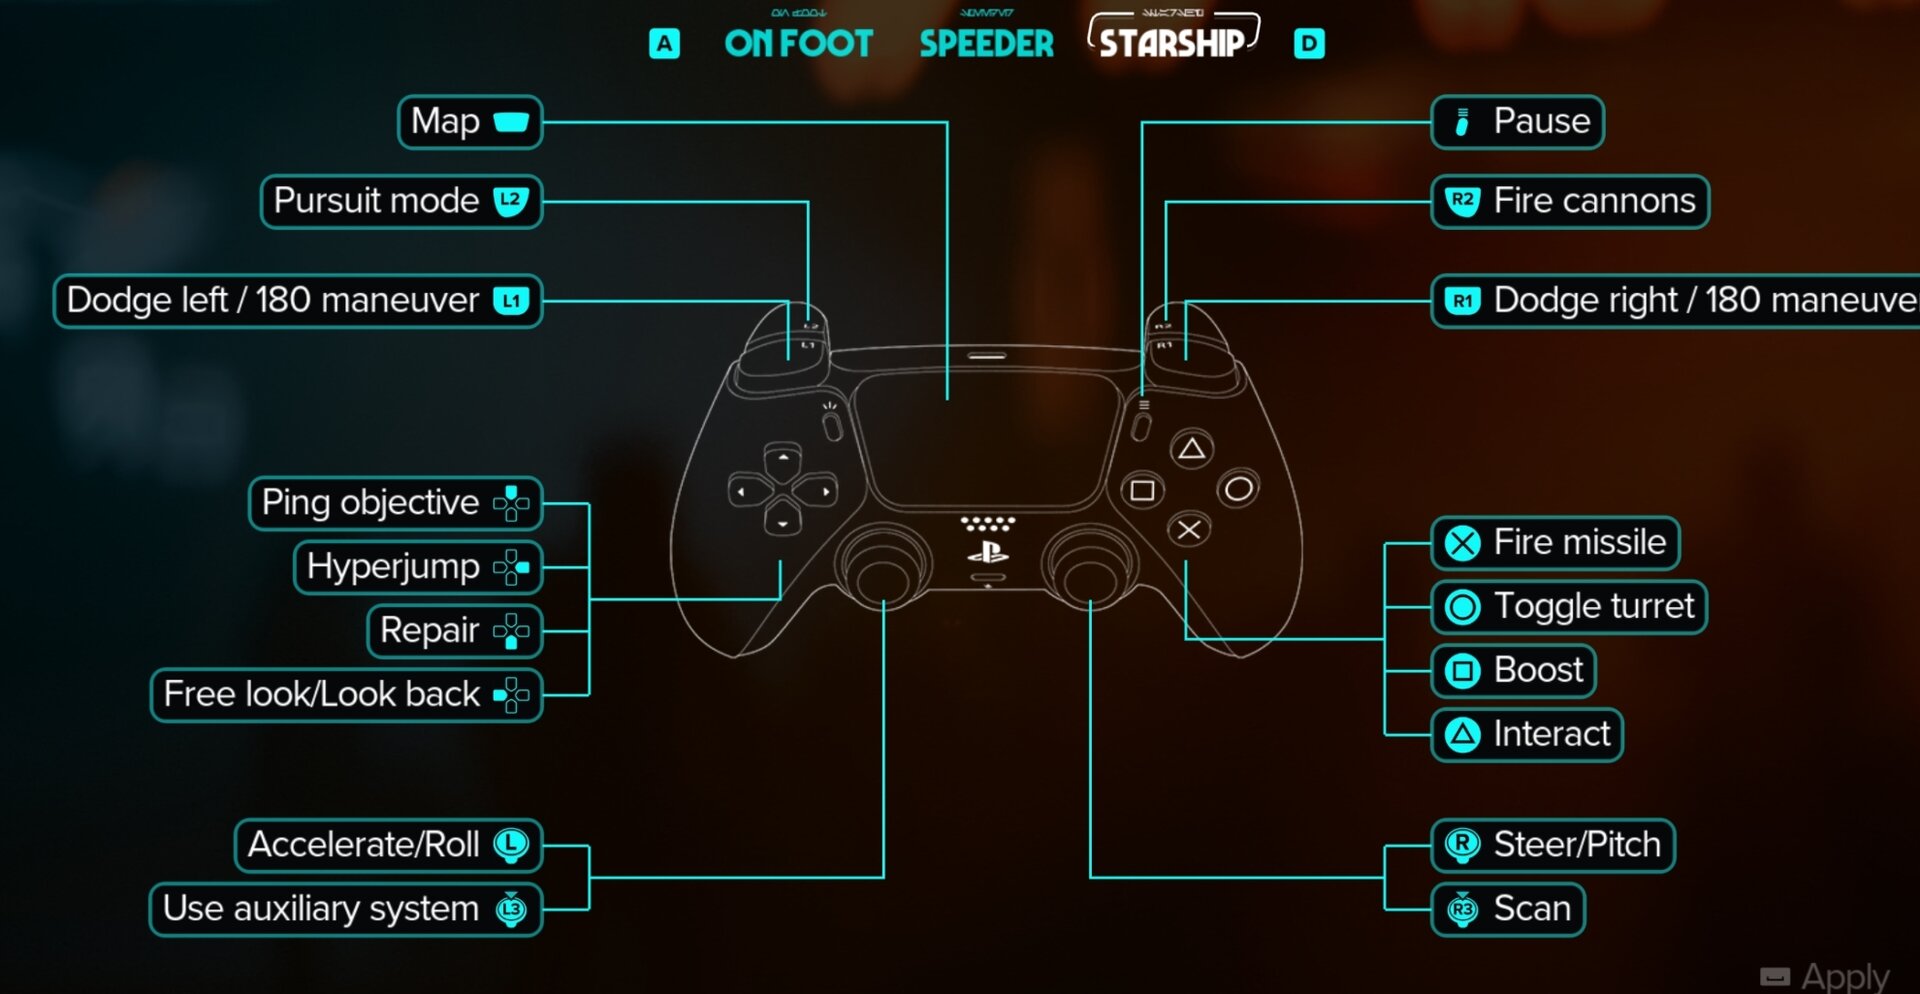
Playstation
Below is the default layout for Starship controls with a Playstation Controller. Much like the other Console Controls, these cannot be altered beyond switching to a Left-handed or Southpaw control scheme.
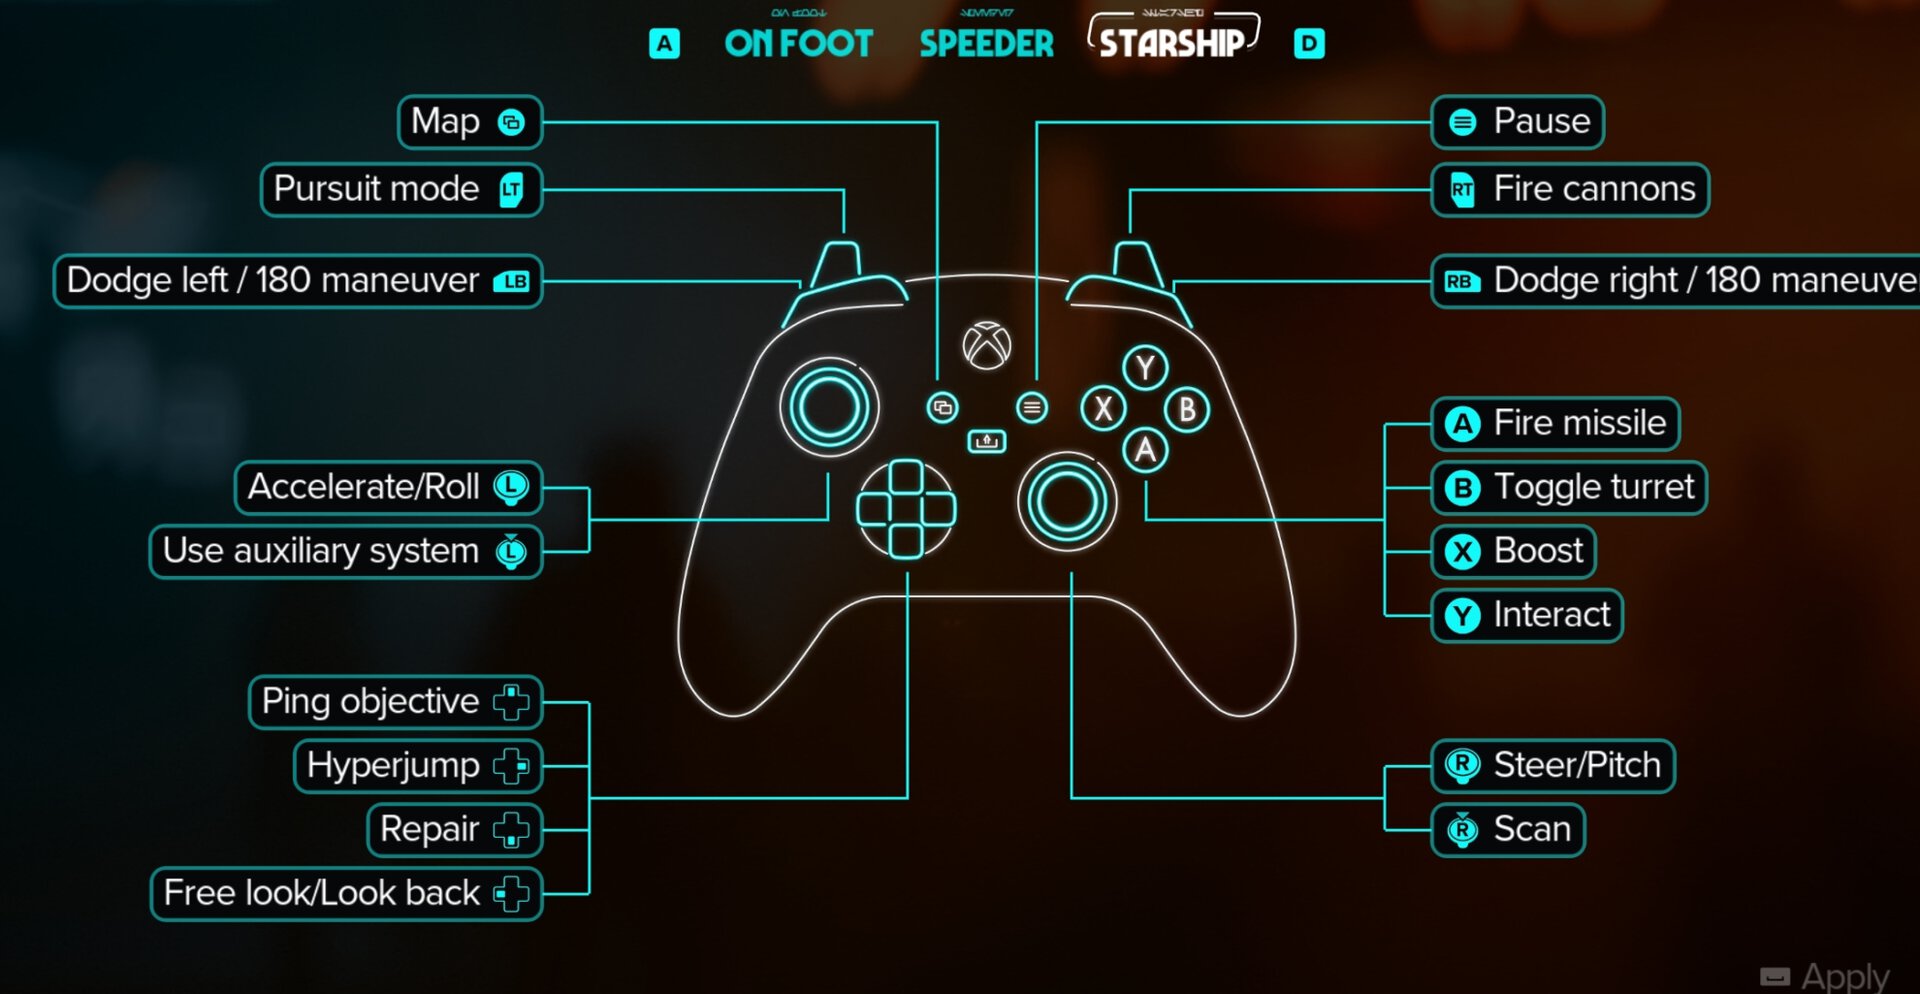
Xbox
Below is the default layout for Starship controls with an Xbox Controller. Much like the other Console Controls, these cannot be altered beyond switching to a Left-handed or Southpaw control scheme.
That covers everything about Controls and Keybindings in Star Wars Outlaws. Be sure to check out our other Star Wars Outlaws content here on VULKK.com.