Learn how to unlock all Experts in Star Wars Outlaws, what abilities each one of them can teach Kay as well as locations and details for l!
Table of contents
What are Experts in Star Wars Outlaws
You learn new abilities in Star Wars Outlaws by completing tasks given to you by Experts. You meet those experts as you journey through the game’s story. Each expert has a quest you have to complete with or for them first. After that they are unlocked in your experts menu and you can start learning abilities and perks from them.
Not everything new you learn is an active abiity. Sometimes it’s a passive boost or an upgrade to an existing ability.
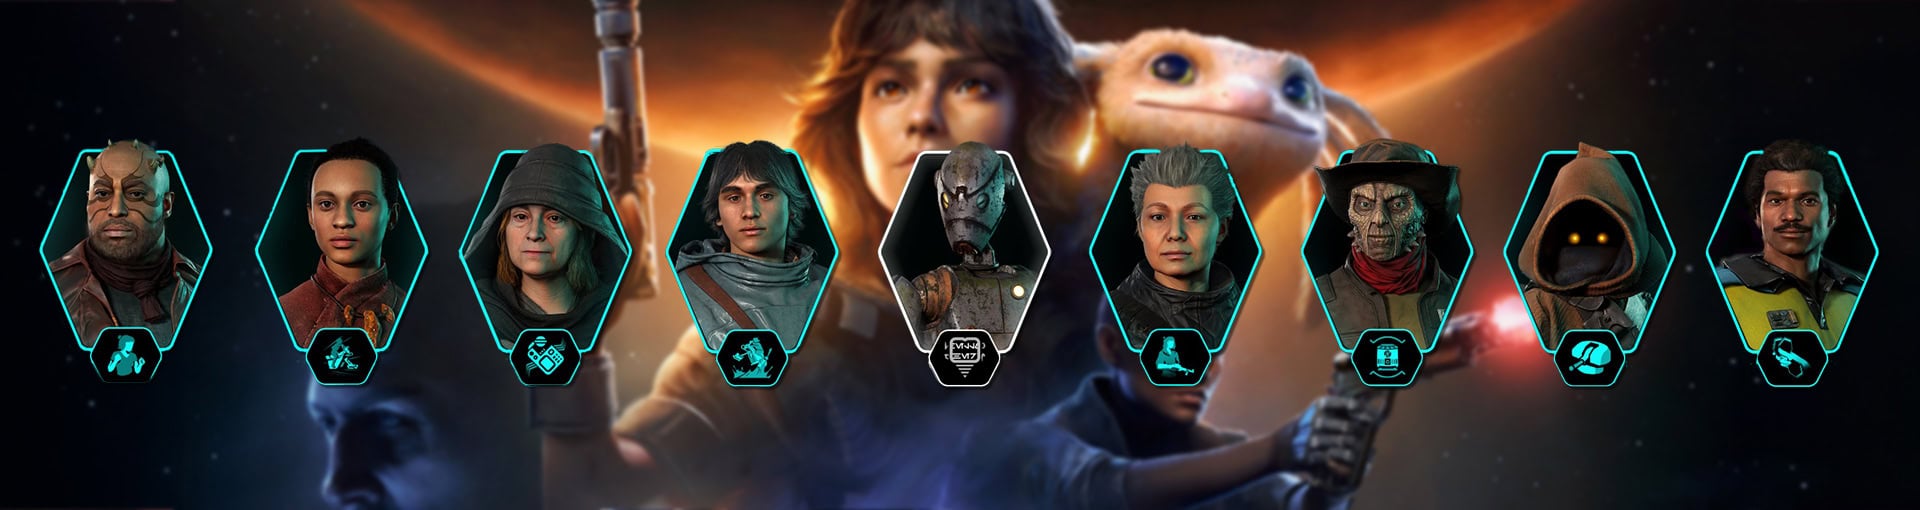
There are nine experts in Star Wars Outlaws. This guide will show and tell you who they are, how to unlock them and what ability each one can teach you.
Many of the required actions are easy to perform or don’t require explanations. For the tricker ones, we have more detailed explanations below the ability tables and links to dedicated guides.
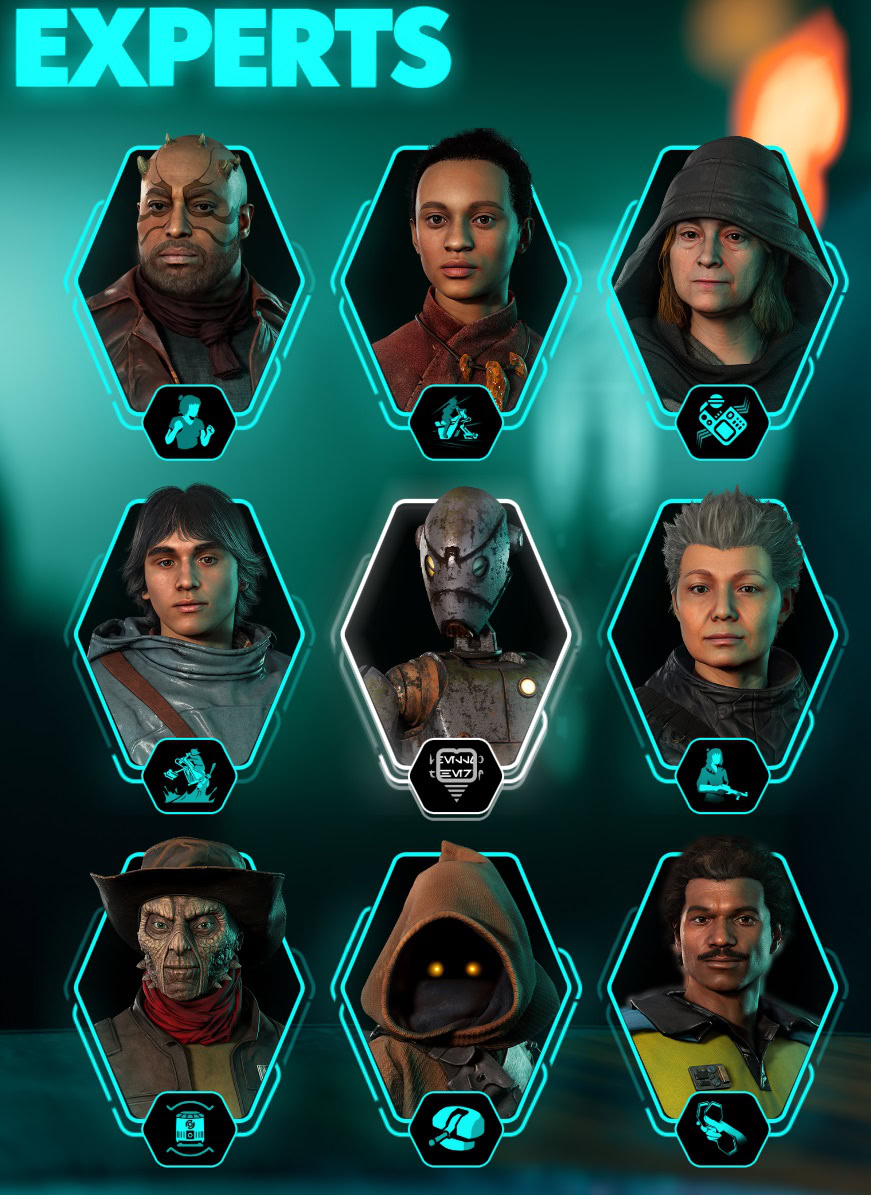
Hover over a portrait to see the Expert’s Name.
Click on it to learn more about them!
Bram – The Bartender
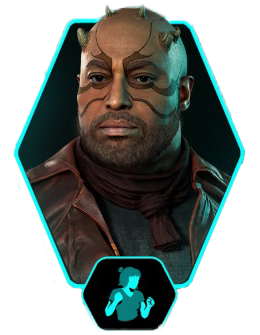
Bram is the first expert you meet in the game. He is the bartender who has allowed Kay to live in the attic above his cantina in Canto Bight on Cantonica.
You unlock Bram as an Expert very early on, during the main mission Outlaws. He has five abilities to teach you, one of them has an upgrade available.
Your first two abilities – Cantina Browler and Lockpicking – are already unlocked. Below is the full list of abilities Kay can learn from Bram along with the requirements for each one.
Cantina Browler
Allows Kay to execute melee attacks by pressing V. Press repeatedly to chain hits.
Requirements:
– unlocked from the start
Lockpicking
Kay will be able to open a variety of Doors and Containers by succeeding at the Lockpicking Minigame. Press E when facing a lock to start Lockpicking.
Requirements:
– unlocked from the start
Fast-Talk
Allows Kay to quickly react to nearby alerted enemies and delay their reaction. Press E when prompted to briefly distract the alerted enemy.
Requirements:
– 3x Use takedown on distracted enemies
– 5x Defeat enemies with melee
Upgrade: allows Fast-Talk to affect every nearby enemy. Press E when prompted to briefly distract every enemy within a medium radius.
Armored Undershirt
Increases Kay’s maximum Health
Requirements:
– Ironweave
– 8x Coarseweave
I know Someone
Unlocks the ability to see and fulfill Personal Requests. Find merchants with the Requests category to find new opportunities.
Requirements:
– 6x Meet different merchants
– 1000x Spend credits at merchants
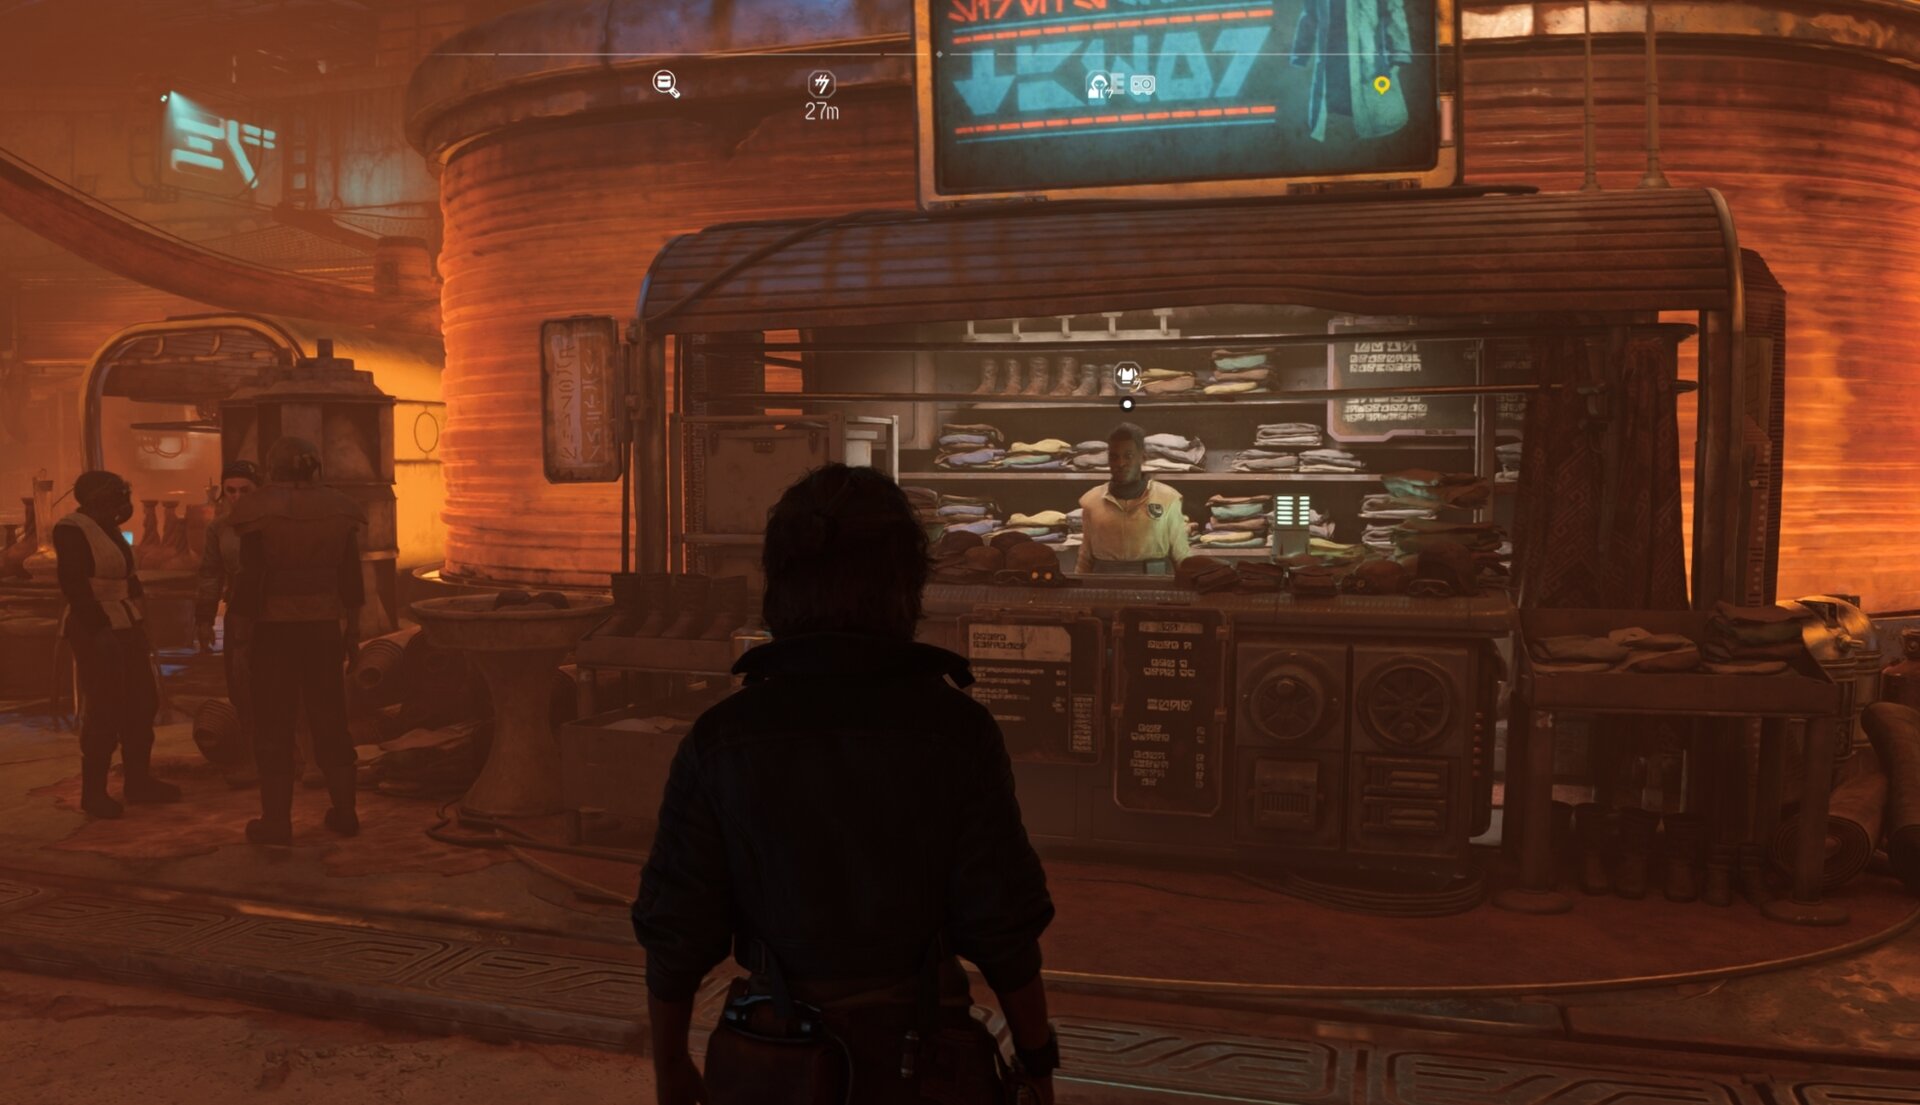
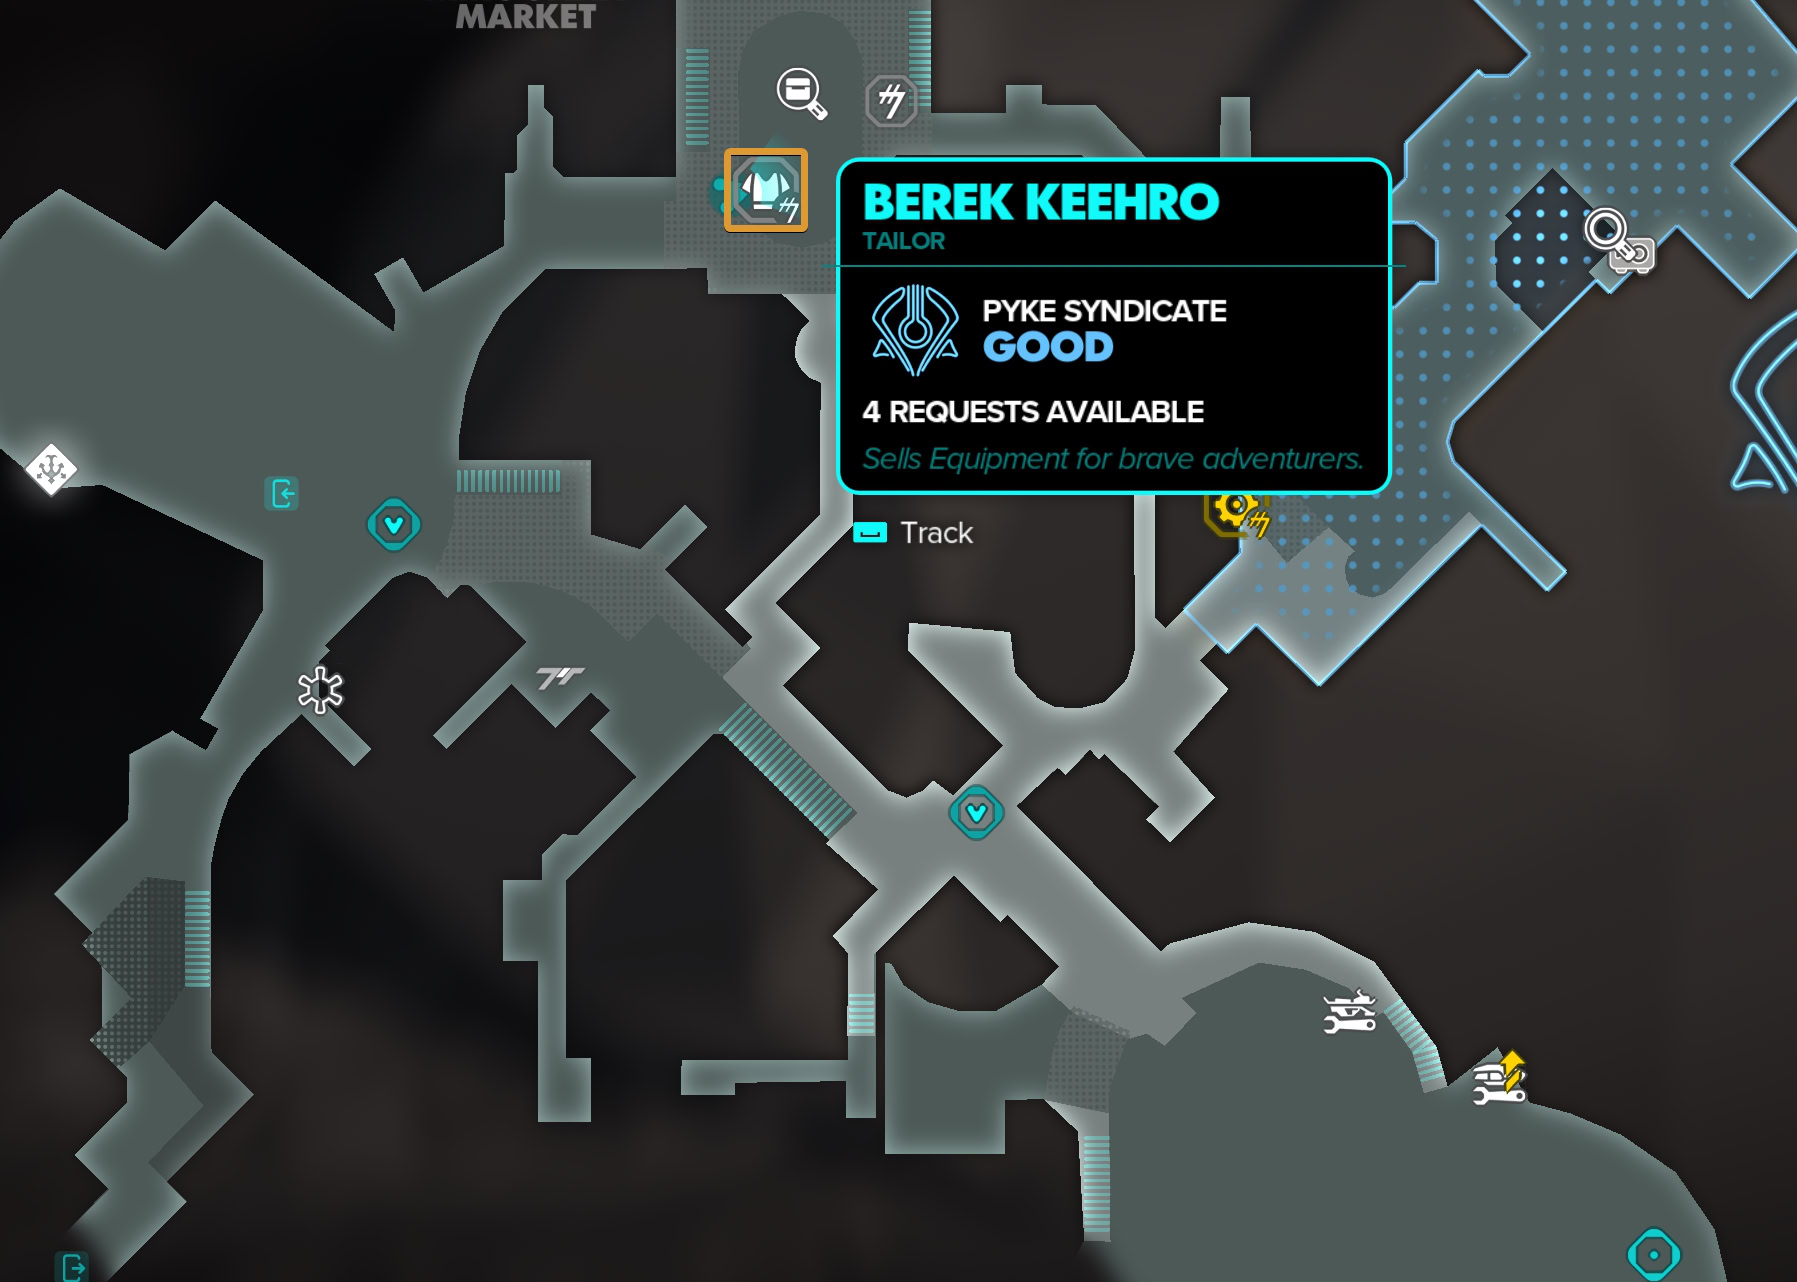
Where to find Ironweave
Ironweave is a material that can be found on Toshara by exploration. You can also purchase it from the tailor Berek Keehro, located in Mirogana’s Market area. If you are in good standings with the Pykes, he may also give you a discount.
Where to find and meet different merchants
To fullfill this requirement, just explore Mirogana and you will find plenty of merchants. This is a great tutorial to show you what the different vendors haveto offer and to teach you about limited stocks, items available only if you have high enough reputation with a certain faction. And you will also stumble upon some shady individuals that only sell to “friends” or “friends of friends”.
Selo Rovak – The Mechanic
Selo Rovan is one of two experts you meet after completing the quest New Tricks. She is a mechanic living alone at her shop on Toshara.
She has five abilities to teach you, one of which has an upgrade available.
The first ability you unlock after completing The Mechanic quest is the Speed Boost ability. Below is the full list of abilities Kay can learn from Selo Rovak along with the requirements for each one.
Speed Boost
Enhances the speeder with a boost engine. Press Shift while on the speeder for a short-lived burst of speed.
Requirements:
– Unlocked after completing the quest “The Mechanic”
Speeder Jump
Allows Kay to perform a short upwards jump with the speeder. Hold and release Space while on the speeder to jump.
Requirements:
– Perform a 60-meter-long jump without being ejected.
Treasure Hunter
Allows Nix to provide audiovisual cues when nearby Containers are present. Additionally, Containers in range will now be highlighted by pressing B.
Requirements:
– Find 10 Containers
– Find 4 different ways to make Nix happy
– Use Nix to fetch an item
Smoke Bomb
Press Z to create a dense smoke area which obfuscates vision.
Requirements:
– Smoke Bomb Compressor
– 7x Polycarbonate
– 3x MG-2 Power Exceeder
Scoudrel’s Pouch
Increase the amount of Bacta Vials and Grenades Kay can carry by 1 each.
Requirements:
– Durafiber Fabric
– 8x Coarseweave
– 4x Robuma Leather
Outlaw’s Pouch
Increase the amount of Bacta Vials and Grenades Kay can carry by 1 each.
Requirements:
– Elastic Durafiber Fabric
– 18x Coarseweave
– 10x Polycarbonate
How to unlock Speeder Jump
To unlock the Speeder Jump ability, you have to make a big enough jump to cross at least 60 meters distance in the air and not eject from the speeder. It’s OK if you crash-land.
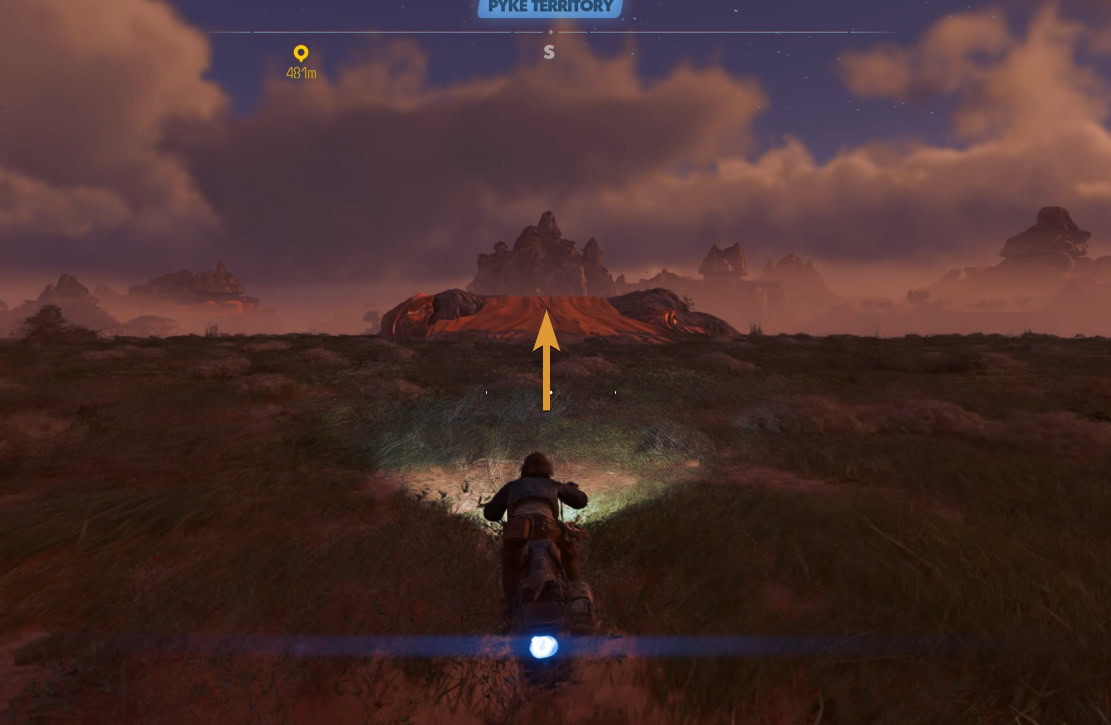
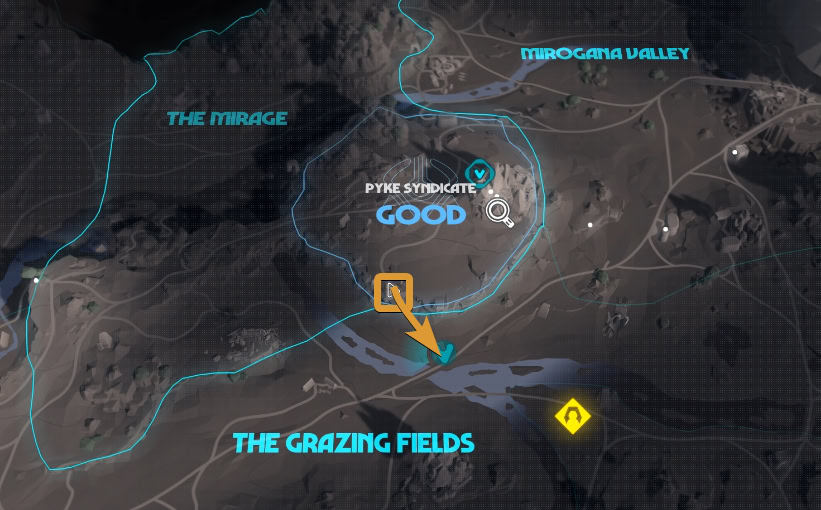
There are several locations on Toshara where you can easily perform this. One example I will give you is in a large jump from the southernmost part of The Mirage, south of the Pyke Syndicate area, down and into the northern parts of The Grazing Fields. Use Speeder Boost to make this jump even longer.
How to unlock Treasure Hunter ability
To unlock the ability, you need to find 10 containers. Any containers will do. You don’t have to look only for the big metal treasure chest type of containers.
The main requirement is to find 4 different ways to make Nix happy. Our detailed guide will give you all the instructions and locations where you can perform the various activities to satisfy this requirement.
In short, here is what you can do to make Nix happy:
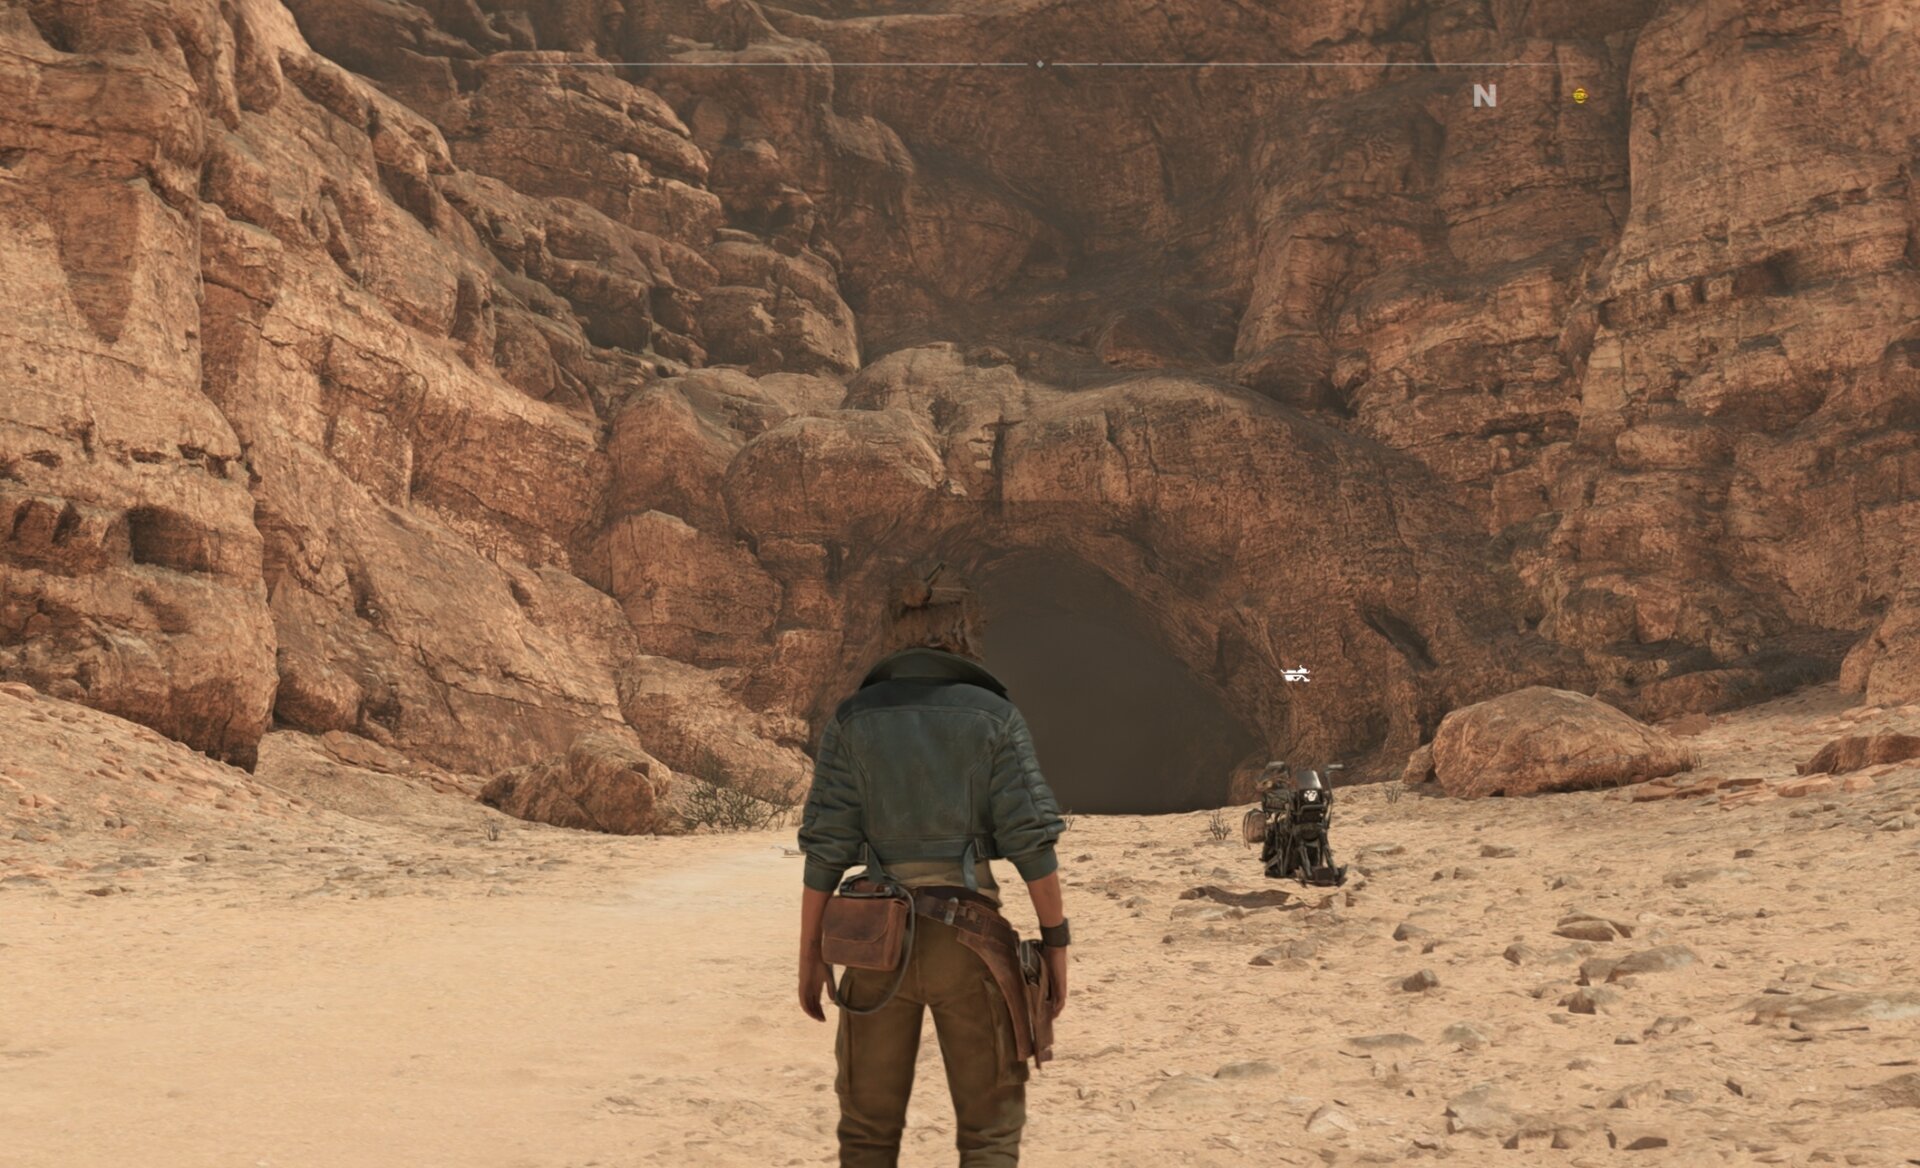
Smoke Bomb Compressor Location for the Smoke Bomb
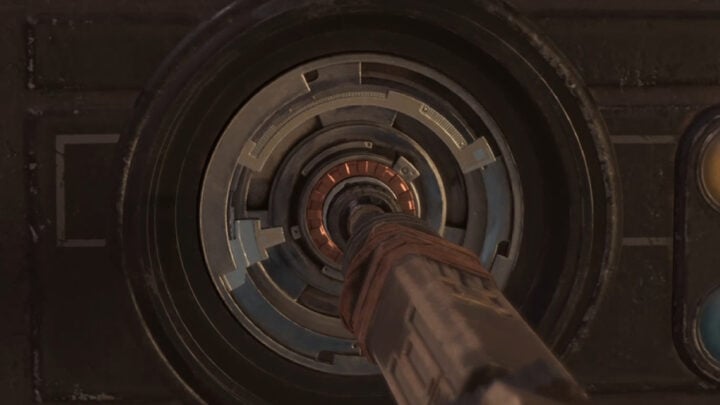
The unique element you will need for the Smoke Bomb ability, the Smoke Bomb Compressor, is in the Fallen Mound. This area is far to the east in the
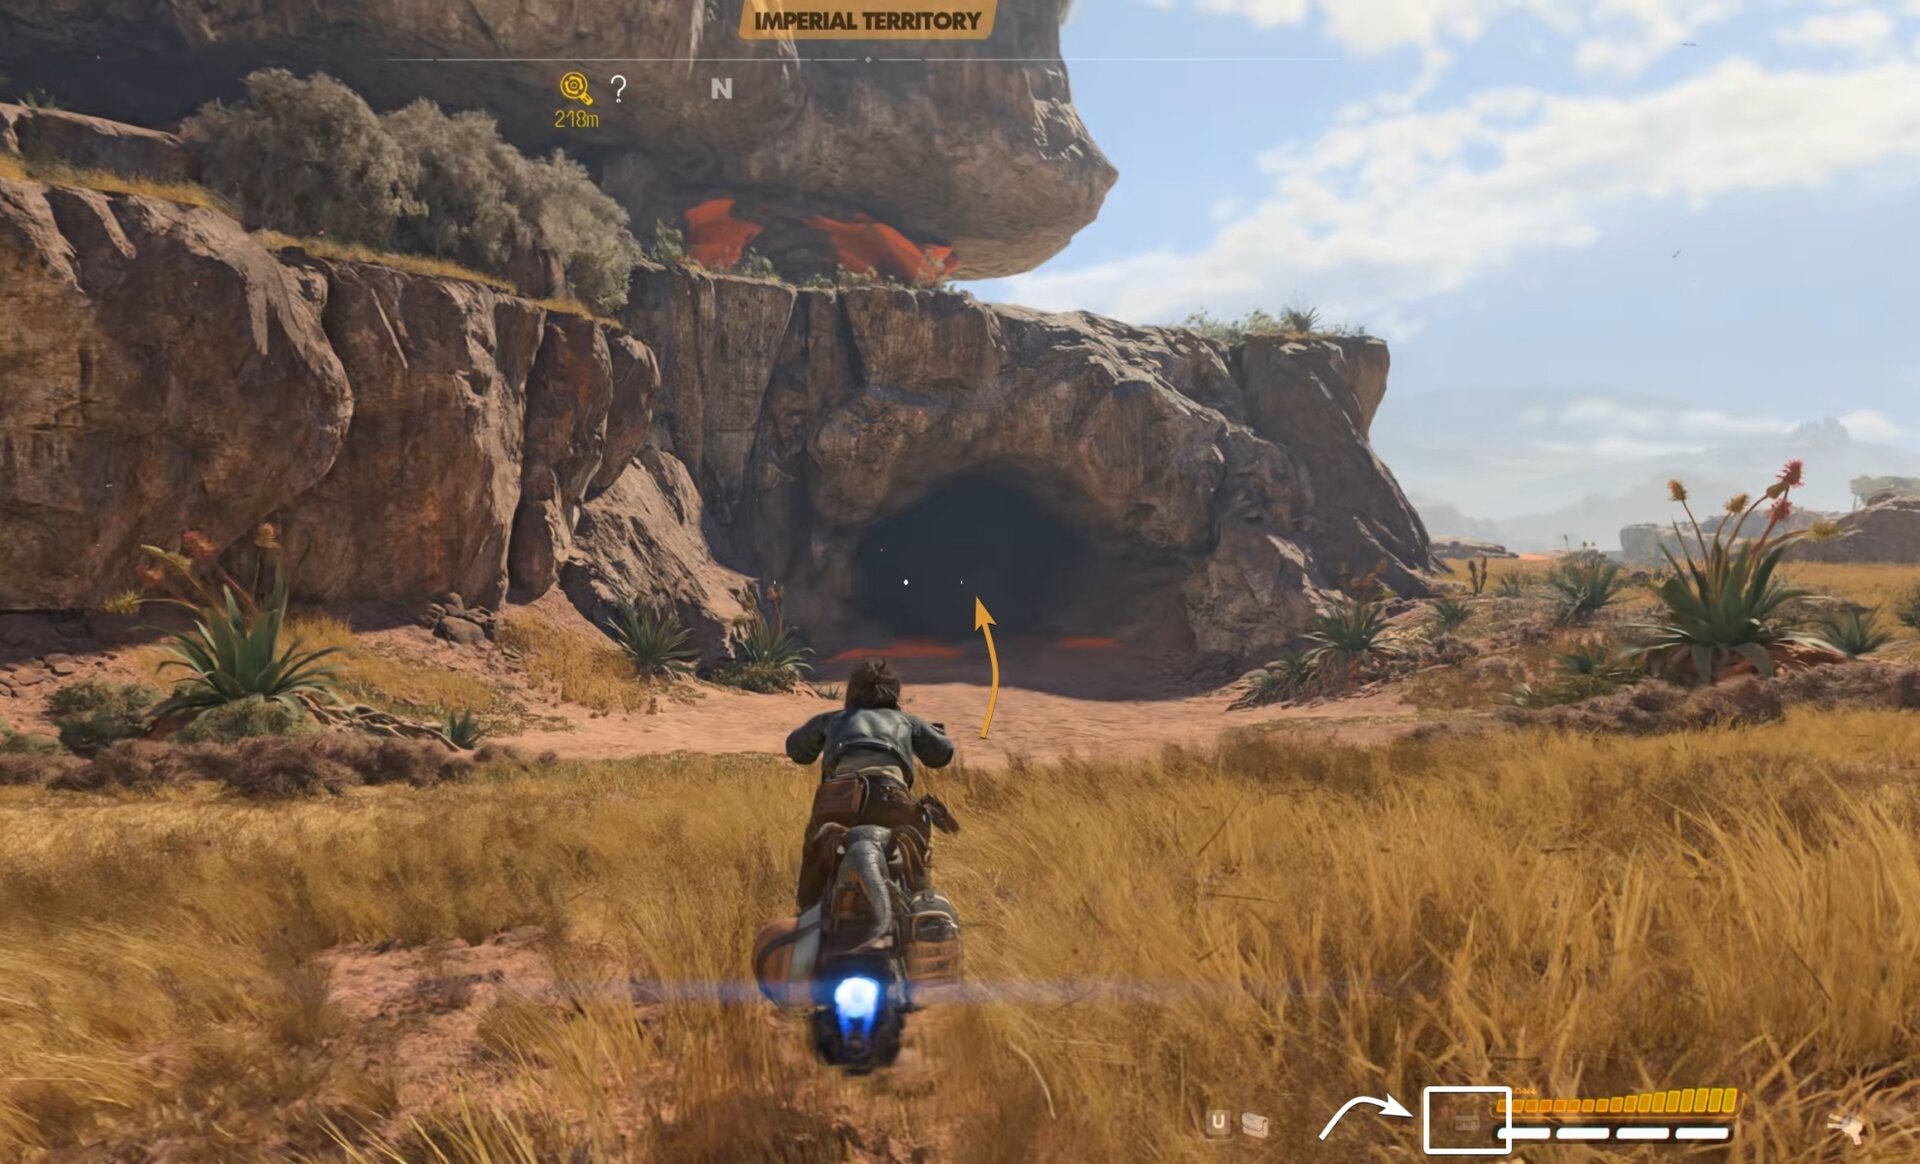
To access it, you need to use the Speeder Boost ability when you enter the tunnel. We have a full walkthrough for the Fallen Mound area including the locations and contents of the two treasure chests in it:
Durafiber Fabric Location for Scoundrel’s Pouch
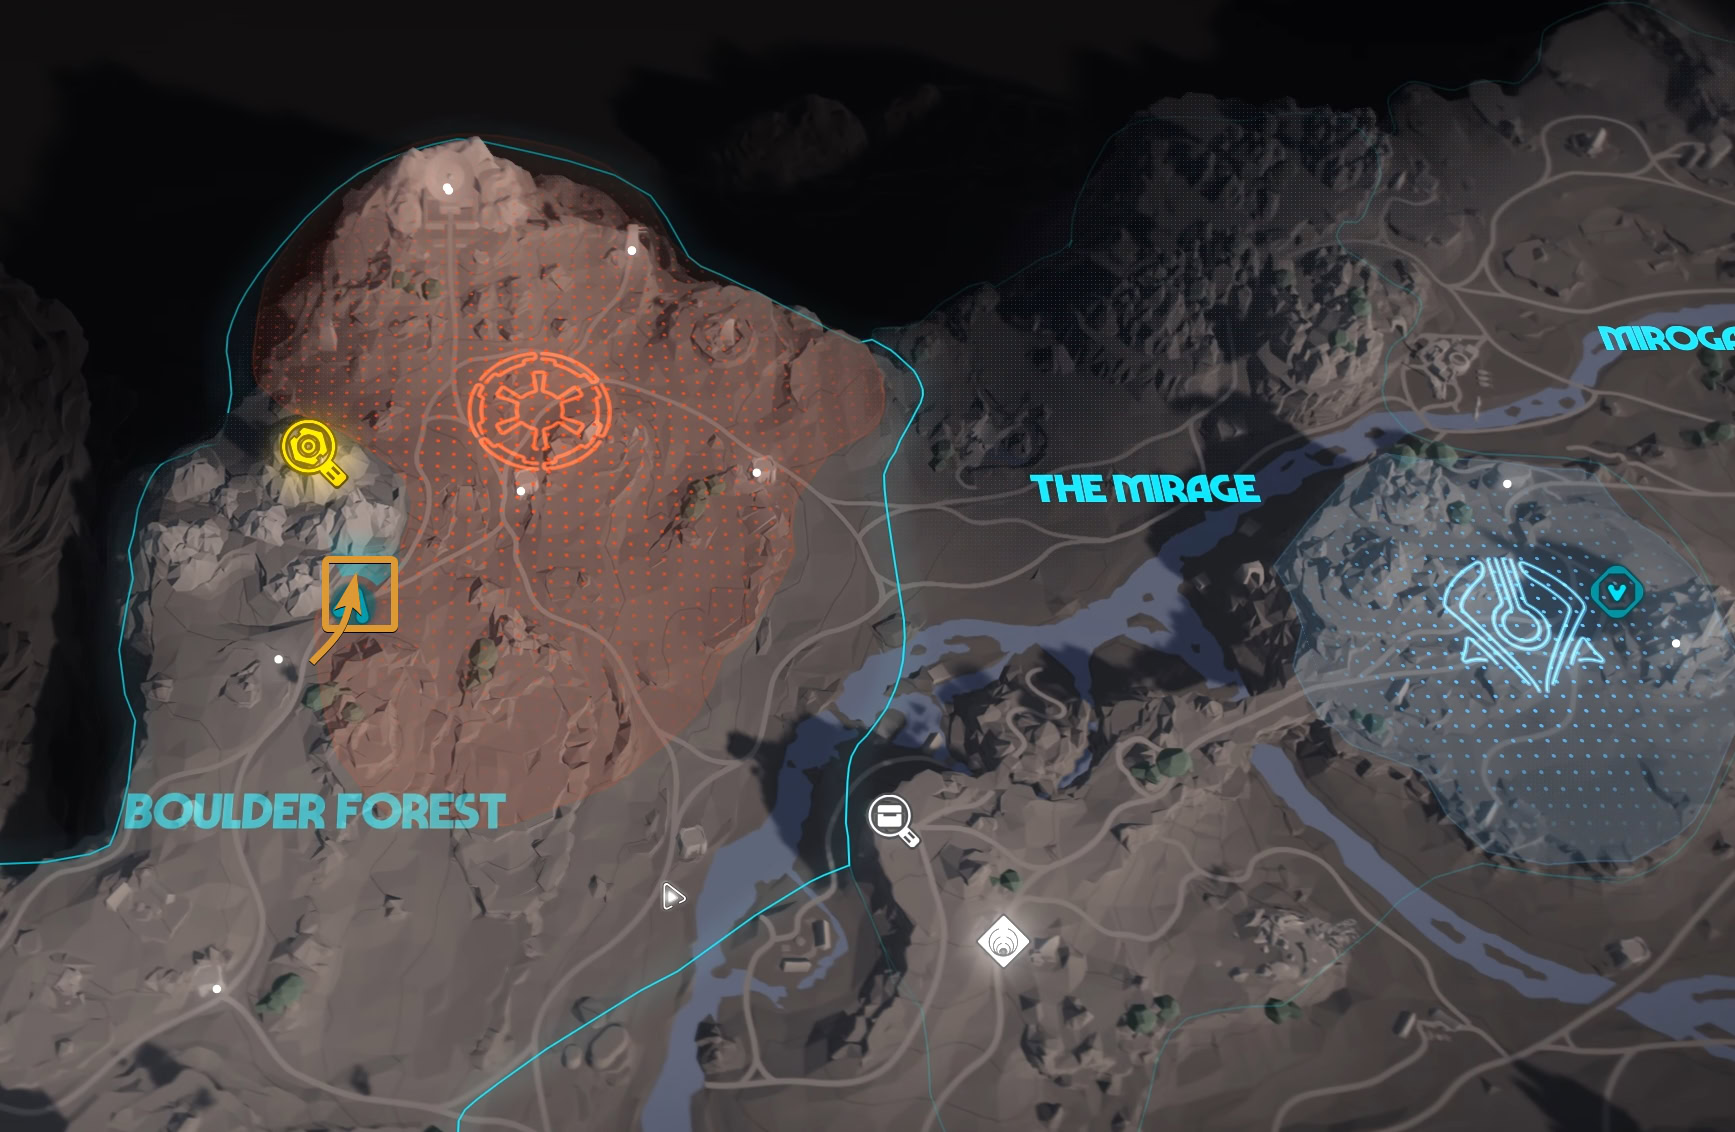
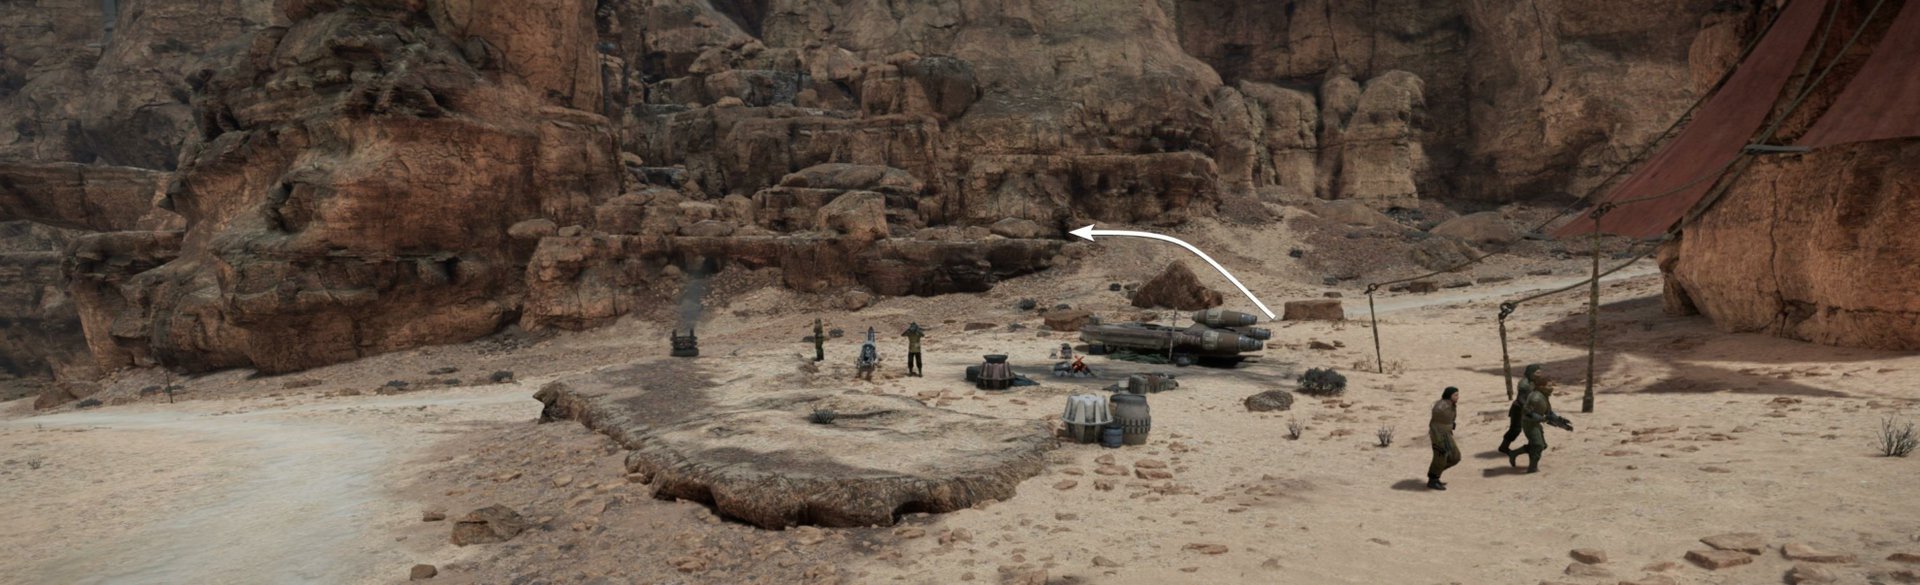
For the Scoundrel’s Pouch, you need to obtain a rare material called Durafiber Fabric. You can loot it from the Crimson Dawn Hideout in the southern part of Boulder Forrest, bordering The Lost Steppe.
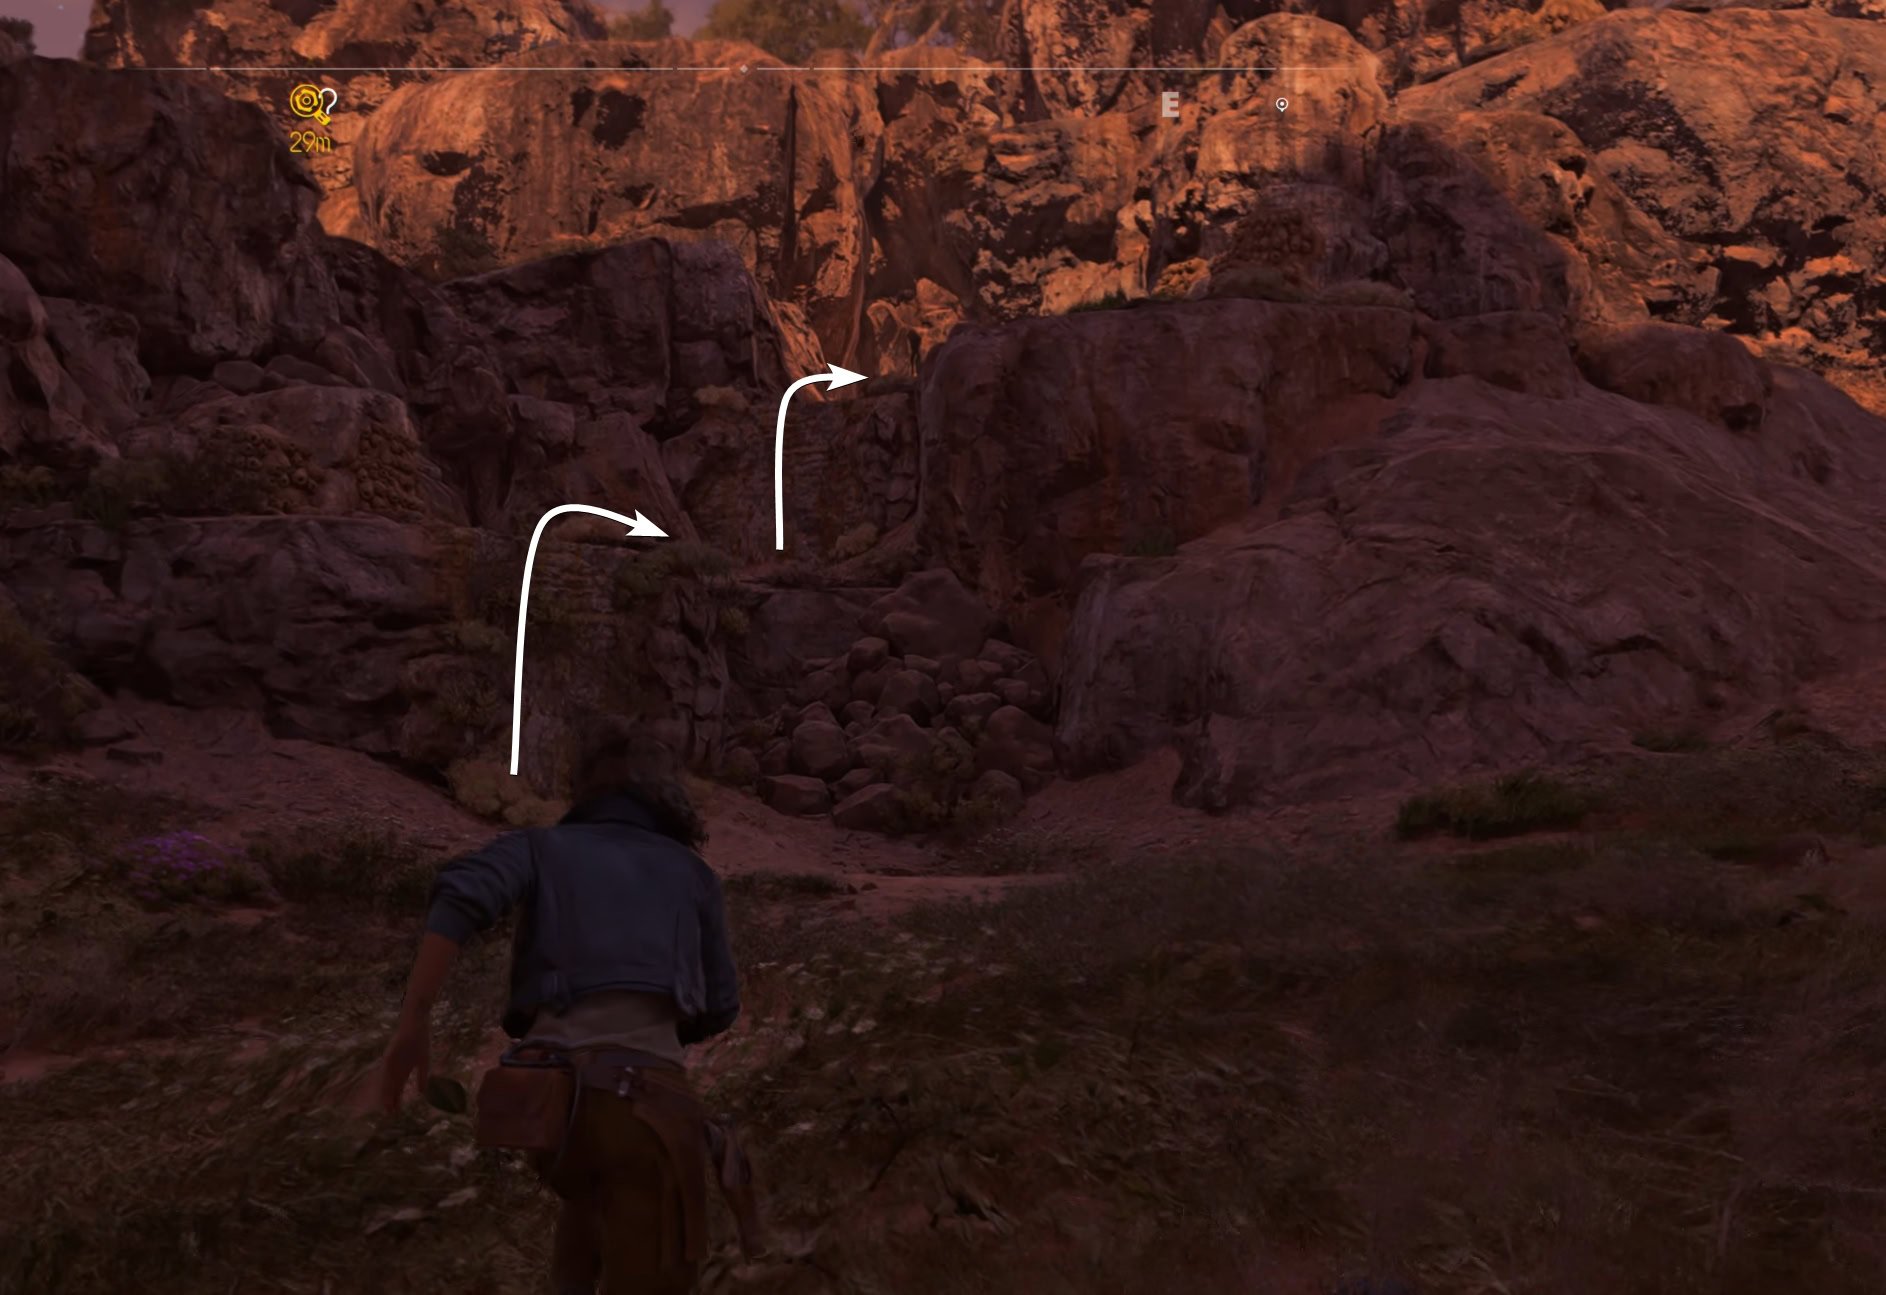
The marked approach on the map above is also a candidate for a long jump for unlocking the Speeder Jump ability.
Aila Bren – The Slicer
Aila Bren, The Slicer, is an expert you meet after completing the quest New Tricks. She is a Slicer. Your first contact is via a call.
You meet Aila in person during the quest The Slicer to unlock her in the middle of an Imperial Compound. She has six abilities to teach you
The first ability you unlock after completing The Slicer quest is the Slicing Kit. Below is the full list of abilities Kay can learn from Selo Rovak along with the requirements for each one.
Slicing Kit
Gadget able to connect to advanced, terminal-less devices. Interact with a device by pressing E to Slice it.
Requirements:
– Unlocked after completing the quest “The Slicer”
Sneak Shot
Shooting an enemy unaware of Kay’s position deals extra damage.
Requirements:
– 5x Blast down distracted enemies
– Complete an Infiltration Contract
Concussive Smoke
Upgrades the smoke bomb with a concussion effect that leaves enemies in the area Staggered for 2 seconds.
Requirements:
– Unlock the Smoke Bomb Ability
– Ion Capacitor Charge
– 10x Durasteel
– 4x Accu-Accelerator
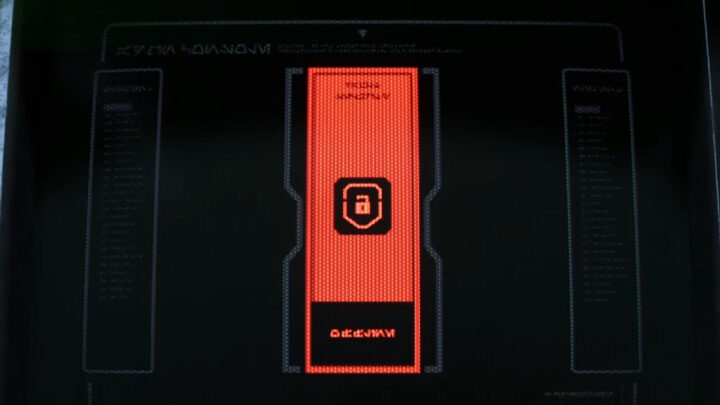
Sneaky Trap
Allows Nix to trap Alarm Panels
Requirements:
– 7x Command Nix to perform different actions
– 3x Slice devices in 3 attempts or fewer
Lightfooted
Reduces the noise Kay makes while Walking and Sprinting, halving the enemy detection distance.
Requirements:
– Complete a smuggler contract
– Perform a Takedown on an Imperial Officer
– 3x Lockpick different locks
Slice Kit Upgrade
Increases the amount of Energy for the Slicing Kit by 2. Use Energy to activate Jokers during the slicing process.
Requirements:
– Code breaker Chip
– 8x Chalcopyrite
– 3x Direct-Energy Circuit
How to Blast down distracted enemies
The task to Blast down distracted enemies is required for unlocking the Sneak Shot ability. Later, when you unlock MT-7, The Veteran, you will have to blast down ten more distracted enemies to unlock the Nix Commando ability.
There are many ways to do this and plenty of locations to choose from. In case you want to farm it out quickly, an easy example I can give you is the Imperial Terminal in Southern Falls on Toshara. This is just west of the Shipjacker Workshop.
If you have the Duradan Soup for Nix, you can ask him to Multi Distract and take all troopers outside the door. Just use your Plasma Blaster Module. Wait for Nix to play dead before you take them down. After that, exit to a clear area (50m away should be enough), save and reload the game. The troopers would have respawned.
Where to find Ion Capacitor Charge
The Ion Capacity Charge material is available as loot in a treasure chest in the basement of an Imperial guard tower called West Turbolaser, located in the northern part of the Boulder Forrest region on Toshara.
Our walkthrough will guide you in and out of the West Turbolaser without sounding an alarm or getting marked as Wanted.

How to Slice devices in 3 attempts or fewer
To be able to achieve this reliably fast, you should pick easier terminals. Those are usually located in starter areas such as Mirogana city and in many locations all over Toshara.
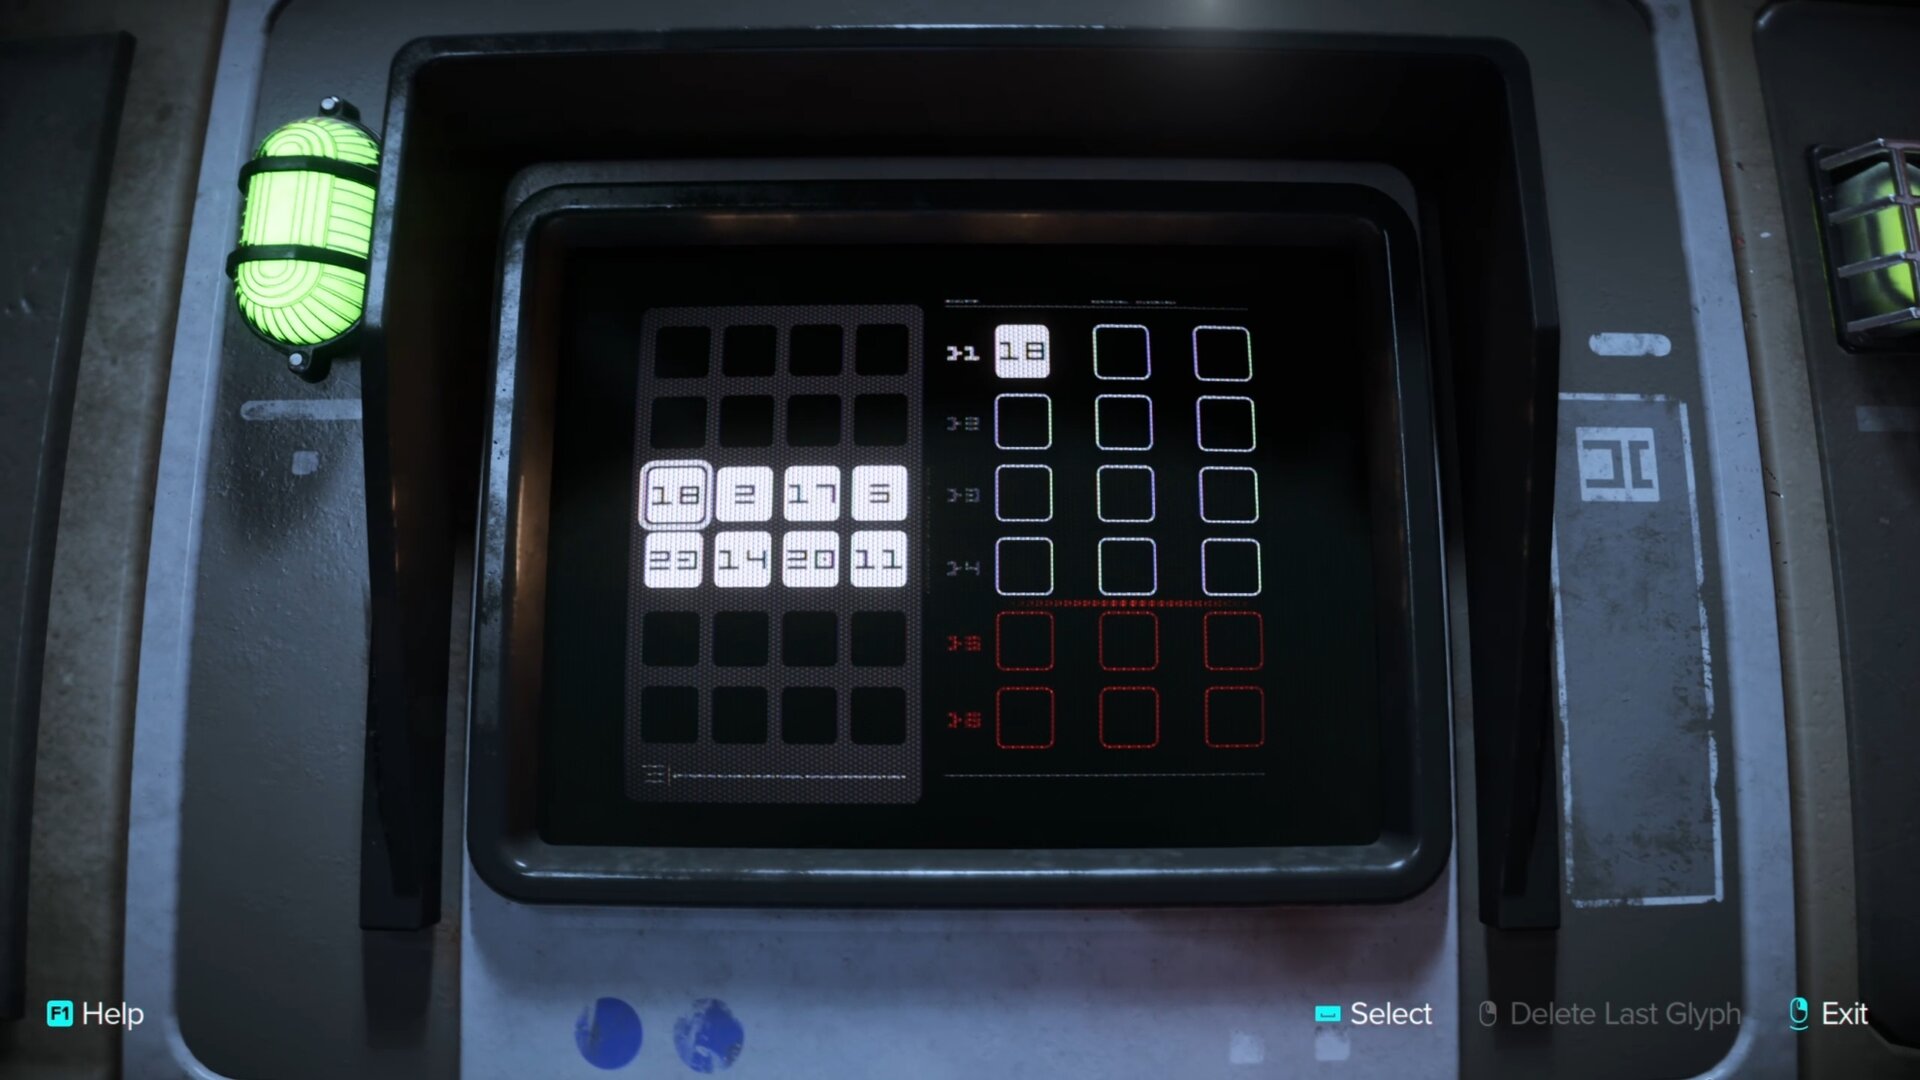
Later on, the Slicing Kit and Slicing Kit Upgrade allow you to slice more complex terminals, but you’d have to rely on luck to complete one such sequence in three rows or fewer when there are four or five glyphs per row. You can still use your advanced slicing skills on a simplet terminal to make things quicker.
Where to find the Code Breaker Chip
The Code Breaker Chip is located inside the Shipjacker Workshop. This area is full of raiders. If you have the guts and gear, you can go guns blazing and clear the entire area without fear of repercussions with any of the Syndicates.
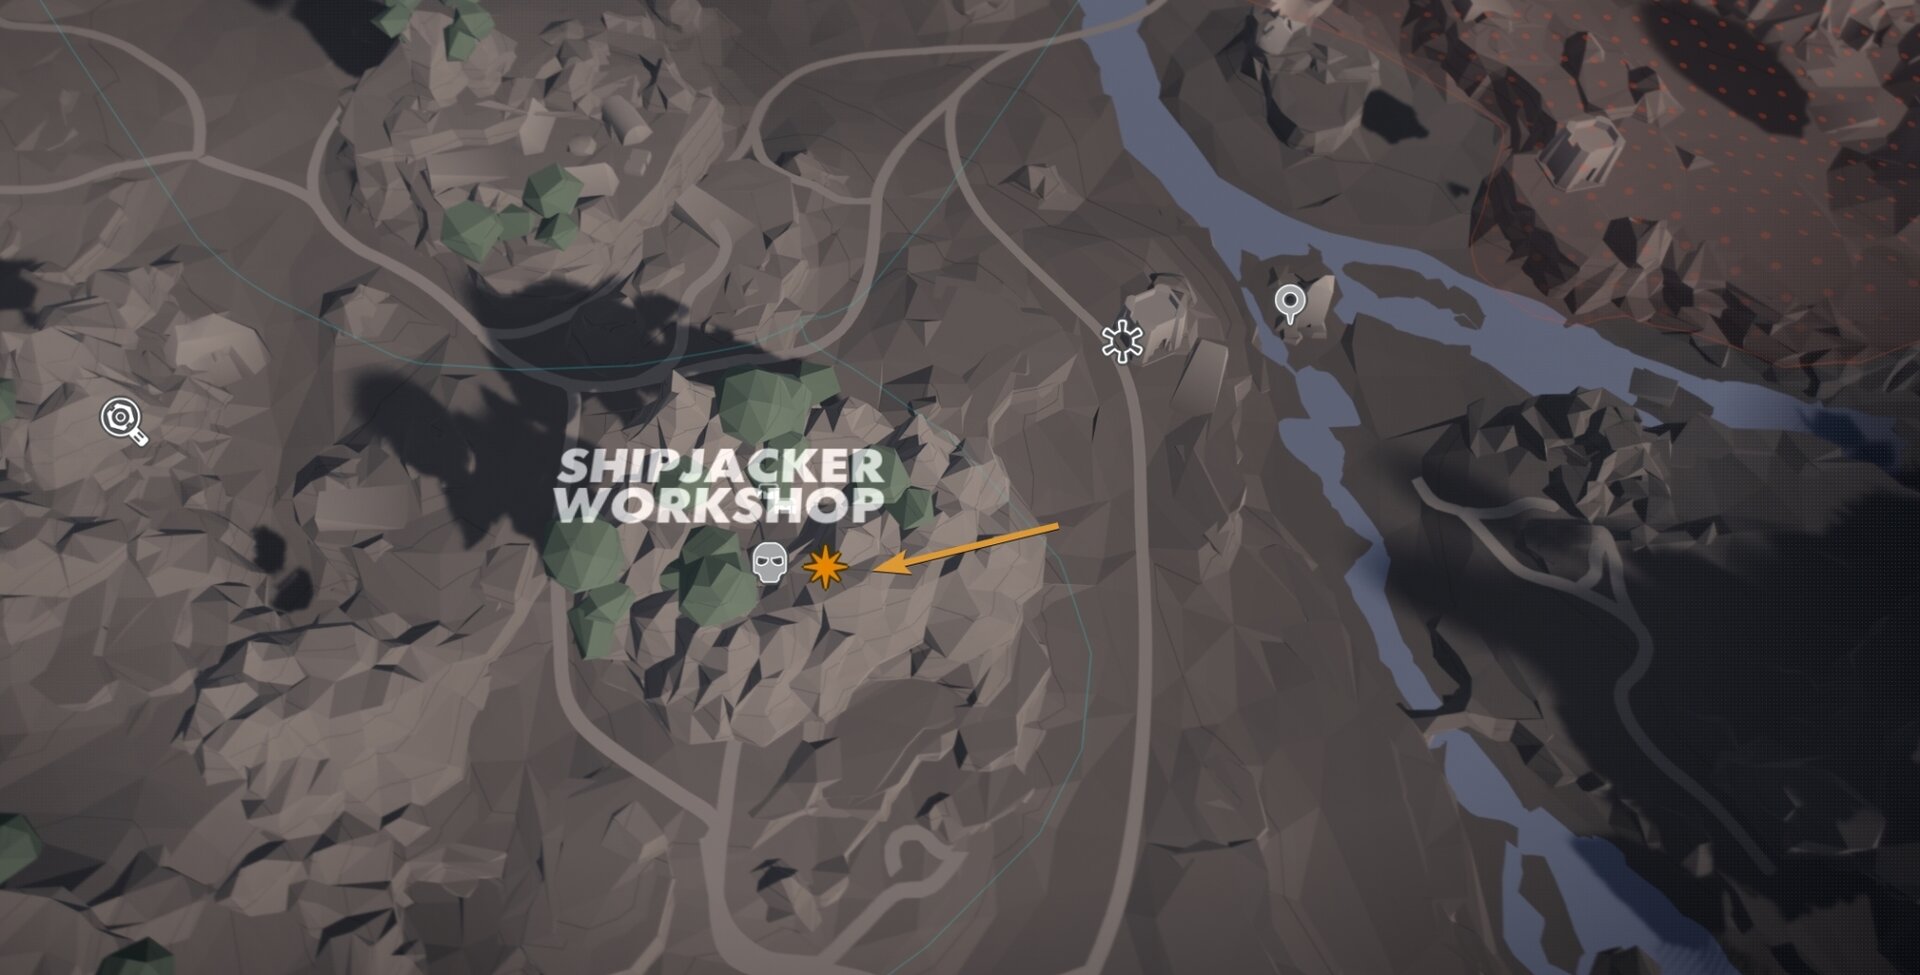
Get on top of the central platform inside the workshop and look for a large yellow door. Go inside the room and you’ll find a thin ray shield. Using a nearby panel, slice into it to bring the shield down.
Check out our walkthrough for getting the Code Breaker Chip for more details. We also have a full walkthrough for the Shipjacker Workshop, where you can pick up three more treasures.
Temmin Wexley – The Scavenger
Temmin Wexley, The Scavenger, is an expert you meet on Akiva. To unlock him as an expert, you must complete The Scavenger quest.
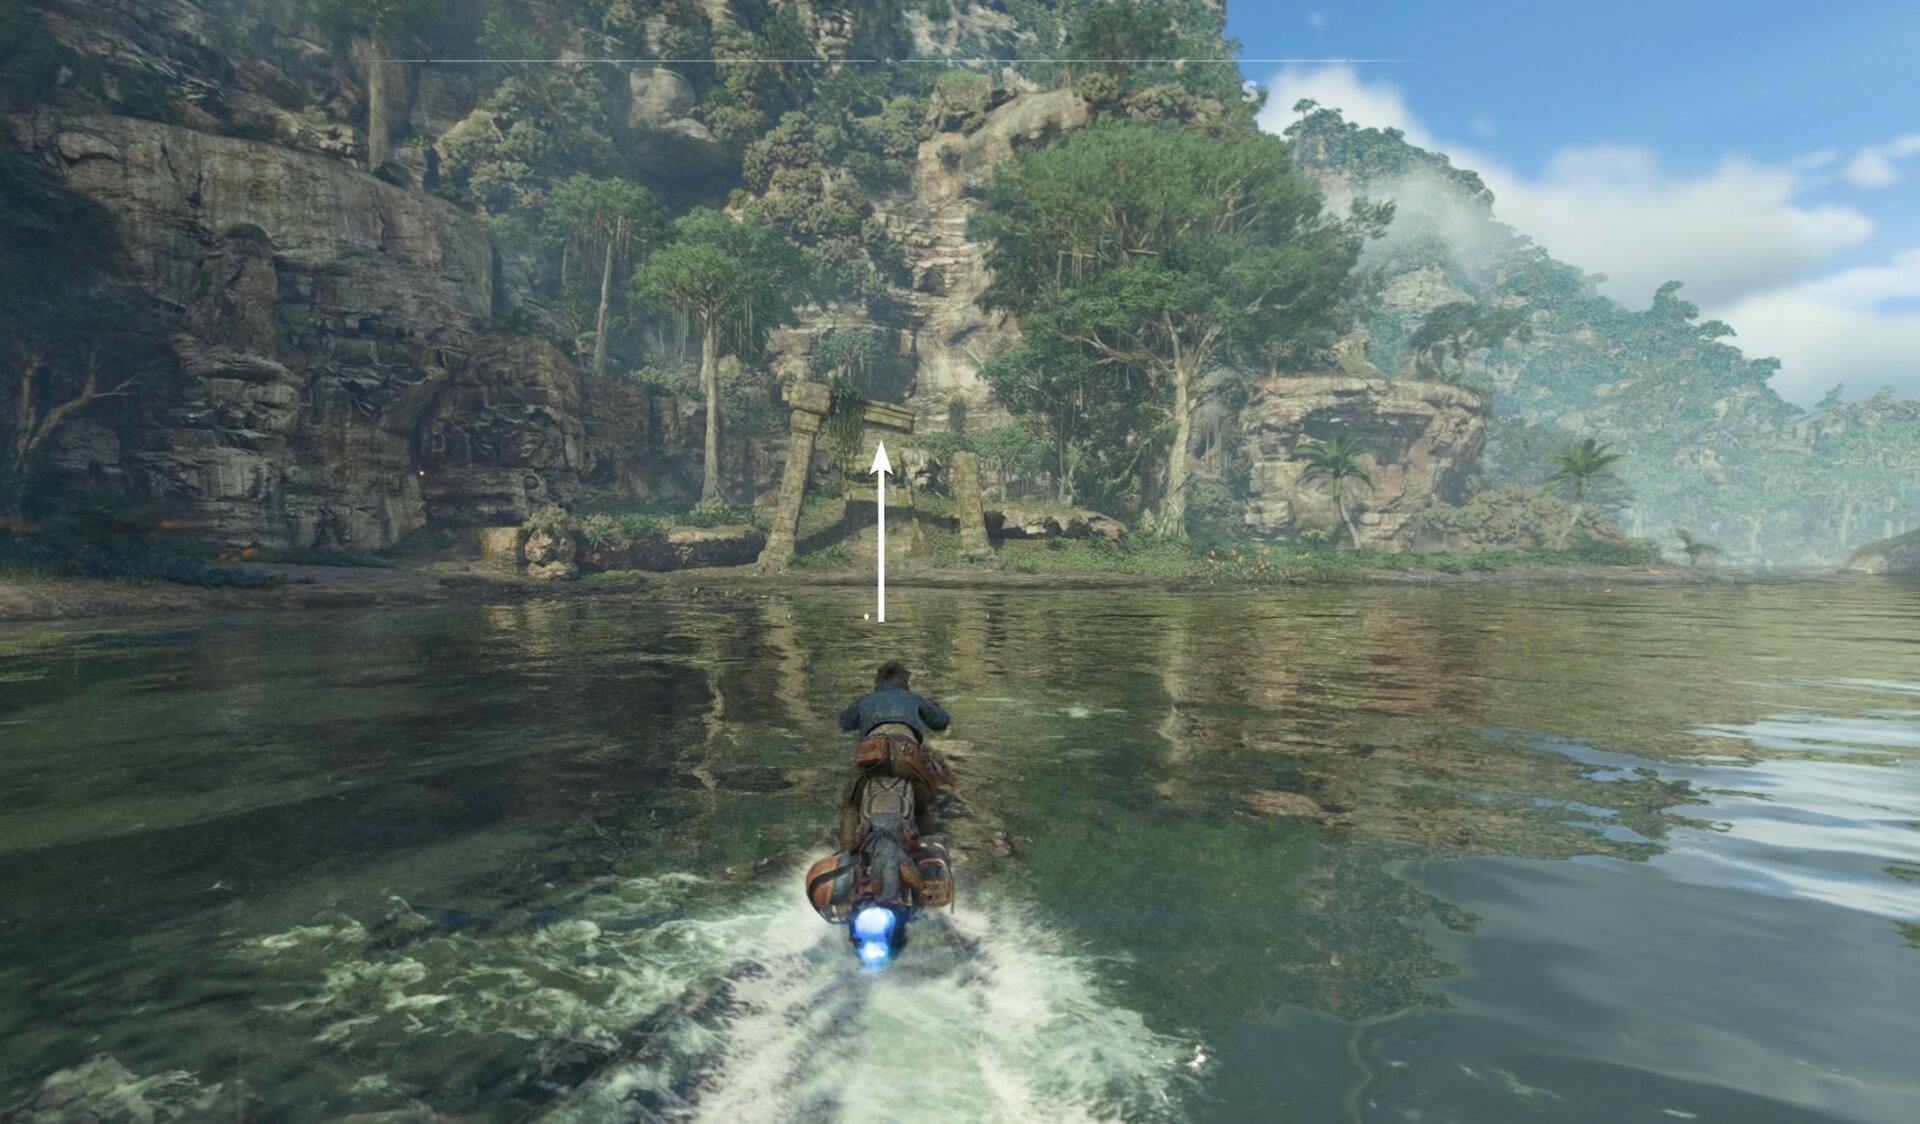
At first, Temmin will install a temporary hydrorepulsor on your speeder, which will allow you to complete his quest. Latyer, you will get this as a permament unlock.
Temmin has six new abilities to teach you and the first two you learn automatically when you complete his quest: Hydrorepulsor for your speeder and Electro-Shock Prod.
Hydrorepulsor
Allows the speeder to soar over water, enhancing its traversal capabilities.
Requirements:
– Unlocked after completing the quest “The Slicer”
Electro-Shock Prod
Allows Kay to perform Takedowns on Elite enemies.
Requirements:
– NL-02 Charge Emitter
– 15x Chalcopyrite
– 5x Ion Cell
Ion Smoke Bomb
In addition to its base effect, Smoke Bomb now deals ion damage, which temporarily disables devices and disrupts droids in the affected area.
Requirements:
– Unlock the Smoke Bomb Ability
– Flux Compressor
– 25x Durasteel
– 10x Ray Acelerator
Assisted Scavenging
Allows Nix to go the extra mile when searching in containers, occasionally granting extra materials and valuables.
Requirements:
– Find a Smuggler Cache
– Collect 2500 Credits
– 5x Fullfill merchant requests
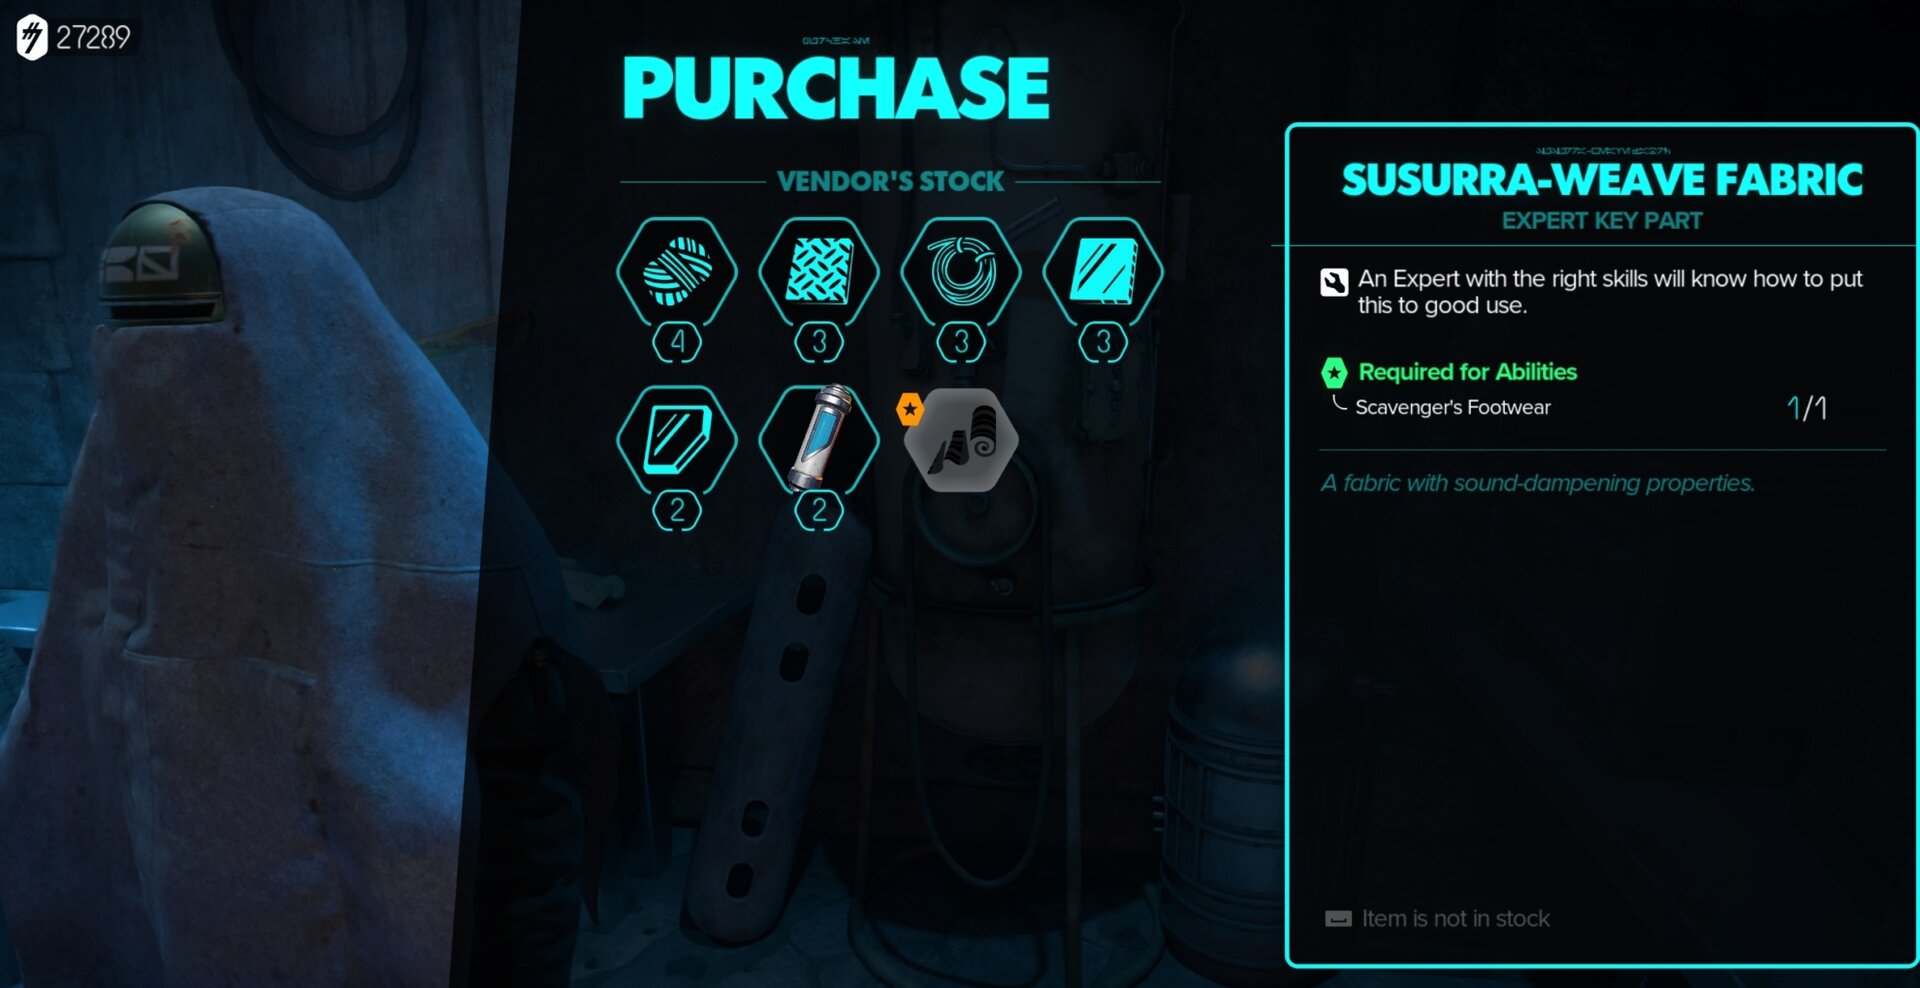
Scavenger’s Footwear
Increases Kay’s movement speed while crouching by a Medium amount.
Requirements:
– Susurra-Weave Fabric
– 30x Coarseweave
– 15x Jarwal Fiber
Survivor
Increases Kay’s maximum Health.
Requirements:
– Defeat 3 death troopers in a row.
– Find stranged merchant on Akiva.
How to get the Flux Compressor
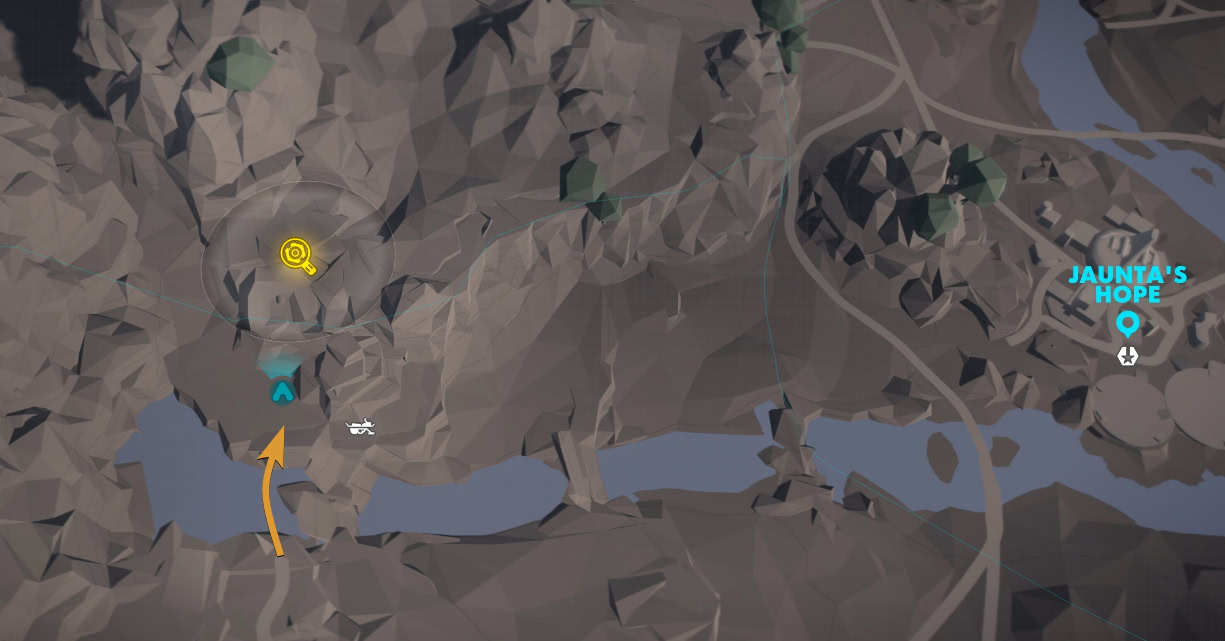
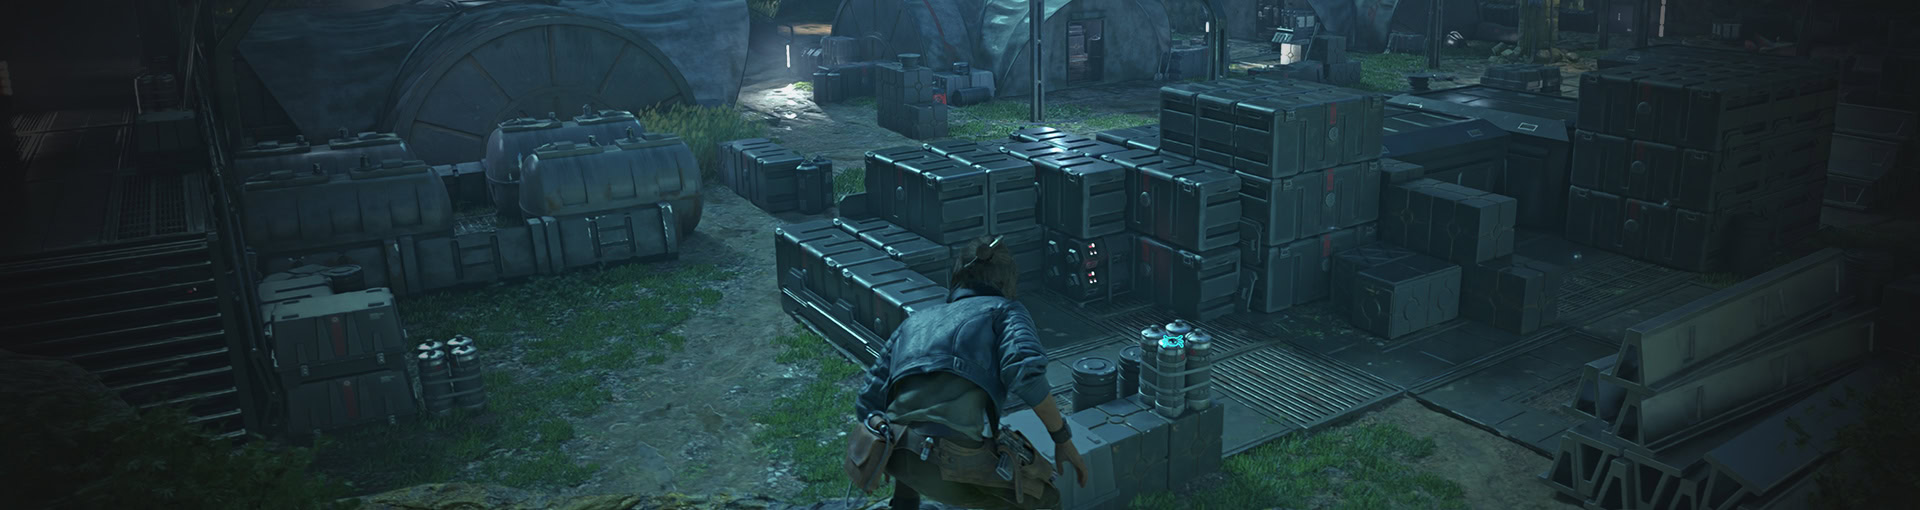
The Flux Compressor material is available as loot in a treasure chest in a locked storage room up on a hill in the far northwestern end on the map of Akiva, in The Great Basin region.
We have a full walkthrough of the area to help you get the Flux Compressor. You will need to use the Ion Blaster and Power Blaster modes for this one. On the image below is the starting point that will take you to the storage room with the treasure chest containing the material.
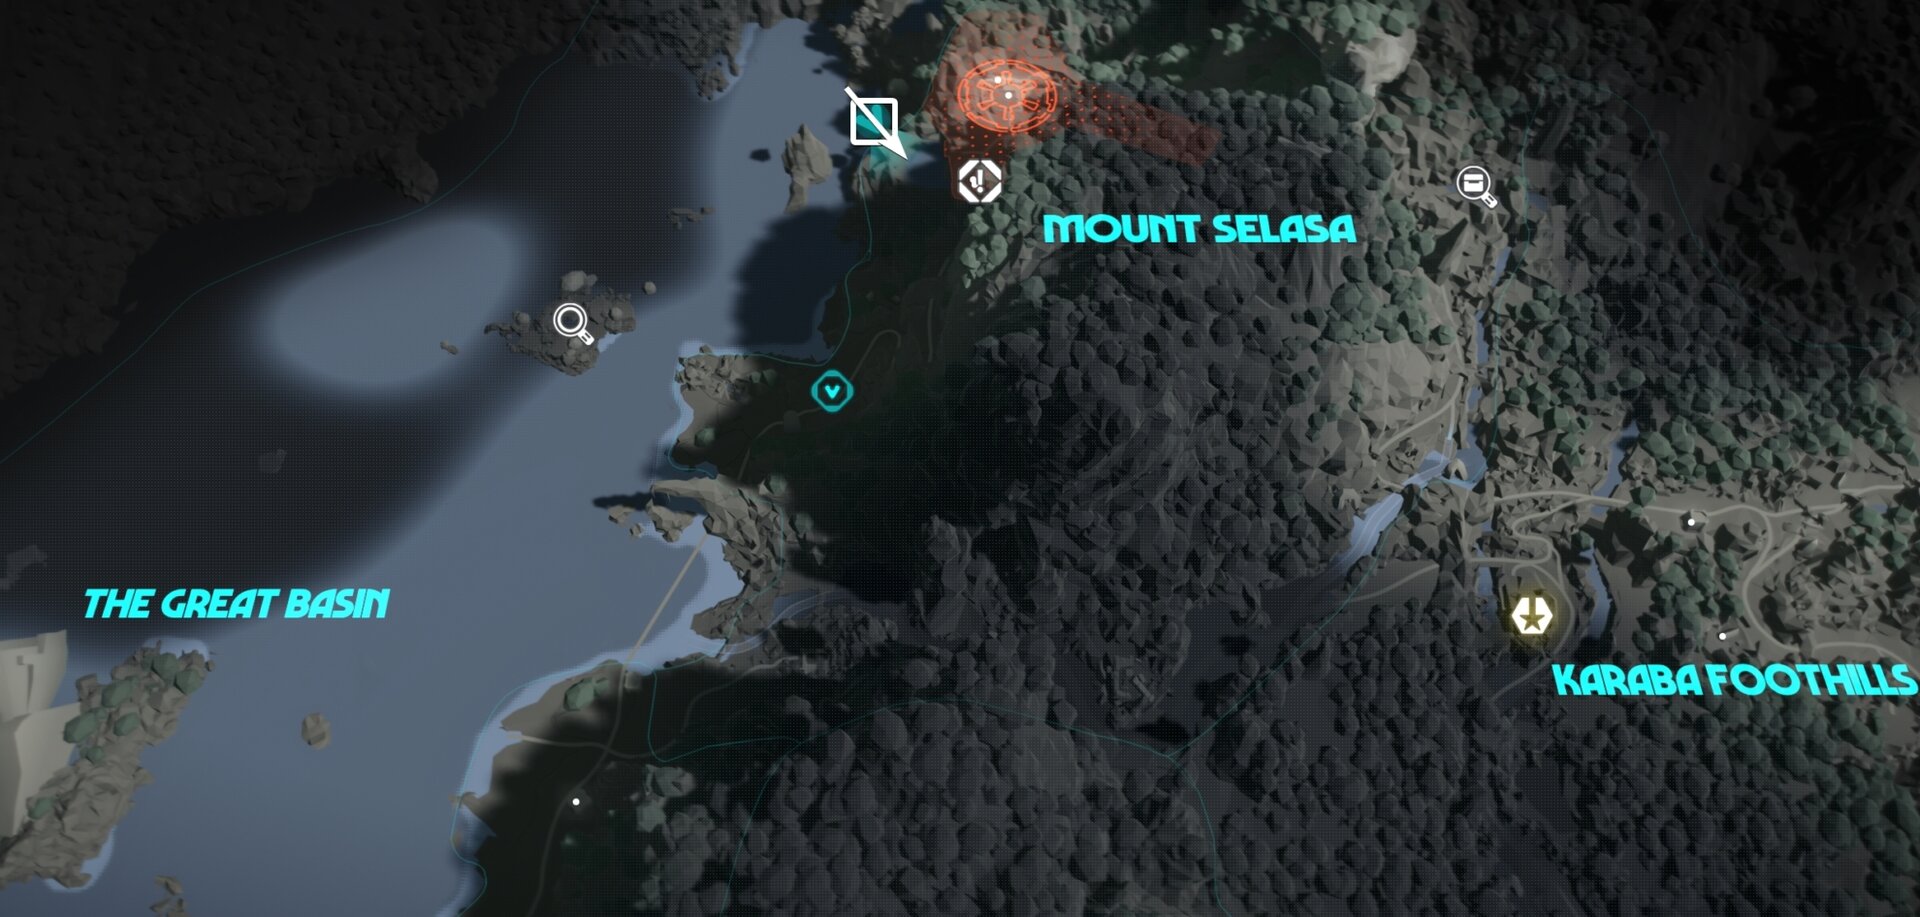
Where to find NL-02 Charge Emitter
The expert key part is in a treasure chest at Excavation Site 12. This is an Imperial camp in the middle of the Great Basin on Akiva.

How to find Smuggler Caches
Smuggler Caches are treasure chests fontainin insignificant loot. You can find them all planets. To be able to find them, you will need to first unlock the Holotracker tool. This is the starting point of Jet Kordo’s Legacy Vaults quest chain. Our Holotracker guide for Toshara also has a lot of locations of Smuggler Cache locations.
We have full guides to all Smuggler Cache locations on all planets:
![]() All Smuggler Cache Locations on Toshara
All Smuggler Cache Locations on Toshara![]() All Smuggler Cache Locations on Tatooine
All Smuggler Cache Locations on Tatooine![]() All Smuggler Cache Locations on Akiva
All Smuggler Cache Locations on Akiva
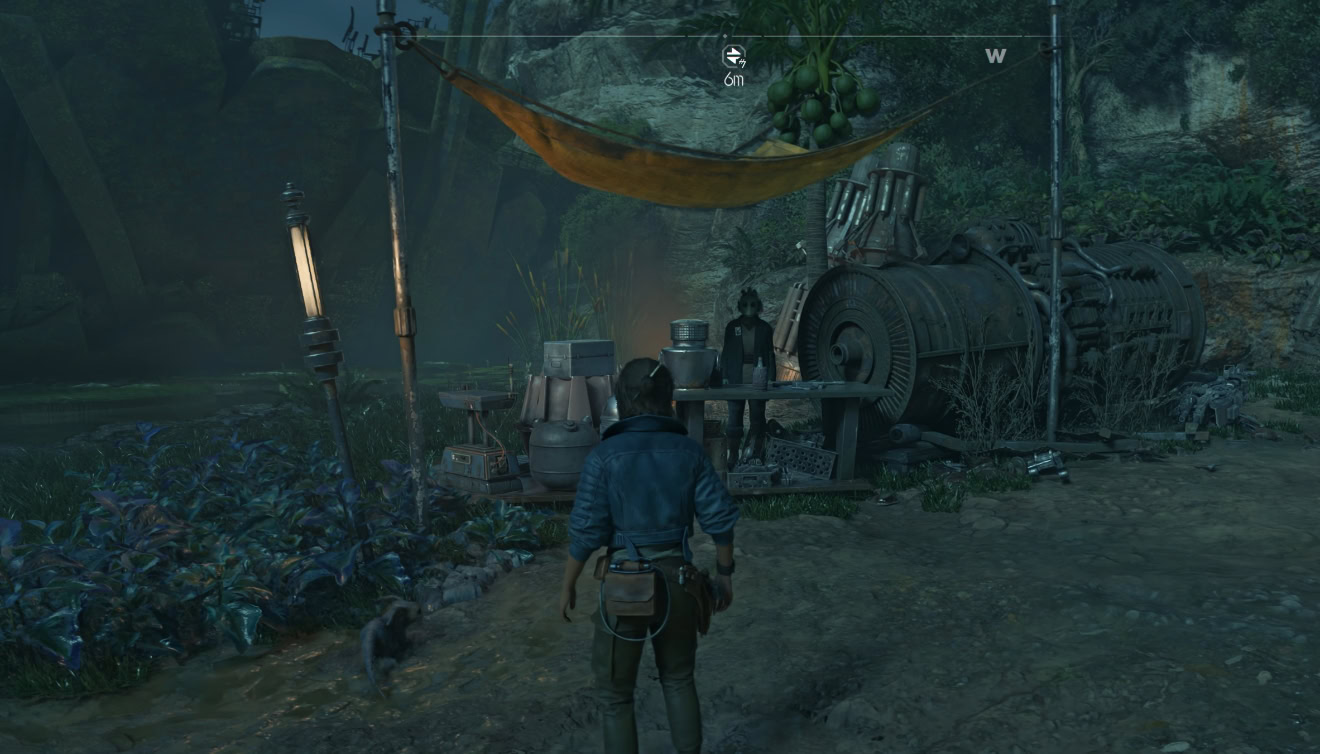
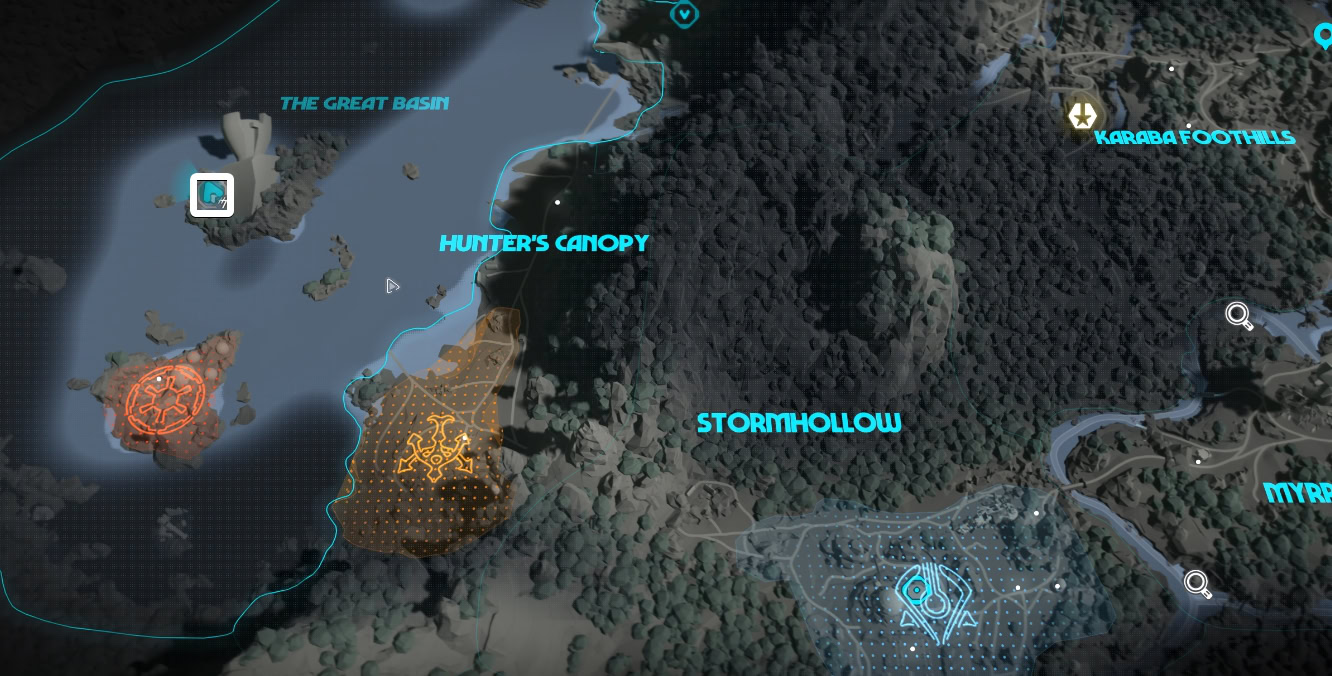
Where to find stranded merchant on Akiva
Near the crashed ship in The Great Basin region, on the island, you will find Namda Eaakee. This is the stranged merchant you need to find to unlock the Survivor ability.
This rodian sells AF-2 Cypher Key as well, which is required for unlocking the second Slice Kit Upgrade from The Veteran expert.
How to get Susurra-Weave Fabric
Susurra-Weave Fabric is not an exclusive key expert material and there are several merchants and survivalistts you can buy it from. One such example is the merchant on Kijimi. Raiva Melin’s shop in Kijimi city is right to the east of the spawn point in the Thermal District.
MT-7 – The Veteran
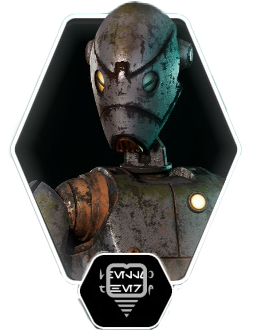
MT-7 is a BX-Series Commando Droid from the Clone Wars era. This old relic is lying on the floor of a hidden compound in Akiva.
To unlock MT-7, you must complete The Veteran quest, unlocked after completing The Viper main quest, unlock the Mechanic expert and Scavenger expert, and find at least five CIS transmissions.
Decryption Module
Allows Kay to decrypt previously encrypted Separatists Datadiscs, which could reveal some useful information.
Requirements:
– Unlocked after completing the quest “The Veteran”.
Improvise
Increases Kay’ maximum Health.
Requirements:
– Defeat 5 enemies using the environment.
– Find 3 Hideouts.
Adapt
Increases the amount of health instantly recovered by Bacta Vials by 1, without affecting the over time regeneration.
Requirements:
– Requires Improvise.
– J8 Terrain Sensor.
– 9x Transparisteel.
– 3x Ion Cells.
Overcome
After suffering Explosive damage, immediately start regenerating health at an increased speed.
Requirements:
– Requires Adapt.
– Defeat the Wanted 6 event.
– Defeat 3 enemies with a single explosion.
Nix Commando
After performing a Nix Attack command, Nix will be able to autonomously execute a second attack on another nearby enemy.
Requirements:
– Find 6 different ways to make Nix happy.
– 10x Blast down distracted enemies.
Slice Kit upgrade
Increases the amount of Energy for the Slicing Kit by 2.
Requirements:
– AF-2 Cypher Key.
– 30x Chalcopyrite.
– 15x 4XB Calculacion Units
How to use the Environment to defeat opponents
There are several methods you can use the environment to defeat opponents in the game. The simples one is to ask Nix to trigger an explosion on a canister or a flamable tube near an NPC.
A more fun and advanced method is to use Nix to trap an alarm and an even better one is to use the Sneaky Trap ability to ask Nix to to pull the pin of a grenade carried by an NPC. Note that not all of them carry grenades.
Find 3 Hideout Locations
You can’t complain from the lack of hideouts in Star Wars Outlaws. Here are a few examples. We have full walkthroughs for each one linked below:
- Crimson Dawn Hideout, The Grazing Fields
- Crimson Dawn Hideout, Boulder Forrest
- Smuggler’s Hideout, The Lost Steppe
It’s worth exploring them too, not just reaching and discovering them. Each one has one or multiple treasures, some with valuable key parts used to unlock an ability or upgrade your blaster.
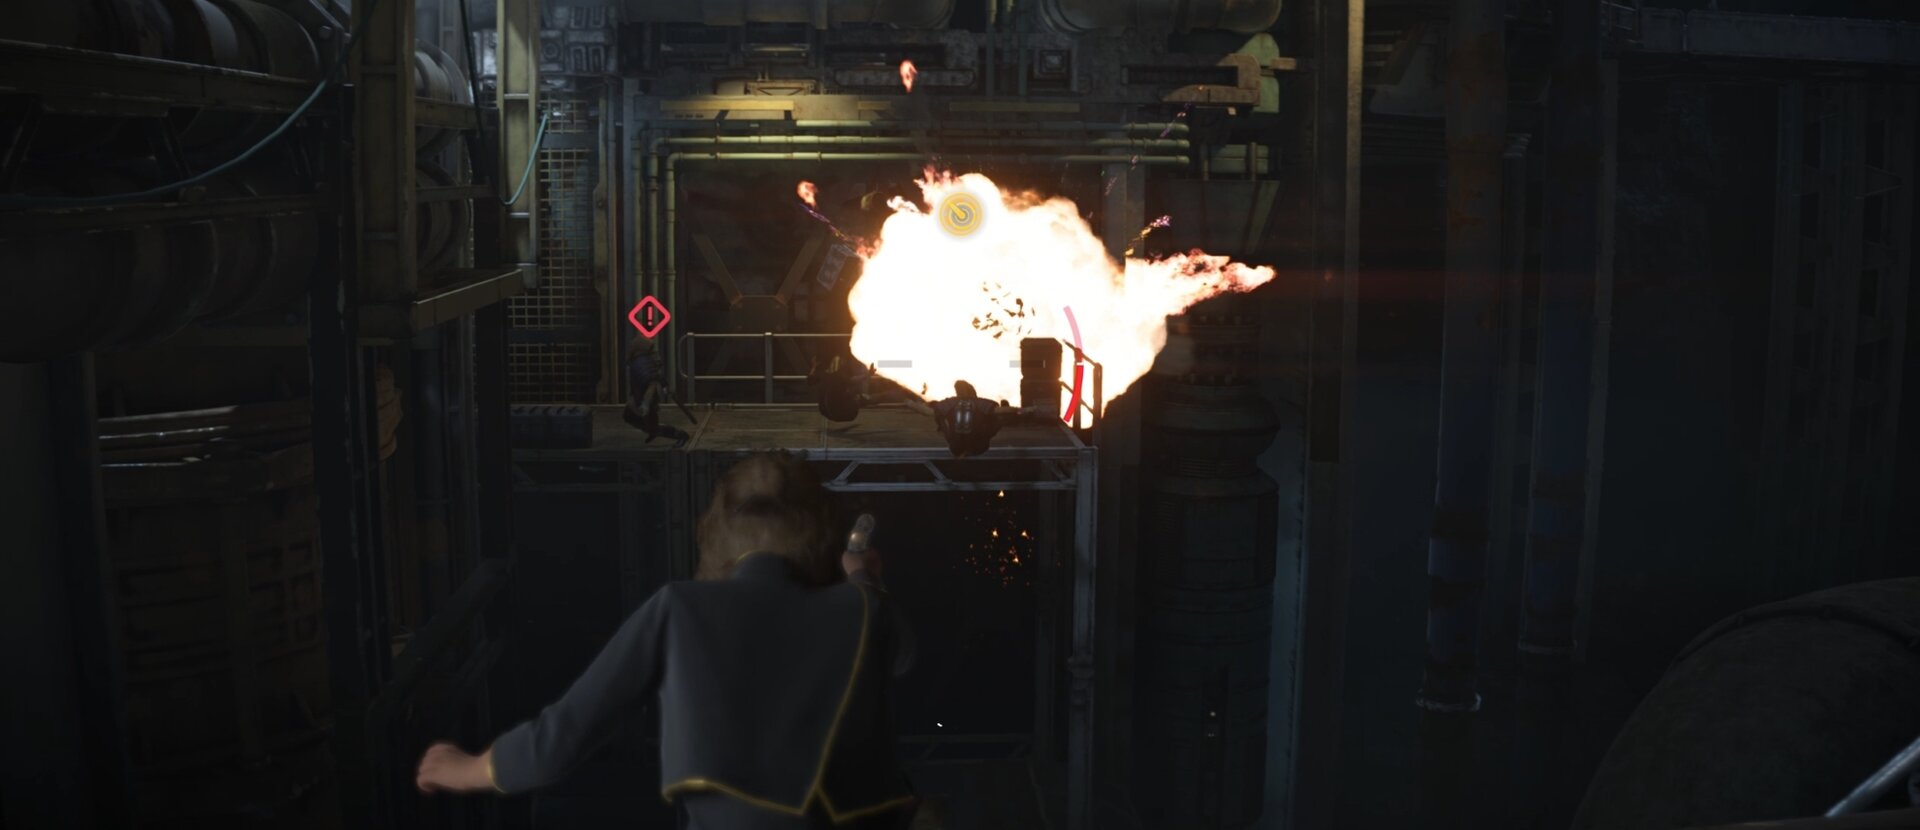
Tips for defeating 3 enemies with a single explosion
Most imperial bases are filled with gas and combustible tanks. Get inside one of these compounds and wait for the right moment to shoot or send Nix. If done with precision you can complete the “defeat 3 enemies with a single explosion” and also “Defeat 5 enemies using the environment”.
AF-2 Cypher Key
You can purchase this expert item from Namda Eaakee Barterer, the stock vendor located in the Great Basin, on Akiva. This Rodian will trade the AF-2 Cypher Key for 6x Durasteel, 4x Polycarbonate, and 2x Helicyclic Gears.
You should have already been to the stranged merchant before as this is a requirement to unlock the Survivor ability form the Scavenger expert’s list of abilities.
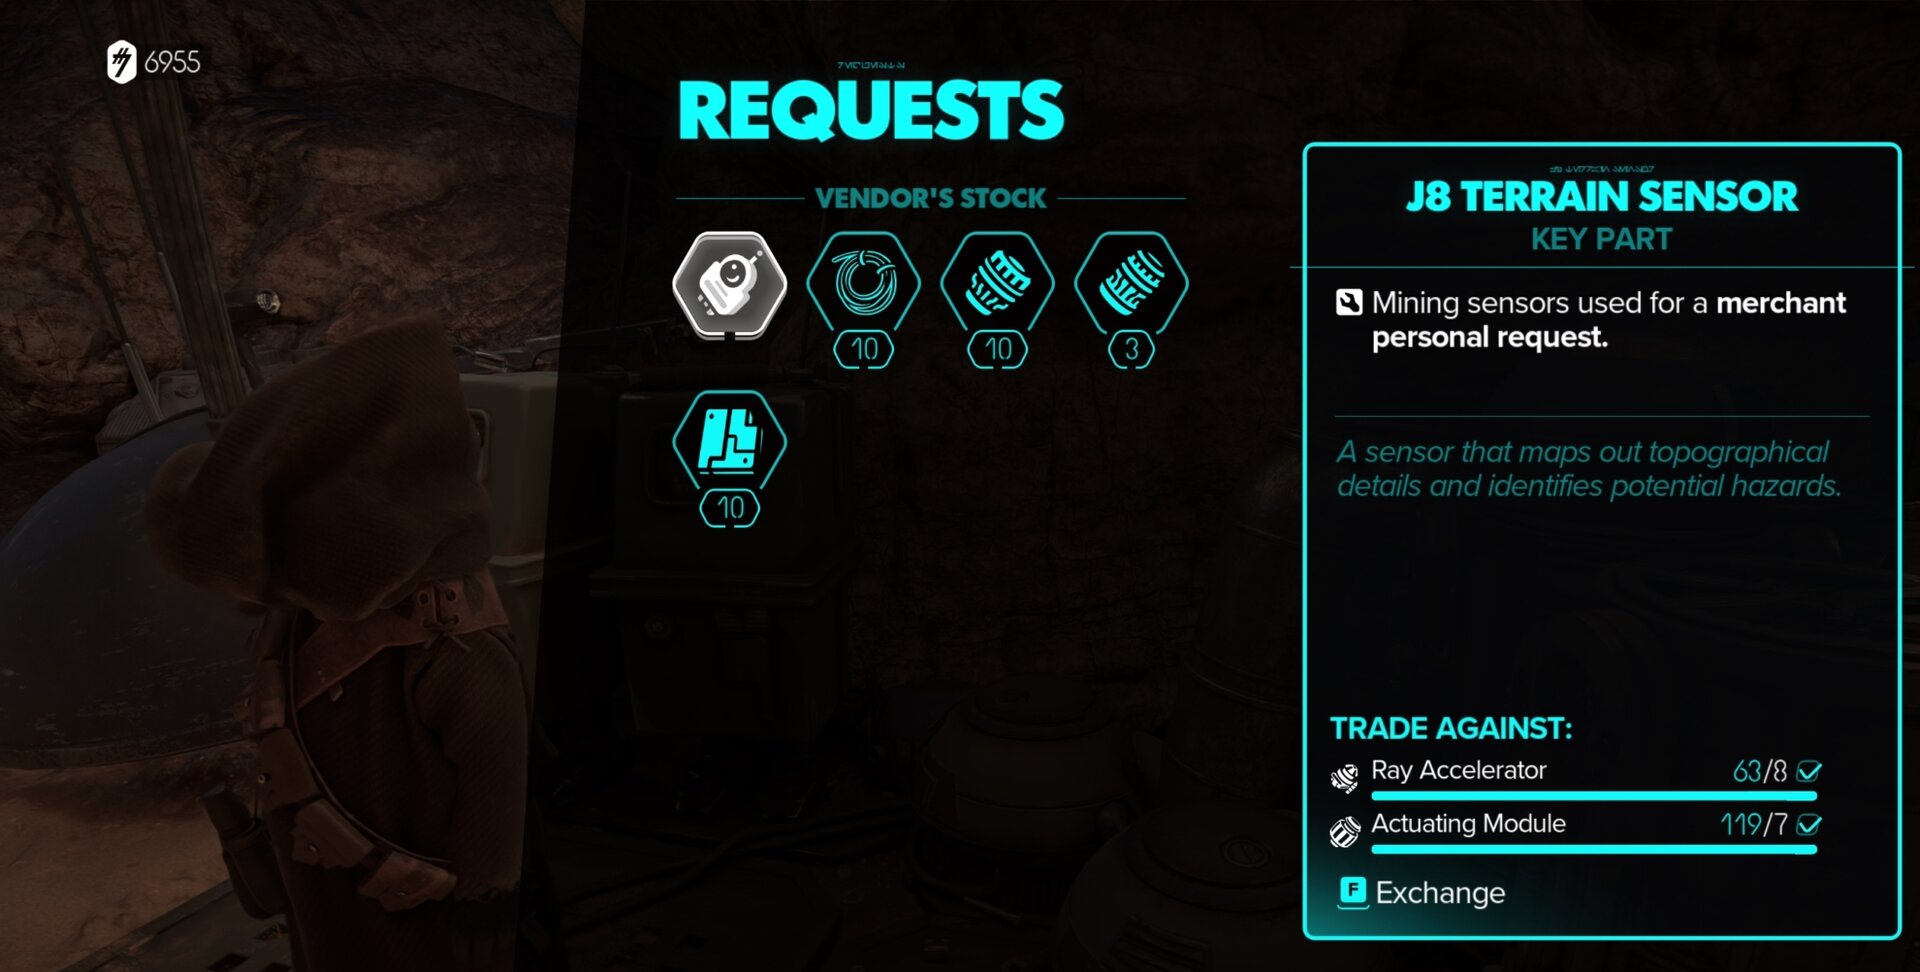
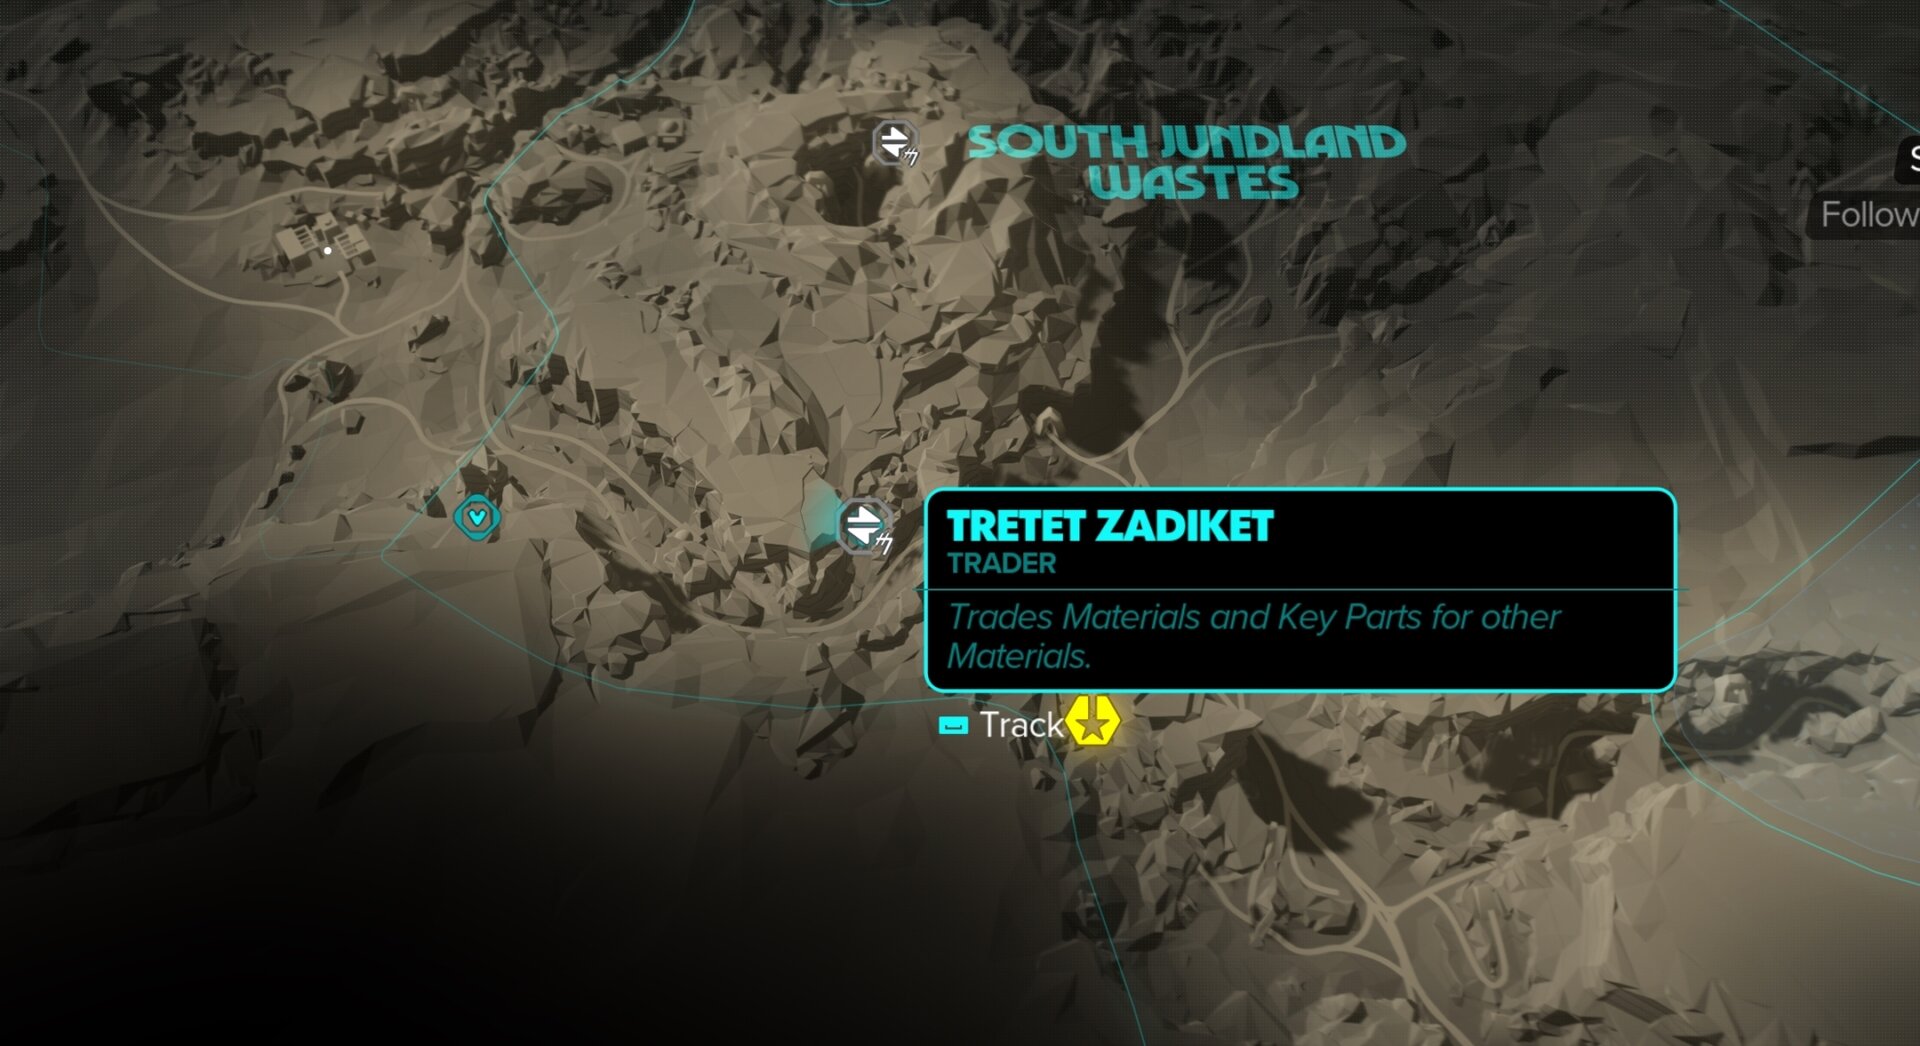
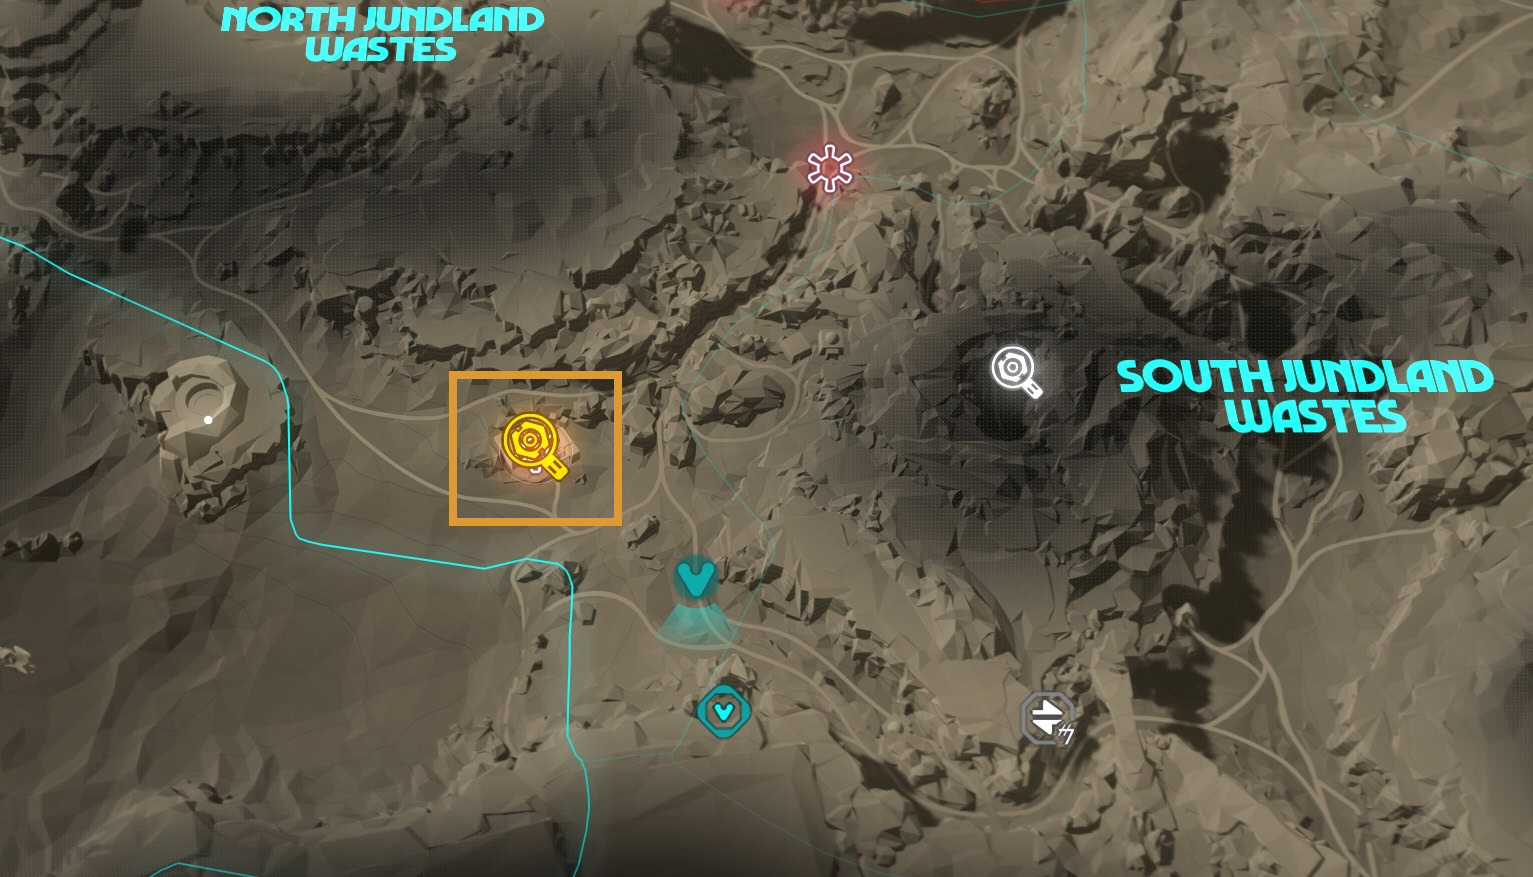
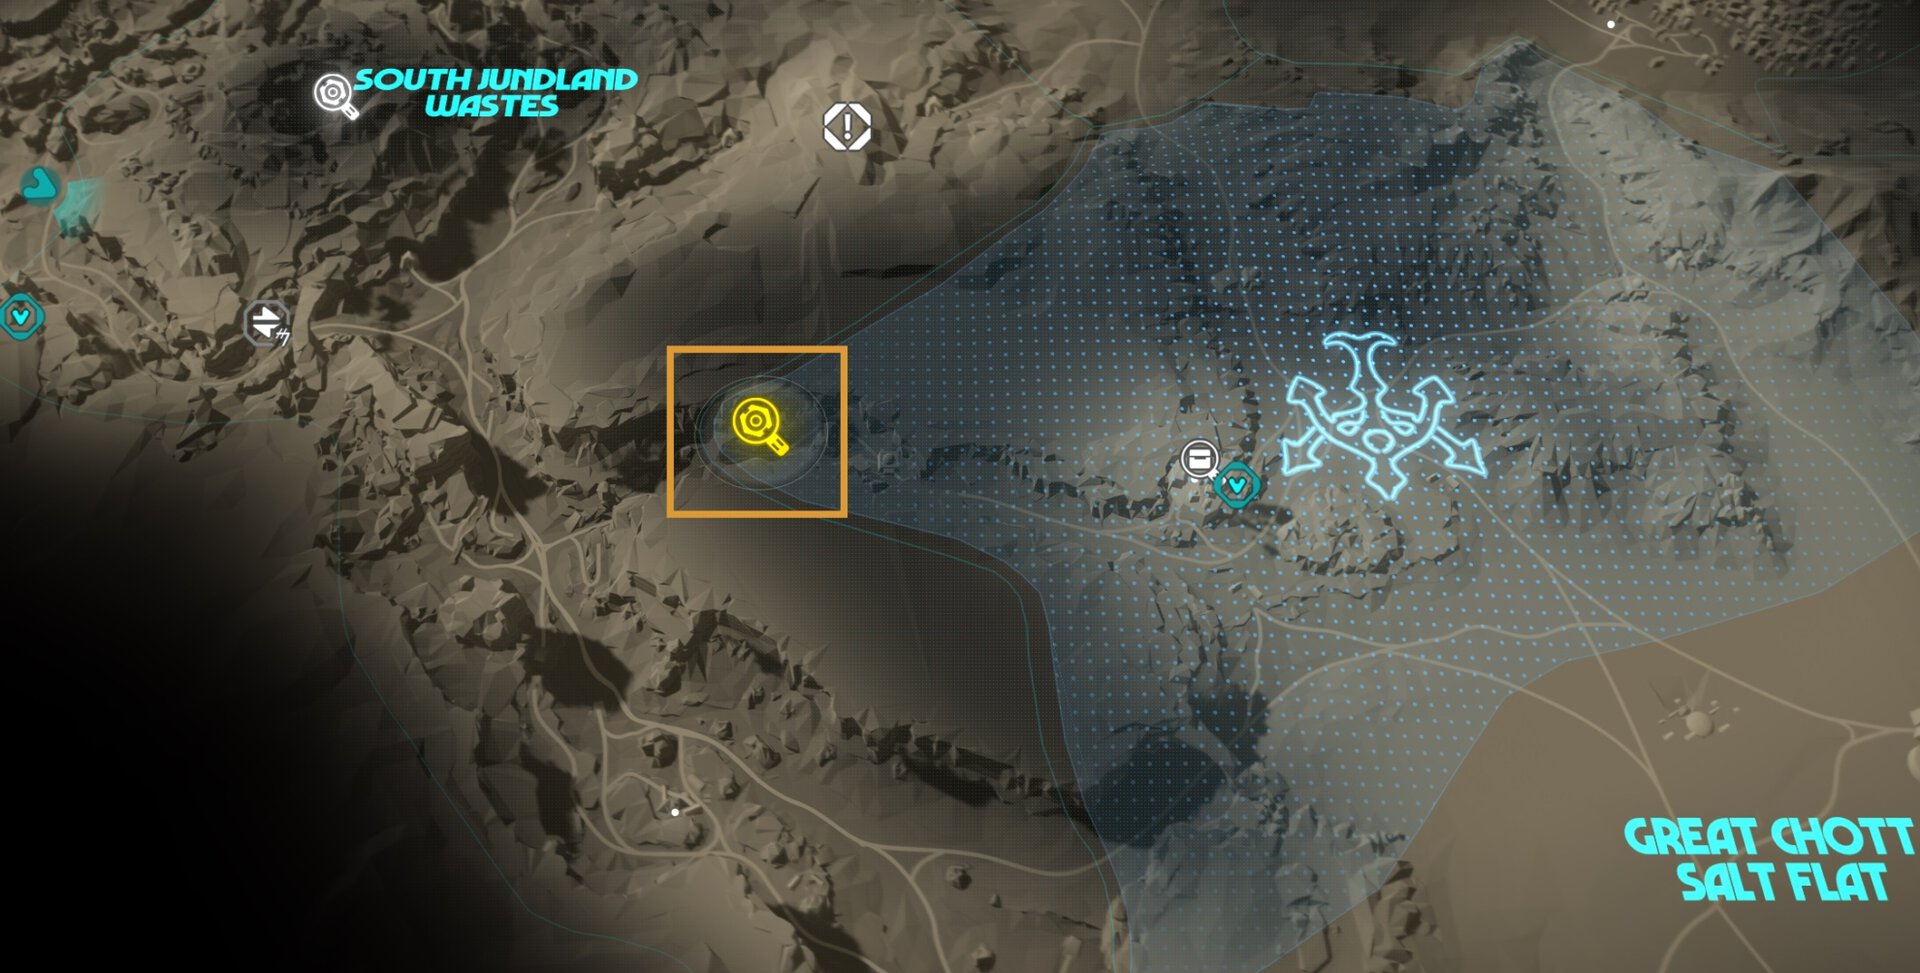
J8 Terrain Sensor
You can get this expert item from Tretet Zadiket, the Jawa Trader located south of the South Jundland Wastes. Since this is a merchant’s request, Tretet won’t accept credits for it. Instead, you must exchange a total of 8x Ray Accelerator and 7x Actuating Module for the J8 Terrain Sensor.
With the J8 Terrain Sensor, you’ll meet one of the requirements to learn the Adapt ability from MT-7.
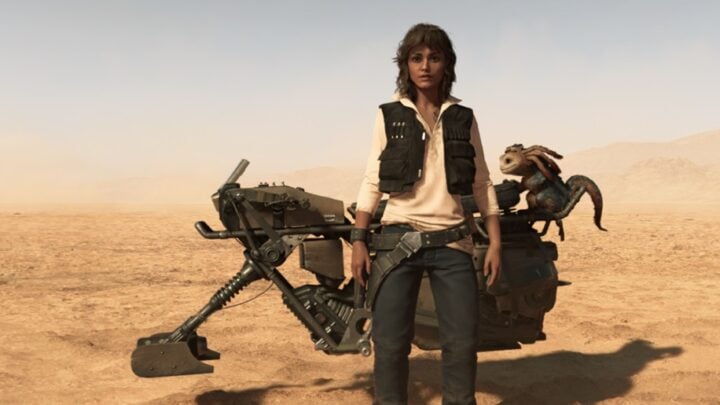
Rooster Trace – The Mercenary
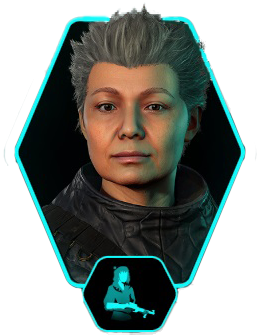
Tracer Roost, the Mercenary, is an expert you can meet shortly after landing on Kijimi during the quest The Safecracker. She is a Mercenary that can teach you how to use heavy weapons.
She can be found in Kijimi City in The Domak Refectory Cantina. You’ll find her sitting alone at one of the cantina’s tables. Check out our walkthrough for unlocking the Mercenary for more details.
The first ability Rooster can unlock is to allow Kay to use advanced weapons such as the Z-6 Rotary Cannon. Below is the full list of abilities Kay can learn from Rooster Trace along with the requirements for each one.
CAN I TRY THAT

Allows Kay to use a broader range of Pick-up weapons by learning how to use High Tier Imperial Weaponry.
Requirements:
– Unlocked after completing the quest “The Mercenary”
I like this thing
Increases the amount of Pickup Weapon Ammunition by 25%.
Requirements:
– Defeat 5 enemies with different types of pickup weapons.
feelers out
Doubles the distance at which Nix will be able to detect and highlight enemies via the Nix Sense mechanic.
Requirements:
– 3x Use Nix to fetch a weapon, a grenade, or a bacta vial
– Complete a thief contract without being detected
– Make Nix Jealous
sharpshooting
Increases the adrenaline generated by headshots by a High amount.
Requirements:
– 3x Hit Headshots
– Complete an Enforcer Contract
– 8x Defeat enemies using any marksman rifle
loop maneuver
Tap Space to execute a 180 degrees turn that will quickly turn the Trailblazer into the opposite direction.
Requirements:
– 6x Defeat TIE Interceptors
– 12x Defeat enemy ships
– Complete a space smuggler contract
top roll maneuver
Execute a 360 degree top roll maneuver that will position the Trailblazer behind the immediate pursuers.
Requirements:
– Unlock Loop Maneuver
– Defeat an Imperial Gozanti-Class Cruiser in Space
– Complete a Space Enforcer contract
How to get and complete Contracts
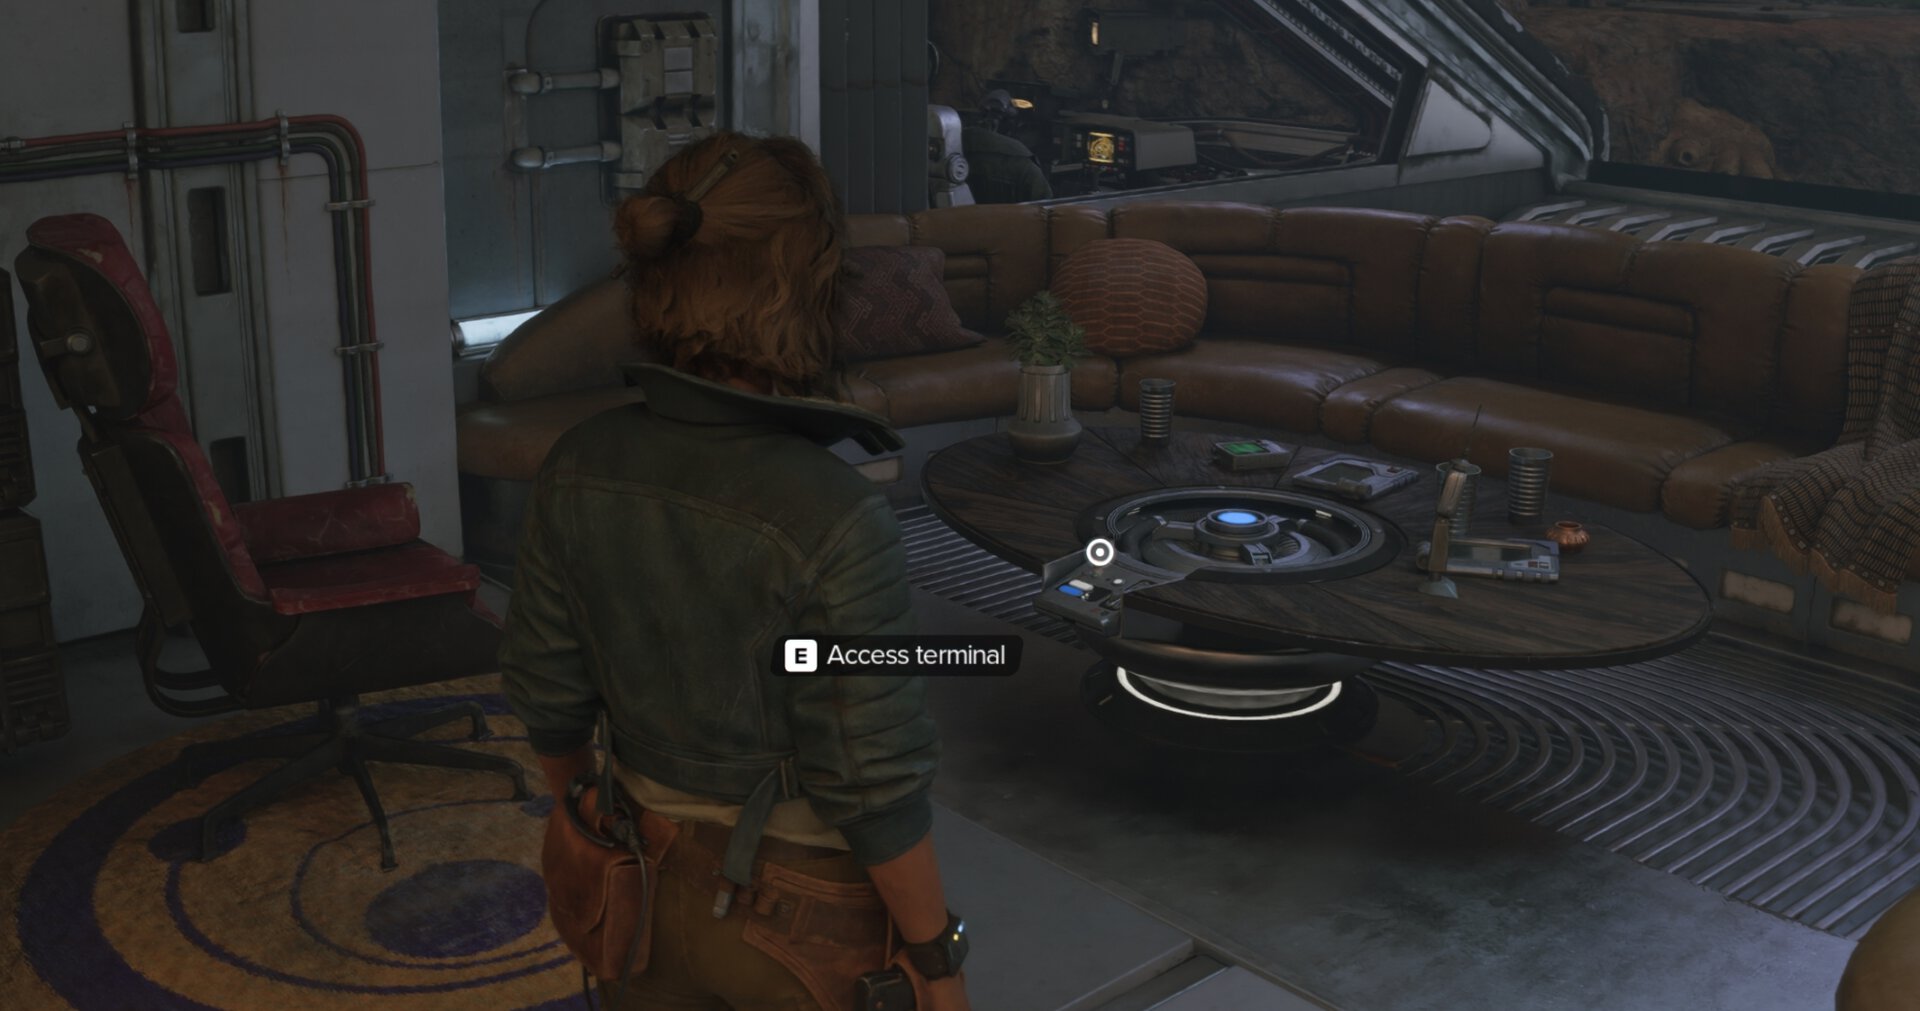
You can find contract brokents in every planet in Star Wars Outlaws. There are also terminals located usually in a city to help you manage the contracts you want to complete. You can also do this from the table on your ship, The Trailblazer.
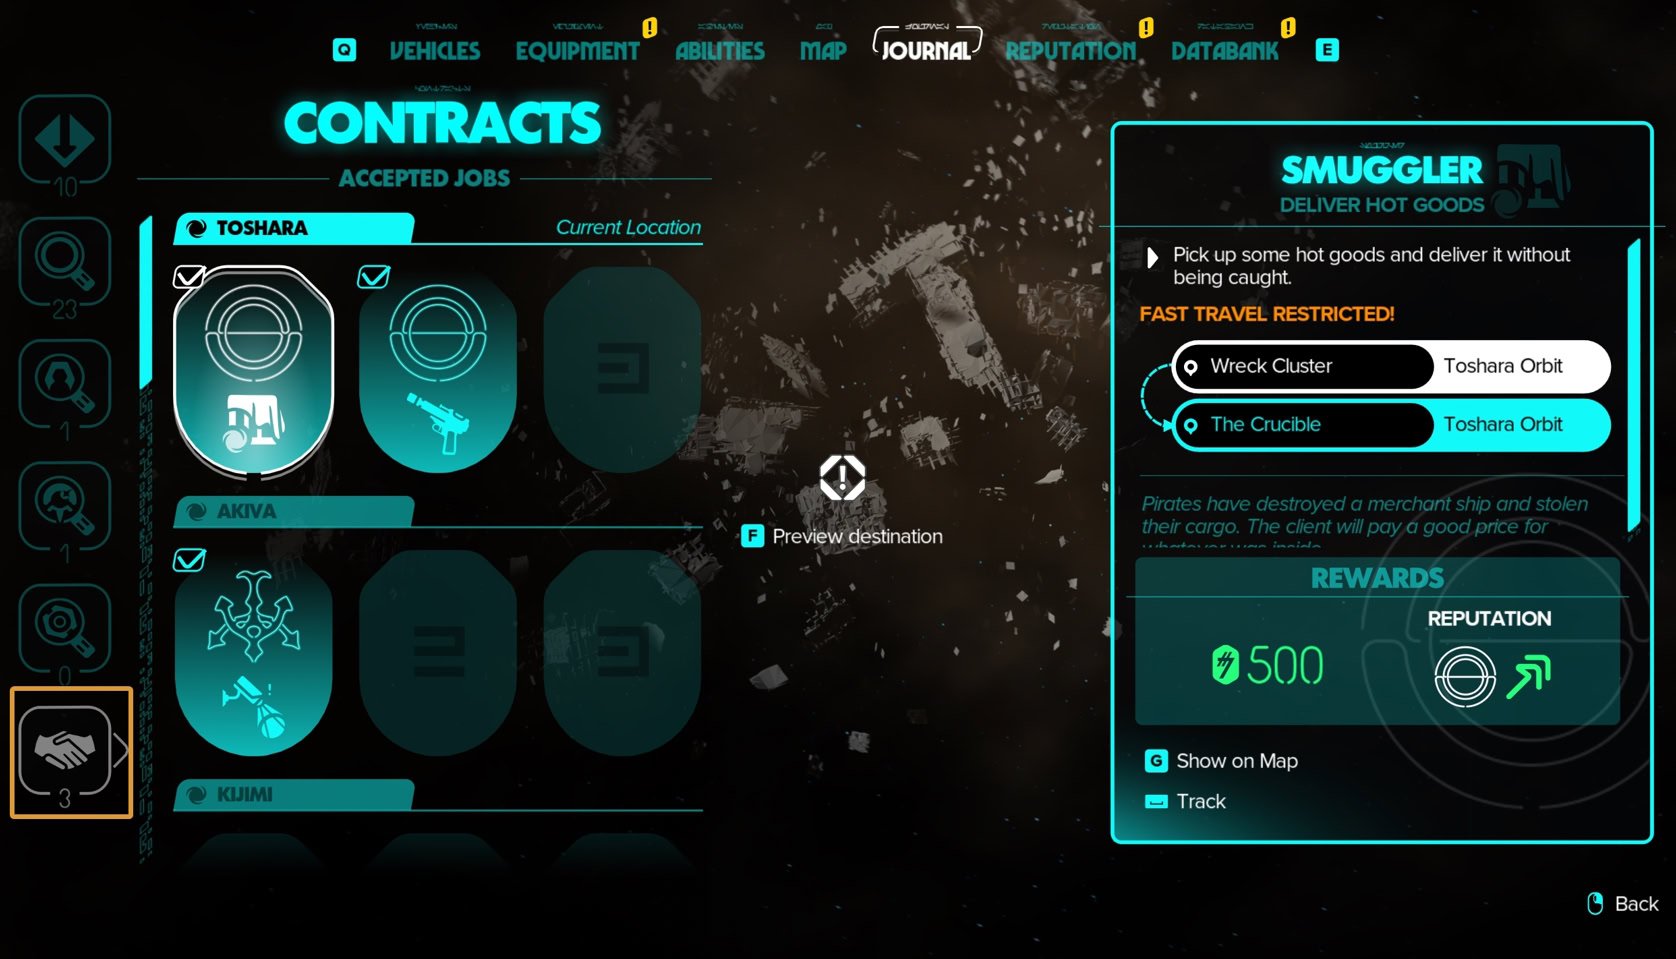
Contracts are often simple fetch-style missions, but they vary in style and requirements.
You can have up to three contracts per planet. At the end of a contract, you will often get a prompt to honor your original deal or screw the quest giver and earn reputation with another factiom.
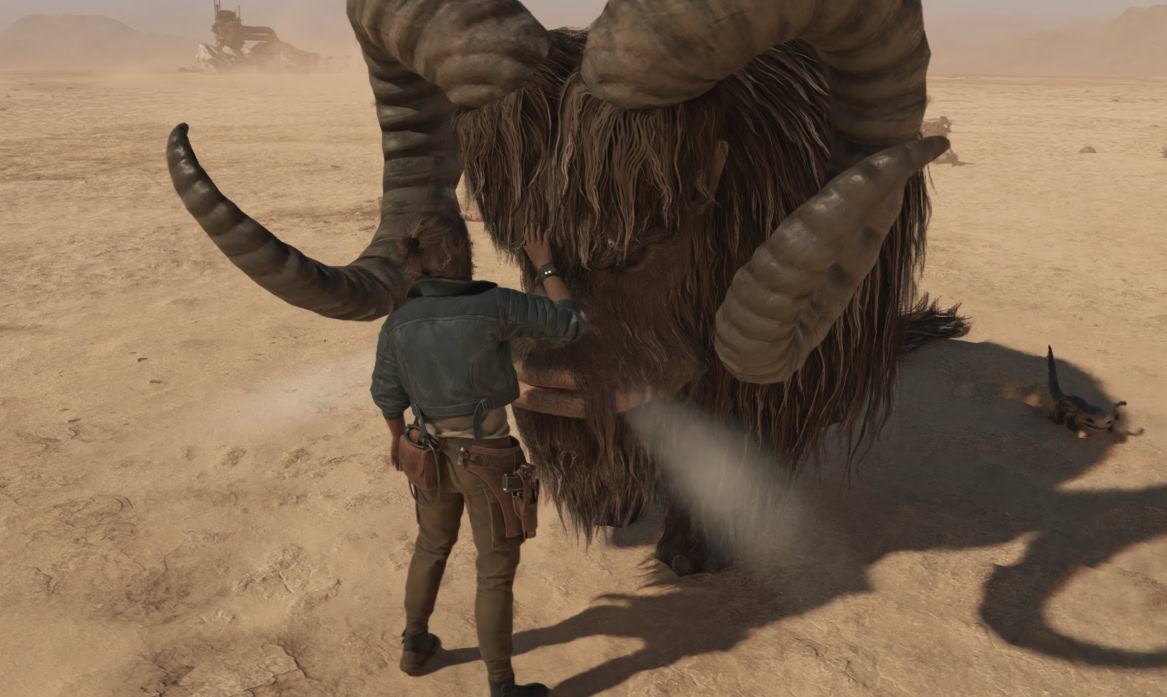
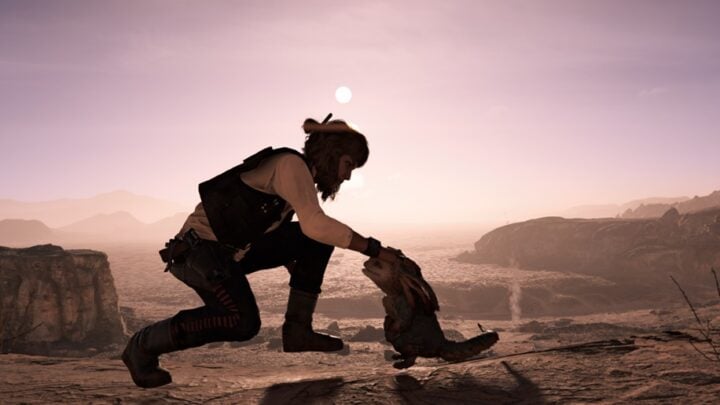
How to Make Nix Jealous
Earlier on, you had to make Nix happy to unlock the Treasure Hunter ability. Now, to unlock the Feelers Out, you have to make Nix jealous. You can do this very easily by approaching any of the non-aggressive animals on any planet and interact with them.
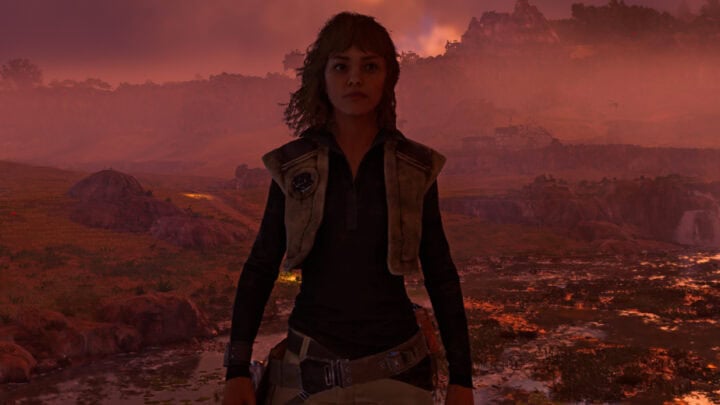
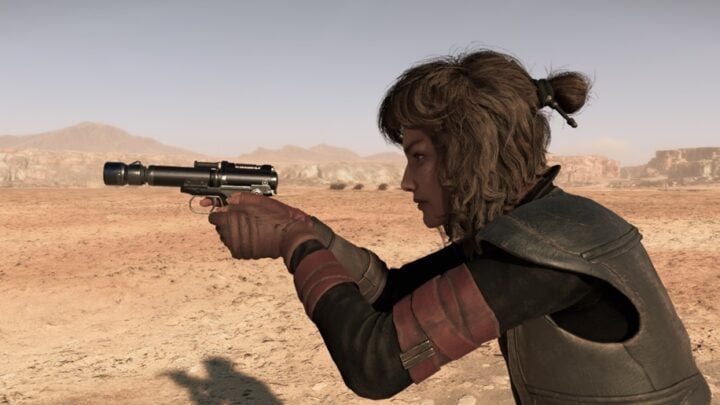
Quint – The Gunslinger

Quint is one of the first individuals you meet on Tatooine, she is a sheriff and former pirate who worked for the Hutts. Kay ends up teaming with Quint to defeat a Hutt underboss and his enforcers.
To unlock Quint as an expert, you have to complete The Gunslinger quest, which is unlocked after arriving on Tatooine and completing a few steps of the main quest.
After completion of the expert quest, the first ability will be automatically unlocked for you – Adrenaline Rush Mastery.
Adrenaline Rush Mastery
Upgrades Adrenaline Rush, increasing the maximum number of targets by 2 as well as enabling marking objects such as explosive barrels.
Requirements:
– Unlocked after completing the quest “The The Gunslinger”.
Powered recharge
Provides a small amount of Adrenaline when a Perfect Cooling is achieved.
Requirements:
– Pick three different locks flawlessly.
– Eliminate 12 enemies with the Blaster’s Power Module.
Speeder Shot
Adrenaline Rush can now be used more effectively from the speeder, allowing automatic targeting of nearby enemy speeders while on the drive.
Requirements:
– Participate and win three different Speeder Races.
– Land five headshots on driving enemies.
Resilient
Increases Kay’s maximum Health.
Requirements:
– Eliminate ten Imperial Forces in a row at Wanted 3 or higher.
– While at one HP, eliminate five enemies in a row.
The More
Allows Kay to mark 1 extra target during Adrenaline Rush.
Requirements:
– Eliminate four enemies during Adrenaline Rush three times.
– Land 15 headshots.
The better
Allows Kay to mark tougher enemies twice during Adrenaline Rush, which leads to an instant kill instead of a staggering effect.
Requirements:
– Eliminate three Death Troopers in a row.
– Eliminate six enemies with a single Adrenaline Rush.
Meet many requirements at once
I found that increasing the Wanted Level with the Empire is a good way to unlock some of the requirements needed to unlock Quint’s granted abilities. It should be high enough for them to continue sending troops.
Assuming you’re killed in the process, you should be able to use Adrenaline Rush to kill six enemies, use Adrenaline Rush three times, eliminate Imperial Forces in a row, and eliminate multiple enemies with the Power Module.
An easy way to start this chaos is by parking in the middle of the road. Imperial scouts who patrol the area will stop. With them not moving it’s very easy to land headshots. You can repeat this multiple times until the requirement for The More is met.
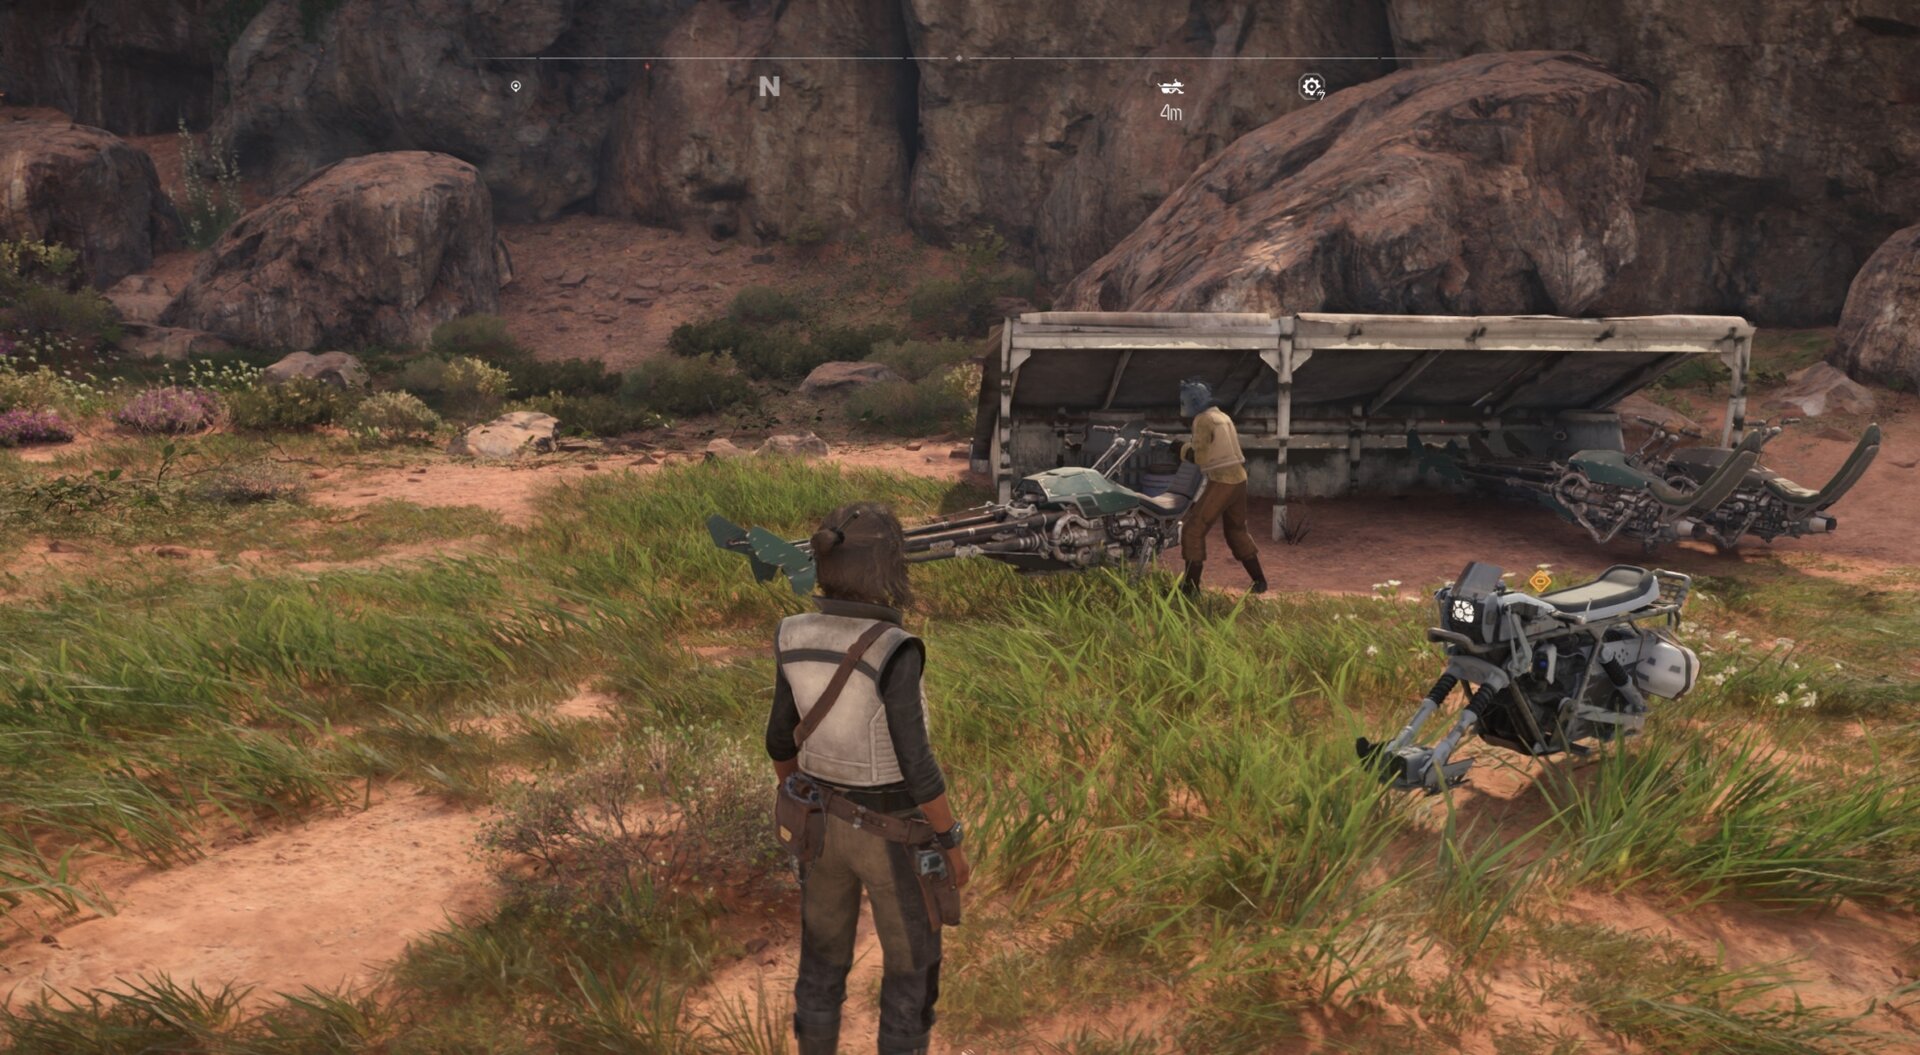
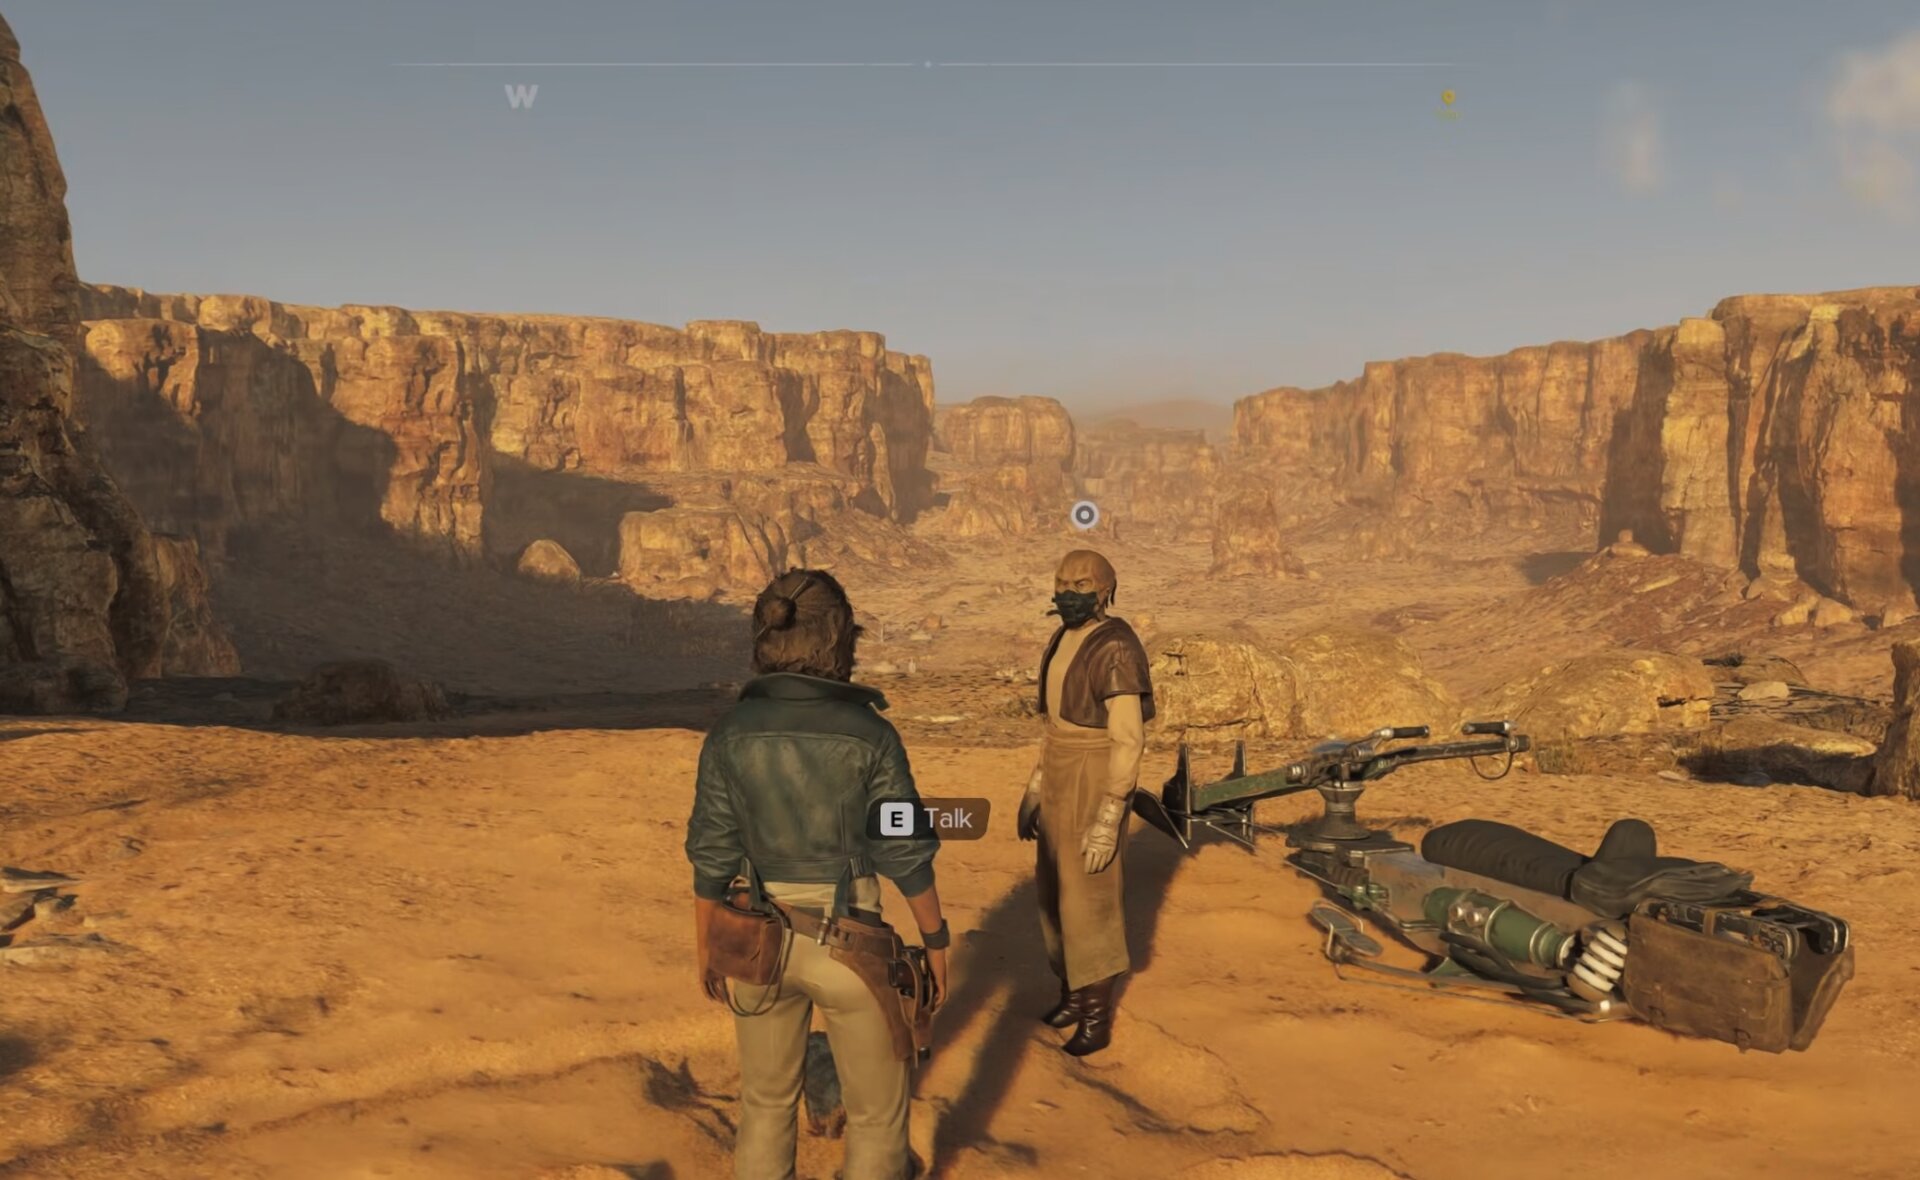
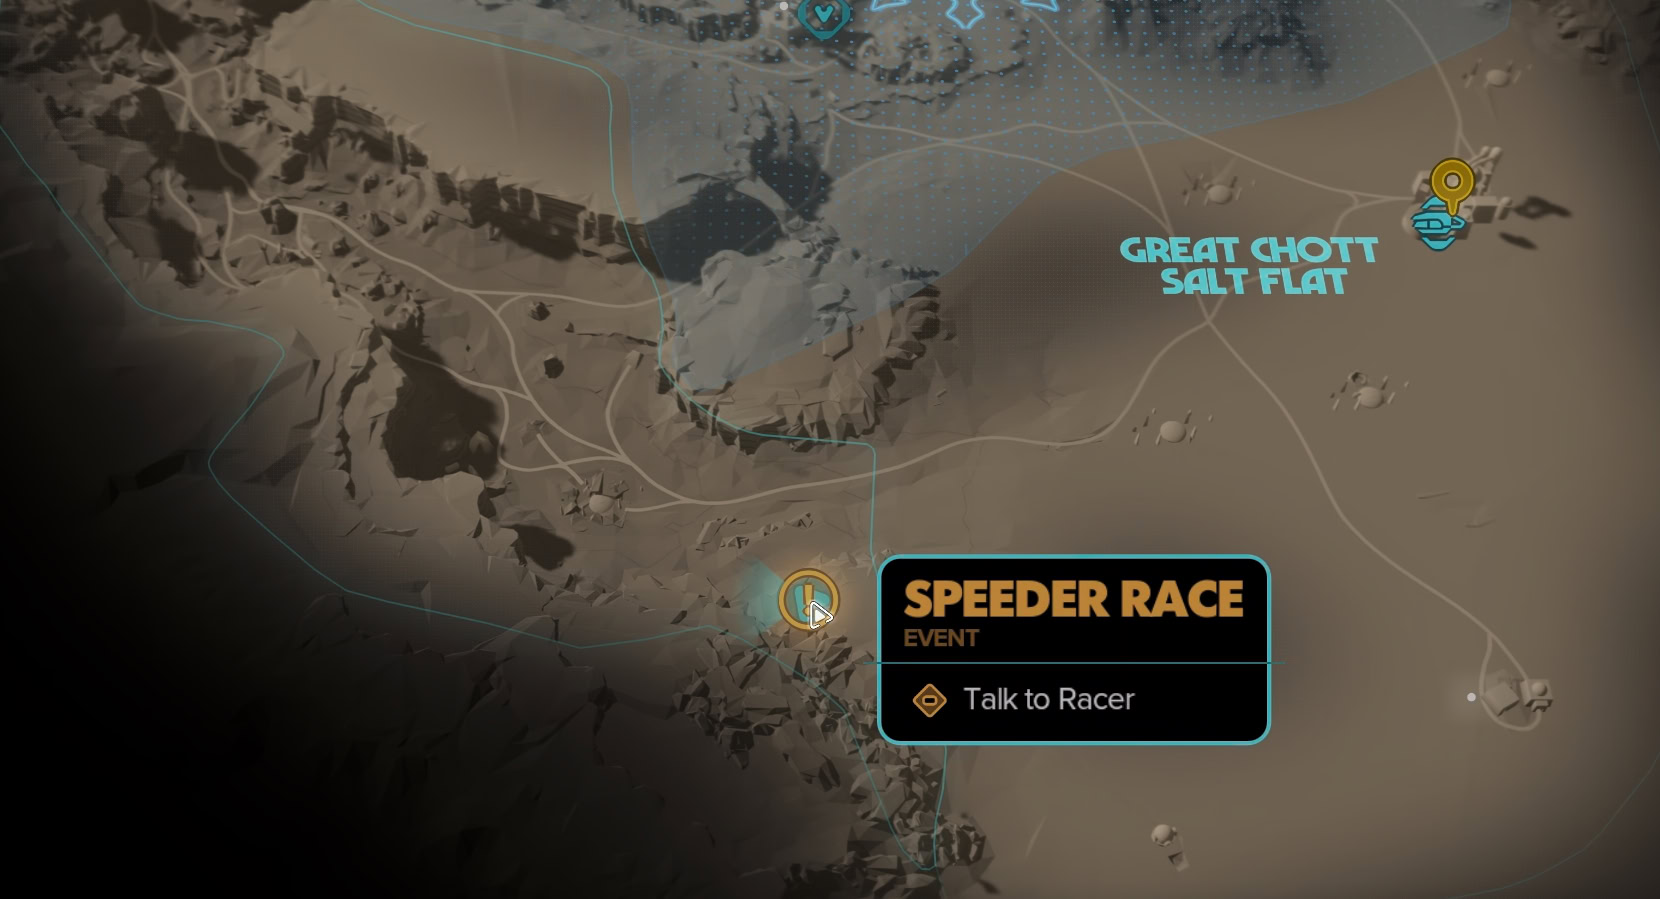
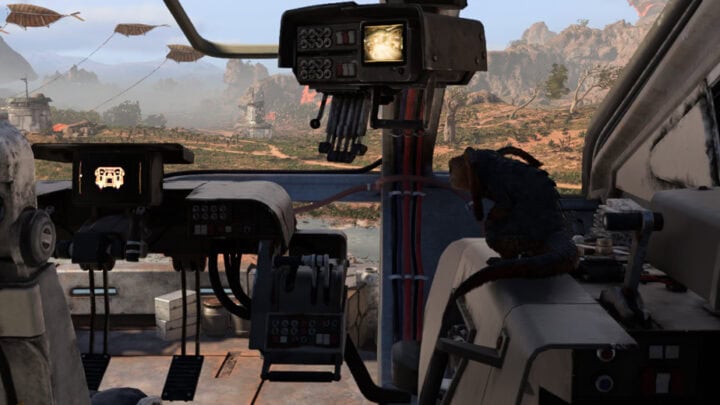
Speeder Race Locations
You’ll need to win speeder races 3 times, along with landing 5 headshots on enemies sitting/riding/driving on speeders, to unlock the Speeder Shot ability. The speeder races are fairly uncommon world events, but they can occur in a few set locations.
Toshara Speeder Race Location 1
You can find a Speeder Race Event at the western exit of Jaunta’s Hope on the northern side of the river on Toshara.
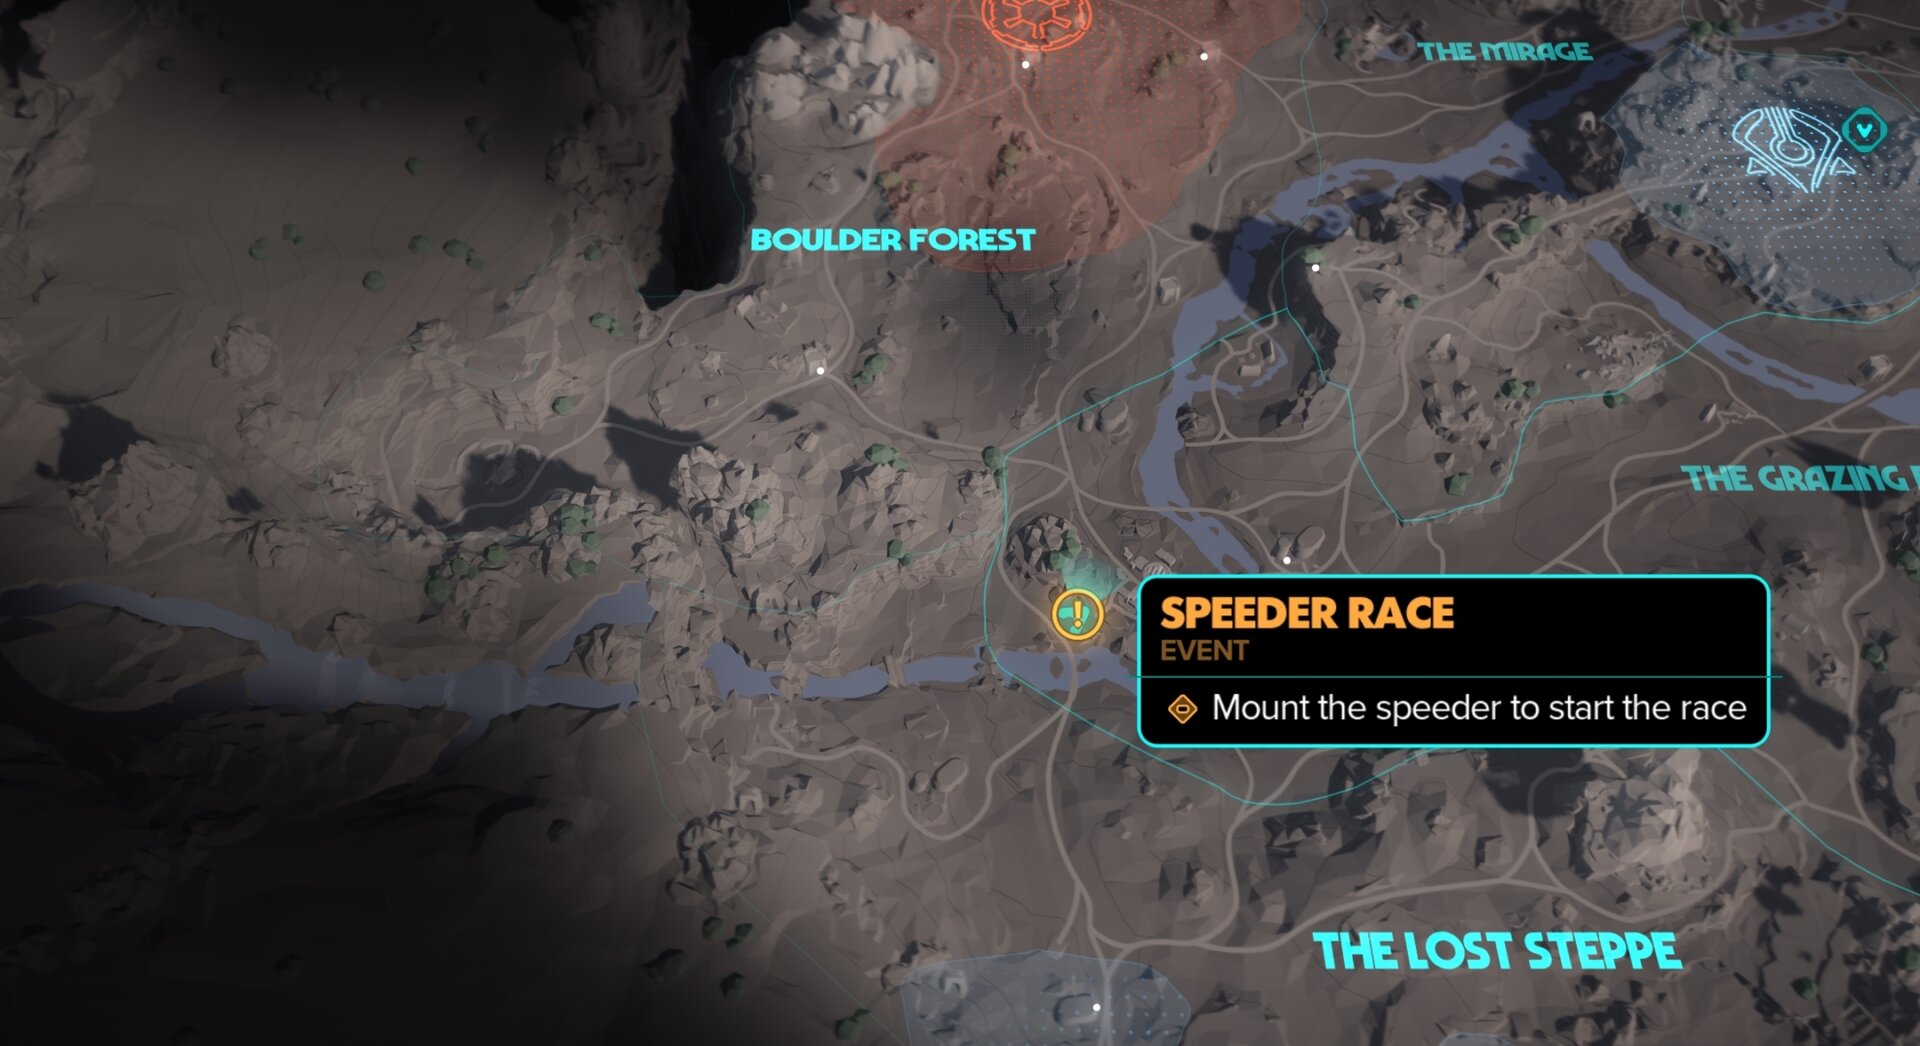
Toshara Speeder Race Location 2
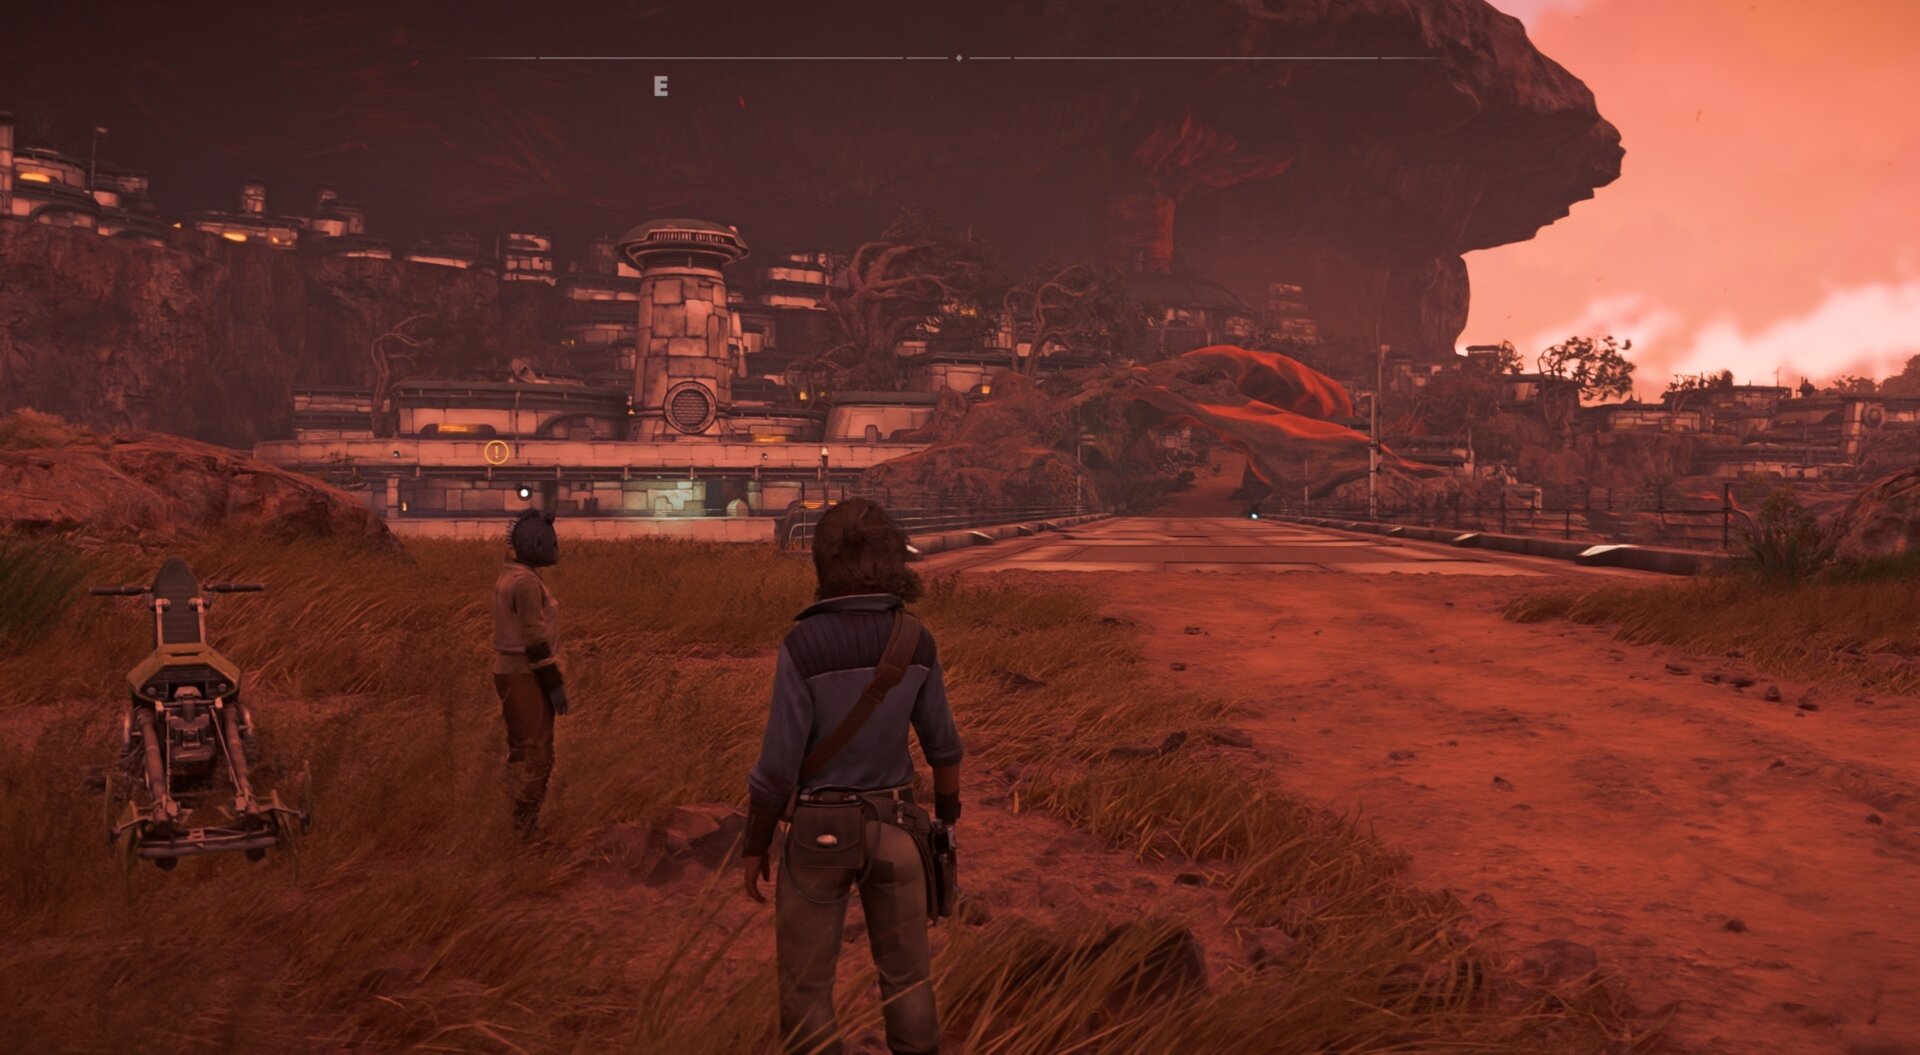
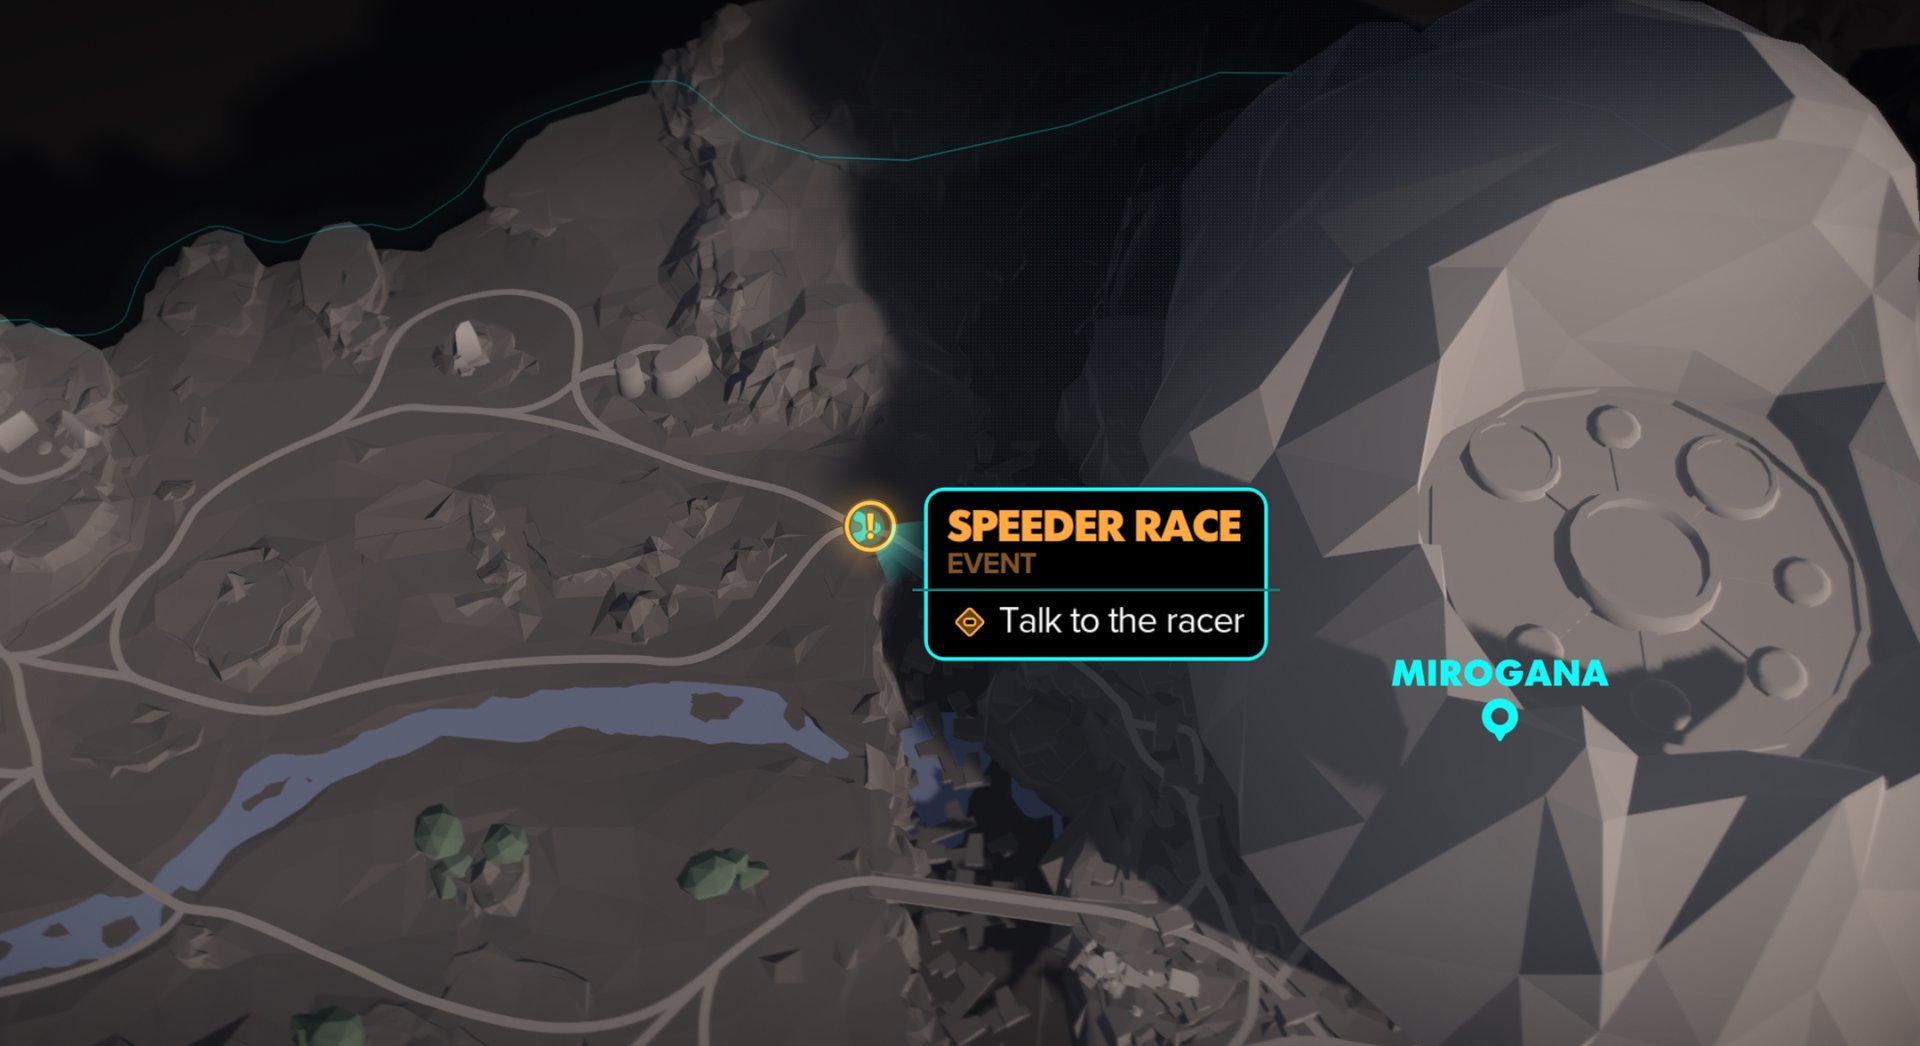
You can find a Speeder Race Event across the northern bridge out of Mirogana on Toshara.
Tatooine Speeder Race Location 1
You can find a Speeder Race Event along the main road leading out of Bestine that connects to Jabba’s Palace on Tatooine.
Tatooine Speeder Race Location 2
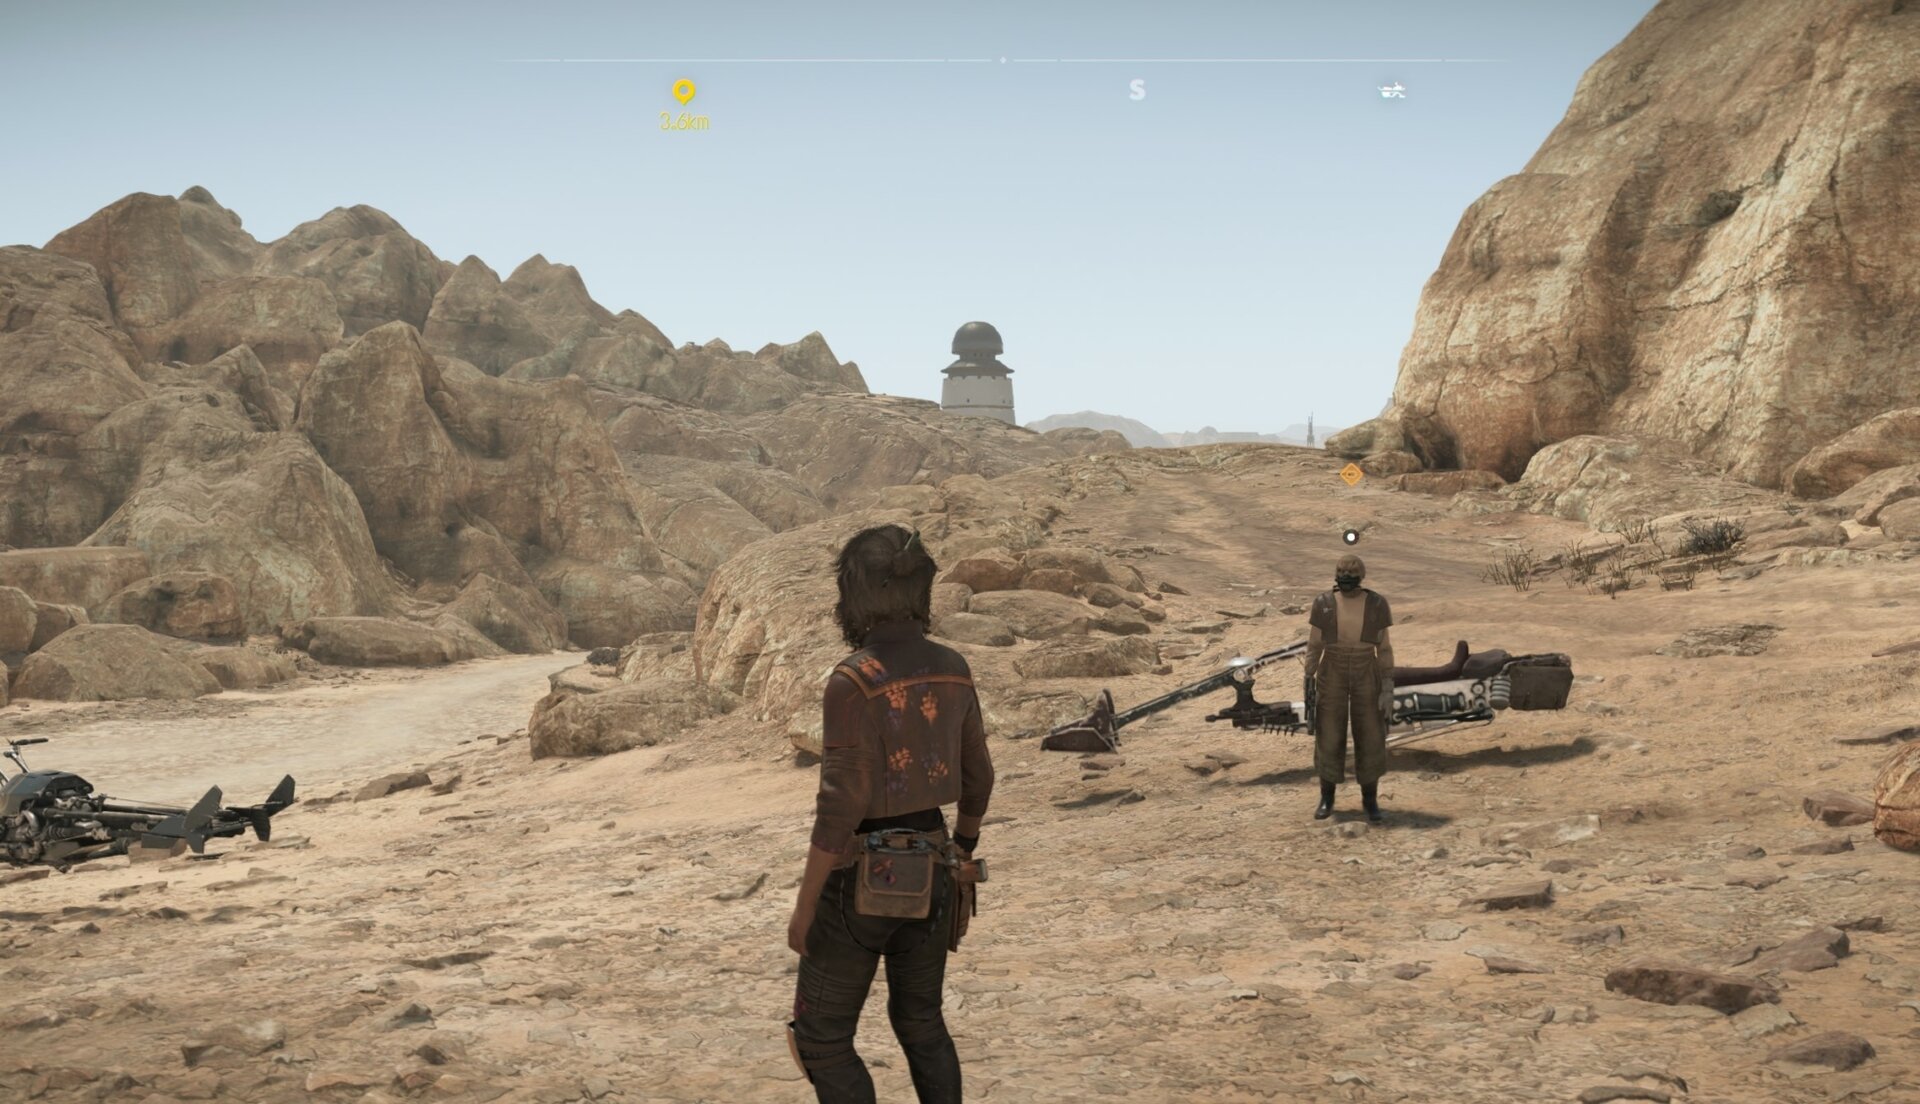
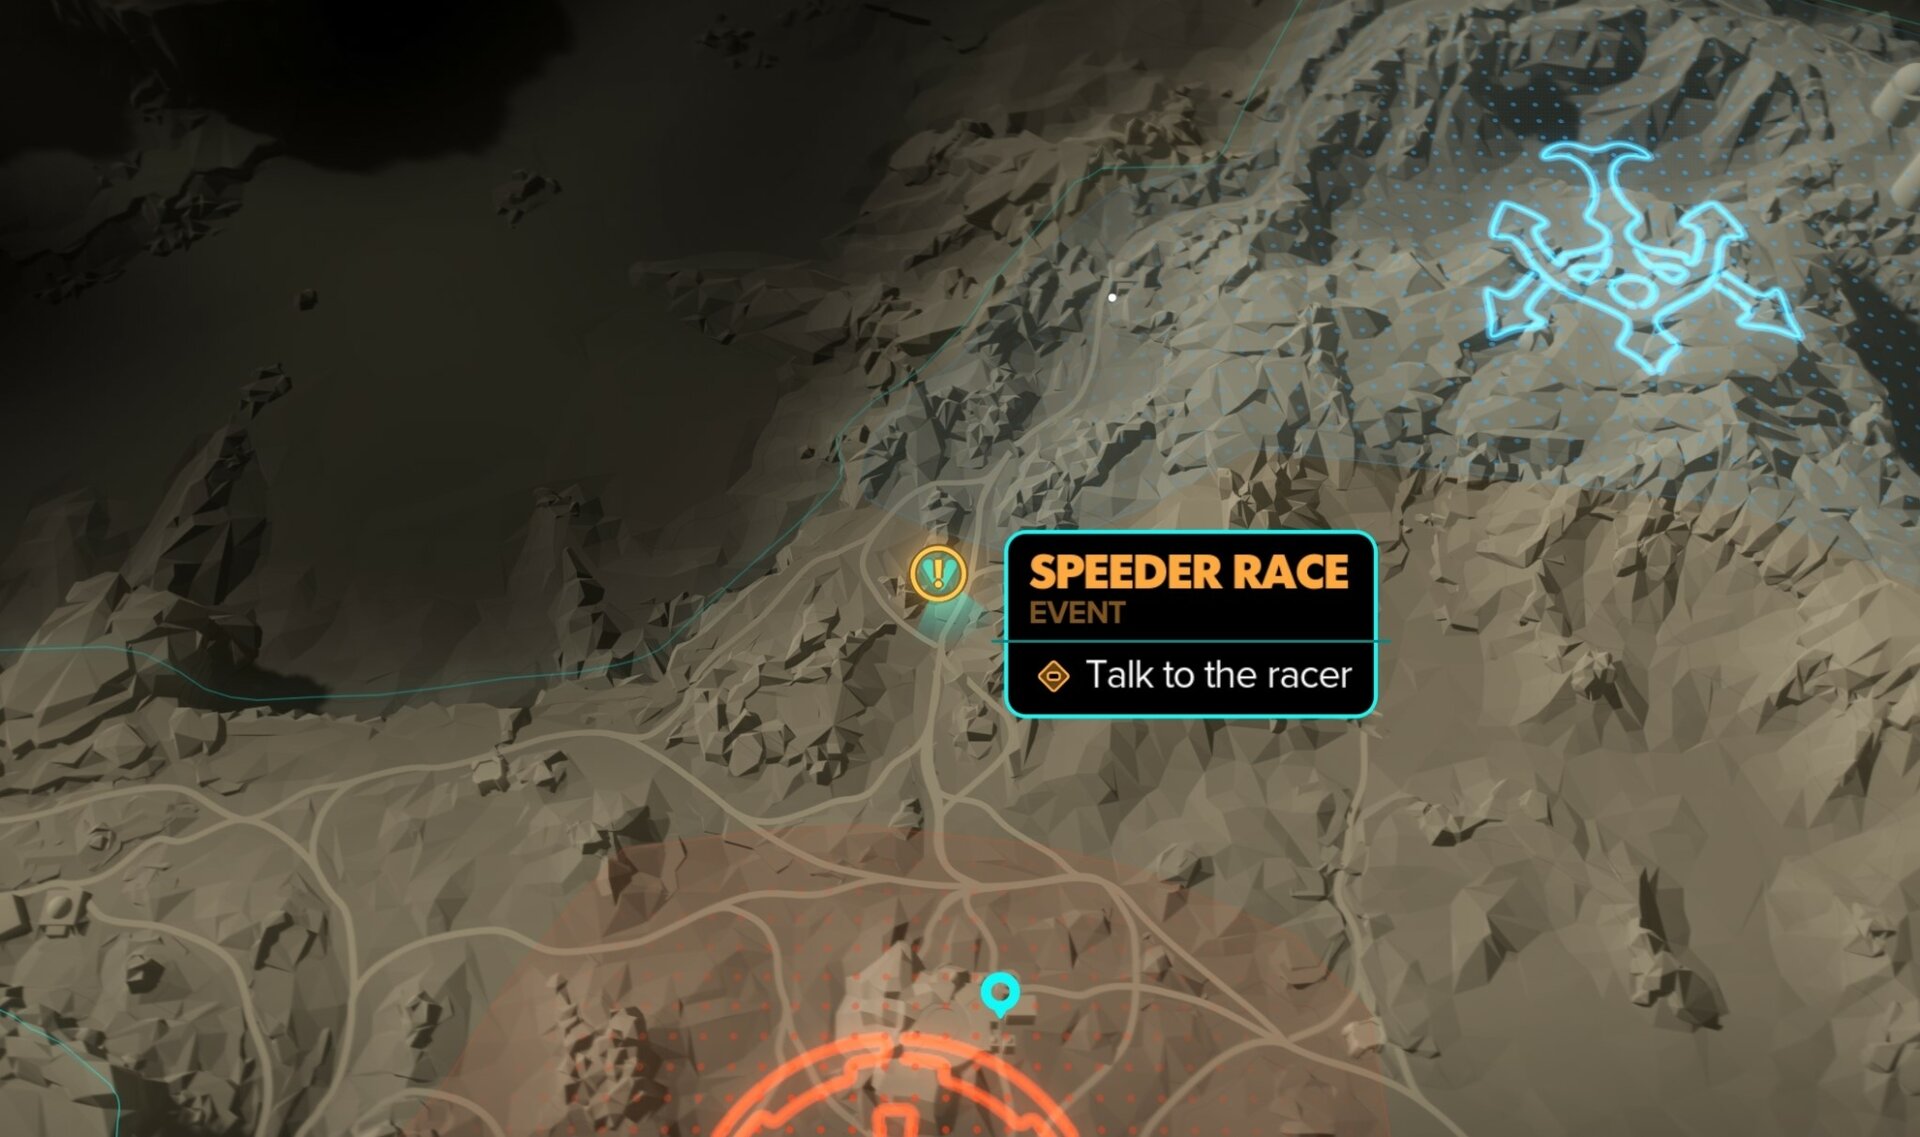
You can find a speeder race event in the southernmost part of the Southern Jundland Wastes, directly west of the Toshe Station and the Shuma merchant location.
Teeka – The Hotfixer
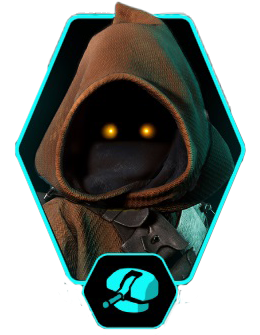
Teeka is a Jawa wandering the planet Tatooine, the Jawa Sandwcrawler is located at the edge of the Dune Sea.Kay must acquire a Sarlacc tooth before Teeka agrees to install the laser turret on the Trailblazer.
To unlock Teeka, you must complete The Hotfixer quest, which is unlocked after Jabba forbids Kay to travel outside of Tatooine.
After completion of the expert quest, the first ability will be automatically unlocked for you – Laser Turret.
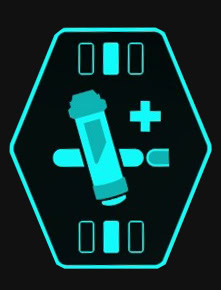
Laser Turret
Allows Kay to use the Trailblazer’s Laser Turrets.
Requirements:
– Unlocked after completing the quest “The Hotfixer”.
Improved Grenade
Grants a 50 percent increase to the Grenade’s blast radius and damage.
Requirements:
– Compact Detonite
– 20x Durasteel
– 6x Accu-Accelerator
Enhanced Bacta Injector
Bacta Vials now restore more health instantly when used.
Requirements:
– Burst Injector
– 15x Transparisteel
– 6x Helicyclic Gears
Magnetic dice
Grants Kay weighted dice to cheat in a game of Sabacc.
Requirements:
– LC-3 Skifter
– 15x Slivian Iron
– 6x Direct Energy Circuit
Cheeky Explosion
Kay can now command Nix to pull the pin on holstered enemy Grenades.
Requirements:
– Eliminate four enemies during Adrenaline Rush three times.
– Land 15 headshots.
M’Gasha
Merchant prices substantially decrease, and Kay receives ten percent more Credits when selling items.
Requirements:
– Gain the trust of three different Merchants.
– Locate five different Jawa Traders.
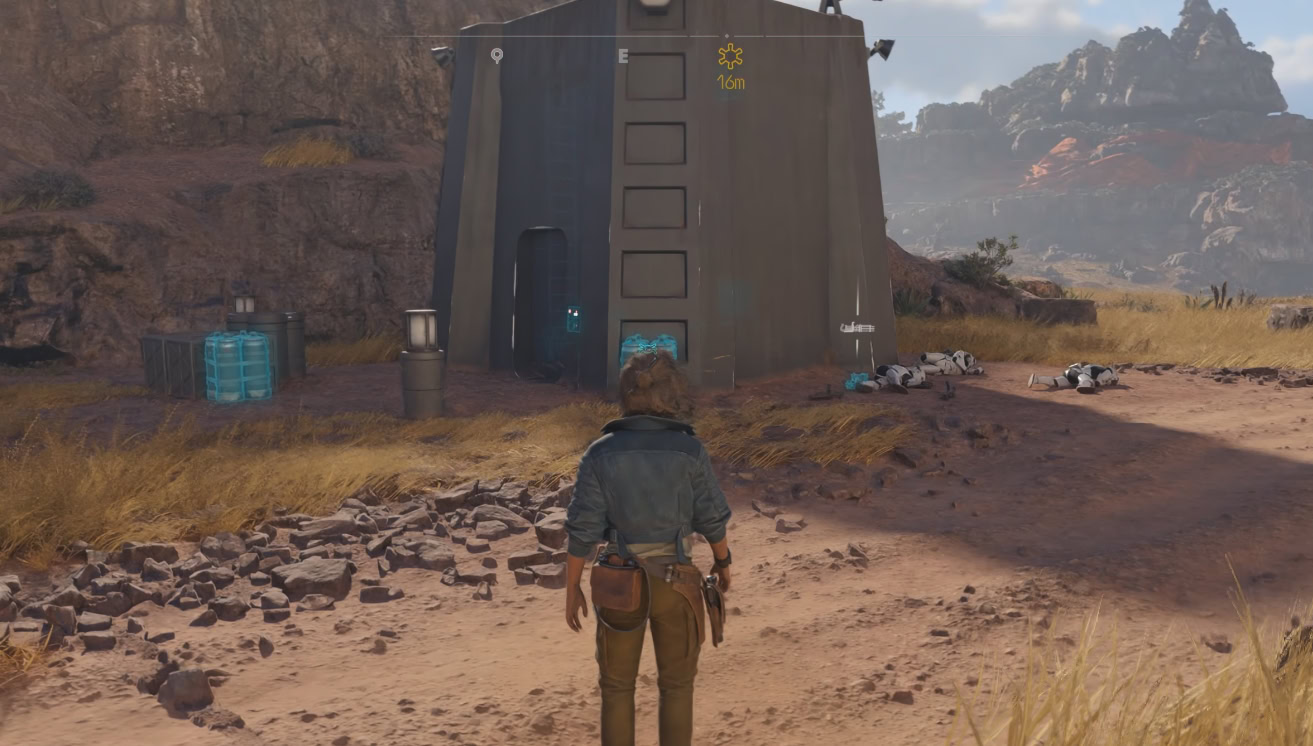
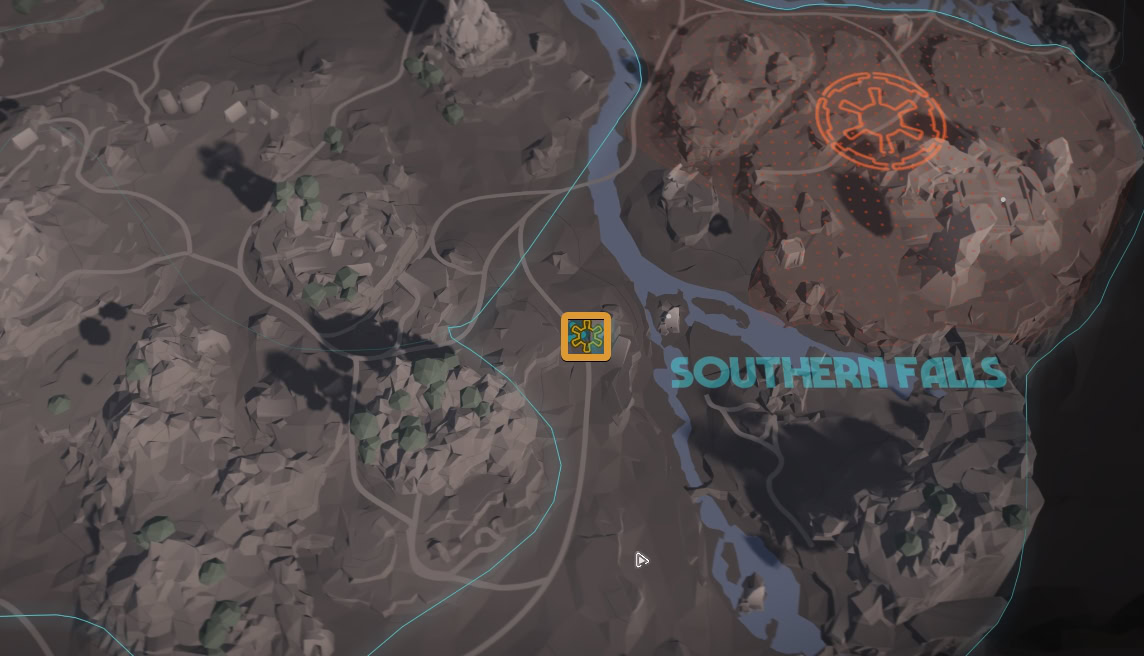
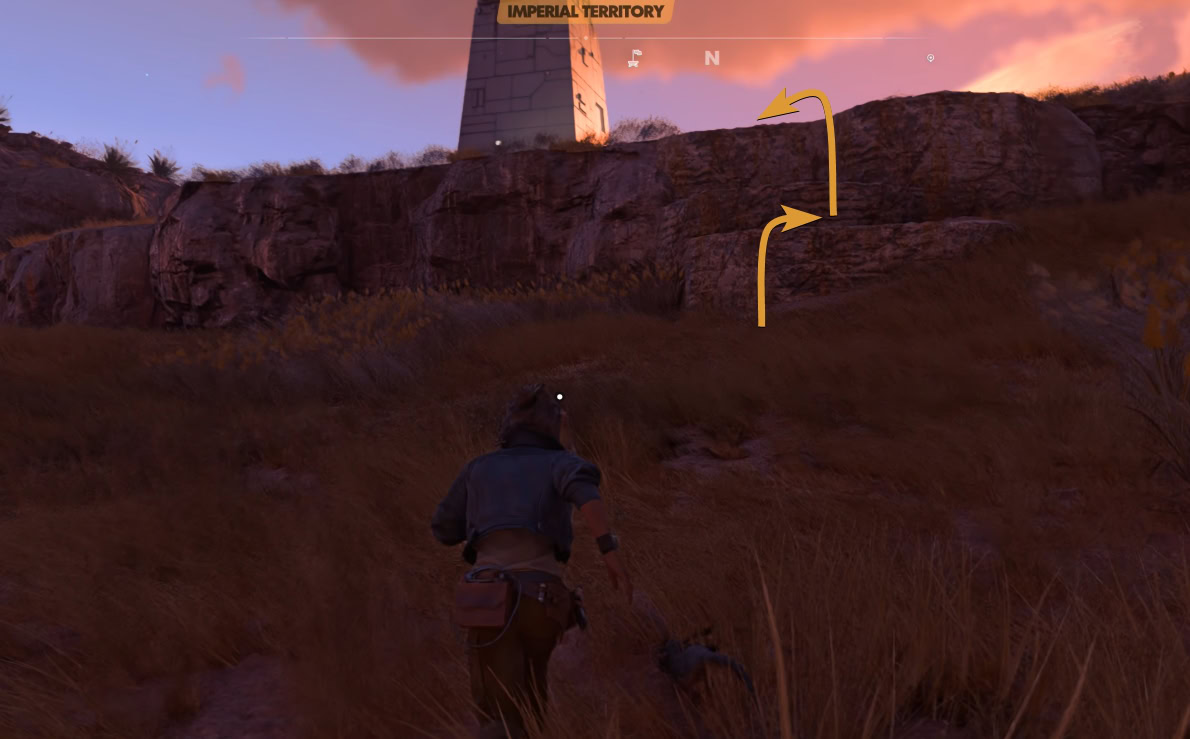
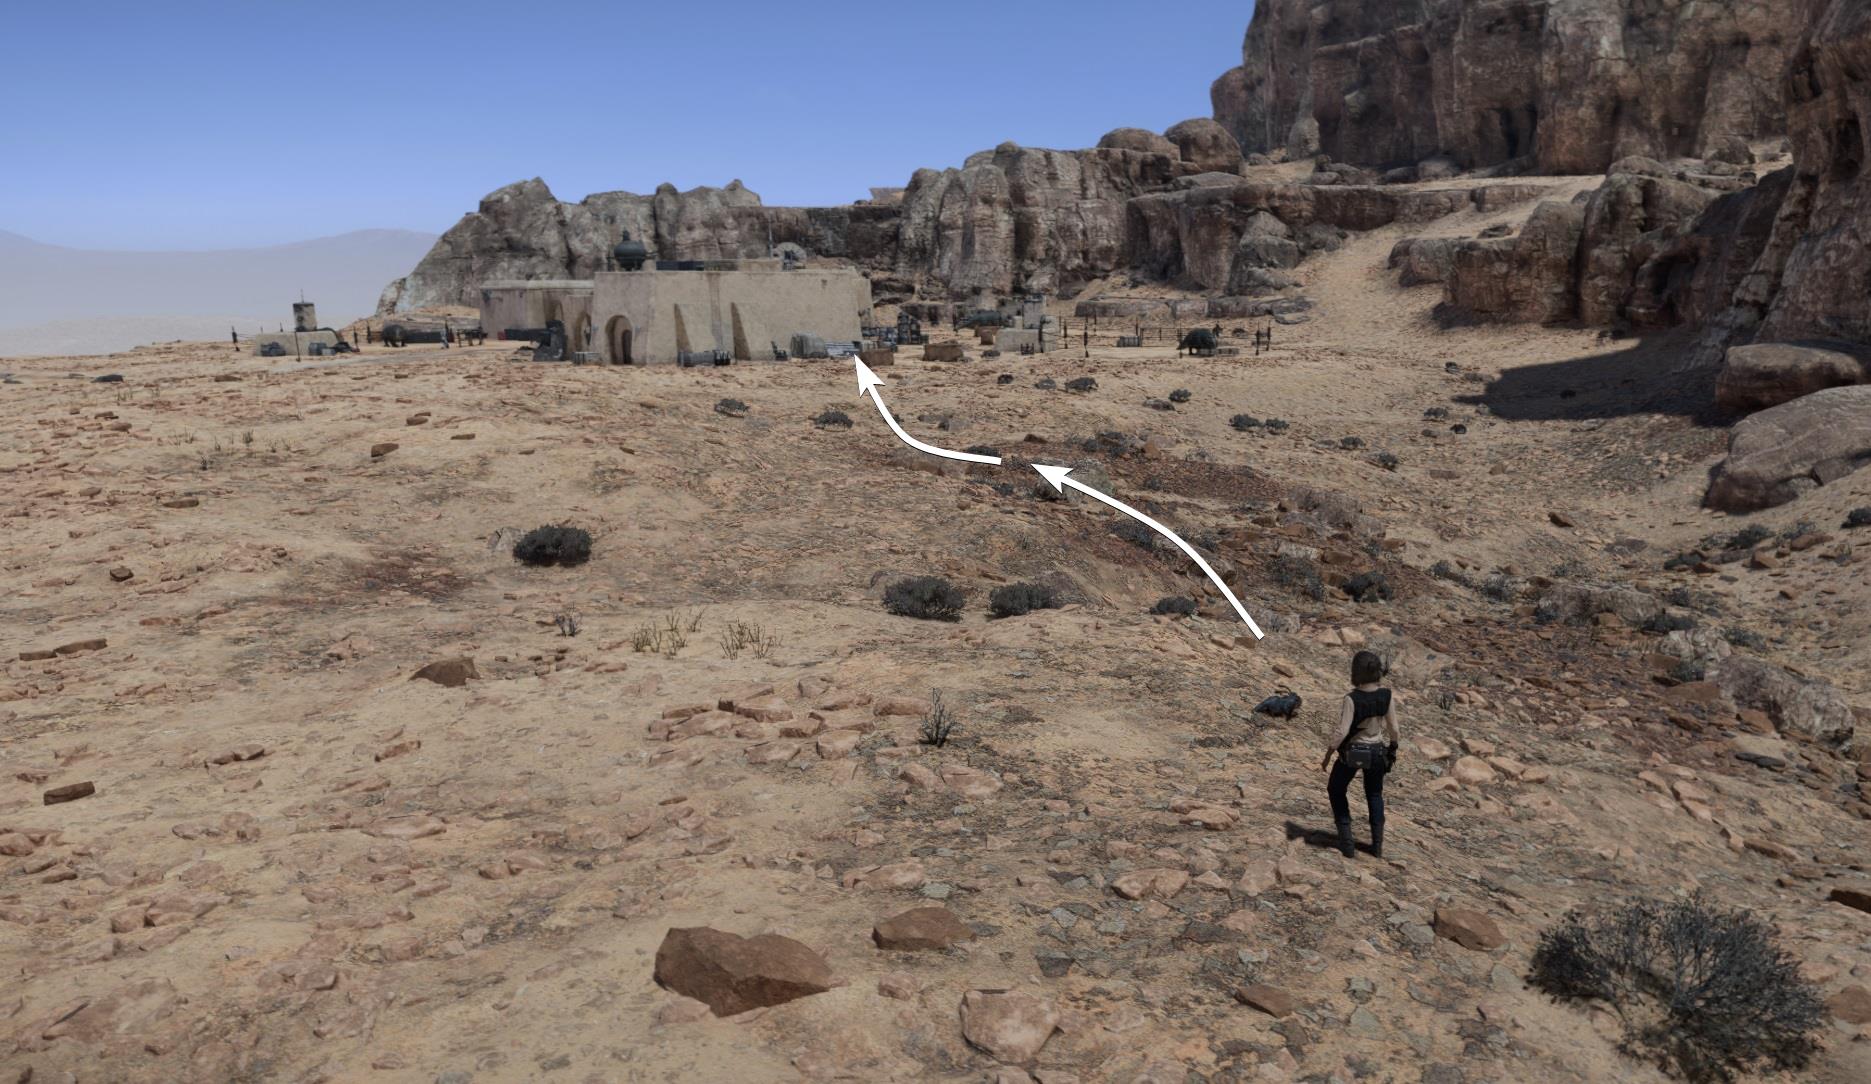
How to get Compact Detonite
This item is located south of the North Jundland wastes, inside Imperial Territory. This is a restricted area, they will attack the moment you get close to them. I recommend approaching this area from the right side since only two Scout Troopers are guarding this side. Sneak behind them. Take them down silently and continue to the restricted territory.
For more details, read your detailed walkthrough showing you how to get to the Compact Detonite location.
How to get Burst Injector
The Burst Injector is available as a request from the jawa trader, Pinota Pakinota, who has a shop at the Seeker’s Peril in the South Jundland Wastes. We have two guides detailing this area.
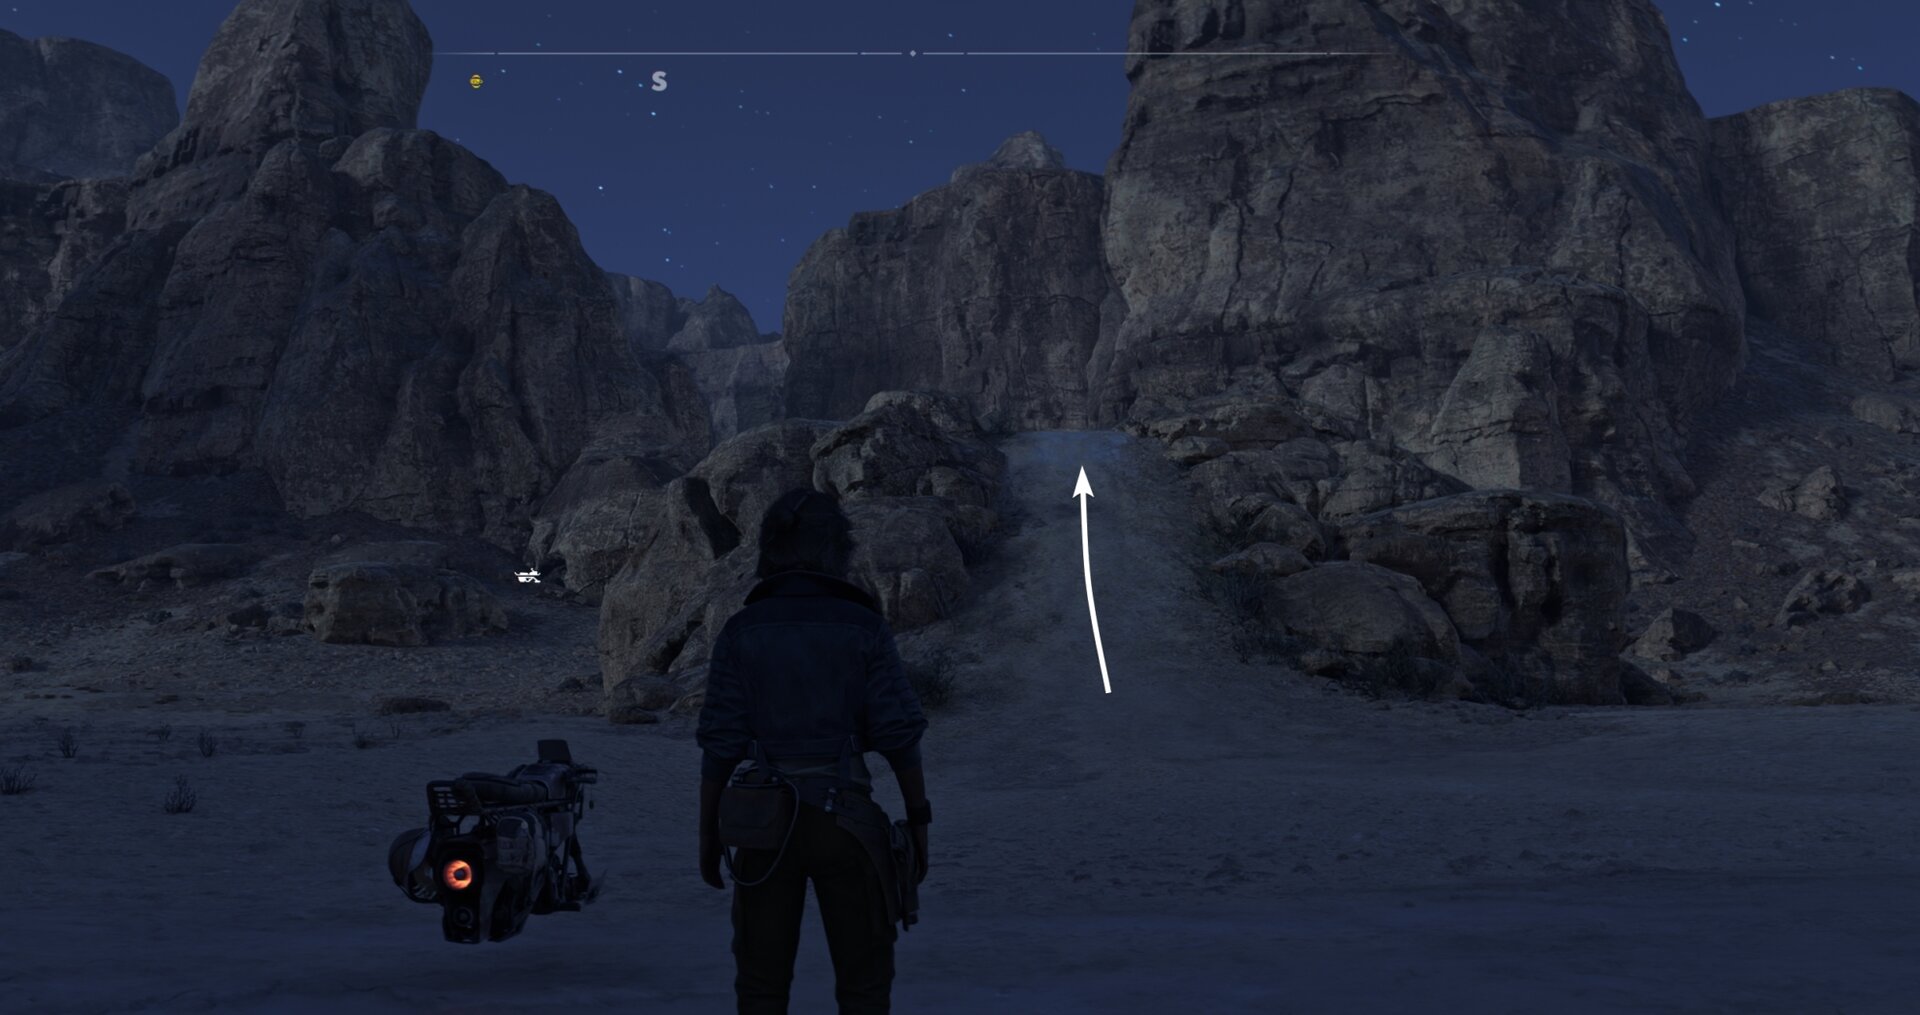

To both of them we have added a full video walkthrough for the entire Seeker’s Peril area, which is also available on the VULKK YouTube channel. Here are the important items you can and should pick up while exploring the Seeker’s Peril:
- Pinota Pakinota – the jawa trader that will sell you a Burst Injector, required for the Enhanced Bacta Injector ability
- Slicer’s Shelter – a treasure chest containing BT-2X Charge Controller, the unique material required to upgrade Kay’s Blaster Bolt mode to its highest tier
Where to find LC-3 Skifter
This expert item is located Southeast of the South Jundland Wastes, at the edge of Hutt territory. There’s a small outpost of Hutt enforcers. It appears to be the right location but the place you are looking for is right behind them.
There are two of them standing guard while three patrol the area. If you are on bad terms with the Hutts wait for the patrol group to go away and circle around the center to reach the wall behind.
Our detailed walkthrough for obtaining the LC-3 Skifter to unlock the Magnetic Dice ability is available should you need some more help finding and getting to the location.
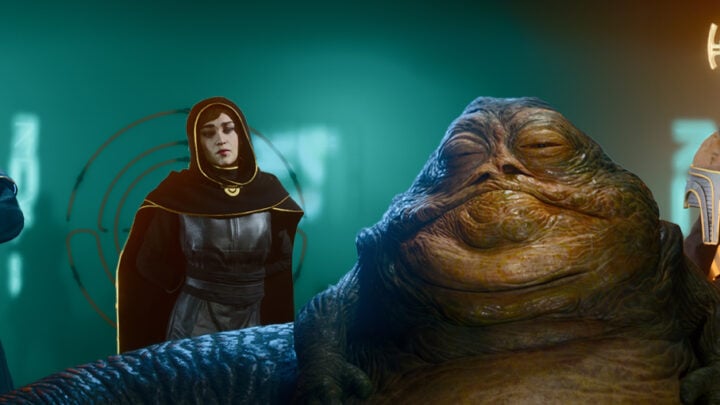
Lando Calrissian – The High Roller
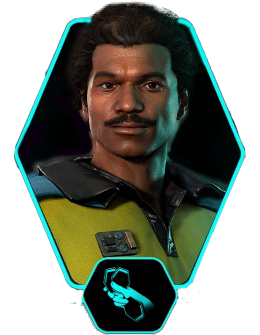
You meet Lando on Akiva. At the time of this game’s events, he is a rebel and you join his efforts to aid the rebellion’s cause.
To unlock Lando as an expert, you have to complete The High Roller quest, which is unlocked after you complete the main quest on Akiva.
After completion of the expert quest, the first two abilities will be automatically unlocked for you – Plan A and Plan B. Go to your workbench on the Trailblazer to craft the blaster upgrade for Plan B.
Plan A
Allows Kay to perform a Double Draw at Kessel Sabacc. Accept the prompt during the Draw Phase to start the cheat.
Requirements:
– Unlocked after completing the quest “The High Roller”
Plan B
Provides the components needed to craft the Heavy Blaster Module. Visit the workbench to craft and upgrade it.
Requirements:
– Defeat 5 enemies with different types of pickup weapons.
Roll Maneuver
Enables a strafing Dodge Roll maneuver for the Trailblazer that will dodge longer distances and avoid damage for a short duration.
Requirements:
– 10x Defeat enemies in space
– 10x Find containers in space
– 5x Dodge incoming missiles
Shoot First
The opening blaster shot from an out of combat state will cause a large burst of extra damage.
Requirements:
– Win Sabacc games after cheating at least 3 times
– 10x Defeat enemies with blaster hip fire
– 2x Defeat Sabacc High-Rollers
Ask Later
For a brief period after un-holstering, any shot or near-miss from Hip-Fire Mode will grant a Small amount of Adrenaline.
Requirements:
– Unlock Shot First ability
– Locate eight Charms
– Defeat an enemy with a single shot via Hip-Fire
– Defeat two Sabacc Nemesis
Just Improvise
After a Fast-Talk or Arrest sequence, instantly provide a Very High amount of Adrenaline.
Requirements:
– Have a good or better reputation with 3 different syndicates at the same time
– 2x Steal from syndicate vaults
How to build reputation faster
One of the best and quickest methods to build or repair your reputation are contracts. You can find brokers on every planet and you can also pick and manage contracts from the table in the Trailblazer as well as in other terminals conveniently located, often in a city and near a cantina.
At the end of a contract, you may get a prompt from ND-5 to decide to screw over your original quest giver and betray them in favor of another syndicate.
There’s a good chance that if one syndicate adores you, another will hate your guts. To keep your hard-earned reputation, you’ll need to rely on stealthing through more areas without using your blaster
When you’re faced with a choice to support one syndicate and sabotage the other, consider if one of them will know it was you, and how much they will care. Try to get the most bang for your reputational buck.
Steal from Syndicate Vaults
On every planet where a syndicate has an established base of operation in the main city or hub, they also have a vault. The Crimson Dawn Vault on Toshara and Pyke Syndicate Vault on Toshara are excellent candidates as they are accessible early on in the game and require minimal amount of upgrades and ability unlocks to complete the missions.
Star Wars Outlaws Review
Our spoiler-free review of Star Wars Outlaws. Written after completing the game and gathering everything possible from it.
Star Wars Outlaws DOs and DONTs: Tips for Beginners
A collection of Star Wars Outlaws beginner tips for new players. Learn the DOs and DONTs for Star Wars Outlaws early game and discover how to improve your experience.
Star Wars Outlaws PC and Console Controls Guide
Star Wars Outlaws has its controls laid out quite well, but with a bit of tweaking, you can make them even better. This guide lists all of the default controls for PC and Consoles alongside the changes we recommend you to make for more comfort.
Star Wars Outlaws Settings and UI Guide: What should you change
This guide covers the Visual and Gameplay Settings for Star Wars Outlaws and how best to adjust them for a better experience.

Star Wars Outlaws Nix Guide: All Controls and Abilities
Learn what your fuzzy little sidekick Nix can do for you in Star Wars Outlaws. I hope you're ready to get your sick kicks with Nix!
Star Wars Outlaws Syndicates Reputation System: Everything You Need to Know
This guide explains how the Syndicates Reputation System works in Star Wars Outlaws – the effects of Positive and Negative reputation, what rewards you get for increasing reputation with each syndicate and recommend Reputation Building Strategies!
Star Wars Outlaws Loadouts and Gearing Guide
The Loadout system in Star Wars Outlaws plays an important role in its gameplay, allowing you access to various perks and benefits. This guide goes into this system in-depth.
Blaster Modules and Key Parts: Star Wars Outlaws Guide
This guide will show you when you unlock each of the main Blaster Modes and their sub-variants in Star Wars Outlaws. We will also explain where and how to get the Blaster Key Parts and other rare materials required for the upgrades.
Trailblazer Upgrades and Builds: Star Wars Outlaws Guide
You’ll learn how to unlock the various Trailblazer Upgrades and Systems in Star Wars Outlaws, including the more elusive components. We’ll also provide you with several builds for your Trailblazer.
All Star Wars Outlaws Outfits: Full Catalog
This catalog lists absolutely all Outfits available in Star Wars Outlaws. It also explains how outfits work if you are a new player. We will keep it updated when DLCs start coming out.
Star Wars Outlaws Lockpicking Guide: How to Override Locks
This guide will help you learn the basics of lockpicking in Star Wars Outlaws. This simple yet fun mini-game will test your timing and ability to keep pace with the door's rhythm.
Star Wars Outlaws Slicing Guide
This guide will explain how the Slicing mini-game in Star Wars Outlaws works and how to beat it. Through the power of the process of elimination, no computer will be safe from you!
How to use Photo Mode in Star Wars Outlaws
This guide explains how to use Photo Mode in Star Wars: Outlaws and what tools it offers for taking the most perfect and tuned-up screenshots!
Related Star Wars Outlaws Collections of Guides

Our Guides Master List for Star Wars Outlaws is a great starting point. In it you will find all of our guides and walkthroughs ordered in categories.