This guide will show you how to complete the final story quest for Star Wars Outlaws, Revelator. After the heist on Canto Bight, Kay needs to escape the Imperial Star Destroyer, the Revelator. Before she can leave, she must take care of some unfinished business.
How to get The Revelator Quest
The Revelator quest is the final story quest of Star Wars Outlaws. You must complete The Truth and The Heist quests to access it.
Jaylen has the Imperial Officer Database with Asara as his hostage. He is planning to give them over to the Empire in exchange for control of the Zerek Besh Syndicate.
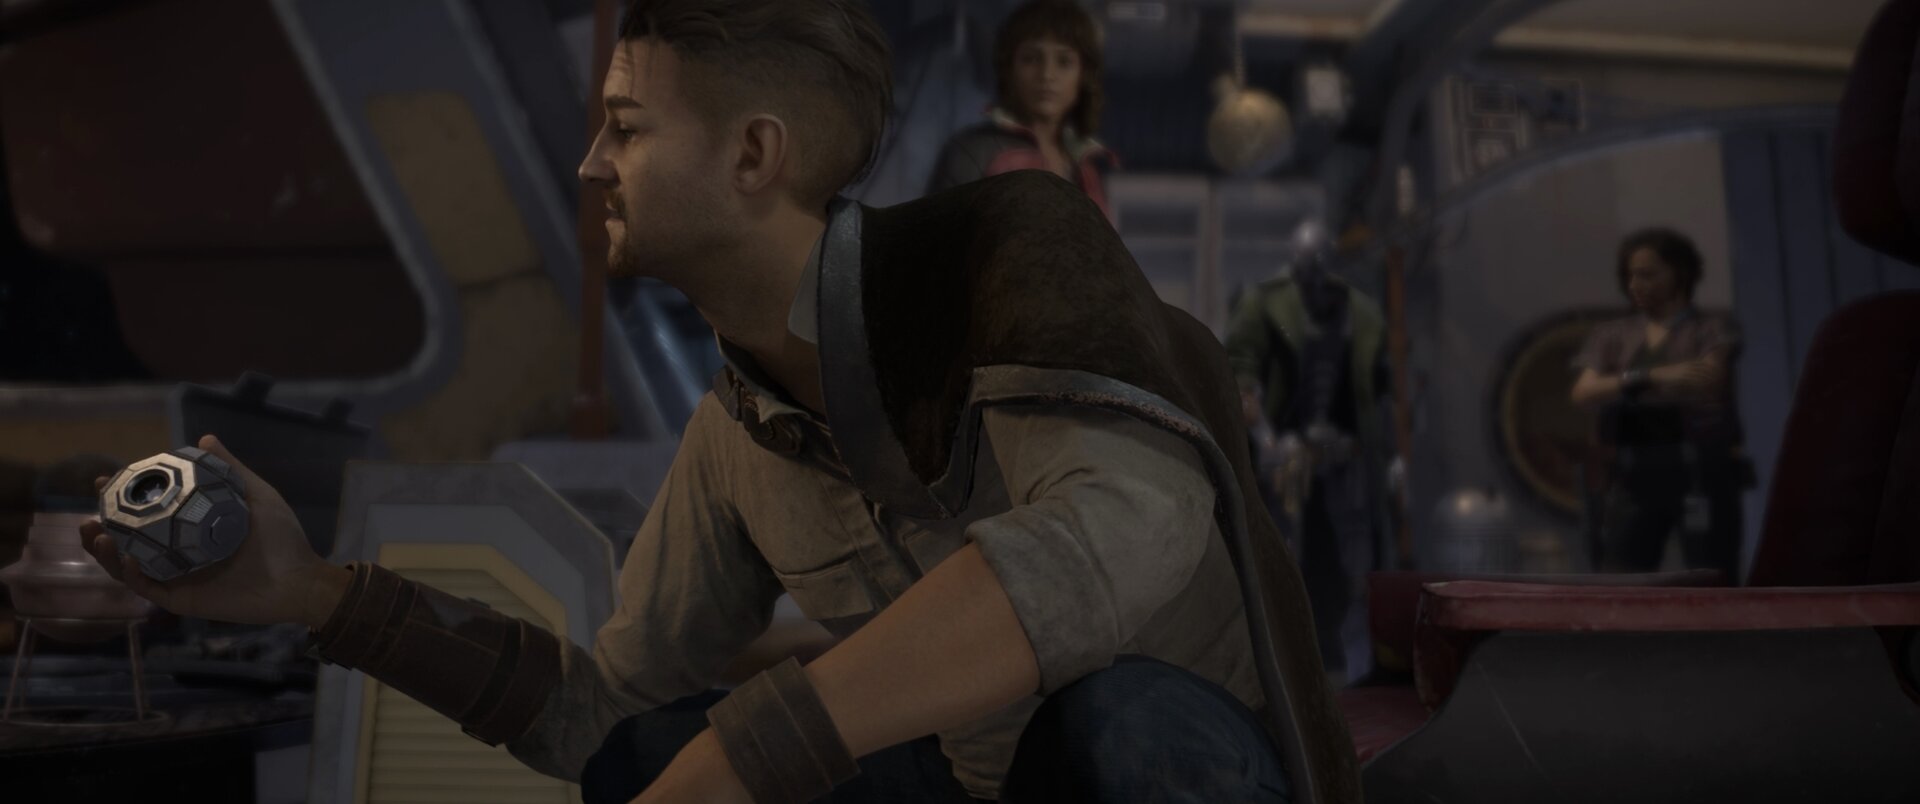
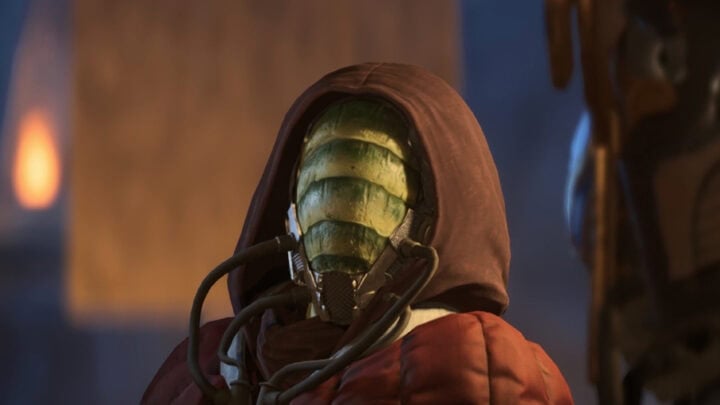
Kay, Ank, and Gedeek find themselves on the Imperial Star Destroyer, the Revelator. Instead of fleeing, Kay wants to free ND-5 from Jaylen’s control and escape with him.
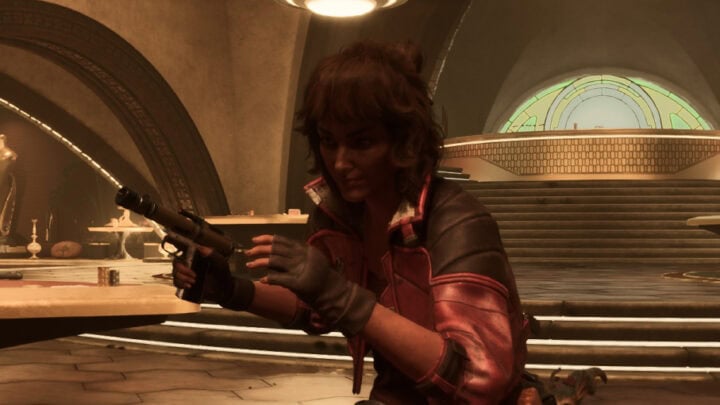
Escorting Gedeek in the Revelator
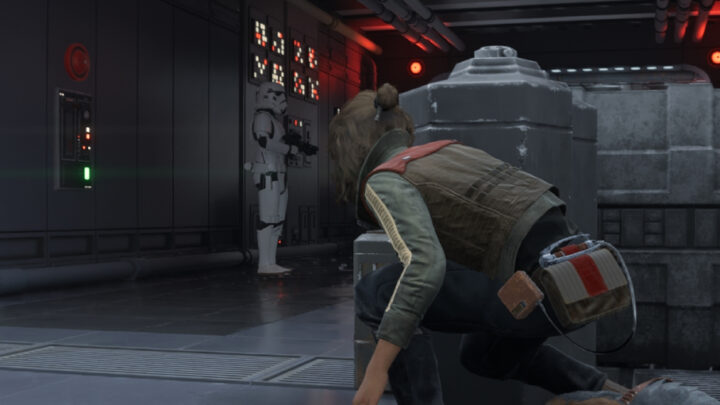
Ank and Gedeek agree to help Kay free ND-5. To get deeper into the star destroyer, Kay must pose as a stormtrooper transporting Gedeek as a prisoner.
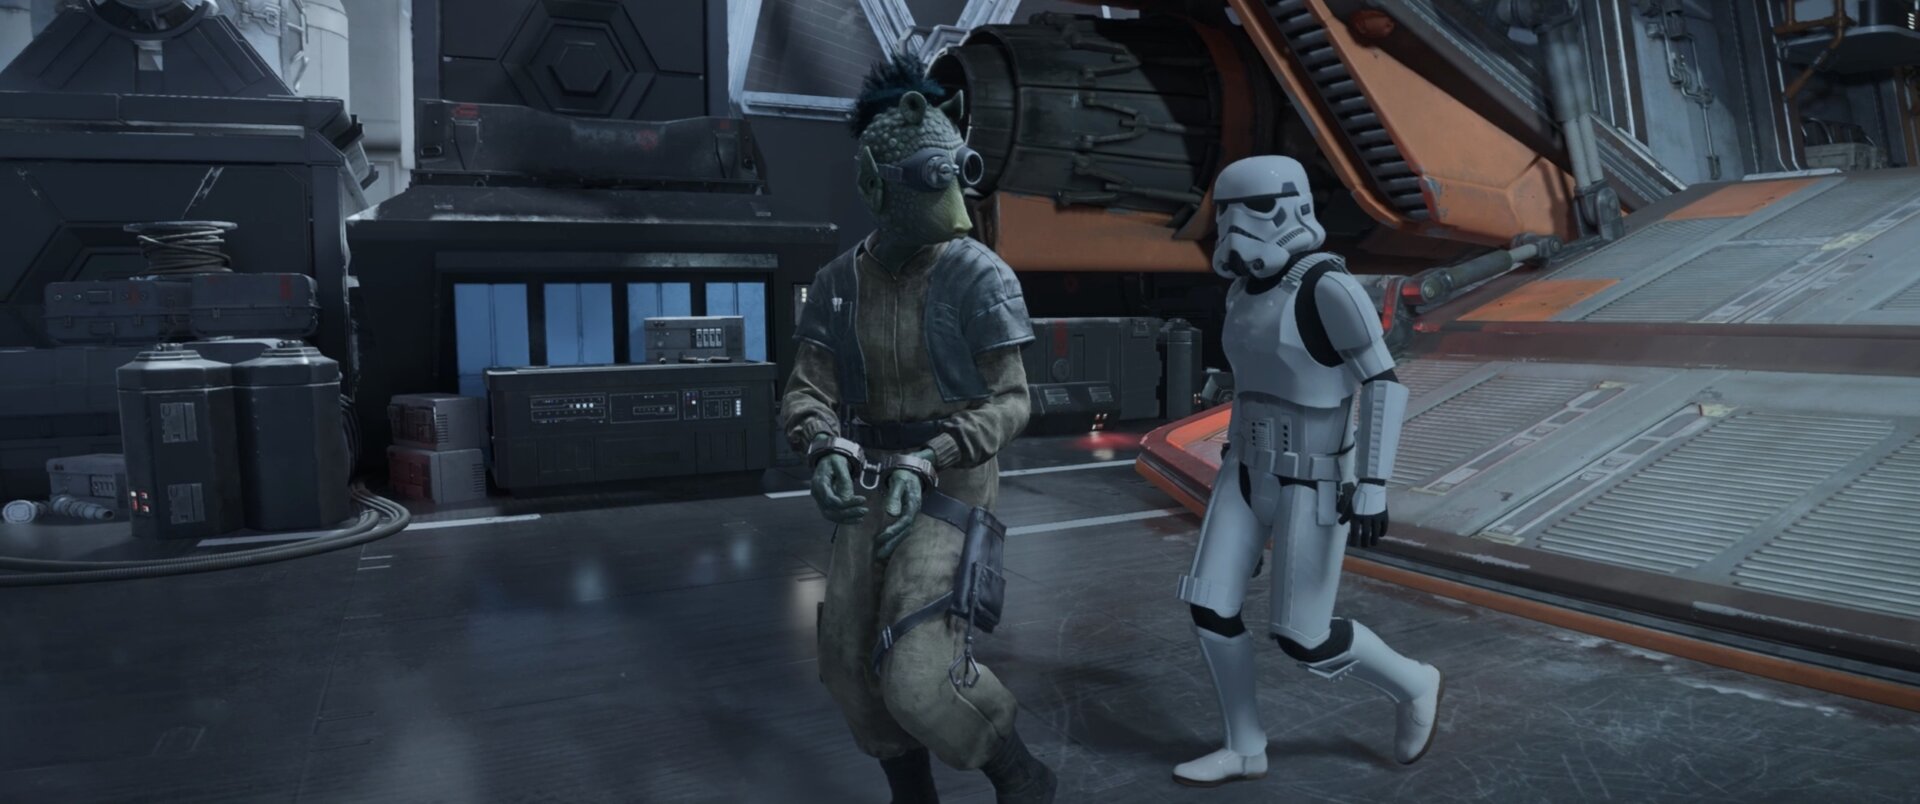
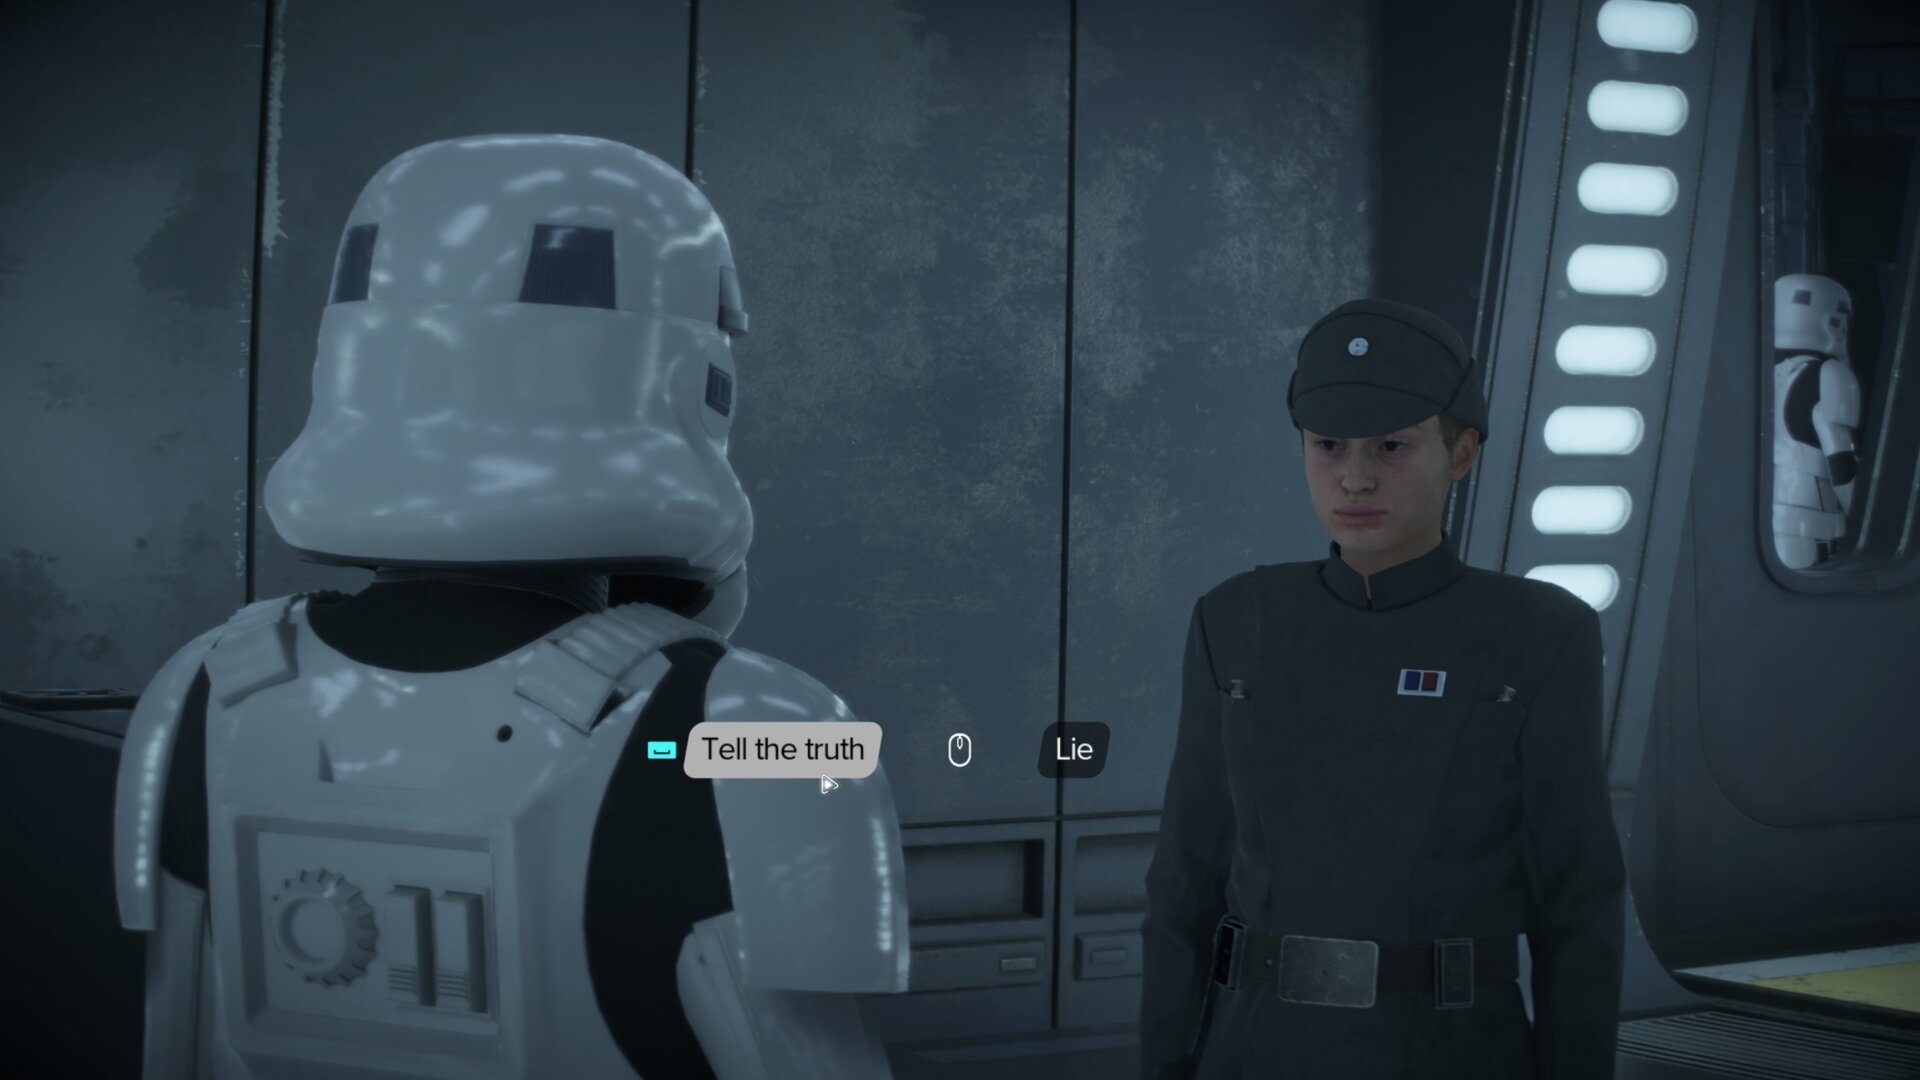
This part is fairly straightforward, just stay behind Gedeek as you two walk through the ship. You’ll encounter an officer who’s asking questions about the prisoner.
You can tell the truth about Gedeek or lie to her. Given how Kay has shown to be a rather bad liar up to this point, perhaps telling the truth might get you past the officer. Either way, each option leads to some funny dialogue.
After getting Gedeek to the control room, you’ll need to join Sliro’s escort and transport him to the bridge. Don’t fall too far behind or you’ll raise suspicion.
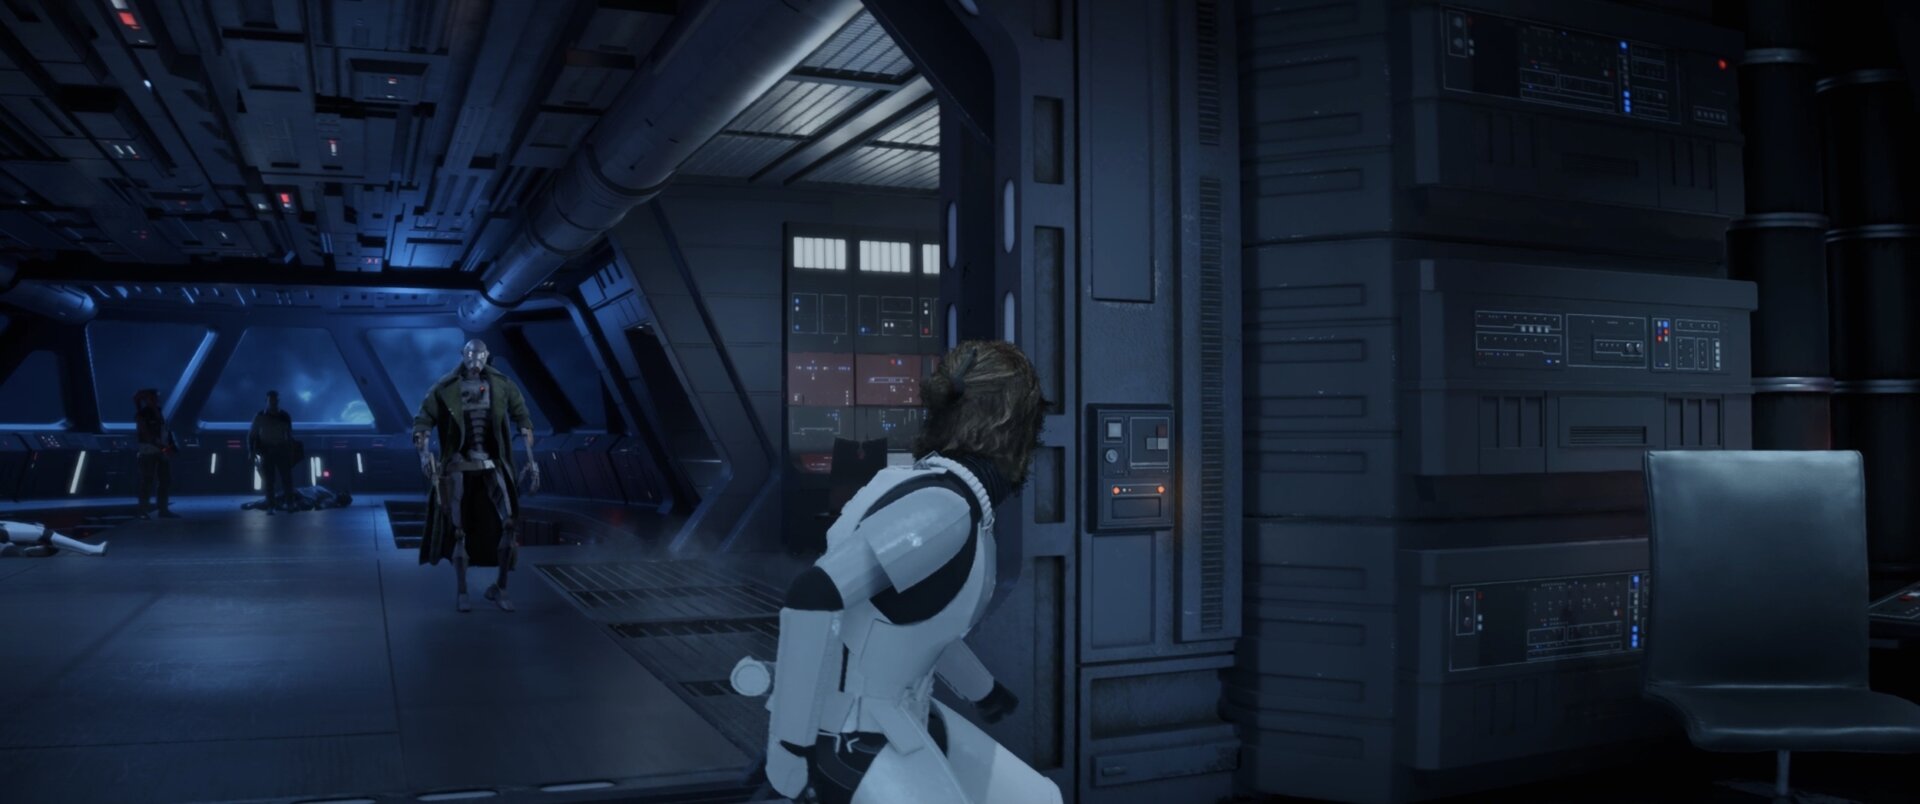
When you reach the bridge, a cutscene will start. It results in you blowing your cover, the alarm going off, and ND-5 is now hunting you down.
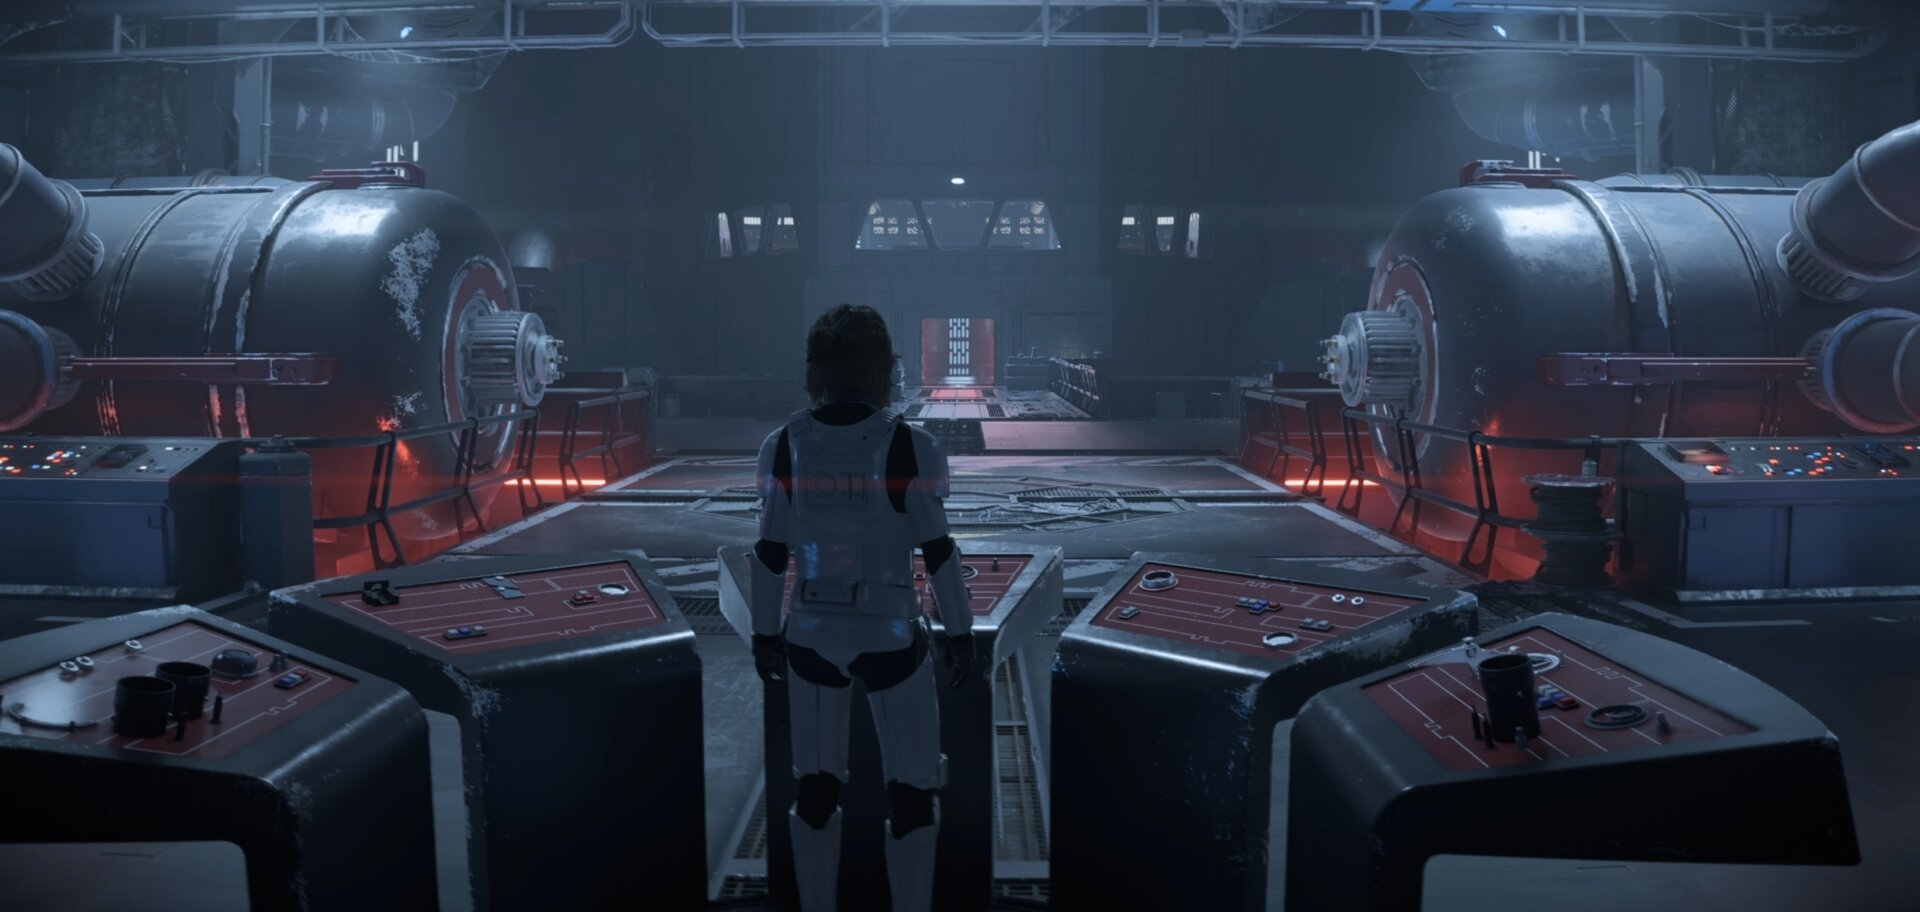
The Revelator’s Power Cores
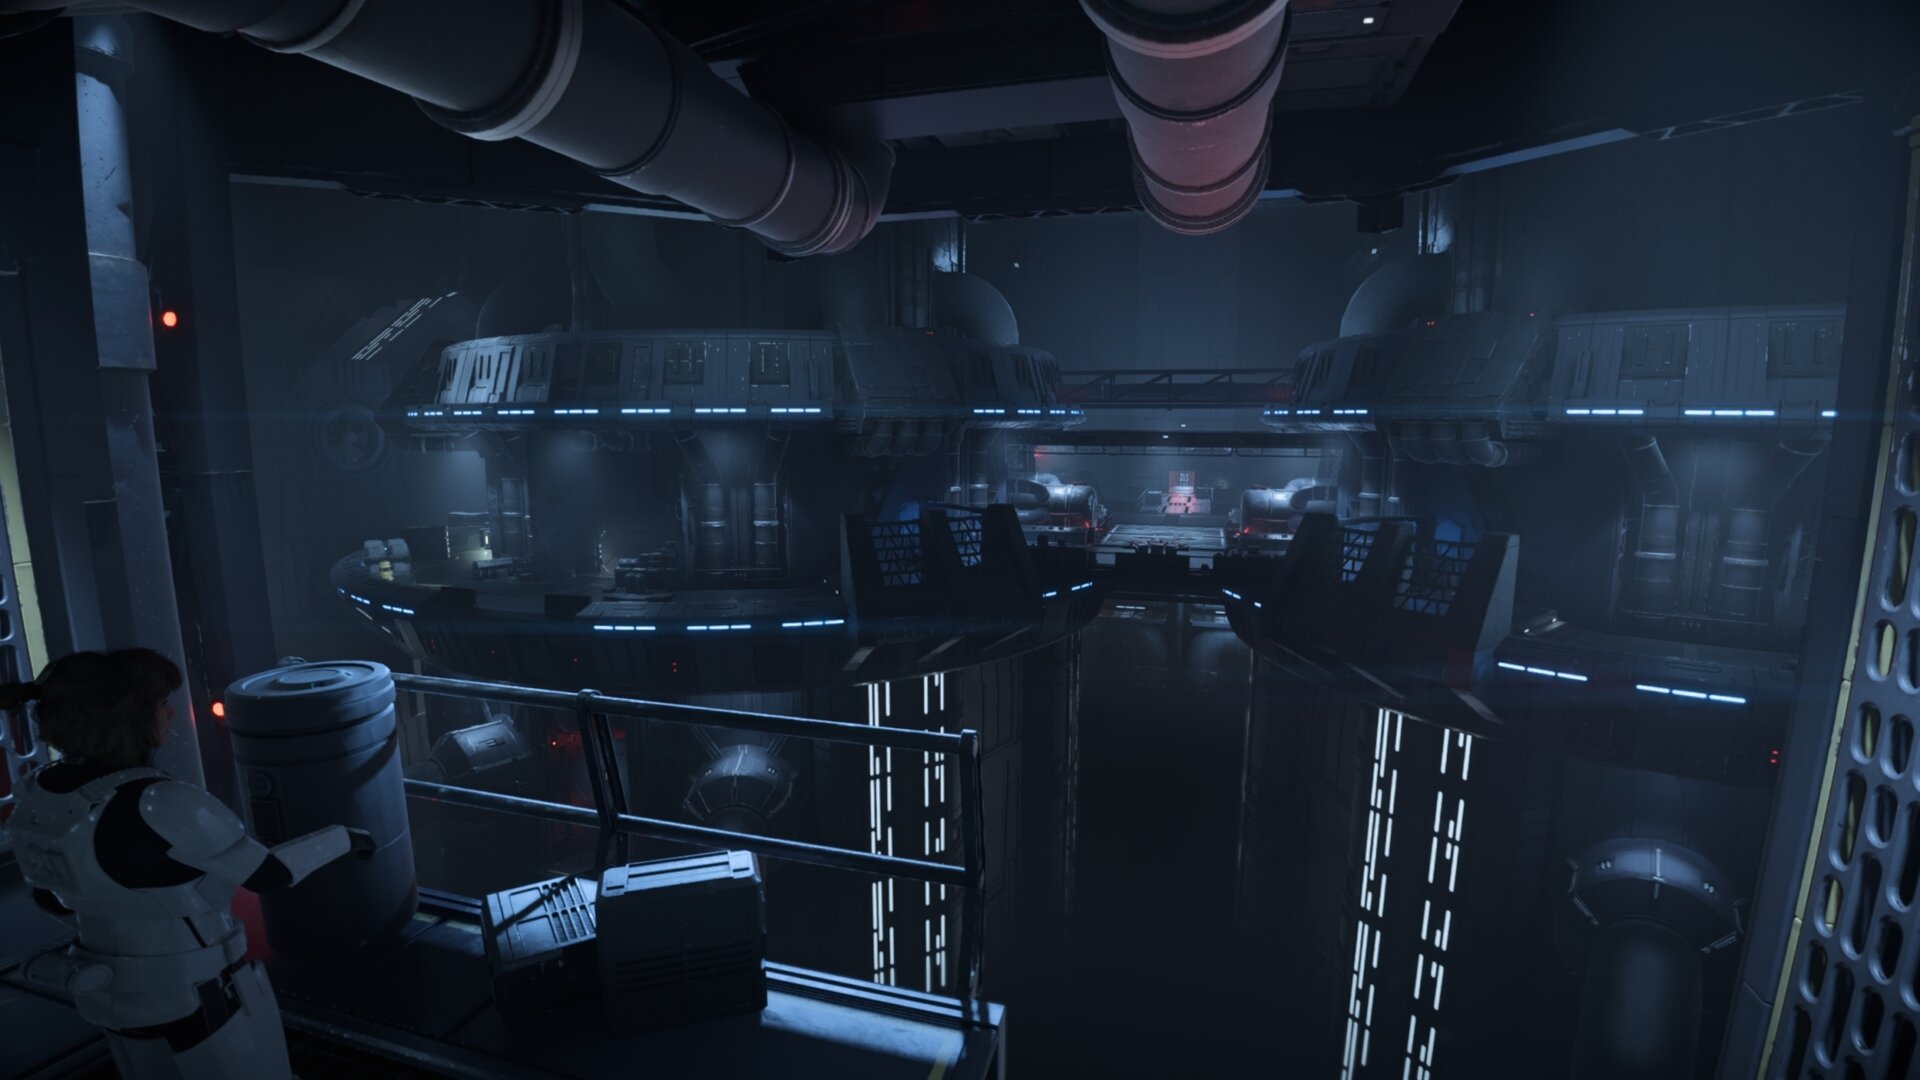
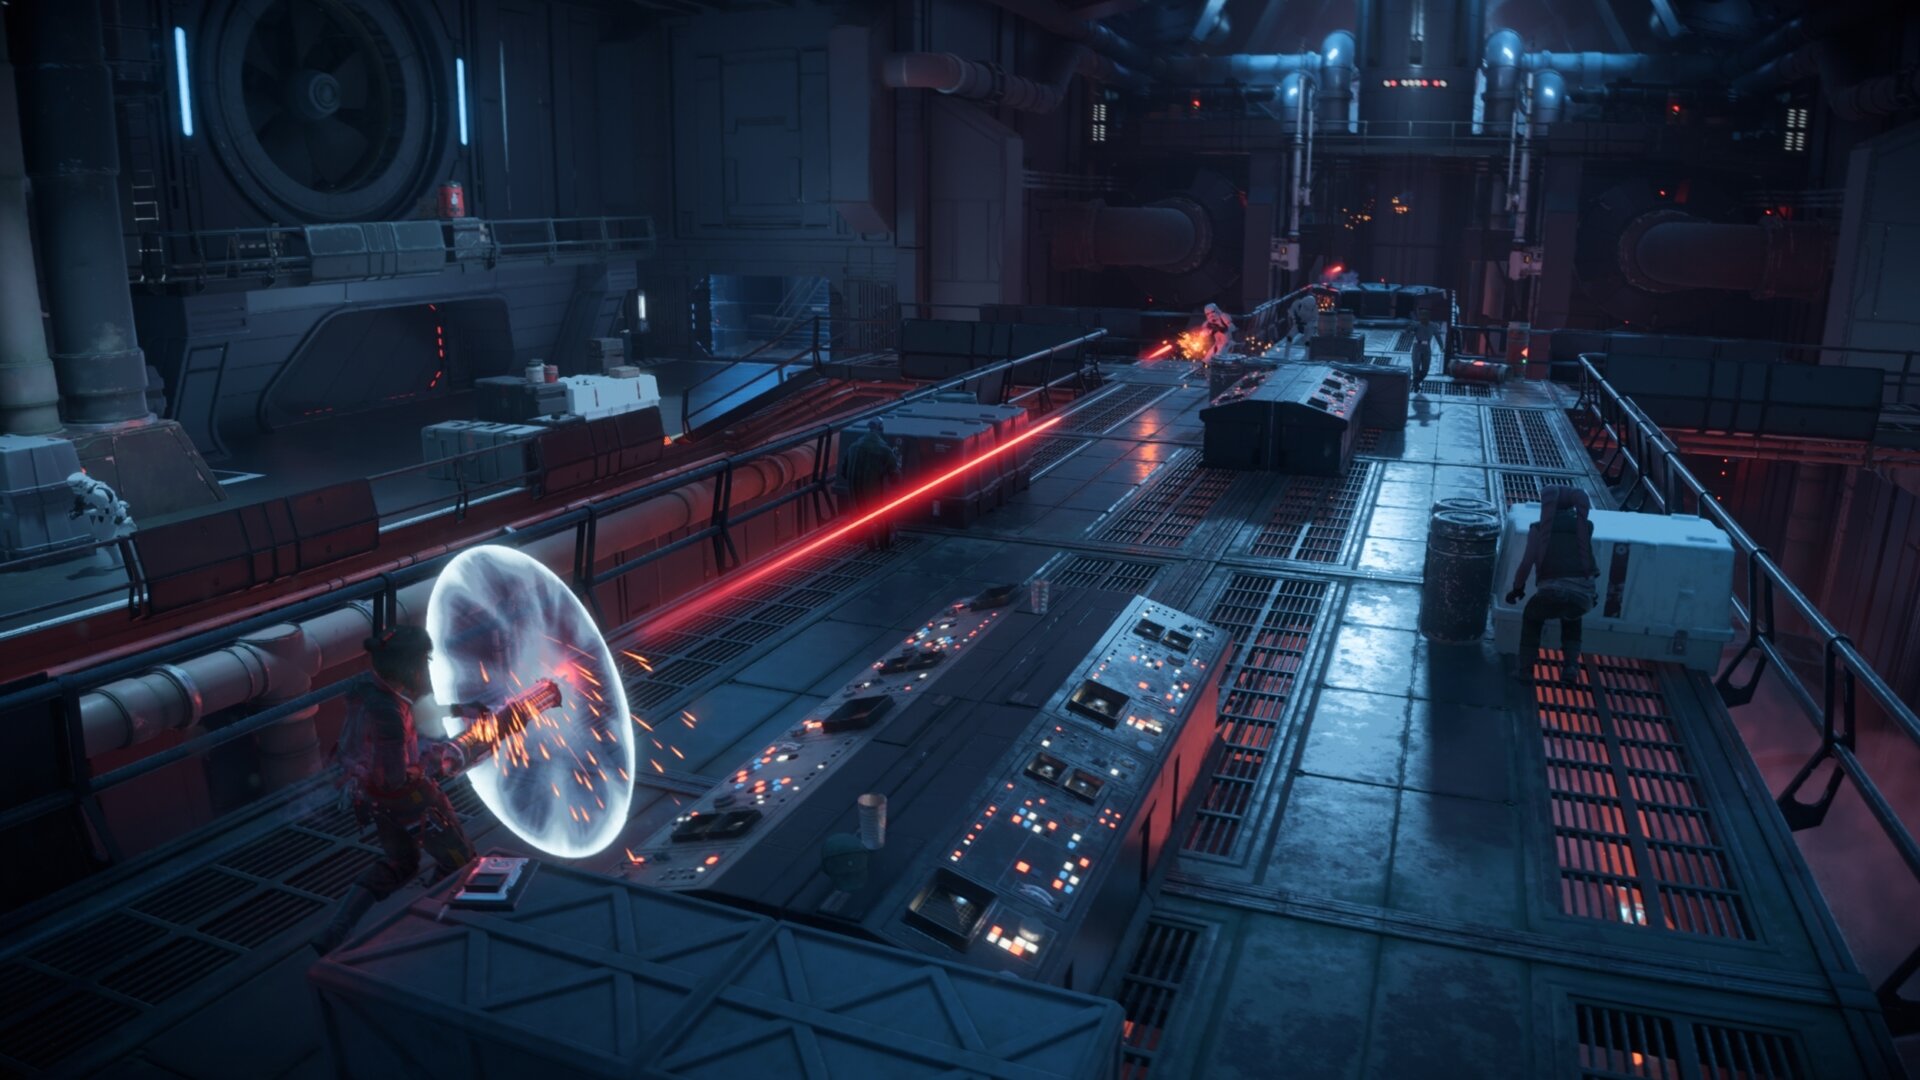
The path forward is incredibly linear. Just don’t stop running as you risk getting shot by ND-5 or worse, captured by him. You will eventually reach the primary power cores for the star destroyer’s deflector shields.
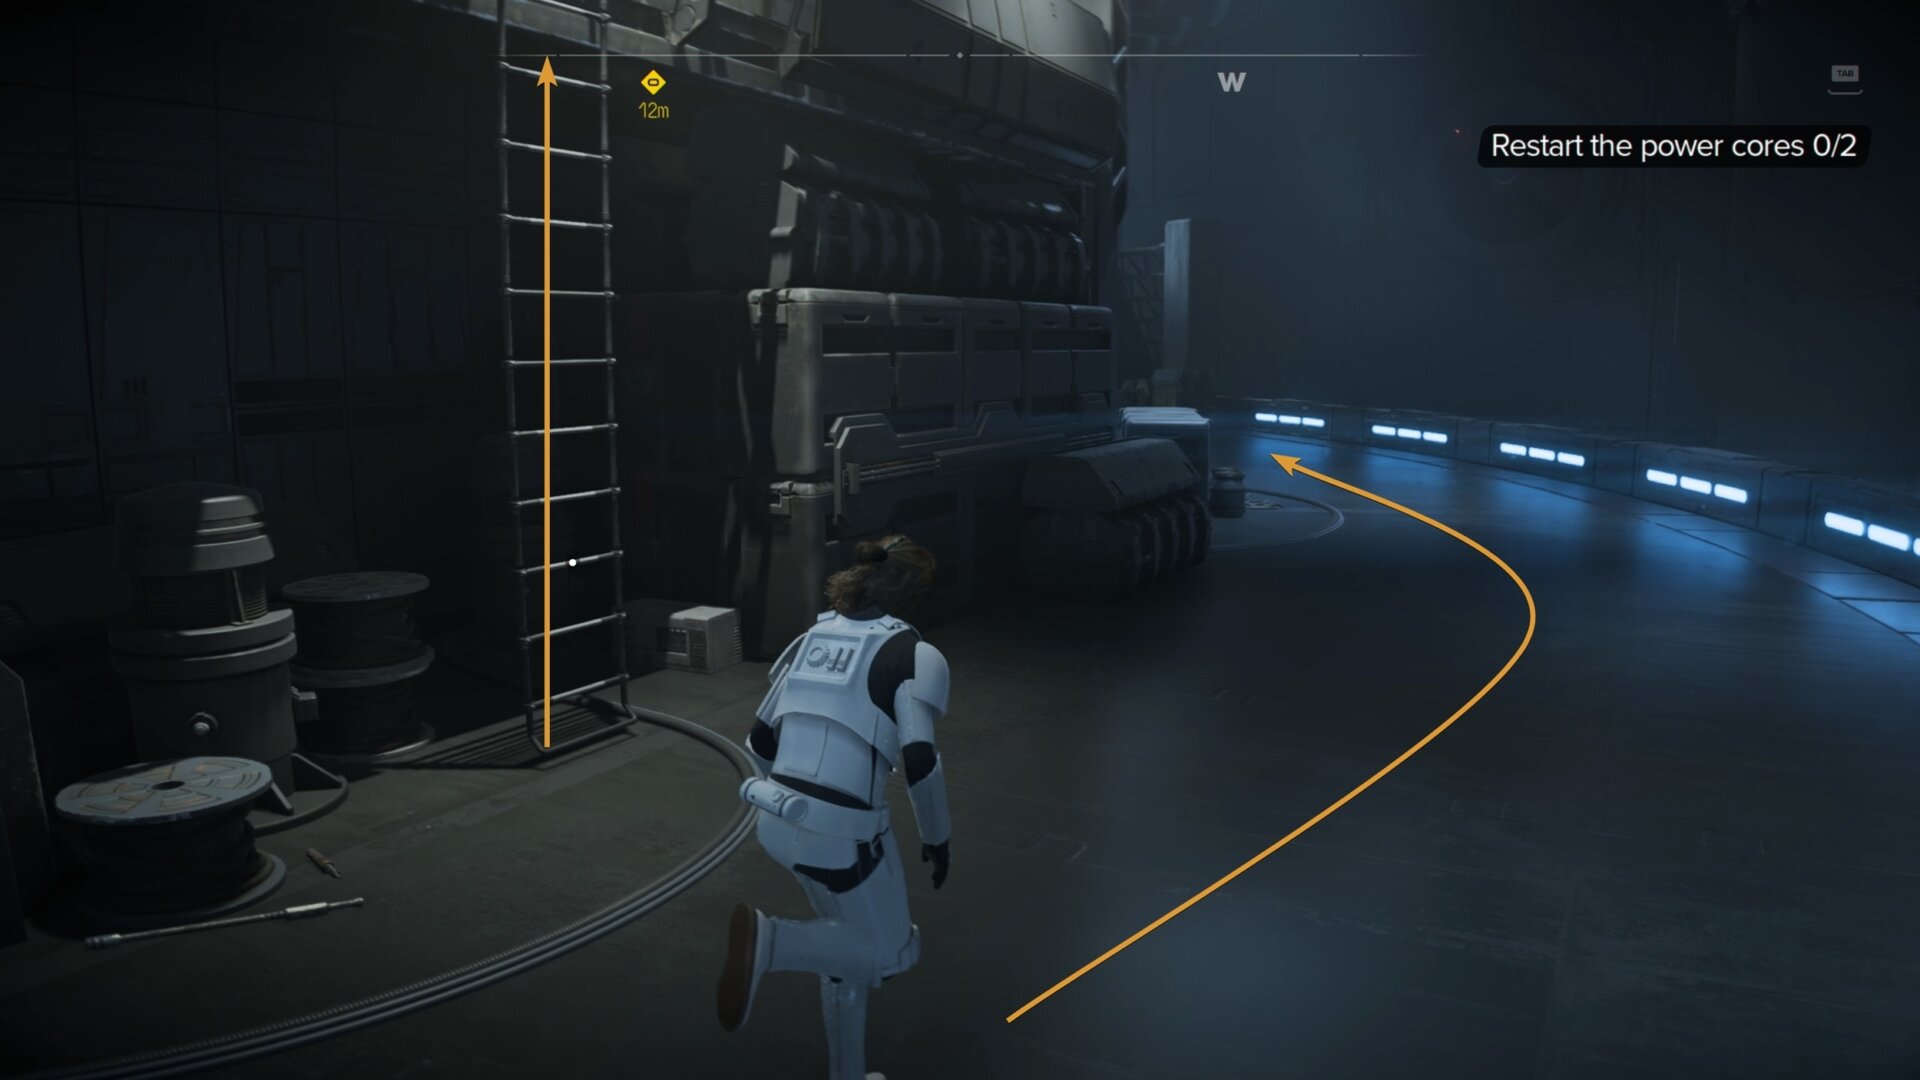
Climb down using the grates to your left or right and go down a ladder to the west. Hop onto the metal ledges on the wall and scuttle to the right onto the walkway.
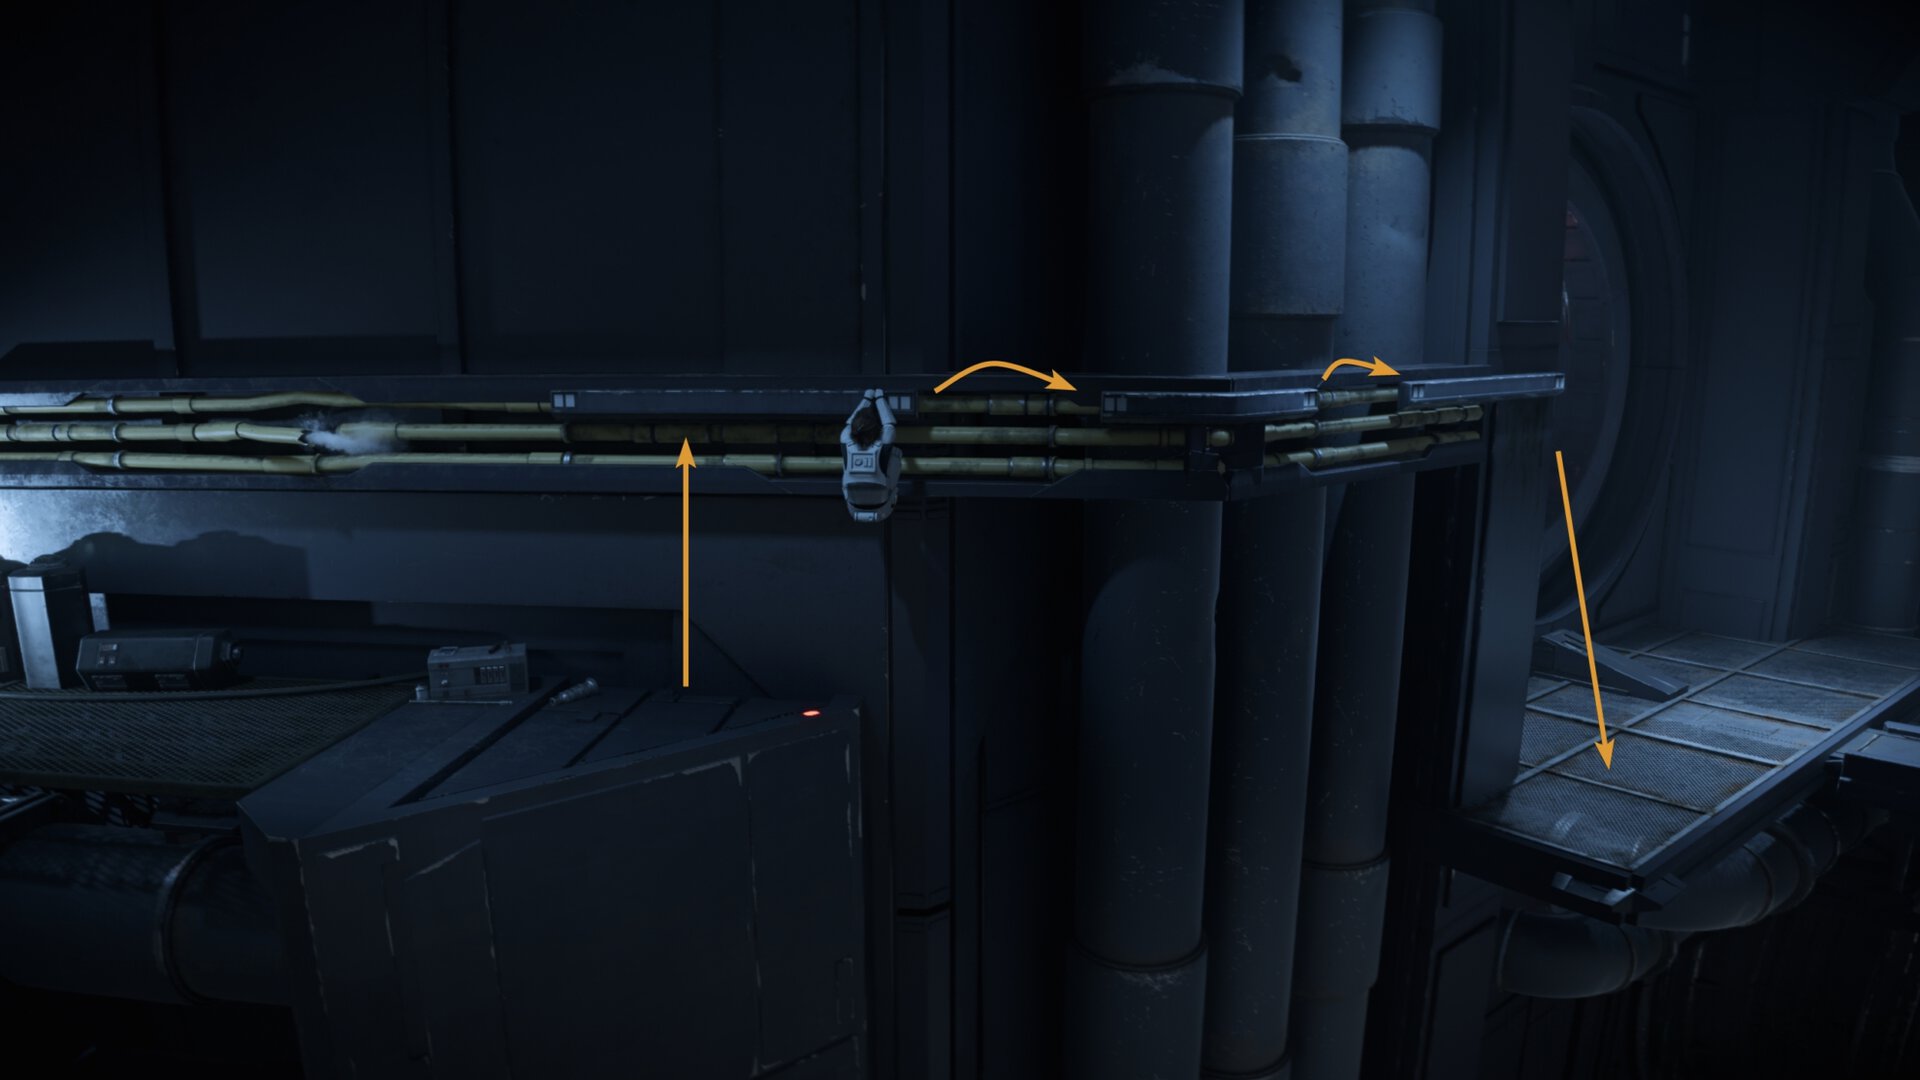
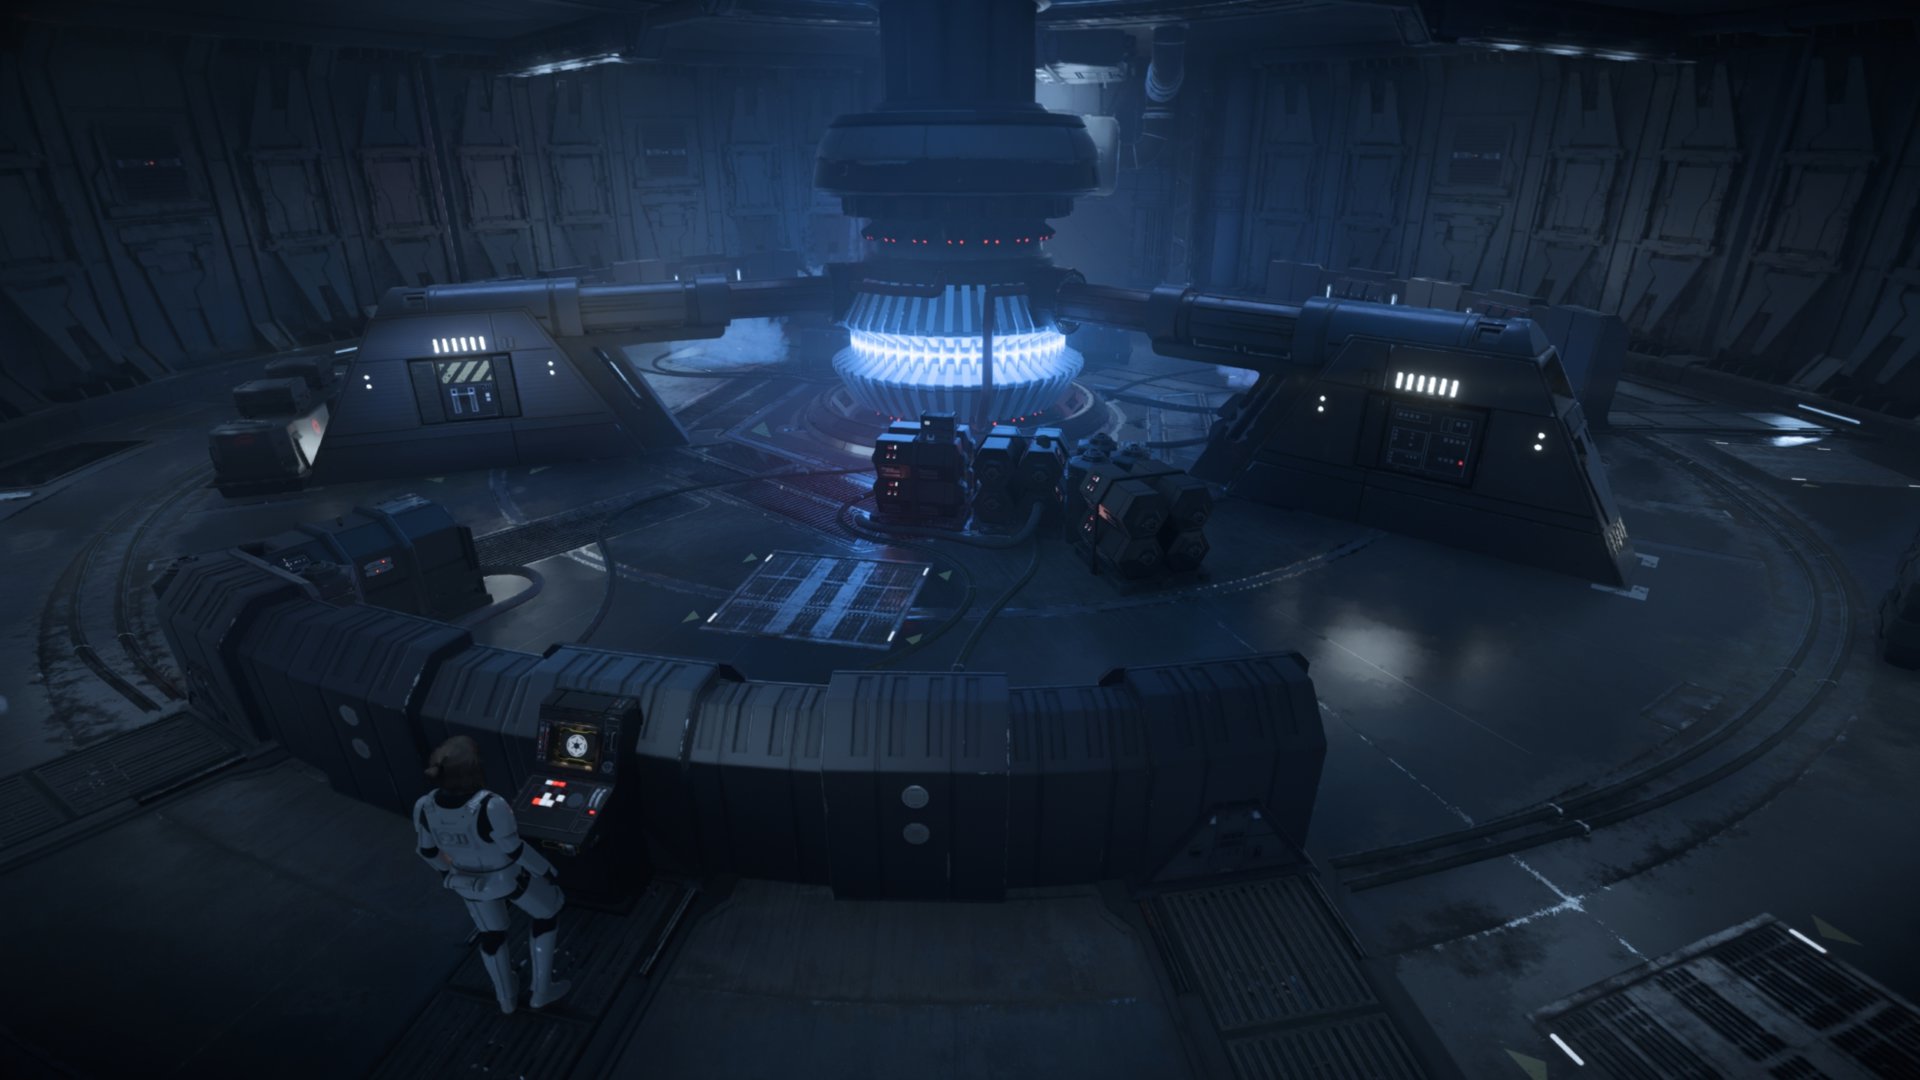
Jump across the gap and climb into the vent ahead. Once you’re out, activate the central emitter at the console. The emitter will fail to power up as both power generators are inactive.
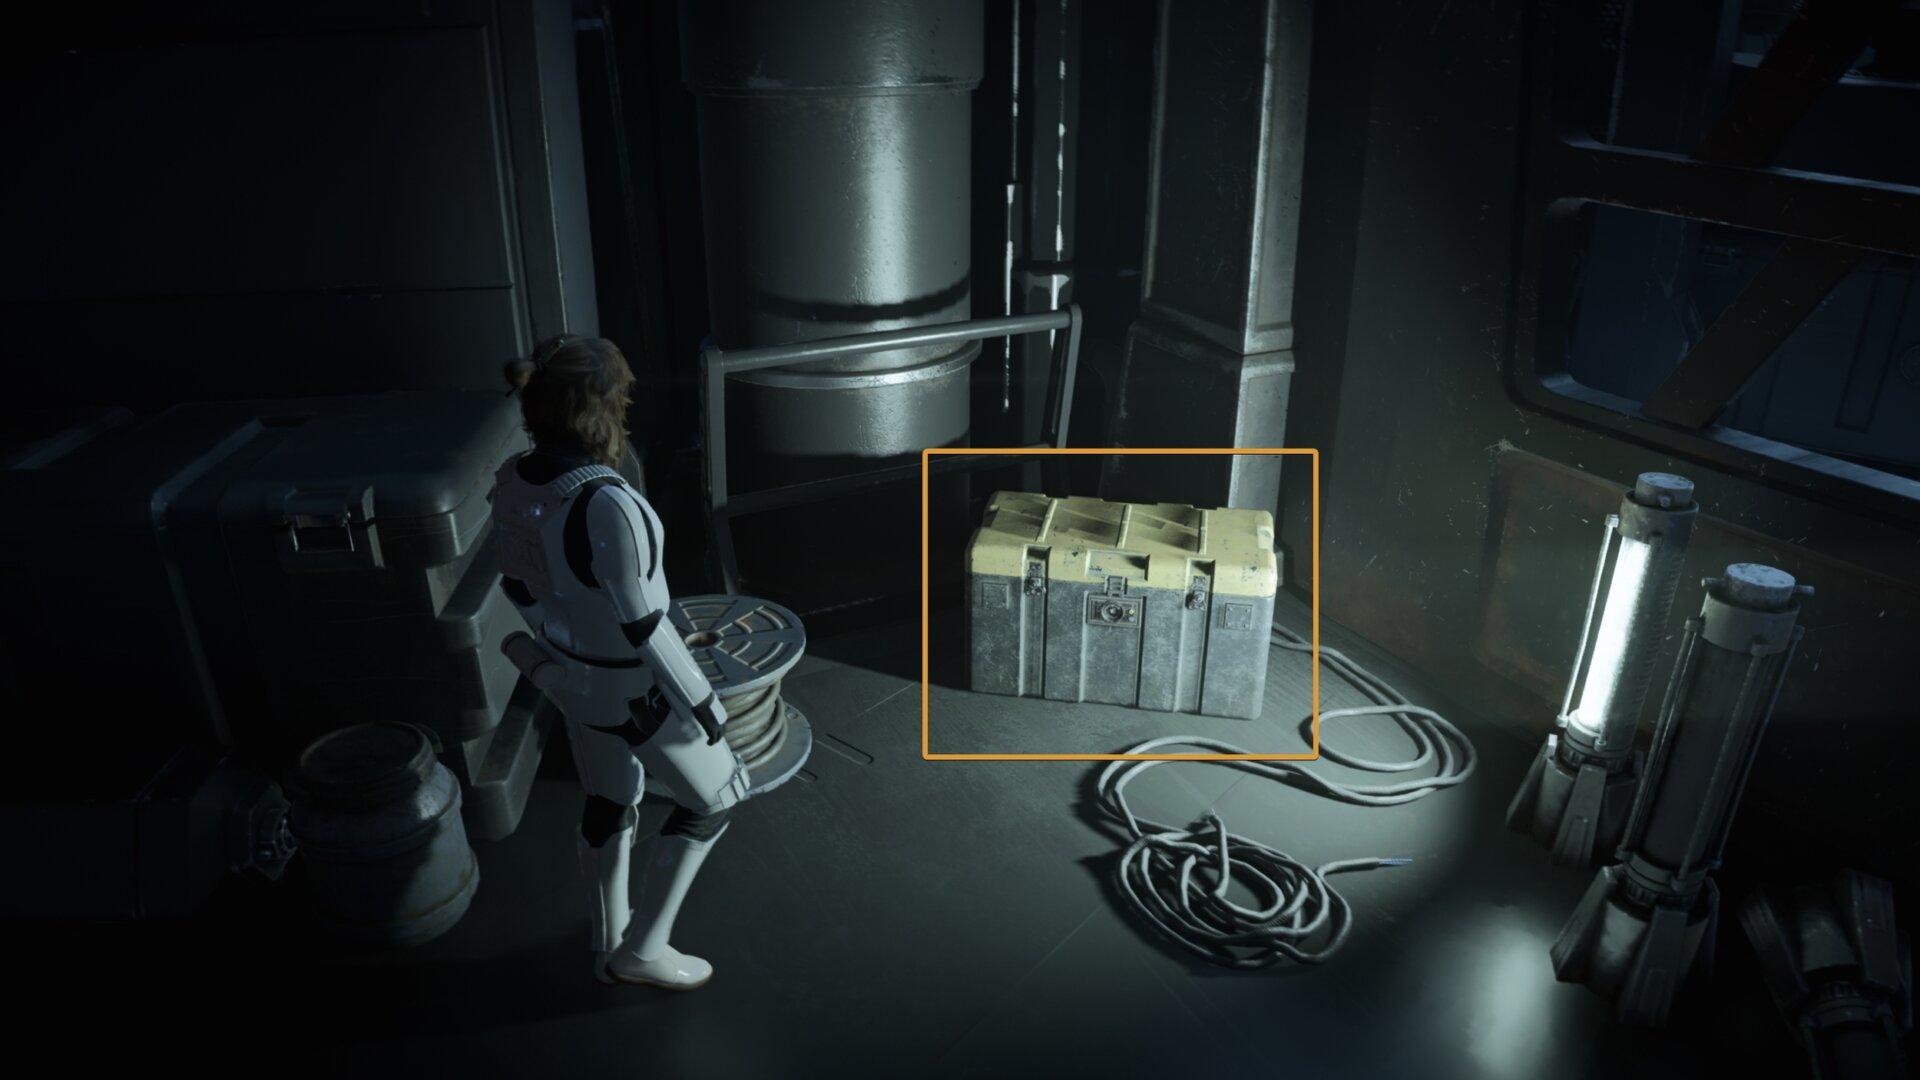
Go north of the console and then go west. You’ll find a ladder that leads to the first generator, but if you go around the corner you’ll find a large chest containing upgrade materials.
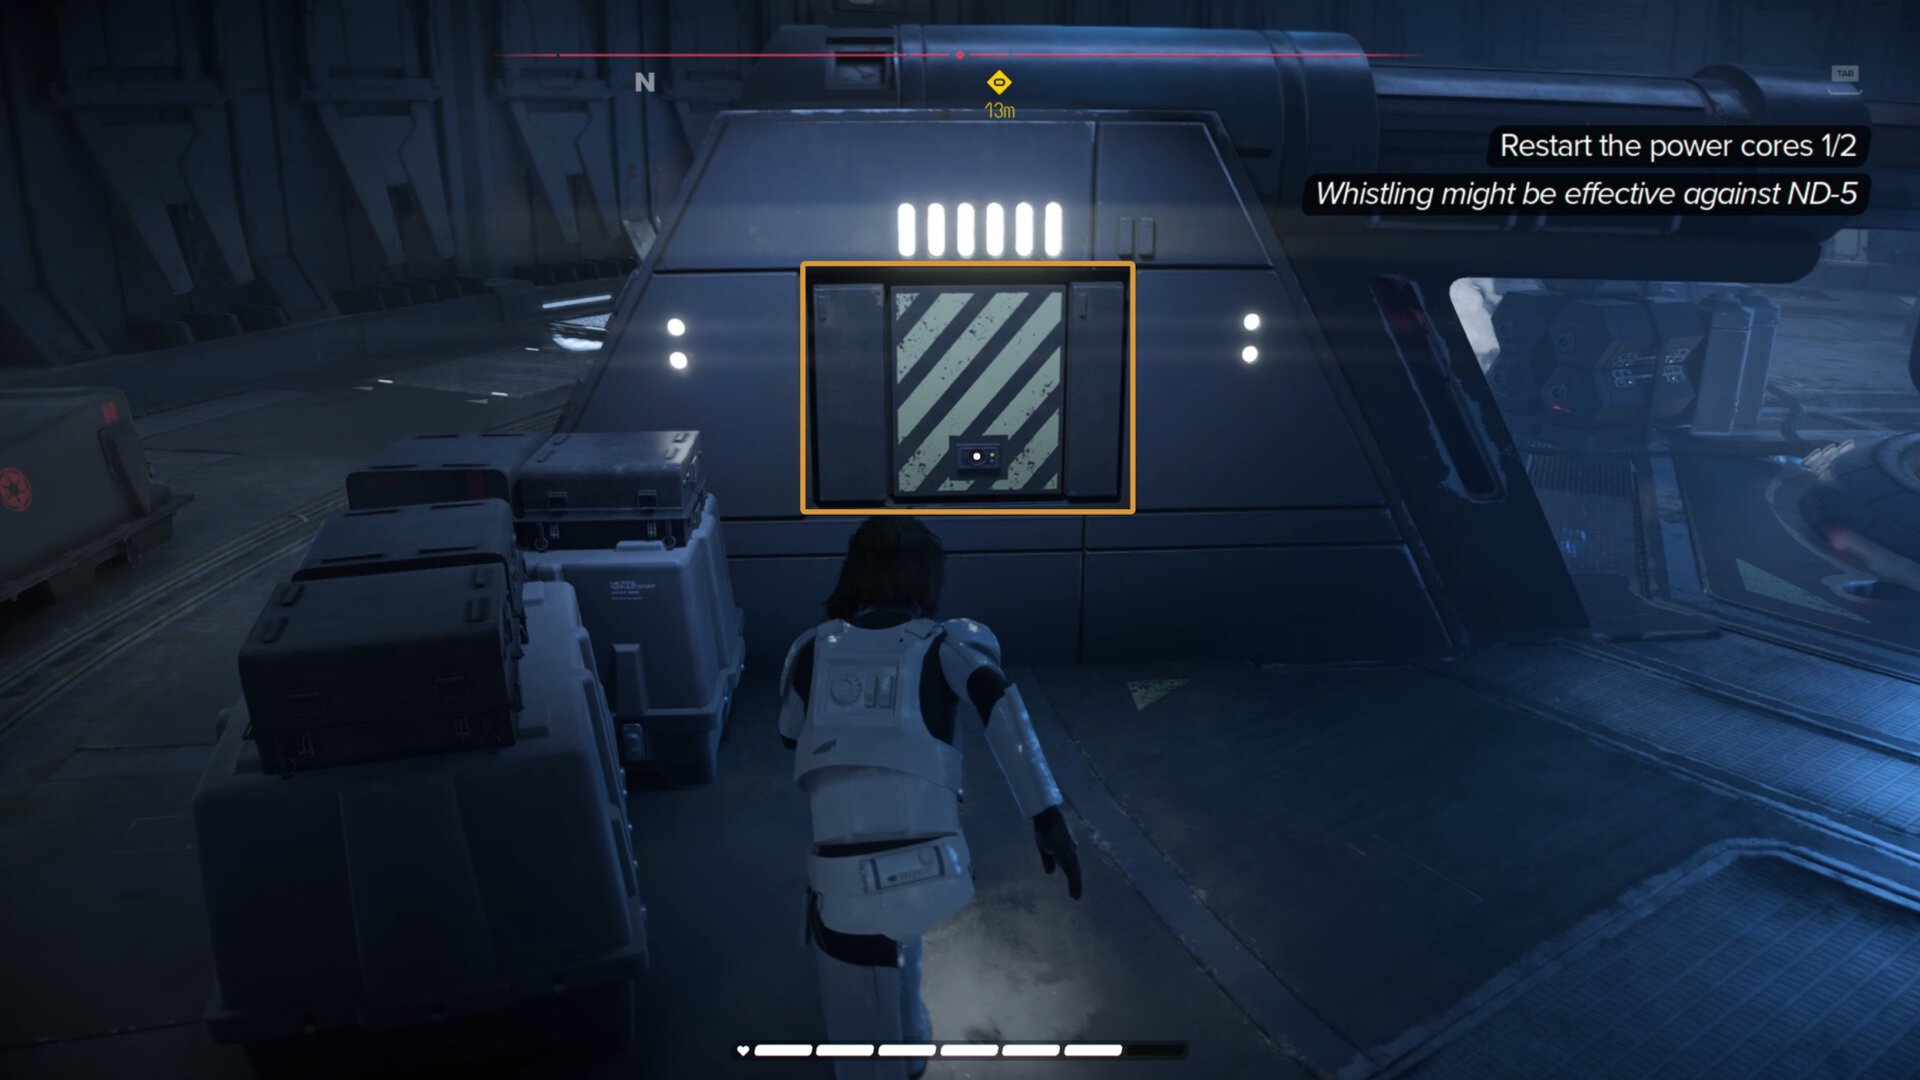
Go up the ladder and through the vent to access the first generator. If you need them, pick up bacta vials found in the room before you activate the computer.
With the core refusing to start, you’ll need to activate it manually by pulling down the 3 levers found around it.
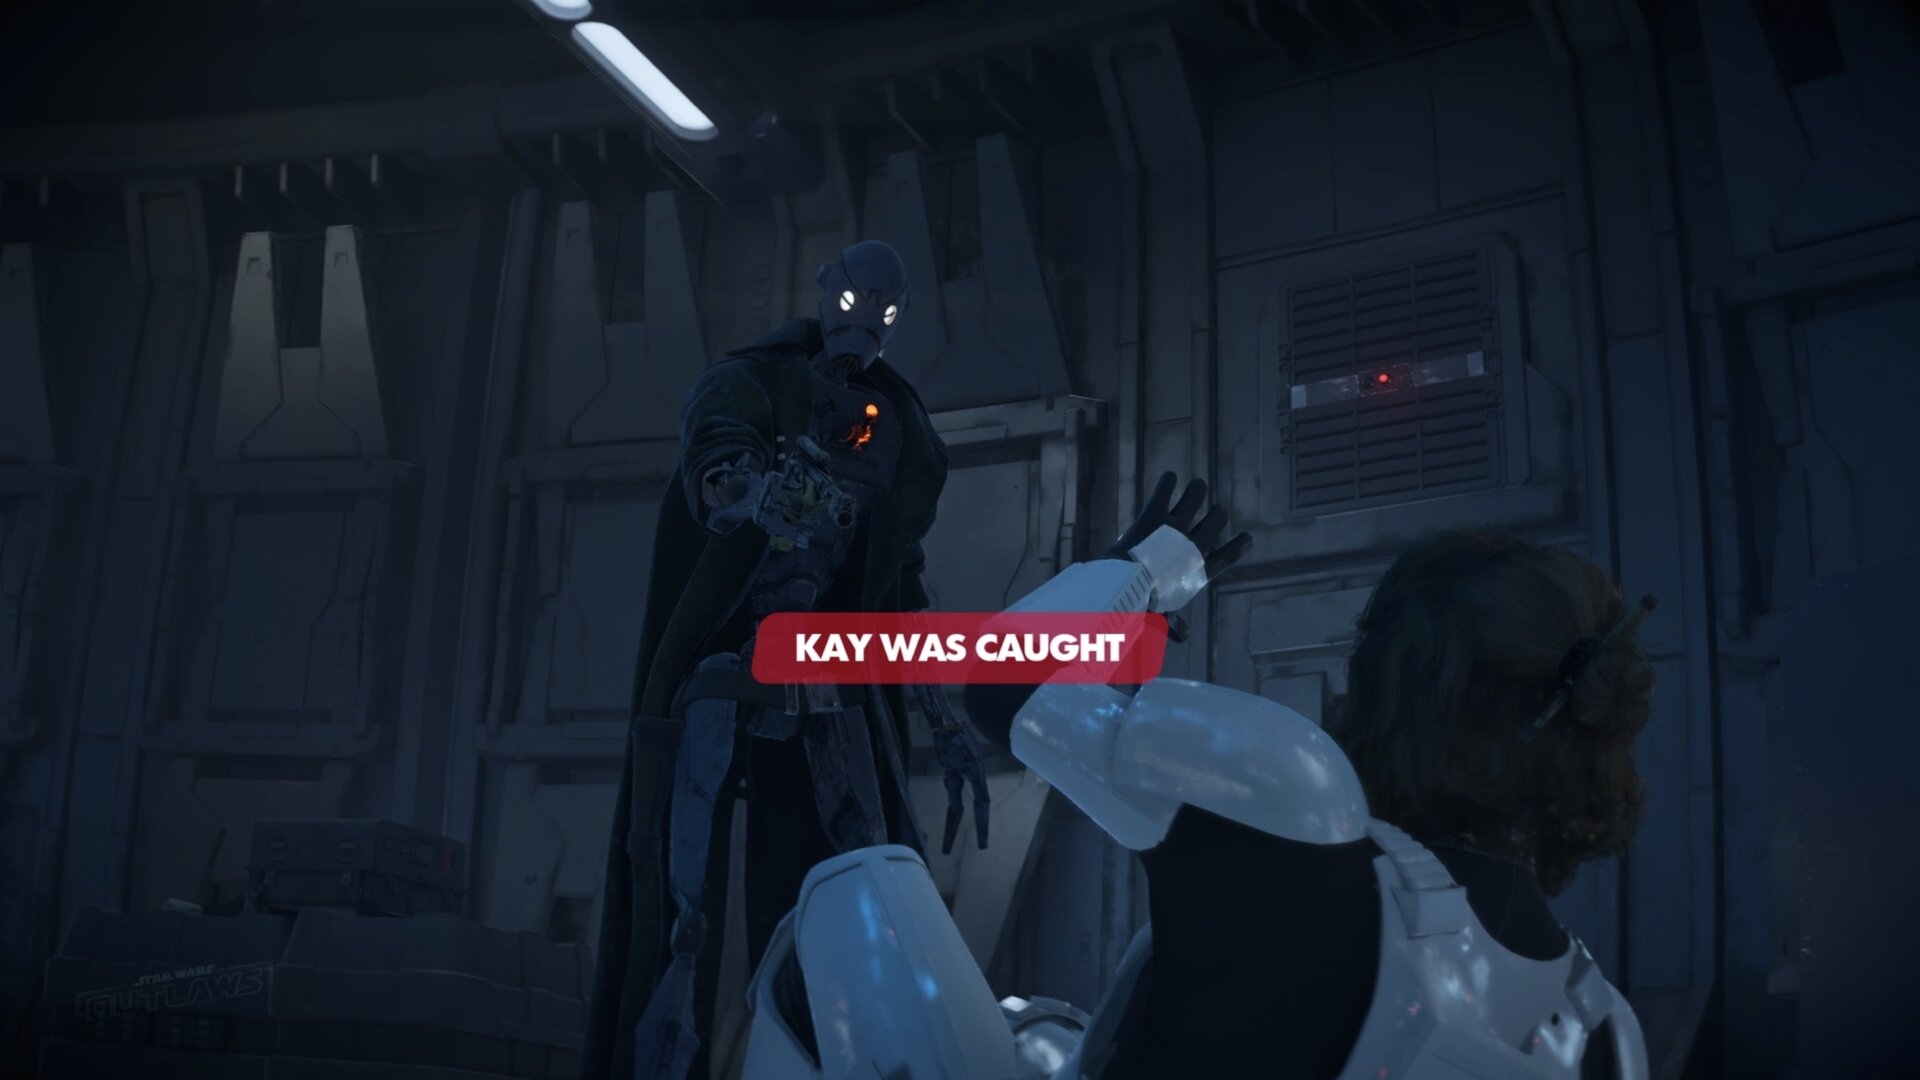
After you pull the first one, ND-5 will enter the room and start chasing you. Do not let him capture you or you’ll have to restart this segment.
As each lever needs several seconds to activate, you’ll need to buy yourself some time.
When you find a lever you haven’t pulled down yet, lure ND-5 to the opposite side of the room. Circle around and run for cover behind the panels or in the steam.
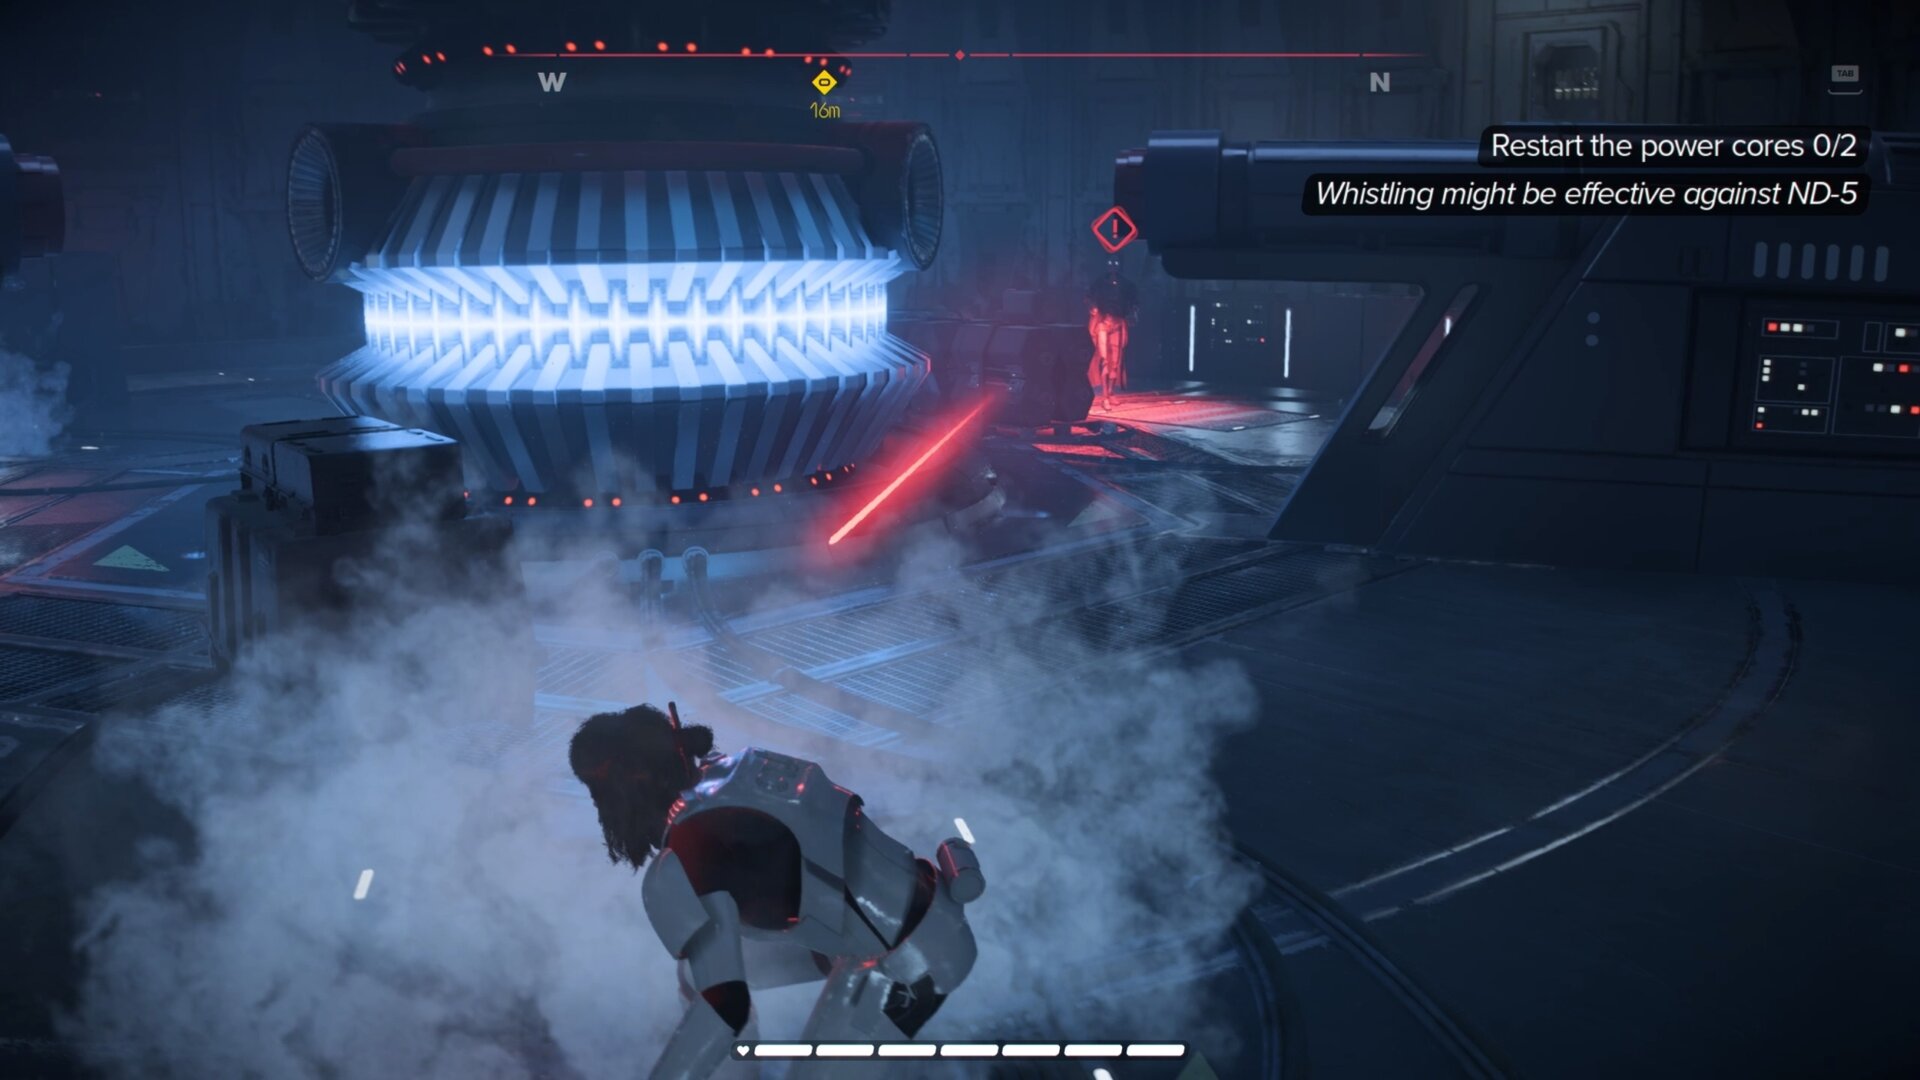
When he has lost you, sneak to the inactive lever and hold it. Repeat this process and when all 3 levers are pulled, activate the power core with the computer.
Once the power core is active, ND-5 will start shooting at you. Run through the large door and turn right. Keep running until you can jump down through a vent on the floor.
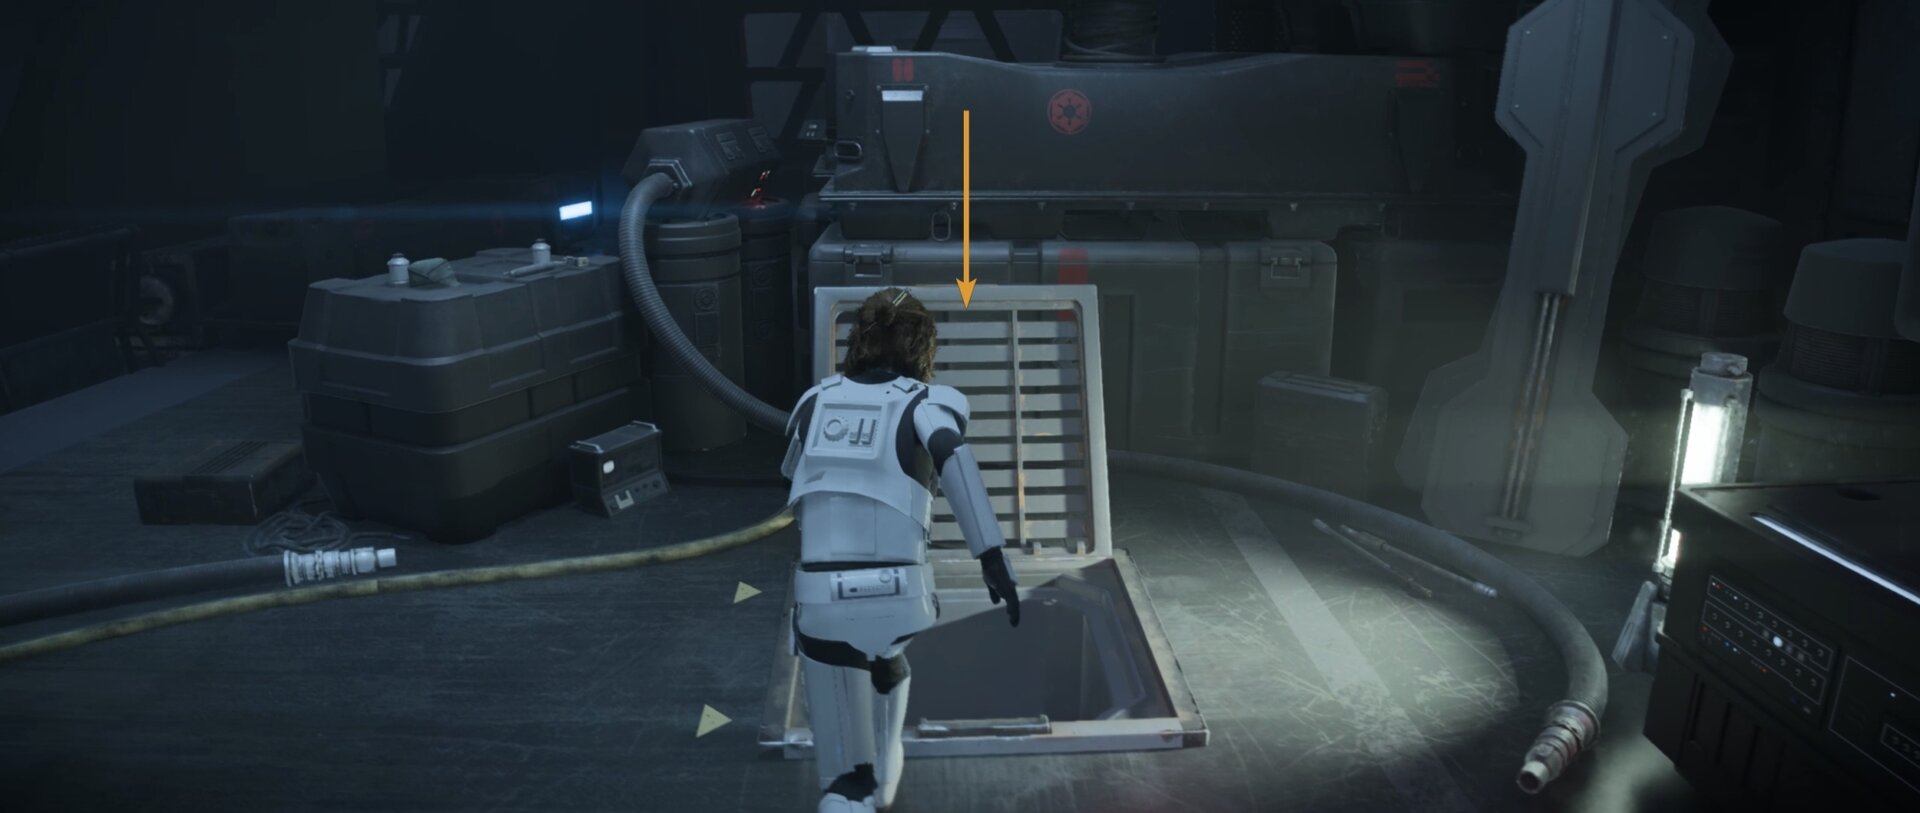
When you exit the vent, don’t stop running and crawl through another vent. Go up the ladder to your left to access the second power core.
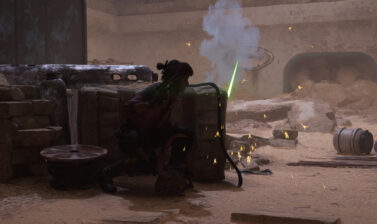
There will be no time to breathe as ND-5 has beat you to the core. Run away and hide until he loses you. This power core won’t be as simple as the last one.
There are no levers to pull down here. Instead, you’ll have to use your data spike at 3 ports around the core.
If you have the data spike minigame turned off, this segment poses no issue. If you had it set to hard like I did, this can be a rather stressful situation.
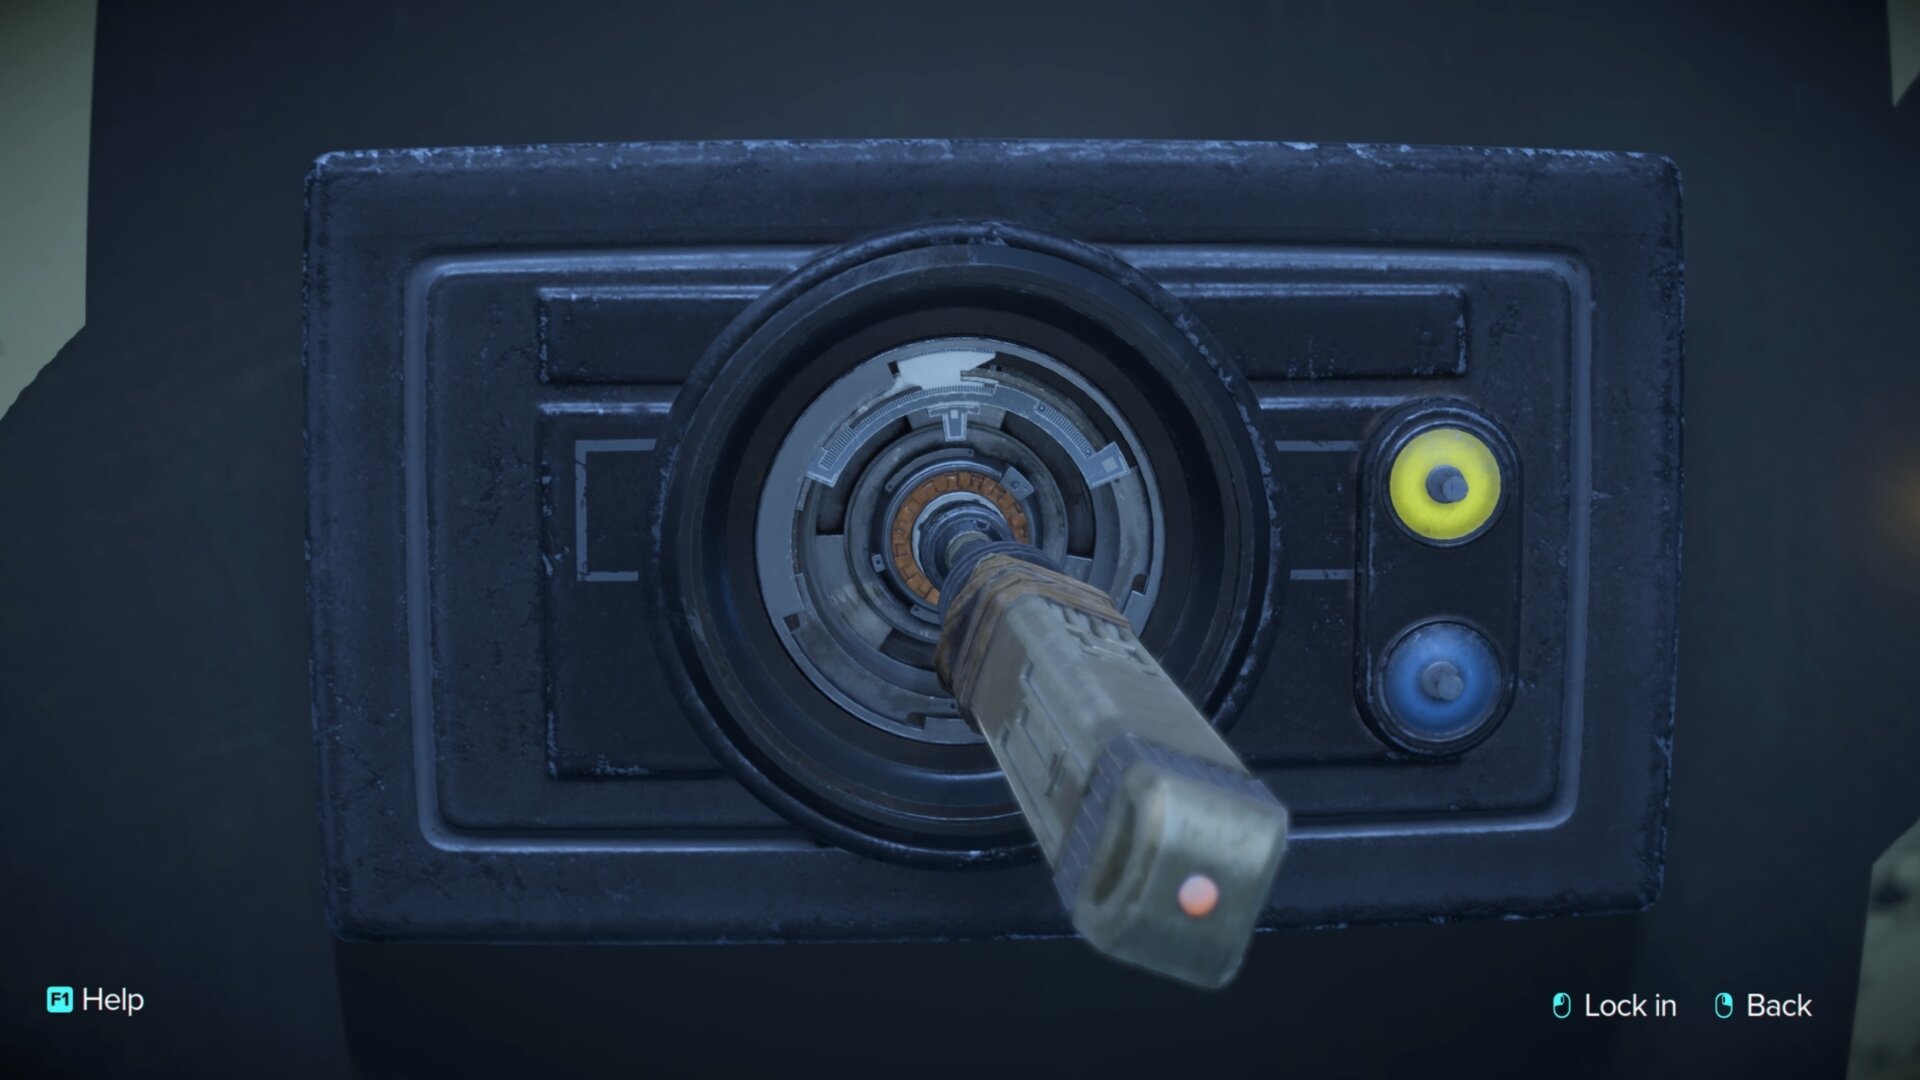
Do what you did last time and lure ND-5 to the opposite side of a port you need to lockpick. Once all three are unlocked, use the computer to activate the core.
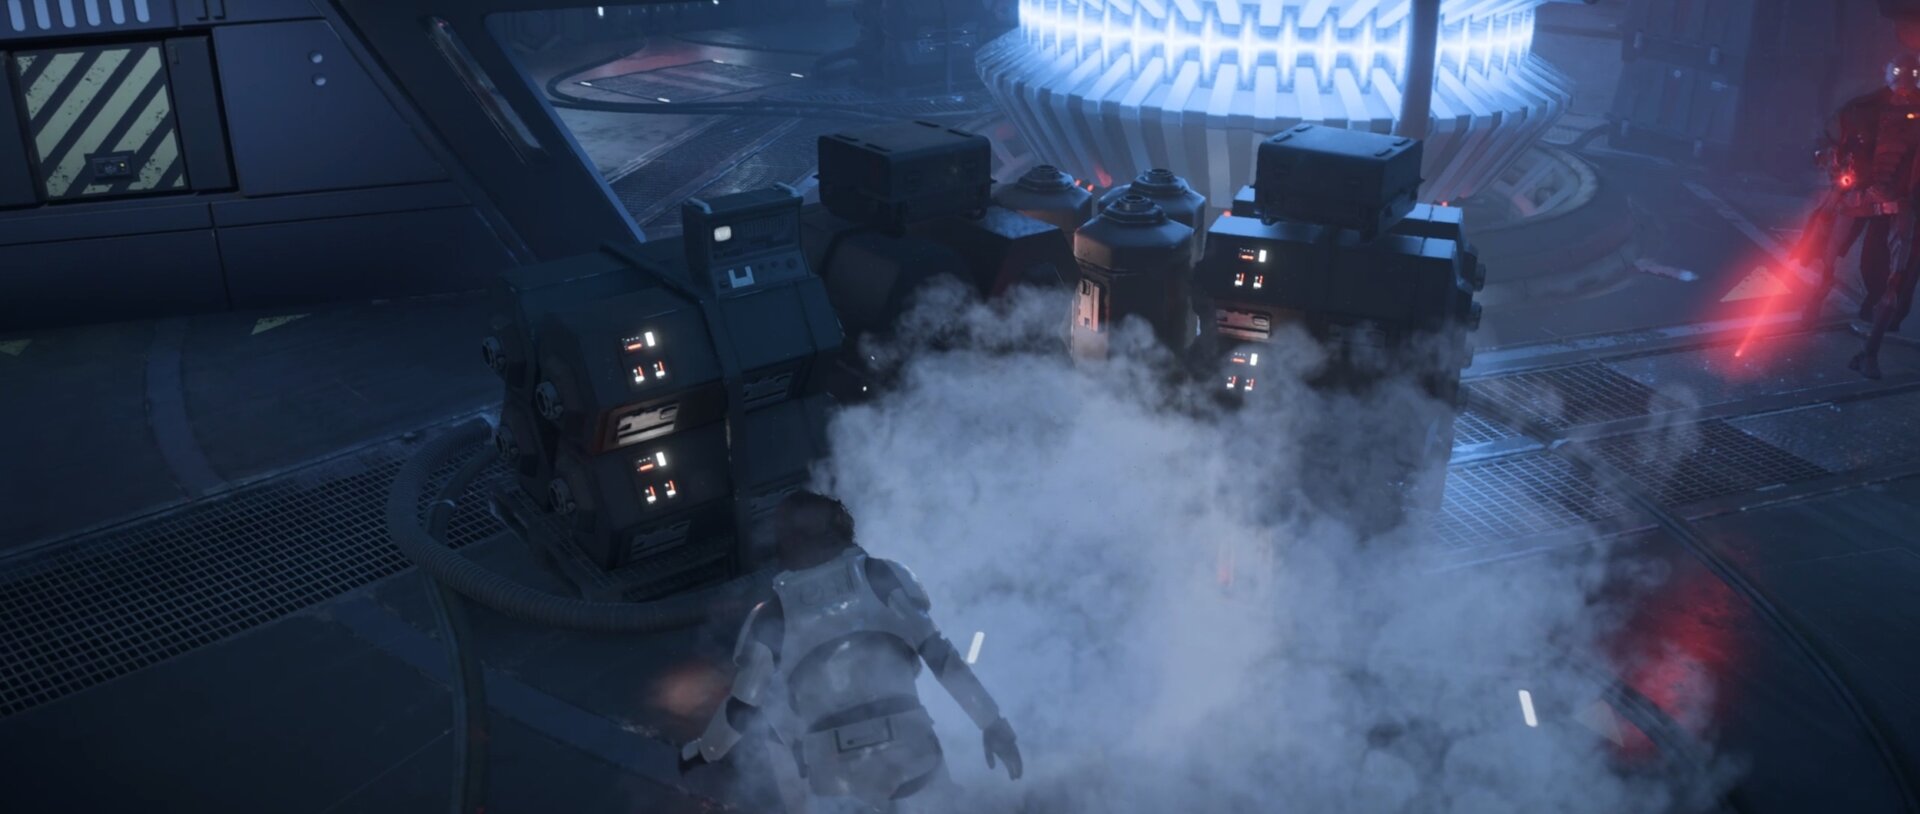
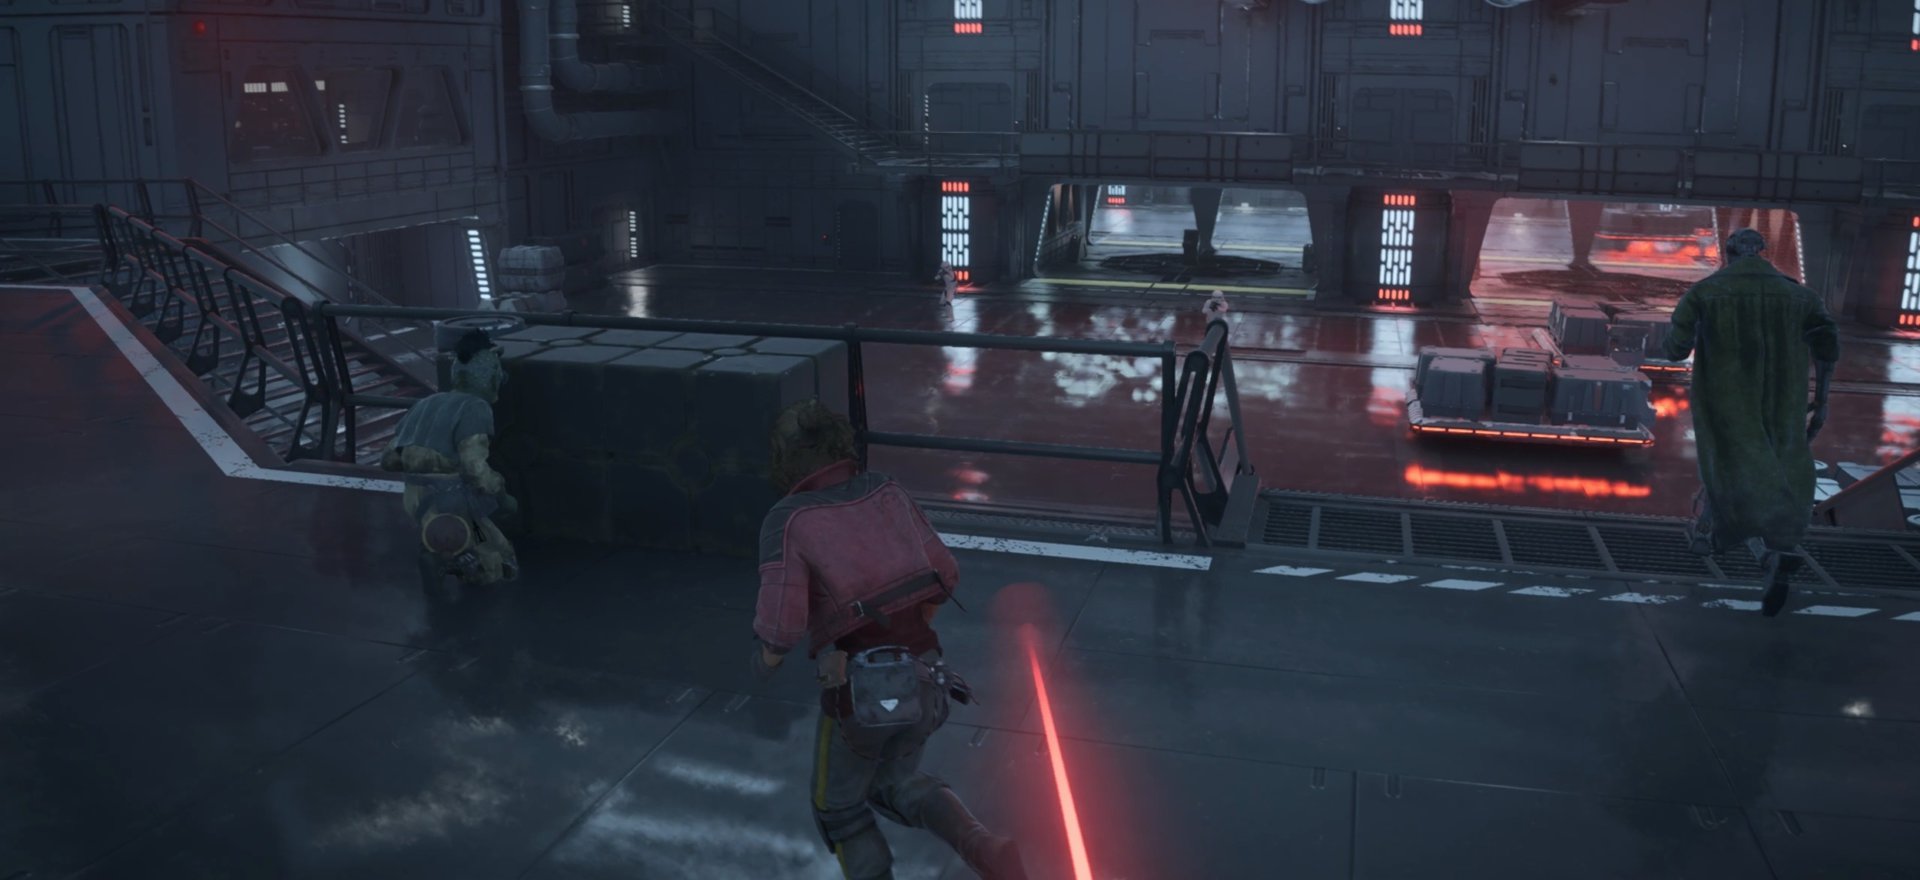
Run outside the room, turn left, and run. Go under or over any obstacles in your way. If you go around them, you’ll get hit by an explosive and caught by ND-5.
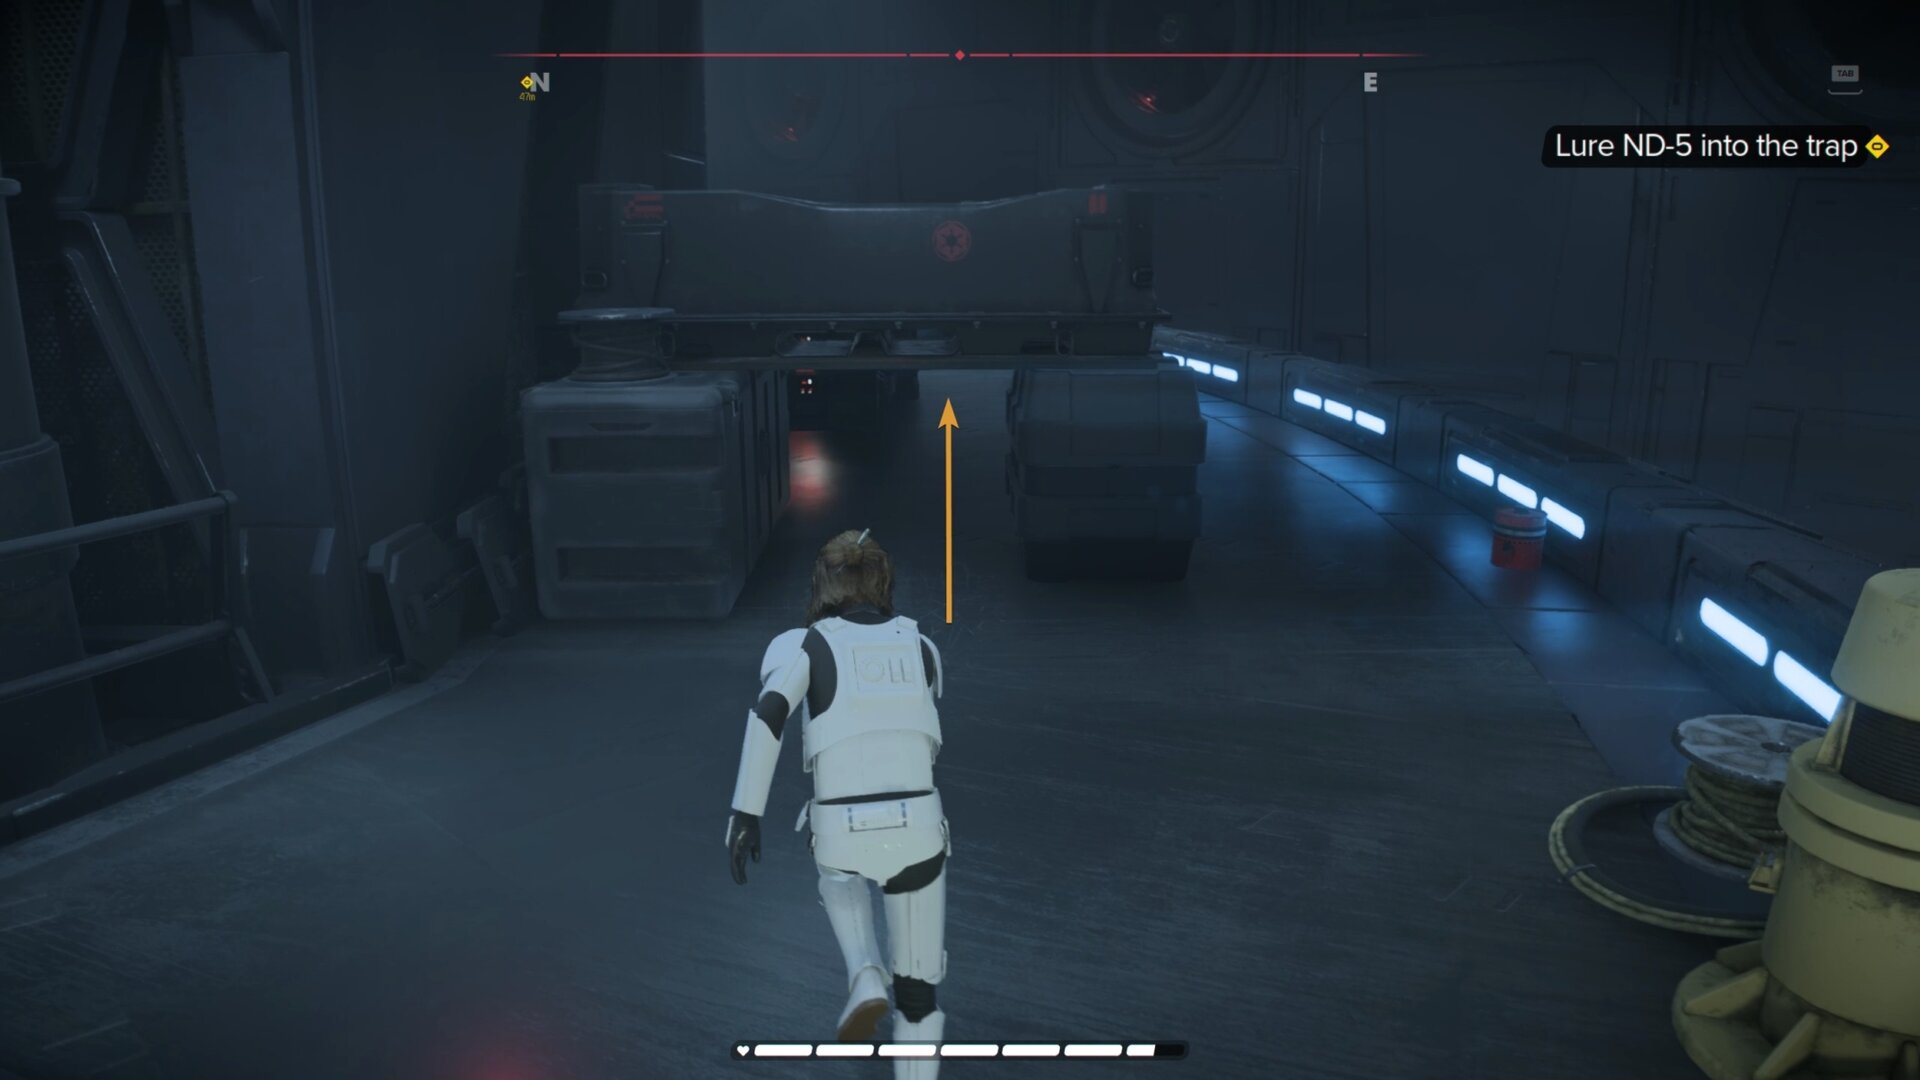
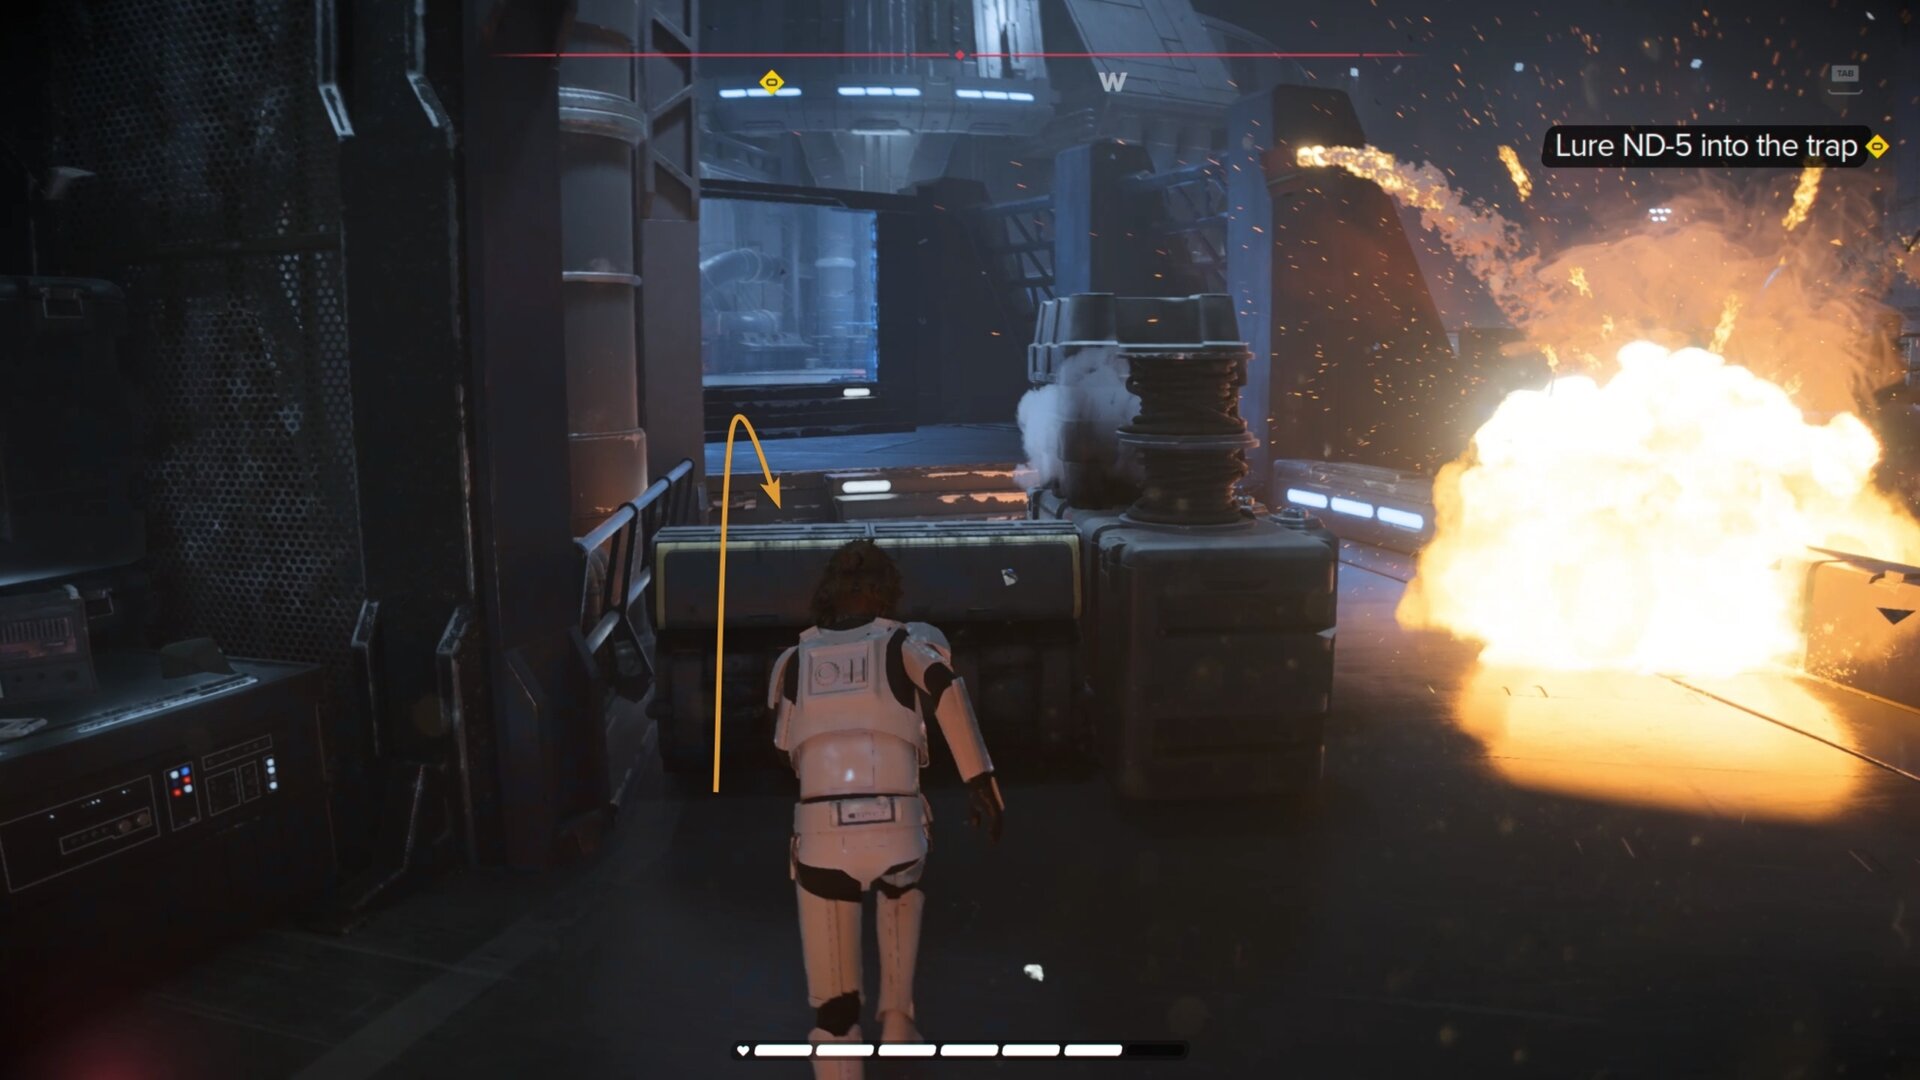
Run past the emitters to lure ND-5 into the trap. Once he’s caught between the emitters, a cutscene will start.
Escaping the Revelator
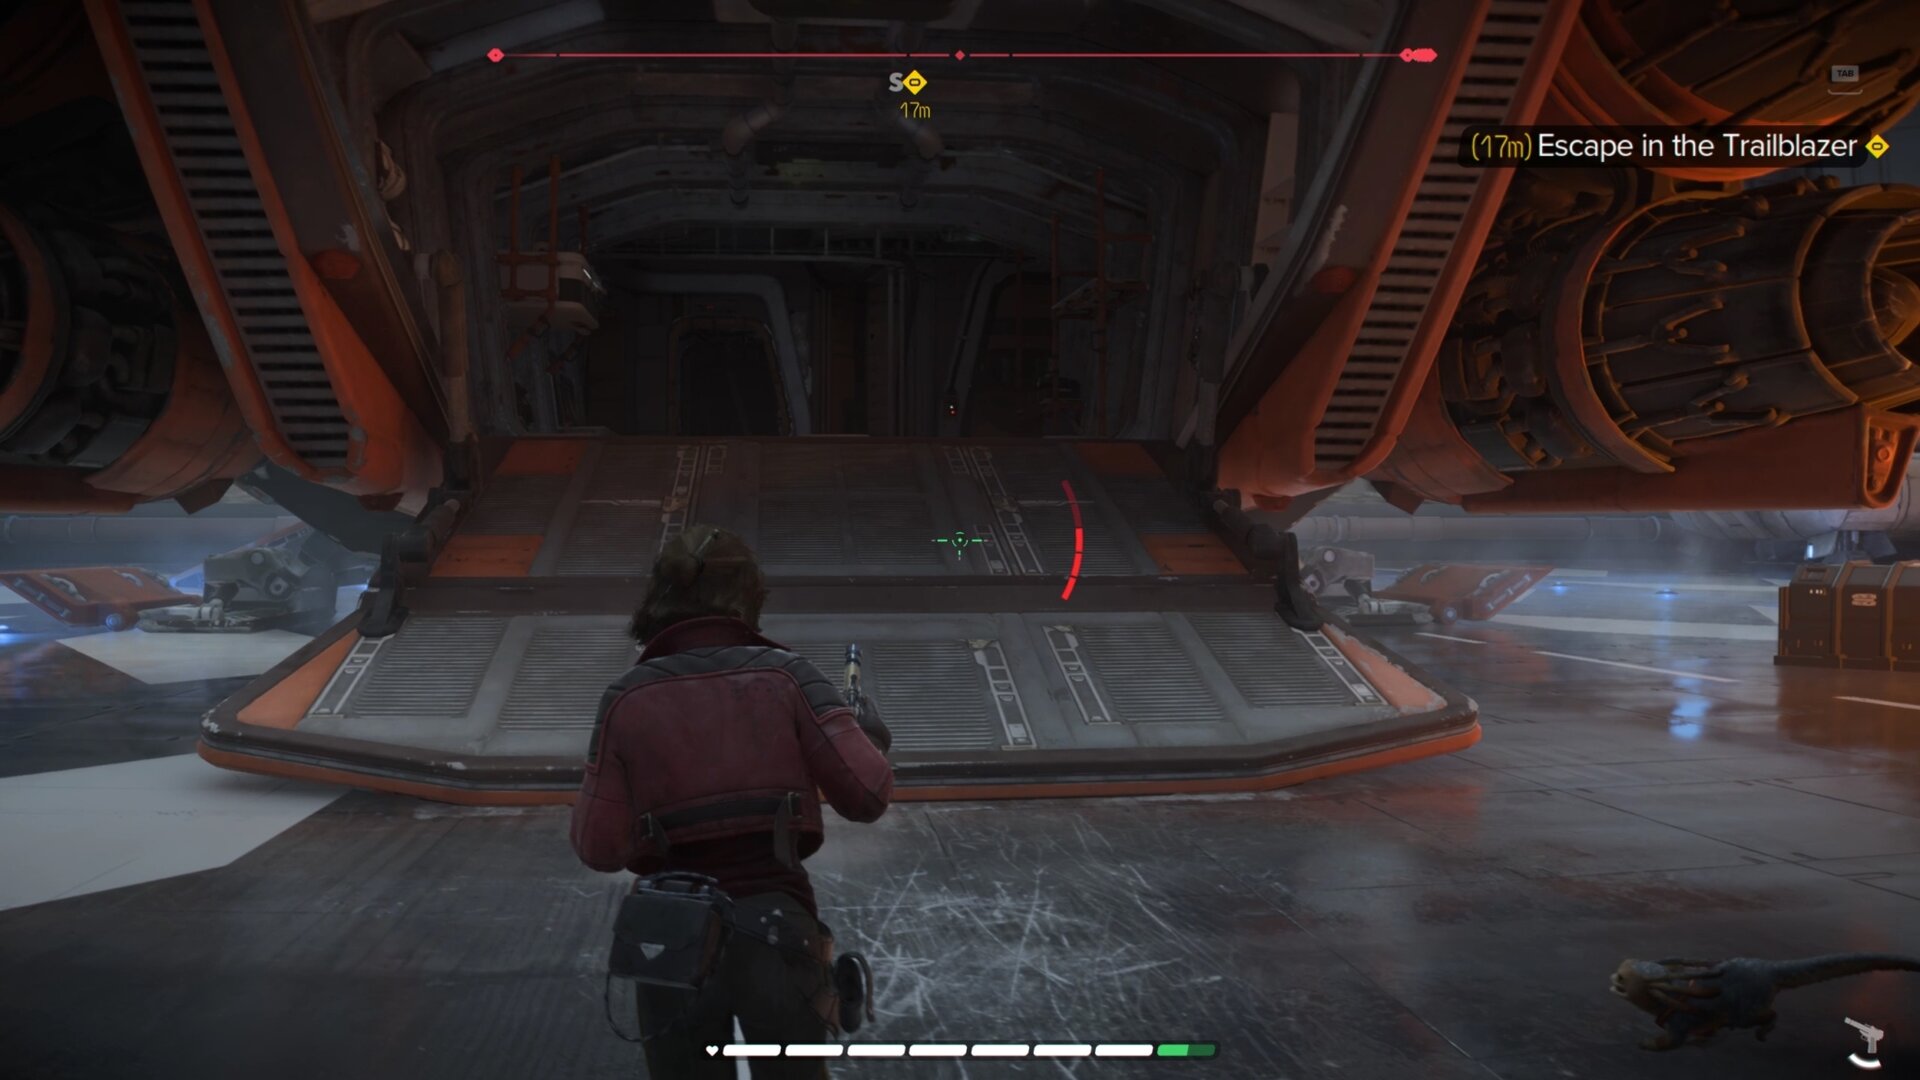
With ND-5 now having free will, you need to get off the Revelator. Have Nix disable the ray shield and pick up one of the weapons on the rack within the hall.

After the hall, you’ll walk into the Mechanical Room. You’ll need to hold off waves of Imperials attacking you. The Z-6 Rotary Cannon is great here, a personal shield in an open space is never a bad thing.
Once the room is cleared, go upstairs and up the turbolift. There are more halls you need to fight through. If you run into any heavy troopers or death troopers, use your adrenaline rush to take them out.
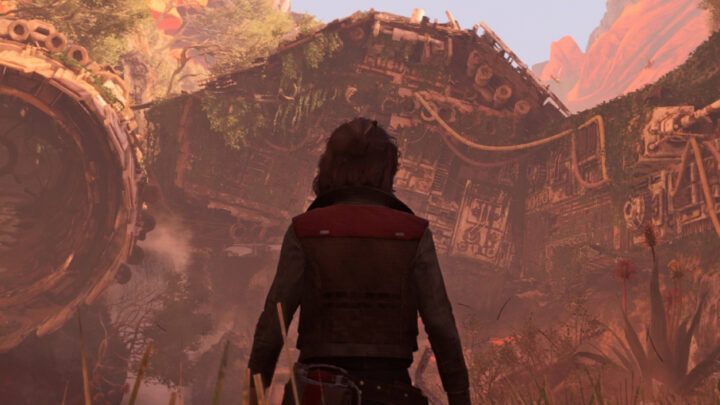
Keep running and get inside the Trailblazer. Now you need to stop the Empire before they destroy the Rebel base on Akiva, hurting countless civilians in the process.
The Battle for Akiva
I hope you’ve upgraded your ship and unlocked some maneuvers, it will help you immensely in the fight ahead.
While Asara tries to contact the Rebel base, Kay starts up a distress beacon as she’s “calling in some favors”.
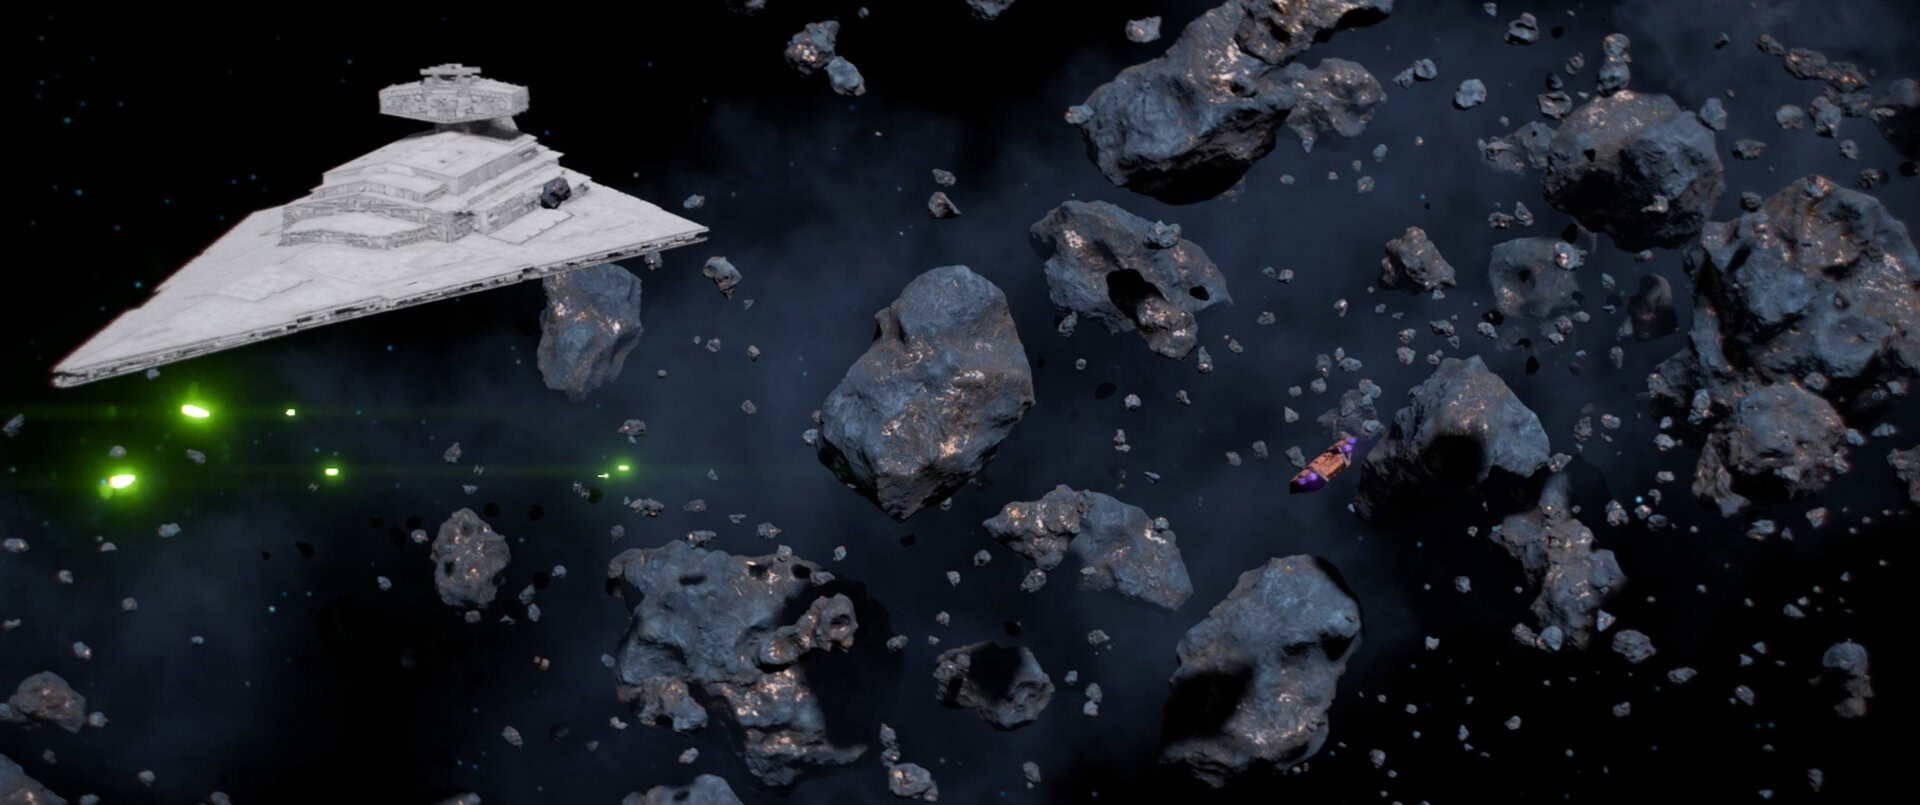
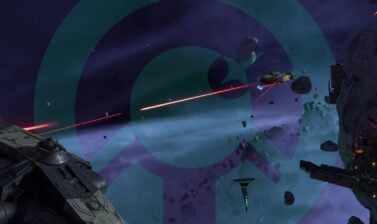
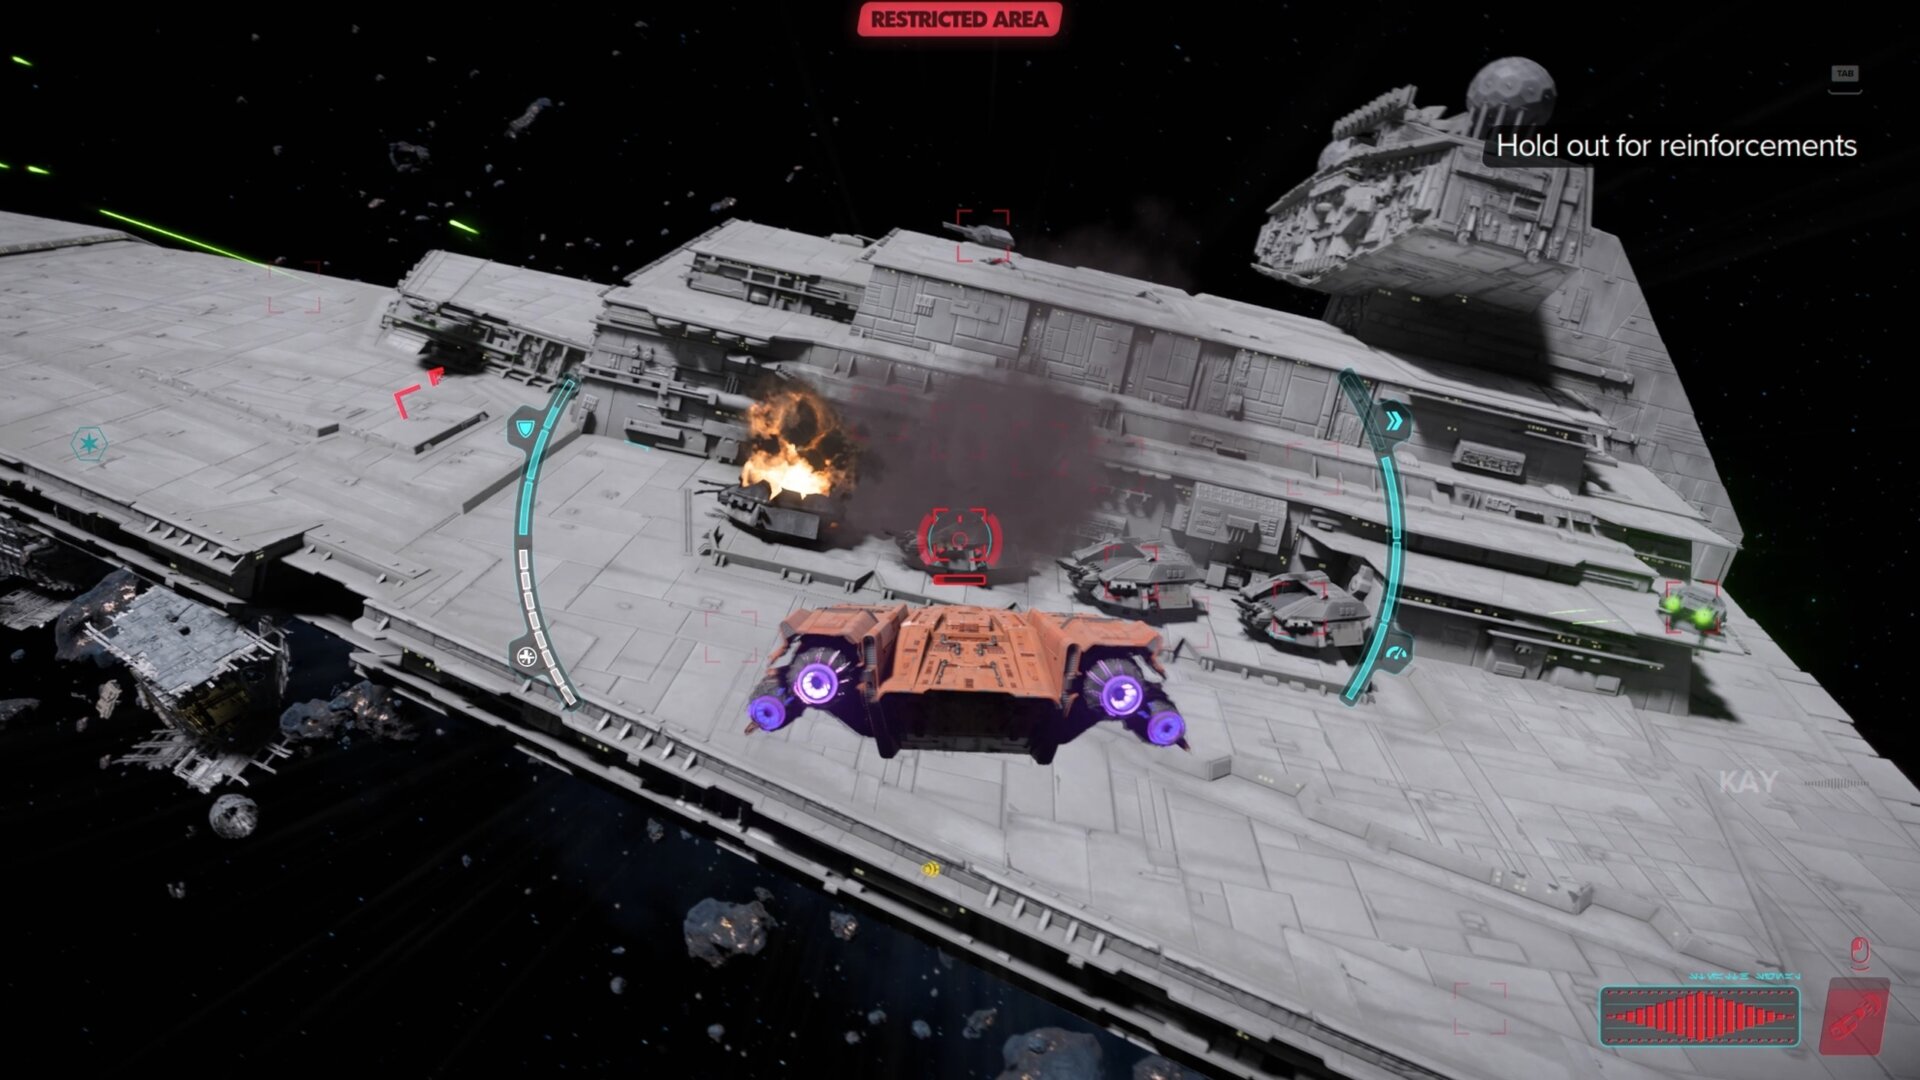
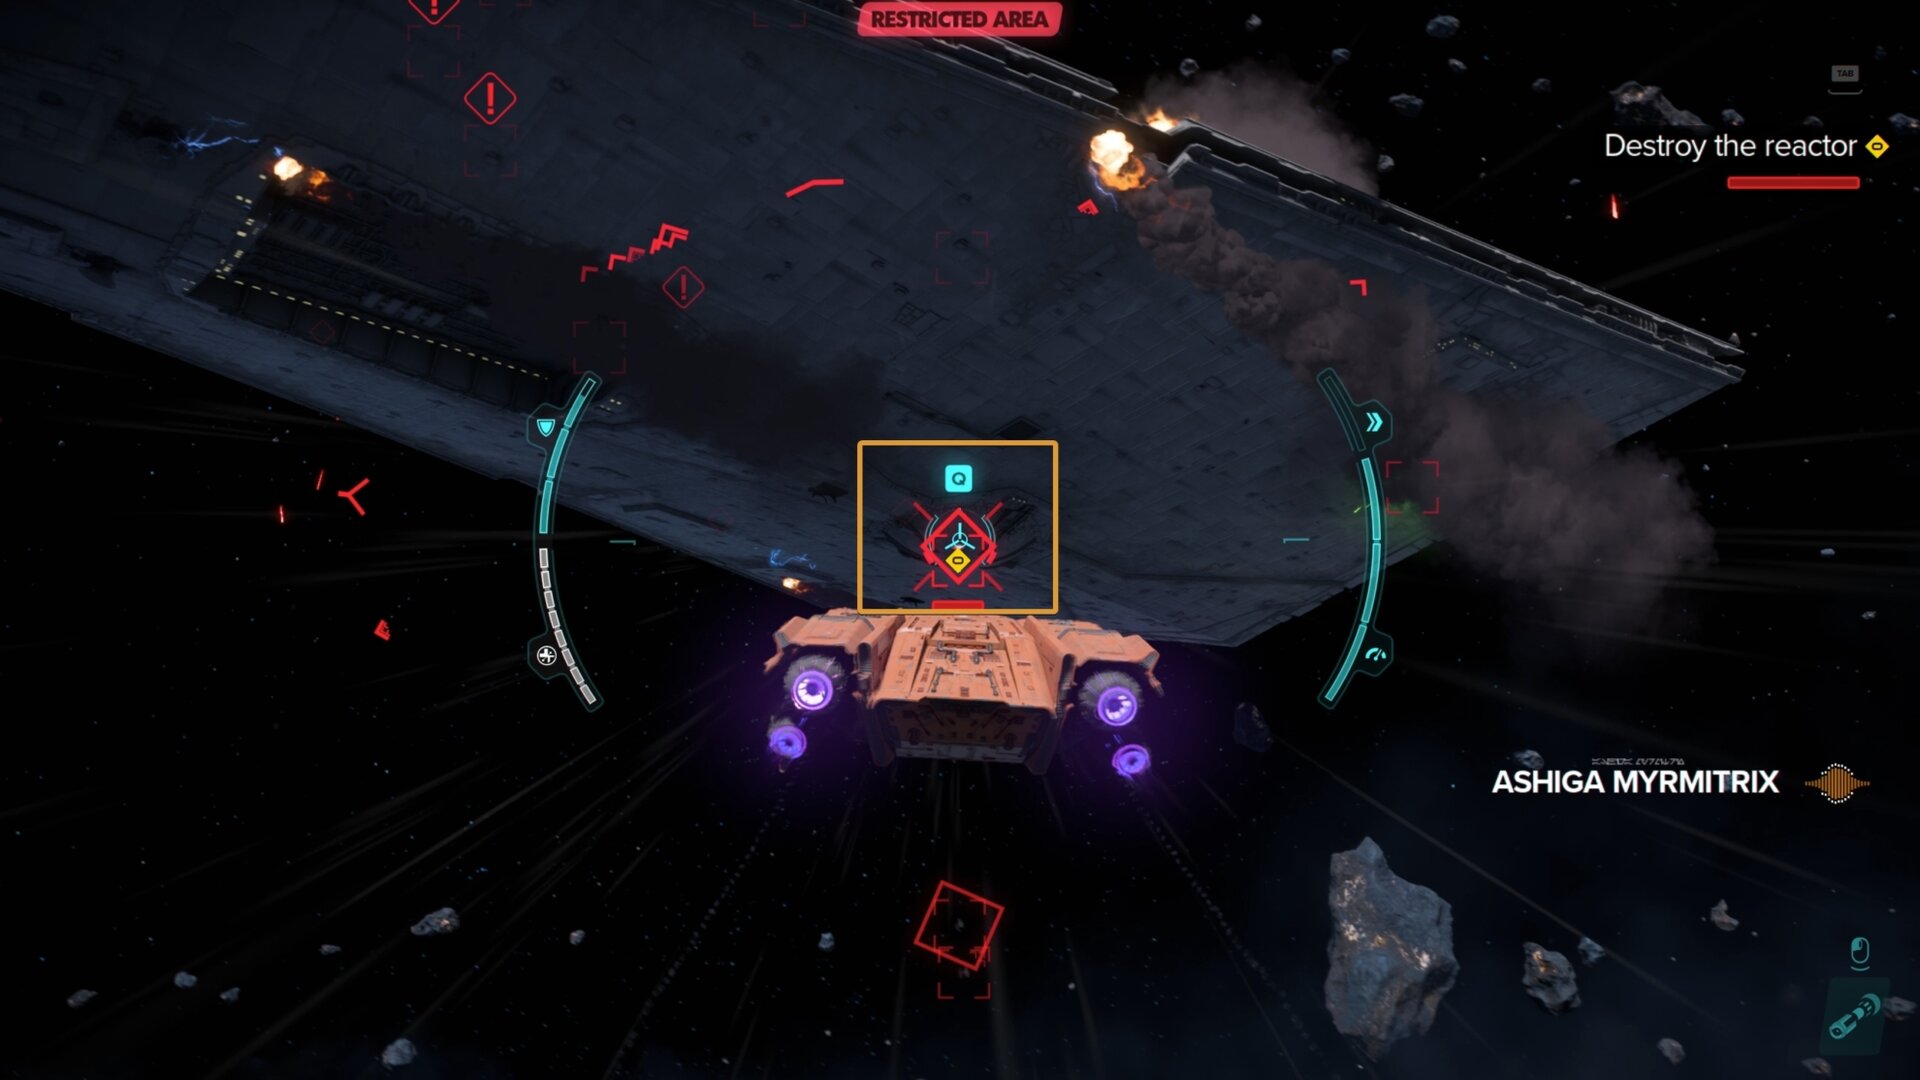
Your objective is to survive until reinforcements arrive. While you can blast away TIE fighters to your heart’s content, this would be a great time to destroy the Revelator’s turbolasers.
Be sure to get the turbolasers on top and underneath the Revelator. These turrets hit hard and removing them from the fight increases your survivability immensely.
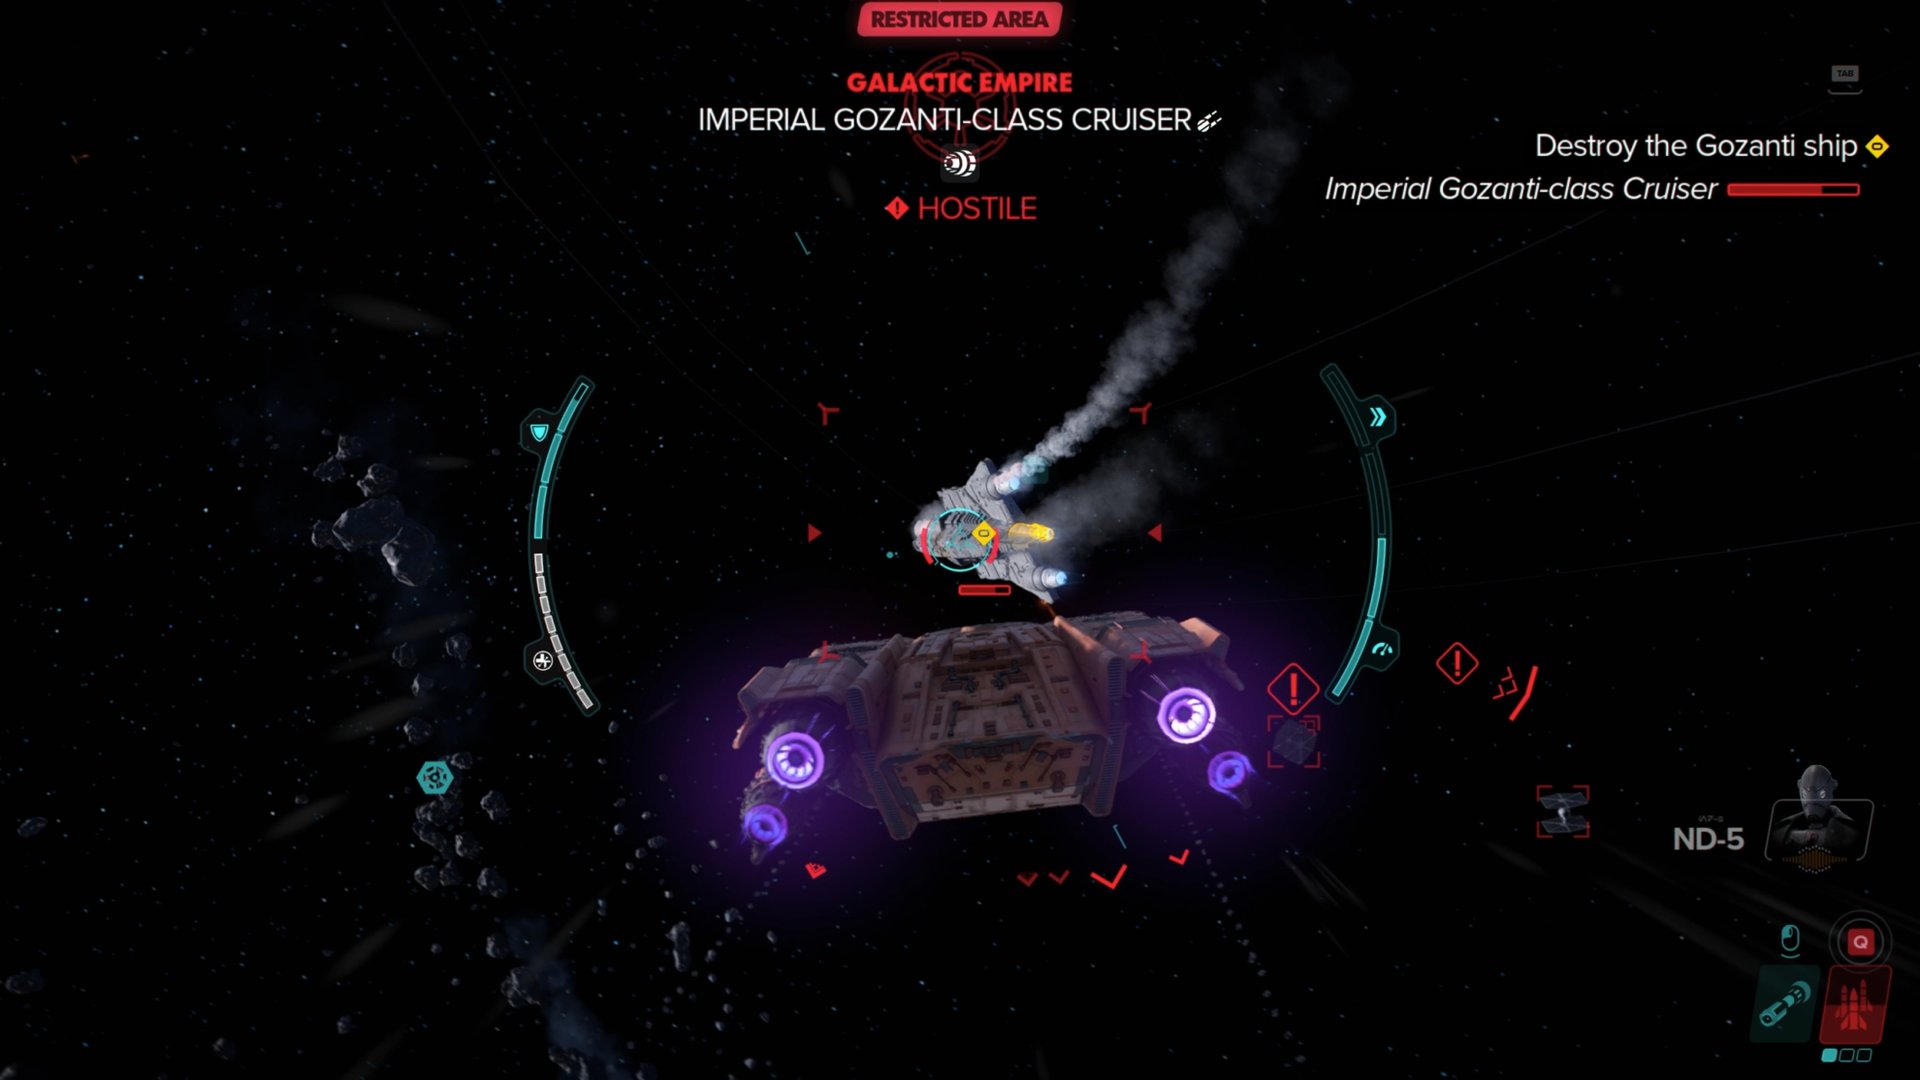
Communications are jammed and a Gozanti-class cruiser is the culprit. Destroy the cruiser to bring down the jammer so you can call in reinforcements.
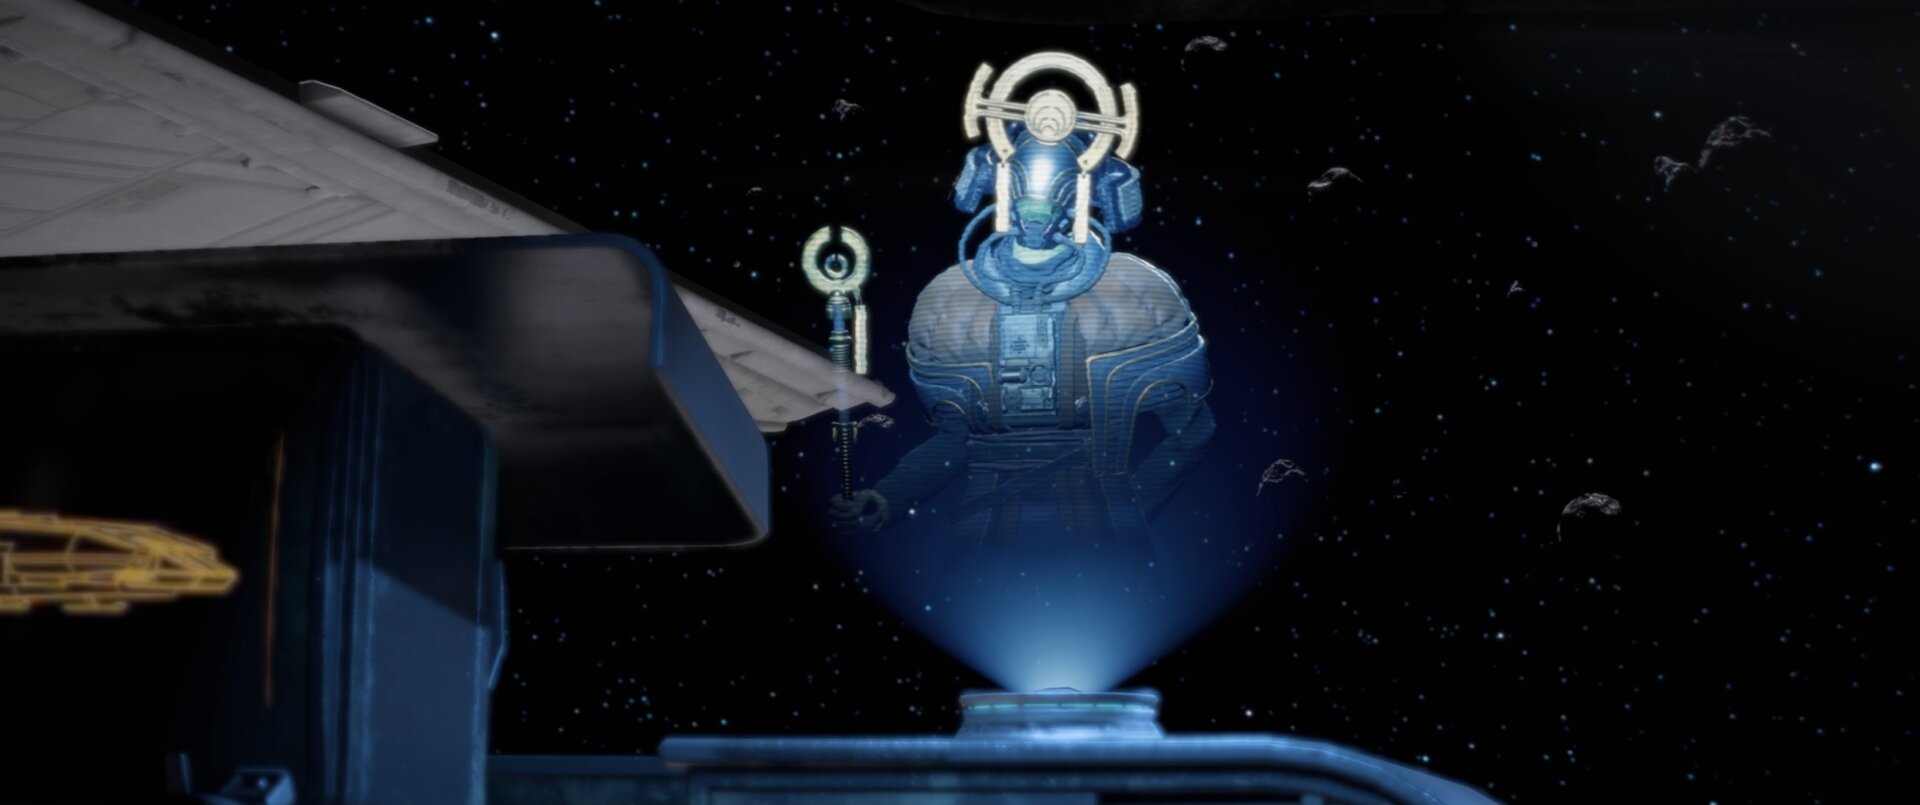
You’ll be caught in a tractor beam and unable to move. Fortunately, Rebel starfighters have arrived from Akiva. Better yet, Kay gets an answer from her distress call.
Whichever syndicate you have the most reputation with will answer your call and either Gorak, Qi’ra, Jabba, or the Ashiga Queen will appear on a holocall. Rebels and Syndicates will fight the Empire together.
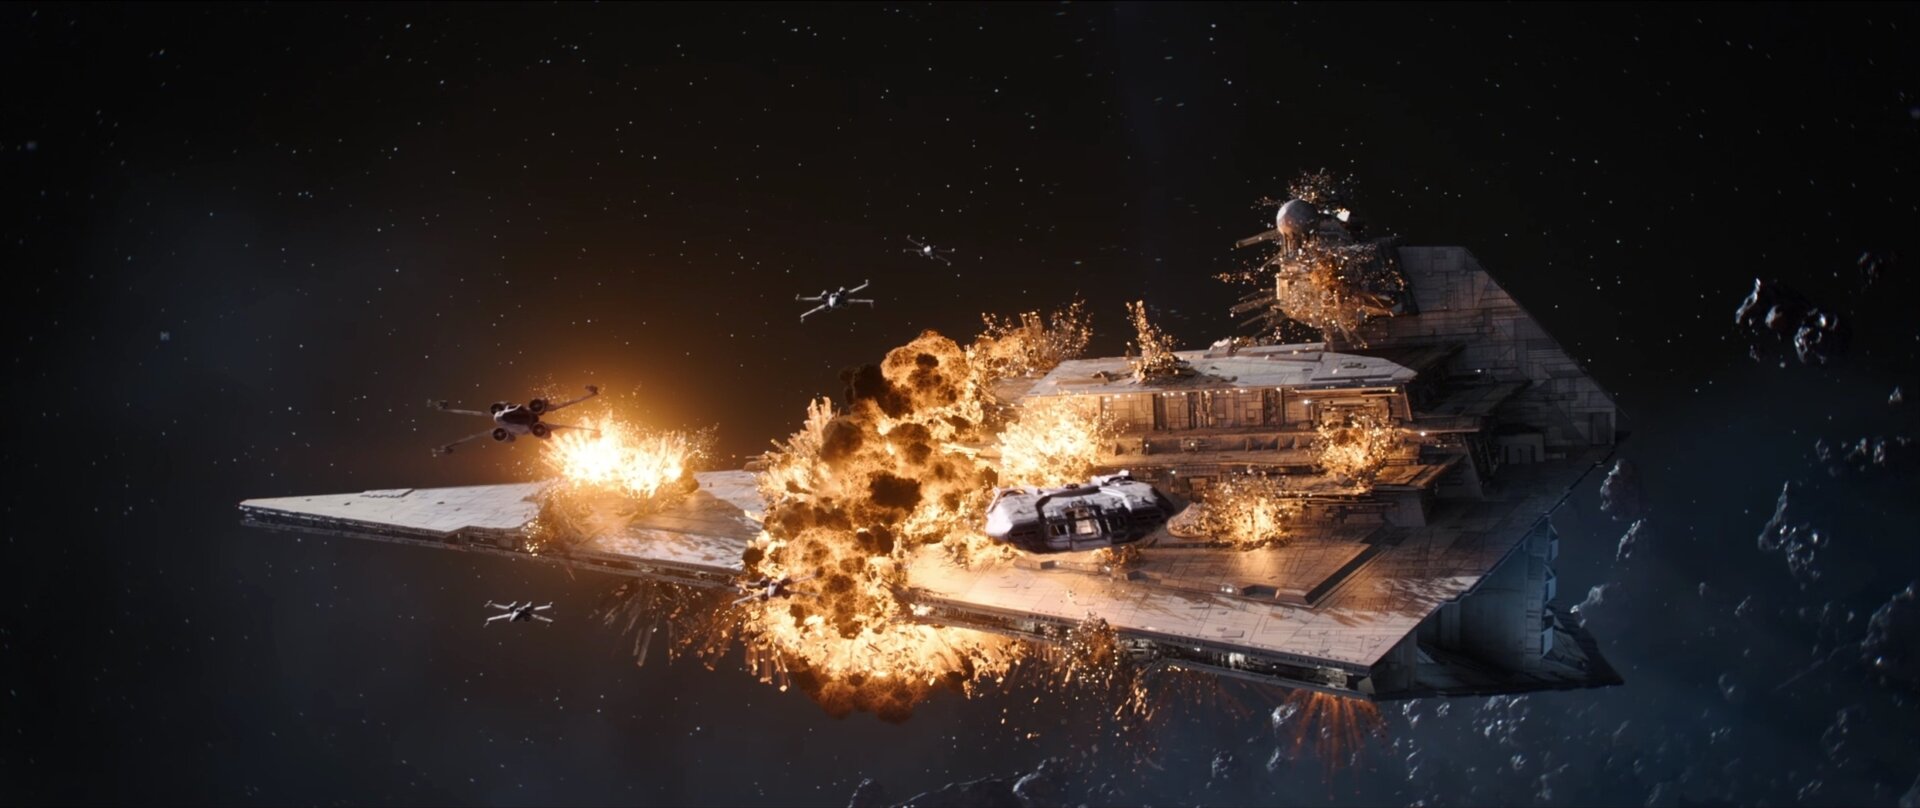
Your final task is to destroy the Revelator. If you’ve played games such as Star Wars: Rogue Squadron, Star Wars: Squadrons, or any Star Wars game with space combat, then you know the drill.
Take out the two shield generators attached to the top of the bridge. If you followed my advice about destroying the turbolasers early on, this task is child’s play.
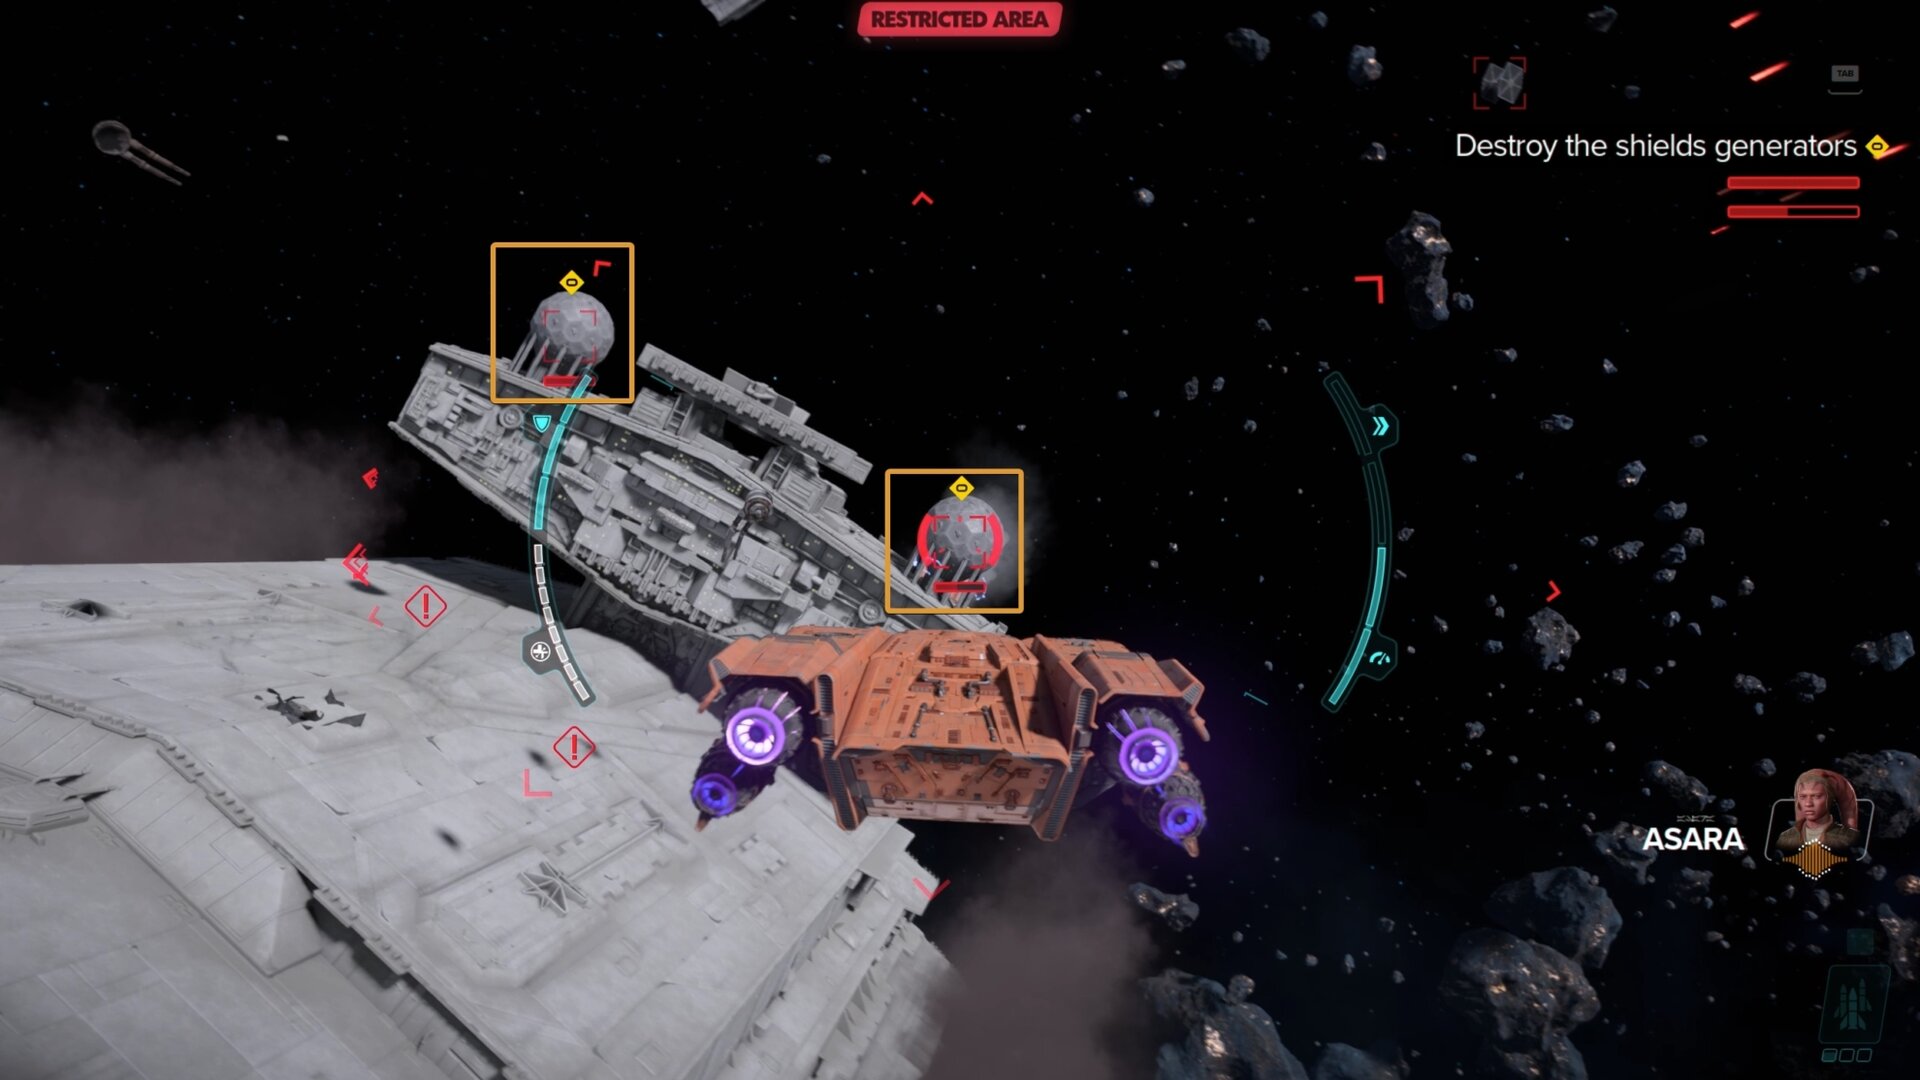
When both the shield generators are down, go underneath the Revelator and take out the reactor.
With the Revelator destroyed, Akiva, the Rebel Alliance, and most importantly Nix, are safe. Enjoy the remaining cutscenes, relax, and give yourself a pat on the back. You can return to Akiva’s orbit and search the remains of the Revelator for chests.
If by chance you had maximum reputation with all syndicates, tell us how the cutscene plays out! I’m very curious to learn how it goes with max reputation.
This concludes the main story for Star Wars Outlaws. Now you’ll have to get out there and make your own adventures. Alternatively, you can wait for the upcoming DLC featuring Lando Calrissian and Hondo Ohnaka.
Good luck and may the Force be with you.
UNDERWORLD Quest Walkthrough
Sneaking through the Pyke District and Gorak’s Base on Toshara will definitely test your mettle far more than infiltrating the Zerek Besh stronghold on Canto Bight. To survive this you’ll need to lay low, act with caution, and act without hesitation.
NEW TRICKS Quest Walkthrough
This guide will show you how to steal the Ion Blaster Part in Star Wars Outlaws. Whether you’re stealing from the Pykes or Crimson Dawn, you’ll know where to go and what to watch out for.
FALSE FLAG Quest Walkthrough
This guide will show you how to infiltrate the Imperial Fueling Station in Star Wars Outlaws. You need to find a Data Vault inside the Imperial Station and delete some data to frame the Pyke Syndicate, but that is easier said than done.
THE WRECK Quest Walkthrough
This guide will show you how to get the Nav Computer in the Star Wars Outlaws main mission, The Wreck. Waka needs this final component to fully repair the Trailblazer and let it travel throughout the galaxy once more. The guide also gives you the locations of all treasure chests in the area.
THE SAFECRACKER Quest Walkthrough
This guide will show you how to complete the quest, The Safecracker, in Star Wars Outlaws. Kay needs to find a safecracker named Ank on Kijimi, however, the Ashiga Clan has a strong presence on the planet and it might make the search for Ank difficult.

BREAKOUT Quest Walkthrough
This guide will show you how to break out the Safecracker, Ank, in Star Wars Outlaws. After returning the relic to the Ashiga Clan, Krisk offers a proposal to help you get Ank back for your needs.
THE HIVE Quest Walkthrough
This guide will show you how to complete the Star Wars Outlaws quest, The Hive. To recruit Ank for the heist scheme, you’ll need to help her with her current job of blasting a hole through the Ashiga Clan Queen’s stronghold on Kijimi.

THE HEAVY Quest Walkthrough
This guide will show you how to complete the Star Wars Outlaws quest, The Heavy. Kay is in search of a potential crew member for Jaylen’s heist mission, though tracking down The Heavy will have you traveling to Tatooine.

PARTNERS Quest Walkthrough
This guide will show you how to complete the Star Wars Outlaws quest, Partners. After rescuing Hoss from the Tuskens, you must meet up with him at Mos Eisley on Tatooine, but trouble seems to follow Hoss around.

JABBA'S FAVOR Quest Walkthrough
This guide will show you how to complete the quest Jabba’s Favor in Star Wars Outlaws. Jabba needs you to find the identity of a spy in his palace, and the only way to determine this is to access the databanks of Fort Sunfire on Tatooine.
THE DROIDSMITH Quest Walkthrough
This guide will show you how to complete the quest, The Droidsmith, in Star Wars Outlaws. Kay is in search of a Droidsmith to join her crew that can help with Jaylen’s heist on the Zerek Besh stronghold on Canto Bight.

THE SCAVENGER Outlaws Walkthrough
This guide will show you how to unlock and complete the quest The Scavenger in Star Wars Outlaws. Temmin Wexley, the Scavenger Expert, will be able to give Kay upgrades that help her in a wide variety of fields.
VIPER Quest Walkthrough
This guide will show you how to complete the Viper quest in Star Wars Outlaws. Before Gedeek can join Kay’s crew as a Droidsmith for the heist, he and Kay must put an end to the Imperial’s enhanced Viper Probe Droid project.
LEGACY Quest Walkthrough
This guide will show you how to complete the quest, Legacy, in Star Wars Outlaws. ND-5 is experiencing malfunctions, so Kay and Gedeek need to find a replacement power core before ND-5 stops functioning entirely.

THE TRUTH Quest Walkthrough
This guide will show you how to complete the Star Wars Outlaws quest, The Truth. Kay and another slicer need to steal codes from Sliro while he’s having a meeting with the Empire. Only then can the crew pull off the heist on Canto Bight.
THE HEIST Quest Walkthrough
This guide will show you how to complete the Star Wars Outlaws quest, The Heist. After gathering her crew and stealing Sliro’s codes, Kay can once again attempt to break into the Zerek Besh Vault and get away with the galaxy’s biggest heist.
Related Star Wars Outlaws Collections of Guides

Our Guides Master List for Star Wars Outlaws is a great starting point. In it you will find all of our guides and walkthroughs ordered in categories.