You’ll learn how to unlock the various Trailblazer Upgrades and Systems in Star Wars Outlaws, including the more elusive components. We’ll also provide you with several builds for your Trailblazer.
Table of contents
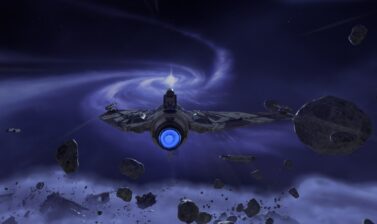
Why you should upgrade the Trailblazer
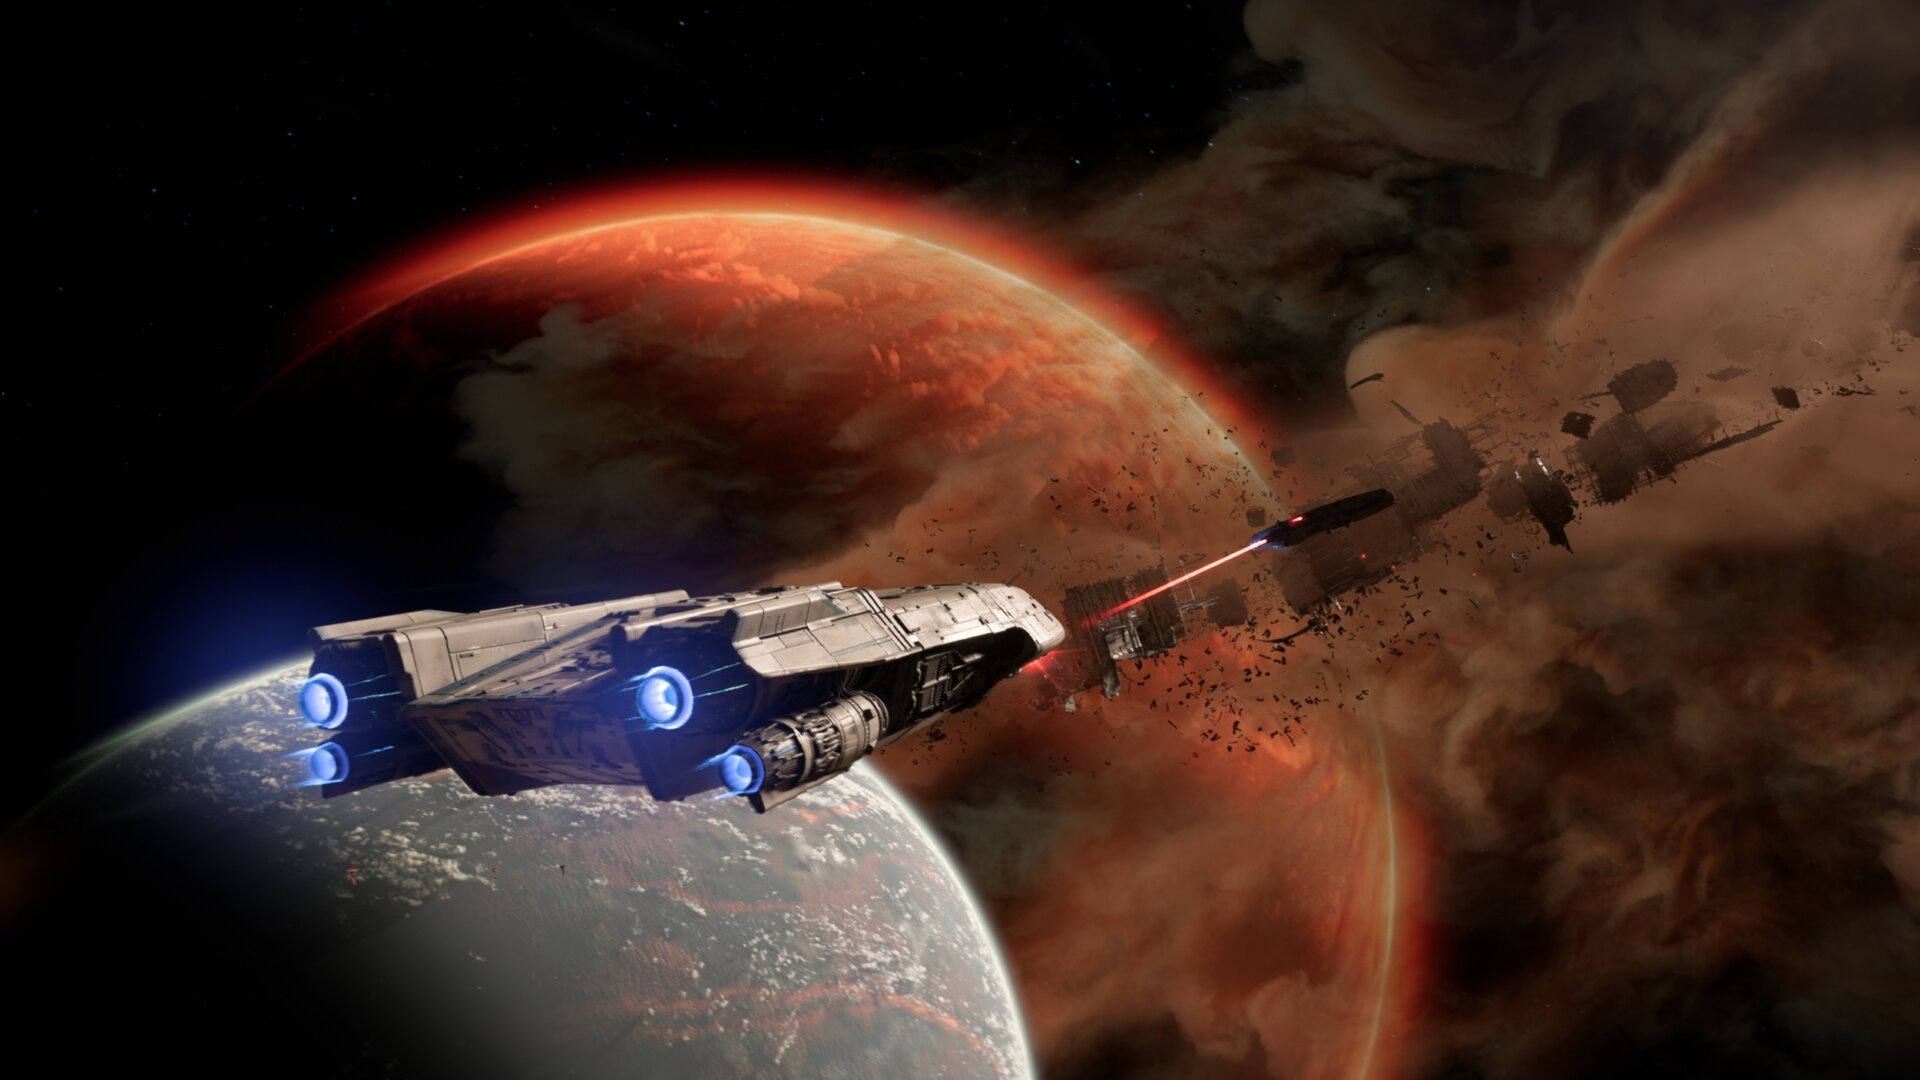
It’s worthwhile to upgrade the Trailblazer is if you’re enjoying being in space. However, some story quests, side missions, and contracts happen in space. You can’t avoid the Trailblazer completely if you want to beat the game.
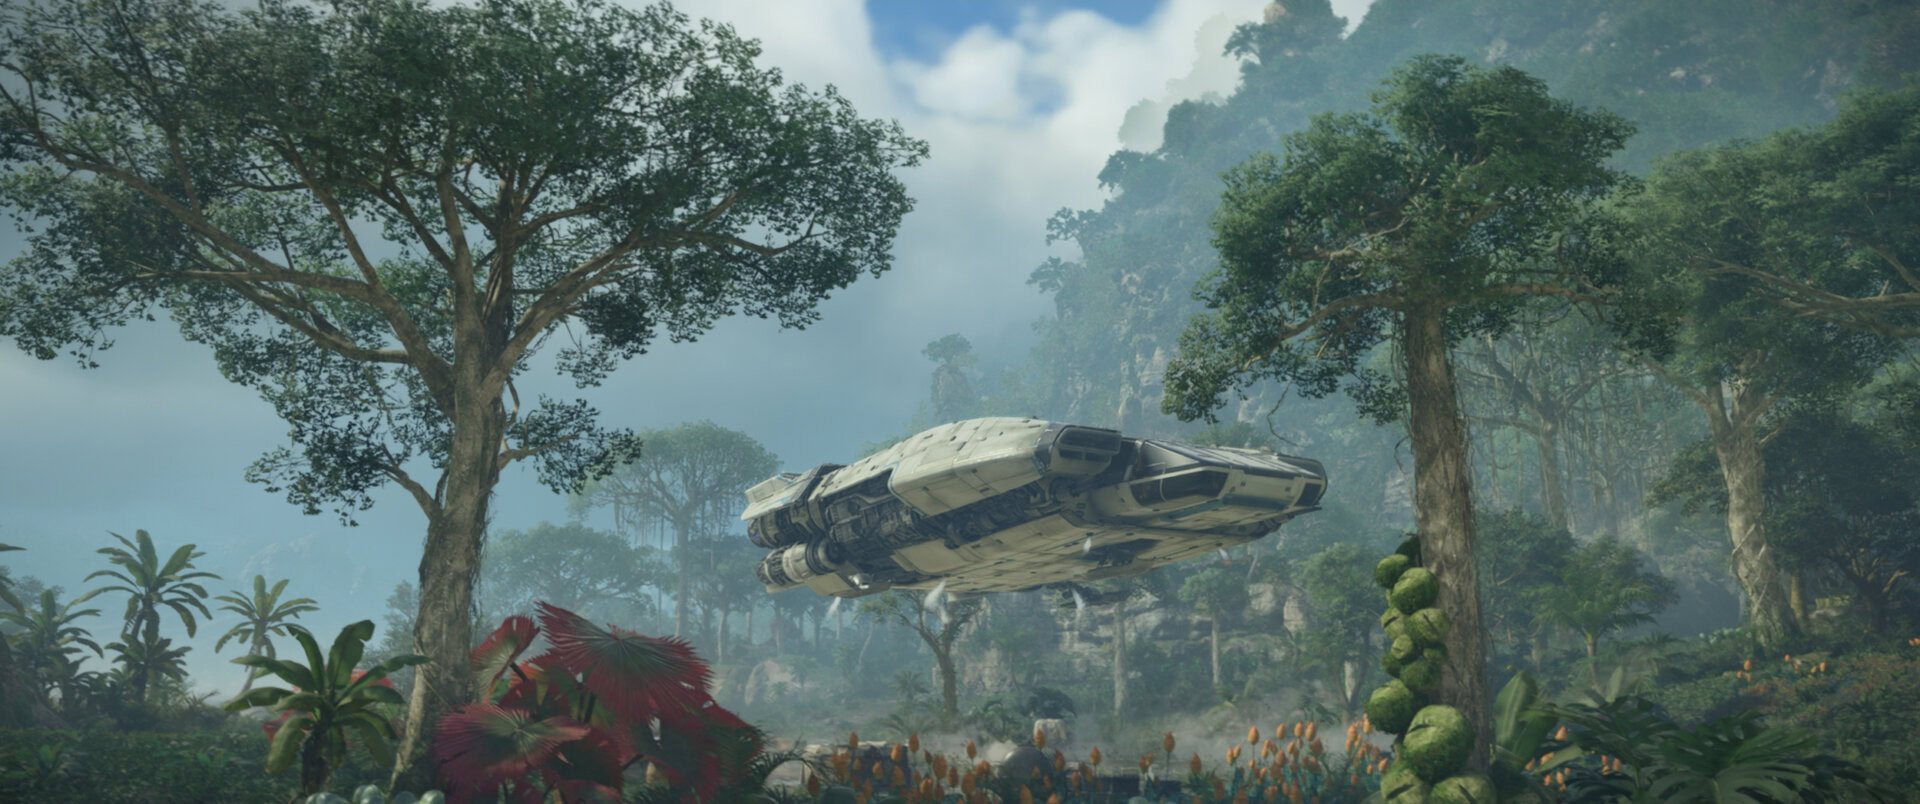
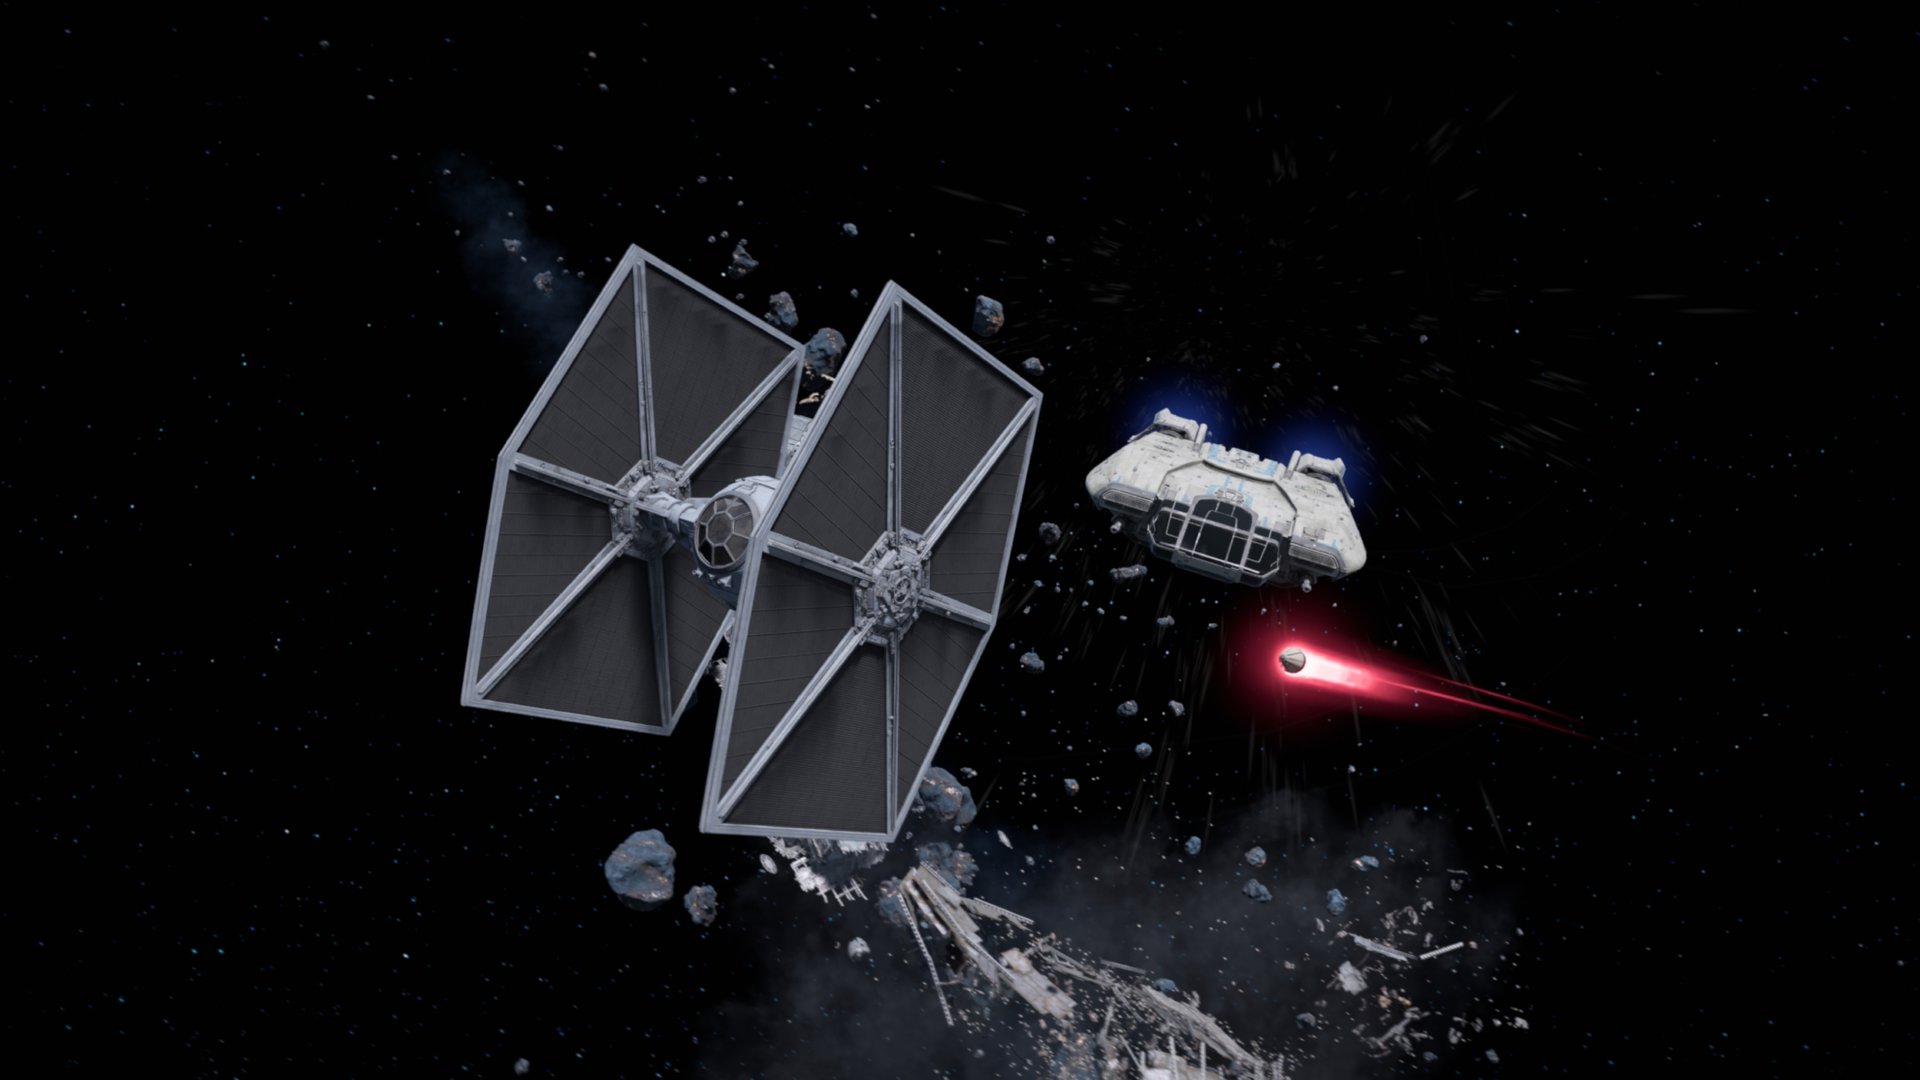
Some high-risk jobs require you to face multiple fighters and even a couple of cruisers. Having an upgraded Trailblazer helps to make these tasks much easier, and space is the main place to find upgrades for your starship.
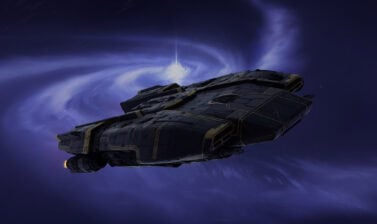
Upgrading and Modifying the Trailblazer
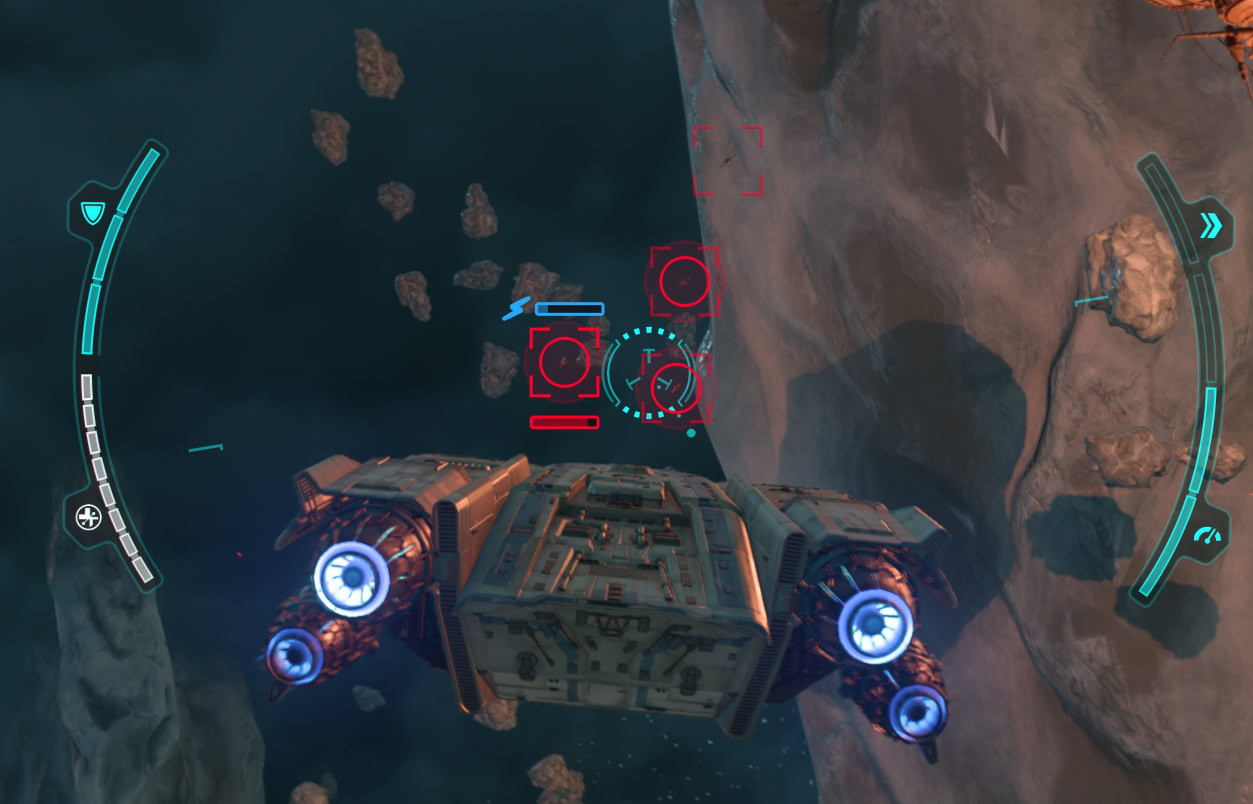
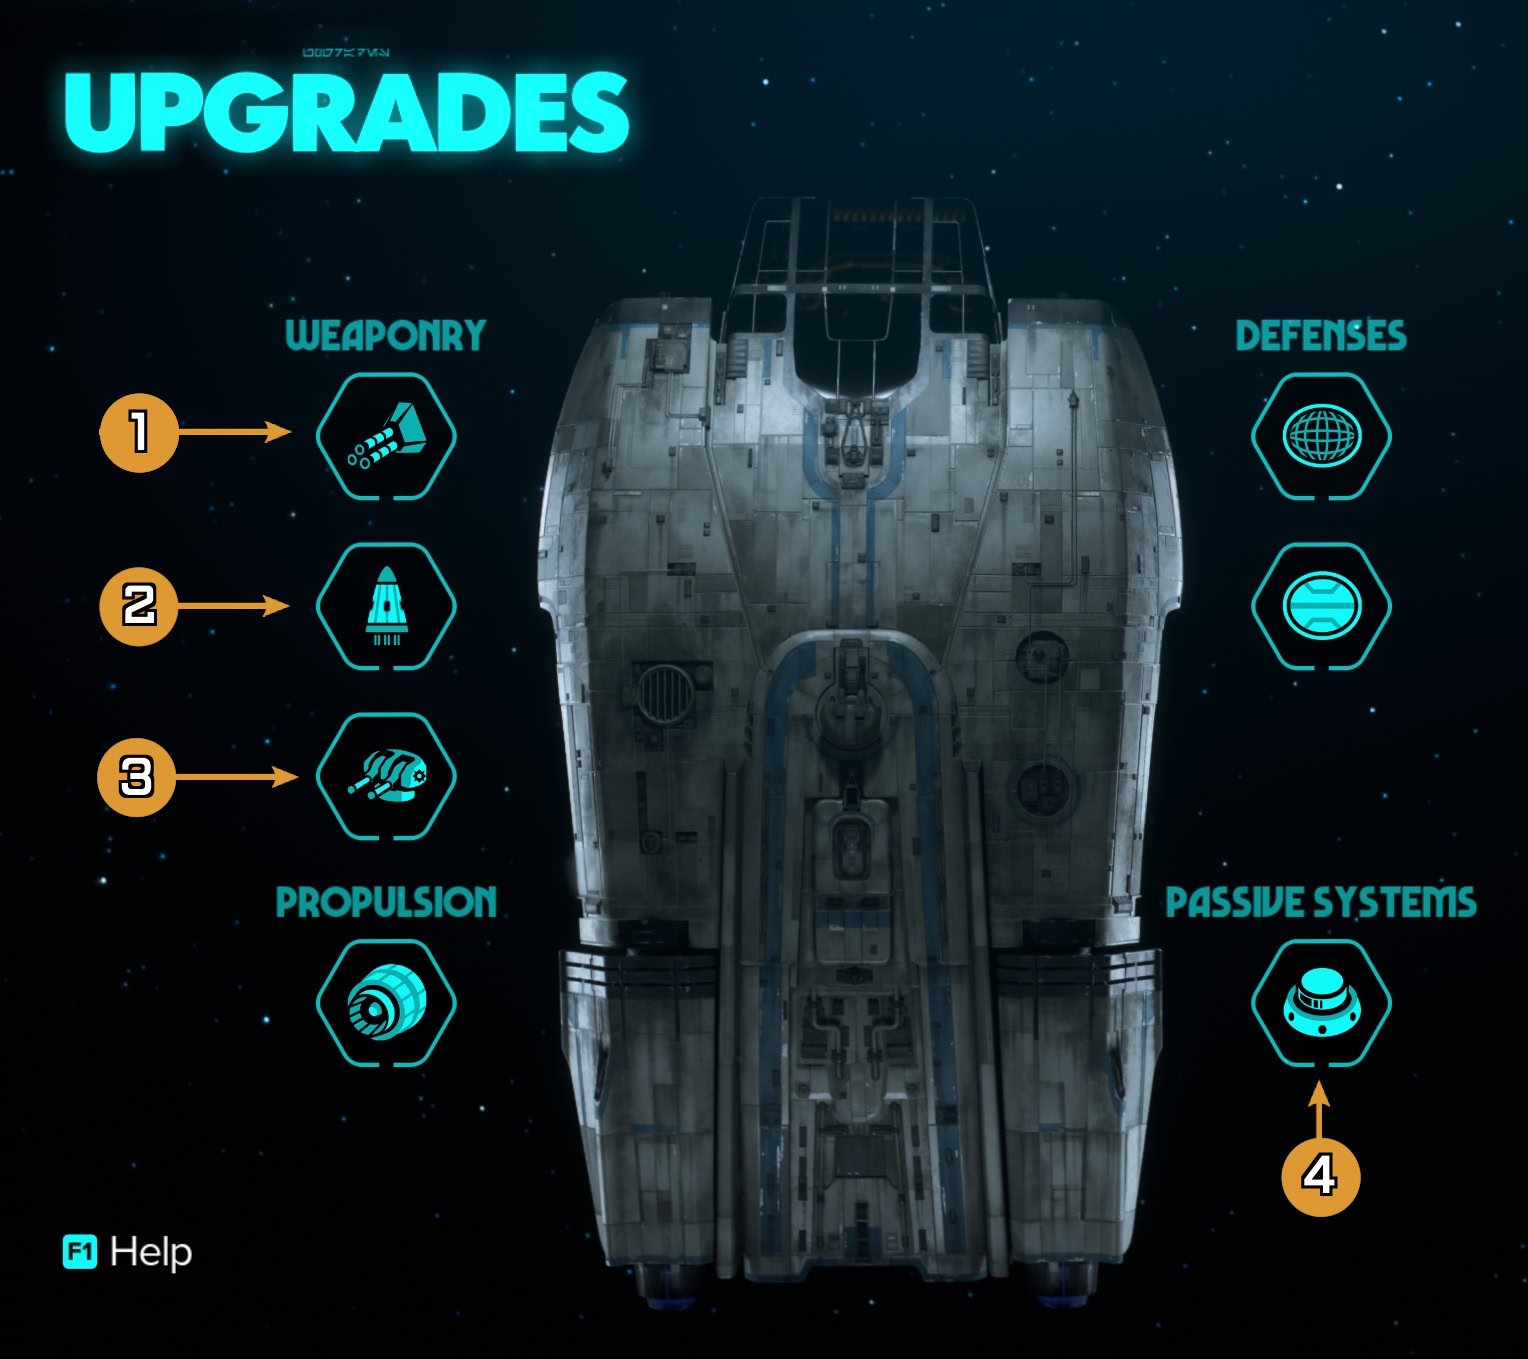
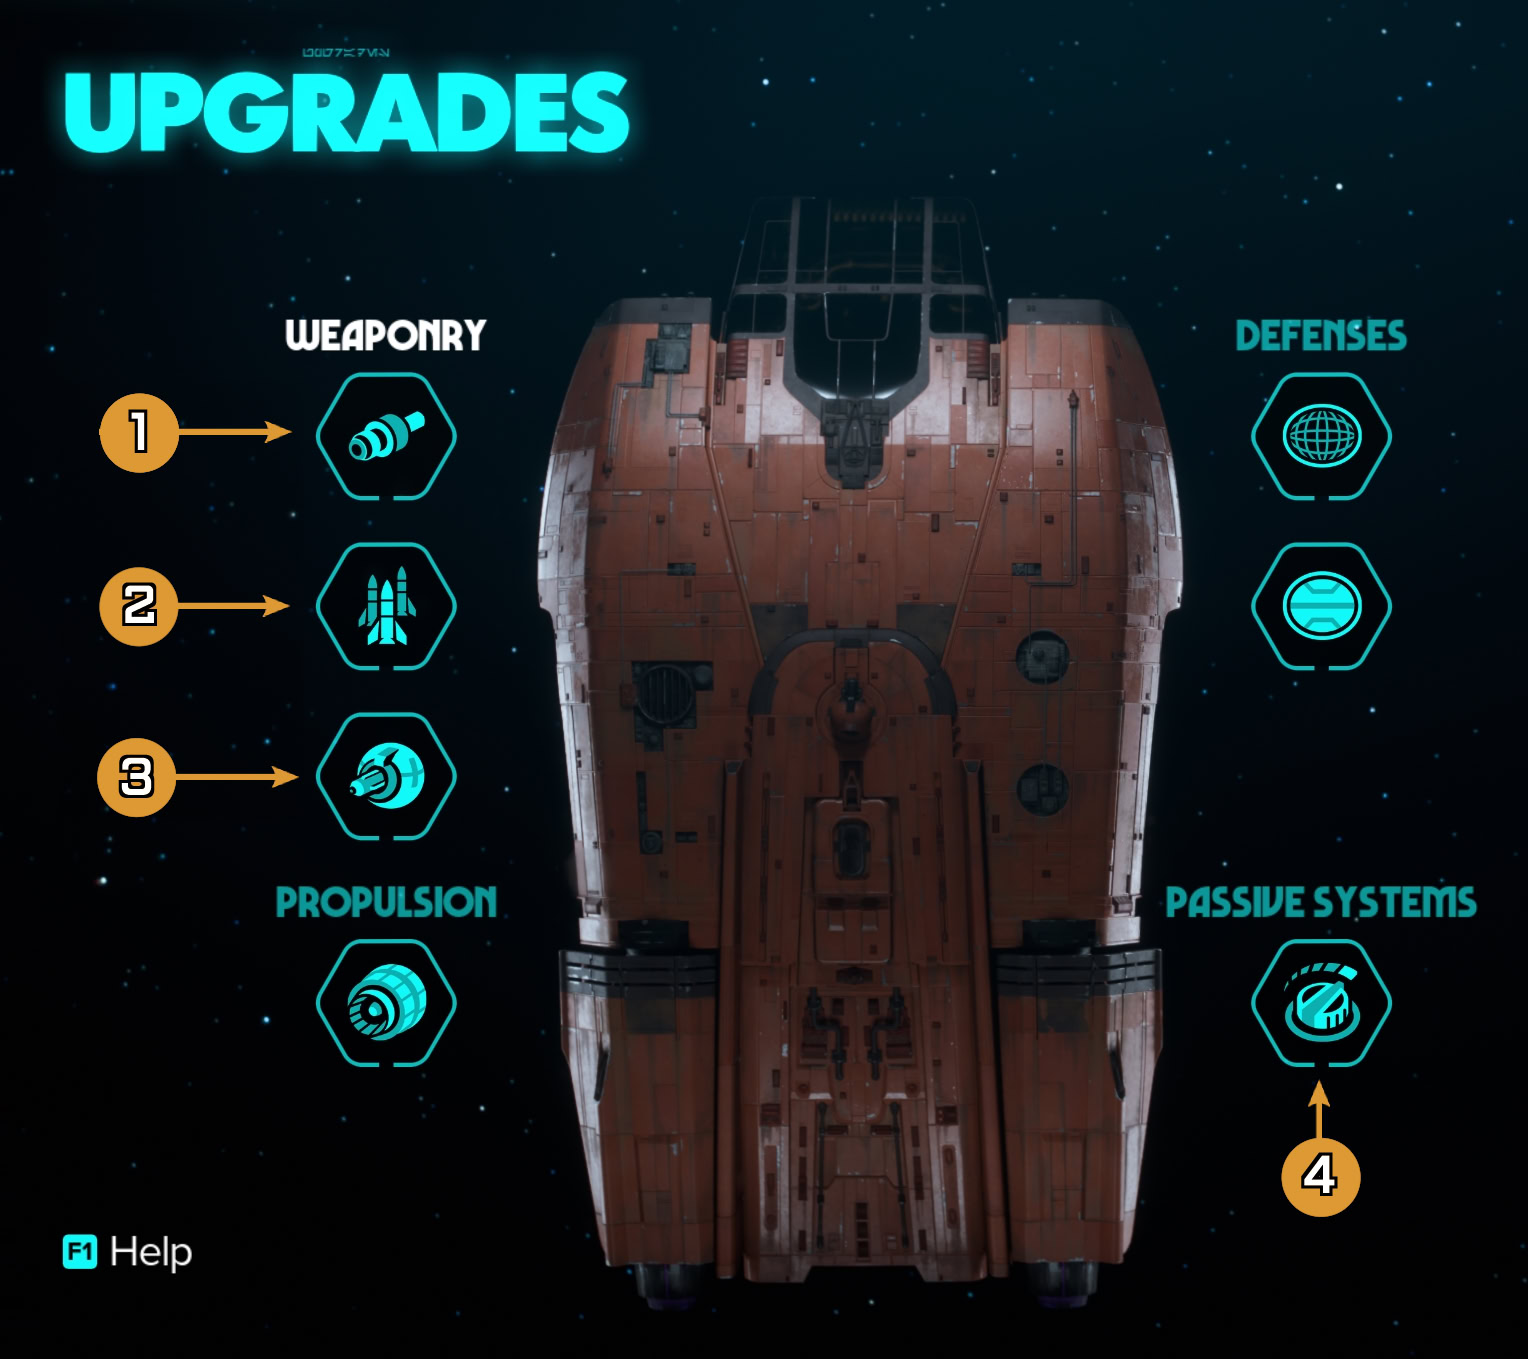
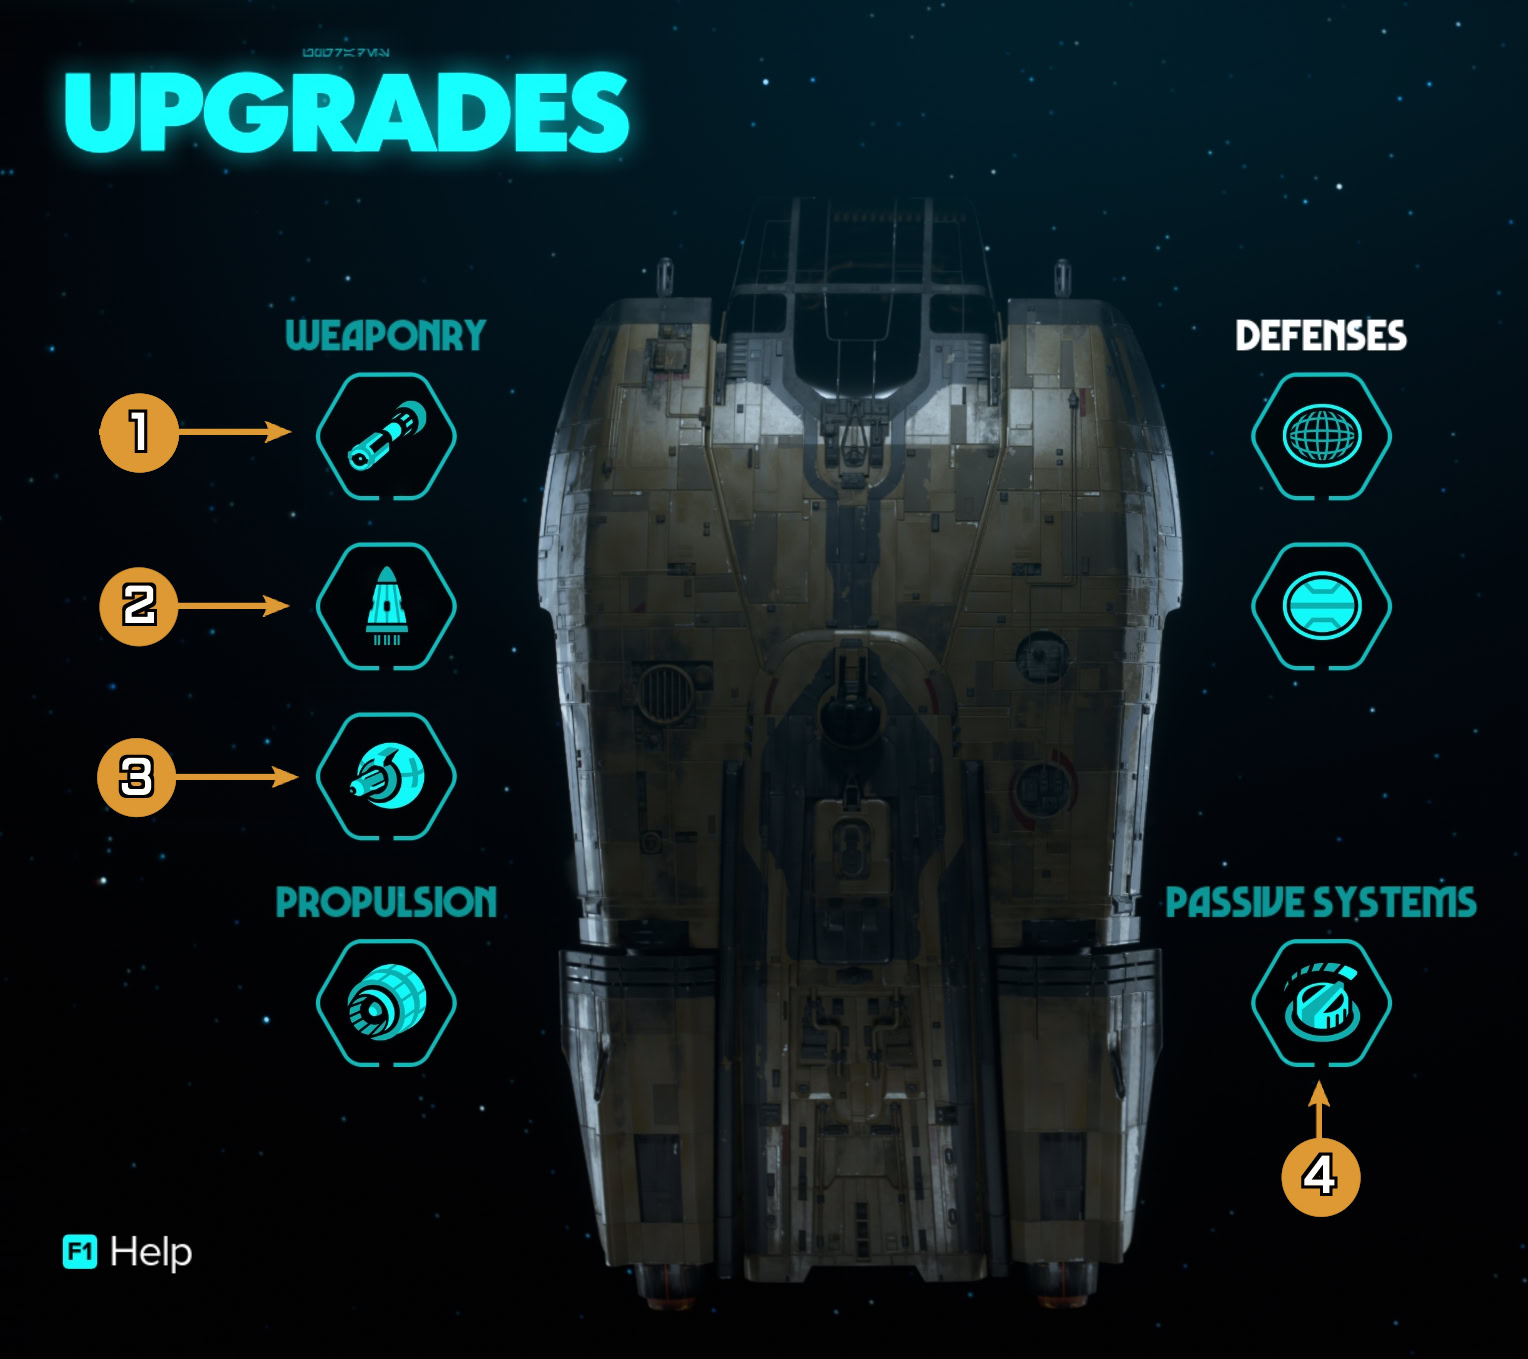
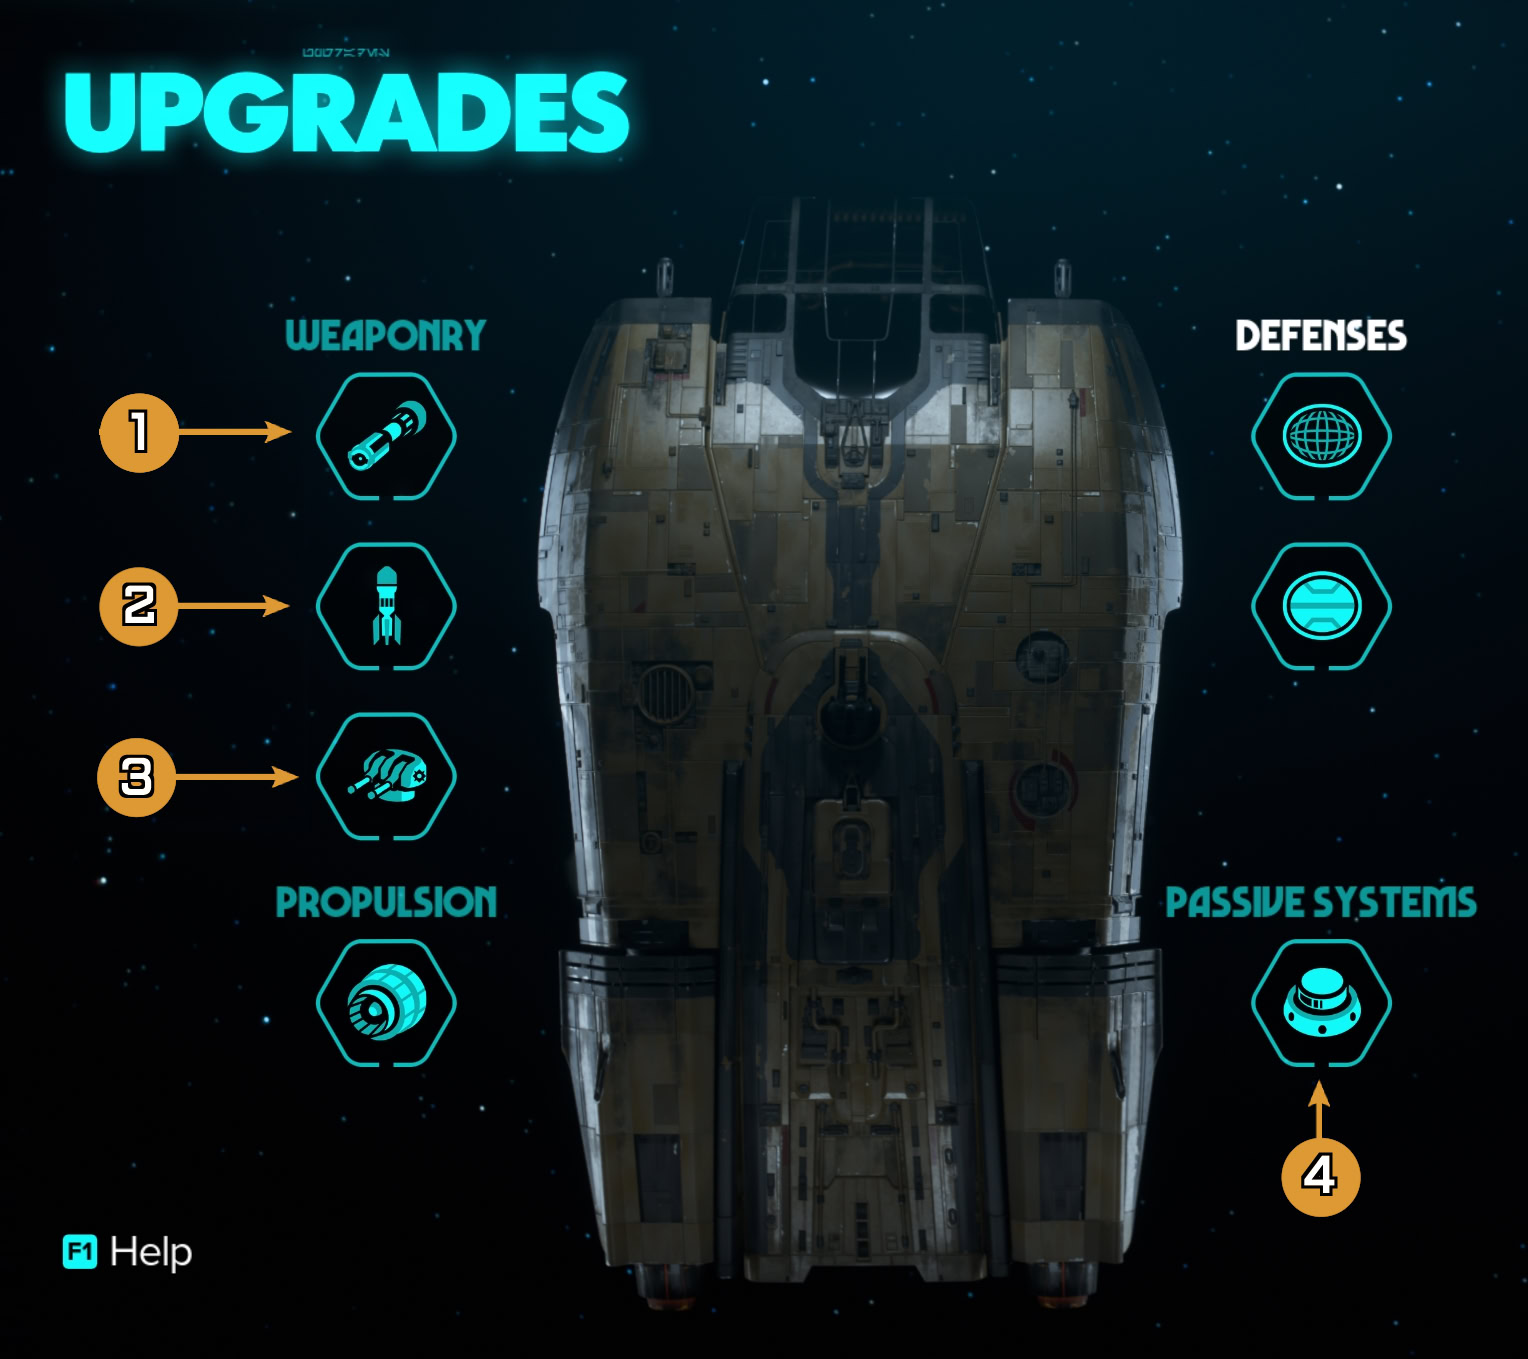
You can view which systems and subsystems you can modify and upgrade on the Trailblazer through the Vehicles menu. Upgradable systems include Weaponry, Propulsion, and Defenses.
You can swap out Weapon, Active, and Passive System Modules to give your ship different characteristics just like you can for your blaster.
Unlike your Loadout on the ground, you can swap Modules mid-combat. However, they will be placed on a fresh cooldown, and you can only upgrade your modules with a ship engineer.
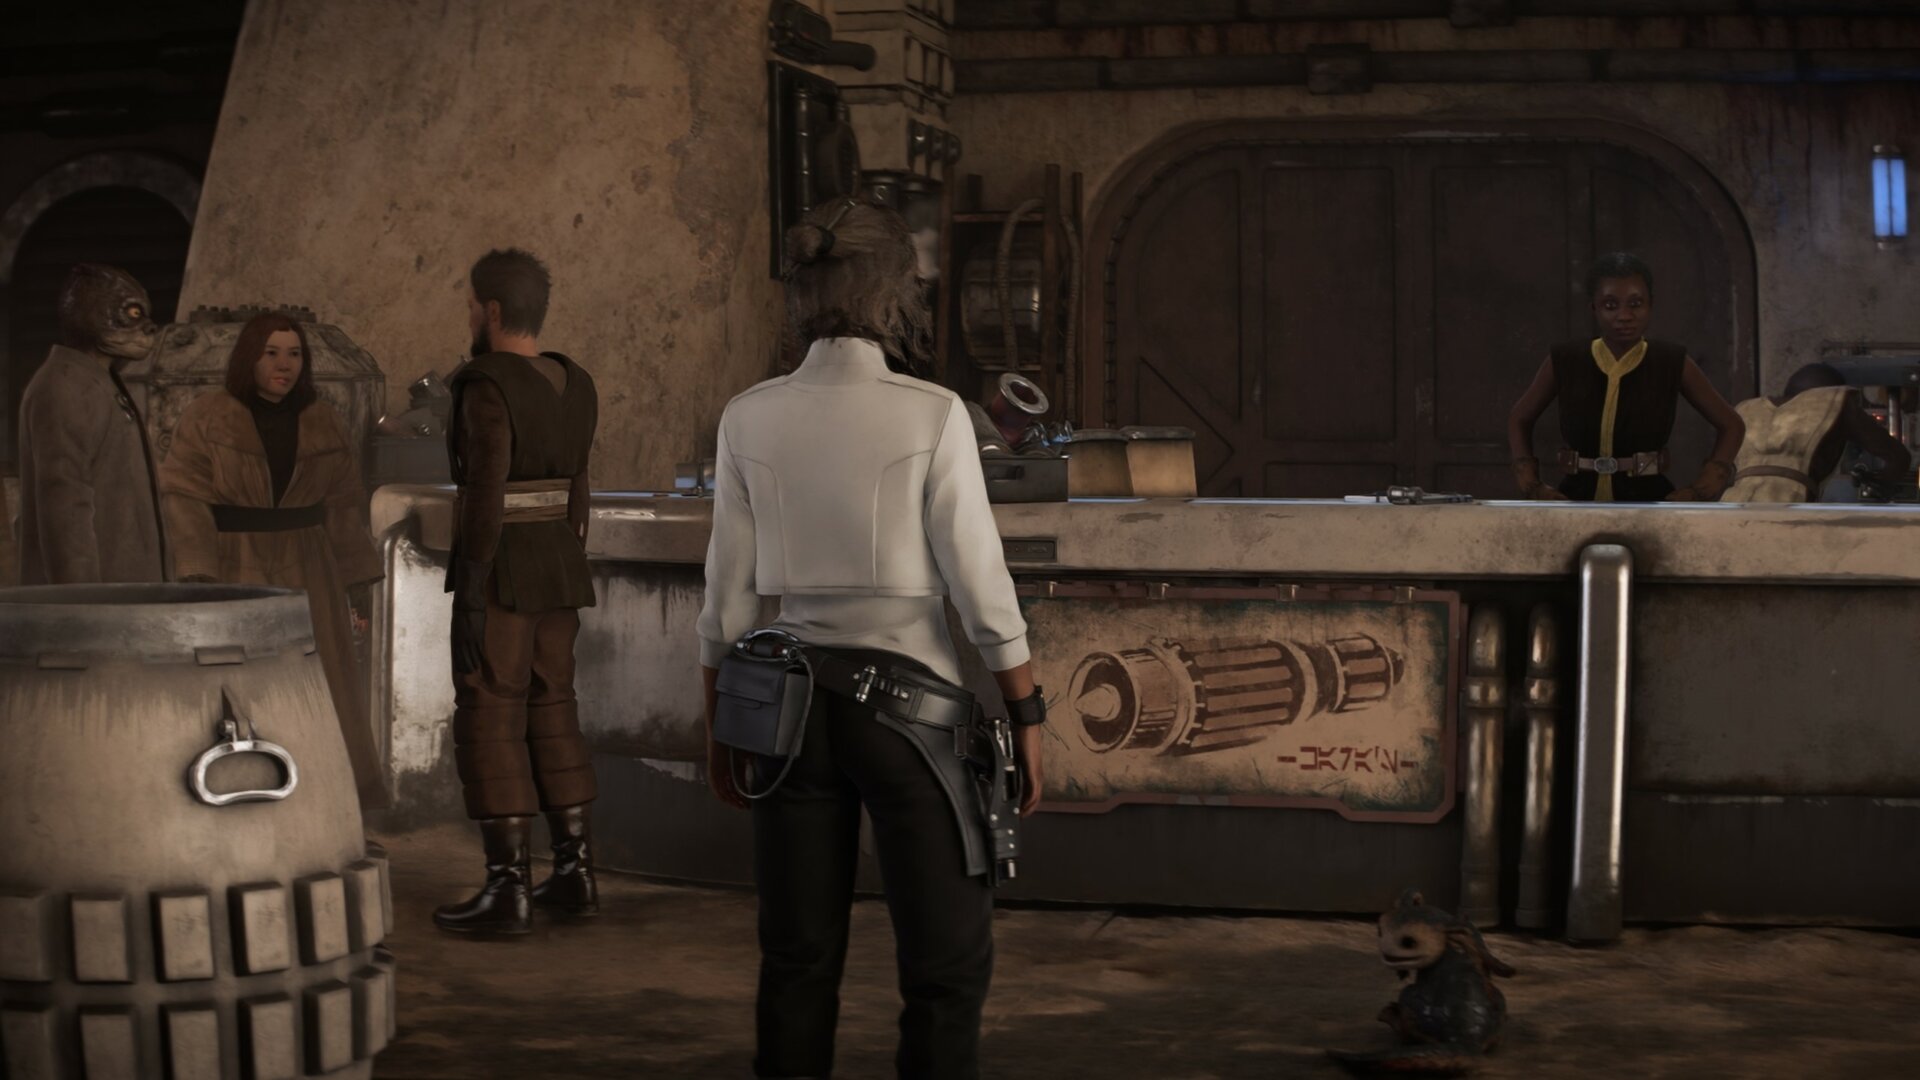
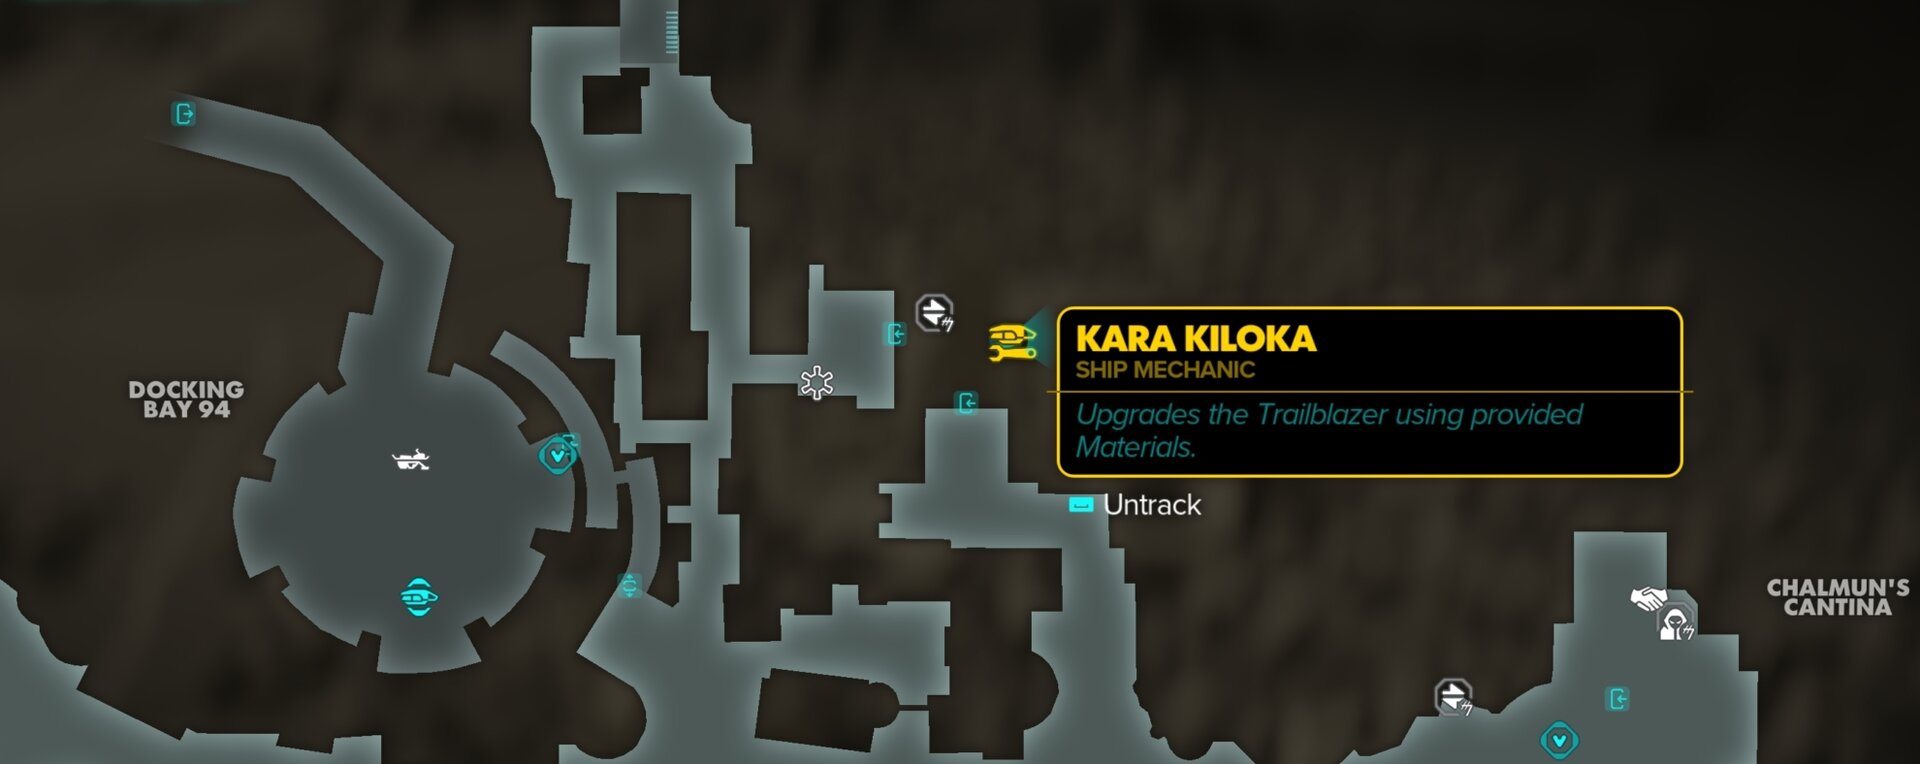
Ship engineers are almost always found near major landing pads, sometimes only a few steps away from your ship. You can find ship engineers at the following locations:
| Vendor | Planet | Location |
|---|---|---|
| Ava Wobin | Toshara | Mirogana |
| Doni Laro | Toshara | Jaunta’s Hope |
| Lendha Drefty | Toshara | Pyke Poaching Station |
| Lendha Drefty | Toshara (Orbit) | Renpalli Station |
| Benyah Melax | Kijimi | Kijimi City |
| Jas Wit’u | Akiva | Myrra Spaceport |
| Sibe Trulac | Akiva (Orbit) | Achra Station |
| Kara Kiloka | Tatooine | Mos Eisley |
Weaponry
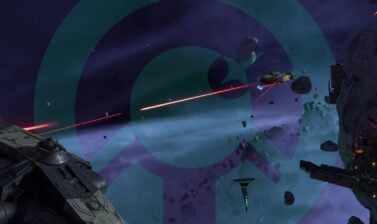
The Trailblazer’s weapon systems are the most numerous and customizable. There are 3 types of cannons, 3 types of missiles, and 2 types of turrets.
Just like your blaster, each has their own strengths and weaknesses. None are strictly better than the others, though modules that are easier to use tend to be weaker. It never hurts to try them all out to see which of them you enjoy the most.
Cannons
The cannon is your primary weapon for the Trailblazer. There are 3 types of cannons available, Laser Cannons, Rapid Fire Cannons, and Plasburst Cannons. You’ll have the Laser Cannons available by default.
The following table may not be entirely visible on a small screen. If you are reading the guide on a mobile device, rotate it or scroll to the right to see the full contents of the table.
| Cannon | Damage Per Shot | Heat Consumption* | Charge Time |
|---|---|---|---|
Laser | Moderate | Poor | None |
Rapid Fire | Low | Moderate | Short |
Plasburst | High | Good | Long |
Laser Cannons
The Trailblazer starts out with the LC-50 Laser Cannons by default. So long as you hold down the trigger, they’ll fire a constant stream of bolts at your target. Upgrading the Laser Cannon improves its rate of fire.
LC-50 Laser Cannons
Overheating may occur during extended use
Requirements:
– Available by default
LC-60 Laser Cannons
A laser cannon upgrade that increases its rate of fire.
Requirements:
– 500 Credits
– x5 Durasteel
– x2 Heuristic Processor
LC-70 Laser Cannons
A laser cannon upgrade that greatly increases its rate of fire.
Requirements:
– BT-009S Fastshot Trigger
– 15x Slivian Iron
– MG-2 Power Exceeders
Laser Cannons offer the most responsiveness and granular control over your damage output. However, they require you to stay on target for an extended period and can’t hit multiple enemies at the same time.
Rapid Fire Cannons
The Rapid Fire Cannons fire brief volleys of laserfire at all targets in front of you. To fire it, press and hold your fire button and it’ll charge up and select targets in front of you. Release the fire button to shoot a volley of shots at your target(s).
C-K10A Rapid Fire Cannons
An upgraded laser cannon that fires bursts at multiple targets.
Requirements:
– 750 Credits
– x10 Quadanium
– x4 Enhanced Durasteel Hull
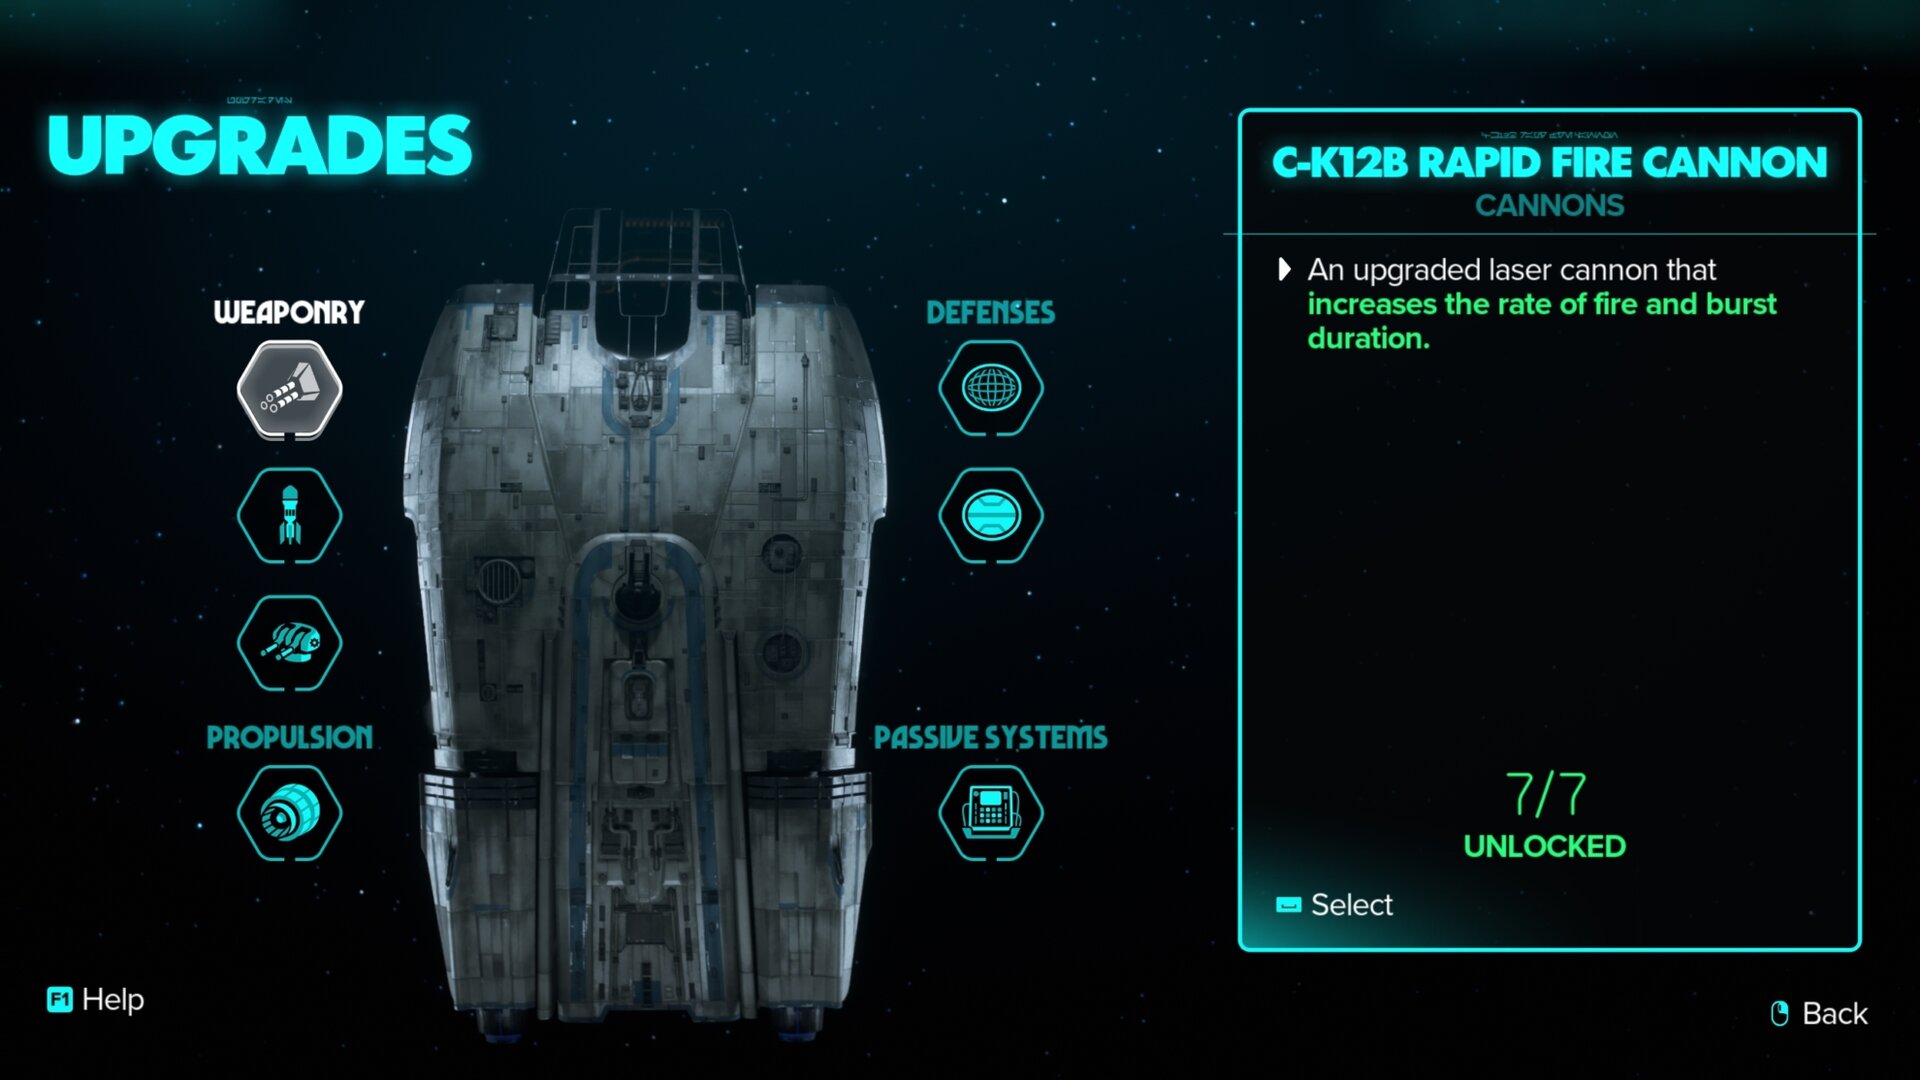
C-K12B Rapid Fire Cannon
An upgraded laser cannon that increases the rate of fire and burst duration.
Requirements:
– 2,000 Credits
– X-FP-C28 Ship Computer
– x20 Quadanium
– x8 Heuristic Processor
Due to the limited number of lasers per volley, spreading out the shots on multiple targets means you’ll do less damage per target than if you were just targeting one. It’s great to use if you’re struggling to aim with other cannons.
Plasburst Cannons
Like the Rapid Fire Cannons, the Plasburst Cannons require you to charge your shots, though the charge time is longer, and they can only hit one enemy at a time. You’ll have to manually aim at your target and then release when ready to fire.
C-5B Plasburst Cannon
An advanced laser cannon that adds a charge function to deal great damage.
Requirements:
– 750 Credits
– x10 Quadanium
– x4 4XB Calculation Unit
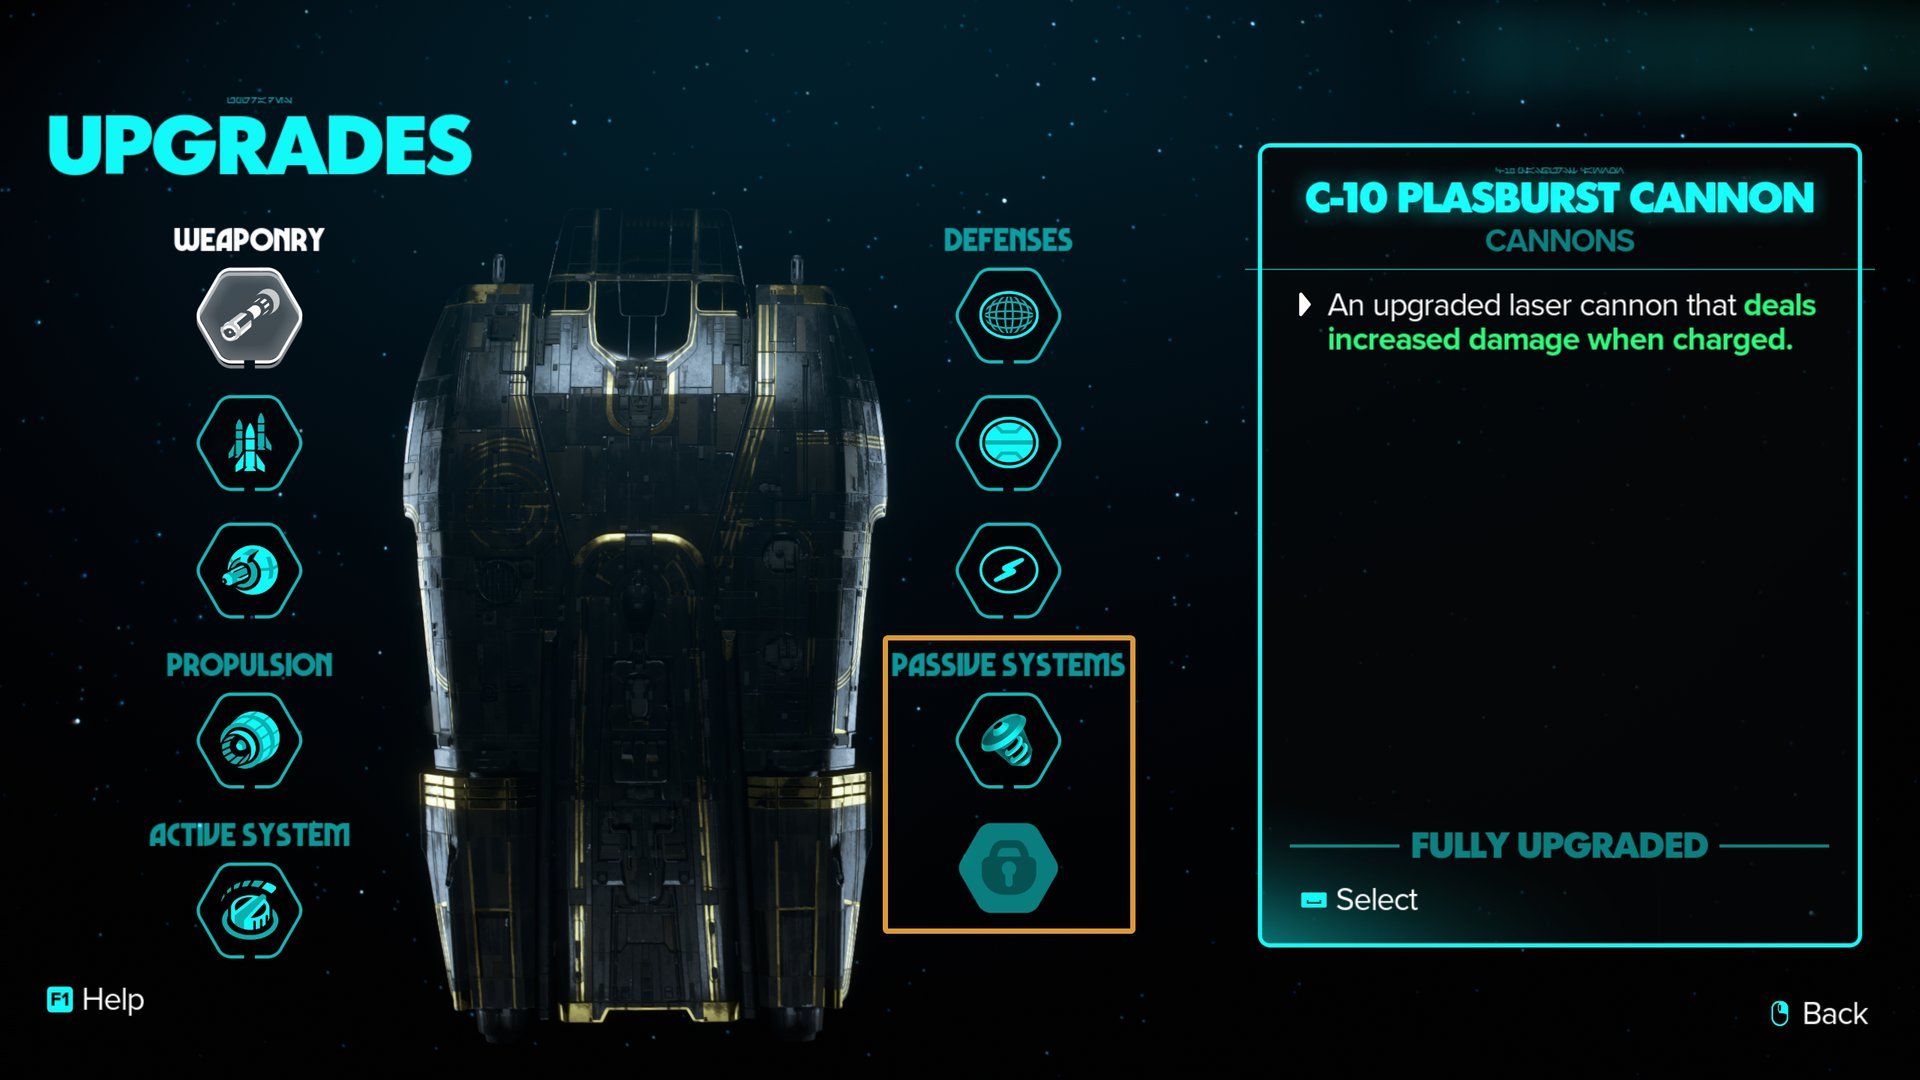
C-10 Plasburst Cannon
An upgraded laser cannon that deals increased damage when charged.
Requirements:
– 2,000 Credits
– X-FP-C28 Ship Computer
– x20 Quadanium
– x8 Heuristic Processor
The Plasburst Cannons deal large amounts of damage on a target and can destroy most ships in a single shot, but they require more skill to use effectively. You can fire around 4 fully charged shots before overheating.
Launcher
The Launcher can be used to lock on and fire Concussion and Cluster Missiles, Torpedoes, or Ion Missiles that home towards your target. These are great for easily taking down starfighters or dealing good chunks of damage to cruisers and freighters.
Just like with the Cannons, each type of ordnance deals varying amounts of damage and comes with its own strengths and weaknesses.
The following table may not be entirely visible on a small screen. If you are reading the guide on a mobile device, rotate it or scroll to the right to see the full contents of the table.
| Launcher Ammunition | Damage Output | Reload Time | Homing Speed | Utility |
|---|---|---|---|---|
Cluster Missiles (x3) | Moderate | Medium | Fast | Multi-target |
Proton Torpedoes (x2) | High | Long | Slow | High damage |
Ion Missiles (x4) | Low | Short | Fast | Disables Ships |
Concussion and Cluster Missiles
These are your basic missiles that can one-shot unshielded starfighters. When fully upgraded, you can use them to lock onto 3 separate targets.
M-52 Concussion Missiles
An agile missile type that deals light damage to enemies.
Requirements:
– Available by default
M-72 Concussion Missiles
An upgrade to missiles that increases the damage.
Requirements:
– 750 Credits
– x10 Durasteel
– x4 4XB Calculation Unit
CM-2 Arana Cluster Missiles
An upgrade to the missiles that locks on multiple targets.
Requirements:
– 2,000 Credits
– X-FP-C28 Ship Computer
– x20 Quadanium
– x8 Enhanced Durasteel Hull
These missiles deal a solid chunk of damage to larger ships and have a moderate reload time. However, they deal less damage than Torpedoes and don’t offer additional utility like Ion Missiles. These drawbacks are minor, though, as they work well against everything.
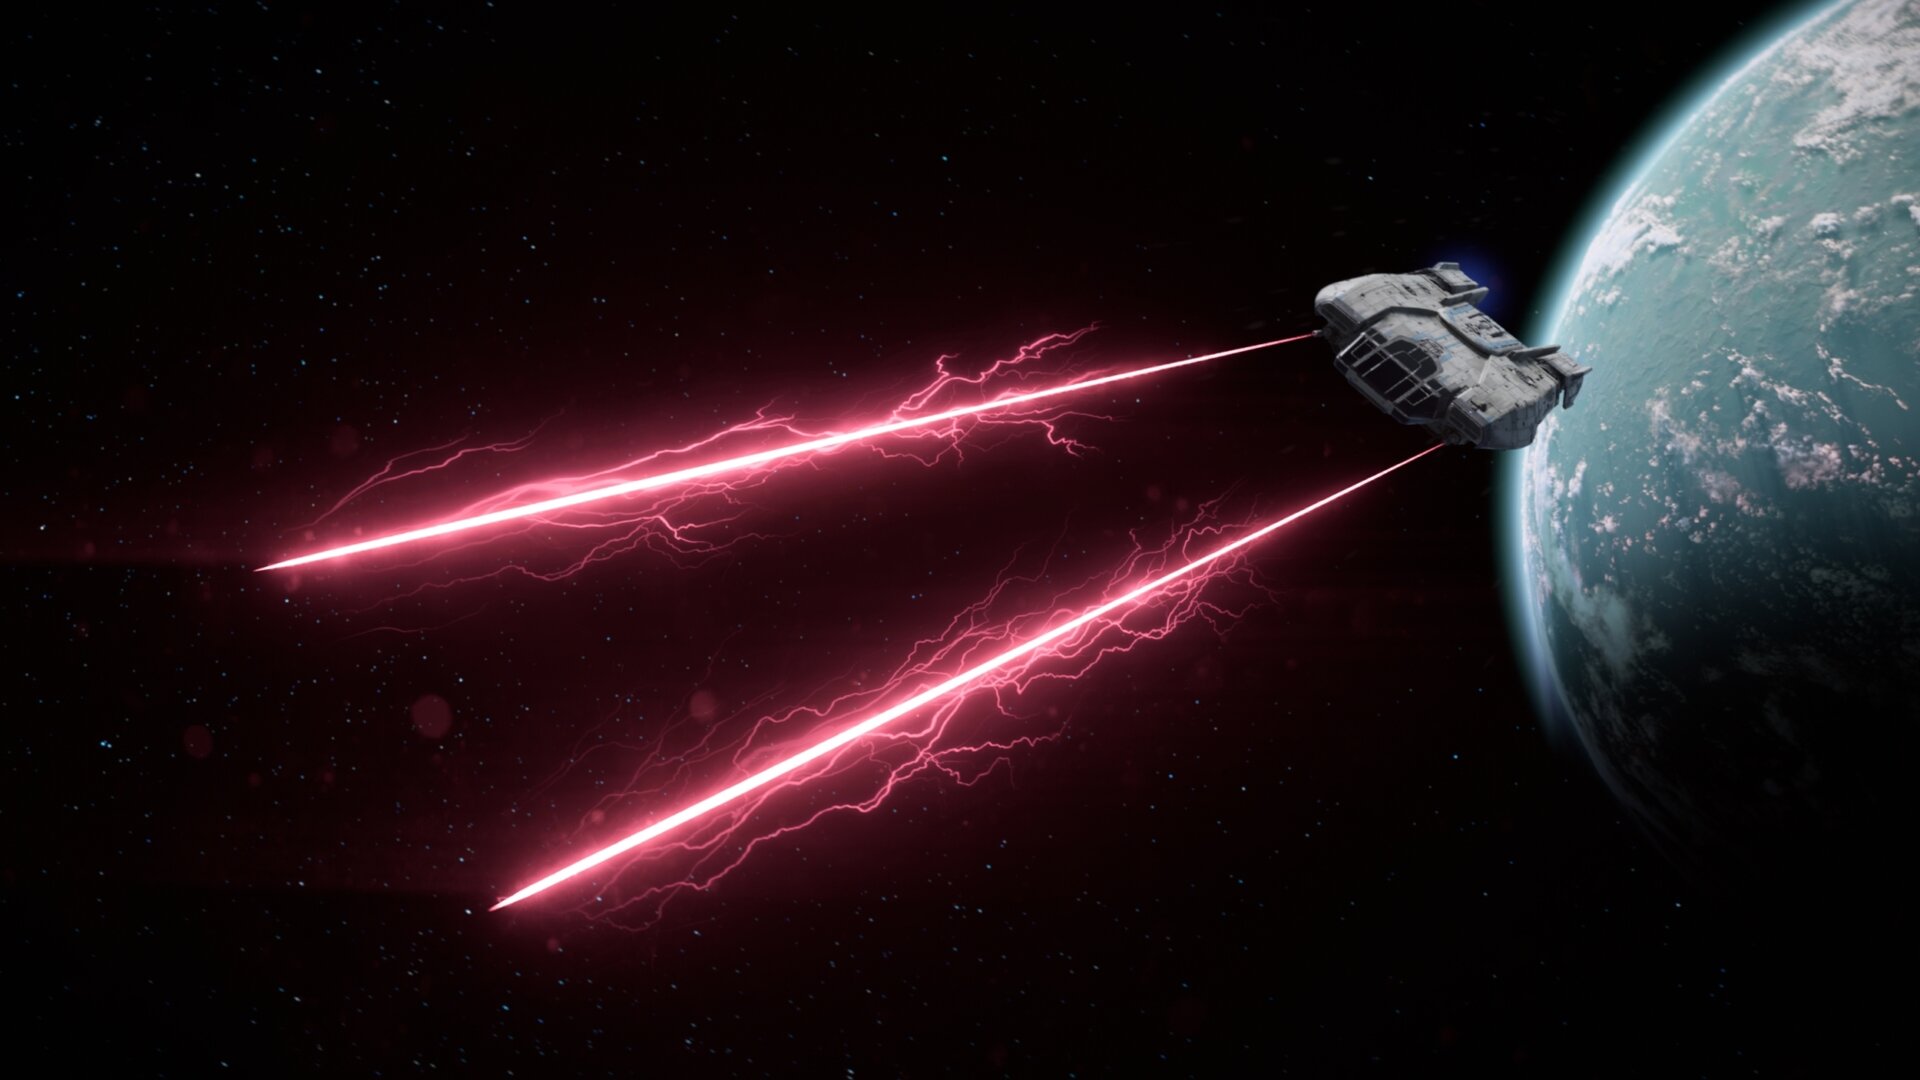
Torpedoes
Torpedoes have long reload times, worse homing capabilities, and deal far more damage than required to dispatch regular fighters, though their explosions are large enough to take out multiple craft if they’re close enough. You can hold up to 2 Torpedoes at a time.
T-350 Torpedoes
A less maneuverable missile type that deals great damage in a big explosion radius.
Requirements:
– 1,000 Credits
– x10 QUadanium
– x4 4XB Calculation Unit
PT-240 Proton Torpedoes
An upgrade to missiles that increases the damage, explosion radius, and maneuverability.
Requirements:
– 2,500 Credits
– X-FP-C28 Ship Computer
– x25 Quadanium
– x12 Enhanced Durasteel Hull
Their high damage is only useful for obliterating Systems on enemy freighters, freighters, and syndicate starfighters. You need to be more judicious and conservative with your Torpedoes compared to the other two types of ordnance.
Be conscientious of the more physicalized and realistic nature of Torpedoes. Their homing and travel speed is slow enough that they can crash into space debris before reaching their target. The explosions can also deal damage to friendlies.
Ion Missiles
Ion Missiles deal less damage and aren’t enough to defeat anything but the weakest ships on their own, but they’re great for making them incapable of fighting back. Ionized ships lose power to their systems, disabling their Shields, Weapons’ targeting systems, Engines, and Hyperdrive.
M-IO4 Ion Missiles
A missile type with ionized energy that disables ships.
Requirements:
– 1,000 Credits
– x15 Quadanium
– x7 Heuristic Processor
M-IO8 Ion Missiles
An upgrade to the missiles that increases damage and effectiveness.
Requirements:
– 2,500 Credits
– X-FP-C28 Ship Computer
– x25 Quadanium
– x4 4XB Calculation Unit
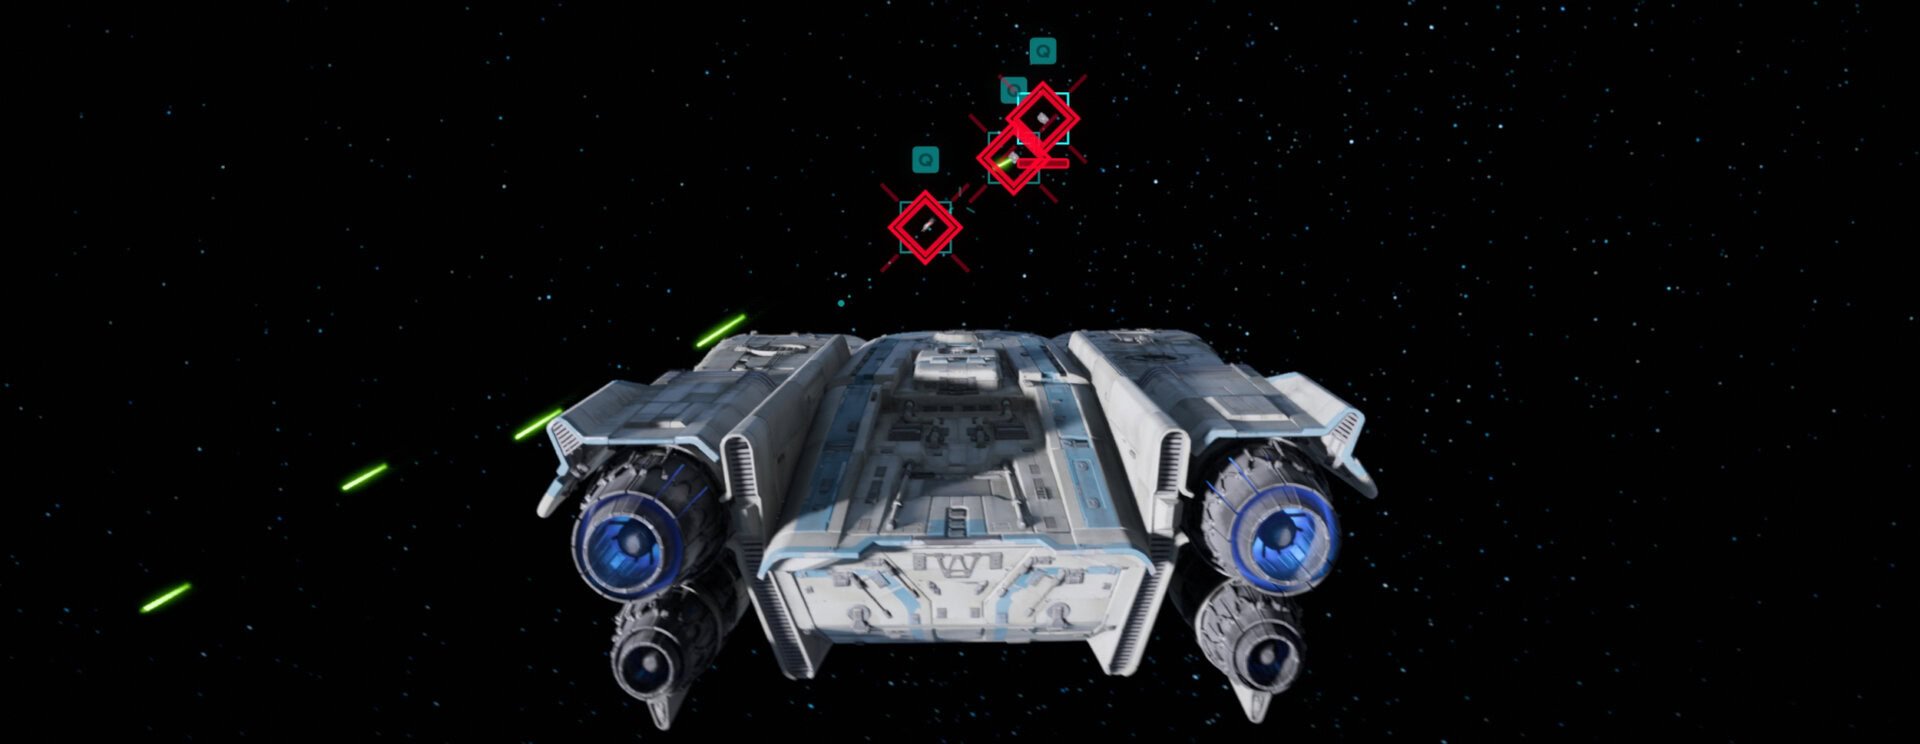
One Ion Missile is enough to disable smaller ships, but larger ones require multiple. You can tell when a ship is ionized because a blue bar next to a lightning bolt will fill up.
These work best in conjunction with the Plasburst Cannons and Laser Turret. It’s unnecessary to have more than one source of Ion damage.
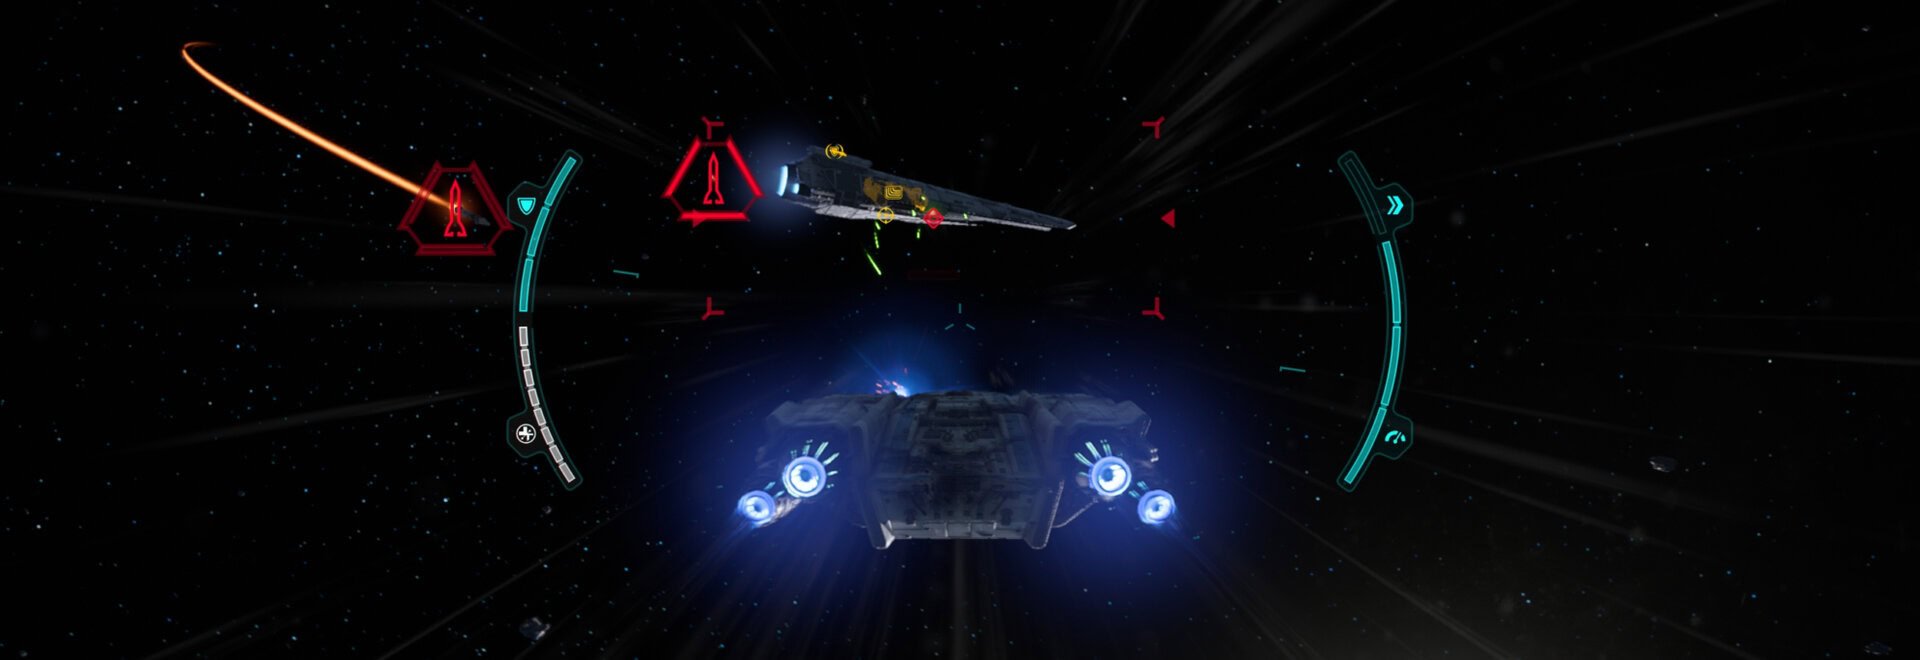
Turret
The Turret contributes an additional source of damage and utility during combat. It can be useful to help you take out large groups of starfighters or can’t focus as much on aiming because you need to divert attention to survival.
The Turret’s aim isn’t the best, about as good as that of enemy fighters. Still, free damage is always great to have, and it makes for an excellent addition to the Trailblazer.
There are two types of Turret, Laser and Ion. The Laser Turret deals more damage while the Ion Turret adds a disabling effect at the cost of some damage output.
Laser Turret
The default option is the Laser Turret. It’s focused on dealing damage to enemy targets when activated and the upgraded version does more damage. This damage is enough to take out starfighters on its own.
TU-B4 Laser Turret
A turret that automatically fires laser cannons at enemy targets when activated.
Requirements:
– Unlock the Hotfixer Expert
TU-C6 Laser Turret
An upgrade to the laser turret that increases its damage.
Requirements:
– 2,500 Credits
– X-FP-C28 Ship Computer
– x30 Quadanium
– x15 Heuristic Processor
Use the Laser Turret if you aren’t using the Ion Missiles or don’t need them because you don’t intend to fight any larger ships.
Ion Turret
The Ion Turret deals Ion damage to ships. With enough Ion damage, enemy ships will become disabled and unable to move or fight back. The Ion Turret is only a second Module, there aren’t any upgrades for it.
IT-11 Ion Turret
An advanced turret that fires ionized energy blasts and disables ships.
Requirements:
– 2,500 Credits
– X-FP-C28 Ship Computer
– x30 Quadanium
– x15 4XB Calculation Unit
Use the Ion Turret with anything but the Ion Missiles. Activate it whenever you’re facing off against stronger ships or large swarms of starfighters.
How to unlock the Turret
You unlock the Turret on Tatooine as the main upgrade from Teeka the Hotfixer Expert. She’ll install the turret on the Trailblazer if you can get her a sarlacc tooth from the Dune Sea.
Propulsion
The Propulsion System improves your speed while out of combat. It’s good for Smuggling Contracts, traversal, and extraplanetary exploration.
If you only care about improving your combat capabilities, you should prioritize upgrading something else, though the speed increase out of combat is significant.
Propulsion Upgrades
E-210 Sublight Engine
A standard starship engine.
Requirements:
– Available by default
E-310 Sublight Engine
An engine upgrade that increases speed during Travel Mode.
Requirements:
– 750 Credits
– x10 Quadanium
– x4 Enhanced Durasteel Hull
E-410 Sublight Engine
An engine upgrade that greatly increases speed during Travel Mode.
Requirements:
– 2,000 Credits
– X-FP-C28 Ship Computer
– x20 Quadanium
– x8 Enhanced Durasteel Hull
Defenses
The Trailblazer’s Defenses come from its Deflector Shield and Hull. While the Deflector Shield can always regenerate during combat, the same can’t be said about the Hull until you upgrade it.
The cost for the first upgrade isn’t too expensive, it’s worth getting early on as the best offense is a good defense. Being able to repair your hull in combat is too good to pass up.
As with survivability in general, upgrade your Defenses as needed. If you’re able to make it through the fight with your current protections, there’s no need to upgrade your Shield or Hull.
Shield
S15A Deflector Shield
A deflector shield surrounding the Trailblazer’s hull.
Requirements:
– Available by default
S30B Deflector Shield
A shield upgrade that increases its capacity.
Requirements:
– 500 Credits
– x5 Durasteel
– x2 4XB Calculation Unit
S50C Deflector Shield
A shield upgrade that greatly increases its capacity.
Requirements:
– 1,500 Credits
– X-FP-C28 Ship Computer
– x15 Quadanium
– x7 Heuristic Processor
Hull
H-AD Duralloy Hull
A standard hull used for starships.
Requirements:
– Available by default
H-RD Duralloy Hull
A hull upgrade that increases durability and adds an auto-repair function during combat.
Requirements:
– 500 Credits
– x5 Quadanium
– x2 Enhanced Durasteel Hull
H-SD Duralloy Hull
A hull upgrade that greatly increases durability and enhances the auto-repair function during combat.
Requirements:
– 1,500 Credits
– X-FP-C28 Ship Computer
– x15 Quadanium
– x7 Enhanced Durasteel Hull
Ion Shield
Ion Shield
An Ion Shield used to protect the spaceship from ion build-up inflicted by nebulas and enemies.
Requirements:
– Complete Brave the Unknown from A Pirate’s Fortune DLC
Charged Ion Shield
This upgraded Ion Shield has increased ion resistance and discharges ion energy when it breaks, disabling nearby ships.
Requirements:
– x2 X-FP-C28 Ship Computer
– x35 Refined Roxodium Plating
– x50 Quadanium
Active Systems
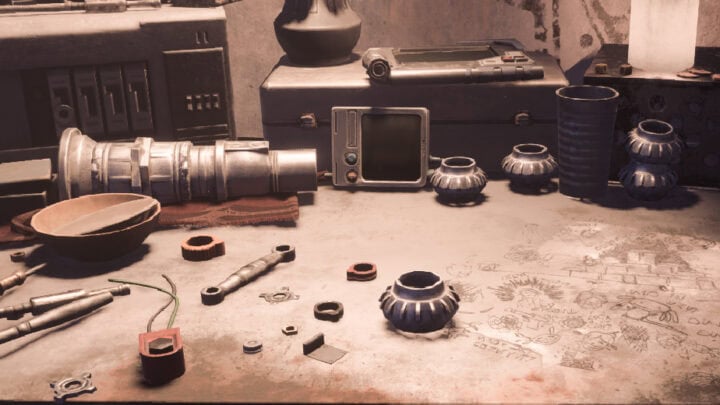
Active Systems (formerly known as Passive Systems, before the DLC A Pirate’s Fortune) are additional effects you can activate. These modules cost nothing to purchase, but they require you to hunt them down on foot. Whether they’re easy to find or require some effort, you’ll find out how and where to get them in the next section.
CO-BA Countermeasures
A device used to deflect incoming missiles.
SE-JA-4 Sensor Jammer
A device used to make the Trailblazer harder to detect by interfering with enemy scanners.
HS-2300 Heat Sink
A device that temporarily boosts the rate of fire of laser cannons and prevents overheating.
Power Flux Emitter
A device that instantly vents heat from Cannons, rapidly reloads Launchers, and resets Repair System and Turret if they are on cooldown.
Countermeasures
This is a good preliminary Active module. Until you unlock maneuvers with the Mercenary Expert, this is the only way to evade Missiles. With this module, you simply activate it, and the missiles lose their lock on you for a short time.
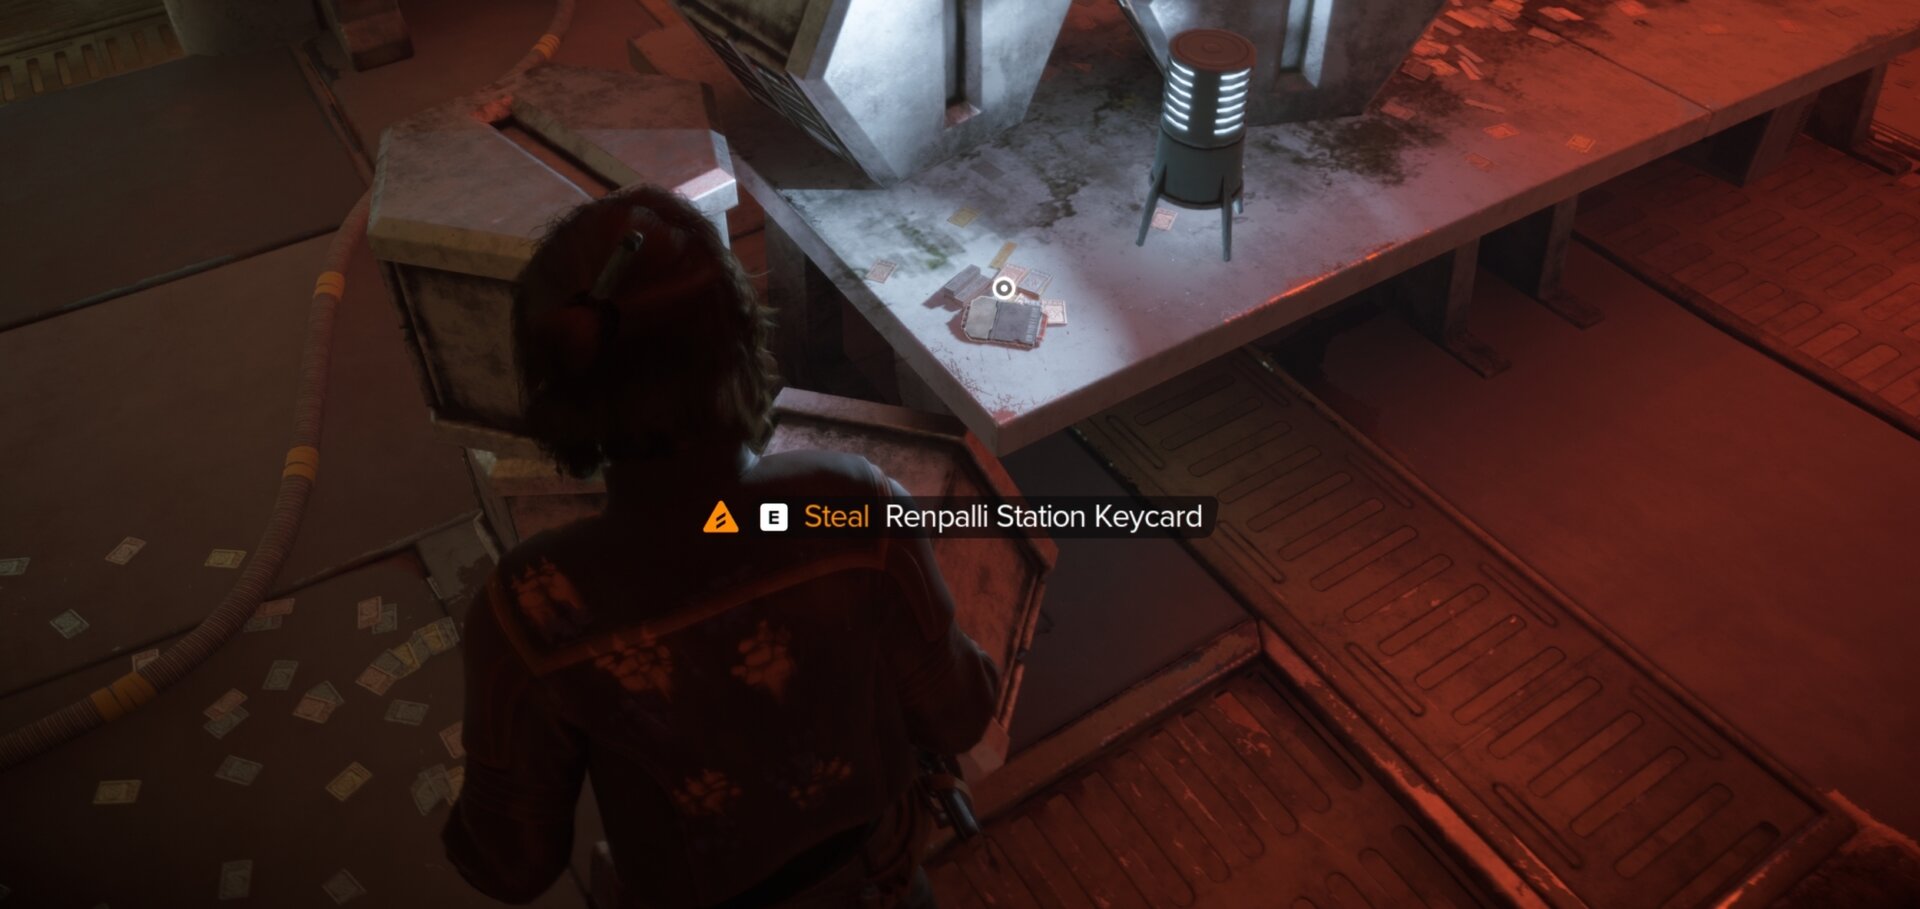
How to unlock the Countermeasures
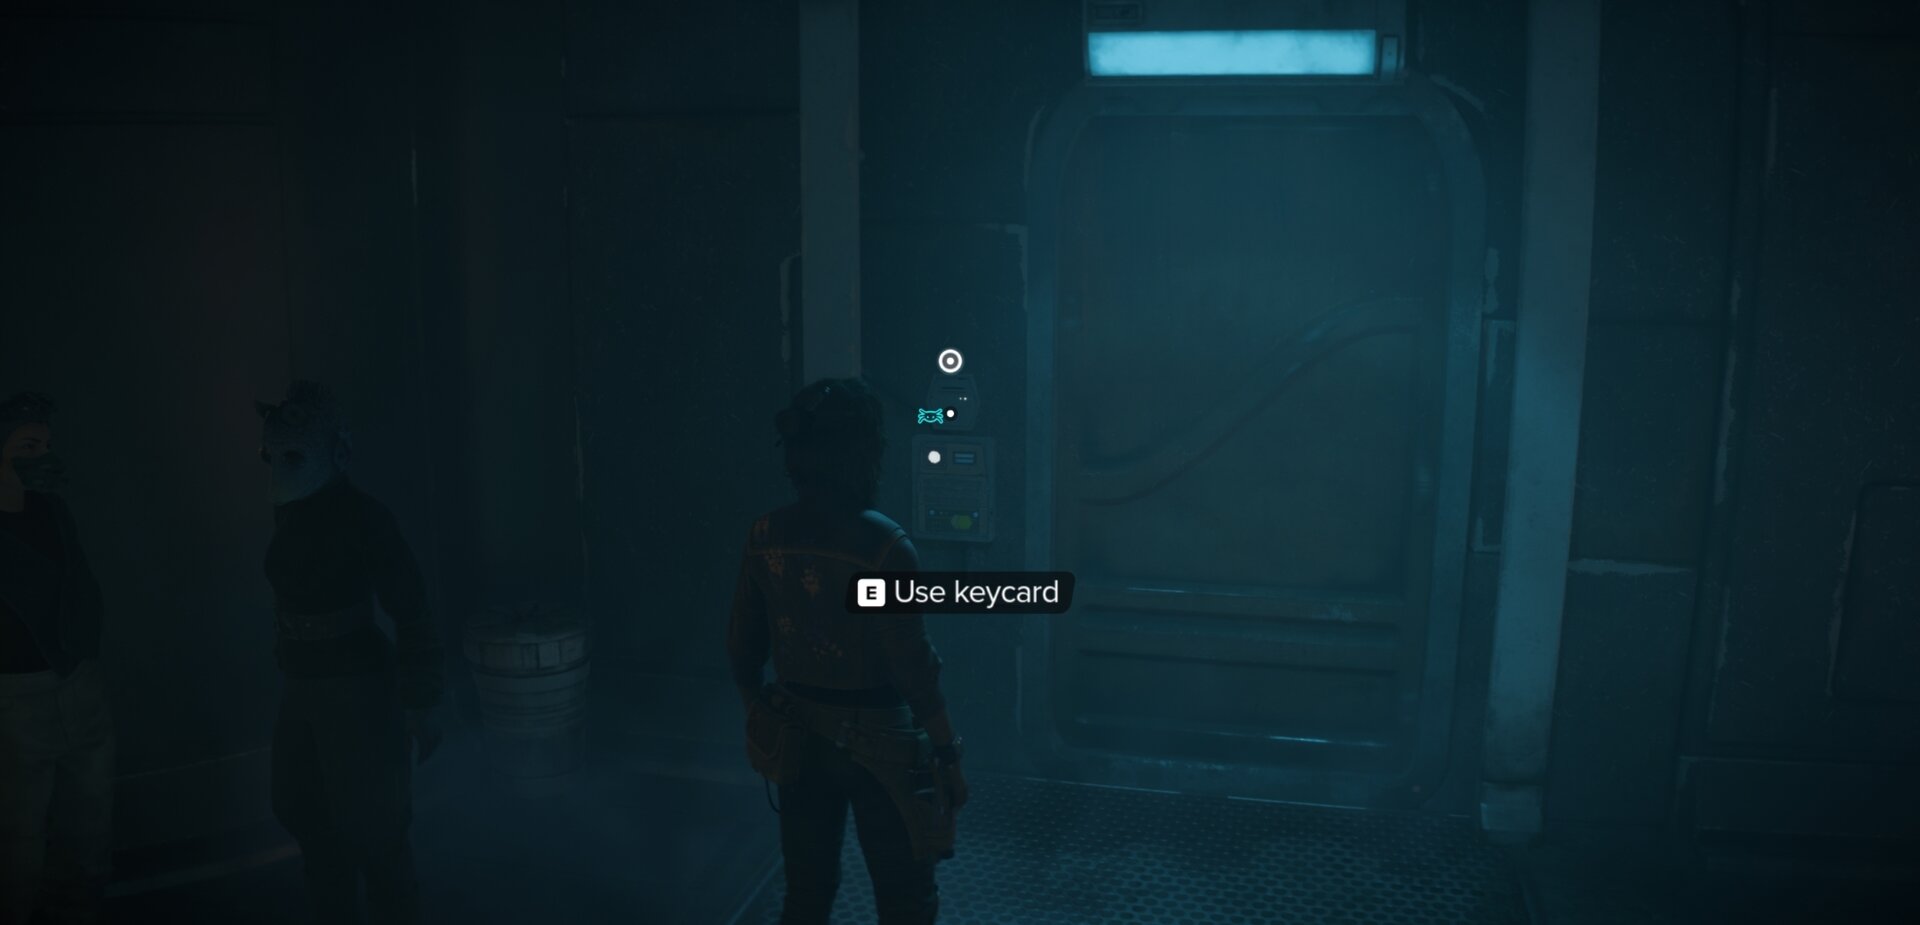
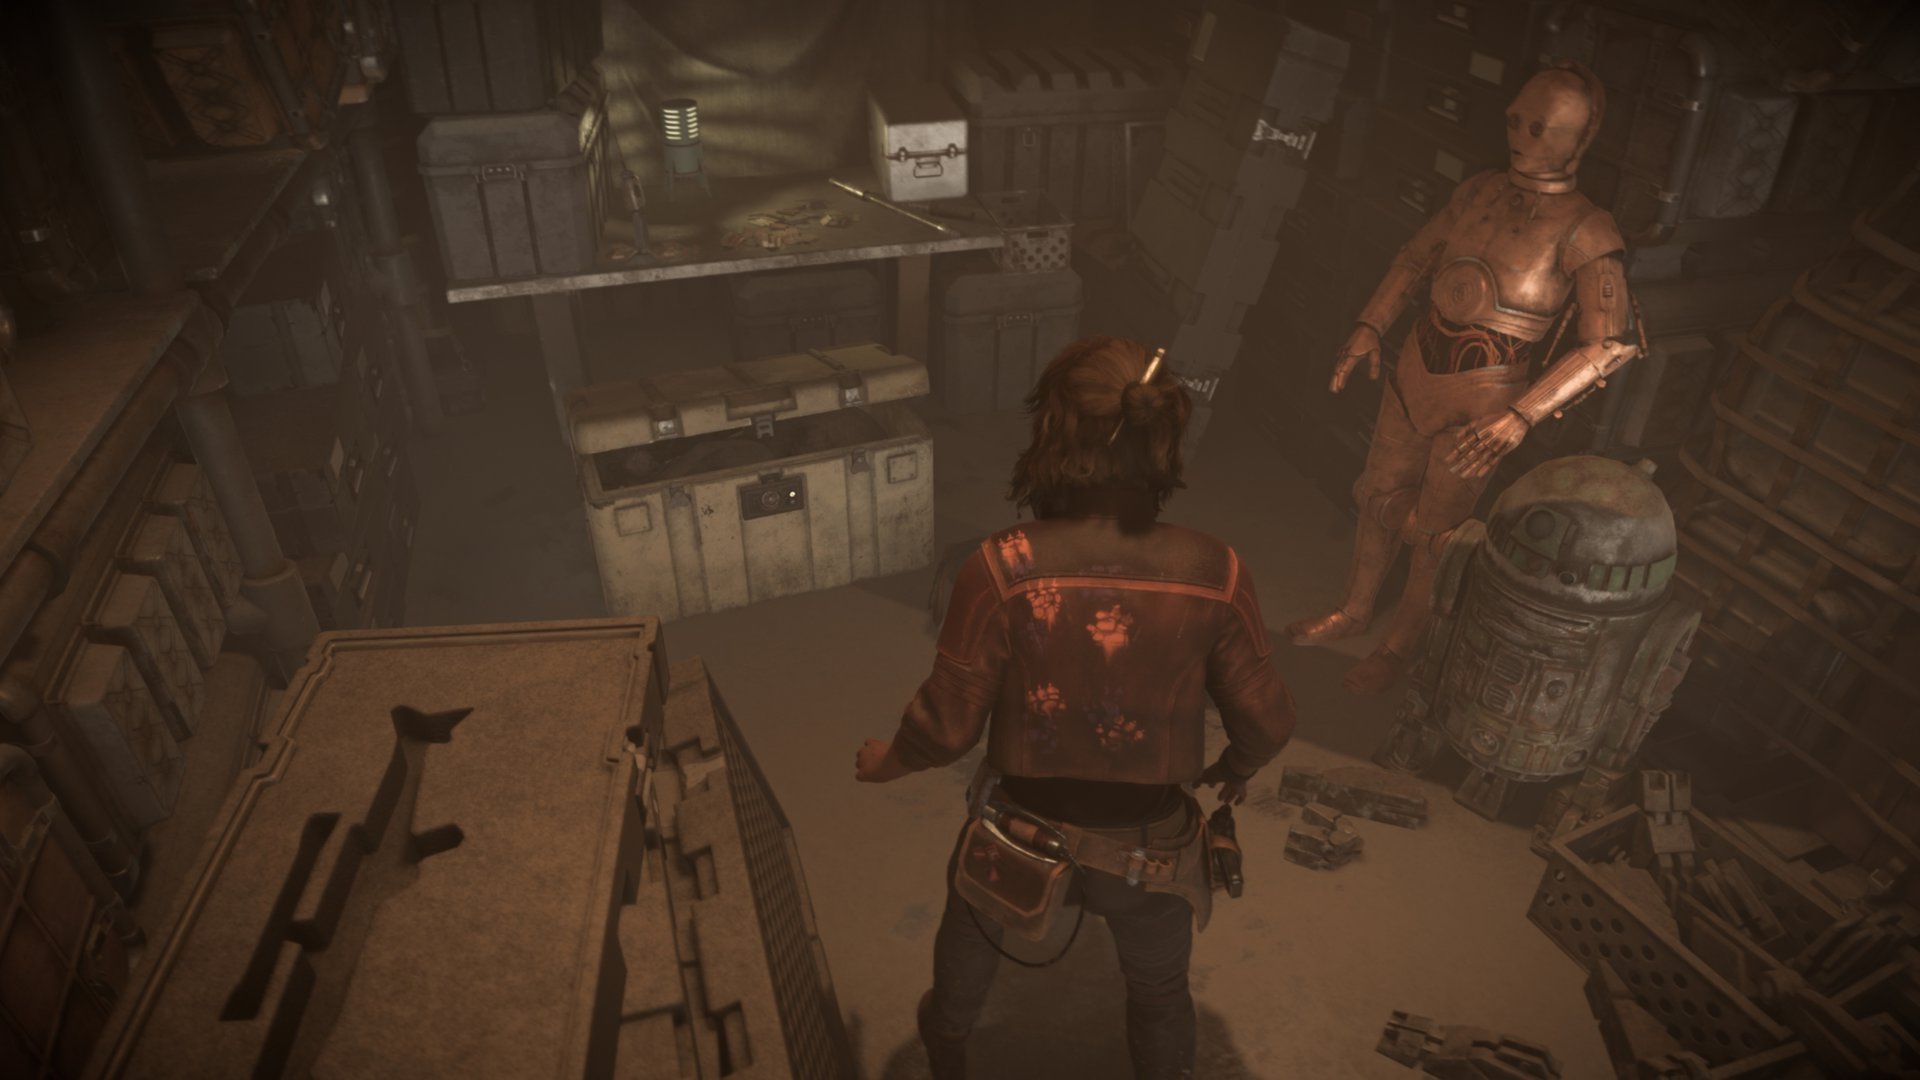
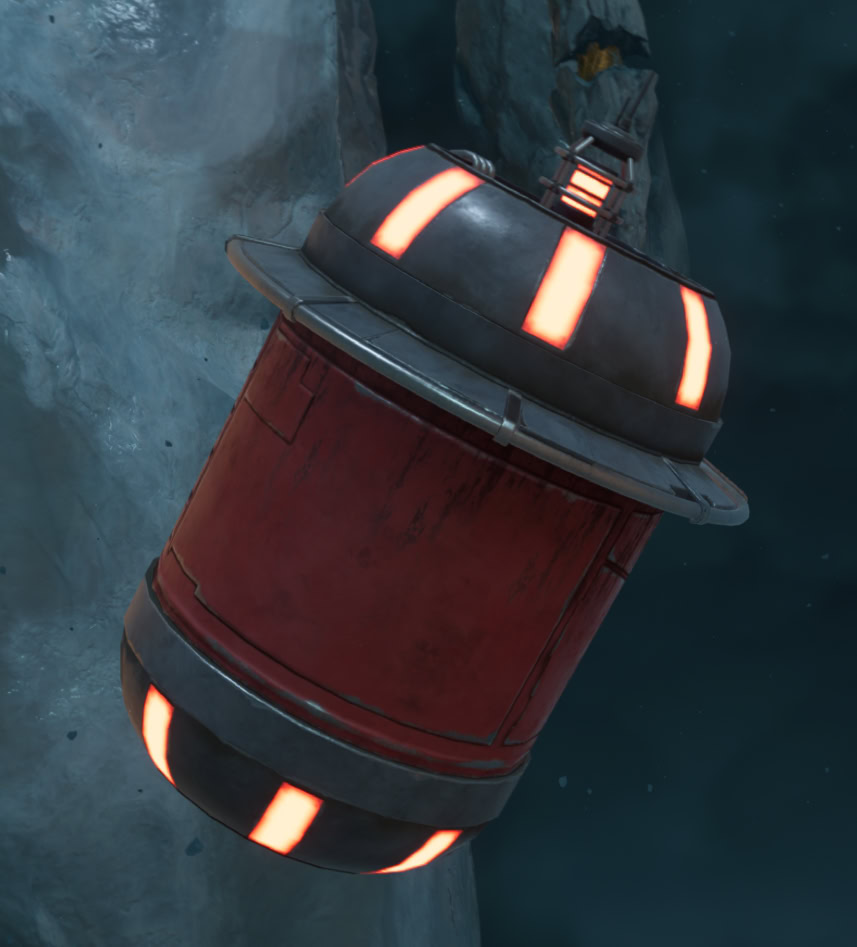
To unlock the Countermeasures, you’ll need to sneak into the Crimson Dawn Vault on Toshara. On the corner of a table in the vault, you’ll find the Renpalli Station Keycard. Pick it up then go to Renpalli Station in Toshara’s orbit.
Take the elevator up to the Renpalli Station market and you’ll find a locked door. Use your keycard to go inside and loot the large chest for the Countermeasures module.

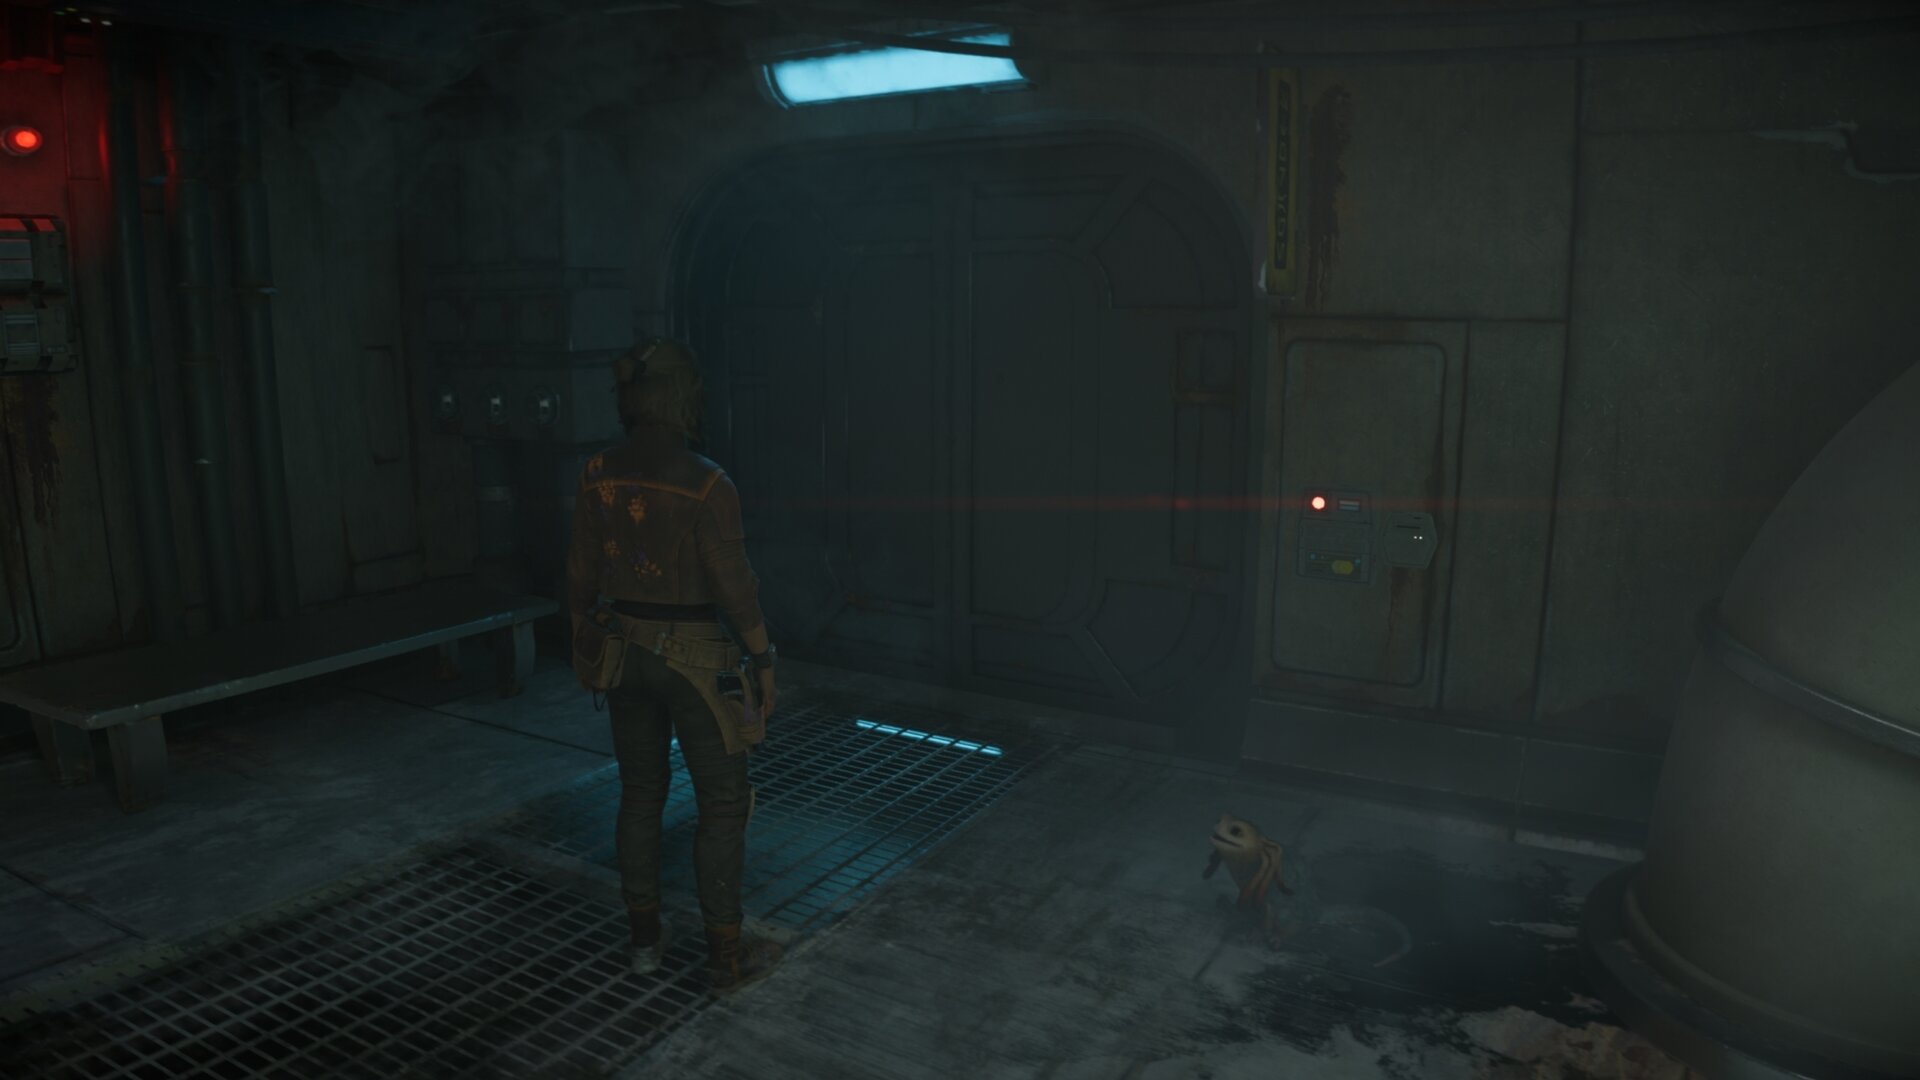
Sensor Jammer
The Sensor Jammer decreases the detection range of any enemy ships and prevents them from calling for reinforcements. It’s useful if you’re on a space Thief Contract and need to get in and out unnoticed, or if you want to minimize the amount of space combat you do.
How to unlock the Sensor Jammer
The Sensor Jammer can be found during the Passenger Side Quest. At one point in the mission, you’ll need to unlock the door in Achra Station that contains a Crimson Dawn operative.
Inside the storage closet you found him in, there will be a large chest containing the Sensor Jammer.
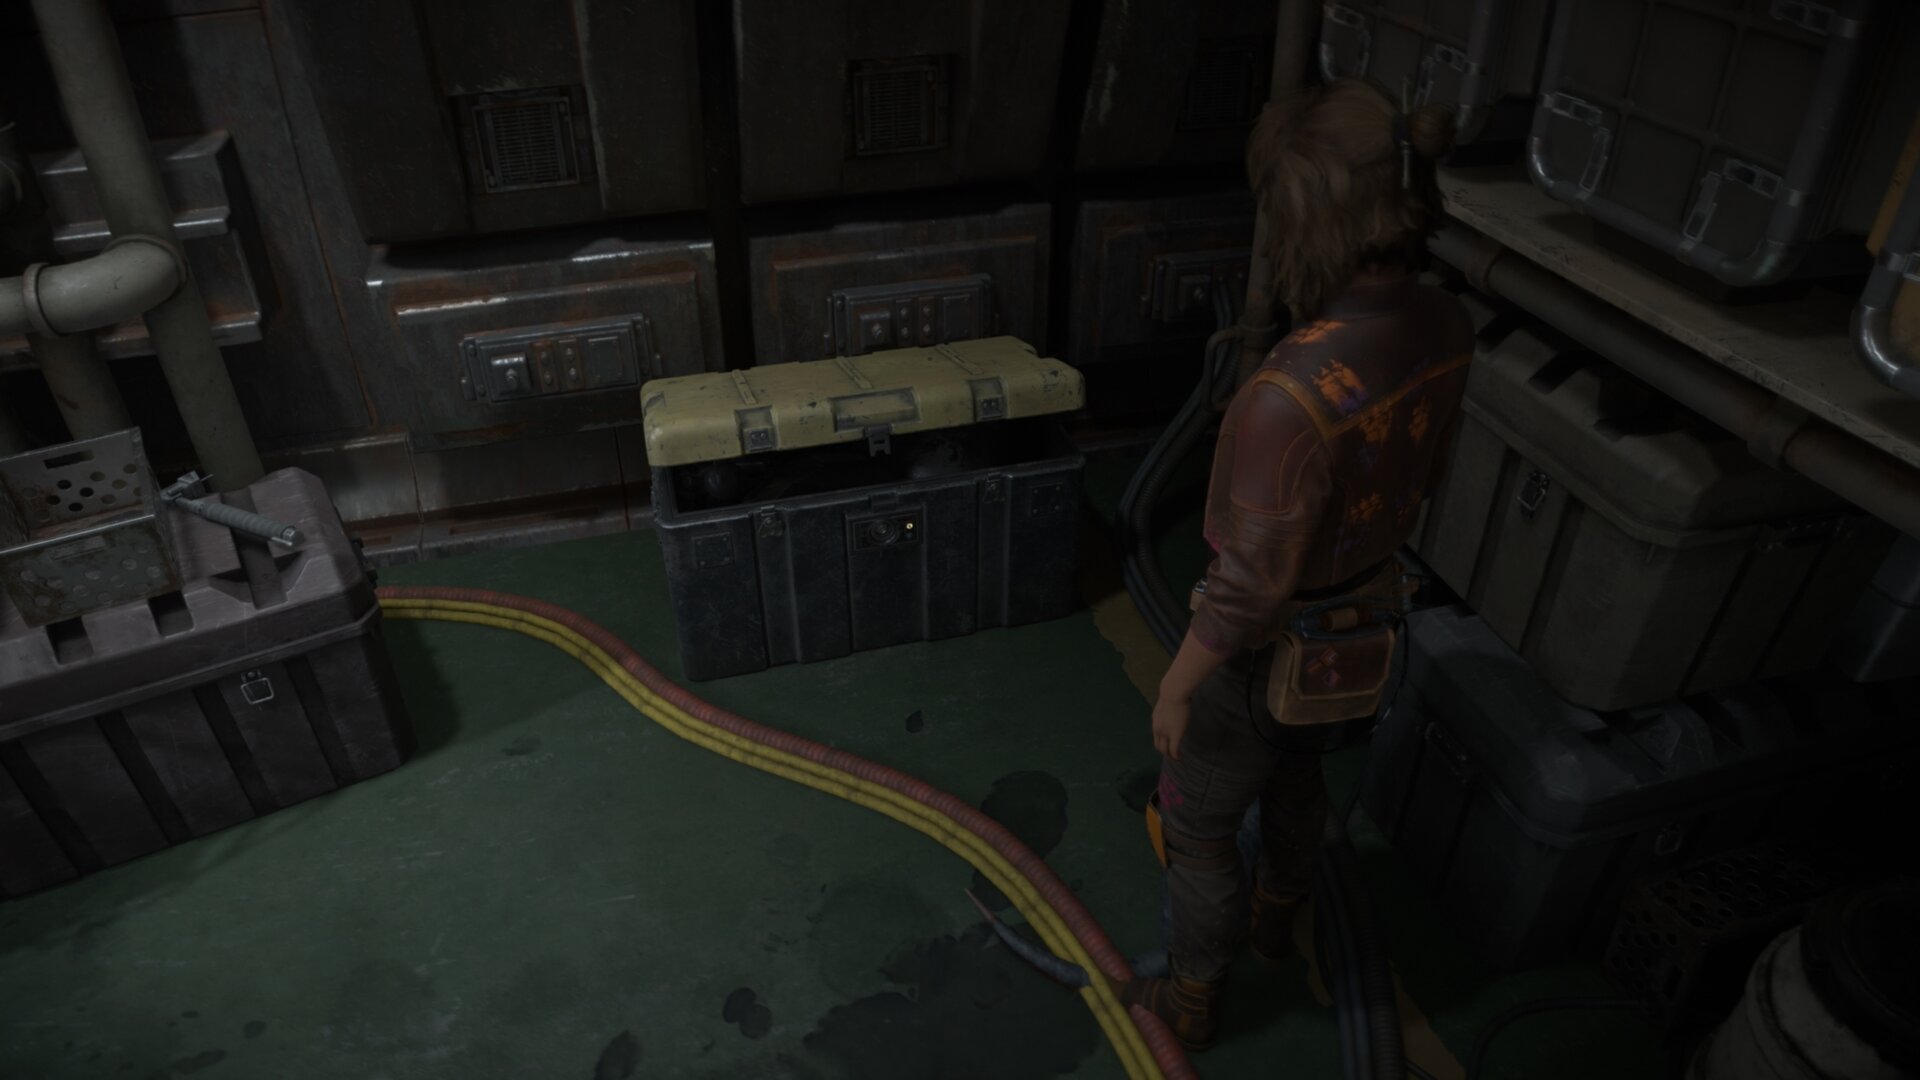
Heat Sink
If you’re good at manually dodging missiles, I highly recommend taking the Heat Sink as your go-to active module.
This allows you to fire off more lasers, increase the rate of fire for the laser cannons, and decrease charge time for Rapid Fire and Plasburst Cannons. Make sure you don’t activate it until you have a lock and have just overheated.
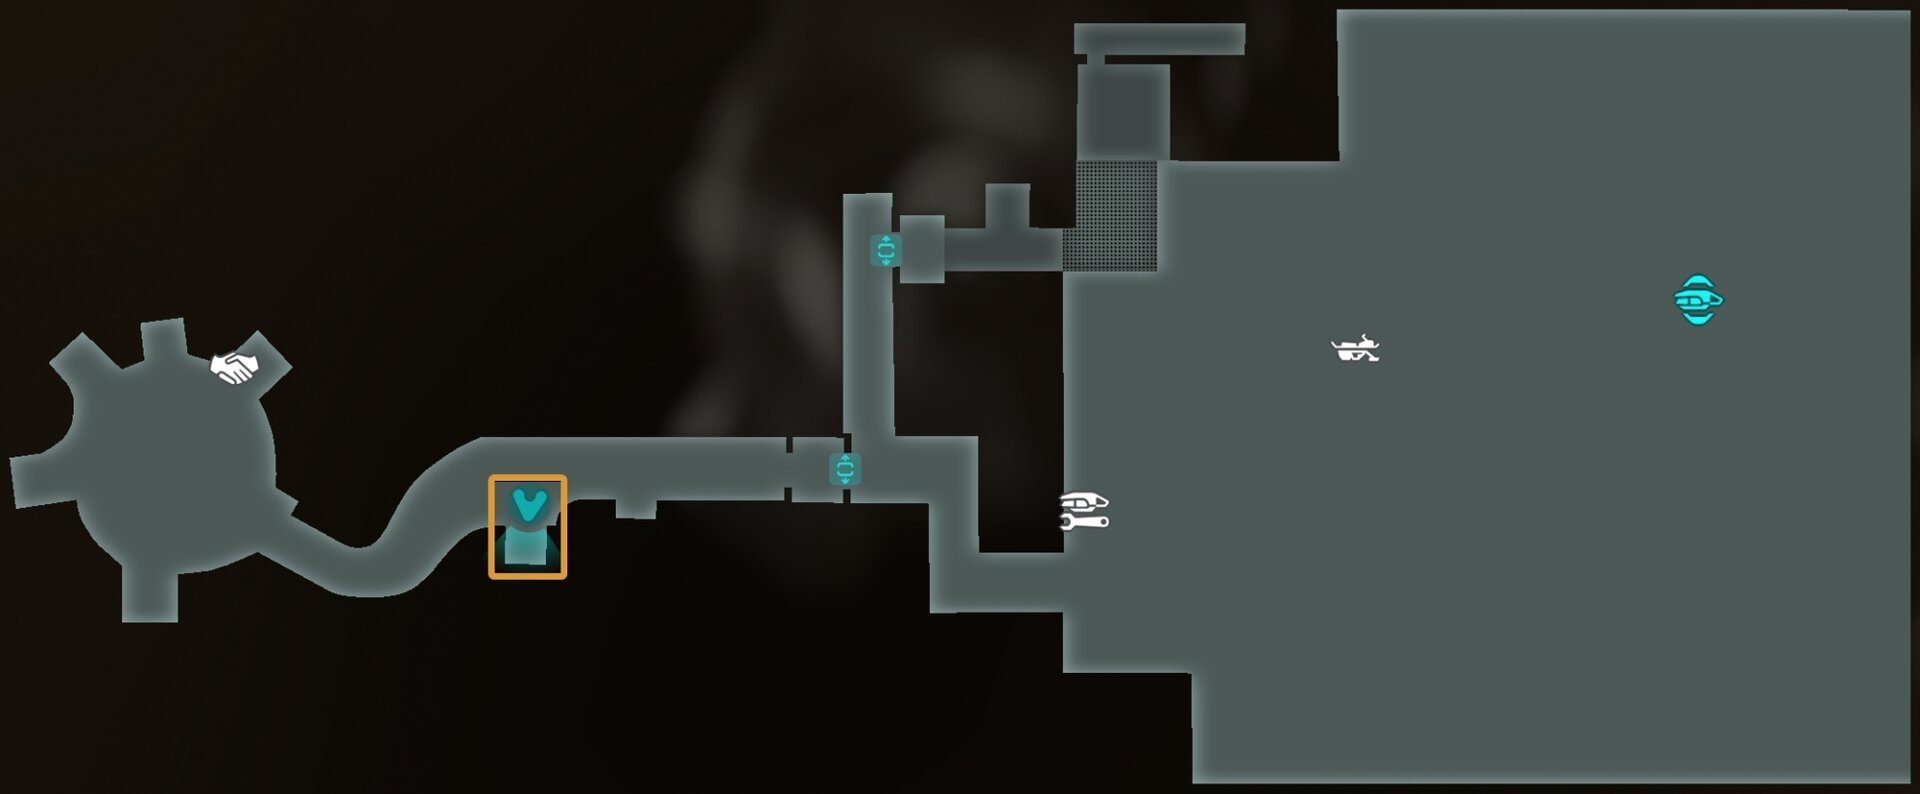
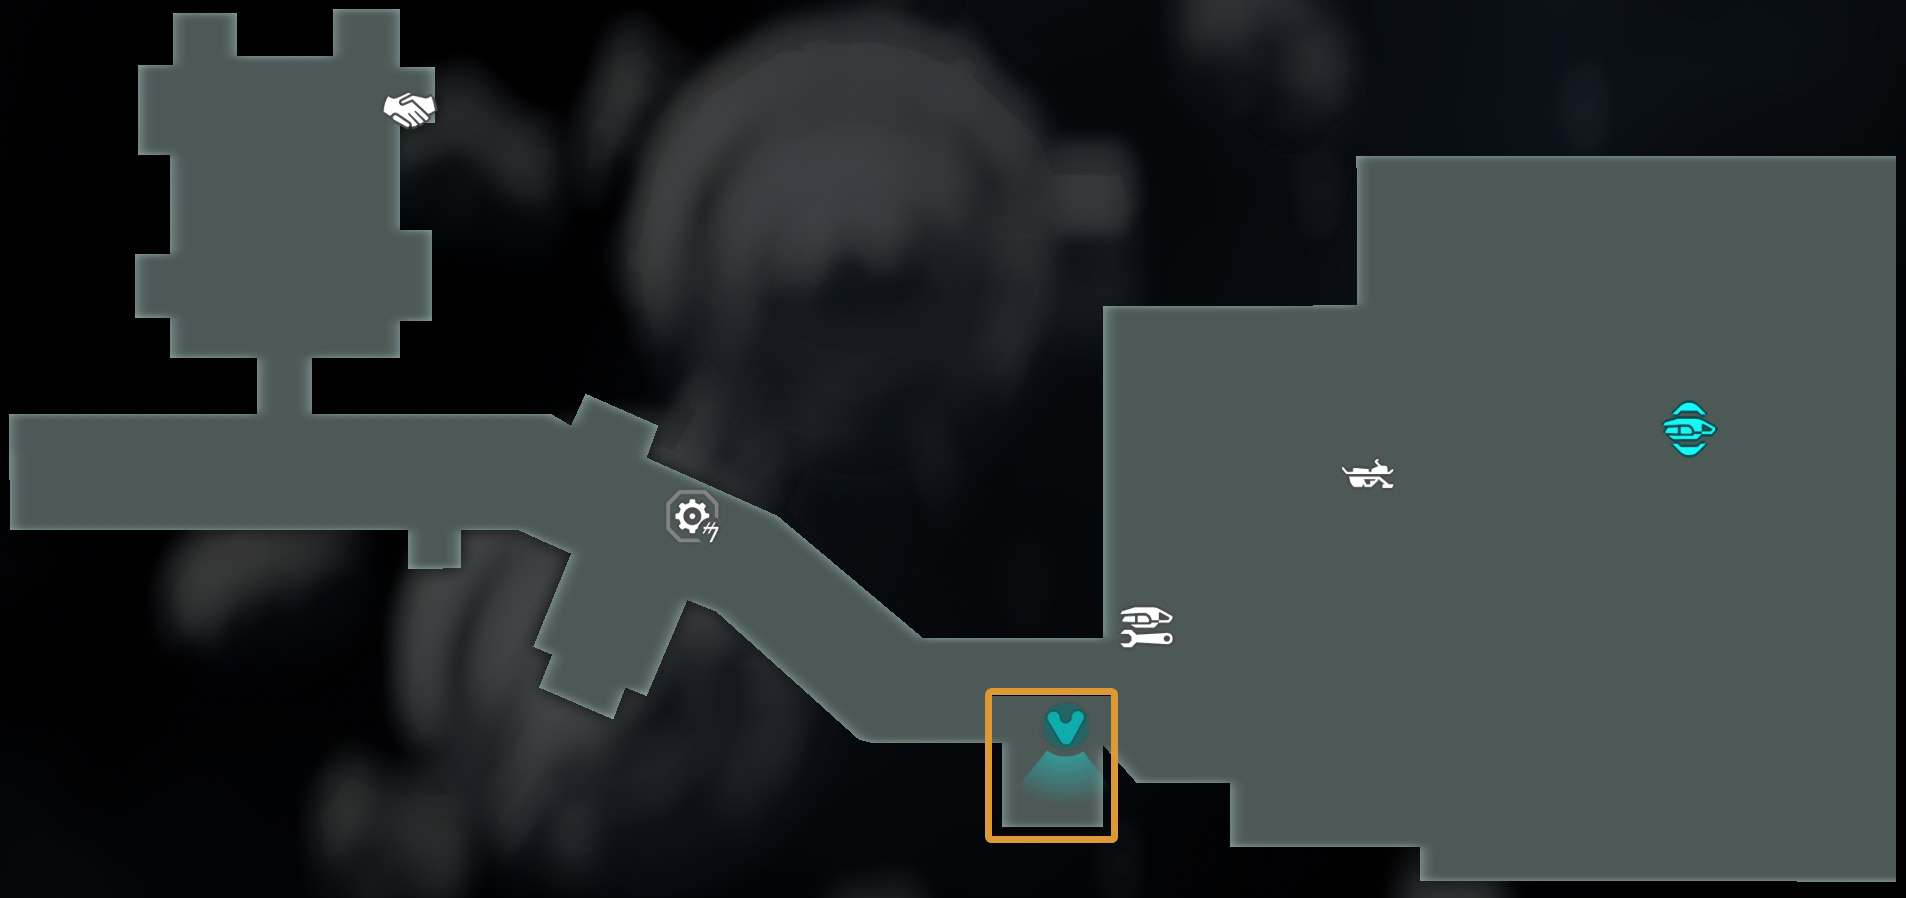
How to unlock the Heat Sink
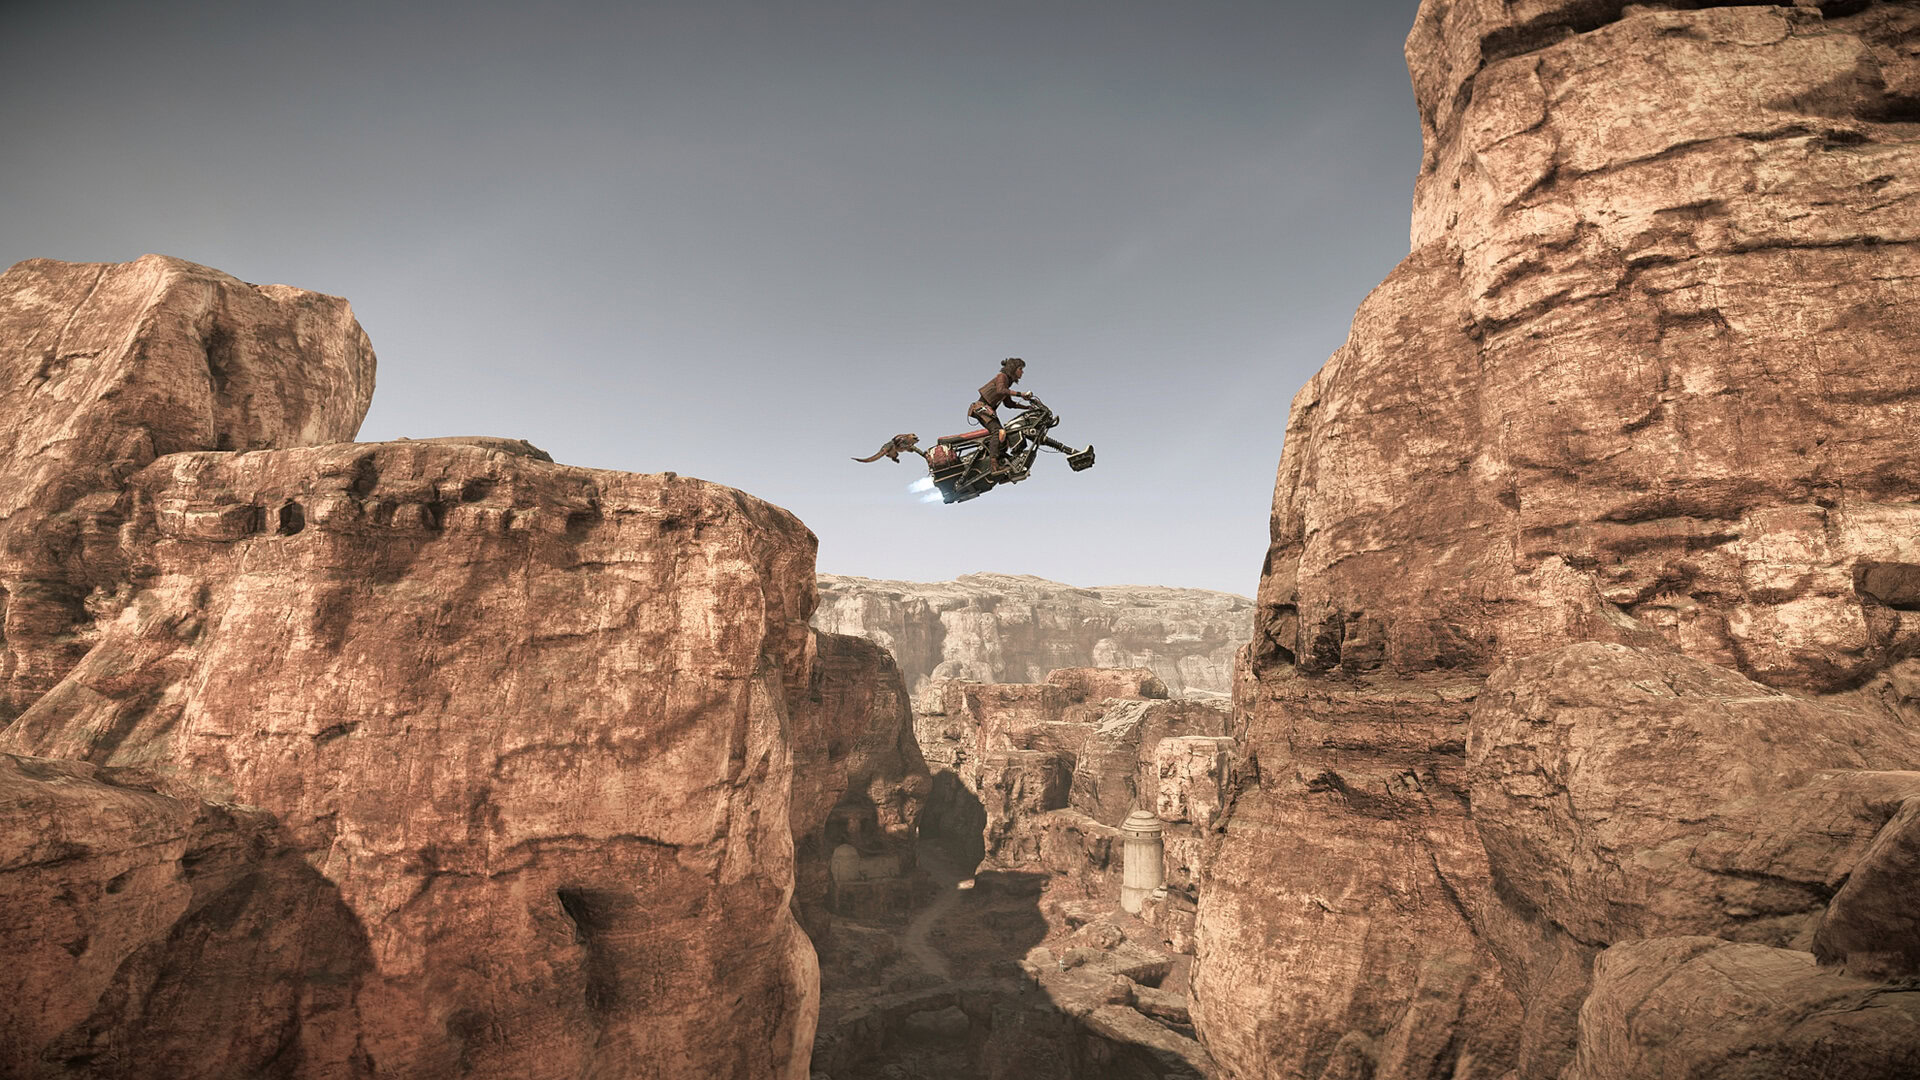
To find the Heat Sink, fast travel to the South Jundland Wastes fast travel point and follow the path seen in the map below. When you find the ramp, use your speeder’s speed boost the make the jump.
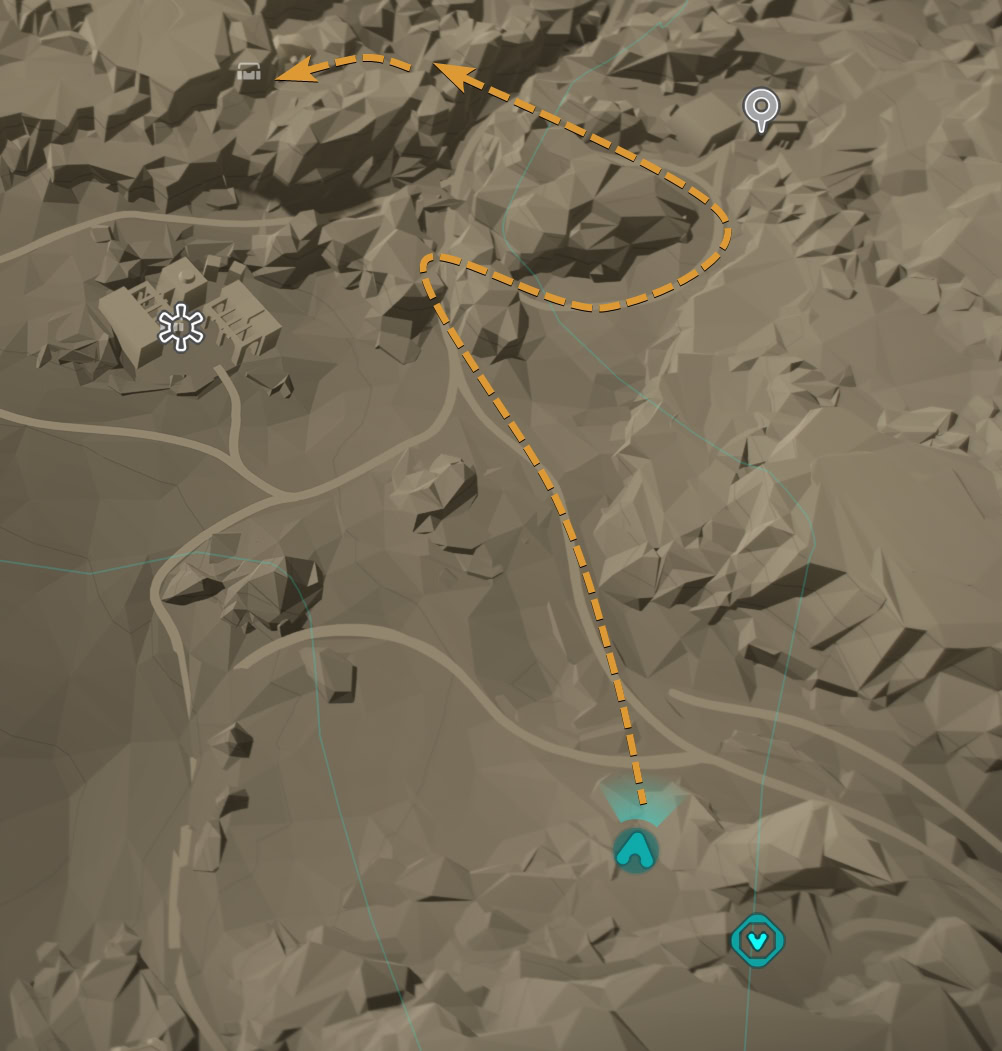
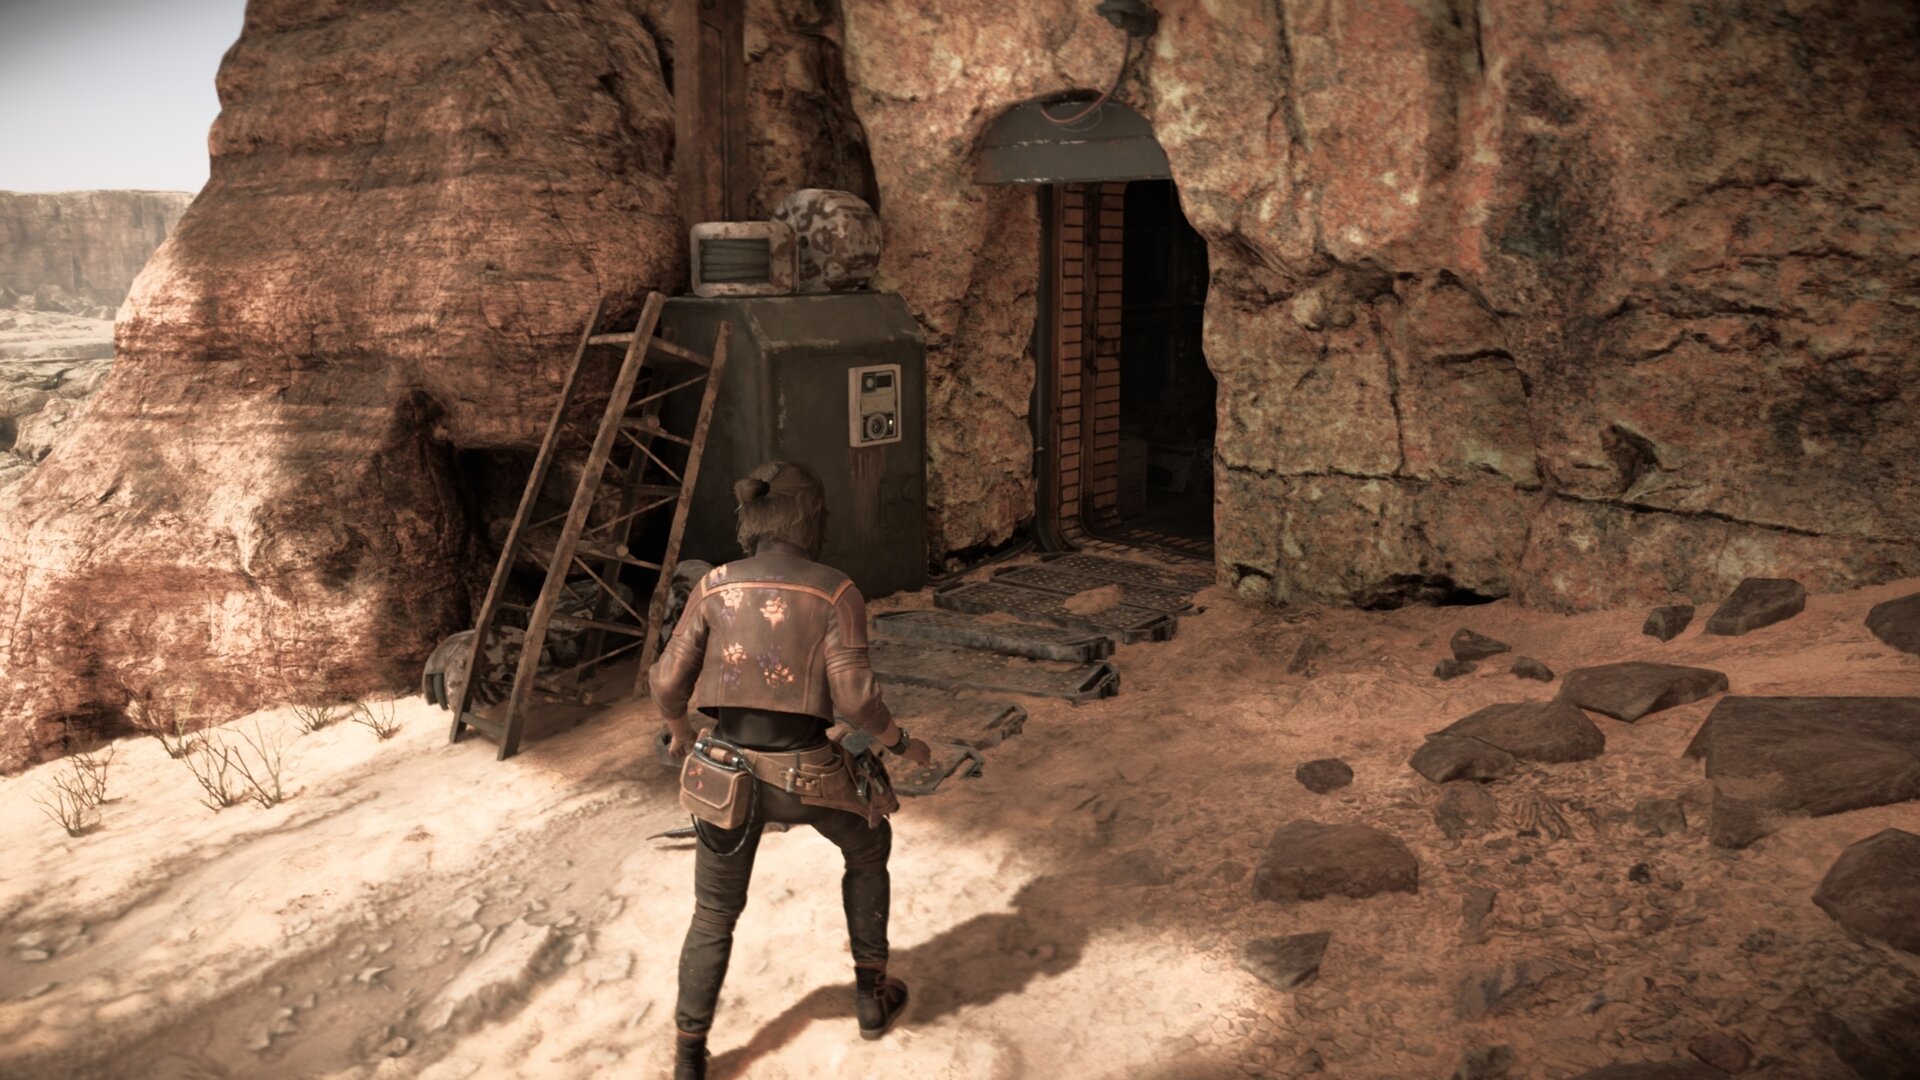
After making the jump, follow the path until you run into some massiffs. There’s a trench nearby that’ll lead to a platforming segment. Follow the platforming path and it’ll lead you to the Smuggler’s Refuge.

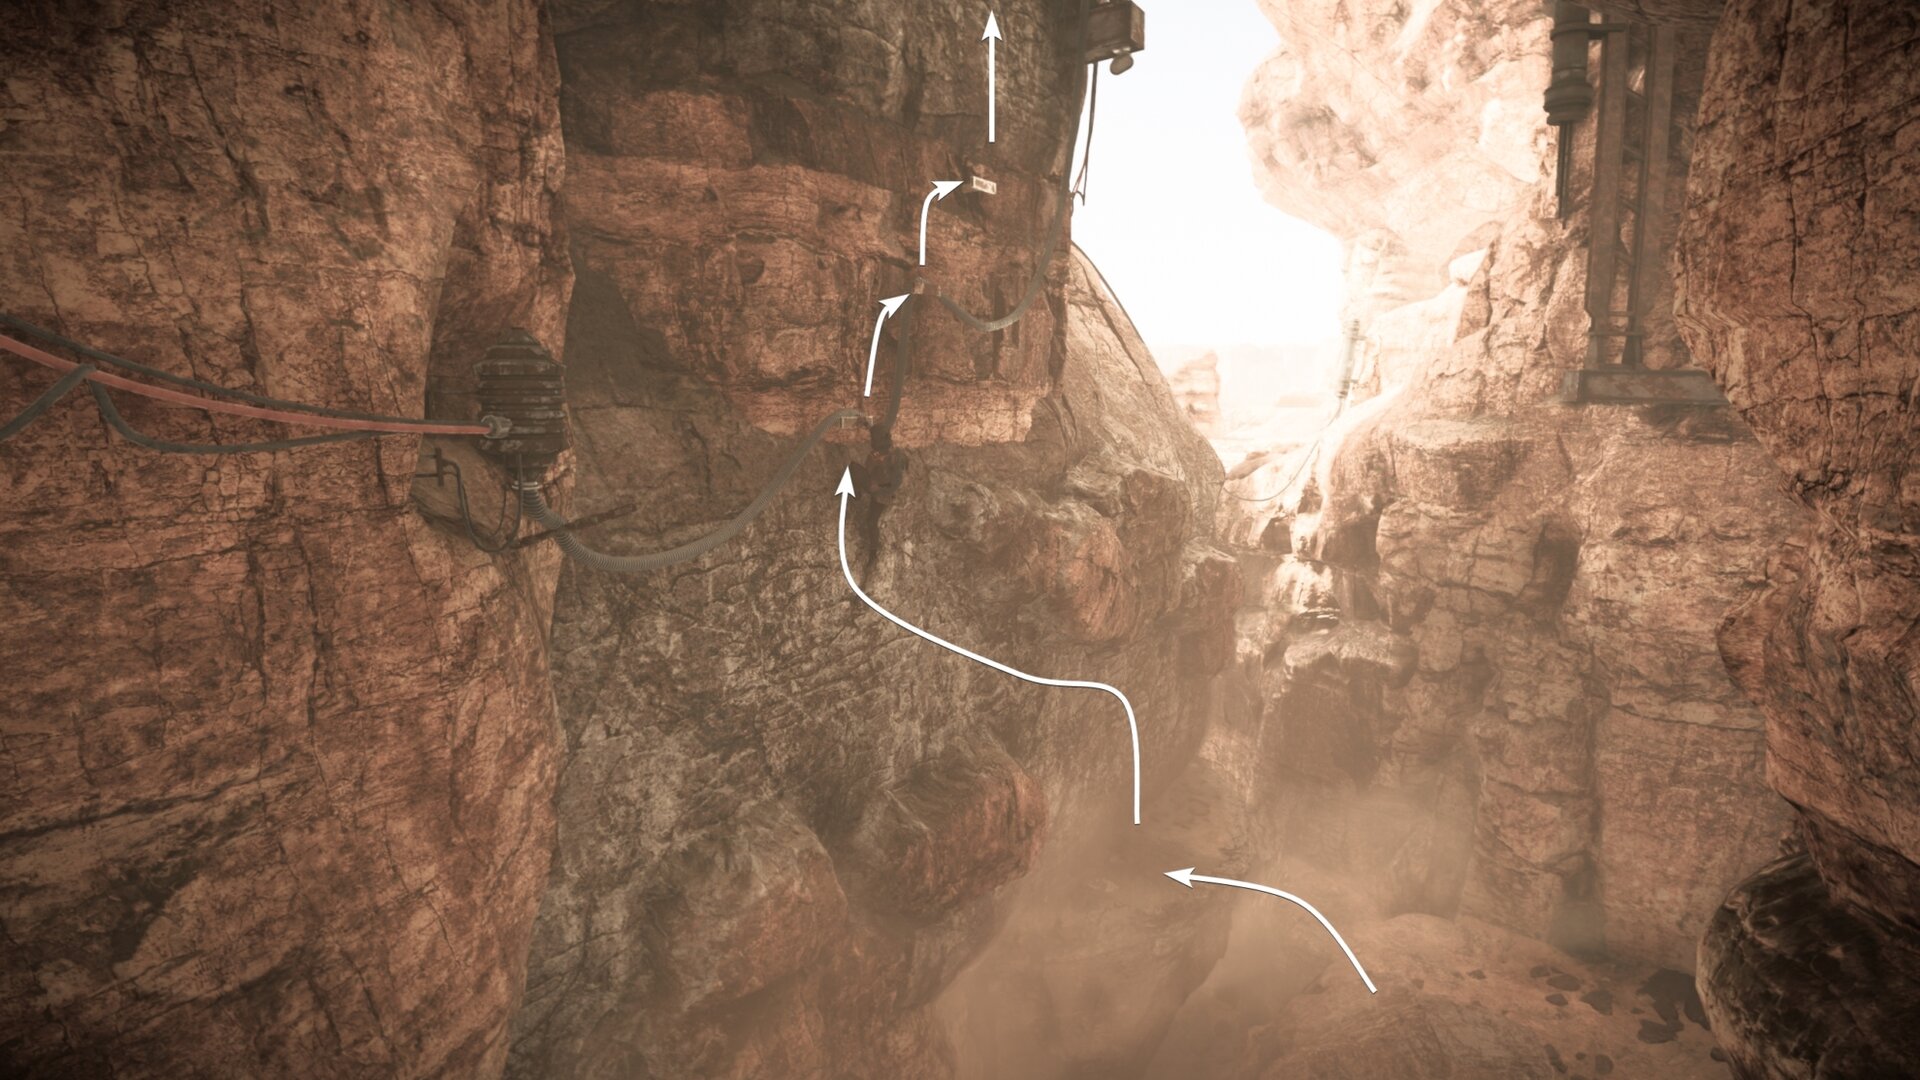
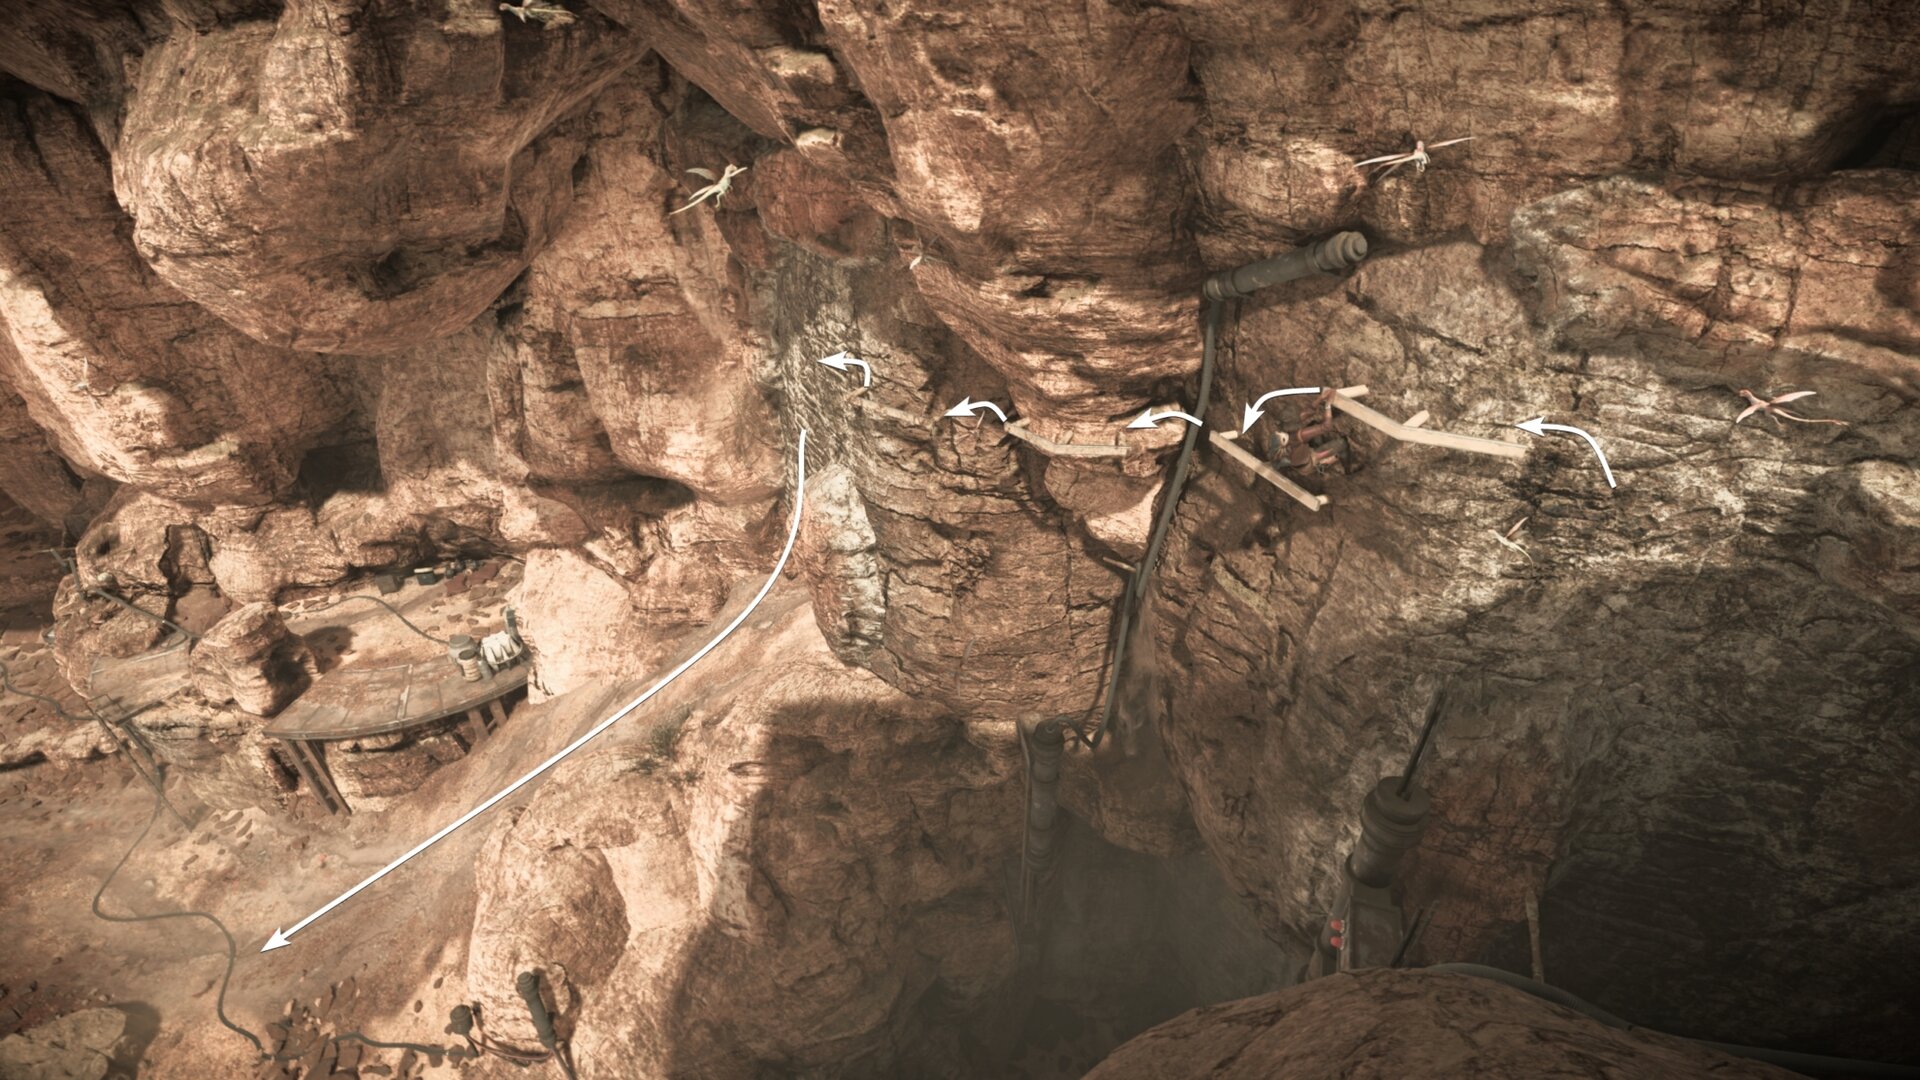
Take out the Imperials in the area, unlock the door, and loot the chest found inside the refuge to pick up the Heat Sink module.
How to unlock the Power Flux Emitter
To get the Power Flux Emitter, you’ll need to complete the main quest of Star Wars Outlaws and have access to A Pirate’s Fortune DLC.
After completing the quest No Prey, No Pay, you’ll unlock the Miyuki Trade League Contract Broker. Complete 1 Miyuki Contract to unlock the Power Flux Emitter.
Passive Systems
As you make progress with A Pirate’s Fortune DLC, you’ll unlock Passive Systems for the Trailblazer. These systems modify your defenses or offenses in minor yet effective ways.
You’ll be able to add these once you access the Khepi system during the quest No Prey, No Pay. You can find a Miyuki Trade League vendor, Jagra, selling Passive Systems in Hauler’s Keep.
| Icon | Name | Source | Location |
|---|---|---|---|
 | Miyuki Splice Core Unlocks an additional Passive System slot for the Trailblazer | Trader | Trader |
 | Rapid Recovery Systems Reduces Repair System cooldown. | Trader | Trader |
 | Shield Booster Increases Shield capacity and recovery. | Trader | Trader |
 | Improved Launchers Increases Launcher reload speed for missiles and torpedos. | Trader | Trader |
 | Emergency Thrusters Increases ability to avoid missiles when performing a Dodge. | Trader | Trader |
 | Redirecting Manifolds Doubles effectiveness of the Repair System when repairing the Hull, but no longer restores Shields when activated. | Trader | Trader |
 | Transference Prisms Reduces Shield strength in exchange for increased Cannon damage. | Trader | Trader |
 | Flux Capacitor Connectors Cannons generate more heat when firing, but deal progressively more damage as heat increases, and gain maximum damage bonus while Heatsinks are active. | Trader | Trader |
 | Enriched Coolant Reduces the cooldown of the equipped Active System. | Complete the Hauler’s Keep Mechanic Intel | Hauler’s Keep |
 | Reinforced Coils All destroyed Hull segments now repair over time while in combat. | Find the Miyuki Stash in Hauler’s Keep | Hauler’s Keep |
| Adaptive Generators Restores some Hull damage and Shield strength when destroying enemy ships. | Complete the Jet Kordo’s Hideout Intel | Hauler’s Keep | |
| Conductor Shields Increases resistance to, and rate of recovery from, ion buildup. Also reduces the amount of time requires to recover from being disabled by ion damage. | Found inside a chest in the Mynock Lair, Khepi System | Khepi Space | |
| Over-Clocked Fire Control Enhances Turret efficiency, increasing duration and rate of fire. | Found inside a chest in Dead Man’s Claim, Khepi System | Khepi Space | |
| Supercharged Ions Increases the effectiveness of Ion Missiles and the Iron Turret. | Found inside a chest in Dead Man’s Claim, Khepi System | Khepi Space | |
| Reactive Heatsinks Cannons lose heat when destroying enemy ships. | Complete Miyuki Trade League Objectives | Miyuki Trade League Objectives | |
| Precision Optics Increases damage done to ship Weakpoints | Complete Miyuki Trade League Objectives | Miyuki Trade League Objectives | |
| Kinetic Capacitors Temporarily increases Cannon damage and removes heat buildup after performing a Dodge or Maneuver. | Complete Miyuki Trade League Objectives | Miyuki Trade League Objectives | |
| Turbocharged Servos Reduces Turret cooldown. | Complete Miyuki Trade League Objectives | Miyuki Trade League Objectives |
Cargo Support Upgrades
After completing the quest No Prey, No Pay from A Pirate’s Fortune DLC, you’ll gain access to the Miyuki Trade League contract broker. He’ll offer you rewards and upgrades for providing smuggling services.
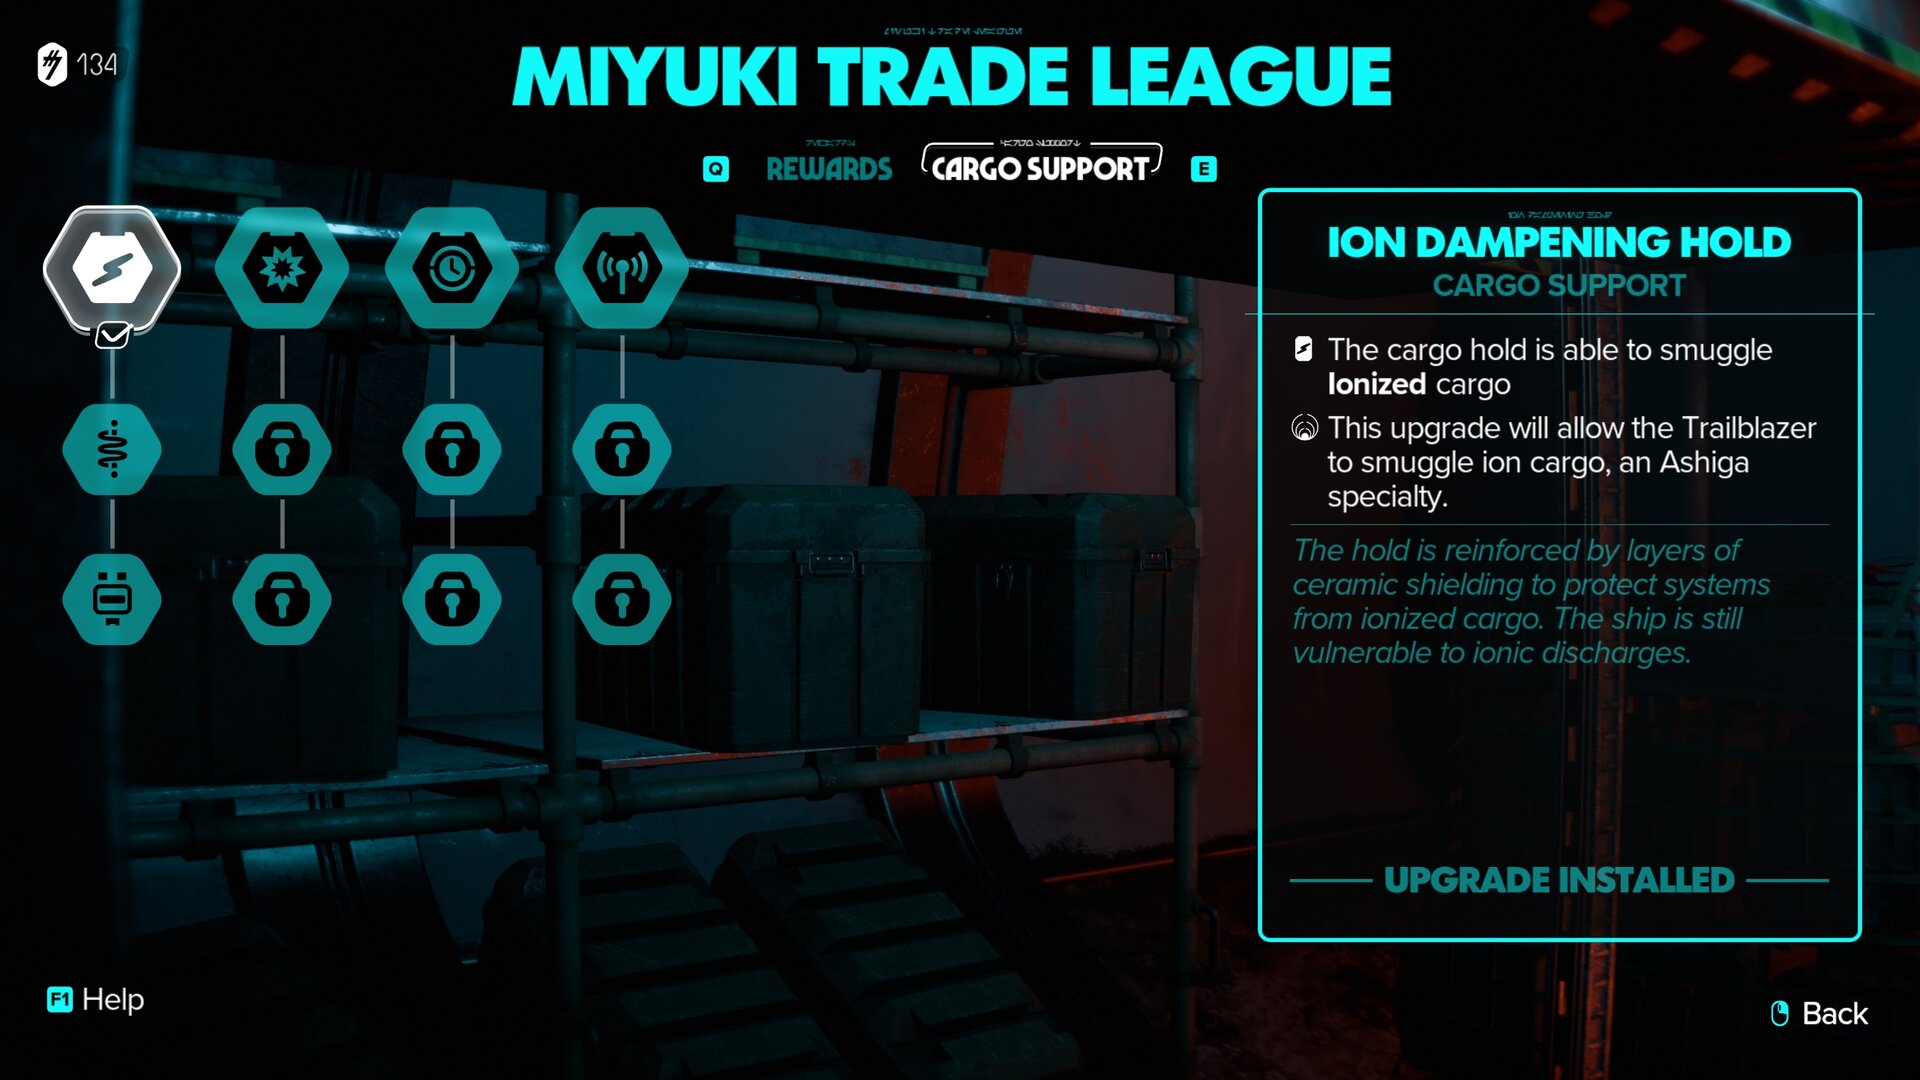
These upgrades allow you to carry different types of cargo. There are four different cargo supports with upgrades:
- The Current Insulator allows you to carry Ionized cargo (favored by the Ashiga).
- The Cargo Suspensor Array lets you carry Volatile cargo (favored by Crimson Dawn).
- The Rapid Cargo Loader lets you carry Timed cargo (favored by the Hutts).
- The Cargo Cloaking lets you carry Suspicious cargo (favored by the Pykes).
Due to the limited availability of the Miyuki Trade League contracts, we’re working on gathering materials and unlocking components to provide you with a complete list of upgrades with requirements.
Unlocking Trailblazer Maneuvers
If you’re going to survive space combat, you’re going to need a few tricks up your sleeve. While listing lazily to the left is a great maneuver, you can learn some better ones by unlocking them through Experts.
The Mercenary and High Roller Experts offer abilities for the Trailblazer once you unlock them. Earning these isn’t too difficult and they’re definitely worth the effort.
Trailblazer Maneuvers
Loop Maneuver
Execute a 180 degrees turn that will quickly turn the Trailblazer into the opposite direction.
Requirements:
– Unlock the Mercenary Expert
– Defeat 6 TIE Interceptors
– Defeat 12 enemies in space
– Complete a space smuggler contract
Top Roll Maneuver
Execute a 360 degrees top roll maneuver that will position the Trailblazer behind the immediate pursuers.
Requirements:
– Unlock the Mercenary Expert
– Defeat an Imperial Gozanti-class Cruiser in Space
– Complete a space enforcer contract.
Roll Maneuver
Enables a strafing Dodge Roll maneuver that will dodge longer distances and avoid damage for a short duration.
Requirements:
– Unlock the High Roller Expert
– Defeat 10 enemies in space
– Find 10 containers in space
– Dodge 5 incoming missiles
Recommended Trailblazer Builds
While there are many builds you can utilize, it’s good to make sure your build has some good cohesion. Here are several builds you can use for the Trailblazer:
Easy Mode Build
If you have trouble aiming, need a good beginner build, or don’t like going into space often, the Easy Mode Build is a good build for any of those issues.
- Rapid Fire Cannons
These cannons are easy to use, can hit multiple targets, and it’s just fun to see the rapid lasers blow up a target. These will never fail you as it will be difficult for you to miss. - Proton Torpedoes
Whether you’re trying to take out pesky starfighter swarms or take down an Imperial cruiser, the proton torpedoes will get the job done. Two of these blow up the Death Star; they can accomplish anything. - Laser Turret
Let ND-5 help you take out some of the fighters with the turret. - Countermeasures
The countermeasures are a great utility item that can allow you to focus more on shooting things rather than dodging missiles. If you don’t mind dodging missiles, go for the Heat Sink.
The Easy Mode Build is good for light combat situations where you’re primarily fighting small groups of enemies. It might struggle in situations where you’re vastly outnumbered and the shots get too spread out on starfighters.
If you’re against a freighter, rely on your torpedoes to do significant damage on the weak spots. The rapid fire cannons are fun and easy to use, but they deal little damage to freighters.
All-Rounder Build
If you want a build that’ll make the Trailblazer good in most situations, then you should use this All-Rounder build. It assumes you have developed more skill with piloting, thus you can use more advanced techniques.
- Laser Cannons
The laser cannons are a very balanced weapon that offers solid damage and is more forgiving with missed shots. - Cluster Missiles
The cluster missiles are primarily for taking down large squads of starfighters. They can also be used to deal good chunks of damage to a freighter’s weak spots. - Ion Turret
The ion cannon is good for having it peel some starfighters off you. If you want to use it against a larger ship, be sure to take down any nearby starfighters. This way the turret will focus the freighter and not the starfighters. - Heatsink
Do you want maximum over-DPS laser cannons that will melt starfighters and Gozanti-class cruisers? Use the heat sink with the laser cannons for one of the best weapon experiences in the game.
The All-Rounder Build is just a more advanced setup of the default build the Trailblazer starts out with. It’s good for heavier combat situations where you are outnumbered by starfighters.
The only downside is that if you are out of missiles and the heat sink is on cooldown, you might struggle to deal sufficient damage to a freighter’s weak points. That’s what the next build addresses.
Heavy Offensive Anti-Freighter Build
This build is great against destroying Imperial or syndicate freighters. The mantra behind this approach is “the best defense is a good offense”. You want to delete them before they have a chance to respond with force.
- Plasburst Cannons
With enough practice, the Plasburst cannons become an excellent weapon for taking down starfighters with one shot. It also deals good damage on a larger ship’s weak spot. Make sure you have a fully charged shot before entering combat, if possible. - Proton Torpedoes
Try to reserve these for larger ships, like freighters, cruisers, and even the syndicate starfighters. Make sure you have a full missile lock before entering combat, if possible. - Ion Turret
The Ion Turret will shred through the shields on any vessel and disable them, while contributing a bit of damage itself. - Heatsink
If you go in at the right angle, you can decimate 1-2 systems on a freighter before the crew even has a chance to get back in their seats after being rocked around from the Plasburst spam.
Freighters are a very dangerous opponent to fight in space. They’re typically going to be accompanied by a starfighter escort, and they deal a bunch of damage, including launching numerous missiles at you.
With this build, engage with a full lock on Proton Torpedoes and charged Plasburst Cannons. Fire them both at the same time, then charge another shot and activate the Ion Turret. Charge a third shot and lock on with the second Proton Torpedo. Then, fire the third shot and second torpedo and engage the Heatsink.
Heavy Defense Anti-Freighter Build
This build is great against destroying Imperial cruisers or syndicate freighters. The mantra behind this approach is “the best offense is a good defense”. With an enemy ship disabled, you have breathing room to regenerate your shields.
- Plasburst Cannons
With enough practice, the Plasburst cannons become an excellent weapon for taking down starfighters with one shot. It also deals good damage on a larger ship’s weak spot. Charge these cannons before a battle starts, always go in prepared. - Ion Missiles
Save these for larger ships and syndicate starfighters. You’ll need 3 ion missiles to disable a freighter, so try to get the upgraded version as soon as you can for this build.f - Laser Turret
The laser turret will help peel off starfighters as you’re fighting a larger ship. With the Plasburst cannon’s slow rate of fire, the laser turret helps add some extra damage in combat. - Countermeasures
The Countermeasures allow you to focus on aiming your Plasburst Cannons instead of dodging missiles. You’ll be immune to them for the full duration.
With this build, you’re looking to disable the freighters, so they hold still. This makes them a perfect target to hit with the Plasburst Cannons. Make good use of your time when the ship is disabled and take out the shield generator first.
From there, any damage you can chip in will whittle away at the freighter, whether it’s from nearby explosions, Plasburst shots, or Turret shots. If you’re good at using your ship maneuvers, you can replace the countermeasures with the heat sink for faster charge times.
Space Combat Tips
Let’s face it, the space combat in Star Wars Outlaws takes some getting used to. When you do learn how to play it, it becomes quite fun.
It can be even more fun if you’re smart about combat. The following tips will help make sure you and Nix (but mostly Nix) don’t get blown into space dust.
How to Dodge Missiles
When you see incoming missiles, you’ll hear a beeping sound. When the beeping tone gets deeper and the border is flashing, strafe to the left or right to dodge it.
Be mindful with your strafing while dodging missiles, it’s still possible to strafe right into an incoming missile.
Using the Environment
The environment has a lot of things you can shoot to change the flow of battle. If an asteroid or rock formation looks out of place, try shooting it!
Often times these objects explode when you shoot them, dealing damage to nearby enemy ships. If you’re too close, they’ll affect the Trailblazer as well.
Take Out the Weak
If you’re in a heavy combat situation with large and small ships, focus on destroying the small ships such as TIE fighers first. Their small bits of damage can quickly add up. With them out of the way, you can safely focus on the big ships.
Focus on one system at a time
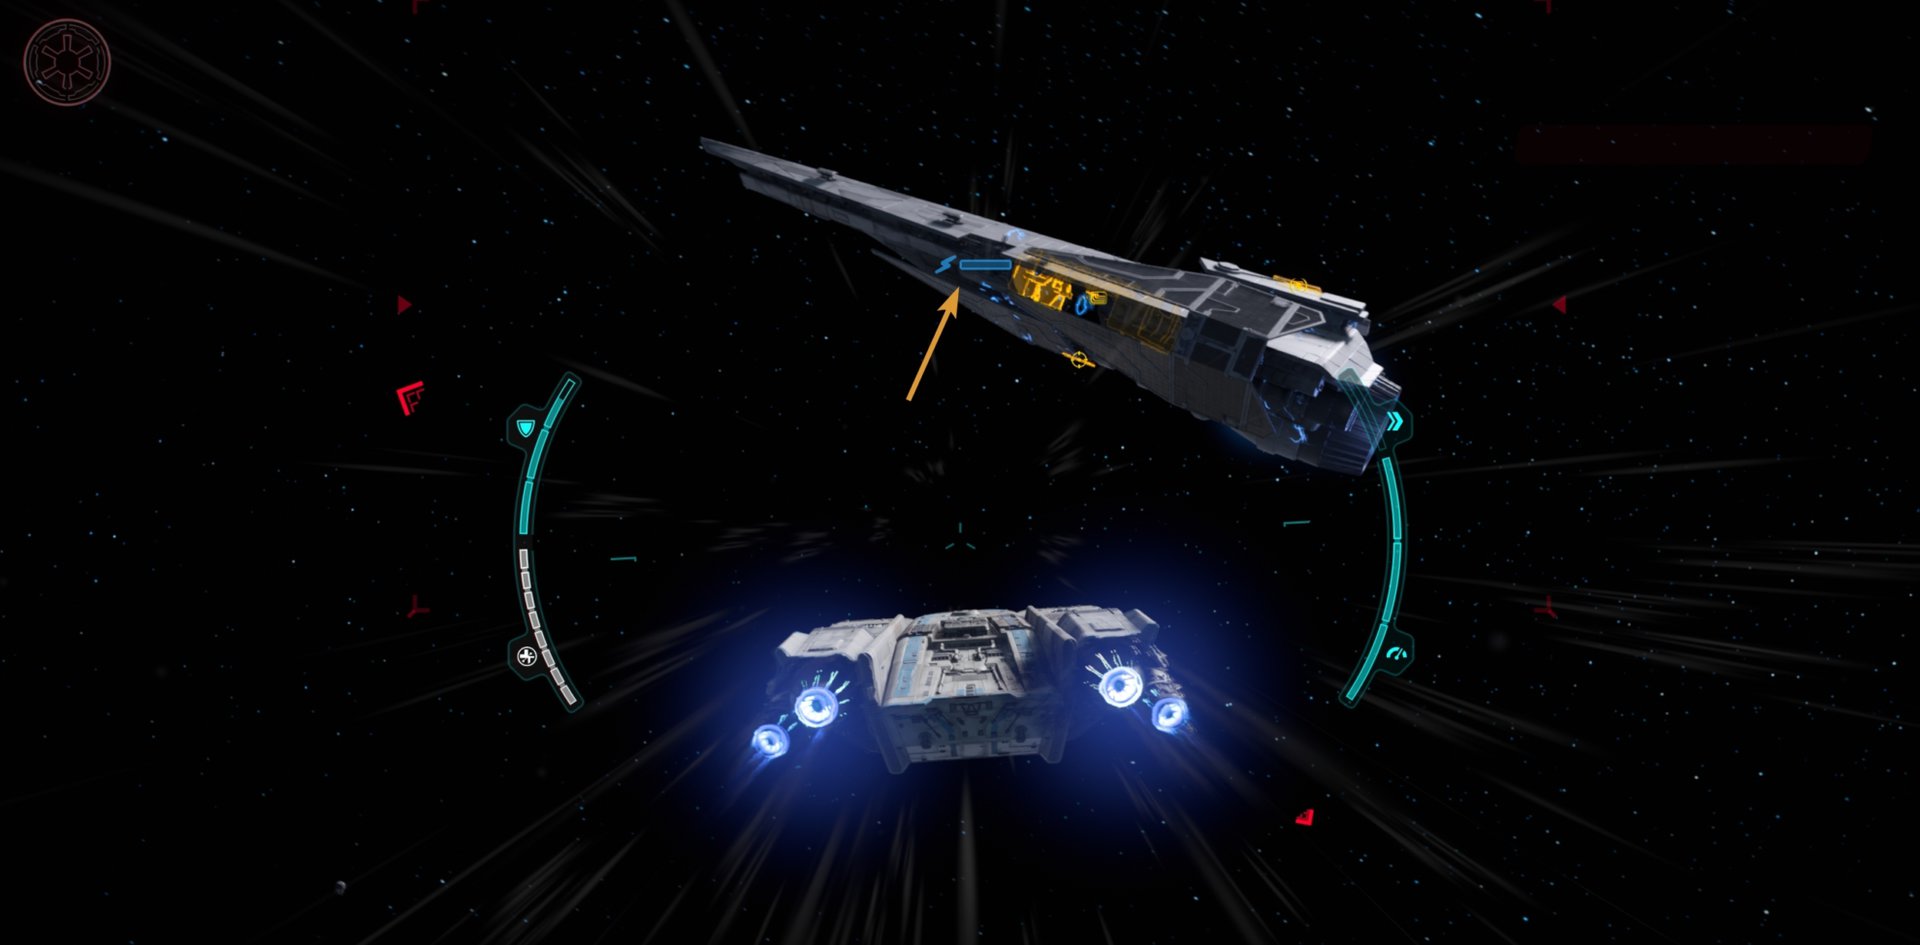
When attacking a freighter or cruiser, focus your fire on a single system at a time. It will appear as a yellow area with a symbol. The best type of system to focus first is dependent on your goals.
For example, if you are looking to escape an Imperial Raider, you only need to destroy the interdiction systems.
If you take out the shield generator, they can no longer regenerate shields. If you take out their weapon systems, they will hardly hurt you. If you take out their engines, they can’t escape.
No Shame in Running
If worse comes to worse and you’re about to be blown up, simply activate your speed boost and get out of the area. You can activate your hyperdrive to relocate yourself into a safe area where you can regenerate your hull out of combat.
Trailblazer Customizations
Adjusting your ship’s modules to your tastes helps it feel more like your ship. The only way to take this further is to apply customizations to the Trailblazer. You can change your customizations at a ship engineer or from the vehicle menu.

There are many paint jobs and fuels to find, be sure to explore planets and their orbits for the various Trailblazer customizations!
I hope this guide serves you well and teaches you what you need to know about the Trailblazer and space combat! Good luck and may the Force be with you.
Star Wars Outlaws Review
Our spoiler-free review of Star Wars Outlaws. Written after completing the game and gathering everything possible from it.

Star Wars Outlaws DOs and DONTs: Tips for Beginners
A collection of Star Wars Outlaws beginner tips for new players. Learn the DOs and DONTs for Star Wars Outlaws early game and discover how to improve your experience.
Star Wars Outlaws PC and Console Controls Guide
Star Wars Outlaws has its controls laid out quite well, but with a bit of tweaking, you can make them even better. This guide lists all of the default controls for PC and Consoles alongside the changes we recommend you to make for more comfort.
Star Wars Outlaws Settings and UI Guide: What should you change
This guide covers the Visual and Gameplay Settings for Star Wars Outlaws and how best to adjust them for a better experience.

Star Wars Outlaws Nix Guide: All Controls and Abilities
Learn what your fuzzy little sidekick Nix can do for you in Star Wars Outlaws. I hope you're ready to get your sick kicks with Nix!

Star Wars Outlaws Syndicates Reputation System: Everything You Need to Know
This guide explains how the Syndicates Reputation System works in Star Wars Outlaws – the effects of Positive and Negative reputation, what rewards you get for increasing reputation with each syndicate and recommend Reputation Building Strategies!

Star Wars Outlaws Loadouts and Gearing Guide
The Loadout system in Star Wars Outlaws plays an important role in its gameplay, allowing you access to various perks and benefits. This guide goes into this system in-depth.

How to unlock all Experts and Abilities in Star Wars Outlaws
This guide will help you unlock all Experts in Star Wars Outlaws and show you what abilities each one of them can teach Kay as well as everything you need to learn each one of them!

Blaster Modules and Key Parts: Star Wars Outlaws Guide
This guide will show you when you unlock each of the main Blaster Modes and their sub-variants in Star Wars Outlaws. We will also explain where and how to get the Blaster Key Parts and other rare materials required for the upgrades.

All Star Wars Outlaws Outfits: Full Catalog
This catalog lists absolutely all Outfits available in Star Wars Outlaws. It also explains how outfits work if you are a new player. We will keep it updated when DLCs start coming out.
Star Wars Outlaws Lockpicking Guide: How to Override Locks
This guide will help you learn the basics of lockpicking in Star Wars Outlaws. This simple yet fun mini-game will test your timing and ability to keep pace with the door's rhythm.
Star Wars Outlaws Slicing Guide
This guide will explain how the Slicing mini-game in Star Wars Outlaws works and how to beat it. Through the power of the process of elimination, no computer will be safe from you!

How to use Photo Mode in Star Wars Outlaws
This guide explains how to use Photo Mode in Star Wars: Outlaws and what tools it offers for taking the most perfect and tuned-up screenshots!
Related Star Wars Outlaws Collections of Guides

Our Guides Master List for Star Wars Outlaws is a great starting point. In it you will find all of our guides and walkthroughs ordered in categories.