There are 37 Treasure Chests you can find and loot on Kijimi in Star Wars Outlaws. We will show you where to find every single one of them!
Out of all available treasure chests on the planet, 12 are on the path of the main story quests and contain less valuable loot or credits. The others are marked treasures in the open world with 18 containing cosmetics and collectible items. The remaining few offer Credits or Upgrade Materials.
The items in the guide are sorted according to their subjective importance with more valiable and possibly more often used and desired items near the top and the less valuable treasure locations containing credits and upgrade materials at the bottom.
Table of contents
- Main Story Treasure Chests
- Ashiga Clan Vault: Credits, Paint Job, Ship Finish
- Crimson Dawn Vault: Credits, Shift Token, Ship Finish
- Jet Kordo’s Legacy Vault: Collectibles
- Street Food Mini Game – Duradan Soup for Nix
- Rama’s Stash: Blue Scarf (Nix Accessory)
- Teko’s Stash: Blue Tail Wrappings (Nix Accessory)
- Sacluded Backalley: Picture Card (Nix Treasure)
- Luda’s Stash: Blaster Recirculator Upgrade Material
- Minga’s Stash: Parasol Lantern Speeder Trophy
- Okali’s Stash: Survival Kit Speeder Trophy
- Kona’s Stash: Spot Lantern Speeder Trophy
- Mehdo’s Parlor: Nightfall Finish
- Piapo’s Stash: Starburst Finish
- Novi’s Stash: Kijimi Explorer Fuel
- Quola’s Stash: Vandor Survivalist Belt
- Muroma’s Stash: Crimelord’s Petars Trinket
- Saku’s Stash: Tauntaun Horn Trinket
- Crimson Dawn Sabacc Card Room: Shift Tokens
- Hakan’s Stash: Upgrade Materials
- Luda’s Stash: Blaster Recirculator (Blaster Upgrade)
- Ilario’s Stash: Upgrade Materials
- Jarmo’s Stash: Credits
- Venti’s Stash: Credits
- Velek’s Stash: Credits and Upgrade Materials
- Umi’s Stash: Credits and Upgrade Materials
Main Story Treasure Chests
Many of the areas you visit for main story quests feature treasure chests:
- If the areas are outside the boundaries of the maps and unmarked or become inaccessible after the quest, the treasures always contain only minor items such as credits and valuables or upgrade materials.
- If the areas are part of the open world and are marked on the maps, the treasures could be more valuable.
The main storyline on Kijimi features three quests: The Safecracker, Breakout and The Hive. The table below lists the available treasures for each mission. Our in-depth quest walkthgroughs will guide you to the locations of each treasure chest as you progress through the story.
The Safecracker – 3 Treasure Chests:
- #1: Kijimi Explorer Fuel – In the Ashiga Clan Vault building. More details below.
- #2: Upgrade Materials – Inside the control room.
- #3: 1000 Credits – In the bath house.
- #4: Credits – On the way to meet the Queen, inside the Wellspring.
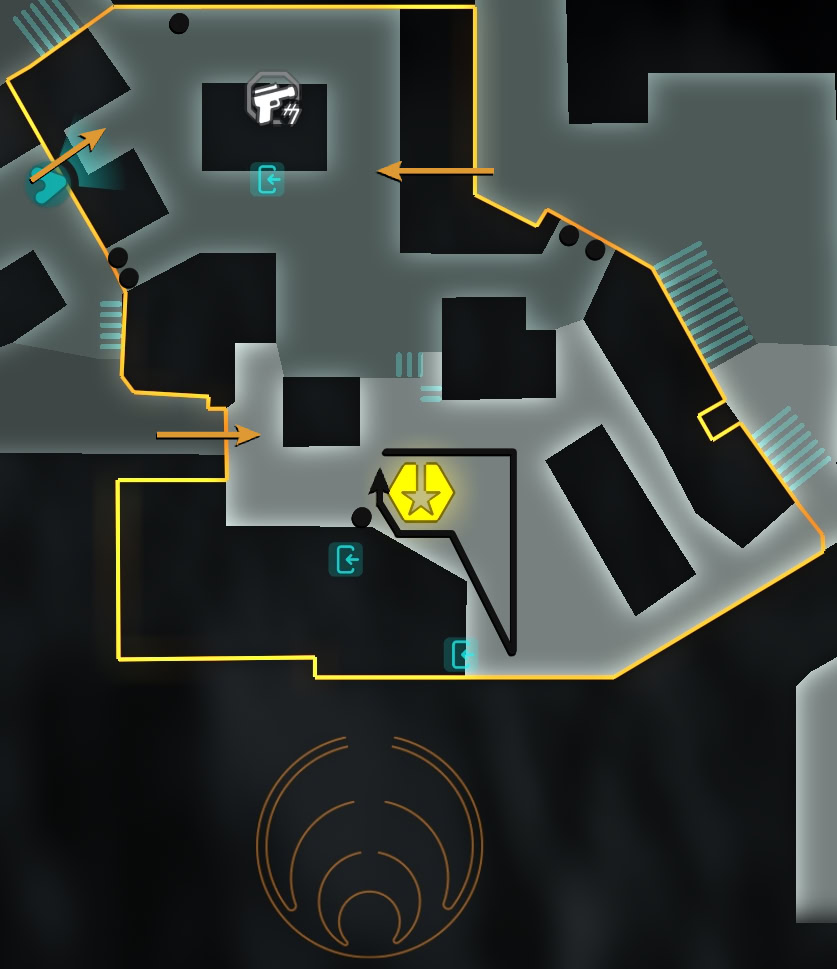
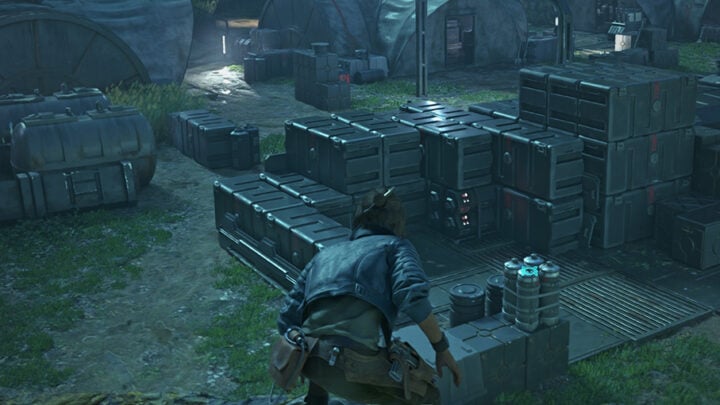
Breakout – 6 Treasure Chests:
- #1: Credits – Left side of the landing pad area.
- #2: Credits – Right side of the landing pad area.
- #3: Upgrade Materials – Past the air duct, on the ground.
- #4: Credits – Behind a moving fan you have to stop.
- #5: Upgrade Materials – Next to Ank’s charm.
- #6: Credits – On your way out back to the landing pad.
The Hive – 3 Treasure Chests
- #1: Credits – Area right after you plant Ank’s explosives.
- #2: Credits – Room you unlock right after you fight off the guards and insects.
- #3: Credits – After retrieving the origin stand, next to climable wall.
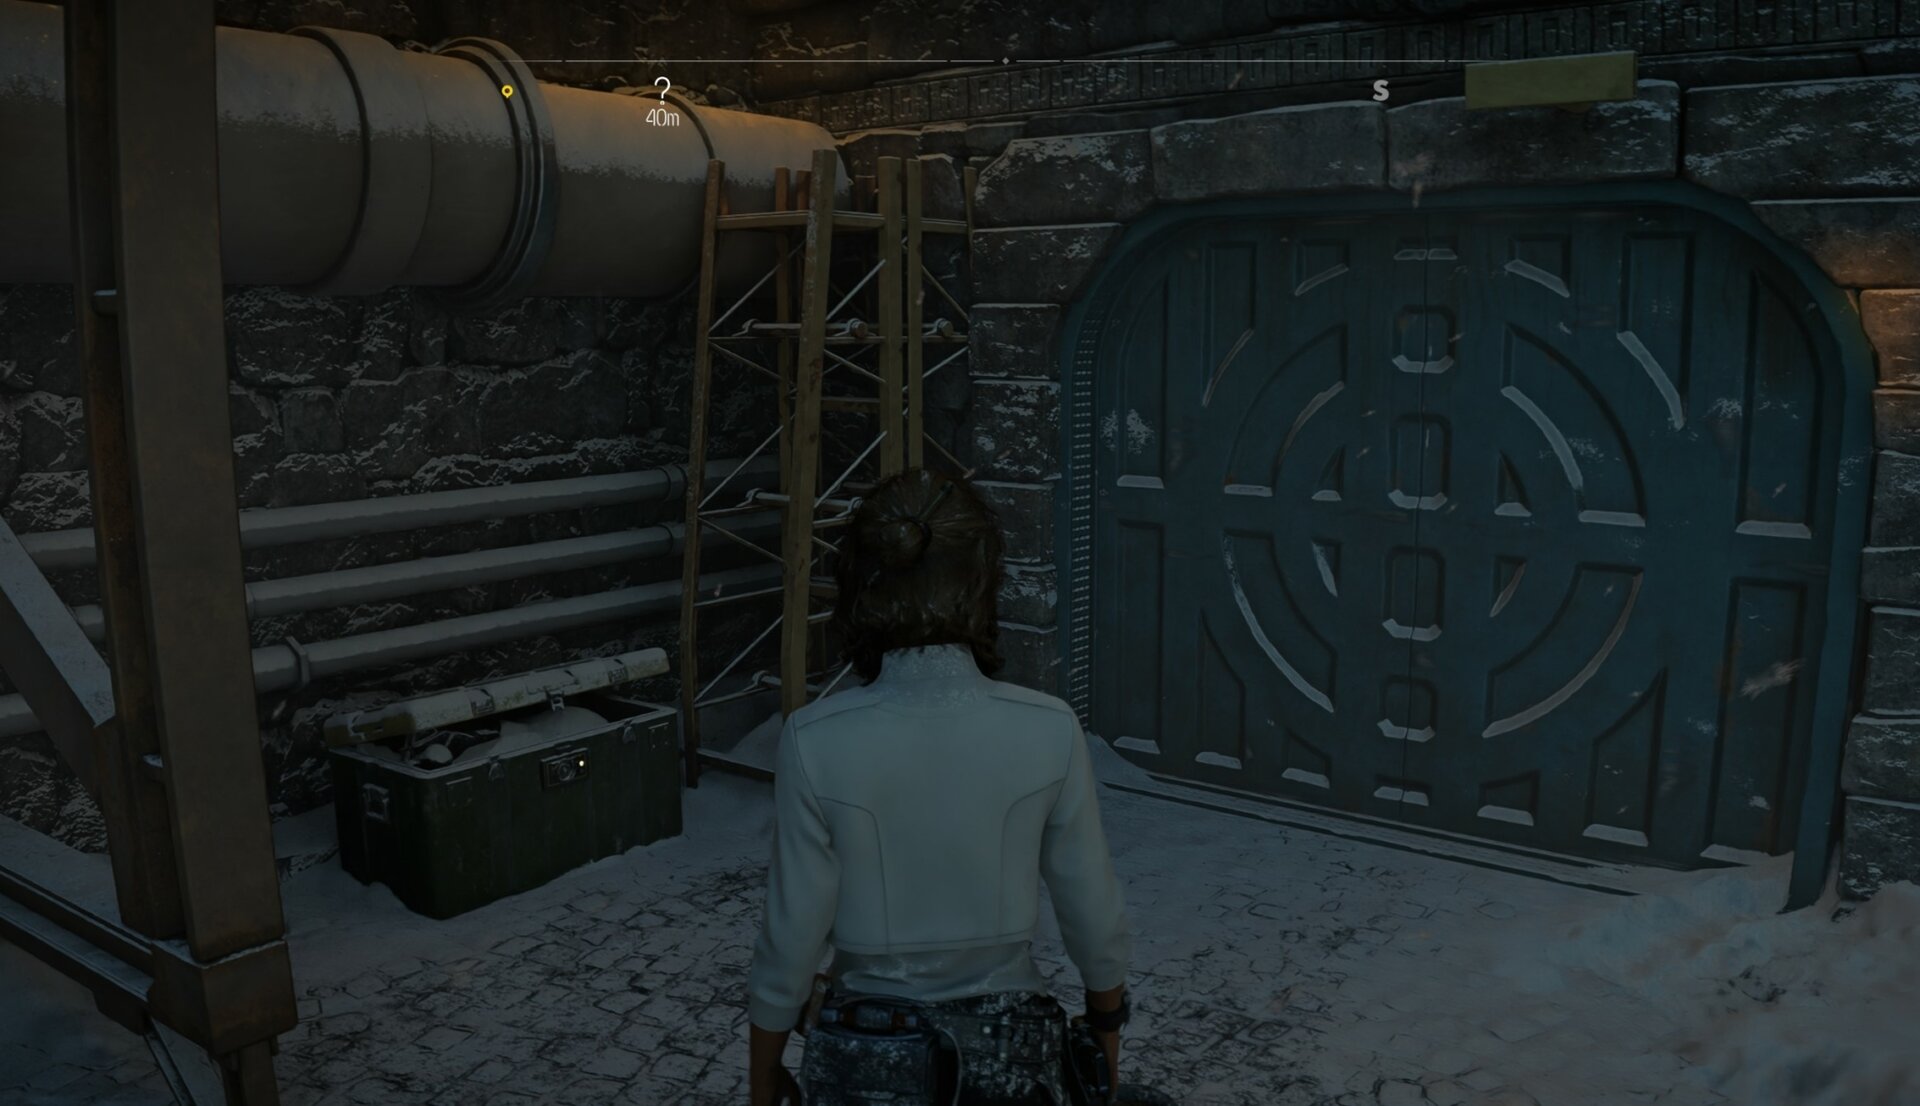
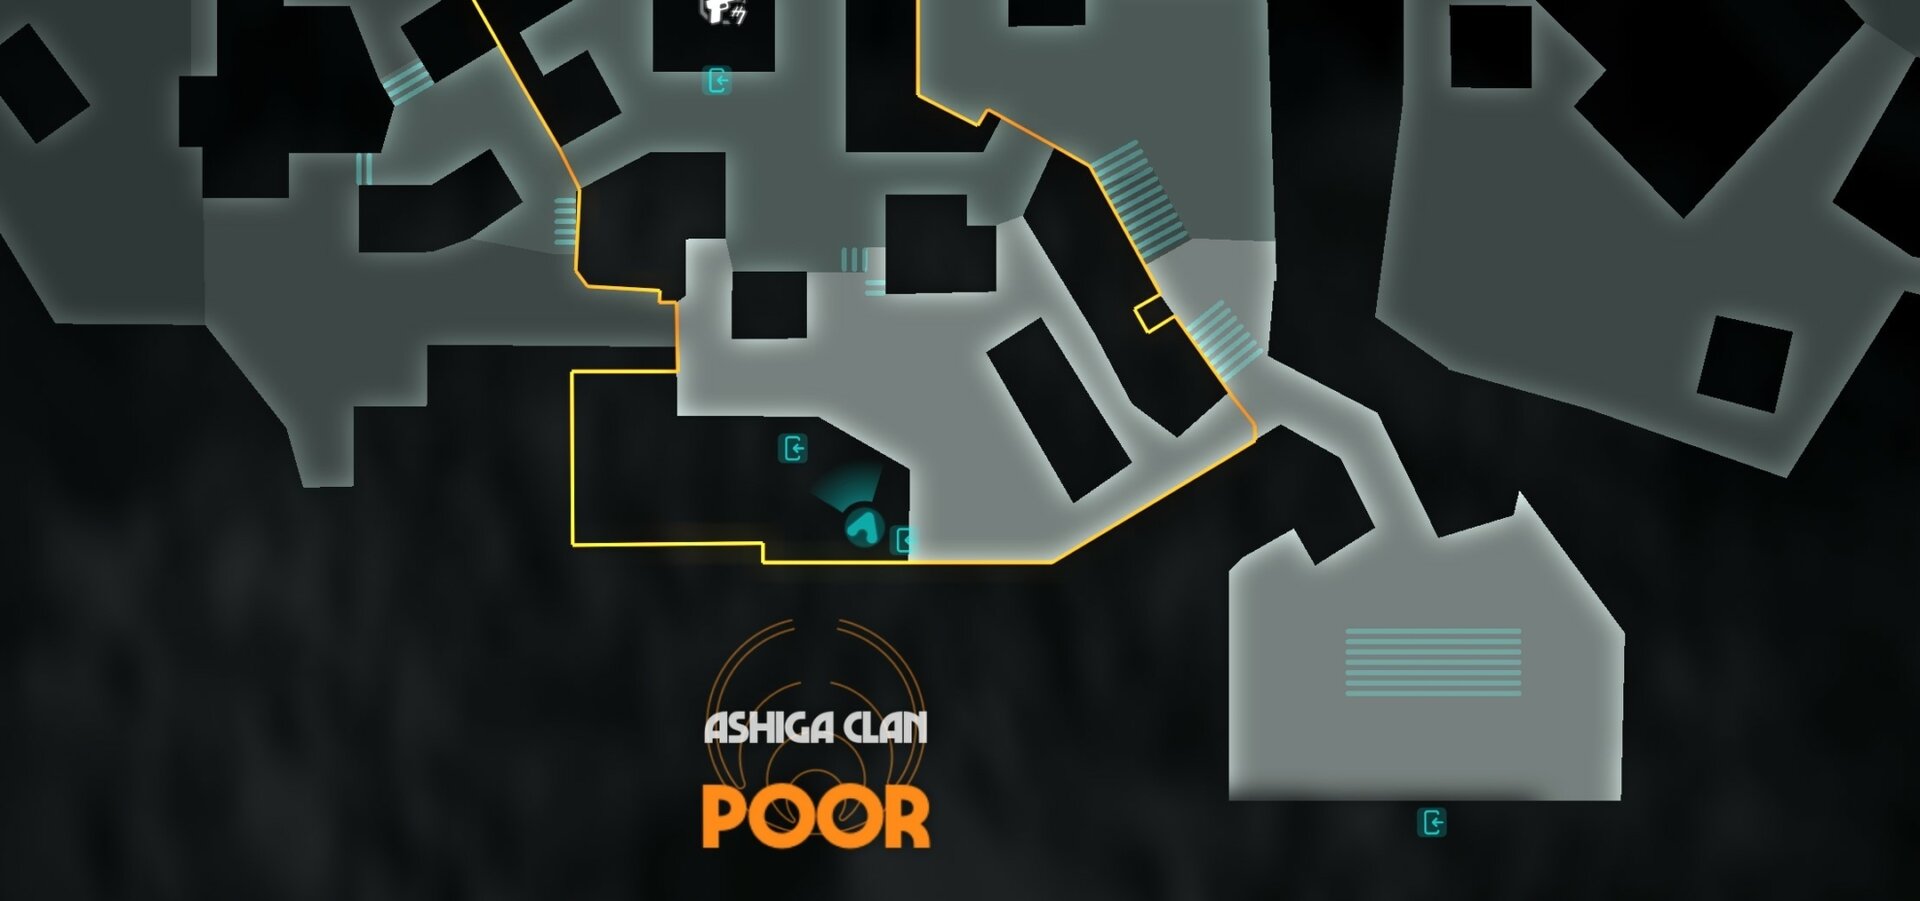
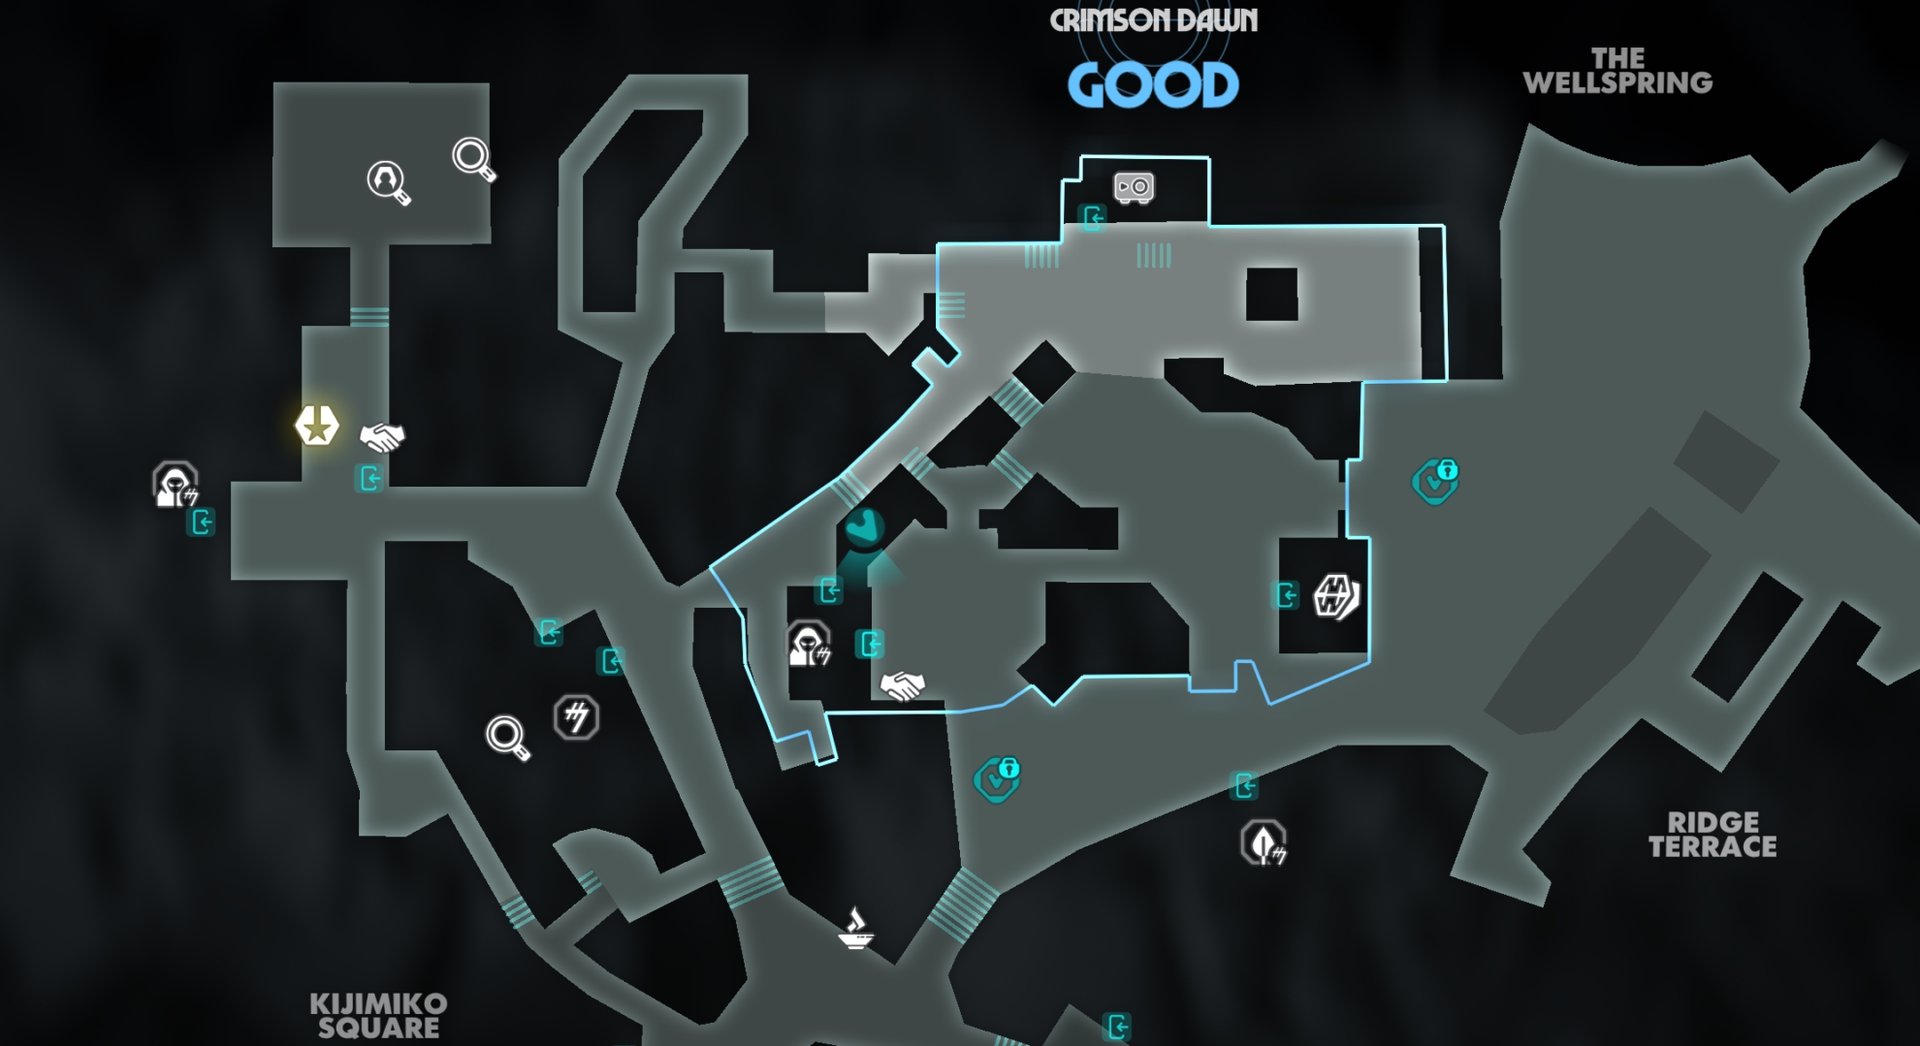
Ashiga Clan Vault: Credits, Paint Job, Ship Finish
The Ashiga Clan district on Kijimi has three secret entrances, two on the west side and one on the east. If you are not allowed to walk directly past the guards, you can use one of them.
The east entry point is the easiest. You will only encounter the two guards in front of the vault building, which is in the south side of the district.
The patrolling one will drop an access card, which you can use to enter the building. The vault is in the basement. Slice the computer inside the building to get the Vault Keycard locations.
- Frisk’s Vault Keycard is in the district. Head out of the building where the vault is and climb the wall to the west. The Vault Keycard is behind the locked door, next to a treasure chest. Here is also Velek’s Stash.
- Zyssyk’s Vault Keycard is near the Kijimi City Gate in the west corner of the map. Ask Nix to get the card above the door so you can access the area.
- Mehdo’s Vault Keycard is located between Kijimi’s Spaceport and Kijimiko Square. Ask Nix to shut off the power to the door. Thios will allow you to explore the interior of this unused shop.
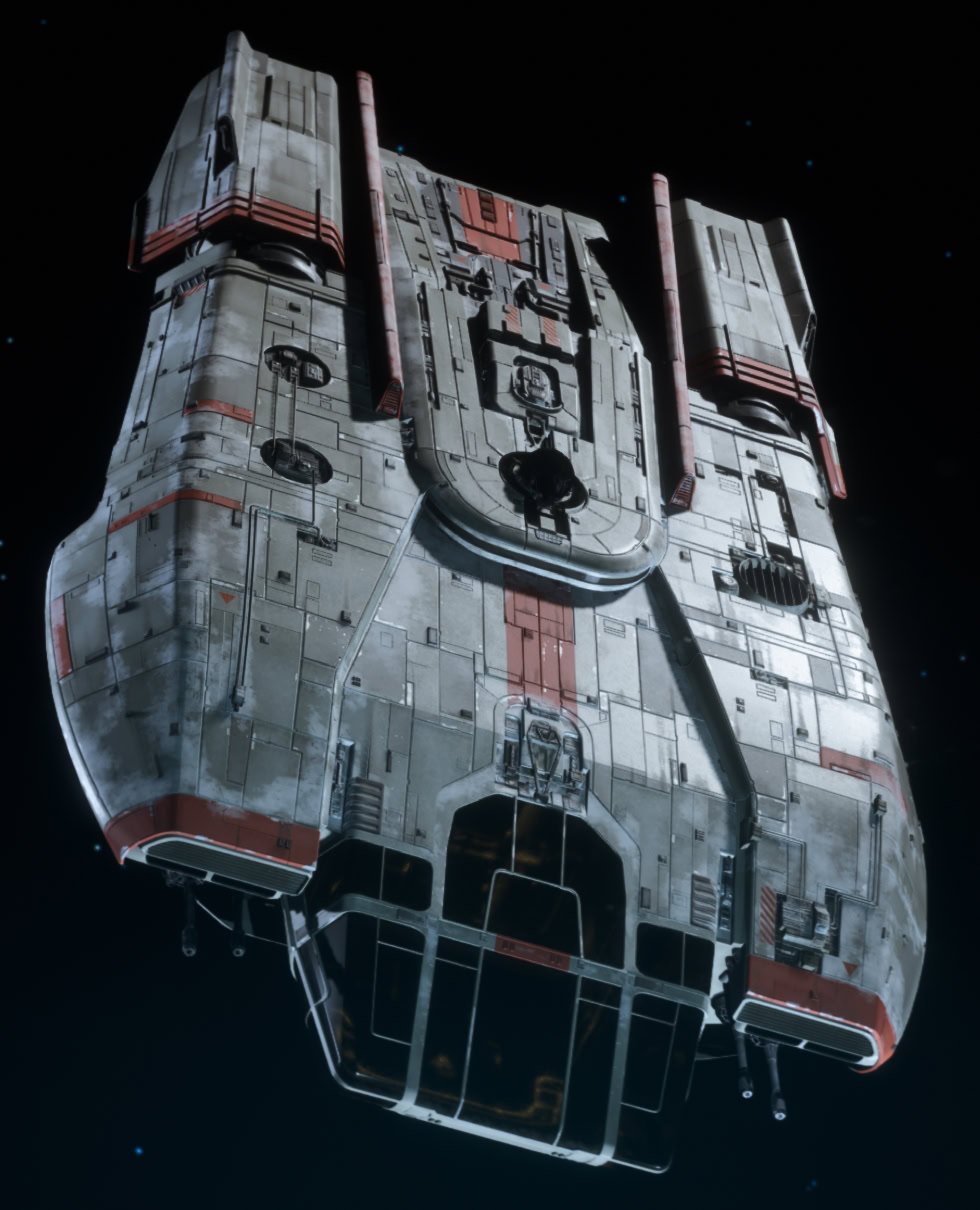
The rewards from the vault include 5000 Credits, upgrade materials and the Kijimi Explorer Speeder Paint Job and Kijimi Explorer Ship Finish. There are three more Speeder Paint Jobs available in Kijimi City on Kijimi, which we have detailed further down in this guide.
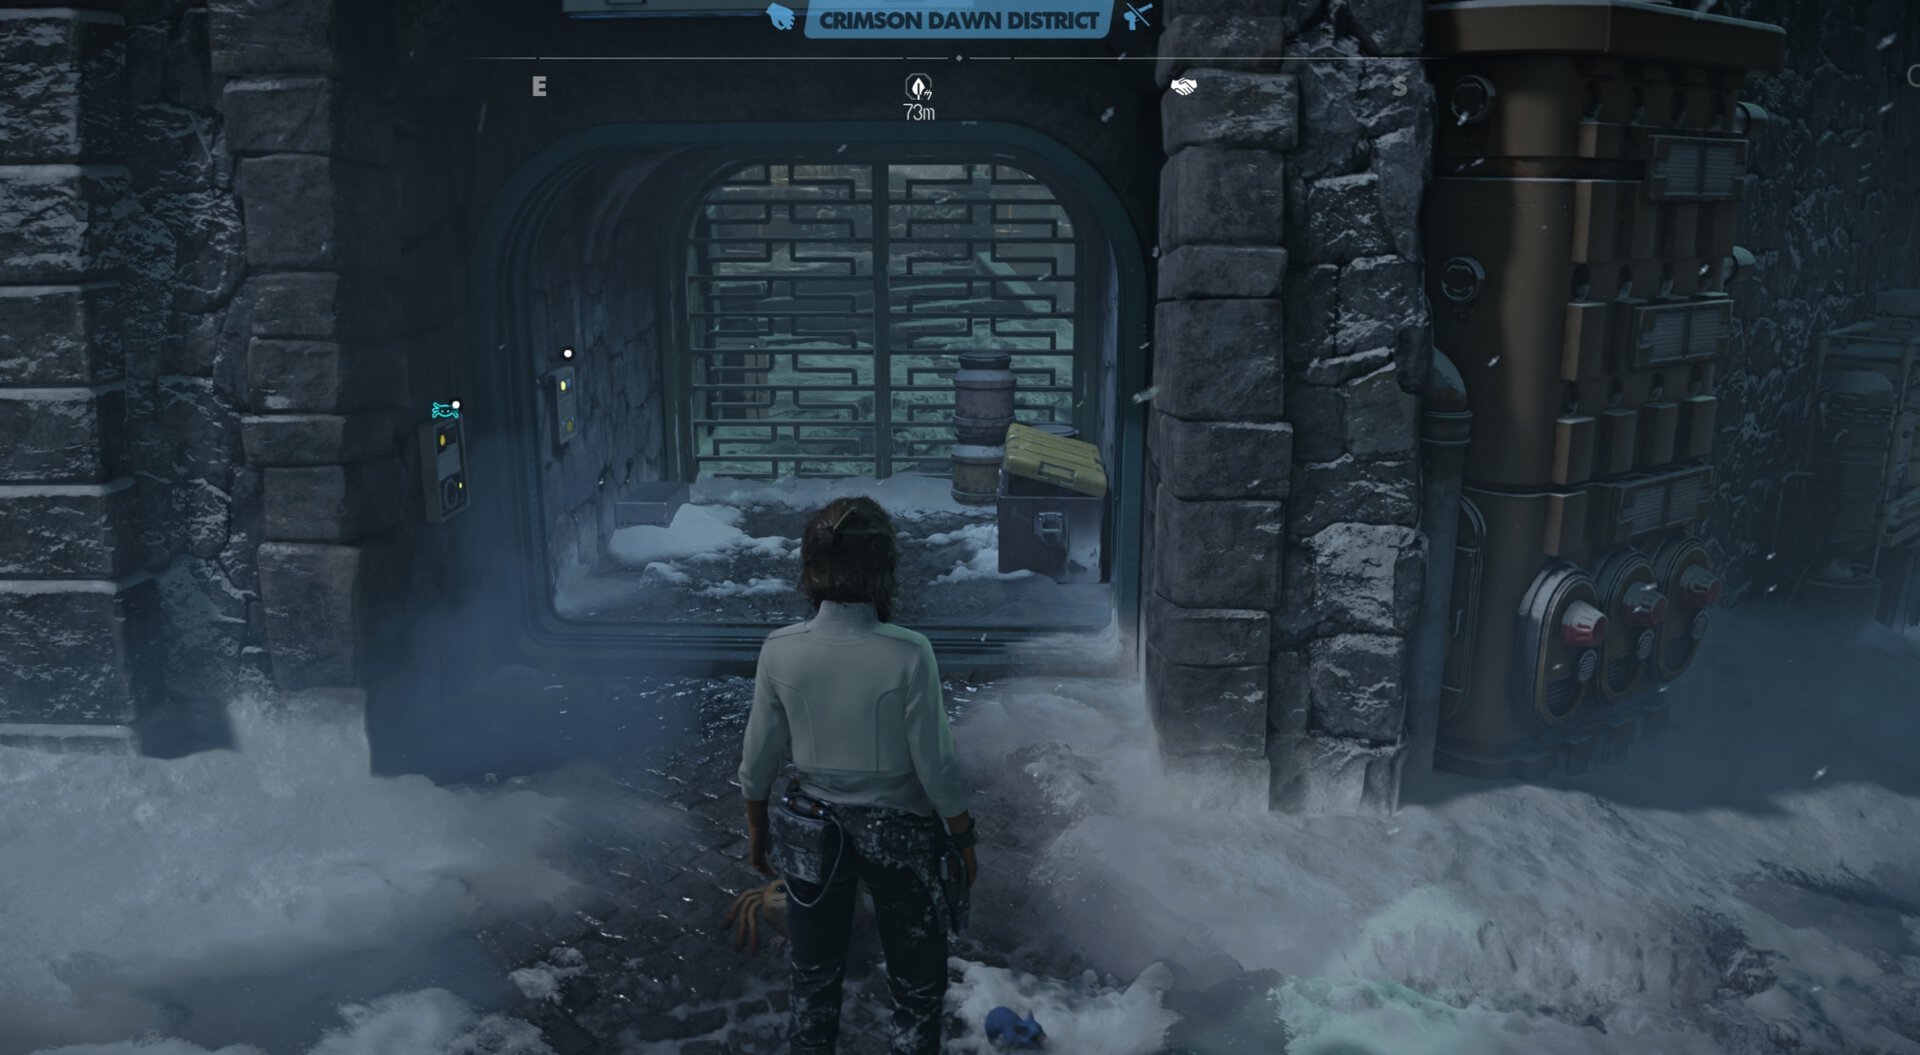
Crimson Dawn Vault: Credits, Shift Token, Ship Finish
The Crimson Dawn district area on Kijimi is guarded by two enforcers standing in front of the main gate near the Ridge Terrace. If your reputation is slow, they will not allow you in.
While facing the entrance on the east side, turn to the right, you’ll see a vent. Climb the ledge and go in. There’s a total of four guards in this area. Two on the lower level, one on the middle level, and one up the stairs, next to the vault’s main door.
With the guards down you can head upstairs and slice the main door to enter the vault. Then slice the computer to obtain all three Keycards’ locations:
- Dart’s Vault Keycard is found inside the district, behind a door in an alley after dropping down a lower level near the vault.
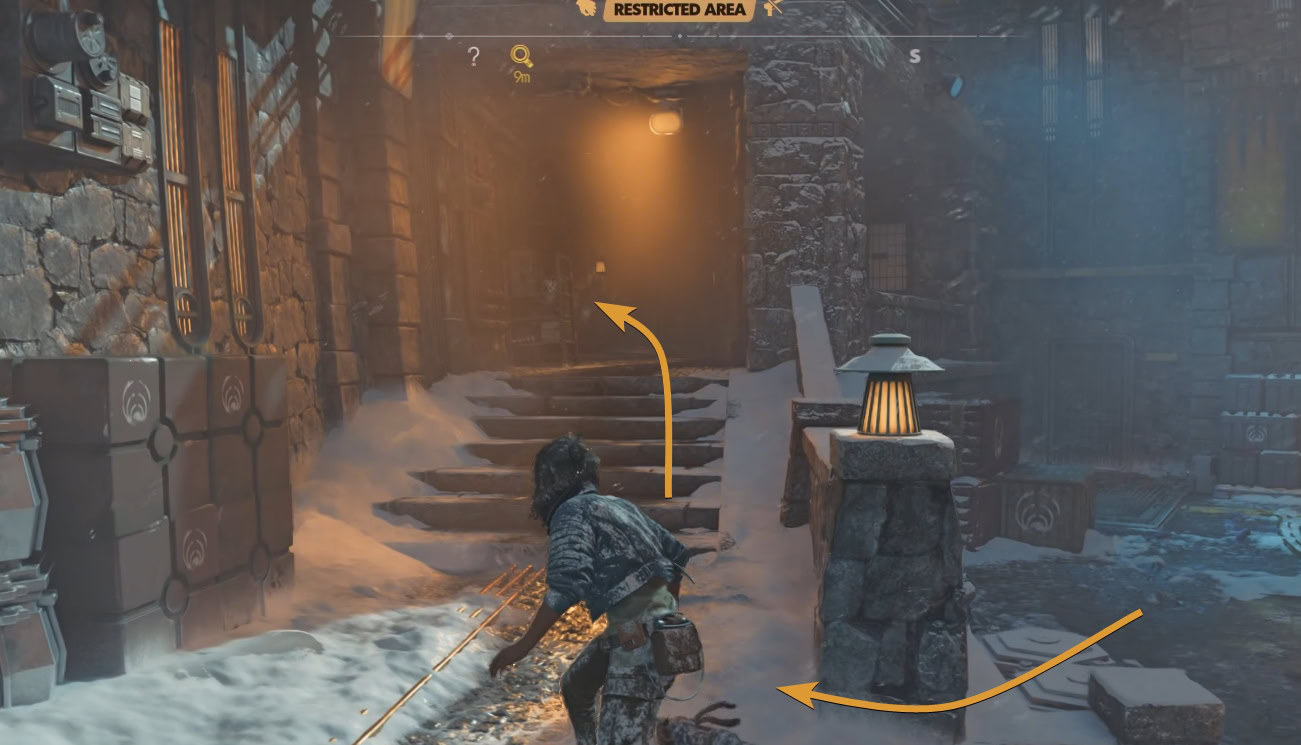
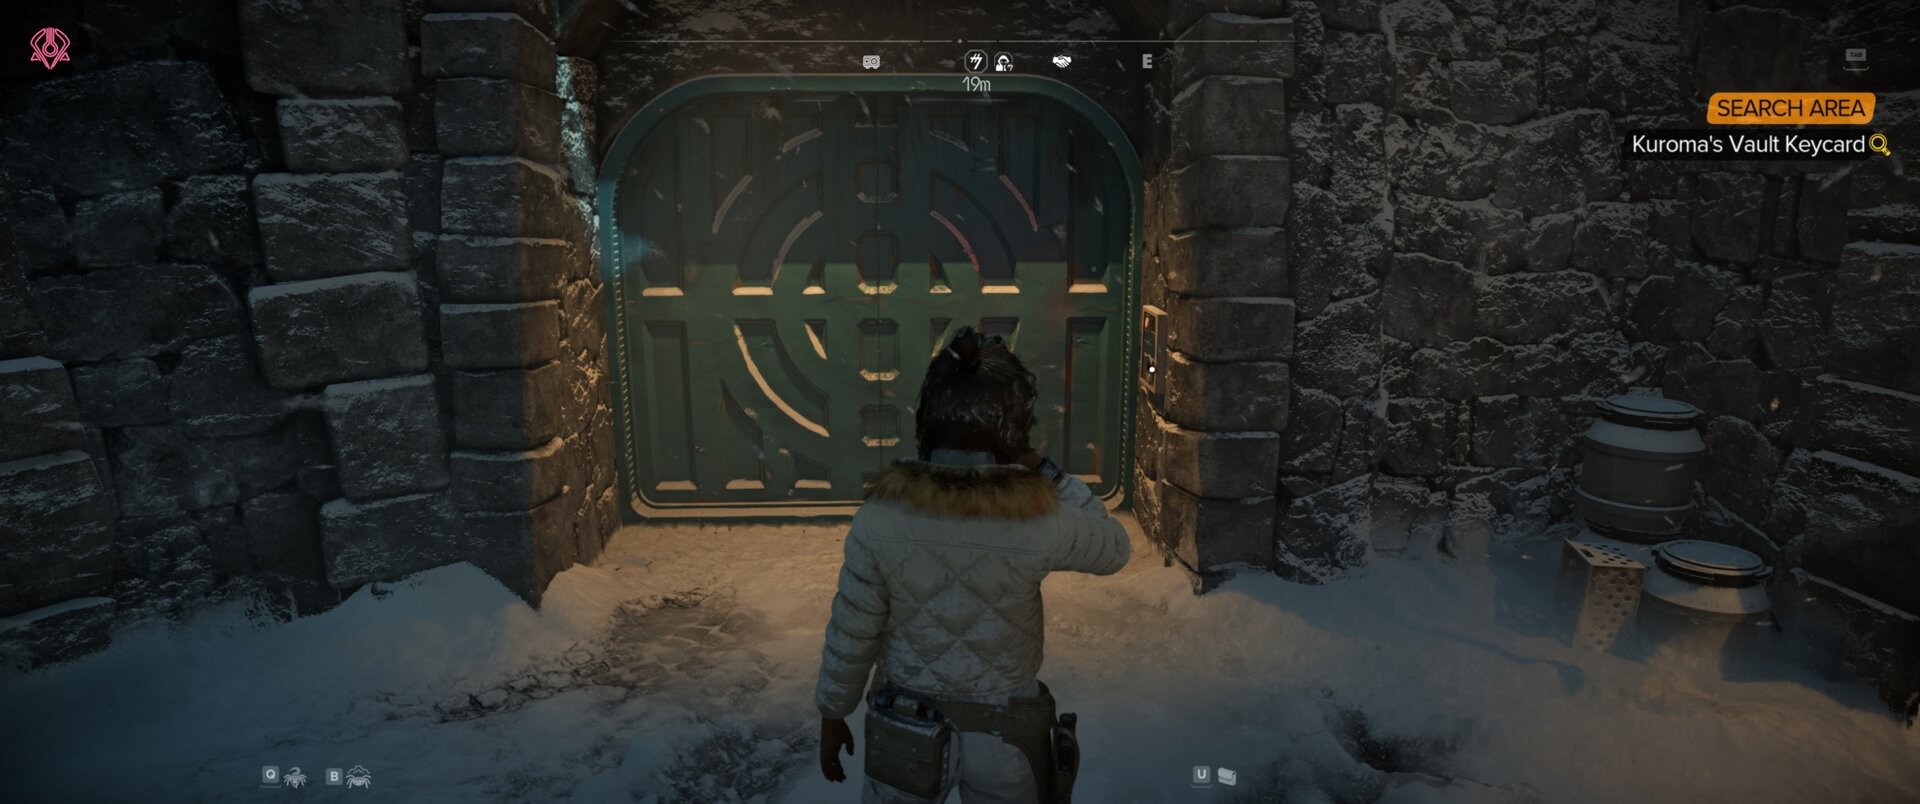
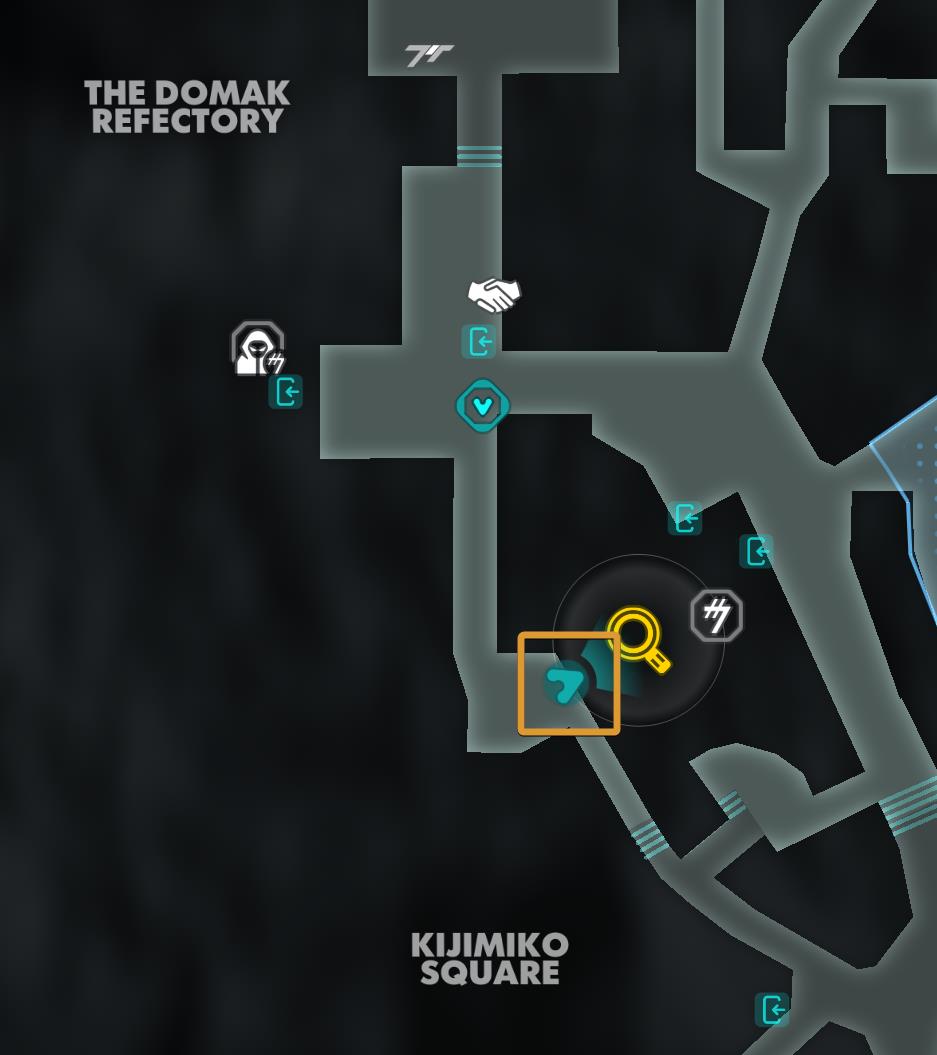
- Kuroma’s Vault Keycard is located in Kijimiko Square, behind a slicable door outside Crimson Dawn’s territory. Here you can also loot Umi’s Stash.
- EE’Zok’s Keycard is in Domak Refectory, on the second level of the cantina.
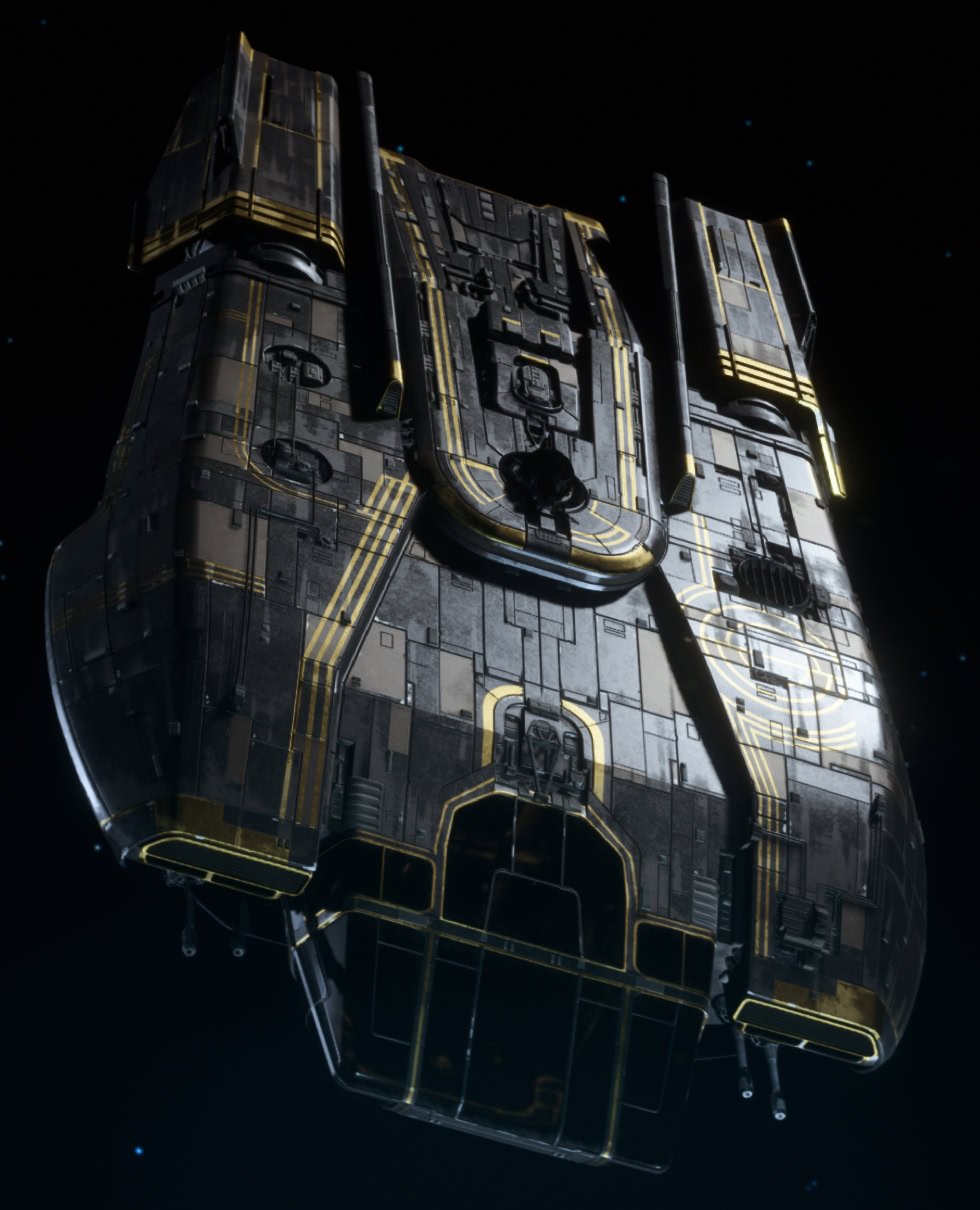
Looting the vault, will grant you 5000 Credits, upgrade materials, the Crimson Reign Finish for the Trailblazer, and the Target Audit Shift Token collectible.
Jet Kordo’s Legacy Vault: Collectibles
One of Jet Kordo’s Legacy Vaults, the Sheltered Vault, is here on Kijimi. This is a part of along quest chain that starts with the finding of the Holotracker and first Vault on Toshara.
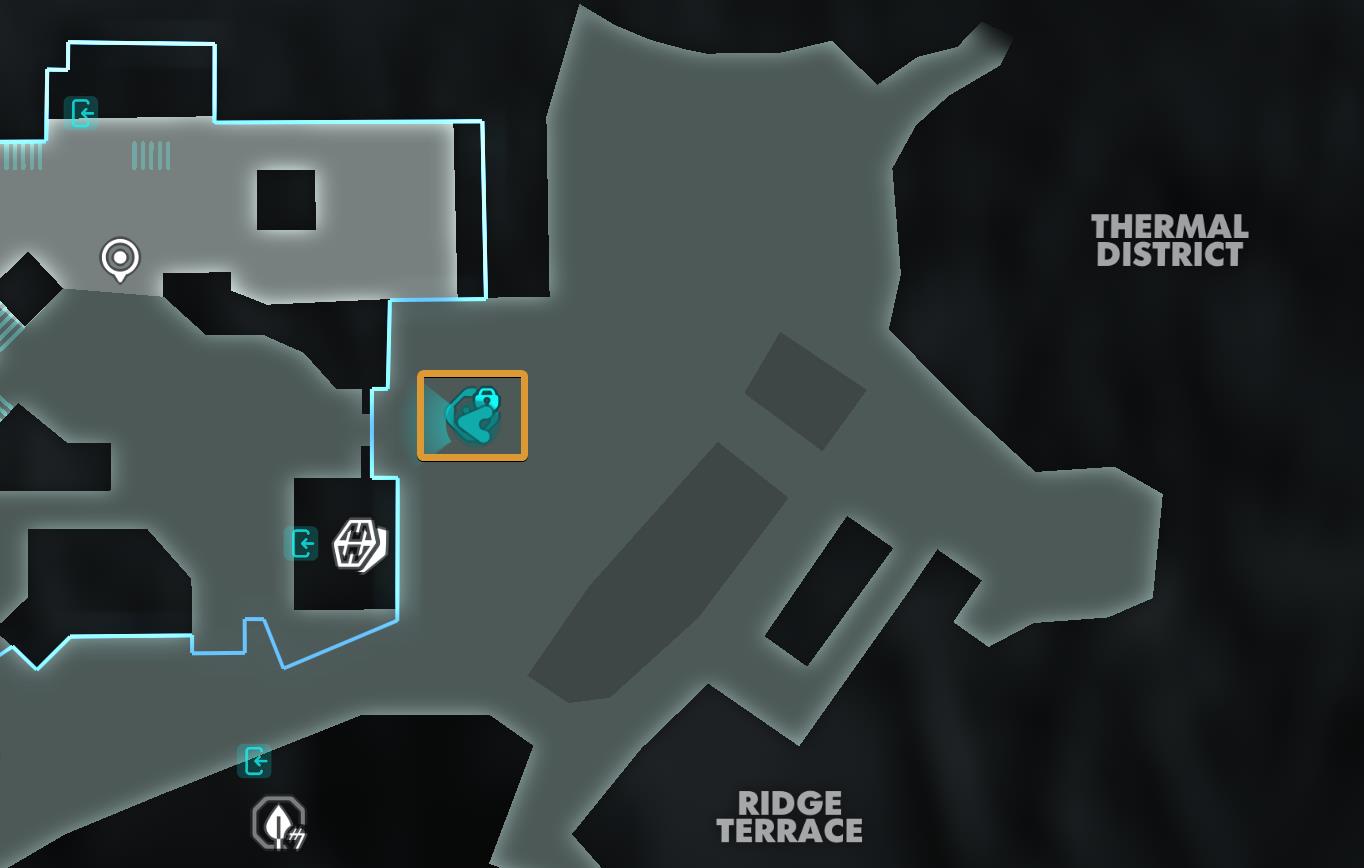
From the Fast Travel point east of the Crimson Dawn district in Kijimi City, head east and go on the bridge where you will see two citizens chatting – a Sullustan and a Mon Calamari. Listen to their chat and talk to them.
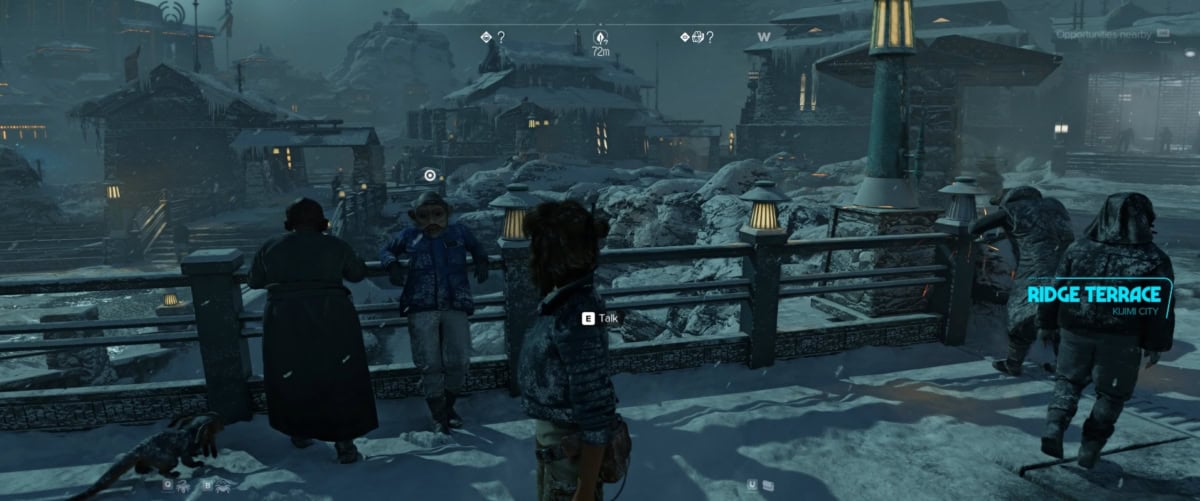
They were talking about the Miyuki Trade League. The Sulustan will tell you that she heard someone talk about them in the square in the Thieves District. From there on, follow the leads to discover the vault on Kijimi.
Completing the quest chain and discovering all of Jet Kordo’s Legacy Vaults will grant you the full Scoundrel outfit. Sadly, the vault on Kijimi doesn’t have a part of the set in its chest. The Sheltered vault will reward you with the following items:
- Jet Kordo’s Legacy Part 6 (Collectible)
- Direct Transaction (Collectible)
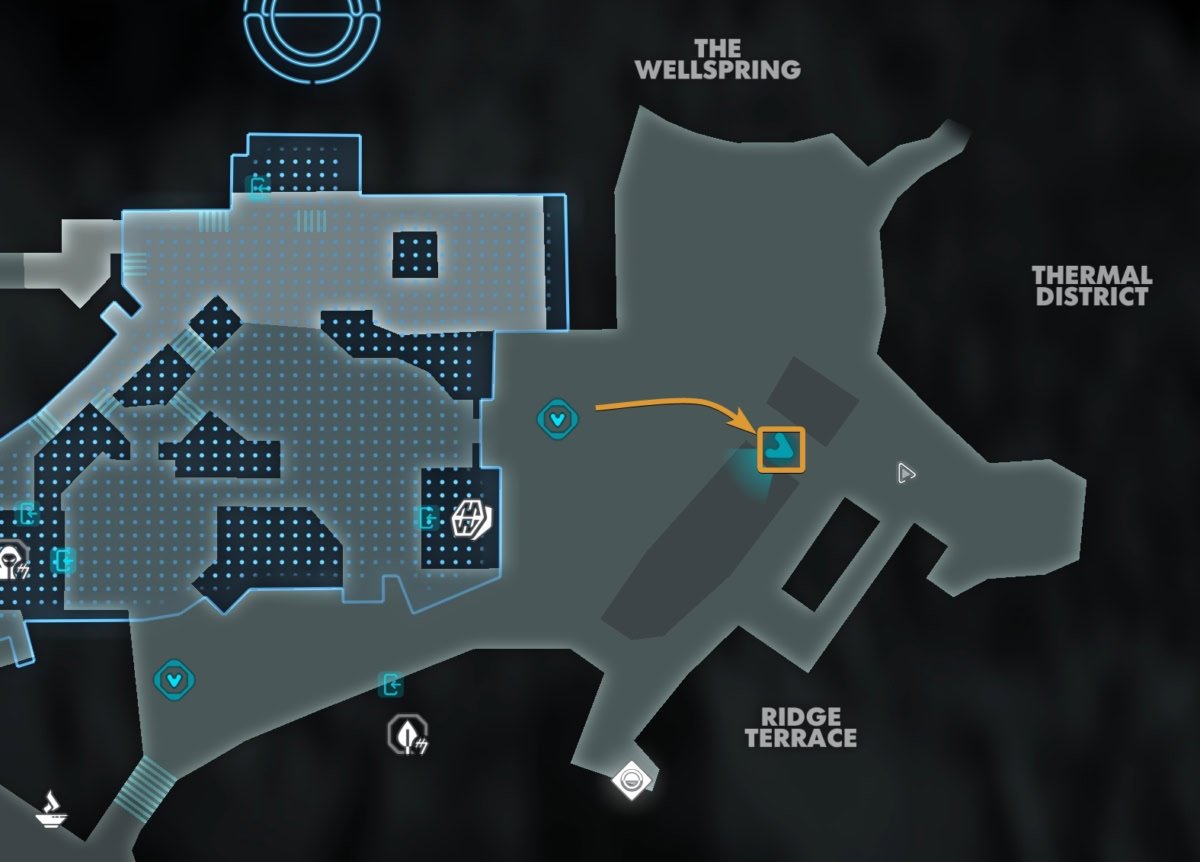
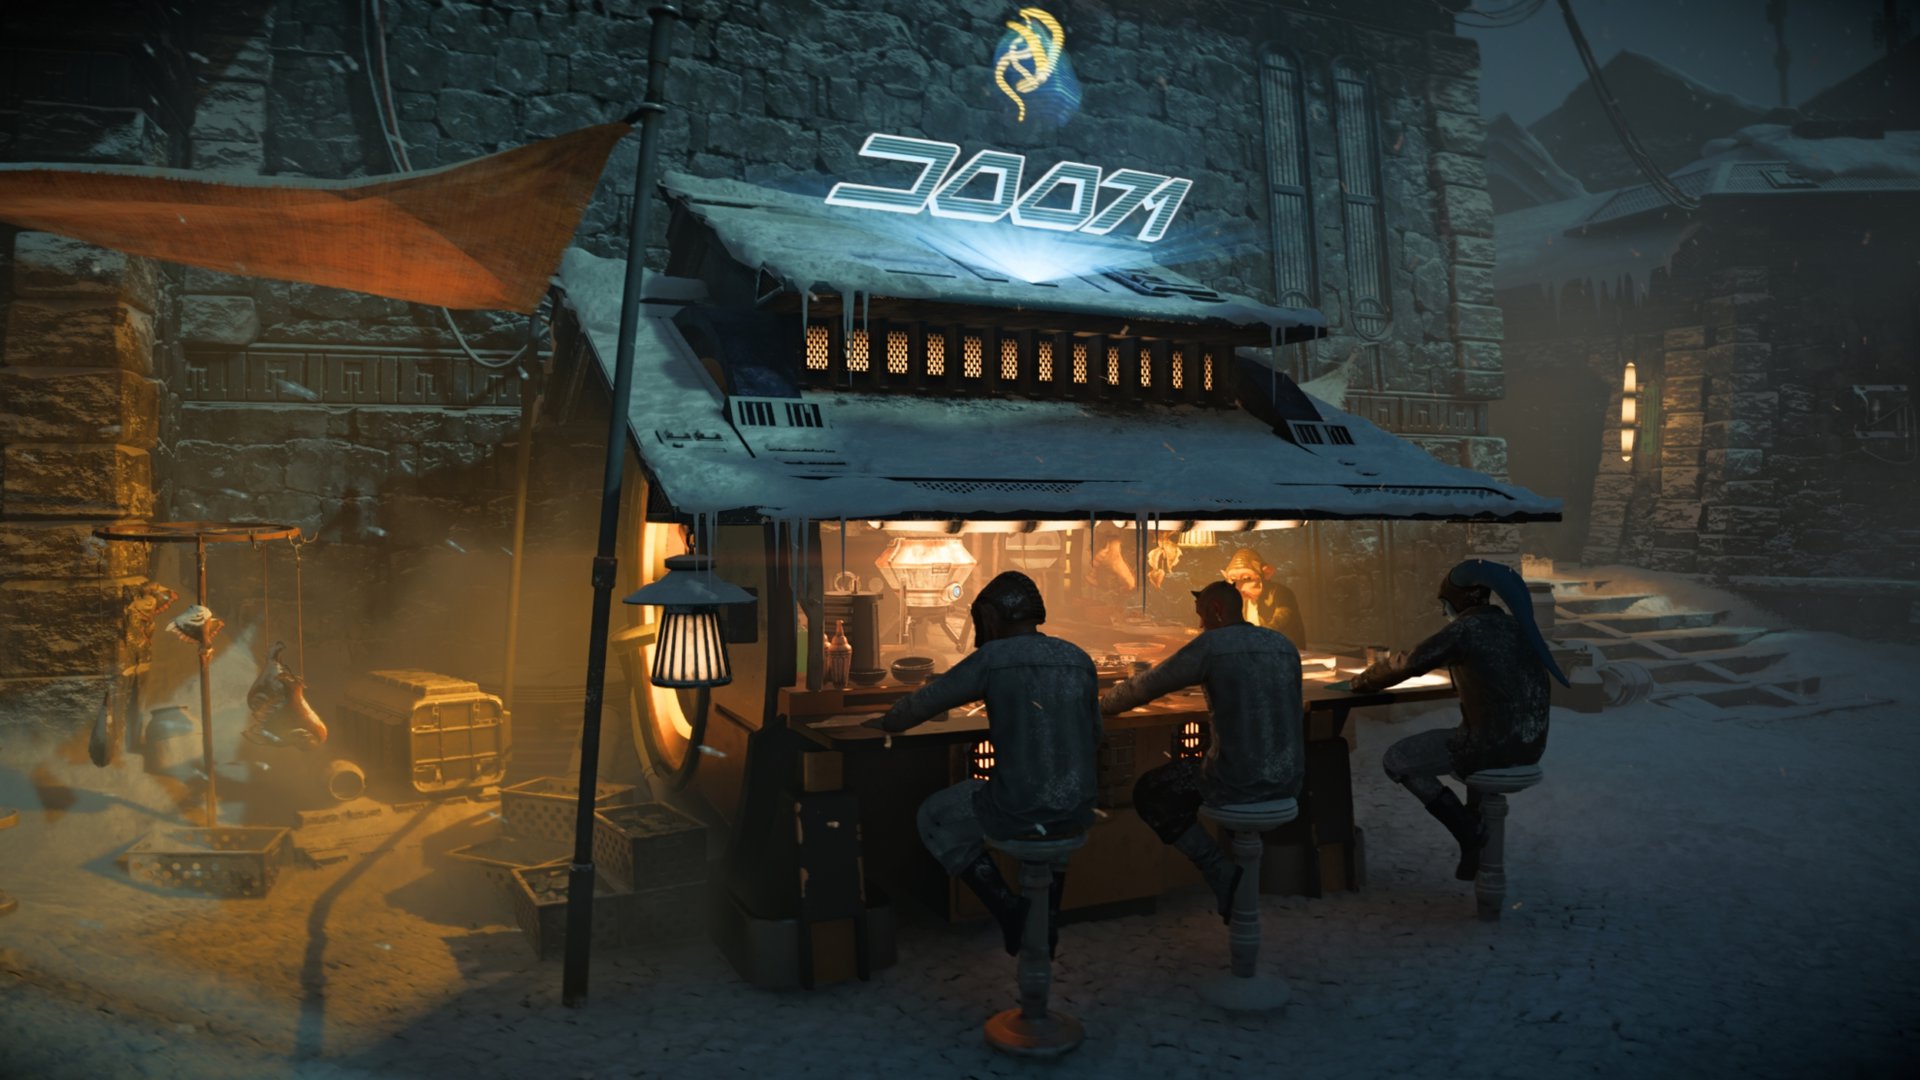
Street Food Mini Game – Duradan Soup for Nix
You can purchase Duradan Soup from a street food vendor south of the Crimson Dawn District. This dish’s effect allows Nix to distract multiple enemies at once with this treat, though it comes at the cost of a reduced distraction range.
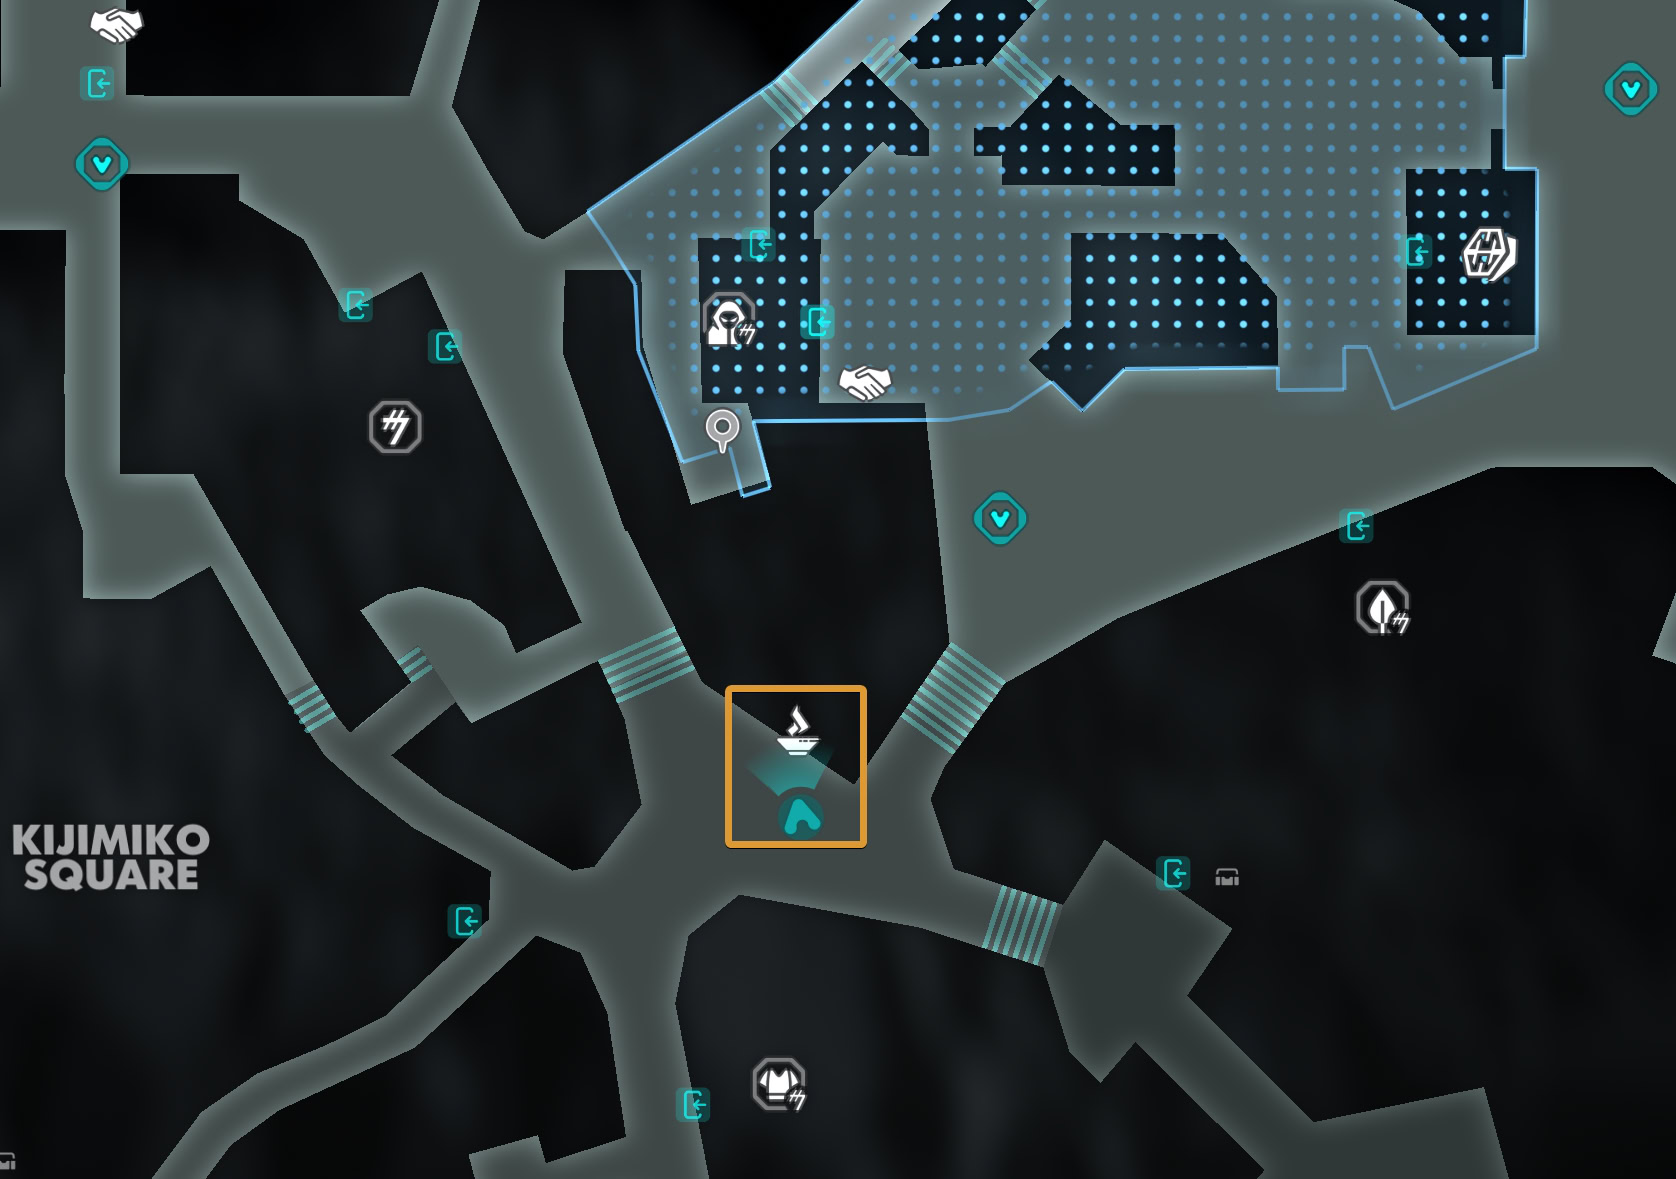
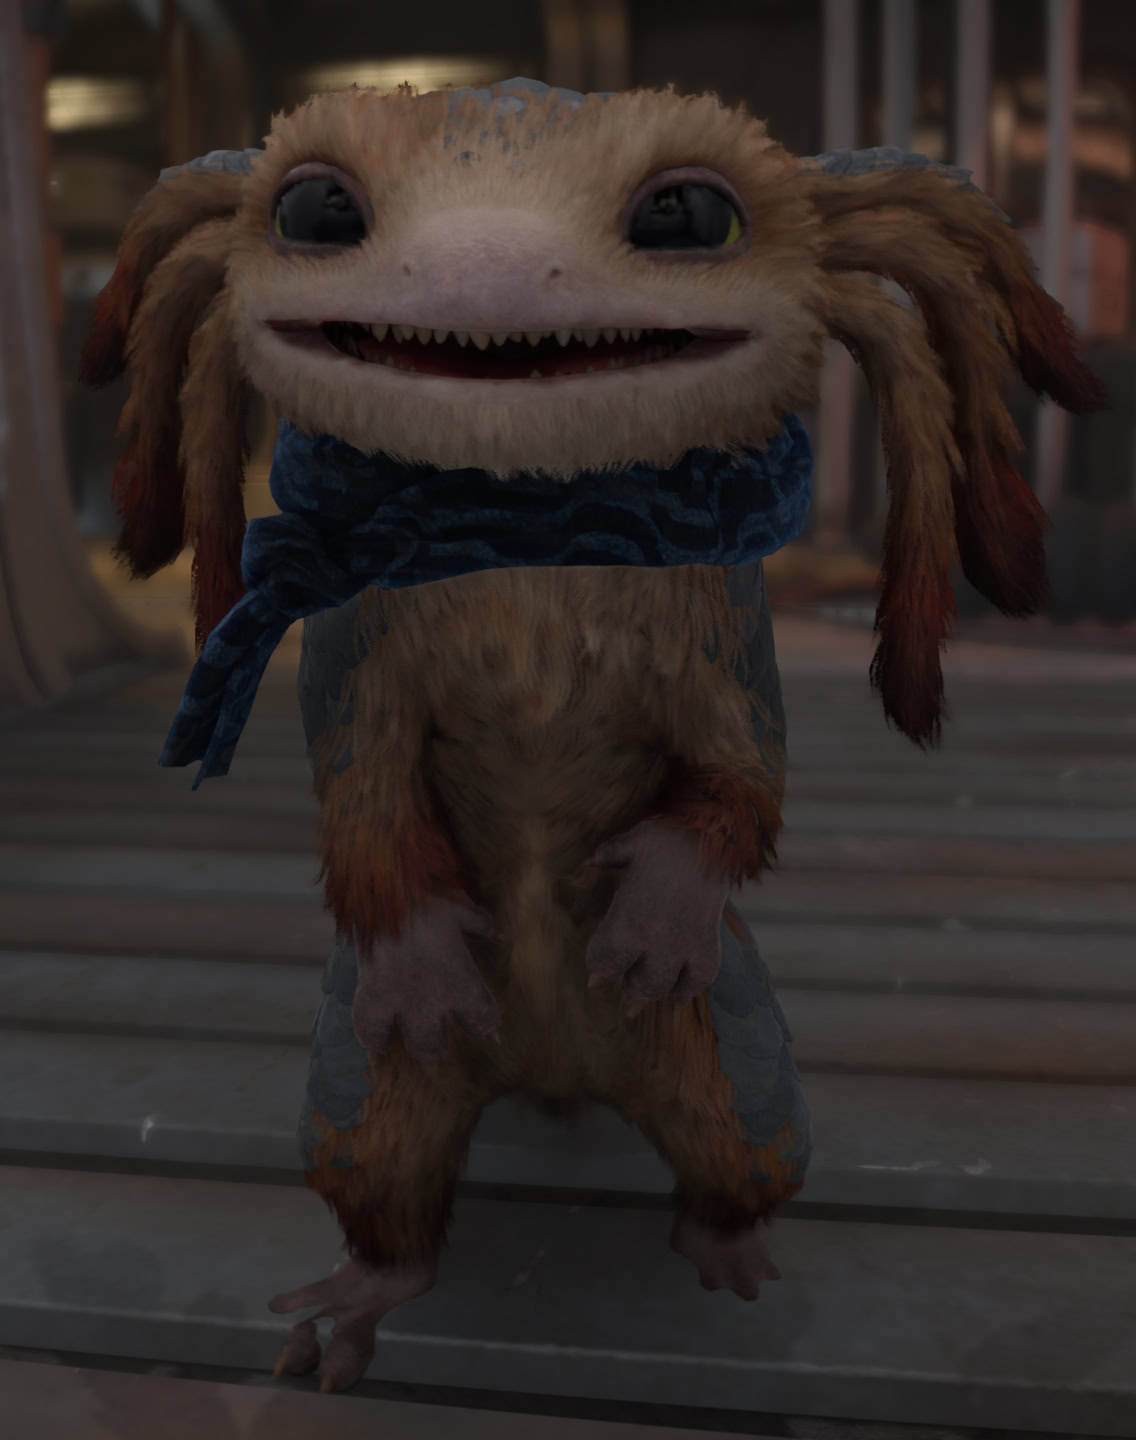
Rama’s Stash: Blue Scarf (Nix Accessory)
Procuring the Blue Scarf MUST be the very first thing you do when you arrive on Kijimi! It’s that adorable.
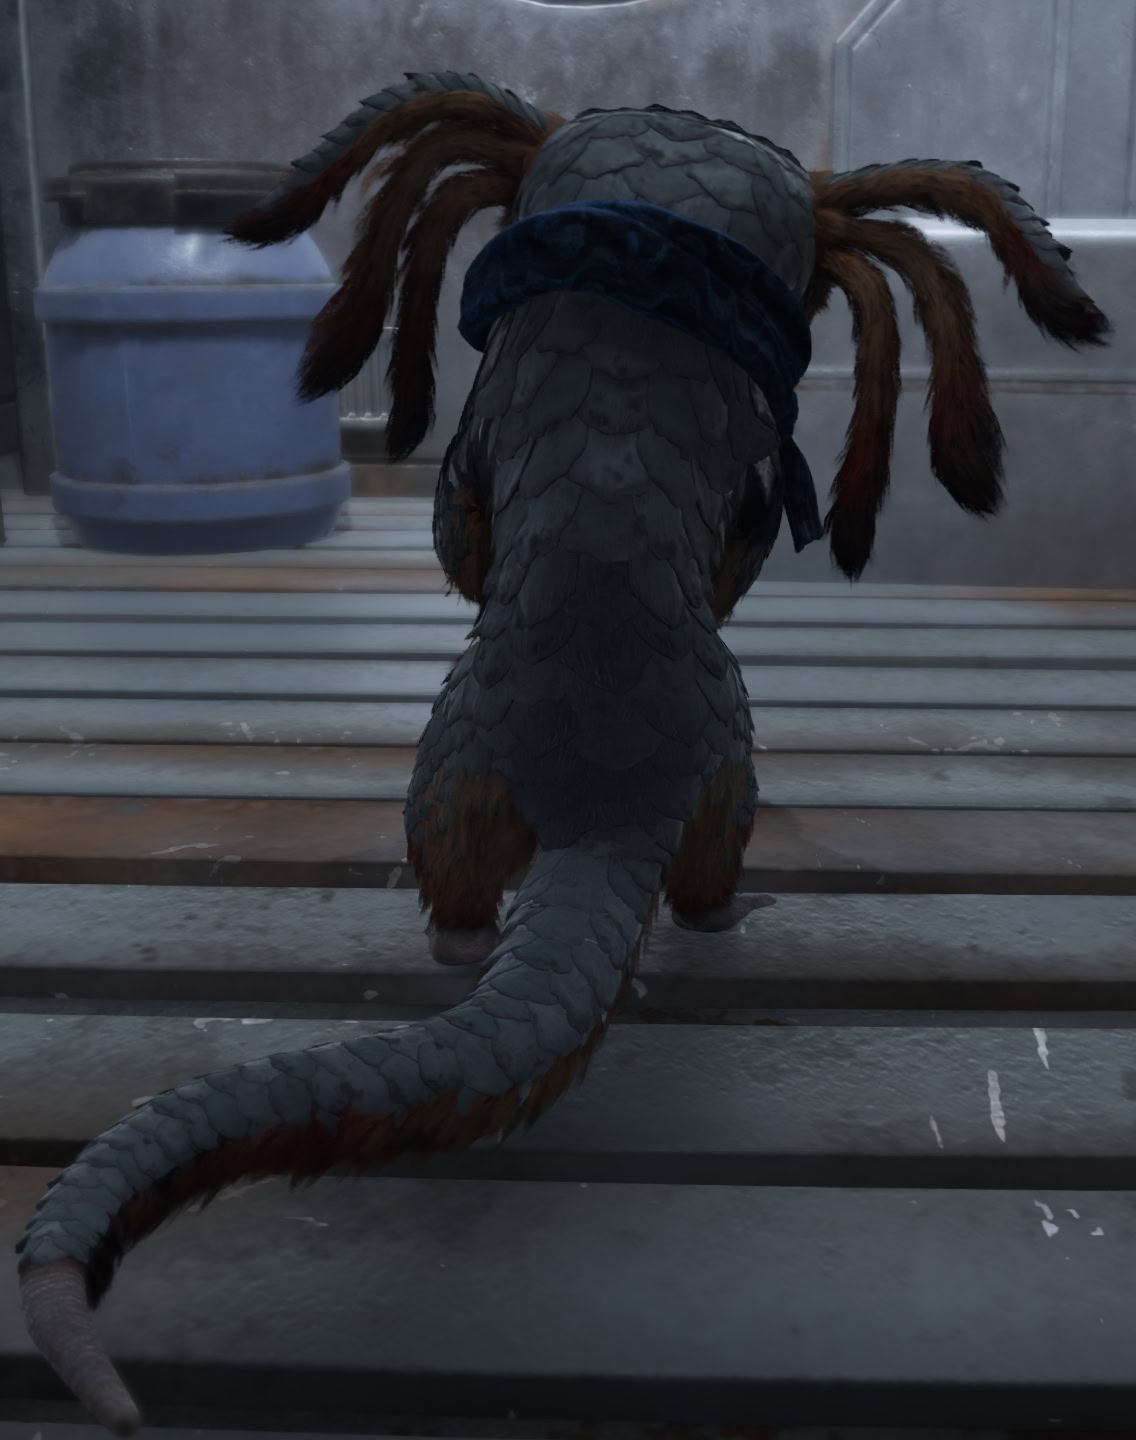
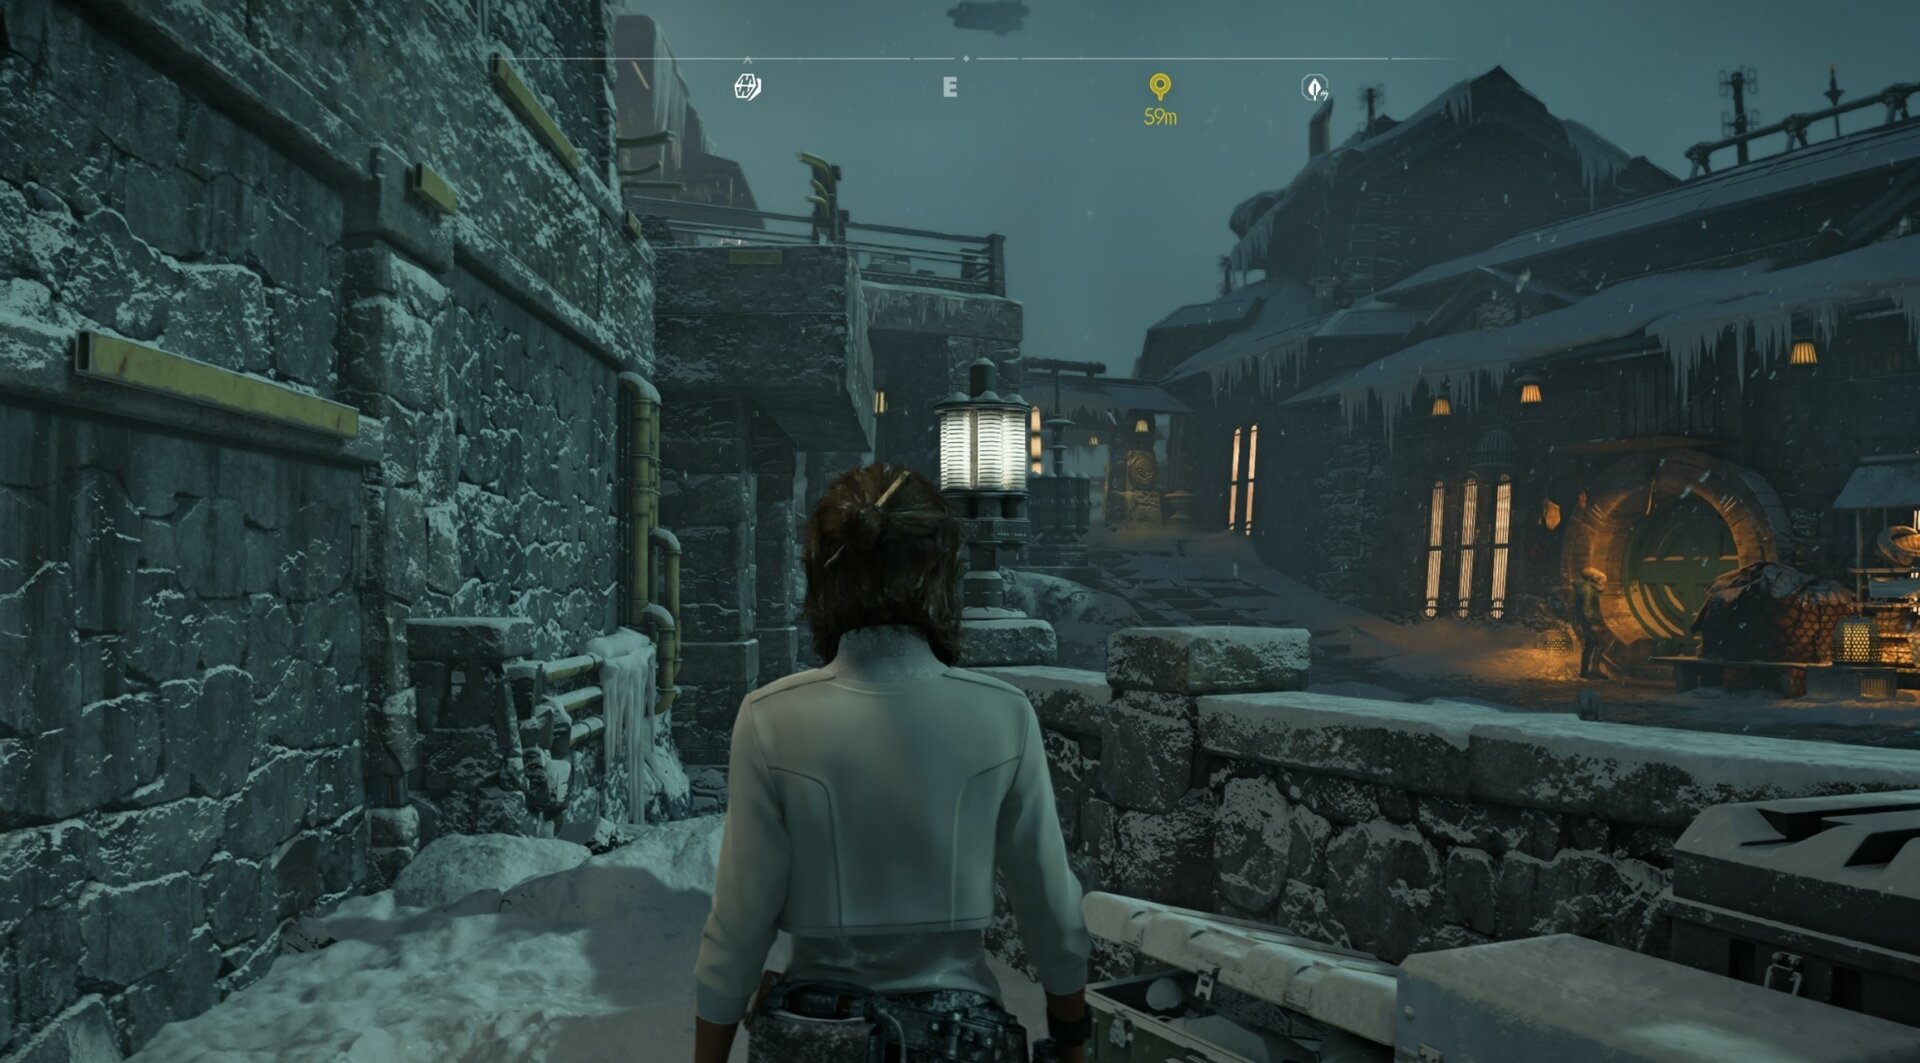
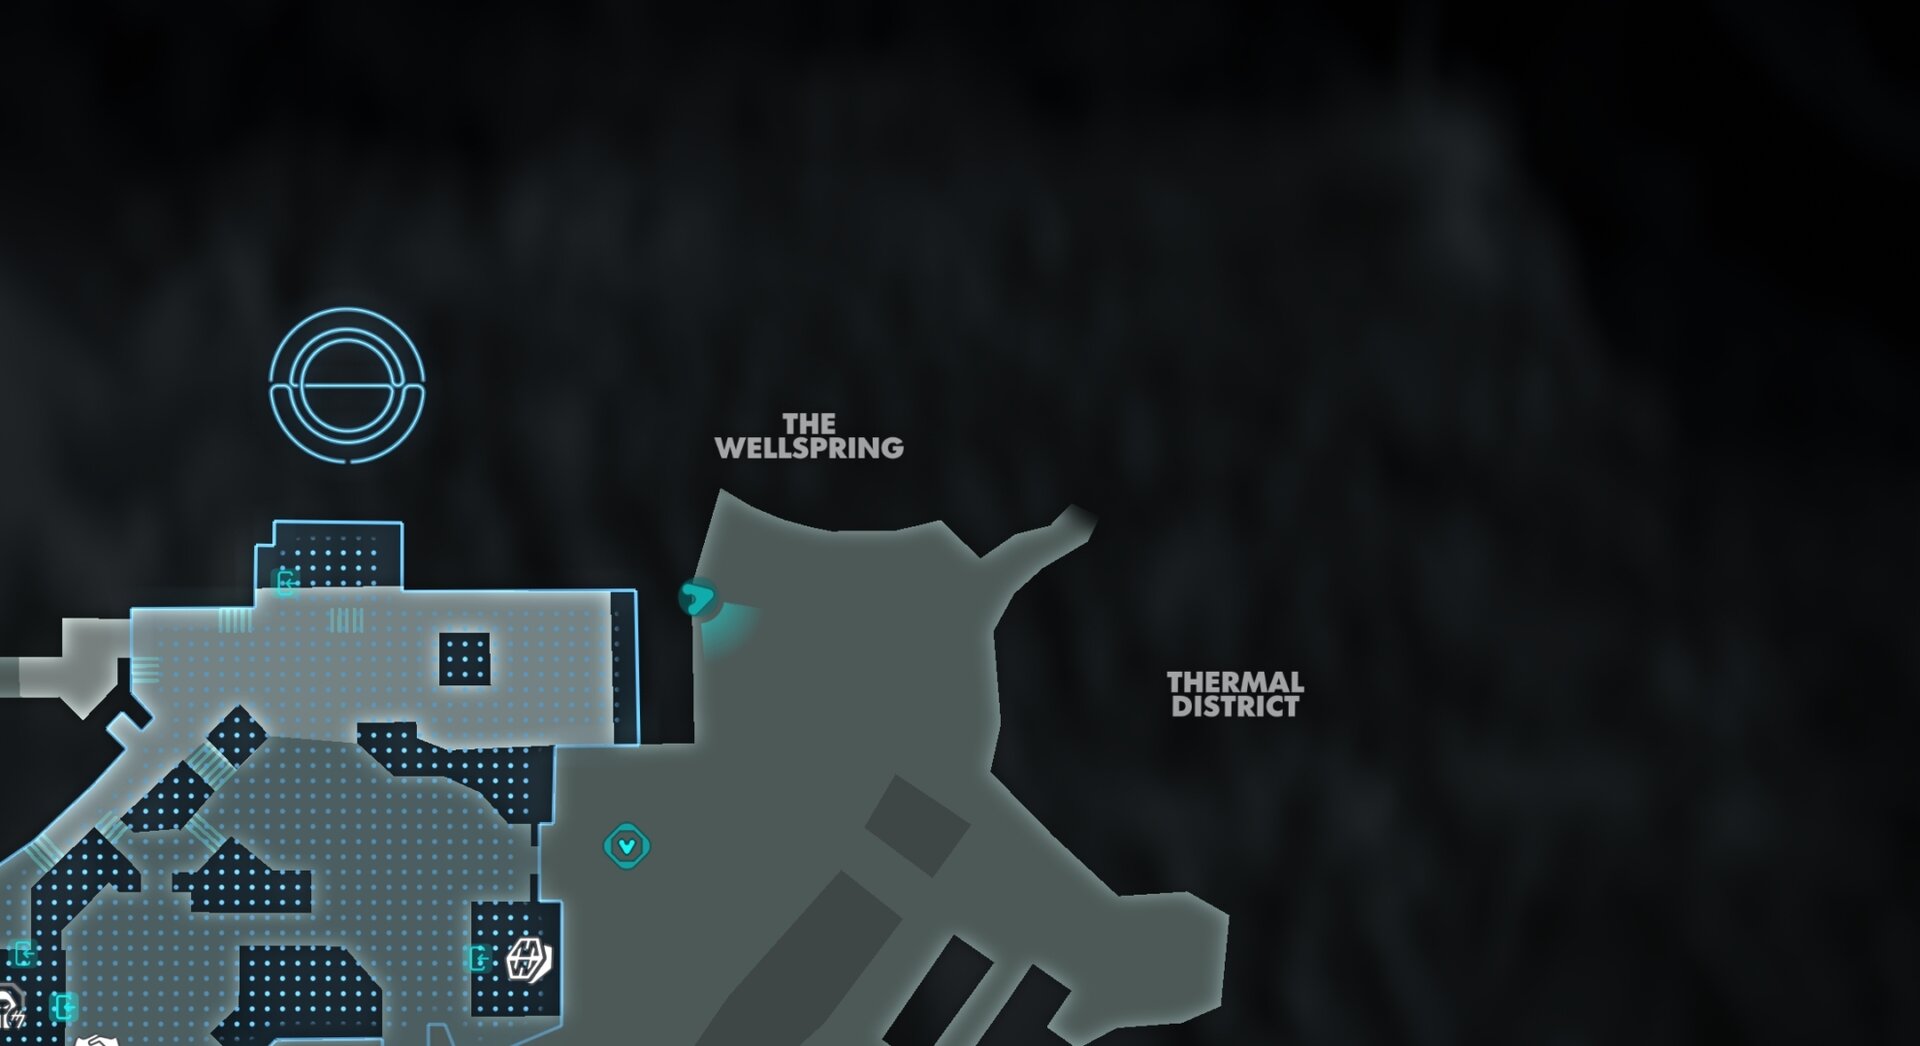
You can loot the Blue Scarf from a chest near the official main entrance to The Wellspring on Kijimi, on the edge of Crimson Dawn Territory.
Teko’s Stash: Blue Tail Wrappings (Nix Accessory)
The second Nix Accessory is The Blue Tail Wrappings, which contain a couple of green stripes along with the blue, out of a material reminiscent of masking tape.
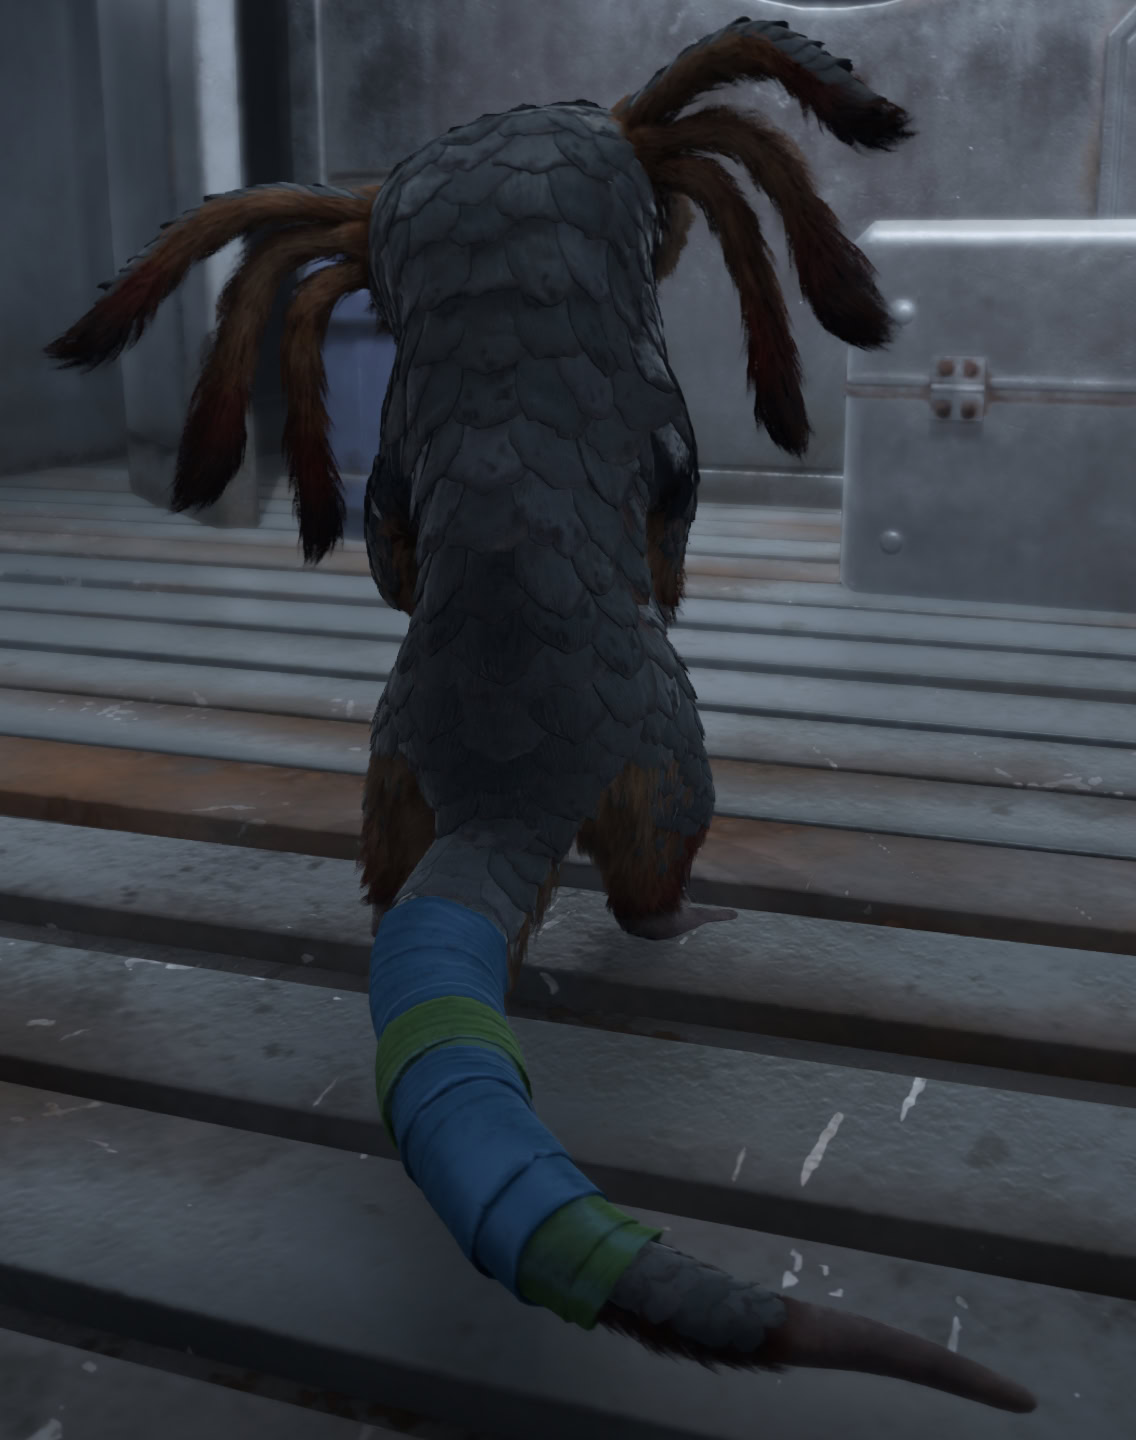
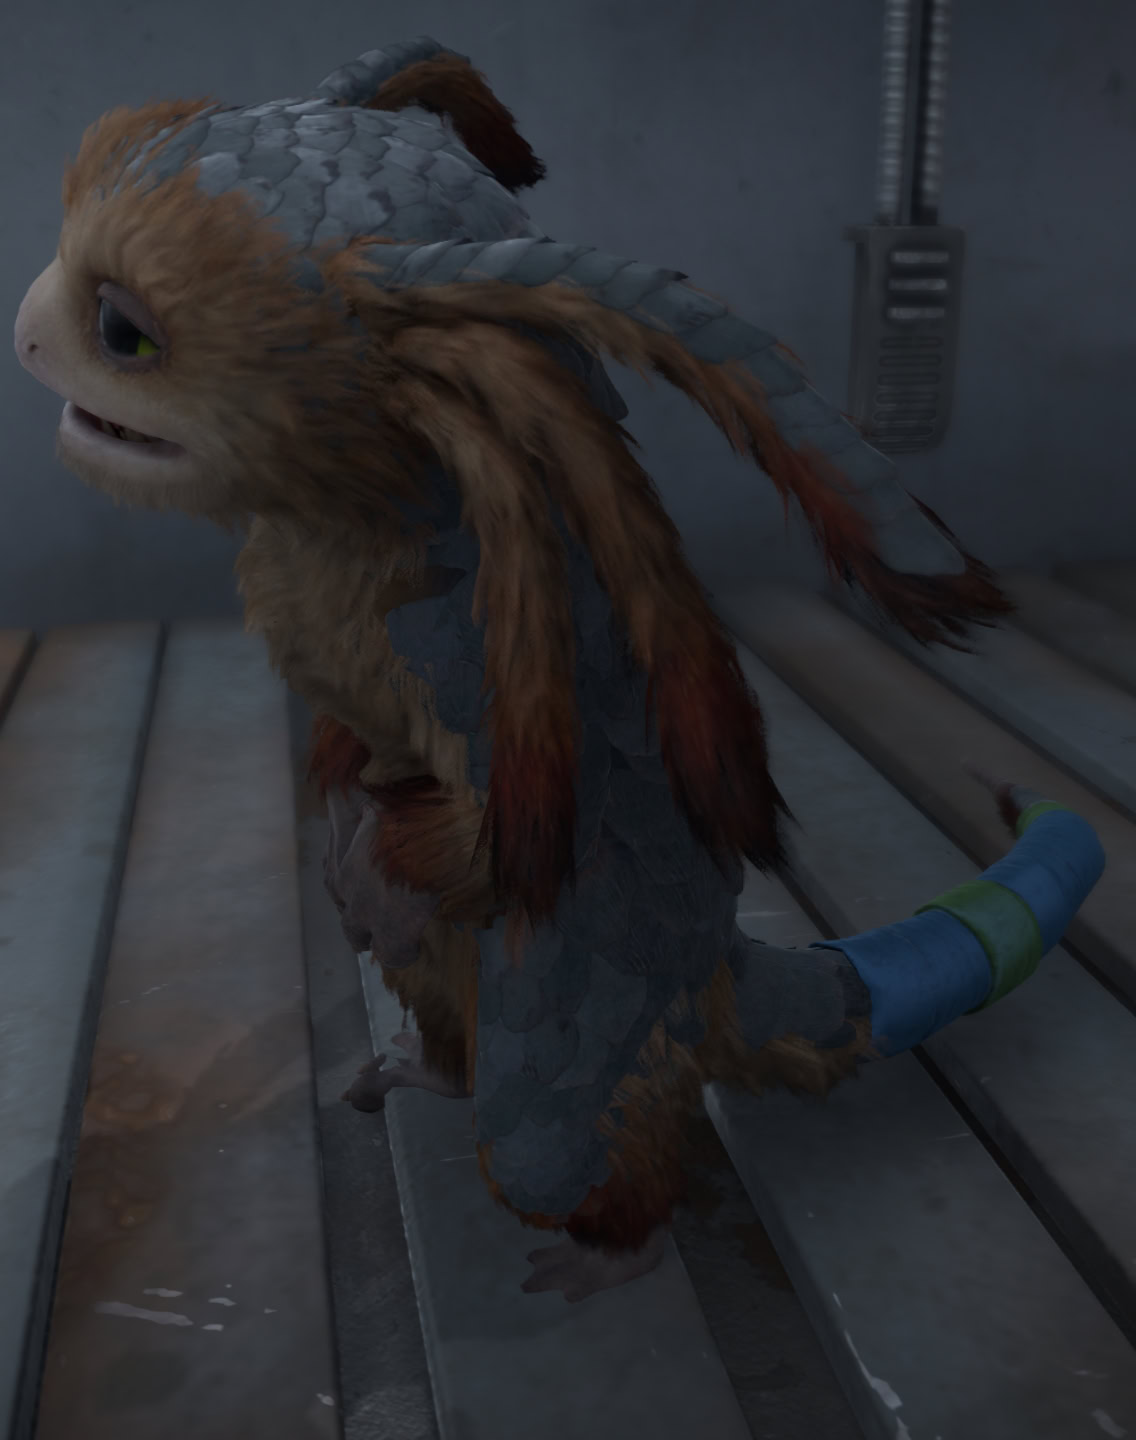
You can loot the Blue Tail Wrappings from a chest on a ledge along the outer wall of Crimson Dawn territory on Kijimi. You don’t need to do any climbing; you can just walk through the water from the over by the Survivalist vendor across the way.
There are 22 more Nix Accessories available in the game and if you follow our list and guide, you will find all of them easily. Nix deserves some love and attention! Accessorize him!
Sacluded Backalley: Picture Card (Nix Treasure)
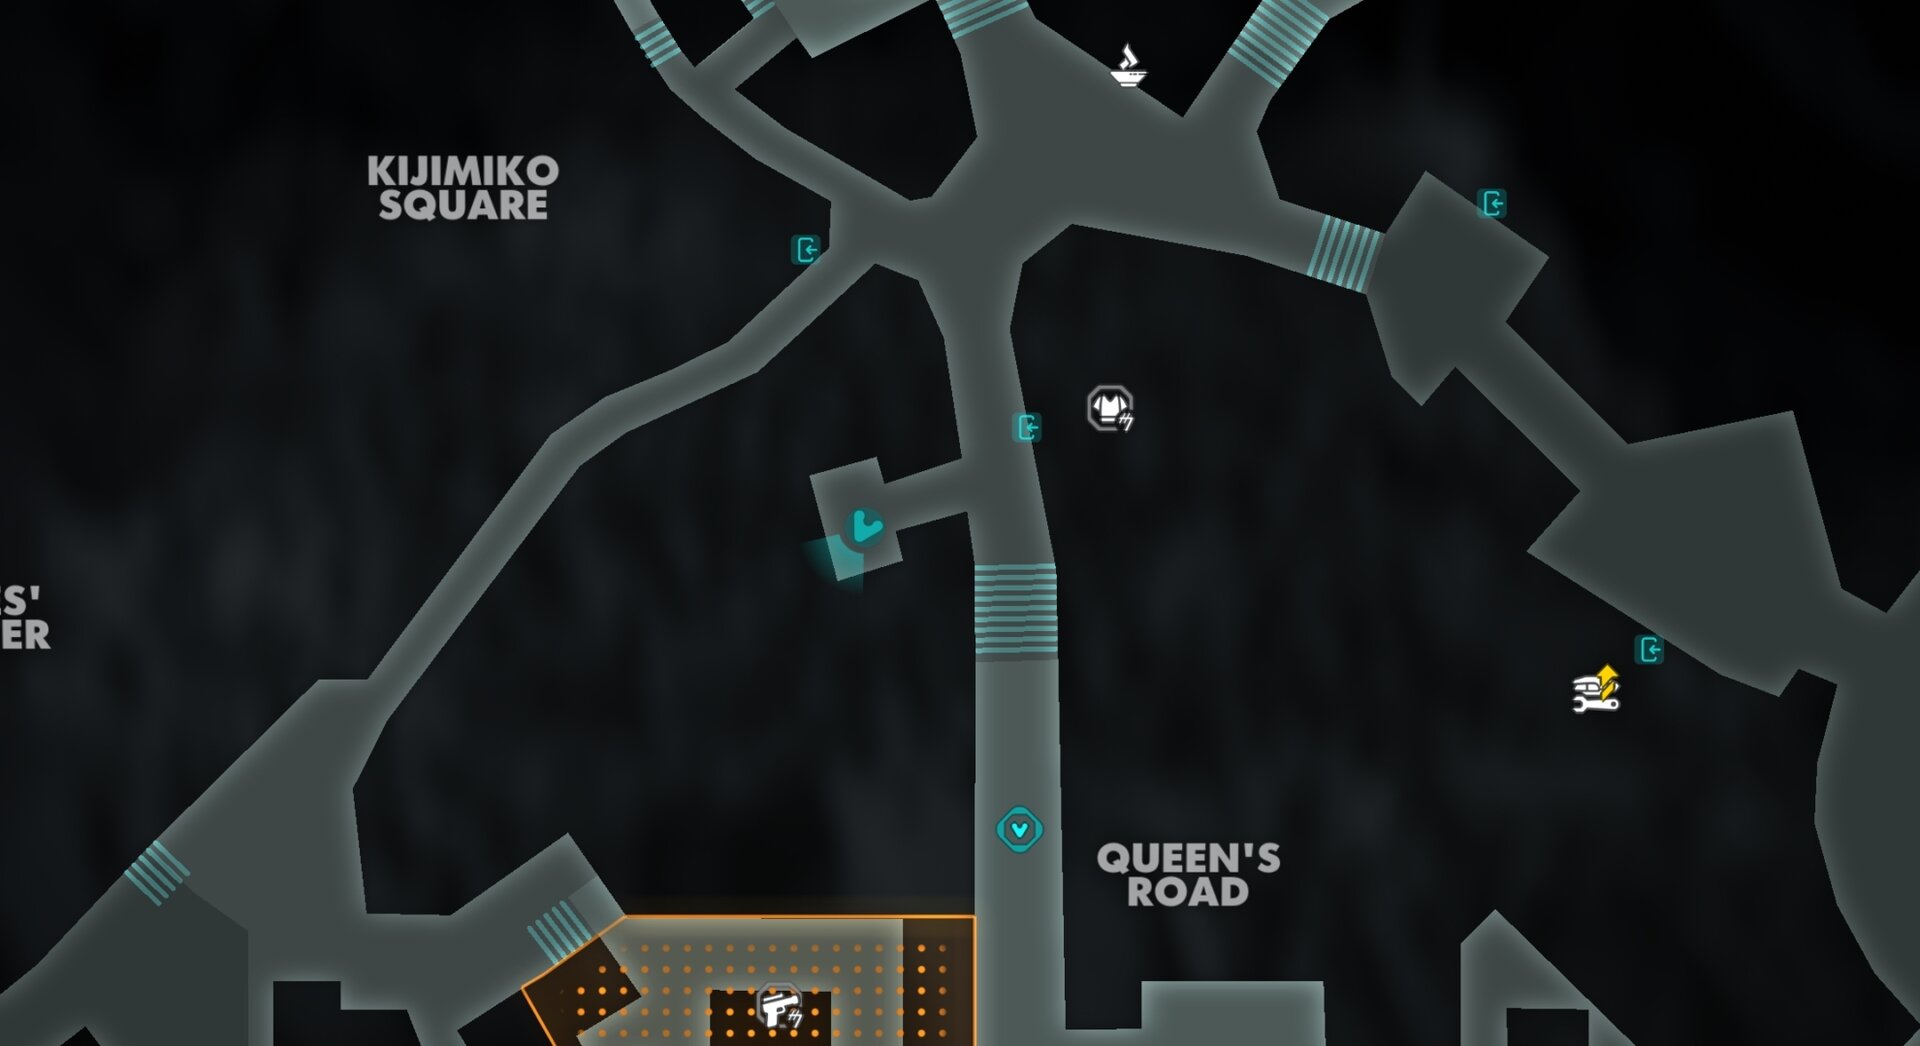
You can find the Picture Card in the Secluded Backalley on Kijimi. The starting point is through a small opening in the wall along the Queen’s Road on the way to the Ashiga Clan Stronghold.
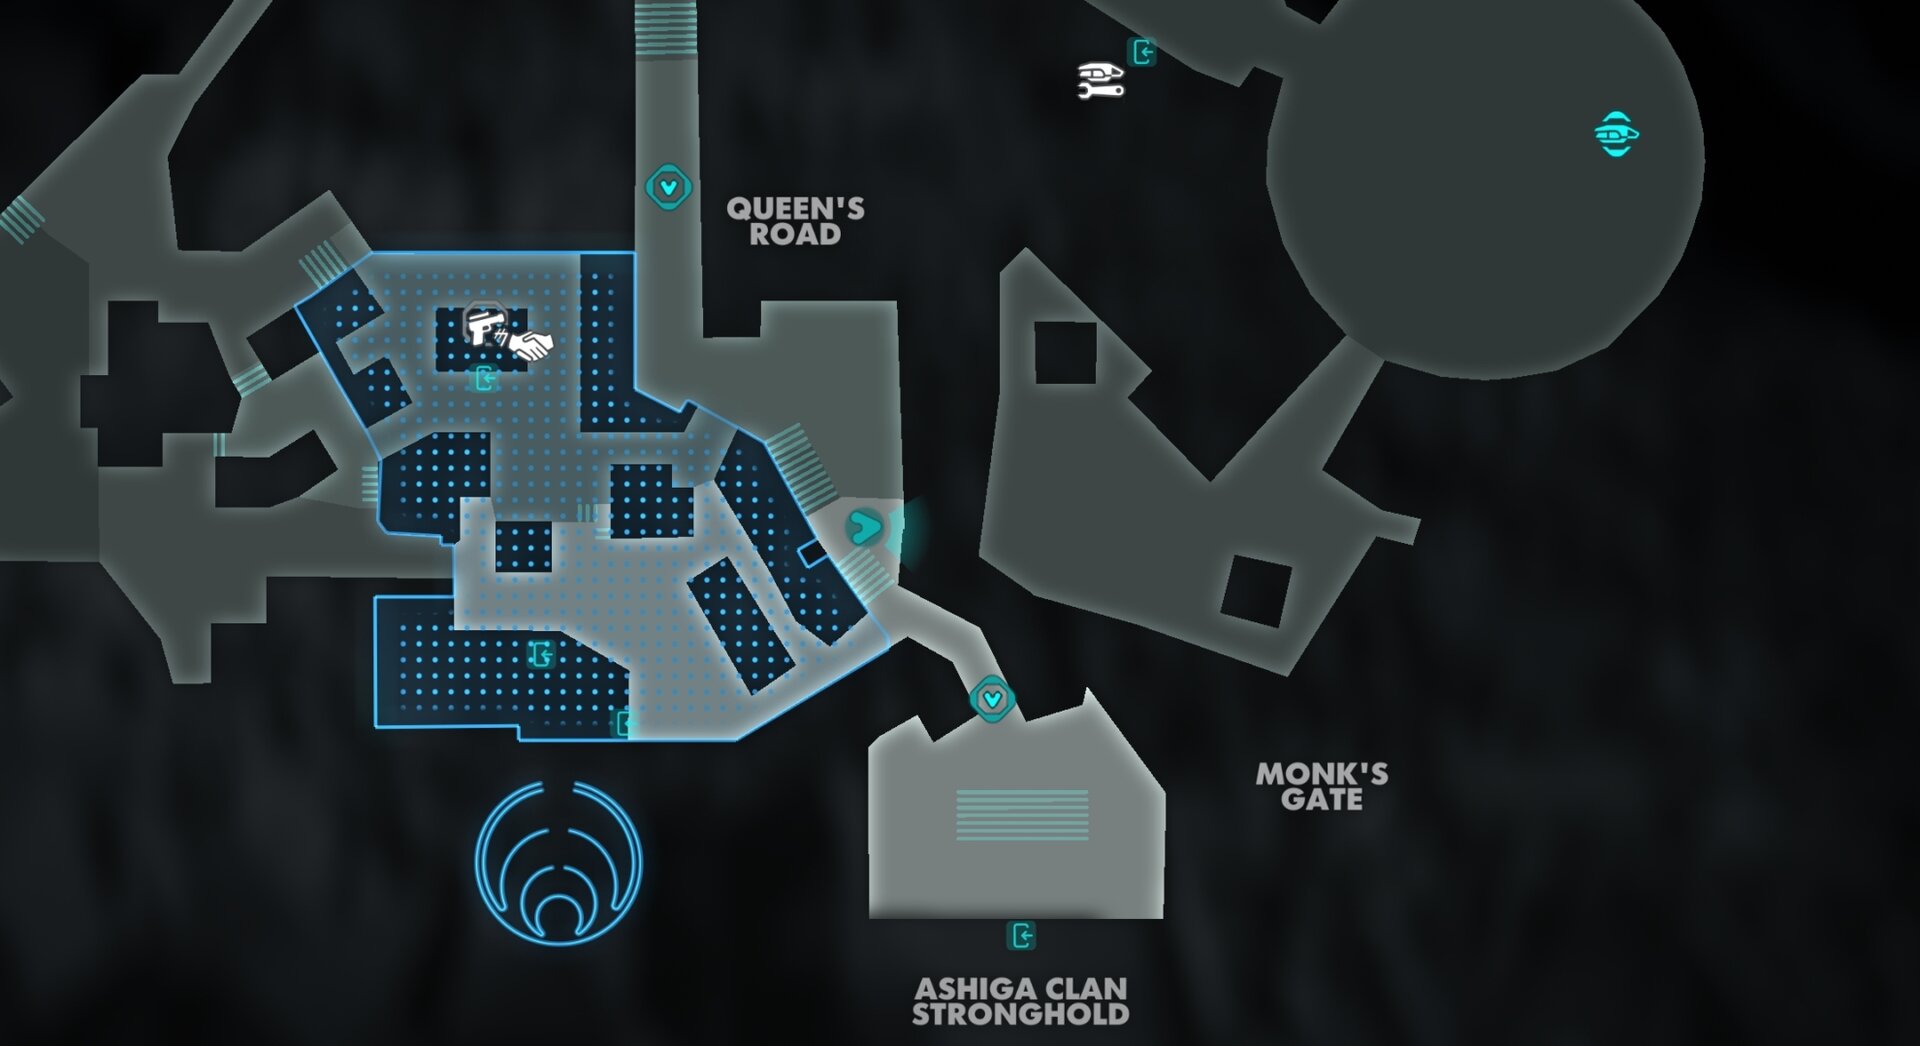
There is a total of 15 Nix Treasures. This is the only one on Kijimi. You can trade Nix Treasures for Accessories at the Tailor in Mirogana on Toshara (marked as Nix Treasure Trader on your map).
Luda’s Stash: Blaster Recirculator Upgrade Material
Minga’s Stash: Parasol Lantern Speeder Trophy
The Parasol Lantern is a jade-colored light source, the likes of which illuminates Kijimi City. It matches the Kowak Ranger Paint Job.
You can loot the Parasol Lantern Speeder Trophy from a chest up the stairs near the northwestern corner of Ashiga Clan territory on Kijimi.
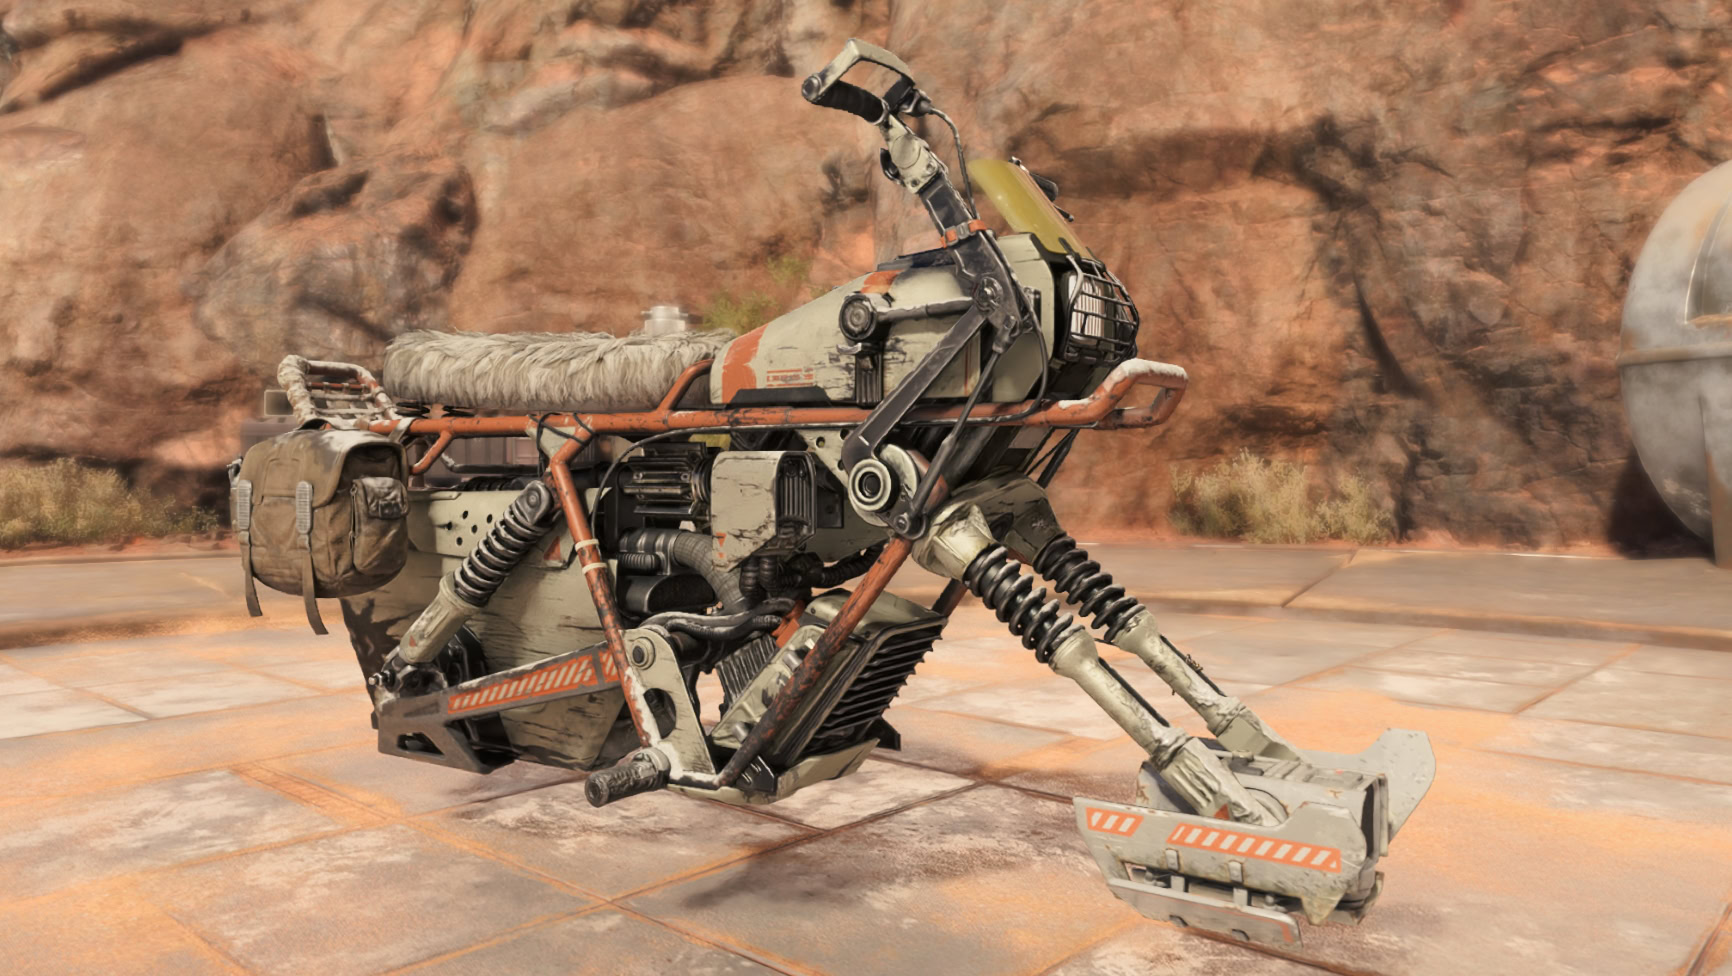
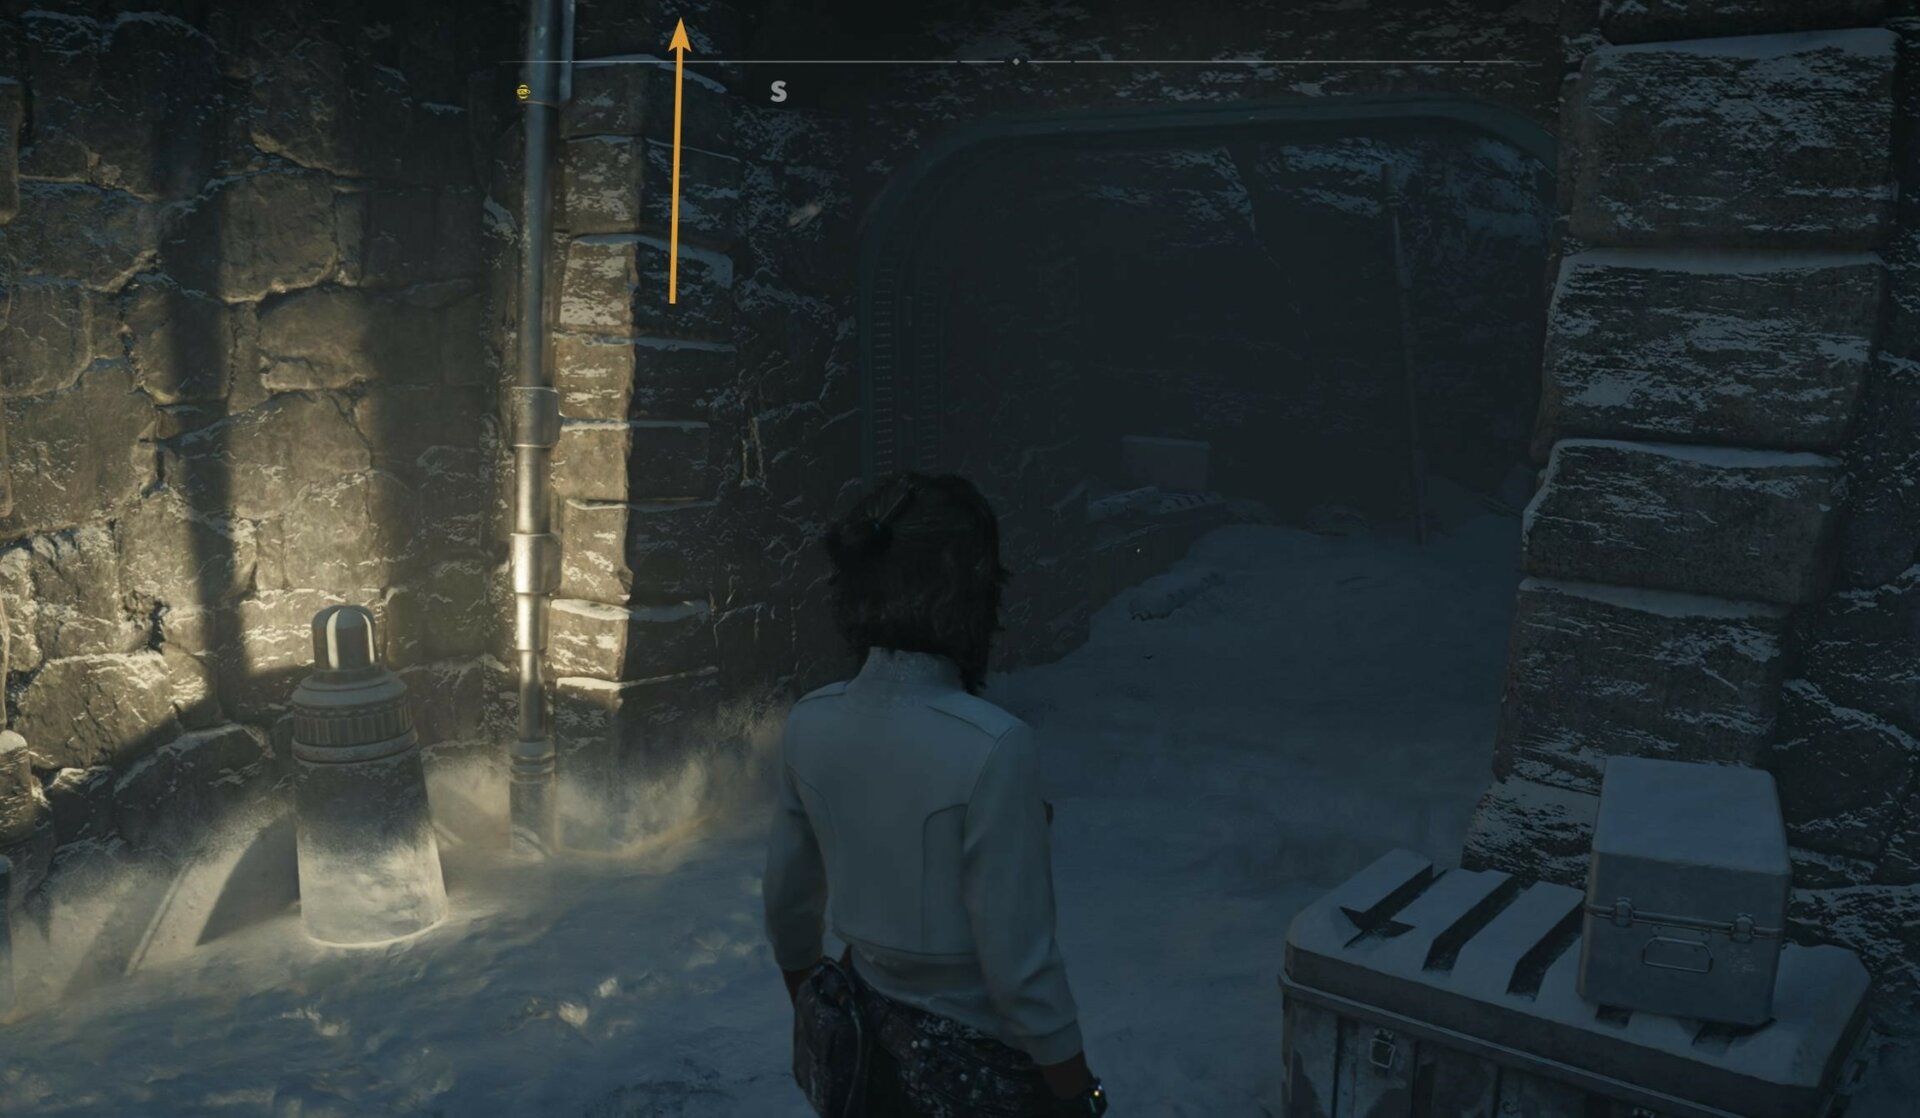
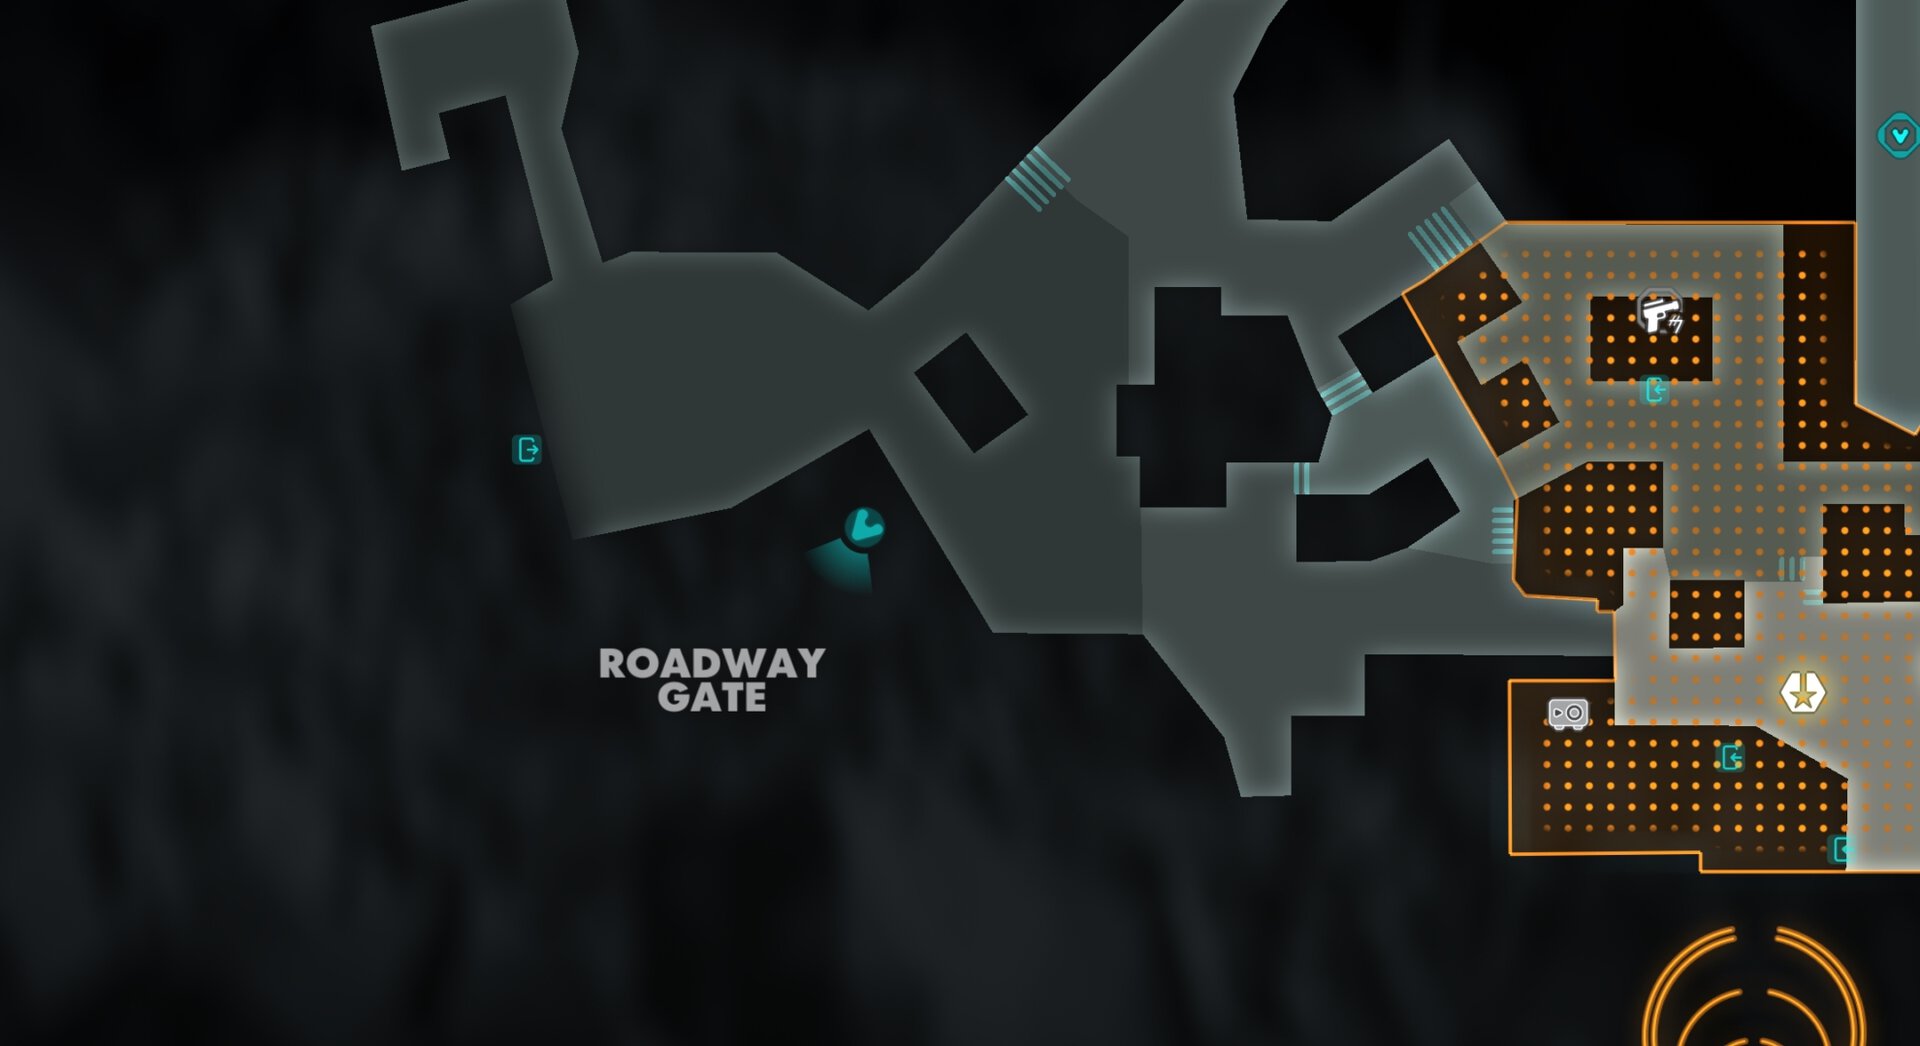
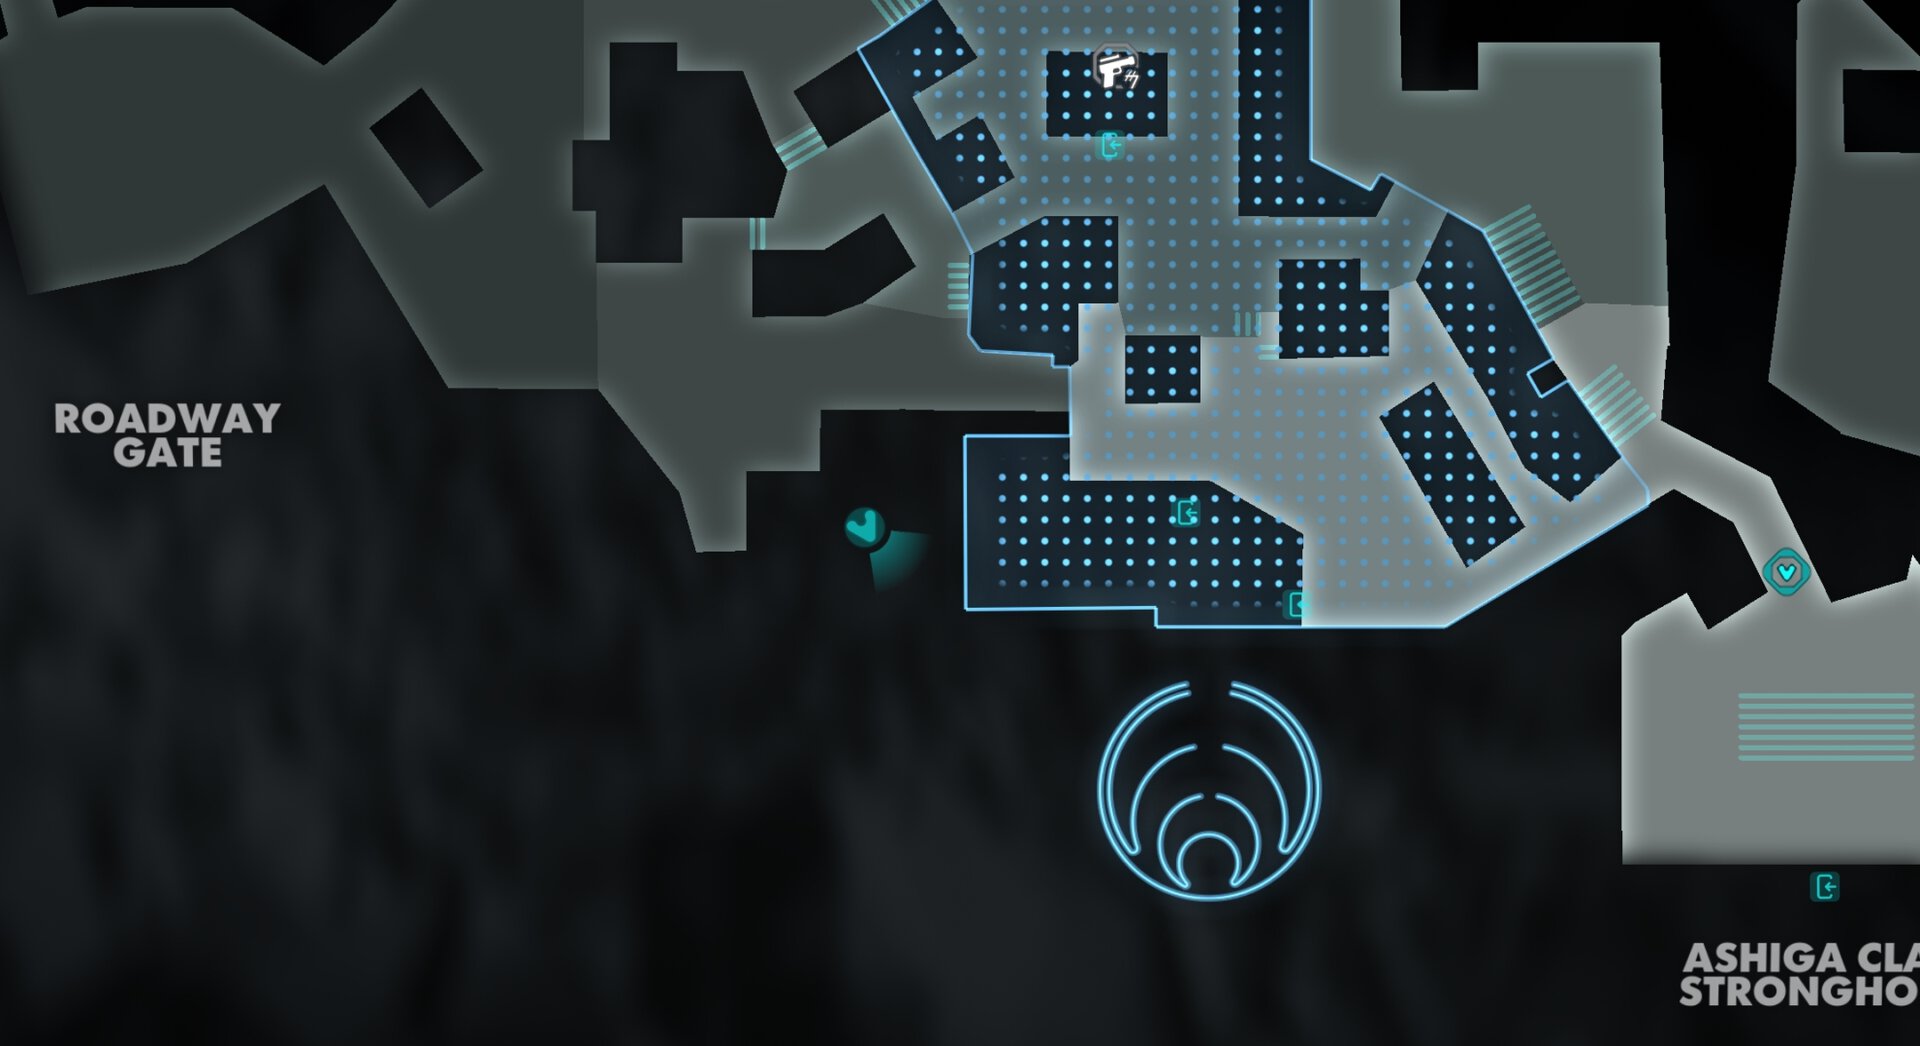
Okali’s Stash: Survival Kit Speeder Trophy
Anotyher Speeder Trophy, the Survival Kit, is available on Kijimi. It features a rolled up blanket and white fur hide that matches the seat of the Kijimi Explorer Paint Job perfectly.
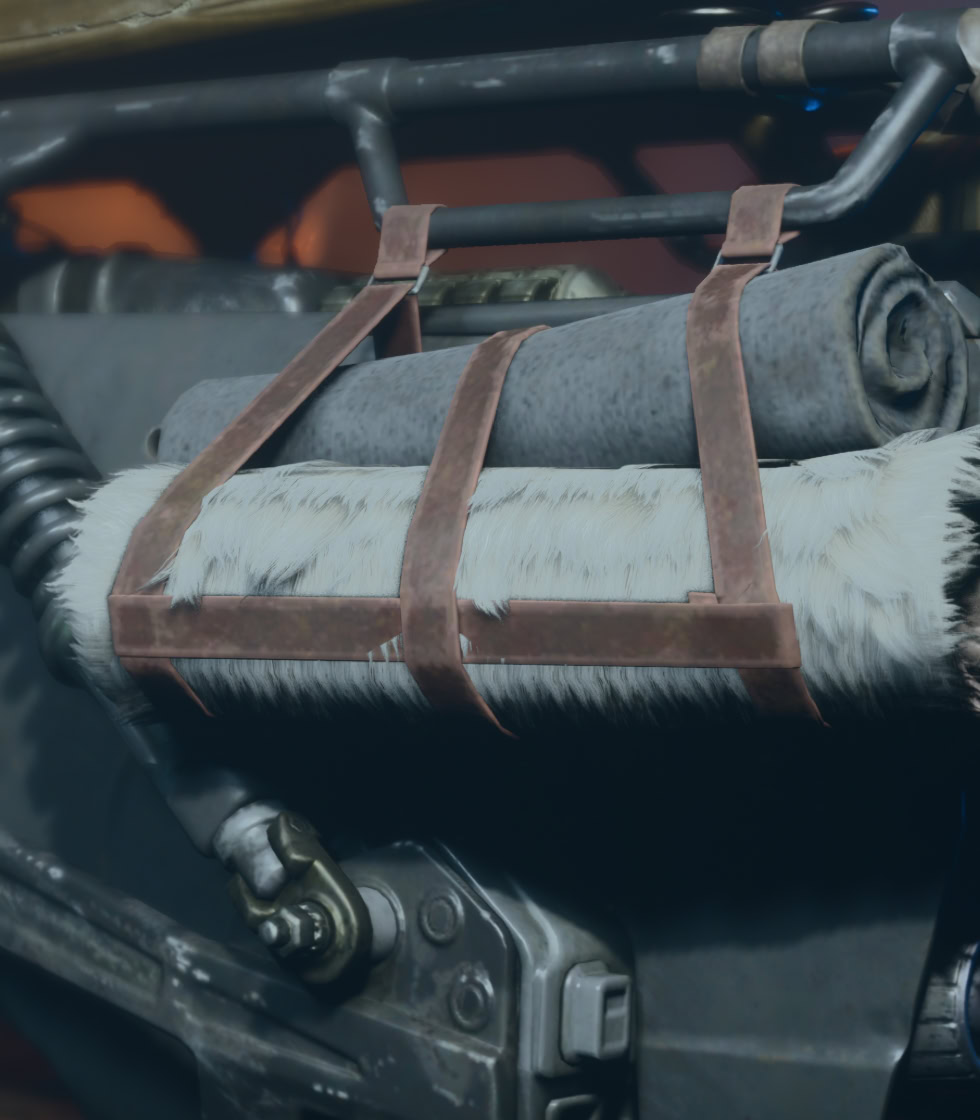
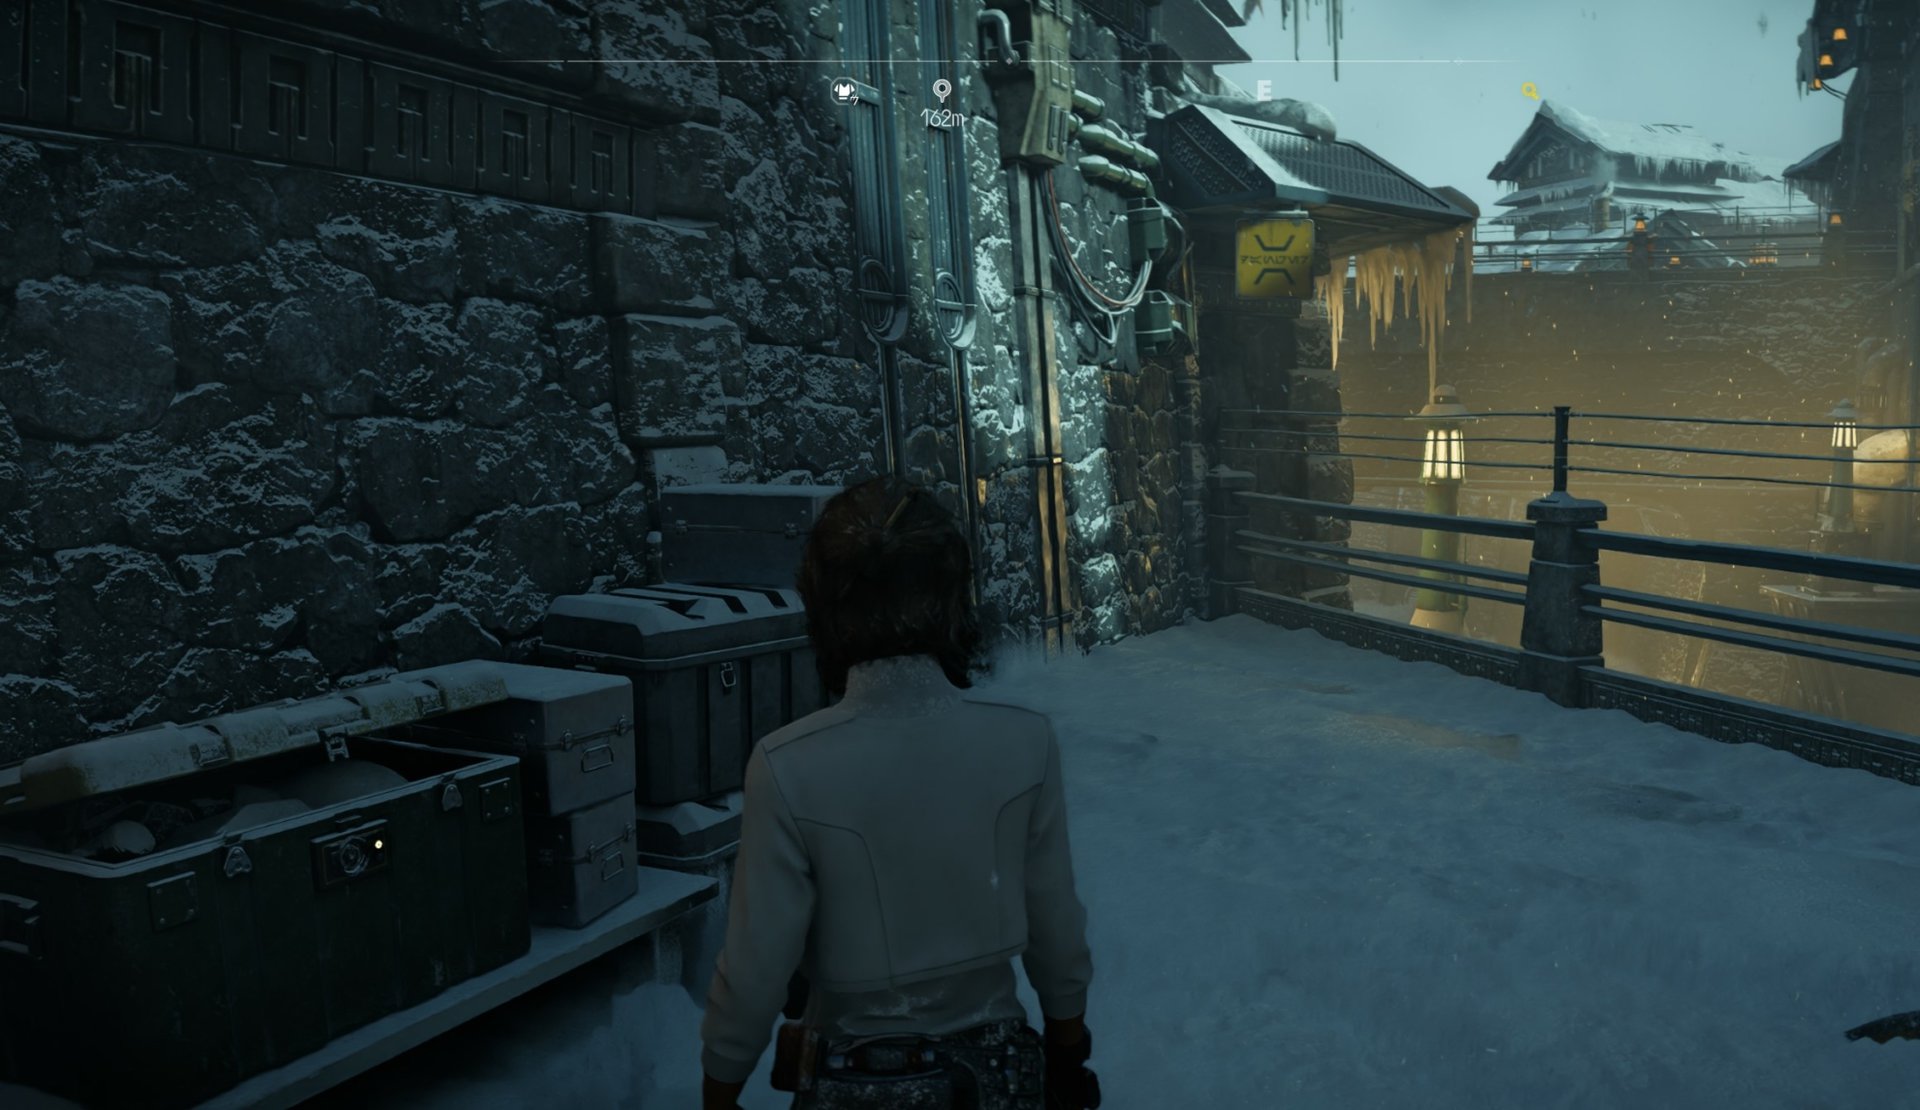
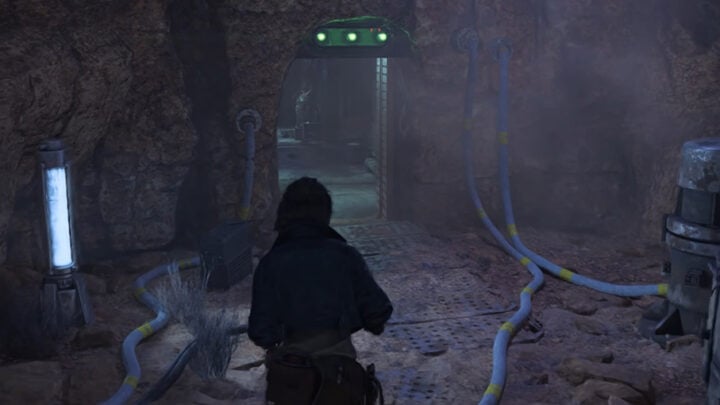
You can loot the Survival Kit from a chest behind a locked door near the Roadway Gate west of Ashiga Clan territory on Kijimi. The lock requires a key from Research Station 57. Conveniently the keycard is on a ledge right above the door, and you can just send Nix to grab it for you!
You can also get the keycard from an Imperial officer at Research Station 57, an actual Imperial base on Akiva!
Kona’s Stash: Spot Lantern Speeder Trophy
The next Speeder Trophy you can get while in Kijimi City, is the Spot Lantern. It is a green vase with a bunch of holes in it.
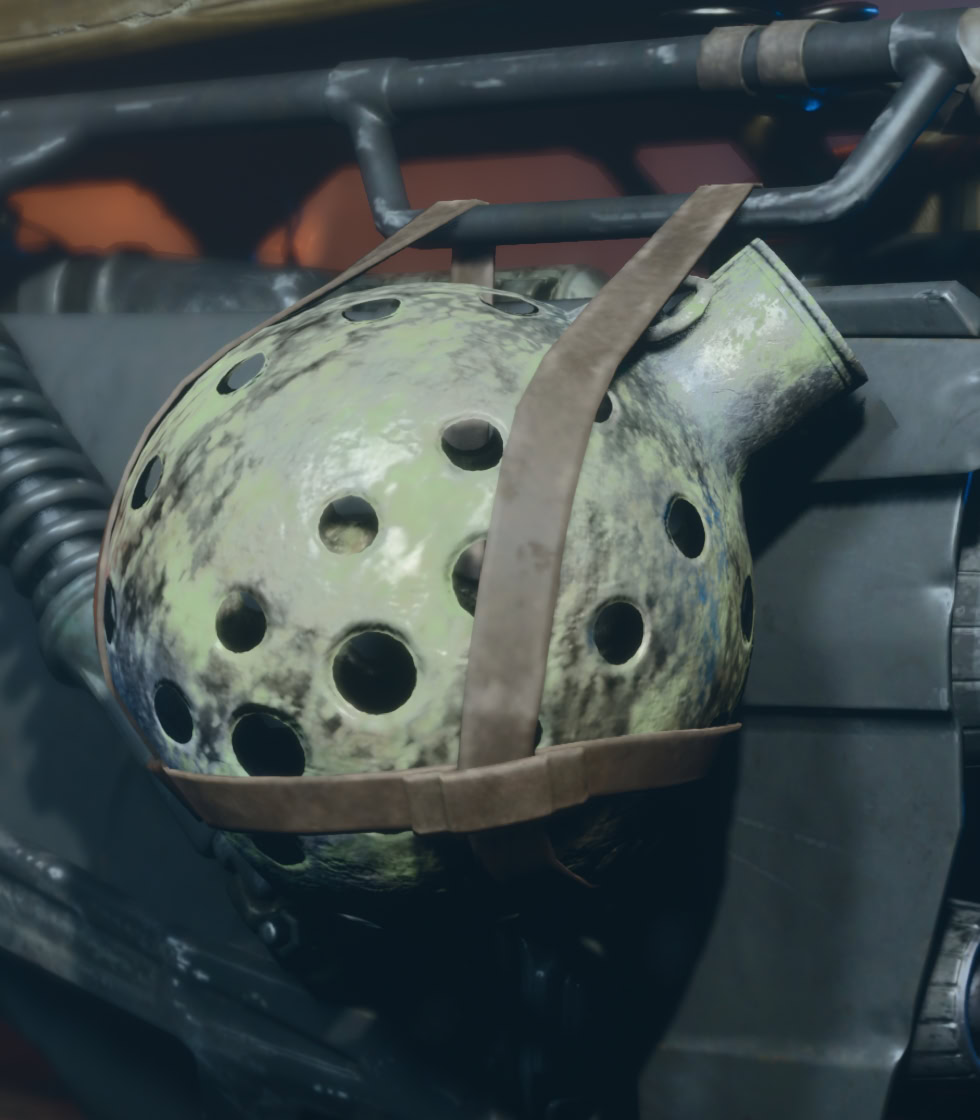
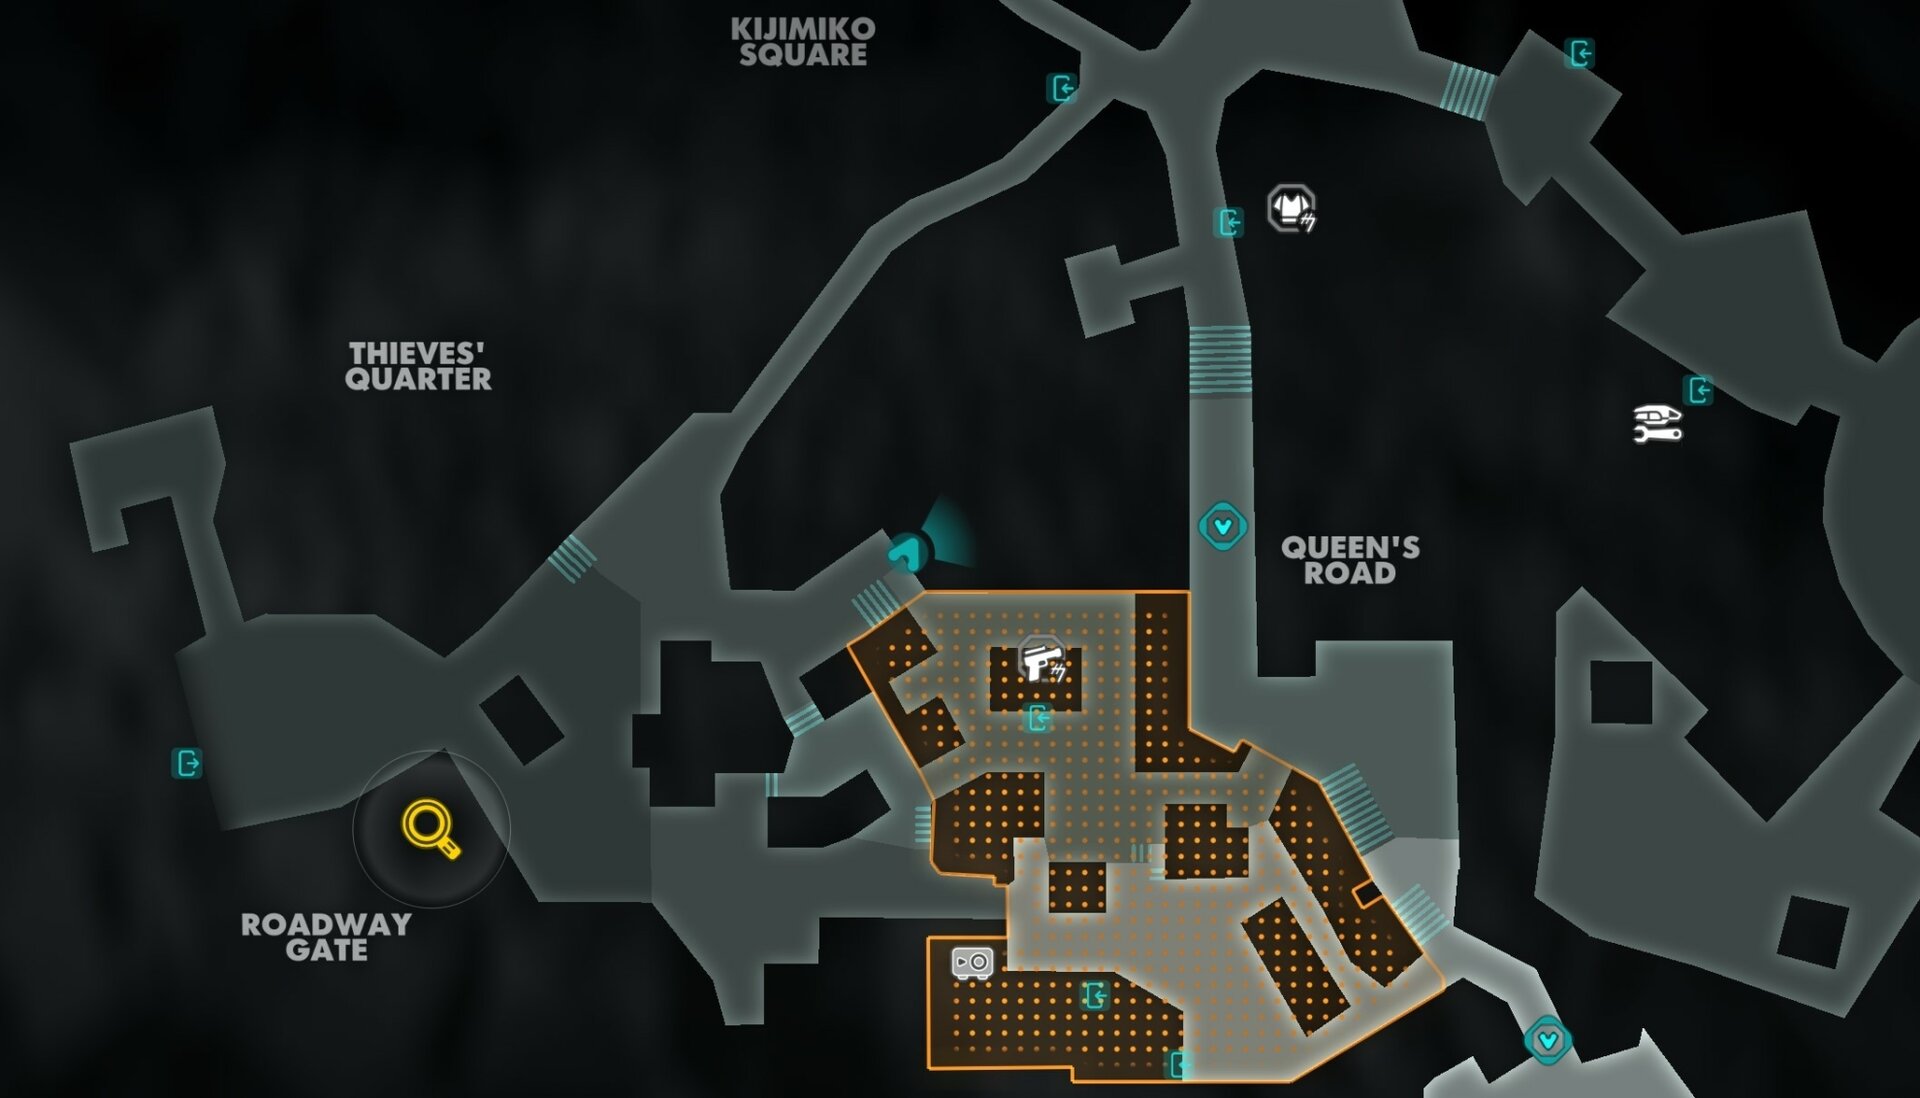
You can loot the Spot Lantern Trophy from a chest behind a door you can climb over that’s west of the main western entrance into Ashiga Clan Territory on Kijimi. The chest is in the highest reachable part of Kijimi City.
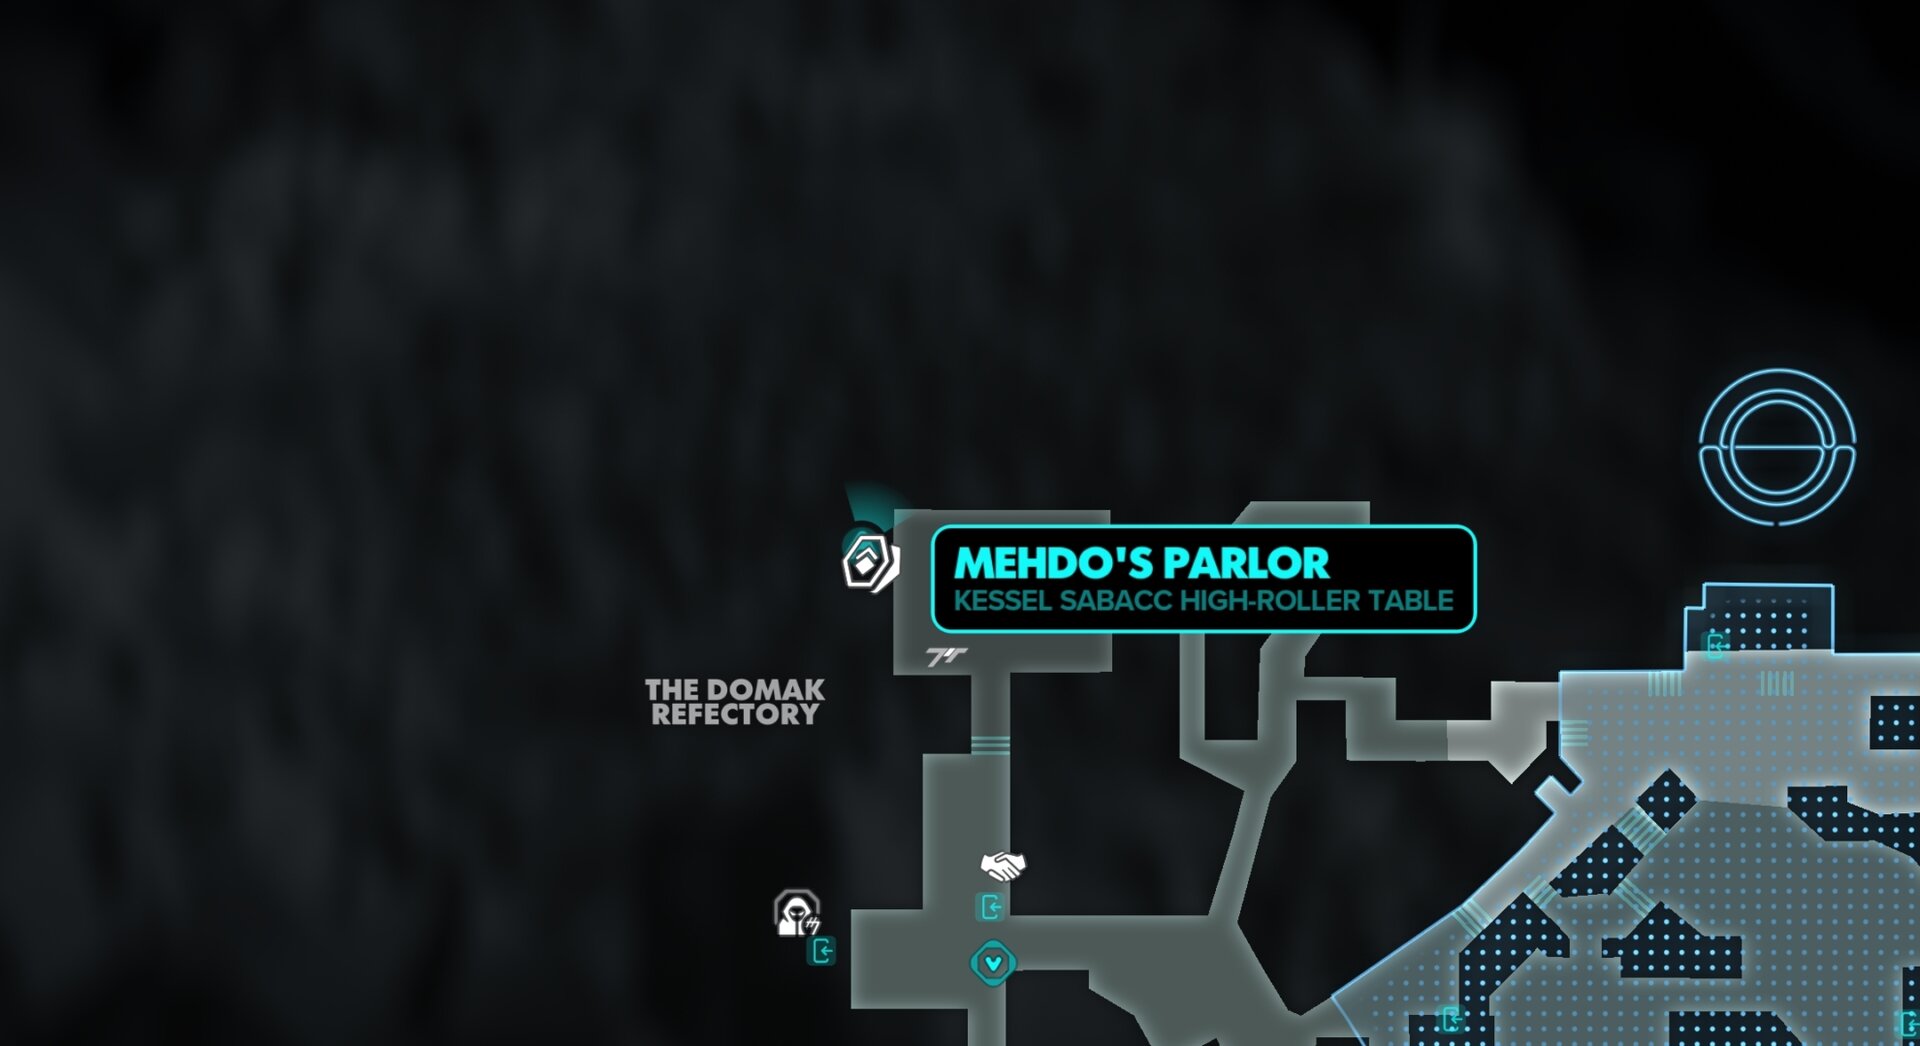
Mehdo’s Parlor: Nightfall Finish
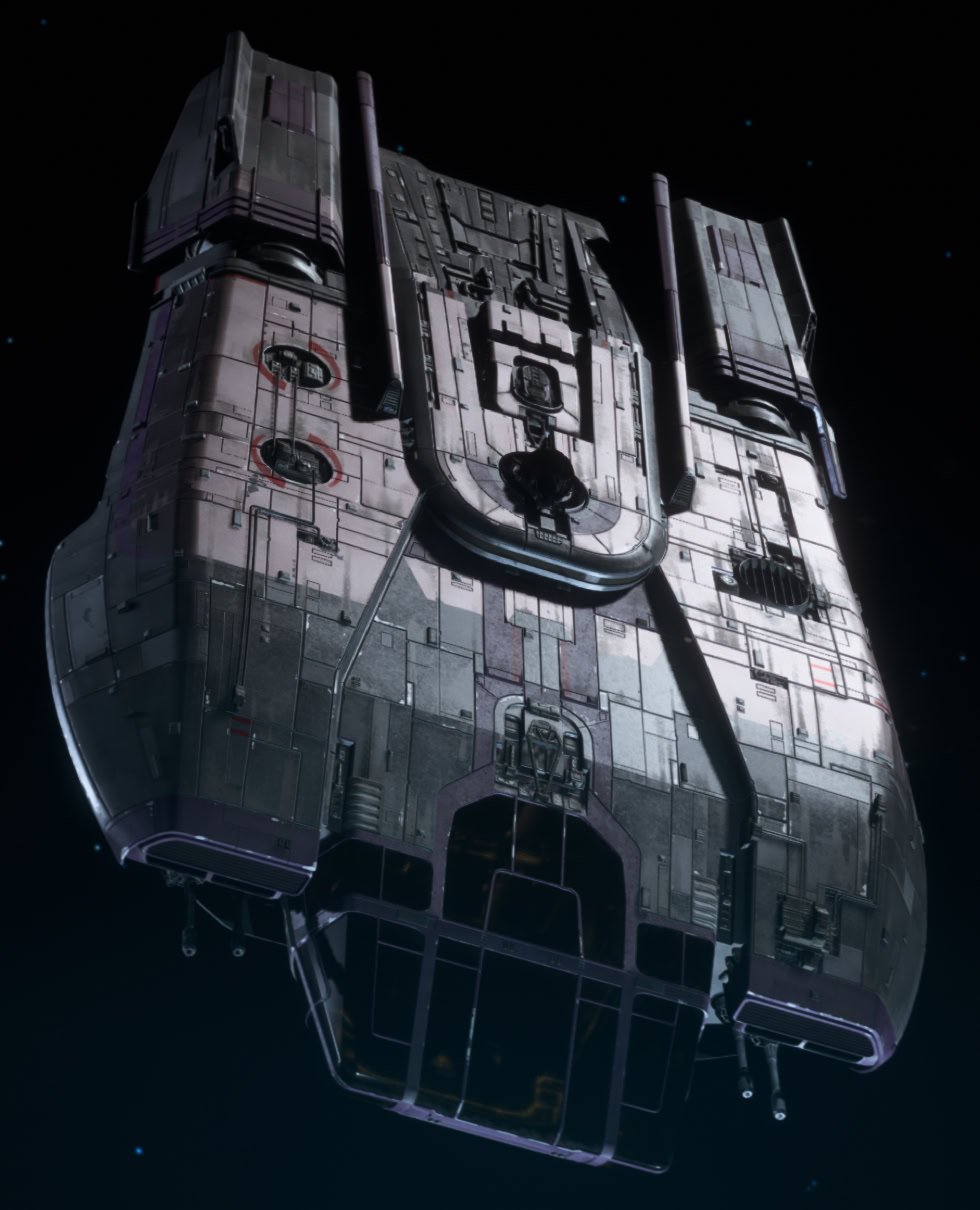
The Nightfall Finish for the Trailblazer is jet black, like the Hermit Coating and Dominance Paint Job.
You win the Nightfall Finish for defeating Mehdo, the Kessel Sabacc High-Roller at the Domak Refectory.
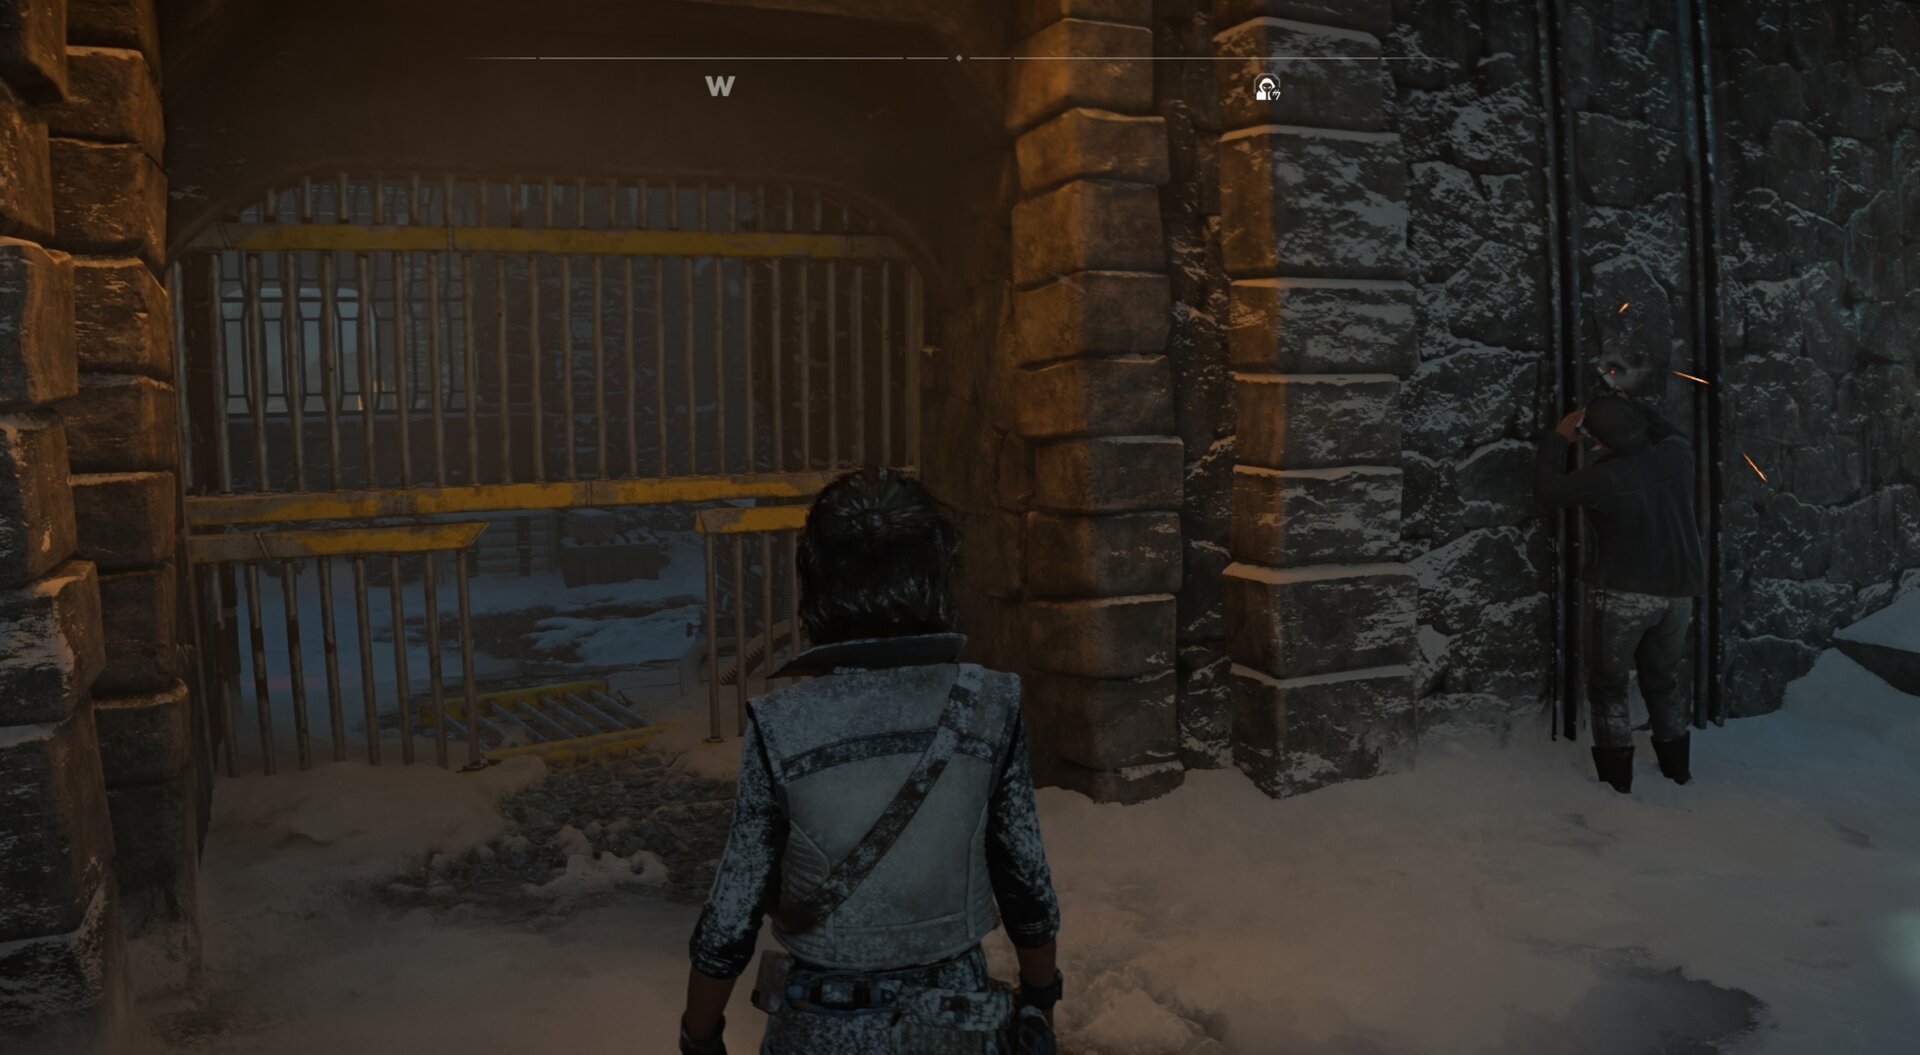
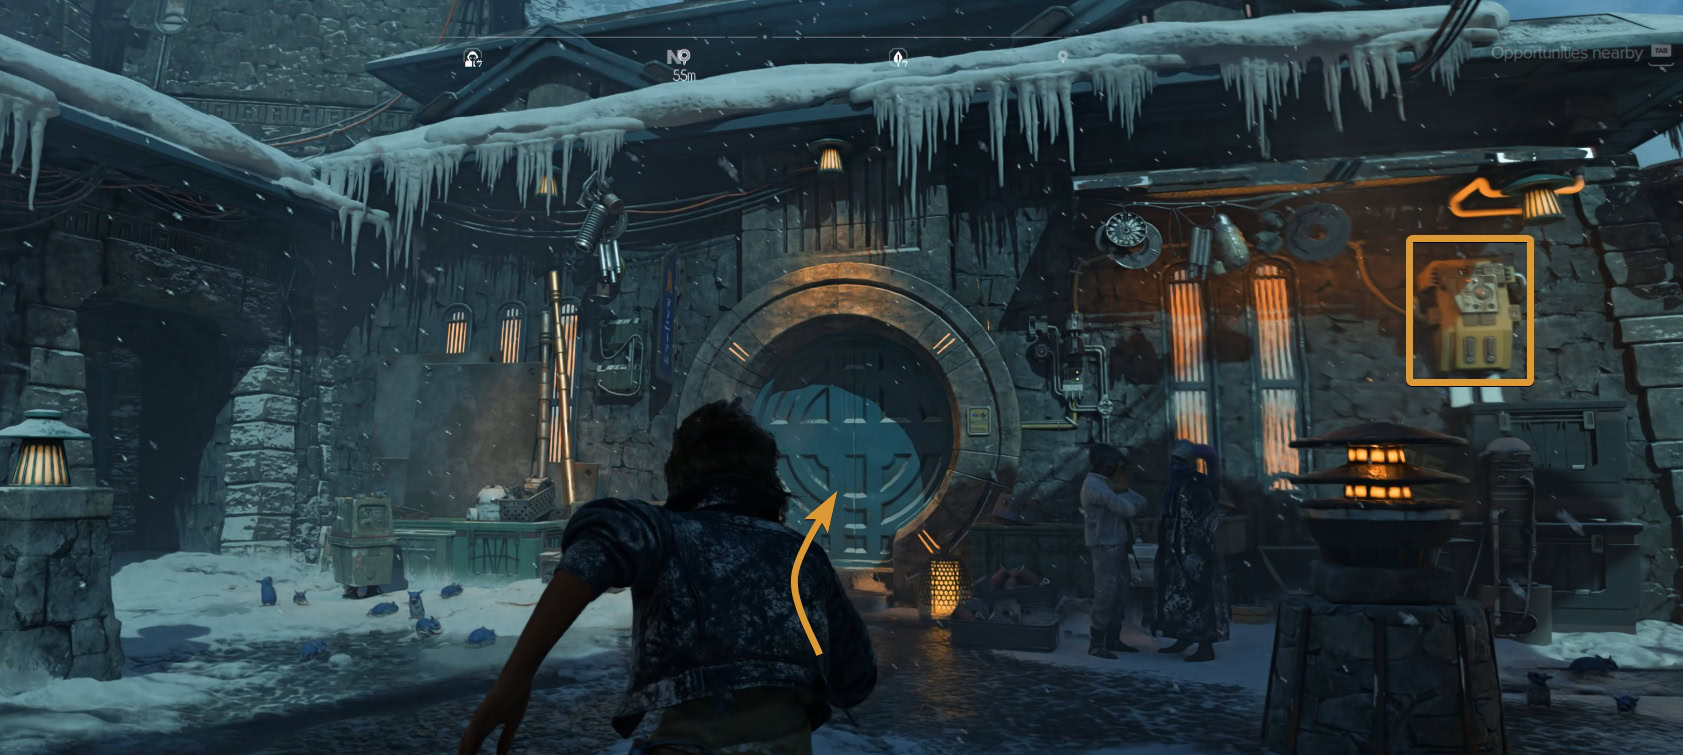
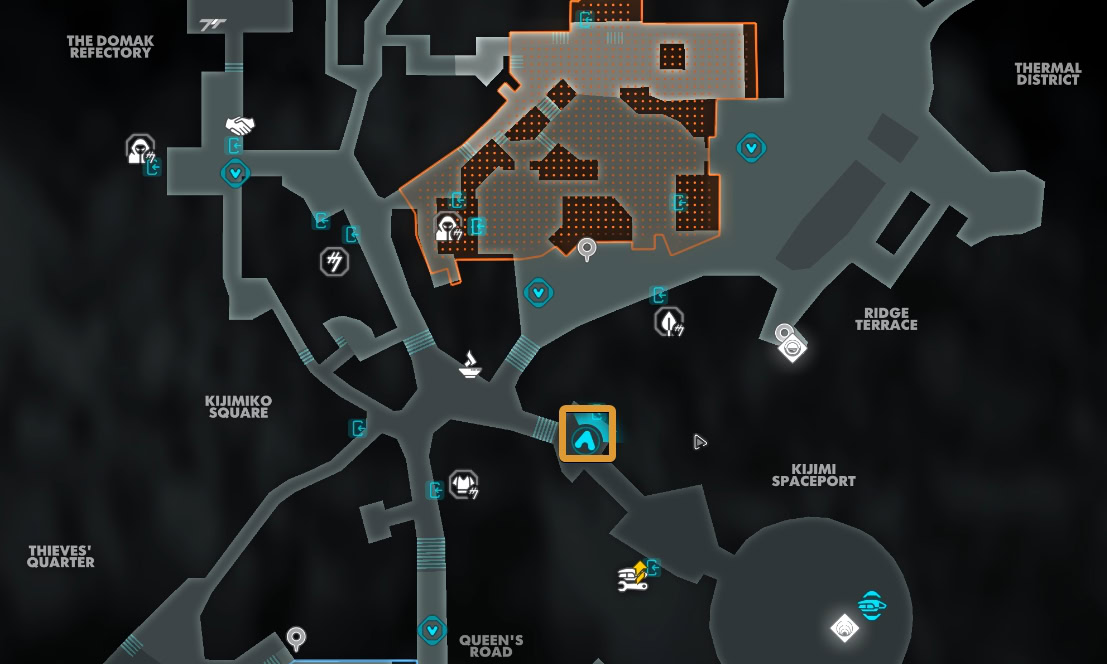
Piapo’s Stash: Starburst Finish
The Starburst Finish has a rose gold mid-section with lavender details and red accents. The rest of the ship is unpainted. It matches the Violet Brezak Paint Job quite well.
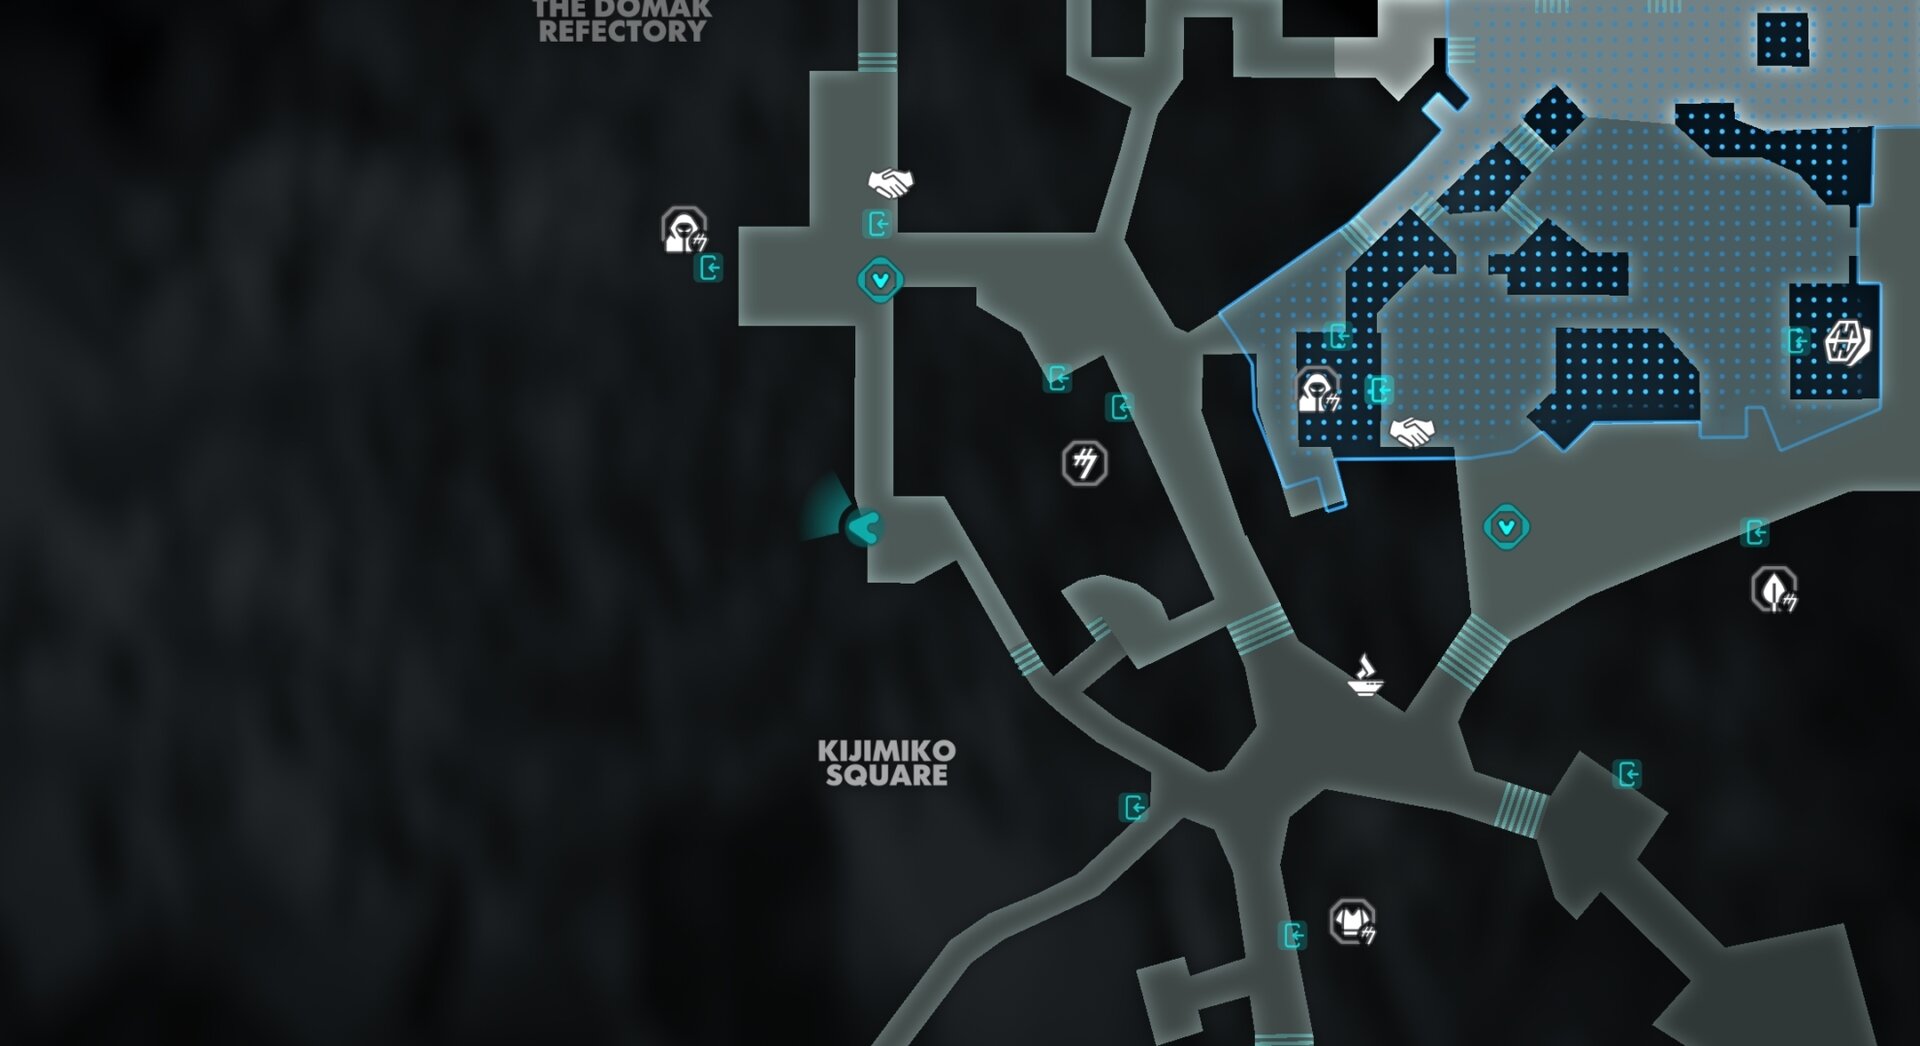
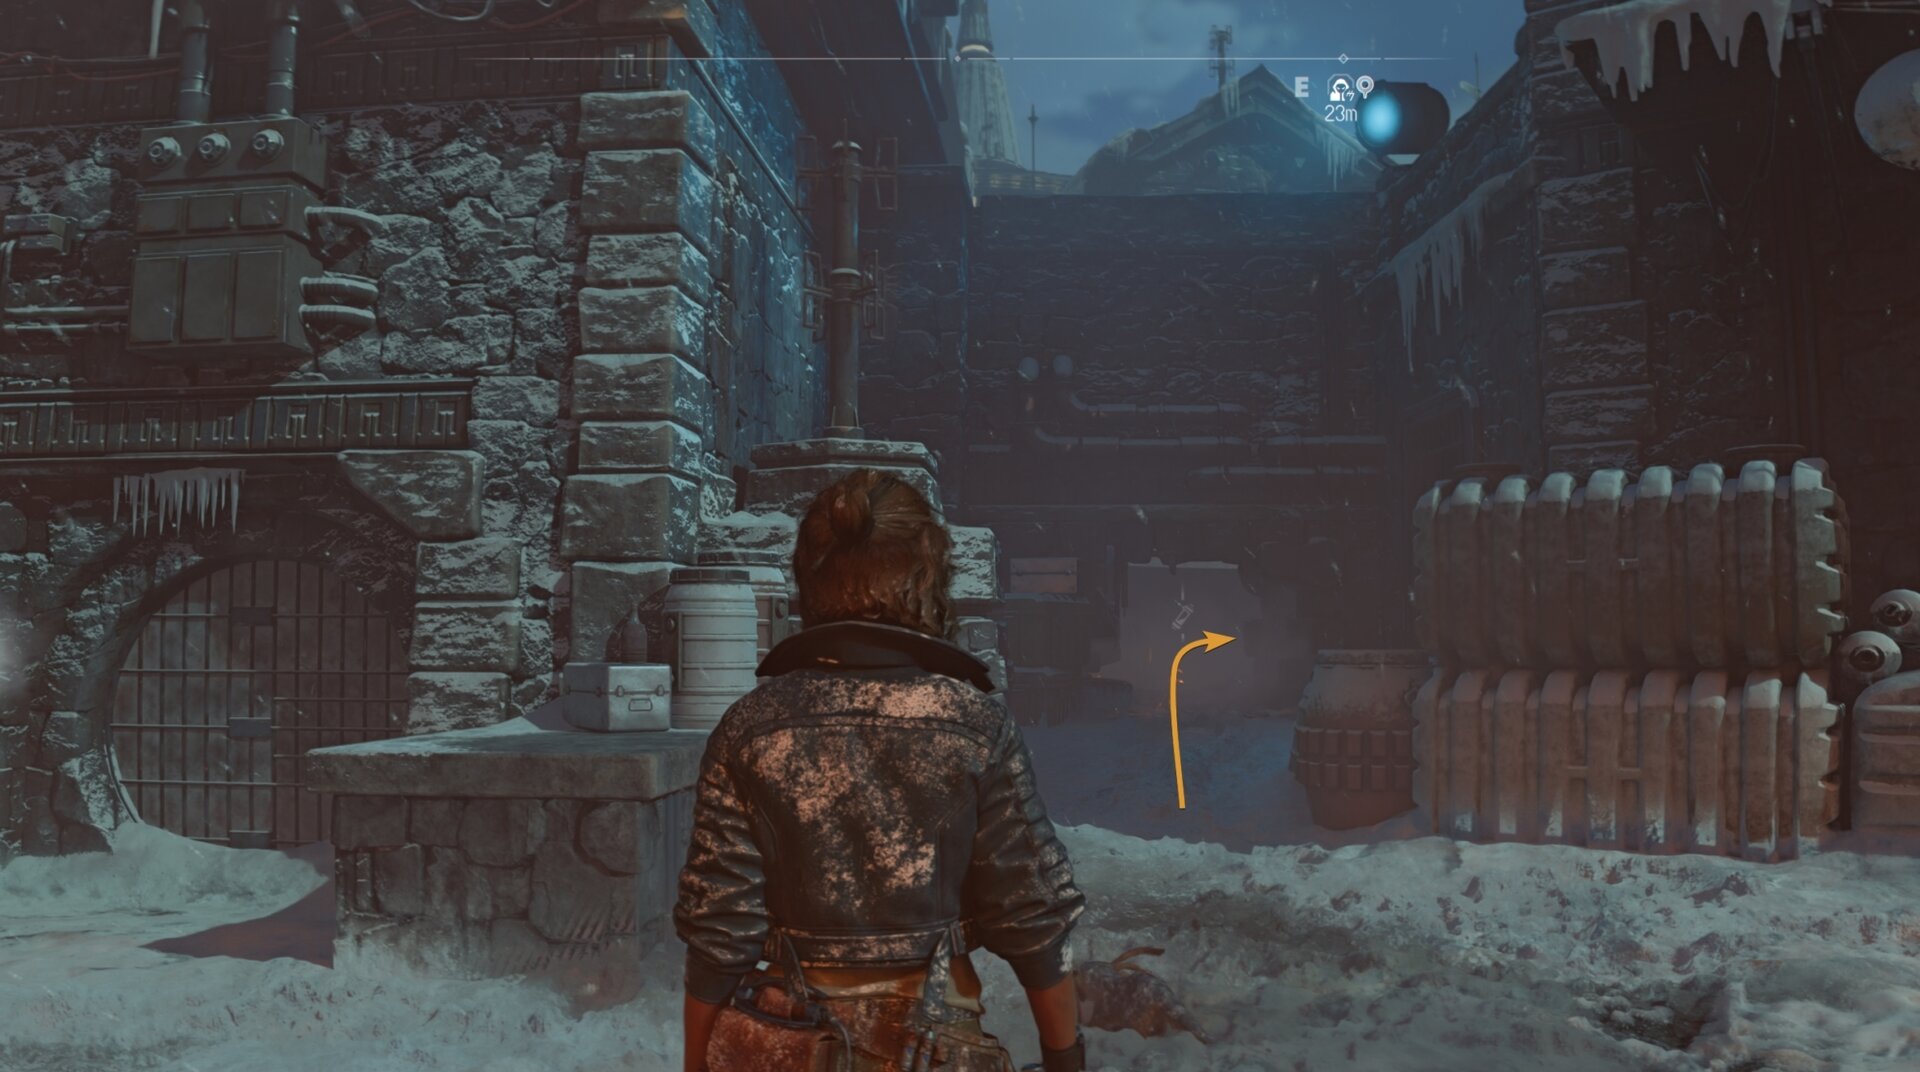
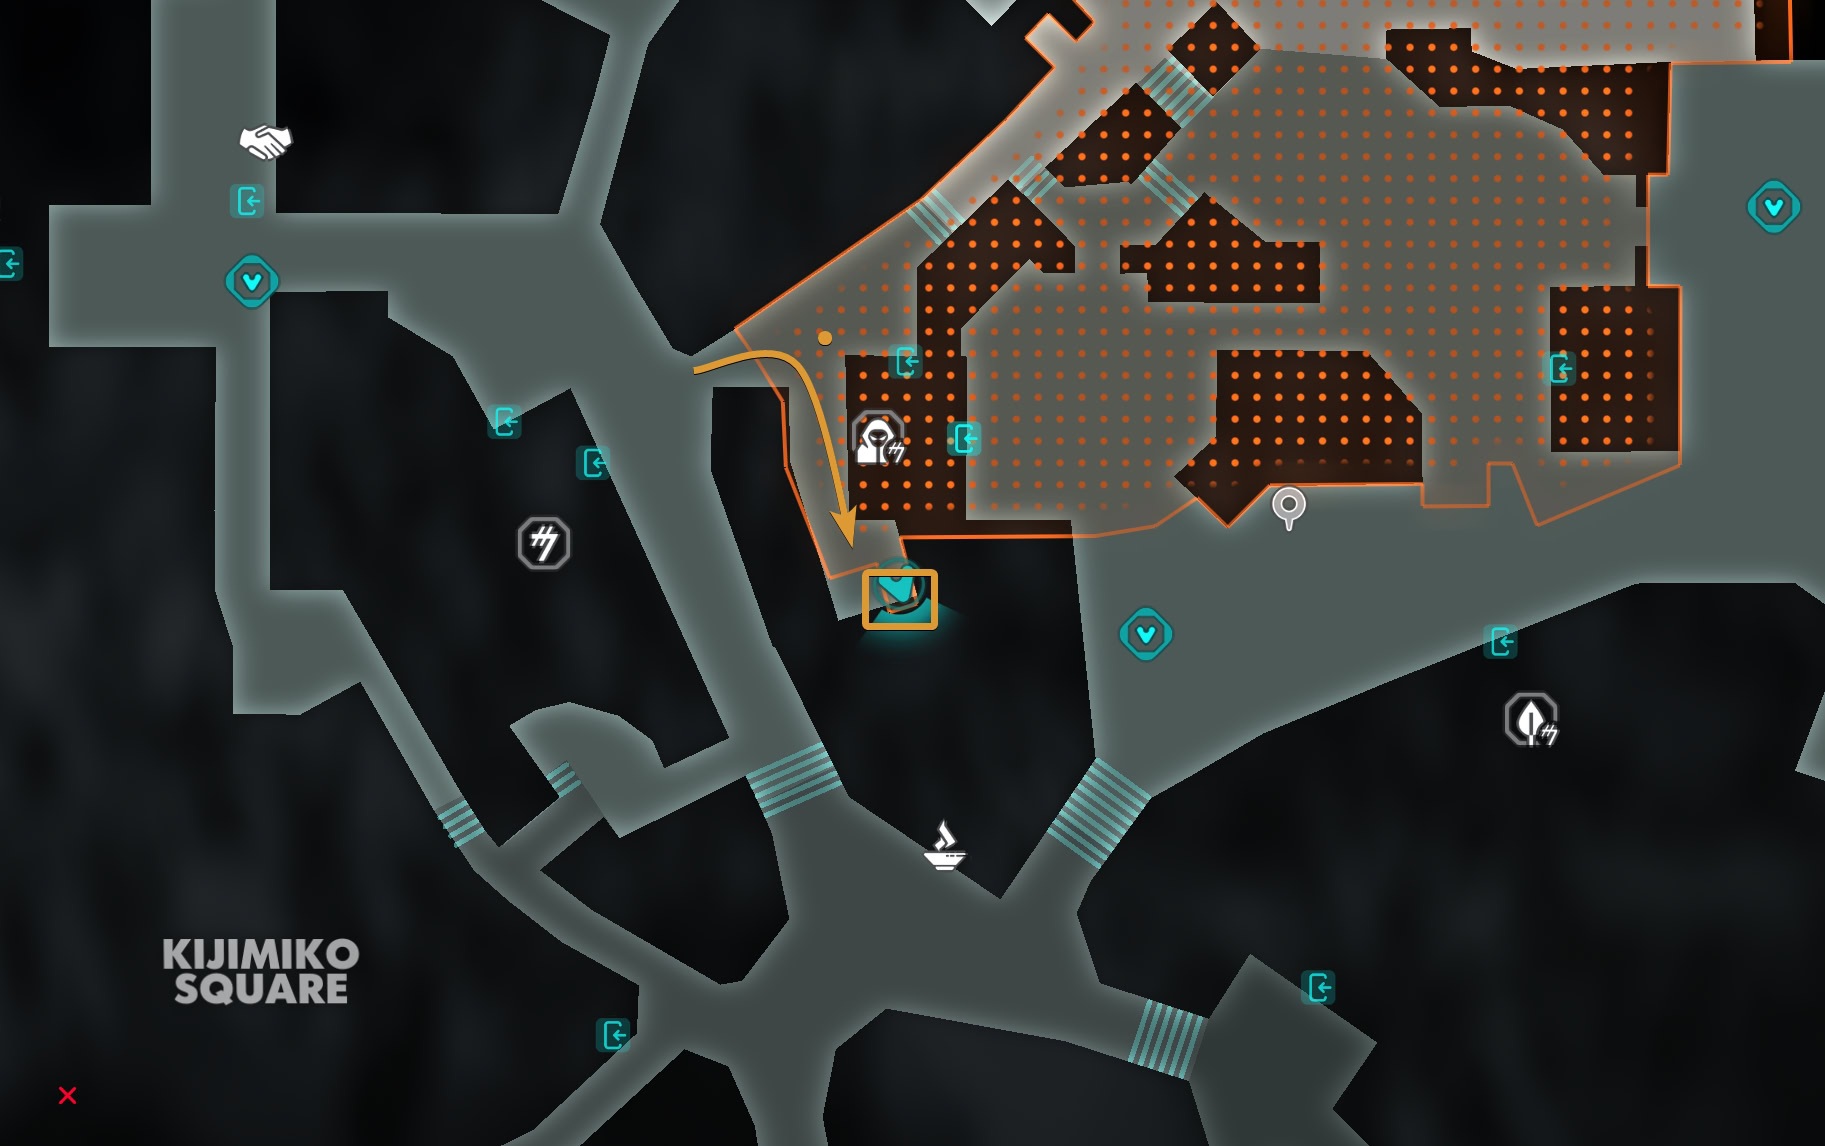
You can loot the Starburst Finish from a chest behind bars near Kijimiko Square, south of the Domak Refectory on Kijimi. You’ll need to unlock the Fusioncutter to reach this chest.
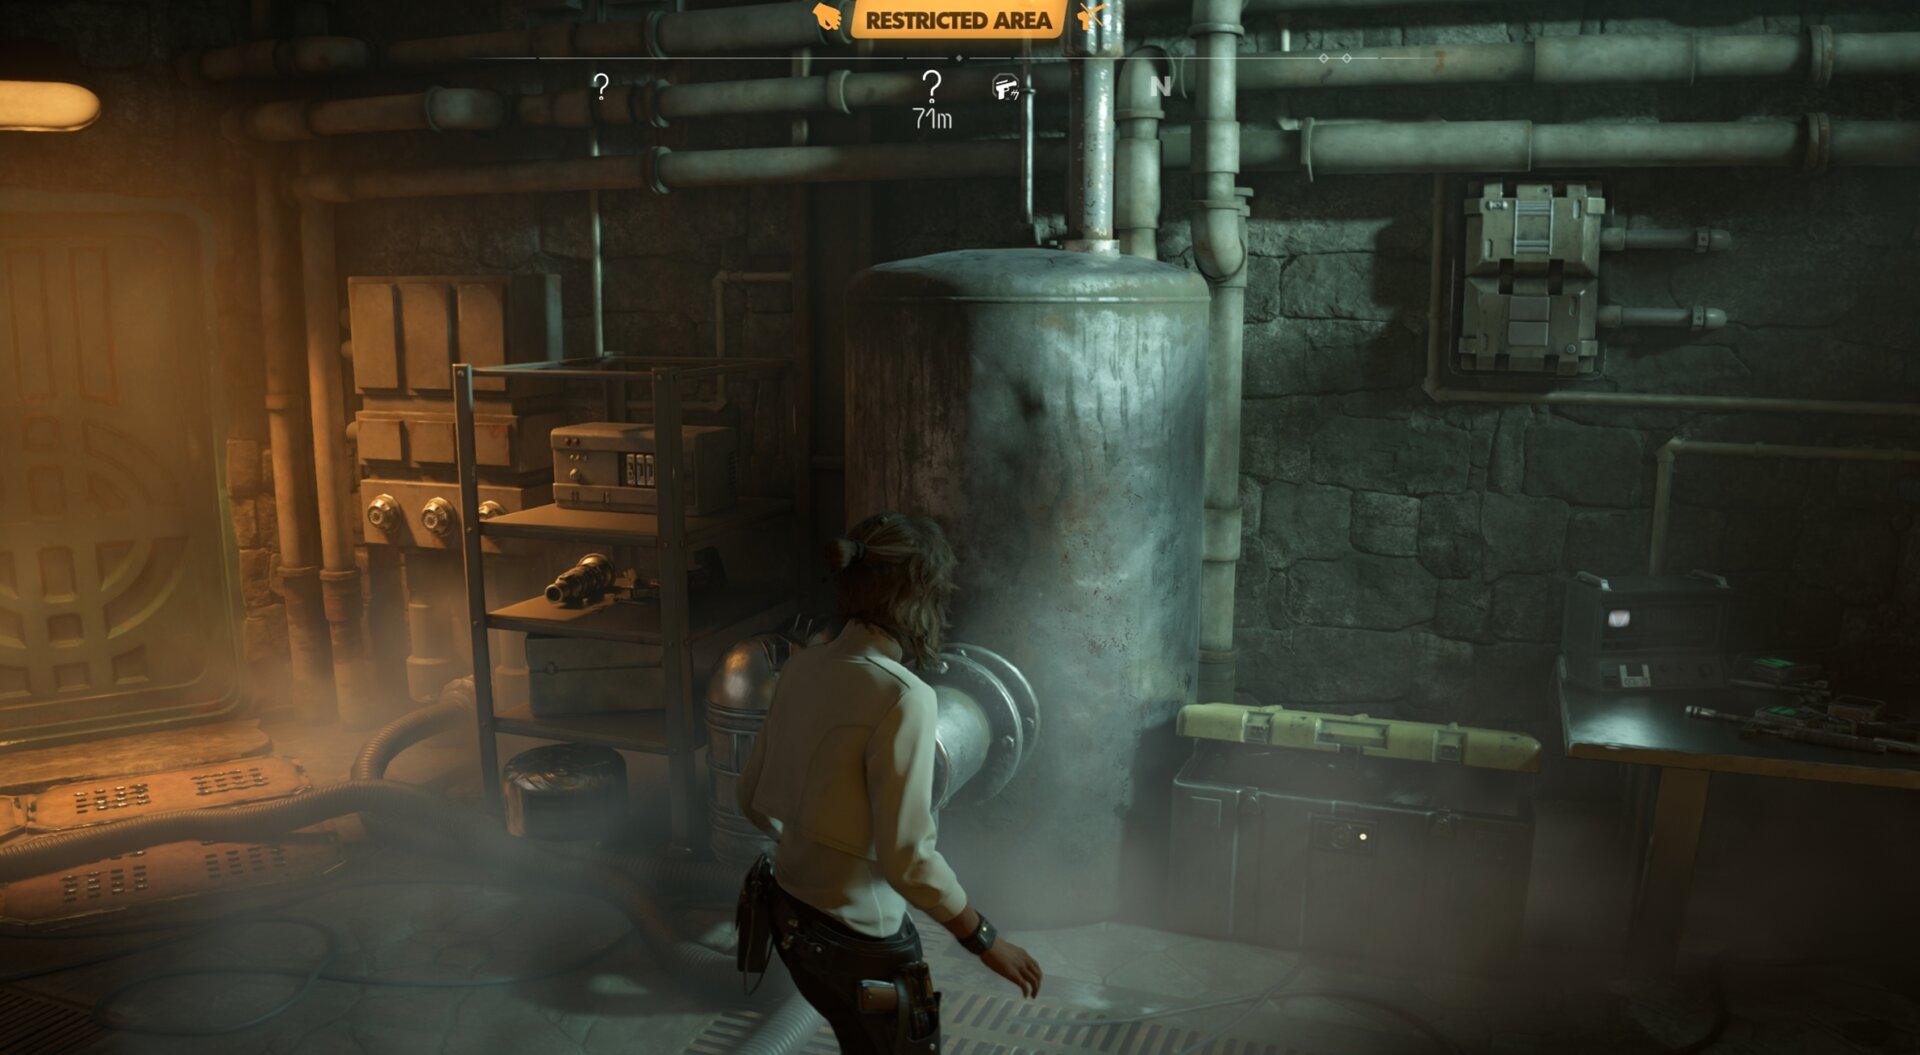
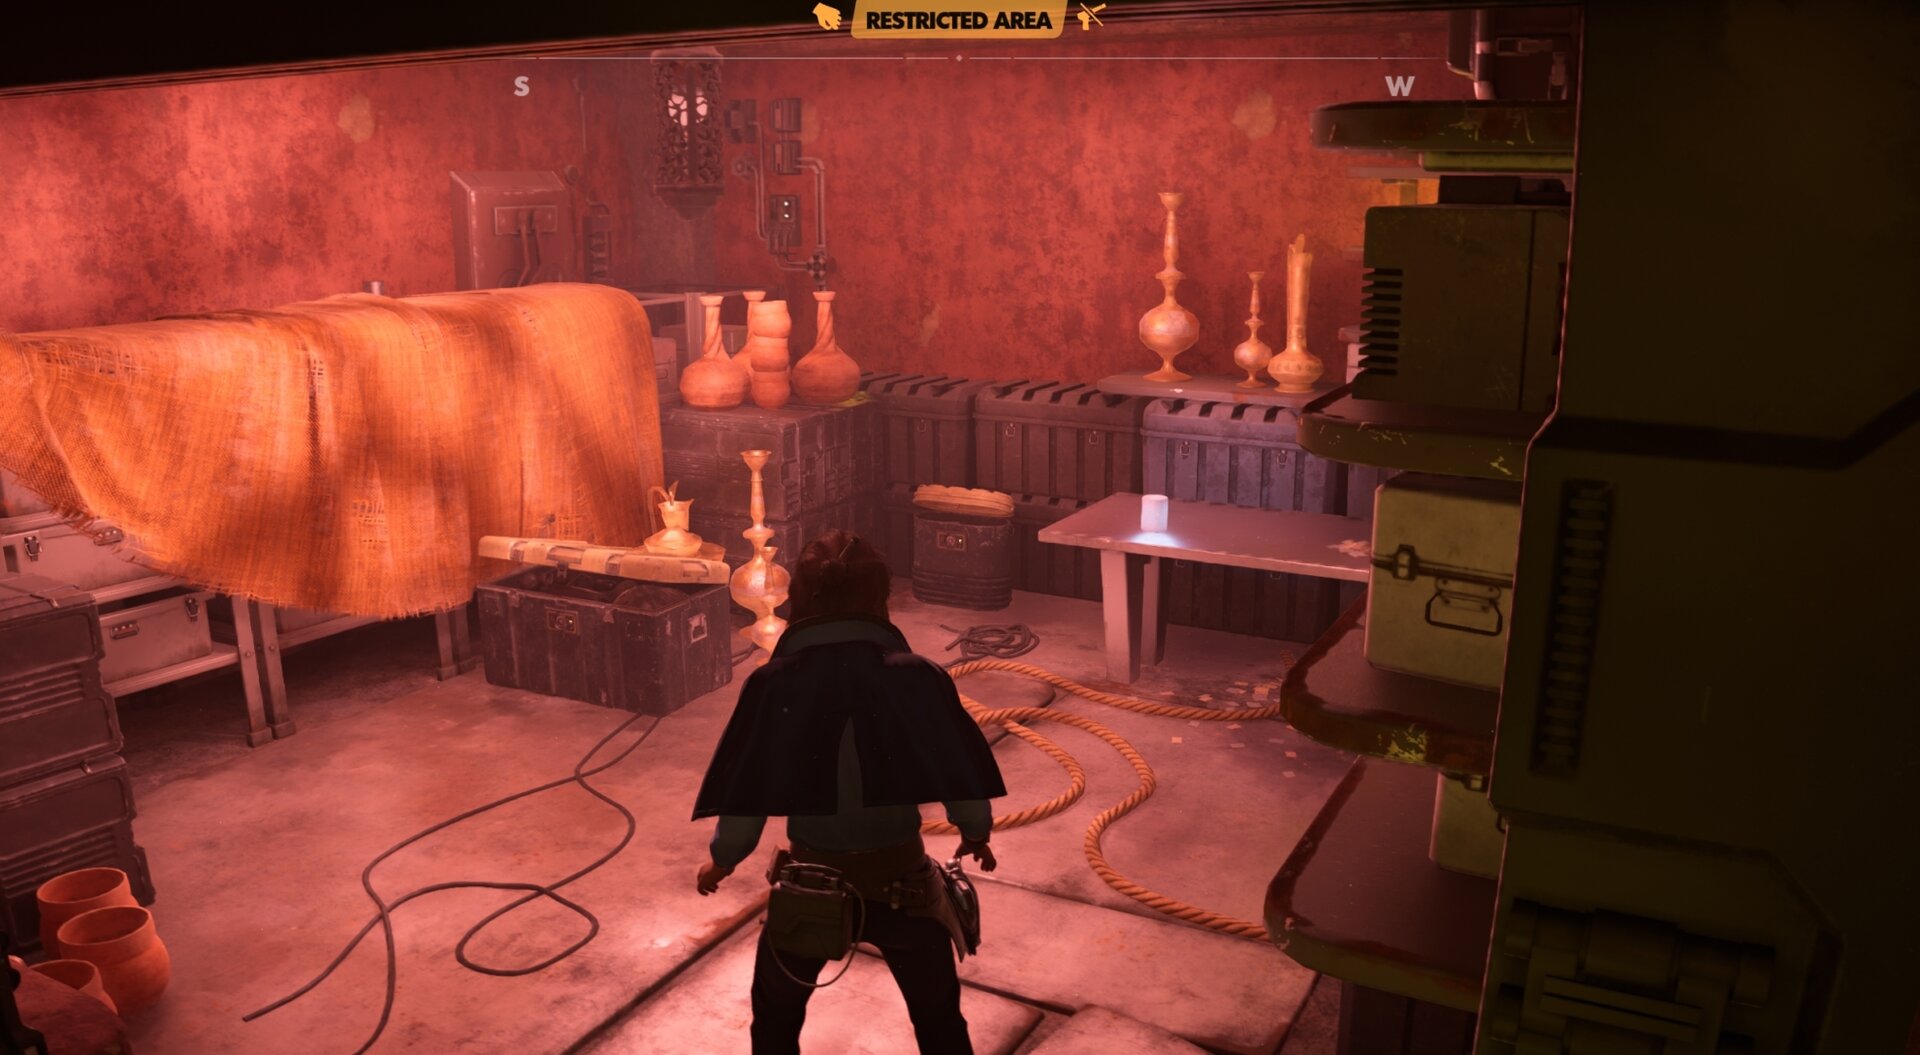
Novi’s Stash: Kijimi Explorer Fuel
The Kijimi Explorer Fuel changes the color of your ship’s thruster exhaust to a golden orange color, allowing it to match the Kijimi Explorer rewards from the Ashiga Clan.
You can loot the Kijimi Explorer Fuel from a chest in the same building as the Ashiga Clan Vault on Kijimi, though it’s in the room opposite the one with the vault.
Quola’s Stash: Vandor Survivalist Belt
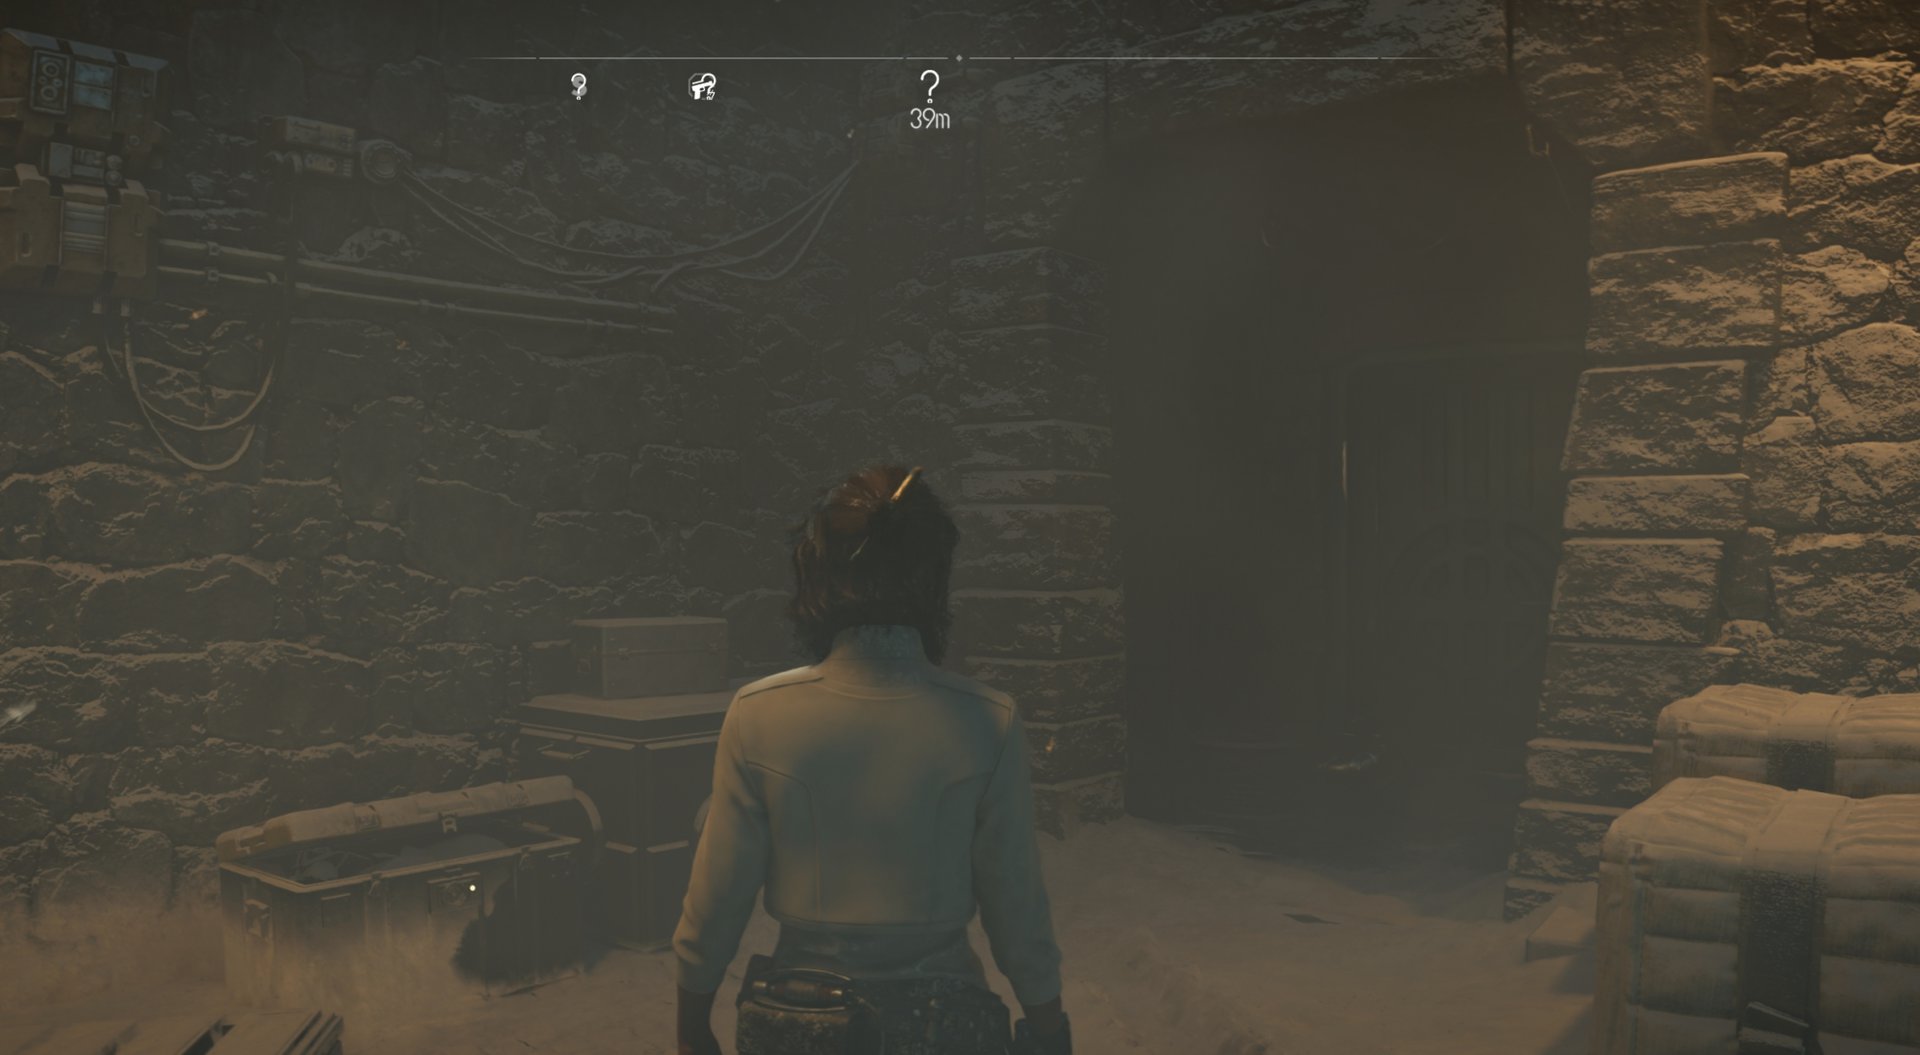
You can loot the Vandor Survivalist Belt from a chest in an alcove behind a sliceable door across from the Tailor along the Queen’s Road on Kijimi.
Our complete catalog to all Outfits in Star Wars Outlaws will show you where and how you can obtain all available outfits in the game and help you decide which set bonuses and individual perks fit better your playstyle.
Muroma’s Stash: Crimelord’s Petars Trinket
The Crimelord’s Petars is a brass knuckle twin dagger used by Crimson Dawn agents.
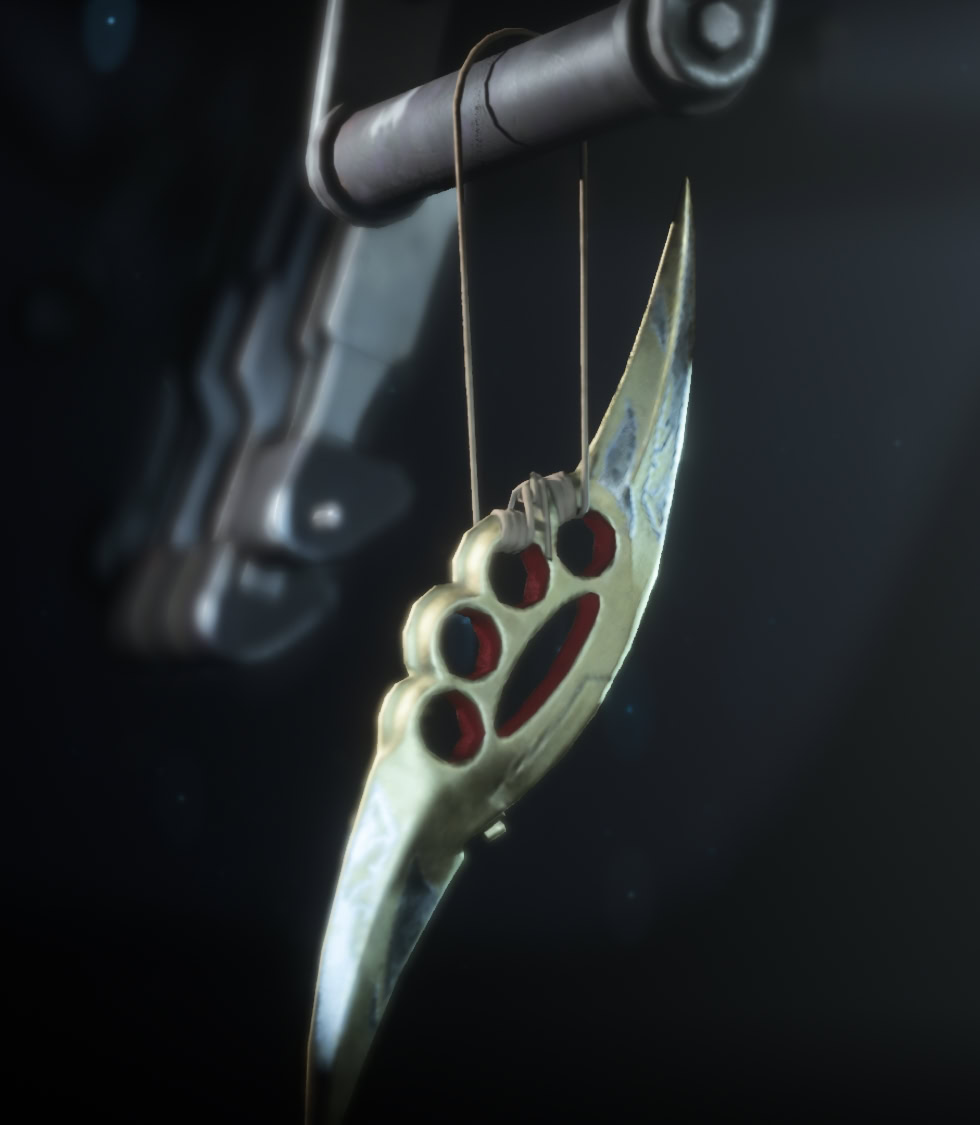
You can loot the Crimelord’s Petars Trinket from a chest behind a locked door inside Crimson Dawn Territory on Kijimi. This is where Dark’s Vault Keycard is for the Crimson Dawn Syndicate Vault.
You can see the chest from the main square, but the door is around back. There’s a guard nearby that you can safely knock out, so she won’t freak out when you start picking the lock.
Saku’s Stash: Tauntaun Horn Trinket
The Tauntaun Horn Trinket is the horn of an animal with Lukewarm insides native to Hoth.
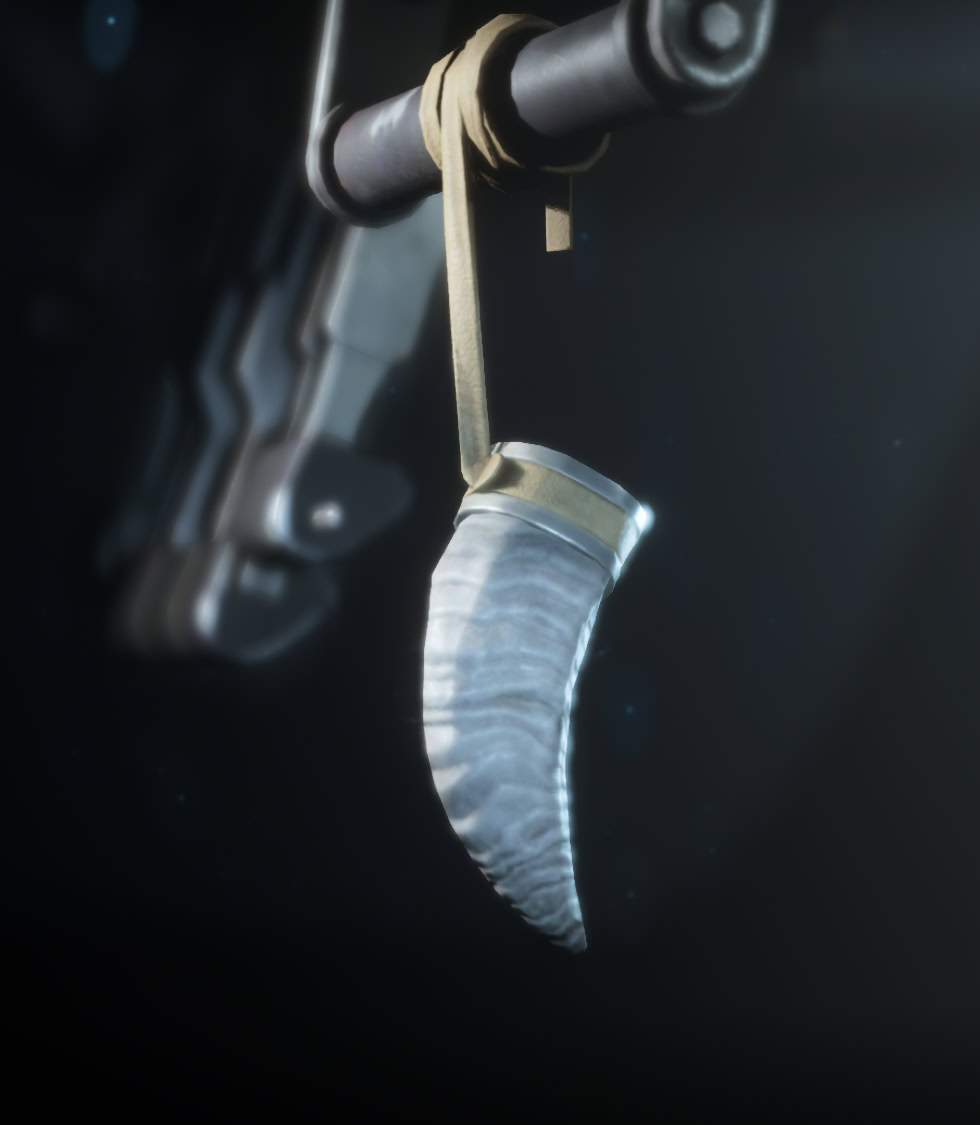
You can loot the Tauntaun Horn Trinket from a chest behind an unlocked door at the highest accessible point in Kijimi City west of Ashiga Clan Territory.
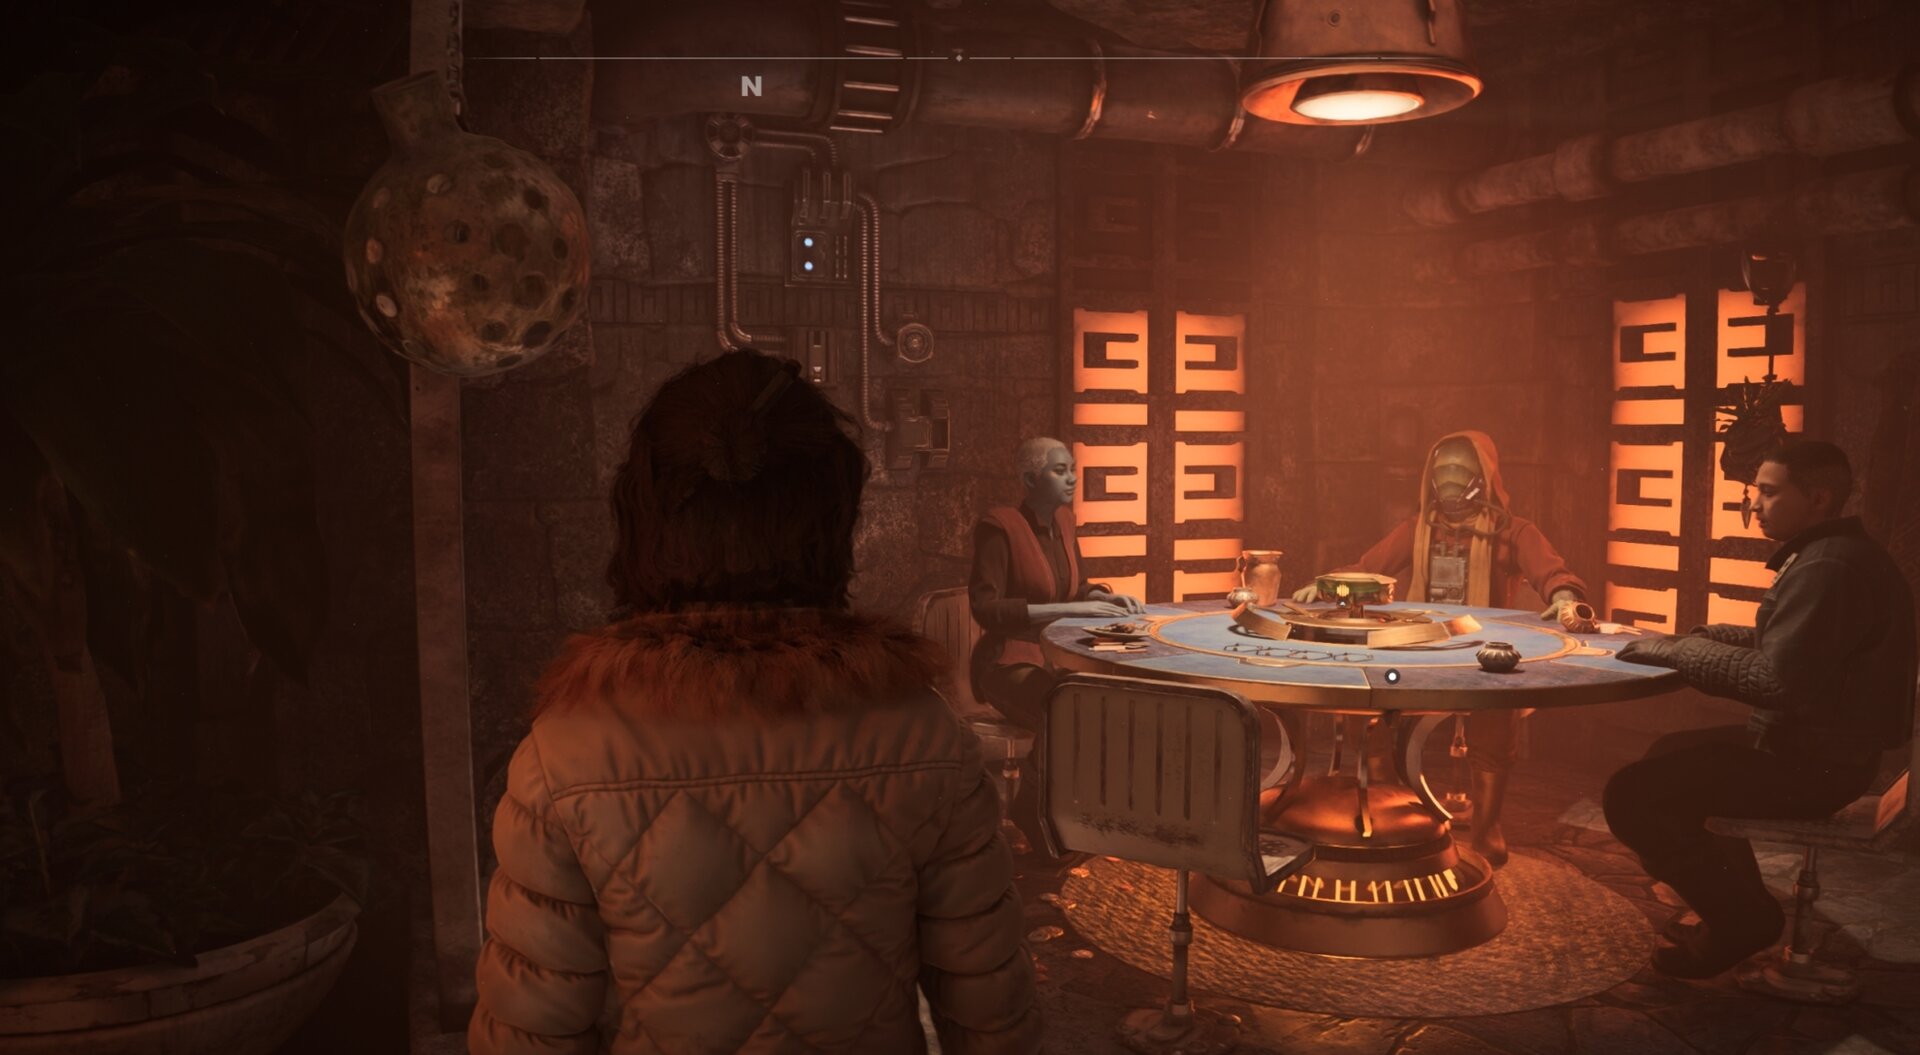
Crimson Dawn Sabacc Card Room: Shift Tokens
Winning a game of Kessel Sabacc at the Crimson Dawn Cardroom, will grant you the following three Shift Tokens: Immunity: Major Fraud and Exhaustion.
Prevent Shift Tokens effect against you until next reveal.
Immunity will prevent shift token effects from affecting you before the next reveal. This does not include tokens that change the rules of a round such as Cook the Books or Prime Sabacc.
Set Imposter value to 6 until next reveal.
The Major Fraud token can be used to sabotage opponents with an Imposter Card. It can also be used to your advantage if the Sabacc ranks were inverted by the Cook the Books token.
Choose a player. They must discard and draw a new hand.
If you suspect your opponent has good cards (or cheated using Nix), you can force their current cards out of their hand and have them draw new cards.
Even if your reputation is low, if you sneak into the parlor, you will be allowed to play a game of Sabacc.
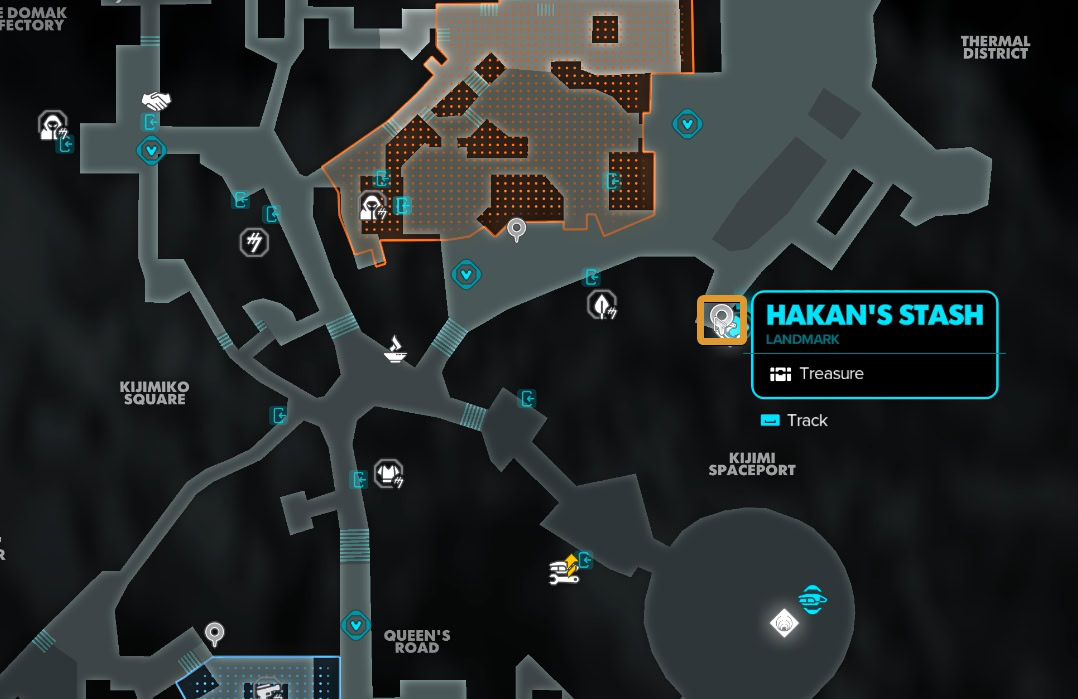
Hakan’s Stash: Upgrade Materials
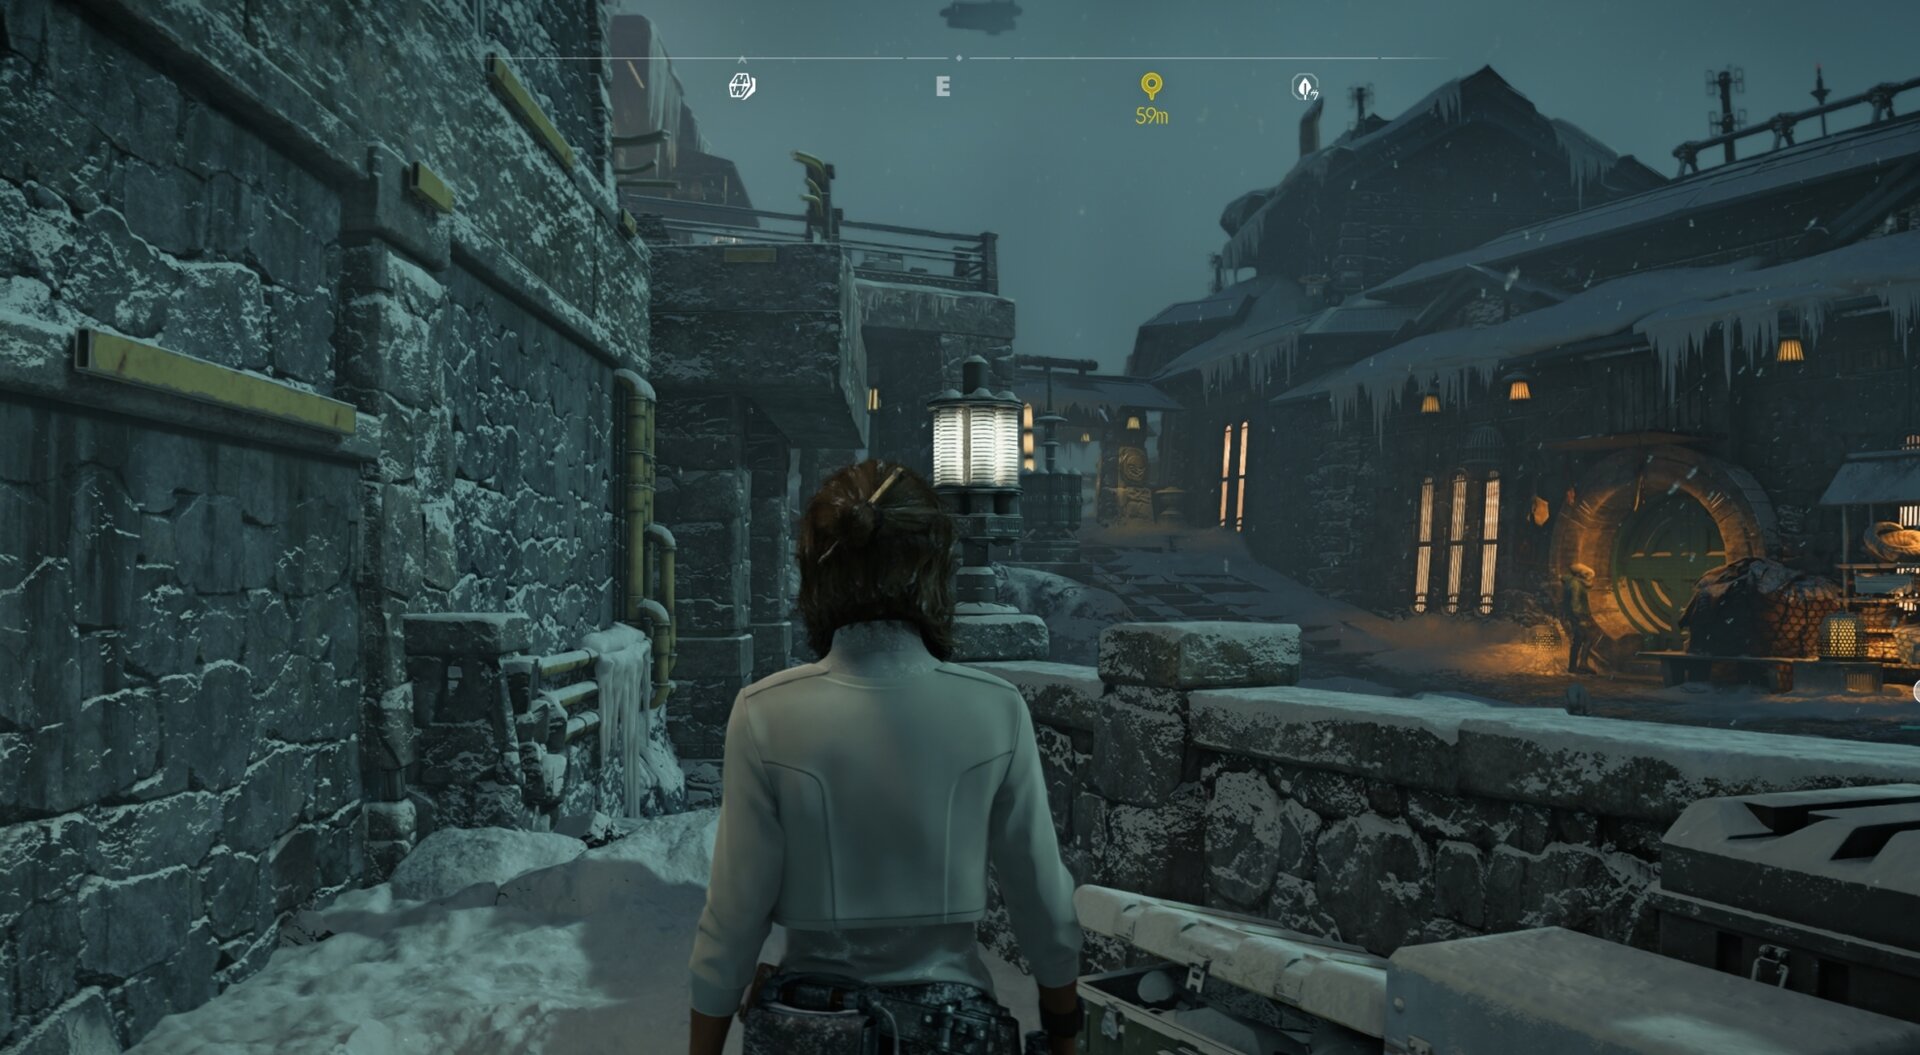
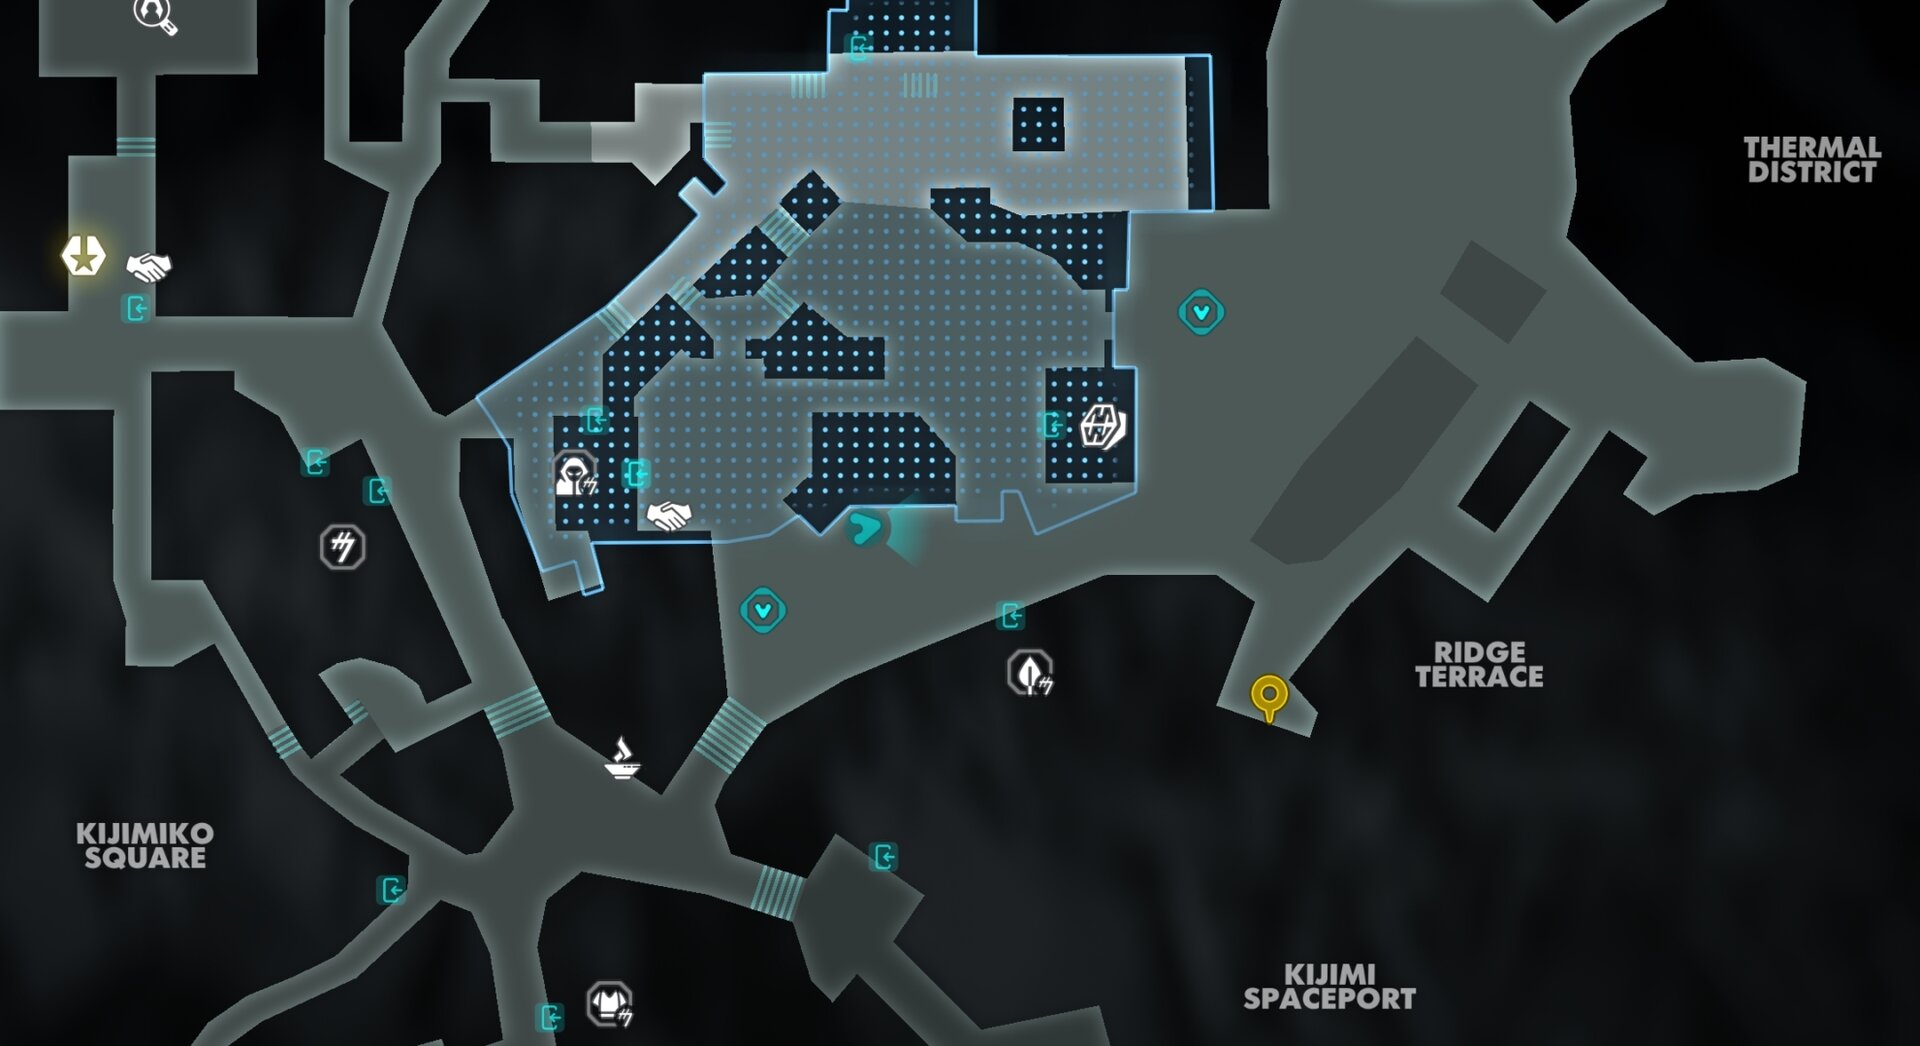
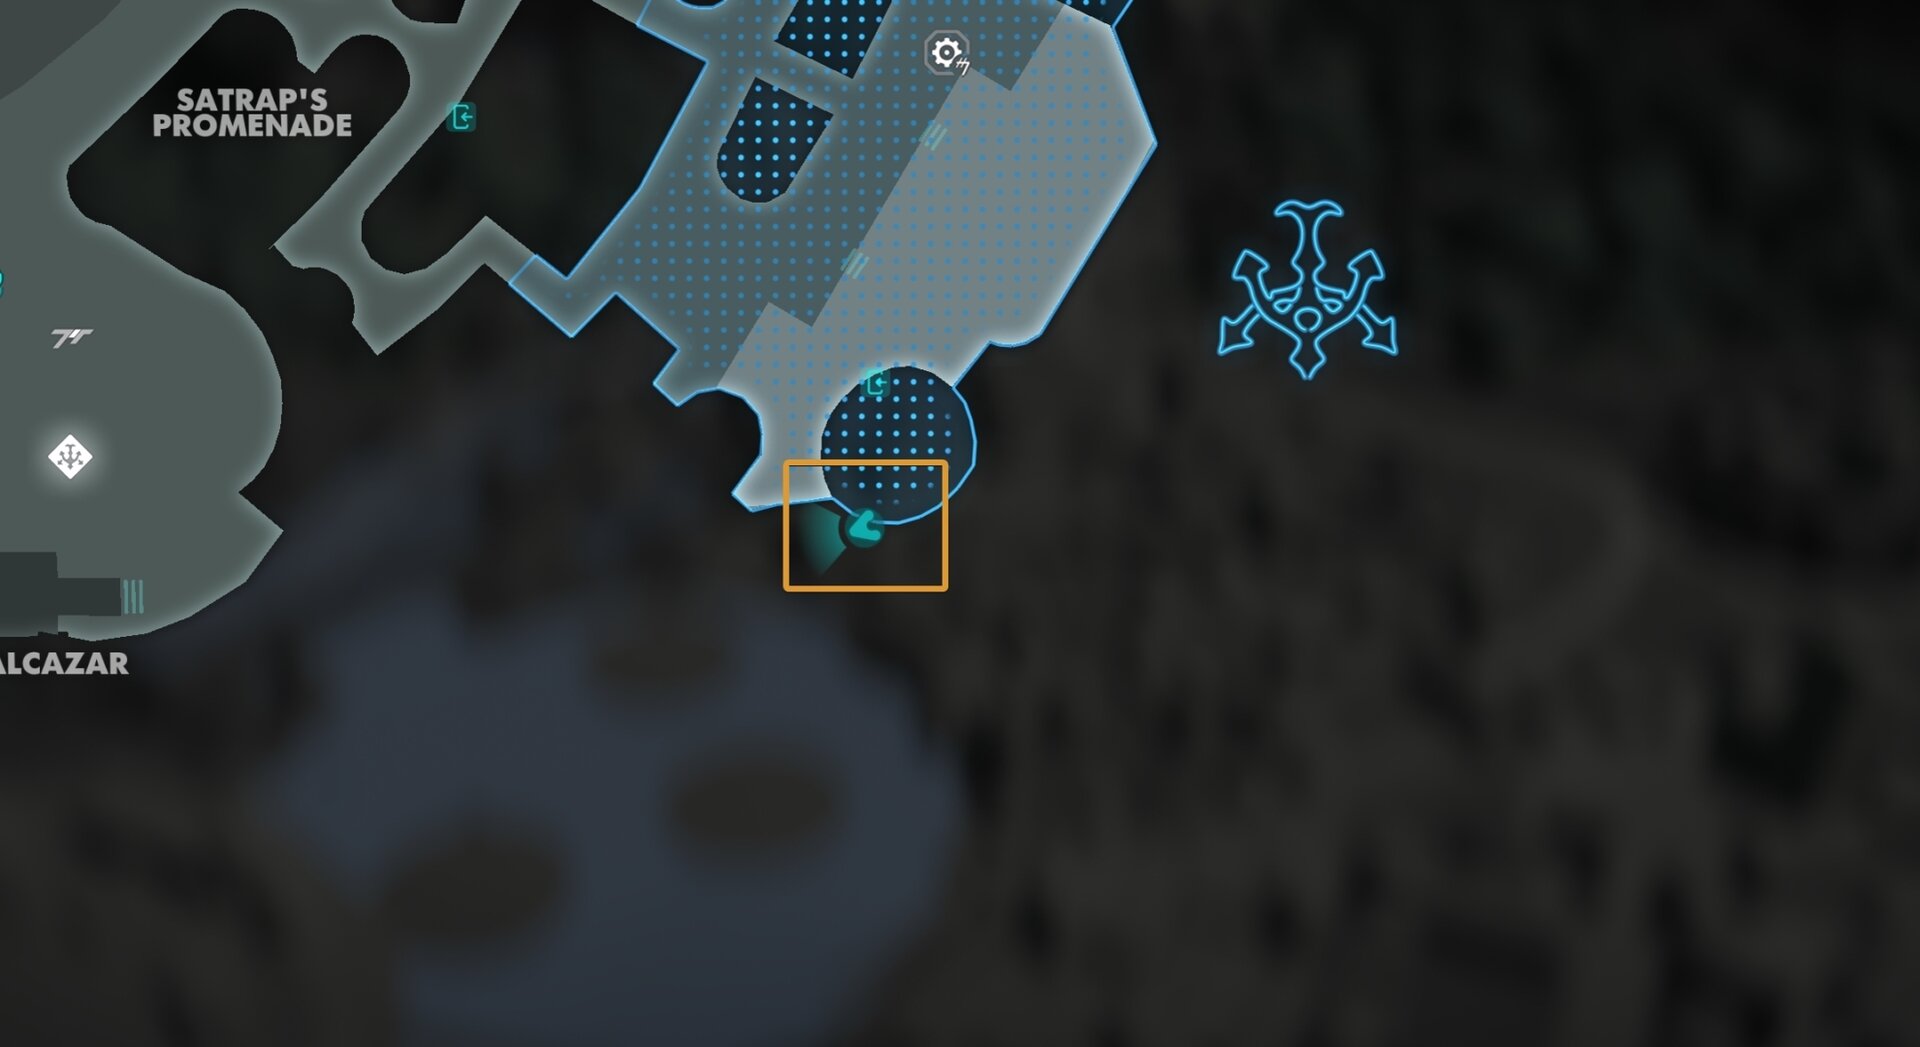
Hakan’s Stash is in the corner of the Ridge Terrace, southwest of the west main entrance to the Crimson Dawn district in Kijimi City.
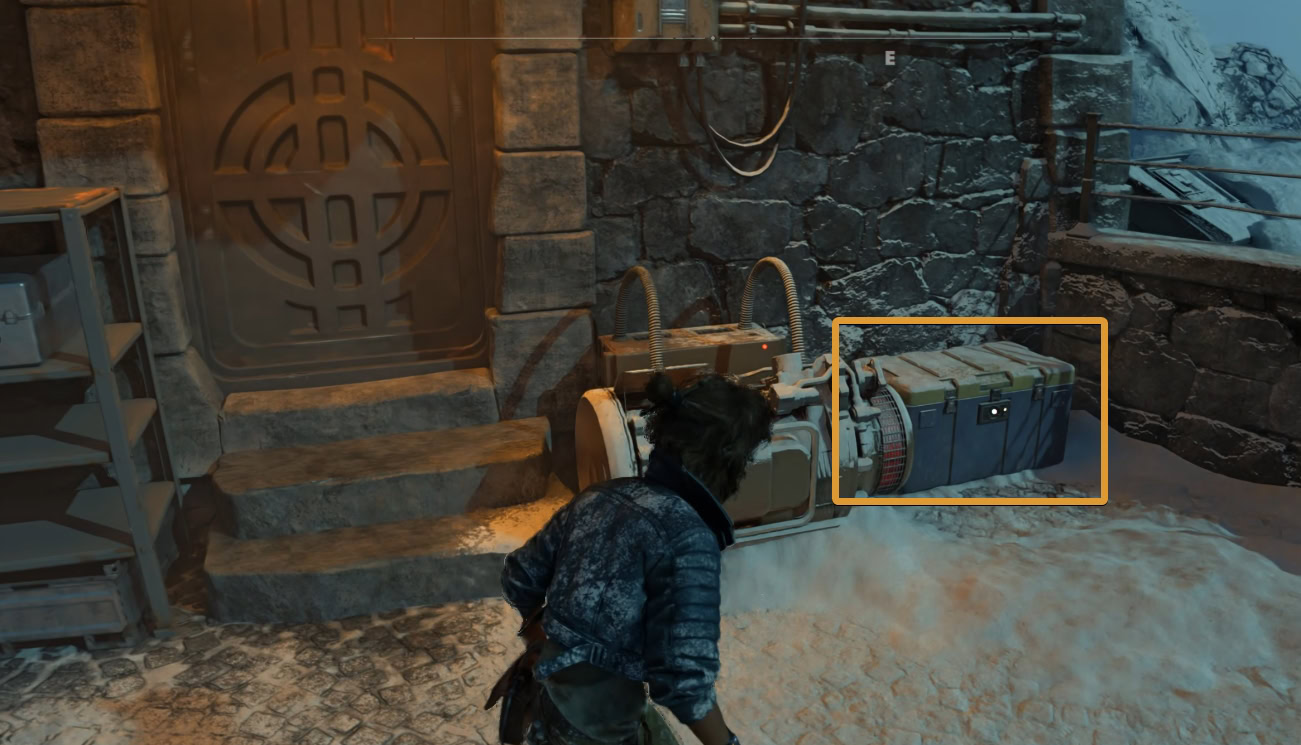
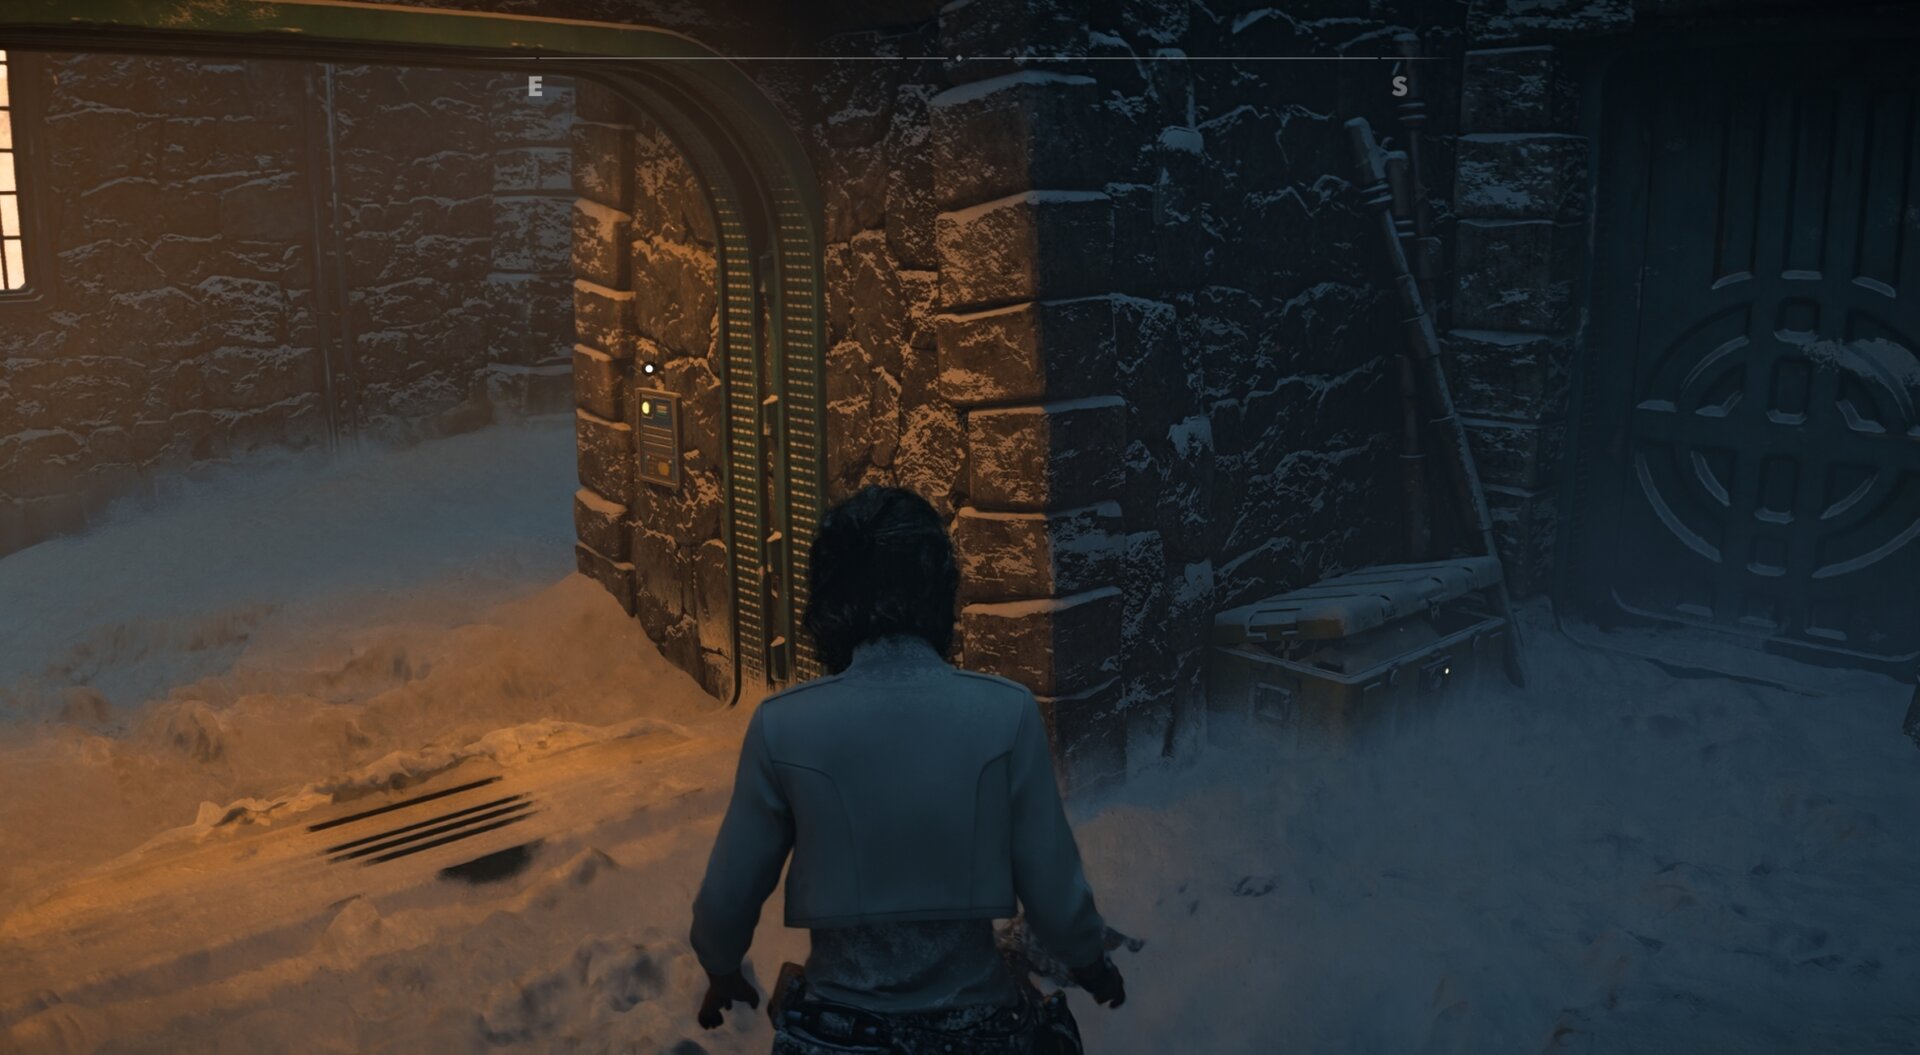
Luda’s Stash: Blaster Recirculator (Blaster Upgrade)
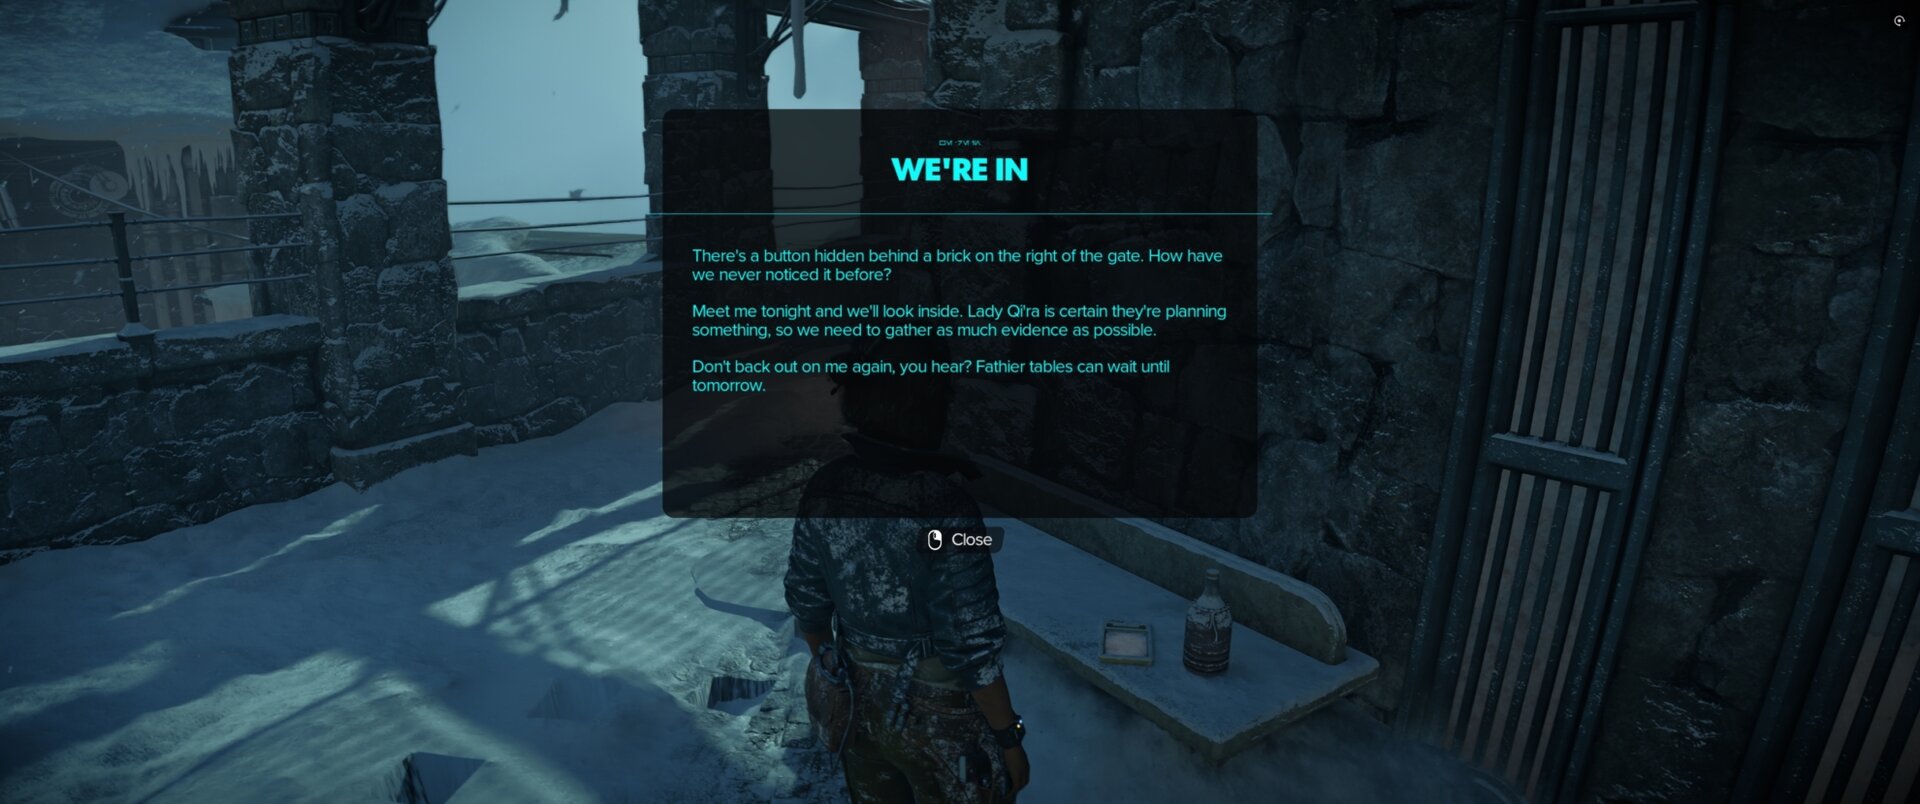
The treasure chest is behind a locked door. The button that unlocks it is hidden until you find a specific note in Kijimi City that reveals its location.
On a bench just up the stairs from Hakan’s Stash at Ridge Terrace, you will find a note that reveals the existence and location of the secret button to the locked door.
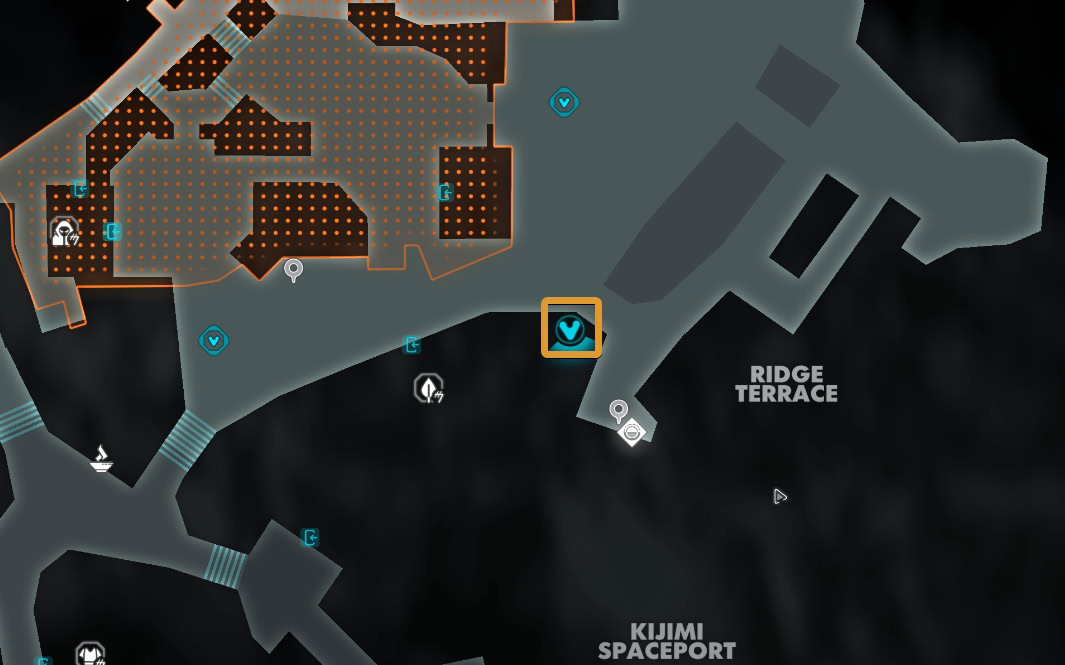
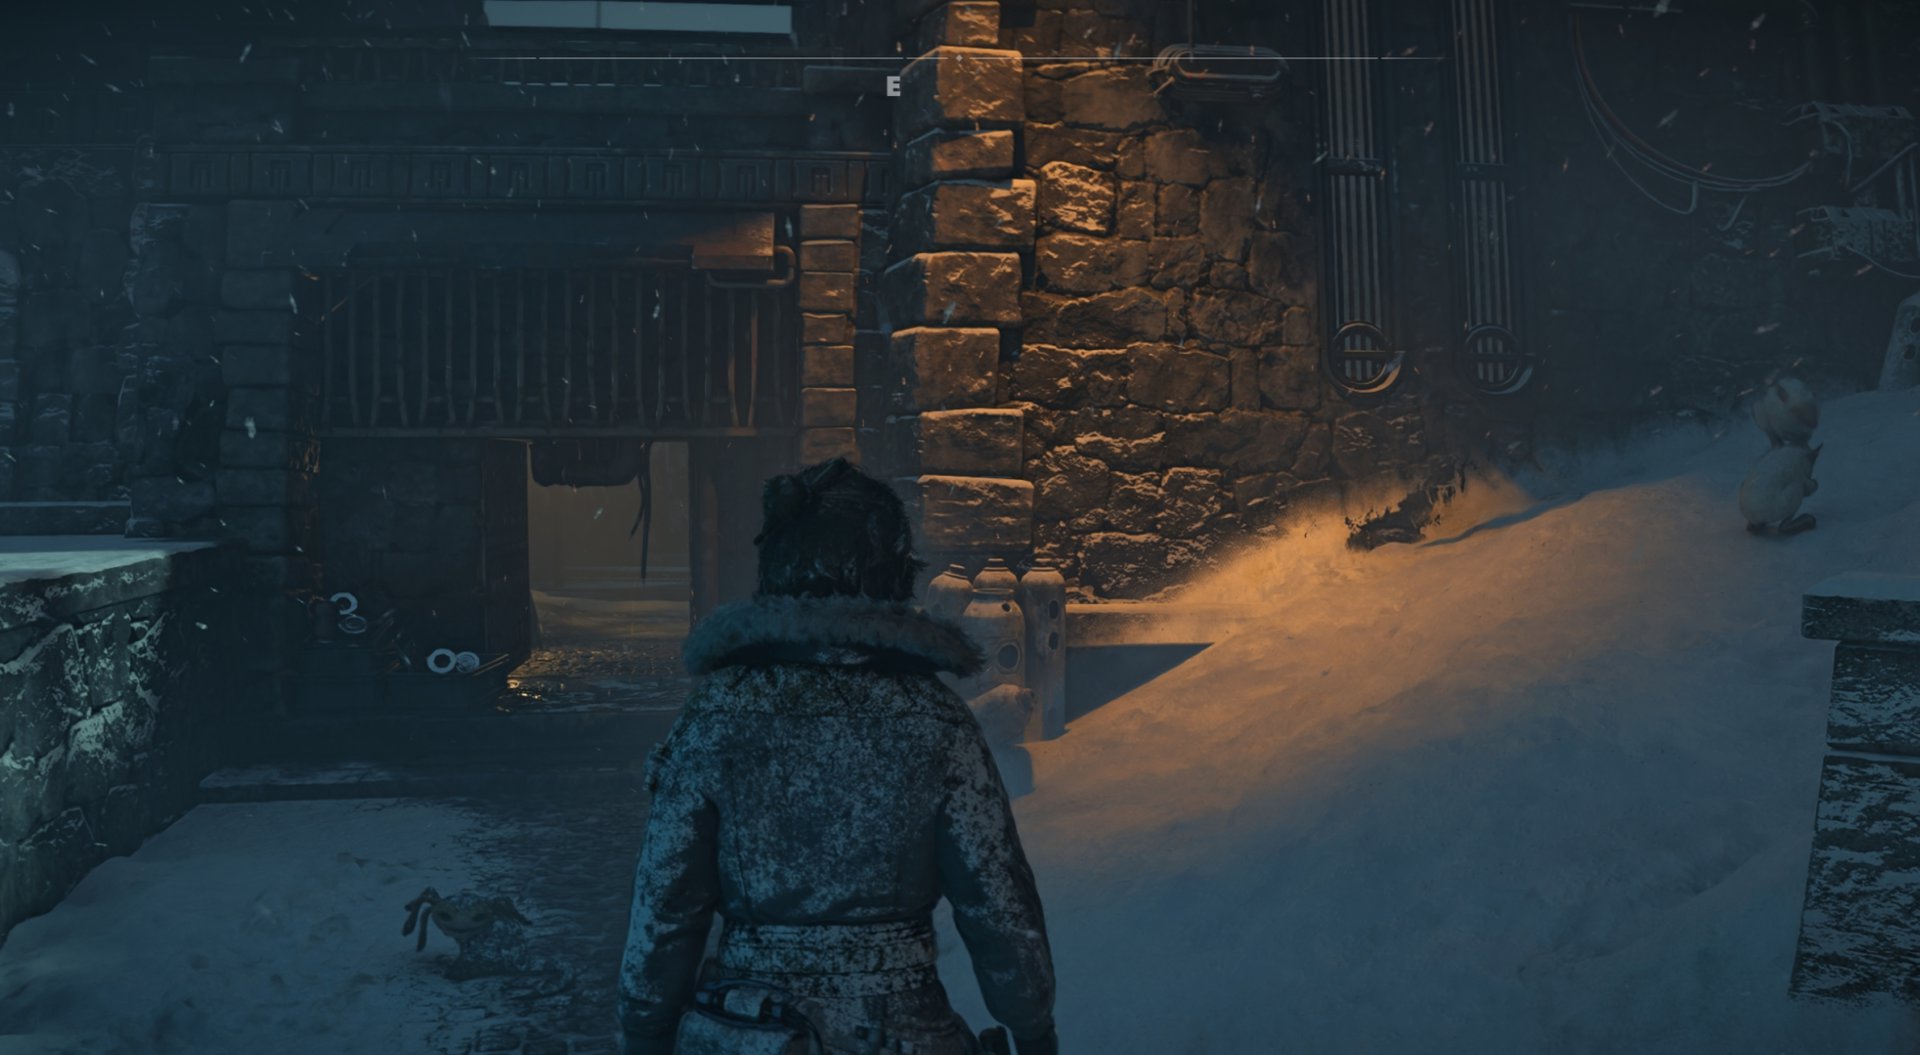
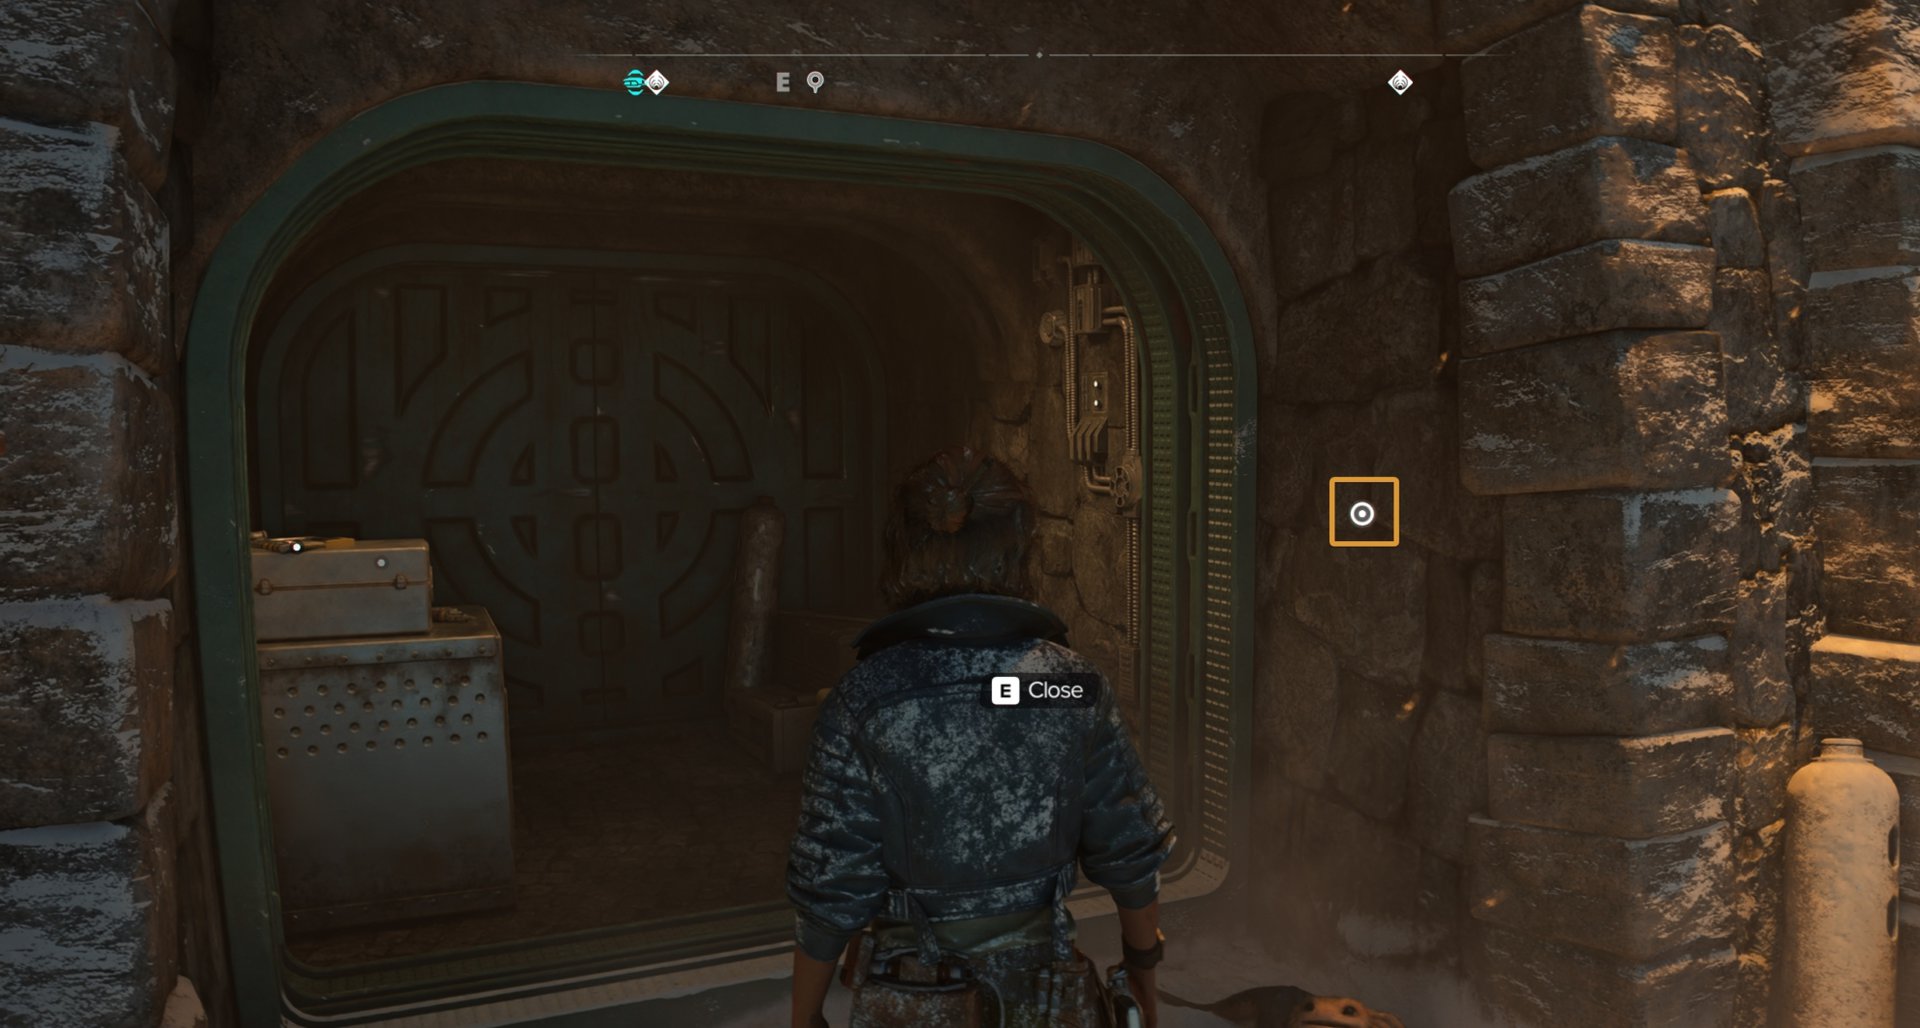
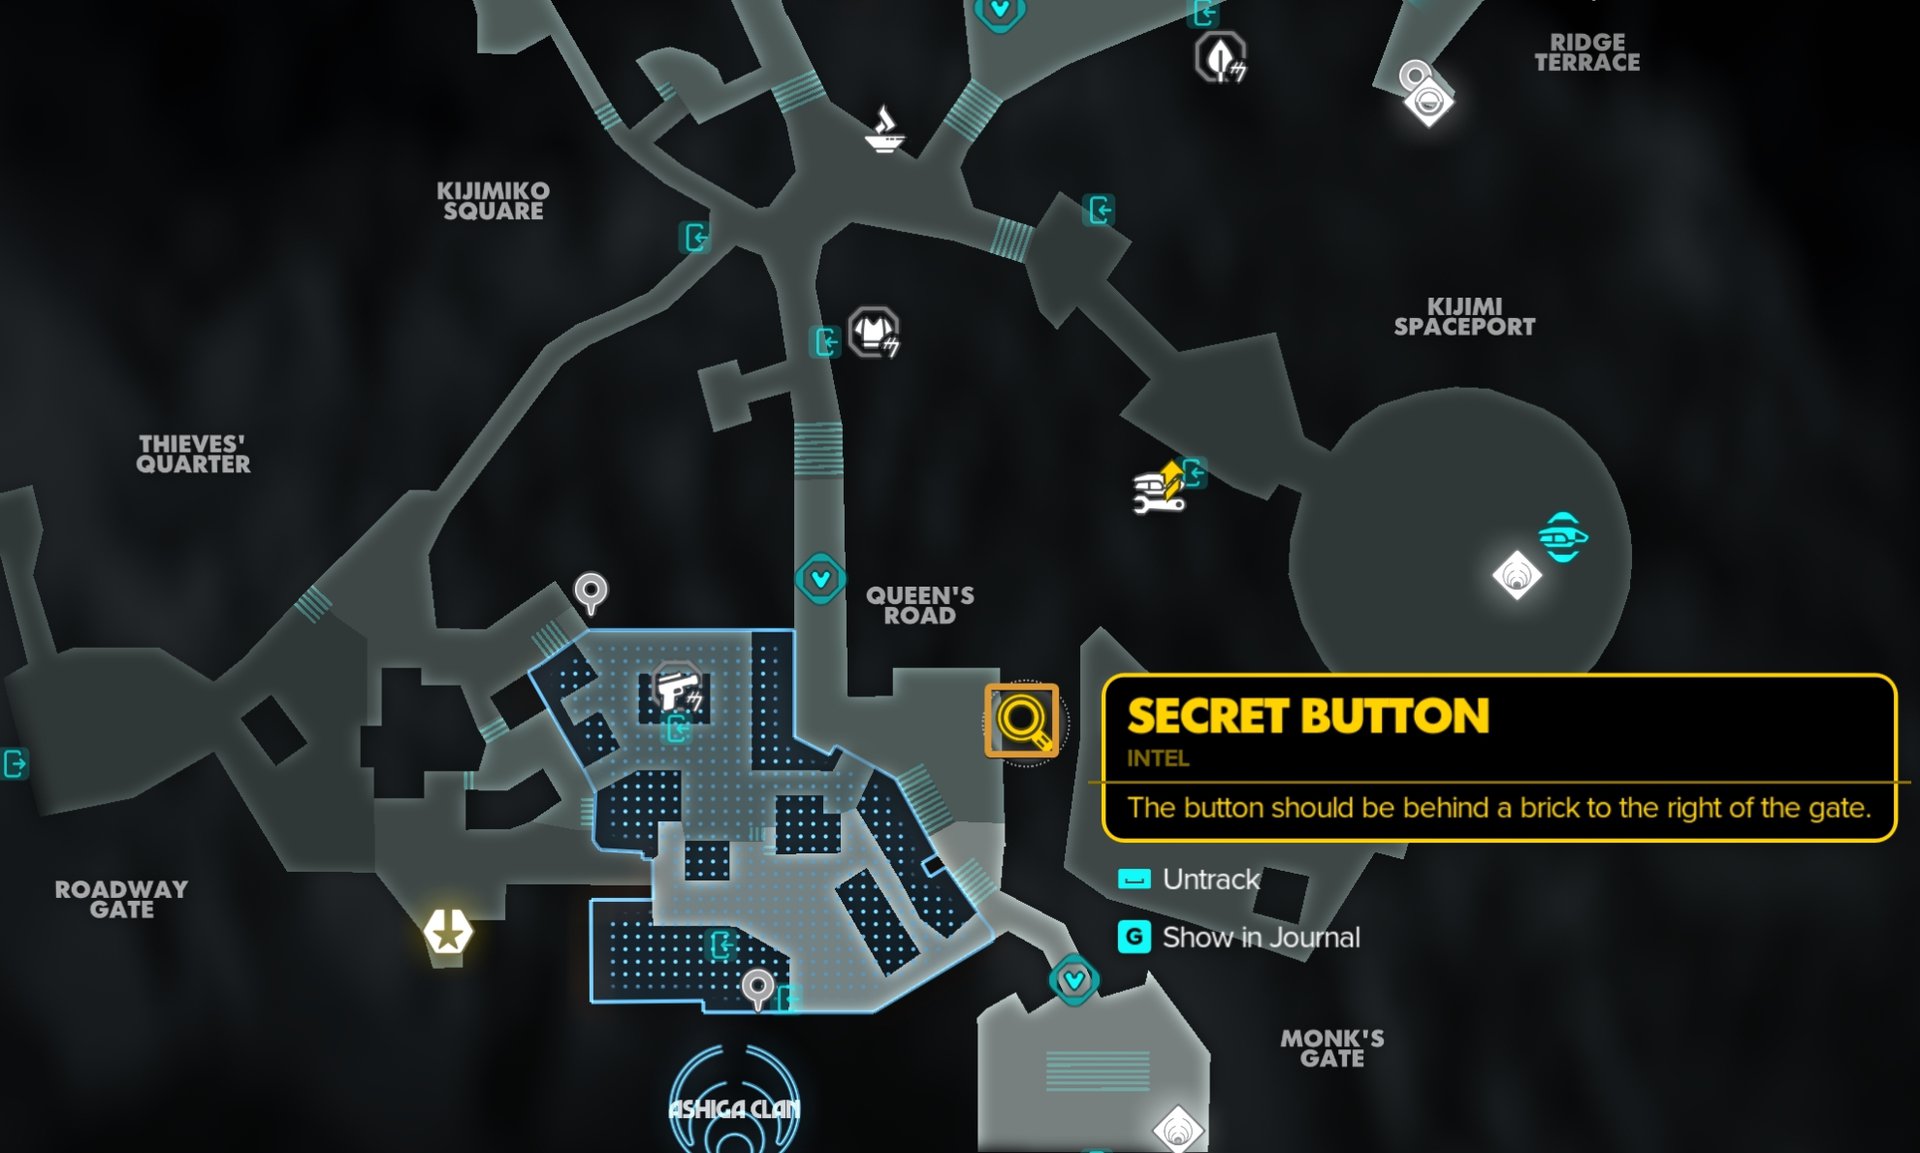
The door is located near the main east entrance of the Ashiga Clan district. From the Fast Travel Point, just a few steps to the south, you will see it. The button is on the right side of the door and you can now interact with it to unlock the room and loot the treasure. In the same room you will also find an ISB Report collectible for Qi’ra.
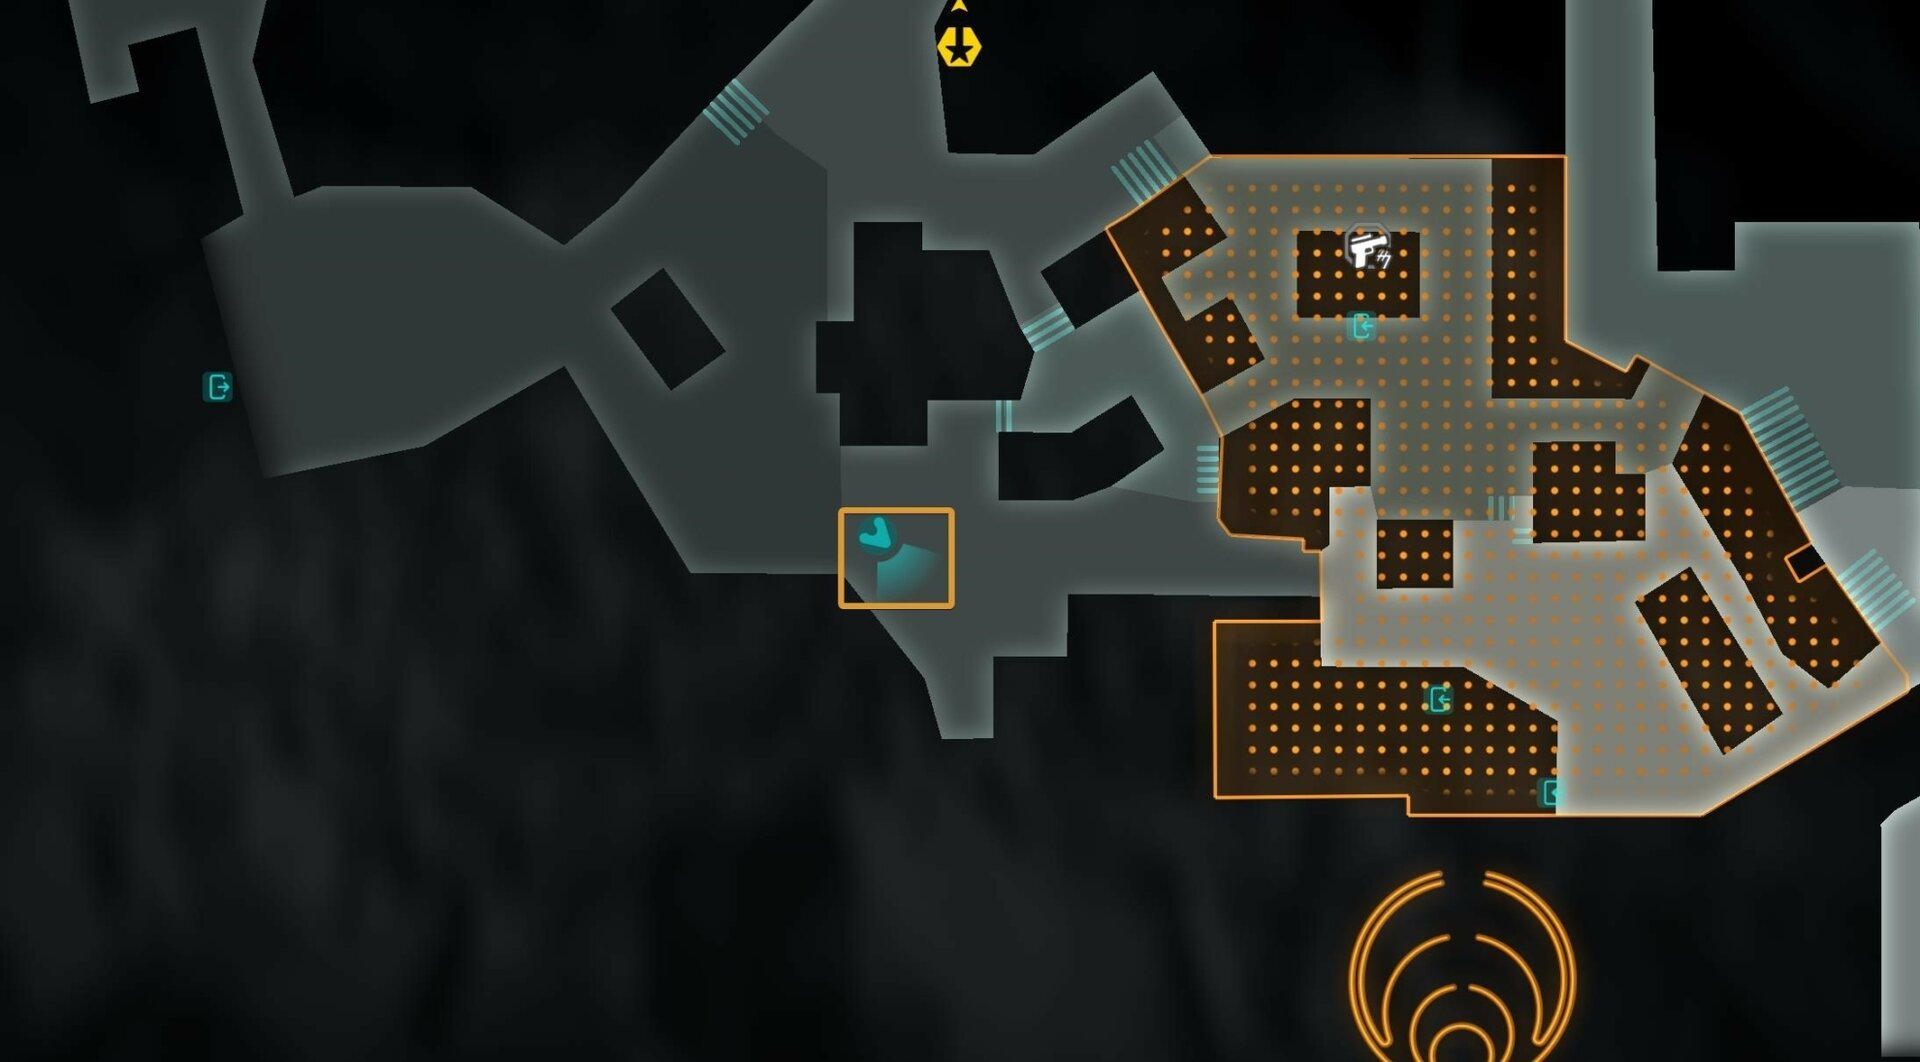
Ilario’s Stash: Upgrade Materials
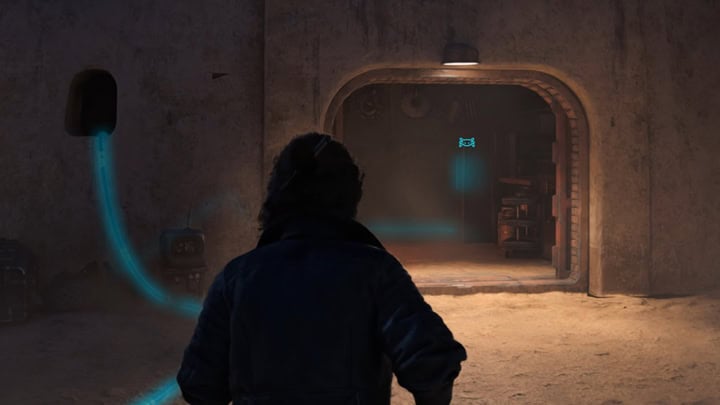
Ilario’s Stash is a short way from the landing pad where you park the Trailblazer. After you cross the bridge, look north. There is a locked circular door. To the right of that door, there is a node you can ask Nix to interact with to turn off power to that door.
This will allow you to explore what appears to be an old abandoned store. Next to the treasure chest, you will also find Mehdo’s Vault Keycard for the Ashiga Clan Vault on Kijimi.
Jarmo’s Stash: Credits
Jarmo’s Stash is a treasure chest located inside the Crimson Dawn district. The easiest way to access it is through a hole in the wall. You will find it across the street from the merchant Selik Mynnabah, north from the street food vendor you visited for the Duradan Soup.
When you enter, knock down the guard and turn right. At the end of this short and narrow alley, you will find the treasure chest.
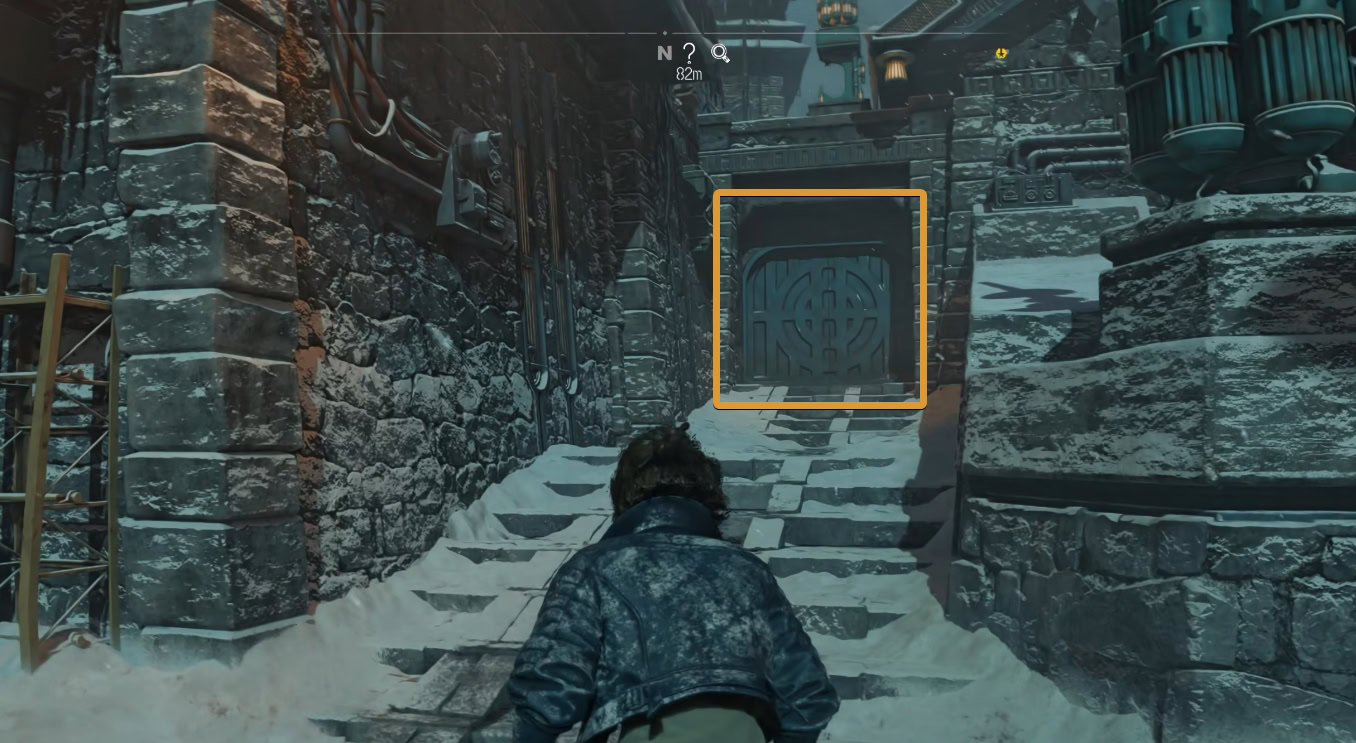
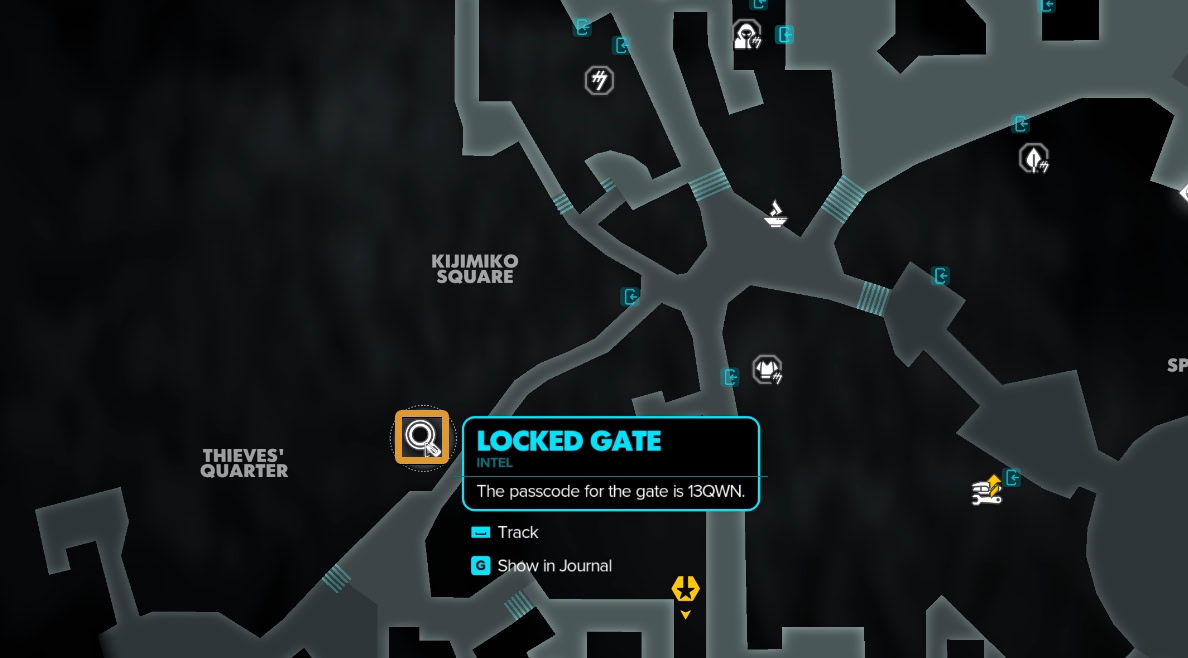
Venti’s Stash: Credits
On a table near the entrance in Domak’s Refectory cantina, you can pick up a note that will give you optional intel for a locked door with a passcode. You have likely stumbled on this node if you have been following out walkthrough for the quest The Safecracker.
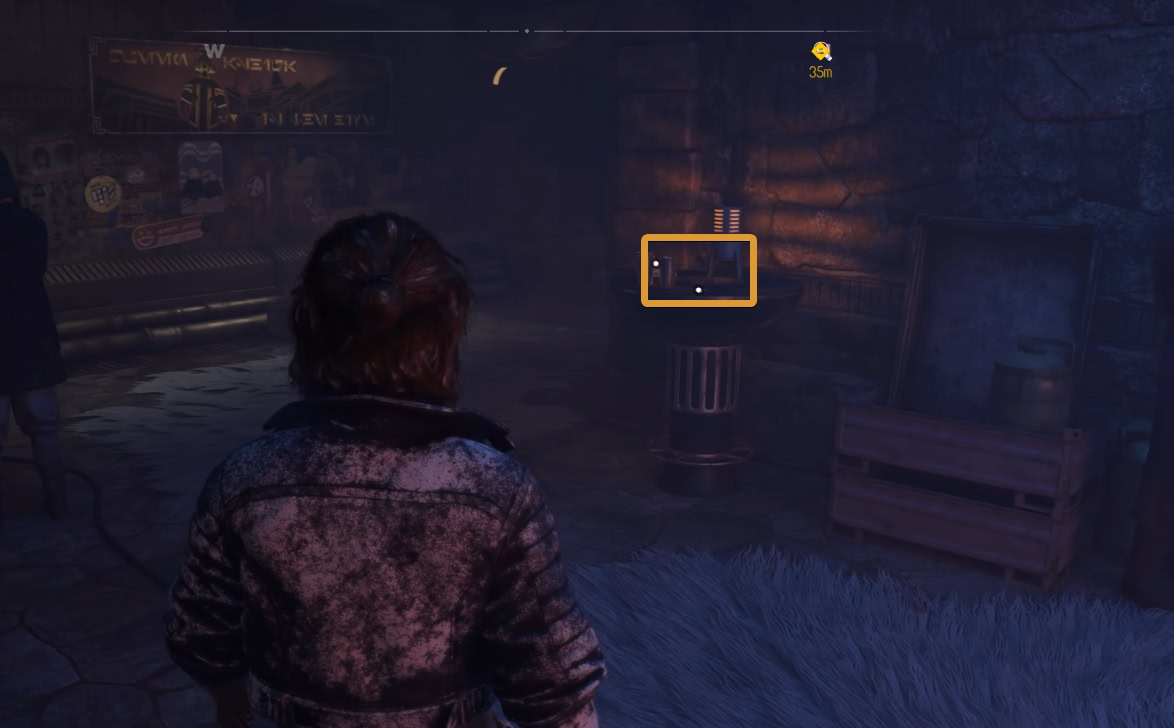
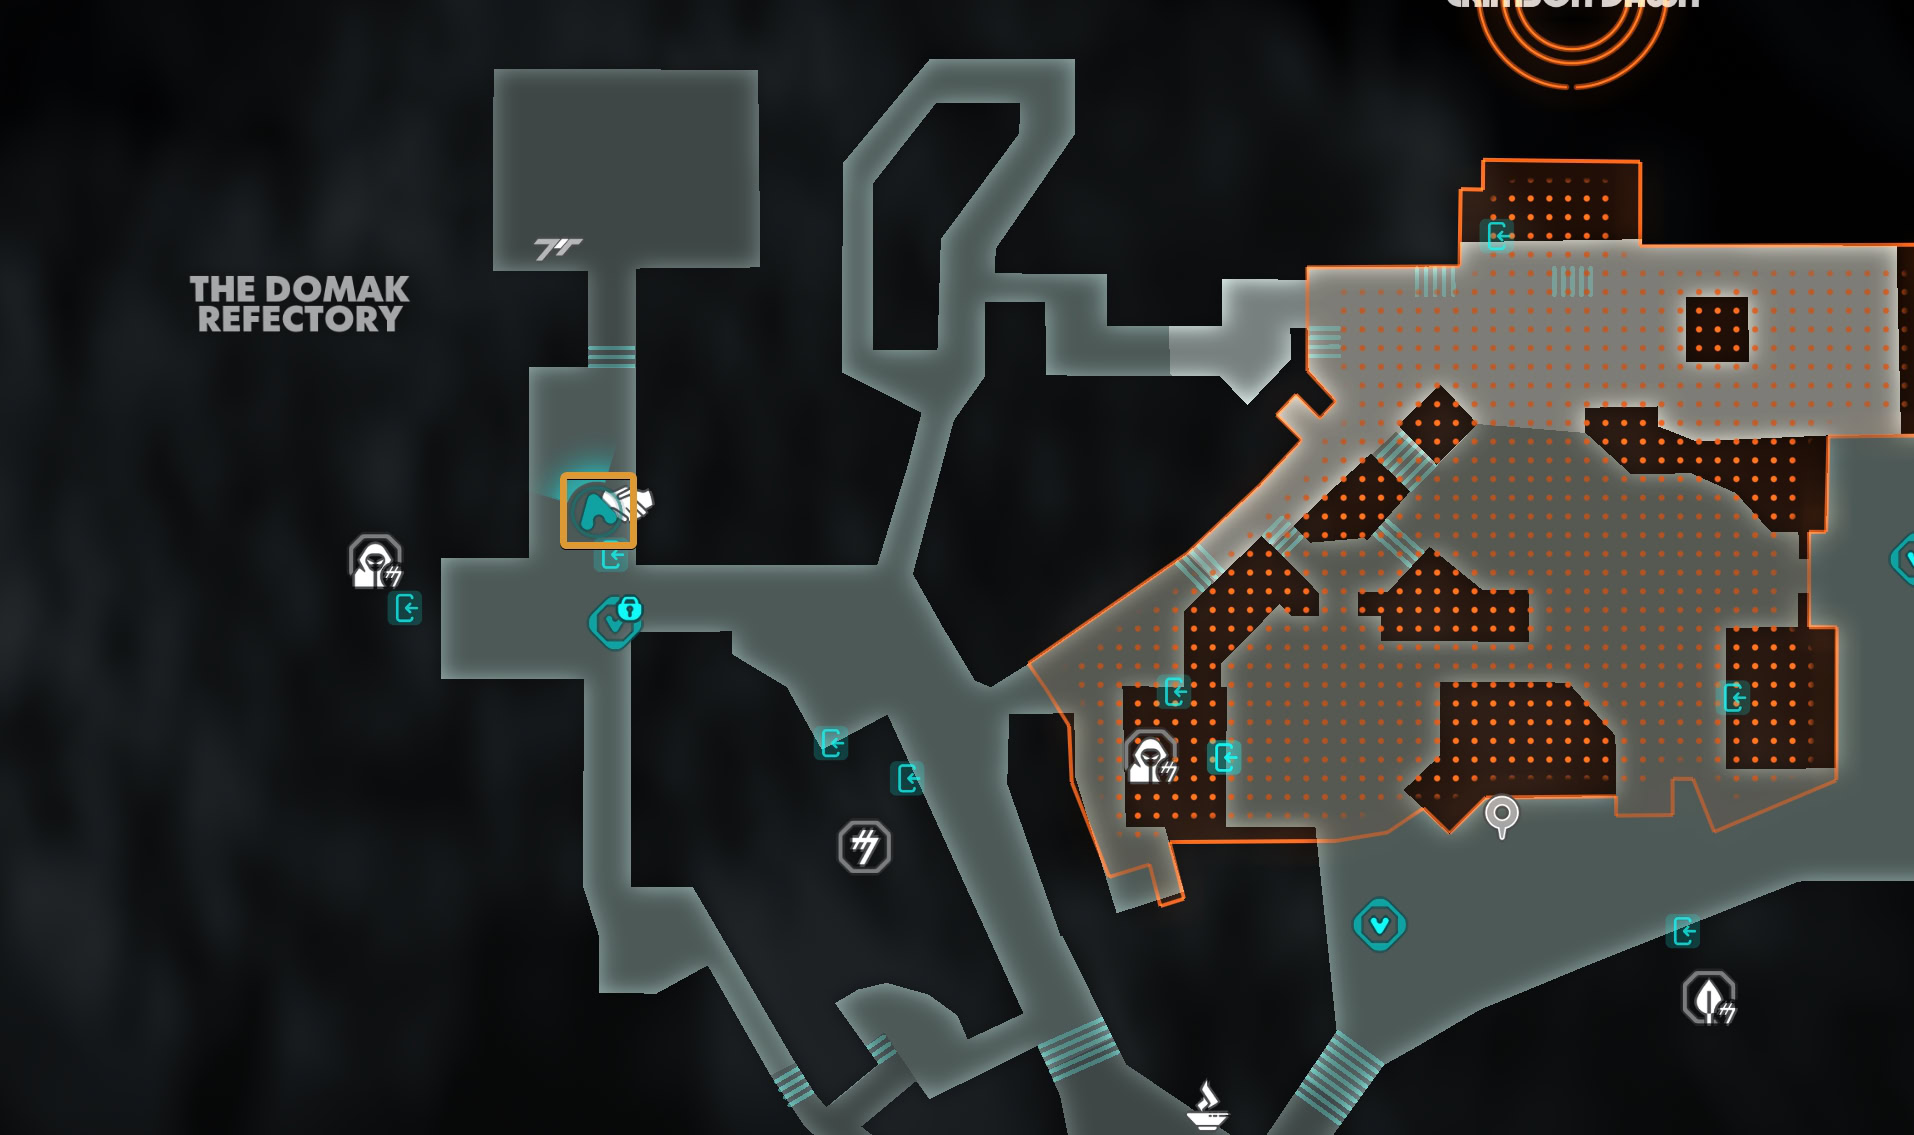
If you have not opened the note in th cantina, you can override the door’s lock using your data spike. The door is at the end of a staircase to the side of the narrow street leading northeast from the Kijimi City Gate. The treasure is half-buried in the snow, similar to how the Smuggler Caches are half-buried in the ground.
Velek’s Stash: Credits and Upgrade Materials
This treasure chest is next to Krisk’s Vault Keycard for the Ashiga Clan Syndicate Vault. From the building with the vault, head east and up the stairs. To open the locked door and access the treasure and keycard, you have to take out the roaming guard in front of the vault building and loot the card for this door.
Umi’s Stash: Credits and Upgrade Materials
The treasure chest is next to Kuroma’s Vault Keycard, which you have likely already obtained for the Crimson Dawn Syndicate Vault. Head straight south from Domak’ Refectory. Use your data spike on the door to get inside and loot the keycard and the treasure chest.
All Treasures at Shipjacker Workshop: Star Wars Outlaws Walkthrough
This guide will show you all four valuable treasure chests located at the Shipjacker Workshiop on Toshara, including Zafi’s Vault Card and the Code Breakde Chip.
All Treasures at Slicer's Shelter and Seeker's Peril: Star Wars Outlaws Walkthrough
This guide will show you how to unlock the door of the Slicer’s Shelter at Seeker’s Peril on Tatooine in Star Wars Outlaws. This is a unique upgrade material for Kay’s Blaster.
Mos Algo and Lost Sandcrawler Treasure Locations: Star Wars Outlaws Walkthrough
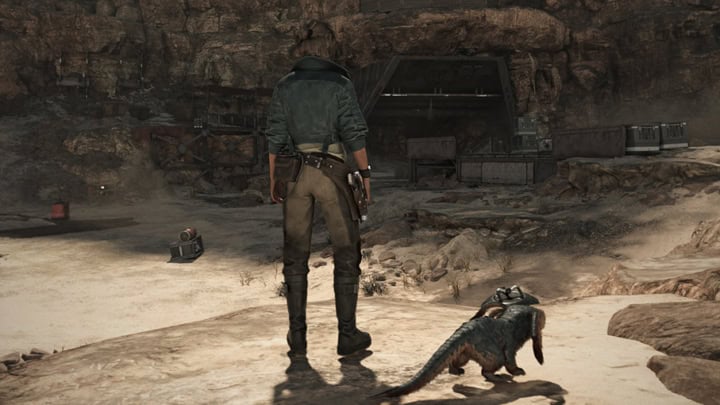
This guide will show you how to find and loot all seven available treasure chests (and other containers and small loot) at the Old Mine in Mos Algo on Tatooine. The walkthrough also includes full exploration of the Lost Sandcrawler area with its own treasures.
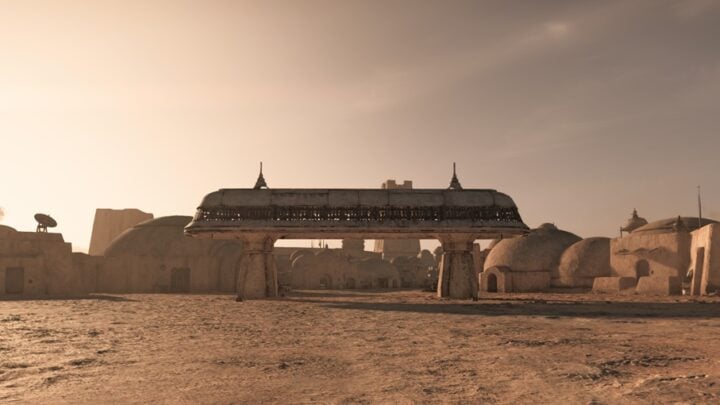
Mos Eisley Outskirts Treasure Puzzle: Star Wars Outlaw Walkthrough
This guide shows you how to solve the puzzle to access and obtain the Mos Eisley Outskirts treasure on Tatooine in Star Wars Outlaws. The reward is Coronet Ace Paint Job for your speeder.
All Mos Eisley Treasure and Unique Item Locations in Star Wars Outlaws
Walkthroughs with maps, visual and text directions and exact locations for all Treasures and unique Items available in Mos Eisley in Star Wars Outlaws.
Star Wars Outlaws: All Treasures at Excavation Site 12: Star Wars Outlaws Walkthrough
This guide will show you how to reach and open all four treasure chests at the Imperial Excavation Site 12 area at the Great Basin on Akiva. This is the location where you can obtain the NL-02 Charge Emitter, required for the Electro-Shock Prod ability.
Akiva Research Station 57 Treasures and ISB Report Locations: Star Wars Outlaws Walkthrough
There are four treasures, one of which is in a vault, ISB report, a collectible item and a few other valuables you can pick up from Research Station 57 on Akiva in Star Wars Outlaws. We will show you how to infiltrate and fully explore this Imperial base.
All Toshara Smuggler Cache Locations
This guide will show you where to find all Smuggler Caches on Toshara. It also explains how to pick up the Holotracker, the tool you will use to track down the exact locations of each treasure.
All Tatooine Smuggler Cache Locations in Star Wars Outlaws
There are ten Smuggler Cache Locations on Tatooine in Star Wars Outlaws and we will show you how to reach and loot each one of them!

All Akiva Smuggler Cache Locations in Star Wars Outlaws
There are ten Smuggler Cache Locations on Akiva in Star Wars Outlaws and we will show you how to reach and loot each one of them!
Related Star Wars Outlaws Collections of Guides

Our Guides Master List for Star Wars Outlaws is a great starting point. In it you will find all of our guides and walkthroughs ordered in categories.